


US
ES
INSTRUCTION MANUAL
Ellipse 2 Multimedia Player

Congratulations on purchasing your new Invion product. We are convinced you
will be satised with it.
To always guarantee optimal function and performance of your product, we would
ask the following:
● Before using the player for the rst time, carefully read the operating instructions
and adhere to the safety precautions!
● All activities at and with this player may only be carried out as described in these
operating instructions.
● Please be sure to include the operating instructions in case you pass along this
product to someone else.
Packaging:
This device is delivered in protective packaging to prevent transportation damage.
Packaging materials are raw materials and can therefore be recycled. Please recycle
these materials.
This device complies with Part 15 of the FCC Rules. Operation is subject to the
following two conditions:
(1) This device may not cause harmful interference, and (2) this device must accept
any interference received, including interference that may cause undesired
operation.
ENGLISH
2

Content
Keys & Ports Specications . . . . . . . . . . . . . . . . . . . . . . . . . . . . . . . . . . . . . . . . . . . . . . 6
Features . . . . . . . . . . . . . . . . . . . . . . . . . . . . . . . . . . . . . . . . . . . . . . . . . . . . . . . . . . . . . . 7
Technical Specications . . . . . . . . . . . . . . . . . . . . . . . . . . . . . . . . . . . . . . . . . . . . . . . . . 8
System Requirements . . . . . . . . . . . . . . . . . . . . . . . . . . . . . . . . . . . . . . . . . . . . . . . . . . . 9
Notice . . . . . . . . . . . . . . . . . . . . . . . . . . . . . . . . . . . . . . . . . . . . . . . . . . . . . . . . . . . . . . . 10
Contents on Accessory CD. . . . . . . . . . . . . . . . . . . . . . . . . . . . . . . . . . . . . . . . . . . . . . 11
1. Installation of USB Driver . . . . . . . . . . . . . . . . . . . . . . . . . . . . . . . . . . . . . . . . . . . . 11
2. Installation of Movie Converter . . . . . . . . . . . . . . . . . . . . . . . . . . . . . . . . . . . . . . . . 13
Operation Manual. . . . . . . . . . . . . . . . . . . . . . . . . . . . . . . . . . . . . . . . . . . . . . . . . . . . . . 14
1. Turn On/Off . . . . . . . . . . . . . . . . . . . . . . . . . . . . . . . . . . . . . . . . . . . . . . . . . . . . . . . . . 14
2. Music Mode . . . . . . . . . . . . . . . . . . . . . . . . . . . . . . . . . . . . . . . . . . . . . . . . . . . . . . . . . 14
2.1 Interface introduction . . . . . . . . . . . . . . . . . . . . . . . . . . . . . . . . . . . . . . . . . . . . . . 15
2.2 Music play mode. . . . . . . . . . . . . . . . . . . . . . . . . . . . . . . . . . . . . . . . . . . . . . . . . . 16
2.3 Music setting. . . . . . . . . . . . . . . . . . . . . . . . . . . . . . . . . . . . . . . . . . . . . . . . . . . . . 16
2.4 Music pause mode . . . . . . . . . . . . . . . . . . . . . . . . . . . . . . . . . . . . . . . . . . . . . . . . 19
2.5 Lyric display . . . . . . . . . . . . . . . . . . . . . . . . . . . . . . . . . . . . . . . . . . . . . . . . . . . . . 21
2.6 Directory function . . . . . . . . . . . . . . . . . . . . . . . . . . . . . . . . . . . . . . . . . . . . . . . . . 21
3. Movie Mode . . . . . . . . . . . . . . . . . . . . . . . . . . . . . . . . . . . . . . . . . . . . . . . . . . . . . . . . . 22
3.1 Playback mode . . . . . . . . . . . . . . . . . . . . . . . . . . . . . . . . . . . . . . . . . . . . . . . . . . . 22
3

3.2 Pause mode . . . . . . . . . . . . . . . . . . . . . . . . . . . . . . . . . . . . . . . . . . . . . . . . . . . . . 23
3.3 Delete movie le . . . . . . . . . . . . . . . . . . . . . . . . . . . . . . . . . . . . . . . . . . . . . . . . . . 23
4. Record Mode . . . . . . . . . . . . . . . . . . . . . . . . . . . . . . . . . . . . . . . . . . . . . . . . . . . . . . . . 24
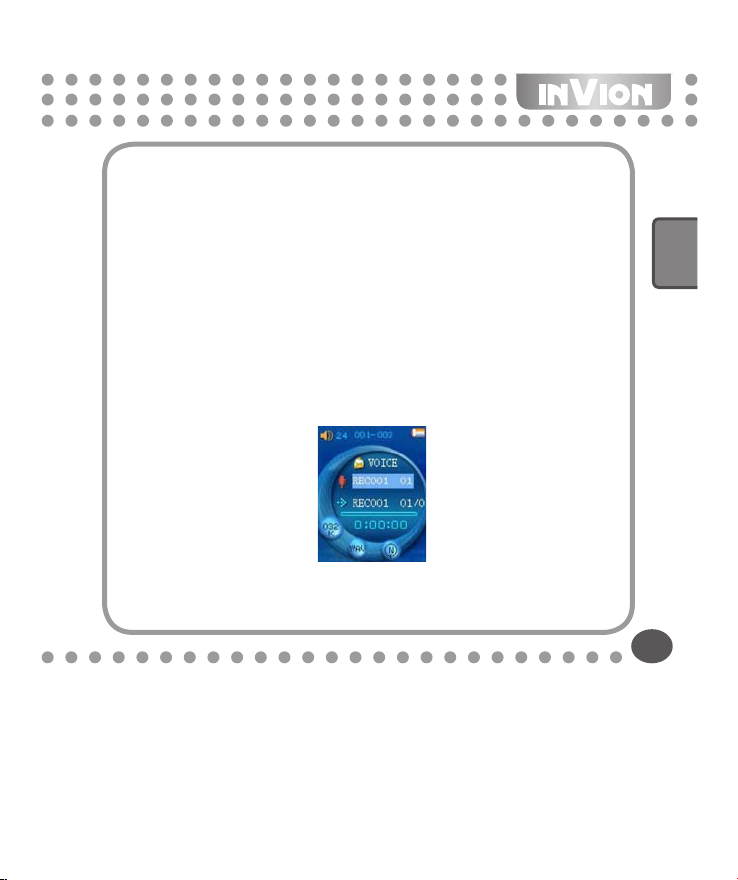
5. Voice Mode . . . . . . . . . . . . . . . . . . . . . . . . . . . . . . . . . . . . . . . . . . . . . . . . . . . . . . . . . 26
5.1 Under voice stop mode. . . . . . . . . . . . . . . . . . . . . . . . . . . . . . . . . . . . . . . . . . . . . 27
5.2 Under voice playing mode . . . . . . . . . . . . . . . . . . . . . . . . . . . . . . . . . . . . . . . . . . 28
5.3 Voice mode error display . . . . . . . . . . . . . . . . . . . . . . . . . . . . . . . . . . . . . . . . . . . 29
6. Photo Mode . . . . . . . . . . . . . . . . . . . . . . . . . . . . . . . . . . . . . . . . . . . . . . . . . . . . . . . . . 30
6.1 Play set . . . . . . . . . . . . . . . . . . . . . . . . . . . . . . . . . . . . . . . . . . . . . . . . . . . . . . . . . 30
6.2 Delete le . . . . . . . . . . . . . . . . . . . . . . . . . . . . . . . . . . . . . . . . . . . . . . . . . . . . . . . 31
6.3 Delete all. . . . . . . . . . . . . . . . . . . . . . . . . . . . . . . . . . . . . . . . . . . . . . . . . . . . . . . . 31
6.4 Flipping and rotating the picture . . . . . . . . . . . . . . . . . . . . . . . . . . . . . . . . . . . . . . 31
7. System Setting . . . . . . . . . . . . . . . . . . . . . . . . . . . . . . . . . . . . . . . . . . . . . . . . . . . . . . . 32
7.1 Record time. . . . . . . . . . . . . . . . . . . . . . . . . . . . . . . . . . . . . . . . . . . . . . . . . . . . . . 32
7.2 LCD set. . . . . . . . . . . . . . . . . . . . . . . . . . . . . . . . . . . . . . . . . . . . . . . . . . . . . . . . . 32
7.3 Power off setting . . . . . . . . . . . . . . . . . . . . . . . . . . . . . . . . . . . . . . . . . . . . . . . . . . 32
7.4 Replay mode setting . . . . . . . . . . . . . . . . . . . . . . . . . . . . . . . . . . . . . . . . . . . . . . . 33
7.5 Online device setting . . . . . . . . . . . . . . . . . . . . . . . . . . . . . . . . . . . . . . . . . . . . . . 33
7.6 Disk format . . . . . . . . . . . . . . . . . . . . . . . . . . . . . . . . . . . . . . . . . . . . . . . . . . . . . . 33
7.7 Memory info . . . . . . . . . . . . . . . . . . . . . . . . . . . . . . . . . . . . . . . . . . . . . . . . . . . . . 34
7.8 Firmware version . . . . . . . . . . . . . . . . . . . . . . . . . . . . . . . . . . . . . . . . . . . . . . . . . 34
ENGLISH
4

7.9 DRM time . . . . . . . . . . . . . . . . . . . . . . . . . . . . . . . . . . . . . . . . . . . . . . . . . . . . . . . 34
7.10 Exit . . . . . . . . . . . . . . . . . . . . . . . . . . . . . . . . . . . . . . . . . . . . . . . . . . . . . . . . . . . 34
8. E-book Mode . . . . . . . . . . . . . . . . . . . . . . . . . . . . . . . . . . . . . . . . . . . . . . . . . . . . . . . . 34
8.1 Play set . . . . . . . . . . . . . . . . . . . . . . . . . . . . . . . . . . . . . . . . . . . . . . . . . . . . . . . . . 35
8.2 Delete le . . . . . . . . . . . . . . . . . . . . . . . . . . . . . . . . . . . . . . . . . . . . . . . . . . . . . . . 35
8.3 Delete all. . . . . . . . . . . . . . . . . . . . . . . . . . . . . . . . . . . . . . . . . . . . . . . . . . . . . . . . 35
9. Game Mode . . . . . . . . . . . . . . . . . . . . . . . . . . . . . . . . . . . . . . . . . . . . . . . . . . . . . . . . . 36
9.1 Boxman . . . . . . . . . . . . . . . . . . . . . . . . . . . . . . . . . . . . . . . . . . . . . . . . . . . . . . . . 36
9.2 Bricks . . . . . . . . . . . . . . . . . . . . . . . . . . . . . . . . . . . . . . . . . . . . . . . . . . . . . . . . . . 37
9.3 Winmine . . . . . . . . . . . . . . . . . . . . . . . . . . . . . . . . . . . . . . . . . . . . . . . . . . . . . . . . 37
9.4 Color bead . . . . . . . . . . . . . . . . . . . . . . . . . . . . . . . . . . . . . . . . . . . . . . . . . . . . . . 38
9.5 Puzzle . . . . . . . . . . . . . . . . . . . . . . . . . . . . . . . . . . . . . . . . . . . . . . . . . . . . . . . . . . 38
9.6 Exit . . . . . . . . . . . . . . . . . . . . . . . . . . . . . . . . . . . . . . . . . . . . . . . . . . . . . . . . . . . . 39
DRM Demo . . . . . . . . . . . . . . . . . . . . . . . . . . . . . . . . . . . . . . . . . . . . . . . . . . . . . . . . . . . 40
Troubleshooting . . . . . . . . . . . . . . . . . . . . . . . . . . . . . . . . . . . . . . . . . . . . . . . . . . . . . . . 46
Claims & Warranties . . . . . . . . . . . . . . . . . . . . . . . . . . . . . . . . . . . . . . . . . . . . . . . . . . . 49
5

Keys & Ports Specications
ON/OFF
Earphone
Display
ENGLISH
Mode
Previous/Volume -
(Rewind)
Volume
USB Port
Keys
Play/pause/stop: “Play”,” Pause” and “Stop”.
•
•
Mode: Working mode or Menu.
Previous/Vol-: Select previous music, voice or video le, or fast forward/decrease
•
volume.
•
Next/Vol+: Select next music, voice or video le, or rewind/increase volume.
VOL: To select volume adjust mode.
•
•
Power Switch: Power on and power off the player.
Next/Volume +
(Forward)
Play/Pause/Stop
6

Features
•
Support MP3, WMA, WAV format les
•
View JPEG format picture
Supports AMV video format.
•
•
USB storage, plug & play by cable
Built in MIC
•
Save energy mode, auto off set
•
Various EQ, play modes
•
Supports Windows98, Windows SE/ME, Win2000, Win XP
•
USB 2.0 speed
•
7

Technical Specications
Music format .MP3 (ID3 tag compatible), .WMA, .WAV
Video format AMV
Picture format JPG
Storage capacity 256MB/512MB/1GB/2GB/4GB (Depending on
Display 1.8” color LCD display , 128*160 matrix
SNR 85dB
Record mode Built-in Microphone
Record format WAV
Output frequency range 20Hz-22kHz
Size 90*42*12 mm
Battery specication Rechargeable lithium battery
PC slot USB2.0
Battery life Music: 6 hours (under power saving mode)
Playing time * Music - up to 500 songs (MP3 and WMA format)
*Playing time is based on using all capacity of memory.
model)
Movie: 1-2 hours
Game: 3-4 hours
* Video - up to 7 hours (AMV format)
* Photo - more than 6500 pictures (Each picture
300KB in JPG format)
ENGLISH
8

System Requirements
PC running Windows98SE/ME/2000/XP with USB connection and CD drive.
Using music with copyright restrictions (DRM) and/or movie conversion will require
a PC with:
A Pentium class processor with a speed of at least 300 MHz
•
Minimum of 128 MB RAM for Windows 98/ME, 256 MB for Windows2000/XP
•
Minimum of 200 MB free space on hard drive
•
Video resolution of at least 800x600 pixels
•
A sound system
•
DirectX 9.0 or higher
•
Windows Media Player 10 or higher
•
Note: Depending on your media player and the type of media you want to play, your
media player may have additional hardware requirements, such as: minimum RAM,
minimum processor speed, minimum free disk space, video adapter type, sound
adapter type, etc.
For details please check the help function of your media player, or its documentation.
9

Notice
Do not throw the player into re to avoid danger of explosion.
•
Do not immerse the player into water or allow the player to get soaked to avoid
•
losing the battery charging function.
When charging the battery, the Power Switch should be in the ON position.
•
Do not take batteries apart.
•
Recharge the battery when:
•
- Battery icon displays a low level of power.
- Player automatically shuts off.
- Operation keys are not working.
When the “copying Files” window appears on your PC, please do not remove the
•
USB from the computer.
Do not unplug the USB cable when downloading a le. This may cause
•
malfunctioning of your PC and player.
Do not plug in an earphone or audio cable when downloading a le.
•
Downloading can be slow if there are too many folders or les.
•
The order of music les displayed on the Windows Explorer is not the order of
•
actual music playback.
When it is connected with the PC, the player starts charging only when the Power
•
switch is in the ON position.
Do not open the player. If you have any questions, please contact SupportPlus.
•
If the video le converted into AMV cannot be played on your computer, then it
•
cannot be played on the player.
Please make sure the version of the media player should be Media player 9.0 or
•
Media Player 10.
ENGLISH
10

Contents on Accessory CD
1. Installation of USB Driver
This installation is only required for Windows98. The steps are as follows:
Insert the accessory CD into the CD drive.
1)
Connect the player by the USB cable to the computer. Choose “Control Panel”,
2)
“System”, and enter “Device Manager”, the computer screen will display:
11

Please select “other devices”, right click “other devices” and choose “Update Driver”.
The following will be displayed:
Attention: If the above screen is not shown, please uninstall your USB driver and
reinstall it.
ENGLISH
12

2. Installation of Movie Converter
The conversion software supports converting many video formats into AMV format.
Insert the accessory CD and install the movie converter from the ‘Convert tool’
directory. Double click the le named “Msien.msi” to install the English version of the
movie converter.
Follow the installation steps displayed on your computer screen.
Note: See section 3, “Movie Mode”, for more information on converting movie les.
13

Operation Manual
1. Turn On/Off
Please switch the Power Switch to the ON position to turn on the player.
Please long press the PLAY key to turn on the player when the Power switch is in
the ON position and the player is in the turned off status.
Long press the PLAY key to turn off the player and then switch the Power switch to
the OFF position.
2. Music Mode
After turning on the player, select Music from the main menu, and then press the “M”
key. Press the PLAY key to play the music.
ENGLISH
14

2.1 Interface introduction
Sound volume
Folder name
Song/Singer name
Playing progress
Bit rate
If there is corresponding lyric le, it will display .
15
Song number/Total songs
File type Repeat mode
Battery level
Lyrics of song playing
Playing time
Equalizer effect

2.2 Music play mode
While playing, short press the PLAY key to pause. Short press the PLAY key again
1)
to continue the playing.
In the play/pause mode, short press the VOL key to enter the “volume adjust”
2)
mode, and then press / to adjust the volume.
In the music play/pause mode, short press / to skip to the next or previous
3)
song, and long press / to fast forward or rewind.
While playing, short press the “M” key to enter the music setting mode.
4)
Long press the “M” key to return to the main menu.
5)
2.3 Music setting
In the music playing mode, short press the “M” key to enter music setting mode.
ENGLISH
16

2.3.1 Repeat setting
In the music setting mode, select Repeat and then press the “M” key. Press /
to select the mode you prefer and then press the “M” key to conrm. There are the
following modes: Normal, Repeat One, Folder, Repeat Folder, Repeat All, Random
and Intro.
Normal Mode: After playing all the music under the current folder, it will play all the
•
music under the next folder until it nishes playing all the les in the subsequent
folders.
Repeat One Mode: Play one song repeatedly.
•
Folder Mode: Repeat all songs inside the folder.
•
Repeat Folder Mode: Play all music inside the folder repeatedly.
•
Repeat All Mode: Play all music repeatedly.
•
Random Mode: Play all music under the current folder randomly.
•
Intro Mode: Play the rst 10 sec. of all music under the current folder sequentially.
•
17

2.3.2 Equalizer setting
Under music setting mode, press / to choose the EQ Mode, there are 7
equalizer settings as follows: Natural, Rock, Pop, Classic, Soft, Jazz and DBB.
2.3.3 SRS WOW mode
In this option, you can set the voice effect of the music.
2.3.4 Tempo rate setting
Under music setting mode, press / to choose the Tempo rate (rate of playing).
There are 16 levels from -8 to +8, -8 is the lowest, +8 is the fastest and 0 means
natural.
2.3.5 Replay setting
A-B Repeat: Under music setting mode, choose Replay, and then “A” starts to icker
on the display. Press to set the replay starting point “A”, “A” will stop ickering,
and “B” will start to icker. Press to set the replay ending point B, “A-B” will stop
ickering and it will start to replay from A to B.
If you want to change what section is replayed press and “A” will start to icker
again. Follow the other steps as before.
Following: If you want to “follow” the section that is repeated, press again, you
will see the icon on the screen, and it will start to record.
Contrast: After recording, press key and it will show , it will play the repeated
le and then it will show , and it will then play the recorded le. You can compare
the “following” and the repeated section.
In any step above, if you want to exit short press the “M” key.
ENGLISH
18

2.3.6 Replay times setting
Replay times means the times the replay le will be played. You can set to repeat
from 1-10 times. Press / to set the number of times and then press the “M” to
conrm.
2.3.7 Replay gap setting
Repeat gap is the pause time between the rst replay time and the next replay time.
(Unit: Seconds). You can set the pause time from 1-10 seconds. Press / to set
the time, and then press the “M” to conrm.
2.3.8 Exit
Exit from MUSIC setting mode.
2.4 Music pause mode
While playing music, short press PLAY key to pause.
In the pause mode, short press PLAY key to continue to play.
•
In the pause mode, long press PLAY key to turn off the player.
•
In the pause mode, short press the “M” key to enter the submenu of music.
•
2.4.1 Playlist
Display the information of the les.
2.4.2 Artists
Display the information of artists.
2.4.3 Album
Display the information of the album.
19

2.4.4 Genre
Display the information of the genre.
2.4.5 Composers
Display the information of the composers.
2.4.6 License Inf
Display the information of the License.
2.4.7 Local folder
Select local folder and then press / to choose the folder and press the “M” key
to conrm.
2.4.8 Delete le
Select Delete le and then press the “M” key. Press / to select the le you
want to delete and then press the “M” key to conrm. Press / to select “Yes”
or “No” (If you choose “Yes” and press the “M” key to conrm, it will delete the le
selected, and if you choose “No”, it will exit the delete mode).
2.4.9 Delete all
Select Delete all and press the “M” key to conrm. Press / to select “Yes”, and
press the “M” key to conrm.
2.4.10 Exit
Exit from the menu
ENGLISH
20

2.5 Lyric display
Under music playing mode, if there is a properly formatted lyric le for the current
playing song it will display the icon . Long press the “M” key to enter the lyric
mode. In this mode, you can see the lyrics for the current track.
Lyric
The MP4 player supports “LRC” lyric les, it will display the lyrics simultaneously with
the song le. Just make sure the lyric le and the song le have the same le name.
Example:
Song le name is: sky.mp3 Lyric le name is: sky.lrc
2.6 Directory function
It can support two levels – Root Directory and subdirectory.
•
The les/folders are listed in the order they are stored.
•
If you enter into the stop mode, the player will go back to the song you played
•
last time, and its directory. If the song does not exist, it will go to the rst le of the
current directory, and if the current directory does not exist, it will go to the next
directory.
The player can support up to 90 entries in the root directory and support up to 900
•
entries in each sub-directory. One entry can be a le or a sub-directory. Every 14
characters of a le name or a directory name will take up one entry.
21

3. Movie Mode
In the main menu, select MOVIE and press the “M” key to conrm.
Remark:
1.
The video le format that can be played in the player is AMV, and the formats
that can be converted into AMV directly by the movie converter (available on the
accessory CD provided) are MPG, ASF, AVI, and WMV.
Please make sure that the AMV video le can be played on your computer, because
2.
if it cannot, then it also cannot be played on the player.
Install the movie converter on your computer. In the interface of the movie
3.
converter, please click to enter HELP mode, please read the content before
converting any les.
When you use the movie converter, you can save the movie le on to the player
4.
directly, but please set the Online Device as USB device in the system setting and
connect the player to the computer rst.
3.1 Playback mode
In the main menu, select MOVIE and press the “M” key to conrm.
Press PLAY key to play the video.
1)
In the movie pause mode, short press VOL key to enter the “volume adjust” mode,
2)
and then press / to adjust the volume.
In the movie play mode, short press / to skip to the next or previous video,
3)
long press / to fast forward or rewind.
Long press the “M” key to return to the main menu.
4)
ENGLISH
22

3.2 Pause mode
While in movie playback mode, short press PLAY key to pause.
In the pause mode, short press PLAY key to continue to play.
1)
Long press PLAY key to turn off the player.
2)
Short press / to skip to the next or previous video.
3)
Short press VOL key to enter the “Volume Adjust” mode and then press /
4)
to adjust the volume.
Short press the “M” key to enter into the movie delete mode.
5)
Long press the “M” key to return to the main menu.
6)
3.3 Delete movie le
In the movie pause mode, short press the “M” key to enter the delete mode, and
then the next operations are the same with the operations introduced in the music
mode. Please refer to that section.
23

4. Record Mode
In the main menu, select Record and press the “M” key to enter the record mode.
Before recording, short press the “M” key to enter the submenu of the record.
Local folder: Users can choose the folder here.
REC type: Choose the recording type in this menu. Recording types are: Fine
Fine REC: The record time is shortest, but the record quality is better. (WAV
Long REC: Record with longer time, but the record quality is lower. (ACT format)
Fine VOR: WAV format (Sound control record, it will pause recording if there is
Long VOR: ACT format. (Sound control record, it will pause recording if there is
Exit: Go back to the record standby interface.
REC, Long REC, Fine VOR, Long VOR.
format)
no sound.)
no sound.)
ENGLISH
24

Start Record
Under record standby condition, short press the “PLAY” key, the record will start.
Short press the “PLAY” key to pause the recording. When in the pause mode, the
record time will be ickering.
Long press the “M” key to save the currently recorded le and return back to the
main menu.
Low battery
When recording, if in short of power, the System will save the currently recording le,
stop recording and show LOW BATTERY. Please recharge the battery.
Abnormal displaying of record mode
Record le is full
1.
Too many les in a folder. When recording le reaches 99 units or the ash space
is full, it will show a notice. At this moment, please delete some MP3 songs or other
recorded les to have more space and continue recording.
Total les are full
2.
Too many recorded les. This player can save a maximum of 200 recorded les,
but usually less because the maximum amount is relative to the le name. The
system will judge if it reaches the maximum amount automatically; if it does, then,
the recording will stop and user should delete some recorded les to have more
space and continue recording.
Disk space is full
3.
When the disk has no more space to save the recording le, the system will display
“disk full” and the user should delete some MP3 les or other recorded les to
continue recording.
25

Disk error
4.
When the disk has an error, the system will nd the error, save the currently
recording le, and then display “Disk error”. Please perform a format to avoid this
error. (Note: When trying to format it, you might experience difculties.)
5. Voice Mode
In the main menu, select VOICE and press the “M” key to enter the voice mode.
ENGLISH
26

5.1 Under voice stop mode
Long press the PLAY key to turn off the player
Short press the “M” key to enter the submenu of the VOICE Settings
Long press the “M” key to go back to the Main menu
Short press / to select next/previous recorded le
Press VOL key to enter the volume adjusting mode, and then press / to adjust
the volume.
Submenu of voice stop mode:
Local folder:
In the voice stop mode, select Local Folder, press / to select the folder you
want, and then press the “M” key.
Delete le:
In the voice stop mode, short press the “M” key to enter the submenu, select Delete
le and then press the “M” key. Press / to select the le you want to delete
and then press the “M” key to conrm. Press / to select YES or No, and then
press the “M” key.
Delete all:
Same as delete le, but it will delete all les in the folder.
Exit:
Exit from this menu.
27

5.2 Under voice playing mode
Press PLAY to stop the playing
Long press PLAY to turn off the player
Short press the “M” key to enter the submenu of Voice playing mode
Long press the “M” key to go back to the Main menu
Short press / to select next/previous le
Short press VOL key to enter the volume adjusting mode.
Submenu of voice playing mode:
Repeat:
In the repeat submenu, press / to select the repeat mode. There are 7
choices: Normal, Repeat One, Folder, Repeat Folder, Repeat All, Random and Intro.
Tempo rate:
In the tempo rate submenu, press / to set the rate of playing. There are 16
levels from -8 to +8, -8 is the lowest, +8 is the fastest and 0 means natural.
Replay:
In the submenu of voice playing mode: choose Replay, “A” will start to icker. Press
to set the replay starting point “A”, “A” stops ickering, and “B” will start to icker.
Press to set replay ending point B, “A-B” will stop ickering and now it will start to
replay the from A to B.
Exit:
Exit from the submenu.
ENGLISH
28

5.3 Voice mode error display
No record le
1.
This notice will be displayed when the player does not have the recorded le or
recorded le has been deleted.
No les
2.
The recorded le’s name has a format, so if the user changes the recorded le’s
name the player cannot nd the recorded le and it will show the notice when under
the playing mode.
Illegal le
3.
When the recorded le is damaged or if the le is not a recorded le, the player
cannot play the le and it will show the notice.
Attention: For playing WAV les, the player can only play WAV les that were
recorded by this player. It cannot play WAV les copied from a PC.
29

6. Photo Mode
This function supports all JPG formatted pictures
1.
In the main menu, press / keys to choose the “Photo” option.
Press the “M” key to enter picture selection menu.
2.
Press / keys to choose the desired picture and press PLAY key to display
3.
the picture.
Press / keys to browse the pictures in sequence (please rst set the option
4.
for ”Manual play”, see section 6.1).
6.1 Play set
In the picture list, short press the “M” key to enter into the picture submenu,
1.
Press / keys to select the “play set” option.
2.
Press the “M” key.
3.
Press / keys to choose “Manual play” or “auto play” options, press the “M”
4.
key to conrm.
Press / keys to adjust “auto play” speed. Press the “M” key to conrm.
5.
ENGLISH
30

6.2 Delete le
In the picture list, short press the “M” key to enter the submenu.
1.
Press / to choose “Delete le” option.
2.
Press the “M” key to enter this option.
3.
4.
Press / to choose the le you want to delete and press the “M” key to
conrm.
Press / to choose Yes or No, and press the “M” key to conrm.
5.
6.3 Delete all
In the picture list, short press the “M” key to enter submenu.
1.
Press / to choose “Delete All” option.
2.
Press the “M” key to enter this option.
3.
Press / to choose Yes or No, if you choose Yes, it will delete all the photo
4.
les.
6.4 Flipping and rotating the picture
In the picture list, press / to select the picture you want to view.
1.
Press PLAY key to view the picture.
2.
Press M key to ip the picture up or down.
3.
Press VOL key to ip the picture left or right.
4.
Press PLAY key to rotate the picture 90 degree.
5.
Note: This function applies to “Manual play” only.
31

7. System Setting
Choose Setup in the main menu.
Short press / to select the setting option and short press the “M” key to
conrm.
Long press the “M” key will go back to the main menu. Long press PLAY to power
off the player.
7.1 Record time
Short press the “VOL” key, the year will be selected, press / key to modify the
year. Press VOL again, and the Month will be selected, press / to modify the
month. You can modify the date, hour, minute and seconds following the same steps.
At last please press the “M” key to conrm the setting and exit from the system time
menu.
7.2 LCD set
Main menu select: In this mode, you can select the picture for the main interface.
Black set: Set xed period of time (unit: second) so that when no key operation is
performed, the player’s screen turns black automatically. If “0” is selected, function
is disabled.
7.3 Power off setting
There are two choices: off time and sleep time.
Off time: means that if no operation is selected during the pre-set time, the system
will power off automatically.
(Unit: second) Pick from 0-60, where 0 means this feature is disabled
Sleep time: it means that after working for xxx minutes (xxx=preset time), the system
will power off automatically. Pick from 0-240, where 0 means this feature is disabled.
Note: Sleep mode is only valid once and must be reset if required again.
ENGLISH
32

7.4 Replay mode setting
There are two choices: Manual replay, Auto replay
“Manual replay”: when using the A-B repeat function, it cannot stop automatically.
“Auto replay”: Used in language learning; the system can pause between the rst
sentence and the second sentence automatically.
7.5 Online device setting
USB Device: Set the MP3 player as a USB Mass Storage Device.
Note: When you set the online device as a USB Mass Storage Device, then after
you connect the player to the PC, you can only see the les saved in the USB mode
and the les saved in the DATA folder of the Media Device mode.
Media Device: Set the MP3 player as a Media Transfer Protocol Device, transfer
music les only by synchronization of Microsoft© Windows Media player.
Note:
If you want to transfer music les with DRM (Digital Rights Management), you
1.
should set the MP3 player to Media Device mode. Then you can synchronize music
les by Windows Media Player 9 or above.
In the Media Device mode, after you connect the device to the PC, then you will not
2.
be able to see the les saved in the USB Device mode.
7.6 Disk format
There are two options in this function; you can select FAT16 or FAT 32 to format the
player.
33

7.7 Memory info
Users can check the amount of free memory space.
Example: 1932MB means the total memory size, and 51% means 51% of the total
memory has been used.
7.8 Firmware version
Users can check the rmware of the player here.
7.9 DRM time
Display the DRM time.
7.10 Exit
Exit back to the Main menu.
8. E-book Mode
This function supports all TXT les.
Enter the main menu, press / to choose “E-Book”
1.
Press the “M” key to enter the mode.
2.
Press / to select desired text le to read. Press Play key to enter text
3.
interface
Press / to turn the pages in sequence (only suitable for ”Manual play”)
4.
While reading, short press the “M” key to enter the Bookmark setting mode.
5.
ENGLISH
34

35
8.1 Play set
In the E-book list, short press the “M” key to enter submenu.
1.
Press / to choose “play set” option:
2.
Press the “M” key to enter this option, or press PLAY key to exit.
3.
4.
Press / to choose “Manual play” or “auto play” options. Press the “M” key
to conrm.
Press / to adjust “auto play” speed. Press the “M” key to conrm.
5.
8.2 Delete le
In the E-book list, short press the “M” key to enter the submenu.
1.
Press / to choose the “Delete le” option.
2.
Press the “M” key to enter this option.
3.
Press / to choose the le you want to delete and press the “M” key to
4.
conrm.
Press / to choose Yes or No, and press the “M” key to conrm.
5.
8.3 Delete all
In the E-book list, short press the “M” key to enter the submenu.
1.
Press / to choose “Delete all” option.
2.
Press the “M” key to enter this option.
3.
Press / to choose Yes or No. If you choose Yes, it will delete all the E-book
4.
les.

9. Game Mode
Short press the “M” key to enter the Game mode. Press / to select the game
and press the “M” key to conrm.
9.1 Boxman
Select Boxman and press the “M” key to enter.
Start: Short press the “M” key to start the game.
•
Map: Select new game or enter the next game directly.
•
Help: Displays the help for the current game.
•
Return: Return to the Game’s main interface.
•
Guide: Enter the game, select START and then press the “M” key to start playing
a new game. In this game you need to move the box to a xed place (the red icon
place). Button control: up-PLAY, down-VOL, left-PREV, right-NEXT, M key is for
exit. Once all of the boxes are moved to all proper places, then the game level will
change to the next level for more challenging fun.
ENGLISH
36

9.2 Bricks
Select Bricks and press the “M” key to enter.
Start: Short press the “M” key to start the game.
•
Speed: In the speed mode, you can adjust the speed.
•
•
Open Grid: Open the grid line of the game’s interface.
Close Grid: Close the grid line of the game’s interface.
•
Help: Displays the help for the current game.
•
Return: Return to the Game’s main interface.
•
Guide: Enter game, select START and then press the “M” key to start a new game,
blocks will descent automatically, user needs to adjust the block’s direction and
location by using the buttons to make the blocks go to the proper places.
Button function: the “M” key changes the direction, the PREV key moves the block
to the left, the NEXT key moves the block to the right, the VOL key makes the block
descend faster, and the PLAY key allows you to exit from the game. On the left of the
screen, there is the speed, score and next block preview shown. Once every line is
lled by blocks, the line will be cleared and the score recorded, until the game is over
or the screen is all piled up by blocks.
9.3 Winmine
Select Winmine and press the “M” key to enter.
Start: Short press the “M” key to start the game.
•
Line Number: Set the line for the current game.
•
Row Number: Set the row for the current game.
•
Mine Number: Set the mine number for the current game.
•
Help: Displays the help for the current game.
•
Return: Return to the Game’s main interface.
•
37

Guide: In this game, users are required to nd all landmines. On the top of the
screen, “Total” means the number of landmines, “Spare” means the landmines which
were still hidden. Button function: the “M” key opens the block, the PREV key move
left, the NEXT key move right, the VOL key move down, short press the PLAY key
move up, and long press the PLAY key to mark the landmine.
After opening the block, a number may appear, 1 means around this block there is
1 landmine, 2 means there are 2 landmines around the block, and so on. Once all
landmines have been found the user wins the game and can move to the next level.
9.4 Color bead
Select Color bead and press the “M” key to enter.
Start: Short press the “M” key to start the game.
•
Highest Score: Display the highest score.
•
Help: Display the help for the current game.
•
Return: Return to the Game’s main interface.
•
Guide: In this game, there are several colors beads, once 3 beads of the same color
are in the same line (vertical or horizontal), the beads will be cleared and new beads
will come down.
Button function: the “M” key to select bead, the PLAY key to move up, the PREV key
to move left, the NEXT key to move right, and the VOL key to move down. Press the
“M“ key for around 2-3 seconds to exit the game.
9.5 Puzzle
Select Puzzle and press the “M” key to enter.
Start: Short press the “M” key to start the game.
•
Level: Set the different levels for the current game.
•
Select Picture: Select the picture for the game’s interface.
•
Help: Display the help for the current game.
•
ENGLISH
38

Return: Return to the Game’s main interface
•
Guide: In this game, there is a big picture broken into 16 small pieces in random
locations, the user is required to sort the pieces to complete the big picture.
Button function: the PLAY key to move up, the PREV key to move left, the NEXT key
to move right, the VOL key to move down, and the “M” Key to exit.
9.6 Exit
Select Exit to exit the mode.
39

DRM Demo
A. Demo songs
Download the DRM (Digital Rights Management) formatted song from the PC to
the MP3 player. These songs have been encrypted and need a license to decode.
Songs can be downloaded for free from http://wmtap.smdisp.net/janus website.
Save the licenses and songs to your computer.
B. At the homepage, click on STC1
ENGLISH
40

C. Save songs
D. After downloading the Audio Files, scroll down the web-page then select
“Acquired License (Security Level=150)” to download the license for the songs.
41

E. System requirements
PC with Windows® XP + SP1 operating system or above, Windows Media Player
10 or above
F. How to download songs
WMP10 is used to download music with copyright protection e.g. DRM. USB
a)
devices not supporting the MTP (Media Transfer Protocol) cannot be used
to acquire the license although the music can be downloaded. MTP is only
available in Windows® XP, there is no DRM capability for Windows® 98 SE, and
Windows® 2000, or other legacy operating systems.
G. When using the Media device for transferring or copying from the computer,
please use Windows Media Player 10 or above for downloading songs with DRM
protection.
H. Please set the Online Device in the system setting as Media device and then
connect the MP3 player to the computer.
I. After about 10 seconds, Windows will prompt to continue or cancel. Select “OK”
to proceed or “Cancel” to end.
J. Click “OK” to launch the Windows Media Player application.
ENGLISH
42

K. Click on the “Library” menu as shown below
L. And then select the music le, right-click it and select “add to Sync List”.
43

M. And then click the “Sync” menu as follows:
ENGLISH
44

N. Click on “Start Sync” at the top
O. “Synchronization in progress” will be displayed after about 10 seconds
45

P. After the music has been transferred to the player, close the Windows Media
Player application.
Q. Unplug the player from the computer, and then the player will display the progress
for creating the data as follows:
Note: When creating the data, please do not do any other operation with the
player.
R. After nishing creating data, it will enter the music mode and then you can choose
the DRM songs you want to play.
Troubleshooting
1. When I press on “play” there is no display.
Cause/ Solution: Please connect the player on the computer to recharge it. Try to
restart it 10 minutes later.
2. When I want to play les there is no sound.
Cause/ Solution: Volume is too low. Turn up the volume and inspect the connection
of the earphone to see if it is broken.
ENGLISH
46

3. My Computer malfunctions when I disconnect the player.
Cause/ Solution: Disconnecting the player when it is transferring les. Do not
disconnect the player when les are transferring.
4. Why can’t I download les while player is connected to the PC?
Cause/ Solution: The USB Driver hasn’t been installed correctly. Please install
the USB driver again following the operation instruction, or your computer’s
motherboard does not support USB equipment, in which case you need to update
your motherboard driver.
5. Why can’t I see the les which have been stored on the player?
Cause/ Solution: There maybe too many les on your player, so you may have to
delete some of the les on your player (refer to section 2.6).
6. Why does it display that “the disk is full” in the computer but we do not see
any les on the disk after connecting it to the PC?
Cause/Solution: In the system setting, the Online Device mode is set as Media
device but the Online Device mode was set to USB device when you downloaded
the les, or the Online Device mode is set as USB device but the Online Device
mode was set to Media device when you downloaded the les. Please set the Online
Device into the proper mode.
47

Claims & Warranties
In case of possible product defects, please contact SupportPlus. For this reason we
recommend you save your purchase receipt.
Service: For technical questions, information about our products, and for spare part
orders, our Service team is available as follows:
Website: www.supportplususa.com
E-mail: info@supportplususa.com
Phone: 800-984-3270
Important note: Please do not send your device to our address without having
been requested to do so by our Service team. The costs and the risk of loss for
unsolicited mailings will be borne by the sender. We reserve the right to refuse the
acceptance of unsolicited mailings or to return the corresponding merchandise to the
sender carriage forward, that is, at the sender’s expense.
The rechargeable lithium battery should be disposed of properly. Contact your local
government for disposal or recycling practices in your area.
Warranty: If for any reason the registered product does not function as it should due
to factory defects, it can be serviced within 90 days from the date of purchase.
This warranty does not cover failures due to abuse, misuse, accident, or
unauthorized alterations or repairs.
In no event will SupportPlus be liable for any incidental, special, indirect, or
consequential damages resulting from the use, misuse, or inability to use this
product.
ENGLISH
48

US Address:
SupportPlus North America Inc.
26439 Rancho Pkwy. Unit 115
Lake Forest, CA 92630
www.supportplususa.com
Note: To ensure prompt customer service, please register.
How to Register
To register, rst go to www.supportplususa.com website, next click on ‘Contact
US Registration,’ then click the link below ‘MP3 Registration,’ enter in the required
information into the online form, and then click the ‘Submit’ button to submit the
registration form.
Remark: Both the Quick Start Guide and the full manual are only available in
English and Spanish. The full manual can be found on the accessory CD in the ‘User
Manual‘ directory.
Windows® is a registered trademark of Microsoft Corporation.
49
VRS 1.2


MANUAL DE INSTRUCCIÓN
Reproductor Multimedia Ellipse 2

Felicitaciones por la adquisición de su nuevo producto Invion. Estamos
convencidos que usted estará completamente satisfecho con su nueva
compra.
Para siempre garantizar la función óptima y buen funcionamiento de su producto, nos
gustaría darle las siguientes recomendaciones:
● Antes de utilizar el dispositivo por primera vez, lea el manual de las instrucciones
de uso y medidas de seguridad atentamente, y apéguese a ellas en todo momento!
● Todas las actividades realizadas con éste producto debe llevarse a cabo como se
describe en el manual de instrucciones.
● Por favor asegúrese de incluir el manual de instrucciones en caso de obsequiar
éste producto a otra persona.
Embalaje:
Este producto es entregado en un embalaje protector para prevenir el daño de
transporte. Los materiales de embalaje son materias primas y por lo tanto pueden ser
recicladas. Por favor recicle estos materiales.
Este dispositivo cumple la parte 15 de las Reglas de la FCC. Su funcionamiento
está sujeto a las dos condiciones siguientes:
(1) este dispositivo no causará interferencias nocivas y (2) este dispositivo debe
aceptar cualquier interferencia que reciba, incluidas las que puedan causar un
funcionamiento no deseado.
ESPAÑOL
2

Contenido
Especicaciones Teclas & Puertos . . . . . . . . . . . . . . . . . . . . . . . . . . . . . . . . . . . . . . . . 6
Características . . . . . . . . . . . . . . . . . . . . . . . . . . . . . . . . . . . . . . . . . . . . . . . . . . . . . . . . . 7
Especicaciones Técnicas . . . . . . . . . . . . . . . . . . . . . . . . . . . . . . . . . . . . . . . . . . . . . . . 8
Requerimientos del sistema . . . . . . . . . . . . . . . . . . . . . . . . . . . . . . . . . . . . . . . . . . . . . . 9
Nota . . . . . . . . . . . . . . . . . . . . . . . . . . . . . . . . . . . . . . . . . . . . . . . . . . . . . . . . . . . . . . . . . 10
Contenido del CD accesorio . . . . . . . . . . . . . . . . . . . . . . . . . . . . . . . . . . . . . . . . . . . . . 11
1. Instalación del Driver para USB. . . . . . . . . . . . . . . . . . . . . . . . . . . . . . . . . . . . . . . . . . 11
2. Instalación del Convertidor de Películas . . . . . . . . . . . . . . . . . . . . . . . . . . . . . . . . . . . 13
Operation Manual. . . . . . . . . . . . . . . . . . . . . . . . . . . . . . . . . . . . . . . . . . . . . . . . . . . . . . 14
1. Encender/Apagar . . . . . . . . . . . . . . . . . . . . . . . . . . . . . . . . . . . . . . . . . . . . . . . . . . . . . 14
2. Modo Música . . . . . . . . . . . . . . . . . . . . . . . . . . . . . . . . . . . . . . . . . . . . . . . . . . . . . . . . 14
2.1 Introducción interfaz . . . . . . . . . . . . . . . . . . . . . . . . . . . . . . . . . . . . . . . . . . . . . . . 15
2.2 Modo reproducir música . . . . . . . . . . . . . . . . . . . . . . . . . . . . . . . . . . . . . . . . . . . . 16
2.3 Conguración música . . . . . . . . . . . . . . . . . . . . . . . . . . . . . . . . . . . . . . . . . . . . . . 16
2.4 Modo Pausar música . . . . . . . . . . . . . . . . . . . . . . . . . . . . . . . . . . . . . . . . . . . . . . 19
2.5 Visualización letra. . . . . . . . . . . . . . . . . . . . . . . . . . . . . . . . . . . . . . . . . . . . . . . . . 21
2.6 Función directorio . . . . . . . . . . . . . . . . . . . . . . . . . . . . . . . . . . . . . . . . . . . . . . . . . 21
3. Modo Película . . . . . . . . . . . . . . . . . . . . . . . . . . . . . . . . . . . . . . . . . . . . . . . . . . . . . . . 22
3.1 Modo reproducción . . . . . . . . . . . . . . . . . . . . . . . . . . . . . . . . . . . . . . . . . . . . . . . . 22
3

3.2 Modo pausa . . . . . . . . . . . . . . . . . . . . . . . . . . . . . . . . . . . . . . . . . . . . . . . . . . . . . 23
3.3 Borrar archivo película . . . . . . . . . . . . . . . . . . . . . . . . . . . . . . . . . . . . . . . . . . . . . 23
4. Modo grabación . . . . . . . . . . . . . . . . . . . . . . . . . . . . . . . . . . . . . . . . . . . . . . . . . . . . . . 24
5. Modo Voz . . . . . . . . . . . . . . . . . . . . . . . . . . . . . . . . . . . . . . . . . . . . . . . . . . . . . . . . . . . 26
5.1 En modo voz parado . . . . . . . . . . . . . . . . . . . . . . . . . . . . . . . . . . . . . . . . . . . . . . . 27
5.2 En modo voz en reproducción . . . . . . . . . . . . . . . . . . . . . . . . . . . . . . . . . . . . . . . 28
5.3 Visualización errores en modo voz. . . . . . . . . . . . . . . . . . . . . . . . . . . . . . . . . . . . 29
6. Modo Foto . . . . . . . . . . . . . . . . . . . . . . . . . . . . . . . . . . . . . . . . . . . . . . . . . . . . . . . . . . 30
6.1 Congurar reproducción . . . . . . . . . . . . . . . . . . . . . . . . . . . . . . . . . . . . . . . . . . . . 30
6.2 Borrar archivo . . . . . . . . . . . . . . . . . . . . . . . . . . . . . . . . . . . . . . . . . . . . . . . . . . . . 31
6.3 Borrar todo . . . . . . . . . . . . . . . . . . . . . . . . . . . . . . . . . . . . . . . . . . . . . . . . . . . . . . 31
6.4 Volteando y girando la imagen . . . . . . . . . . . . . . . . . . . . . . . . . . . . . . . . . . . . . . . 31
7. Conguración Sistema. . . . . . . . . . . . . . . . . . . . . . . . . . . . . . . . . . . . . . . . . . . . . . . . . 32
7.1 Tiempo grabación . . . . . . . . . . . . . . . . . . . . . . . . . . . . . . . . . . . . . . . . . . . . . . . . . 32
7.2 Congurar LCD . . . . . . . . . . . . . . . . . . . . . . . . . . . . . . . . . . . . . . . . . . . . . . . . . . . 32
7.3 Congurar apagado . . . . . . . . . . . . . . . . . . . . . . . . . . . . . . . . . . . . . . . . . . . . . . . 32
7.4 Congurar volver a reproducir . . . . . . . . . . . . . . . . . . . . . . . . . . . . . . . . . . . . . . . 33
7.5 Conguración del dispositivo en línea . . . . . . . . . . . . . . . . . . . . . . . . . . . . . . . . . 33
7.6 Formateado del disco . . . . . . . . . . . . . . . . . . . . . . . . . . . . . . . . . . . . . . . . . . . . . . 34
7.7 Info memoria . . . . . . . . . . . . . . . . . . . . . . . . . . . . . . . . . . . . . . . . . . . . . . . . . . . . . 34
7.8 Versión rmware. . . . . . . . . . . . . . . . . . . . . . . . . . . . . . . . . . . . . . . . . . . . . . . . . . 34
ESPAÑOL
4

7.9 Hora DRM . . . . . . . . . . . . . . . . . . . . . . . . . . . . . . . . . . . . . . . . . . . . . . . . . . . . . . . 34
7.10 Salir . . . . . . . . . . . . . . . . . . . . . . . . . . . . . . . . . . . . . . . . . . . . . . . . . . . . . . . . . . . 34
8. Modo E-book . . . . . . . . . . . . . . . . . . . . . . . . . . . . . . . . . . . . . . . . . . . . . . . . . . . . . . . . 34
8.1 Congurar reproducción . . . . . . . . . . . . . . . . . . . . . . . . . . . . . . . . . . . . . . . . . . . . 35
8.2 Borrar archivo . . . . . . . . . . . . . . . . . . . . . . . . . . . . . . . . . . . . . . . . . . . . . . . . . . . . 35
8.3 Borrar todo . . . . . . . . . . . . . . . . . . . . . . . . . . . . . . . . . . . . . . . . . . . . . . . . . . . . . . 35
9. Modo Juegos . . . . . . . . . . . . . . . . . . . . . . . . . . . . . . . . . . . . . . . . . . . . . . . . . . . . . . . . 36
9.1 Cartero . . . . . . . . . . . . . . . . . . . . . . . . . . . . . . . . . . . . . . . . . . . . . . . . . . . . . . . . . 36
9.2 Ladrillos . . . . . . . . . . . . . . . . . . . . . . . . . . . . . . . . . . . . . . . . . . . . . . . . . . . . . . . . 37
9.3 Buscaminas . . . . . . . . . . . . . . . . . . . . . . . . . . . . . . . . . . . . . . . . . . . . . . . . . . . . . 37
9.4 Gotas de color. . . . . . . . . . . . . . . . . . . . . . . . . . . . . . . . . . . . . . . . . . . . . . . . . . . . 38
9.5 Puzzle . . . . . . . . . . . . . . . . . . . . . . . . . . . . . . . . . . . . . . . . . . . . . . . . . . . . . . . . . . 39
9.6 Salir. . . . . . . . . . . . . . . . . . . . . . . . . . . . . . . . . . . . . . . . . . . . . . . . . . . . . . . . . . . . 39
Demostración DRM . . . . . . . . . . . . . . . . . . . . . . . . . . . . . . . . . . . . . . . . . . . . . . . . . . . . 40
Resolución Problemas . . . . . . . . . . . . . . . . . . . . . . . . . . . . . . . . . . . . . . . . . . . . . . . . . 46
Reclamosy Garantías. . . . . . . . . . . . . . . . . . . . . . . . . . . . . . . . . . . . . . . . . . . . . . . . . . . 48
5

Especicaciones Teclas & Puertos
ENCENDIDO/APAGADO
Pantalla
Modo
Anterior/Volumen
(Retroceso)
Volumen
Teclas
Reproducir/pausar/detener: “Reproduce”,” Pausa” y “Detiene”.
•
•
Modo: Modo de trabajo o Menú.
Anterior/Vol-: Selecciona archivo anterior de música, voz o vídeo, o avanza/
•
disminuye rápidamente el volumen.
•
Siguiente/Vol+: Selecciona archivo siguiente de música, voz o vídeo, o rebobina/
incrementa volumen.
•
VOL: Para seleccionar modo ajustar volumen.
Interruptor corriente: Enciende y apaga el reproductor.
•
Auricular
Puerto USB
Siguiente/Volumen
(Avance)
Reproducir/Pausa/Detener
ESPAÑOL
6

Características
Soporta archivos con formato MP3, WMA, WAV
•
•
Ver imágenes con formato JPEG
•
Soporta formato vídeo AMV.
Almacenamiento USB, enchufar & jugar por cable
•
•
MIC incorporado
Modo ahorrar energía, congurar auto apagado
•
Varios EQ, modos reproducción
•
Soporta Windows98, Windows SE/ME, Win2000, Win XP
•
USB 2.0 Alta velocidad
•
7

Especicaciones Técnicas
Formato Música .MP3 (Compatible con etiquetas ID3), .WMA, .WAV
Formato Vídeo AMV
Formato Imagen JPG
Capacidad almacenamiento 256MB/512MB/1GB/2GB/4GB (Dependiendo del
Visualización Visualización LCD 1.8” a color, 128*160 matriz
SNR 85dB
Modo grabación Microfono integrado
Formato de grabación WAV
Rango frecuencia salida 20Hz-22kHz
Tamaño 90*42*12 mm
Especicaciones batería Batería recargable de litio
Ranura PC USB2.0
Tiempo de vida de la batería Música: 6 horas (en el modo ahorrador de energía)
Tiempo de reproducción * Música – hasta 500 canciones (Formatos MP3
*El tiempo de reproducción esta basado en la utilización de la capacidad de
memoria.
modelo)
Película: 1-2 horas
Juego: 3-4 horas
y WMA)
* Video – hasta 7 horas (Formato AMV)
* Fotos – mas de 6500 fotos (JPG de 300KB cada
una)
ESPAÑOL
8

Requerimientos del sistema
Ordenador con Windows98SE/ME/2000/XP y con conexión de USB y CD drive.
Al utilizar música con restricciones del derecho de autor (DRM) y/o conversión de
películas, el ordenador requiere lo siguiente:
Un procesador tipo Pentium con una velocidad de por lo menos 300MHz
•
Un RAM mínimo de 128 MB para Windows 98/ME y de 256 MB para Windows2000/
•
XP
Disco duro con espacio libre mínimo de 200 MB
•
Resolución de video de por lo menos 800x600 píxeles
•
Un sistema de sonido
•
DirectX 9.0 o versiones mas recientes
•
Windows Media Player 10 o versiones mas recientes
•
Nota: Dependiendo de su reproductor de videos y del tipo de archivos que desea
reproducir, su reproductor de videos podría tener requerimientos del hardware
adicionales como: RAM mínimo, mínima velocidad del procesador, mínimo espacio
libre del disco, tipo del adaptador de video, tipo del adaptador de sonido, etc.
Para mayor información consulte la función de ayuda de su reproductor de videos, o
su documentación.
9

Nota
No arroje el reproductor al fuego para evitar peligro de explosión.
•
No sumerja el reproductor en agua o permitir que se empape para evitar perder la
•
función de carga de la batería.
Al cargar la batería, el Interruptor de Corriente debe estar en posición
•
Encendido.
No desmonte la batería.
•
Recargue la batería cuando:
•
- El icono de batería visualiza un nivel bajo de batería.
- El reproductor se apaga automáticamente.
- Las teclas de operación no funcionan.
Cuando aparece en la pantalla de su PC la ventana “copiando archivos”, por favor
•
no saque el USB del ordenador.
No desenchufe el cable USB mientras descarga un archivo. Esto puede provocar
•
malfuncionamiento de su PC y reproductor.
No enchufe un audífono o cable de audio al descargar archivos.
•
La descarga puede ser lenta si hay muchas carpetas o archivos.
•
El orden de los archivos de música visualizado en Windows Explorer no es el
•
orden de la reproducción real.
Cuando está conectado al PC, el reproductor empieza a cargar sólo cuando el
•
Interruptor de Corriente está en posición Encendido.
No abra el reproductor. Si tiene alguna pregunta, por favor contacte con
•
SupportPlus.
Si el archivo de vídeo convertido a AMV no puede reproducirse en su ordenador,
•
no puede reproducirse en su reproductor MP3.
Por favor compruebe que la versión del reproductor sea Media player 9.0 ó Media
•
Player 10.
ESPAÑOL
10

Contenido del CD accesorio
1. Instalación del Driver para USB
La instalación sólo es requerida para ordenadores Windows98. Los pasos a seguir
son los siguientes:
Inserte el CD accesorio en la unidad CD.
1)
Conecte el reproductor al ordenador mediante cable USB. Escoja “Panel
2)
Control”, “Sistema”, y entre “Administrador Dispositivo”, la pantalla del ordenador
visualizará:
11

Por favor seleccione “otro dispositivos”, haga clic derecho en “otro dispositivos” y
escoja “Mejorar Instalador”. Se visualizará lo siguiente:
Atención: Si no se muestra la pantalla anterior, por favor desinstale el driver para
USB y reinstálelo.
ESPAÑOL
12

2. Instalación del Convertidor de Películas
El software de conversión soporta la conversión de muchos formatos de video al
formato AMV.
Insertar el CD accesorio e instale el convertidor de películas del directorio ‘Convert
tool’. Dar clic dos veces el archivo llamado “Msisp.msi” para instalar la versión en
español del convertidor de películas.
Seguir los pasos visualizados en su pantalla para la instalación.
Nota: Ver sección 3, “Movie Mode”, para una mayor información de la conversión de
archivos de películas
13

Operation Manual
1. Encender/Apagar
Cambiar el Interruptor Corriente (Power Switch) a posición ENCENDIDO (ON) para
encender el reproductor.
Mantenga presionada la tecla REPRODUCIR (PLAY) para encender el reproductor
cuando el Interruptor de corriente (Power switch) está en posición ENCENDIDO
(ON) y el reproductor está en estado apagado.
Mantenga presionada la tecla REPRODUCIR (PLAY) para apagar el reproductor
y después cambie el Interruptor de corriente (Power switch) a posición APAGADO
(OFF).
2. Modo Música
Después de encender el reproductor, seleccione Música desde el menú principal y
presione tecla “M”. Presione tecla REPRODUCIR para reproducir la música.
ESPAÑOL
14

2.1 Introducción interfaz
Número de canción/Número total de canciones
Volumen de sonido
Nombre de carpeta
Canción/Nombre de
Progreso de la reproducción
cantante
Rango de bits
Tipo de archivo Modo repetir
Si hay el archivo de letra correspondiente, visualizará .
15
Nivel de batería
Letra de la canción
reproducida
Tiempo de reproducción
Efecto de equalizador

2.2 Modo reproducir música
Mientras reproduce, presione la tecla REPRODUCIR para pausar. Presione la
1)
tecla REPRODUCIR otra vez para continuar la reproducción.
En modo reproducir/pausar, presione la tecla VOL para entrar modo “ajuste
2)
volumen”, y presione / para ajustar el volumen.
En modo reproducir/pausar música, presione / para saltar a la canción
3)
siguiente o anterior y mantenga presionado / para avance rápido o
rebobinado.
Mientras reproduce, presione la tecla “M” para entrar modo conguración música.
4)
Mantenga presionada la tecla “M” para volver a menú principal.
5)
2.3 Conguración música
En modo reproducción música, presione la tecla “M” modo conguración música.
ESPAÑOL
16

2.3.1 Conguración repetir
En modo conguración música, seleccione Repetir y presione tecla “M”. Presione
/ para seleccionar el modo que preere y presione tecla “M” para conrmar.
Hay los siguiente modos: Normal, Repetir Uno, Carpeta, Repetir Carpeta, Repetir
Todo, Aleatorio y Entrar.
Modo Normal: Después de reproducir toda la música en la carpeta actual,
•
reproducirá toda la música en la siguiente carpeta hasta que acabe de reproducir
todos los archivos en las carpetas siguientes.
Modo Repetir Una: Reproduce una canción repetidamente.
•
Modo Carpeta: Repite toda la música de una carpeta.
•
Modo Repetir Carpeta: Reproduce toda la música de una carpeta repetidamente.
•
Modo Repetir Todo: Reproduce toda la música repetidamente.
•
Modo Aleatorio: Reproduce toda la música en la carpeta actual aleatoriamente.
•
Modo Intro: Reproduce los primeros 10 seg. de toda la música en la carpeta actual
•
secuencialmente.
17

2.3.2 Conguración ecualizador
En modo conguración música, presione / para escoger Modo EQ; hay 7
conguraciones de ecualizador: Natural, Rock, Pop, Clásico, Suave, Jazz y DBB.
2.3.3 Modo SRS WOW
En esta opción, puede congurar los efectos de voz en la música.
2.3.4 Conguración tasa tempo
En modo conguración música, presione / para escoger Tasa tempo (tasa de
reproducción). Hay 16 niveles desde -8 a +8, -8 es el más bajo, +8 es el más rápido
y 0 es el natural.
2.3.5 Conguración volver a reproducir
Repetición A-B: En modo conguración música, escoja Volver a reproducir, y “A”
empieza a parpadear en el visualizador. Presione para congurar el punto de
partida “A”, “A” detendrá el parpadeo y “B” empezará a parpadear. Presione
para congurar el punto nal B, “A-B” detendrá el parpadeo y empezará a volver a
reproducir de A a B.
Si quiere cambiar la sección para volver a reproducir presione y “A” empezará a
parpadear otra vez. Siga los pasos anteriormente descritos.
Seguimiento: Si quiere “seguir” la sección repetida, presione otra vez, verá el
icono en pantalla y empezará a grabar.
Contraste: Después de grabar, presione la tecla y aparecerá , reproducirá el
archivo repetido y después aparecerá , y reproducirá el archivo repetido. Puede
comparar el “seguimiento” y la sección repetida.
En cualquier paso anterior, para salir presione la tecla “M”.
ESPAÑOL
18

2.3.6 Congurar veces a volver a reproducir
Volver a reproducir signica las veces que el archivo volverá a reproducirse. Puede
congurar la reptición entre 1-10 veces. Presione / para congurar el número
de veces y presione “M” para conrmar.
2.3.7 Conguración espacio a volver a reproducir
El espacio de repetición es el tiempo de pausa entre la primera vez que se vuelve a
reproducir y la siguiente. (Unidad: Segundos). Puede congurar el tiempo de pausa
entre 1-10 segundos. Presione / para congurar el tiempo, y presione “M”
para conrmar.
2.3.8 Salir
Sale del modo conguración MÚSICA.
2.4 Modo Pausar música
Mientras reproduce música, presione la tecla REPRODUCIR para pausar.
En modo pausa, presione la tecla REPRODUCIR para continuar la reproducción.
•
En modo pausa, mantenga presionada la tecla REPRODUCIR para apagar el
•
reproductor.
En modo pausa, presione la tecla “M” para entrar el submenú de música.
•
2.4.1 Lista de reproducción
Visualiza la información de los archivos.
2.4.2 Artistas
Visualiza la información de los artistas.
19

2.4.3 Álbum
Visualiza la información del álbum.
2.4.4 Género
Visualiza la información del género.
2.4.5 Compositores
Visualiza la información de los compositores.
2.4.6 Información licencia
Visualiza la información de la Licencia.
2.4.7 Carpeta local
Seleccione carpeta local y presione / para escoger la carpeta y presione tecla
“M” para conrmar.
2.4.8 Borrar archivo
Seleccione Borrar archivo y presione la tecla “M”. Presione / para seleccionar
el archivo a borrar y presione la tecla “M” para conrmar. Presione / para
seleccionar “Sí” o “No” (Si escoge “Sí” y presiona la tecla “M” para conrmar, borrará
el archivo seleccionado, y si escoge “No”, saldrá del modo borrar).
2.4.9 Borrar todo
Seleccione Borrar todo y presione la tecla “M” para conrmar. Presione / para
seleccionar “Sí”, y presione la tecla “M” para conrmar.
2.4.10 Salir
Salir del menú
ESPAÑOL
20

2.5 Visualización letra
En modo reproducción música, si hay un archivo de letras con el formato adecuado,
se visualizará el icono para la canción en reproducción actual. Mantenga
presionada tecla “M” para entrar en modo letra. En este modo, puede ver las letras
de la pista actual.
Letra
El reproductor MP4 respalda archivos de letra “. LRC”, visualizará la letra
simultáneamente con el archivo de canción. Sólo asegúrese que el archivo de letra
y de música tienen el mismo nombre de archivo.
Ejemplo:
El nombre de archivo de canción es: sky.mp3
El nombre de archivo de letra es: sky.lrc
2.6 Función directorio
Puede soportar dos niveles – Directorio Raíz y subdirectorio.
•
Los archivos/carpetas serán listados en el orden como fueron guradados.
•
Si entra en modo detenido, el reproductor volverá a la canción reproducida
•
la última vez y a su directorio. Si la canción no existe, irá al primer archivo del
directorio actual, si el directorio no existe, irá al siguiente directorio.
El reproductor puede soportar hasta 90 entradas en el directorio raíz. Y soportar
•
hasta 900 entradas en cada subdirectorio. Una entrada puede ser un archivo o
un subdirectorio. Una entrada se compone de 14 letras para nombrar un archivo
o directorio.
21

3. Modo Película
En el menú principal, seleccione PELÍCULA y presione tecla “M” para conrmar.
Observación:
1.
El formato de vídeo válido en este reproductor es AMV, y los formatos que pueden
convertirse directamente en AMV con el convertidor de peliculas (disponible en el
CD accesorio suministrado) son MPG, ASF, AVI, y WMV.
Por favor asegúrese que el archivo de vídeo AMV puede ser reproducido en su
2.
ordenador, porque si no, tampoco puede reproducirse en su reproductor.
Instale el convertidor de peliculas en su ordenador. En el interfaz del convertidor de
3.
peliculas, haga clic en para entrar en modo AYUDA, por favor lea el contenido
antes de convertir ningún archivo.
Cuando use el convertidor de peliculas, puede guardar el archivo película en el
4.
reproductor directamente, pero asegúrese por favor de congurar el Dispositivo
En Línea como dispositivo USB en la conguración de sistema y conecte el
reproductor al ordenador primero.
3.1 Modo reproducción
En el menú principal, seleccione PELÍCULA y presione la tecla “M” para conrmar.
Presione la tecla REPRODUCIR para reproducir el vídeo.
1)
En modo pausa película, presione la tecla VOLUMEN (VOL) para entrar modo
2)
“ajuste volumen” mode, y presione / para ajustar el volumen.
En modo reproducir película, presione / para saltar al vídeo siguiente o
3)
anterior, mantenga presionado / para avance o rebobinado rápida.
Mantenga presionada la tecla “M” para volver al menú principal.
4)
ESPAÑOL
22

3.2 Modo pausa
Mientras está en modo reproducir película, presione la tecla REPRODUCIR para
pausar.
En modo pausa, presione la tecla REPRODUCIR para continuar la reproducción.
1)
Mantenga presionada la tecla REPRODUCIR para apagar el reproductor.
2)
Presione / para saltar al vídeo siguiente o anterior.
3)
Presione la tecla VOL para entrar modo “Ajuste Volumen” y presione / para
4)
ajustar volumen.
Presione la tecla “M” para entrar en modo borrar película.
5)
Mantenga presionada la tecla “M” para volver al menú principal.
6)
3.3 Borrar archivo película
En modo pausa película, presione la tecla “M” para entrar modo borrar, las
siguientes operaciones son las mismas que las introducidas en modo música. Por
favor vea esa sección.
23

4. Modo grabación
En el menú principal, seleccione Grabar presione la tecla “M” para entrar modo
grabar.
Antes de grabar, presione la tecla “M” para entrar submenú de la grabación.
Carpeta Local: Los usuarios pueden escoger la carpeta aquí.
Tipo REC: Escoja el tipo de grabación en este menú. Los tipos de grabación
son: Buena REC, Larga REC, Buena VOR, Larga VOR.
Buena REC: Tiempo de grabación más bajo, pero la calidad es mejor. (formato
WAV)
Larga REC: Graba más tiempo, pero la calidad es inferior. (formato ACT)
Buena VOR: Formato WAV (Grabación con control de sonido, pausará la
grabación si no hay sonido.)
Larga VOR: Formato ACT. (Grabación con control de sonido, pausará la
grabación si no hay sonido.)
Salir: Vuelve al interfaz de espera de grabación.
ESPAÑOL
24

Empezar grabación
En condición grabación en espera, presione la tecla “REPRODUCIR”, la grabación
empezará.
Presione la tecla “REPRODUCIR” para pausar la grabación. En modo pausa, el
tiempo de grabación parpadeará.
Mantenga presionada la tecla “M” para guardar el archivo grabado y volver al menú
principal.
Batería baja
Si se queda corto de energía durante la grabación, el Sistema guardará el archivo
actual en grabación, detendrá la grabación y mostrará BATERÍA BAJA. Por favor
recargue la batería.
Visualización anormal de modo grabación
Archivo de grabación lleno
1.
Hay muchos archivos en un folder. Cuando los archivos grabados llegan a 99
unidades o el espacio ash está lleno, se mostrará una nota. En este momento,
por favor borre algunas canciones MP3 u otros archivos grabados para tener más
espacio y continuar grabando.
Total de archivos lleno
2.
Hay muchos archivos grabados. Este reproductor puede guardar un máximo de
200 archivos grabados, pero normalmente menos debido a que la cantidad máxima
es relativa al nombre de archivo. El sistema juzgará si alcanza la cantidad máxima
automáticamente; en tal caso, la grabación se detendrá y el usuario deberá borrar
algunos archivos grabados para tener más espacio y continuar grabando.
25
Espacio de disco lleno
3.
Cuando el disco no tiene más espacio para guardar el archivo en grabación, el
sistema visualizará “disco lleno” y el usuario deberá borrar algunos archivos MP3
u otros archivos grabados para continuar grabando.
Error disco
4.
Cuando el disco tiene un error, el sistema lo encontrará y guardará el archivo de
grabación actual y visualizará “Error disco”. Por favor realice un formateo. (Nota:
Al realizar el formateo, podría experimentar algunas dicultades.)
5. Modo Voz
En el menú principal, seleccione VOZ y presione la tecla “M” para entrar modo voz.
ESPAÑOL
26

5.1 En modo voz parado
Mantener presionada la tecla REPRODUCIR para apagar el reproductor
Presionar la tecla “M” para entrar submenú de Conguración de VOZ
Mantener presionada la tecla “M” para volver a menú principal
Presionar la tecla / para seleccionar archivo siguiente/anterior grabado
Presione la tecla VOL para entrar modo ajustar volumen, y presione / para
ajustar volumen.
Submenú de modo voz parado:
Carpeta local:
En modo voz detenida, seleccione Carpeta Local, presione / para seleccionar
la carpeta que quiere, y presione la tecla “M”.
Borrar archivo:
En modo voz detenida, presione tecla “M” para entrar submenú, seleccione Borrar
archivo y presione tecla “M”. Presione / para seleccionar el archivo a borrar
y presione tecla “M” para conrmar. Presione / para seleccionar Sí o No, y
presione tecla “M”.
Borrar todo:
Lo mismo que borrar archivo pero borrará todos los archivos de la carpeta.
Salir:
Salir de este menú.
27

5.2 En modo voz en reproducción
Presione REPRODUCIR para detener la reproducción
Mantenga presionado REPRODUCIR para apagar el reproductor
Presione tecla “M” para entrar submenú de modo Voz en reproducción
Mantenga presionada tecla “M” para volver a Menú principal
Presione / para seleccionar archivo siguiente/anterior
Presione tecla VOL para entrar modo ajuste volumen.
Submenú de modo voz en reproducción:
Repetir:
En el submenú repetir, presione / para seleccionar modo repetir. Hay 7
elecciones: Normal, Repetir Uno, Carpeta, Repetir Carpeta, Repetir Todo, Aleatorio
e Intro.
Tasa tempo:
En el submenú tasa tempo, presione / para congurar la tasa de
reproducción. Hay 16 niveles de -8 a +8, -8 es el más bajo, +8 es el más rápido y 0
es el natural.
Volver a reproducir:
En el submenú de modo voz en reproducción: escoja Volver a reproducir, “A”
empezará a parpadear. Presione para congurar el punto de inicio “A”, “A” deja
de parpadear y “B” empezará a parpadear.
Presione para congurar el punto nal B, “A-B” dejará de parpadear y empezará
a volver a reproducir de A a B.
ESPAÑOL
28

Salir:
Salir del submenú.
5.3 Visualización errores en modo voz
No hay archivos grabados
1.
Esta nota se visualiza cuando el reproductor no tiene archivos grabados o se han
borrado los archivos grabados.
No hay archivos
2.
El nombre del archivo grabado tiene un formato, por tanto si el usuario lo cambia
el reproductor no puede encontrar el archivo grabado y lo avisará en el modo en
reproducción.
Archivo ilegal
3.
Cuando un archivo grabado está dañado o el archivo no es grabado, el reproductor
no puede reproducir el archivo grabado y lo avisará.
Atención: Para reproducir archivos WAV, el reproductor sólo puede reproducir
archivos WAV grabados en este reproductor. No puede reproducir archivos
WAV copiados de un PC.
29

6. Modo Foto
Esta función soporta todas las imágenes en formato JPG
1.
En el menú principal, presione teclas / para escoger opción “Foto”.
Presione tecla “M” para entrar menú selección foto.
2.
Presione teclas / para escoger la imagen foto deseada y presione tecla
3.
REPRODUCIR para visualizarla.
Presione teclas / para mostrar las fotos en secuencia (establezca primero
4.
la opción ”Reproducción manual”, ver sección 6.1).
6.1 Congurar reproducción
En la lista de fotos, presione la tecla “M” para entrar el submenú de fotos.
1.
Presione teclas / para seleccionar opción “congurar reproducción”.
2.
Presione la tecla “M”.
3.
Presione teclas / para escoger “Reproducción manual” u opciones “auto
4.
reproducción”, presione tecla “M” para conrmar.
Presione teclas / para ajustar velocidad “auto reproducción”. Presione tecla
5.
“M” para conrmar.
ESPAÑOL
30

6.2 Borrar archivo
En la lista de fotos, presione la tecla “M” para entrar el submenú.
1.
Presione / para escoger opción “Borrar archivo”.
2.
Presione la tecla “M” para entrar esta opción.
3.
4.
Presione / para escoger archivo a borrar y presione la tecla “M” para
conrmar.
Presione / para escoger Sí o No, y presione la tecla “M” para conrmar.
5.
6.3 Borrar todo
En la lista de fotos, presione la tecla “M” para entrar el submenú.
1.
Presione / para escoger opción “Borrar Todo”.
2.
Presione la tecla “M” para entrar esta opción.
3.
Presione / para escoger Sí o No; si escoge Sí, borrará todos los archivos
4.
de foto.
6.4 Volteando y girando la imagen
En la lista de imágenes, presionar / para seleccionar la imagen que desea
1.
visualizar.
Presionar la tecla REPRODUCIR (PLAY) para visualizar la imagen.
2.
Presionar la tecla M para voltear la imagen hacia arriba o hacia abajo.
3.
Presionar la tecla VOL para voltearla imagen hacia la izquierda o hacia la
4.
derecha.
Presionar REPRODUCIR (PLAY) para girar la imagen 90 grados.
5.
Nota: Esta función solo se aplica en “Reproducción manual”.
31

7. Conguración Sistema
Escoja Congurar en el menú principal.
Presione / para seleccionar la opción de conguración y presione tecla “M”
para conrmar.
Mantenga presionada tecla “M” y volverá al menú principal. Mantenga presionada
REPRODUCIR para apagar el reproductor.
7.1 Tiempo grabación
Presione tecla “VOL”, seleccionará el año, presione la tecla / para
modicarlo. Presione VOL otra vez, y seleccionará el mes, presione / para
modicarlo. Puede modicar la fecha, hora, minutos y segundos siguiendo los
mismos pasos.
Finalmente presione la tecla “M” para conrmar la conguración y salir del menú
Hora sistema.
7.2 Congurar LCD
Seleccionar menú principal: En este modo puede seleccionar la imagen para el
interfaz principal.
Congurar en negro: Congura un periodo de tiempo jo (unidad: segundo) de
modo que cuando no hay ninguna operación de tecla, la pantalla del reproductor se
vuelve negra automáticamente. Si se selecciona “0” la función está inutilizada.
7.3 Congurar apagado
Hay dos opciones: apagar y dormir.
Apagar: signica que si no se selecciona ninguna operación durante el tiempo
preestablecido, el sistema se apagará automáticamente.
(Unidad: segundo) Escoja entre 0-60, donde 0 signica que esta característica está
inutilizada.
Hora dormir: signica que después de trabajar durante xxx minutos (xxx= tiempo
ESPAÑOL
32

preestablecido), el sistema se apagará automáticamente. Escoja entre 0-240, donde
0 signica que esta característica está inutilizada.
Nota: El modo dormir sólo es válido una vez y debe volver a congurarse cada vez.
7.4 Congurar volver a reproducir
Hay dos opciones: Volver a reproducción manual o automática
“Volver a reproducción manual”: cuando usa la función repetir A-B no puede
detenerse automáticamente.
“Volver a reproducir automático”: Usado en aprendizaje de idioma; el sistema puede
pausarse entre primera y segunda frase automáticamente.
7.5 Conguración del dispositivo en línea
Dispositivo USB: Congura el reproductor MP3 como un Dispositivo de
Almacenamiento en Masa USB.
Nota: Cuando usted congura el dispositivo en línea como un Dispositivo de
Almacenamiento en Masa USB, tras conectar el reproductor a la PC, usted sólo
puede ver los archivos guardados en modo USB y los archivos guardados en la
carpeta DATA del modo Dispositivo de Media.
Dispositivo de media: Congura el reproductor MP3 como un Dispositivo de
Protocolo de Transferencia de Media, transriendo archivos de música sólo por
sincronización mediante Microsoft© Windows Media player.
Nota:
Si usted desea transferir archivos de música con DRM (Gestión de Derechos
1.
Digitales), usted deberá congurar el reproductor MP3 a modo Dispositivo de
Media. Entonces podrá sincronizar archivos de música mediante Windows Media
Player 9 ó versiones más recientes.
En modo Dispositivo de Media, tras conectar el dispositivo al PC, no será posible
2.
ver los archivos guardados en el modo Dispositivo USB.
33

7.6 Formateado del disco
Existen dos opciones en esta función; usted puede seleccionar FAT16 ó FAT 32
para formatear el reproductor.
7.7 Info memoria
Los usuarios pueden comprobar el espacio de memoria libre.
Ejemplo: 1932MB es el tamaño total de memoria, y 51% signica 51% del total de
memoria usado.
7.8 Versión rmware
Los usuarios pueden comprobar el rmware del reproductor aquí.
7.9 Hora DRM
Visualiza tiempo DRM.
7.10 Salir
Vuelve al Menú principal.
8. Modo E-book
Esta función soporta todos los archivos TXT.
Entre el menú principal, presione / para escoger “E-Book”
1.
Presione la tecla “M” para entrar el modo.
2.
Presione / para seleccionar archivo de texto a leer. Presione tecla Reproducir
3.
para entrar interfaz texto
Presione / para girar las páginas en secuencia (sólo apropiado para
4.
“Reproducción manual”)
ESPAÑOL
34

Mientras lee, presione la tecla “M” para entrar al modo conguración Marcador.
5.
8.1 Congurar reproducción
En la lista E-book, presione la tecla “M” para entrar submenú.
1.
2.
Presione / para escoger opción “congurar reproducción”:
Presione la tecla “M” para entrar a esta opción, o presione tecla REPRODUCIR
3.
para salir.
Presione / para escoger opciones de “Reproducción manual” o “auto
4.
reproducción”. Presione la tecla “M” para conrmar.
Presione / para ajustar la velocidad “auto reproducción”. Presione la tecla
5.
“M” para conrmar.
8.2 Borrar archivo
En la lista E-book, presione la tecla “M” para entrar submenú.
1.
Presione / para escoger opción “Borrar archivo”.
2.
Presione la tecla “M” para entrar esta opción.
3.
Presione / para escoger el archivo a borrar y presione la tecla “M” para
4.
conrmar.
Presione / para escoger Sí o No, y presione la tecla “M” para conrmar.
5.
8.3 Borrar todo
En la lista E-book, presione la tecla “M” para entrar submenú.
1.
Presione / para escoger la opción “Borrar todo”.
2.
Presione la tecla “M” para entrar esta opción.
3.
Presione / para escoger Sí o No. Si escoge Sí, borrará todos los archivos
4.
E-book.
35

9. Modo Juegos
Presione la tecla “M” para entrar al modo Juegos. Presione / para seleccionar
el juego y presione la tecla “M” para conrmar.
9.1 Cartero
Seleccione Cartero y presione la tecla “M” para entrar.
Empezar: Presione la tecla “M” para empezar el juego.
•
Mapa: Selecciona nuevo juego o entrar al juego siguiente directamente.
•
Ayuda: Visualiza la ayuda para el juego actual.
•
Volver: Vuelve al interfaz principal del juego.
•
Guía: Entrar al juego, seleccionar START y después presionar la tecla “M” para
comenzar un juego nuevo. En este juego usted necesita mover la caja a un lugar
establecido (en el icono rojo). Botones de control: Arriba-PLAY, abajo-VOL, izquierdaPREV, derecha-NEXT, la tecla M es para salir. Una vez que todas las cajas se han
movido a lugares apropiados, entonces el juego cambiará al siguiente nivel para un
reto mas divertido.
ESPAÑOL
36

9.2 Ladrillos
Seleccione Ladrillos y presione la tecla “M” para entrar.
Empezar: Presione la tecla “M” para empezar el juego.
•
Velocidad: En el modo velocidad, puede ajustar la velocidad.
•
•
Rejilla abierta: Abre la línea de rejilla del interfaz del juego.
Rejilla cerrada: Cierra la línea de rejilla del interfaz del juego.
•
Ayuda: Visualiza la ayuda para el juego actual.
•
Volver: Vuelve al interfaz principal del juego.
•
Guía: Entre al juego, seleccione START y después presione la tecla “M” para
comenzar un juego nuevo, los jugadores necesitan ajustar la dirección de los ladrillos
para ir a los lugares adecuados.
Función de botones: la tecla “M” cambia la dirección, la tecla PREV mueve el ladrillo
a la izquierda, la tecla NEXT mueve el ladrillo a la derecha, la tecla VOL hace que
el ladrillo baje más rápidamente, y la tecla PLAY le permite salir del juego. En la
parte izquierda de la pantalla, esta la velocidad, el marcador y la visualización previa
del ladrillo siguiente. Una vez que cada línea sea llenada de ladrillos, la línea será
eliminada y se anotarán los puntos al marcador, hasta que el juego sea terminado o
la pantalla este llena de ladrillos.
9.3 Buscaminas
Seleccione Buscaminas y presione la tecla “M” para entrar.
Empezar: Presione la tecla “M” para empezar el juego.
•
Número Línea: Congura la línea para el juego actual.
•
Número Fila: Congura la la para el juego actual.
•
Número Mina: Congura el número de mina para el juego actual.
•
Ayuda: Visualiza la ayuda para el juego actual.
•
Volver: Vuelve al interfaz principal del juego.
•
37

Guía: En este juego, los jugadores necesitan encontrar todas las minas. En la parte
superior, el “Total” signica el número de minas, “Paltantes” (spare) signica el
número de minas que aun no han sido descubiertas. Función de botones: la tecla
“M” abre el bloque, la tecla PREV se mueve a la izquierda, la tecla NEXT se mueve a
la derecha, la tecla VOL se mueve hacia abajo, presione momentáneamente la tecla
PLAY para moverse hacia arriba, y presione por algunos segundos la tecla PLAY
para marcar la mina.
Después de abrir un bloque, un número aparecerá, 1 signica que hay 1 mina al
rededor de este bloque, 2 signica que hay 2 minas alrededor de este bloque, y así
sucesivamente. Una vez que todas las minas hayan sido descubiertas, el jugador
ganará el juego y podrá moverse al siguiente nivel.
9.4 Gotas de color
Seleccione Gotas de Color y presione la tecla “M” para entrar.
Empezar: Presione la tecla “M” para empezar el juego.
•
Puntuación más alta: Visualiza la puntuación más alta.
•
Ayuda: Visualiza la ayuda para el juego actual.
•
Volver: Vuelve al interfaz principal del juego.
•
Guía: En este juego, hay varias gotas de colores, una vez que hayan 3 gotas del
mismo color en la misma línea (vertical u horizontal), las gotas serán eliminadas y
nuevas gotas bajarán.
Función de botones: la tecla “M” selecciona la gota, la tecla PLAY se mueve para
arriba, la tecla PREV se mueve a la izquierda, la tecla NEXT se mueve para la
derecha, y la tecla VOL se mueve hacia abajo. Presione la tecla “M” por 2-3 segundos
para salir del juego.
ESPAÑOL
38

9.5 Puzzle
Seleccione Puzzle y presione la tecla “M” para entrar.
Empezar: Presione la tecla “M” para empezar el juego.
•
•
Nivel: Congura los diferentes niveles para el juego actual.
Seleccionar Imagen: Selecciona la imagen para la interfaz del juego.
•
Ayuda: Visualiza la ayuda para el juego actual.
•
Volver: Vuelve al interfaz principal del juego
•
Guía: En este juego, hay una imagen grande separada en 16 pequeñas piezas en
lugares aleatorios, el jugador requiere de encontrar las piezas para completar la
imagen.
Función de botones: la tecla PLAY se mueve para arriba, la tecla PREV se mueve a la
izquierda, la tecla NEXT se mueve a la derecha, y la tecla VOL se mueve hacia abajo.
La tecla “M” se utiliza para salir.
9.6 Salir
Seleccione Salir para salir del modo.
39

Demostración DRM
A. Canciones de introducción
Descargar la canción en formato DRM (Gestión de Derechos Digitales) desde
el PC al reproductor MP3. Estas canciones han sido encriptadas y necesitan
una licencia para ser descodicadas. Las canciones pueden ser descargadas
gratuitamente desde la página web http://wmtap.smdisp.net/janus. Guarde la
licencia y la canción en su ordenador.
B. En la página web, picar sobre STC1
ESPAÑOL
40

C. Guardar las Canciones
D. Tras descargar los Archivos de Audio, desplazar la página hacia abajo y luego
seleccionar “Licencia Adquirida (Nivel de Seguridad=150)” para descargar la
licencia para las canciones.
41

E. Requerimientos del Sistema
PC con sistema operativo Windows® XP + SP1 o superior, Windows Media Player
10 o superior
F. Cómo descargar canciones
WMP10 es utilizado para descargar música con protección de los derechos
a)
de autor e.g. DRM. Los dispositivos USB que no admitan MTP (Protocolo
de Transferencia de Media) no pueden ser utilizados para adquirir la licencia
aunque la música pueda ser descargada. MTP sólo está disponible en
Windows® XP, Windows® 98 SE y Windows® 2000 y otros sistemas operativos
legales no poseen capacidad DRM.
G. Cuando use un dispositivo de Media (Media device) para transferir o copiar
desde el ordenador, use Windows Media Player 10 o superior para descargar
canciones con protección DRM.
H. Congure el Dispositivo En Línea (Online Device) en la conguración de sistema
como Dispositivo Media (Media device) y después conecte el reproductor MP3 al
ordenador.
I. Transcurridos unos 10 segundos, Windows le preguntará si continuar o cancelar.
Seleccionar “OK” para avanzar o “Cancelar” (Cancel) para nalizar.
J. Picar sobre “OK” para arrancar la aplicación Windows Media Player.
ESPAÑOL
42

K. Picar sobre el menú “Librería” como se muestra abajo:
L. Y luego seleccionar el archivo de música, picar sobre él con el botón derecho y a
continuación seleccionar “Añadir a la Lista de Sincronización”.
43

M. Picar sobre el menú “Sincronización” como sigue:
ESPAÑOL
44

N. Picar sobre “Comenzar la Syncronización” en la parte superior
O. Transcurridos unos 10 segundos se mostrará el mensaje “Sincronización en
proceso”
45

P. Una vez que la música haya sido transferida al reproductor, cerrar la aplicación
Windows Media Player.
Q. Desconecte el reproductor del ordenador y el reproductor visualizará el progreso
de creación de datos del siguiente modo:
Nota: Por favor, no haga ninguna operación con el reproductor al crear datos.
R. Una vez nalizada la creación de datos, entrará en modo música y entonces
puede escoger las canciones DRM a reproducir.
Resolución Problemas
1. Cuando presiono “reproducir” no hay visualización.
Causa/ Solución: Por favor conecte el reproductor al ordenador para recargarlo.
Intente reiniciarlo 10 minutos después.
2. Cuando quiero reproducir archivos no hay sonido.
Causa/ Solución: El volumen es demasiado bajo. Aumente el volumen e inspeccione
la conexión del audífono para ver si está rota.
ESPAÑOL
46

3. Mi ordenador funciona mal cuando desconecto el reproductor.
Causa/ Solución: Desconectar el reproductor mientras se transeren archivos. No
desconectar el reproductor mientras se transeren archivos.
4. ¿Por qué no puedo descargar archivos mientras el reproductor está
conectado al PC?
Causa/ Solución: El driver para USB no se ha instalado correctamente. Por favor
instale el driver para USB otra vez siguiendo las instrucciones de operación, o
la tarjeta madre del ordenador no soporta equipamiento USB, en tal caso debe
modernizar la unidad tarjeta madre.
5. ¿Por qué no puedo ver archivos guardados en el reproductor?
Causa/ Solución: Su reproductor puede tener demasiados archivos, deberá de
borrar algunos de ellos en su reproductor (vea sección 2.6).
6. Por qué se visualiza en el ordenador “disco lleno” pero no vemos ningún
archivo en el disco después de conectar al PC?
Causa/Solución: En la conguración de sistema, el modo Dispositivo En Línea
(Online Device) está congurado como Dispositivo media (Media device) pero
el modo Dispositivo En Línea (Online Device) estaba congurado como modo
dispositivo USB cuando descargó los archivos, o el modo Dispositivo En Línea
(Online Device) está congurado como dispositivo USB pero el modo Dispositivo En
Línea (Online Device) estaba congurado como Dispositivo media (Media device)
cuando descargó los archivos. Por favor congure el dispositivo en línea del modo
apropiado.
47

Reclamos y Garantías
En el caso de eventuales defectos en el producto, favor de dirigirse directamente
con Supportplus. A tal n le recomendamos conservar cuidadosamente el
comprobante de compra.
Servicio: En caso de consultas técnicas, informacion sobre nuestros productos y
para realizar pedidos de repuestos, nuestro equipo de Servicio está a su dispocisión
como se muestra a continuación:
Website: www.supportplususa.com
E-mail: info@supportplususa.com
Teléfono: 800-984-3270
Dato importante: Por favor no envíe su aparato a nuestra dirección sin que se lo
haya pedido nuestro equipo de Servicio. Los gastos y el peligro de pérdida en el
caso de envíos no requeridos corren por cuenta del remitente. Nos reservamos
el derecho de rechazar la aceptación de envíos no solicitados o de devolverle la
mercancía respectiva al remitente que será por cuenta de este último.
La batería de litio recargable debe ser eliminada correctamente. Contacte con su
administración local acerca de las prácticas de eliminación y reciclaje en su área.
Garantía: Si por alguna razón éste producto registrado no funciona como debería por
defectos de fábrica, puede ser reparado dentro de los primeros 90 días después de
la fecha de compra. Esta garantía no cubre las fallas causadas por uso inapropiado,
accidentes, reparaciones o alteraciones hechas por personal no autorizado.
SuportPlus en ningún momento se hará responsable por daños accidentale,
especiales, indirectos o consiguientes como resultado del uso, mal uso o incapacidad
de utilizar éste producto.
ESPAÑOL
48

Dirección en EEUU:
SupportPlus North America Inc.
26439 Rancho Pkwy. Unit 115
Lake Forest, CA 92630
www.supportplususa.com
Nota: Para asegurarle un servicio immediato al cliente, favor de registrarse.
Como registrarse
Para registrarse, ir primero a la página web www.supportplususa.com. A
continuación picar sobre “Registro de Contacto en EEUU” (‘Contact US
Registration.’). Luego picar sobre el enlace debajo “Registro de MP3” (‘MP3
Registration’). Finalmente, introducir la información requerida en el formulario en
línea, y luego picar sobre el botón “Enviar” (‘Submit’) para enviar el formulario de
registro.
Nota: La guía de comienzo rápido y la versión completa del manual solo estan
disponibles en Inglés y Español. La versión completa del manual puede ser
encontrada en el CD accesorio en el directorio de “User Manual”.
Windows® es una marca registrada del Grupo Microsoft.
49
VRS 1.2

 Loading...