

Interlogix TruVision series, TruVision TVN-11, TruVision NVR 11, TruVision TVN-22S, TruVision NVR 22S Quick Start Manual
Page 1
STEP 5: Setup the recording parameters for
each recording level.
• Camera Setup/Camera Recording Setup -
For each camera enter the values.
• Values selected are - resolution (TL-Hi)
and motion (event).
• Make sure to click “Save.”
STEP 3: Plug the cameras into the POE ports
on the back of the recorder (it is recommended to plug them into the ports on the back in
order so that Camera 1 is in port 1, etc. It will
make it easier to troubleshoot later).
STEP 2: Use Internet Explorer (or Firefox
ESR52)(or Chrome with IETab extension) to
login to the configuration page of the recorder.
• Network Settings –Set your Preferred and
Alternate DNS Servers (use any valid DNS
server – Free Google Versions 8.8.8.8 &
8.8.4.4) – This is necessary for DDNS,
NTP, & Push Notifications. Click “Save.”
• Device Management/Time & Date Settings
– Set the time & date and check Auto
DST. Click “Save.”
• Network Settings/NTP – Click Enable
NTP. Click “Save.”
STEP 1: Use Device Manage to activate the
recorder (assigning it a password) and set the
IP of the recorder to an address within the
subnet of the premise.
Quickstart Guide
Interlogix TruVision TVN-11/TVN-22S
STEP 6: If you want to record on motion only
(no time lapse) adjust the recording schedule
(recording/recording schedule) to show all yellow (Event).
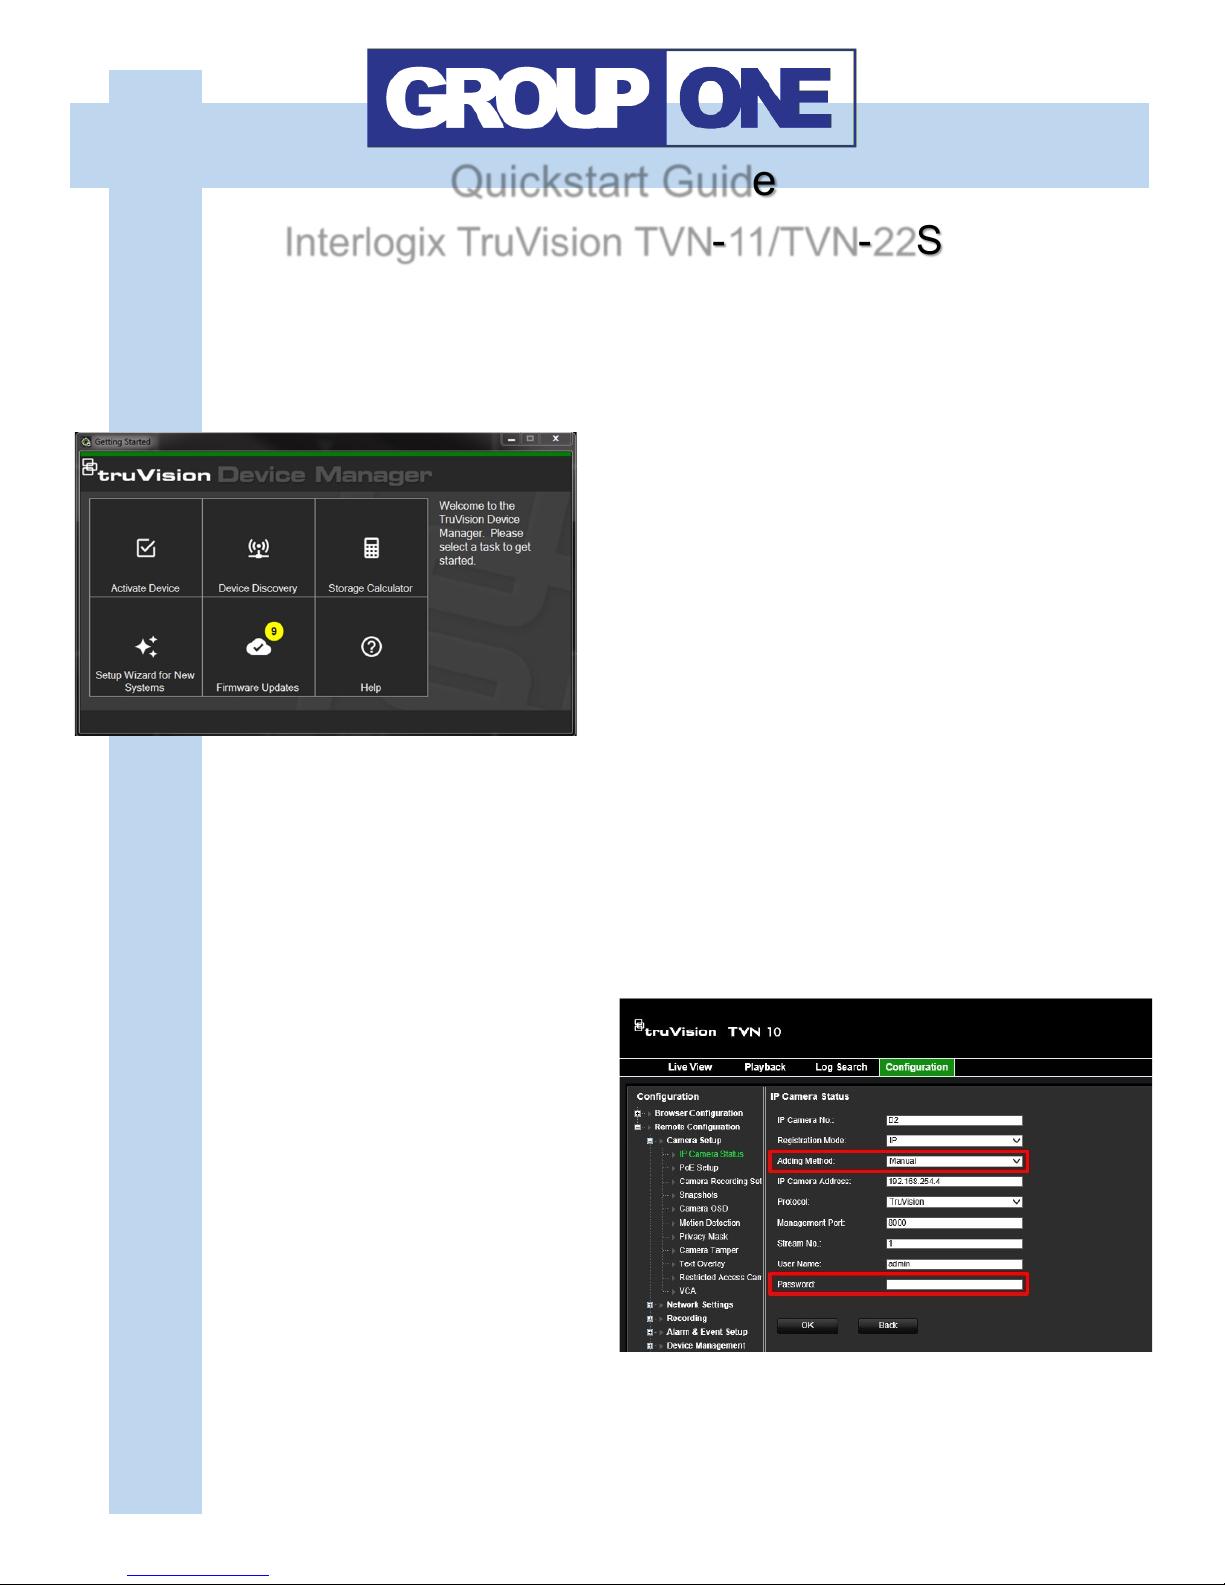
STEP 4: After the cameras come up online,
with video, go back into configuration of the
recorder and change each camera from Plug
and Play to Manual - *IMPORTANT*
• Camera Setup/IP Camera Status - High-
light the camera and click “Modify.”
• Change the adding method to Manual, en-
ter the password (newer cameras will have
the same password as the recorder from
the initial setup, older cameras may still
have the default password 1234). Click
“Ok”
Page 2

STEP 11: Log into the router on site and setup port forwarding for ports 80,8000,554
(these are the defaults and can be changed in
the Network Settings of the recorder). Forward these ports to the same IPv4 address of
the recorder.
STEP 10: Enable DDNS if you don’t have a
static IP address - Network Settings/DDNS -
Click “Enable DDNS”, type in a Host Name
(start with a letter, only letters and numbers,
no capitals, no symbols), click “Save” (not get
URL). If the name is taken it will fail and you
will need to select a different host name.
• Use hostname.tvr-ddns.net to access the
recorder from offsite
STEP 9: Name the Cameras - Camera Setup/
Camera OSD - Name each camera you
choose whether or not you want to name and/
or time & date to display on the screen. Click
“Save.”
STEP 7: For every camera you want to use
Motion to activate Event mode enable motion
detection.
• Camera Setup/Motion Detection - Click
“Enable Motion Detection”, click “Start
Draw” and drag mouse to setup motion
area (red squares are where it is looking
for motion). Click “Save.”
STEP 8: For every camera you want to use
embedded analytics to activate Event mode
(Cross Line, Intrusion Detection, etc.) enable
VCA (TVN-11 Only—TVN-10 programs in the
camera).
• VCA/ Cross Line Detection - Click “Enable
Cross Line Detection”, Click “Start Draw”
and drag mouse to create Cross Line, select directionality, Click “Save.”
• In the Actions tab, click “Notify Alarm Host”
to enable push notifications for this camera
(VCA is more stable than Motion Detection
and works better for push notifications, but
walk testing line location and sensitivity is
still recommended).
 Loading...