

Intek SL-02 Owner's Manual
SL-02
MULTISTANDARD
UHF HANHDELD TRANSCEIVER
(PMR446 / LPD433 BANDS)
OWNER'S MANUAL
MANUALE DI
ISTRUZIONI

Index
English
Index........................................................................................................................................................... 1
Introduction ........................................................................................................................................... 2-3
Contents of Package ............................................................................................................................... 3
Controls and Indicators ........................................................................................................................ 3-5
Battery Installation.................................................................................................................................... 6
Battery Operation / Battery Charging ..................................................................................................... 7
Operation.............................................................................................................................................. 7-13
Specifications.......................................................................................................................................... 13
Optional Accessories ............................................................................................................................. 13
Important Informations........................................................................................................................... 14
Declaration of Conformity...................................................................................................................... 15
User Information ..................................................................................................................................... 15
Notes........................................................................................................................................................ 16
IMPORTANT !
It is recommended to carefully read this instruction manual throughout, before using the radios. This also in order to prevent
you from using the radios out of the limits stated by the regulations.
IMPORTANT !
The maximum operating range will vary depending on terrain and environment. Range will be usually greater in open fields.
While range is usually shorter within and around buildings or large structures. This unit may not ensure privacy of
communication.
RoHS
2002/95/EC
- 1 -

Introduction
Congratulations !
Congratulations on your selection and purchase of this high quality product. With proper care and adherence to the
set-up and user instructions in this Owner’s Manual, this unit will let you enjoy years of trouble-free service.
We are committed to providing quality products that fit your needs, however we would like to receive any comments
or suggestions that you might have on this product, which will help us in continuous improvement of the quality.
Applications
The SL-02 is a lightweight, pocket size, compact and very slim design two-way communication device, operating on
the PMR 446 MHz and on the LPD 433 MHz European bands. Radio must be operated on the band (PMR446 or
LPD433) and on the channels allowed in the country where the product is been used, in accordance with the
local regulations. It can be used to provide immediate, high quality, cost free 2-way communication, for both
business or personal use, it is the ideal communication tool for many applications, like :
Industry Sport & Leisure
Construction Sites Sporting Events, Concerts, Meetings
Shops, Stores & Shopping Malls Bike & Motorcycle Riding
Warehouses & Buildings Kids and old persons Control
Hotels & Resorts Camping and Hiking
Safety & Emergency Indoor & Outdoor Activities
Baby Monitor Sailing and Sports Flight
Features and Benefits
The radio includes a number of advanced features, nevertheless its operation is user firendly and you may get
familiar with it, after few minutes of use.
Please refer to the following list of the main feautres in this two-way radio :
8 PMR Channels + 69 LPD Channels
38 CTCSS Codes
Roger Beep Tone
Keypad Program Tone
Keypad Lock
Up to 10 km range on PMR446 channels, depending on the environment
Auto Squelch
Auto Monitor
Auto Power Save Circuit
VOX (Baby Room Monitor) / Handsfree Use
Adjustable Hi-LO Transmitter Power (PMR band)
Channel Scan
Channel / CTCSS Tone Memory
English
- 2 -
Introduction - Contents of Package - Controls and Indicators
English
3 Selectable Call Tone Melodies
Last Used Channel Memory
TX LED Indicator
LCD Display
Battery Status / Charge Indicator
External Earset-Microphone Jack
Wall Charger Jack
Vibrator Alert (for silent use)
Lithium Ion Battery Pack (720 mAh) Included
Contents of Package
Please carefully check that the package contains the following items :
2 x Main Unit (Radio)
2 x Li-Ion 720mAh Battery Pack (already installed into the radio)
2 x 230VAC Wall Charger
2 x Earset-Microphone
2 x Necklace
1 x User Manual (this one)
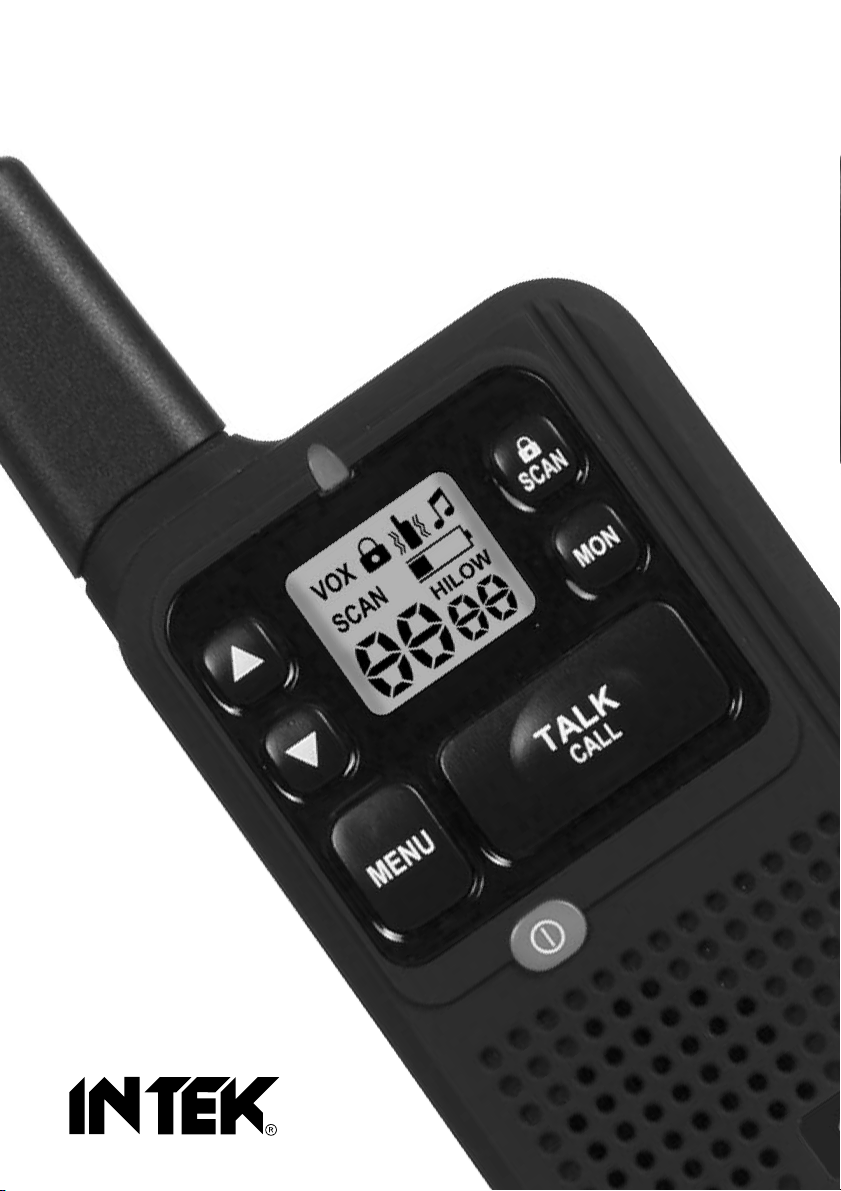
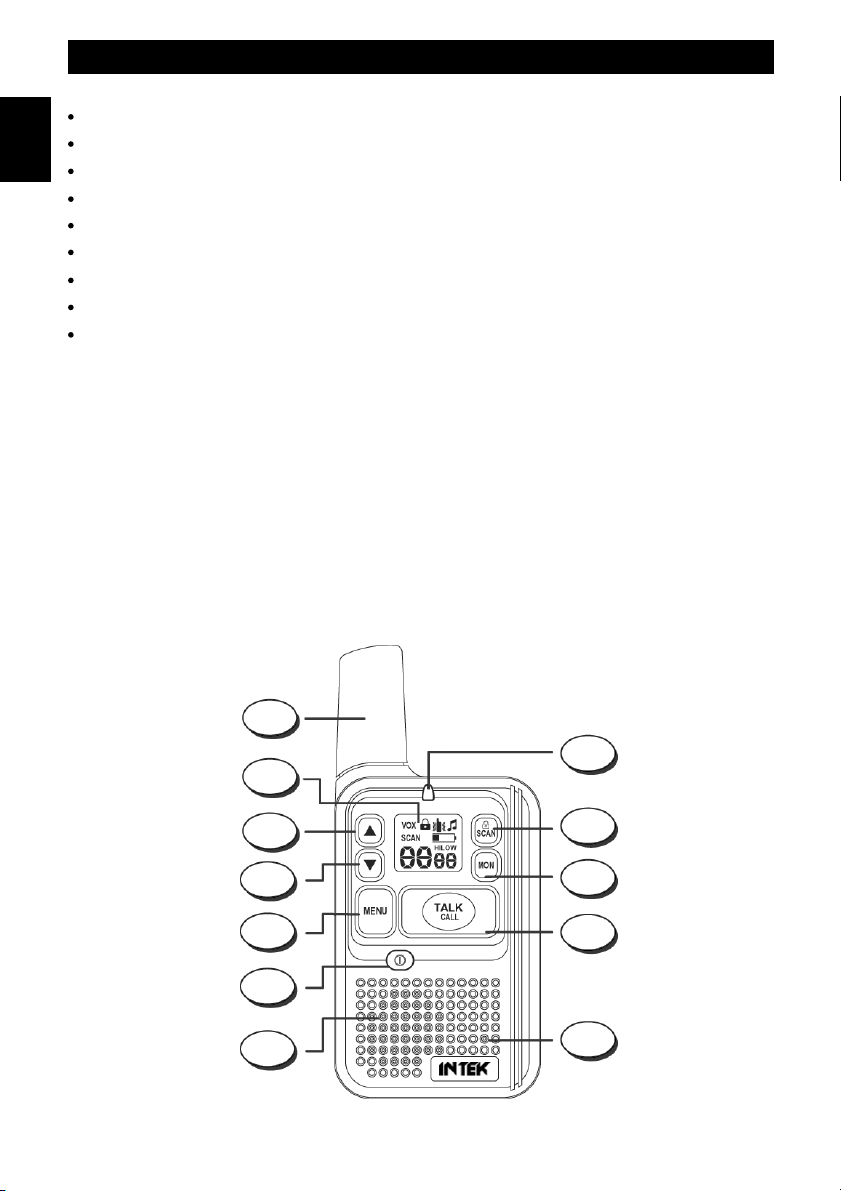
CONTROLS AND INDICATORS
Front Panel
1
12
11
10
9
8
7
2
3
4
5
6
- 3 -

Controls and Indicators
1. Antenna
High efficency antenna.
2. TX LED indicator
This green LED Indicator is lighted when radio is in transmit mode.
3. SCAN / LOCK Key
SCAN
Shortly press the SCAN / LOCK (3) key to start the channels scanning (refer to AUTOMATIC CHANNEL SCANNING at
page 12).
KEYPAD LOCK
Press and hold the SCAN (3) key for about 5 seconds to enable the keypad LOCK function. Press and hold this key
again to disable the keypad LOCK function (refer to KEYPAD LOCK at page 12).
4. MON Key
Press the MON key (4) to activate the Monitor function. This function opens Squelch in order to listen to the background
noise and weak signals.
5. TALK / CALL Key
TALK
Press the TALK / CALL (5) key to transmit and hold it during transmission. The LED Indicator (2) will be lighted during
transmission. Release the TALK / CALL Key (5) at the end of your transmission to return to the receive mode.
WARNING ! Do not touch the antenna during transmission.
CALL
Press the TALK / CALL Key (5) twice in rapid action to transmit Call Tone.
6. Built-in Microphone
Built-in microphone.
7. Built-in Speaker
Built-in front speaker.
8. ON-OFF Key
Press and hold this key to switch ON or OFF the radio.
9. MENU Key
Press the MENU Key (9) key enable and program the various functions of the radio. Pressing the MENU Key (9) key
will scroll the various functions.
10. DOWN Key
The DOWN Key (10) is used to decrease the volume level (from level 8 to level 1) and toggle setting in Menu mode.
11. UP Key
The UP Key (11) is used to increase the volume level (from level 1 to level 8) and toggle setting in Menu mode.
12. LCD Display
The LCD Display indicates simultaneously all the programmed settings and all the enabled functions.
English
- 4 -
English
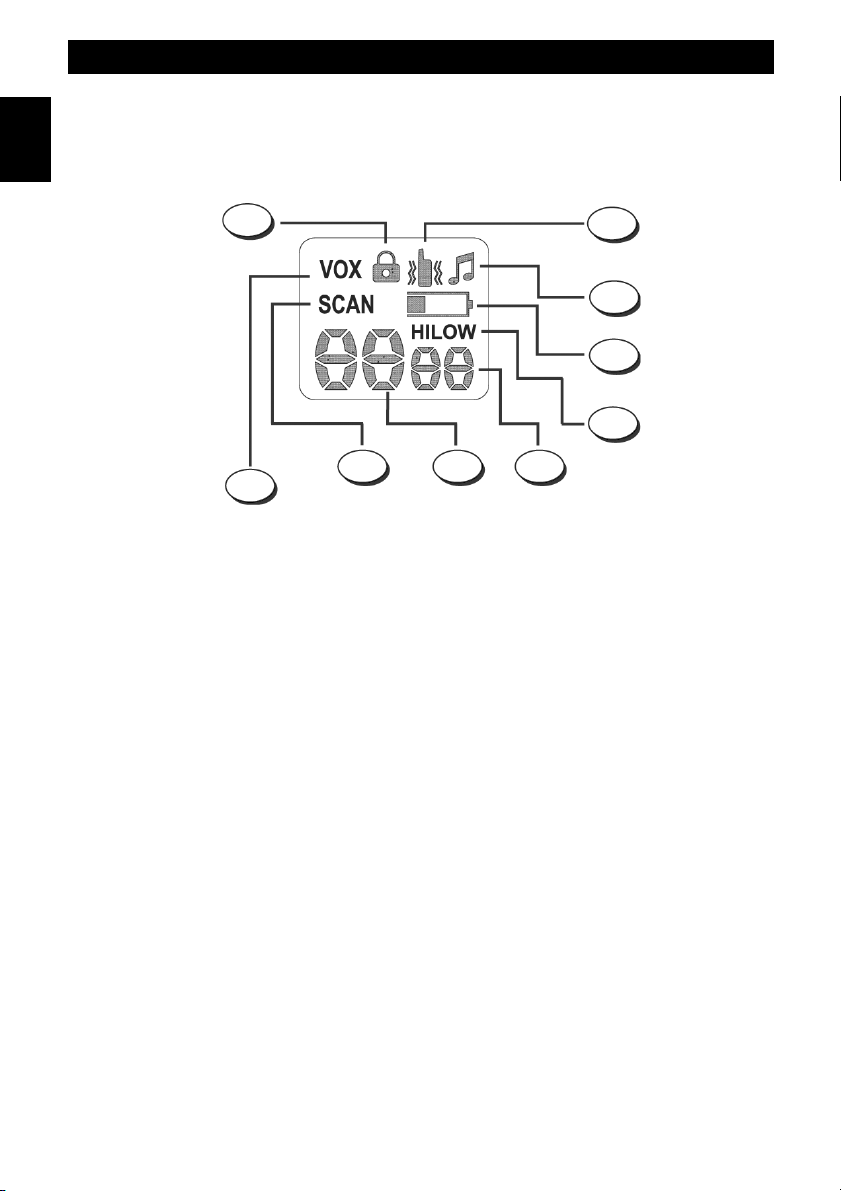
LCD Display
Controls and Indicators
A
B
C
D
E
FGH
I
A. LOCK Icon
The LOCK Icon (A) is lighted when the Keypad Lock function has been enabled.
B. VIBRATE MODE Icon
This icon is lighted when the unit is in Vibrate-Alert mode. (Please refer to VIBRATE ALERT SETTING at page 12).
C. Roger Beep Icon
The Roger Beep Icon (D) is lighted when the Roger Beep function is enabled.
D. Low Battery Level Icon
It indicates when battery level is low or during the battery charging.
E. HI / LOW Power Indicator
Indicates when the unit is High Power mode (HI), or in Low Power mode (LOW). Transmitter power is adjustable only
on the 8 PMR channels.
F. CTCSS Code Number
It shows the selected CTCSS Code Number.
G. Channel Number
It shows the selected channel, from P1 to P8 (PMR channels) and from 1 to 69 (LPD channels).
H. SCAN Icon
The SCAN icon (H) is lighted when the SCAN function has been enabled, in order to automatically search busy
channels. (Please refer to AUTOMATIC CHANNEL SCANNING at page 12).
I. VOX Icon
The VOX Icon (I) is lighted when the VOX (handsfree use) function is enabled. (Please refer to VOX FUNCTION
at page 11).
- 5 -
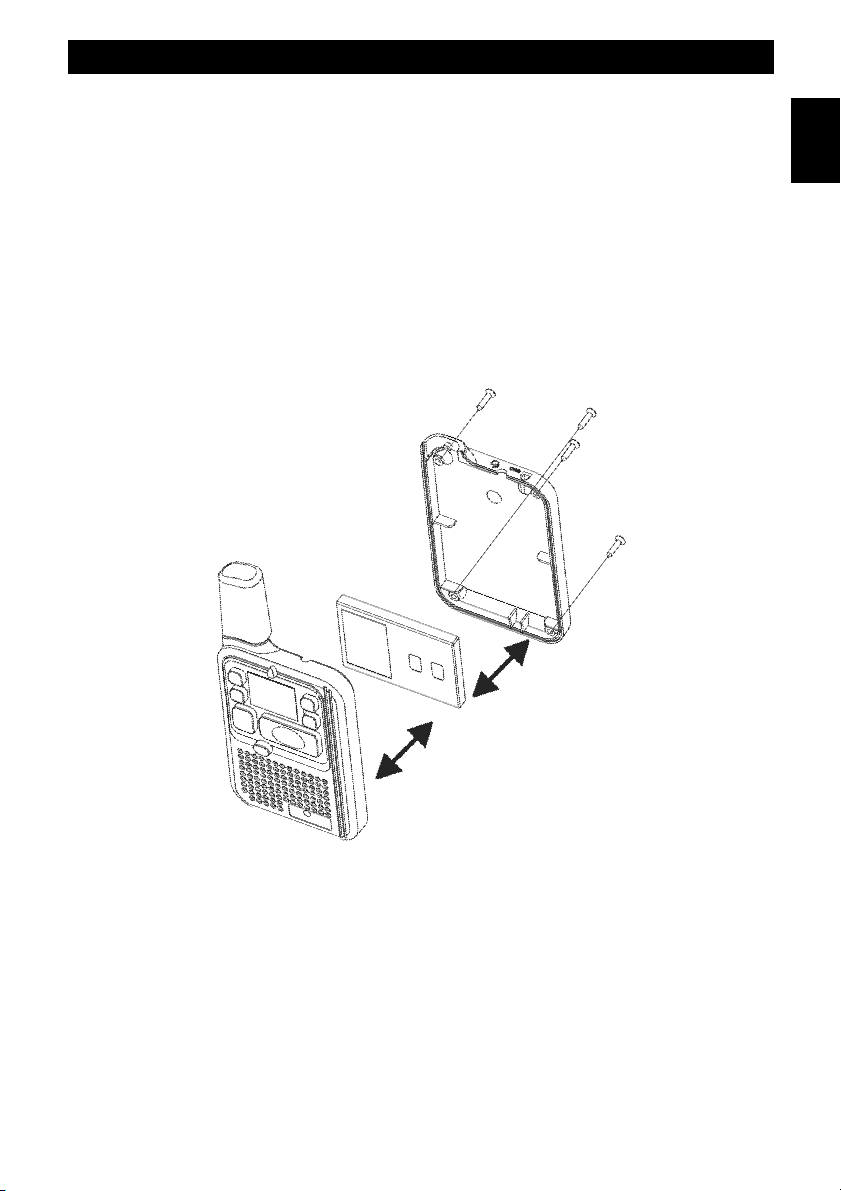
Battery Installation
Battery Installation
The radio is powered by a Lithium-Ion Battery. The battery is already installed in the unit, but, if replacement is
needed, please refer to the following procedure :
1. Release the Cabinet Back Cover located on the rear side of the unit, by removing four (4) pieces of Screws and
remove the Battery Pack from the Battery Compartment.
2. Install the new Lithium-Ion Battery into the Battery Compartment. Be certain to follow the correct battery
orientation in the compartment. Installing the batteries incorrectly will prevent the unit from operating. Use only
the original Battery Pack.
3. Replace the Cabinet Back Cover and lock it into position, by replacing the four (4) Screws removed previously.
Do not overtighten the screws to avoid damaging the plastic cabinet.
English
CAUTION :
To reduce the risk of fire or personal injury, use only the battery listed in this user manual. The radio has a built in
Power Saver feature for maximum battery life. Anyway, when the radio is not being used, conserve battery power by
pressing the ON/OFF Key (8) to OFF.
- 6 -

Battery Operation - Battery Charging - Operation
English
Battery Level and Low Battery Operation
The unit has a Low Battery Level icon (D) which will appear when it detects a low battery level. You should recharge
the battery at this time. The Low Battery Level icon (D) will not appear on the LCD display (12) unless the unit detects
that the battery is low.
When the unit has a Low Battery Level, then the PTT operation will be disabled and the unit will emit an Error Tone if
the TALK/CALL Key (5) is pressed.
When the Low Battery icon (D) appears, then the TALK/CALL Key (5) and MENU Key (9) will be disabled.
If the unit is not charged within 5 minutes, then it will shut down until it is recharged.
Battery Charging
The radio comes with a 230VAC Adaptor Charger, which must be used to recharge the Lithium-Ion battery pack.
To charge the battery proceed as follow :
1. Locate the Headset / Charger Jack Cover on the top side of the unit.
2. Connect the A/C Adaptor Charger into an A/C wall outlet.
3. Insert the A/C Adaptor Charger plug into the Headset / Charge Jack.
During battery charging, the Low Battery Level icon (D) will appear on the LCD display (12) and it will disappear once
the battery is fully charged.
NOTE: Charge the battery for approximately 12 hours before initial use.
OPERATION
Using the Radio
1. Switch on the radio by pressing and holding the ON/OFF key (8) for around 2 seconds. To switch off the radio,
press and hold the ON/OFF key (8) for around 3 seconds.
2. Check the battery condition on the LCD display (12).
3. Adjust the volume to a comfortable level by pressing the UP (11) or DOWN (10) keys (default).
Transmitting and Receiving
To use the radio to communicate with others :
1. The radio is continuously in RECEIVE mode when the unit is ON.
2. Press and hold the TALK/CALL key (5) and speak as you normally would, holding the microphone (6) about 20
cm away from your mouth. While transmitting, the TX LED (2) located at the top side of the unit lights up. To
avoid cutting off the first part of your transmission, do not speak immediately after pressing the TALK/CALL key
(5); first pause briefly, then speak.
3. When you have finished speaking, release the TALK/CALL key (5). You are now ready to receive incoming
transmission.
- 7 -
Operation
To communicate between two or more radios, both the channel number and the CTCSS code selections must be the
same for all units.
Transmitting a Call Alert Tone
To transmitt a Call Alert Tone, press the TALK/CALL key (5) twice in rapid action. The Call Alert Tone will be
automatically transmitted for a fixed length of time.
During transmission, the TX LED (2) lights up and a Call Alert Tone is also locally generated for confirmation of
operation. The radio will return to standby mode following completion of the Call Tone sequence.
Adjusting the Speaker Volume
To adjust the receiving Volume, procede as follows :
1. Press the UP Key (11) to increase the Speaker Volume.
2. Press the DOWN Key (10) to decrease the Speaker Volume.
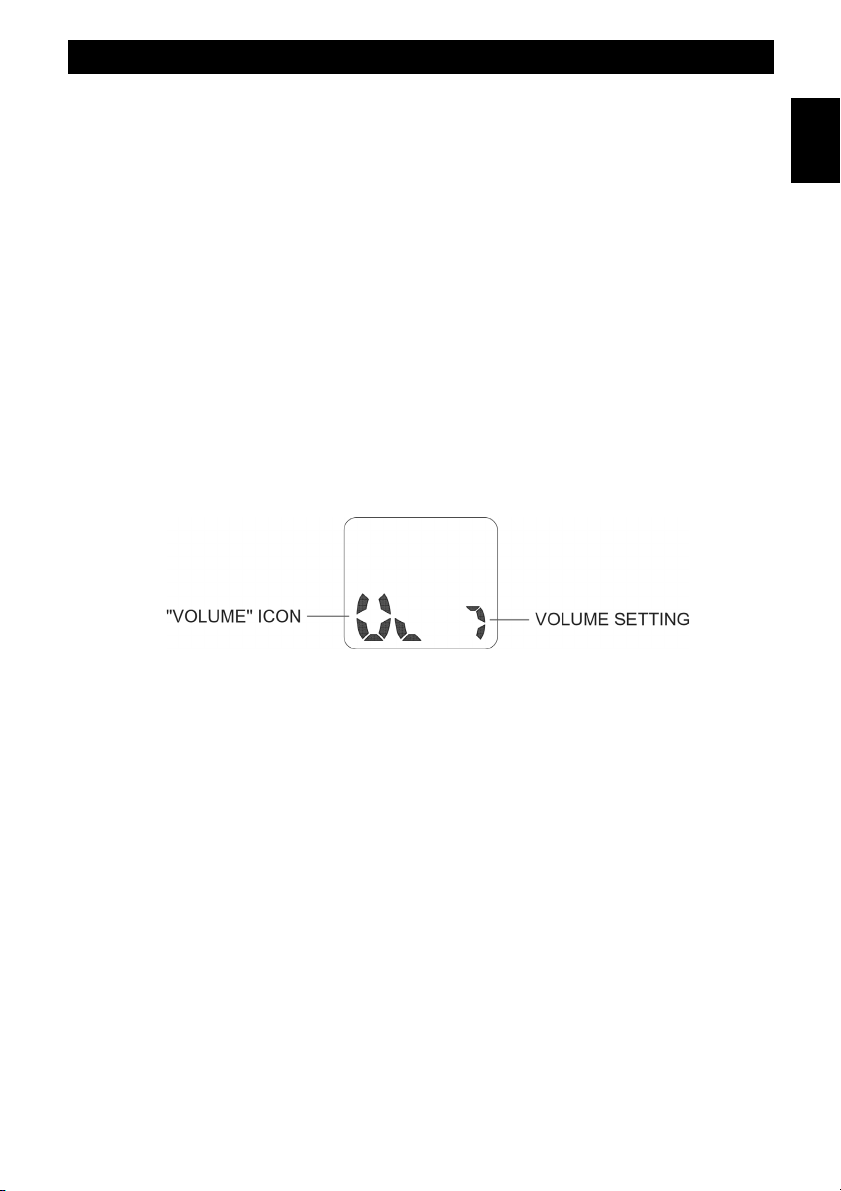
3. The current level setting from 1 to 8 indicates the Speaker Volume level. The default Speaker Volume is 4. This will
normally not appear on the LCD Display (12) and will only appear when the UP (11) or DOWN (10) keys are pressed.
The Volume setting will be displayed as follow :
English
Setting the Monitor Function
Pressing the MON Key (4) will let you hear the background noise, so you can adjust the volume level of the radio
when not receiving a signal. The Monitor function may also be used to check any activity on the current channel
before transmitting. To exit the Monitor function, press again the MON Key (4).
- 8 -
Operation
English
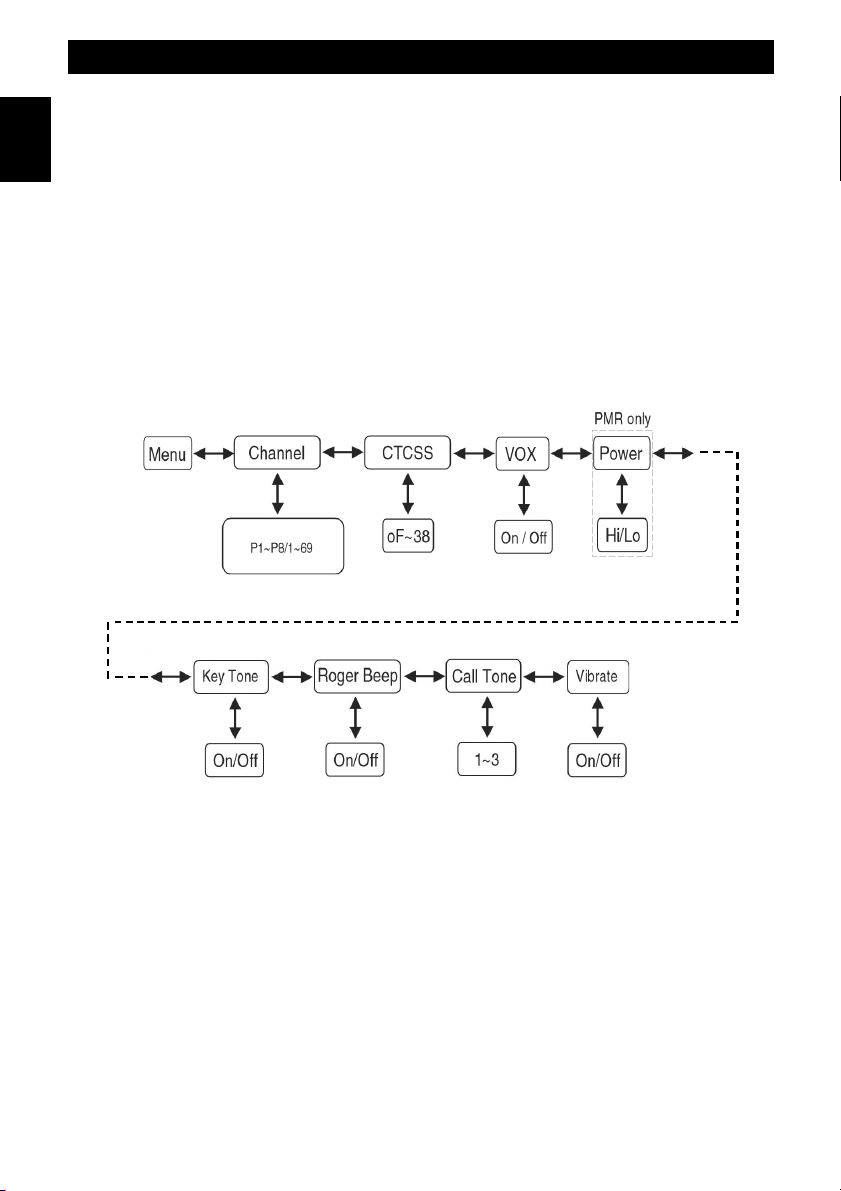
MENU OPERATION
Navigating through the Menu
To access the several advanced features, the radio has a convenient Menu program.
1. To enter the Menu Mode/Program, press the MENU key (9) briefly. A key beep will be locally generated when the
Menu Mode is engaged.
2. Additional presses of the MENU key (9) for no longer than 1 second will advance you through the menu until
exiting to Radio mode. A short key beep tone is generated at each key press.
3. Menu mode exits to standby mode when the MENU key (9) is pressed while the final menu selection is active.
4. Menu mode will automatically time out to standby mode 10 seconds after the last user programming key is
pressed.
5. Menu mode can be also automatically cancelled by pressing the TALK/CALL key (5).
Channel Selection
The radio has 8 PMR channels (P1-P8) + 69 LPD channels (1-69). To choose the desired channel, please proceed as
follows :
1. Press the MENU key (9) for at least one second. The channel number (G) will flash on the LCD Display (12).
2. Press the UP Key (11) or DOWN key (10) to select the desired channel. Auto-repeat is engaged by pressing and
holding either the UP (11) or DOWN (10) keys. You’ ll hear a standard key beep with each channel change.
3. To exit the Menu Mode, press TALK/CALL key (5).
- 9 -

PMR Channels
Operation
FREQ. CH FREQ. CH FREQ. CH FREQ. CH
446.00625 P1
446.01875 P2
446.03125 P3
446.04375 P4
446.05625 P5
446.06875 P6
446.08125 P7
446.09375 P8
English
LPD Channels
FREQ. CH FREQ. CH FREQ. CH FREQ. CH
433.07500 1
433.10000 2
433.12500 3
433.15000 4
433.17500 5
433.20000 6
433.22500 7
433.25000 8
433.27500 9
433.30000 10
433.32500 11
433.35000 12
433.37500 13
433.40000 14
433.42500 15
433.45000 16
433.47500 17
433.50000 18
433.52500 19
433.55000 20
433.57500 21
433.60000 22
433.62500 23
433.65000 24
433.67500 25
433.70000 26
433.72500 27
433.75000 28
433.77500 29
433.80000 30
433.82500 31
433.85000 32
433.87500 33
433.90000 34
433.92500 35
433.95000 36
433.97500 37
434.00000 38
434.02500 39
434.05000 40
434.07500 41
434.10000 42
434.12500 43
434.15000 44
434.17500 45
434.20000 46
434.22500 47
434.25000 48
434.27500 49
434.30000 50
434.32500 51
434.35000 52
434.37500 53
434.40000 54
434.42500 55
434.45000 56
434.47500 57
434.50000 58
434.52500 59
434.55000 60
434.57500 61
434.60000 62
434.62500 63
434.65000 64
434.67500 65
434.70000 66
434.72500 67
434.75000 68
434.77500 69
--
--
--
CTCSS Code Selection
The radio has 38 CTCSS private codes available. Different CTCSS tones may be associated to different channels.
To choose the desired CTCSS code, please proceed as follows :
1. Enter to Menu mode. Advance through the Menu until the CTCSS Code Number (F) will flash on the LCD Display (12).
2. Press the UP Key (11) or DOWN key (10) to select the desired CTCSS Code Number. Auto-repeat is engaged
by pressing and holding either the UP (11) or DOWN (10) keys. You’ ll hear a standard key beep with each
CTCSS Code change.
3. To exit the Menu, press the TALK/CALL key (5).
No Freq. (Hz)
OF
CTCSS OFF
01 67,0
02 71,9
03 74,4
04 77,0
05 79,7
06 82,5
07 85,4
CTCSS - TONE FREQUENCY CHART
No Freq. (Hz)
08 88,5
09 91,5
10 94,8
11 97,4
12 100,0
13 103,5
14 107,2
15 110,9
No Freq. (Hz)
16 114,8
17 118,8
18 123,0
19 127,3
20 131,8
21 136,5
22 141,3
23 146,2
- 10 -
No Freq. (Hz)
24 151,4
25 156,7
26 162,2
27 167,9
28 173,8
29 179,9
30 186,2
31 192,8
No Freq. (Hz)
32 203,5
33 210,7
34 218,1
35 225,7
36 233,6
37 241,8
38 250,3
--
 Loading...