

Integra French Fry SARATOGA Instruction Manual
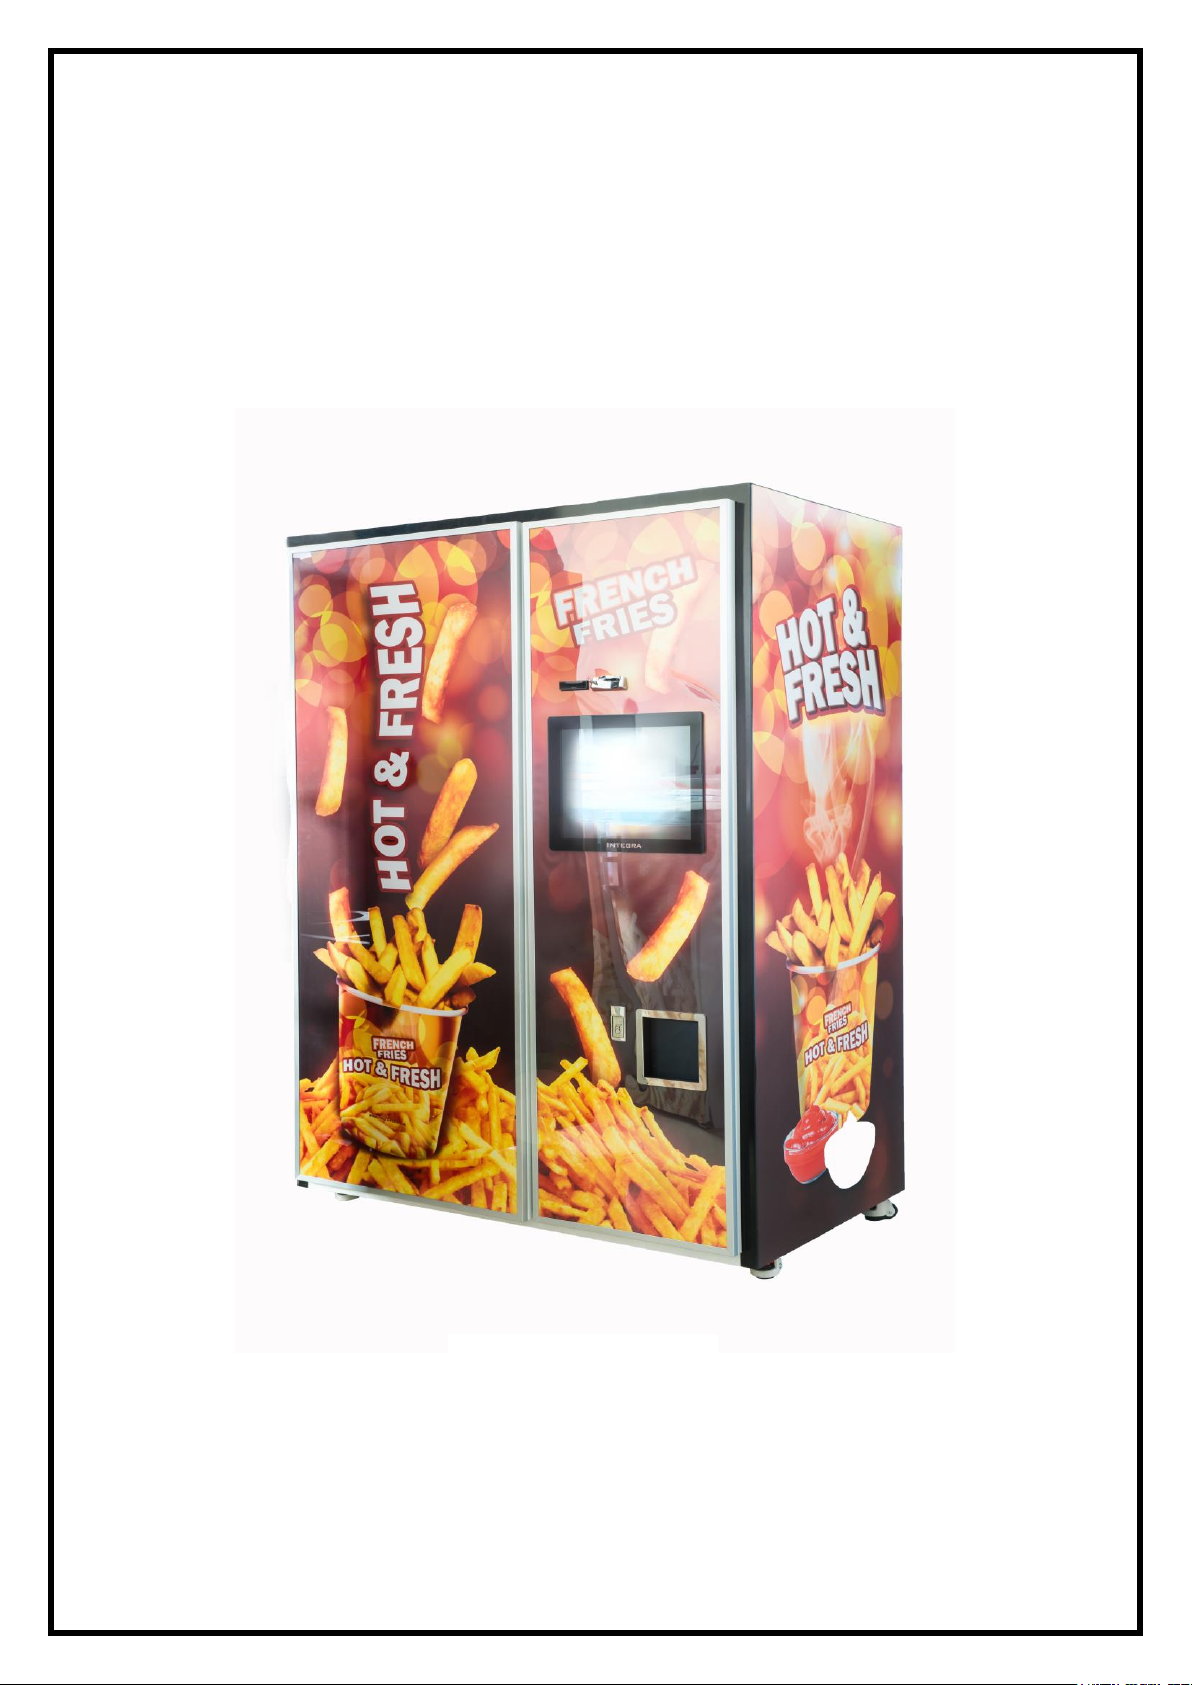
French Fry
Copyright © 12-18
Integra d.o.o.
Trg kralja Tomislava 4
42000 Varaždin
Croatia
Saratoga Vending Machine
Instruction Manual

French fry machine Saratoga Manual
Table of Contents
INTRODUCTION .............................................................................................................................................. 3
SPECIFICATIONS ............................................................................................................................................... 4
SARATOGA MACHINE FRONT PICTURE ....................................................................................................... 5
SARATOGA REFRIGERATION UNIT INTERNAL PARTS ................................................................................ 7
FRYING UNIT INSIDE PARTS (FRONT VIEW) ................................................................................................ 8
FRONT RIGHT MACHINE UNIT – SIDE VIEW ................................................................................................ 9
MACHINE INSIDE PARTS (REAR VIEW) ...................................................................................................... 10
POWERING CONTROLS AND INDICATORS .............................................................................................. 11
INSTALLATION ............................................................................................................................................... 13
MAIN CONTROLLER PCBS – CPU BOARD ................................................................................................. 20
INSTALL THE COIN MECHANISM ................................................................................................................ 20
INSTALL THE BILL ACCEPTOR ..................................................................................................................... 21
FILLING MACHINE WITH CUPS, FRIES, SALT, SAUCES, OIL .................................................................... 22
ROUTINE SERVICE AND SANITATION ......................................................................................................... 23
GENERAL ........................................................................................................................................................ 24
ELECTRONICS, ELECTRICS AND PNEUMATIC INSTRUCTION MANUAL ...................................... 31
CONNECTING THE POWER CONTROL BOX IN SARATOGA MACHINE ................................................... 31
LIST OF CABLES CONECTING THE POWER CONTROL BOX ................................................................... 32
SCHEME PATH CABLES FROM THE JUNCTION BOX ................................................................................ 33
CONNECTING UTP CABLES RJ45 ON CONNECTION BOXES .................................................................... 33
OVERVIEW OF UTP CABLES ........................................................................................................................................... 33
PIN ASSIGNMENT IN THE JUNCTION BOXES RJ 45. .................................................................................. 34
LIST OF MOTORS IN SARATOGA MACHINE ................................................................................................ 35
LIST OF SENSORS IN SARATOGA MACHINE ............................................................................................... 36
PNEUMATIC NEST ......................................................................................................................................... 37
PUMPS ............................................................................................................................................................. 38
LIST OF CABLES IN SARATOGA MACHINE ................................................................................................. 39
SPECIFICATION ............................................................................................................................................. 41
SOFTWARE AND USER INTERFACE INSTRUCTION MANUAL .......................................................... 42
IMPORTANT NOTES...........................................................................................................54
2

Thank you for buying an Saratoga vending machine. We hope you will be pleased with our
product. Please read the manual before using the machine and follow safety guidelines.
Saratoga machine has been engineered to our own rigid safety and performance standards. It
has been designed to comply with sanitation and health guidelines recommended by the
Automatic Merchandising Health-Industry Council (AMHIC), and it conforms with all other
NAMA safety recommendations. This machine has been manufactured in accordance with the
safety standards of both Underwriter’s Laboratories and the Canadian Standards Association.
To maintain this degree of safety and to continue to achieve the level of performance built
into this machine, it is important that installation and maintenance be performed not to alter
the original construction or wiring and that replacement parts are as specified in the Parts
Manual. Your investment in this equipment will be protected by using this Setup Guide,
Operator’s Guide and the Parts Manual in your operation, service and maintenance work. By
following prescribed procedures, machine performance and safety will be preserved.
This documentation is copyright protected. All rights, including those of photographic
reproduction, duplication and distribution by particular methods, wholly or partially as well as
substantive and technical changes are reserved.
All documentation specifications can hold a error of not correct data. Company Integra is not
responsible for these misunderstanding errors.
3
Dimensions
Height – 2000mm (78.74 inch)
Width – 1487mm (58.54 inch)
Depth – 840mm (33.07 inch)
Weight
608 kg (1119lb) ± 1%
Frying oil requirements
Internal 30 liter tank – Oil type: Sunflower oil or any fry
oil to max 210° C
Ambient temperature
Minimum: 37.4° F (3° C)
Maximum: 95° F (35° C)
Operating Environment
For indoor use or outdoor with rain, snow protection.
Please don't install direct to sun.
Cup Capacity (Approximated)
100 cups
Frozen French fry Capacity
(Approximate)
≈20 kg - 100 potions
Sauce capacity
1 sauce ≈ 2,5kg
Salt capacity
1 kg
Electrical
220-240 V AC, 50-60 Hz, 16 Amps, Single Phase
Options and accesories
Options
Coin box and Cashless pay module support
Bill's acceptor (not included)
ICT BILL VALIDATOR - MDB
Coin changer (not included)
MEI CASHFLOW CF7000 or size compatible – MDB
French fry machine Saratoga Setup Guide
SPECIFICATIONS
4
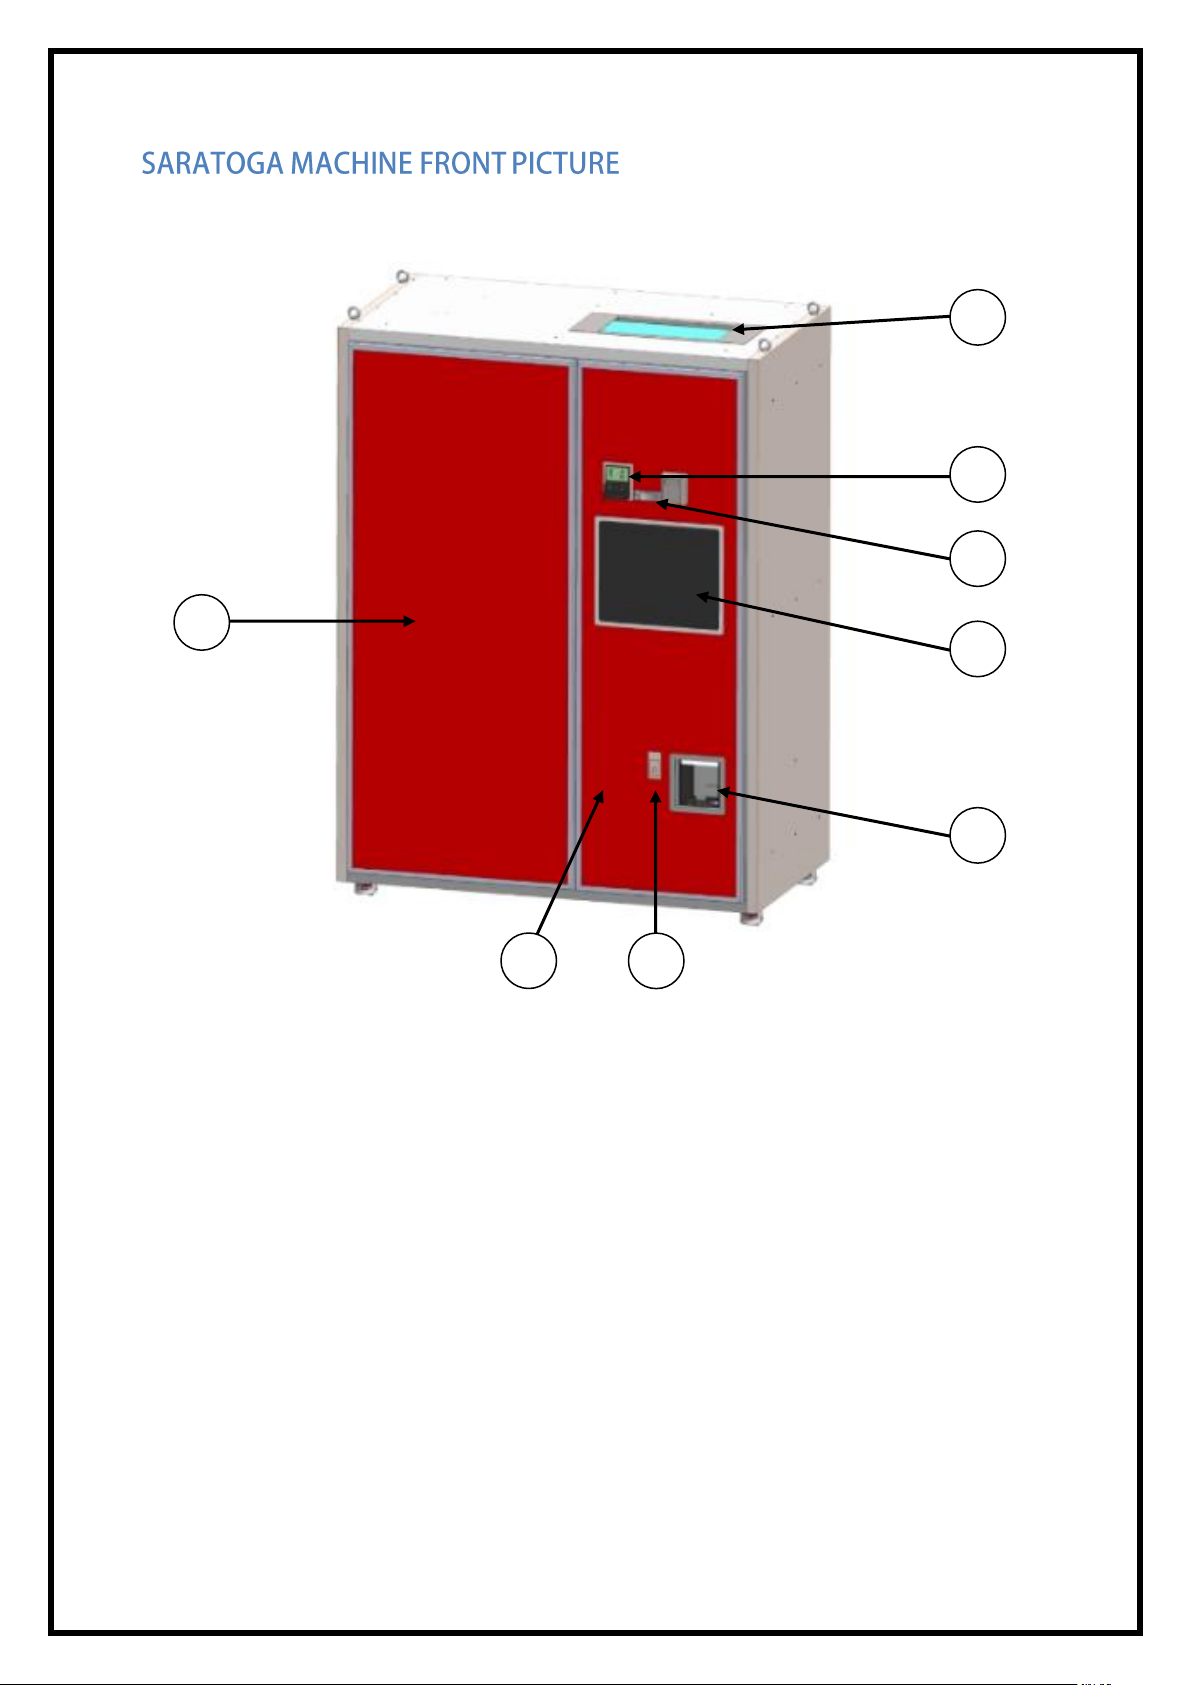
1
2 76 4 5 3 8
Picture 1: Front side of machine
1 – Machine left door (with graphic / LED backlight)
2 – Machine right door (with graphic / LED backlight)
3 – Coin return exit
4 – Cups delivery lifting door
5 – 19'' touch screen display
6 – Coin insert
7 – Bill validator
8 – Air filter cleaning
5
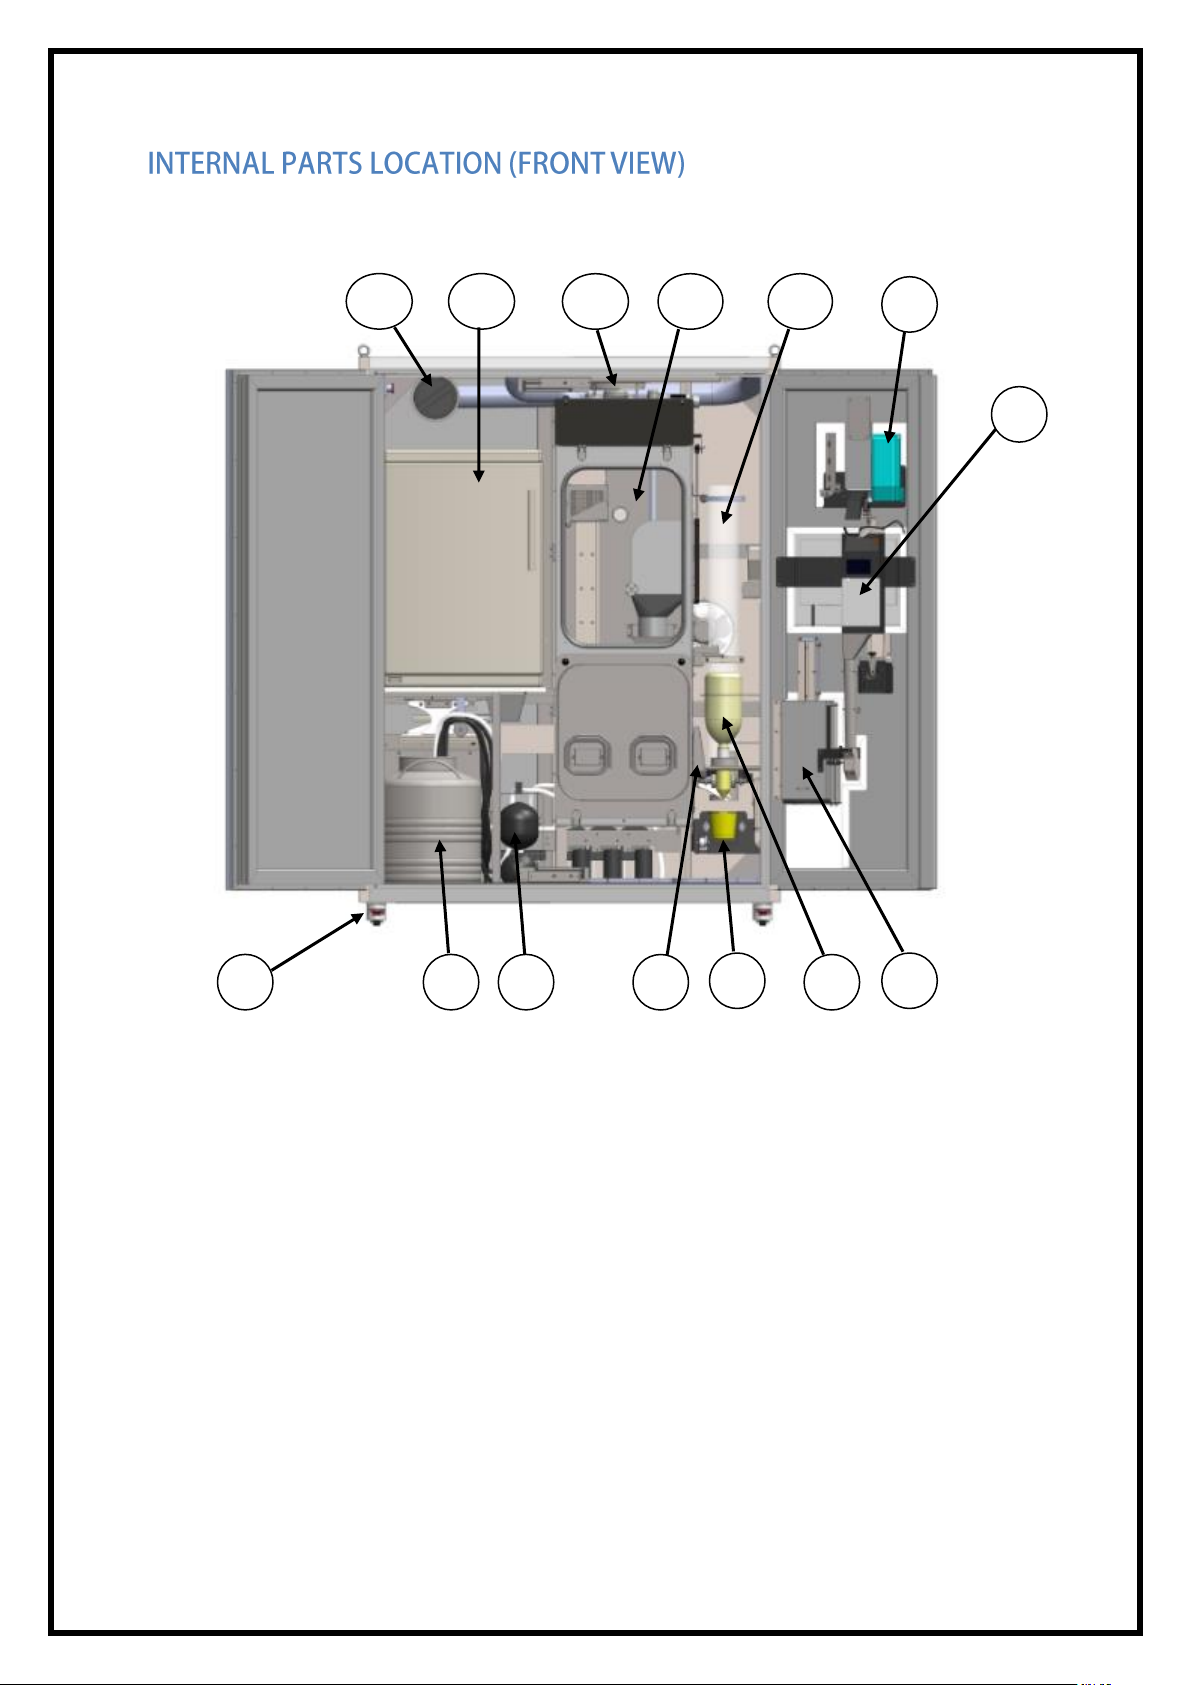
13
6
11 1 4 3 2
10
5 7 9 8 14
12
Picture 2: Front side internal parts
1 – Wheels 8 – Coin changer
2 – Oil tank 9 – Bill acceptor
3 – Air compressor 10 – Cup dispenser
4 – Frying unit exit 11 – Frying unit
5 – Cup transport system 12 – Air filter fan
6 – Sauce dispenser 13 – Refrigeration unit
7 – Cup lift 14 – HEPA filter
6
1
2
3 4 5
6
7 8 9
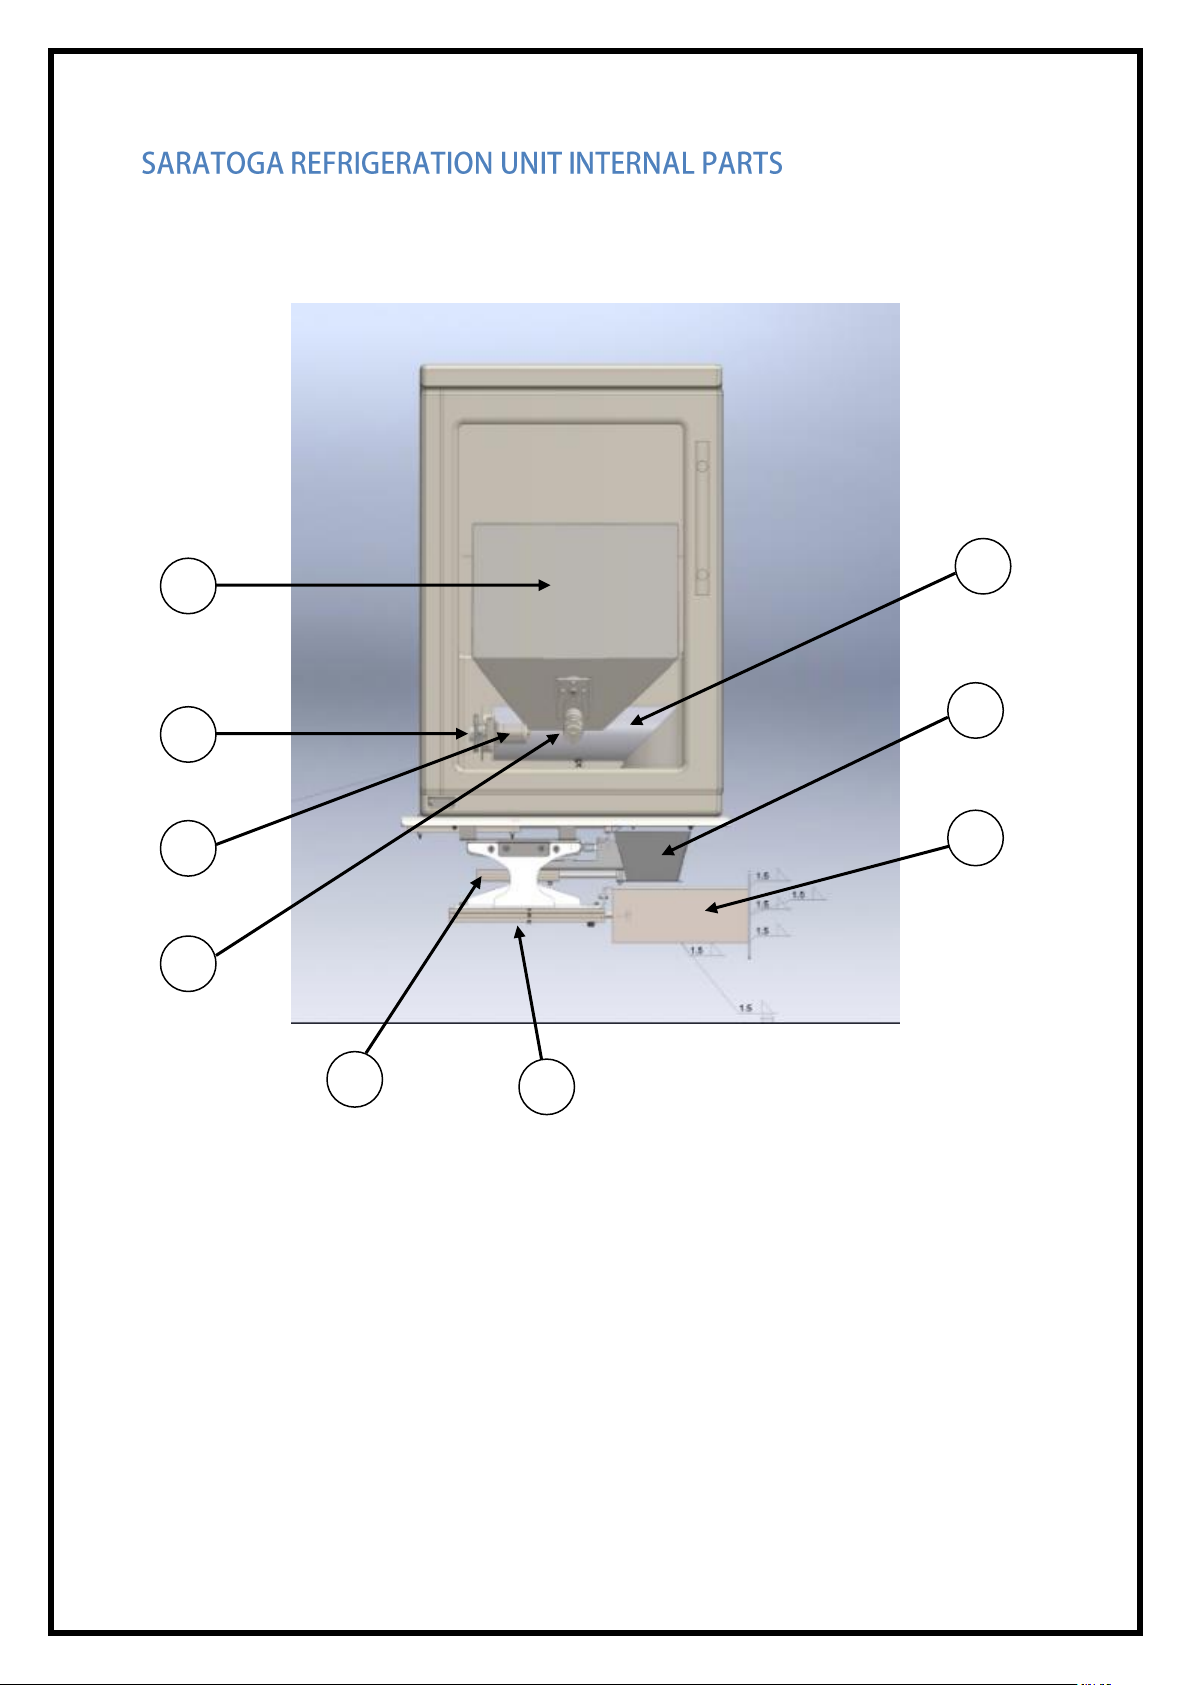
Picture 3: Freezer internal parts
1 – Frozen French fry storage space 6 – Air cylinder (Exit plunger)
2 – Sprocket with chain 7 – Weighting platform
3 – Dosing screw drive motor 8 – Freezer weight scale system
4 – Second freezer motor 9 – Dosing screw
5 – Air cylinder (weighting platform)
7

13
11 1 9
10 8 7 6 5
3 2 4
12
Picture 4: Frying unit internal parts
1 – Big fryer basket 8 – Buffer
2 – Small fryer system 9 – Light bulb
3 – Big fryer system 10 – Buffer brush
4 – Exit door 11 – Small fryer basket lift motor
5 – Small fryer 12 – Buffer brush motor
6 – Buffer scale 13 – Big fryer basket lift motor
7 – Buffer scale system
8
1 6 5
7 2 3
4
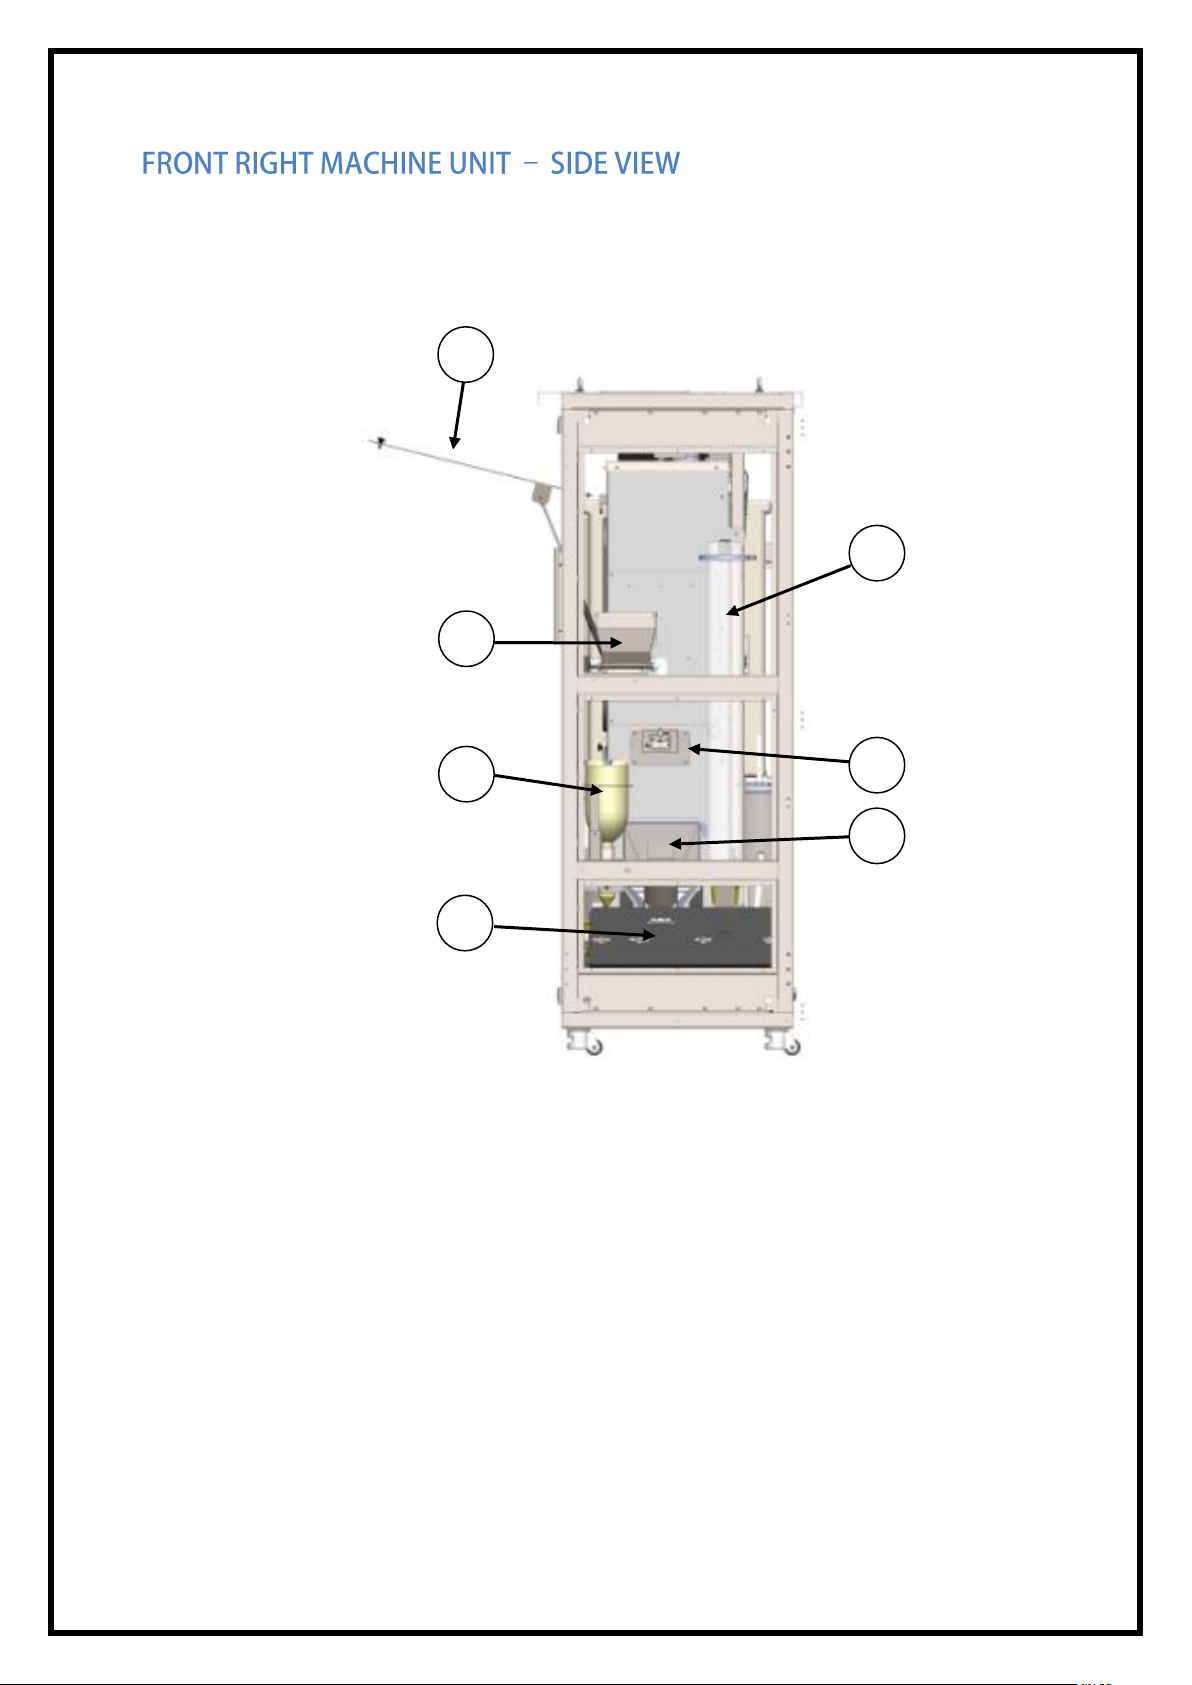
Picture 4: Right side view
1 – Central unit door 5 – French fry exit assembly
2 – Salt dispenser box (pneumatic) 6 – Weight scale system
3 – Sauce dispenser 7 – Cup dispenser
4 – Waste fries box
9
MACHINE INSIDE PARTS (REAR VIEW)
13
5
7
8
1
4
3 2 6
9
10
11
12
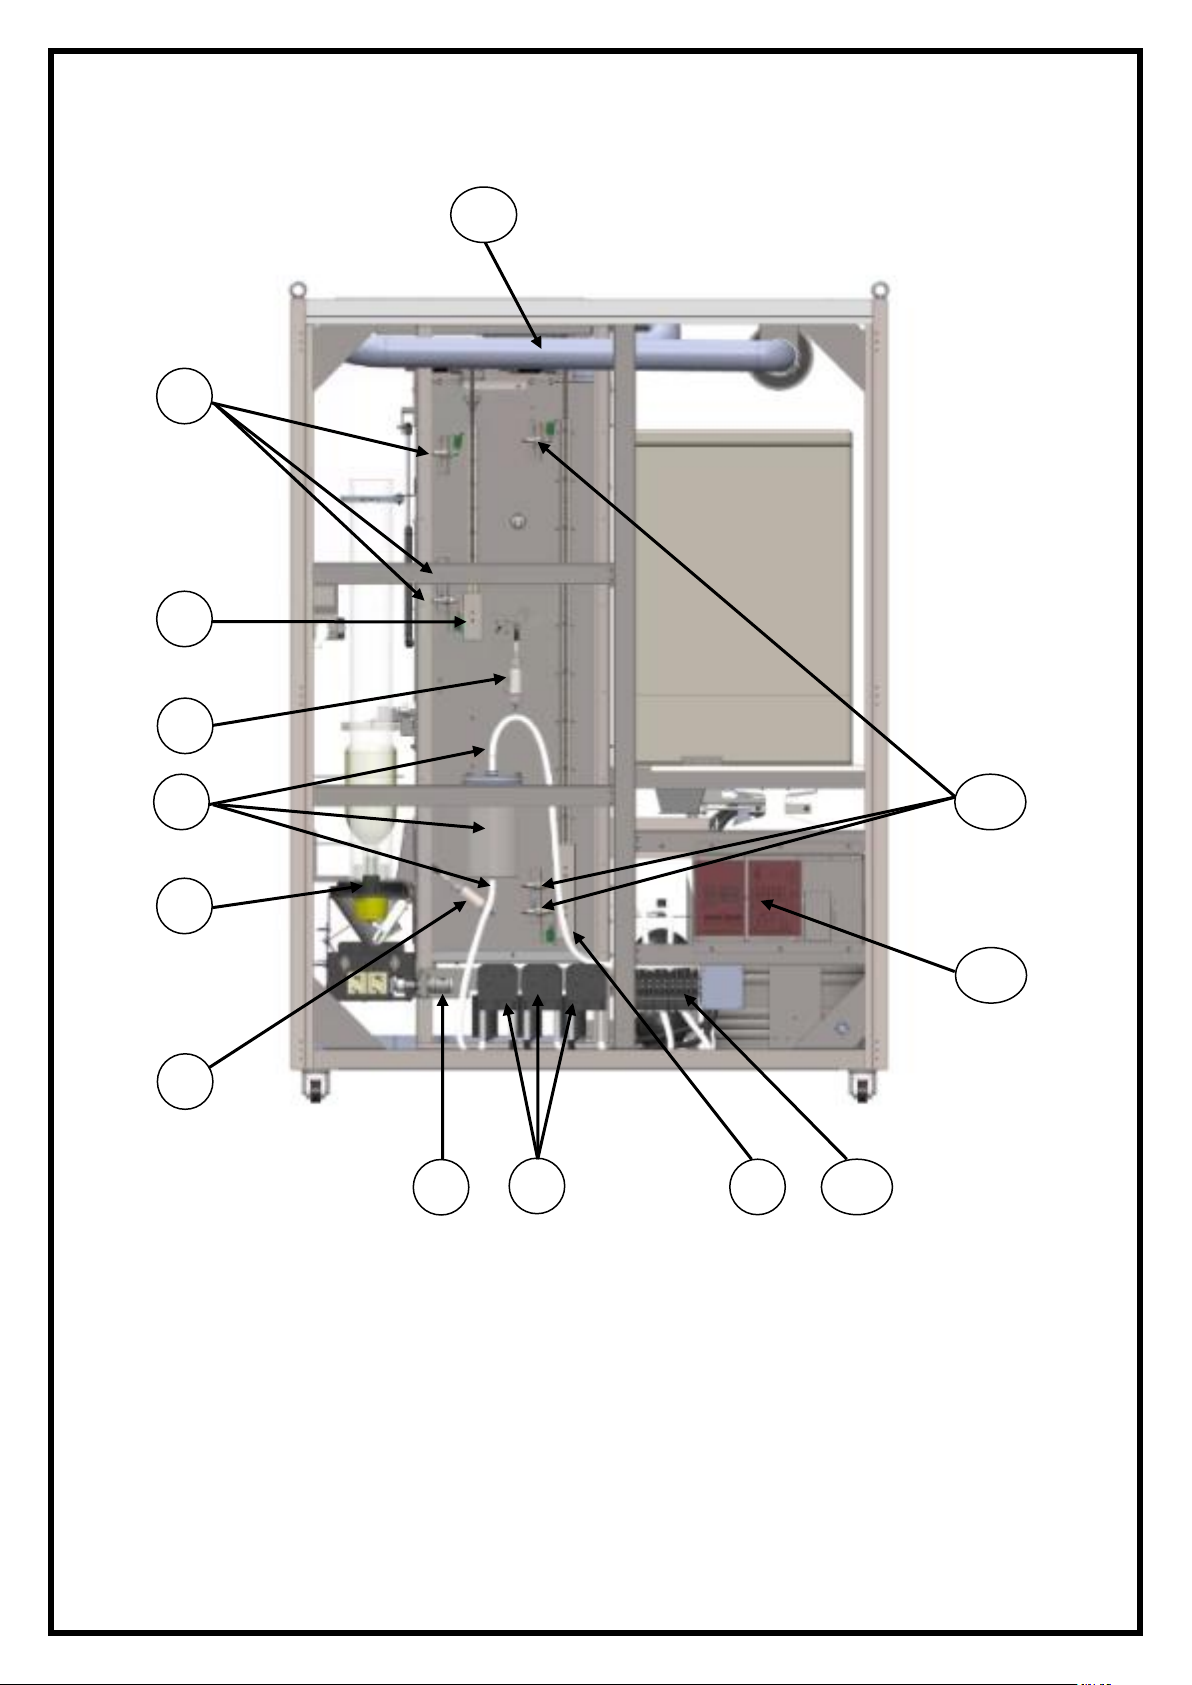
Picture 5: Rear view internal parts
1 – Small basket position sensors 8 – Oil pumps
2 – Small lift counter weight 9 – Big lift counter weight
3 – Buffer lift pneumatic cylinder 10 – Pneumatic block valve
4 – Oil filtration system 11 – Electronic box
5 – Cup doser 12 – Big basket position sensors
6 – Exit door pneumatic cylinder 13 – Air filtration tube
7 – Cup transport motor
10

Fuses A, E and H
Circuit breaker
User emergency switch is used in emergency situation, this breaker cuts power to all internal
components
Picture 6: Emergency switch
Circuit Breaker and Fuses. If any fuse trips and cannot be reset, or if a fuse repeatedly
blows, contact a field service representative. Circuit breaker is main power of the machine
and security in emergency cases. it is connected to user emergency switch.
Fuse A is used for air compressor and freezer.
Fuse E is used for display and ecu units (control electronics)
Fuse H is used for heaters
Picture 7: Power control box
WARNING To protect against electrical shocks and possible damage to the machine, turn
this switch OFF when performing any maintenance on the machine.
INITIAL SETUP
11

The tools required for setting up machines:
200g weight, tools for horizontal install machine position label.
These tools are not included!
UNPACK AND INSPECT.
1. Carefully remove the machine from shipping protection and place it on a straight surface.
2. Inspect the outside of the machine for dents, scratches, or any other damage resulting from
improper transport. If any, please contact your shipping forwarder.
3. Inspect the inside of machine. Observe the location and position of the packing material.
Carefully remove all packing material.
4. Instructions for installing a machine wheel is on next page.
IMPORTANT
If you see any damage when you unpack the machine, file a claim immediately with
the carrier.
VOID YOUR WARRANTY.
Each machine should have its own electrical circuit, and that circuit should be protected
with a circuit breaker or fuse conforming to local regulations.
Voltages Check - Place the test leads with a voltmeter across the LINE (LIVE) and NEUTRAL
terminals of the wall receptacle. The meter should indicate 220 – 240 volts ac , 50 - 60 Hz.
Possible equipment damage could result from improper supply voltage.
12
This machine is intended for indoor use or outdoor with rain, snow protection. Please don't
install direct to sun.
CAUTION
Make sure the machine is properly leveled and secure on a flat, solid and stable floor or
a base foundation. IF IT IS NOT DONE CORRECT, PERSONAL INJURY AND/OR
DAMAGE TO EQUIPMENT MAY RESULT!
1. Move the machine to the desired location.
2. Position the machine at least 7.8 inches (20 cm) from any wall.
3. Use a level tools to level the machine front to back and side to side, on a ground surface.
4.
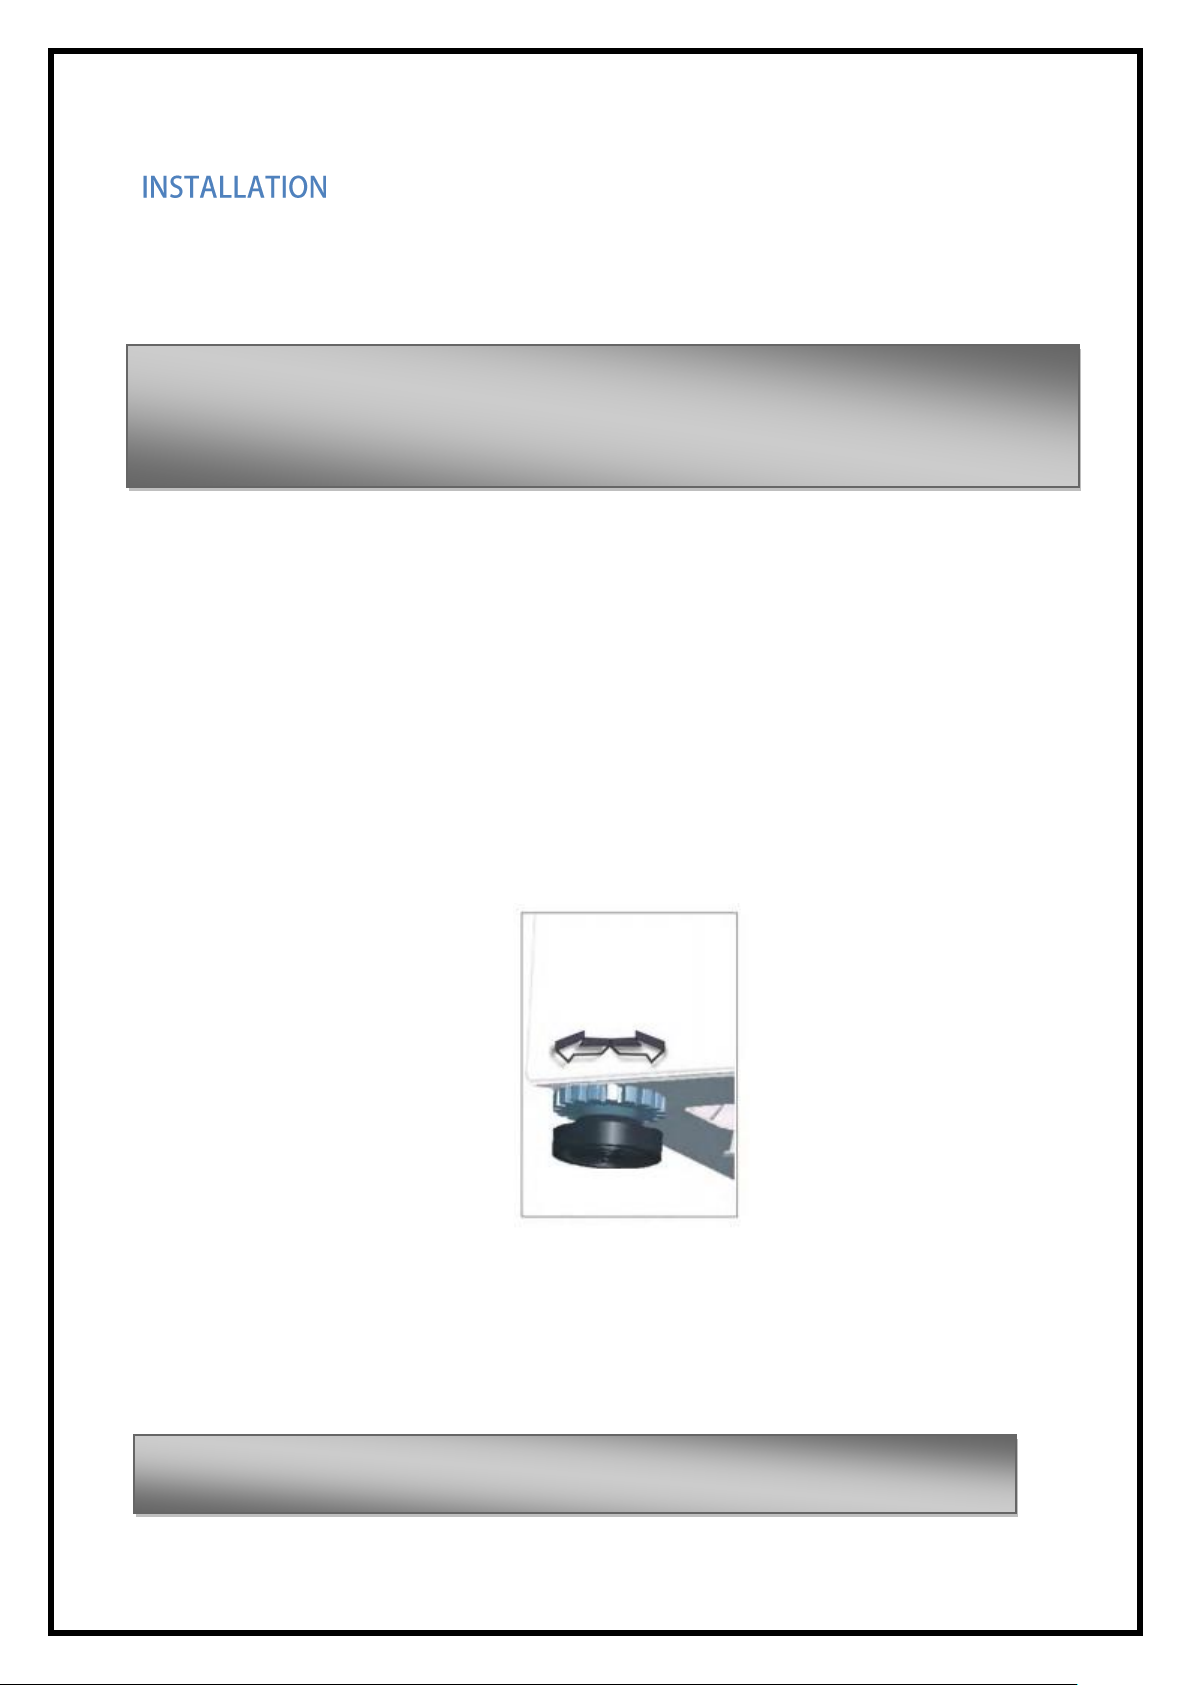
Use a leg levelers ( pic. 2) to provide a machine balance.
Before setting up release the red plastic screws.
Use the leg leveler turning the screw counterclockwise.
Picture 7: Leg leveler
5. Set the main power switch to OFF.
IMPORTANT
Do not apply power to the machine until you have done the main power source above.
13

6. Open the door of the central unit
6.1. Pull the big fryer basket counter weight and check if it can move freely on big
fryer rails.
6.2. Pull the small fryer basket counter weight and check if it can move freely on small
fryer rails.
7. Check in visually for the free transporting cups. (free from covers, cables and transport
protected ). Also check all the connectors and cables if they are connected properly.
8. Check in visually for free sauce transportation (covers, for example)
9. Turning on
9.1. Connect machine to power supply
9.2. Check if emergency switch is switched on, if so switch it off by switching it in
the clockwise direction.
9.3. Turn the fuses A, E and H ON.
9.5. Waiting for the system to work.
After few moments display will start machine program which is explaind in details at last
chapter of this manual.
When system boots machine program, select „COM6“ and press „Connect“. If messages start
to appear on textbox PC is connected properly with electronics. If not go to device manager
and set COM port to COM6, and for payment system to COM5.
10. Check the fridge temperature, and wait until the temperature is in a minus position.
10.1. Fill a fridge with frozen fries
10.2. Wait for temperature stabilization from -5 to -8 °C.
11. Scale calibration
Machine has two scales that should be calibrated once after transport. For freezer scale,
calibration buttons are under Fridge tab, and for Central unit are under Central unit tab (also
explained in last chapter)
11.1. Make sure scale you are calibrating is clean and has nothing on it.
11.2. Press Zero scale
14
11.3. Place 200g weight on scale
11.4. Press Calibrate scale
11.5. Press „Display weight“
If scale is showing 200(±5) grams, and 0 (+5) grams when weight is removed, the scale works
fine.
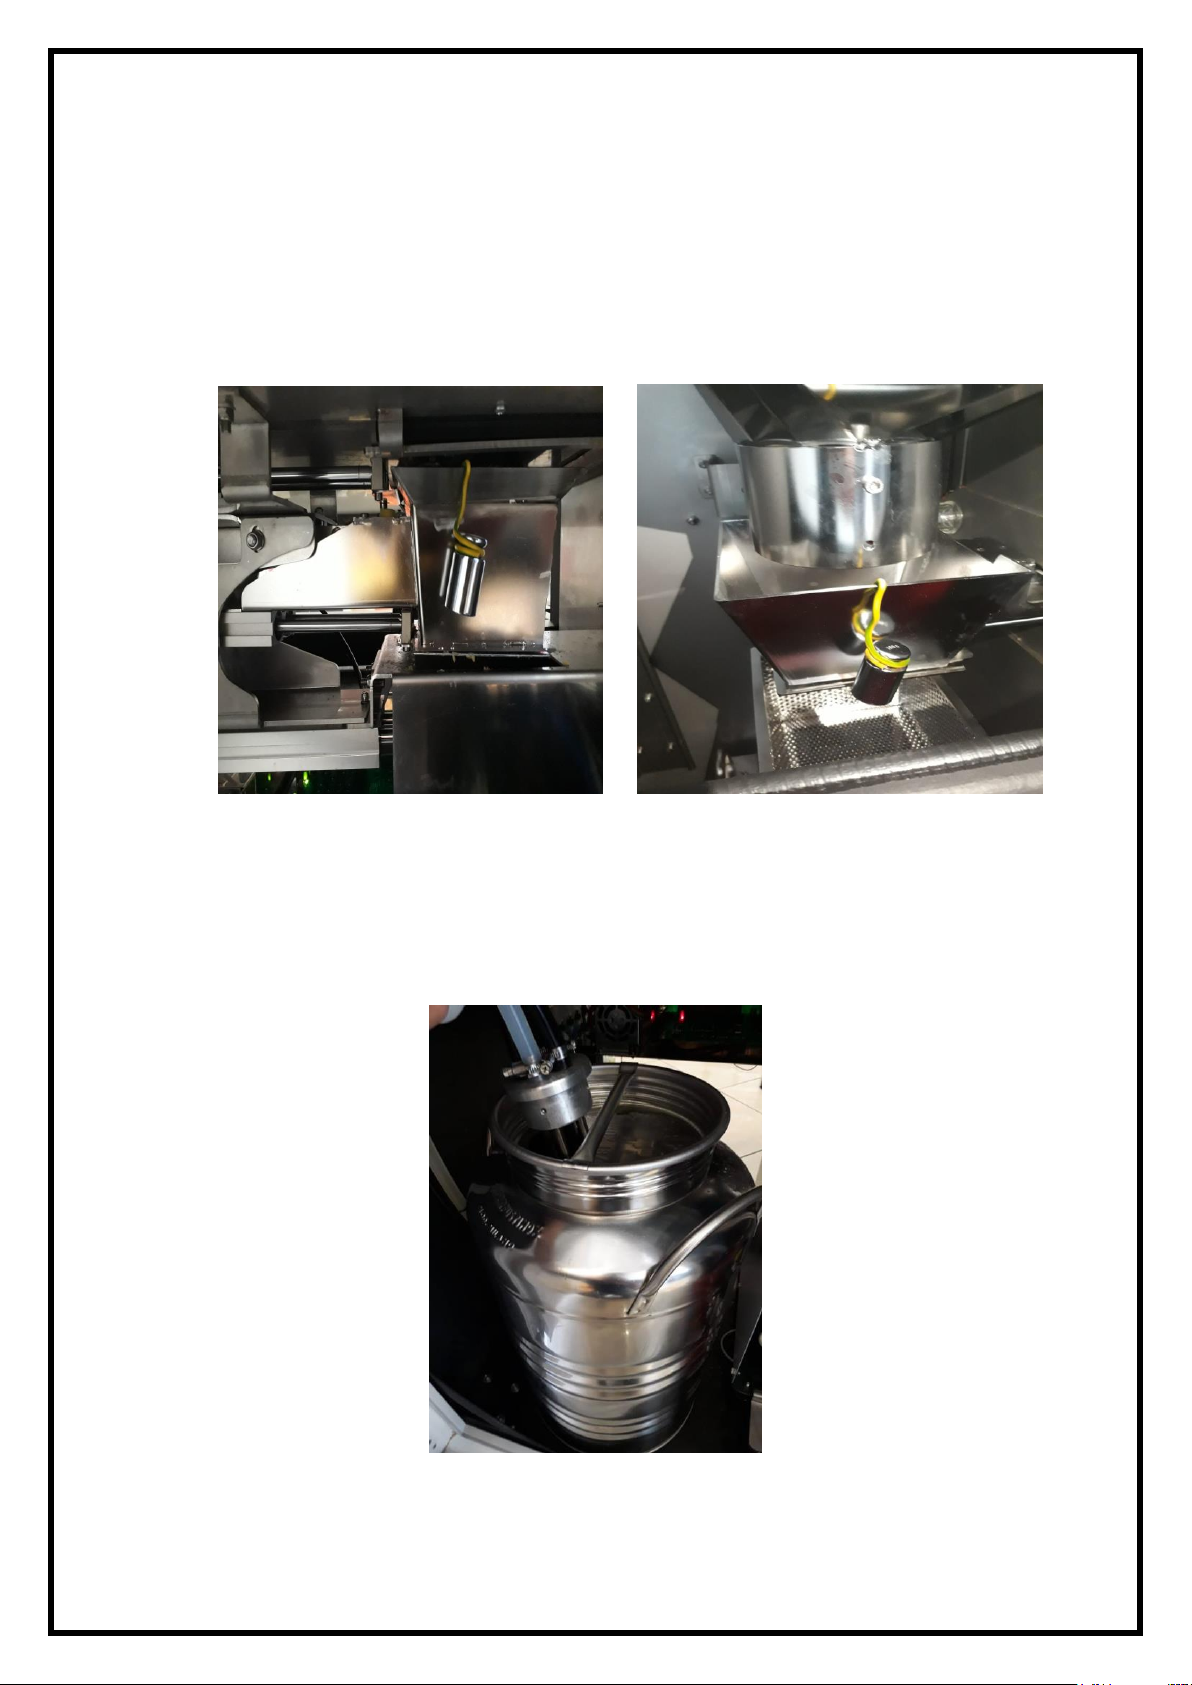
12. Oil fill in
12.1. Remove supply from tank, fill it with oil and put supply pipes back in tank so
that they fit in their position. The tank has 30 liter capacity.
Picture 8: Freezer and buffer scale calibration
Picture 9: Oil tank
15
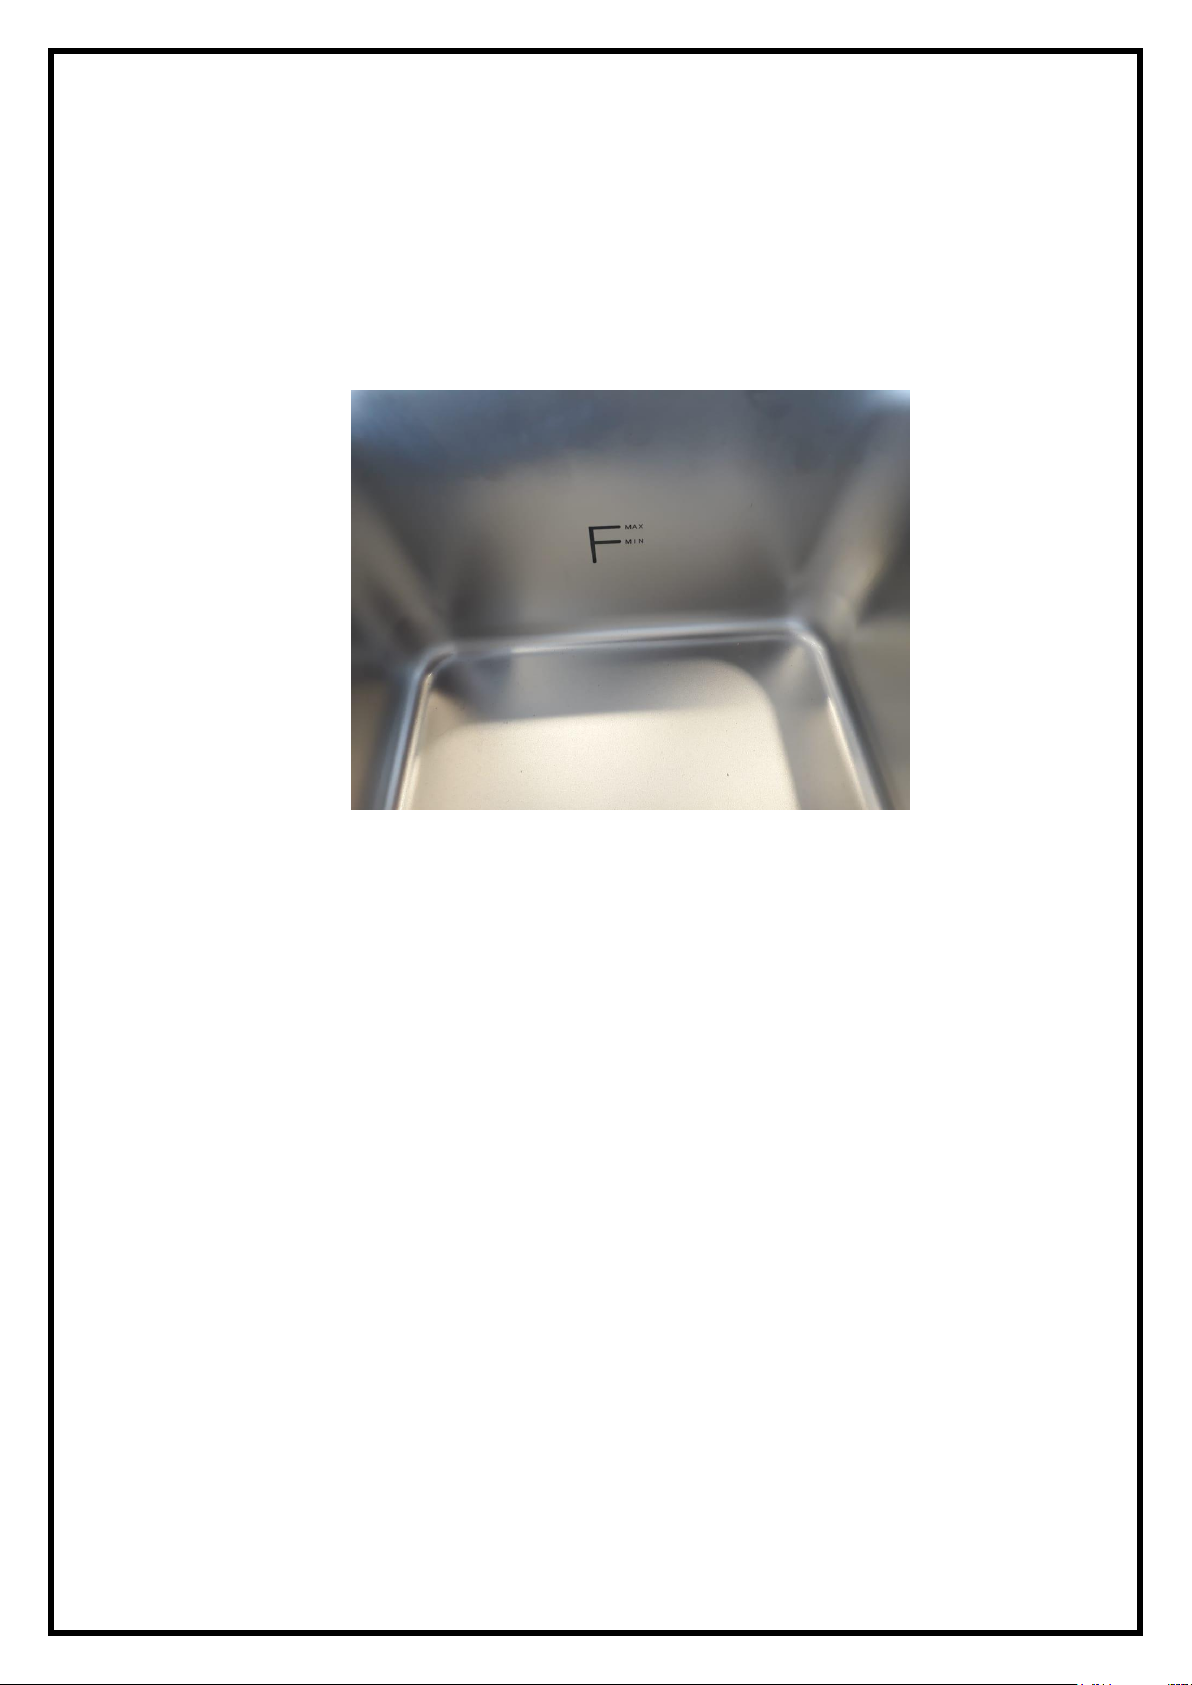
12.2. In oil section in machine program are buttons for oil filling. You can start both
big and oil pump on at the same time. Press buttons „Big oil pump on“ and „Small oil
pump on“ and fill frying units with oil up to marked level (pic. 5). We recommend for
initial filling to fill oil up to maximum level.
Picture 10: Minimum and maximum oil level marks
12.3. When you reach desired level, press button „Big oil pump off“ and/or „Small oil
pump off“.
Note that machine has automatic refill system, which means it will check oil level after
each frying and refill it if it is needed. Also machine has automatic oil filtration which
will be explained in later chapters.
13. Fill cups in cup dispensor system.
14. Place sauce and salt in dosing units.
15. Go to „Settings“ and then „Fry settings“. Set parameters as you want and press „Save“.
Big fryer settings are related to process of dosing fries from freezer and frying fries for the
first time. Small fryer settings are related to second frying process. You can choose desired
sauce dispense time and salt level (low, medium or high). Also you can set up automatic oil
16
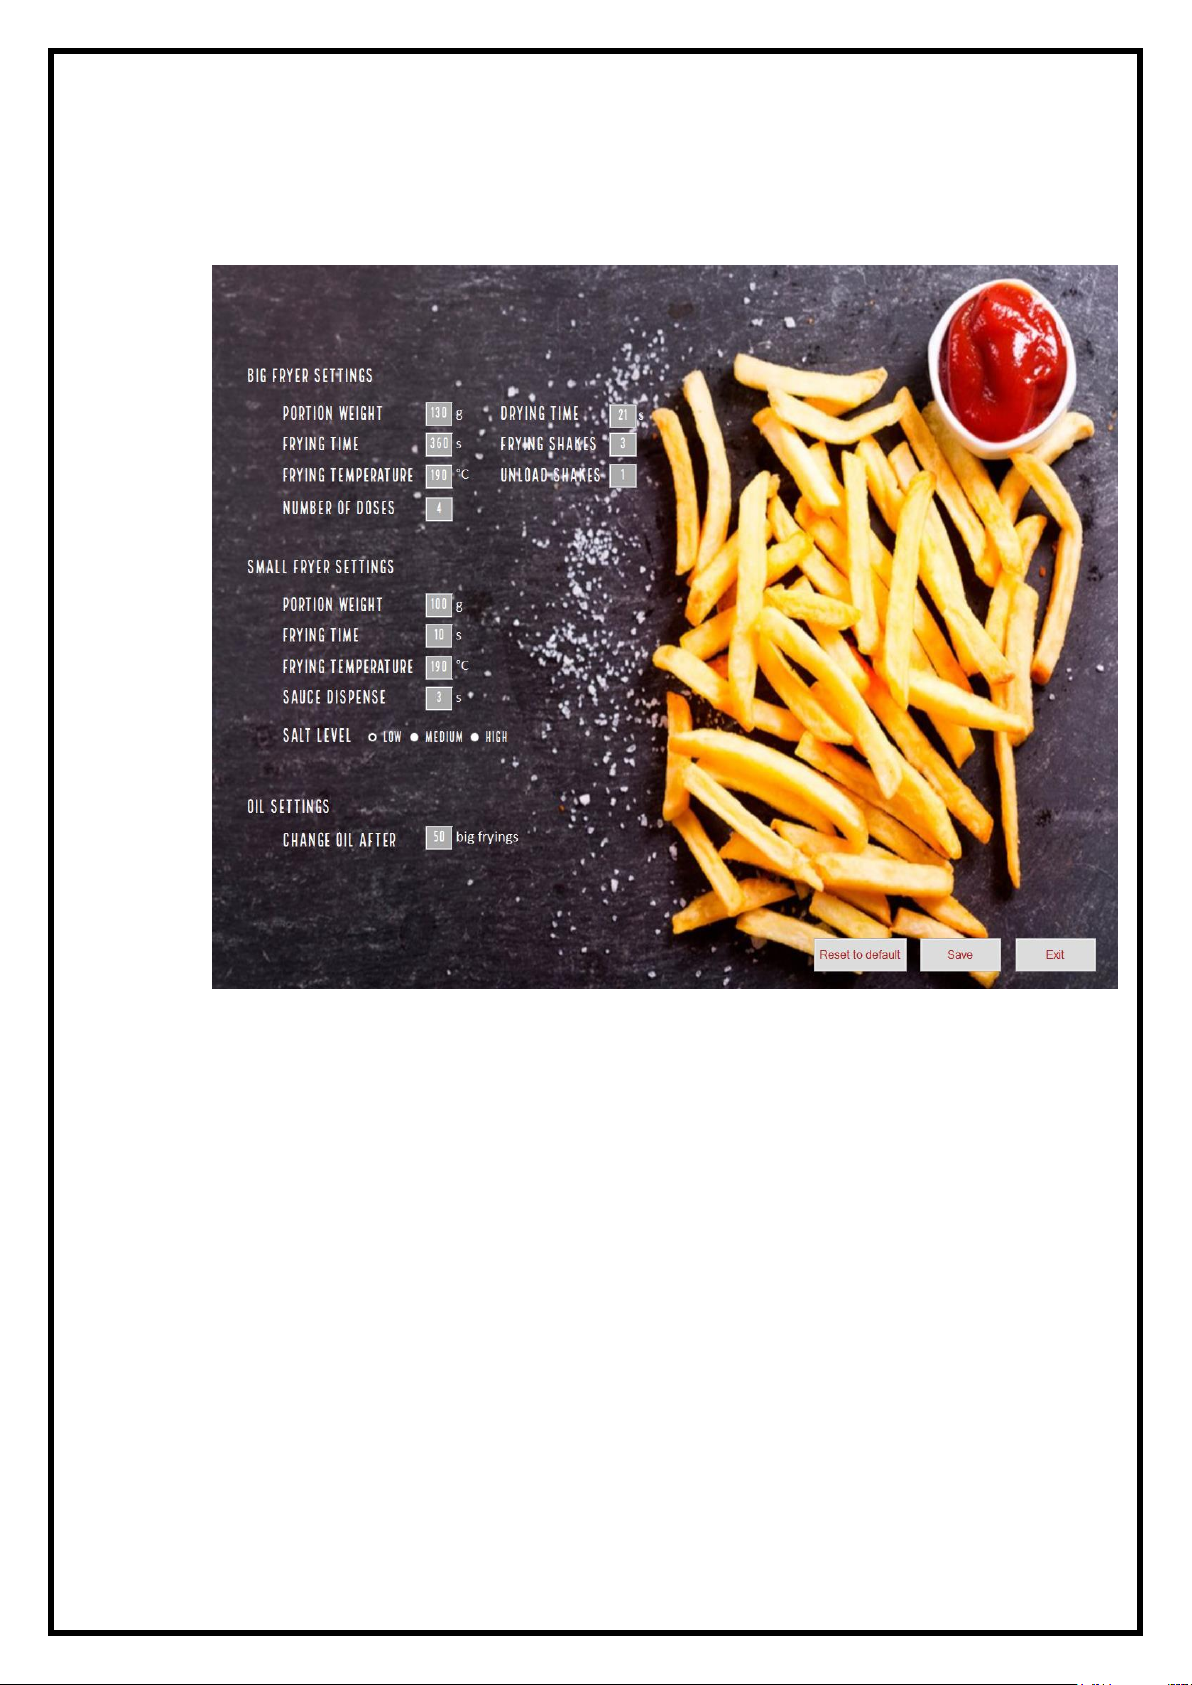
change after certaing amount of big fryings. Note that recomended settings are already
displayed and saved and you can revert to them simply by pressing „Reset to default“ button.
Picture 11: Fry settings menu
After you saved your bake settings, press Exit and go to Price/Buffer settings.
Buffer max per hour is option where you decide how many portions you want machine to have
ready in buffer for every hour.
Price per hour is option where you decide price per portion for every hour.
Potatoe in buffer maximum age is amount of time after which fries will be disposed if 0
portions are vended in that ammount of time.
Automatic old fries dispose option will enable/disable previously explained feature.
Autoclean on startup is option where machine will start autoclean routin every time machine is
turned off and then turned on. The machine will clean freezer tunnel, both fryers and dispose
17
 Loading...