

Page 1
TM
VORTEX
TM
VORTEX
PLUS
6 Quart Air Fryer
Welcome
Initial Setup
Product Overview
Initial Test Run
More Controls & Smart Programs
Cooking Timetable
Support & Contact Information
Getting Started Guide
Full Manual, How to Videos and Recipes available online at instantappliances.com
Register your product today at instantappliances.com/support/register
Page 2
2
Page 3

Welcome to the world of Instant cooking.
Hello! Thank you for welcoming us into your kitchen.
Having families ourselves, we developed the InstantTM Vortex
TM
Air Fryers
to allow busy families and professionals alike to cook healthy, delicious
meals more easily and in less time.
We have partnered with chefs, authors and bloggers to compile
a collection of recipes that we hope you enjoy!
Download the FREE Instant Pot App
Robert J. Wang
Founder & Chief Innovation Ofcer
• Original Recipes
• New User Tips
• Getting Started Videos
3
Page 4
Initial Setup
Page 5

Initial Setup
• Remove all packaging material from in and around the Air Fryer, as well as all accessories from inside
the cooking chamber.
• Follow Care & Cleaning instructions in the Safety, Maintenance & Warranty booklet to clean the air fryer
before first use.
• Place the Air Fryer on a stable, level surface, away from combustible material and external heat sources.
Leave at least 5” of space around the air fryer.
• Do not place anything on top of the air fryer and do not block the air vents.
• Never use the Air Fryer on a stovetop.
• Read all Important Safeguards in the Safety, Maintenance & Warranty booklet before use.
Failure to do so may result in property damage and/or personal injury.
Initial Setup |
5
Page 6
Product Overview
Page 7

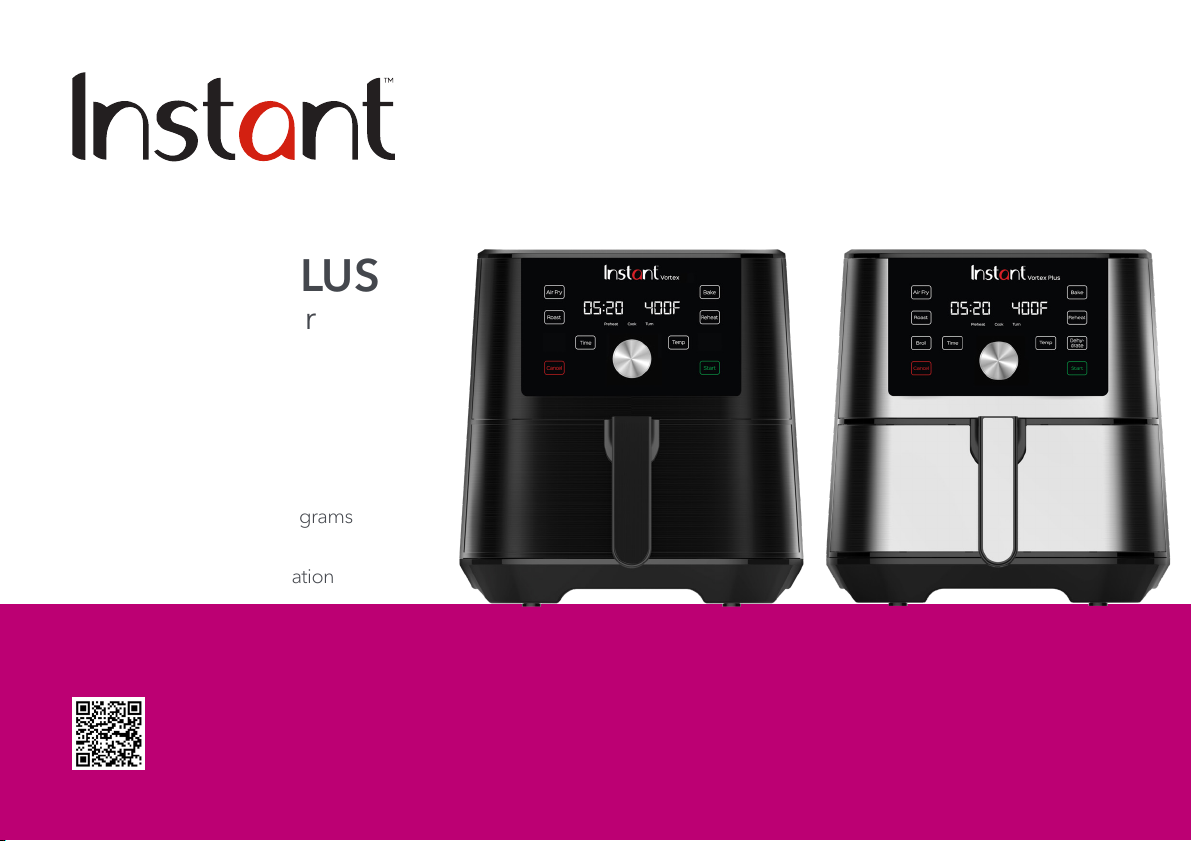
Product Overview
The models listed here may not be representative of all models in the Vortex, Vortex Plus and Vortex Pro series.
For a complete list of colors and patterns, visit instantappliances.com.
Product Overview |
7
Page 8

Initial Test Run
(approximate time: 25 minutes)
Page 9

1 2
Connect the power cord to a
120V power source.
Air fryer is in Standby and display
indicates “OFF”.
Remove the air fry basket from the
cooking chamber.
Note: To wake the air fryer, press the dial button or
touch the screen.
Initial Test Run |
9
Page 10

3 4
Place the cooking tray on the bottom
of the air fry basket.
Note: Ensure the indicator arrows point towards the back
or the front of the air fryer.
Insert the air fry basket back into the
cooking chamber.
10
| Initial Test Run
Page 11

5 6
Select Smart Program: Air Fry. Touch Temp, then use the dial to adjust the
cooking temperature to 205 ºC/400 ºF.
Touch Time, then use the dial to adjust
the cook time to 20 minutes.
*Note: Smart Programs automatically save your last
temperature and time settings.
*
Initial Test Run |
11
Page 12

7 8
Touch Start to begin cooking.
The display indicates “On” while the
air fryer Preheats.
Touch the Time or Temp key to select the
desired setting, then use the dial to adjust
the cook time and temperature at any
time during cooking.
12
| Initial Test Run
When the air fryer reaches the target
temperature, the display indicates
“Add Food”.
For this initial test, do not add food to
the air fry basket.
*
Note: Some food items do not require a preheat time.
Whether you remove the basket or not, cooking
will proceed after 10 seconds.
*
When cooking, food may be added
before or after preheating, as
you desire.
Page 13

9 10
Carefully remove and re-insert the
air fryer basket.
Display changes from “Add Food” to
indicate cook time and temperature.
Display also indicates “Cook”.
Part way through the Smart Program,
the air fryer beeps and displays “turn
Food” to remind you to ip or shake
your food items.*
Remove the air fry basket to pause the
Smart Program and insert it into the
cooking chamber to resume.
*
Note: Notice only appears on Air Fry and Roast.
Some food items do not require attention.
Cooking will proceed after 10 seconds
whether food has been turned or not.
Initial Test Run |
13
Page 14

11
When 1 minute remains, the cook time counts down in seconds.
When the Smart Program completes, the display indicates “End” and the fan conitnues to blow to cool
the air fryer.
Note: If the door is not opened, the Air Fryer will remind you that food is ready after 5, 30, and 60 minutes.
For further operation instructions, refer to the full User Manual online at instantappliances.com.
14
| Initial Test Run
CAUTI ON
Warranty booklet.
The air fryer and air fry basket will be hot during and after cooking. Do not touch hot surfaces. Allow the air fryer to cool to room
temperature, then clean the air fry basket according to “Care & Cleaning” instructions in the included Safety, Maintenance &
Page 15

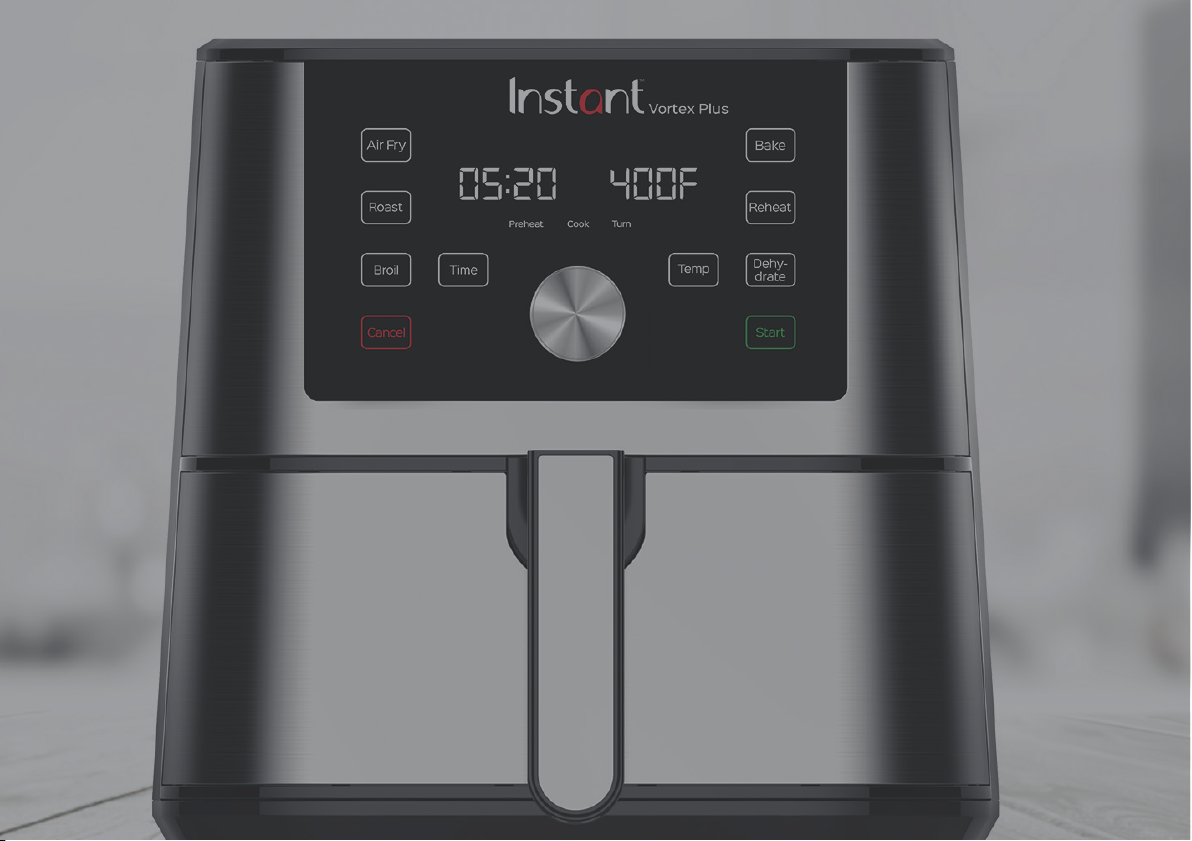
More Controls
Cancel Touch to stop cooking. Air fryer returns to Standby and displays “OFF”.
Sound On/Off When in Standby, touch and hold both Temp and Time keys for 3 seconds to toggle
sound on or off.
Note: Error alerts cannot be silenced.
Temperature
(ºF to ºC)
Smart Program
Reset
Full Reset
Touch and hold Temp until the display changes from ºF to ºC, or vice versa.
When in Standby, touch and hold the Smart Program for 3 seconds. The Smart Program is
restored to its default setting.
When in Standby, press the dial in and hold it for 3 seconds. All settings and Smart Programs are
restored to default settings.
More Controls |
15
Page 16

Smart Programs
Smart Program Time Range Temperature Range
AirFry 1 – 60 minutes 180 – 400°F / 82 – 205°C
Roast 1 – 60 minutes 180 – 400°F / 82 – 205°C
Bake 1 – 60 minutes 180 – 400°F / 82 – 205°C
Reheat 1 – 60 minutes 120 – 360°F / 49 – 182°C
Broil* 1 – 40 minutes 400°F / 205°C
Dehydrate* 1 – 72 hours 95 - 175°F / 35 – 79°C
*
Broil & Dehydrate Smart Programs are only available on Vortex Plus 6 models.
For further information on controls and Smart Programs, refer to the full User Manual online at instantappliances.com.
16
| Smart Programs
Page 17

Cooking Timetable
Food Setting Cook Time
*
Temperature
*
Instruction
Thin-cut fries (Frozen) AirFry/Roast 14 - 18 minutes 385°F / 196°C Shake partway
Thin-cut fries (Fresh) AirFry/Roast 18 - 20 minutes 385°F / 196°C Shake partway
Thick-cut fries (Frozen) AirFry/Roast 16 - 20 minutes 385°F / 196°C Shake partway
Thick-cut fries (Fresh) AirFry/Roast 20 - 25 minutes 385°F / 196°C Shake partway
Chicken wings AirFry/Roast 20 - 30 minutes 400°F / 205°C Shake or turn partway
Half chicken (up to 2lbs) Roast 30 - 40 minutes 380°F / 193°C Optionally, baste partway
Chicken nuggets (Frozen) Broil / Air Fry 10-15 minutes 400°F / 205°C Turn partway
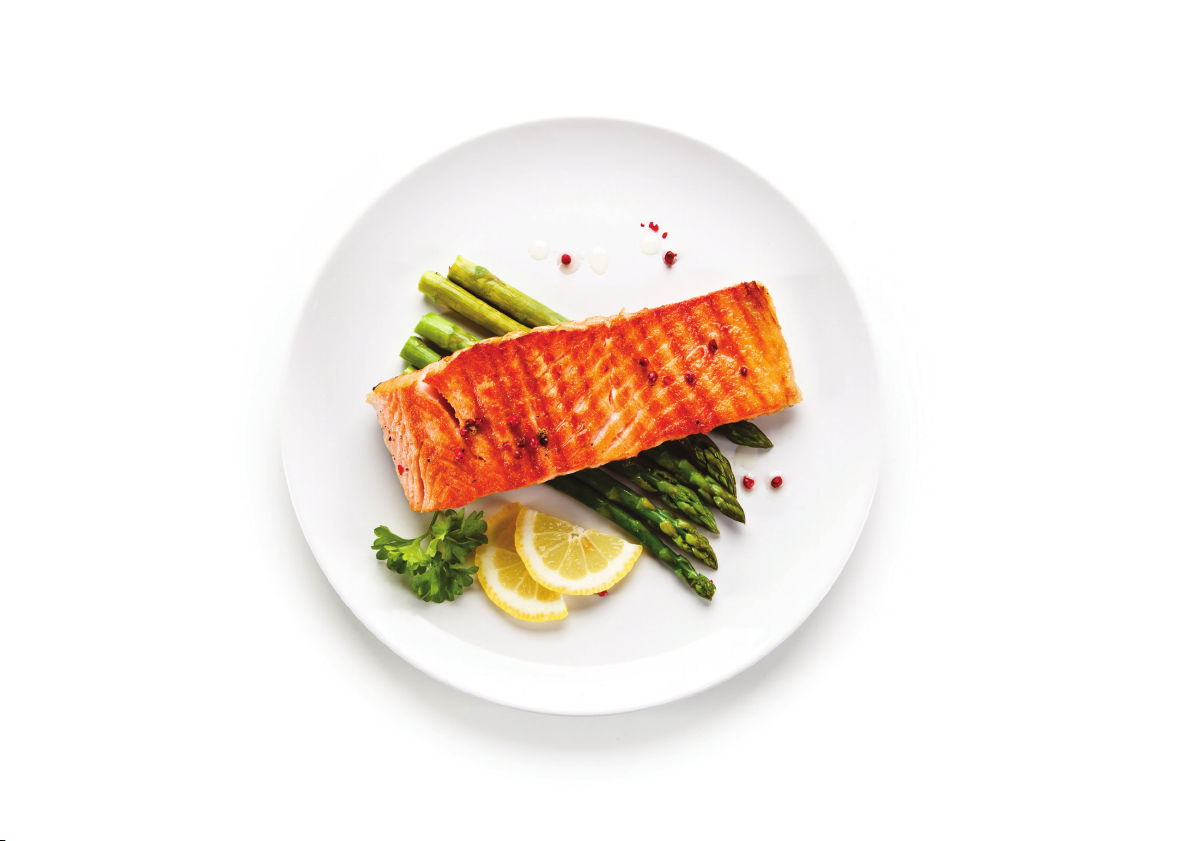
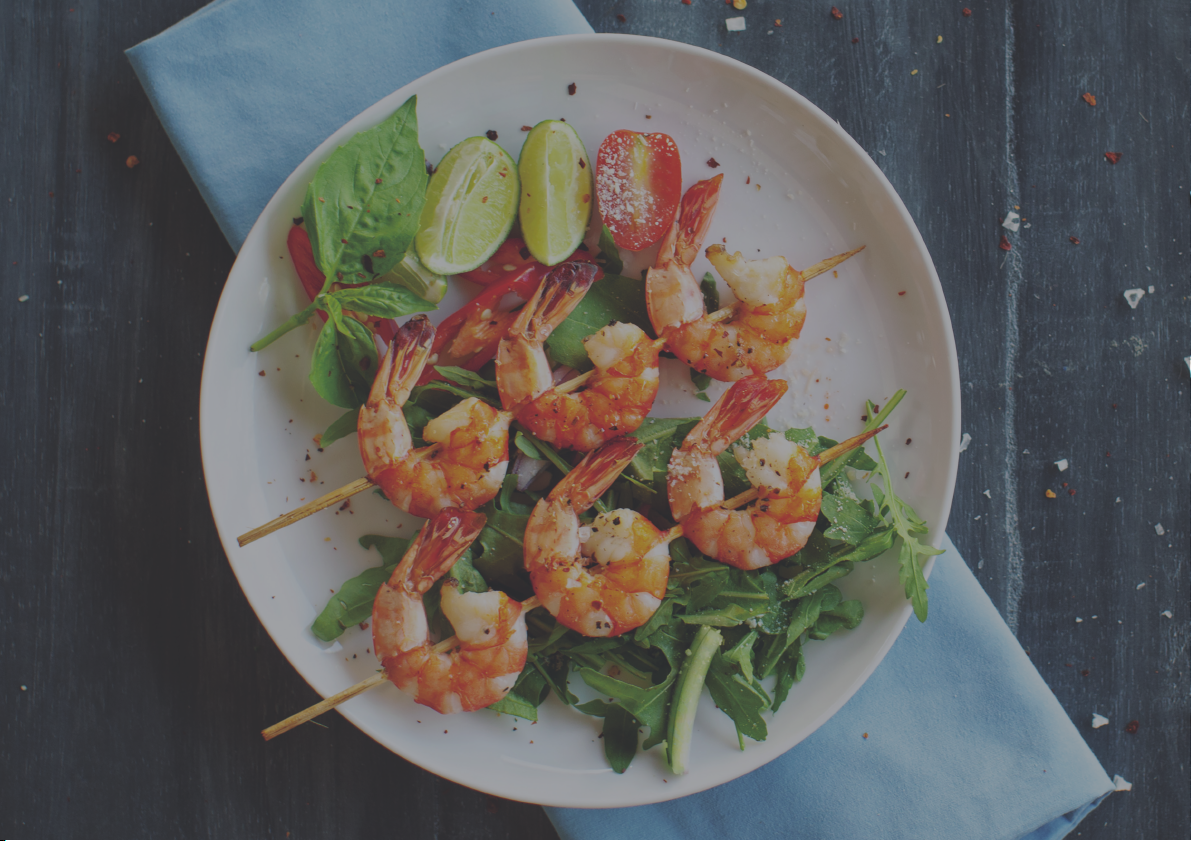
Shrimp (Fresh) Air Fry 8 - 10 minutes 350°F / 177°C Turn partway
Fish sticks (Frozen) Broil 8 - 12 minutes 400°F / 205°C Turn partway
Asparagus Broil / Bake 7 - 9 minutes 380°F / 193°C Turn partway
Cauliower Broil / Bake 6 - 10 minutes 380°F / 193°C Turn partway
Nachos Broil 3 - 5 minutes 400°F / 205°C Check cheese halfway
Cake Bake 25 – 35 minutes 365°F / 185°C Use a springform cake pan
*Note: Cook times and temperatures are recommendations only.
All oven safe cookware is safe to use in the Air Fryer.
For a complete cooking timetable, visit instantappliances.com
Cooking Timetable |
17
Page 18

Let’s get cooking!
689-0302-01
Enjoy time well spent with
the Instant family of small appliances.
Register your product today at:
instantappliances.com/support/register
Copyright © 2019 Instant Brands™ Inc
Instant Brands Inc.
11 - 300 Earl Grey Dr., Suite 383
Ottawa, Ontario
K2T 1C1
Canada
Contact Customer Care:
1-800-828-7280
support@instantappliances.com
instantappliances.com/#Chat
instantappliances.com
store.instantappliances.com
 Loading...