

Page 1
Instruction Sheet
O-Ring Replacement Kit for the RDO®PROand RDO®PRO-X Probe
Part Number 0080810
Kit Contents
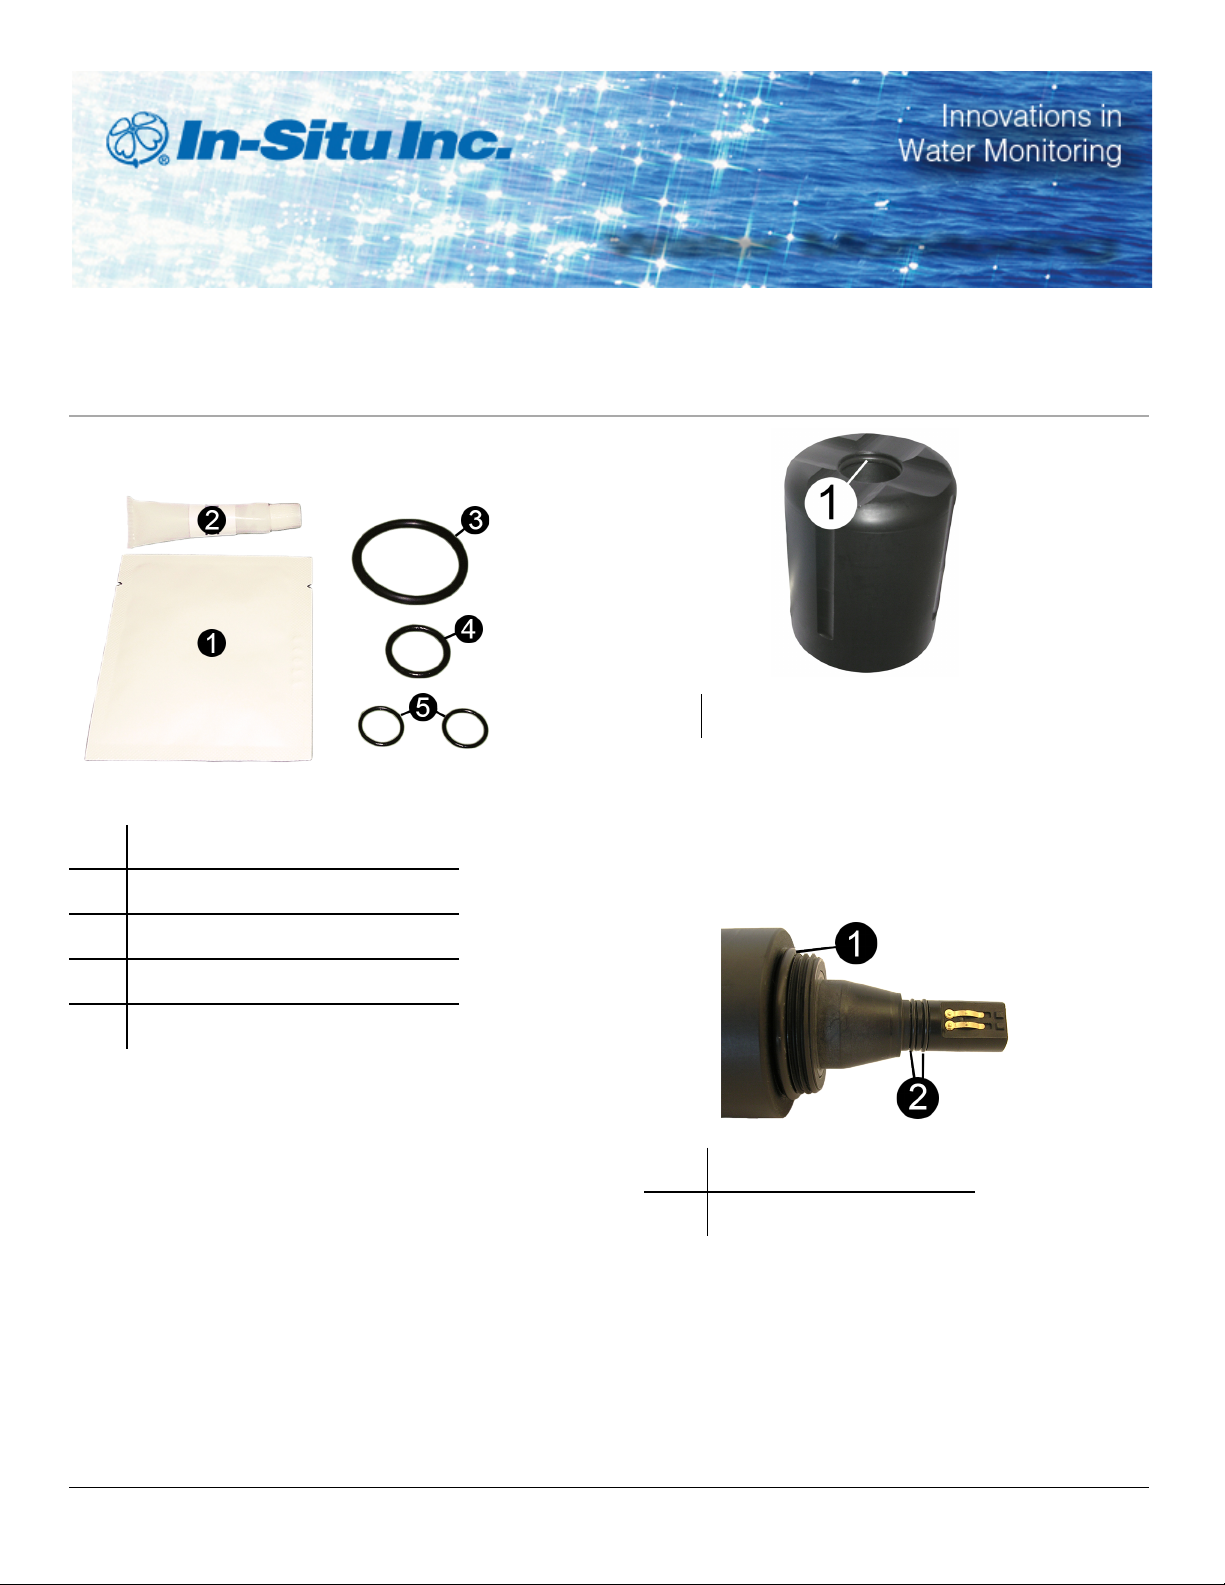
1 Mid-sized internal nose cone O-ring
6. Place the probe body O-ring on the probe housing.
7. Place the sensor cap O-rings in the grooves on the
1 Lens cloth
2 Lubricant
sensor.
8. Do not transfer lubricant from your fingers to the gold
pins on the sensor or the inner lens of the sensor.
3 O-ring for probe body
4 Internal nose cone O-ring
5 Sensor cap O-rings
Replacement Procedure
1. Remove the nose cone from the probe.
2. Use your fingers or a non-metallic tool to remove the
worn O-rings from the grooves.
3. Clean all contact surfaces with a swab or lint-free
cloth.
4. Using your fingers, apply lubricant evenly to the new
O-rings.
5. Place the mid-sized internal nose cone O-ring in the
nose cone.
Informationsubject to change without notice. In-Situ, In-Situ logo, BaroMerge, BaroTROLL, HE RMIT, iSitu, Pocket-Situ, RDO,
RuggedCable, RuggedReader, TROLL, and Win-Situ aretrademarks or registeredtrademarks of In-Situ Inc.©2013. All rights reserved.
1 Probe body O-ring
2 Sensor cap O-rings
9. Clean the lens with the enclosed lens cloth after
placing the two O-rings on the sensor.
10. Place the nose cone on the probe.
11/2013 | Rev. 002| 0080812
 Loading...