


EN7016SK EchoStream™ Survey Kit
Installation and Operation Manual - 04493D
1 Quick Start
By following this procedure you can quickly configure the supplied
equipment to perform a site survey. Review the main body of this
manual for additional options, features and a more detailed startup
process.
Note: If performing site surveys in Australia or New Zealand, the
additional setup steps in the main body of this manual must be
performed.
1. Slide off the battery cover on the back of the EN4016SK survey
receiver.
2. Load four AA batteries into the survey kit receiver.
3. Press the Power button to turn on the survey kit receiver.
12.Press the ES1210SK Reset button. The transmitter should now
be registered.
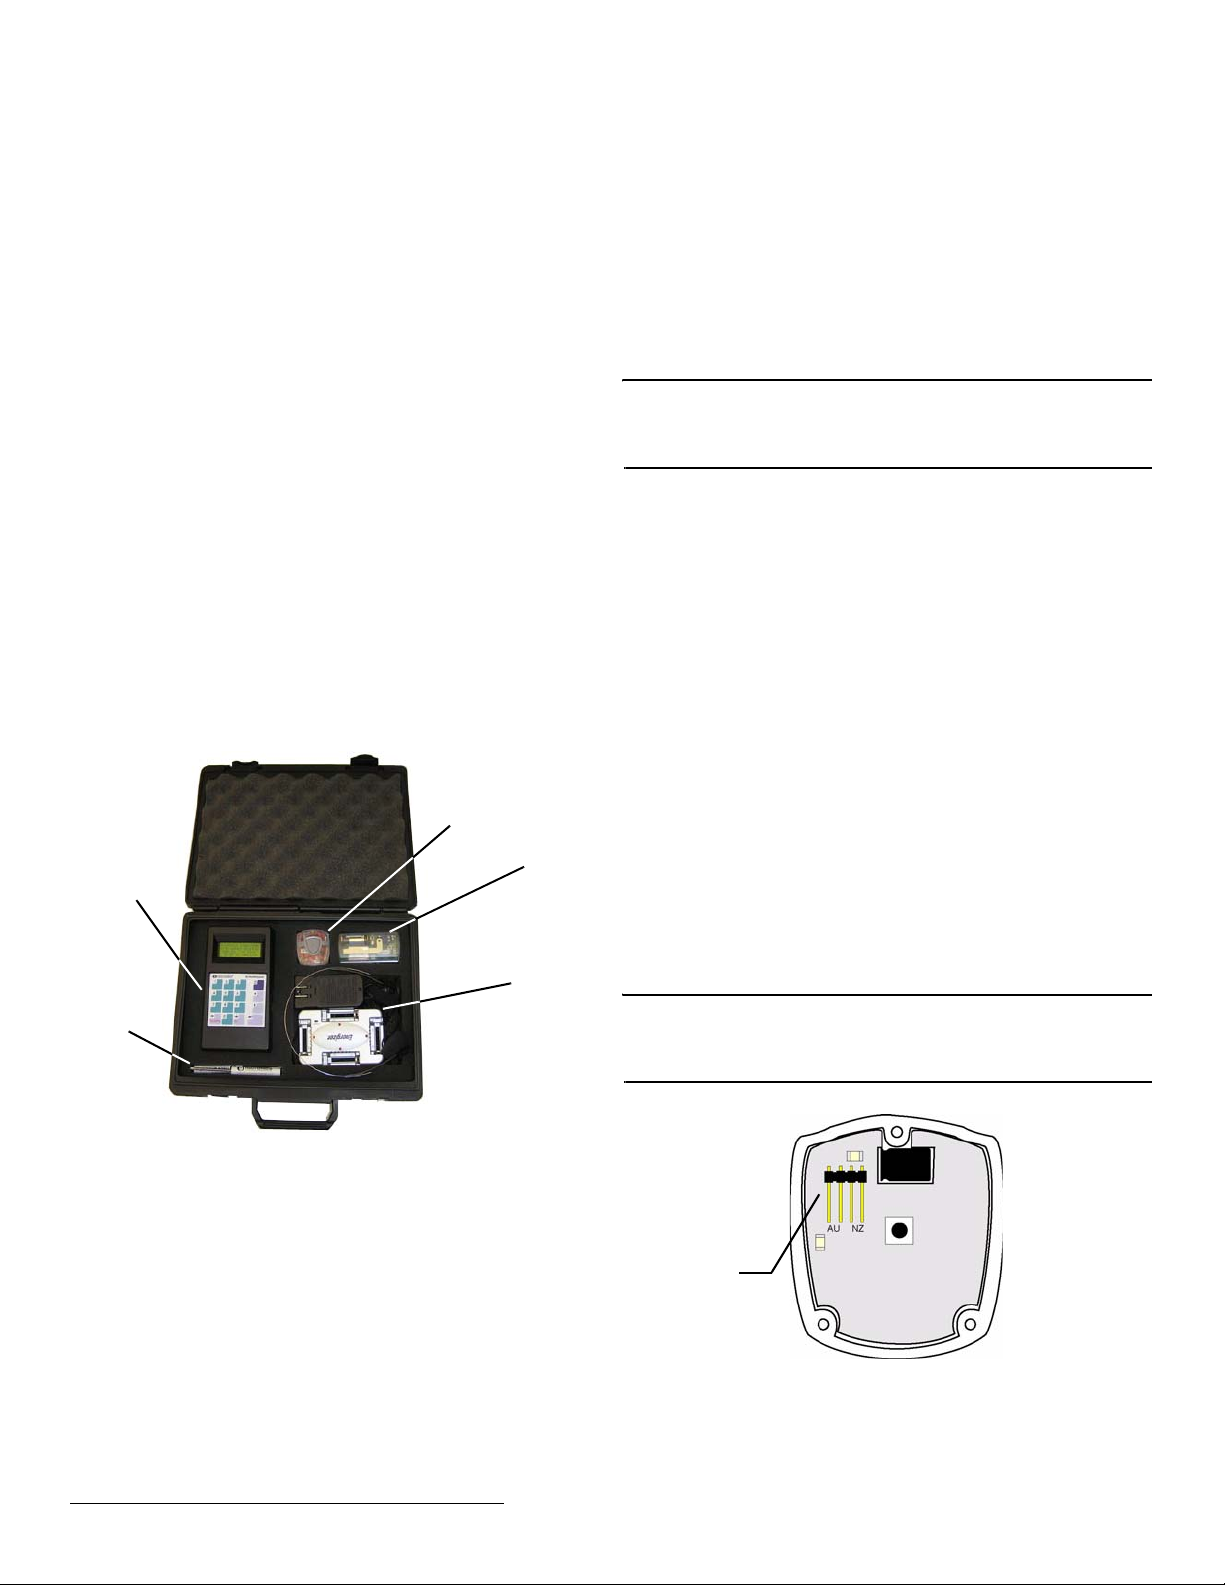
Frequency
Band
Selection
Pins
Transmit
LED
Reset
Button
On/Off
Button
Figure 1 EN4016SK Survey Receiver
4. Press the Enter button to advance to M
5. Select R
6. Select P
EGISTER POINT on the MAIN MENU.
OINT 1 on the REGISTER POINT menu.
7. Press the EN1223SK Reset button.
Transmit
LED
On/Off
Button
Power
Button
Enter
Button
Exit
Button
AIN MENU.
Reset
Button
Figure 3 ES1210SK Survey Transmitter
13.Press the ES1210SK On/Off button. The transmit LED should
begin to flash.
14.Place the survey transmitters where you plan to mount your
network coordinator or receiver.
15.Walk the receiver to the first point you plan to use a transmitter
or a two-way end device.
Note: Reversing the position of the end device and the high-power
repeater will make the survey easier to perform. This equipment
reversal will not affect the accuracy of the results.
16.Press Exit to return to the M
17.Select P
18.Select P
OINT STATUS on the MAIN MENU.
OINT 1 or POINT 2 to view signal information.
AIN MENU.
Signal
Quality
Transmission
Symbols
Figure 4 The Point Status Summary Screen
Figure 2 EN1223SK Survey Transmitter
8. Select P
ENDANT. The survey transmitter should now be
registered.
9. Press the EN1223SK On/Off button. The transmit LED should
begin to flash.
10.Use the small flat-blade screwdriver to press the housing
release tab on either end of the ES1210SK and separate the
housing.
11.Select P
© Inovonics, 2011 - www.inovonics.com
OINT 2 on the REGISTER POINT menu.
2 EN7016SK Overview
The EchoStream survey kit is a portable, easy-to-use system for
conducting EchoStream site surveys to determine optimal location
of Inovonics wireless receivers, high-power repeaters and enddevices.
2.1 Measuring Signal Strength
The EchoStream survey kit measures the signal strength of highpower repeater and end-device messages to help optimize your
EchoStream system. The EchoS tream survey kit provides you with
two signal strength measurements: signal level and signal margin.
Signal level The signal level is the measurement of the overall
decibel level of the message.
Signal margin The signal margin is the measurement of the
decibel level of the message, minus the decibel level of any
interfering signals. Inovonics Wireless equipment should be placed
within a facility such that all end-devices produce signal margin
readings of at least 4 decibels.
Both the signal level and signal margin are measured in decibels.
Because signal strength and signal margin are measured on a
logarithmic scale, the difference between a decibel level of 3
(Weak) and a decibel level of 4 (Good) is a much larger difference
than it would be on a linear scale.
2.2 Inovonics Wireless Contact Information
If you have any problems with this procedure, contact Inovonics
Wireless technical services:
• E-mail: support@inovonics.com
• Phone: (800) 782-2709; (303) 939-9336
2.3 EchoStream Survey Kit Components
C
D
A
E
B
• The EN7016SK EchoStream Survey Kit Installation and
Operation Manual
You will also need:
• A set of four fresh AA alkaline batteries, or four fully-charged
AA NiMH rechargeable batteries, for the receiver
You may also want:
• Headphones with a 3.5 mm plug
• A battery charger, if using rechargeable batteries
- Inovonics Wireless recommends either Rayovac PS5/PS6 or
Energizer CH30MNCP-4 batteries
3 Configure Survey Transmitters
Note: The survey transmitters are designed for use with the survey
kit only. Survey transmitters should not be used to perform range
tests with any EchoStream receivers other than the EN4016SK
survey receiver.
EchoStream products are adaptable to various radio frequency
bands. If you are using the EN7016 survey kit anywhere except
North America, you will need to configure the survey transmitters
for the frequency band appropriate to your geographic area. All
EN7016 survey transmitters are set for North America by default. If
you are performing a site survey in North America using the
EN7016 survey kit, there is no need to configure the survey
transmitters.
3.1 Select EN1223SK Survey Transmitter
Frequency Band
The EN1223SK survey transmitter is shipped with the frequency
band set for North America. If you are using the EN1223SK in
Australia or New Zealand, you will need to set the frequency band
for your geographic area.
1. Use the small Phillips head screwdriver to remove the three
housing screws on the back of the unit.
2. Remove the front of the housing.
3. Place a selection jumper on the appropriate frequency band
selection pins (6).
• Place the jumper on the left two pins, marked AU, to set the
frequency range to 915-928 MHz for Australia.
• Place the jumper on the right two pins, marked NZ, to set the
frequency range to 921-928 MHz for New Zealand.
• Leave the jumper off the pins to set the frequency range to
902-928 MHz for North America.
Note: North America is also selected when the jumper is either
attached to one pin or no pins. Attaching the jumper to one pin can
prevent the jumper from being lost when selecting the North
America.
Figure 5 EchoStream Survey Kit Components
A EN4016SK Survey
Receiver
D ES1210SK Survey
Transmitter
The EchoStream survey kit is battery-powered for portability. The
following components are included in the survey kit:
• An EN4016SK EchoStream survey receiver
• An EN1223SK survey transmitter for testing the location of
pendant transmitters or two-way end devices
• An ES1210SK survey transmitter for testing the location of all
other end devices
• A flat-blade screwdriver
• A Phillips screwdriver
© Inovonics, 2011 - www.inovonics.com 2
B Screwdrivers C EN1223SK Survey
Transmitter
E Accessory Compartment (Battery
Charger and Headphones Not Included)
Frequency
Band
Selection
Pins
Figure 6 EN1223SK Internal View
Figure 7 EN1223SK Frequency Band Selection Options
4. Close the housing and replace the three housing screws.
5. Press the Reset button to complete frequency band selection.
Transmit
LED
Frequency
Band Selection
Pins
Reset
Button
Reset
Button
On/Off
Button
Figure 8 EN1223SK External View
3.2 Select ES1210SK Survey Transmitter
Frequency Band
The ES1210SK survey transmitter is shipped with the frequency
band set for North America. If you are using the ES1210SK in
Australia or New Zealand, you will need to set the frequency band
for your geographic area.
1. Use the small flat-blade screwdriver to press the housing
release tab on the top or bottom of the receiver and separate
the housing.
2. Place a selection jumper on the appropriate frequency band
selection pins (8).
• Place the jumper on the left two pins, marked AUS, to set the
frequency range to 915-928 MHz for Australia.
• Place the jumper on the right two pins, marked NZ, to set the
frequency range to 921-928 MHz for New Zealand.
• Leave the jumper off the pins to set the frequency range to
902-928 MHz for North America.
Note: North America is also selected when the jumper is either
attached to one pin or no pins. Attaching the jumper to one pin can
prevent the jumper from being lost when selecting the North
America.
Transmit
LED
Figure 9 ES1210SK Components.
Figure 10 ES1210SK Frequency Band Selection Options
3. Press the Reset button to complete frequency band selection.
4. Replace the housing.
On/Off
Button
4 Configure the Survey Receiver
Observe the following rules to navigate the display screens and
select options:
• Press the Up and Down buttons to highlight (CAPITALIZE)
menu items on the display screen.
• Press the Enter button to select highlighted menu items.
• Press the Exit button to exit the current display screen. The
display will return to the last higher-level display screen.
Note: The EN4016SK survey receiver is set for North America by
default. If you are using an EN4016SK survey receiver to perform
your site survey in North America there is no need to configure the
survey receiver’s frequency band for your geographic area.
Note: The EN4016SK survey receiver will turn itself off if no key is
pressed for 30 minutes, unless the survey receiver is in one of the
POINT STATUS screens. If in one of the POINT STATUS screens, the
survey receiver will turn itself off after five hours.
1. Press the Power button on the EN4016SK keypad to power on
the receiver. When the receiver information screen displays,
press Enter to advance to the main menu.
© Inovonics, 2011 - www.inovonics.com 3
 Loading...