

Page 1

Ɋɭɤɨɜɨɞɫɬɜɨ ɩɨ ɷɤɫɩɥɭɚɬɚɰɢɢ
ɄɈɆȻɂɇɂɊɈȼȺɇɇȺə (ȽȺɁɈȼȺə) ɉɅɂɌȺ
ɋɨɞɟɪɠɚɧɢɟ
RS
GB
KZ
Ɋɭɫɫɤɢɣ, 1
English, 16
KN1M117S/RU S
KNJ1G17/RU S
KN1M117SA/RU
KNJ1G17A/RU
Қазақша, 30Қазақша, 30Қазақша, 30
ȼɇɂɆȺɇɂȿȼɇɂɆȺɇɂȿȼɇɂɆȺɇɂȿ
,2,2
ɂɧɮɨɪɦɚɰɢɹ ɞɥɹ ɩɨɬɪɟɛɢɬɟɥɹ, 3
ɍɫɬɚɧɨɜɤɚ, 4-7
Ɋɚɡɦɟɳɟɧɢɟ ɢ ɜɵɪɚɜɧɢɜɚɧɢɟ
ɉɨɞɤɥɸɱɟɧɢɟ ɤ ɷɥɟɤɬɪɨɫɟɬɢ
ɉɨɞɤɥɸɱɟɧɢɟ ɤ ɝɚɡɭ
ɇɚɫɬɪɨɣɤɚ ɧɚ ɪɚɡɥɢɱɧɵɟ ɬɢɩɵ ɝɚɡɚ
Ɍɟɯɧɢɱɟɫɤɢɟ ɯɚɪɚɤɬɟɪɢɫɬɢɤɢ
ɏɚɪɚɤɬɟɪɢɫɬɢɤɢ ɝɨɪɟɥɨɤ ɢ ɠɢɤɥɟɪɨɜ
Ɉɩɢɫɚɧɢɟ ɨɛɨɪɭɞɨɜɚɧɢɹ, 8
ȼɧɟɲɧɢɣ ɜɢɞ
ɉɚɧɟɥɶ ɭɩɪɚɜɥɟɧɢɹ
ȼɤɥɸɱɟɧɢɟ ɢ ɢɫɩɨɥɶɡɨɜɚɧɢɟ, -13
ɂɫɩɨɥɶɡɨɜɚɧɢɟ ɪɚɛɨɱɟɣ ɩɨɜɟɪɯɧɨɫɬɢ
ɂɫɩɨɥɶɡɨɜɚɧɢɟ ɞɭɯɨɜɤɢ
ȼɫɩɨɦɨɝɚɬɟɥɶɧɚɹ ɬɚɛɥɢɰɚ ɩɨ ɩɪɢɝɨɬɨɜɥɟɧɢɸ
ɜ ɞɭɯɨɜɤɟ
999
ɉɪɟɞɭɩɪɟɠɞɟɧɢɹ ɢ ɪɟɤɨɦɟɧɞɚɰɢɢ, 14
Ɉɫɧɨɜɧɵɟ ɩɪɚɜɢɥɚ ɛɟɡɨɩɚɫɧɨɫɬɢ
ɍɬɢɥɢɡɚɰɢɹ
ɗɤɨɧɨɦɢɹ ɷɥɟɤɬɪɨɷɧɟɪɝɢɢ ɢ ɨɯɪɚɧɚ ɨɤɪɭɠɚɸɳɟɣ
ɫɪɟɞɵ
Ɉɛɫɥɭɠɢɜɚɧɢɟ ɢ ɭɯɨɞ, 15
Ɉɬɤɥɸɱɟɧɢɟ ɨɛɨɪɭɞɨɜɚɧɢɹ
ɑɢɫɬɤɚ ɨɛɨɪɭɞɨɜɚɧɢɹ
ɍɯɨɞ ɡɚ ɜɟɧɬɢɥɹɦɢ ɪɭɤɨɹɬɨɤ
Ɂɚɦɟɧɚ ɥɚɦɩɵ ɨɫɜɟɳɟɧɢɹ
ɉɨɦɨɳɶ
Page 2

ȼɇɂɆȺɇɂȿ
ȼɇɂɆȺɇɂȿ: Ⱦɚɧɧɨɟ ɢɡɞɟɥɢɟ ɢ
ɟɝɨ ɞɨɫɬɭɩɧɵɟ ɤɨɦɩɥɟɤɬɭɸɳɢɟ
ɫɢɥɶɧɨ ɧɚɝɪɟɜɚɸɬɫɹ ɜ ɩɪɨɰɟɫɫɟ
ɷɤɫɩɥɭɚɬɚɰɢɢ.
Ȼɭɞɶɬɟ ɨɫɬɨɪɨɠɧɵ ɢ ɧɟ
ɤɚɫɚɣɬɟɫɶ ɧɚɝɪɟɜɚɬɟɥɶɧɵɯ
ɷɥɟɦɟɧɬɨɜ.
ɇɟ ɪɚɡɪɟɲɚɣɬɟ ɞɟɬɹɦ ɦɥɚɞɲɟ 8
ɥɟɬ ɩɪɢɛɥɢɠɚɬɶɫɹ ɤ ɢɡɞɟɥɢɸ ɛɟɡ
ɤɨɧɬɪɨɥɹ.
Ⱦɚɧɧɨɟ ɢɡɞɟɥɢɟ ɦɨɠɟɬ ɛɵɬɶ
ɢɫɩɨɥɶɡɨɜɚɧɨ ɞɟɬɶɦɢ ɫɬɚɪɲɟ 8
ɥɟɬ ɢ ɥɢɰɚɦɢ ɫ ɨɝɪɚɧɢɱɟɧɧɵɦɢ
ɮɢɡɢɱɟɫɤɢɦɢ, ɫɟɧɫɨɪɧɵɦɢ ɢɥɢ
ɭɦɫɬɜɟɧɧɵɦɢ ɫɩɨɫɨɛɧɨɫɬɹɦɢ ɢɥɢ
ɛɟɡ ɨɩɵɬɚ ɢ ɡɧɚɧɢɹ
ɢɫɩɨɥɶɡɨɜɚɧɢɹ ɢɡɞɟɥɢɹ ɩɪɢ
ɭɫɥɨɜɢɢ ɧɚɞɥɟɠɚɳɟɝɨ ɤɨɧɬɪɨɥɹ
ɢɥɢ ɨɛɭɱɟɧɢɹ ɛɟɡɨɩɚɫɧɨɦɭ
ɢɫɩɨɥɶɡɨɜɚɧɢɸ ɢɡɞɟɥɢɹ ɫ
ɭɱɟɬɨɦ ɫɨɨɬɜɟɬɫɬɜɭɸɳɢɯ ɪɢɫɤɨɜ.
ɇɟ ɪɚɡɪɟɲɚɣɬɟ ɞɟɬɹɦ ɢɝɪɚɬɶ
ɫ ɢɡɞɟɥɢɟɦ. ɇɟ ɪɚɡɪɟɲɚɣɬɟ
ɞɟɬɹɦ ɨɫɭɳɟɫɬɜɥɹɬɶ ɱɢɫɬɤɭ ɢ
ɭɯɨɞ ɡɚ ɢɡɞɟɥɢɟɦ ɛɟɡ ɤɨɧɬɪɨɥɹ
ɜɡɪɨɫɥɵɯ.
ȼɇɂɆȺɇɂȿ: Ɉɩɚɫɧɨ ɨɫɬɚɜɥɹɬɶ
ɜɤɥɸɱɟɧɧɭɸ ɤɨɧɮɨɪɤɭ ɫ ɦɚɫɥɨɦ
ɢɥɢ ɠɢɪɨɦ ɛɟɡ ɩɪɢɫɦɨɬɪɚ, ɬɚɤ
ɤɚɤ ɷɬɨ ɦɨɠɟɬ
ɇɂɄɈȽȾȺ ɧɟ ɩɵɬɚɣɬɟɫɶ ɩɨɝɚɫɢɬɶ
ɩɥɚɦɹ/ɩɨɠɚɪ ɜɨɞɨɣ. ɉɪɟɠɞɟ
ɜɫɟɝɨ ɜɵɤɥɸɱɢɬɟ ɢɡɞɟɥɢɟ ɢ
ɧɚɤɪɨɣɬɟ ɩɥɚɦɹ ɤɪɵɲɤɨɣ ɢɥɢ
ɨɝɧɟɭɩɨɪɧɨɣ ɬɤɚɧɶɸ.
ɩɪɢɜɟɫɬɢ ɤ ɩɨɠɚɪɭ.
ɨ ɩɪɚɜɢɥɚɯ
ɇɟ ɢɫɩɨɥɶɡɭɣɬɟ ɚɛɪɚɡɢɜɧɵɟ
ɜɟɳɟɫɬɜɚ ɢɥɢ ɪɟɠɭɳɢɟ
ɦɟɬɚɥɥɢɱɟɫɤɢɟ ɫɤɪɟɛɤɢ ɞɥɹ
ɱɢɫɬɤɢ ɫɬɟɤɥɹɧɧɨɣ ɞɜɟɪɰɵ
ɞɭɯɨɜɨɝɨ ɲɤɚɮɚ, ɬɚɤ ɤɚɤ ɨɧɢ
ɦɨɝɭɬ ɩɨɰɚɪɚɩɚɬɶ ɩɨɜɟɪɯɧɨɫɬɶ,
ɱɬɨ ɦɨɠɟɬ ɩɪɢɜɟɫɬɢ ɤ
ɪɚɡɛɢɜɚɧɢɸ ɫɬɟɤɥɚ.
ȼɧɭɬɪɟɧɧɹɹ ɩɨɜɟɪɯɧɨɫɬɶ ɹɳɢɤɚ
ɟɫɥɢ ɨɧ ɢɦɟɟɬɫɹ) ɦɨɠɟɬ ɫɢɥɶɧɨ
(
ɧɚɝɪɟɬɶɫɹ
ɇɢɤɨɝɞɚ ɧɟ ɢɫɩɨɥɶɡɭɣɬɟ ɩɚɪɨɜɵɟ
ɱɢɫɬɹɳɢɟ ɚɝɪɟɝɚɬɵ ɢɥɢ ɚɝɪɟɝɚɬɵ
ɩɨɞ ɜɵɫɨɤɢɦ ɞɚɜɥɟɧɢɟɦ ɞɥɹ
ɱɢɫɬɤɢ ɢɡɞɟɥɢɹ.
ȿɫɥɢ ɧɚ ɤɪɵɲɤɭ ɩɪɨɥɢɬɚ
ɠɢɞɤɨɫɬɶ, ɭɞɚɥɢɬɟ ɟɟ ɩɟɪɟɞ
ɬɟɦ, ɤɚɤ ɨɬɤɪɵɬɶ ɤɪɵɲɤɭ. ɇɟ
ɡɚɤɪɵɜɚɣɬɟ ɫɬɟɤɥɹɧɧɭɸ ɤɪɵɲɤɭ
ɜɚɪɨɱɧɨɣ ɩɚɧɟɥɢ (ɟɫɥɢ ɨɧɚ
ɢɦɟɟɬɫɹ), ɟɫɥɢ ɝɚɡɨɜɵɟ ɢɥɢ
ɷɥɟɤɬɪɢɱɟɫɤɢɟ ɤɨɧɮɨɪɤɢ ɟɳɟ
ɝɨɪɹɱɢɟ.
ȼɇɂɆȺɇɂȿ: ɉɪɨɜɟɪɶɬɟ, ɱɬɨɛɵ
ɢɡɞɟɥɢɟ ɛɵɥɨ ɜɵɤɥɸɱɟɧɨ, ɩɟɪɟɞ
ɡɚɦɟɧɨɣ ɥɚɦɩɨɱɤɢ ɜɨ ɢɡɛɟɠɚɧɢɟ
ɜɨɡɦɨɠɧɵɯ ɭɞɚɪɨɜ ɬɨɤɨɦ.
ɂɡɞɟɥɢɟ ɧɟ ɪɚɫɫɱɢɬɚɧɨ
ɧɚ ɜɥɸɱɟɧɢɟ ɩɨɫɪɟɞɫɬɜɨɦ
ɜɧɟɲɧɟɝɨ ɫɢɧɯɪɨɧɢɡɚɬɨɪɚ
ɢɥɢ ɨɬɞɟɥɶɧɨɣ ɫɢɫɬɟɦɵ
ɞɢɫɬɚɧɰɢɨɧɧɨɝɨ ɭɩɪɚɜɥɟɧɢɹ.
! ɉɪɢ ɭɫɬɚɧɨɜɤɟ ɪɟɲɟɬɤɢ
ɩɪɨɜɟɪɢɬɶ, ɱɬɨɛɵ ɮɢɤɫɚɬɨɪ ɛɵɥ
ɩɨɜɟɪɧɭɬ ɜɜɟɪɯ ɫ ɡɚɞɧɟɣ ɫɬɨɪɨɧɵ
ɜɵɟɦɤɢ.
56
Page 3

ɂɧɮɨɪɦɚɰɢɹ ɞɥɹ ɩɨɬɪɟɛɢɬɟɥɹ
RS
ɂɡɞɟɥɢɟ: Ʉɨɦɛɢɧɢɪɨɜɚɧɧɚɹ (ɝɚɡɨɜɚɹ) ɩɥɢɬɚ
Ɍɨɪɝɨɜɚɹ ɦɚɪɤɚ:
Ɍɨɪɝɨɜɵɣ ɡɧɚɤ ɢɡɝɨɬɨɜɢɬɟɥɹ:
Ɇɨɞɟɥɢ: KN1M117S/RU S, KNJ1G17/RU S
ɂɡɝɨɬɨɜɢɬɟɥɶ: Indesit Company
ɋɬɪɚɧɚ-ɢɡɝɨɬɨɜɢɬɟɥɶ: ɉɨɥɶɲɚ
ɇɨɦɢɧɚɥɶɧɨɟ ɡɧɚɱɟɧɢɟ ɧɚɩɪɹɠɟɧɢɹ ɷɥɟɤɬɪɨɩɢɬɚɧɢɹ
ɢɥɢ ɞɢɚɩɚɡɨɧ ɧɚɩɪɹɠɟɧɢɹ
ɍɫɥɨɜɧɨɟ ɨɛɨɡɧɚɱɟɧɢɟ ɪɨɞɚ ɷɥɟɤɬɪɢɱɟɫɤɨɝɨ ɬɨɤɚ
ɢɥɢ ɧɨɦɢɧɚɥɶɧɚɹ ɱɚɫɬɨɬɚ ɩɟɪɟɦɟɧɧɨɝɨ ɬɨɤɚ
Ʉɥɚɫɫ ɷɧɟɪɝɨɩɨɬɪɟɛɥɟɧɢɹ ɋ
Ʉɥɚɫɫ ɡɚɳɢɬɵ ɨɬ ɩɨɪɚɠɟɧɢɹ ɷɥɟɤɬɪɢɱɟɫɤɢɦ ɬɨɤɨɦ Ʉɥɚɫɫ ɡɚɳɢɬɵ I
Ɉɛɴɟɦ ɞɭɯɨɜɨɝɨ ɲɤɚɮɚ 50 ɥ
Ɇɚɤɫ. ɩɨɝɥɨɳɚɟɦɚɹ ɦɨɳɧɨɫɬɶ
ȼ ɫɥɭɱɚɟ ɧɟɨɛɯɨɞɢɦɨɫɬɢ ɩɨɥɭɱɟɧɢɹ ɢɧɮɨɪɦɚɰɢɢ
ɩɨ ɫɟɪɬɢɮɢɤɚɬɚɦ ɫɨɨɬɜɟɬɫɬɜɢɹ ɢɥɢ ɩɨɥɭɱɟɧɢɹ ɤɨɩɢɣ
ɫɟɪɬɢɮɢɤɚɬɨɜ ɫɨɨɬɜɟɬɫɬɜɢɹ ɧɚ ɞɚɧɧɭɸ ɬɟɯɧɢɤɭ, ȼɵ
ɦɨɠɟɬɟ ɨɬɩɪɚɜɢɬɶ ɡɚɩɪɨɫ ɩɨ ɷɥɟɤɬɪɨɧɧɨɦɭ ɚɞɪɟɫɭ
cert.rus@indesit.com.
Ⱦɚɬɭ ɩɪɨɢɡɜɨɞɫɬɜɚ ɞɚɧɧɨɣ ɬɟɯɧɢɤɢ ɦɨɠɧɨ
ɩɨɥɭɱɢɬɶ ɢɡ ɫɟɪɢɣɧɨɝɨ ɧɨɦɟɪɚ, ɪɚɫɩɨɥɨɠɟɧɧɨɝɨ
ɩɨɞ ɲɬɪɢɯ-ɤɨɞɨɦ
(S/N XXXXXXXXX * XXXXXXXXXXX),
ɫɥɟɞɭɸɳɢɦ ɨɛɪɚɡɨɦ:
ɉɪɨɢɡɜɨɞɢɬɟɥɶ ɨɫɬɚɜɥɹɟɬ ɡɚ ɫɨɛɨɣ ɩɪɚɜɨ ɛɟɡ ɩɪɟɞɭɩɪɟɠɞɟɧɢɹ ɜɧɨɫɢɬɶ
ɥɟɤɬɚɰɢɸ, ɧɟ ɭɯɭɞɲɚɸɳɢɟ ɷɮɮɟɤɬɢɜɧɨɫɬɶ ɪɚɛɨɬɵ ɨɛɨɪɭɞɨɜɚɧɢɹ. ɇɟɤɨɬɨɪɵɟ ɩɚɪɚɦɟɬɪɵ, ɩɪɢɜɟɞɟɧɧɵɟ
ɜ ɷɬɨɣ ɢɧɫɬɪɭɤɰɢɢ, ɹɜɥɹɸɬɫɹ ɩɪɢɛɥɢɡɢɬɟɥɶɧɵɦɢ. ɉɪɨɢɡɜɨɞɢɬɟɥɶ ɧɟ ɧɟɫɟɬ ɨɬɜɟɬɫɬɜɟɧɧɨɫɬɢ ɡɚ ɧɟɡɧɚɱɢɬɟɥɶɧɵɟ ɨɬɤɥɨɧɟɧɢɹ ɨɬ ɭɤɚɡɚɧɧɵɯ ɜɟɥɢɱɢɧ. ɂɡɝɨɬɨɜɢɬɟɥɶ ɧɟ ɧɟɫɟɬ ɨɬɜɟɬɫɬɜɟɧɧɨɫɬɢ ɡɚ ɜɨɡɦɨɠɧɵɟ ɧɟɬɨɱɧɨɫɬɢ
ɜ ɷɬɨɣ ɛɪɨɲɸɪɟ ɢɡ-ɡɚ ɩɟɱɚɬɢ ɢɥɢ ɤɨɩɢɪɨɜɚɧɢɹ ɨɲɢɛɨɤ.
220–230 ȼ ~
50/60 Ƚɰ
(ɬɨɥɶɤɨ ɞɥɹ ɦɨɞɟɥɢ KN1M117S/RU S)
2000 ȼɬ — ɞɥɹ ɦɨɞ. KNJ1G17/RU S (ɝɚɡɨɜɚɹ ɞɭɯɨɜɤɚ);
3500 ȼɬ
ɱɚɫɬɶ ɢɡɞɟɥɢɹ)
— ɞɥɹ ɦɨɞ. KN1M117S/RU S ( ɷɥɟɤɬɪɢɱɟɫɤɚɹ
- 1-ɹ ɰɢɮɪɚ ɜ S/N ɫɨɨɬɜɟɬɫɬɜɭɟɬ ɩɨɫɥɟɞɧɟɣ ɰɢɮɪɟ
ɝɨɞɚ;
- 2-ɹ ɢ 3-ɹ ɰɢɮɪɵ ɜ S/N — ɩɨɪɹɞɤɨɜɨɦɭ ɧɨɦɟɪɭ
ɦɟɫɹɰɚ ɝɨɞɚ,
- 4-ɹ ɢ 5-ɹ ɰɢɮɪɵ ɜ S/N — ɱɢɫɥɭ ɨɩɪɟɞɟɥɟɧɧɨɝɨ
ɦɟɫɹɰɚ ɢ ɝɨɞɚ.
ɢɡɦɟɧɟɧɢɹ ɜ ɤɨɧɫɬɪɭɤɰɢɸ ɢ ɤɨɦɩ-
KN1M117SA/RU
KNJ1G17A/RU
/A
ɉɪɨɢɡɜɨɞɢɬɟɥɶ: Indesit Company S.p.A.
ȼɢɚɥɟ Ⱥ. Ɇɟɪɥɨɧɢ 47, 60044, Ɏɚɛɪɢɚɧɨ (Ⱥɇ), ɂɬɚɥɢɹ
ɂɦɩɨɪɬɟɪ: ɈɈɈ «ɂɧɞɟɡɢɬ Ɋɍɋ»
ɋ ɜɨɩɪɨɫɚɦɢ (ɜ Ɋɨɫɫɢɢ) ɨɛɪɚɳɚɬɶɫɹ ɩɨ ɚɞɪɟɫɭ: Ɋɨɫɫɢɹ, 127018, Ɇɨɫɤɜɚ, ɭɥ. Ⱦɜɢɧɰɟɜ, ɞɨɦ 12, ɤɨɪɩ. 1
3
Page 4

ɍɫɬɚɧɨɜɤɚ
! ɉɟɪɟɞ ɭɫɬɚɧɨɜɤɨɣ ɢ ɩɨɞɤɥɸɱɟɧɢɟɦ ɜɚɲɟɝɨ ɧɨɜɨɝɨ
ɨɛɨɪɭɞɨɜɚɧɢɹ ɜɧɢɦɚɬɟɥɶɧɨ ɩɪɨɱɢɬɚɣɬɟ ɞɚɧɧɨɟ ɪɭɤɨɜɨɞɫɬɜɨ: ɜ ɧɟɦ ɫɨɞɟɪɠɚɬɫɹ ɜɚɠɧɵɟ ɫɜɟɞɟɧɢɹ ɩɨ
ɭɫɬɚɧɨɜɤɟ, ɛɟɡɨɩɚɫɧɨɣ ɷɤɫɩɥɭɚɬɚɰɢɢ ɢ ɨɛɫɥɭɠɢɜɚɧɢɸ
ɨɛɨɪɭɞɨɜɚɧɢɹ.
! ɋɨɯɪɚɧɢɬɟ ɪɭɤɨɜɨɞɫɬɜɨ ɤɚɤ ɢɫɬɨɱɧɢɤ ɫɩɪɚɜɨɱɧɨɣ
ɢɧɮɨɪɦɚɰɢɢ ɩɨ ɨɛɨɪɭɞɨɜɚɧɢɸ ɢ ɞɥɹ ɩɟɪɟɞɚɱɢ ɜɨɡɦɨɠɧɵɦ ɧɨɜɵɦ ɜɥɚɞɟɥɶɰɚɦ.
! ɍɫɬɚɧɨɜɤɚ ɨɛɨɪɭɞɨɜɚɧɢɹ ɞɨɥɠɧɚ ɩɪɨɢɡɜɨɞɢɬɶɫɹ
ɤɜɚɥɢɮɢɰɢɪɨɜɚɧɧɵɦ ɩɟɪɫɨɧɚɥɨɦ ɜ ɫɨɨɬɜɟɬɫɬɜɢɢ
ɫ ɩɪɢɜɨɞɢɦɵɦɢ
ɢɧɫɬɪɭɤɰɢɹɦɢ.
! ɉɟɪɟɞ ɪɟɝɭɥɢɪɨɜɤɨɣ ɢɥɢ ɨɛɫɥɭɠɢɜɚɧɢɟɦ ɨɛɨɪɭɞɨɜɚɧɢɹ ɟɝɨ ɫɥɟɞɭɟɬ ɨɬɤɥɸɱɢɬɶ ɨɬ ɷɥɟɤɬɪɨɫɟɬɢ.
ȼɟɧɬɢɥɹɰɢɹ ɩɨɦɟɳɟɧɢɹ
ȼ ɫɨɨɬɜɟɬɫɬɜɢɢ ɫ ɞɟɣɫɬɜɭɸɳɢɦɢ ɫɬɚɧɞɚɪɬɚɦɢ ɩɨ
ɭɫɬɚɧɨɜɤɟ ɝɚɡɨɜɨɝɨ ɨɛɨɪɭɞɨɜɚɧɢɹ ɩɥɢɬɚ ɦɨɠɟɬ ɛɵɬɶ
ɭɫɬɚɧɨɜɥɟɧɚ ɬɨɥɶɤɨ ɜ ɩɨɦɟɳɟɧɢɹɯ ɫ ɩɨɫɬɨɹɧɧɨɣ ɜɟɧɬɢɥɹɰɢɟɣ. ɉɨɦɟɳɟɧɢɟ ɞɨɥɠɧɨ ɢɦɟɬɶ ɜɟɧɬɢɥɹɰɢɨɧɧɭɸ
ɫɢɫɬɟɦɭ, ɨɛɟɫɩɟɱɢɜɚɸɳɭɸ ɭɞɚɥɟɧɢɟ ɩɪɨɞɭɤɬɨɜ ɫɝɨɪɚɧɢɹ (ɩɪɢɬɨɤ ɜɨɡɞɭɯɚ ɞɨɥɠɟɧ ɫɨɫɬɚɜɥɹɬɶ ɧɟ ɦɟɧɟɟ
3
/ɱ ɧɚ ɤɚɠɞɵɣ ɤɢɥɨɜɚɬɬ ɦɨɳ ɧɨɫɬɢ ɭɫɬɚɧɚɜɥɢɜɚ-
ɦ
2
ɟɦɨɝɨ ɨɛɨɪɭɞɨɜɚɧɢɹ). Ɍɪɭɛɚ, ɢɞɭɳɚɹ ɤ ɜɯɨɞɧɨɦɭ
ɜɟɧɬɢɥɹɰɢɨɧɧɨɦɭ ɨɬɜɟɪɫɬɢɸ, ɡɚɳɢɳɟɧɧɨɦɭ ɪɟɲɟɬɤɨɣ, ɞɨɥɠɧɚ ɢɦɟɬɶ ɜɧɭɬɪɟɧɧɟɟ ɩɨɩɟɪɟɱɧɨɟ ɫɟɱɟɧɢɟ
100 ɫɦ2 ɢ ɩɪɨɥɨɠɟɧɚ ɬɚɤ, ɱɬɨɛɵ ɢɫɤɥɸɱɢɬɶ ɡɚɫɨɪɟɧɢɟ
ɜ ɥɸɛɨɣ ɟɟ ɱɚɫɬɢ (ɪɢɫ. A).
ȿɫɥɢ ɪɚɛɨɱɚɹ ɩɨɜɟɪɯɧɨɫɬɶ ɩɥɢɬɵ ɧɟ ɨɫɧɚɳɟɧɚ ɭɫɬɪɨɣɫɬɜɨɦ ɛɟɡɨɩɚɫɧɨɫɬɢ, ɜɯɨɞɧɨɟ ɜɟɧɬɢɥɹɰɢɨɧɧɨɟ
ɨɬɜɟɪɫɬɢɟ ɞɨɥɠɧɨ ɛɵɬɶ ɭɜɟɥɢɱɟɧɨ ɧɚ 100% (ɫ ɦɢɧɢɦɚɥɶɧɵɦ ɩɨɩɟɪɟɱɧɵɦ ɫɟɱɟɧɢɟɦ ɬɪɭɛɵ 200 ɫɦ2).
Ʉɨɝɞɚ ɩɨɬɨɤ ɜɨɡɞɭɯɚ ɩɨɫɬɭɩɚɟɬ ɢɡ ɫɦɟɠɧɵɯ ɩɨɦɟɳɟɧɢɣ
(ɩɪɢ ɭɫɥɨɜɢɢ, ɱɬɨ ɨɧɢ ɧɟ ɹɜɥɹɸɬɫɹ ɤɨɦɦɭɧɚɥɶɧɵɦɢ
ɱɚɫɬɹɦɢ ɡɞɚɧɢɹ, ɩɨɠɚɪɨɨɩɚɫɧɵɦɢ ɩɨɦɟɳɟɧɢɹɦɢ ɢɥɢ
ɫɩɚɥɶɧɹɦɢ), ɢɯ ɜɯɨɞɧɵɟ ɜɟɧɬɢɥɹɰɢɨɧɧɵɟ ɨɬɜɟɪɫɬɢɹ
ɬɚɤɠɟ ɞɨɥɠɧɵ ɛɵɬɶ ɨɫɧɚɳɟɧɵ ɧɚɪɭɠɧɨɣ ɜɨɡɞɭɯɨɨɬɜɨɞɧɨɣ ɬɪɭɛɨɣ, ɤɚɤ ɨɩɢɫɚɧɨ ɜɵɲɟ (ɪɢɫ. B).
AB
ɉɨɦɟɳɟɧɢɟ,
ɬɪɟɛɭɸ ɳɟɟ
ɜɟɧɬɢɥɹɰɢɢ
ɉɪɢɦɟɪ ɨɛɟɫɩɟɱɟɧɢɹ
ɩɪɢɬɨɤɚ ɜɨɡɞɭɯɚ
ɋɦɟɠɧɨɟ
ɩɨɦɟɳɟɧɢɟ
ɍɜɟɥɢɱɟɧɢɟ ɡɚɡɨɪɚ
ɦɟɠɞɭ ɞɜɟɪɶɸ ɢ ɩɨɥɨɦ
ɞɥɹ ɫɜɨɛɨɞɧɨɝɨ ɩɪɨɯɨɞɚ
ɩɪɢɬɨɱɧɨɝɨ ɜɨɡɞɭɯɚ
! ɉɨɫɥɟ ɩɪɨɞɨɥɠɢɬɟɥɶɧɨɝɨ ɢɫɩɨɥɶɡɨɜɚɧɢɹ ɨɛɨɪɭɞɨɜɚɧɢɹ ɠɟɥɚɬɟɥɶɧɨ ɨɬɤɪɵɬɶ ɨɤɧɨ ɢɥɢ ɭɜɟɥɢɱɢɬɶ ɫɤɨɪɨɫɬɶ
ɪɚɛɨɬɚɸɳɟɝɨ ɜɟɧɬɢɥɹɬɨɪɚ.
Ɉɬɜɨɞ ɨɬɪɚɛɨɬɚɧɧɨɝɨ ɜɨɡɞɭɯɚ
ɗɮɮɟɤɬɢɜɧɨɟ ɭɞɚɥɟɧɢɟ ɩɪɨɞɭɤɬɨɜ ɫɝɨɪɚɧɢɹ ɛɭɞɟɬ
ɨɛɟɫɩɟɱɟɧɨ ɩɪɢ ɢɫɩɨɥɶɡɨɜɚɧɢɢ ɜɵɬɹɠɤɢ, ɩɨɞɤɥɸɱɟɧ-
ɤ ɧɚɪɭɠɧɨɦɭ ɞɵɦɨɨɬɜɨɞɭ, ɢɥɢ ɷɥɟɤɬɪɢɱɟɫɤɨɝɨ
ɧɨɣ
ɜɟɧɬɢɥɹɬɨɪɚ, ɚɜɬɨɦɚɬɢɱɟɫɤɢ ɜɤɥɸɱɚɸɳɟɝɨɫɹ ɤɚɠɞɵɣ
ɪɚɡ, ɤɨɝɞɚ ɨɛɨɪɭɞɨɜɚɧɢɟ ɪɚɛɨɬɚɟɬ (cɦ. ɪɢɫ.).
ɉɪɹɦɚɹ ɜɵɬɹɠɤɚ ɧɚɪɭɠɭ
!
ɋɠɢɠɟɧɧɵɣ ɝɚɡ ɬɹɠɟɥɟɟ ɜɨɡɞɭɯɚ, ɢ ɩɨɷɬɨɦɭ ɫɤɚɩɥɢ-
ȼɵɬɹɠɤɚ ɩɪɢ ɧɚɥɢɱɢɢ
ɞɵɦɨɯɨɞɚ (ɬɨɥɶɤɨ
ɞɥɹ ɤɭɯɨɧɧɨɝɨ ɨɛɨɪɭɞɨɜɚɧɢɹ)
ɜɚɟɬɫɹ ɜɧɢɡɭ. ɉɨɦɟɳɟɧɢɹ, ɜ ɤɨɬɨɪɵɯ ɭɫɬɚɧɚɜɥɢɜɚɸɬɫɹ
ɛɚɥɥɨɧɵ ɫɨ ɫɠɢɠɟɧɧɵɦ ɝɚɡɨɦ, ɞɨɥɠɧɵ ɛɵɬɶ ɨɫɧɚɳɟɧɵ ɧɚɪɭɠɧɨɣ ɜɟɧɬɢɥɹɰɢɟɣ, ɱɬɨɛɵ ɱɟɪɟɡ ɧɟɟ ɦɨɝ
ɭɯɨɞɢɬɶ ɝɚɡ ɜ ɫɥɭɱɚɟ ɭɬɟɱɤɢ. ɇɟɥɶɡɹ ɭɫɬɚɧɚɜɥɢɜɚɬɶ ɢ
ɯɪɚɧɢɬɶ ɛɚɥɥɨɧɵ ɫ ɝɚɡɨɦ ɜ ɩɨɦɟɳɟɧɢɹɯ, ɪɚɫɩɨɥɨɠɟɧɧɵɯ ɧɢɠɟ ɭɪɨɜɧɹ ɩɨɥɚ (ɜ ɩɨɞɜɚɥɚɯ ɢ ɩɨɥɭɩɨɞɜɚɥɚɯ).
Ɋɟɤɨɦɟɧɞɭɟɦ ɞɟɪɠɚɬɶ ɜ ɤɭɯɧɟ ɬɨɥɶɤɨ ɢɫɩɨɥɶɡɭɟɦɵɣ
ɛɚɥɥɨɧ ɢ ɭɫɬɚɧɚɜɥɢɜɚɬɶ ɟɝɨ ɩɨɞɚɥɶɲɟ ɨɬ ɢɫɬɨɱɧɢɤɨɜ
ɬɟɩɥɚ (ɞɭɯɨɜɨɤ, ɤɚɦɢɧɨɜ, ɩɟɱɟɣ ɢ ɬ.ɩ.), ɫɩɨɫɨɛɧɵɯ
ɧɚɝɪɟɬɶ ɛɚɥɥɨɧ ɞɨ ɬɟɦɩɟɪɚɬɭɪɵ ɜɵɲɟ 50°ɋ.
Ɋɚɡɦɟɳɟɧɢɟ ɢ ɜɵɪɚɜɧɢɜɚɧɢɟ
!
ɉɥɢɬɚ ɦɨɠɟɬ ɛɵɬɶ ɭɫɬɚɧɨɜɥɟɧɚ ɪɹɞɨɦ ɫ ɥɸɛɨɣ
ɤɭɯɨɧɧɨɣ ɦɟɛɟɥɶɸ, ɧɟ ɩɪɟɜɵɲɚɸɳɟɣ ɨɛɨɪɭɞɨɜɚɧɢɟ
ɩɨ ɜɵɫɨɬɟ.
!
ɋɬɟɧɚ, ɫɨɩɪɢɤɚɫɚɸɳɚɹɫɹ ɫ ɡɚɞɧɟɣ ɱɚɫɬɶɸ ɨɛɨɪɭɞɨ-
ɜɚɧɢɹ, ɞɨɥɠɧɚ ɛɵɬɶ ɫɞɟɥɚɧɚ ɢɡ ɧɟɜɨɫɩɥɚɦɟɧɹɸɳɢɯɫɹ, ɬɟɪɦɨɫɬɨɣɤɢɯ ɦɚɬɟɪɢɚɥɨɜ (ɜɵɞɟɪɠɢɜɚɬɶ ɧɚɝɪɟɜ
ɞɨ 90 °C).
Ⱦɥɹ ɩɪɚɜɢɥɶɧɨɣ ɭɫɬɚɧɨɜɤɢ:
Ɋɚɡɦɟɫɬɢɬɟ ɨɛɨɪɭɞɨɜɚɧɢɟ ɜ ɤɭɯɧɟ, ɫɬɨɥɨɜɨɣ, ɧɨ ɧɟ
x
ɜ ɜɚɧɧɨɣ ɤɨɦɧɚɬɟ.
ȿɫɥɢ ɪɚɛɨɱɚɹ ɩɨɜɟɪɯɧɨɫɬɶ ɩɥɢɬɵ ɜɵɲɟ ɪɹɞɨɦ
x
ɫɬɨɹɳɟɣ ɤɭɯɨɧɧɨɣ ɦɟɛɟɥɢ, ɩɨɫɥɟɞɧɹɹ ɞɨɥɠɧɚ ɧɚɯɨɞɢɬɶɫɹ ɧɚ ɪɚɫɫɬɨɹɧɢɢ
ɧɟ ɦɟɧɟɟ 200 ɦɦ ɨɬ
ɨɛɨɪɭɞɨɜɚɧɢɹ.
Ɇɢɧɢɦɚɥɶɧɨɟ ɪɚɫɫɬɨɹ-
x
ɧɢɟ ɦɟɠɞɭ ɪɚɛɨɱɟɣ
ɩɨɜɟɪɯ ɧɨɫɬɶɸ ɩɥɢɬɵ ɢ
ɧɚɜɟɫɧɵɦɢ ɲɤɚɮɚɦɢ
(ɩɨɥɤɚɦɢ) ɞɨɥɠɧɨ ɫɨɫɬɚɜɥɹɬɶ 420 ɦɦ. ɗɬɨ
ɪɚɫɫɬɨɹɧɢɟ ɫɥɟɞɭɟɬ
RS
4
Page 5

RS
ɭɜɟɥɢɱɢɬɶ ɞɨ 700 ɦɦ, ɟɫɥɢ ɧɚɜɟɫɧɵɟ ɲɤɚɮɵ ɫɞɟɥɚɧɵ ɢɡ ɝɨɪɸɱɢɯ ɦɚ ɬɟ ɪɢɚɥɨɜ (ɫɦ. ɪɢɫ.).
x
ɒɬɨɪɵ / ɠɚɥɸɡɢ ɧɟ ɞɨɥɠɧɵ ɧɚɯɨɞɢɬɶɫɹ ɩɨɡɚɞɢ
ɩɥɢɬɵ ɢɥɢ ɧɚ ɪɚɫɫɬɨɹɧɢɢ ɦɟɧɟɟ 200 ɦɦ ɨɬ ɟɟ ɛɨɤɨɜɵɯ ɫɬɨɪɨɧ.
x
ȼɵɬɹɠɤɢ ɭɫɬɚɧɚɜɥɢɜɚɸɬɫɹ ɫɨɝɥɚɫɧɨ ɢɯ ɢɧɫɬɪɭɤɰɢɹɦ ɩɨ ɭɫɬɚɧɨɜɤɟ.
ȼɵɪɚɜɧɢɜɚɧɢɟ
ɉɥɢɬɚ ɫɧɚɛɠɟɧɚ ɪɟɝɭɥɢɪɭɟɦɵɦɢ
ɧɨɠɤɚɦɢ, ɤɨɬɨɪɵɟ ɫɥɭɠɚɬ ɞɥɹ
ɟɟ ɜɵɪɚɜɧɢɜɚɧɢɹ. ɉɪɢ ɧɟɨɛɯɨɞɢɦɨɫɬɢ, ɧɨɠɤɢ ɜɤɪɭɱɢ ɜɚɸɬɫɹ
ɜ ɨɬɜɟɪɫɬɢɹ ɩɨ ɭɝɥɚɦ ɨɫɧɨɜɚɧɢɹ
ɩɥɢɬɵ (ɫɦ. ɪɢɫ.).
ɉɥɢɬɚ ɤɨɦɩɥɟɤɬɭɟɬɫɹ ɧɚɞɫɬɚɜɧɵɦɢ ɨɩɨɪɚɦɢ*, ɤɨɬɨɪɵɟ ɭɫɬɚɧɚɜɥɢɜɚɸɬɫɹ ɜ ɨɬɜɟɪɫɬɢɹ ɩɨɞ
ɨɫɧɨɜɚɧɢɟɦ ɩɥɢɬɵ.
ɉɨɞɤɥɸɱɟɧɢɟ ɤ ɷɥɟɤɬɪɨɫɟɬɢ
Ɉɫɧɚɫɬɢɬɟ ɩɢɬɚɸɳɢɣ ɤɚɛɟɥɶ ɫɬɚɧɞɚɪɬɧɨɣ ɜɢɥɤɨɣ,
ɫɨɨɬɜɟɬɫɬɜɭɸɳɟɣ ɧɚɝɪɭɡɤɟ, ɭɤɚɡɚɧɧɨɣ ɜ ɬɚɛɥɢɱɤɟ
ɬɟɯɧɢɱɟɫɤɢɯ ɞɚɧɧɵɯ ɨɛɨɪɭɞɨɜɚɧɢɹ.
Ɉɛɨɪɭɞɨɜɚɧɢɟ ɦɨɠɟɬ ɧɚɩɪɹɦɭɸ ɩɨɞɫɨɟɞɢɧɹɬɶɫɹ
ɤ ɫɟɬɢ ɫ ɢɫɩɨɥɶɡɨɜɚɧɢɟɦ ɦɧɨɝɨɥɢɧɟɣɧɨɝɨ ɚɜɬɨɦɚɬɢɱɟɫɤɨɝɨ ɜɵɤɥɸɱɚɬɟɥɹ (ɫɨɨɬɜɟɬɫɬɜɭɸɳɟɝɨ ɬɟɯɧɢɱɟɫɤɢɦ
ɧɨɪɦɚɦ ɢ ɧɚɝɪɭɡɤɟ ɨɛɨɪɭɞɨɜɚɧɢɹ), ɪɚɫɫɬɨɹ ɧɢɟ ɦɟɠɞɭ
ɪɚɡɜɟɞɟɧɧɵɦɢ ɤɨɧɬɚɤɬɚɦɢ ɤɨɬɨɪɨɝɨ ɧɟ ɦɟɧɟɟ 3 ɦɦ,
ɥɢɧɢɹ ɡɚɡɟɦɥɟɧɢɹ ɧɟ ɞɨɥɠɧɚ ɩɪɟɪɵɜɚɬɶɫɹ ɜɵɤɥɸɱɚɬɟɥɟɦ. ɉɢɬɚɸɳɢɣ ɤɚɛɟɥɶ ɫɥɟɞɭɟɬ ɪɚɫɩɨɥɨɠɢɬɶ
ɱɬɨɛɵ ɩɨ ɜɫɟɣ ɞɥɢɧɟ ɨɧ ɧɢɤɨɝɞɚ ɧɟ ɧɚɝɪɟɜɚɥɫɹ ɞɨ
ɬɟɦɩɟɪɚɬɭɪɵ, ɩɪɟɜɵɲɚɸɳɟɣ ɧɚ 50 °ɋ ɬɟɦɩɟɪɚɬɭɪɭ
ɜ ɩɨɦɟɳɟɧɢɢ.
ɉɟɪɟɞ ɩɨɞɫɨɟɞɢɧɟɧɢɟɦ ɩɪɨɜɟɪɶɬɟ, ɱɬɨ:
x Ɉɛɨɪɭɞɨɜɚɧɢɟ ɡɚɡɟɦɥɟɧɨ ɢ ɜɢɥɤɚ ɫɨɨɬɜɟɬɫɬɜɭɟɬ
ɫɬɚɧɞɚɪɬɚɦ.
x Ɋɨɡɟɬɤɚ ɦɨɠɟɬ ɜɵɞɟɪɠɚɬɶ ɦɚɤɫɢɦɚɥɶɧɭɸ ɧɚɝɪɭɡɤɭ
ɨɬ ɭɫɬɚɧɚɜɥɢɜɚɟɦɨɝɨ ɨɛɨɪɭɞɨɜɚɧɢɹ (ɫɦ. ɬɚɛɥɢɱɤɭ
ɬɟɯɧɢɱɟɫɤɢɯ ɞɚɧɧɵɯ ɨɛɨɪɭɞɨɜɚɧɢɹ).
x ɗɥɟɤɬɪɢɱɟɫɤɨɟ ɧɚɩɪɹɠɟɧɢɟ ɫɨɨɬɜɟɬɫɬɜɭɟɬ ɞɢɚɩɚ-
ɡɨɧɭ ɡɧɚɱɟɧɢɣ, ɭɤɚɡɚɧɧɵɯ ɜ
ɞɚɧɧɵɯ ɨɛɨɪɭɞɨɜɚɧɢɹ.
x Ɋɨɡɟɬɤɚ ɩɨɞɯɨɞɢɬ ɤ ɜɢɥɤɟ ɨɛɨɪɭɞɨɜɚɧɢɹ, ɜ ɩɪɨɬɢɜ-
ɧɨɦ ɫɥɭɱɚɟ — ɨɛɪɚɬɢɬɟɫɶ ɤ ɤɜɚɥɢɮɢɰɢɪɨɜɚɧɧɨɦɭ
ɫɩɟɰɢɚɥɢɫɬɭ ɞɥɹ ɡɚɦɟɧɵ ɪɨɡɟɬɤɢ. ɇɟ ɢɫɩɨɥɶɡɭɣɬɟ
ɭɞɥɢɧɢɬɟɥɢ ɢ ɦɧɨɝɨɝɧɟɡɞɨɜɵɟ ɪɨɡɟɬɤɢ.
ɬɚɛɥɢɱɤɟ ɬɟɯɧɢɱɟɫɤɢɯ
ɬɚɤ,
! ɉɨɫɥɟ ɭɫɬɚɧɨɜɤɢ ɨɛɨɪɭɞɨɜɚɧɢɹ ɞɨɥɠɟɧ ɛɵɬɶ ɨɛɟɫɩɟɱɟɧ ɫɜɨɛɨɞɧɵɣ ɞɨɫɬɭɩ ɤ ɩɢɬɚɸɳɟɦɭ ɤɚɛɟɥɸ ɢ ɪɨɡɟɬɤɟ.
! Ʉɚɛɟɥɶ ɧɟ ɞɨɥɠɟɧ ɛɵɬɶ ɩɟɪɟɤɪɭɱɟɧ ɢɥɢ ɩɟɪɟɠɚɬ.
! Ʉɚɛɟɥɶ ɫɥɟɞɭɟɬ ɪɟɝɭɥɹɪɧɨ ɩɪɨɜɟɪɹɬɶ, ɟɝɨ ɡɚɦɟɧɚ
ɞɨɥɠɧɚ ɩɪɨɢɡɜɨɞɢɬɶɫɹ ɬɨɥɶɤɨ ɫɩɟɰɢɚɥɢɫɬɚɦɢ ɫɟɪɜɢɫɧɨɝɨ ɰɟɧɬɪɚ.
ɉɪɨɢɡɜɨɞɢɬɟɥɶ ɧɟ ɧɟɫɟɬ ɨɬɜɟɬɫɬɜɟɧɧɨɫɬɢ
ɜ ɫɥɭɱɚɟ ɧɟɫɨɛɥɸɞɟɧɢɹ ɭɤɚɡɚɧɧɵɯ ɦɟɪ ɛɟɡɨɩɚɫɧɨɫɬɢ.
ɉɨɞɤɥɸɱɟɧɢɟ ɤ ɝɚɡɭ
ɉɨɞɤɥɸɱɟɧɢɟ ɞɚɧɧɨɝɨ ɨɛɨɪɭɞɨɜɚɧɢɹ ɤ ɝɚɡɨɜɨɣ ɫɟɬɢ
ɦɨɠɟɬ ɛɵɬɶ ɜɵɩɨɥɧɟɧɨ ɩɪɢ ɩɨɦɨɳɢ ɝɢɛɤɨɝɨ ɪɟɡɢɧɨɜɨɝɨ ɢɥɢ ɫɬɚɥɶɧɨɝɨ ɲɥɚɧɝɚ, ɫɨɝɥɚɫɧɨ ɞɟɣɫɬɜɭɸɳɢɦ
ɧɨɪɦɚɦ ɩɨɞɤɥɸɱɟɧɢɹ ɢ ɩɨɫɥɟ ɩɪɨɜɟɪɤɢ ɫɨɨɬɜɟɬɫɬɜɢɹ
ɬɢɩɚ ɩɨɞɤɥɸɱɚɟɦɨɝɨ ɝɚɡɚ ɬɨɦɭ, ɧɚ ɤɨɬɨɪɵɣ ɧɚɫɬɪɨɟɧɨ ɨɛɨɪɭɞɨɜɚɧɢɟ (ɫɦ. ɦɚɪɤɢɪɨɜɤɭ ɧɚ ɤɨɪɩɭɫɟ ɨɛɨɪɭɞɨɜɚɧɢɹ): ɜ ɢɧɨɦ ɫɥɭɱɚɟ ɫɥɟɞɭɣɬɟ ɢɧɫɬɪɭɤɰɢɹɦ
§ «ɇɚɫɬɪɨɣɤɚ ɧɚ ɪɚɡɥɢɱɧɵɟ ɬɢɩɵ ɝɚɡɚ». ȿɫɥɢ ɩɥɢɬɚ
ɩɨɞɫɨɟɞɢɧɹɟɬɫɹ ɤ ɛɚɥɥɨɧɭ ɫɨ ɫɠɢɠɟɧɧɵɦ ɝɚɡɨɦ, ɧɚ
ɛɚɥɥɨɧ ɫ ɝɚɡɨɦ ɧɟɨɛɯɨɞɢɦɨ ɭɫɬɚɧɨɜɢɬɶ ɪɟɝɭɥɹɬɨɪ
ɞɚɜɥɟɧɢɹ (ɪɟɞɭɤɬɨɪ), ɨɬɜɟɱɚɸɳɢɣ ɞɟɣɫɬɜɭɸɳɢɦ ɫɬɚɧɞɚɪɬɨɦ ɩɨɞɤɥɸɱɟɧɢɹ ɝɚɡɨɜɨɝɨ ɨɛɨɪɭɞɨɜɚɧɢɹ.
ɑɬɨɛɵ ɨɛɥɟɝɱɢɬɶ ɩɨɞɤɥɸɱɟɧɢɟ, ɩɨɞɜɨɞ ɝɚɡɚ ɦɨɠɟɬ
ɛɵɬɶ ɨɫɭɳɟɫɬɜɥɟɧ ɫ ɨɛɟɢɯ ɫɬɨɪɨɧ ɨɛɨɪɭɞɨɜɚɧɢɹ*:
ɩɨɦɟɧɹɣɬɟ ɩɨɥɨɠɟɧɢɟ ɞɟɪɠɚɬɟɥɹ ɲɥɚɧɝɚ ɢ ɡɚ ɝɥɭɲɤɢ
ɢ ɡɚɦɟɧɢɬɟ ɭɩɥɨɬɧɢɬɟɥɶɧɭɸ ɩɪɨɤɥɚɞɤɭ (ɩɨɫɬɚɜɥɹɟɬɫɹ
ɫ ɨɛɨɪɭɞɨɜɚɧɢɟɦ).
ɍɛɟɞɢɬɟɫɶ, ɱɬɨ ɞɚɜɥɟɧɢɟ ɝɚɡɚ ɫɨɨɬɜɟɬɫɬɜɭɟɬ ɡɧɚɱɟ-
!
ɧɢɹɦ, ɭɤɚɡɚɧɧɵɦ ɜ ɬɚɛɥɢɰɟ «ɏɚɪɚɤɬɟɪɢɫɬɢɤɢ ɝɨɪɟɥɨɤ
ɢ ɠɢɤɥɟɪɨɜ». ɗɬɨ ɨɛɟɫɩɟɱɢɬ ɛɟɡɨɩɚɫɧɭɸ ɪɚɛɨɬɭ ɢ ɞɨɥɝɢɣ ɫɪɨɤ ɫɥɭɠɛɵ ɨɛɨɪɭɞɨɜɚɧɢɹ ɩɪɢ ɷɮɮɟɤɬɢɜɧɨɦ
ɷɧɟɪɝɨɩɨɬɪɟɛɥɟɧɢɢ.
ɉɨɞɤɥɸɱɟɧɢɟ ɝɢɛɤɢɦ ɪɟɡɢɧɨɜɵɦ ɲɥɚɧɝɨɦ
ɉɨɞɫɨɟɞɢɧɢɬɟ ɝɚɡɨɜɵɣ ɲɥɚɧɝ, ɯɚɪɚɤɬɟɪɢɫɬɢɤɢ ɤɨɬɨɪɨɝɨ ɨɬɜɟɱɚɸɬ ɞɟɣɫɬɜɭɸɳɢɦ ɫɬɚɧɞɚɪɬɚɦ. ȼɧɭɬɪɟɧɧɢɣ
ɞɢɚɦɟɬɪ ɲɥɚɧɝɚ ɞɨɥɠɟɧ ɫɨɫɬɚɜɥɹɬɶ: 8 ɦɦ — ɞɥɹ
ɫɠɢɠɟɧɧɨɝɨ ɝɚɡɚ; 13 ɦɦ— ɞɥɹ
ɉɨɫɥɟ ɩɨɞɤɥɸɱɟɧɢɹ ɭɞɨɫɬɨɜɟɪɶɬɟɫɶ, ɱɬɨ ɲɥɚɧɝ:
x
ɩɨ ɜɫɟɣ ɞɥɢɧɟ ɧɟ ɤɚɫɚɟɬɫɹ ɱɚɫɬɟɣ ɩɥɢɬɵ, ɤɨɬɨɪɵɟ
ɦɨɝɭɬ ɧɚɝɪɟɜɚɬɶɫɹ ɞɨ ɬɟɦɩɟɪɚɬɭɪɵ ɜɵɲɟ 50 °ɋ;
x
ɧɟ ɧɚɬɹɧɭɬ, ɧɟ ɩɟɪɟɤɪɭɱɟɧ, ɧɟ ɨɛɪɚɡɭɟɬ ɩɟɬɟɥɶ
ɢ ɢɡɝɢɛɨɜ, ɧɟ ɩɟɪɟɠɚɬ;
x
ɧɟ ɤɚɫɚɟɬɫɹ ɩɨɞɜɢɠɧɵɯ ɨɛɴɟɤɬɨɜ ɢ ɩɪɟɞɦɟɬɨɜ
ɫ ɨɫɬɪɵɦɢ ɭɝɥɚɦɢ;
ɩɨ ɜɫɟɣ ɞɥɢɧɟ ɞɨɫɬɭɩɟɧ ɞɥɹ ɨɫɦɨɬɪɚ ɢ ɤɨɧɬɪɨɥɹ
x
ɟɝɨ ɫɨɫɬɨɹɧɢɹ;
x
ɞɥɢɧɨɣ ɦɟɧɟɟ 1500 ɦɦ;
x
ɩɪɨɱɧɨ ɡɚɮɢɤɫɢɪɨɜɚɧ ɧɚ ɦɟɫɬɟ ɫ ɨɛɨɢɯ ɤɨɧɰɨɜ ɡɚɠɢɦɚɦɢ, ɫɨɨɬɜɟɬɫɬɜɭɸɳɢɦɢ ɧɨɪɦɚɦ ɩɨɞɤɥɸɱɟɧɢɹ
ɝɚɡɨɜɨɝɨ ɨɛɨɪɭɞɨɜɚɧɢɹ.
ɦɟɬɚɧɚ
* Ɍɨɥɶɤɨ ɞɥɹ ɧɟɤɨɬɨɪɵɯ ɦɨɞɢɮɢɤɚɰɢɣ ɦɨɞɟɥɟɣ.
5
Page 6
Точка соединения
Изолирующая
заглушка
Крепление
шланга
Точка соединения
Крепление
шланга
ГОРЯЧАЯ ПОВЕРХНОСТЬ
Изолирующая
заглушка
! ȿɫɥɢ ɯɨɬɹ ɛɵ ɨɞɧɨ ɢɡ ɩɪɢɜɟɞɟɧɧɵɯ ɜɵɲɟ ɬɪɟɛɨɜɚɧɢɣ
ɧɟ ɭɞɚɟɬɫɹ ɜɵɩɨɥɧɢɬɶ, ɢɥɢ, ɟɫɥɢ ɩɥɢɬɚ ɞɨɥɠɧɚ ɭɫɬɚɧɚɜɥɢɜɚɬɶɫɹ ɩɨ ɩɪɚɜɢɥɚɦ, ɨɬɧɨɫɹɳɢɦɫɹ ɤ ɛɵɬɨɜɵɦ
ɩɪɢɛɨɪɚɦ ɤɥɚɫɫɚ 2 ɩɨɞɤɥɚɫɫɚ 1 (ɭɫɬɚɧɨɜɤɚ ɦɟɠɞɭ ɞɜɭɦɹ ɲɤɚɮɚɦɢ), ɬɨ ɫɨɝɥɚɫɧɨ ɞɟɣɫɬɜɭɸɳɢɦ ɫɬɚɧɞɚɪɬɚɦ
ɞɥɹ ɩɨɞɤɥɸɱɟɧɢɹ ɝɚɡɚ ɞɨɥɠɧɵ ɢɫɩɨɥɶɡɨɜɚɬɶɫɹ ɬɨɥɶɤɨ
ɝɢɛɤɢɟ ɦɟɬɚɥɥɢɡɢɪɨɜɚɧɧɵɟ ɬɪɭɛɵ.
ɉɨɞɫɨɟɞɢɧɟɧɢɟ ɝɢɛɤɨɣ ɛɟɫɲɨɜɧɨɣ
ɫɬɚɥɶɧɨɣ ɬɪɭɛɵ ɤ ɪɟɡɶɛɨɜɨɦɭ
ɫɨɟɞɢɧɟɧɢɸ
Ɍɪɭɛɚ ɢ ɩɪɨɤɥɚɞɤɢ ɞɨɥɠɧɵ ɨɬɜɟɱɚɬɶ ɞɟɣɫɬɜɭɸɳɢɦ
ɫɬɚɧɞɚɪɬɚɦ.
ɍɞɚɥɢɬɟ ɞɟɪɠɚɬɟɥɶ ɲɥɚɧɝɚ ɫ ɨɛɨɪɭɞɨɜɚɧɢɹ. Ƚɢɛɤɚɹ
ɫɬɚɥɶɧɚɹ ɬɪɭɛɚ ɩɪɢɫɨɟɞɢɧɹɟɬɫɹ ɤ ɬɨɦɭ ɠɟ ɜɵɜɨɞɭ
ɫ ɧɚɪɭɠɧɨɣ ɪɟɡɶɛɨɣ 1/2 ɞɸɣɦɚ.
! Ɇɚɤɫɢɦɚɥɶɧɚɹ ɞɥɢɧɚ ɬɪɭɛɵ ɧɟ ɞɨɥɠɧɚ ɛɵɬɶ ɛɨɥɟɟ
2 ɦ. ɉɨɫɥɟ ɩɨɞɤɥɸɱɟɧɢɹ ɩɪɨɜɟɪɶɬɟ, ɱɬɨ ɬɪɭɛɚ ɧɟ ɩɪɢ-
ɠɚɬɚ ɢ ɧɟ ɫɨɩɪɢɤɚɫɚɟɬɫɹ ɫ ɩɨɞɜɢɠɧɵɦɢ ɞɟɬɚɥɹɦɢ.
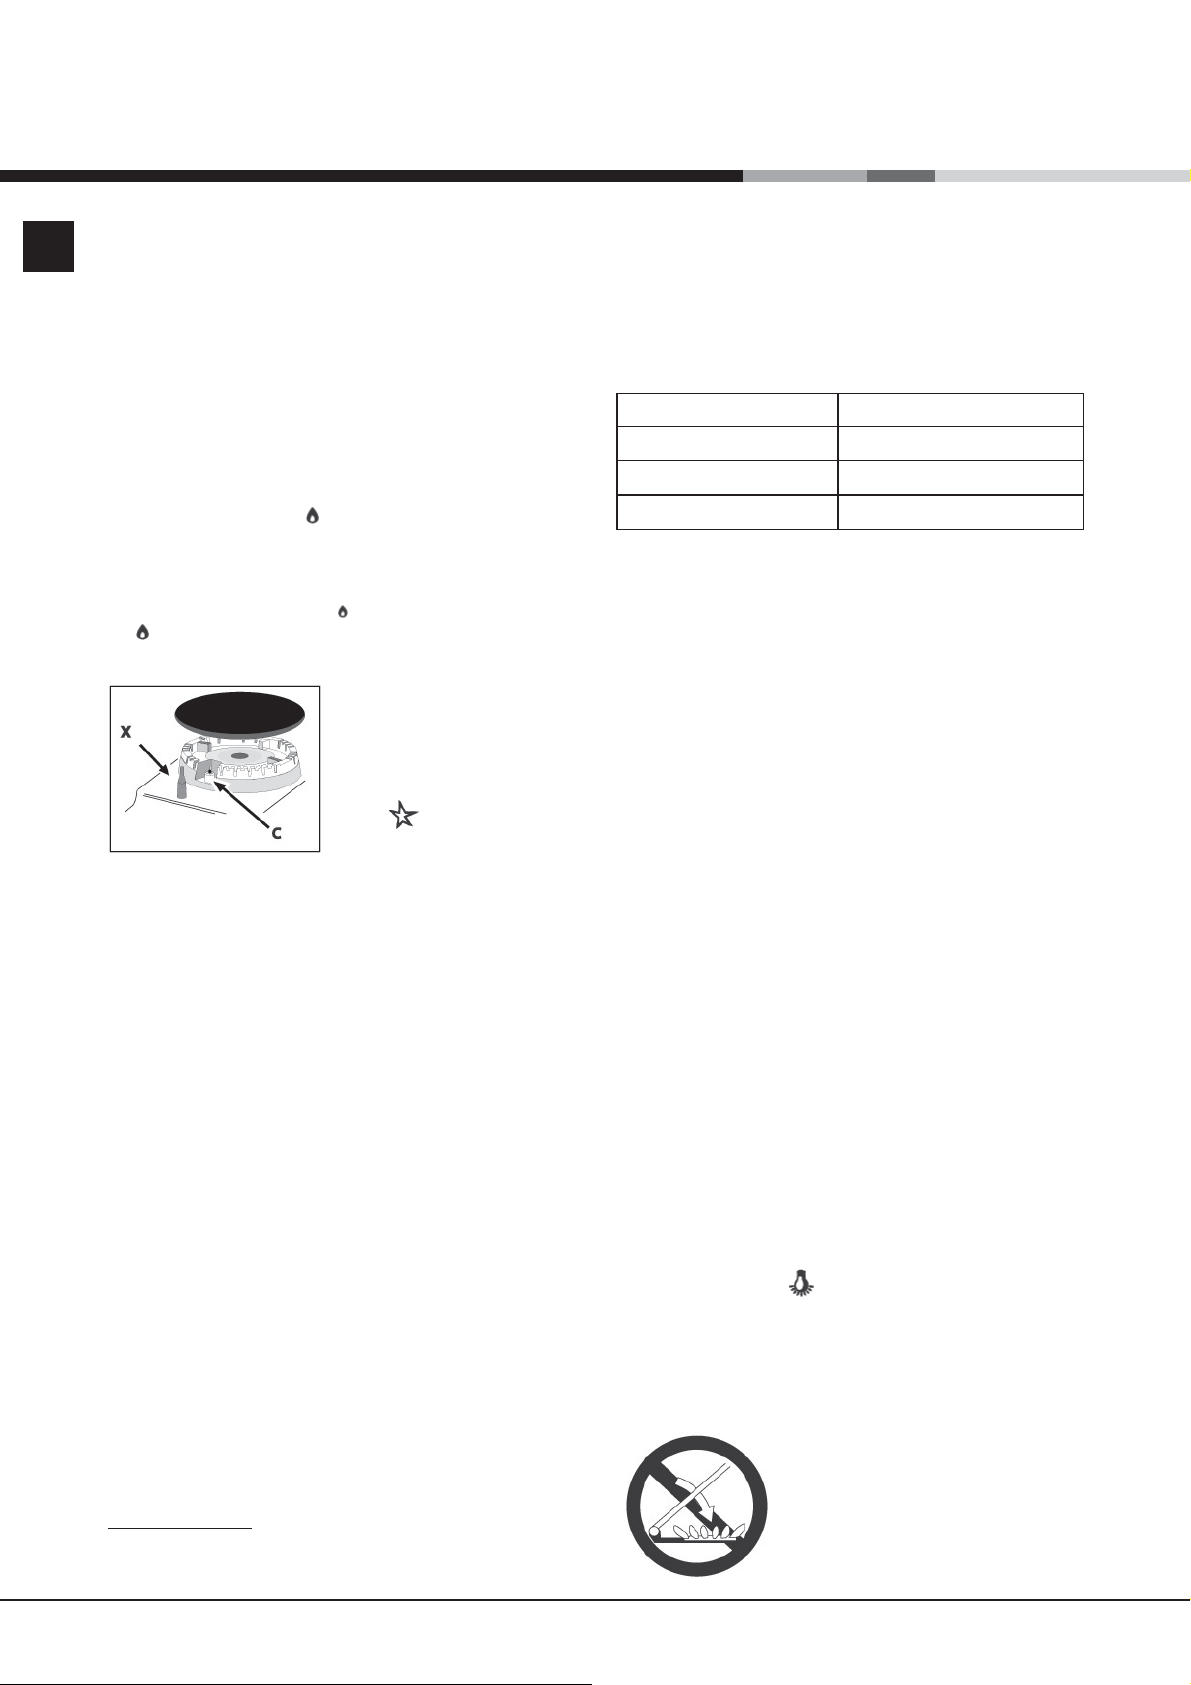
Ɋɟɝɭɥɢɪɨɜɤɚ ɦɢɧɢɦɚɥɶɧɨɝɨ ɩɥɚɦɟɧɢ
ɤɨɧɮɨɪɨɤ ɧɚ ɪɚɛɨɱɟɣ ɩɨɜɟɪɯɧɨɫɬɢ
1. ɉɨɜɟɪɧɢɬɟ ɪɭɤɨɹɬɤɭ ɤ ɦɢɧɢɦɚɥɶɧɨɦɭ ɩɨɥɨɠɟɧɢɸ
ɩɥɚɦɟɧɢ.
2. ɋɧɢɦɢɬɟ ɪɭɤɨɹɬɤɭ ɢ ɜɪɚɳɚɣɬɟ ɟɟ ɪɟɝɭɥɢɪɨɜɨɱɧɵɣ
ɜɢɧɬ (ɪɚɫɩɨɥɨɠɟɧ ɫɛɨɤɭ ɢɥɢ ɜɧɭɬɪɢ ɫɬɟɪɠɧɹ ɪɟɝɭɥɹɬɨɪɚ), ɩɨɤɚ ɩɥɚɦɹ ɧɟ ɫɬɚɧɟɬ ɦɚɥɵɦ, ɧɨ ɭɫɬɨɣɱɢɜɵɦ.
! ɉɪɢ ɢɫɩɨɥɶɡɨɜɚɧɢɢ ɫɠɢɠɟɧɧɨɝɨ ɝɚɡɚ ɪɟɝɭɥɢɪɨɜɨɱɧɵɣ ɜɢɧɬ ɞɨɥɠɟɧ ɛɵɬɶ ɡɚɤɪɭɱɟɧ ɩɨ ɱɚɫɨɜɨɣ ɫɬɪɟɥɤɟ
ɩɨɥɧɨɫɬɶɸ.
3. ɉɪɢ ɝɨɪɹɳɟɦ ɩɥɚɦɟɧɢ ɧɟɫɤɨɥɶɤɨ
ɪɚɡ ɛɵɫɬɪɨ ɩɨ-
ɜɟɪɧɢɬɟ ɪɭɤɨɹɬɤɭ ɢɡ ɦɢɧɢɦɚɥɶɧɨɝɨ ɜ ɦɚɤɫɢɦɚɥɶɧɨɟ ɩɨɥɨɠɟɧɢɟ ɢ ɧɚɨɛɨɪɨɬ, ɩɪɨɜɟɪɹɹ, ɱɬɨ ɩɥɚɦɹ
ɧɟ ɝɚɫɧɟɬ.
! Ⱦɥɹ ɤɨɧɮɨɪɨɤ ɪɚɛɨɱɟɣ ɩɨɜɟɪɯɧɨɫɬɢ ɧɟ ɬɪɟɛɭɟɬɫɹ
ɪɟɝɭɥɢɪɨɜɤɚ ɩɨɫɬɭɩɥɟɧɢɹ ɜɨɡɞɭɯɚ.
RS
Ʉɨɧɬɪɨɥɶ ɩɥɨɬɧɨɫɬɢ
ɩɨɞɫɨɟɞɢɧɟɧɢɹ
ȼɵɩɨɥɧɢɜ ɩɨɞɤɥɸɱɟɧɢɟ ɤ ɝɚɡɭ, ɩɪɨɜɟɪɶɬɟ ɧɚɥɢɱɢɟ
ɟɝɨ ɭɬɟɱɟɤ, ɢɫɩɨɥɶɡɭɹ ɦɵɥɶɧɵɣ ɪɚɫɬɜɨɪ. ɇɢɤɨɝɞɚ ɧɟ
ɢɫɩɨɥɶɡɭɣɬɟ ɞɥɹ ɩɪɨɜɟɪɤɢ ɩɥɚɦɹ.
ɇɚɫɬɪɨɣɤɚ ɧɚ ɪɚɡɥɢɱɧɵɟ ɬɢɩɵ ɝɚɡɚ
ȼɨɡɦɨɠɧɨ ɧɚɫɬɪɨɢɬɶ ɨɛɨɪɭɞɨɜɚɧɢɟ ɧɚ ɞɪɭɝɨɣ ɬɢɩ ɝɚɡɚ,
ɨɬɥɢɱɧɵɣ ɨɬ ɡɚɜɨɞ ɫɤɨɣ ɧɚɫɬɪɨɣɤɢ (ɫɦ. ɦɚɪɤɢɪɨɜɤɭ ɧɚ
ɤɨɪɩɭɫɟ ɨɛɨɪɭɞɨɜɚɧɢɹ).
ɇɚɫɬɪɨɣɤɚ ɪɚɛɨɱɟɣ ɩɨɜɟɪɯɧɨɫɬɢ
Ɂɚɦɟɧɚ ɠɢɤɥɟɪɨɜ ɝɨɪɟɥɨɤ ɪɚɛɨɱɟɣ ɩɨɜɟɪɯɧɨɫɬɢ:
1) ɫɧɢɦɢɬɟ ɩɨɞɞɟɪɠɢɜɚɸɳɢɟ
ɪɟɲɟɬɤɢ ɞɥɹ ɩɨɫɭɞɵ ɢ ɜɵɧɶɬɟ ɝɨɪɟɥɤɢ ɢɡ ɝɧɟɡɞ;
2) ɜɵɜɟɪɧɢɬɟ ɠɢɤɥɟɪɵ 7 ɦɦ
ɬɨɪɰɟɜɵɦ ɤɥɸɱɨɦ (ɫɦ. ɪɢɫ.)
ɢ ɡɚɦɟɧɢɬɟ ɢɯ ɩɨɞɯɨɞɹɳɢɦɢ
ɞɥɹ ɧɨɜɨɝɨ ɬɢɩɚ ɝɚɡɚ (ɫɦ.
ɬɚɛɥ. «ɏɚɪɚɤɬɟɪɢɫɬɢɤɢ
ɝɨɪɟɥɨɤ ɢ ɠɢɤɥɟɪɨɜ»);
3) ɫɨɛɟɪɢɬɟ ɜɫɟ ɤɨɦɩɨɧɟɧɬɵ, ɜɵɩɨɥɧɹɹ ɞɟɣɫɬɜɢɹ
ɜ ɨɛɪɚɬɧɨɦ ɩɨɪɹɞɤɟ.
Ȼɟɡɨɩɚɫɧɨɫɬɶ ɰɟɩɢ
! ȼɨ ɢɡɛɟɠɚɧɢɟ
ɫɥɭɱɚɣɧɨɝɨ
ɨɩɪɨɤɢɞɵɜɚɧɢɹ
ɢɡɞɟɥɢɹ,
ɧɚɩɪɢɦɟɪ,
ɟɫɥɢ ɪɟɛɟɧɨɤ
ɡɚɥɟɡɟɬ ɧɚ
ɞɜɟɪɰɭ ɞɭɯɨɜɤɢ,
ɇȿɈȻɏɈȾɂɆɈ
ɭɫɬɚɧɨɜɢɬɶ
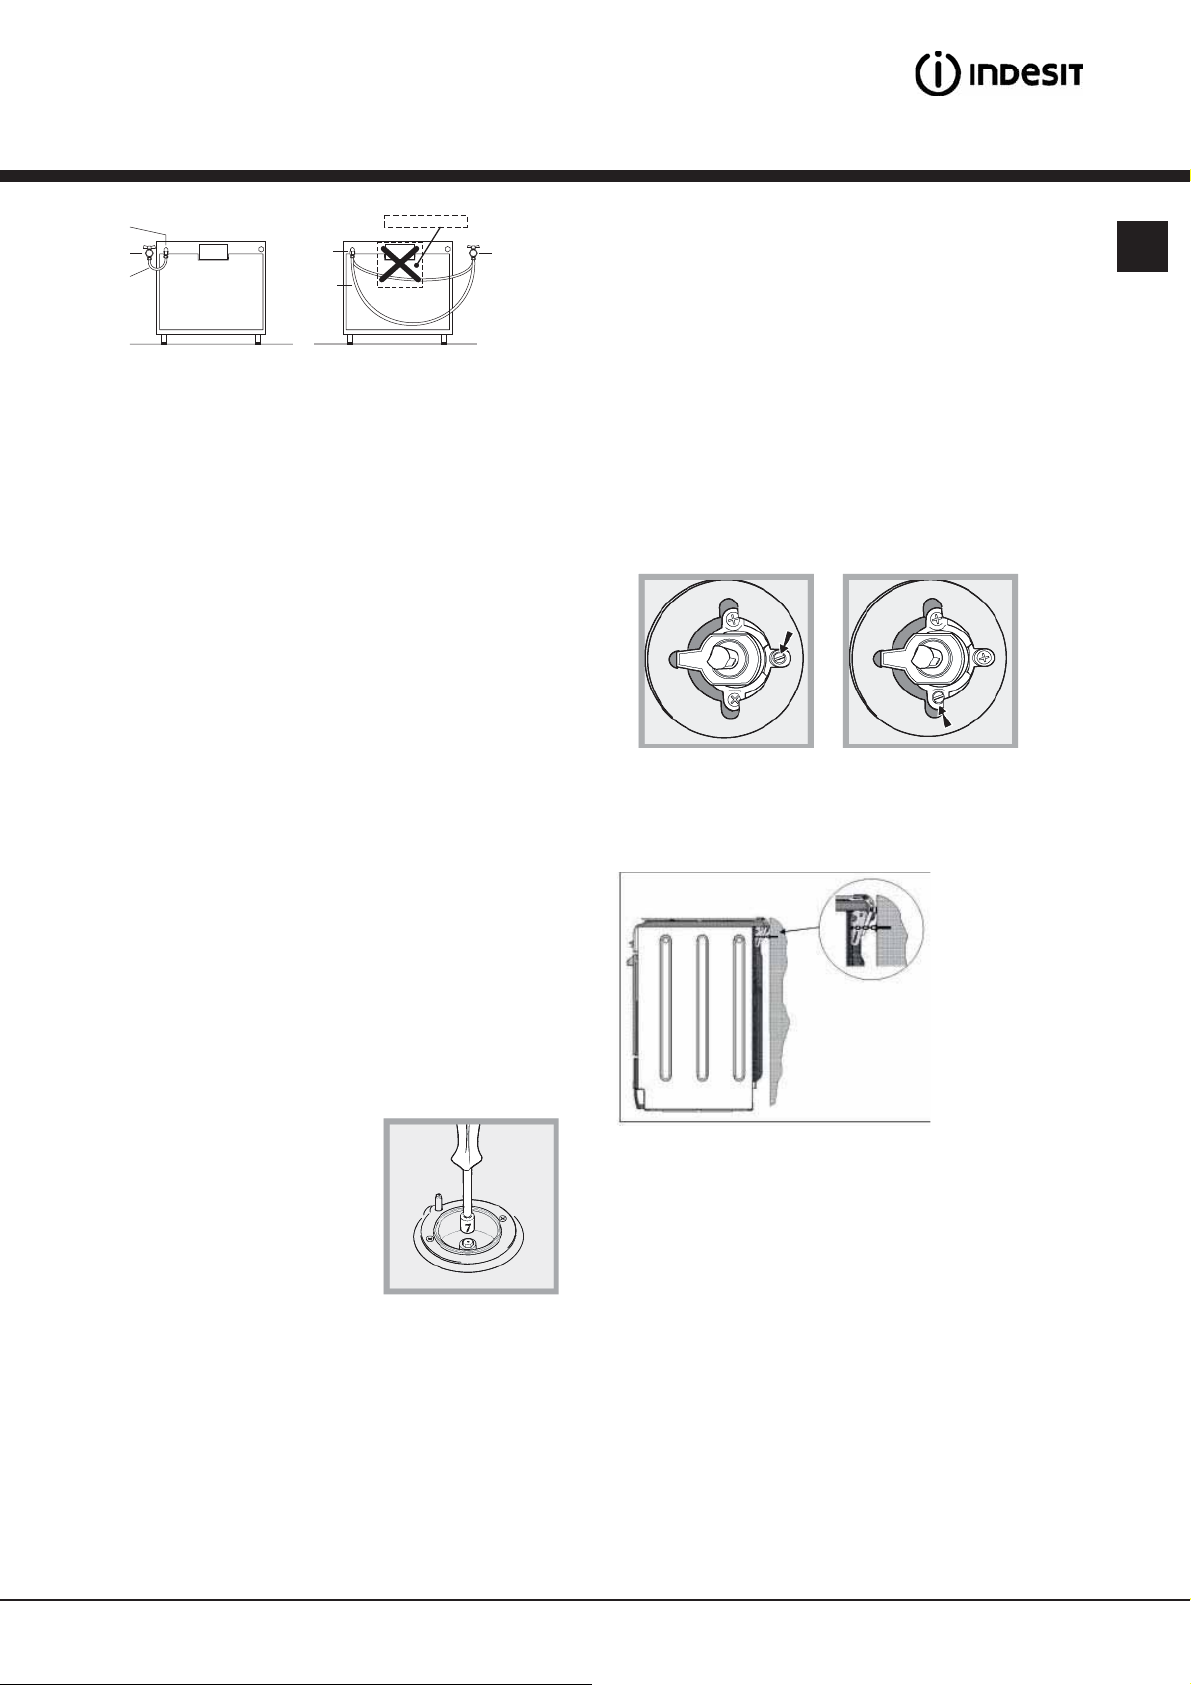
ɩɪɢɥɚɝɚɸɳɭɸɫɹ ɩɪɟɞɨɯɪɚɧɢɬɟɥɶɧɭɸ ɰɟɩɶ.
Ⱦɭɯɨɜɨɣ ɳɤɚɮ ɭɤɨɦɩɥɟɤɬɨɜɚɧ ɩɪɟɞɨɯɪɚɧɢɬɟɥɶɧɨɣ
ɰɟɩɶɸ, ɤɨɬɨɪɚɹ ɞɨɥɠɧɚ ɛɵɬɶ ɩɪɢɤɪɟɩɥɟɧɚ
ɜɢɧɬɨɦ (ɧɟ ɩɪɢɥɚɝɚɟɬɫɹ ɤ ɩɟɱɢ) ɤ ɫɬɟɧɟ ɫɡɚɞɢ
ɢɡɞɟɥɢɹ ɧɚ ɬɨɣ ɠɟ ɜɵɫɨɬɟ, ɧɚ ɤɨɬɨɪɨɣ ɰɟɩɶ
ɤɪɟɩɢɬɫɹ ɤ
ɢɡɞɟɥɢɸ. ȼɵɛɟɪɢɬɟ ɜɢɧɬ ɢ ɜɢɧɬɨɜɨɣ ɚɧɤɟɪɧɵɣ
ɛɨɥɬ, ɫɨɨɬɜɟɬɫɬɜɭɸɳɢɟ ɬɢɩɭ ɦɚɬɟɪɢɚɥɚ ɫɬɟɧɵ
ɫɡɚɞɢ ɢɡɞɟɥɢɹ. ȿɫɥɢ ɝɨɥɨɜɤɚ ɜɢɧɬɚ ɢɦɟɟɬ
ɞɢɚɦɟɬɪ ɦɟɧɶɲɟ 9 ɦɦ, ɧɟɨɛɯɨɞɢɦɨ ɢɫɩɨɥɶɡɨɜɚɬɶ
ɲɚɣɛɭ. ɐɟɦɟɧɬɧɚɹ ɫɬɟɧɚ ɬɪɟɛɭɟɬ ɜɢɧɬ ɞɢɚɦɟɬɪɨɦ
ɧɟ ɦɟɧɟɟ 8 ɦɦ ɢ 60 ɦɦ ɞɥɢɧɨɣ.
ɉɪɨɜɟɪɶɬɟ, ɱɬɨɛɵ ɰɟɩɶ ɛɵɥɚ ɩɪɢɤɪɟɩɥɟɧɚ ɤ
ɡɚɞɧɟɣ ɫɬɟɧɤɟ ɞɭɯɨɜɨɝɨ ɲɤɚɮɚ ɢ ɤ ɫɬɟɧɟ, ɤɚɤ
ɩɨɤɚɡɚɧɨ ɧɚ ɫɯɟɦɟ, ɬɚɤɢɦ ɨɛɪɚɡɨɦ, ɱɬɨɛɵ ɩɨɫɥɟ
ɦɨɧɬɚɠɚ ɨɧɚ ɛɵɥɚ ɧɚɬɹɧɭɬɚ ɢ ɩɚɪɚɥɥɟɥɶɧɚ ɩɨɥɭ.
6
Page 7
ɌȿɏɇɂɑȿɋɄɂȿ ɏȺɊȺɄɌȿɊɂɋɌɂɄɂ
RS
SSS
KNJ1G17A/RU
ɏɚɪɚɤɬɟɪɢɫɬɢɤɢ ɝɨɪɟɥɨɤ ɢ ɠɢɤɥɟɪɨɜ
Ƚɨɪɟɥɤɢ
Ȼɵɫɬɪɚɹ (ɛɨɥɶɲɚɹ) (R) 100 3,00 0,70 41 86 218 214 116 286 143 286
ɉɨɥɭɛɵɫɬɪɚɹ (ɫɪɟɞɧɹɹ) (S) 75 1,90 0,40 30 70 138 136 103 181 118 181
ȼɫɩɨɦɨɝɚɬɟɥɶɧɚɹ
(ɦɚɥɟɧɶɤɚɹ) (A)
Ⱦɚɜɥɟɧɢɟ
* ɋɭɯɨɣ ɝɚɡ ɩɪɢ 15 °ɋ ɢ ɞɚɜɥɟɧɢɢ 1013 ɦɛɚɪ
** ɉɪɨɩɚɧ P.C.S. = 50,37 MȾɠ/ɤɝ
* Ɍɨɥɶɤɨ ɞɥɹ ɦɨɞɟɥɟɣ ɫɨ ɫɬɟɤɥɹɧɧɨɣ ɤɪɵɲɤɨɣ.
Ⱦɢɚɦɟɬɪ,
ɜɵɫɨɬɚ 34 ɫɦ;
Ɋɚɡɦɟɪɵ ɞɭɯɨɜɤɢ
ɲɢɪɢɧɚ 38 ɫɦ;
ɝɥɭɛɢɧɚ 39 ɫɦ
Ɉɛɴɟɦ 50 ɥ
ȼɧɭɬɪɟɧɧɢɟ ɪɚɡɦɟɪɵ
ɨɬɞɟɥɟɧɢɹ
ɩɨɞ ɞɭɯɨɜɤɨɣ
ɗɥɟɤɬɪɢɱɟɫɤɢɟ
ɩɚɪɚɦɟɬɪɵ
ɜɵɫɨɬɚ 23 ɫɦ;
ɲɢɪɢɧɚ 42 ɫɦ;
ɝɥɭɛɢɧɚ 44 ɫɦ
ɫɦ. ɬɚɛɥɢɱɤɭ ɬɟɯ. ɯɚɪɚɤɬɟɪɢɫɬɢɤ ɧɚ ɨɛɨɪɭɞɨɜɚɧɢɢ
ɦɨɝɭɬ ɛɵɬɶ ɚɞɚɩɬɢɪɨɜɚɧɵ
Ƚɚɡɨɜɵɟ ɝɨɪɟɥɤɢ
ɞɥɹ ɥɸɛɨɝɨ ɬɢɩɚ ɝɚɡɚ, ɭɤɚɡɚɧɧɨɝɨ ɜ ɬɚɛɥɢɱɤɟ ɬɟɯ. ɯɚɪɚɤɬɟɪɢɫɬɢɤ
ɗɥɟɤɬɪɢɱɟɫɤɚɹ
ɤɨɧɮɨɪɤɚ
Ɉɛɵɱɧɚɹ, Ø 145 ɦɦ: 1500 ȼɬ
Ⱦɢɪɟɤɬɢɜɚ ȿɗɋ 2002/40/ȿɋ
ɞɥɹ ɷɥɟɤɬɪɨɞɭɯɨɜɨɤ.
ɋɬɚɧɞɚɪɬ EN 50304
ɗɧɟɪɝɨɩɨɬɪɟɛɥɟɧɢɟ
(ɦɚɪɤɢɪɨɜɤɚ)
Ɂɚɹɜɥɟɧɧɨɟ ɷɧɟɪɝɨɩɨɬɪɟɛɥɟɧɢɟ ɞɥɹ ɤɥɚɫɫɚ ɟɫɬɟɫɬɜɟɧɧɨɣ ɤɨɧɜɟɤɰɢɢ – ɪɟɠɢɦ
ɧɚɝɪɟɜɚ:
ɋɬɚɬɢɱɟɫɤɚɹ
ɞɭɯɨɜɤɚ
Ⱦɢɪɟɤɬɢɜɚ ȿɋ 2006/95/ȿɋ
ɨɬ 12.12.06 («ɇɢɡɤɨɟ ɧɚɩɪɹɠɟɧɢɟ») ɢ ɩɨɫɥɟɞɭɸɳɢɟ
ɦɨɞɢɮɢɤɚɰɢɢ;
2004/108/EC ɨɬ 15.12.04
(«ɗɥɟɤɬɪɨɦɚɝɧɢɬɧɚɹ ɫɨɜɦɟɫ-
ɬɢɦɨɫɬɶ» ɢ ɩɨɫɥɟɞɭɸɳɢɟ
ɦɨɞɢɮɢɤɚɰɢɢ;
145
2009/142/EC ɨɬ 30.11.09
(«Ƚɚɡ») ɢ ɩɨɫɥɟɞɭɸɳɢɟ
ɦɨɞɢɮɢɤɚɰɢɢ;
93/68/EEC ɨɬ 22.07.93 ɢ ɩɨ-
ɫɥɟɞɭɸɳɢɟ ɦɨɞɢɮɢɤɚɰɢɢ;
2002/96/EC;
1275/2008 (ɪɟɠɢɦ ɨɠɢɞɚɧɢɹ
SSS
KN1M117SA/RU
ɉɅɂɌɕ ɇɈɆɂɇȺɅɖɇȺə ɟɫɬɶ ɫ ɜɧɭɬɪɟɧɧɟɣ ɫɬɨɪɨɧɵ
Stand-by / ȼɵɤɥ.).
ɨɬɤɢɞɧɨɣ ɤɪɵɲɤɢ ɢɥɢ ɧɚ ɥɟɜɨɣ ɜɧɭɬɪɟɧɧɟɣ ɫɬɟɧɤɟ
ɹɳɢɤɚ ɞɥɹ ɪɚɡɨɝɪɟɜɚɧɢɹ ɩɢɳɢ.
ɋɠɢɠɟɧɧɵɣ ɝɚɡ ɉɪɢɪɨɞɧɵɣ ɝɚɡ
Ɇɨɳɧɨɫɬɶ
ɧɚɝɪɟɜɚ,
ɦɦ
55 1,00 0,40 30 50 73 71 79 95 80 95
ɤȼɬ (p.c.s.*)
ɧɨɦɢɧ. ɭɦɟɧɶɲ ɦɦ ɦɦ
ɇɨɦɢɧɚɥɶɧɨɟ (ɦɛɚɪ)
Ɇɢɧɢɦɚɥɶɧɨɟ (ɦɛɚɪ)
Ɇɚɤɫɢɦɚɥɶɧɨɟ (ɦɛɚɪ)
ɨɬɜɟɪɫɬɢɟ
1/100
*** Ȼɭɬɚɧ P.C.S. = 49,47 MȾɠ/ɤɝ
ɉɪɢɪɨɞɧɵɣ ɝɚɡ P.C.S. = 37,78 MȾɠ/ɦ
ɠɢɤɥɟɪ
1/100
ɩɨɬɨɤ*
ɝ/ɱ
*** **
28-30
20
35
ɠɢɤɥɟɪ
1/100
37
25
45
3
ɩɨɬɨɤ*
ɦɦ ɦɦ
20
17
25
ɥ/ɱ
ɠɢɤɥɟɪ
1/100
ɩɨɬɨɤ*
13
6,5
18
ɥ/ɱ
7
Page 8
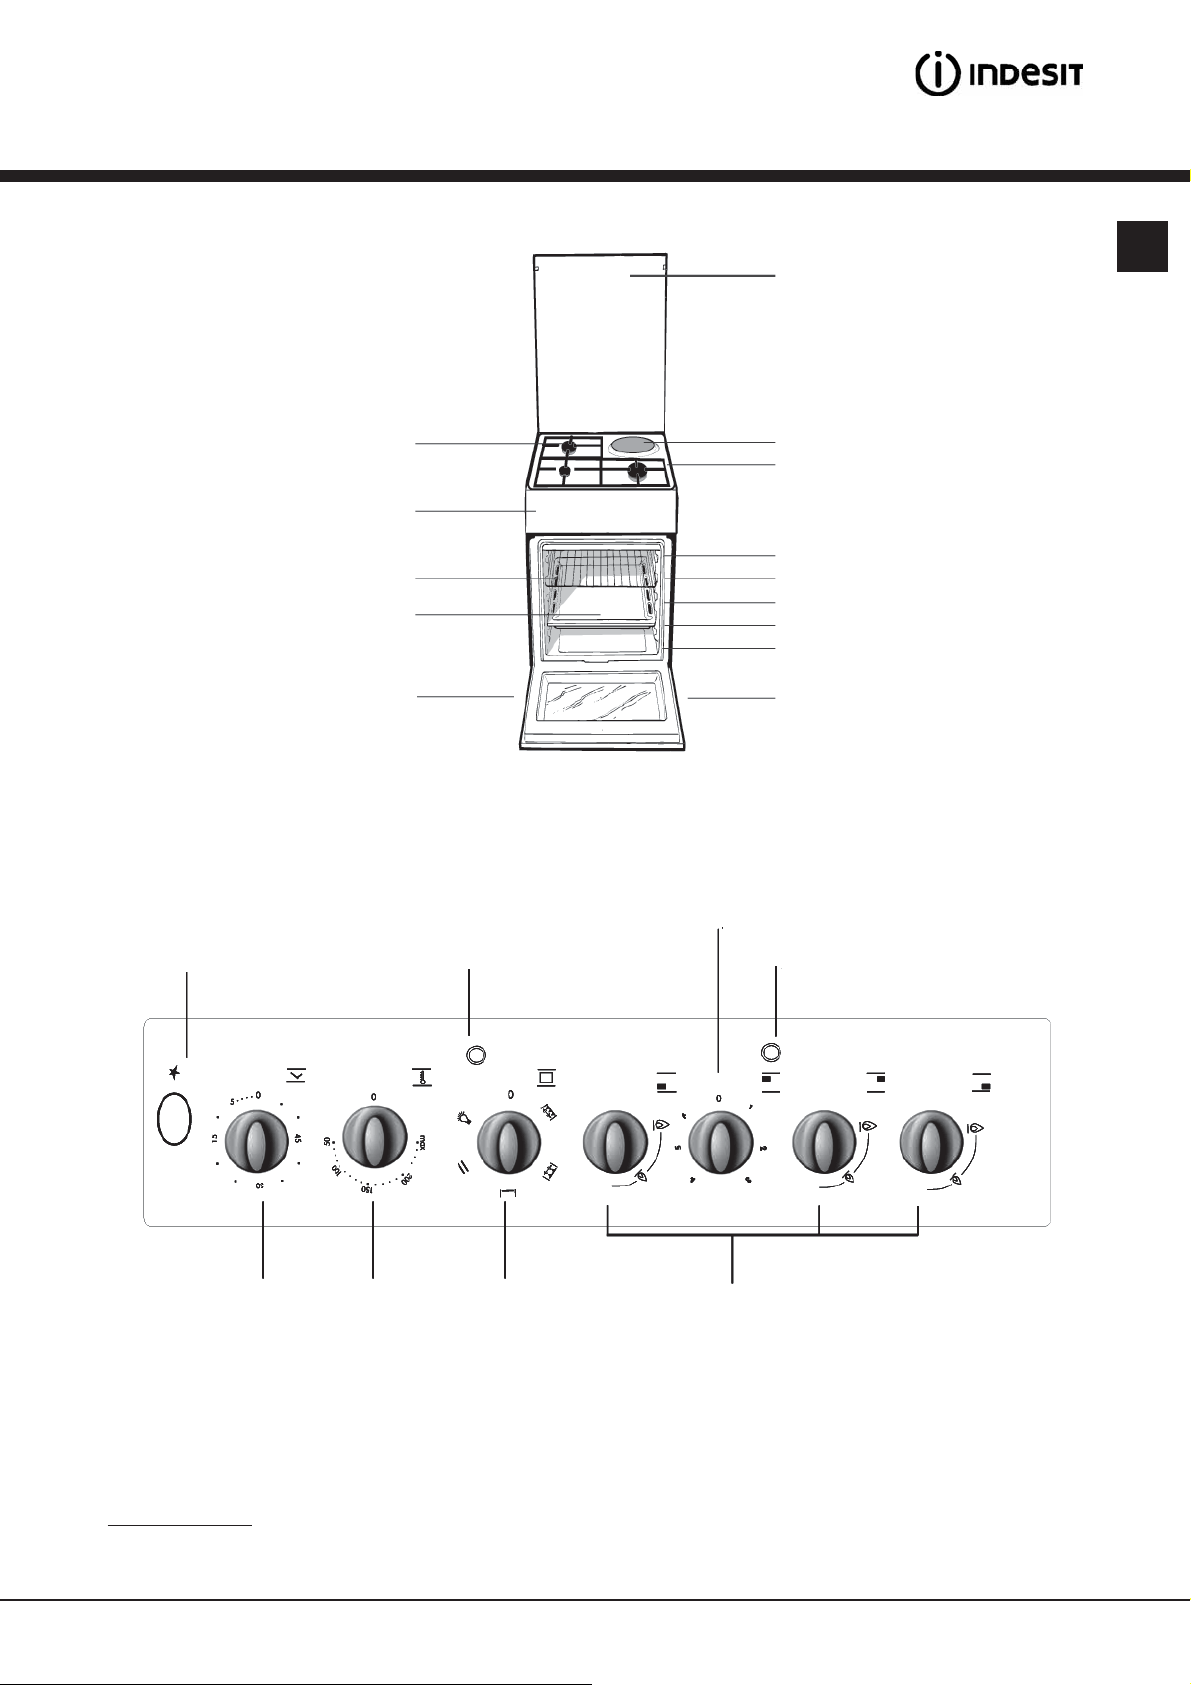
Ɉɩɢɫɚɧɢɟ ɨɛɨɪɭɞɨɜɚɧɢɹ
ȼɧɟɲɧɢɣ ɜɢɞ
ɗɥɟɤɬɪɢɱɟɫɤɢɟ ɤɨɧɮɨɪɤɢ
ɉɚɧɟɥɶ ɭɩɪɚɜɥɟɧɢɹ
ɉɪɨɬɢɜɟɧɶ (ɩɨɞɞɨɧ)
Ɋɟɝɭɥɢɪɭɟɦɵɟ ɧɨɠɤɢ
Ɋɟɲɟɬɤɚ ɞɭɯɨɜɤɢ
RS
ɋɬɟɤɥɹɧɧɚɹ ɤɪɵɲɤɚ
Ɋɚɛɨɱɚɹ ɩɨɜɟɪɯɧɨɫɬɶ ɩɥɢɬɵ
ɉɨɡɢɰɢɢ (ɭɪɨɜɧɢ ɞɭɯɨɜɤɢ)
ɇɚɩɪɚɜɥɹɸɳɢɟ ɞɥɹ ɪɟɲɟɬɤɢ / ɩɪɨɬɢɜɧɹ
(ɩɨɞɞɨɧɚ)
5
4
3
2
1
Ɋɟɝɭɥɢɪɭɟɦɵɟ ɧɨɠɤɢ
ɉɚɧɟɥɶ ɭɩɪɚɜɥɟɧɢɹ
Ʉɧɨɩɤɚ ɷɥɟɤɬɪɨɧɧɨɝɨ
ɡɚɠɢɝɚɧɢɹ* ɤɨɧɮɨɪɨɤ
ɪɚɛɨɱɟɣ ɩɨɜɟɪɯɧɨɫɬɢ
Ɋɭɤɨɹɬɤɚ
ɬɚɣɦɟɪɚ*
Ɋɭɤɨɹɬɤɚ
ɬɟɪɦɨɫɬɚɬɚ
ɂɧɞɢɤɚɬɨɪ
ɬɟɪɦɨɫɬɚɬɚ
Ɋɭɤɨɹɬɤɚ
ɫɟɥɟɤɬɨɪɚ
Ɋɭɤɨɹɬɤɚ ɭɩɪɚɜɥɟɧɢɹ
ɷɥɟɤɬɪɨɤɨɧɮɨɪɤɨɣ*
ɂɧɞɢɤɚɬɨɪ
ɷɥɟɤɬɪɨɤɨɧɮɨɪɤɢ*
Ɋɭɤɨɹɬɤɚ ɭɩɪɚɜɥɟɧɢɹ
ɝɚɡɨɜɵɦɢ ɤɨɧɮɨɪɤɚɦɢ
* Ɍɨɥɶɤɨ ɞɥɹ ɧɟɤɨɬɨɪɵɯ ɦɨɞɢɮɢɤɚɰɢɣ ɦɨɞɟɥɟɣ.
8
Page 9
ȼɤɥɸɱɟɧɢɟ ɢ ɢɫɩɨɥɶɡɨɜɚɧɢɟ
RS
ɂɫɩɨɥɶɡɨɜɚɧɢɟ ɪɚɛɨɱɟɣ ɩɨɜɟɪɯɧɨɫɬɢ
Ɂɚɠɢɝɚɧɢɟ ɝɚɡɨɜɵɯ ɝɨɪɟɥɨɤ
ȼɨɤɪɭɝ ɤɚɠɞɨɣ ɪɭɤɨɹɬɤɢ ɭɩɪɚɜɥɟɧɢɹ ɝɨɪɟɥɤɨɣ ɭɤɚɡɚɧɵ
ɫɢɦɜɨɥɵ, ɨɛɨɡɧɚɱɚɸɳɢɟ ɫɢɥɭ ɩɥɚɦɟɧɢ ɫɨɨɬɜɟɬɫɬɜɭɸɳɟɣ ɝɨɪɟɥɤɢ.
ɑɬɨɛɵ ɡɚɠɟɱɶ ɨɞɧɭ ɢɡ ɝɨɪɟɥɨɤ ɧɚ ɪɚɛɨɱɟɣ ɩɨɜɟɪɯɧɨɫɬɢ ɩɥɢɬɵ:
1. ɉɨɞɧɟɫɢɬɟ ɡɚɠɠɟɧɧɭɸ ɫɩɢɱɤɭ ɢɥɢ ɡɚɠɢɝɚɥɤɭ
ɤ ɝɨɪɟɥɤɟ.
2. ɇɚɠɦɢɬɟ ɪɭɤɨɹɬɤɭ ɝɨɪɟɥɤɢ, ɩɨɜɟɪɧɢɬɟ ɟɟ ɩɪɨɬɢɜ
ɱɚɫɨɜɨɣ ɫɬɪɟɥɤɢ ɢ ɭɫɬɚɧɨɜɢɬɟ ɜ ɩɨɡɢɰɢɸ ɦɚɤɫɢɦɚɥɶɧɨɝɨ ɩɥɚɦɟɧɢ
3. Ɉɬɪɟɝɭɥɢɪɭɣɬɟ ɢɧɬɟɧɫɢɜɧɨɫɬɶ ɩɥɚɦɟɧɢ, ɭɫɬɚɧɨɜɢɜ ɟɝɨ ɠɟɥɚɟɦɵɣ ɭɪɨɜɟɧɶ ɜɪɚɳɟɧɢɟɦ ɪɭɤɨɹɬɤɢ
ɩɪɨɬɢɜ ɱɚɫɨɜɨɣ ɫɬɪɟɥɤɢ. Ɋɭɤɨɹɬɤɭ ɦɨɠɧɨ ɭɫɬɚɧɚɜɥɢɜɚɬɶ ɜ ɩɨɡɢɰɢɢ:
— ɦɚɤɫɢɦɚɥɶɧɨɟ ɩɥɚɦɹ ɢɥɢ ɜ ɥɸɛɨɟ ɩɨɥɨɠɟɧɢɟ
ɦɟɠɞɭ ɭɤɚɡɚɧɧɵɦɢ ɩɨɡɢɰɢɹɦɢ.
ɤ ɩɨɡɢɰɢɢ ɦɚɤɫɢɦɚɥɶɧɨɝɨ ɩɥɚɦɟɧɢ, ɭɞɟɪɠɢɜɚɣɬɟ ɪɭɤɨɹɬɤɭ ɧɚɠɚɬɨɣ, ɩɨɤɚ ɩɥɚɦɹ ɧɟ ɡɚɝɨɪɢɬɫɹ.
ɇɟɤɨɬɨɪɵɟ ɦɨɞɟɥɢ ɨɫɧɚɳɟɧɵ ɭɫɬɪɨɣɫɬɜɨɦ ɷɥɟɤɬɪɨɧɧɨɝɨ ɡɚɠɢɝɚɧɢɹ, ɜɫɬɪɨɟɧɧɵɦ ɜ ɪɭɤɨɹɬɤɭ ɭɩɪɚɜɥɟɧɢɹ
ɝɨɪɟɥɤɨɣ, — ɜ ɷɬɨɦ ɫɥɭɱɚɟ ɩɪɢɫɭɬɫɬɜɭɟɬ ɭɫɬɪɨɣɫɬɜɨ
ɷɥɟɤɬɪɨɧɧɨɝɨ ɡɚɠɢɝɚɧɢɹ* (ɫɦ. ɪɢɫ.), ɧɨ ɧɟɬ ɤɧɨɩɤɢ
ɷɥɟɤɬɪɨɩɨɞɠɢɝɚ. ɉɪɨɫɬɨ ɧɚɠɦɢɬɟ ɪɭɤɨɹɬɤɭ ɝɨɪɟɥɤɢ ɢ
ɜɪɚɳɚɣɬɟ ɟɟ ɩɪɨɬɢɜ ɱɚɫɨɜɨɣ ɫɬɪɟɥɤɢ ɤ ɩɨɡɢɰɢɢ ɦɚɤɫɢɦɚɥɶɧɨɝɨ ɩɥɚɦɟɧɢ, ɩɨɤɚ ɩɥɚɦɹ ɧɟ ɡɚɝɨɪɢɬɫɹ.
ɉɪɢ ɨɬɩɭɫɤɚɧɢɢ ɪɭɤɨɹɬɤɢ ɩɥɚɦɹ ɦɨɠɟɬ ɩɨɝɚɫɧɭɬɶ.
ȼ ɷɬɨɦ ɫɥɭɱɚɟ ɩɨɜɬɨɪɢɬɟ ɞɟɣɫɬɜɢɹ, ɭɞɟɪɠɢɜɚɹ ɪɭɤɨɹɬɤɭ ɞɨɥɶɲɟ ɧɚɠɚɬɨɣ.
! ȿɫɥɢ ɩɥɚɦɹ ɫɥɭɱɚɣɧɨ ɩɨɝɚɫɥɨ, ɜɵɤɥɸɱɢɬɟ ɝɨɪɟɥɤɭ
ɢ ɩɨɞɨɠɞɢɬɟ ɧɟ ɦɟɧɟɟ 1 ɦɢɧɭɬɵ, ɩɪɟɠɞɟ ɱɟɦ ɫɧɨɜɚ
ɡɚɠɟɱɶ ɟɟ.
ȼ ɦɨɞɟɥɹɯ, ɨɫɧɚɳɟɧɧɵɯ
ɩɥɚɦɟɧɢ (ɏ)*, ɧɚɠɦɢɬɟ ɢ ɞɟɪɠɢɬɟ ɪɭɤɨɹɬɤɭ ɝɨɪɟɥɤɢ
ɧɚɠɚɬɨɣ ɩɪɢɦɟɪɧɨ 2–3 ɫɟɤɭɧɞɵ, ɱɬɨɛɵ ɭɞɟɪɠɚɬɶ
ɝɨɪɟɧɢɟ ɩɥɚɦɟɧɢ ɢ ɚɤɬɢɜɢɪɨɜɚɬɶ ɭɫɬɪɨɣɫɬɜɨ.
ɑɬɨɛɵ ɜɵɤɥɸɱɢɬɶ ɝɨɪɟɥɤɭ, ɩɨɜɟɪɧɢɬɟ ɟɟ ɪɭɤɨɹɬɤɭ ɞɨ
ɭɩɨɪɚ ɢ ɭɫɬɚɧɨɜɢɬɟ ɜ ɩɨɥɨɠɟɧɢɟ «z» — ɜɵɤɥɸɱɟɧɨ.
.
— ɦɢɧɢɦɚɥɶɧɨɟ ɩɥɚɦɹ,
ȼ ɦɨɞɟɥɹɯ, ɢɦɟɸɳɢɯ ɭɫ-
ɬɪɨɣɫɬɜɨ ɷɥɟɤɬɪɨɧɧɨɝɨ
ɡɚɠɢɝɚɧɢɹ*(ɋ), ɧɚɠɦɢɬɟ
ɤɧɨɩɤɭ ɷɥɟɤɬɪɨɩɨɞɠɢɝɚ,
ɨɛɨɡɧɚɱɟɧɧɭɸ ɫɢɦɜɨ-
ɥɨɦ
ɬɟ ɢ ɩɨɜɟɪɧɢɬɟ ɪɭɤɨɹɬɤɭ
ɩɪɨɬɢɜ ɱɚɫɨɜɨɣ ɫɬɪɟɥɤɢ
ɭɫɬɪɨɣɫɬɜɨɦ ɛɟɡɨɩɚɫɧɨɝɨ
, ɡɚɬɟɦ ɧɚɠɦɢ-
ɉɪɚɤɬɢɱɟɫɤɢɟ ɪɟɤɨɦɟɧɞɚɰɢɢ ɩɨ ɢɫɩɨɥɶɡɨɜɚɧɢɸ
ɝɚɡɨɜɵɯ ɝɨɪɟɥɨɤ
Ⱦɥɹ ɧɚɢɛɨɥɟɟ ɷɮɮɟɤɬɢɜɧɨɣ ɪɚɛɨɬɵ ɝɚɡɨɜɵɯ ɝɨɪɟɥɨɤ
ɢ ɷɤɨɧɨɦɧɨɝɨ ɩɨɬɪɟɛɥɟɧɢɹ ɝɚɡɚ ɢɫɩɨɥɶɡɭɣɬɟ ɬɨɥɶɤɨ
ɩɨɫɭɞɭ ɫ ɤɪɵɲɤɚɦɢ ɢ ɩɥɨɫɤɢɦ ɞɧɨɦ.
Ɍɚɤɠɟ ɩɨɫɭɞɚ ɞɨɥɠɧɚ ɩɨɞɯɨɞɢɬɶ ɩɨ ɪɚɡɦɟɪɭ
ɤ ɝɨɪɟɥɤɟ.
Ƚɨɪɟɥɤɚ Ⱦɢɚɦɟɬɪ ɞɧɚ ɩɨɫɭɞɵ, ɫɦ
Ȼɵɫɬɪɚɹ (R) 24–26
ɉɨɥɭɛɵɫɬɪɚɹ (S) 16–20
ȼɫɩɨɦɨɝɚɬɟɥɶɧɚɹ (Ⱥ) 10–14
ɑɬɨɛɵ ɨɩɪɟɞɟɥɢɬɶ ɬɢɩ ɝɨɪɟɥɤɢ, ɨɛɪɚɬɢɬɟɫɶ ɤ ɬɚɛɥ.
«ɏɚɪɚɤɬɟɪɢɫɬɢɤɢ ɝɨɪɟɥɨɤ ɢ ɠɢɤɥɟɪɨɜ».
! ȿɫɥɢ ɦɨɞɟɥɶ ɨɫɧɚɳɟɧɚ ɭɦɟɧɶɲɟɧɧɨɣ ɩɨɞɫɬɚɜɤɨɣ,
ɭɱɬɢɬɟ, ɱɬɨ ɨɧɚ ɞɨɥɠɧɚ ɢɫɩɨɥɶɡɨɜɚɬɶɫɹ ɬɨɥɶɤɨ ɞɥɹ
ɜɫɩɨɦɨɝɚɬɟɥɶɧɨɣ ɝɨɪɟɥɤɢ ɫ ɩɨɫɭɞɨɣ, ɞɢɦɟɬɪ ɞɧɚ ɤɨɬɨɪɨɣ ɧɟ ɩɪɟɜɵɲɚɟɬ 12 ɫɦ.
ɂɫɩɨɥɶɡɨɜɚɧɢɟ ɞɭɯɨɜɤɢ
! ɉɟɪɟɞ ɩɟɪɜɵɦ ɢɫɩɨɥɶɡɨɜɚɧɢɟɦ ɜ ɬɟɱɟɧɢɟ ɩɨɥɭɱɚ-
ɫɚ ɩɪɨɤɚɥɢɬɟ ɩɭɫɬɭɸ ɞɭɯɨɜɤɭ ɫ ɡɚɤɪɵɬɨɣ ɞɜɟɪɰɟɣ
ɩɪɢ ɦɚɤɫɢɦɚɥɶɧɨɣ ɬɟɦɩɟɪɚɬɭɪɟ. ɉɪɟɠɞɟ ɱɟɦ ɜɵɤɥɸɱɢɬɶ ɨɛɨɪɭɞɨɜɚɧɢɟ ɢ ɨɬɤɪɵɬɶ ɞɜɟɪɰɭ, ɭɞɨɫɬɨɜɟɪɶɬɟɫɶ ɜ ɧɚɥɢɱɢɢ ɯɨɪɨɲɟɣ ɜɟɧɬɢɥɹɰɢɢ ɜ ɩɨɦɟɳɟɧɢɢ.
ɉɨɹɜɢɜɲɢɣɫɹ ɜɨ ɜɪɟɦɹ ɩɪɨɤɚɥɢɜɚɧɢɹ ɧɟɩɪɢɹɬɧɵɣ
ɡɚɩɚɯ ɜɵɡɜɚɧ ɫɝɨɪɚɧɢɟɦ ɡɚɳɢɬɧɵɯ ɜɟɳɟɫɬɜ, ɢɫɩɨɥɶɡɭɟɦɵɯ ɜɨ ɜɪɟɦɹ ɩɪɨɢɡɜɨɞɫɬɜɚ ɨɛɨɪɭɞɨɜɚɧɢɹ.
! ɉɪɟɠɞɟ ɱɟɦ ɢɫɩɨɥɶɡɨɜɚɬɶ ɨɛɨɪɭɞɨɜɚɧɢɟ, ɭɞɚɥɢɬɟ
ɫ ɟɝɨ ɛɨɤɨɜɵɯ ɫɬɨɪɨɧ ɩɥɚɫɬɢɤɨɜɭɸ ɩɥɟɧɤɭ.
! ɇɢɱɟɝɨ ɧɟ ɤɥɚɞɢɬɟ ɧɚ ɞɧɨ ɞɭɯɨɜɤɢ — ɷɬɨ ɦɨɠɟɬ
ɩɨɜɪɟɞɢɬɶ ɟɝɨ ɷɦɚɥɟɜɨɟ ɩɨɤɪɵɬɢɟ. ɂɫɩɨɥɶɡɭɣɬɟ 1-ɣ
ɭɪɨɜɟɧɶ ɞɭɯɨɜɤɢ ɬɨɥɶɤɨ ɩɪɢ ɝɨɬɨɜɤɟ ɧɚ ɜɟɪɬɟɥɟ (ɩɪɢ
ɟɝɨ ɧɚɥɢɱɢɢ).
Ɋɭɤɨɹɬɤɢ ɞɭɯɨɜɤɢ
Ɋɚɡɥɢɱɧɵɟ ɮɭɧɤɰɢɢ ɞɭɯɨɜɤɢ ɢ ɬɟɦɩɟɪɚɬɭɪɚ ɩɪɢɝɨɬɨɜɥɟɧɢɹ ɭɫɬɚɧɜɥɢɜɚɸɬɫɹ ɞɜɭɦɹ ɪɚɛɨɱɢɦɢ ɪɭɤɨɹɬɤɚɦɢ:
ɪɭɤɨɹɬɤɨɣ ɫɟɥɟɤɬɨɪɚ ɢ ɪɭɤɨɹɬɤɨɣ
ɭɫɬɚɧɨɜɤɟ ɪɭɤɨɹɬɤɢ ɫɟɥɟɤɬɨɪɚ ɜ ɥɸɛɭɸ ɩɨɡɢɰɢɸ, ɨɬɥɢɱɧɭɸ ɨɬ «0», ɜ ɞɭɯɨɜɤɟ ɡɚɝɨɪɚɟɬɫɹ ɫɜɟɬ; ɭɫɬɚɧɨɜɤɚ
ɪɭɤɨɹɬɤɢ ɜ ɩɨɡɢɰɢɸ
ɞɚɠɟ ɟɫɥɢ ɧɟ ɜɤɥɸɱɟɧ ɧɢ ɨɞɢɧ ɢɡ ɧɚɝɪɟɜɚɬɟɥɶɧɵɯ
ɷɥɟɦɟɧɬɨɜ. Ʉɨɝɞɚ ɜ ɞɭɯɨɜɤɟ ɝɨɪɢɬ ɫɜɟɬ, ɷɬɨ ɨɡɧɚɱɚɟɬ, ɱɬɨ ɞɭɯɨɜɤɚ ɢɫɩɨɥɶɡɭɟɬɫɹ, ɨɫɜɟɳɟɧɢɟ ɨɫɬɚɟɬɫɹ
ɜɤɥɸɱɟɧɧɵɦ ɜ ɬɟɱɟɧɢɟ ɜɫɟɝɨ ɜɪɟɦɟɧɢ ɢɫɩɨɥɶɡɨɜɚɧɢɹ
ɞɭɯɨɜɤɢ.
ɡɚɠɢɝɚɟɬ ɨɫɜɟɳɟɧɢɟ ɜ ɞɭɯɨɜɤɟ,
ɬɟɪɦɨɫɬɚɬɚ. ɉɪɢ
* Ɍɨɥɶɤɨ ɞɥɹ ɧɟɤɨɬɨɪɵɯ ɦɨɞɢɮɢɤɚɰɢɣ ɦɨɞɟɥɟɣ.
ɉɪɟɞɭɩɪɟɠɞɟɧɢɟ! ɋɬɟɤɥɹɧɧɚɹ
ɤɪɵɲɤɚ ɩɥɢɬɵ ɦɨɠɟɬ ɬɪɟɫɧɭɬɶ
ɨɬ ɧɚɝɪɟɜɚ. ɉɪɟɠɞɟ ɱɟɦ ɡɚɤɪɵɬɶ
ɤɪɵɲɤɭ, ɨɛɹɡɚɬɟɥɶɧɨ ɜɵɤɥɸɱɢɬɟ
ɜɫɟ ɝɨɪɟɥɤɢ.*
9
Page 10

ȼɤɥɸɱɟɧɢɟ ɢ ɜɵɤɥɸɱɟɧɢɟ ɡɨɧ ɧɚɝɪɟɜɚ
Ɋɭɤɨɹɬɤɢ ɭɩɪɚɜɥɟɧɢɹ ɷɥɟɤɬɪɨɤɨɧɮɨɪɤɚɦɢ
ɉɥɢɬɵ ɦɨɝɭɬ ɛɵɬɶ ɨɫɧɚɳɟɧɵ ɨɛɵɱɧɵɦɢ ɢ ɛɵɫɬɪɵɦɢ
ɷɥɟɤɬɪɢɱɟɫɤɢɦɢ ɤɨɧɮɨɪɤɚɦɢ ɜ ɪɚɡɥɢɱɧɵɯ ɤɨɦɛɢɧɚɰɢɹɯ (ɛɵɫɬɪɵɟ ɤɨɧɮɨɪɤɢ ɦɨɠɧɨ ɪɚɫɩɨɡɧɚɬɶ ɩɨ
ɤɪɚɫɧɨɦɭ ɤɪɭɠɤɭ ɜ ɰɟɧɬɪɟ). ȼɨ ɢɡɛɟɠɚɧɢɟ ɩɨɬɟɪɢ
ɬɟɩɥɚ ɢ ɩɨɜɪɟɠɞɟɧɢɹ ɤɨɧɮɨɪɨɤ ɢɫɩɨɥɶɡɭɣɬɟ ɩɨɫɭɞɭ
ɫ ɩɥɨɫɤɢɦ ɞɧɨɦ, ɞɢɚɦɟɬɪ ɤɨɬɨɪɨɝɨ ɫɨɨɬɜɟɬɫɬɜɭɟɬ
ɞɢɚɦɟɬɪɭ ɤɨɧɮɨɪɤɢ.
ȼ ɬɚɛɥɢɰɟ ɩɪɢɜɟɞɟɧɵ ɪɟɤɨɦɟɧɞɚɰɢɢ ɩɨ ɢɫɩɨɥɶɡɨɜɚɧɢɸ ɷɥɟɤɬɪɨɤɨɧɮɨɪɨɤ ɩɪɢ
ɪɭɤɨɹɬɨɤ ɭɩɪɚɜɥɟɧɢɹ.
ɪɚɡɥɢɱɧɵɯ ɭɫɬɚɧɨɜɤɚɯ ɢɯ
ɉɪɚɤɬɢɱɟɫɤɢɟ ɫɨɜɟɬɵ ɩɨ ɢɫɩɨɥɶɡɨɜɚɧɢɸ
ɪɚɛɨɱɟɣ ɩɨɜɟɪɯɧɨɫɬɢ
x ɂɫɩɨɥɶɡɭɣɬɟ ɩɨɫɭɞɭ ɫ ɬɨɥɫɬɵɦ, ɩɥɨɫɤɢɦ ɞɧɨɦ.
ɗɬɨ ɨɛɟɫɩɟɱɢɬ ɩɨɥɧɵɣ ɤɨɧɬɚɤɬ ɞɧɚ ɩɨɫɭɞɵ ɫ ɡɨɧɨɣ
ɧɚɝɪɟɜɚ.
x ɂɫɩɨɥɶɡɭɣɬɟ ɩɨɫɭɞɭ ɞɨɫɬɚɬɨɱɧɨɝɨ ɞɢɚɦɟɬɪɚ: ɱɬɨɛɵ
ɨɧɚ ɩɨɥ ɧɨɫɬɶɸ ɡɚɤɪɵɜɚɥɚ ɤɨɧɮɨɪɤɭ / ɡɨɧɭ ɧɚɝɪɟɜɚ,
ɷɬɨ ɫɩɨɫɨɛɫɬɜɭɟɬ ɧɚɢɛɨɥɟɟ ɷɮɮɟɤɬɢɜɧɨɦɭ ɢɫɩɨɥɶɡɨɜɚɧɢɸ ɬɟɩɥɚ.
RS
ɉɨɡɢɰɢɹ
ɪɭɤɨɹɬɤɢ
0 ȼɵɤɥɸɱɟɧɨ
1 ɉɪɢɝɨɬɨɜɥɟɧɢɟ ɨɜɨɳɟɣ, ɪɵɛɵ
2
3
4 ɀɚɪɤɚ (ɭɦɟɪɟɧɧɵɣ ɧɚɝɪɟɜ)
5 ɀɚɪɤɚ (ɧɚɝɪɟɜ ɜɵɲɟ ɫɪɟɞɧɟɝɨ)
6 Ⱦɥɹ ɛɵɫɬɪɨɣ ɩɨɞɠɚɪɤɢ ɢ ɤɢɩɹɱɟɧɢɹ
Ɉɛɵɱɧɚɹ ɢɥɢ ɛɵɫɬɪɚɹ ɤɨɧɮɨɪɤɚ
ȼɚɪɤɚ ɤɚɪɬɨɮɟɥɹ (ɧɚ ɩɚɪɭ), ɫɭɩɨɜ,
ɝɨɪɨɯɚ, ɮɚɫɨɥɢ
Ɍɭɲɟɧɢɟ ɛɨɥɶɲɢɯ ɨɛɴɟɦɨɜ ɩɢɳɢ,
ɩɪɢɝɨɬɨɜɥɟɧɢɟ ɦɹɫɧɵɯ ɛɭɥɶɨɧɨɜ
ɫ ɨɜɨɳɚɦɢ
ɉɟɪɟɞ ɩɟɪɜɵɦ ɢɫɩɨɥɶɡɨɜɚɧɢɟɦ ɩɪɨɤɚɥɢɬɟ ɩɭɫɬɵɟ ɷɥɟɤɬɪɢɱɟɫɤɢɟ ɤɨɧɮɨɪɤɢ ɩɪɢ ɦɚɤɫɢɦɚɥɶɧɨɣ
ɬɟɦɩɟɪɚɬɭɪɟ ɩɪɢɦɟɪɧɨ ɜ ɬɟɱɟɧɢɟ 4-ɯ ɦɢɧɭɬ: ɡɚ ɷɬɨ
ɜɪɟɦɹ ɡɚɳɢɬɧɨɟ ɩɨɤɪɵɬɢɟ ɤɨɧɮɨɪɨɤ ɡɚɬɜɟɪɞɟɟɬ
ɢ ɫɬɚɧɟɬ ɦɚɤɫɢɦɚɥɶɧɨ ɩɪɨɱɧɵɦ.
x ȼɫɟɝɞɚ ɩɪɨɜɟɪɹɣɬɟ, ɱɬɨɛɵ ɞɧɨ ɤɚɫɬɪɸɥɶ ɢ ɫɤɨɜɨ-
ɪɨɞ ɛɵɥɨ ɫɭɯɢɦ ɢ ɱɢɫɬɵɦ. ɗɬɨ ɨɛɟɫɩɟɱɢɬ ɯɨɪɨɲɢɣ
ɤɨɧɬɚɤɬ ɦɟɠɞɭ ɪɚɛɨɱɟɣ ɩɨɜɟɪɯɧɨɫɬɶɸ ɢ ɤɭɯɨɧɧɨɣ
ɩɨɫɭɞɨɣ ɢ ɩɪɨɞɥɢɬ ɫɪɨɤ ɢɯ ɫɥɭɠɛɵ.
x ɇɟ ɩɨɥɶɡɭɣɬɟɫɶ ɩɨɫɭɞɨɣ, ɜ ɤɨɬɨɪɨɣ ɝɨɬɨɜɢɥɢ ɧɚ
ɝɚɡɨɜɵɯ ɝɨɪɟɥɤɚɯ. Ʉɨɧɰɟɧɬɪɢɪɨɜɚɧɧɨɟ ɬɟɩɥɨ ɨɬ
ɝɚɡɨɜɨɣ ɝɨɪɟɥɤɢ ɦɨɠɟɬ ɞɟɮɨɪɦɢɪɨɜɚɬɶ ɞɧɨ ɤɭɯɨɧɧɨɣ ɩɨɫɭɞɵ, ɜ ɪɟɭɥɶɬɚɬɟ
ɧɟ ɛɭɞɟɬ ɩɨɥɧɨɝɨ ɤɨɧɬɚɤɬɚ
ɩɨɫɭɞɵ ɫ ɪɚɛɨɱɟɣ ɩɨɜɟɪɯɧɨɫɬɶɸ.
x ɇɢɤɨɝɞɚ ɧɟ ɨɫɬɚɜɥɹɣɬɟ ɩɭɫɬɵɦɢ ɜɤɥɸɱɟɧɧɵɟ ɡɨɧɵ
ɧɚɝɪɟɜɚ: ɨɧɢ ɛɵɫɬɪɨ ɧɚɝɪɟɜɚɸɬɫɹ ɞɨ ɦɚɤɫɢɦɚɥɶɧɨɝɨ ɭɪɨɜɧɹ, ɱɬɨ ɦɨɠɟɬ ɩɪɢɜɟɫɬɢ ɤ ɩɨɜɪɟɠɞɟɧɢɸ
ɧɚɝɪɟɜɚɬɟɥɶɧɵɯ ɷɥɟɦɟɧɬɨɜ ɢ ɩɨɫɭɞɵ.
10
Page 11
RS
Ɋɟɠɢɦɵ ɩɪɢɝɨɬɨɜɥɟɧɢɹ
! Ɂɧɚɱɟɧɢɟ ɬɟɦɩɟɪɚɬɭɪɵ ɨɬ 50 °ɋ ɞɨ Max ɦɨɠɟɬ ɛɵɬɶ
ɭɫɬɚɧɨɜɥɟɧɨ ɞɥɹ ɜɫɟɯ ɪɟɠɢɦɨɜ ɩɪɢɝɨɬɨɜɥɟɧɢɹ ɡɚ
ɢɫɤɥɸɱɟɧɢɟɦ ɪɟɠɢɦɚ ȽɊɂɅɖ, ɞɥɹ ɤɨɬɨɪɨɝɨ ɪɟɤɨɦɟɧɞɭɟɬɫɹ ɭɫɬɚɧɨɜɤɚ ɬɨɥɶɤɨ ɦɚɤɫɢɦɚɥɶɧɨɝɨ (Max) ɭɪɨɜɧɹ
ɦɨɳɧɨɫɬɢ.
ɋɌȺɌɂɑȿɋɄȺə ȾɍɏɈȼɄȺ
ȼɤɥɸɱɟɧɵ ɨɛɚ ɧɚɝɪɟɜɚɬɟɥɶɧɵɯ ɷɥɟɦɟɧɬɚ — ɜɟɪɯɧɢɣ ɢ
ɧɢɠɧɢɣ. ɋ ɷɬɢɦ ɬɪɚɞɢɰɢɨɧɧɵɦ ɪɟɠɢɦɨɦ ɩɪɢɝɨɬɨɜɥɟɧɢɹ ɥɭɱɲɟ ɢɫɩɨɥɶɡɨɜɚɬɶ ɬɨɥɶɤɨ ɨɞɢɧ ɭɪɨɜɟɧɶ ɞɭɯɨɜɤɢ;
ɩɪɢ ɝɨɬɨɜɤɟ ɧɚ ɧɟɫɤɨɥɶɤɢɯ ɭɪɨɜɧɹɯ ɪɚɫɩɪɟɞɟɥɟɧɢɟ
ɬɟɩɥɚ ɛɭɞɟɬ ɧɟɪɚɜɧɨɦɟɪɧɵɦ.
ɇɂɀɇɂɃ ɇȺȽɊȿȼȺɌȿɅɖɇɕɃ ɗɅȿɆȿɇɌ
Ɋɚɛɨɬɚɟɬ ɧɢɠɧɢɣ ɧɚɝɪɟɜɚɬɟɥɶɧɵɣ ɷɥɟɦɟɧɬ. Ɋɟɠɢɦ
ɪɟɤɨɦɟɧɞɭɟɬɫɹ ɢɫɩɨɥɶɡɨɜɚɬɶ ɞɥɹ ɛɥɸɞ (ɜ ɮɨɪɦɚɯ
ɞɥɹ ɡɚɩɟɤɚɧɢɹ), ɩɨɜɟɪɯɧɨɫɬɶ ɤɨɬɨɪɵɯ ɭɠɟ ɝɨɬɨɜɚ, ɧɨ
ɬɪɟɛɭɟɬɫɹ ɞɚɥɶɧɟɣɲɟɟ ɩɪɢɝɨɬɨɜɥɟɧɢɟ ɢɯ ɰɟɧɬɪɚɥɶɧɨɣ ɱɚɫɬɢ, ɢɥɢ ɞɥɹ ɞɟɫɟɪɬɨɜ, ɩɨɤɪɵɬɵɯ ɮɪɭɤɬɚɦɢ
ɢɥɢ ɞɠɟɦɨɦ, ɱɬɨɛɵ ɨɬɤɨɥɢɪɨɜɚɬɶ ɢɯ ɩɨɜɟɪɯɧɨɫɬɶ.
ɍɱɬɢɬɟ, ɱɬɨ ɜ ɷɬɨɦ ɪɟɠɢɦɟ ɧɟɜɨɡɦɨɠɧɨ ɞɨɫɬɢɱɶ ɜ ɞɭɯɨɜɤɟ ɦɚɤɫɢɦɚɥɶɧɨɣ ɬɟɦɩɟɪɚɬɭɪɵ
ɧɟ ɪɟɤɨɦɟɧɞɭɟɬɫɹ ɩɪɢɝɨɬɨɜɥɟɧɢɟ ɫ ɢɫɩɨɥɶɡɨɜɚɧɢɟɦ
ɬɨɥɶɤɨ ɷɬɨɣ ɭɫɬɚɧɨɜɤɢ, ɡɚ ɢɫɤɥɸɱɟɧɢɟɦ ɤɨɧɞɢɬɟɪɫɤɨɣ
ɜɵɩɟɱɤɢ, ɞɥɹ ɩɪɢɝɨɬɨɜɥɟɧɢɹ ɤɨɬɨɪɨɣ ɬɪɟɛɭɟɬɫɹ ɬɟɦɩɟɪɚɬɭɪɚ 180 °ɋ ɢ ɧɢɠɟ.
ȼȿɊɏɇɂɃ ɇȺȽɊȿȼȺɌȿɅɖɇɕɃ ɗɅȿɆȿɇɌ
Ɍɟɦɩɟɪɚɬɭɪɚ ɦɟɠɞɭ 50 °C ɢ Max.
ȼɤɥɸɱɟɧɨ ɨɫɜɟɳɟɧɢɟ, ɚ ɬɚɤɠɟ ɞɟɣɫɬɜɭɟɬ ɭɥɶɬɪɚ-ɤɪɚɫɧɨɟ ɢɡɥɭɱɟɧɢɟ ɝɪɢɥɹ, ɦɨɬɨɪ ɧɚɱɢɧɚɟɬ ɜɪɚɳɚɬɶ ɜɟɪɬɟɥ.
Ⱦɨɜɨɥɶɧɨ ɜɵɫɨɤɨɟ ɢ ɩɪɹɦɨɟ ɬɟɩɥɨ ɝɪɢɥɹ ɩɨɡɜɨɥɹɟɬ
ɦɝɧɨɜɟɧɧɨ ɡɚɩɟɱɶ ɩɨɜɟɪɯɧɨɫɬɶ ɦɹɫɚ, ɫɨɯɪɚɧɹɹ ɟɝɨ
ɫɨɱɧɵɦ ɢ ɧɟɠɧɵɦ.
ȽɊɂɅɖ
Ɍɟɦɩɟɪɚɬɭɪɚ ɦɟɠɞɭ 50 °C ɢ Max.
ȼɤɥɸɱɟɧɨ ɨɫɜɟɳɟɧɢɟ, ɚ ɬɚɤɠɟ ɪɚɛɨɬɚɟɬ ɧɚɝɪɟɜɚɬɟɥɶɧɵɣ ɷɥɟɦɟɧɬ ɝɪɢɥɹ, ɦɨɬɨɪ ɜɪɚɳɚɟɬ ɜɟɪɬɟɥ. ɑɪɟɡɜɵɱɚɣɧɨ ɜɵɫɨɤɨɟ ɢ ɩɪɹɦɨɟ ɬɟɩɥɨ ɝɪɢɥɹ ɩɨɡɜɨɥɹɟɬ
ɦɝɧɨɜɟɧɧɨ ɡɚɩɟɱɶ ɩɨɜɟɪɯɧɨɫɬɶ ɦɹɫɚ, ɫɨɯɪɚɧɹɹ ɟɝɨ
ɫɨɱɧɵɦ ɢ ɧɟɠɧɵɦ.
Ɍɚɣɦɟɪ*
1. ɑɬɨɛɵ ɡɚɜɟɫɬɢ ɡɜɨɧɨɤ ɬɚɣɦɟɪɚ, ɩɨɜɟɪɧɢɬɟ ɪɭɤɨ-
ɹɬɤɭ ɌȺɃɆȿɊȺ ɧɚ ɨɞɢɧ ɩɨɥɧɵɣ ɨɛɨɪɨɬ ɩɨ ɱɚɫɨɜɨɣ
ɫɬɪɟɥɤɟ .
2. Ɍɟɩɟɪɶ ɜɪɚɳɚɣɬɟ ɪɭɤɨɹɬɤɭ ɩɪɨɬɢɜ ɱɚɫɨɜɨɣ ɫɬɪɟɥɤɢ
, ɱɬɨɛɵ ɭɫɬɚɧɨɜɢɬɶ ɠɟɥɚɟɦɨɟ ɜɪɟɦɹ.
(250 °ɋ), ɩɨɷɬɨɦɭ
ȼɟɪɬɟɥ*
ɑɬɨɛɵ ɡɚɞɟɣɫɬɜɨɜɚɬɶ ɜɟɪɬɟɥ (ɫɦ. ɪɢɫ.):
ɚ) ɩɨɦɟɫɬɢɬɟ ɩɨɞɞɨɧ
ɞɥɹ ɫɛɨɪɚ ɠɢɪɚ/ɫɨɤɚ ɧɚ
1-ɣ ɭɪɨɜɟɧɶ ɞɭɯɨɜɤɢ;
ɛ) ɜɫɬɚɜɶɬɟ ɪɚɦɤɭ ɜɟɪɬɟɥɚ ɧɚ 4-ɣ ɭɪɨɜɟɧɶ,
ɩɨɦɟɫɬɢɬɟ ɧɚ ɧɟɟ
ɜɟɪɬɟɥ, ɜɫɬɚɜɢɜ ɟɝɨ
ɜ ɫɩɟɰɢɚɥɶɧɨɟ ɨɬɜɟɪɫɬɢɟ ɧɚ ɡɚɞɧɟɣ ɫɬɟɧɤɟ
ɞɭɯɨɜɤɢ;
ɜ) ɜɤɥɸɱɢɬɟ ɜɟɪɬɟɥ, ɭɫɬɚɧɨɜɢɜ ɪɭɤɨɹɬɤɭ ɫɟɥɟɤɬɨɪɚ
ɜ ɩɨɡɢɰɢɸ
ɇɢɠɧɟɟ ɨɬɞɟɥɟɧɢɟ*
! ȼɧɭɬɪɟɧɧɢɟ ɩɨɜɟɪɯɧɨɫɬɢ ɨɬɞɟɥɟɧɢɹ ɦɨɝɭɬ ɧɚɝɪɟɜɚɬɶ-
ɫɹ ɜɨ ɜɪɟɦɹ ɪɚɛɨɬɵ ɞɭɯɨɜɤɢ.
! ɇɟ ɩɨɦɟɳɚɣɬɟ ɜ ɧɢɠɧɟɟ ɨɬɞɟɥɟɧɢɟ
ɳɢɟɫɹ ɦɚɬɟɪɢɚɥɵ.
.
ȼ ɧɢɠɧɟɦ ɨɬɞɟɥɟɧɢɢ
ɞɭɯɨɜɤɢ ɦɨɠɧɨ ɞɟɪɠɚɬɶ ɫɤɨɜɨɪɨɞɵ ɢ ɩɪɢɧɚɞɥɟɠɧɨɫɬɢ ɞɭɯɨɜɤɢ.
Ʉɪɨɦɟ ɬɨɝɨ, ɜɨ ɜɪɟɦɹ
ɪɚɛɨɬɵ ɞɭɯɨɜɤɢ ɨɬɞɟɥɟɧɢɟ ɦɨɠɟɬ ɢɫɩɨɥɶɡɨɜɚɬɶɫɹ ɞɥɹ ɫɨɯɪɚɧɟɧɢɹ ɛɥɸɞ ɬɟɩɥɵɦɢ.
Ⱦɜɟɪɰɚ ɨɬɤɪɵɜɚɟɬɫɹ
ɜɧɢɡ.
ɜɨɫɩɥɚɦɟɧɹɸ-
ȼɇɂɆȺɇɂȿ! Ⱦɭɯɨɜɨɣ
ɲɤɚɮ ɭɤɨɦɩɥɟɤɬɨɜɚɧ
ɫɢɫɬɟɦɨɣ ɛɥɨɤɢɪɨɜɤɢ
ɪɟɲɟɬɨɤ, ɩɨɡɜɨɥɹɸɳɟɣ
ɜɵɧɢɦɚɬɶ ɢɯ ɢɡ ɞɭɯɨɜɤɢ
ɧɟ ɩɨɥɧɨɫɬɶɸ (1).
Ⱦɥɹ ɩɨɥɧɨɝɨ ɜɵɧɢɦɚɧɢɹ
ɪɟɲɟɬɨɤ ɞɨɫɬɚɬɨɱɧɨ
ɩɨɞɧɹɬɶ ɢɯ, ɤɚɤ
ɩɨɤɚɡɚɧɨ ɧɚ ɫɯɟɦɟ, ɜɡɹɜ ɢɯ ɡɚ ɩɟɪɟɞɧɢɣ ɤɪɚɣ, ɢ
ɩɨɬɹɧɭɬɶ ɧɚ ɫɟɛɹ (2).
* Ɍɨɥɶɤɨ ɞɥɹ ɧɟɤɨɬɨɪɵɯ ɦɨɞɢɮɢɤɚɰɢɣ ɦɨɞɟɥɟɣ.
11
Page 12

ɉɪɚɤɬɢɱɟɫɤɢɟ ɫɨɜɟɬɵ
Ʉɨɝɞɚ ȼɵ ɝɨɬɨɜɢɬɟ ɜ ɞɭɯɨɜɤɟ, ɢɫɩɨɥɶɡɭɣɬɟ ɨɞɧɨɜɪɟɦɟɧɧɨ ɬɨɥɶɤɨ ɨɞɢɧ ɩɪɨɬɢɜɟɧɶ ɢɥɢ ɪɟɲɟɬɤɭ. ȼɵɛɟɪɢɬɟ
ɜɟɪɯɧɢɣ ɢɥɢ ɧɢɠɧɢɣ ɭɪɨɜɟɧɶ ɞɭɯɨɜɤɢ — ɜ ɡɚɜɢɫɢɦɨɫɬɢ ɨɬ ɬɨɝɨ, ɤɚɤɨɣ ɧɚɝɪɟɜ ɬɪɟɛɭɟɬɫɹ ɞɥɹ ɩɨɜɟɪɯɧɨɫɬɢ
ɛɥɸɞɚ (ɛȩɥɶɲɢɣ ɢɥɢ ɦɟɧɶɲɢɣ).
ɉɪɟɞɜɚɪɢɬɟɥɶɧɵɣ ɪɚɡɨɝɪɟɜ ɞɭɯɨɜɤɢ
ȿɫɥɢ ɬɪɟɛɭɟɬɫɹ ɡɚɪɚɧɟɟ ɪɚɡɨɝɪɟɬɶ ɞɭɯɨɜɤɭ (ɨɫɨɛɟɧɧɨ ɜ ɫɥɭɱɚɟ ɜɵɩɟɱɤɢ ɢɡɞɟɥɢɣ ɢɡ ɞɪɨɠɠɟɜɨɝɨ ɬɟɫɬɚ),
ɛɵɫɬɪɨɝɨ ɞɨɫɬɢɠɟɧɢɹ ɠɟɥɚɟɦɨɣ ɬɟɦɩɟɪɚɬɭɪɵ
ɞɥɹ
ɢɫɩɨɥɶɡɭɣɬɟ ɪɟɠɢɦ «ɋɬɚɬɢɱɟɫɤɚɹ (ɤɨɧɜɟɤɰɢɨɧɧɚɹ)
ɞɭɯɨɜɤɚ». ɉɨ ɨɤɨɧɱɚɧɢɢ ɪɚɡɨɝɪɟɜɚ ɞɭɯɨɜɤɢ ɤɪɚɫɧɵɣ
ɢɧɞɢɤɚɬɨɪ ɬɟɪɦɨɫɬɚɬɚ ɩɨɝɚɫɧɟɬ ɢ ȼɵ ɫɦɨɠɟɬɟ ɜɵɛɪɚɬɶ
ɬɪɟɛɭɟɦɵɣ ɪɟɠɢɦ ɩɪɢɝɨɬɨɜɥɟɧɢɹ.
ɉɪɢɝɨɬɨɜɥɟɧɢɟ ɪɵɛɵ ɢ ɦɹɫɚ
Ʉɨɝɞɚ ɝɨɬɨɜɢɬɟ ɛɟɥɨɟ ɦɹɫɨ, ɩɬɢɰɭ ɢɥɢ ɪɵɛɭ, ɭɫɬɚɧɨɜɢɬɟ ɧɢɡɤɭɸ ɬɟɦɩɟɪɚɬɭɪɭ — 180–200 °ɋ.
ɉɪɢ ɩɪɢɝɨɬɨɜɥɟɧɢɢ ɤɪɚɫɧɨɝɨ ɦɹɫɚ, ɤɨɬɨɪɨɟ ɞɨɥɠɧɨ
ɛɵɬɶ ɯɨɪɨɲɨ ɩɪɨɩɟɱɟɧɧɵɦ ɫɧɚɪɭɠɢ ɢ
ɪɢ, ɧɚɱɢɧɚɣɬɟ ɝɨɬɨɜɢɬɶ ɩɪɢ ɜɵɫɨɤɨɣ ɬɟɦɩɟɪɚɬɭɪɟ
(200–220 °ɋ), ɭɫɬɚɧɨɜɢɜ ɟɟ ɧɚ ɤɨɪɨɬɤɨɟ ɜɪɟɦɹ, ɚ ɡɚɬɟɦ
ɩɨɧɢɡɶɬɟ ɬɟɦɩɟɪɚɬɭɪɭ.
ȼ ɨɫɧɨɜɧɨɦ, ɱɟɦ ɛɨɥɶɲɟ ɠɚɪɤɨɟ, ɬɟɦ ɧɢɠɟ ɬɟɦɩɟɪɚɬɭɪɚ ɢ ɞɨɥɶɲɟ ɜɪɟɦɹ ɩɪɢɝɨɬɨɜɥɟɧɢɹ. ɉɨɥɨɠɢɬɟ ɦɹɫɨ
ɧɚ ɫɟɪɟɞɢɧɭ ɪɟɲɟɬɤɢ, ɚ ɩɨɞ ɧɟɟ ɩɨɦɟɫɬɢɬɟ ɩɨɞɞɨɧ
ɞɥɹ ɫɛɨɪɚ ɠɢɪɚ.
ɉɨɫɬɚɜɶɬɟ ɪɟɲɟɬɤɭ ɧɚ ɫɪɟɞɧɢɣ (ɰɟɧɬɪɚɥɶɧɵɣ) ɭɪɨɜɟɧɶ
ɞɭɯɨɜɤɢ. ȿɫɥɢ ȼɵ ɯɨɬɢɬɟ ɭɜɟɥɢɱɢɬɶ ɤɨɥɢɱɟɫɬɜɨ ɬɟɩɥɚ
ɫɧɢɡɭ, ɢɫɩɨɥɶɡɭɣɬɟ ɧɢɠɧɢɣ ɭɪɨɜɟɧɶ ɞɭɯɨɜɤɢ.
Ⱦɥɹ ɩɨɥɭɱɟɧɢɹ ɡɚɠɚɪɢɫɬɨɣ ɤɨɪɨɱɤɢ (ɧɚɩɪ., ɧɚ ɭɬɤɟ ɢɥɢ
ɞɢɱɢ) ɩɨɥɨɠɢɬɟ ɧɚ ɦɹɫɨ ɤɭɫɨɱɤɢ ɫɚɥɚ ɢɥɢ ɛɟɤɨɧɚ.
ɫɨɱɧɵɦ ɜɧɭɬ-
ȼ ɦɨɞɟɥɹɯ ɫ ɜɟɪɬɟɥɨɦ
ɞɥɹ ɪɟɠɢɦɚ «Ƚɪɢɥɶ» ɤɨɦɩɥɟɤɬ. ȼ ɷɬɨɦ ɫɥɭɱɚɟ ɝɨɬɨɜɶɬɟ
ɩɪɢ ɡɚɤɪɵɬɨɣ ɞɜɟɪɰɟ ɞɭɯɨɜɤɢ: ɭɫɬɚɧɨɜɢɬɟ ɜɟɪɬɟɥ ɧɚ
3-ɣ ɫɧɢɡɭ ɭɪɨɜɟɧɶ, ɚ ɩɨɞɞɨɧ ɞɥɹ ɫɛɨɪɚ ɫɨɤɚ / ɠɢɪɚ —
ɧɚ ɧɢɠɧɢɣ ɭɪɨɜɟɧɶ.
! ȼɫɟɝɞɚ ɢɫɩɨɥɶɡɭɣɬɟ ɝɪɢɥɶ ɩɪɢ ɡɚɤɪɵɬɨɣ ɞɜɟɪɰɟ
ɞɭɯɨɜɤɢ — ɷɬɨ ɩɨɡɜɨɥɢɬ ɞɨɫɬɢɱɶ ɩɪɟɜɨɫɯɨɞɧɵɯ ɪɟɡɭɥɶɬɚɬɨɜ ɝɨɬɨɜɤɢ ɢ ɫɷɤɨɧɨɦɢɬɶ ɷɥɟɤɬɪɨɷɧɟɪɝɢɸ (ɩɪɢɦɟɪɧɨ 10%).
ɋɬɚɜɶɬɟ ɪɟɲɟɬɤɭ
ɧɭɸ ɬɚɛɥɢɰɭ ɩɨ ɩɪɢɝɨɬɨɜɥɟɧɢɸ ɜ ɦɧɨɝɨɩɪɨɝɪɚɦɦɧɨɣ
ɞɭɯɨɜɤɟ), ɜɨ ɢɡɛɟɠɚɧɢɟ ɨɛɪɚɡɨɜɚɧɢɹ ɱɚɞɚ ɢ ɩɨɩɚɞɚɧɢɹ ɠɢɪɚ / ɫɨɤɚ ɧɚ ɞɧɨ ɞɭɯɨɜɤɢ ɧɚ 1-ɦ ɫɧɢɡɭ ɭɪɨɜɧɟ
ɪɚɡɦɟɫɬɢɬɟ ɩɨɞɞɨɧ.
ɧɚ ɧɢɠɧɢɟ ɭɪɨɜɧɢ (ɫɦ. ɜɫɩɨɦɨɝɚɬɟɥɶ-
ɢɫɩɨɥɶɡɭɣɬɟ ɩɪɢɥɚɝɚɟɦɵɣ
RS
ȼɵɩɟɱɤɚ ɩɢɪɨɝɨɜ
Ⱦɥɹ ɜɵɩɟɤɚɧɢɹ ɨɛɹɡɚɬɟɥɶɧɨ ɡɚɪɚɧɟɟ ɪɚɡɨɝɪɟɣɬɟ ɞɭɯɨɜɤɭ, ɧɟ ɨɬɤɪɵɜɚɣɬɟ ɟɟ ɞɜɟɪɰɭ ɜɨ ɜɪɟɦɹ ɩɪɢɝɨɬɨɜɥɟɧɢɹ, ɱɬɨɛɵ ɬɟɫɬɨ ɧɟ ɨɫɟɥɨ.
ɂɫɩɨɥɶɡɨɜɚɧɢɟ ɝɪɢɥɹ
ɢɫɩɨɥɶɡɨɜɚɧɢɢ ɪɟɠɢɦɚ «Ƚɪɢɥɶ» ɩɨɦɟɫɬɢɬɟ
ɉɪɢ
ɩɢɳɭ ɜ ɰɟɧɬɪɟ ɪɟɲɟɬɤɢ (ɪɚɫɩɨɥɨɠɟɧɧɨɣ ɧɚ 3-ɦ ɢɥɢ
4-ɦ ɭɪɨɜɧɟ), ɩɨɫɤɨɥɶɤɭ ɪɚɛɨɬɚɟɬ ɬɨɥɶɤɨ ɰɟɧɬɪɚɥɶɧɚɹ
ɱɚɫɬɶ ɜɟɪɯɧɟɝɨ ɧɚɝɪɟɜɚɬɟɥɶɧɨɝɨ ɷɥɟɦɟɧɬɚ.
ɉɨɦɟɫɬɢɬɟ ɩɪɨɬɢɜɟɧɶ ɞɥɹ ɫɛɨɪɚ ɫɨɤɚ / ɠɢɪɚ ɧɚ ɧɢɠɧɢɣ ɭɪɨɜɟɧɶ (1-ɣ ɫɧɢɡɭ), ɱɬɨ ɬɚɤɠɟ ɩɪɟɞɨ ɯɪɚɧɢɬ ɞɧɨ
ɞɭɯɨɜɤɢ ɨɬ ɡɚɝɪɹɡɧɟɧɢɹ.
ɉɪɢ ɢɫɩɨɥɶɡɨɜɚɧɢɢ ɪɟɠɢɦɚ «Ƚɪɢɥɶ» ɪɟɤɨɦɟɧɞɭɟɬɫɹ
ɭɫɬɚɧɚɜɥɢɜɚɬɶ ɬɟɪɦɨɫɬɚɬɨɦ ɦɚɤɫɢɦɚɥɶɧɭɸ ɬɟɦɩɟɪɚɬɭɪɭ. Ɉɞɧɚɤɨ
ɡɨɜɚɬɶ ɭɫɬɚɧɨɜɤɢ ɧɢɡɤɨɣ ɬɟɦɩɟɪɚɬɭɪɵ — ɩɪɢ ɧɟɨɛɯɨɞɢɦɨɫɬɢ ɩɪɨɫɬɨ ɩɨɜɟɪɧɢɬɟ ɪɭɤɨɹɬɤɭ ɬɟɪɦɨɫɬɚɬɚ ɧɚ
ɧɭɠɧɨɟ ɡɧɚɱɟɧɢɟ ɬɟɦɩɟɪɚɬɭɪɵ.
ɷɬɨ ɧɟ ɡɧɚɱɢɬ, ɱɬɨ ɧɟɜɨɡɦɨɠɧɨ ɢɫɩɨɥɶ-
12
Page 13
RS
¥³´¾»É³Âû¶ÁÅÁµ¾¸À»Òµ·ÆÈÁµÁ¿Ë½³ÇÆ
Ɋɟɠɢɦ
ɩɪɢɝɨɬɨɜɥɟɧɢɹ
ɋɬɚɬɢɱɟɫɤɚɹ
ɞɭɯɨɜɤɚ
ɇɢɠɧɢɣ
ɧɚɝɪɟɜɚɬɟɥɶɧɵɣ
ɷɥɟɦɟɧɬ
ȼɟɪɯɧɢɣ
ɧɚɝɪɟɜɚɬɟɥɶɧɵɣ
ɷɥɟɦɟɧɬ
Ƚɪɢɥɶ ɋɬɟɣɤɢ ɢɡ ɬɟɥɹɬɢɧɵ
ɉɪɢɦɟɱɚɧɢɟ. ɉɪɢɜɟɞɟɧɧɨɟ ɜɪɟɦɹ ɩɪɢɝɨɬɨɜɥɟɧɢɹ ɹɜɥɹɟɬɫɹ ɩɪɢɛɥɢɡɢɬɟɥɶɧɵɦ ɢ ɦɨɠɟɬ ɢɡɦɟɧɹɬɶɫɹ ɩɨ ȼɚɲɟɦɭ ɭɫɦɨɬ-
ɉɪɢɦɟɱɚɧɢɟ. ɉɪɢɜɟɞɟɧɧɨɟ ɜɪɟɦɹ ɩɪɢɝɨɬɨɜɥɟɧɢɹ ɹɜɥɹɟɬɫɹ ɩɪɢɛɥɢɡɢɬɟɥɶɧɵɦ ɢ ɦɨɠɟɬ ɢɡɦɟɧɹɬɶɫɹ ɩɨ ȼɚɲɟɦɭ ɭɫɦɨɬ-
ɪɟɧɢɸ. ɉɪɢ ɢɫɩɨɥɶɡɨɜɚɧɢɢ ɝɪɢɥɹ ɨɛɹɡɚɬɟɥɶɧɨ ɩɨɦɟɫɬɢɬɟ ɩɨɞɞɨɧ ɧɚ ɧɢɠɧɢɣ ɭɪɨɜɟɧɶ ɞɭɯɨɜɤɢ.
ɪɟɧɢɸ. ɉɪɢ ɢɫɩɨɥɶɡɨɜɚɧɢɢ ɝɪɢɥɹ ɨɛɹɡɚɬɟɥɶɧɨ ɩɨɦɟɫɬɢɬɟ ɩɨɞɞɨɧ ɧɚ ɧɢɠɧɢɣ ɭɪɨɜɟɧɶ ɞɭɯɨɜɤɢ.
Ȼɥɸɞɨ
Ʌɚɡɚɧɶɹ
Ʉɚɧɟɥɥɨɧɢ
Ɇɚɤɚɪɨɧɧɚɹ ɡɚɩɟɤɚɧɤɚ
Ɍɟɥɹɬɢɧɚ
Ʉɭɪɢɰɚ
ɍɬɤɚ
Ʉɪɨɥɢɤ
ɋɜɢɧɢɧɚ
Ȼɚɪɚɧɢɧɚ
ɋɤɭɦɛɪɢɹ
Ɇɚɤɪɟɥɶ
Ɏɨɪɟɥɶ ɜ ɮɨɥɶɝɟ
ɇɟɚɩɨɥɢɬɚɧɫɤɚɹ ɩɢɰɰɚ
ɉɟɱɟɧɶɟ ɢ ɦɟɥɤɚɹ ɜɵɩɟɱɤɚ
ɋɥɚɞɤɢɟ ɨɬɤɪɵɬɵɟ ɩɢɪɨɝɢ
ɢɡ ɛɟɡɞɪɨɠɠɟɜɨɝɨ ɬɟɫɬɚ
ɂɡɞɟɥɢɹ ɢɡ ɩɪɟɫɧɨɝɨ ɬɟɫɬɚ
ɂɡɞɟɥɢɹ ɢɡ ɞɪɨɠɠɟɜɨɝɨ ɬɟɫɬɚ
Ɏɪɭɤɬɨɜɵɣ ɩɢɪɨɝ
ɉɨɞɪɭɦɹɧɢɜɚɧɢɟ ɛɥɸɞ ɜ ɤɨɧɰɟ ɩɪɢɝɨɬɨɜɥɟɧɢɹ
Ɇɨɪɫɤɚɹ ɤɚɦɛɚɥɚ ɢ ɤɚɪɚɤɚɬɢɰɚ
ɒɚɲɥɵɤ ɢɡ ɤɚɥɶɦɚɪɨɜ
ɢ ɤɪɟɜɟɬɨɤ
Ɏɢɥɟ ɬɪɟɫɤɢ
Ɂɚɩɟɱɟɧɧɵɟ ɨɜɨɳɢ
Ɉɬɛɢɜɧɵɟ ɤɨɬɥɟɬɵ
Ƚɚɦɛɭɪɝɟɪɵ
ɋɤɭɦɛɪɢɹ
Ɂɚɩɟɱɟɧɧɵɟ ɛɭɬɟɪɛɪɨɞɵ
Ȼɥɸɞɚ ɧɚ ɜɟɪɬɟɥɟ*
Ɍɟɥɹɬɢɧɚ
Ʉɭɪɢɰɚ
ȼɟɫ, ɤɝɍɪɨɜɟɧɶ
4 ɲɬ.
2,5
2,5
2,0
1,7
1,5
1,8
2,1
1,8
1,1
1,5
0,5
1,1
0,5
1,0
2,0
ɞɭɯɨɜɤɢ
2
3
3
2
3
2
1
1
1
1
1
1
1
1
1
1
1
1
3
3
3
3
2
2
2
2
3
3
3
3
3
4
4
4
3/4
4
4
3
4
4
-
-
ȼɪɟɦɹ ɩɪɟɞ-
ɜɚɪɢɬɟɥɶɧɨɝɨ
ɪɚɡɨɝɪɟɜɚ
ɞɭɯɨɜɤɢ, ɦɢɧ
5
5
5
10
10
10
10
10
10
5
5
5
15
10
10
10
10
10
5
5
5
5
5
5
5
5
5
5
5
Ɋɟɤɨɦɟɧɞɭɟɦɚɹ
ɬɟɦɩɟɪɚɬɭɪɚ,
ɋ°
200
200
200
180
200
180
180
180
180
180
180
180
220
180
180
180
160
170
Ɇɚɯ
Ɇɚɯ
Ɇɚɯ
Ɇɚɯ
Ɇɚɯ
Ɇɚɯ
Ɇɚɯ
Ɇɚɯ
Ɇɚɯ
Ɇɚɯ
Ɇɚɯ
ȼɪɟɦɹ
ɩɪɢɝɨɬɨɜɥɟɧɢɹ,
ɦɢɧ
45-50
30-35
30-35
60-70
80-90
90-100
70-80
70-80
70-80
30-40
30-35
25-30
15-20
10-15
25-30
30-35
25-30
25-30
8
4
10
8-10
15-20
20
7
15-20
5
70-80
70-80
* Ɍɨɥɶɤɨ ɞɥɹ ɧɟɤɨɬɨɪɵɯ ɦɨɞɢɮɢɤɚɰɢɣ ɦɨɞɟɥɟɣ.
13
Page 14

ɉɪɟɞɭɩɪɟɠɞɟɧɢɹ ɢ ɪɟɤɨɦɟɧɞɚɰɢɢ
! Ɉɛɨɪɭɞɨɜɚɧɢɟ ɪɚɡɪɚɛɨɬɚɧɨ ɢ ɢɡɝɨɬɨɜɥɟɧɨ ɜ ɫɨɨɬɜɟɬ-
ɫɬɜɢɢ ɫ ɦɟɠɞɭɧɚɪɨɞɧɵɦɢ ɧɨɪɦɚɦɢ ɛɟɡɨɩɚɫɧɨɫɬɢ. ȼɧɢɦɚɬɟɥɶɧɨ ɩɪɨɱɢɬɚɣɬɟ ɧɚɫɬɨɹɳɢɟ ɩɪɟɞɭɩɪɟɠɞɟɧɢɹ, ɩɪɢɜɨɞɢɦɵɟ ɜ ɰɟɥɹɯ ɜɚɲɟɣ ɛɟɡɨɩɚɫɧɨɫɬɢ.
Ɉɫɧɨɜɧɵɟ ɩɪɚɜɢɥɚ ɛɟɡɨɩɚɫɧɨɫɬɢ
Ⱦɚɧɧɵɟ ɭɤɚɡɚɧɢɹ ɤɚɫɚɸɬɫɹ ɬɨɥɶɤɨ ɫɬɪɚɧ, ɭɤɚɡɚɧ-
x
ɧɵɯ ɜ ɪɭɤɨɜɨɞɫɬɜɟ ɢ ɬɚɛɥɢɱɤɟ ɬɟɯɧɢɱɟɫɤɢɯ ɯɚɪɚɤɬɟɪɢɫɬɢɤ, ɪɚɫɩɨɥɨɠɟɧɧɨɣ ɧɚ ɨɛɨɪɭɞɨɜɚɧɢɢ.
Ɉɛɨɪɭɞɨɜɚɧɢɟ ɪɚɡɪɚɛɨɬɚɧɨ ɞɥɹ ɛɵɬɨɜɨɝɨ ɢɫɩɨɥɶ-
x
ɡɨɜɚɧɢɹ ɜ ɞɨɦɚɲɧɢɯ ɭɫɥɨɜɢɹɯ ɢ ɧɟ ɩɪɟɞɧɚɡɧɚɱɟɧɨ
ɞɥɹ ɩɪɢɦɟɧɟɧɢɹ ɧɚ ɩɪɟɞɩɪɢɹɬɢɹɯ ɩɪɨɦɵɲɥɟɧɧɨɫɬɢ
ɢ ɬɨɪɝɨɜɥɢ.
Ɉɛɨɪɭɞɨɜɚɧɢɟ ɧɟ ɞɨɥɠɧɨ ɭɫɬɚɧɚɜɥɢɜɚɬɶɫɹ ɧɚ ɨɬ-
x
ɤɪɵɬɨɦ ɜɨɡɞɭɯɟ (ɞɚɠɟ ɩɨɞ ɧɚɜɟɫɨɦ). ɑɪɟɡɜɵɱɚɣɧɨ
ɨɩɚɫɧɨ ɨɫɬɚɜɥɹɬɶ ɨɛɨɪɭɞɨɜɚɧɢɟ
ɞɨɠɞɹ / ɝɪɨɡɵ.
ɇɟ ɤɚɫɚɣɬɟɫɶ ɨɛɨɪɭɞɨɜɚɧɢɹ, ɟɫɥɢ ɜɚɲɢ ɧɨɝɢ / ɪɭɤɢ
x
ɦɨɤɪɵɟ; ɧɟ ɩɨɥɶɡɭɣɬɟɫɶ ɨɛɨɪɭɞɨɜɚɧɢɟɦ, ɤɨɝɞɚ ȼɵ
ɛɨɫɢɤɨɦ.
Ɉɛɨɪɭɞɨɜɚɧɢɟ ɞɨɥɠɧɨ ɢɫɩɨɥɶɡɨɜɚɬɶɫɹ ɬɨɥɶɤɨ
x
ɜɡɪɨɫɥɵɦɢ ɥɢɰɚɦɢ ɞɥɹ ɩɪɢɝɨɬɨɜɥɟɧɢɹ ɩɢɳɢ ɢ ɜ
ɫɨɨɬɜɟɬɫɬɜɢɢ ɫ ɢɧɫɬɪɭɤɰɢɹɦɢ ɞɚɧɧɨɝɨ ɪɭɤɨɜɨɞɫɬɜɚ. Ʌɸɛɨɟ ɞɪɭɝɨɟ ɢɫɩɨɥɶɡɨɜɚɧɢɟ ɨɛɨɪɭɞɨɜɚɧɢɹ
(ɧɚɩɪ., ɞɥɹ ɨɛɨɝɪɟɜɚ ɩɨɦɟɳɟɧɢɹ) ɹɜɥɹɟɬɫɹ ɧɟɩɪɚɜɢɥɶɧɵɦ ɢ ɨɩɚɫɧɵɦ. ɉɪɨɢɡɜɨɞɢɬɟɥɶ ɧɟ
ɨɬɜɟɬɫɬɜɟɧɧɨɫɬɢ ɡɚ ɩɨ ɜɪɟɠɞɟɧɢɟ ɨɛɨɪɭɞɨɜɚɧɢɹ
ɜ ɪɟɡɭɥɶɬɚɬɟ ɟɝɨ ɧɟɩɪɚɜɢɥɶɧɨɝɨ, ɧɟɰɟɥɟɜɨɝɨ ɢɫɩɨɥɶɡɨɜɚɧɢɹ.
ɂɧɫɬɪɭɤɰɢɢ ɪɭɤɨɜɨɞɫɬɜɚ ɨɬɧɨɫɹɬɫɹ ɤ ɨɛɨɪɭɞɨɜɚɧɢɸ
x
ɤɥɚɫɫɚ 1 (ɫɜɨɛɨɞɧɚɹ ɭɫɬɚɧɨɜɤɚ) ɢɥɢ ɤɥɚɫɫɚ 2 ɩɨɞɤɥɚɫɫɚ 1 (ɭɫɬɚɧɨɜɤɚ ɦɟɠɞɭ ɞɜɭɦɹ ɲɤɚɮɚɦɢ).
ɇɟ ɩɨɞɩɭɫɤɚɣɬɟ ɞɟɬɟɣ ɤ ɪɚɛɨɬɚɸɳɟɦɭ ɨɛɨɪɭɞɨɜɚ-
x
ɧɢɸ.
ɍɞɨɫɬɨɜɟɪɶɬɟɫɶ, ɱɬɨ ɩɢɬɚɸɳɢɟ ɤɚɛɟɥɢ ɞɪɭɝɢɯ ɷɥɟɤɬ-
x
ɪɨɩɪɢɛɨɪɨɜ ɧɟ ɫɨɩɪɢɤɚɫɚɸɬɫɹ ɫ ɝɨɪɹɱɢɦɢ ɱɚɫ ɬɹɦɢ
ɨɛɨɪɭɞɨɜɚɧɢɹ.
ɩɟɪɟɝɨɪɚɠɢɜɚɣɬɟ ɨɬɜɟɪɫɬɢɹ, ɩɪɟɞɧɚɡɧɚɱɟɧɧɵɟ ɞɥɹ
ɇɟ
x
ɜɟɧɬɢɥɹɰɢɢ ɢ ɨɬɜɨɞɚ ɬɟɩɥɚ.
ɇɟ ɡɚɤɪɵɚɣɬɟ ɫɬɟɤɥɹɧɧɭɸ ɤɪɵɲɤɭ* ɩɥɢɬɵ, ɤɨɝɞɚ ɤɨɧ-
x
ɮɨɪɤɢ ɜɤɥɸɱɟɧɵ ɢɥɢ ɟɳɟ ɧɟ ɨɫɬɵɥɢ.
ɉɨɥɶɡɭɣɬɟɫɶ ɤɭɯɨɧɧɵɦɢ ɪɭɤɚɜɢɰɚɦɢ / ɩɪɢɯɜɚɬɤɚɦɢ,
x
ɩɨɦɟɳɚɹ ɢ ɜɵɧɢɦɚɹ ɩɨɫɭɞɭ ɢɡ ɞɭɯɨɜɤɢ.
ɇɟ ɢɫɩɨɥɶɡɭɣɬɟ ɜɨɫɩɥɚɦɟɧɹɸɳɢɟɫɹ ɠɢɞɤɨɫɬɢ (ɫɩɢɪɬ,
x
ɛɟɧɡɢɧ ɢ ɬ.ɩ.) ɪɹɞɨɦ ɫ ɜɤɥɸɱɟɧɧɵɦ ɨɛɨɪɭɞɨɜɚɧɢɟɦ.
x
ɇɟ ɩɨɦɟɳɚɣɬɟ ɜ ɞɭɯɨɜɤɭ ɢɥɢ ɟɟ ɨɬɞɟɥɟɧɢɟ
ɧɟɧɢɹ ɝɨɪɸɱɢɟ ɦɚɬɟɪɢɚɥɵ: ɫɥɭɱɚɣɧɨɟ ɜɤɥɸɱɟɧɢɟ
ɨɛɨɪɭɞɨɜɚɧɢɹ ɦɨɠɟɬ ɩɪɢɜɟɫɬɢ ɤ ɜɨɡɝɨɪɚɧɢɸ.
ȼɫɟɝɞɚ ɩɪɨɜɟɪɹɣɬɟ, ɱɬɨ ɪɭɤɨɹɬɤɢ ɭɩɪɚɜɥɟɧɢɹ ɧɚɯɨ-
x
ɞɹɬɫɹ ɜ ɩɨɡɢɰɢɢ «z», ɤɨɝɞɚ ɨɛɨɪɭɞɨɜɚɧɢɟ ɧɟ ɢɫɩɨɥɶɡɭɟɬɫɹ.
Ɉɬɤɥɸɱɚɹ ɨɛɨɪɭɞɨɜɚɧɢɟ ɨɬ ɷɥɟɤɬɪɨɫɟɬɢ, ɧɟ ɬɹɧɢɬɟ
x
ɡɚ ɩɢɬɚɸɳɢɣ ɤɚɛɟɥɶ, ɱɬɨɛɵ ɜɵɧɭɬɶ ɜɢɥɤɭ ɢɡ ɪɨɡɟɬɤɢ:
ɛɟɪɢɬɟɫɶ ɡɚ ɜɢɥɤɭ.
* ɂɦɟɟɬɫɹ ɬɨɥɶɤɨ ɜ ɧɟɤɨɬɨɪɵɯ ɦɨɞɢɮɢɤɚɰɢɹɯ ɦɨɞɟɥɟɣ.
ɩɨɞ ɜɨɡɞɟɣɫɬɜɢɟɦ
ɧɟɫɟɬ
ɞɥɹ ɯɪɚ-
x
ɉɟɪɟɞ ɥɸɛɵɦɢ ɪɚɛɨɬɚɦɢ ɩɨ ɱɢɫɬɤɟ ɢ ɨɛɫɥɭɠɢɜɚɧɢɸ
ɨɛɨɪɭɞɨɜɚɧɢɹ ɨɛɹɡɚɬɟɥɶɧɨ ɨɬɤɥɸɱɢɬɟ ɟɝɨ ɨɬ ɷɥɟɤɬɪɨɫɟɬɢ, ɜɵɧɭɜ ɜɢɥɤɭ ɢɡ ɪɨɡɟɬɤɢ.
x
ȼ ɫɥɭɱɚɟ ɧɟɢɫɩɪɚɜɧɨɫɬɢ, ɧɢ ɩɪɢ ɤɚɤɢɯ ɨɛɫɬɨɹɬɟɥɶɫɬɜɚɯ
ɧɟ ɩɵɬɚɣɬɟɫɶ ɩɨɱɢɧɢɬɶ ɨɛɨɪɭɞɨɜɚɧɢɟ ɫɚɦɨɫɬɨɹɬɟɥɶɧɨ.
Ɋɟɦɨɧɬ, ɜɵɩɨɥɧɟɧɧɵɣ ɧɟɤɜɚɥɢɮɢɰɢɪɨɜɚɧɧɵɦɢ ɥɢɰɚɦɢ, ɦɨɠɟɬ ɛɟɡɜɨɡɜɪɚɬɧɨ ɩɨɜɪɟɞɢɬɶ ɨɛɨɪɭɞɨɜɚɧɢɟ ɢɥɢ
ɫɬɚɬɶ ɩɪɢɱɢɧɨɣ ɟɝɨ ɧɟɩɪɚɜɢɥɶɧɨɝɨ
Ɉɛɪɚɬɢɬɟɫɶ ɡɚ ɩɨɦɨɳɶɸ ɜ Ⱥɜɬɨɪɢɡɨɜɚɧɧɵɣ ɫɟɪɜɢɫɧɵɣ
ɰɟɧɬɪ.
x
ɇɟ ɤɥɚɞɢɬɟ ɬɹɠɟɥɵɟ ɩɪɟɞɦɟɬɵ ɧɚ ɨɬɤɪɵɬɭɸ ɞɜɟɪɰɭ
ɞɭɯɨɜɤɢ.
x
Ɉɛɨɪɭɞɨɜɚɧɢɟɦ ɧɟ ɞɨɥɠɧɵ ɩɨɥɶɡɨɜɚɬɶɫɹ ɥɢɰɚ (ɜɤɥɸɱɚɹ ɞɟɬɟɣ) ɫɨ ɫɧɢɠɟɧɧɵɦɢ ɮɢɡɢɱɟɫɤɢɦɢ, ɫɟɧɫɨɪɧɵɦɢ
ɢɥɢ ɭɦɫɬɜɟɧɧɵɦɢ ɫɩɨɫɨɛɧɨɫɬɹɦɢ, ɚ ɬɚɤɠɟ ɧɟ ɨɡɧɚɤɨɦɥɟɧɧɵɟ ɫ ɢɧɫɬɪɭɤɰɢɹɦɢ ɞɚɧɧɨɝɨ ɪɭɤɨɜɨɞɫɬɜɚ.
ɂɫɩɨɥɶɡɨɜɚɧɢɟ ɢɦɢ ɨɛɨɪɭɞɨɜɚɧɢɹ ɞɨɩɭɫɤɚɟɬɫɹ ɬɨɥɶɤɨ
ɩɨɞ ɤɨɧɬɪɨɥɟɦ ɥɢɰ, ɨɬɜɟɬɫɬɜɟɧɧɵɯ ɡɚ ɢɯ
ɧɨɫɬɶ ɢɥɢ ɩɨɫɥɟ ɩɨɥɭɱɟɧɢɹ ɢɧɫɬɪɭɤɰɢɣ ɩɨ ɪɚɛɨɬɟ
ɨɛɨɪɭɞɨɜɚɧɢɹ.
x
ɇɟ ɩɨɡɜɨɥɹɣɬɟ ɞɟɬɹɦ ɢɝɪɚɬɶ ɫ ɨɛɨɪɭɞɨɜɚɧɢɟɦ.
x
ȼɇɂɆȺɇɂȿ! Ⱦɨɫɬɭɩɧɵɟ ɱɚɫɬɢ ɨɛɨɪɭɞɨɜɚɧɢɹ
ɞɨɫɬɢɝɚɸɬ ɜɵɫɨɤɨɣ ɬɟɦɩɟɪɚɬɭɪɵ ɩɪɢ ɪɚɛɨɬɟ ɝɪɢɥɹ.
ɇɟ ɩɨɞɩɭɫɤɚɣɬɟ ɞɟɬɟɣ ɛɥɢɡɤɨ ɤ ɩɥɢɬɟ.
•
ȿɫɥɢ ɩɥɢɬɚ ɪɚɫɩɨɥɨɠɟɧɚ ɧɚ ɩɶɟɞɟɫɬɚɥ, ɩɪɢɧɹɬɶ
ɮɭɧɤɰɢɨɧɢɪɨɜɚɧɢɹ.
ɛɟɡɨɩɚɫ-
ɧɟɨɛɯɨɞɢɦɵɟ ɦɟɪɵ ɩɪɟɞɨɫɬɨɪɨɠɧɨɫɬɢ ɞɥɹ
ɩɪɟɞɨɬɜɪɚɳɟɧɢɹ ɫɨɫɤɚɥɶɡɵɜɚɧɢɹ ɩɥɢɬɵ ɫ
ɩɶɟɞɟɫɬɚɥɚ ɫɚɦɨɝɨ.
ɍɬɢɥɢɡɚɰɢɹ
ɉɪɢ ɭɧɢɱɬɨɠɟɧɢɢ ɭɩɚɤɨɜɨɱɧɨɝɨ ɦɚɬɟɪɢɚɥɚ ɢ ɜ ɫɥɭɱɚɟ
x
ɢɡɛɚɜɥɟɧɢɹ ɨɬ ɫɬɚɪɨɝɨ ɨɛɨɪɭɞɨɜɚɧɢɹ ɫɨɛɥɸɞɚɣɬɟ
ɞɟɣɫɬɜɭɸɳɢɟ ɬɪɟɛɨɜɚɧɢɹ ɩɨ ɢɯ ɭɬɢɥɢɡɚɰɢɢ.
ɋɨɝɥɚɫɧɨ ȿɜɪɨɩɟɣɫɤɨɣ ɞɢɪɟɤɬɢɜɟ 2002/96/EC ɩɨ
x
ɭɬɢɥɢɡɚɰɢɢ ɷɥɟɤɬɪɢɱɟɫɤɨɝɨ ɢ ɷɥɟɤɬɪɨɧɧɨɝɨ ɨɛɨɪɭɞɨɜɚɧɢɹ (WEEE) ɫɬɚɪɵɟ ɷɥɟɤɬɪɨɛɵɬɨɜɵɟ ɩɪɢɛɨɪɵ ɧɟ ɞɨɥɠɧɵ ɩɨɦɟɳɚɬɶɫɹ ɜ ɨɛɳɢɣ ɝɨɪɨɞɫɤɨɣ
ɧɟɨɬɫɨɪɬɢɪɨɜɚɧɧɵɣ ɩɨɬɨɤ ɨɬɯɨɞɨɜ: ɨɧɢ ɞɨɥɠɧɵ
ɫɨɛɢɪɚɬɶɫɹ ɨɬɞɟɥɶɧɨ, ɱɬɨɛɵ ɨɩɬɢɦɢɡɢɪɨɜɚɬɶ ɜɨɫɫɬɚɧɨɜɥɟɧɢɟ ɢ ɩɟɪɟɪɚɛɨɬɤɭ ɢɯ ɦɚɬɟɪɢɚɥɨɜ ɢ ɭɦɟɧɶɲɢɬɶ
ɧɟɝɚɬɢɜɧɨɟ ɜɨɡɞɟɣɫɬɜɢɟ ɧɚ ɡɞɨɪɨɜɶɟ ɱɟɥɨɜɟɤɚ ɢ ɷɤɨɥɨɝɢɸ. ɍɤɚɡɚɧɧɵɣ ɧɚ ɢɡɞɟɥɢɢ ɫɢɦɜɨɥ ɩɟɪɟɱɟɪɤɧɭɬɨɝɨ
ɜɟɞɪɚ ɧɚ ɤɨɥɟɫɚɯ ɧɚɩɨɦɢɧɚɟɬ, ɱɬɨ ɩɪɢ ɭɬɢɥɢɡɚɰɢɢ ɷɬɨ
ɨɛɨɪɭɞɨɜɚɧɢɟ ɫɥɟɞɭɟɬ ɩɨɦɟɫɬɢɬɶ ɨɬɞɟɥɶɧɨ.
Ⱦɥɹ ɩɨɥɭɱɟɧɢɹ ɢɧɮɨɪɦɚɰɢɢ ɨ ɩɪɚɜɢɥɶɧɨɣ ɭɬɢɥɢɡɚɰɢɢ
ɫɬɚɪɨɝɨ ɨɛɨɪɭɞɨɜɚɧɢɹ ɩɨɬɪɟɛɢɬɟɥɢ ɞɨɥɠɧɵ ɨɛɪɚɬɢɬɶɫɹ ɜ ɦɟɫɬɧɵɟ ɨɪɝɚɧɵ ɭɩɪɚɜɥɟɧɢɹ ɢɥɢ ɜ ɮɢɪɦɭɩɨɫɬɚɜɳɢɤ.
ɗɤɨɧɨɦɢɹ ɷɧɟɪɝɢɢ ɢ ɨɯɪɚɧɚ ɨɤɪɭɠɚɸɳɟɣ
ɫɪɟɞɵ
ɂɫɩɨɥɶɡɨɜɚɧɢɟ ɨɛɨɪɭɞɨɜɚɧɢɹ ɭɬɪɨɦ ɢɥɢ ɜɟɱɟɪɨɦ
x
ɩɨɡɜɨɥɹɟɬ ɫɧɢɡɢɬɶ ɩɢɤɨɜɭɸ ɧɚɝɪɭɡɤɭ ɧɚ ɷɥɟɤɬɪɨɫɟɬɶ
ɢ ɫɷɤɨɧɨɦɢɬɶ ɩɨɬɪɟɛɥɟɧɢɟ ɷɧɟɪɝɢɢ.
Ɋɟɝɭɥɹɪɧɨ ɩɪɨɜɟɪɹɣɬɟ ɭɩɥɨɬɧɢɬɟɥɢ ɞɜɟɪɰɵ ɞɭɯɨɜɤɢ
x
ɢ ɩɪɨɬɢɪɚɣɬɟ ɢɯ, ɨɱɢɳɚɹ ɨɬ ɥɸɛɨɣ ɝɪɹɡɢ ɢ ɫɨɪɚ: ɜɨ
ɢɡɛɟɠɚɧɢɟ ɭɬɟɱɤɢ ɬɟɩɥɚ ɭɩɥɨɬɧɢɬɟɥɢ ɞɨɥɠɧɵ ɩɥɨɬɧɨ
ɩɪɢɥɟɝɚɬɶ ɤ ɞɜɟɪɰɟ.
RS
14
Page 15

Ɉɛɫɥɭɠɢɜɚɧɢɟ ɢ ɭɯɨɞ
RS
Ɉɬɤɥɸɱɟɧɢɟ ɨɛɨɪɭɞɨɜɚɧɢɹ
! ɉɟɪɟɞ ɥɸɛɵɦɢ ɪɚɛɨɬɚɦɢ ɩɨ ɨɛɫɥɭɠɢɜɚɧɢɸ ɨɛɨɪɭ-
ɞɨɜɚɧɢɹ ɨɬɤɥɸɱɚɣɬɟ ɟɝɨ ɨɬ ɷɥɟɤɬɪɨɫɟɬɢ.
ɑɢɫɬɤɚ ɨɛɨɪɭɞɨɜɚɧɢɹ
! ɇɟ ɢɫɩɨɥɶɡɭɣɬɟ ɚɛɪɚɡɢɜɧɵɟ ɢɥɢ ɚɝɪɟɫɫɢɜɧɵɟ ɱɢɫ-
ɬɹɳɢɟ ɫɪɟɞɫɬɜɚ, ɬɚɤɢɟ ɤɚɤ ɩɹɬɧɨɜɵɜɨɞɢɬɟɥɢ, ɚɧɬɢɤɨɪɪɨɡɢɨɧɧɵɟ ɫɪɟɞɫɬɜɚ, ɩɨɪɨɲɤɢ ɢɥɢ ɚɛɪɚɡɢɜɧɵɟ
ɝɭɛɤɢ: ɨɧɢ ɦɨɝɭɬ ɛɟɡɜɨɡɜɪɚɬɧɨ ɩɨɜɪɟɞɢɬɶ (ɩɨɰɚɪɚɩɚɬɶ)
ɩɨɜɟɪɯɧɨɫɬɶ.
! ɇɢɤɨɝɞɚ ɧɟ ɢɫɩɨɥɶɡɭɣɬɟ ɞɥɹ ɱɢɫɬɤɢ ɞɭɯɨɜɤɢ ɩɚɪɨ-
ɨɱɢɫɬɢɬɟɥɢ ɢ ɚɷɪɨɡɨɥɢ.
Ɋɚɛɨɱɭɸ ɩɨɜɟɪɯɧɨɫɬɶ ɩɥɢɬɵ ɩɨɫɥɟ ɝɨɬɨɜɤɢ ɨɛɵɱɧɨ
x
ɞɨɫɬɚɬɨɱɧɨ ɩɪɨɫɬɨ ɩɪɨɬɟɪɟɬɶ ɜɥɚɠɧɨɣ ɝɭɛɤɨɣ ɢ
ɜɵɬɟɪɟɬɶ ɧɚɫɭɯɨ ɝɢɝɪɨɫɤɨɩɢɱɧɵɦ
ɬɟɧɰɟɦ.
x
ɗɦɚɥɢɪɨɜɚɧɧɵɟ ɜɧɟɲɧɢɟ ɱɚɫɬɢ ɢɥɢ ɩɨɜɟɪɯɧɨɫɬɢ ɢɡ ɧɟɪɠɚɜɟɸɳɟɣ ɫɬɚɥɢ, ɚ ɬɚɤɠɟ ɪɟɡɢɧɨɜɵɟ
ɭɩɥɨɬɧɢɬɟɥɢ ɨɱɢɳɚɣɬɟ ɝɭɛɤɨɣ, ɫɦɨɱɟɧɧɨɣ ɜ ɪɚɫɬɜɨɪɟ ɬɟɩɥɨɣ ɜɨɞɵ ɫ ɧɟɣɬɪɚɥɶɧɵɦ ɦɵɥɨɦ, ɡɚɬɟɦ
ɨɩɨɥɨɫɧɢɬɟ ɢ ɬɳɚɬɟɥɶɧɨ ɜɵɬɪɢɬɟ. Ⱦɥɹ ɭɞɚɥɟɧɢɹ
ɭɫɬɨɣɱɢɜɵɯ ɡɚɝɪɹɡɧɟɧɢɣ ɢɫɩɨɥɶɡɭɣɬɟ ɫɩɟɰɢɚɥɶɧɵɟ
ɫɪɟɞɫɬɜɚ. ɉɨɫɥɟ ɨɱɢɫɬɤɢ ɨɩɨɥɨɫɧɢɬɟ ɢ ɜɵɬɪɢɬɟ
ɧɚɫɭɯɨ. ɇɟ ɩɪɢɦɟɧɹɣɬɟ ɚɛɪɚɡɢɜɧɵɟ ɩɨɪɨɲɤɢ ɢɥɢ
ɫɪɟɞɫɬɜɚ, ɫɨɞɟɪɠɚɳɢɟ ɚɝɪɟɫɫɢɜɧɵɟ ɜɟɳɟɫɬɜɚ.
x
Ɋɟɲɟɬɤɢ ɪɚɛɨɱɟɣ ɩɨɜɟɪɯɧɨɫɬɢ, ɤɪɵɲɤɢ ɝɨɪɟɥɨɤ,
ɩɥɚɦɹɪɚɫɫɟɤɚɬɟɥɢ ɢ ɜɟɪɯɧɢɟ ɝɨɪɟɥɤɢ ɞɥɹ ɨɛɥɟɝɱɟɧɢɹ ɱɢɫɬɤɢ ɦɨɠɧɨ ɫɧɹɬɶ; ɩɪɨɦɨɣɬɟ ɢɯ ɬɟɩɥɨɣ ɜɨɞɨɣ
ɫ ɧɟɚɛɪɚɡɢɜɧɵɦ ɦɨɸɳɢɦ ɫɪɟɞɫɬɜɨɦ, ɭɞɚɥɹɹ ɧɚɝɚɪ,
ɡɚɬɟɦ ɜɵɫɭɲɢɬɟ.
ȼ ɦɨɞɟɥɹɯ ɫ ɷɥɟɤɬɪɨɧɧɵɦ ɡɚɠɢɝɚɧɢɟɦ ɪɟɝɭɥɹɪɧɨ
x
ɫɥɟɞɭɟɬ ɨɱɢɳɚɬɶ ɧɚɤɨɧɟɱɧɢɤɢ ɭɫɬɪɨɣɫɬɜ ɛɟɡɨɩɚɫɧɨɫɬɢ ɢ ɩɪɨɜɟɪɹɬɶ, ɧɟ ɡɚɫɨɪɟɧɵ ɥɢ ɝɚɡɨɜɵɟ
ɨɬɜɟɪɫɬɢɹ ɝɨɪɟɥɨɤ
x
Ⱦɭɯɨɜɤɭ ɢɞɟɚɥɶɧɨ ɨɱɢɳɚɬɶ ɢɡɧɭɬɪɢ ɩɨɫɥɟ ɤɚɠɞɨɝɨ
ɢɫɩɨɥɶɡɨɜɚɧɢɹ, ɩɨɤɚ ɨɧɚ ɧɟ ɨɫɬɵɥɚ. ɂɫɩɨɥɶɡɭɣɬɟ
ɝɨɪɹɱɭɸ ɜɨɞɭ ɢ ɧɟɣɬɪɚɥɶɧɨɟ ɦɨɸɳɟɟ ɫɪɟɞɫɬɜɨ,
ɡɚɬɟɦ ɯɨɪɨɲɨ ɨɩɨɥɨɫɧɢɬɟ ɢ ɜɵɬɪɢɬɟ ɦɹɝɤɨɣ ɬɤɚɧɶɸ.
ɇɟ ɢɫɩɨɥɶɡɭɣɬɟ ɚɛɪɚɡɢɜɧɵɟ ɱɢɫɬɹɳɢɟ ɫɪɟɞɫɬɜɚ.
ɋɬɟɤɥɨ ɞɜɟɪɰɵ ɞɭɯɨɜɤɢ ɨɱɢɳɚɣɬɟ ɫ ɩɨɦɨɳɶɸ
x
ɝɭɛɤɢ ɢ ɧɟɚɛɪɚɡɢɜɧɨɝɨ ɱɢɫɬɹɳɟɝɨ ɫɪɟɞɫɬɜɚ, ɡɚɬɟɦ
ɜɵɬɪɢɬɟ ɧɚɫɭɯɨ ɦɹɝɤɨɣ ɬɤɚɧɶɸ. ɇɟ ɢɫɩɨɥɶɡɭɣɬɟ
ɚɛɪɚɡɢɜɧɵɟ ɫɪɟɞɫɬɜɚ
ɤɨɬɨɪɵɟ ɦɨɝɭɬ ɩɨɜɪɟɞɢɬɶ ɩɨɜɟɪɯɧɨɫɬɶ ɢ ɩɪɢɜɟɫɬɢ
ɨɛɪɚɡɨɜɚɧɢɸ ɬɪɟɳɢɧ ɧɚ ɫɬɟɤɥɟ.
x
ɉɪɢɧɚɞɥɟɠɧɨɫɬɢ ɨɛɨɪɭɞɨɜɚɧɢɹ ɦɨɠɧɨ ɦɵɬɶ, ɤɚɤ ɢ
ɨɛɵɱɧɭɸ ɩɨɫɭɞɭ (ɞɚɠɟ ɜ ɩɨɫɭɞɨɦɨɟɱɧɨɣ ɦɚɲɢɧɟ).
ɑɚɫɬɢɰɵ ɠɢɪɚ ɢ ɝɪɹɡɢ, ɨɫɬɚɸɳɢɟɫɹ ɧɚ ɩɚɧɟɥɢ
x
ɭɩɪɚɜɥɟɧɢɹ ɩɨɫɥɟ ɝɨɬɨɜɤɢ, ɭɞɚɥɹɣɬɟ ɧɟɚɛɪɚɡɢɜɧɨɣ
ɝɭɛɤɨɣ ɢɥɢ ɦɹɝɤɨɣ ɬɤɚɧɶɸ.
ɉɨɜɟɪɯɧɨɫɬɶ ɢɡ ɧɟɪɠɚɜɟɸɳɟɣ ɫɬɚɥɢ ɦɨɠɟɬ ɩɨ-
x
ɤɪɵɬɶɫɹ ɩɹɬɧɚɦɢ ɩɪɢ ɞɥɢɬɟɥɶɧɨɦ
ɠɟɫɬɤɨɣ ɜɨɞɨɣ ɢɥɢ ɚɝɪɟɫɫɢɜɧɵɦɢ ɱɢɫɬɹɳɢɦɢ
ɫɪɟɞɫɬɜɚɦɢ, ɫɨɞɟɪɠɚɳɢɦɢ ɮɨɫɮɨɪ. Ɋɟɤɨɦɟɧɞɭɟɦ
ɯɨɪɨɲɨ ɟɟ ɨɩɨɥɚɫɤɢɜɚɬɶ ɢ ɜɵɬɢɪɚɬɶ ɧɚɫɭɯɨ.
.
ɢɥɢ ɦɟɬɚɥɥɢɱɟɫɤɢɟ ɫɤɪɟɛɤɢ,
ɤɭɯɨɧɧɵɦ ɩɨɥɨ-
ɤɨɧɬɚɤɬɟ ɫ
ɍɯɨɞ ɡɚ ɤɪɵɲɤɨɣ ɩɥɢɬɵ*
Ʉɪɵɲɤɭ ɩɥɢɬɵ ɫɥɟɞɭɟɬ ɨɱɢɳɚɬɶ
ɫ ɩɨɦɨɳɶɸ ɬɟɩɥɨɣ ɜɨɞɵ, ɧɟ ɢɫɩɨɥɶɡɭɣɬɟ ɚɛɪɚɡɢɜɧɵɟ ɫɪɟɞɫɬɜɚ. ɑɬɨɛɵ ɨɱɢɫɬɢɬɶ ɩɥɨɳɚɞɶ
ɡɚ ɪɚɛɨɱɟɣ ɩɨɜɟɪɯɧɨɫɬɶɸ ɩɥɢɬɵ, ɫɧɢɦɢɬɟ ɤɪɵɲɤɭ — ɨɬɤɪɨɣɬɟ
ɟɟ ɩɨɥɧɨɫɬɶɸ ɢ ɩɨɬɹɧɢɬɟ ɜɜɟɪɯ
(ɫɦ. ɪɢɫ.).
ɉɪɨɜɟɪɤɚ ɭɩɥɨɬɧɢɬɟɥɟɣ
Ɋɟɝɭɥɹɪɧɨ ɩɪɨɜɟɪɹɣɬɟ ɭɩɥɨɬɧɢɬɟɥɢ ɞɜɟɪɰɵ ɩɨ ɜɫɟɦɭ
ɩɟɪɢɦɟɬɪɭ. ȼ ɫɥɭɱɚɟ ɢɯ ɩɨɜɪɟɠɞɟɧɢɹ ɨɛɪɚɬɢɬɟɫɶ
ɜ Ⱥɜɬɨɪɢɡɨɜɚɧɧɵɣ ɫɟɪɜɢɫɧɵɣ ɰɟɧɬɪ. ɇɟ ɩɨɥɶɡɭɣɬɟɫɶ
ɞɭɯɨɜɤɨɣ, ɩɨɤɚ ɭɩɥɨɬɧɢɬɟɥɢ ɧɟ ɛɭɞɭɬ ɡɚɦɟɧɟɧɵ.
Ɂɚɦɟɧɚ ɥɚɦɩɵ ɨɫɜɟɳɟɧɢɹ
1. Ɉɬɤɥɸɱɢɬɟ ɨɛɨɪɭɞɨɜɚɧɢɹ ɨɬ
ɷɥɟɤɬɪɨɫɟɬɢ, ɡɚɬɟɦ ɫɧɢɦɢɬɟ
ɫɬɟɤɥɹɧɧɵɣ ɩɥɚɮɨɧ ɫ ɩɚɬɪɨɧɚ ɥɚɦɩɵ (ɫɦ. ɪɢɫ.).
2. ȼɵɜɟɪɧɢɬɟ ɩɟɪɟɝɨɪɟɜɲɭɸ
ɥɚɦɩɭ ɢ ɡɚɦɟɧɢɬɟ ɟɟ ɥɚɦɩɨɣ ɫ ɚɧɚɥɨɝɢɱɧɵɦɢ ɯɚɪɚɤɬɟɪɢɫɬɢɤɚɦɢ: ɧɚɩɪɹɠɟɧɢɟ
230 ȼ, ɦɨɳɧɨɫɬɶ – 25 ȼɬ,
ɬɢɩ – ȿ 14.
3. ɍɫɬɚɧɨɜɢɬɟ ɫɬɟɤɥɹɧɧɵɣ ɩɥɚɮɨɧ ɧɚ ɦɟɫɬɨ ɢ ɫɧɨɜɚ
ɩɨɞɤɥɸɱɢɬɟ ɨɛɨɪɭɞɨɜɚɧɢɟ ɤ ɷɥɟɤɬɪɨɫɟɬɢ.
! ɇɟ ɢɫɩɨɥɶɡɭɣɬɟ ɥɚɦɩɨɱɤɭ ɞɭɯɨɜɨɝɨ ɲɤɚɮɚ ɞɥɹ
ɨɫɜɟɳɟɧɢɹ ɩɨɦɟɳɟɧɢɹ.
ɉɨɦɨɳɶ
! ɇɟ ɩɨɥɶɡɭɣɬɟɫɶ ɭɫɥɭɝɚɦɢ ɥɢɰ, ɧɟ ɭɩɨɥɧɨɦɨɱɟɧɧɵɯ
ɉɪɨɢɡɜɨɞɢɬɟɥɟɦ. ɉɪɢ ɪɟɦɨɧɬɟ ɬɪɟɛɭɣɬɟ ɢɫɩɨɥɶɡɨɜɚ-
ɧɢɹ ɨɪɢɝɢɧɚɥɶɧɵɯ ɡɚɩɚɫɧɵɯ ɱɚɫɬɟɣ.
ɋɨɨɛɳɢɬɟ ɜ Ⱥɜɬɨɪɢɡɨɜɚɧɧɵɣ ɫɟɪɜɢɫɧɵɣ ɰɟɧɬɪ:
x
ɧɨɦɟɪ ɝɚɪɚɧɬɢɣɧɨɝɨ ɞɨɤɭɦɟɧɬɚ (ɫɟɪɜɢɫɧɨɣ ɤɧɢɠɤɢ,
ɫɟɪɜɢɫɧɨɝɨ ɫɟɪɬɢɮɢɤɚɬɚ ɢ ɬ.ɩ.);
x
ɦɨɞɟɥɶ ɩɥɢɬɵ (Ɇɨɞ.) ɢ ɫɟɪɢɣɧɵɣ ɧɨɦɟɪ (S/N),
ɭɤɚɡɚɧɧɵɟ ɜ ɢɧɮɨɪɦɚɰɢɨɧɧɨɣ ɬɚɛɥɢɱɤɟ, ɪɚɫɩɨɥɨɠɟɧɧɨɣ ɧɚ ɨɛɨɪɭɞɨɜɚɧɢɢ, ɧɚ ɭɩɚɤɨɜɤɟ ɢɥɢ
ɜ ɝɚɪɚɧɬɢɣɧɨɦ ɞɨɤɭɦɟɧɬɟ
* Ɍɨɥɶɤɨ ɞɥɹ ɧɟɤɨɬɨɪɵɯ ɦɨɞɢɮɢɤɚɰɢɣ ɦɨɞɟɥɟɣ.
.
15
Page 16

Operating Instructions
COOKER
RS GB
ɊɍɋɋɄɂɃ ,1
ɊɍɋɋɄɂɃɊɍɋɋɄɂɃ
English, 16
KN1M117S/RU S
KNJ1G17/RU S
KN1M117SA/RU
KNJ1G17A/RU
KZ
Қазақша, 30Қазақша, 30Қазақша, 30
Contents
17
WARNINGWARNINGWARNING,
1717
Installation, 18-21
Positioning and levelling
Electrical connection
Gas connection
Adapting to different types of gas
Technical data
Table of burner and nozzle specifications
Description of the appliance, 22
Overall view
Control panel
Start-up and use, 23-27
Using the hob
Using the oven
Electronic timer
Oven cooking advice table
Precautions and tips, 28
General safety
Disposal
Respecting and conserving the environment
Care and maintenance, 29
Switching the appliance off
Cleaning the appliance
Gas tap maintenance
Replacing the oven light bulb
Assistance
Page 17

WARNING
*%
WARNING: The appliance and its
accessible parts become hot during
use.
Care should be taken to avoid
touching heating elements.
Children less than 8 years of
age shall be kept away unless
continuously supervised.
This appliance can be used by
children aged from 8 years and
above and persons with reduced
physical, sensory or mental
capabilities or lack of experience
and knowledge if they have been
given supervision or instruction
concerning use of the appliance
in a safe way and understand the
hazards involved. Children shall not
play with the appliance. Cleaning
and user maintenance shall not
be made by children without
supervision.
WARNING: Danger of fire: do not
store items on the cooking surfaces.
Do not use harsh abrasive cleaners
or sharp metal scrapers to clean
the oven door glass since they can
scratch the surface, which may
result in shattering of the glass.
The internal surfaces of the
compartment (where present) may
become hot.
Never use steam cleaners or pressure
cleaners on the appliance.
Remove any liquid from
the lid before opening it.
Do not close the glass
cover (if present) when the gas burners or
electric hotplates are still hot.
WARNING: Ensure that the appliance is
switched off before replacing the lamp to
avoid the possibility of electric shock.
WARNING: Unattended cooking on a
hob with fat or oil can be dangerous
and may result in fire.
NEVER try to extinguish a fire with
water, but switch off the appliance
and then cover flame e.g. with a lid
or a fire blanket.
! When you place the rack inside,
make sure that the stop is directed
upwards and in the back of the cavity.
17
Page 18

Installation
GB
! Before operating your new appliance please read
this instruction booklet carefully. It contains
important information concerning the safe installation
and operation of the appliance.
! Please keep these operating instructions for future
reference. Make sure that the instructions are kept
with the appliance if it is sold, given away or moved.
! The appliance must be installed by a qualified
professional according to the instructions provided.
! Any necessary adjustment or maintenance must be
performed after the cooker has been disconnected
from the electricity supply.
Room ventilation
The appliance may only be installed in permanentlyventilated rooms, according to current national
legislation. The room in which the appliance is
installed must be ventilated adequately so as to
provide as much air as is needed by the normal gas
combustion process (the flow of air must not be
lower than 2 m
3
/h per kW of installed power).
The air inlets, protected by grilles, should have a
duct with an inner cross section of at least 100 cm
2
and should be positioned so that they are not liable
to even partial obstruction (
see figure A
).
These inlets should be enlarged by 100% - with a
minimum of 200 cm
2
- whenever the surface of the
hob is not equipped with a flame failure safety
device. When the flow of air is provided in an
indirect manner from adjacent rooms (
see figure B
),
provided that these are not communal parts of a
building, areas with increased fire hazards or
bedrooms, the inlets should be fitted with a
ventilation duct leading outside as described above.
Adjacent room
A
B
Room requiring
ventilation
Disposing of combustion fumes
The disposal of combustion fumes should be
guaranteed using a hood connected to a safe and
efficient natural suction chimney, or using an electric
fan that begins to operate automatically every time
the appliance is switched on (
Fumes channelled
straight outside
see figure
).
Fumes channelled through
a chimney or a branched
flue system (reserved for
cooking appliances)
! The liquefied petroleum gases are heavier than air
and collect by the floor, therefore all rooms
containing LPG cylinders must have openings
leading outside so that any leaked gas can escape
easily.
LPG cylinders, therefore, whether partially or
completely full, must not be installed or stored in
rooms or storage areas that are below ground level
(cellars, etc.). Only the cylinder being used should
be stored in the room; this should also be kept well
away from sources of heat (ovens, chimneys,
stoves) that may cause the temperature of the
cylinder to rise above 50°C.
Positioning and levelling
! It is possible to install the appliance alongside
cupboards whose height does not exceed that of the
hob surface.
! Make sure that the wall in contact with the back of
the appliance is made from a non-flammable, heatresistant material (T 90°C).
A
Ventilation opening for
comburent air
Increase in the gap
between the door and
the flooring
! After prolonged use of the appliance, it is
advisable to open a window or increase the speed of
any fans used.
18
To install the appliance correctly:
• Place it in the kitchen, the dining room or the bedsit (not in the bathroom).
• If the top of the hob is higher than the cupboards,
the appliance must be installed at least 200 mm
away from them.
• If the cooker is installed underneath a wall cabinet,
there must be a minimum distance of 420 mm
between this cabinet and the top of the hob.
This distance should be increased to 700 mm if the
wall cabinets are flammable (
see figure
).
Page 19

mm.
420
Min.
HOOD
Min. mm.
600
420
Min. mm.
mm. with hood
650
min.
• Do not position blinds
behind the cooker or
less than 200 mm away
from its sides.
• Any hoods must be
mm. without hood
installed according to
700
the instructions listed in
min.
the relevant operating
manual.
! Once the appliance has been installed, the power
supply cable and the electrical socket must be
easily accessible.
! The cable must not be bent or compressed.
! The cable must be checked regularly and replaced
by authorised technicians only.
! The manufacturer declines any liability should
these safety measures not be observed.
GB
Levelling
If it is necessary to level the
appliance, screw the
adjustable feet into the places
provided on each corner of the
base of the cooker (
).
figure
see
The legs* fit into the slots on
the underside of the base of
the cooker.
Electrical connections
Install a standardised plug corresponding to the
load indicated on the appliance data plate (
Technical data table
).
The appliance must be directly connected to the
mains using an omnipolar circuit-breaker with a
minimum contact opening of 3 mm installed between
the appliance and the mains. The circuit-breaker
must be suitable for the charge indicated and must
comply with NFC 15-100 regulations (the earthing
wire must not be interrupted by the circuit-breaker).
The supply cable must be positioned so that it does
not come into contact with temperatures higher than
50°C at any point.
Before connecting the appliance to the power
supply, make sure that:
• The appliance is earthed and the plug is compliant
with the law.
• The socket can withstand the maximum power of
the appliance, which is indicated by the data plate.
• The voltage is in the range between the values
indicated on the data plate.
• The socket is compatible with the plug of the
appliance. If the socket is incompatible with the
plug, ask an authorised technician to replace it.
Do not use extension cords or multiple sockets.
* Only available in certain models.
see
Gas connection
Connection to the gas network or to the gas cylinder
may be carried out using a flexible rubber or steel
hose, in accordance with current national legislation
and after making sure that the appliance is suited to
the type of gas with which it will be supplied (see
the rating sticker on the cover: if this is not the case
see below
install a pressure regulator which complies with
current national regulations. To make connection
easier, the gas supply may be turned sideways*:
reverse the position of the hose holder with that of
the cap and replace the gasket that is supplied with
the appliance.
! Check that the pressure of the gas supply is consistent
with the values indicated in the Table of burner and
nozzle specifications (
safe operation and durability of your appliance while
maintaining efficient energy consumption.
Gas connection using a flexible rubber hose
Make sure that the hose complies with current
national legislation. The internal diameter of the hose
must measure: 8 mm for liquid gas supply; 13 mm
for methane gas supply.
Once the connection has been performed, make
sure that the hose:
• Does not come into contact with any parts that
reach temperatures of over 50°C.
• Is not subject to any pulling or twisting forces
and that it is not kinked or bent.
• Does not come into contact with blades, sharp
corners or moving parts and that it is not
compressed.
• Is easy to inspect along its whole length so that
its condition may be checked.
• Is shorter than 1500 mm.
• Fits firmly into place at both ends, where it will be
fixed using clamps that comply with current
). When using liquid gas from a cylinder,
see below
). This will ensure the
regulations.
19
Page 20

GB
! If one or more of these conditions is not fulfilled or
if the cooker must be installed according to the
conditions listed for class 2 - subclass 1 appliances
(installed between two cupboards), the flexible steel
hose must be used instead (
Connecting a flexible jointless stainless steel
pipe to a threaded attachment
Make sure that the hose and gaskets comply with
current national legislation.
To begin using the hose, remove the hose holder on
the appliance (the gas supply inlet on the appliance
is a cylindrical threaded 1/2 gas male attachment).
! Perform the connection in such a way that the hose
length does not exceed a maximum of 2 metres,
making sure that the hose is not compressed and
does not come into contact with moving parts.
Checking the connection for leaks
When the installation process is complete, check
the hose fittings for leaks using a soapy solution.
Never use a flame.
see below
).
Adapting to different types of gas
It is possible to adapt the appliance to a type of gas
other than the default type (this is indicated on the
rating label on the cover).
Adapting the hob
Replacing the nozzles for the hob burners:
1. Remove the hob grids and slide the burners off
their seats.
2. Unscrew the nozzles using
a 7 mm socket spanner (
), and replace them with
figure
nozzles suited to the new type
of gas (
specifications table
3. Replace all the components
by f ollowi ng the above instructions in reverse.
Adjusting the hob burners’ minimum setting:
1. Turn the tap to the minimum position.
2. Remove the knob and adjust the regulatory
screw, which is positioned inside or next to the tap
pin, until the flame is small but steady.
! If the appliance is connected to a liquid gas
supply, the regulatory screw must be fastened as
tightly as possible.
see Burner and nozzle
see
).
3. While the burner is alight, quickly change the position
of the knob from minimum to maximum and vice versa
several times, checking that the flame is not
extinguished.
! The hob burners do not require primary air adjustment.
! After adjusting the appliance so it may be used
with a different type of gas, replace the old rating
label with a new one that corresponds to the new
type of gas (these labels are available from
Authorised Technical Assistance Centres).
! Should the gas pressure used be different (or vary
slightly) from the recommended pressure, a suitable
pressure regulator must be fitted to the inlet hose in
accordance with current national regulations relating
to “regulators for channelled gas”.
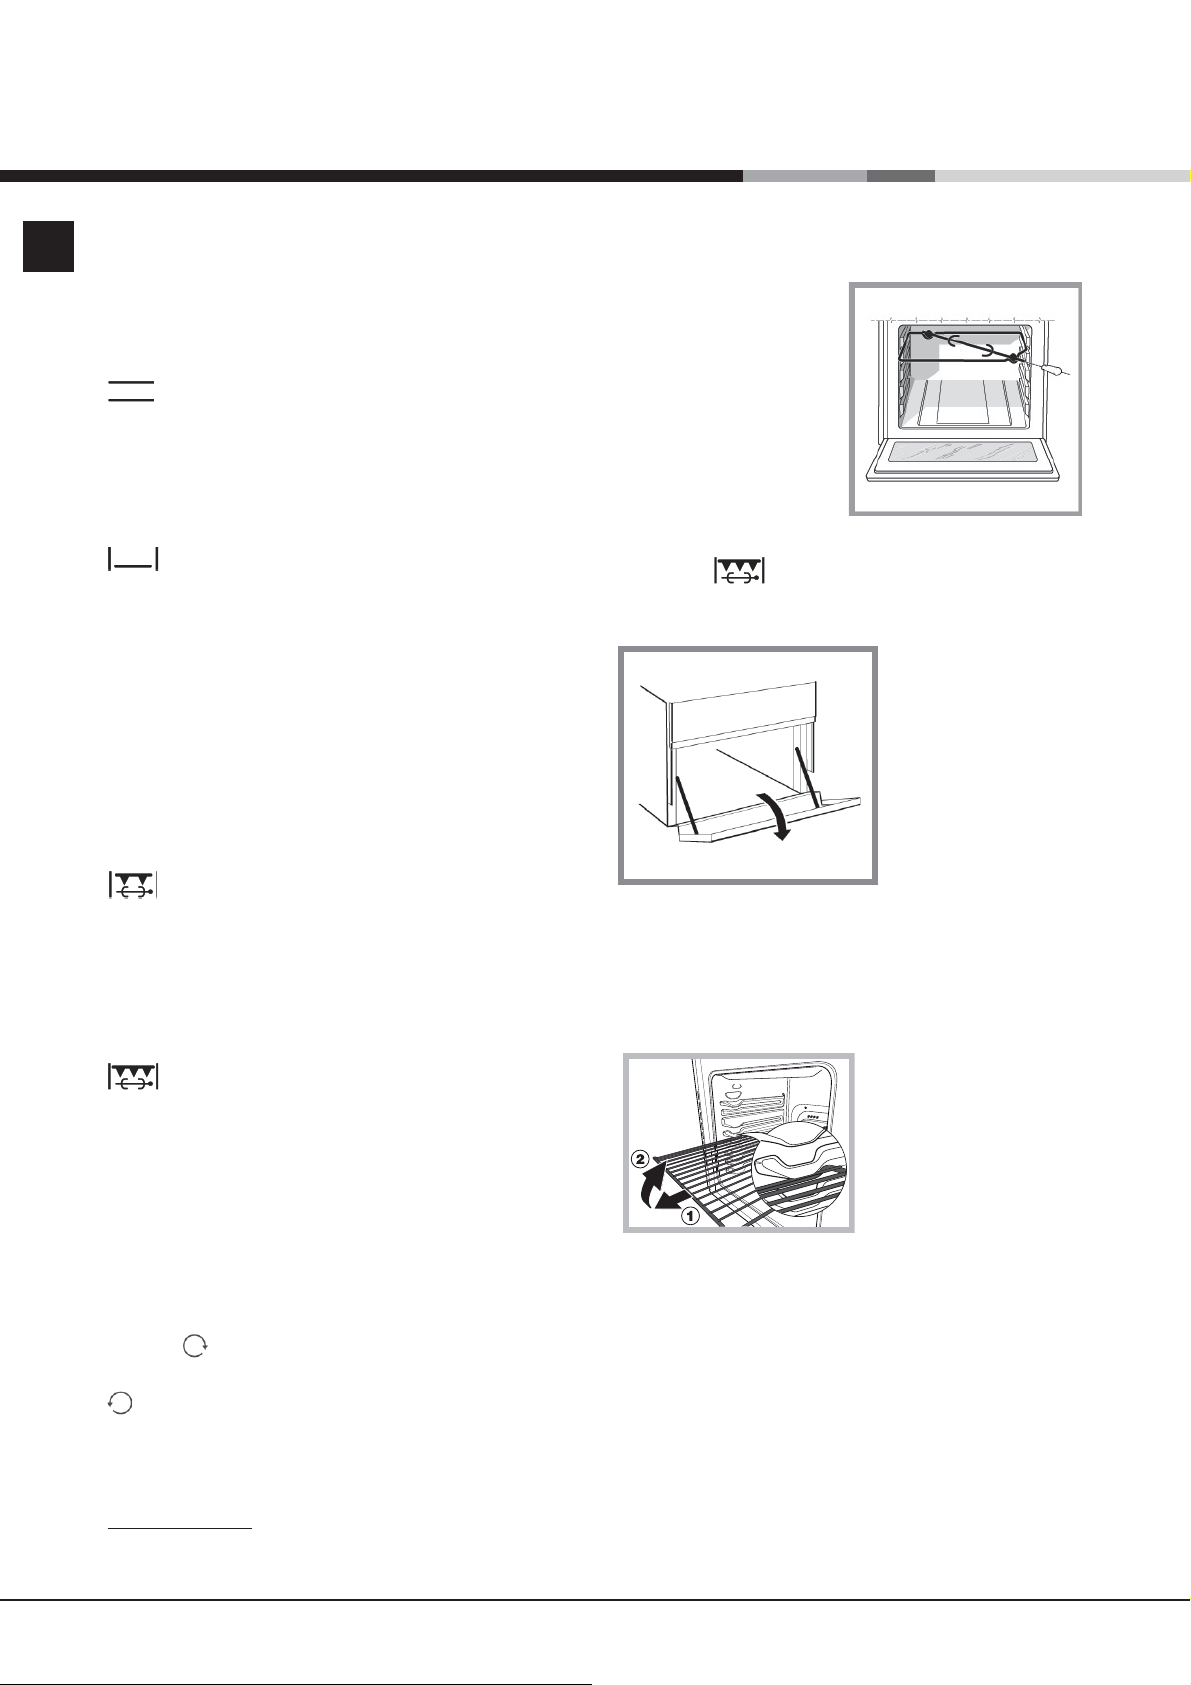
Safety Chain
! In order
to prevent
accidental
tipping of the
appliance, for
example by
a child climbing onto the
oven door, the
supplied safety
chain MUST be
installed!
The cooker is fitted with a safety chain to be fixed by
means of a screw (not supplied with the cooker) to
the wall behind the appliance, at the same height as
the chain is attached to the appliance.
Choose the screw and the screw anchor according
to the type of material of the wall behind the appliance. If the head of the screw has a diameter smaller
than 9mm, a washer should be used. Concrete wall
requires the screw of at least 8mm of diameter, and
60mm of length.
Ensure that the chain is fixed to the rear wall of the
cooker and to the wall, as shown in figure, so that
after installation it is tensioned and parallel to the
ground level.
20
Page 21

Table of burner and nozzle specifications
Table 1 Liquid Gas Natural Gas
Burner
Fast
(Large)(R)
Semi Fast
(Medium)(S)
Auxiliary
(Small)(A)
Supply
Pressures
* At 15°C 1013 mbar-dry gas *** Butane P.C.S. = 49,47 MJ/ Kg
** Propane P.C.S. = 50,37 MJ/Kg Natural P. C.S. = 37,78 MJ/m³
Diameter
(mm)
Nominal Reduced (mm) (mm) *** ** (mm) (mm)
100 3.00 0.70 41 86 218 214 116 286 143 286
75 1.90 0.40 30 70 138 136 103 181 118 181
55 1.00 0.40 30 50 73 71 79 95 80 95
Thermal Power
kW (p.c.s.*)
Nominal (mbar)
Minimum (mbar)
Maximum (mbar)
By Pass
1/100
Nozzle
1/100
Flow*
28-30
20
35
g/h
37
25
45
Nozzle
1/100
Flow*
l/h
20
17
25
Nozzle
1/100
GB
Flow*
l/h
13
6,5
18
KNJ1G17A/RU
SSS
SSS
KN1M117SA/RU
TECHNICAL DATA
Oven dimensions
(HxWxD)
Volume
Useful
measurements
relating to the
oven
compartment
Power supply
voltage and
frequency
Burners
Electric Plate
ENERGY LABEL
34x38x39 cm
50 l
width 42 cm
depth 44 cm
height 23 cm
Static
see data plate
may be adapted for use with any
type of gas shown on the data
plate, which is located inside the
flap or, after the oven compartment
has been opened, on the left-hand
wall inside the oven.
Standard Ø 145 mm: 1500 W
Directive 2002/40/EC on the label
of electric ovens. Standard EN
50304
Declared energy consumption for
Natural convection Class – heating
mode:
EC Directives: 2006/95/EC dated
12/12/06 (Low Voltage) and
subsequent amendments 2004/108/EC dated 15/12/04
(Electromagnetic Compatibility) and
subsequent amendments 2009/142/EC dated 30/11/09 (Gas)
and subsequent amendments 2002/96/EC.
1275/2008 Stand-by/ Off mode
Data plate, is located inside the flap or, after the
ovencompartment has been opened, on the left-hand
wall inside the oven.
21
Page 22

Description of the appliance
GB
Overall view
Gas burner
Hob grid
Control panel
GRILL
DRIPPING PAN
Adjustable foot
Cover*
Elettric plate
Containment surface
for spills
GUIDE RAILS
for the sliding racks
position 5
position 4
position 3
position 2
position 1
Adjustable foot
Control panel
Electronic Lighting
for Hob Burners*
Timer Knob*
Thermostat
knob
The oven-operating
pilot lamp
Selection
knob
The control knob for the electric plate*
The electric plate
pilot lamp*
Control Knobs for
Gas Burners on Hob
Only available in certain models.
**
*
**
22
Page 23

Start-up and use
X
C
Using the hob
Lighting the burners
For each BURNER knob there is a complete ring
showing the strength of the flame for the relevant
burner.
To light one of the burners on the hob:
1. Bring a flame or gas lighter close to the burner.
2. Press the BURNER knob and turn it in an
anticlockwise direction so that it is pointing to the
maximum flame setting (.
3. Adjust the intensity of the flame to the desired
level by turning the BURNER knob in an
anticlockwise direction. This may be the minimum
setting &, the maximum setting ( or any position in
between the two.
If the appliance is fitted with
an electronic lighting
towards the maximum flame setting, until the burner
is lit.The burner may be extinguished when the knob
is released. If this occurs, repeat the operation,
holding the knob down for a longer period of time.
device* (
ignition button, marked with
the symbol
the BURNER knob down
and turn it in an
anticlockwise direction,
C
), press the
, then hold
Burner ø Cookware diameter (cm)
Fast (R) 24 - 26
Semi Fast (S) 16 - 20
Auxiliary (A) 10 - 14
! On the models supplied with a reducer shelf,
remember that this should be used only for the
auxiliary burner when you use casserole dishes with
a diameter under 12 cm.
Using the oven
! The first time you use your appliance, heat the
empty oven with its door closed at its maximum
temperature for at least half an hour. Ensure that the
room is well ventilated before switching the oven off
and opening the oven door. The appliance may emit
a slightly unpleasant odour caused by protective
substances used during the manufacturing process
burning away.
! Before operating the product, remove all plastic
film from the sides of the appliance.
! Never put objects directly on the bottom of the
oven; this will avoid the enamel coating being
damaged. Only use position 1 in the oven when
cooking with the rotisserie spit.
GB
! If the flame is accidentally extinguished, switch off
the burner and wait for at least 1 minute before
attempting to relight it.
If the appliance is equipped with a flame failure
safety device (X)*, press and hold the BURNER
knob for approximately 2-3 seconds to keep the
flame alight and to activate the device.
To switch the burner off, turn the knob until it
reaches the stop position
Practical advice on using the burners
For the burners to work in the most efficient way
possible and to save on the amount of gas
consumed, it is recommended that only pans that
have a lid and a flat base are used. They should also
be suited to the size of the burner.
To identify the type of burner, please refer to the
diagrams contained in the “Burner and nozzle
specifications”.
•.
The oven knobs
With these two controls you can select the different
functions of the oven and choose the cooking
temperature suitable for the food you are preparing.
The different cooking functions are set up by
operating the two knobs:
the selection knob
the thermostat knob on the oven panel.
For any selection-knob setting different from idle,
identified by the “
knob setting marked
light without any heating element being switched on.
When the oven light is on, it means that the oven is
in use, and it will remain on for the entire time the
oven is being used.
Only available in certain models.
**
*
**
00
0”, the oven light turns on; the
00
permits turning on the oven
23
Page 24

GB
Switching the cooking zones on and off
The control knobs for the hob electric hotplates
The cookers can be fitted with normal and rapid
electric hotplates in a variety of combinations (the
rapid hotplates can be distinguished from the rest
by the red boss in the centre of the same). To avoid
any heat loss and damage to the hotplates, we
advise you to use pans with a flat bottom, with a
diameter which matches that of the hotplate itself.
The table contains the different settings indicated on
the knobs and the use for which the hotplates are
recommended.
Before using the hotplates for the first time,Before using the hotplates for the first time,
Before using the hotplates for the first time,
Before using the hotplates for the first time,Before using the hotplates for the first time,
you should heat them at maximumyou should heat them at maximum
you should heat them at maximum
you should heat them at maximumyou should heat them at maximum
temperature for approximately 4 minutes,temperature for approximately 4 minutes,
temperature for approximately 4 minutes,
temperature for approximately 4 minutes,temperature for approximately 4 minutes,
without any pans. During this initial stage,without any pans. During this initial stage,
without any pans. During this initial stage,
without any pans. During this initial stage,without any pans. During this initial stage,
their protective coating hardens and reachestheir protective coating hardens and reaches
their protective coating hardens and reaches
their protective coating hardens and reachestheir protective coating hardens and reaches
its maximum resistance.its maximum resistance.
its maximum resistance.
its maximum resistance.its maximum resistance.
Electric hotplate indicator light
This light comes on when any of the electrical
hotplates on a hob which features electric hotplates
have been turned on.
Practical advice on using the hob
• Use pans with a thick, flat base to ensure that
they adhere perfectly to the cooking zone.
• Always use pans with a diameter that is large
enough to cover the hotplate fully, in order to use
all the heat produced.
• Always make sure that the base of the pan is
completely clean and dry: this ensures that the
pans adhere perfectly to the cooking zones and
that both the pans and the hob remain effective
for a longer period of time.
• Avoid using the same cookware that is used on
gas burners: the heat concentration on gas
burners may have warped the base of the pan,
causing it not to adhere to the surface correctly.
• Never leave a cooking zone switched on without a
pan on top of it, as doing so may cause the zone
to become damaged.
Setting Normal or Fast Plate
0 Off
1 Cooking vegetables, fish
Cooking potatoes (using steam) soups,
2
chickpeas, beans.
Continuing the cooking of large quantities of
3
food, minestrone
4 For roasting (average)
5 For roasting (above average)
For browning and reaching a boil in a short
6
time.
WARNING! The glass lid canWARNING! The glass lid can
WARNING! The glass lid can
WARNING! The glass lid canWARNING! The glass lid can
break in if it is heated up. Turn offbreak in if it is heated up. Turn off
break in if it is heated up. Turn off
break in if it is heated up. Turn offbreak in if it is heated up. Turn off
all the burners and the electricall the burners and the electric
all the burners and the electric
all the burners and the electricall the burners and the electric
plates before closing the lid.plates before closing the lid.
plates before closing the lid.
plates before closing the lid.plates before closing the lid.
*Applies to the models with glass*Applies to the models with glass
*Applies to the models with glass
*Applies to the models with glass*Applies to the models with glass
cover only.cover only.
cover only.
cover only.cover only.
24
Page 25

Cooking Modes
Static oven
Knob setting: anywhere between
The oven light turns on and the top and bottom
heating elements (resistors) switch on. The
temperature, fixed by the thermostat knob, is
reached automatically and kept constant by the
thermostat control. This function permits cooking
and type of food thanks to excellent temperature
distribution.
The bottom heating element
-Knob setting: anywhere between
The oven light turns on and so does the bottom
heating element. The temperature, fixed by the
thermostat knob, is reached automatically and kept
constant. This setting is recommended for finishing
the cooking of foods (placed in pans) that are well
done on the outside but still not done inside or for
desserts covered with fruit or jam which require a
light browning on top. Note that this function does
not permit reaching the maximum (250°C)
temperature inside for cooking foods always on this
oven setting unless the foods are cakes which only
require temperatures below or equal to 180°C.
The Top heating element
-Knob setting: anywhere between
The oven light turns on and so does the infra-red ray
grill, and the motor starts turning the spit. The rather
high and direct temperature of the grill permits
browning the outside of meats immediately thus
keeping in the juices and assuring tenderness.
The grill
,
The top heating element is activated. The extremely
high and direct temperature of the grill makes it
possible to brown the surface of meats and roasts
while locking in the juices to keep them tender.
Timer*
To activate the Timer proceed as follows:
1. Turn the TIMER knob in a clockwise direction
for almost one complete revolution to set the buzzer.
2. Turn the TIMER knob in an anticlockwise direction
to set the desired length of time.
* Only available in certain models
5050
50°C and
5050
5050
50°C and
5050
5050
50°C and
5050
MaxMax
Max
MaxMax
MaxMax
Max
MaxMax
MaxMax
Max
MaxMax
The rotisserie*
To operate the rotisserie,
proceed as follows:
a)a)
a ) place the dripping-pan on
a)a)
the 1st rack;
b)b)
b ) insert the special rotisserie
b)b)
support on the 4th rack and
position the spit by inserting it
through the special hole into
the rotisserie at the back of the
oven;
c)c)
c ) to start the spit, set the oven selection knob on
c)c)
setting
Storage recess below the oven*
Below the oven a recess can be used to contain
cooking pans and cooker
accessories. Moreover, during
oven operation, it may be
used to keep food warm.To
open the storage is necessary
turn it downwards.
Caution:Caution:
Caution: this storage recess
Caution:Caution:
must not be used to store
inflammable materials.
The oven offers a wide range of alternatives which
allow you to cook any type of food in the best
possible way. With time you will learn to make the
best use of this versatile cooking appliance and the
following directions are only a guideline which may
be varied according to your own personal
experience.
Preheating
If the oven must be preheated (this is generally the
fanfan
case when cooking leavened foods), the “
assistedassisted
assisted” mode
assistedassisted
desired temperature as quickly as possible in order
to save on energy.
Once the food has been placed in the oven, the
most appropriate cooking mode can then be
selected.
can be used to reach the
fan
fanfan
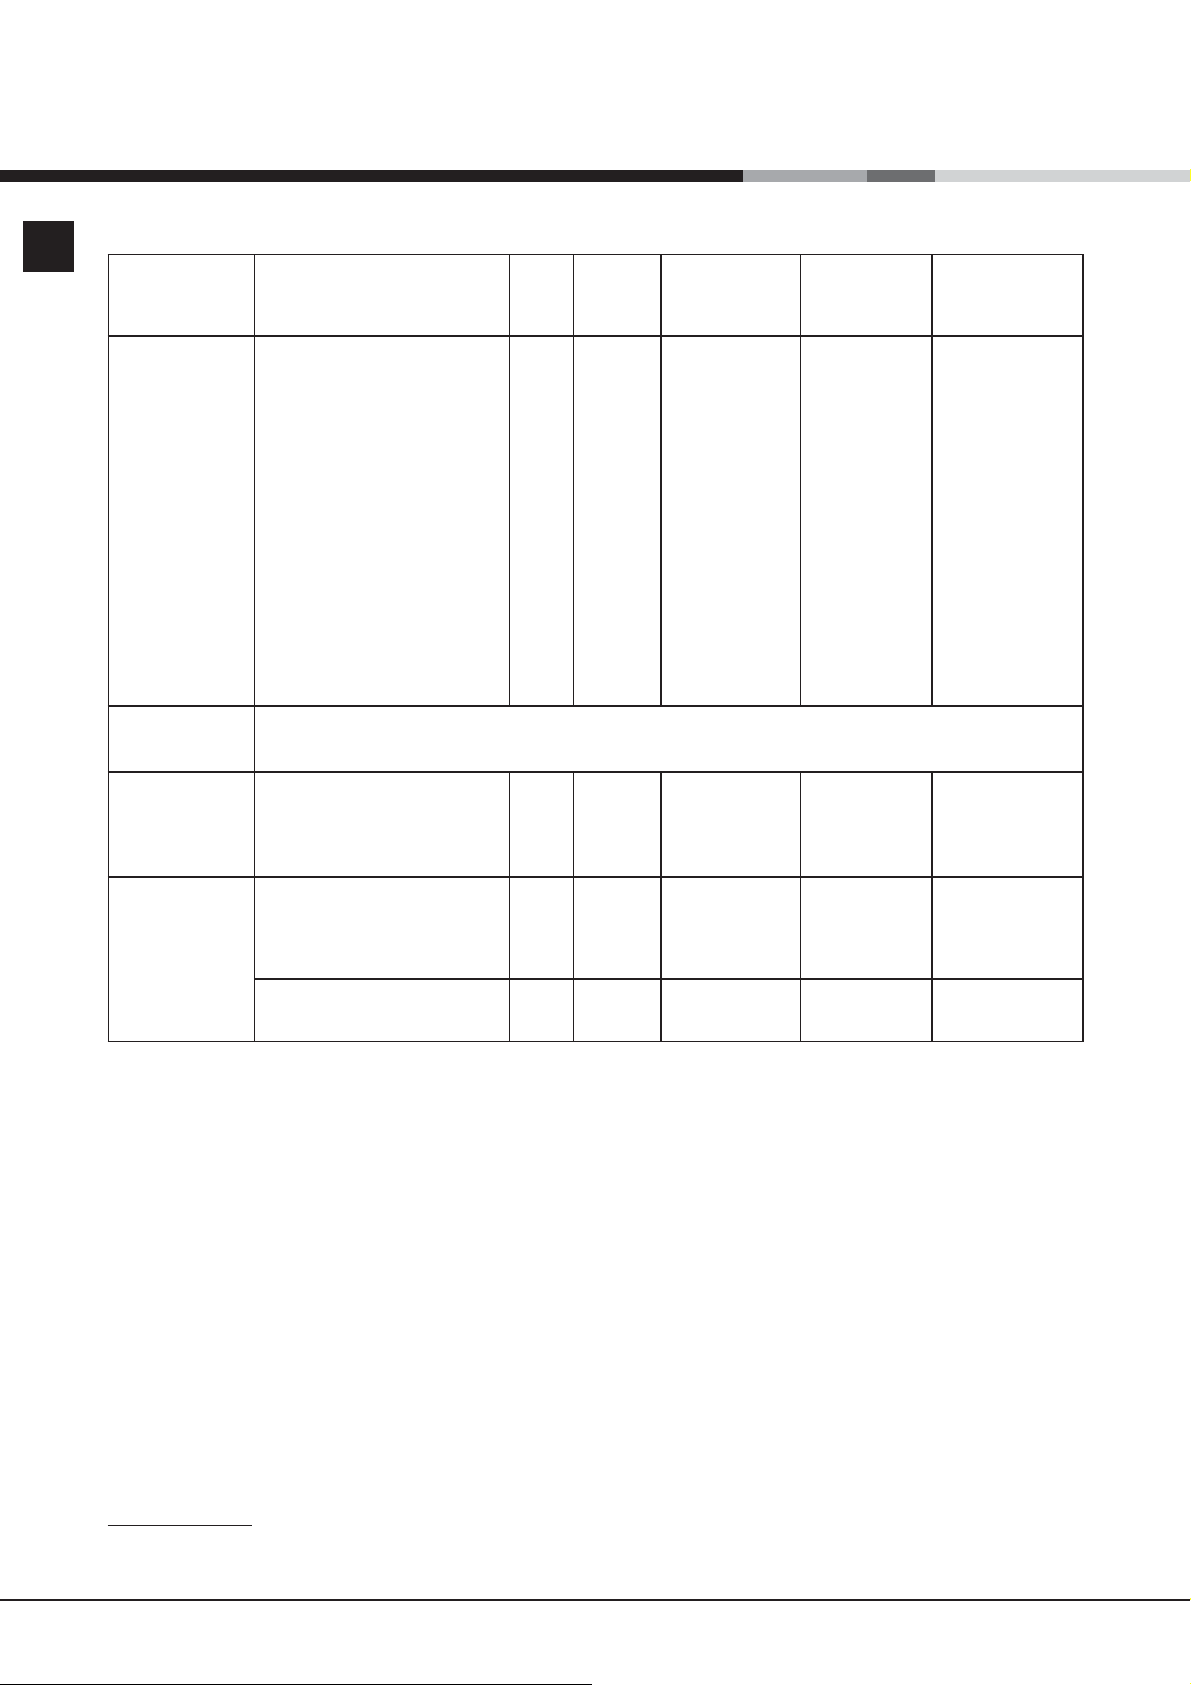
WARNING! The oven is
provided with a stop system to extract the racks
and prevent them from
coming out of the oven.(1)
As shown in the drawing,
to extract them completely, simply lift the racks,
holding them on the front
part, and pull (2).
GB
25
Page 26

GB
Practical Cooking Advice
When cooking in the oven, use only one dripping
pan or rack at a time. Select from among the top or
bottom rack heights based on whether the dish
needs more or less heat from the top.
When using this mode, we recommend you set the
thermostat to the highest setting. However, this
does not mean you cannot use lower temperatures,
simply by adjusting the thermostat knob to the
desired temperature.
Preheating
II
If the oven must be preheated (this is generally the
II
case when cooking leavened foods), we recommend
you use the “convection mode” to reach the desired
temperature as quickly as possible. When
preheating is over, which is indicated by the red
light “E” going out, select the required cooking
mode.
Cooking Fish and Meat
When cooking white meat, fowl and fish, use
temperature settings from 180 °C to 200 °C.
For red meat that should be well done on the outside
while tender and juicy in the inside, it is a good idea
to start with a high temperature setting (200°C220°C) for a short time, then turn the oven down
afterwards.
In general, the larger the roast, the lower the
temperature setting. Place the meat on the centre of
the grid and place the dripping pan beneath it to
catch the fat.
Make sure that the grid is inserted so that it is in the
centre of the oven. If you would like to increase the
amount of heat from below, use the low rack heights.
For savoury roasts (especially duck and wild game),
dress the meat with lard or bacon on the top.
In models fitted with a rotisserie
the spit kit provided when using the “
, you can use
grillgrill
grill” mode. In
grillgrill
this case, cook with the oven door shut, placing the
spit kit on the third oven rack from the bottom and
the dripping pan on the bottom rack to collect any
sauce and /or dripping fat.
! Always use the grill with the oven door! Always use the grill with the oven door
! Always use the grill with the oven door
! Always use the grill with the oven door! Always use the grill with the oven door
shut.shut.
shut. This will allow you both to obtain excellent
shut.shut.
results and to save on energy (approximately 10%).
Therefore the best results when using the grill
modes are obtained by placing the grid on the lower
racks (see cooking table) then, to prevent fat and
grease from dripping onto the bottom of the oven
and smoke from forming, place a dripping-pan on
the 1st oven rack from the bottom.
Baking Cakes
When baking cakes, always preheat the oven and
do not open the oven door during baking to prevent
the cake from dropping.
Using the Grill
Use the
grillgrill
“
grill” mode, placing the food under
grillgrill
the centre of the grill (situated on the 3rd or 4th rack
form the bottom) because only the central part of the
top heating element is turned on.
Use the bottom rack (1st from the bottom), placing
the dripping pan provided to collect any sauce and/
or grease and prevent the same from dripping onto
the oven bottom.
26
Page 27

Oven cooking advice table
GB
Selection
knob setting
1 Static
2 Oven
bottom
Foods Wt.
(Kg)
Lasagne
Cannelloni
Pasta bakes au gratin
Veal
Chicken
Duck
Rabbit
Pork
Lamb
Mackerel
Red porgy
Trout baked in paper
Napolitan pizza
Biscuits or cookies
Flan or tart
Savoury pie
Yeast cake
Fruit cake
Finishing touches
2,5
2,5
2,0
1,7
1,5
1,8
2
2,1
1,8
1,1
1,5
1
1
0,5
1,1
1
0,5
1
Cooking
position from
bottom
2
3
3
2
3
3
3
3
3
2
2
2
2
3
3
3
3
3
Heating time
(minutes)
5
5
5
10
10
10
10
10
10
5
5
5
15
10
10
10
10
10
Thermostat
knob
200
200
200
180
200
180
180
180
180
180
180
180
220
180
180
180
160
170
Cooking
time
(minutes)
45-50
30-35
30-35
60-70
80-90
90-100
70-80
70-80
70-80
30-40
30-35
25-30
15-20
10-15
25-30
30-35
25-30
25-30
3 Top bottom
4 Grill
NB: cooking times are
grill, the dripping-pan must always be placed on the 1st oven rack from the bottom.
Sole and cuttlefish
Squid and shrimp on
spits
Cod fillets
Grilled vegetables
Veal steaks
Cutlets
Hamburgers
Mackerels
Toast sandwiches
With rotisserie (only in
few models)
Veal on the spit
Chicken on the spit
approximate and may vary according to personal taste. When cooking using the grill or double
1
1
1
1
1
1,5
1
1
n.° 4
1,0
2,0
4
4
4
3/4
4
4
3
4
4
-
-
5
5
5
5
5
5
5
5
5
5
5
Max
Max
Max
Max
Max
Max
Max
Max
Max
Max
Max
8
4
10
8-10
15-20
20
7
15-20
5
70-80
70-80
27
Page 28

Precautions and tips
GB
! This appliance has been designed and manufactured in
compliance with international safety standards.
The following warnings are provided for safety reasons and
must be read carefully.
General safety
• These instructions are only valid for the
countries whose symbols appear in the
manual and on the serial number plate.•
The appliance was designed for domestic use inside the
home and is not intended for commercial or industrial use.
• The appliance must not be installed outdoors, even in
covered areas. It is extremely dangerous to leave the
appliance exposed to rain and storms.
• Do not touch the appliance with bare feet or with wet or
damp hands and feet.
• The appliance must be used by adults only for
the preparation of food, in accordance with the
instructions outlined in this booklet. Any other
use of the appliance (e.g. for heating the room)
constitutes improper use and is dangerous.
The manufacturer may not be held liable for
any damage resulting from improper, incorrect
and unreasonable use of the appliance.
• The instruction booklet accompanies a class 1 (insulated)
or class 2 - subclass 1 (recessed between 2 cupboards)
appliance.
• Keep children away from the oven.
• Make sure that the power supply cables of other electrical
appliances do not come into contact with the hot parts of
the oven.
• The openings used for the ventilation and dispersion of
heat must never be covered.
• Do not close the glass hob cover (selected models only)
when the burners are alight or when they are still hot.
• Always use oven gloves when placing cookware in the
oven or when removing it.
• Do not use flammable liquids (alcohol, petrol, etc...) near
the appliance while it is in use.
• Do not place flammable material in the lower storage
compartment or in the oven itself. If the appliance is
switched on accidentally, it could catch fire.
• Always make sure the knobs are in the • position and that
the gas tap is closed when the appliance is not in use.
• When unplugging the appliance, always pull the plug from
the mains socket; do not pull on the cable.
• Never perform any cleaning or maintenance work without
having disconnected the appliance from the electricity
mains.
• If the appliance breaks down, under no circumstances
should you attempt to repair the appliance yourself.
Repairs carried out by inexperienced persons may cause
injury or further malfunctioning of the appliance. Contact
Assistance.
• Do not rest heavy objects on the open oven door.
• The appliance should not be operated by people
(including children) with reduced physical,
sensory or mental capacities, by inexperienced
individuals or by anyone who is not familiar with
the product. These individuals should, at the very
least, be supervised by someone who assumes
responsibility for their safety or receive
preliminary instructions relating to the operation of
the appliance.
• Do not let children play with the appliance.
•
If the cooker is placed on a pedestal, take the necessary precautions to prevent the cooker from sliding
off the pedestal itself.
Disposal
• When disposing of packaging material: observe local
legislation so that the packaging may be reused.
• The European Directive 2002/96/EC relating to Waste
Electrical and Electronic Equipment (WEEE) states that
household appliances should not be disposed of using the
normal solid urban waste cycle. Exhausted appliances
should be collected separately in order to optimise the cost
of re-using and recycling the materials inside the machine,
while preventing potential damage to the atmosphere and
to public health. The crossed-out dustbin is marked on all
products to remind the owner of their obligations regarding
separated waste collection.
Exhausted appliances may be collected by the public
waste collection service, taken to suitable collection areas
in the area or, if permitted by current national legislation,
they may be returned to the dealers as part of an
exchange deal for a new equivalent product.
All major manufacturers of household appliances
participate in the creation and organisation of systems for
the collection and disposal of old and disused appliances.
Respecting and conserving the
environment
• You can help to reduce the peak load of the electricity
supply network companies by using the oven in the hours
between late afternoon and the early hours of the morning.
• Check the door seals regularly and wipe them clean to
ensure they are free of debris so that they adhere properly
to the door, thus avoiding
heat dispersion.
28
Page 29

Care and maintenance
Switching the appliance off
Disconnect your appliance from the electricity supply
before carrying out any work on it.
Cleaning the appliance
! Do not use abrasive or corrosive detergents such as
stain removers, anti-rust products, powder detergents or
sponges with abrasive surfaces: these may scratch the
surface beyond repair.
! Never use steam cleaners or pressure cleaners on the
appliance.
• It is usually sufficient simply to wash the hob using a
damp sponge and dry it with absorbent kitchen roll.
• The stainless steel or enamel-coated external parts and
the rubber seals may be cleaned using a sponge that
has been soaked in lukewarm water and neutral soap.
Use specialised products for the removal of stubborn
stains. After cleaning, rinse well and dry thoroughly. Do
not use abrasive powders or corrosive substances.
• The hob grids, burner caps, flame spreader rings and
burners may be removed to make cleaning easier;
wash them in hot water and non-abrasive detergent,
making sure all burnt-on residue is removed before
drying them thoroughly.
• For hobs with electronic ignition, the terminal part of the
electronic lighting devices should be cleaned
frequently and the gas outlet holes should be checked
for blockages.
• The inside of the oven should ideally be cleaned after
each use, while it is still lukewarm. Use hot water and
detergent, then rinse well and dry with a soft cloth. Do
not use abrasive products.
•
Clean the glass part of the oven door using a sponge
and a non-abrasive cleaning product, then dry
thoroughly with a soft cloth. Do not use rough abrasive
material or sharp metal scrapers as these could
scratch the surface and cause the glass to crack.
The cover*
If the cooker is fitted with a cover,
this cover should be cleaned using
lukewarm water. Do not use
abrasive products.
It is possible to remove the cover in
order to make cleaning the area
behind the hob easier. Open the
cover fully and pull it upwards (
figure
).
! Do not close the cover when the burners are alight or
when they are still hot.
Inspecting the oven seals
Check the door seals around the oven regularly. If the
seals are damaged, please contact your nearest
Authorised After-sales Service Centre. We recommend
that the oven is not used until the seals have been
replaced.
see
Gas tap maintenance
Over time, the taps may become jammed or difficult to
turn. If this occurs, the tap must be replaced.
!This procedure must be performed by a qualified
technician authorised by the manufacturer.
Replacing the oven light bulb*
1. After disconnecting the oven
from the electricity mains, remove
the glass lid covering the lamp
socket (
2. Remove the light bulb and
replace it with a similar one:
voltage 230 V, wattage 25 W, cap
E 14.
3. Replace the lid and reconnect the oven to the electricity
supply.
! Do not use the oven lamp as/for ambient lighting.
see figure
).
Assistance
GB
• The accessories can be washed like everyday
crockery, and are even dishwasher safe.
• Stainless steel can be marked by hard water that has
been left on the surface for a long time, or by
aggressive detergents containing phosphorus. After
cleaning, rinse well and dry thoroughly. Any remaining
drops of water should also be dried.
Please have the following information to hand:
• The appliance model (Mod.).
• The serial number (S/N).
This information can be found on the data plate located on
the appliance and/or on the packaging.
Only available in certain models.
**
*
**
29
Page 30

Пайдалану нұсқаулығы
ПЛИТА
RS
Ɋɭɫɫɤɢɣ, 1
GB
English, 16
KN1M117S/RU S
KNJ1G17/RU S
KN1M117SA/RU
KNJ1G17A/RU
KZ
Қазақша, 30Қазақша, 30Қазақша, 30
Мазмұны
ЕСКЕРТУЕСКЕРТУЕСКЕРТУ
Орнату, 32-35
Орналастыру және түзулеу
Электр қосылымдары
Газды жалғау
Газ түрлеріне сәйкестендіру
Техникалық деректері
Оттық пен форсункалар сипаттарының кестесі
Құрылғы сипаттамасы, 36
Жалпы шолу
Басқару тақтасы
Қосу және пайдалану, 37-41
Плитаны қолдану
Пешті қолдану
Пеште тағам пісіру бойынша кеңестер кестесі
Сақтандырулар мен кеңестер, 42
Жалпы қауіпсіздік
Қоқысқа тастау
Қоршаған ортаны сақтау және қорғау
,31,31,31
Техникалық қызмет көрсету және
күтім, 43
Құрылғыны өшіру
Құрылғыны тазалау
Газ шүмегіне техникалық қызмет көрсету
Пеш шамын ауыстыру
Көмек
Page 31

ЕСКЕРТУ
ЕСКЕРТУЕСКЕРТУЕСКЕРТУ
ЕСКЕРТУ: Құрылғы мен оның қол
жететін бөліктері жұмыс кезінде қызуы
мүмкін.
Қыздыру элементтеріне тимеуге назар
аударыңыз. 8-ге толмаған балаларға
үздіксіз бақылау болмаса, құрылғыдан
аулақ ұстау керек. Бұл құрылғыны
қауіпсіз түрде қолдану бойынша кеңес
не нұсқау берілген жəне ықтимал
қауіп-қатерлерді түсінетін жағдайда,
оны 8-ге толған балалар мен дене,
сезіну немесе ой
немесе тəжірибесі мен білімі жеткіліксіз
адамдар қолдана алады.
Балаларға құрылғымен ойнауға
болмайды. Балаларға бақылаусыз
құрылғыны тазалауға жəне оған қызмет
көрсетуге болмайды.
қабілеті төмен
Бөліктің (бар болса) ішкі беттері қызып
кетуі мүмкін.
Құрылғыда ешқашан бу тазартқышты
немесе шаңсорғышты пайдаланбаңыз.
Металл заттарды (пышақтар, қасықтар,
таба қақпақтары, т.б.) конфоркаға
қоймаңыз, себебі олар қызып кетуі
мүмкін. Қақпақты ашпас бұрын ондағы
сұйықтықты сүртіп алыңыз.
Шыны қақпақты (бар болса) газ
оттықтары немесе электр плиталар əлі
ыстық болған кезде жаппаңыз.
Пайдаланғаннан кейін
элементінің көмегімен өшіріңіз, таба
детекторына сенбеңіз.
плитаны басқару
ЕСКЕРТУ: Плитада майға тамақ пісірген
кезде бақылап тұрмау қауіпті болуы
жəне өрт шығуға əкелуі мүмкін.
Өртті ЕШҚАШАН сумен өшіруші
болмаңыз, оның орнына құрылғыны
өшіріп, жалынды жабыңыз, мысалы
қақпақпен немесе өртенбейтін матамен.
ЕСКЕРТУ: Өрт қаупі бар: пісіру
беттерінде заттарды сақтамаңыз.
ЕСКЕРТУ: Шыны мен керамикадан
жасалған бет шатынаған болса, тоқ соғу
мүмкіндігінің алдын алу үшін құрылғыны
өшіріңіз. Пеш есігінің шынысын тазалау
үшін қатты ысқыш тазалағыштарды
немесе өткір метал ысқыщтарды
пайдаланбаңыз, себебі олар шыныны
сызып, оның шағылуына əкелуі мүмкін.
ЕСКЕРТУ: Тоқ соғу мүмкіндігінің алдын
алу үшін шамды ауыстырмас бұрын
құрылғы өшірілгеніне көз жеткізіңіз.
Құрылғы сыртқы таймермен немесе
бөлек қашықтан басқару жүйесімен
басқарылуға арналмаған.
АБАЙ БОЛЫҢЫЗ: сəйкес келмейтін
конфоркалардың қорғану құралдарын
пайдалану жазатайым оқиғаларға себеп
болуы мүмкін.
! Тартпаны ішке салған кезде шектегіш
жоғары қарап, қуыстың артқы жағында
тұрғанына көз жеткізіңіз.
31
Page 32

Орнату
KZ
! Жаңа құрылғыны іске қоспас бұрын нұсқаулық
кітапшасын мұқият оқып шығыңыз. Мұнда
құрылғыны қауіпсіз орнату және оны пайдалану
туралы маңызды ақпараттар қамтылған.
! Келешекте анықтама ретінде қарау үшін пайдалану
нұсқаулығын сақтап қойыңыз. Құрылғы сатылса,
біреуге берілсе немесе жылжытылса, нұсқаулар
онымен бірге болатынын қамтамасыз етіңіз.
! Құрылғыны нұсқауларға сәйкес арнайы біліктілігі
бар маман орнатуға тиіс.
! Кез келген түрде реттеу немесе қызмет көрсету
қажет болса, оны плитаны токтан ажыратқаннан
кейін орындау керек.
Бөлменің желдетілуі
Ағымдағы мемлекеттік заңдарға сәйкес құрылғыны
тек үздіксіз желдетілетін бөлмелерге орнату қажет.
Құрылғы орнатылған бөлме тиісті түрде желдетілуі тиіс,
яғни әдеттегі газ жану процессіне қажетті ауа мөлшері
қамтамасыз етілуі керек (ауа ағыны орнатылған қуаттың
әрбір кВт-на 2 м
3
/сағ. мәнінен аз болмауы тиіс).
Торлармен қорғалған ауа кіретін саңылауларда ішкі
көлденең қимасы кем дегенде 100 см
2
түтік болуы қажет
және олар тіпті жартылай жабылып қалмайтындай
орналасқан болуы тиіс (A суретін қараңыз).
Плита беті жалынның өшіп қалуына қарсы
сақтандырғышпен жабдықталмаған болса, бұл
кіріс саңылауларын 100%-ға кеңейту қажет, яғни
көлденең қимасы кем дегенде 200 см
2
болуы тиіс.
Ауа ағыны ғимараттың ортақ бөліктері, өрт қаупі
жоғары аймақтар немесе жататын бөлмелерді
қоспағанда, жақындағы бөлмелерден жанама
түрде берілетін болса (B суретін қараңыз), кіріс
саңылауларына жоғарыда айтылғандай сыртқа
шығаратын желдету түтіктерін орнату керек.
A B
Жапсарлас бөлме Желдетуді қажет
ететін бөлме
Жану түтіндерін шығару
Қауіпсіз әрі тиімді әдеттегі мұршаға қосылған қалқаның
немесе құрылғы қосылған кезде автоматты түрде
қосылатын электр желдеткіштің көмегімен жану түтіндерін
шығару қамтамасыз етілуі керек (суретті қараңыз).
Түтіндер тікелей
сыртқа шығарылады
Түтіндер мұрша немесе тағам
пісіру құрылғыларына арналған
тармақты түтін шығару жүйесі
арқылы шығарылады)
! Сұйытылған газдар ауадан ауыр болады және
еденде жиналады, сондықтан сұйытылған газ
баллондары қойылған барлық бөлмелерде
баллоннан шыққан газ оңай шығып кетуі үшін сыртқа
шығатын тесіктер болуы тиіс.
Сол себепті, сұйытылған газ баллондары, жартылай
немесе толық болса да, жер деңгейінен төмен
бөлмелерде не сақтау аумақтарында (төле және
т.б.) орнатылмауы немесе сақталмауы тиіс. Тек
қолданыстағы баллон бөлмеде сақталуы керек; ал
оны баллонның температурасын 50°C-тан
жоғары көтеріп жіберуі мүмкін қызу көздерінен
(пештер, мұршалар, каминдер) алшақ жерде ұстау
қажет.
Орналастыру және түзулеу
! Құрылғыны биіктігі плитаның биіктігінен аспайтын
шкафтардың қасына орнатуға болады.
! Құрылғының артқы жағына тиіп тұратын қабырға
жанғыш емес, қызуға төзімді материалдан (T 90°C)
жасалғанына көз жеткізіңіз.
A
Жануға қажетті ауаға
арналған желдету тесігі
Есік пен еден арасындағы
аралықты үлкейту
! Құрылғыны ұзақ уақыт пайдаланғаннан кейін
терезені ашу немесе қолданылатын кез келген
желдеткіштердің жылдамдығын арттыру жөн.
32
Құрылғыны дұрыс орнату үшін:
• Оны ас үйге, залға немесе тұрғын үйге қойыңыз
(ваннаға қоймаңыз).
• Плита шкафтардан биік болса, құрылғыны олардан
кем дегенде 200 мм қашық орнату қажет.
• Плита қабырғаға ілінетін шкафтың астына
орнатылса, осы шкаф пен плита үстінің арасында
кем дегенде 420 мм аралық болуы тиіс.
Қабырғаға ілінетін шкафтар жанғыш материалдан
жасалған болса, бұл аралықты 700 мм-ге дейін
жеткізу керек (суретті қараңыз).
Page 33

Түзулеу
• Плита артына
немесе оның шеттеріне
200 мм-ден жақын
жерге перде ілмеңіз.
• Қалқалар
қатысты пайдалану
нұсқаулығындағы
нұсқауларға сәйкес
орнатылуы тиіс.
Құрылғыны түзулеу қажет
болса, плита түбінің әрбір
бұрышындағы орындарына
реттелетін аяқтарын бұраңыз
(суретті қараңыз).
Аяқтар плита түбінің астынғы
жағындағы тесіктерге
кигізіледі.
! Құрылғы орнатылғаннан кейін электр кабелі мен
розетка жақын жерде болуы қажет.
! Кабель иілмеуі немесе қысылмауы қажет.
! Кабель жиі тексеріліп, тек өкілетті маманның
көмегімен ғана алмастырылуы тиіс.
! Осы қауіпсіздік шаралары сақталмаған
жағдайда өндіруші жауапкершілікті өз мойнына
алудан бас тартады.
Газды жалғау
Ағымдағы ұлттық заңдарға сәйкес және берілетін
газ түрімен құрылғы жұмыс істей алатынына көз
жеткізгеннен кейін газ желісіне немесе газ баллонына
майысқақ резеңке не болат түтікпен қосылуға болады
(қақпақтағы сипаттама жапсырмасын қараңыз: олай
болмаса, төмендегі мәтінді қараңыз). Баллоннан
сұйық газды пайдаланғанда, ағымдағы ұлттық
заңнамаларға сәйкес келетін қысым реттегішін
орнатыңыз. Қосылымды жеңілдету үшін газ түтігін
шетке қарай бұру керек*: түтік тұтқышын қақпаққа
қарама-қарсы қойыңыз және құрылғымен бірге
берілетін аралық қабатты орнына қойыңыз.
KZ
Токқа жалғау
Құрылғының негізгі деректер кестесінде көрсетілген
жүктемеге сәйкес стандартты штепсельдік ұшты
орнатыңыз (Техникалық деректер кестесін қараңыз).
Құрылғы тікелей электр желісіне құрылғы мен электр желісі
арасында орнатылған 3 мм ашық кішкене байланыс бар
бірнеше каналды айырып-қосқыш арқылы қосылуы қажет.
Айырып-қосқыш көрсетілген жүктемеге лайықты және NFC
15-100 стандартына сәйкес болуы қажет (жерге қосылған
сымды айырып-қосқыш ажыратпауы тиіс). Электр кабелін
кез келген нүктесі 50°C-тан жоғары температурамен
байланыспайтындай етіп орналастыру қажет.
Құрылғыны токқа қоспастан бұрын төмендегілерді
тексеріңіз:
• Құрылғы жерге қосылған және штепсельдік ұш заңға
сәйкес болып табылады.
• Розетка негізгі деректер кестесінде көрсетілген
құрылғының ең жоғарғы күшіне төзімді.
• Кернеу деректер кестесінде көрсетілген мән
аралығы аумағында болады.
• Розетка құрылғының штепсельдік ұшына сәйкес келеді.
Розетка штепсельдік ұшқа сәйкес болмаса, өкілетті
маманнан оны ауыстырып беруді өтініңіз. Бірнеше
розеткалар мен ұзартқыш сымдарын пайдаланбаңыз.
! Газ беру қысымы Оттық пен форсункалар
сипаттарының кестесінде көрсетілген мәндерге
сәйкес келетінін тексеріңіз (төмендегі мәтінді
қараңыз). Бұл құрылғының қауіпсіз жұмыс істеуін
және төзімділігін қамтамасыз ете отырып, қуаттың
тиімді жұмсалуына мүмкіндік береді.
Майысқақ резеңке түтікпен газды жалғау
Түтік ағымдағы ұлттық заңдарға сәйкес келетініне
көз жеткізіңіз. Түтіктің ішкі диаметрі мынадай болуы
тиіс: сұйық газ беру үшін 8 мм; метан газын беру
үшін 13 мм.
Қосылым жасалғаннан кейін түтікке байланысты
келесі жағдайлардың орындалуына көз жеткізіңіз:
• Температурасы 50°C-тан асатын ешбір бөлшекке
тимейді.
• Оған ешбір тарту немесе бұрау күштері
әсер етпейді және ол бұралмаған не
майыстырылмаған.
• Жүздерге, үшкір бұрыштарға немесе қозғалмалы
бөлшектерге тимейді және қысылмаған.
• Жағдайын тексеру үшін бүкіл ұзындығы бойынша
оңай қарап шығуға болады.
• 1500 мм-ден қысқа.
• Ағымдағы заңдарға сәйкес келетін қысқыштармен
екі жағынан да мықтап бекітілген.
* Тек белгілі модельдерде болады
33
Page 34

KZ
! Осы жағдайлардың бірі немесе бірнешесі
орындалмаса не плитаны 2-сынып, 1-ішкі сынып
құрылғыларына (екі шкаф арасына орнатылатын)
қолданылатын жағдайларға сәйкес орнату қажет
болса, резеңке түтік орнына майысқақ болат түтік
қолданылуы қажет (төмендегі мәтінді қараңыз).
Плита оттықтарының ең төменгі параметрін реттеу:
1. Тұтқаны ең төменгі позицияға бұрыңыз.
2. Тұтқа шешіп алып, тұтқа шегесінің ішінде немесе
оның жанында орналасқан реттеу бұрандасын
жалын кіші бірақ тұрақты болғанша реттеңіз.
! Құрылғы сұйық газ көзіне жалғанған болса, реттеу
бұрандасы мүмкін болғанша мықты бекітілуі керек.
Жалғау жері
Оқшаулағыш
шүмек
Түтік жинағы
Жалғау жері
Түтік жинағы
ЫСТЫҚ БЕТ
Оқшаулағыш
Майысқақ буынсыз тот баспайтын болаттан
жасалған түтікті оймасы бар жалғауға қосу
Түтік пен қысқыштар ағымдағы ұлттық заңдарға
сәйкес келетініне көз жеткізіңіз.
Түтікті пайдалана бастау үшін құрылғыдағы түтік
тұтқышын шешіп алыңыз (құрылғыдағы газ беру кіріс
тесігі цилиндр пішіміндегі оймалы 1/2 газдық еркек
жалғау болып табылады).
! Түтік қысылмағанын және қозғалмалы бөліктерге
тимейтінін қамтамасыз ете отырып, оның ұзындығы
ең көбі 2 м-ден аспайтындай қылып қосыңыз.
Қосылым газ жібермейтінін тексеру
Орнату аяқталғаннан кейін, сабынды сумен түтік
фитингтерінде тесіктердің бар не жоқ екенін
тексеріңіз. Ешқашанда алауды қолданушы болмаңыз.
Газ түрлеріне сәйкестендіру
Құрылғыны әдепкі газ түрінен (ол қақпақтағы сипаттама
жапсырмасында көрсетілген) басқа түрге сәйкестендіруге
болады.
Плитаны сәйкестендіру
Плита оттықтарының форсункаларын ауыстыру:
1. Плита торларын алып, оттықтарды тіректерінен
сырғытып шығарыңыз.
2. Форсункаларды 7 мм гайка
кілтімен (суретті қараңыз)
босатып, шығарып алыңыз
да, газдың басқа түріне
арналған форсункалармен
алмастырыңыз(Оттық пен
форсункалар сипаттарының
кестесін қараңыз).
3. Барлық құрамдас бөліктерді жоғарыдағы нұсқауларды
керісінше орындау арқылы алмастырыңыз.
шүмек
3. Оттық жанып тұрғанда тұтқа позициясын бірнеше мәрте
ең төменгіден ең жоғарыға және қарама-қарсы жылдам
ауыстырып, жалын өшіп қалмайтынын тексеріңіз.
! Плита оттықтары үшін негізгі ауаны реттеу қажет
емес.
Пешті алғаш рет қолданбас бұрын «Күтім және
техникалық қызмет көрсету» бөлімінде берілген
нұсқауларға сәйкес оны тазалап алған жөн.
Пеш қауіпсіздік
! Құрылғы
байқаусызда
түсіп кетпеуі
үшін, мысалы
бала пеш
есігіне шыққан
жағдайда,
бірге берілген
қауіпсіздік
шынжыры
орнатылуы
ТИІС!
Пеш қауіпсіздік шынжырымен жабдықталған; оны
құрылғының артындағы қабырғаға,
шынжыр құрылғыға бекітілген биіктікте
бұрандамен (пешпен бірге берілмейді) бекіту
қажет.
Бұранда мен бұранда анкерін құрылғы артындағы
қабырға материалына сəйкес таңдаңыз.
Бұранда басы 9 мм-ден
кіші болса, тығырық
қолданылуы тиіс. Бетон қабырғаға кем дегенде
диаметрі 8 мм жəне ұзындығы 60 мм бұранда
керек.
Шынжыр пештің артқы жағына жəне қабырғаға
суретте көрсетілгендей,
орнатылғаннан кейін жермен параллель күйде
тартылып тұратындай бекітіңіз.
34
Page 35

Оттық пен форсункалар сипаттарының кестесі
1-кесте Сұйық газ Табиғи газ
Оттық Диаметр
Жылдам
(үлкен)(R)
Жартылай
жылдам
(орташа)(S)
Қосымша
(кіші)(A)
(мм)
100
75 1.90 0.4 30 70
55 1.00 0.4 30 50 73 71 79 95
Жылу қуаты, кВт (p.c.s.*) Айналып
Номиналды Азайтылған (мм) (мм)
3.00
0.7 41 86 218 214 116 286
өту 1/100
Форсунка
1/100
Ағым* г/сағ Форсунка
***
138
**
136
1/100
(мм) (мм)
103 181
Ағым*
л/сағ
Форсунка
1/100
143 286
118 181
KZ
Ағым*
л/сағ
80 95
Жеткізу
қысымдары
Номиналды (мбар)
Ең төмен (мбар)
Ең жоғары (мбар)
15°C және 1013 мбарр жағдайында –
құрғақ газ
** Пропан P.C.S. = 50,37 МДж/кг
*** Бутан P.C.S. = 49,47 МДж/кг
Табиғи P.C.S. = 37,78 МДж/м
ЕСКЕРТУ! Шыны қақпақ қызса
сынып кетуі мүмкін. Қақпақты
жаппас бұрын барлық оттықтар
мен электр конфоркаларды
өшіріңіз. *Тек шыны қақпағы бар
модельдер үшін қолданылады.
3
145
SSS
KNJ1G17A/RU
KN1M117SA/RU
30
28-
20
35
37
25
45
ТЕХНИКАЛЫҚ ДЕРЕКТЕР
Пеш өлшемдері
(БхЕхТ)
Көлемі 50 л
Пеш бөлігіне
қатысты пайдалы
өлшемдер
Ток кернеуі мен
жиілігі
Оттықтар
Электр конфорка
ҚУАТ БЕЛГІСІ
SSS
20
17
25
13
6,5
18
34x38x39 см
ені 42 см
тереңдігі 44 см
биіктігі 23 см
деректер кестесін қараңыз
қайырма ішінде немесе пеш
бөлігін ашқанда пештің ішіндегі
сол жақ қабырғада орналасқан
деректер кестесінде көрсетілген
кез келген газ түрімен қолдану
үшін баптандыруға болады,
Жылдам Ø 145 мм: 1500 Вт
Электр пештерінің белгісіндегі
2002/40/EC нұсқауы
EN 50304 нормасы
Қуат тұтыну Сынып куәлігі
Табиғи конвекция
қыздыру режимі:
Статикалық
ЕҚ Директивалары: 12.12.2006
жылғы 2006/95/EC (төмен
кернеу) және кейінгі өзгертулері
– 15.12.04 жылғы 2004/108/EC
(Электромагнитті үйлесімділік)
және кейінгі өзгертулері –
30.11.2009 жылғы 2009/142/EC
(Газ) және кейінгі өзгертулер
– 22.07.1993 жылғы 93/68/
EEC және кейінгі өзгертулері –
2002/96/EC.
1275/2008 (Күту/өшірулі режим)
жақ қабырғада орналасқан деректер кестесінде
көрсетілген кез келген газ түрімен қолдану үшін
баптандыруға болады,
35
Page 36

Құрылғы
т
сипаттамасы
KZ
Жалпы шолу
Плитадағы газ
оттығының торы
Басқару тақтасы
ГРИЛЬ
ТҰТҚАЛЫ ТАБА
Реттелетін аяқ
Электр конфорка
Төгілген сұйықтықтарды ұстайтын бе
Сырғымалы тартпаларға арналған
БАҒЫТТАУШЫ ЖОЛДАР
5-позиция
4-позиция
3-позиция
2-позиция
1-позиция
Реттелетін аяқ
*
Басқару тақтасы
Плита оттықтарына
арналған эл ектрондық
тұтат қыш*
Т а ймер тұтқасы
Пештің істеп тұрғанын
білдіретін шам
Т е рмостат
*
тұтқасы
Т а ңдау
тұтқасы
Э лектр
конфоркаларды
ба сқару тұтқалары
Э лектр конфорка
шамы
*
Плитадағы газ
оттықтарын басқару
*
тұтқалары
* Тек белгілі модельдерде болады
36
Page 37

Қосу және пайдалану
Плитаны қолдану
Оттықтарды жағу
Әрбір ОТТЫҚ тұтқасында қатысты оттық
жалынының күшін көрсететін толық шеңбер бар.
Плитадағы оттықтардың бірін жағу үшін:
1. Оттыққа жалынды немесе газ жақпағын
жақындатыңыз.
2. ОТТЫҚ тұтқасын басып, ол ең жоғарғы жалын
параметріне бағытталғанша, сағат тіліне қарсы
бағытта бұрыңыз.
3. ОТТЫҚ тұтқасын сағат тіліне қарсы бағытта бұру
арқылы жалын күшін қажетті деңгейге реттеңіз.
Ол ең төменгі параметр , ең жоғарғы параметр
немесе екеуінің арасындағы кез келген позиция
болуы мүмкін.
Құрылғы электрондық
жағу құралымен* (C)
жабдықталған болса,
таңбасымен белгіленген
тұтату түймесін басыңыз,
одан кейін ОТТЫҚ тұтқасын
басып, оны оттық жанғанша
ең жоғарғы жалын параметріне қарай, сағат тіліне
қарсы бағытта бұрыңыз. Тұтқа босатылғанда оттық
өшіп қалуы мүмкін. Бұл орын алса, тұтқаны ұзағырақ
ұстап, әрекетті қайталаңыз.
Оттық ø Ыдыс диаметрі (см)
Жылдам (R) 24 - 26
Жартылай жылдам
(S)
16 - 20
Қосымша (A) 10 - 14
Оттық түрін анықтау үшін «Оттық пен
форсункалардың сипаттары» ішіндегі сызбаларды
қараңыз.
! Төмендеткіш сөремен жабдықталған үлгілерде
диаметрі 12 см-ден аз кіші табақтарды қолданған
кезде оны тек қосымша оттықта ғана пайдалануға
болатынын есіңізде болсын.
Пешті қолдану
! Құрылғыны алғаш рет пайдаланғанда оны бос
күйінде есігін жауып, ең жоғарғы температурада
кемінде жарты сағаттай қыздырыңыз. Пешті
өшіріп, оның есігін ашпастан бұрын бөлменің
жақсы желдетілгенін тексеріңіз. Өндіру кезінде
қолданылған қорғағыш заттардың жанып кетуіне
байланысты жеңіл жағымсыз иіс шығуы мүмкін.
! Өнімді пайдаланбас бұрын құрылғының
бүйірлеріндегі барлық пластикалық үлдірлерді алып
тастаңыз.
KZ
! Жалын байқаусыз өшірілсе, оттықты өшіріңіз де,
оны қайтадан жақпас бұрын кем дегенде 1 минут
күтіңіз.
Құрылғы жалынның өшіп қалуына қарсы
сақтандырғышпен (X)* жабдықталған болса, жалынның
жанып тұруы және құралды іске қосу үшін ОТТЫҚ
тұтқасын шамамен 2-3 секунд басып, ұстап тұрыңыз.
Оттықты өшіру үшін тұтқаны тоқтау позициясына
жеткенше бұрыңыз.
Оттықтарды пайдалану бойынша кеңестер
Оттықтар ең тиімді түрде жұмыс істеуі және
тұтынылатын газ мөлшерін үнемдеуі үшін қақпағы
бар және асты тегіс табаларды ғана қолданған жөн.
Сондай-ақ, олар оттықтың өлшеміне сәйкес келуі
тиіс.
•
! Ешқашан пештің астыңғы жағына зат қоймаңыз;
бұл эмальді қабатты зақымдайды. Гриль-бар
істігімен пісірген кезде пеште тек 1-позицияны
қолданыңыз.
Пеш тұтқалары
Осы екі басқару элементінің көмегімен пештің
әртүрлі функцияларын және дайындалатын тағамға
лайықты пісіру температурасын таңдауға болады.
Әртүрлі тағам пісіру функциялары екі тұтқаның
көмегімен орнатылады:
таңдау тұтқасы
пеш тақтасындағы термостат тұтқасы.
«0» санымен белгіленген күту қалпынан басқа
таңдау тұтқасының кез келген параметрін
орнатқанда пеш шамы жанады;
белгіленген тұтқа параметрі ешбір қыздыру
элементін қоспай-ақ, пеш шамын жандыруға
мүмкіндік береді. Пеш шамы жанған кезде, ол
пеш пайдаланылып жатқанын білдіреді және пеш
пайдаланылып жатқан бүкіл мерзім бойы ол жанып
тұрады.
8
санымен
37
Page 38

KZ
Пісіру аймақтарын қосу және өшіру
Плитаның электр конфоркаларын басқару
тұтқалары
Плиталар қалыпты және жылдам электр
конфоркалармен әртүрлі амалдармен жабдықталуы
мүмкін (жылдам конфоркаларды басқаларынан
ортасындағы қызыл дөңгелектерімен айыруға
болады). Қызуды жоғалтпау және конфоркаларға
зақым келтірмеу үшін диаметрі конфорканың
диаметріне сәйкес келетін түбі тегіс табаларды
қолданған жөн. Кестеде тұтқада көрсетілген әртүрлі
параметрлер және конфорканы пайдалануы
ұсынылатын мақсаттар берілген.
Конфоркаларды алғаш рет пайдаланбас бұрын
оларды таба қоймай, 4 минут бойы ең жоғары
температурада қыздыру керек. Осы бастапқы
кезең барысында қорғаушы қаптама қатайып,
өзінің ең жоғары төзімділігіне жетеді.
Электр конфорканың индикатор шамы
Электр конфоркалары бар плитада кез келген
электр конфорка қосылған кезде бұл шам жанады.
Плитаны пайдалану бойынша кеңестер
• Пісіру аймағына толық тиіп тұруы үшін асты қалың
әрі тегіс табаларды пайдаланыңыз.
• Шығарылған қызуды толық пайдалану үшін
конфорканы толық жабатындай диаметрі үлкен
табаларды пайдаланыңыз.
• Табаның асты әрдайым таза әрі құрғақ болуын
қамтамасыз етіңіз: бұл табалардың пісіру
аймақтарына толық тиюін және табалар мен
плита ұзақ уақыт бойы тиімді жұмыс істейтінін
қамтамасыз етеді.
• Газ оттығында пайдаланылатын ыдысты
пайдаланбаңыз: газ оттығындағы қызу табаның
қалпының бұзылып, оның бетке толық тимеуіне
себеп болады.
• Пісіру аймағын табасыз қосып кетпеңіз, әйтпесе
ол зақымдалуы мүмкін.
Параметр Қалыпты немесе жылдам пеш
0 Өшірулі
1 Көкөніс, балық пісіру
2
Картоп (бумен), ноқат, бұршақ пісіру,
сорпа дайындау
Үлкен мөлшерде тағам және көкөніс
3
қосылған етті сорпаны дайындауды
жалғастыру
4 Қуыру үшін (орташа)
5 Қуыру үшін (орташадан жоғары)
6
Қызарту және қайнауға аз уақытта
жеткізу үшін.
38
Page 39

Тағам дайындау режимдері
Статикалық пеш
Тұтқа параметрі: 50°C мен Ең жоғары арасындағы
кез келген параметр
Пеш шамы жанады да, жоғарғы және төменгі
қыздыру элементтері (кедергілер) қосылады.
Термостат тұтқасымен реттелетін температураға
автоматты түрде жетіп, термостат басқару
элементімен бір қалыпта ұсталады. Бұл функция
температураны керемет таратудың арқасында кез
келген тағамды пісіруге мүмкіндік береді.
Гриль-бар
c) істікті іске қосу үшін пештің таңдау тұтқасын
параметріне қойыңыз
*
Гриль-барды іске қосу үшін
төмендегі әрекеттерді орындаңыз:
a) 1-тартпаға тұтқалы табаны
қойыңыз;
b) 4-тартпаға арнайы грильбар тірегін салып, істікті грильбарға ондағы арнайы тесік
арқылы кіргізіп, пештің артқы
жағына қойыңыз;
KZ
Төменгі қыздыру элементі
-Тұтқа параметрі: 50°C мен Ең жоғары арасындағы
кез келген параметр
Пеш шамы жанады және төменгі қыздыру элементі
қосылады. Термостат тұтқасымен реттелетін
температураға автоматты түрде жетіп, бір қалыпта
ұсталады. Бұл параметрді сырты дайын, бірақ
іші әлі піспеген тағамдарды (табаға салынған)
пісіруді аяқтау немесе үстін сәл қызартуды қажет
ететін жеміспен не джеммен қапталған тәттілерді
дайындау үшін қолданған жөн. Бұл функция
әрдайым осы пеш параметрінде тағам пісіру үшін
қажетті температураға жетуге мүмкіндік бермейтінін
ескеріңіз, тек 180°C-ты қажет ететін бәліштерді
дайындауға болады.
Жоғарғы қыздыру элементі
-Тұтқа параметрі: 50°C мен Ең жоғары арасындағы
кез келген параметр
Пеш шамы жанады да, инфрақызыл сәулелер
грилі қосылады және қозғалтқыш істікті айналдыра
бастайды. Грильдің жетерліктей жоғары және
тікелей берілетін температурасы еттің сыртын
қызартып, шырындарын сақтауға және жұмсақтығын
қамтамасыз етуге мүмкіндік береді.
Гриль
Жоғарғы қыздыру элементі қосылады. Грильдің аса
жоғары әрі тіке температурасы ет пен қақталған
етті жұмсақ түрде қалдыру үшін нәрін ішінде ұстай
отырып, олардың бетін қызартуға мүмкіндік береді.
ЕСКЕРТУ! Пеш
тартпаларды алып
шығуға арналған
және пештен шығып
кетуіне жол бермейтін
шектегіш жүйемен
жабдықталған.
Сызбада
көрсетілгендей, толығымен шығарып алу үшін
тартпаларды алдыңғы шетінен ұстап көтеріп,
тартсаңыз (2) болғаны.
Пеш астындағы сақтау бөлімі
Сақтандыру: бұл сақтау бөлімін жанғыш заттарды
сақтау үшін пайдалануға болмайды.
Пеш кез келген тағам түрін ең қолайлы әдіспен
дайындау көптеген мүмкіндіктерді ұсынады.
Уақыт өте тағам пісіруге арналған осы жан-жақты
құрылғыны ең тиімді түрде қолдануды үйренесіз
және төмендегі ұсыныстар тек нұсқау ретінде
беріледі; оларды өз тәжрибеңізге қарай өзгертуге
болады.
Алдын ала қыздыру
Пешті алдын ала қыздыру қажет болса (әдетте
бұл ашытылған тағамдарды пісірген кезде қажет),
қуат үнемдеу үшін қажетті температураға мүмкін
болғанша жылдам жету мақсатында «желдеткіш
көмегімен» режимін
Тағам пешке қойылғаннан кейін ең тиімді пісіру
режимін таңдауға болады.
Таймер*
Таймерді іске қосу үшін төмендегі әрекеттерді орындаңыз:
1. Сигналды орнату үшін ТАЙМЕР тұтқасын сағат
тілі бағытымен бір толық айналымға бұрыңыз.
2. Қажетті уақыт ұзақтығын орнату үшін ТАЙМЕР
тұтқасын сағат тіліне қарсы бағытта бұрыңыз.
* Тек белгілі модельдерде болады
қолдануға болады.
*
Пеш астындағы бөлімді
табалар мен плитаның керекжарақтарын сақтау үшін
пайдалануға болады. Оған
қоса, пеш істеп тұрған кезде,
оны тағамдарды жылы ұстау
үшін қолдануға болады.
Сақтау бөлімін ашу үшін оны
төмен қарай бұрыңыз.
39
Page 40

KZ
Пісіру бойынша пайдалы кеңес
Пеште тағам пісірген кезде бір уақытта тек бір
табаны немесе тартпаны пайдаланыңыз. Тағам
жоғарыдан қаншалықты қызу қажет ететініне
байланысты жоғарғы немесе төменгі тартпа
биіктіктерінен таңдаңыз.
Алдын ала қыздыру
Пешті алдын ала қыздыру қажет болса (әдетте
бұл ашытылған тағамдарды пісірген кезде қажет),
қажетті температураға мүмкін болғанша жылдам
жету мақсатында «конвекция режимін» қолдану
абзал. Алдын ала қыздыру аяқталған кезде, ол «Е»
жасыл шамының сөнуінен білінеді, қажетті пісіру
режимін таңдаңыз.
Балық пен ет пісіру
Ақжем ет, құс және балық пісірген кезде 180 °C 200 °C аралығындағы температура параметрлерін
қолданыңыз.
Сыртын жақсылап пісіру, ал ішін жұмсақ әрі
шырынды қалдыру қажет қызыл ет үшін басында
аз уақытқа жоғары температура параметрін
(200°C-220°C) қолданып, одан кейін пештің азайтқан
жөн.
Негізінде, ет қаншалықты үлкен болса, температура
параметрі соншалықты төмен болуы керек. Етті
тордың ортасына қойып, тамған майды жинау үшін
астына тұтқалы таба қойыңыз.
Торды пештің ортасында болатындай қылып
орналастырыңыз. Төменнен келетін қызудың
мөлшерін арттырғыңыз келсе, төменгі тартпа
биіктіктерін пайдаланыңыз. Хош иісті қуырылған ет
жасау үшін (әсіресе, үйрек пен жабайы құс еті), еттің
үстіне шошқа тоң майын немесе бекон қойыңыз.
Бұл режимді пайдаланған кезде, термостатты ең
жоғарғы параметріне қоюға болады. Дегенмен, бұл
жай ғана термостат тұтқасын қажетті температураға
реттеп, одан төмен температураларды қолдануға
болмайтынын білдірмейді,
Гриль-бармен
«гриль» режимін пайдаланған кезде бірге берілетін
істіктер жинағын қолдануға болады. Мұндай
жағдайда, істіктер жинағын төменнен санағанда
үшінші тартпаға қойып және соус пен тамған майды
жинау үшін төменгі тартпаға тұтқалы табаны қойып,
пештің есігін жауып пісіріңіз.
! Грильді пайдаланған кезде әрдайым пеш есігін
жауып қойыңыз. Бұл жақсы нәтижеге қол жеткізуге
және қуат үнемдеуге (шамамен 10%) мүмкіндік
береді.
Сондықтан, гриль режимдерін пайдаланған кезде
торды төменгі тартпаларға (пісіру кестесін қараңыз)
қойып, одан кейін пештің түбіне тоң май мен
май тамуын және түтін түзілуін болдырмау үшін
төменнен санағанда 1-пеш тартпасына тұтқалы
табаны орналастырып жақсы нәтижеге қол жеткізуге
болады.
жабдықталған модельдерде,
Торт пісіру
Торт пісірген кезде пешті әрдайым алдын ала
қыздырып алыңыз, бәліш түсіп кетпеуі үшін пісіру
кезінде пеш есігін ашпаңыз.
Грильді пайдалану
«Гриль» режимін пайдаланыңыз, тағамды
грильдің (төменнен санағанда 3- және 4-тартпада
орналасқан) ортасының астына қойыңыз, себебі
жоғарғы қыздыру элементінің тек ортаңғы бөлігі
қосылады.
Төменгі тартпаны (төменнен санағанда 1-тартпа)
пайдаланыңыз, соус пен майды жинау және оның
пештің түбіне тамуына жол бермеу үшін тұтқалы
таба қойыңыз.
40
Page 41

Пеште тағам пісіру бойынша кеңестер кестесі
KZ
Таңдау
тұтқасының
қалпы
1 Қалыпты Лазанья
2 Пеш түбі Соңғы өңдеу
3 Жоғарғы
түбі
4 Қос гриль Бұзау етінен пісірілген стейктер
Тағамдар Салмағы
Ет қосылған қамыр түтіктері
Гратин паста пісірмелері
Бұзау еті
Тауық
Үйрек
Қоян
Шошқа еті
Жас қой еті
Макрель
Қызыл пагр
Қағазда пісірілген бақтақ
Неаполитан пиццасы
Печеньелер
Жеміс қосылған бәліш
Хош иісті бәліш
Ашытылған кекс
Жеміс қосылған кекс
Палтус пен каракатица
Істіктегі кальмар және асшаян
Треска белдемесі
Грильде пісірілген көкөністер
Котлет
Гамбургер
Скумбрия
Қызартылған нан мен бутерброд
Гриль-бар болса
Гриль істігінде пісірілген бұзау еті
Гриль істігінде пісірілген тауық еті
(кг)
2,5
2,5
2,0
1,7
1,5
1,8
2
2,1
1,8
1,1
1,5
1
1
0,5
1,1
1
0,5
1
1
1
1
1
1
1,5
1
1
№ ° 4
1,0
2,0
Төменнен
санағанда
позициясы
орны
2
3
3
2
3
3
3
3
3
2
2
2
2
3
3
3
3
3
4
4
4
3/4
4
4
3
4
4
-
-
Қыздыру
ұзақтығы
(минут)
5
5
5
10
10
10
10
10
10
5
5
5
15
10
10
10
10
10
5
5
5
5
5
5
5
5
5
5
5
Термостат
тұтқасы
200
200
200
180
200
180
180
180
180
180
180
180
220
180
180
180
160
170
Ең жоғары
Ең жоғары
Ең жоғары
Ең жоғары
Ең жоғары
Ең жоғары
Ең жоғары
Ең жоғары
Ең жоғары
Ең жоғары
Ең жоғары
Пісіру
ұзақтығы
(минут)
45-50
30-35
30-35
60-70
80-90
90-100
70-80
70-80
70-80
30-40
30-35
25-30
15-20
10-15
25-30
30-35
25-30
25-30
8
4
10
8-10
15-20
20
7
15-20
5
70-80
70-80
Ескертпе: пісіру уақыттары шамалап берілген және оларды жеке қалауға қарай өзгертуге болады.
Грильді немесе қос грильді пайдаланып тағам дайындаған кезде, тұтқалы таба пештің түбінен
Санағанда бірінші тартпада орналастырылуы тиіс.
41
Page 42

Сақтандырулар мен кеңестер
KZ
! Бұл құрылғы халықаралық қауіпсіздік стандарттарына
сай жасақталып, дайындалған.
Төмендегі ескертулер қауіпсіздік ережелерін ескерту
мақсатында берілген және оны мұқият оқып шығу қажет.
Жалпы қауіпсіздік
• Бұл нұсқаулар тек нұсқаулық пен сериялық нөмір
тілімшесінде таңбалары көрсетілген елдер үшін
жарамды.•
Құрылғы үйде қолдануға арналған, оны коммерциялық
немесе өндірістік тұрғыда қолдануға болмайды.
• Жабық жер болса да, құрылғыны сыртта қолданбау
қажет. Құрылғыны қорғаусыз жаңбыр мен боранда
қалдыру аса қауіпті.
• Құрылғыны жалаң аяқ немесе ылғал не дымқыл
қолмен, аяқпен түртпеңіз.
• Құрылғыны кітапшада берілген нұсқауларға
сай, тек ересек адамдар ғана тағам дайындау
мақсатында пайдалануы тиіс. Құрылғыны
басқа түрде пайдалану (мысалы, бөлмені
жылыту үшін) дұрыс емес әрі қауіпті.
Құрылғыны тиісті, дұрыс және саналы түрде
пайдаланбау нәтижесінде пайда болған кез
келген зақымға өндіруші жауапты болмайды.
• Нұсқаулық кітапшасы 1-сынып (оқшауланған)
немесе 2-сынып - 1-ішкі сынып (2 шкаф арасына
орналастырылған) құрылғымен бірге беріледі.
• Балаларды пештен аулақ ұстаңыз.
• Басқа электр құрылғыларының кабельдері пештің
ыстық бөліктеріне тимейтінін тексеріңіз.
• Желдету және ыстықты салқындатуға арналған ашық
жерлерді ешқашан жаппау керек.
• Оттықтар жанып тұрған кезде немесе әлі ыстық
болғанда плитаның шыны қақпағын (тек кейбір
модельдерде) жаппаңыз.
• Пешке асханалық ыдысты қоярда немесе оны алған
кезде әрдайым пеш қолғаптарын пайдаланыңыз.
жағдайда өзіңіз жөндеуге тырыспаңыз. Тәжірибесіз
адам тарапынан жасалған жөндеу жұмыстарынан
құрылғының істен шығуы немесе жарамсыз болып
қалуы мүмкін. Көмек көрсету қызметіне хабарласыңыз.
• Ашық пештің есігіне ауыр заттарды қоймаңыз.
• Құрылғыны физикалық, сезімталдық және
психикалық қабілеттері төмен адамдар (балалар
да кіреді), тәжірибесіз немесе өнімнен хабары
жоқ кез келген адамның қолданбауы тиіс.
Мұндай адамдарға, кем дегенде, қауіпсіздіктерін
қамтамасыз ететін біреулер жетекші болуы керек
немесе құрылғының жұмысына қатысты кіріспе
нұсқаулары берілуі тиіс.
• Балаларға құрылғымен ойнауға рұқсат етпеңіз.
Қоқысқа тастау
• Орау материалдарын тастаған кезде: ораманың қайта
пайдаланылуы мүмкін болатындай жергілікті заңды
қадағалаңыз.
• Электр және электроникалық құралдардың
қалдықтарына (WEEE) қатысты 2002/96/EC Еуропа
заңнамасына сәйкес үй құрылғылары қалыпты қатты
қалалық қалдық айналымын пайдаланып жойылмауы
тиіс. Қоршаған орта мен халық денсаулығына тиетін
зиянның алдын ала отырып, жарамсыз құрылғылар
қайта пайдалану мен машина ішіндегі материалдарды
өңдеу құнын оңтайландыру мақсатында бөлек жиналуы
керек. Барлық өнімдердегі сызылған қоқыс жәшігі өнім
иесінің бөлектелген қоқыс жинауға қатысты міндетін
еске салады.
Қолданылған құрылғыларды қоғамдық қоқыс жинау
қызметіне тапсыруға, айналадағы тиісті жинау
орындарына апаруға немесе, ағымдағы ұлттық
заңдар рұқсат берсе, жаңа ұқсас өнімге ауыстыру
үшін сатушыға ауыстыру ұсынысы бойынша қайтаруға
болады.
Үй құрылғыларының барлық негізгі өндірушілері ескі
және қолданыстан шыққан құрылғыларды жинау
және тастау жүйелерін жасауға және ұйымдастыруға
қатысады.
• Құрылғыны қолданған кезде оны маңына жанғыш
сұйықтықтар (спирт, бензин және т.б.) қоймаңыз.
• Төменгі сақтау бөліміне немесе пештің өзіне жанғыш
заттар салмаңыз. Егер байқаусызда құрылғы қосылса,
бұл заттардың жануы мүмкін.
• Құрылғыны қолданбаған кезде тұтқалар • позициясында
екенін және газ шүмегі жабылғанын тексеріңіз.
• Құрылғыны өшіргенде розеткадан әрдайым айырғышты
ұстап тартыңыз, кабельден тартып суырмаңыз.
• Құрылғыны электр желісінен ажыратпай ешқашан
тазалау немесе күтім көрсету жұмыстарын жасамаңыз.
• Егер құрылғы істен шыққан болса, оны ешбір
42
Қоршаған ортаны сақтау және қорғау
• Пешті таңертең ерте немесе түстен кейін кешірек
пайдалану арқылы электр қуатын қамтамасыз етуші
желілік компаниялардың ең жоғары жүктемесін
азайтуға көмектесе аласыз.
• Есік тығыздағыштарын жиі тексеріңіз, олар есікке
тығыз келетіндей етіп, қалдық болмауы үшін тазалап
сүртіп тұрыңыз, осылайша ыстықтың сыртқа шығуын
болдырмайсыз.
Page 43

Күтім және техникалық
қызмет көрсету
Құрылғыны өшіру
Кез келген бір жұмысты бастамастан бұрын
құрылғыны тоқтан ажыратыңыз.
Құрылғыны тазалау
! Дақ кетіргіштер, тат кетіргіштер, ұнтақ тазартқыш
заттар немесе қырғыш беттері бар губкалар сияқты
қырғыш немесе таттандыратын тазартқыш заттарды
пайдаланбаңыз. олар құрылғы беттерін біржола
сызып тастауы мүмкін.
! Құрылғыны ешқашан бу тазартқышымен немесе
шаңсорғышпен тазаламаңыз.
• Әдетте, плитаны дымқыл губкамен жуып, сорғыш
ас үй сүлгісімен құрғату жеткілікті.
• Тот баспайтын болат немесе эмальданған сыртқы
бөліктер және резеңке тығыздағыштар жылы суға
малынып, түссіз сабын жағылған губкамен тазартылады.
Қиын дақтарды кетіру үшін арнайы өнімдерді
пайдаланыңыз. Жуып болған соң оны жақсылап
шайып, мұқият құрғатыңыз. Қатты ұнтақтарды немесе
таттандыратын заттарды пайдаланбаңыз.
• Плитаның торларын, оттық қақпақтарын, жалын
қақ жарғыш сақиналарын және плита оттықтарын
шешіп алып тазалауды жеңілдетуге болады;
оларды ыстық су мен қырғыш емес тазартқыш
затта жуыңыз да, жақсылап кептірер бұрын қатып
қалған қалдықтарды кетіргеніңізге көз жеткізіңіз.
• Электрондық тұтату функциясы бар плиталарда
электрондық тұтату құралының ұшын жиі тазалап,
газ шығатын тесіктердің бітеліп қалмауын тексеріп
отыру қажет.
Қақпақ
KZ
Пеш шыны қақпақпен
жабдықталған болса, бұл
қақпақты жылы сумен
тазалау керек. Қырғыш
заттарды пайдаланбаңыз.
Плитаның артқы жағын
тазалауды жеңілдету
үшін қақпақты шешіп
алуға болады. Қақпақты
толығымен ашып, оны
жоғары қарай тартыңыз
(суретті қараңыз).
! Оттықтар жанып тұрған кезде немесе әлі ыстық
болғанда қақпақты жаппаңыз.
Пеш тығыздағыштарын тексеру
Пештегі есік тығыздағыштарын жиі тексеріп тұрыңыз.
Егер тығыздағыштар зақымдалған болса, жақын жердегі
Өкілетті сатудан кейін қызмет көрсету орталығына
хабарласыңыз. Тығыздағыштар ауыстырылғанға дейін
пешті пайдаланбауды ұсынамыз.
Газ шүмегіне техникалық қызмет көрсету
Уақыт өте, шүмектер тығыздануы немесе оларды
бұру қиындауы мүмкін. Бұл жағдай орын алса,
шүмекті ауыстыру қажет.
! Бұл процедураны өндіруші өкілет берген білікті
маман орындауы тиіс.
• Пештің іші әрбір қолданғаннан кейін жылы
кезінде мұқият тазалануы тиіс. Ыстық су мен
тазартқышты пайдаланыңыз, одан кейін шайып,
жұмсақ шүберекпен құрғатып сүртіңіз. Қырғыш
заттарды пайдаланбаңыз.
• Пеш есігінің әйнегін ысқышпен және қырғыш емес
тазартқыш құралдармен тазалап, жұмсақ шүберекпен
мұқият құрғатыңыз. Қатты қырғыш затты немесе өткір
темір қырғыштарды пайдаланбаңыз, себебі олар
әйнек бетін тырнап, оның сынуына әкелуі мүмкін.
• Керек-жарақтар күнделікті ыдыстар сияқты
жуылуы мүмкін, тіпті оларды ыдыс жуғыш
машинаға жууға болады.
• Тот баспайтын болатқа оның бетінде ұзақ уақыт
тұрған қаттылығы жоғары су немесе құрамында
фосфор бар күшті тазартқыш заттар дақ түсіруі
мүмкін. Жуып болған соң оны жақсылап шайып,
мұқият құрғатыңыз. Сондай-ақ, қалып қойған
барлық су тамшыларын сүртіп алу қажет.
Пеш шамын ауыстыру
1. Пешті токтан ажыратқаннан
кейін шам ұясын жауып тұрған
шыны қақпақты шешіп алыңыз
(суретті қараңыз).
2. Шамды алып, оны сондай
басқа шаммен ауыстырыңыз:
кернеуі 230 В, қуаты 25 Вт,
цоколі E 14.
3. Қақпақты орнына қойып, пешті токқа қайтадан қосыңыз.
! Пеш шамын бөлмені жарықтандыру үшін
қолданбаңыз.
Көмек
Келесі мәліметтерді оңай жерде ұстаңыз:
• Құрылғының моделі (Мод.).
• Сериялық нөмірі (С/н).
Бұл ақпарат құрылғыда орнатылған деректеме
кестесінде немесе орамадан табылуы мүмкін.
43
Page 44

XEROX FABRIANO
10/2013 - 195085202.04
44
 Loading...