

INDESIT IFW 65Y0 IX UK Daily Reference Guide
DAILY REFERENCE
WWW
GUIDE
EN
THANK YOU FOR PURCHASING
AN INDESIT PRODUCT
To receive more comprehensive help and
support, please register your product at
www.indesit.com/register
Before using the appliance carefully read the Health and Safety guide.
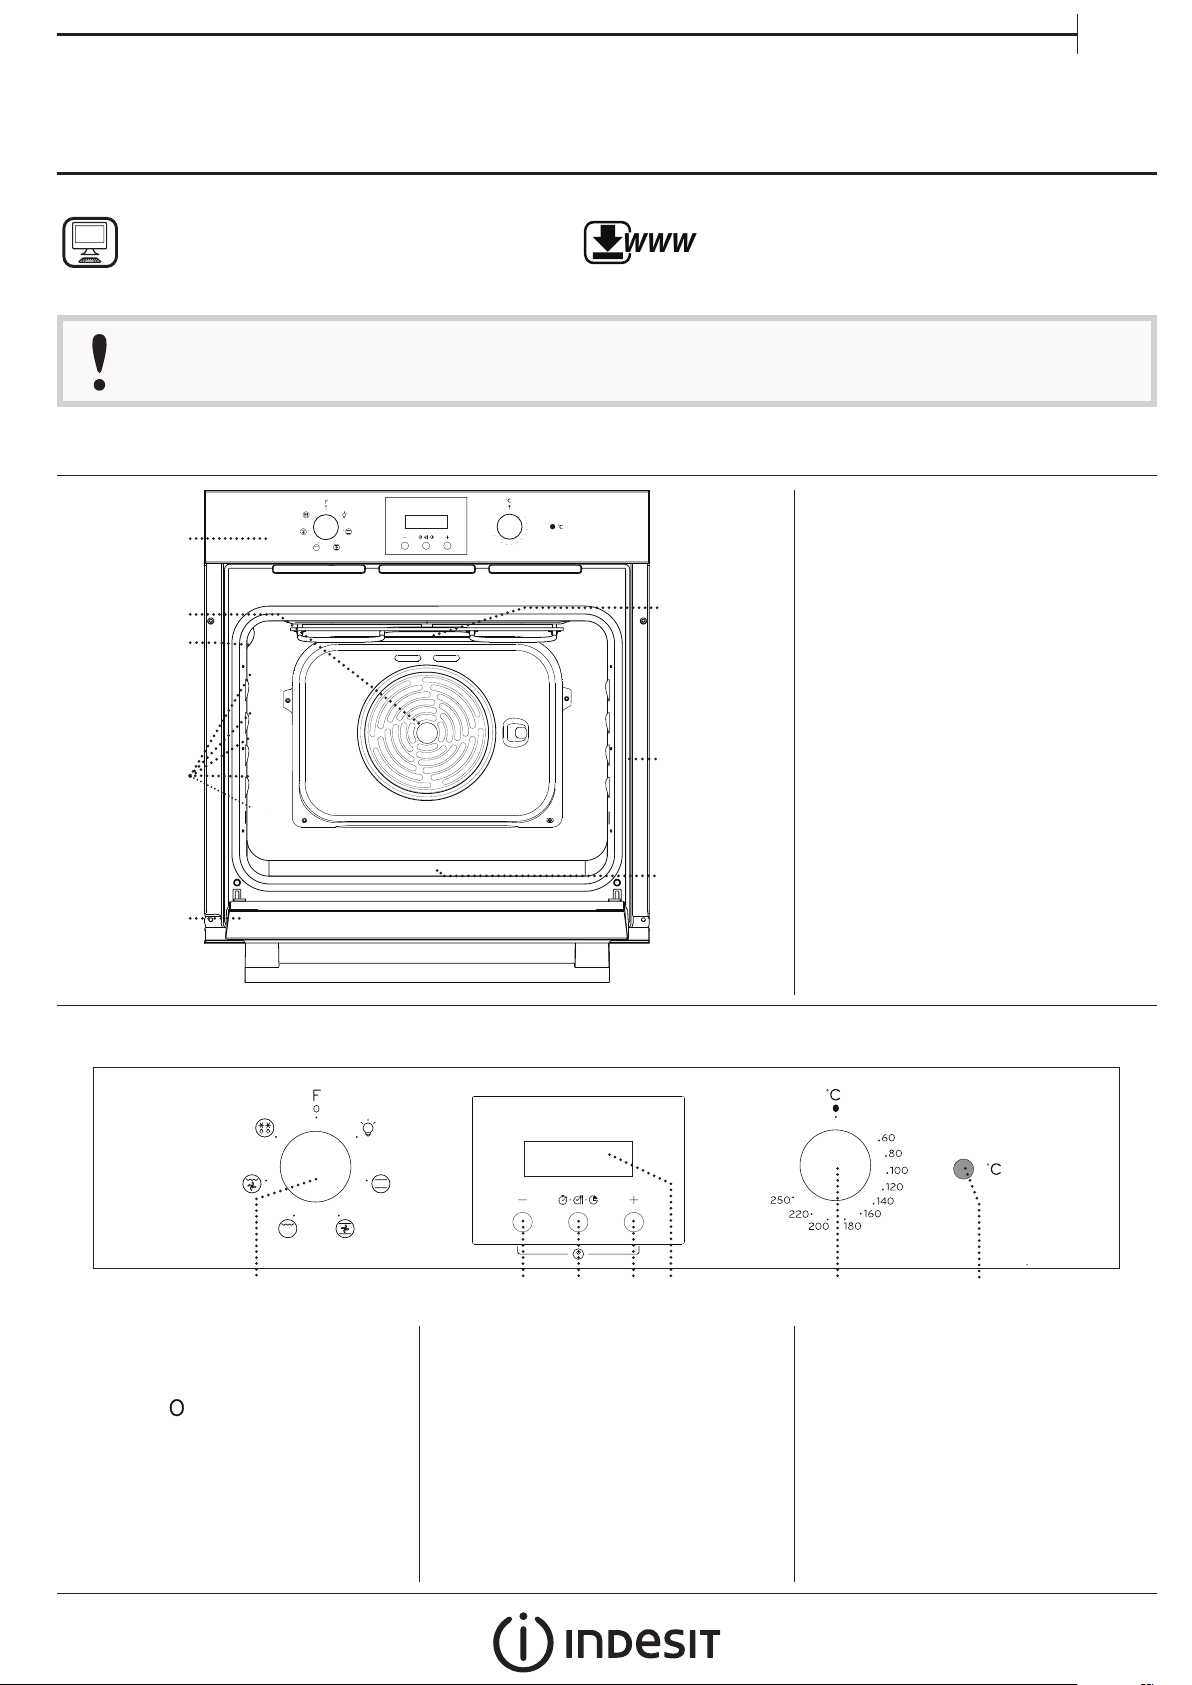
PRODUCT DESCRIPTION
1
2
3
4
250
220
You can download the Safety Instructions
and the Use and Care Guide by visiting our
website docs.indesit.eu and following the
instructions on the back of this booklet.
60
80
100
120
140
160
200
180
1. Control panel
2. Fan
3. Lamp
4. Accessories shelf runners
6
(the level is indicated on the wall
of the cooking compartment)
5. Door
6. Upper heating element/grill
7. Identification plate
(do not remove
7
8. Bottom heating element
(non-visible)
5
CONTROL PANEL
1 32 2 5
1. SELECTION KNOB
For switching the oven on by
selecting a function.
Turn to the
position to switch
the oven off.
8
4
3. TIME BUTTON
For selecting the various settings:
duration, cooking end time, timer.
4. D ISPLAY
6
6. LED THERMOSTAT/
PR EHEATING
Switches on during the heating
process. Switches off once the
desired temperature is reached.
2. +/ BUTTON
To decrease or increase the value
shown on the display.
5. THERMOSTAT KNOB
Turn to select the temperature you
require.
1
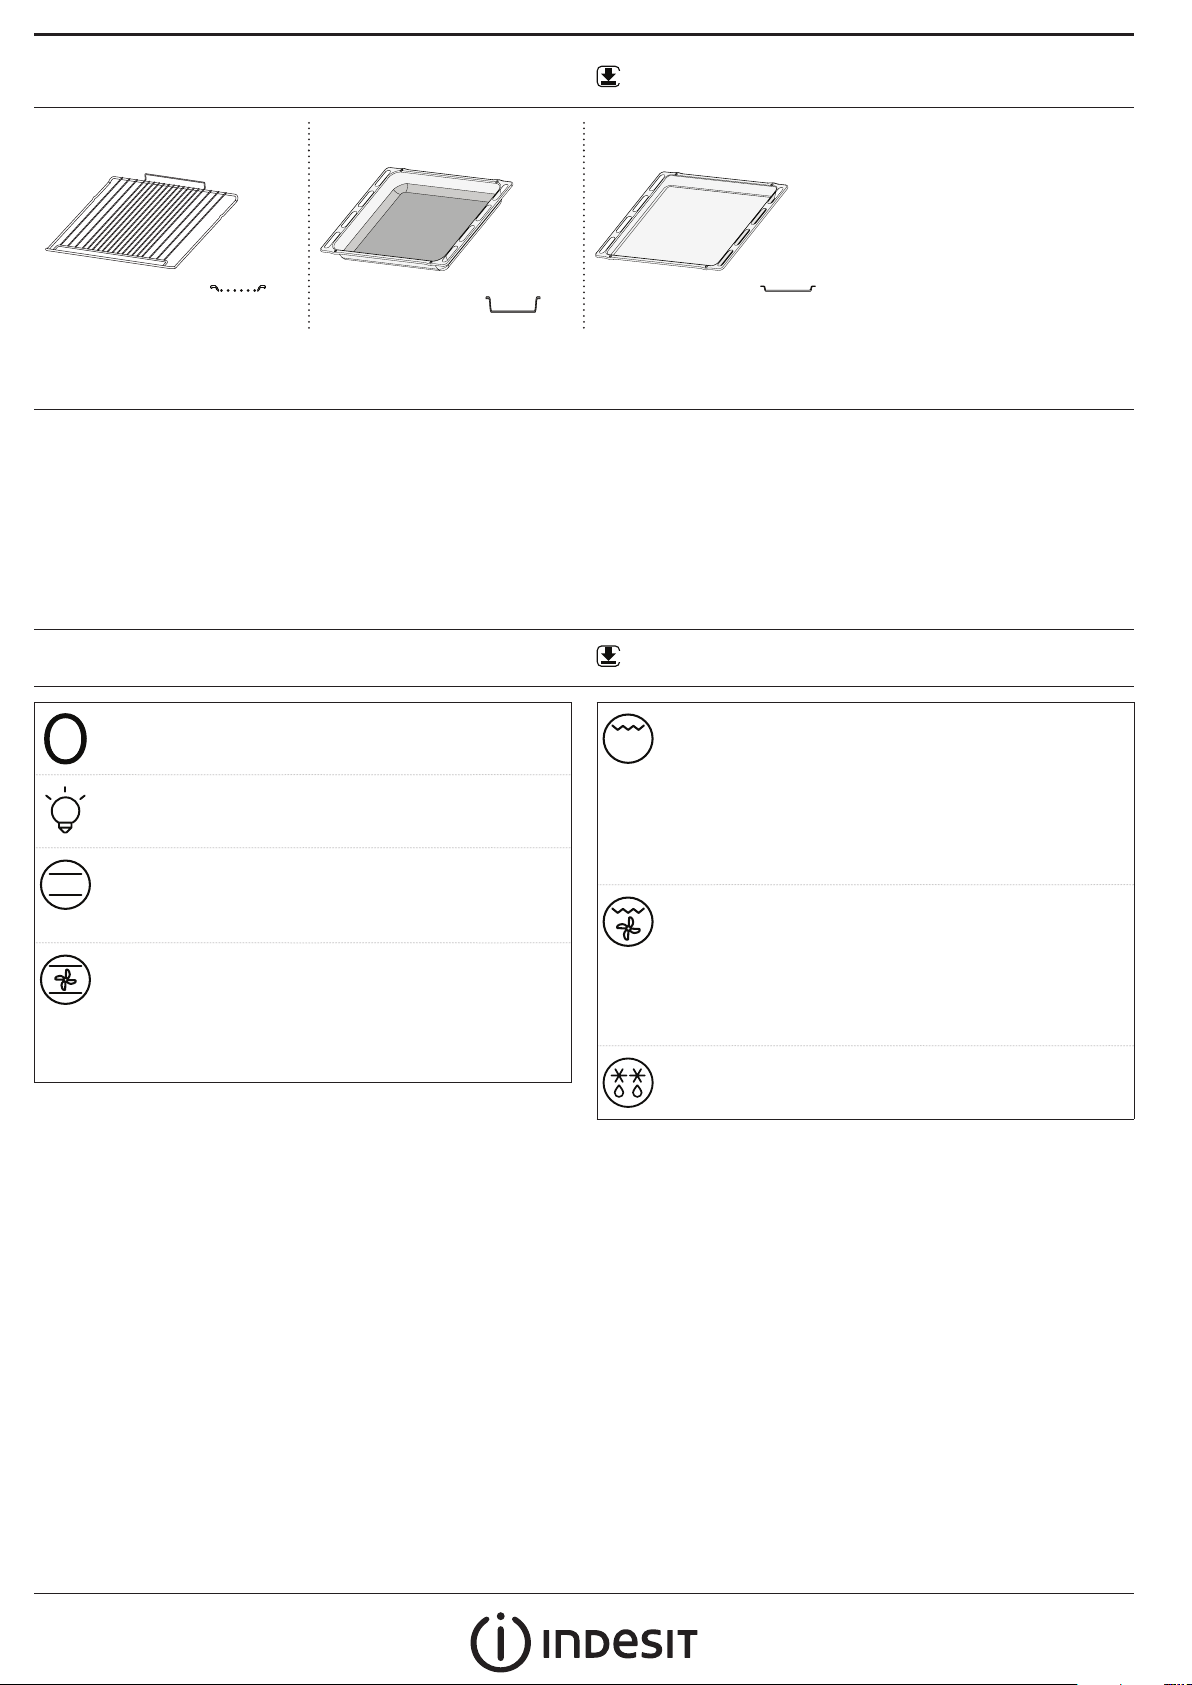
ACCESSORIES
WIRE SHELF DRIP TR AY (IF PRESENT) BAKING TRAY
The number and the type of accessories may vary depending on which model is purchased.
Other accessories can be purchased separately from the After-sales Service.
WWW
Download the Use and Care Guide from
USING THE ACCESSORIES
• Insert the wire shelf onto the level you require by
holding it tilted slightly upwards and resting the
raised rear side (pointing upwards) down first. Then
slide it horizontally along the shelf guide as far as
possible.
The other accessories, such as the baking tray, are
inserted horizontally by sliding them along the shelf
guides.
docs . indesit . eu for more information
FUNCTIONS
OFF
For switching off the oven.
LIGHT
For switching on the light in the compartment.
CONVENTIONAL
For cooking any kind of dish on one shelf only.
It is best to use the 2nd shelf.
CONVECTION BAKE
For baking cakes with juicy fillings on a single
shelf. This function can also be used for cooking on
two shelves. Switch the position of the dishes to
cook food more evenly.
WWW
Download the Use and Care Guide from
docs . indesit . eu for more information
GRILL
For grilling steaks, kebabs and sausages,
cooking vegetables au gratin or toasting bread.
When grilling meat, we recommend using a Baking
tray to collect the cooking juices: position the pan on
any of the levels below the wire shelf and add 200 ml
of drinking water.
GR AT IN
For roasting large joints of meat (legs, roast
beef, chicken). We recommend using a Baking tray to
collect the cooking juices: position the pan on any
of the levels below the wire shelf and add 200ml of
drinking water.
DEFROSTING
For defrosting food more quickly.
2

A
U
T
O
A
U
O
USING THE APPLIANCE FOR THE FIRST TIME
A
U
O
A
U
T
O
EN
1. SETTING THE TIME
You will need to set the time when you switch on the
appliance for the first time: “AUTO” and “0.00” flash on
the display.
To set the time of day, press buttons and at the
same time: Set the time of day using the
and
buttons.
Please note: To change the time of the day afterwards (for
example following lengthy power outages) you will need
to reset the time by pressing buttons and at the same
time.
2. SETTING THE TONE
Having selected the desired time value, press the time
button: The display shows “ton 1”.
3. HEAT THE OVEN
A new oven may release odours that have been left
behind during manufacturing: this is completely
normal.
Before starting to cook food, we therefore
recommend heating the oven with it empty in order
to remove any possible odours.
Remove any protective cardboard or transparent film
from the oven and remove any accessories from inside
it.
Heat the oven to 250 °C for about one hour,
preferably using the “Convection Bake” function. The
oven must be empty during this time.
Follow the instructions for setting the function
correctly.
Please note: It is advisable to air the room after using the
appliance for the rst time.
To select the desired tone, press button , then press
the time button to confirm.
Please note: To change settings afterwards, press buttons
and at the same time and repeat the operations above.
DAI LY USE
1. SELECT A FUNCTION
To select a function, turn the selection knob to the
symbol for the function you require.
2. ACTIVATE A FUNCTION
To start the function you have selected, turn the
thermostat knob to set the temperature you require.
To interrupt the function at any time, switch off the
oven, turn the selection knob and the thermostat knob
and .
to
3. PREHEATING
Once the function has been activated, the LED
thermostat will switch on signalling that the
preheating process has begun.
At the end of this process, the LED thermostat
switches off indicating that the oven has reached the
set temperature: at this point, place the food inside
and proceed with cooking.
Please note: Placing the food in the oven before preheating
has nished may have an adverse eect on the nal cooking
result.
. PROGRAMMING COOKING
After selecting and activating the function, it is
possible to set the duration.
DURATION
Press for at least 2 seconds the time button: the
symbol flashes.
Press the time button again: the display shows DUR
and 0.00 in sequence while AUTO flashes.
Set the duration using the buttons and . After a
few seconds, the display shows the time of the day
while AUTO
remain lit, confirming the setting.
3
 Loading...