How it Works
Log In / Sign Up
Buy Points
How it Works
FAQ
Contact Us
Questions and Suggestions
Users
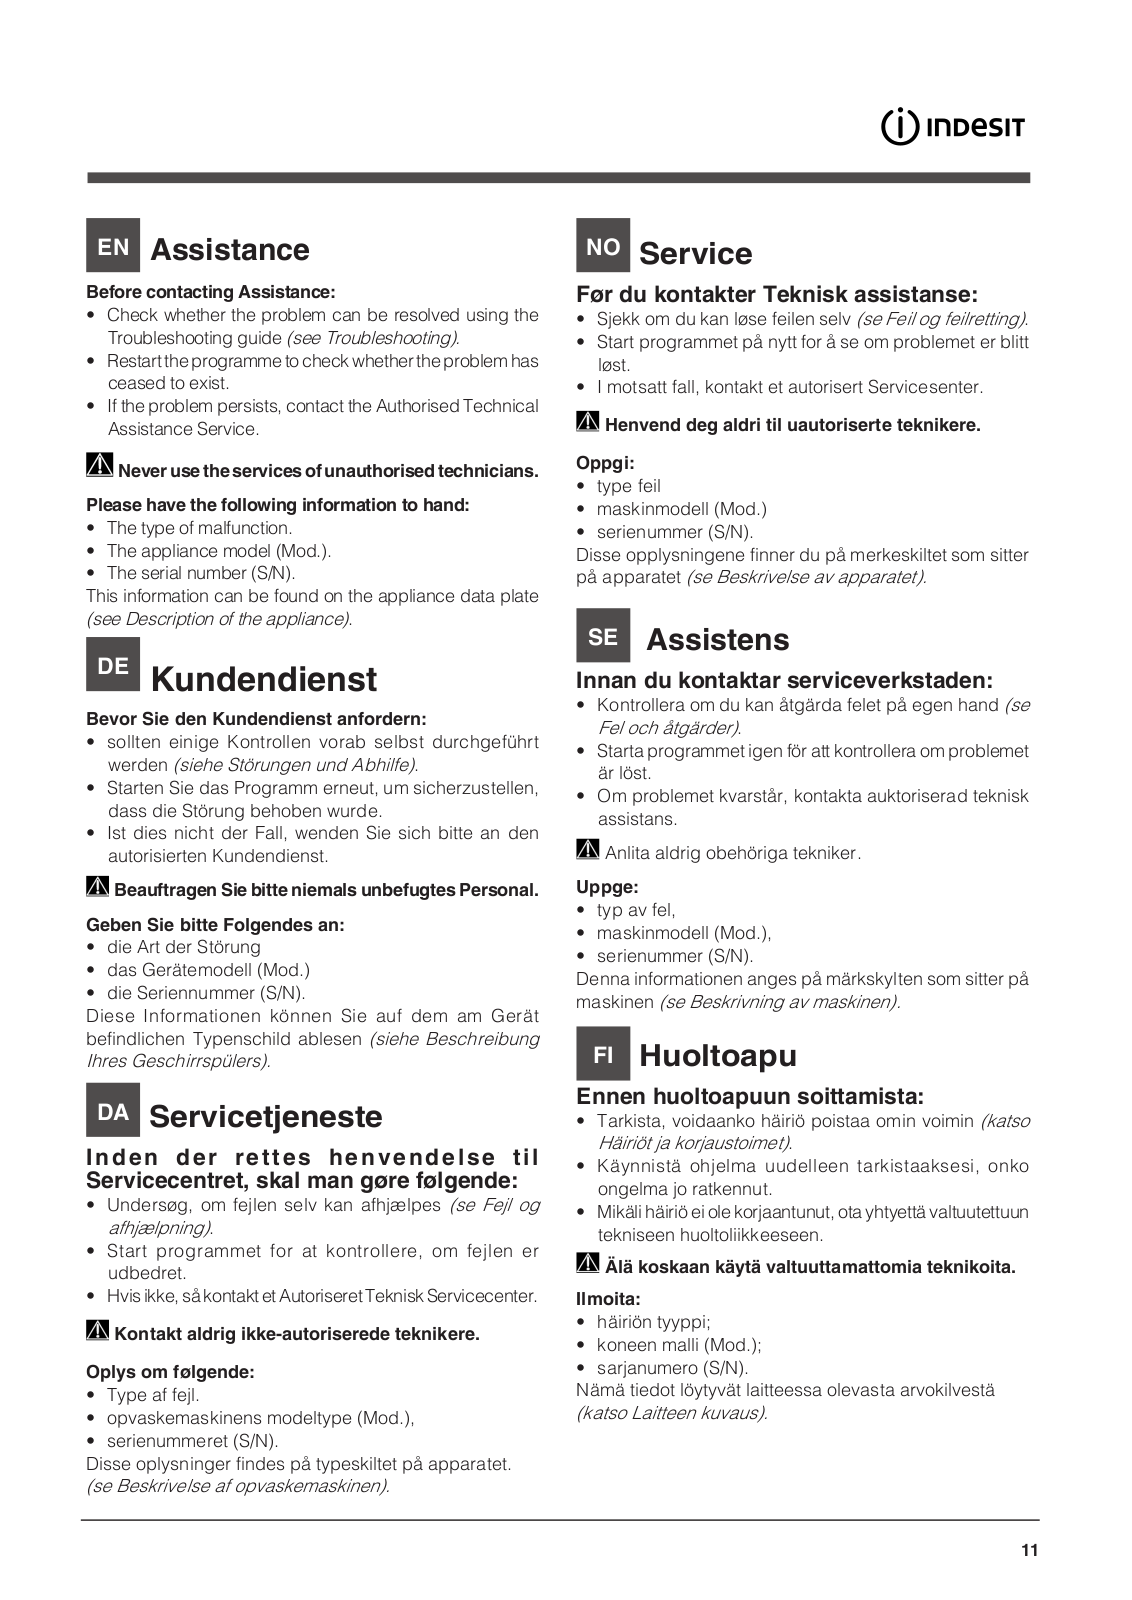
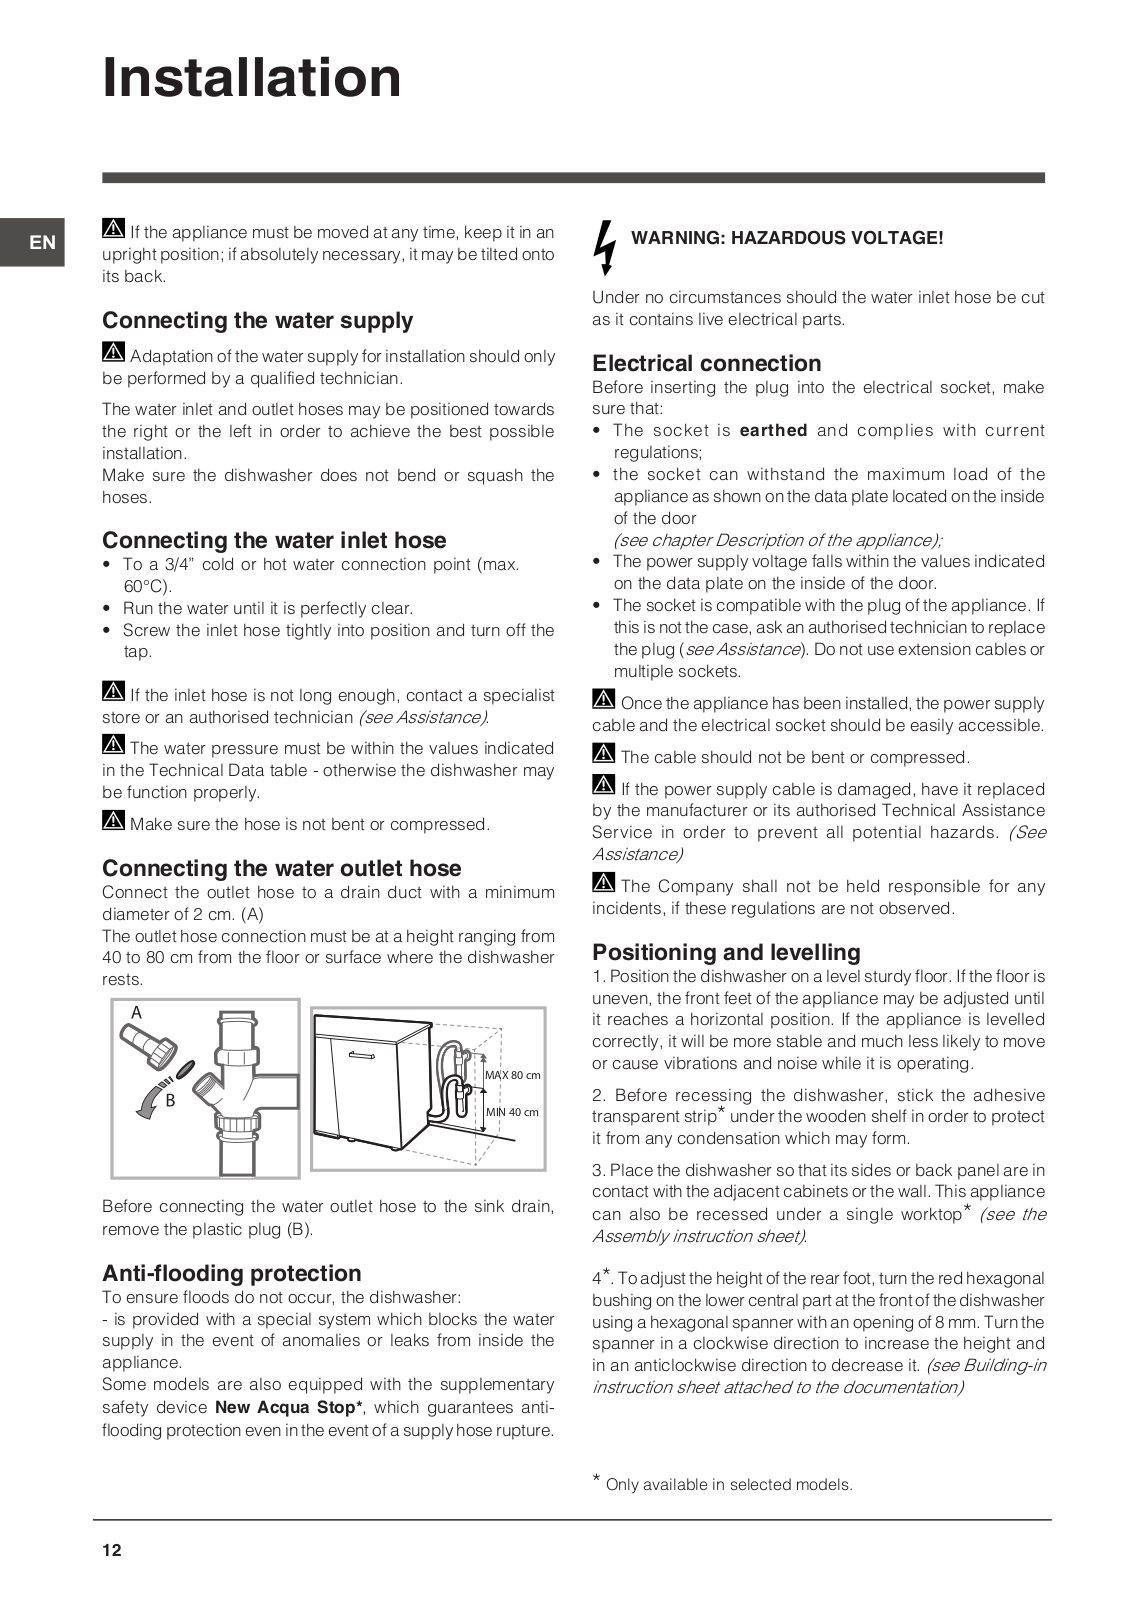
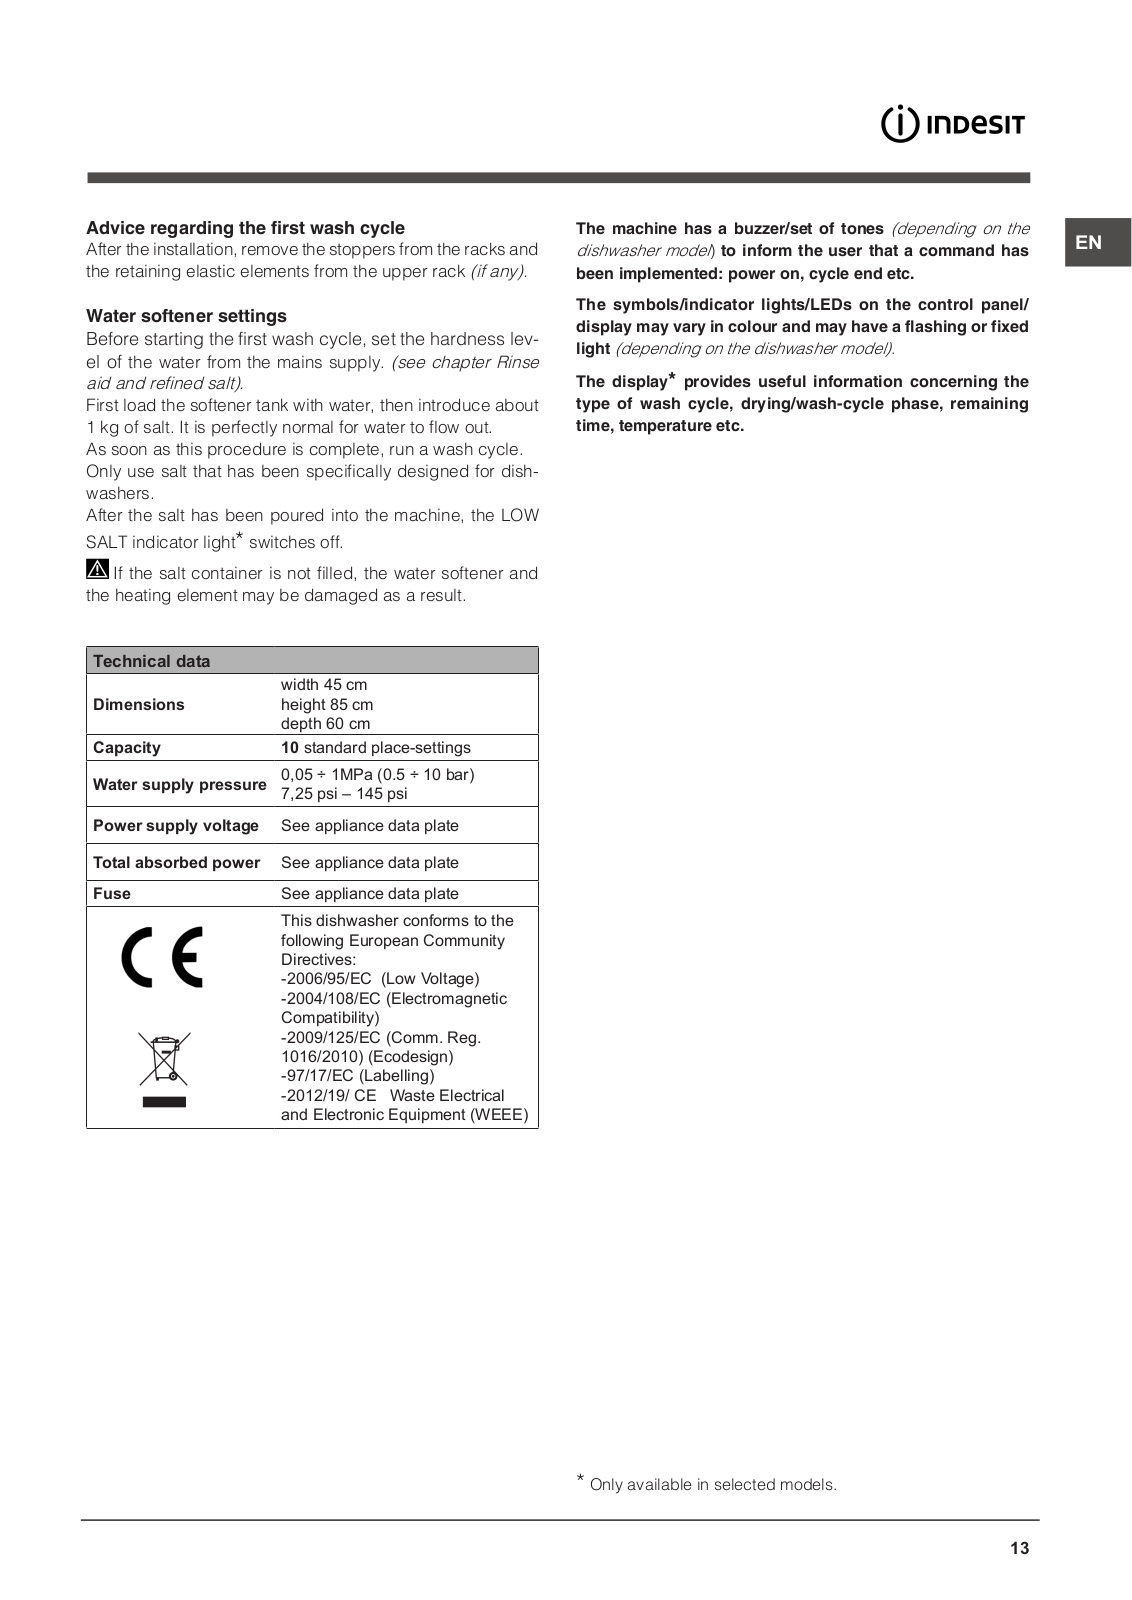
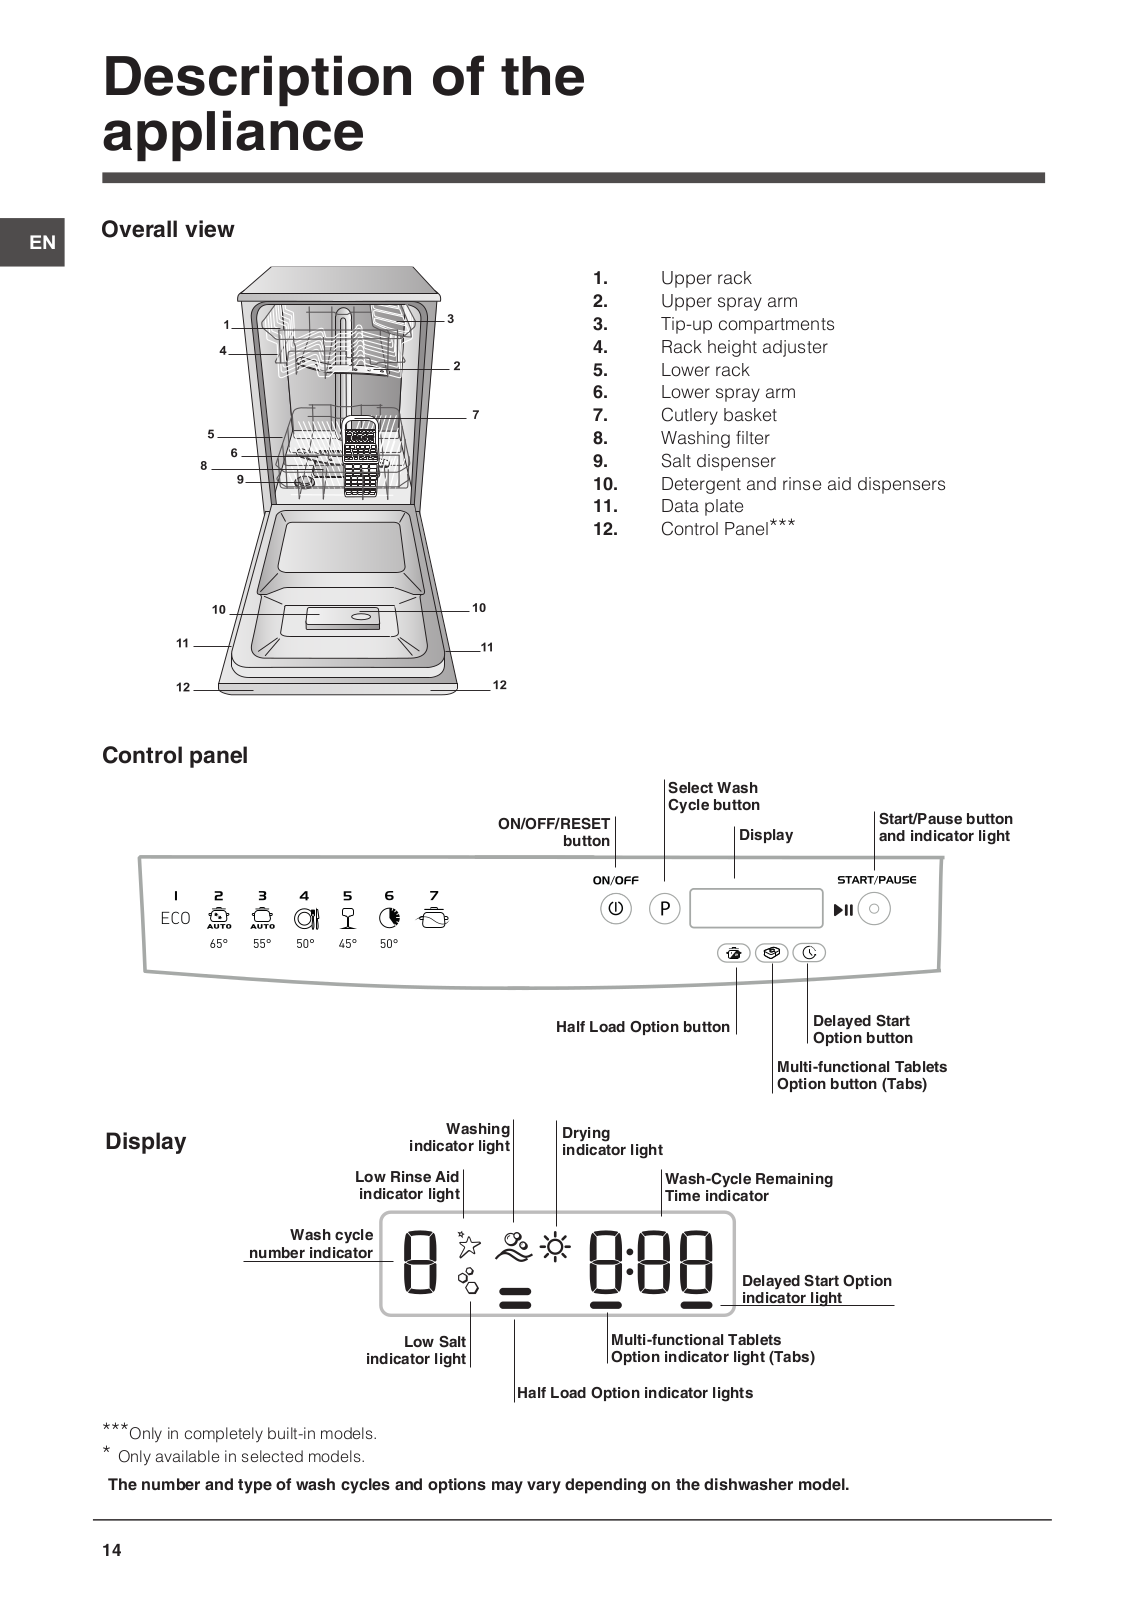
INDESIT
Loading...
D
DSG-051-NX-EU
3
DSG263EU
3
DSG263 NX
DSG263S
2
DSG-5731
3
DSG 5731 NX
DSG 5737
3
DSG 573 NX
3
DSG 5741
DSG 5741 NX
2
DSIC3M19
12
DSIC 3T117
DSIC 3T117 C
8
DSIC 3T117 Z
8
DSIE 2B10
20
DSIE 2B10 UK
DSIE 2B10 UK N
DSIE 2B19
20
DSIE 2B19 UK
DSIO 3T224 CE
5
DSIO 3T224 E Z UK
2
DSIO 3T224 E Z UK N
2
DSIO 3T224 Z E
11
DSR 15B
2
DSR 15B1
4
DSR 15B1 EU
4
DSR 15B1 K UK
DSR 15B1 S EU
DSR 15B1 S UK
DSR 15B1 UK
DSR 15B3
2
DSR 15B3 RU
DSR 15B EU
DSR 15B S EU
2
DSR 15M9
DSR15M9CUK
DSR 26B
DSR26B17
3
DSR 26B17 NX
DSR 26B1 UK
2
DSR 26 B RU
2
DSR 26B S
DSR 57B
DSR 57B S
DSR 57H96 Z
3
DSR 57H96 Z S
3
DSR 57M17 NX
DSR 57M19
3
DSR57M19A
2
DSR 57M19 A EU
DSR 57M19 A S EU
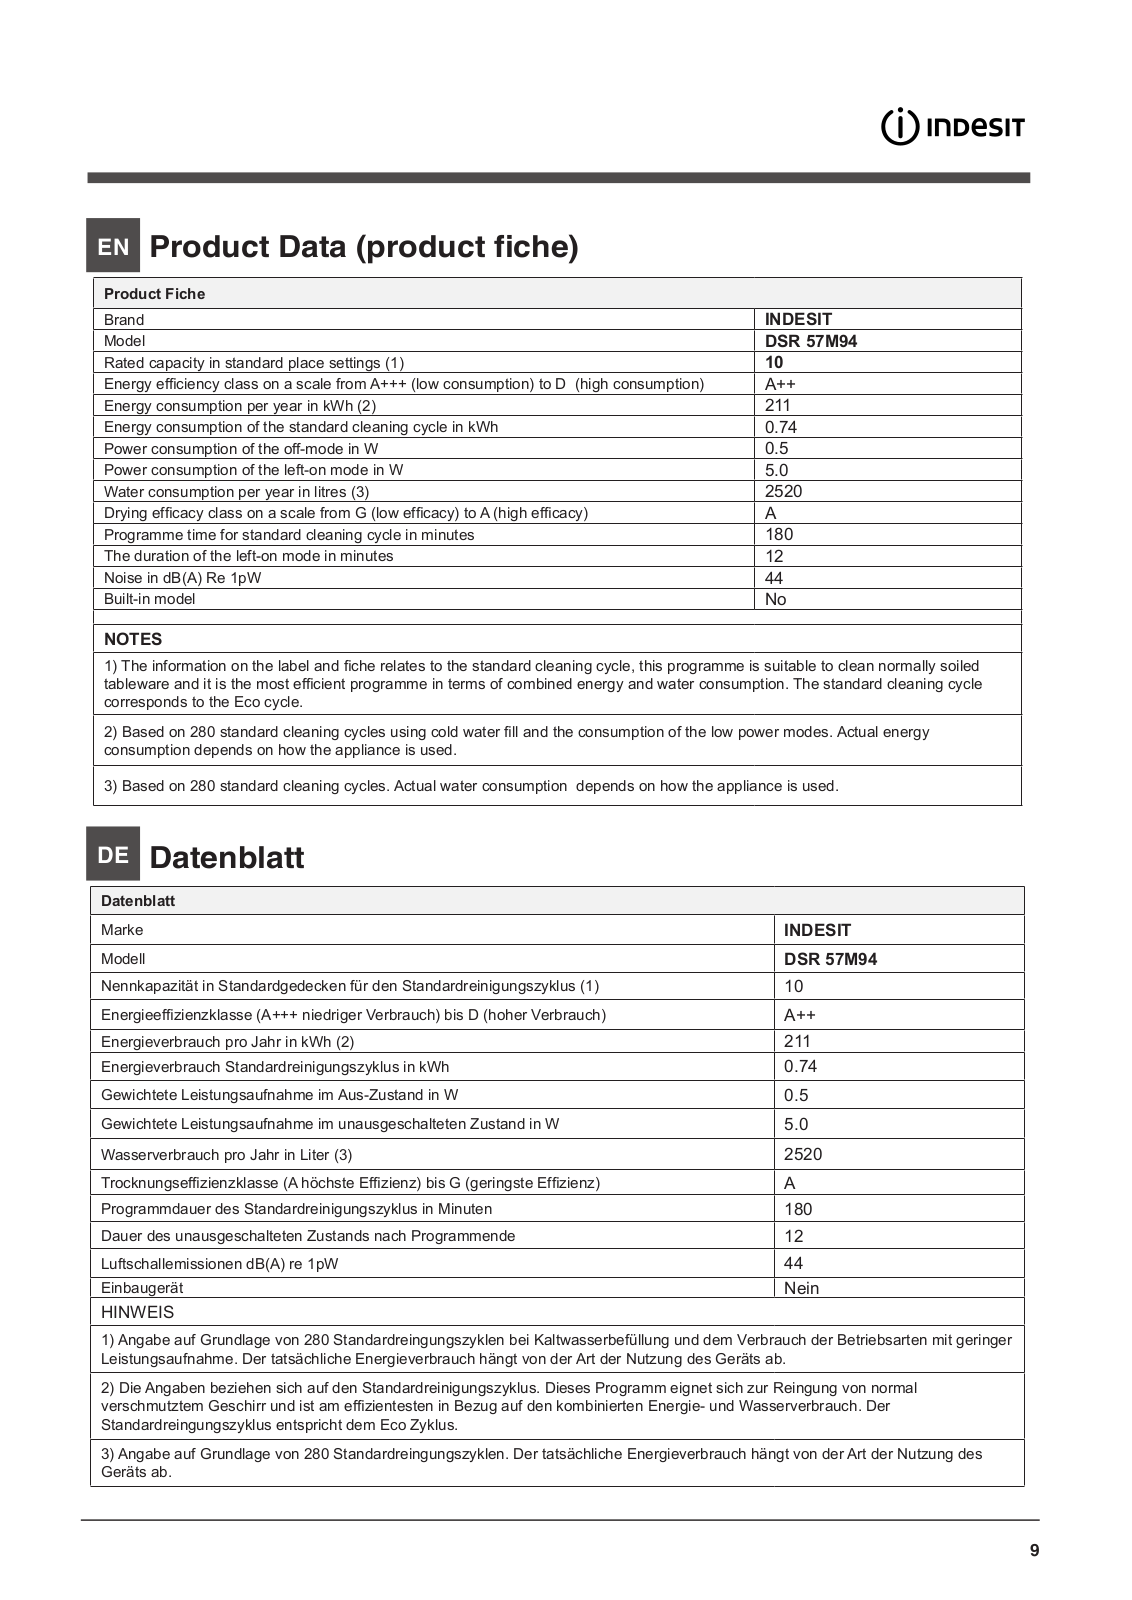
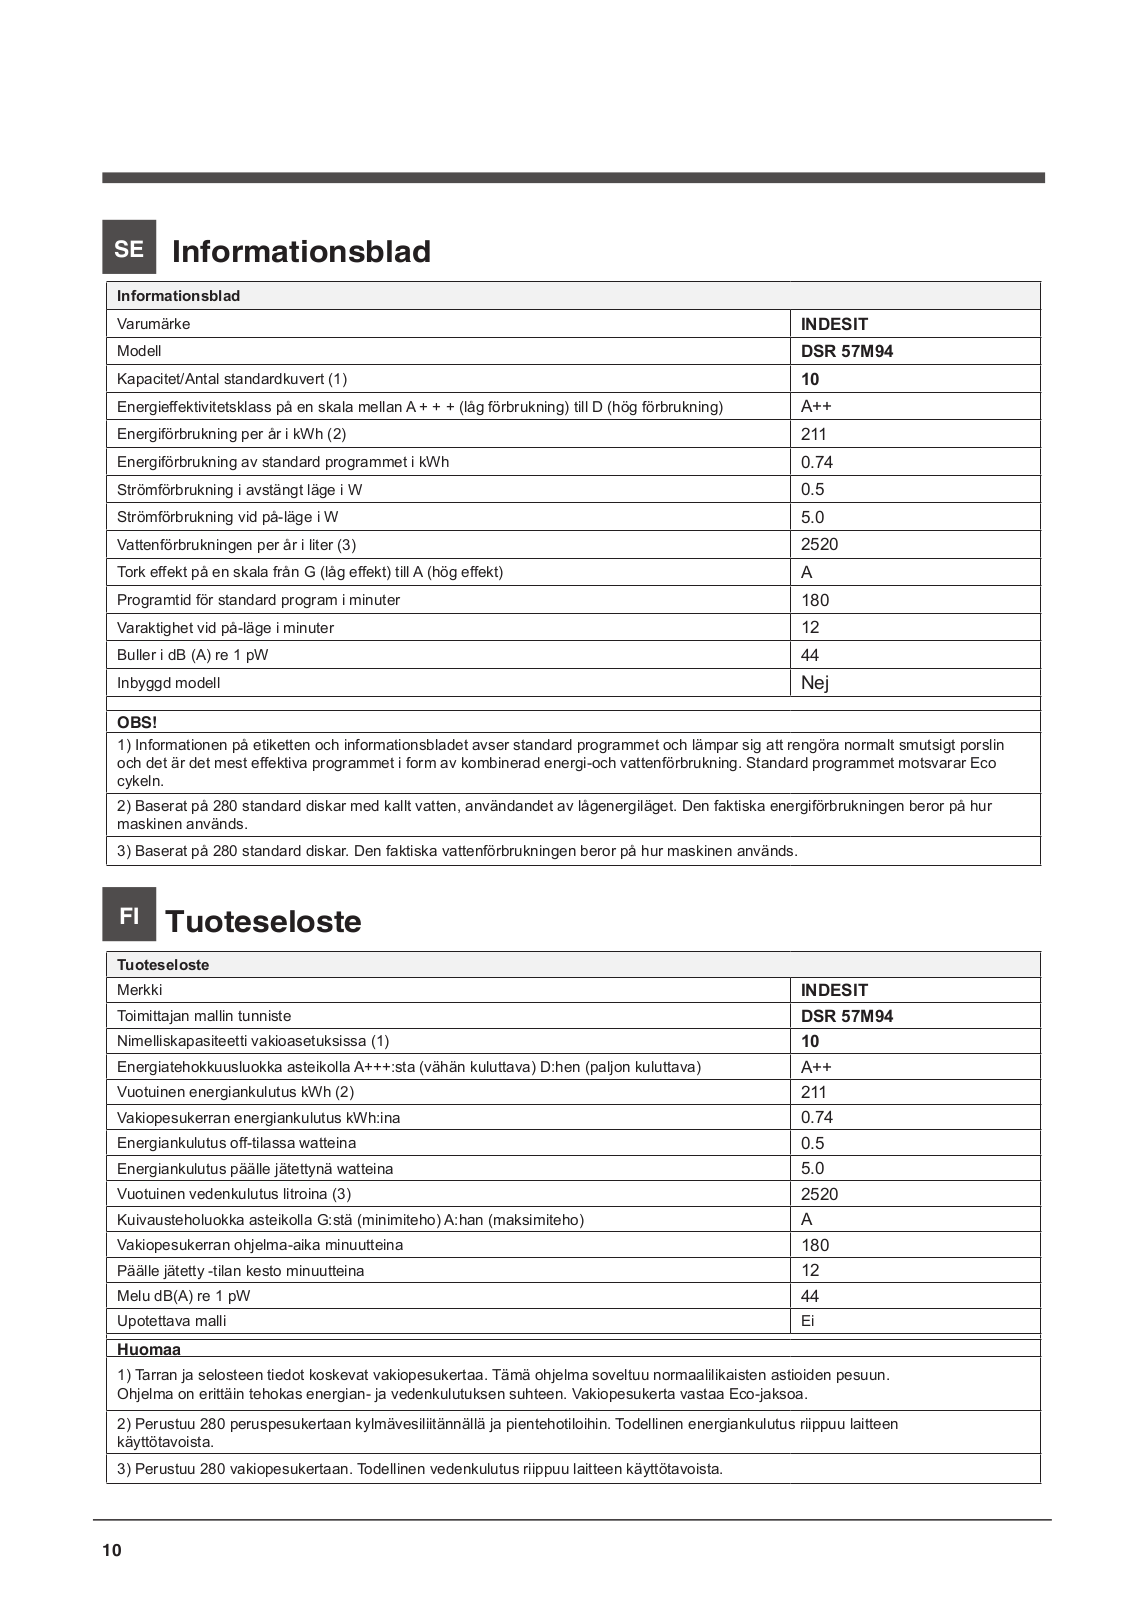
DSR 57M94
3
DSR 57M94 A
DSR 57M94 A EU
2
DSR 57M94 A S EU
2
DSR 57M96
2
DSR 57M96 Z UK
DSR 57T19
DSR 57T19 CA S EU
DSR 57T94 CA EU
DSRL 17B19
DSZ 4150
DSZ 4150.1
DSZ 5175
DUC 2C24 AC X
5
Durant
DV 62
DV 620
2
DV 640 A
DVG 621
DVG 622
2
DVG623
DVG 623 IX
2
DVG 632 A WH
DVG 652 A
DVG 652 A IX
DVLS 5
2
DVSR 5
3
DWIF 14B1
3
DY46K-2
DY46W-2
DY46X-2
E
E11/R
E2BL 19***F
E2BL 19***F O3
E2BL 19***F TK
E2BL 19x***F O3 TK
E2BLH 19***F
E2BLH 19***F O3
E2BLH 19***F O3 TK
E2BLH 19***F TK
E2BLH series
E2BL series
E2BY 19*** F O3
E2BY 19*** F O3 TK
E2BYH 19*** F O3
E2BYH 19*** F O3 TK
E2SB 1160A UA
2
E2SB 1160B B
E IB 15050 A1 D.UK 1
2
Loading...
Loading...
Nothing found
DSR 57M94 A EU
User Manual
28 pgs
5.55 Mb
0
User Manual
80 pgs
21.78 Mb
0
Table of contents
Loading...
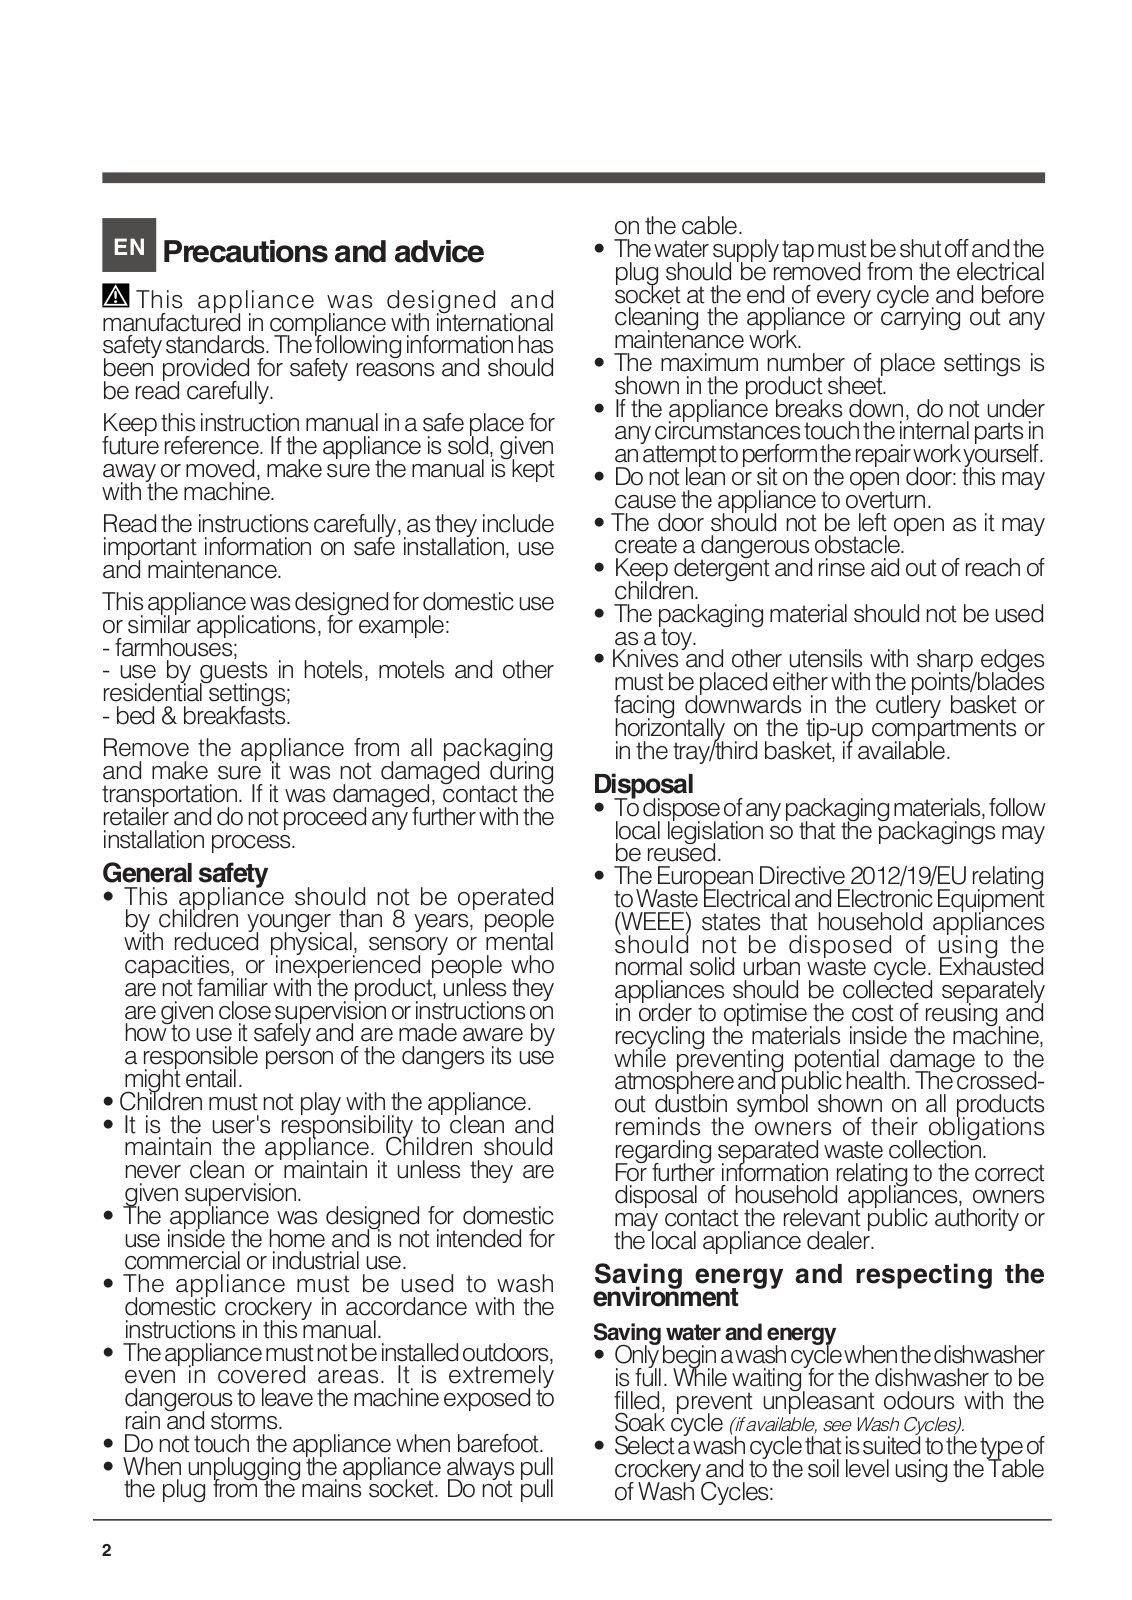
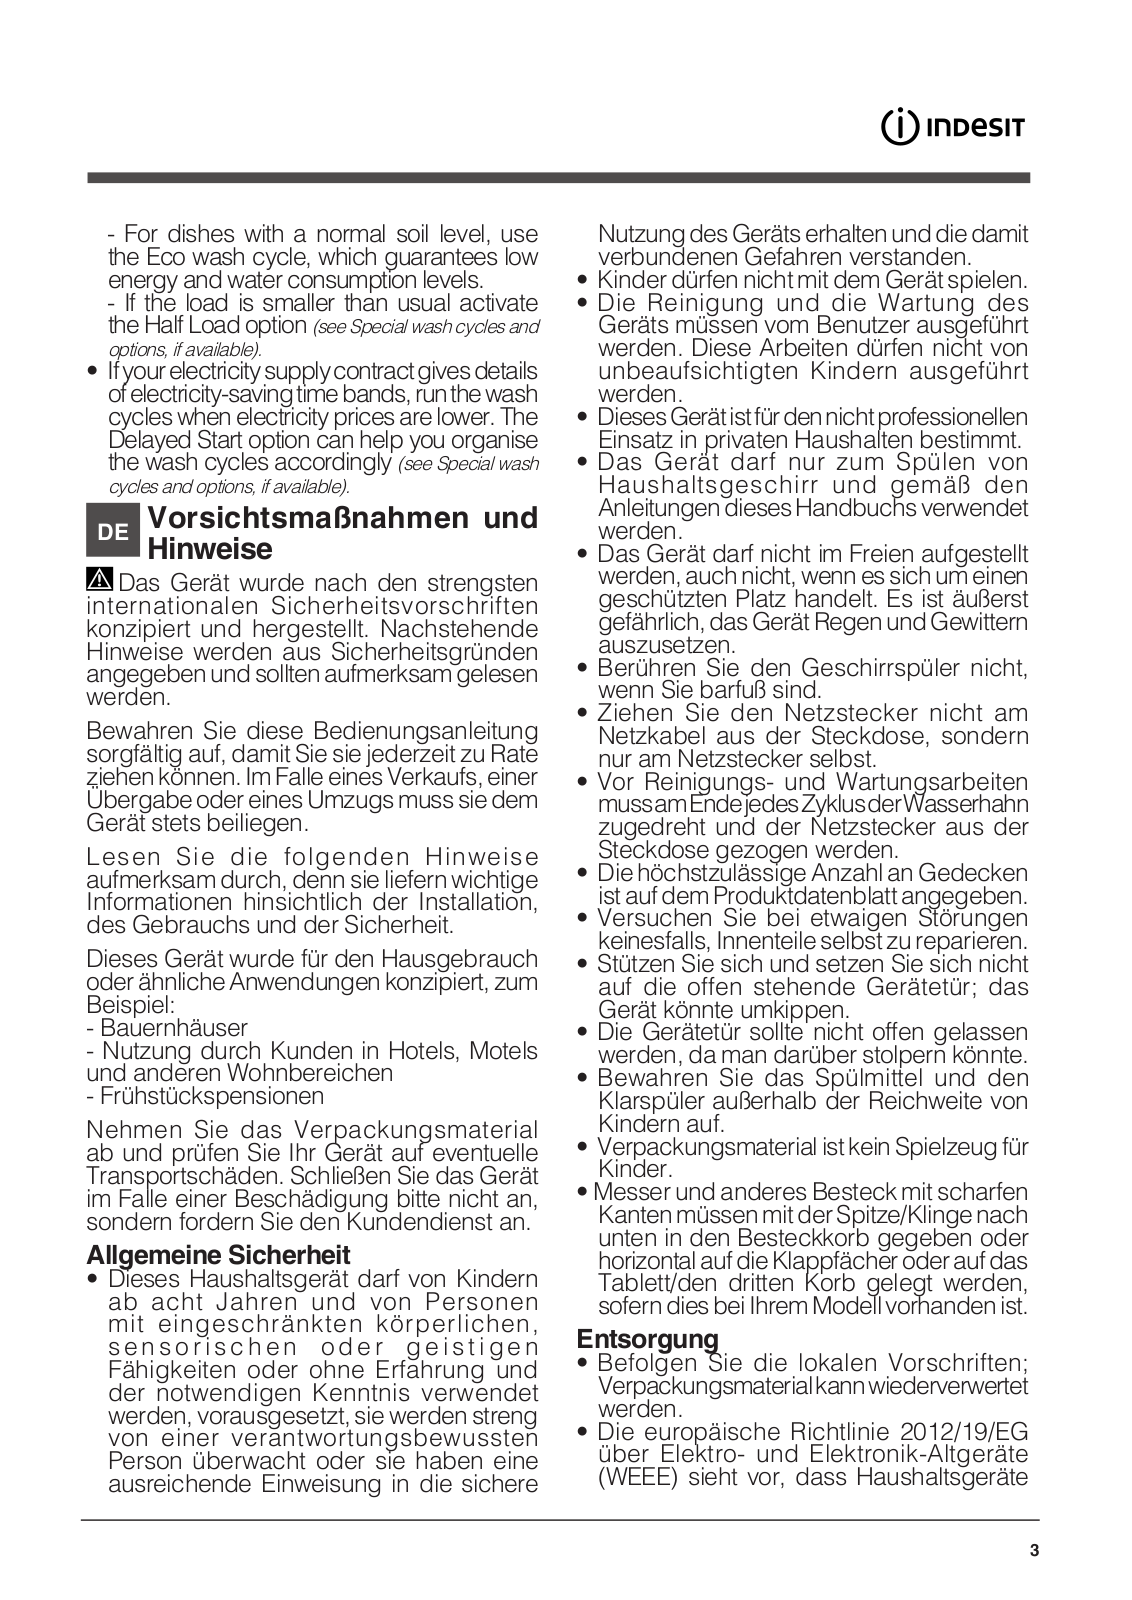
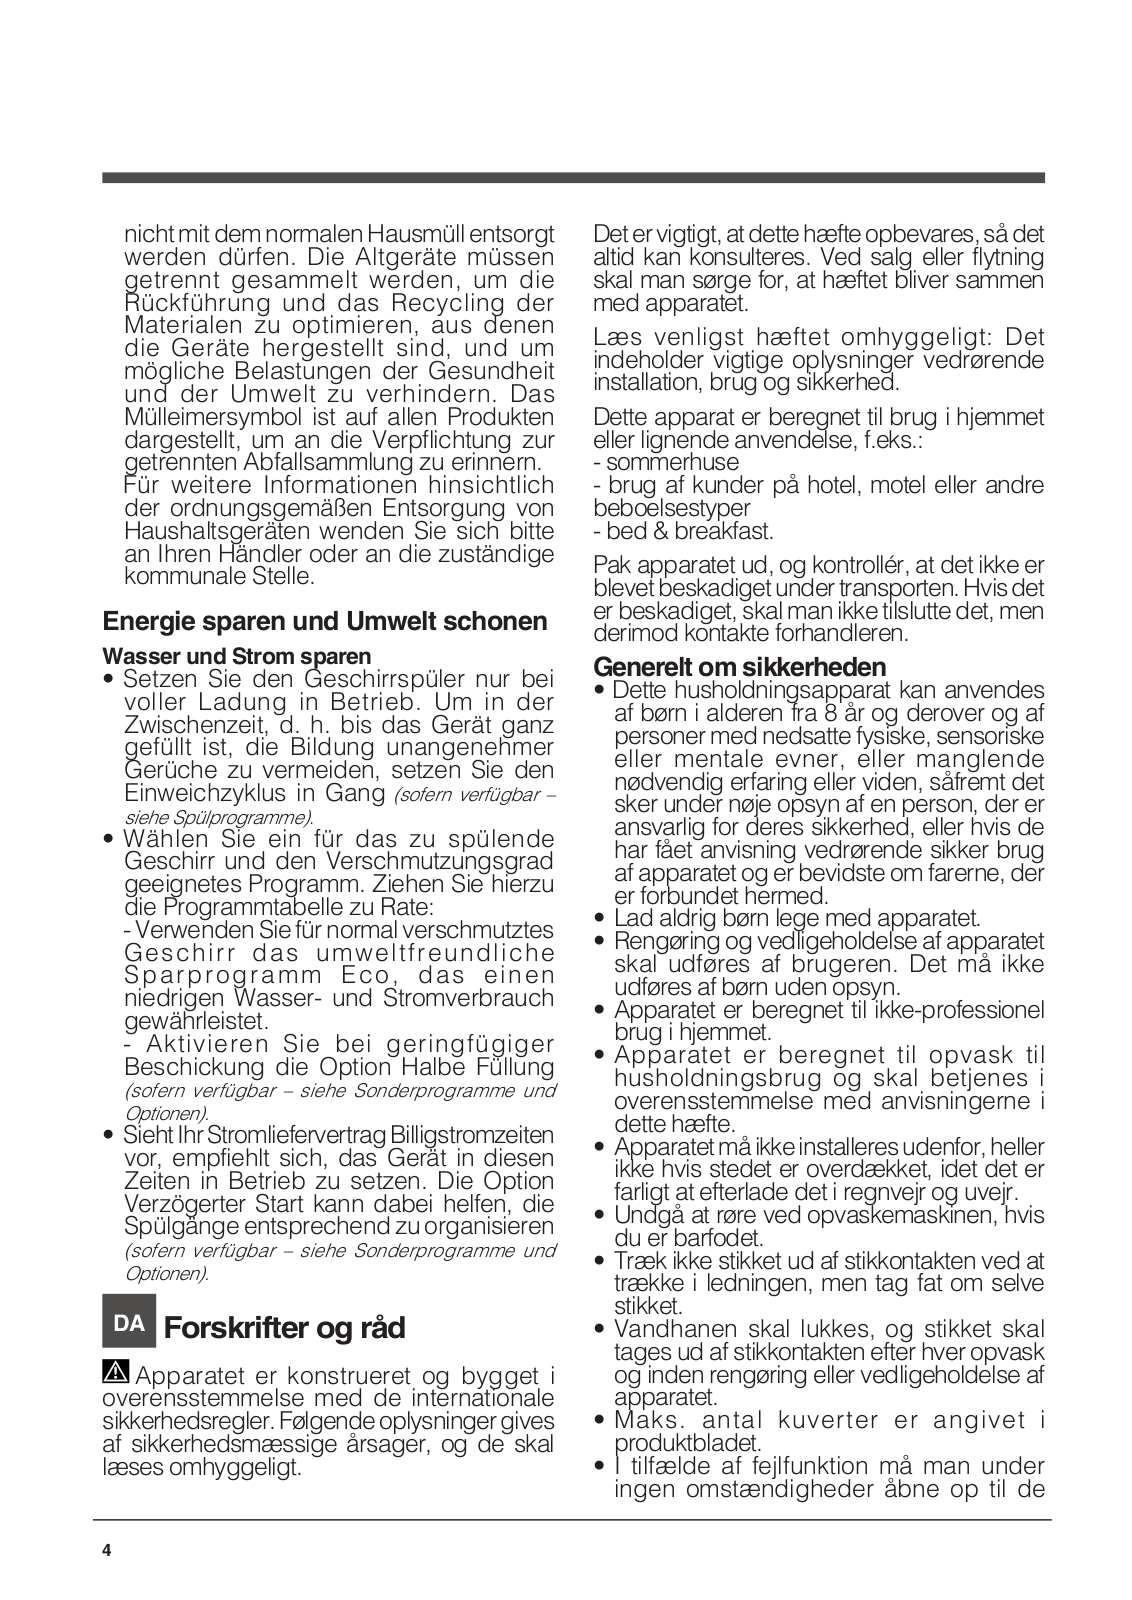
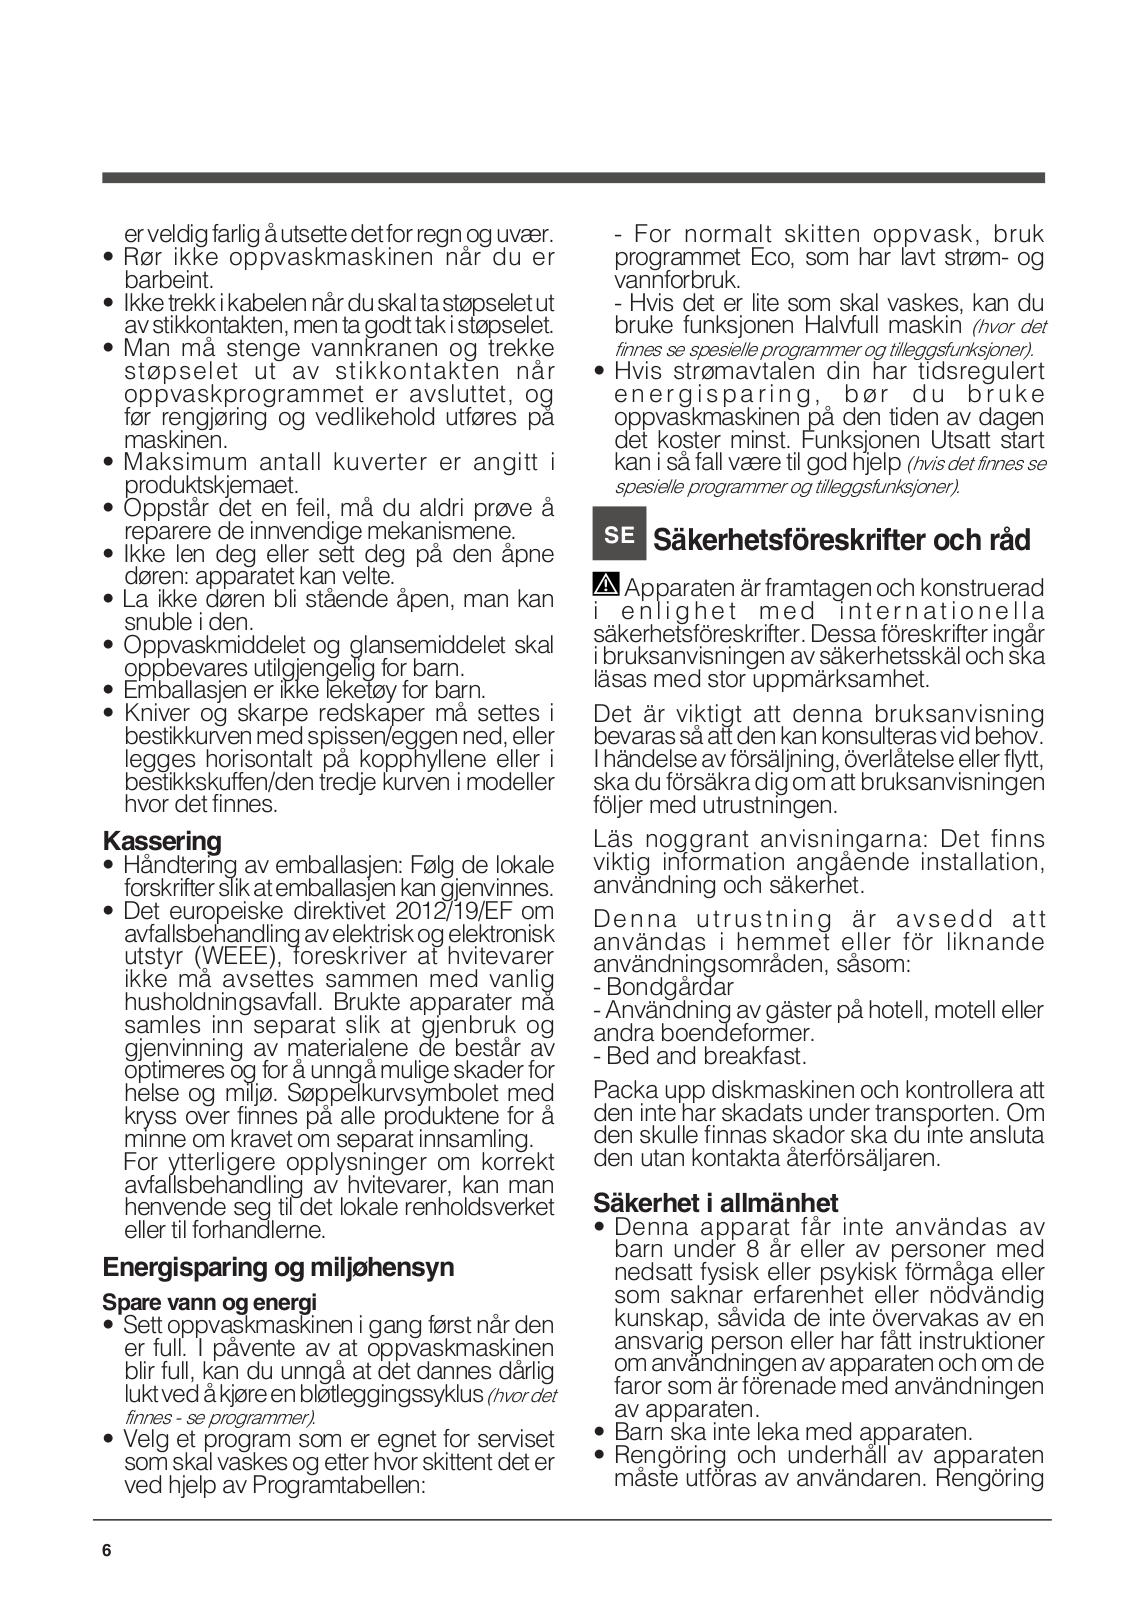
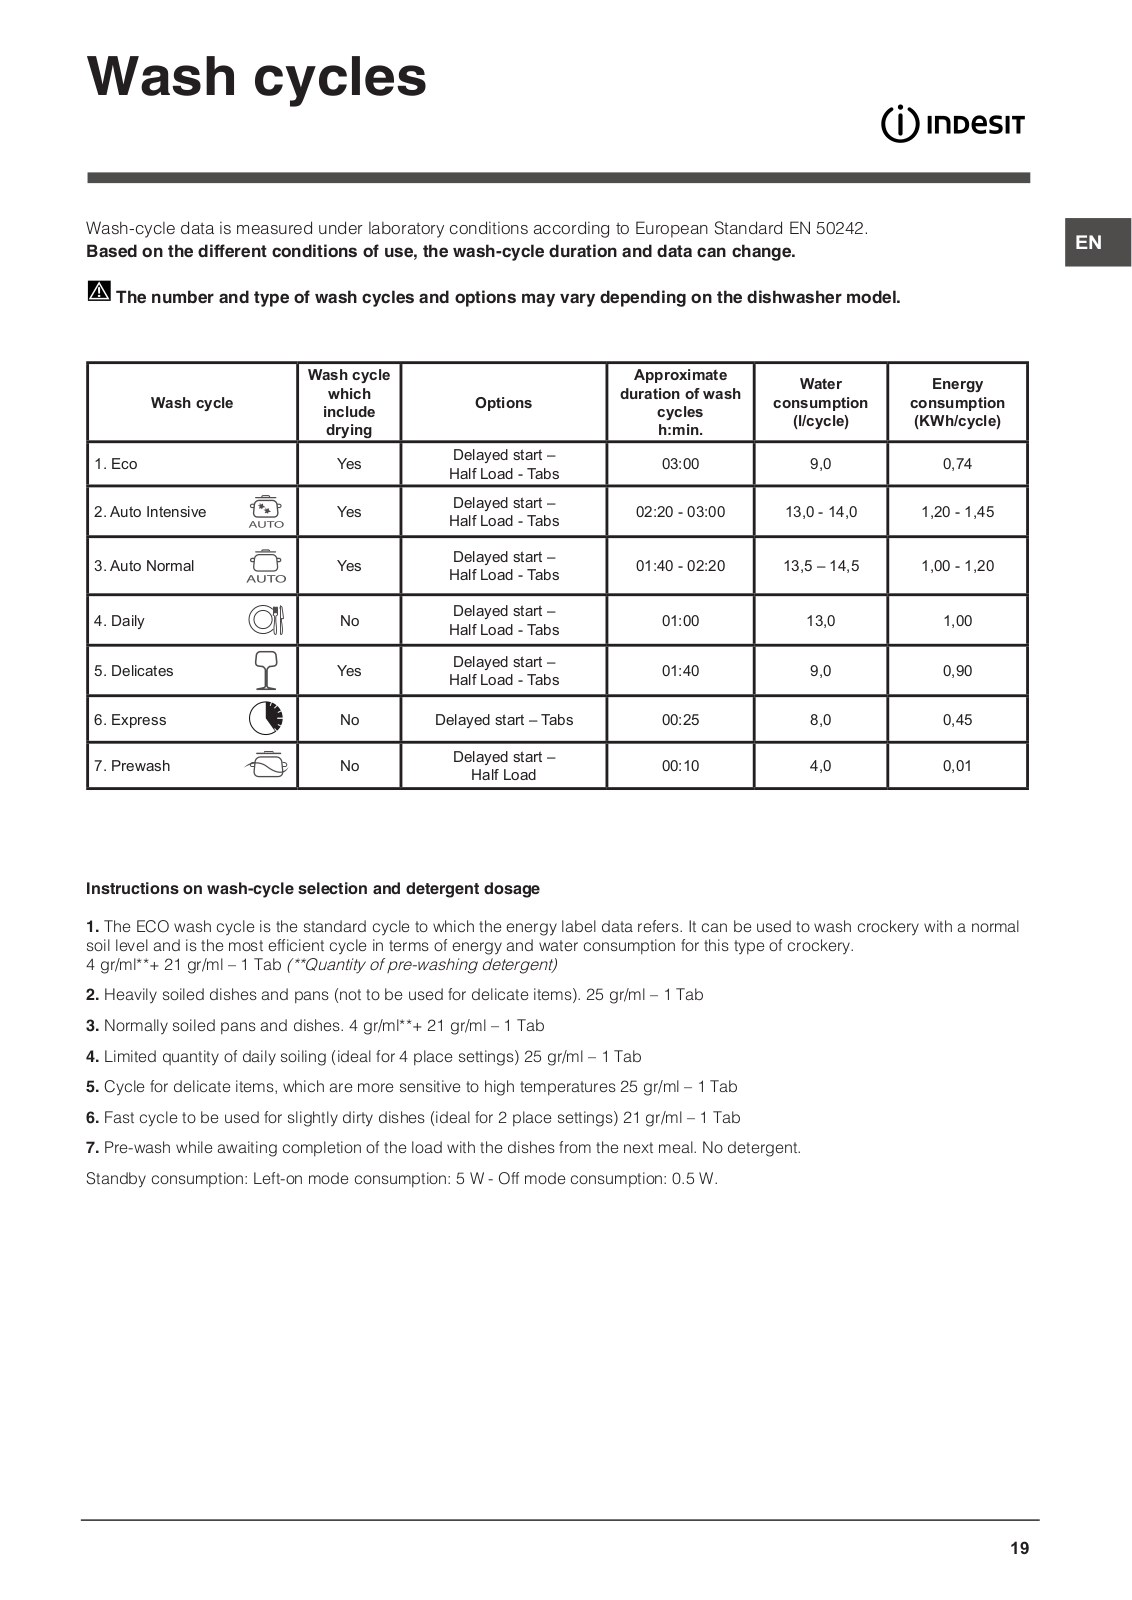
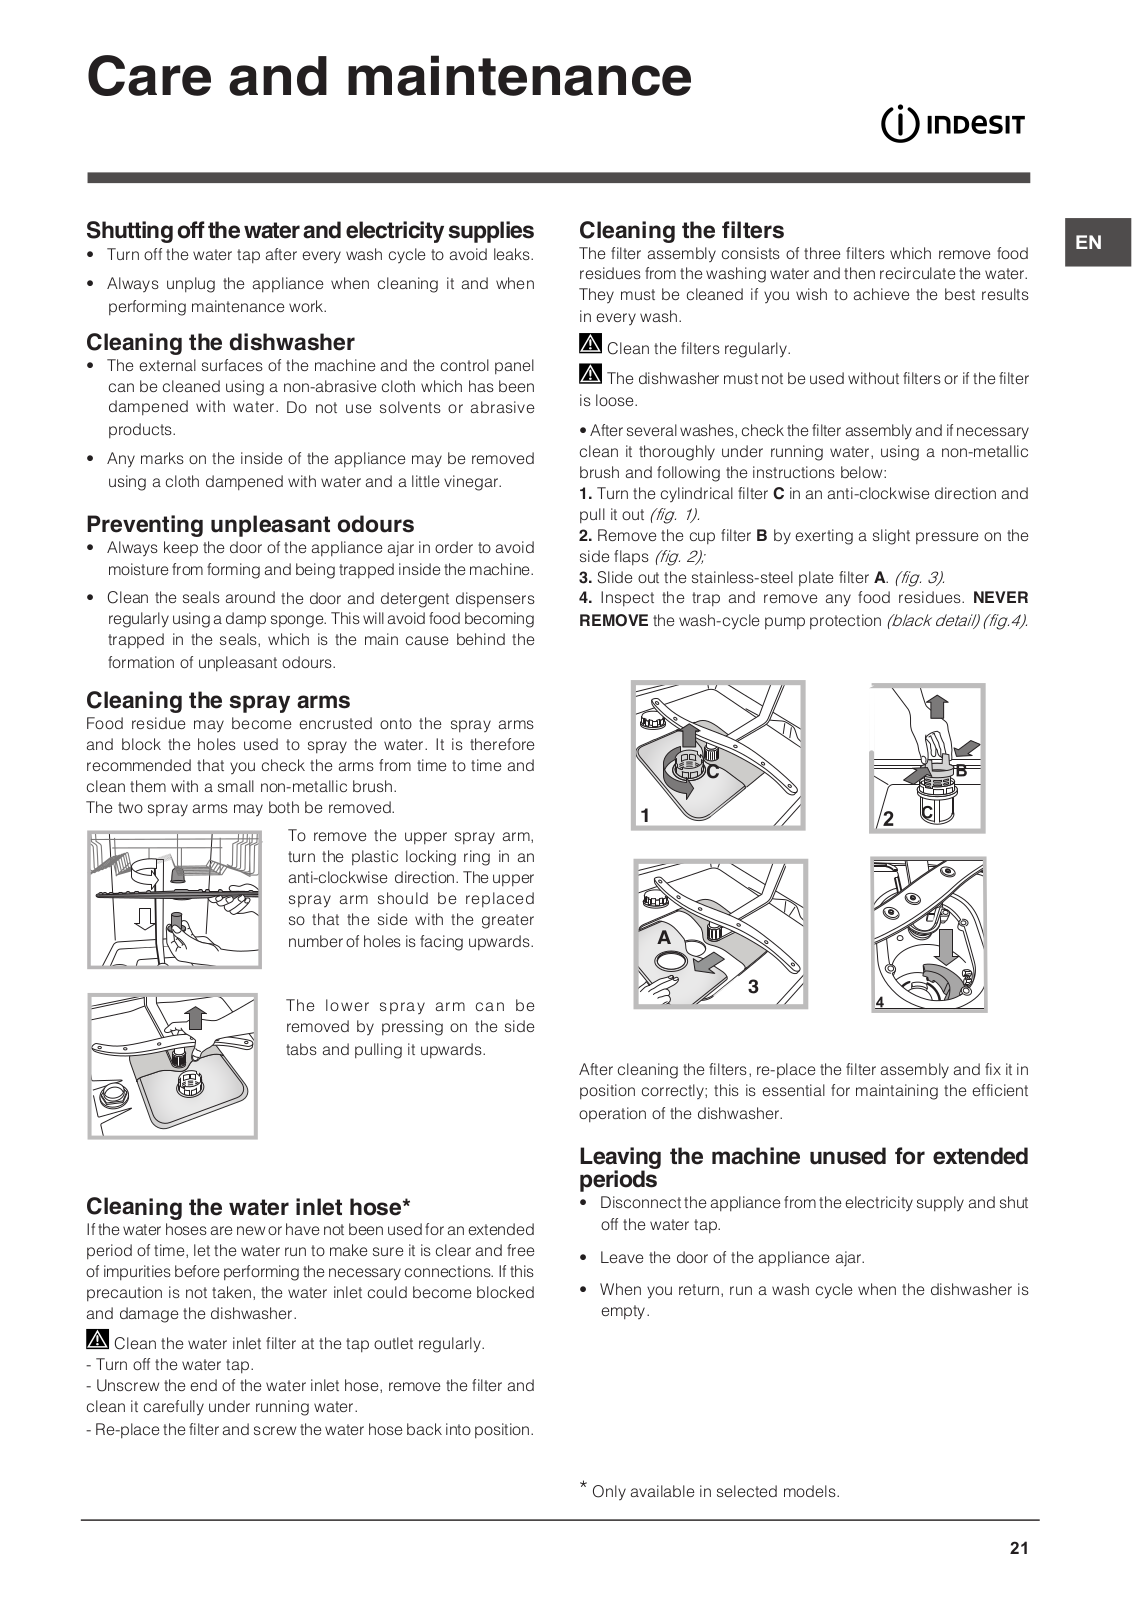
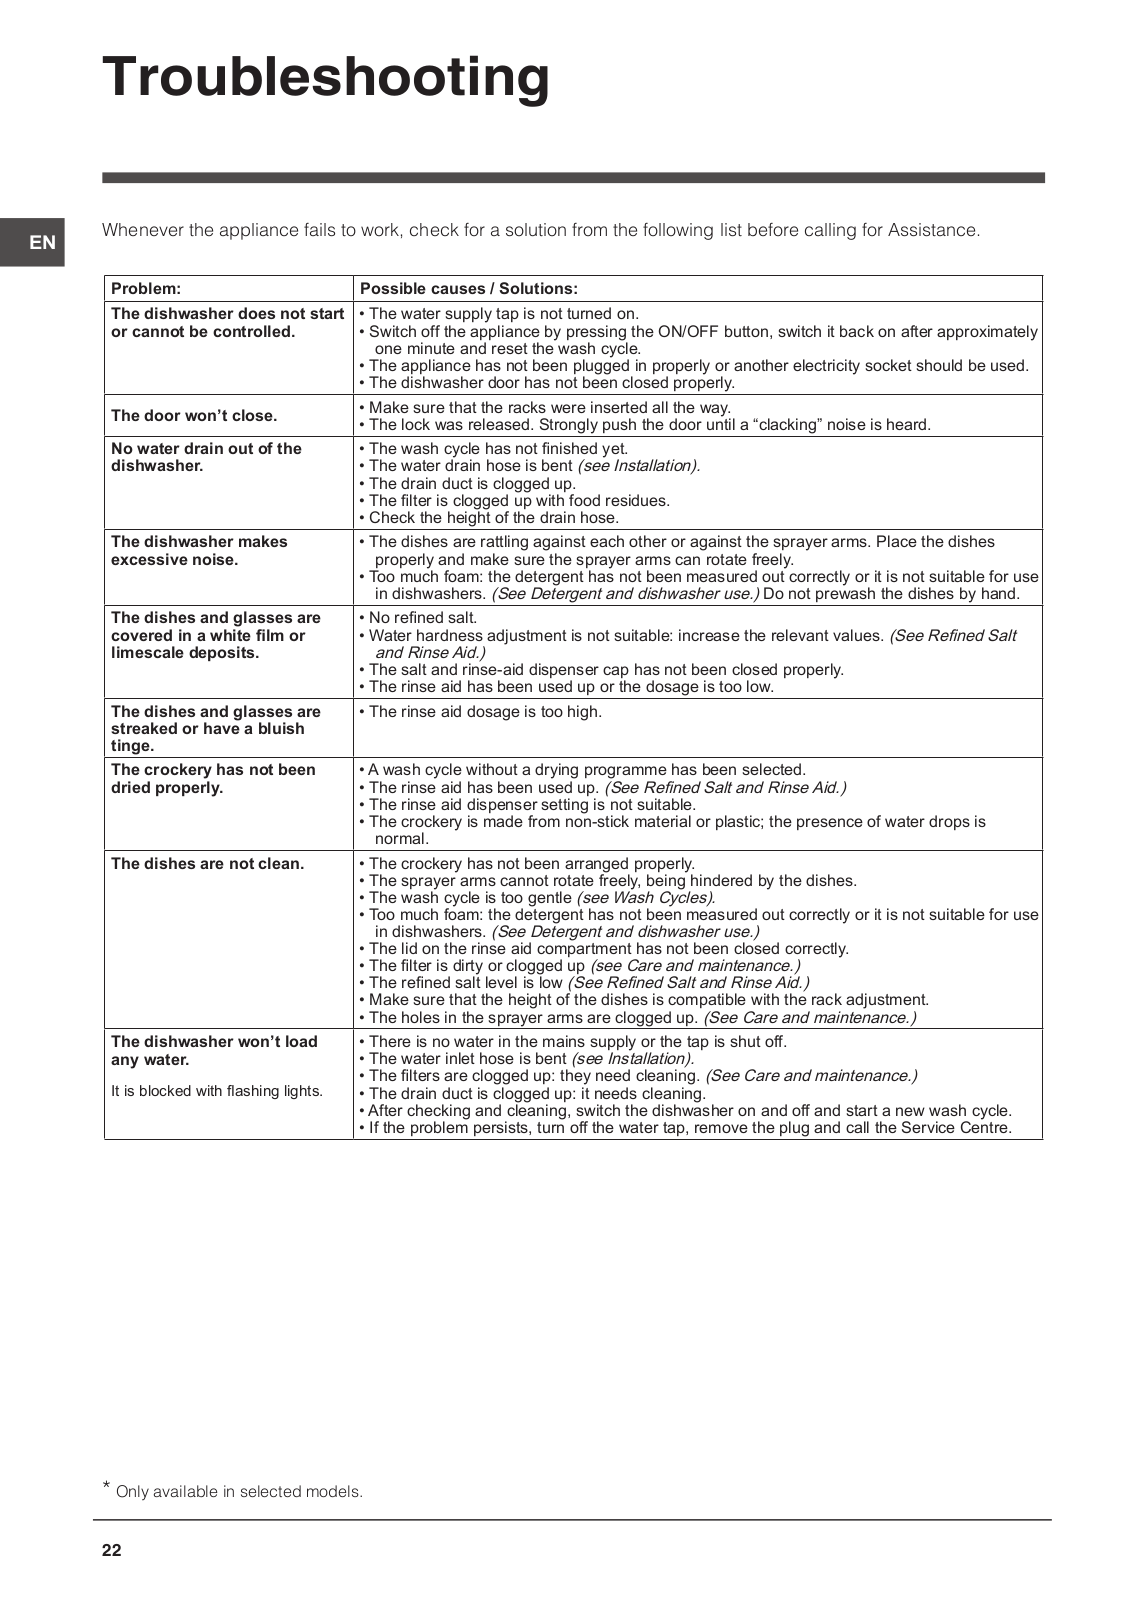
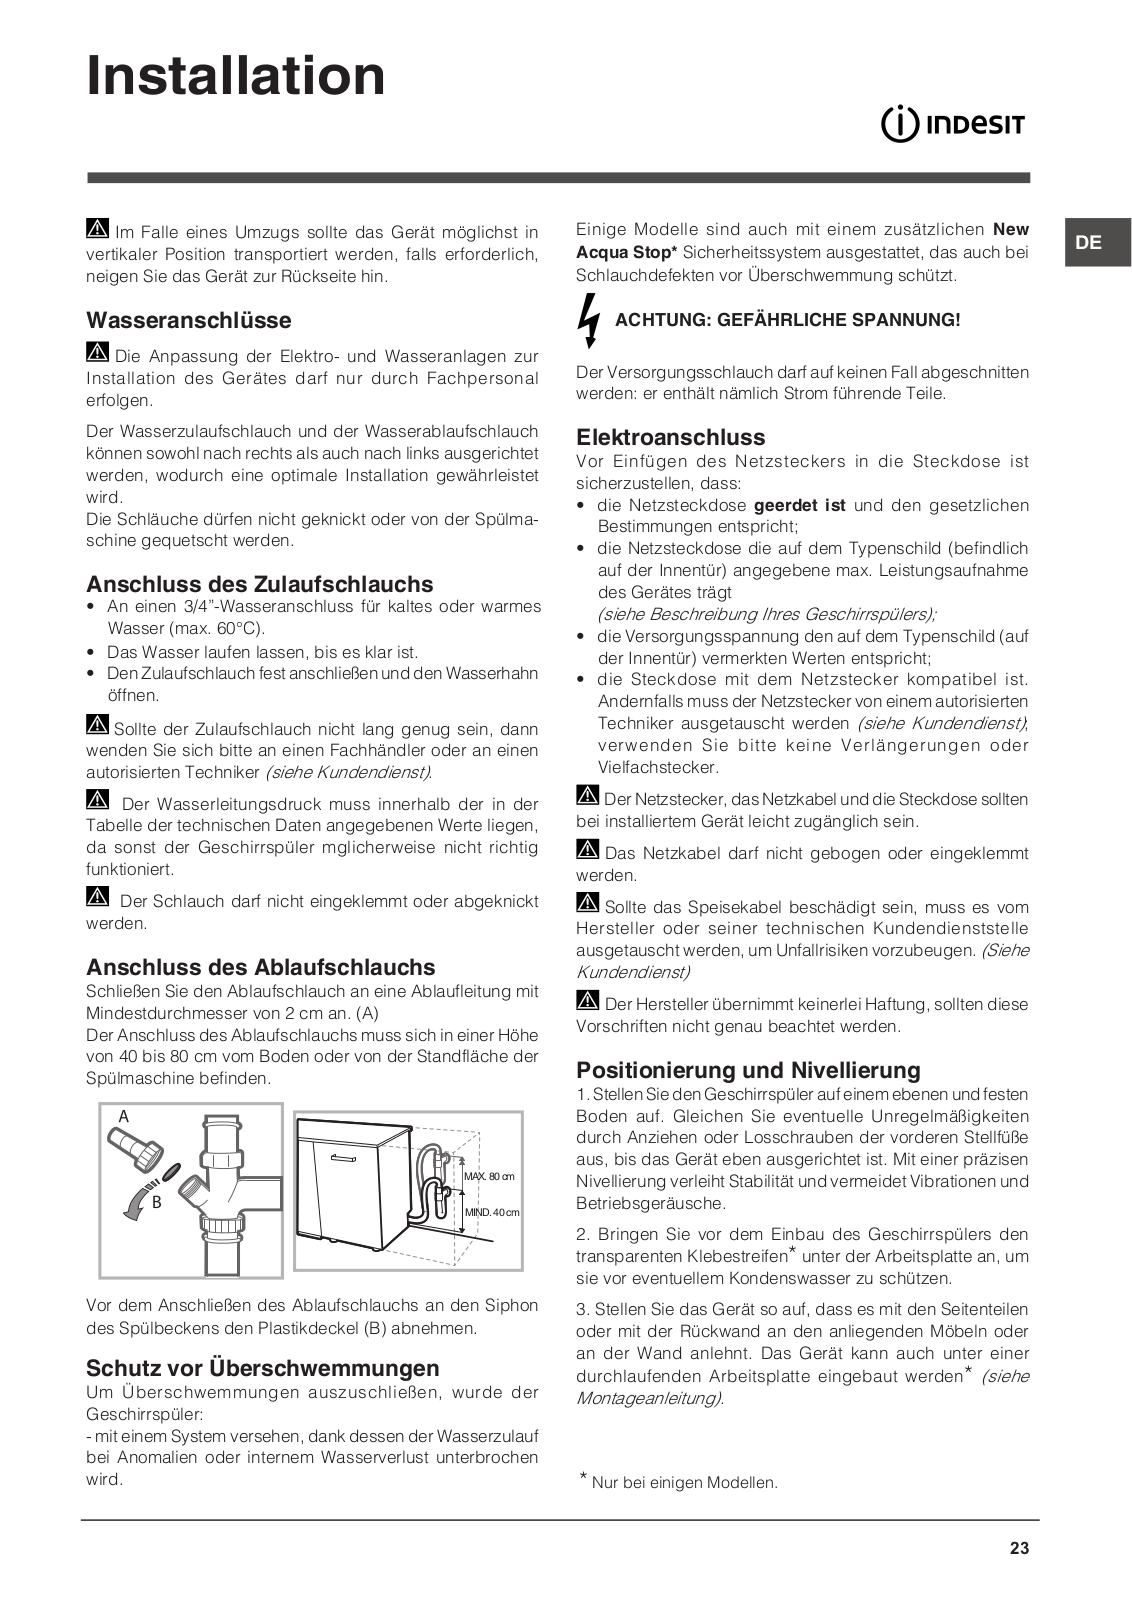
INDESIT DSR 57M94 A EU User Manual
...
INDESIT User Manual
Download
Specifications and Main Features
Frequently Asked Questions
User Manual
Download
Loading...
+
56
hidden pages
Unhide
You need points to download manuals.
1 point = 1 manual.
You can buy points or you can get point for every manual you upload.
Buy points
Upload your manuals
 Loading...