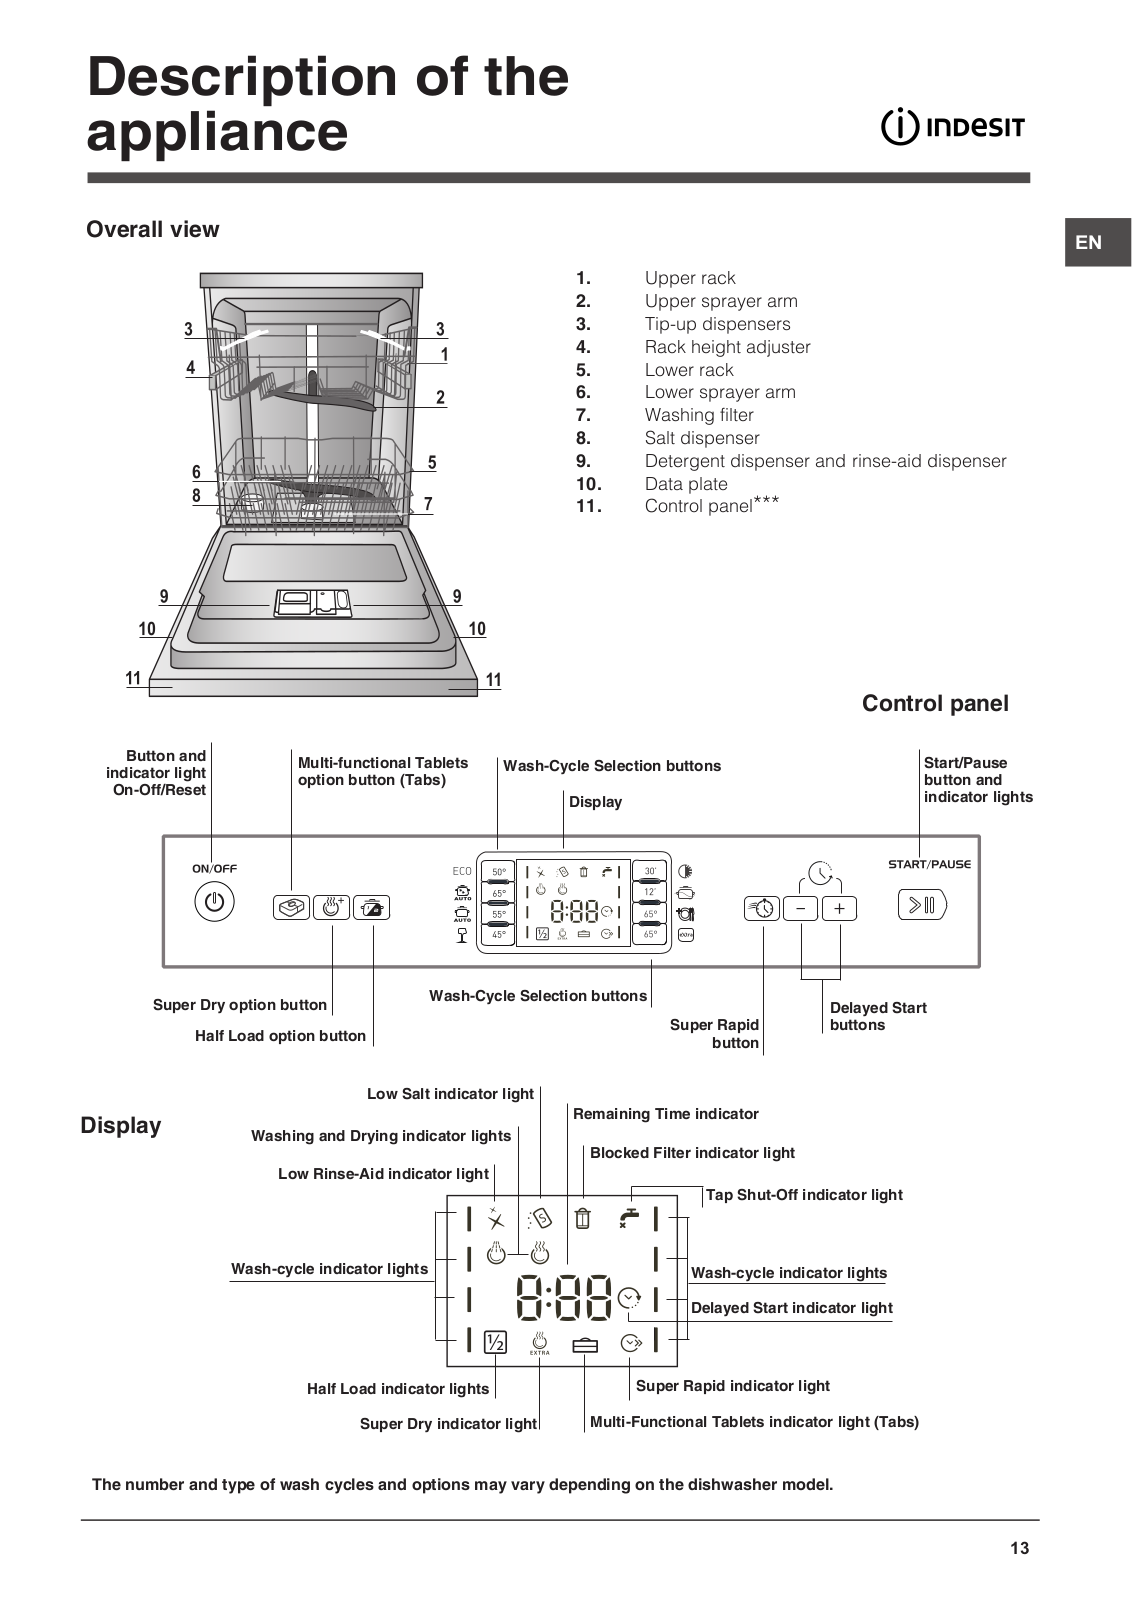
How it Works
Log In / Sign Up
Buy Points
How it Works
FAQ
Contact Us
Questions and Suggestions
Users
INDESIT
Loading...
D
DFP2631M
DFP-2631M-EU
DFP 2727
3
DFP 273
3
DFP 2731M
DFP2741MFR
Dfp2741MNX
DFP2741MNXFR
DFP 274B S FR
DFP 275
DFP 275 NX
DFP 27B1
DFP 27B10
2
DFP 27B16 NX FR
DFP 27B1 A
DFP-27B1-A-EU
5
DFP 27B1 SK
DFP 27B1 UK
3
DFP 27B+96
DFP 27B+96 Z
7
DFP 27M10 NX TK
DFP 27T94
4
DFP27T94A
DFP 27T94 A EU
12
DFP 27T94 A NX EU
2
DFP 27T94 A UK
DFP 27T96 Z UK
2
DFP 28B16 FR
DFP 573
6
DFP 5731
2
DFP5731M
DFP-5731M-EU
DFP 5731 NX
DFP 573 NX
3
DFP 584
4
DFP 5841
DFP5841M
DFP 5841M EX
2
DFP-5841M-NX-EU
DFP 5841 NX
2
DFP 5841 NX EU
DFP 5847
2
DFP 5847 NX
DFP 584 EU
DFP 584 NX
DFP 584 NX EU
DFP585
DFP 58B1
2
DFP 58B16 FR
DFP 58B1 EU
16
DFP 58B1 NX EU
9
DFP 58B1 NX EX
5
DFP 58B+96 EU
DFP 58B+96 NX EU
5
DFP 58M94
DFP 58M94 A NX AUS
DFP 58T1
3
DFP58T1C
DFP-58T1-C-NX-EU
4
DFP 58T1 C UK
DFP 58T1 EU
DFP 58T1 NX UK EX
DFP 58T92
2
DFP 58T92 CA NX SK
7
DFP 58T93 A SK
DFP 58T94
7
DFP 58T94 A EU
7
DFP 58T94 A UK
DFP 58T94 CA NX
3
DFP 58T94 CA NX EU
16
DFP 58T94 Z
16
DFP 58T94 Z NX
17
DFP 58T96 Z UK
2
DFP58TB1
DFW 5530 IX UK
4
DFW 5544 C IX UK
3
DFWS 5544 C IX UK
2
DFZ 4150
DFZ 4150.1
DFZ 4150.1 S
DFZ 5175
DFZ 5175 S
6
DG 5100 W
DG 5100 WG
DG 5145 W
DG 6100
DG 6100 W
DG 6145
3
DG6145W
DG 6345
DG 6445
DG 6450
DH53B
DH53 CK
DH53K
DH53W
DH53X
DHS53CX
DHS53X
DI 450
Loading...
Loading...
Nothing found
DFP 58T93 A SK
User Manual
68 pgs
18.95 Mb
0
Table of contents
Loading...
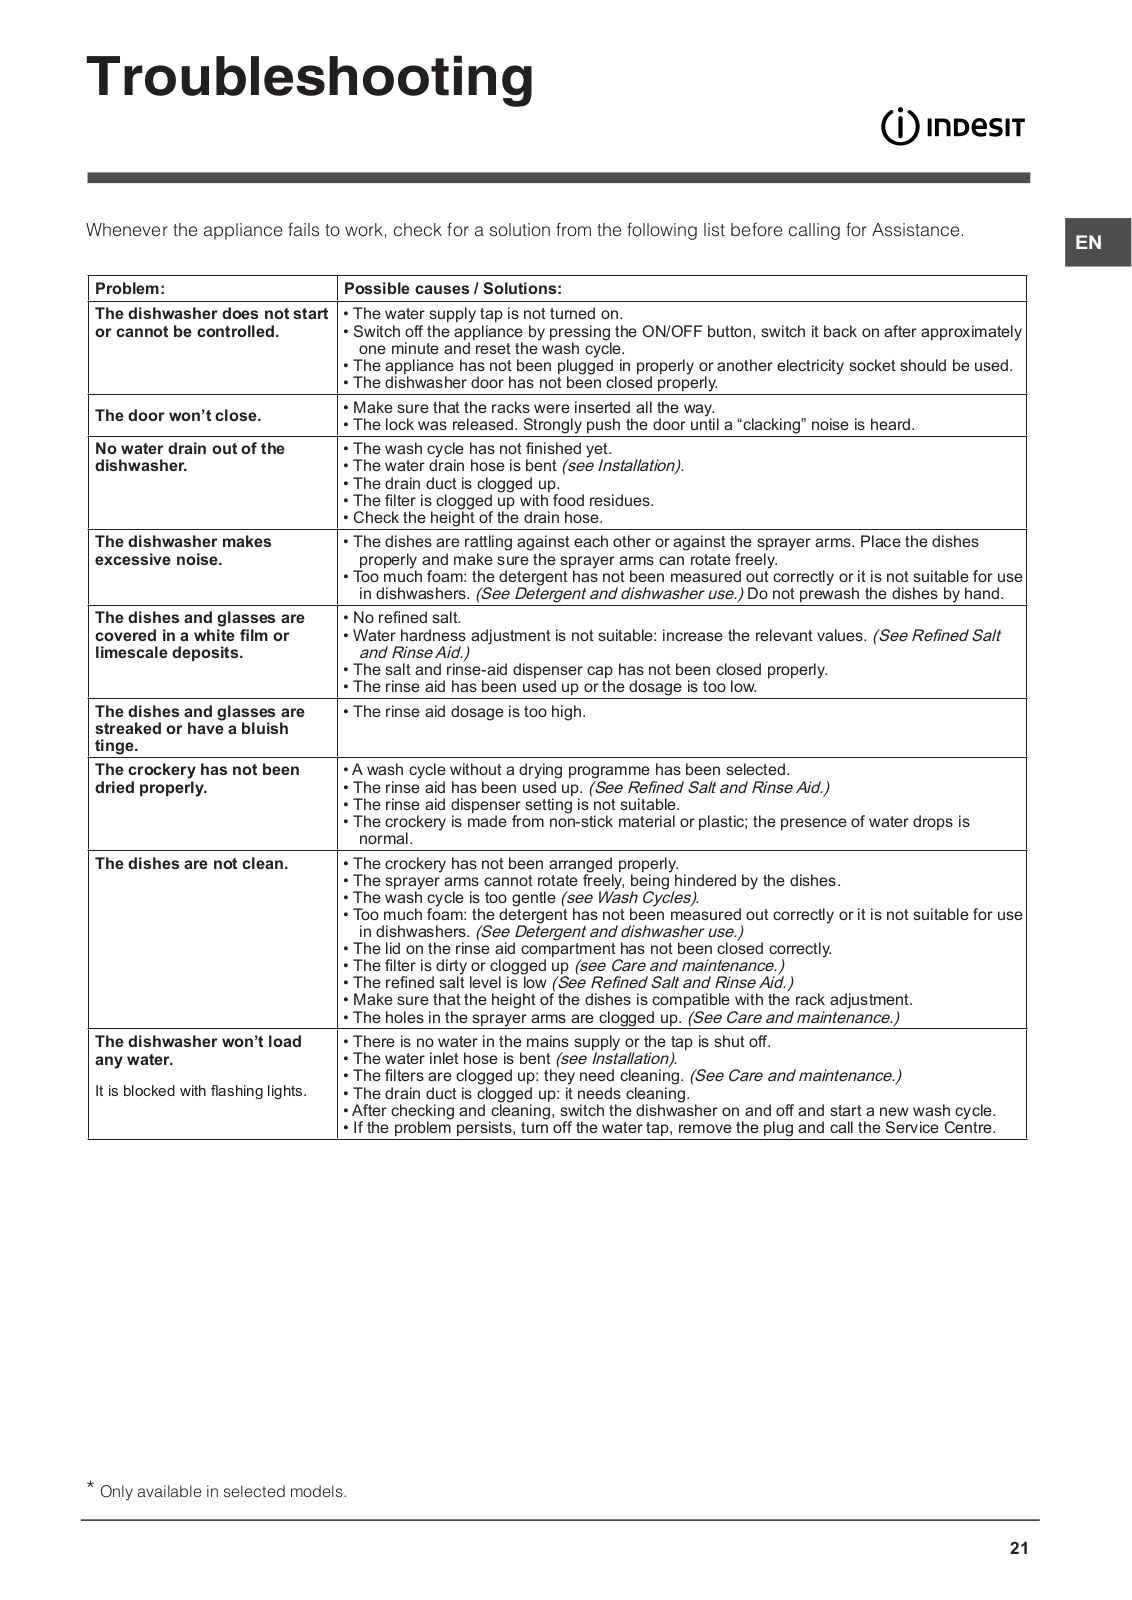
INDESIT DFP 58T93 A SK User Manual
...
INDESIT User Manual
Download
Specifications and Main Features
Frequently Asked Questions
User Manual
Download
Loading...
+
47
hidden pages
Unhide
You need points to download manuals.
1 point = 1 manual.
You can buy points or you can get point for every manual you upload.
Buy points
Upload your manuals
 Loading...