

Page 1

OPERATING GUIDE
OPERATING GUIDE FOR
IC-F5060/F6060 SERIES
BIIS 1200/MDC 1200 SYSTEM/
LTR®/IDAS™ OPERATION
Page 2

IMPORTANT
Thank you for purchasing this Icom transceiver.
®
The BIIS 1200/MDC 1200 system/LTR
/IDAS™ (Icom Digital
NOTE: In this operating guide, the LCD illustration is de-
scribed using the 2 line display mode.
Advanced System) functions are built into your IC-F5060/
F6060 series transceiver.
INFORMATION: The 10-key pad of the optional DTMF mi-
crophone (HM-148T) has only the DTMF code transmitting
READ ALL INSTRUCTIONS carefully and completely
before using the transceiver.
capability, so an ID and message cannot be input with this
microphone.
SAVE THIS OPERATING GUIDE — This operating
guide contains important oper ating instructions for:
• IC-F5061/F5061D/F5062/F5063 VHF MOBILE TRANS-
CEIVERS
• IC-F6061/F6061D/F6062/F6063 UHF MOBILE TRANS-
CEIVERS
Icom, Icom Inc. and the Icom logo are registered trademarks of Icom Incorporated (Japan) in Japan, the United States, the United Kingdom, Germany,
France, Spain, Russia and/or other countries.
IDAS and IDAS logo are trademarks of Icom Incorporated (Japan).
LTR is a registered trademark of the E.F.Johnson Technologies, INC. in the
United States.
All other products or brands are registered trademarks or trademarks of their
i
respective holders.
Page 3

TABLE OF CONTENTS
IMPORTANT .......................................................................... i
TABLE OF CONTENTS ........................................................ ii
1 PREPARATION............................................................1−2
■ Programmable function keys ........................................1
2 BIIS 1200 OPERATION .............................................3−15
■ Setting example ............................................................3
■ Receiving a call ............................................................ 3
■ Transmitting a call ......................................................... 6
■ Receiving a message ...................................................8
■ Transmitting a status...................................................10
■ Transmitting an SDM .................................................. 11
■ Position data transmission..........................................12
■ Printer connection ......................................................13
■ BIIS ANI .....................................................................13
■ Transmitting an Emergency call ..................................13
■ Stun function ..............................................................14
■ BIIS indicators ............................................................ 14
■ Priority A channel selection ........................................14
■ Horn output ................................................................15
3 MDC 1200 SYSTEM OPERATION ..........................16−23
■ MDC 1200 system operation ......................................16
■ Receiving a call .......................................................... 16
■ Transmitting a call ....................................................... 19
■ Status message transmission ....................................23
4 LTR OPERATION ....................................................24−25
■ LTR operation ............................................................. 24
■ Receiving a call .......................................................... 24
■ Transmitting a call ....................................................... 25
5 IDAS OPERATION ..................................................26−46
■ IDAS operation ...........................................................26
■ IDAS-Trunk operation ................................................. 26
■ Receiving a call .......................................................... 26
■ Transmitting a call ....................................................... 32
■ Transmitting Position data...........................................44
■ Sending a Status message ........................................45
■ Sounding a Horn ........................................................45
■ Connecting a printer ...................................................45
■ Encryption function .....................................................45
■ ATB Ring Back function ..............................................46
ii
Page 4

1
PREPARATION
■ Programmable function keys
The following functions can be assigned to the [UP], [DOWN],
[P0], [P1], [P2], [P3] and [P4] programmable function keys.
Consult your Icom dealer or system operator for details concerning your transceivers programming.
If the programmable function names are bracketed in the following explanations, the specific key is used to activate the
function.
D For BIIS 1200 operation only
BIIS BUTTON KEY
➥ Push to toggle the call ID list, transmit message and stand-
by modes.
➥ Push to toggle between the queue channel and the received
message record display, after the queue channel is selected.
➥ Hold down for 1 second to select the queue channel
mode.
STATUS UP/DOWN KEYS
➥ While in standby, push to display the transmit status screen
and select a status number.
➥ When a received SDM (Short Data Message) is displayed,
push to cancel the automatic scroll and then manually
scroll the message.
➥ When an SDM that contains more than 12 characters is
displayed, push to manually scroll the message.
1
D For MDC 1200 system operation only
MDC CALL KEY
➥ Push to enter the MDC menu selection mode.
➥ Push [CH Up] or [CH Down] to select the desired
“SELCALL,” “CALALERT,” “STUN,” “REVIVE,”
“RADIOCHK,” “ STATUS”, “MSG” and “CALL LOG” MDC
menu.
After selecting, push this key again to enter the transceiver
alias selection mode.
• If no operation is performed for approximately 15 seconds, the
transceiver returns to the normal operating mode.
➥ In the transceiver alias selection mode, push to return to the
MDC menu selection mode.
MDC SELCALL KEY
Push to enter the transceiver alias selection mode for a
SelCall.
• After selecting the desired alias, push [PTT] to transmit a SelCall.
• If no operation is performed for approximately 15 seconds, the trans-
ceiver returns to the normal operating mode.
MDC CALLALERT KEY
Push to enter the transceiver alias selection mode for a
CallAlert.
• After the desired alias selection, push [PTT] to transmit a Call
Alert.
• If no operation is performed for approximately 15 seconds, the trans-
ceiver returns to the normal operating mode.
Page 5

PREPARATION
1
1
D For LTR operation only
PHONE KEY
Push to connect or disconnect the telephone network.
D For IDAS operation only
DIGITAL BUTTON KEY
➥ Push to enter the application selection mode.
➥ Hold down for 1 second to toggle the call type between
Individual and Talkgroup, and then automatically enter the
application selection mode.
• Push [CH Up] or [CH Down] to select the desired “VOICE,”
“CALALERT,” “STUN,” “ KILL,” “REVIVE,” “ REM MON,”
“RADIOCHK,” “STATUS,” “MSG,” “ STAT POL” and “CALL LOG”
application.
➥ While in the application selection mode, push to enter the
Individual or Talkgroup ID selection mode.
• If “STATUS” or “MSG” is selected as the application, the message
selection mode appears. Push [CH Up] or [CH Down] to select
the desired message, then push the Digital Button key again to
enter the Individual or Talkgroup ID selection mode. (pp. 39, 40)
➥
In the application selection mode, hold down for
to return to the normal operating mode.
1 second
STATUS UP/DOWN KEYS
➥ When a received SDM is displayed, push to cancel the
automatic scroll and manually scroll the message.
➥ When an SDM that contains more than 12 characters is
displayed, push to manually scroll the message.
10-KEY ENTER KEY
Push to enable the microphone’s 10-key pad operation to select the memory channel, status message number, and so on,
depending on the presetting. Ask your dealer for details.
2
3
4
5
6
7
8
9
10
11
12
13
14
15
16
2
Page 6
2
0001
1234
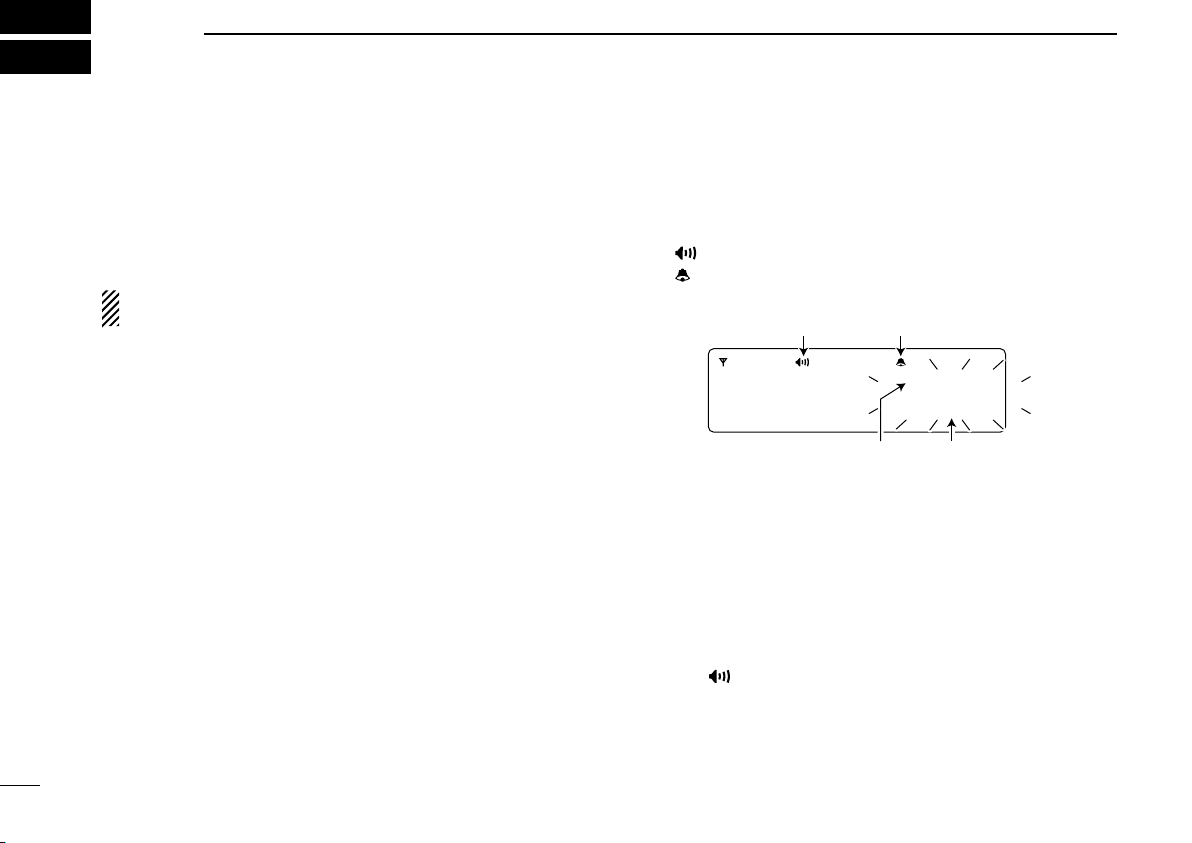
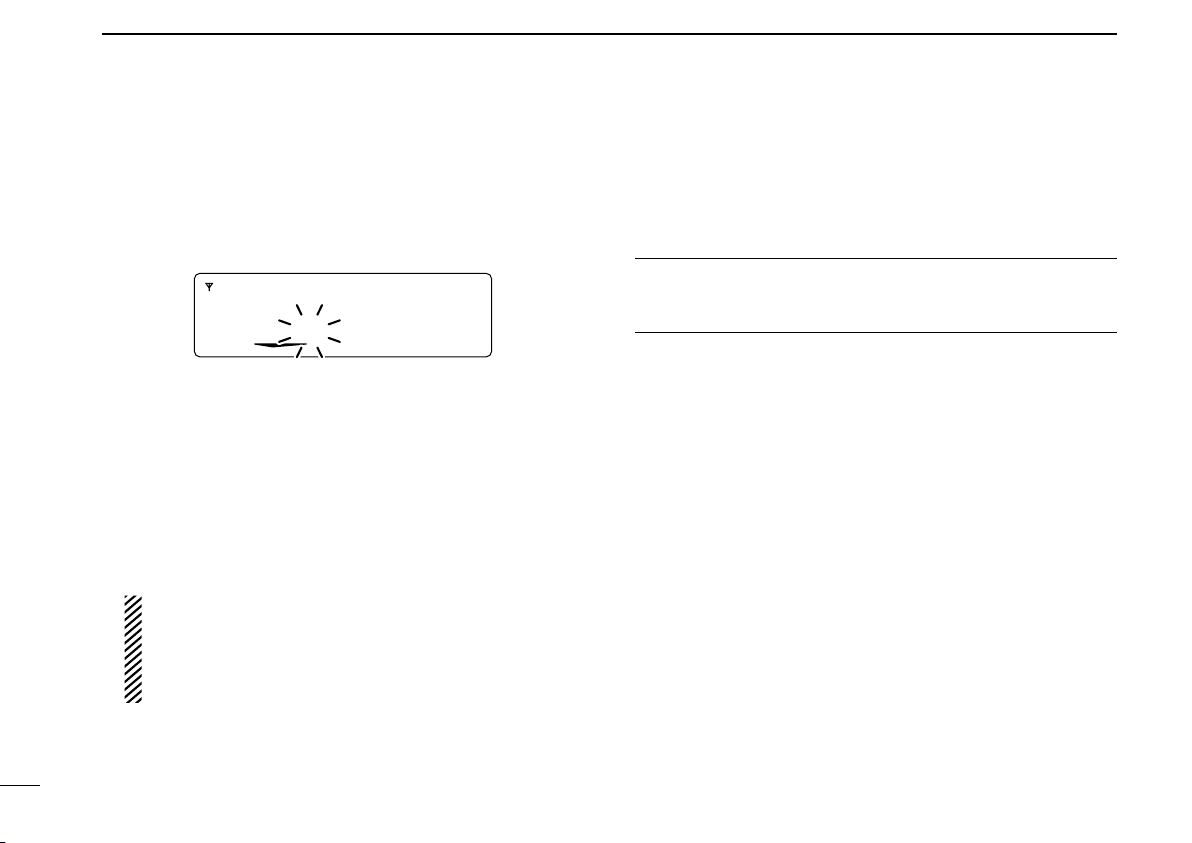
Appears or blinksAppears
Your own ID Calling station ID
BIIS 1200 OPERATION
■ Setting example
The following key functions are recommended to be assigned
to each programmable key for BIIS 1200 operation. The key
functions can be assigned by your dealer. Ask your dealer for
details.
NOTE: During BIIS 1200 operation, the MDC 1200 sys-
tem, LTR
[Call] : Push to transmit a BIIS call when the
[BIIS Button] : Push to select the call list ID/transmit
•
[TX Code Enter] : Push to directly enter the ID code
[Moni (Audi)] : When your communication in the MSK
[CH Up]/[CH Down] : While in the standby mode, push to se-
Aft er pus hing [BIIS Button] or
3
and IDAS operations are disabled.
selected channel is an MSK channel.
message, or a displayed receive message record.
The key indicator appears above the key that
this key function is assigned to, while it is activated. See the instruction manual for details.
edit mode, then push [CH Up] or [CH
Down] to set the desired digit.
channel mode is finished, push this key
to send a ‘Clear down’ signal.
lect an operating channel.
[TX Code CH Enter], push to select a
call list or TX code digit, respectively.
■ Receiving a call
D Individual call
q When an individual call is received:
• Beeps sound.
• “ ” appears and the mute is released.
• “ ” appears or blinks, depending on the presetting.
• Your own ID (or text) and the calling station ID (or text) blink.
w Hold down [PTT], then speak into the microphone at your
normal voice level.
• The LED lights red.
e Release [PTT] to return to receive.
• The LED indicator lights green while receiving a signal.
r To end the call, push [Moni(Audi)] to send the ‘Clear
down’ signal.
• Either station can send a ‘Clear down’ signal.
• “CLR DOWN” is displayed for approximately 2 seconds.
• The “
standby mode.
” icon disappears and the transceiver returns to the
Page 7
BIIS 1200 OPERATION
4001
1234
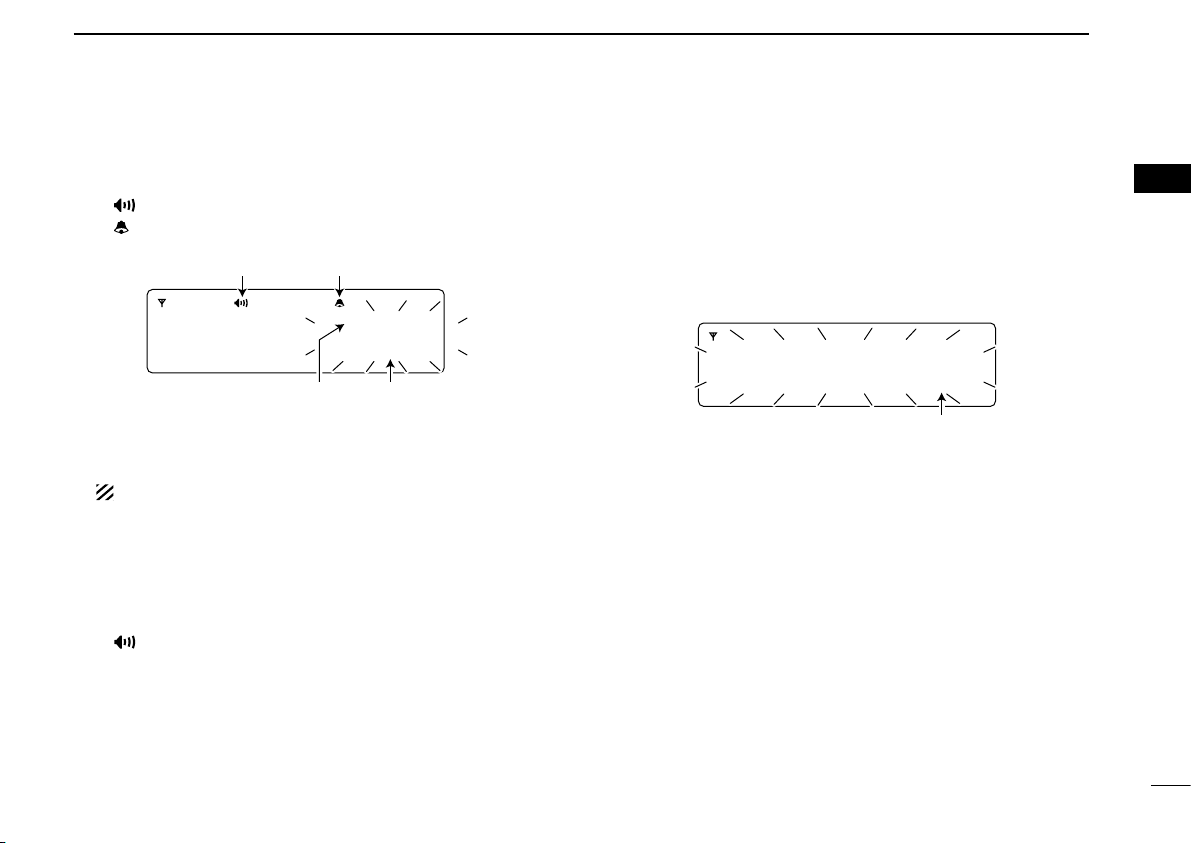
Appears or blinksAppears
Group ID Calling station ID
Emergency
1111
Calling station ID
2
D Group call
q When a group call is received:
• Beeps sound.
• “ ” appears and the mute is released.
• “ ” appears or blinks, depending on the presetting.
• The group ID (or text) and the calling station ID (or text) blink.
w Hold down [PTT], then speak into the microphone at a
normal voice level.
• The LED indicator lights red.
NOTE: Only one station is permitted to speak at a time.
e Release [PTT] to return to receive.
• The LED lights green while receiving a signal.
r To end the call, push [Moni (Audi)] to send a ‘Clear down’
signal.
• Either station can send a ‘Clear down’ signal.
• “CLR DOWN” is displayed for approximately 2 seconds.
• “
” disappears, and the transceiver returns to the standby
mode.
D Emergency call
q When an emergency call is received:
• Beeps sound.
• “Emergency” and the calling station ID (or text) blink.
• The state of the backlight depends on the Backlight setting in the
User set mode. When “OFF Auto” is selected, the backlight turns
ON for the preprogrammed time period. (Auto Backlight Timer)
This function is usable in transceivers whose revision number is
3.0 or later. Ask your dealer for details.
w The transceiver automatically transmits an acknowledge-
ment to the calling station.
e Turn power OFF or change the channel to stop the beep
and display indication.
1
2
3
4
5
6
7
8
9
10
11
12
13
14
15
16
4
Page 8
BIIS 1200 OPERATION
<QUEUE>
-QUEUE!-
<QUEUE>
NO QUEUE
2
D Displaying the received call record
— Queue display
The transceiver memorizes the calling station ID in the
memory. Up to 3 calls can be memorized, and the oldest call
record is erased when a 4th call is received. However, once
the transceiver is powered OFF, all the records are erased.
q Hold down [BIIS Button] for 1 second.
• The following display appears.
When a record is selectable
When no record is stored
w Push [CH Up] or [CH Down] to select the desired call.
e Push and hold [BIIS Button] for 1 second again to return
to the standby mode.
• If no operation is performed for 30 seconds, the transceiver automatically returns to the standby mode.
5
Page 9
BIIS 1200 OPERATION
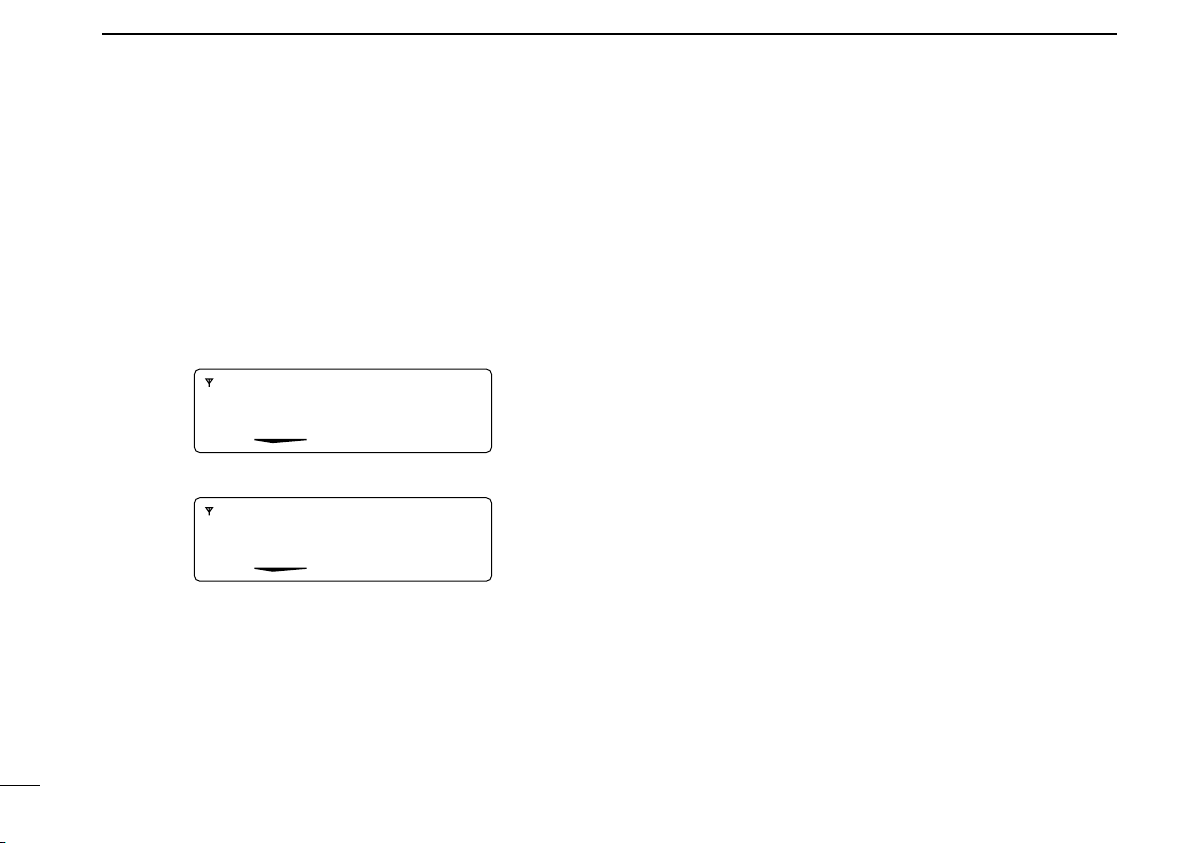
1234
Appears
<QUEUE>
-QUEUE!-
0001
1234
2
■ Transmitting a call
There are 3 ways to select a call code— selecting from memory, calling back from the queue channel record, and entering
from the keypad.
D Using call memory
q While in the standby mode, push [BIIS Button] to enter
the call code memory channel selection mode.
• “ ” appears.
w Push [CH Up] or [CH Down] to select the desired call
code.
e Push [Call] or [PTT]* to call.
* A P
TT call can be made only when PTT call capability is permit-
ted.
NOTE: When no answer back is received, the trans-
ceiver automatically repeats the call 3 times (default),
and “WAIT” is displayed during each call. However, an
error beep sounds and “FAILED” is displayed when
no answer back is received after the repeated calls.
r Push [PTT] to transmit; release to receive.
t Push [Moni (Audi)] to send a ‘Clear down’ signal.
D Calling back from the queue channel
q
While in the standby mode
1 second to enter the queue memory channel selection
mode.
w Push [Up] or [Down] to select the desired record.
e Push [Call] or [PTT]* to call.
* A
PTT call can be made only when PTT call capability is permit-
ted.
NOTE: When no answer back is received, the trans-
ceiver automatically repeats the call 3 times (default),
and “WAIT” is displayed during each call. However, an
error beep sounds and “FAILED” is displayed when
no answer back is received after the repeated calls.
r Push [PTT] to transmit; release to receive.
t Push [Moni (Audi)] to send a ‘Clear down’ signal.
, push and hold [BIIS Button]
for
1
2
3
4
5
6
7
8
9
10
11
12
13
14
15
16
6
Page 10
BIIS 1200 OPERATION
1234
2
D Direct code entry
q In the standby mode, push [TX Code Enter] to enter the
TX code edit mode.
• A Code digit blinks.
w Push [TX Code Enter] to select the desired digit to be
edited.
• Editable digits differ according to the transceiver setting.
e Push [CH Up] or [CH Down] to select the desired digit.
r Push [TX Code Enter] to set the digit, then the digit to the
right will automatically blink.
t Repeat e and r to edit all allowable digits.
y Push [Call] or [PTT]* to call.
* A PTT call can be made only when PTT call capability is permit-
ted.
NOTE: When no answer back is received, the trans-
ceiver automatically repeats the call 3 times (default),
and “WAIT” is displayed during each call. However, an
error beep sounds and “FAILED” is displayed when
no answer back is received after the repeated calls.
u Push [PTT] to transmit; release to receive.
i Push [Moni (Audi)] to send a ‘Clear down’ signal.
For your information
When the “UpDate” setting for the call code is enabled, the
set code is overwritten into the call code memory.
7
Page 11
BIIS 1200 OPERATION
RX Status 01
1234
SDM8
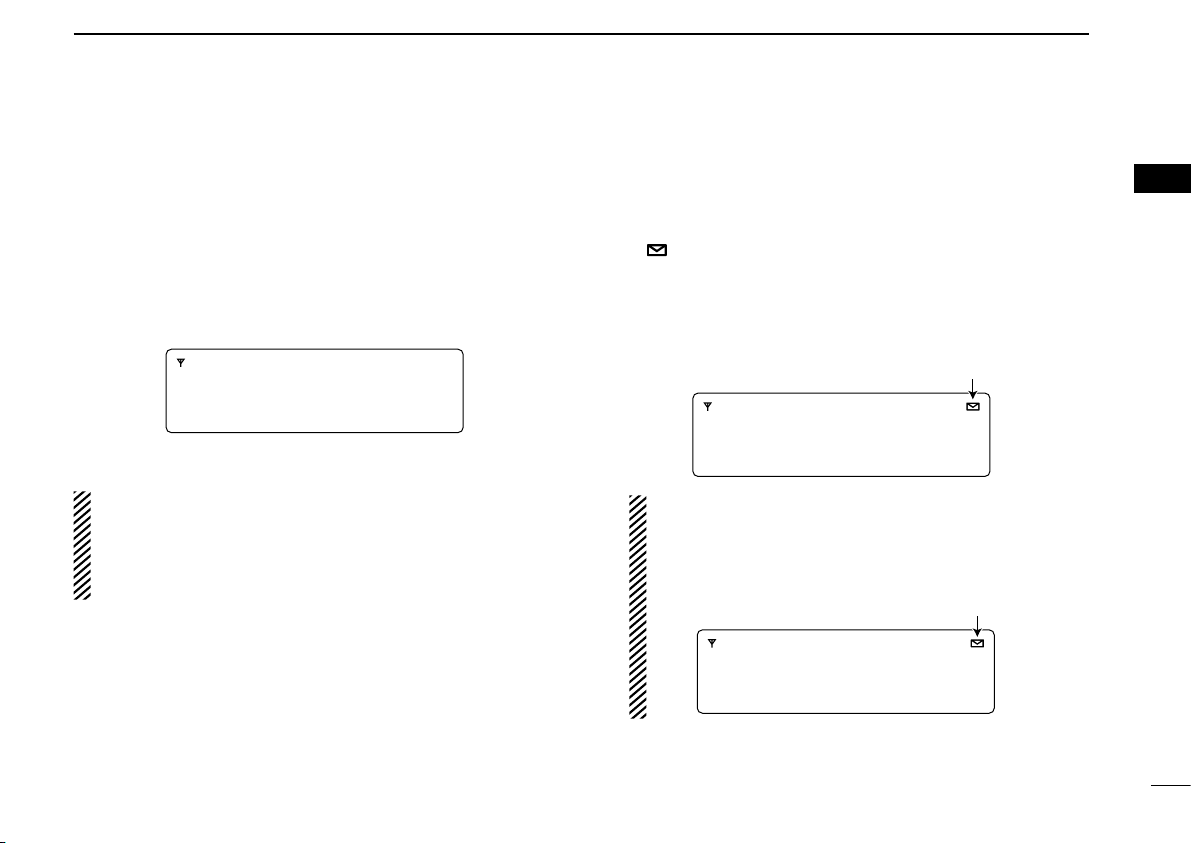
1234
Appears
SDM12345678
1234
Appears
2
■ Receiving a message
D Receiving a status message
q When a status message is received:
• Beeps sound.
• The status message and the calling station ID (or text) is dis-
played when the display mode is 2 lines, as shown below.
• When the display mode is 1 line, the status message and the
calling station ID (or text) may be alternately displayed depending on the setting.
w Push [Moni (Audi)] to return to the standby mode.
NOTE: When the display mode is 1 line
Only the calling station ID (or text) is displayed (no message
is alternately displayed) when the scroll timer is set to ‘OFF.’
In this case, push [Status Up]/[Status Down] to manually
display the status message.
D Receiving an SDM (Short Data Message)
q When an SDM is received:
• Beeps sound.
• “ ” appears.
• The SDM and the calling station ID (or text) may be displayed
when the display mode is 2 lines, as shown below.
• The SDM and the calling station ID (or text) is alternately displayed when the display mode is 1 line, depending on the presetting.
NOTE: When the received SDM includes more than 12
characters, the message automatically scrolls when the
automatic scroll function is activated.
•
Push [Status Up]/[Status Down] to manually scroll the message.
1
2
3
4
5
6
7
8
9
10
11
12
13
14
15
16
w Push [Moni (Audi)] to return to the standby mode.
8
Page 12

BIIS 1200 OPERATION
MESSAGE
-MSG!-
MESSAGE
-NOMSG-
2
D Selecting a received message
The transceiver memorizes the received message in the
memory. Up to 6 messages for status and SDM, or 95 character SDM’s can be memorized. The oldest message is erased
when the 7th message is received. However, once the transceiver is powered OFF, all messages are cleared.
q Hold down [BIIS Button] for 1 second.
• The queue memory is displayed.
w Push [BIIS Button] again for 1 second.
• The message memory is displayed.
When a message is selectable
When no message is stored
e Push [CH Up] or [CH Down] to select a desired mes-
sage.
• When selecting a SDM that includes more than 12 characters,
the message automatically scrolls when the automatic scroll
function is activated.
• Push [Status Up]/[Status Down] to manually scroll the message.
r Push and hold [BIIS Button] for 1 second again to return
to the standby mode.
• If no operation is performed for 30 seconds, the transceiver automatically returns to the standby mode.
9
Page 13

BIIS 1200 OPERATION
STATUS 01
TX Status 01
Status message is displayed.
2
■ Transmitting a status
D General
The programmed status message can be selected, and the
message text is also displayed on the function display of the
called station.
Up to 24 status types (1 to 24) are selectable, and status
messages 22 and 24 have designated meanings.
Status 22: Emergency*
Status 24: GPS request
* Status 22 can also be used as a normal status message by disa-
bling the designated meaning. However, the status 24 meaning
is fixed.
A status call can be sent with both individual and group
calls.
D Transmitting a status
q While in the standby mode, push [BIIS Button], then push
[CH Up] or [CH Down] to select the desired station/group
code.
w Push [BIIS Button] again, then push [CH Up] or
[CH Down] to select the desired status message.
e Push [Call] or [PTT]* to transmit the status message to
the selected station or group.
* A PTT call can be made only when PTT call capability is permit-
ted.
• When the transmission is successful, 2 beeps sound and the
transceiver automatically returns to the standby mode.
1
2
3
4
5
6
7
8
9
10
11
12
13
14
15
16
10
Page 14
BIIS 1200 OPERATION
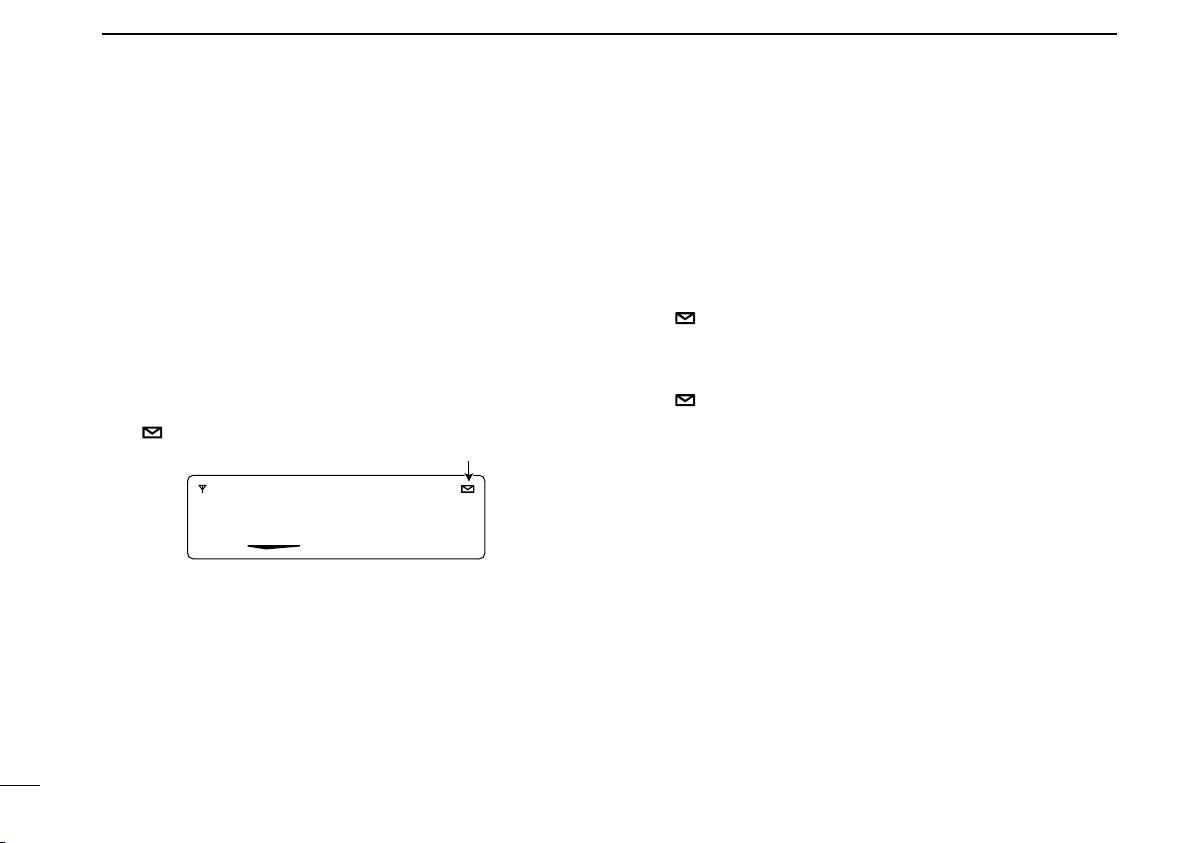
MESSAGE1
SDM1
SDM is displayed.
Appears
2
■ Transmitting an SDM
D General
The short data message, SDM, can be sent to an individual
station or group stations. Also, 8 SDM memory channels are
selectable and the messages can be edited on your PC.
D Transmitting an SDM
q While in the standby mode, push [BIIS Button], then push
[CH Up] or [CH Down] to select the desired station/group
code.
w Push [BIIS Button] again, then push [CH Up] or
[CH Down] to select the desired SDM.
• “ ” appears.
e Push [Call] or [PTT]* to transmit the SDM to the selected
station/group.
* A
PTT call can be made only when PTT call capability is permit-
ted.
• 2 beeps sound and the transceiver automatically returns to the
standby mode when transmission is successful.
D Direct message input
The optional HM-152T is required for this operation.
q While in the standby mode, push [BIIS Button] twice, then
push [CH Up] or [CH Down] to select the desired SDM to
be edited.
• “ ” appears.
w Push [M] or [#] to enter the message editing mode.
• The first character blinks when [#] is pushed; the last character
blinks when [M] is pushed.
• “ ” blinks.
e Push the appropriate digit key, [0] to [9], to enter the de-
sired character.
• See the table on page 12 for the selectable characters.
• Pushing [CH Up] also enters a space, pushing [CH Down] de-
letes the selected character.
r Push [#] to move the cursor to the right, push [M] to move
the cursor to the left.
t Repeat steps e and r to enter the desired text mes-
sage.
y Push and hold [BIIS Button] for 1 second to write the set
message into the message memory.
• Push [BIIS Button] momentarily to cancel the editing and return
to the original message display.
11
Page 15

BIIS 1200 OPERATION
Key
[0]
[1]
[2]
[3]
[4]
[5]
[6]
[7]
[8]
[9]
Characters
0 ! ? ' " , ; : _ ( ) < > [ ]
1 (space) # * / + - = & % $ @ ^
2 A B C a b c
3 D E F d e f
4 G H I g h i
5 J K L j k l
6 M N O m n o
7 P Q R S p q r s
8 T U V t u v
9 W X Y Z w x y z
/
!
2
• Selectable characters
■ Position data transmission
When a GPS receiver is connected to the transceiver, the position
(longitude and latitude) data can be automatically transmitted.
Ask your dealer or system operator for connection details.
The position data is transmitted when:
• A status 24 message is received
* When the status 24 message, GPS request, is received.
• Automatic is enabled.
When automatic position transmission is enabled, sends
the position data according to ‘Time Marker’ and ‘Interval
Timer’ settings.
• PTT is released
When ‘Send with Logoff’ is enabled.
- Set the ‘Log-In/Off’ item as ‘L-OFF.’
• Send with Status is enabled
Sent after sending a status message.
• Send with SDM is enabled
Sent after sending an SDM.
• Send with Emergency is enabled
Sent after sending status 22 (Emergency).
1
2
3
4
5
6
7
8
9
10
11
12
13
14
15
16
12
Page 16

BIIS 1200 OPERATION
2
■ Printer connection
When a printer is connected to the D-sub 25-pin connector on
the transceiver, the received SDM content and the called station ID can be printed out. Ask your dealer or system operator
for connection details.
■ BIIS ANI
Your own ID can be transmitted each time the PTT is pushed
(log-in) or released (log-off) with individual or group calls
communications.
When receiving an ANI, the communication log will be recorded when using a PC dispatch application.
In addition, when using the ANI with log-in, the PTT side tone
function can be used to inform you that the ID is sent and
voice communication can be made.
■ Transmitting an Emergency call
When [Emergency] (described in the instruction manual) is
held down for the specified time period, an emergency signal
(Status 22) is transmitted once or repeatedly* on the emergency channel. When no emergency channel is specified, the
signal is transmitted on the
* When the Repeat Cancel function is ON, the transceiver cancels
repeating after receiving an acknowledgement.
When the Repeat Cancel function is OFF, the transceiver repeats
calling according to the number of repeat cycles, even after receiving an acknowledgement.
This function is usable in transceivers whose revision number is 3.0
or later. Ask your dealer for details.
If you want to cancel the emergency call, hold down the key
again before transmitting the call.
The emergency call may be transmitted without a beep
sounding, and the LCD display, depending on the presetting.
(Silent operation)
The transceiver can also be programmed to keep the microphone open during an emergency call, to allow monitoring of
the situation.
Ask your dealer for details.
IMPORTANT: Setting a separate emergency channel to
provide reliable emergency call operation is recommended.
operating
channel.
13
Page 17

BIIS 1200 OPERATION
2
■ Stun function
When the specified ID, set as a killer ID, is received, the stun
function is activated.
When a killer ID is received, the transceiver switches to the
password required condition. Entering the password with the
keypad is necessary to operate the transceiver again in this
case.
■ BIIS indicators
The following indicators are available for the BIIS operation
on an MSK channel.
CONNECT : Individual/group calls are successful.
OK : Message (status or SDM) transmission was
successful.
FAILED : No answer back is received.
WAIT : Appears during retry of the call (2nd call).
CLR DOWN : End the call.
BUSY : The operating channel is busy.
■ Priority A channel selection
When one of the following operations is performed, the transceiver automatically selects the Priority A channel.
Priority A is selected when:
• A clear down signal is received or transmitted
-
Set the ‘Clear down’ option as ‘Enable’ in ‘Move to PrioA
CH.’
• Turning the power ON
Priority A channel is selected each time the transceiver
power is turned ON.
• Status call
Priority A channel is selected when transmitting a status
call.
- Enable the ‘Send Status on PrioA CH’ item in the MSK
configuration.
1
2
3
4
5
6
7
8
9
10
11
12
13
14
15
16
14
Page 18

BIIS 1200 OPERATION
2
■ Horn output
An automatic honking function can be used when a horn is
connected to D-Sub 25-pin connector on the transceiver.
When a status message is received, the transceiver sounds
the vehicle’s horn for a specified time period to announce a
status message has been received.
This is a convenient function when the operator is away from
the transceiver.
Ask your dealer or system operator, or refer to the service
manual for connection and setting details.
15
Page 19

MDC 1200 SYSTEM OPERATION
SELCALL
ID 1234
BlinksAppears
3
■ MDC 1200 system operation
The MDC 1200 signaling system enhances your transceiver’s capabilities. It allows PTT ID, Selective Calling (SelCall),
Call Alert, Radio Check, Stun, Revive, Status, Messaging and
Emergency signaling.
An additional feature of the MDC 1200 system found in Icom
transceivers is called aliasing. Each transceiver on the system
has a unique ID number. Aliasing substitutes the ID number
with an alphanumeric name. For transmit, you can use this
alias to select a transceiver to call. For receive, the alias of
the calling station is displayed instead of the ID.
Please confirm that your dealer has set one of the programmable keys ([UP], [DOWN], [P0], [P1], [P2], [P3] or [P4]) for
MDC 1200 system operation.
NOTE: During MDC 1200 system operation, BIIS 1200
system and IDAS operations are disabled.
■ Receiving a call
D Receiving a SelCall
q When a SelCall is received:
• Beeps sound.
• “ ” appears.
• “ ” blinks.
• The calling station ID (or alias) and “SELCALL” are alternately
displayed.
w Hold down [PTT] and speak at your normal voice level.
e Release [PTT] to receive.
1
2
3
4
5
6
7
8
9
10
11
12
13
14
15
16
16
Page 20

CALLALRT
ID 1234
Blinks
ID 1234
EMGEMG
MDC 1200 SYSTEM OPERATION
3
D Receiving a Call Alert
q When a Call Alert is received:
• Beeps sound.
• “ ” blinks.
• The calling station ID (or alias) and “CALLALRT” are alternately
displayed
w Hold down [PTT] and speak at your normal voice level.
e Release [PTT] to receive.
D Receiving an Emergency Call
q When an emergency call is received:
• Beeps sound.
• The calling station ID (or alias) and “EMG EMG” are alternately
displayed.
• The action of the backlight depends on the Backlight setting in
the User set mode. When “OFF Auto” is selected, the backlight
turns ON for the specified time period*.
* If the Backlight Update setting is “Enable,” the preprogrammed
time period is enabled. (Auto Backlight Timer)
If the Backlight Update setting is “Inhibit,” the backlight does not
turn ON.
The Backlight Update and Auto Backlight Timer functions are
usable in transceivers whose revision number is 3.0 or later.
Ask your dealer for details.
w When the Send Ack function is turned ON, the transceiver
automatically transmits an acknowledgement to the calling
station.
e Turn power OFF or change the channel to stop the beep
and display action.
17
Page 21

MDC 1200 SYSTEM OPERATION
ID 1234
MSG1
ID 1234
STATUS1
ID 1234
SC -0:27
Calling station ID
Elapsed time after
receiving the call
: SelCall
: Call Alert
: Emergency call
Call type
SC
CA
EMG
3
D Receiving a Message
q When a Message is received:
• Beeps sound.
• The calling station ID (or alias) and the message are alternately
displayed.
w Turn power OFF, push [PTT], or change the channel to
stop the display indication.
D Receiving a Status Message
➥ When a Status Message is received:
• Beeps sound.
• The calling station ID (or alias) and the status message are dis-
played once.
D Receiving a Stun or Revive
If a Stun command is received that matches your station
ID, the transceiver will display “SORRY” and you can not receive or transmit. When a Revive command is received that
matches your station ID, normal operation is restored.
D Call log function
After receiving the SelCall, Call Alert and Emergency call,
the call logs may be displayed, depending on the presetting.
Up to 5 logs can be memorized, and the oldest log is erased
when a 6th call is received.
q Push [MDC Call] to enter the MDC menu selection mode.
w Push [CH Up] or [CH Down] to select “CALL LOG”.
e Push [MDC Call] again to display the call logs.
• When no call is received, an error beep sounds.
r Push [CH Up] or [CH Down] to select the desired call log
memory.
NOTE: After 1000 hours has passed from when the call
was received, the elapsed time resets to 0:00.
1
2
3
4
5
6
7
8
9
10
11
12
13
14
15
16
18
Page 22

MDC 1200 SYSTEM OPERATION
SELCALL
CALALERT
3
■ Transmitting a call
D Transmitting a SelCall
SelCall allows you to make calls to a specific station or to
a particular group. Other MDC 1200 system transceivers on
the channel will not hear a SelCall that does not match their
station or group ID’s.
q Push [MDC Call] to enter the MDC menu selection mode.
• Or push [MDC SelCall] to enter the transceiver alias selection
mode. In this case, skip step w.
w Push [MDC Call] again to enter the transceiver alias se-
lection mode.
e Push [CH Up] or [CH Down] to select the desired alias.
r Hold down [PTT] to transmit the SelCall to the selected
station, then speak into the microphone.
• “ ” appears.
t Release [PTT] to receive.
D Transmitting a Call Alert
Call Alert allows you to notify another user who may be away
from their transceiver, that you want to talk.
q Push [MDC Call] to enter the MDC menu selection mode.
• Or push [MDC CallAlert] to enter the transceiver alias selection
mode. In this case, skip steps w and e.
w Push [CH Up] or [CH Down] to select “CALALERT”.
e Push [MDC Call] again to enter the transceiver alias se-
lection mode.
r Push [CH Up] or [CH Down] to select the desired alias.
t Push [PTT] to transmit the Call Alert to the selected sta-
tion.
• “CA CALL” is displayed.
y Release [PTT].
• “CA OK” is displayed if the targeted station sent back an ac-
knowledgement.
• “CA FAIL” is displayed if the targeted station does not send back
an acknowledgement.
u After a specified time period has passed, the transceiver
will return to receive.
19
Page 23

MDC 1200 SYSTEM OPERATION
STUN
REVIVE
3
D Transmitting a Stun Call
Stun call allows you to send MDC 1200 system signal that
will stun the targeted station.
q Push [MDC Call] to enter the MDC menu selection mode.
w Push [CH Up] or [CH Down] to select “STUN”.
e Push [MDC Call] again to enter the transceiver alias se-
lection mode.
r Push [CH Up] or [CH Down] to select the desired alias.
t Push [PTT] to transmit the stun call to the selected sta-
tion.
• “STN TX” is displayed.
y Release [PTT].
• “STN ACK” is displayed if an acknowledgement is received from
the targeted station.
• “STN FAIL” is displayed if the targeted station does not send
back an acknowledgement.
u After a specified time period has passed, the transceiver
will return to receive.
D Transmitting a Revive Call
Revive call allows you to send MDC 1200 system signals that
will revive a stunned transceiver.
q Push [MDC Call] to enter the MDC menu selection mode.
w Push [CH Up] or [CH Down] to select “REVIVE”.
e Push [MDC Call] again to enter the transceiver alias se-
lection mode.
r Push [CH Up] or [CH Down] to select the desired alias.
t Push [PTT] to transmit the revive call to the selected sta-
tion.
• “REV TX” is displayed.
y Release [PTT].
• “REV ACK” is displayed if an aknowledgement is received from
the stunned station.
• “REV FAIL” is displayed if no acknowledgement is received from
the stunned station.
u After a specified time period has passed, the transceiver
will return to receive.
1
2
3
4
5
6
7
8
9
10
11
12
13
14
15
16
20
Page 24

MDC 1200 SYSTEM OPERATION
RADIOCHK
STATUS
STATUS
STATUS1
Preprogrammed
status message
is displayed.
3
D Transmitting a Radio Check Call
A Radio Check call allows you to determine whether the targeted station is turned on, within the communication range
and on channel without requiring any action from the targeted
station user.
q Push [MDC Call] to enter the MDC menu selection mode.
w Push [CH Up] or [CH Down] to select “RADIOCHK”.
e Push [MDC Call] again to enter the transceiver alias se-
r Push [CH Up] or [CH Down] to select the desired alias.
t Push [PTT] to transmit the radio check call to the selected
• “RDO CHK” is displayed.
y Release [PTT].
• “CHK ACK” is displayed if the targeted station is turned ON, on
• “CHK FAIL” is displayed if the targeted station does not send
u After a specified time period has passed, the transceiver
21
lection mode.
station.
channel and within the communication range.
back an acknowledgement.
will return to receive.
D Transmitting a Status Message
A Status Messaging allows you to send a preprogrammed
status message. There are 16 status codes that can be sent.
In addition, the transceiver can send an MDC 1200 system
signal that causes the targeted station to automatically transmit its current status.
q Push [MDC Call] to enter the MDC menu selection mode.
w Push [CH Up] or [CH Down] to select “STATUS”.
e Push [MDC Call] again to enter the status message selec-
tion mode.
r Push [CH Up] or [CH Down] to select the desired status
message.
t Push [PTT] to transmit the selected status message.
• “STAT TX” is displayed.
y Release [PTT].
• “STAT OK” is displayed if the targeted station sends an acknowl-
edgement.
• “STA FAIL” is displayed if the targeted station does not send
back an acknowledgment.
u After a specified time period has passed, the transceiver
will return to receive.
Page 25

MDC 1200 SYSTEM OPERATION
MSG
MSG
MSG1
Preprogrammed message is displayed.
3
D Transmitting a Message
The transceiver can send a preprogrammed message. There
are 16 messages that can be sent.
q Push [MDC Call] to enter the MDC menu selection mode.
w Push [CH Up] or [CH Down] to select “MSG”.
e Push [MDC Call] again to enter the preprogrammed mes-
sage selection mode.
r Push
t Push [PTT] to transmit the selected message.
• “MSG TX” is displayed.
y Release [PTT].
• “MSG OK” is displayed if the targeted station sends an acknowl-
• “MSG FAIL” is displayed if the targeted station does not send an
u After a specified time period has passed, the transceiver
[CH Up] or [CH Down] to select the desired mes-
sage.
edgement.
acknowledgement.
will return to receive.
D PTTID Calls
The transceiver can send an MDC 1200 system signal that
includes PTTID when [PTT] is pushed (beginning of transmission) and released (end of transmission). If a PTTID call is
received, the transceiver may display the calling station ID (or
alias) and emit a beep, depending on the presetting.
1
2
3
4
5
6
7
8
9
10
11
12
13
14
15
16
22
Page 26

MDC 1200 SYSTEM OPERATION
3
D Transmitting an Emergency Call
When [Emergency], described in the instruction manual, is
held down for the specified time period, the MDC 1200 emergency signal is transmitted once or repeatedly* on the emergency channel. When no emergency channel is specified, the
signal is transmitted on the
* When the Repeat Cancel function is ON, the transceiver cancels
repeating after receiving an acknowledgement.
When the Repeat Cancel function is OFF, the transceiver repeats
calling according to the number of repeat cycles, even after receiving an acknowledgement.
This function is usable in transceivers whose revision number is 3.0
or later. Ask your dealer for details.
If you want to cancel the emergency call, hold down the key
again before transmitting the call.
The emergency call may be transmitted without a beep
sounding, and the LCD lighting, depending on the presetting.
(Silent operation)
The transceiver can also be programmed to keep the microphone open during an emergency call, to allow monitoring of
the situation.
Ask your dealer for details.
IMPORTANT: Setting an emergency channel individually to
provide the certain emergency call operation is recommended.
operating
channel.
■ Status message transmission
The status message can be automatically transmitted when
the transceiver is turned ON.
- Set the status message to be transmitted in the ‘Power ON Status’ item.
23
Page 27

LTR OPERATION
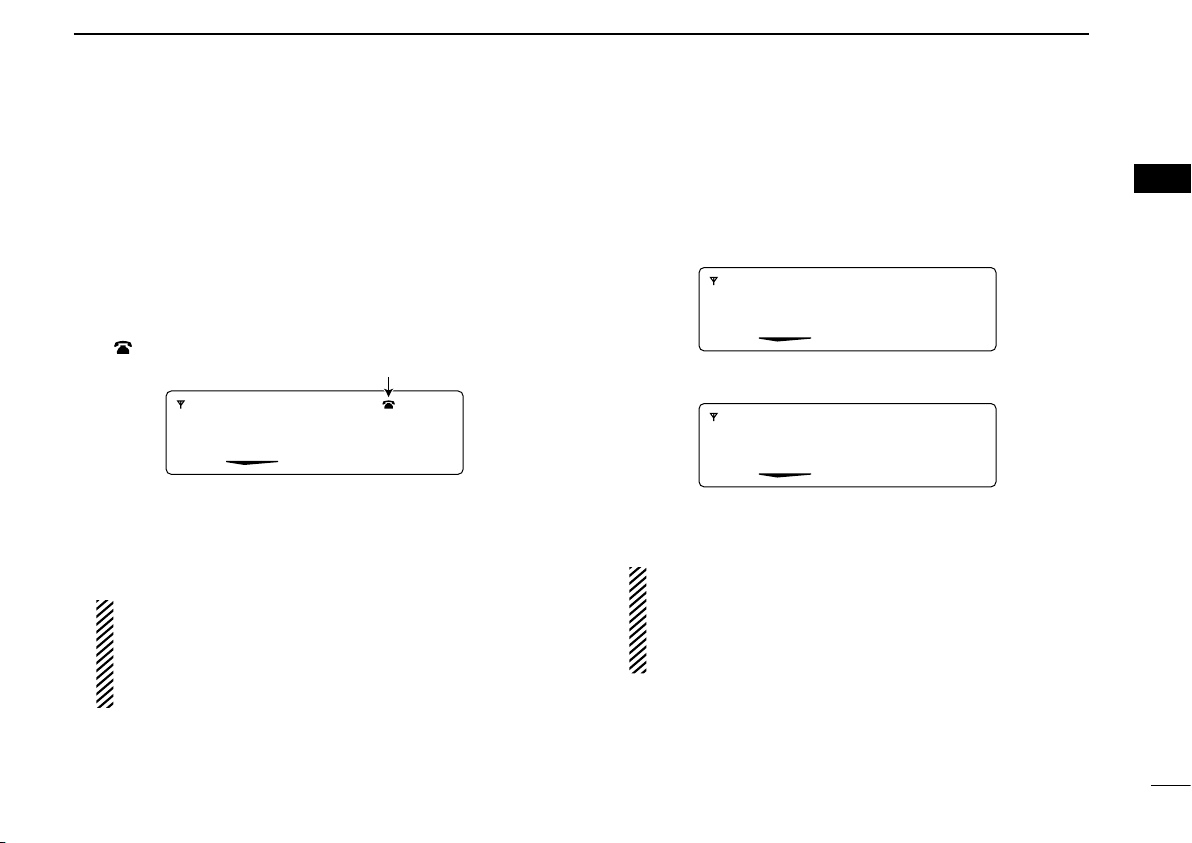
002ch-03
fH 173.7M
Appears
002ch-03
fH 173.7M
Blinks
4
■ LTR operation
Push [Zone], then push [CH Up] or [CH Down]* to select
the LTR zone.
* The way of selecting the desired zone may differ, depending on
your system set up.
NOTE: In the LTR mode, BIIS 1200 and IDAS modes are
disabled.
■ Receiving a call
D Group call
q When a call is received:
• LED lights green.
w Hold down [PTT], then speak into the microphone at a
normal voice level.
e Release [PTT] to return to receive.
D Selective call (DTMF call)
q Push [Call] to mute the channel.
w When receiving a call, the calling station name appears
and a beep sounds. Then the mute is released.
• “ ” appears.
D Phone call
q Push [CH Up] or [CH Down] to select the phone chan-
nel.
• “ ” appears.
w When a phone call is received (transceiver rings), push
[Phone] (or push [PTT]).
• “ ” blinks.
e Hold down [PTT], then speak at a normal voice level. Re-
lease [PTT] to return to receive.
r After conversation is finished, push [Phone] to disconnect
the phone call.
• “ ” stops blinking.
1
2
3
4
5
6
7
8
9
10
11
12
13
14
15
16
24
Page 28

002ch-03
fH 173.7M
Blinks
LTR OPERATION
4
■ Transmitting a call
D Group call
q Push [CH Up] or [CH Down] to select a channel or talk
group.
w While holding down [PTT], speak into the microphone at a
normal voice level after a beep sounds.
• If an error beep sounds, release [PTT], then repeat step w.
• The beep can be turned OFF in User set mode.
D Selective call (DTMF call)
q Push [CH Up] or [CH Down] to select a channel or talk
group.
w Push [DTMF Autodial]— a DTMF encode channel ap-
pears.
e Push [CH Up] or [CH Down] to select the desired DTMF
encode channel.
r Push [PTT] to transmit the DTMF code in the DTMF chan-
nel.
• Push [DTMF Autodial] to cancel the DTMF call.
D Phone call
q Select the phone channel.
• “ ” appears.
w Push [Phone] (or push [PTT]).
• “ ” blinks.
e Push [DTMF Autodial] to make a phone call.
r After conversation is finished, push [Phone] to disconnect
the phone call.
• “ ” stops blinking.
25
Page 29

IDAS OPERATION
STATION1
The calling station or
Talkgroup ID name
CALLALRT
STATION1
Blink
The calling station or
Talkgroup ID name
5
■ IDAS operation
The IC-F5061D and IC-F6061D includes Icom Digital Advanced System (IDAS) that meets the 6.25 kHz emission
mask requirements for narrow banding, and increases efficiency of channel allocation and use of spectrum.
The optional UT-126H provides 6.25 kHz digital mode operation for the transceiver that does not support digital communication.
NOTE: In the IDAS mode, BIIS 1200 system, MDC 1200
system and LTR modes are disabled.
■ IDAS-Trunk operation
The IDAS-Trunk system enables further effective channel
management by sharing a minimum of channels with a large
number of users.
Push [Zone], then push [CH Up] or [CH Down]* to select the
IDAS-Trunk zone.
* The way of selecting the desired zone may differ, depending on
your system set up.
NOTE: While in the IDAS-Trunk mode, you can receive
and transmit digital calls in the same way with the IDAS
operation described above.
■ Receiving a call
D Receiving a Voice Call
q When a Voice call is received:
• Mute is released.
• The calling station or Talkgroup ID name (or code) may be dis-
played while receiving the signal, depending on the presetting.
• When an All Call is received, “All Call” is displayed.
w Hold down [PTT], then speak into the microphone.
e Release [PTT] to receive.
D Receiving a Call Alert
q When a Call Alert is received:
• Beeps sound.
• “ ” blinks.
• The calling station or Talkgroup ID name (or code) and
“CALLALRT” blink.
w Hold down [PTT], then speak into the microphone.
e Release [PTT] to receive.
1
2
3
4
5
6
7
8
9
10
11
12
13
14
15
16
26
Page 30

RX STATUS 01
STATION1
Blink
The received
status message
The calling station or
Talkgroup ID name
MSG1
STATION1
Blink
The received
message
The calling station or
Talkgroup ID name
RET U R N FICETO OF
STATION1
Scrolls
IDAS OPERATION
5
D Receiving a Status Message
q When a Status Message is received:
• Beeps sound.
• The calling station or Talkgroup ID name (or code) and the sta-
tus message blink.
w Push [PTT], turn power OFF, or change the channel to
stop the display blinking.
27
D Receiving a Message
q When a Message is received:
• Beeps sound.
• The calling station ID name (or code) and the message blink.
NOTE: When the received message includes more
than 12 characters, the message automatically scrolls,
when the automatic scroll function is activated.
• Push [Status Up]/[Status Down] to manually scroll the
message.
w P u sh [PTT], turn power OFF, or change the channel to
stop the display blinking.
Page 31

IDAS OPERATION
5
D Receiving a Stun, Kill or Revive
If an individual call with Stun or Kill command is received, the
transceiver will display “SORRY” and you can not receive
or transmit. (RAN code matching may not be necessary, depending on the presetting.)
* Depending on the received Stun command setting.
➥ When a Stun command is received:
• The transceiver cannot be operated until an individual call with
a Revive command is received or you input a password. (RAN
code matching may not be necessary, depending on the presetting.)
➥ When a Kill command is received:
• The transceiver cannot be operated until the transceiver is reprogrammed. Ask your dealer for details.
NOTE: Depending on the presetting, the transceiver may
ignore the Stun, Revive and Kill commands that are from a
non-specified station.
This function is usable in transceivers whose revision number is 2.9 or later. Ask your dealer for details.
D Receiving a Remote Monitor, Radio Check
or Status Polling Call
*
If an individual call with a Remote monitor, Radio check or
Status polling command is received, the transceiver automatically will transmit. (RAN code matching may not be necessary, depending on the presetting.)
➥ When a Remote monitor command is received:
• The microphone audio is automatically transmitted for the set
time period.
➥ When a Radio check command is received:
• The transceiver automatically transmits an acknowledgement
call.
➥ When a Status polling command is received:
• The transceiver automatically transmits a status call.
1
2
3
4
5
6
7
8
9
10
11
12
13
14
15
16
28
Page 32

IDAS OPERATION
RX Emerg e ncy
STATION 1
Blink
The calling station
ID name
5
D Receiving an Emergency call
q When an emergency call is received:
• Beeps sound.
• “RX Emergency” and the calling station ID name (or code)
blink.
• The state of the backlight depends on the Backlight setting in the
User set mode. When “OFF Auto” is selected, the backlight turns
ON for the preprogrammed time period. (Auto Backlight Timer)
This function is usable in transceivers whose revision number is
3.0 or later. Ask your dealer for details.
w When the Send ACK function is turned ON, the transceiver
automatically transmits an acknowledgement to the calling
station, if the received call type is Talkgroup or All Call.
• If the received call type is Individual, and it requests an acknowledgment, the transceiver automatically sends the acknowledgement.
• This function is usable in transceivers whose revision number is
3.0 or later. Ask your dealer for details.
e Turn power OFF or change the channel to stop the beep
and display blinking.
29
Page 33

IDAS OPERATION
VOICE
STATION1
NO LOG
5
D Displaying the received call log
If activated, the transceiver stores a log of all calls in memory.
Up to 10 call logs can be stored, and the oldest call record is
erased when an 11th call is received. However, once the transceiver is turned OFF, the all records are erased.
The received voice call (for individual), call alert, status call
and message logs are
q
Push [Digital Button] to enter the application selection mode.
• “VOICE” appears.
•
To change the call type, hold down [Digital Button] for 1 second
in the standby mode. After changing, the transceiver automatically enters the application selection mode.
w Push [CH Up] or [CH Down] to select “CALL LOG”.
stored
.
e Push [Digital Button] again to display the call log infor-
mation.
When log information is stored
When no log information is stored
r Push [CH Up] or [CH Down] to select the desired log.
t Hold down [PTT] to send a voice call.
1
2
3
4
5
6
7
8
9
10
11
12
13
14
15
16
30
Page 34

IDAS OPERATION
5
D Talk back function
The talk back function allows you to select the same call
mode (Analog or Digital) and/or call type (Individual or Talkgroup) as the received call.
When the talk back timer is set to 0 seconds, this function is
not activated. Ask your dealer for details.
If this function is cancelled by pushing [Digital Button] or any
key on the 10-key keypad, or after the talk back timer period
has passed, your transceiver automatically returns to the default call mode and type.
If the received call is a digital signal, the talk back function is
activated only for Voice Call, Call Alert, Status Message and
Message.*
* Depending on the presetting, the talk back function may be acti-
vated only for Voice Call.
When the channel type is “Mixed-Analog”
After receiving a digital signal, you can select the digital call
mode by pushing [PTT] before or during the talk back timer
period.
When the channel type is “Mixed-Digital”
After receiving an analog signal that can release the mute,
you can select the analog call mode by pushing [PTT] before
or during the talk back timer period.
NOTE:
When this function is not activated, the transceiver transmits an analog signal on a “Mixed-Analog” channel, and
transmits a digital signal on a “Mixed-Digital” channel.
• The transceiver receives both analog and digital signals on the
“Mixed-Analog” and “Mixed-Digital” channels, regardless of the
function's setting.
This function is usable in transceivers whose revision number
is 2.9 or later. Ask your dealer for details.
31
When the channel type is “Mixed-Digital” or “Digital”
After receiving a digital signal, you can select the same call
digit mode to transmit by pushing [PTT] before or during the
talk back timer period.
Page 35

IDAS OPERATION
INDIVIDUAL
VOICE
* This illustration is described with Individual call type.
VOICE
STATION1
Individual or Talkgroup
ID name is displayed.
5
■ Transmitting a call
IDAS operation allows you to make a call to a specific station
(Individual call) or to a particular group (Talkgroup call). Other
transceivers on the channel will not receive a call that does
not match their individual or talkgroup ID and/or RAN (Radio
Access Number) code.
NOTE: When the handshake (repeater access) is failed
after pushing [PTT], the transceiver starts roaming.
• This function is usable in transceivers whose revision number is
4.3 or later. Ask your dealer for details.
D Transmitting a Voice Call
q Push [Digital Button] to enter the application selection
mode.
• “VOICE” appears.
•
To change the call type, hold down [Digital Button] for 1 second
the standby mode. After changing, the transceiver automatically
enters the application selection mode.
in
w Push [Digital Button] again to enter the Individual or Talk-
group ID selection mode.
• The preprogrammed ID name is displayed.
• When an ID name is not programmed, the ID code is displayed.
• The primarily ID can be preset to display first.
This function is usable in transceivers whose revision number is
2.9 or later. Ask your dealer for details.
• When you want to send a voice message to all transceivers
within the communication range, use the ‘All Call’ function–— select the Talkgroup ID code “65535”.
e Push [CH Up] or [CH Down] to select the desired ID name
or ID code.
• Depending on the presetting, you may be able to directly input
the ID. (The optional HM-152T is required.) See page 43 for details.
r
Hold down [PTT], then speak into the microphone to send
a voice message to the selected station or talkgroup.
t Release [PTT] to receive.
Convenient! (The optional HM-152T is required.)
Depending on the presetting, you may be able use the quick
ID selection for Voice Call.
➥ While in the standby mode, push the desired digit key ([1]
to [9] or [0]) to
• The appropriate ID is displayed.
enter the ID selection mode
.
1
2
3
4
5
6
7
8
9
10
11
12
13
14
15
16
32
Page 36

IDAS OPERATION
CALALERT
STATION1
The individual or Talkgroup ID name is displayed.
5
D Transmitting a Call Alert
Call Alert allows you to inform another user who may be away
from the transceiver that you want to talk.
q Push [Digital Button] to enter the application selection
mode.
• “VOICE” appears.
•
To change the call type, hold down [Digital Button] for 1 second
the standby mode. After changing, the transceiver automatically
enters the application selection mode.
w Push [CH Up] or [CH Down] to select “CALALERT.”
e Push [Digital Button] again to enter the Individual or Talk-
group ID selection mode.
• A preprogrammed ID name is displayed.
• When an ID name is not programmed, the ID code is displayed.
• The primarily ID can be preset to display first.
This function is usable in transceivers whose revision number is
2.9 or later. Ask your dealer for details.
r Push [CH Up] or [CH Down] to select the desired ID name
or ID code.
• Depending on the presetting, you may be able to directly input
the ID. (The optional HM-152T is required.) See page 43 for details.
in
t Hold down [PTT] to transmit the Call Alert to the selected
station or talkgroup.
• “CA CALL” is displayed.
y Release [PTT].
• “CA OK” is displayed if an acknowledgement is received from
the targeted station.
• “CA FAIL” is displayed if no acknowledgement is received from
the targeted station.
u After a specified time period has passed, your transceiver
will return to the standby mode.
33
Page 37

IDAS OPERATION
STUN
STATION1
The individual ID name is displayed.
5
D Transmitting a Stun Call
A Stun call allows you to send a signal that will stun a targeted station.
q Push [Digital Button] to enter the application selection
mode.
• “VOICE” appears.
•
To change the call type, hold down [Digital Button] for 1 second
the standby mode. After changing, the transceiver automatically
enters the application selection mode.
w Push [CH Up] or [CH Down] to select “STUN.”
e Push [Digital Button] again to enter the Individual ID se-
lection mode.
• A preprogrammed ID name is displayed.
• When an ID name is not programmed, an ID code is displayed.
• The primarily ID can be preset to display first.
This function is usable in transceivers whose revision number is
2.9 or later. Ask your dealer for details.
r Push [CH Up] or [CH Down] to select the desired ID name
or ID code.
• Depending on the presetting, you may be able to directly input
the ID. (The optional HM-152T is required.) See page 43 for details.
in
t Push [PTT] to transmit the Stun call to the selected sta-
tion.
• “STN TX” is displayed.
y Release [PTT].
• “STN ACK” is displayed if an acknowledgement is received from
the targeted station.
• “STN FAIL” is displayed if no acknowledgement is received from
the targeted station.
u After a specified time period has passed, your transceiver
will return to the standby mode.
1
2
3
4
5
6
7
8
9
10
11
12
13
14
15
16
34
Page 38

IDAS OPERATION
KILL
STATION1
The individual ID name is displayed.
5
D Transmitting a Kill Call
A Kill call allows you to send a signal that will disable the
targeted station.
q
Push [Digital Button] to enter the application selection mode.
• “VOICE” appears.
•
To change the call type, hold down [Digital Button] for 1 second
the standby mode. After changing, the transceiver automatically
enters the application selection mode.
w Push [CH Up] or [CH Down] to select “KILL.”
e Push [Digital Button] again to enter the Individual ID se-
lection mode.
• A preprogrammed ID name is displayed.
• When an ID name is not programmed, an ID code is displayed.
• The primarily ID can be preset to display first.
This function is usable in transceivers whose revision number is
2.9 or later. Ask your dealer for details.
r Push [CH Up] or [CH Down] to select the desired ID name
or ID code.
• Depending on the presetting, you may be able to directly input
the ID. (The optional HM-152T is required.) See page 43 for details.
in
t Push [PTT] to transmit the Kill call to the selected station.
• “KIL TX” is displayed.
y Release [PTT].
• “KIL ACK” is displayed if an acknowledgement is received from
the targeted station.
• “KIL FAIL” is displayed if no acknowledgement is received from
the targeted station.
u After a specified time period has passed, your transceiver
will return to the standby mode.
35
Page 39

IDAS OPERATION
REVIVE
STATION1
The individual ID name is displayed.
5
D Transmitting a Revive Call
A Revive call will send a signal that will revive a stunned
transceiver.
q
Push [Digital Button] to enter the application selection mode.
• “VOICE” appears.
•
To change the call type, hold down [Digital Button] for 1 second
the standby mode. After changing, the transceiver automatically
enters the application selection mode.
w Push [CH Up] or [CH Down] to select “REVIVE.”
e Push [Digital Button] again to enter the Individual ID se-
lection mode.
• A preprogrammed ID name is displayed.
• When an ID name is not programmed, an ID code is displayed.
• The primarily ID can be preset to display first.
This function is usable in transceivers whose revision number is
2.9 or later. Ask your dealer for details.
r Push [CH Up] or [CH Down] to select the desired ID name
or ID code.
• Depending on the presetting, you may be able to directly input
the ID. (The optional HM-152T is required.) See page 43 for details.
in
t
Push [PTT] to transmit the Revive call to the selected station.
• “REV TX” is displayed.
y Release [PTT].
• “REV ACK” is displayed if an acknowledgement is received from
the targeted station.
• “REV FAIL” is displayed if no acknowledgement is received from
the targeted station.
u After a specified time period has passed, your transceiver
will return to the standby mode.
1
2
3
4
5
6
7
8
9
10
11
12
13
14
15
16
36
Page 40

IDAS OPERATION
REMMON
STATION1
The individual ID name is displayed.
5
D Transmitting a Remote Monitor Call
A remote monitor call will send a signal that requires the targeted station to transmit its microphone audio.
q Push [Digital Button] to enter the application selection
mode.
• “VOICE” appears.
•
To change the call type, hold down [Digital Button] for 1 second
the standby mode. After changing, the transceiver automatically
enters the application selection mode.
w Push [CH Up] or [CH Down] to select “REM MON.”
e Push [Digital Button] again to enter the Individual ID se-
lection mode.
• A preprogrammed ID name is displayed.
• When an ID name is not programmed, an ID code is displayed.
• The primarily ID can be preset to display first.
This function is usable in transceivers whose revision number is
2.9 or later. Ask your dealer for details.
r Push [CH Up] or [CH Down] to select the desired ID name
or ID code.
• Depending on the presetting, you may be able to directly input
the ID. (The optional HM-152T is required.) See page 43 for details.
in
t Hold down [PTT] to transmit the Remote monitor call to
the selected station.
• “REM TX” is displayed.
y Release [PTT].
• “REM ACK” is displayed if an acknowledgement is received from
the targeted station.
• “REM FAIL” is displayed if no acknowledgement is received from
the targeted station.
u After a specified time period has passed, your transceiver
will return to the standby mode.
37
Page 41

IDAS OPERATION
RADIOCHK
STATION1
The individual ID name is displayed.
5
D Transmitting a Radio Check Call
A radio check call will determine whether the targeted station
is turned ON, within the communication range and on channel
without requiring any action from the targeted station user.
q Push [Digital Button] to enter the application selection
mode.
• “VOICE” appears.
•
To change the call type, hold down [Digital Button] for 1 second
during standby operation. After changing, the transceiver automatically enters the application selection mode.
w Push [CH Up] or [CH Down] to select “RADIOCHK.”
e Push [Digital Button] again to enter the Individual ID se-
lection mode.
• A preprogrammed ID name is displayed.
• When ID name is not programmed, an ID code is displayed.
• The primarily ID can be preset to display first.
This function is usable in transceivers whose revision number is
2.9 or later. Ask your dealer for details.
r Push [CH Up] or [CH Down] to select the desired ID name
or ID code.
• Depending on the presetting, you may be able to directly input
the ID. (The optional HM-152T is required.) See page 43 for details.
t Hold down [PTT] to transmit the Radio check call to the
selected station.
• “RDO CHK” is displayed.
y Release [PTT].
• “CHK ACK” is displayed if an acknowledgement is received from
the targeted station.
• “CHK FAIL” is displayed if no acknowledgement is received from
the targeted station.
u After a specified time period has passed, your transceiver
will return to the standby mode.
1
2
3
4
5
6
7
8
9
10
11
12
13
14
15
16
38
Page 42

IDAS OPERATION
STATUS
TX STATUS 01
The status message is displayed.
STATUS
STATION1
The individual or Talkgroup ID name is displayed.
5
D Tr ansmitting a Status Message
The transceiver can send a preprogrammed status message.
There are 100 selectable status messages.
q Push [Digital Button] to enter the application selection
mode.
• “VOICE” appears.
•
To change the call type, hold down [Digital Button] for 1 second
the standby mode. After changing, the transceiver automatically
enters the application selection mode.
w Push [CH Up] or [CH Down] to select “STATUS.”
e Push [Digital Button] again to enter the status message
selection mode.
• A preprogrammed status message is displayed.
r Push [CH Up] or [CH Down] to select a desired mes-
sage.
t Push [Digital Button] again to enter the Individual or Talk-
group ID selection mode.
• The preprogrammed ID name is displayed.
• When an ID name is not programmed, an ID code is displayed.
39
• The primarily ID can be preset to display first.
This function is usable in transceivers whose revision number is
2.9 or later. Ask your dealer for details.
in
y Push [CH Up] or [CH Down] to select the desired ID name
or ID code.
•
Depending on the presetting, you may be able to directly input the
ID. (The optional HM-152T is required.) See page 43 for details.
u Push [PTT] to transmit the status message to the selected
station or talkgroup.
• “STAT TX” is displayed.
i Release [PTT].
• “STAT OK” is displayed if an acknowledgement is received from
the targeted station.
• “STA FAIL” is displayed if no acknowledgment is received from
the targeted station.
o After a specified time period has passed, the transceiver
will return to receive.
Convenient! (The optional HM-152T is required.)
Depending on the presetting, you may be able to use the
quick status message selection and transmission.
➥ Push the desired digit key ([1] to [9] or [0]) to
status message selection mode
• The appropriate status message is displayed.
.
enter the
➥ Hold down the desired digit key ([1] to [9] or [0]) for 1 sec-
ond to transmit the appropriate status message, 1 to 10.
Page 43

IDAS OPERATION
MSG
MSG1
The message is displayed.
MSG
STATION1
The individual or Talkgroup ID name is displayed.
5
D Transmitting a Message
The transceiver can send a preprogrammed message.
There are 10 selectable messages.
q Push [Digital Button] to enter the application selection
mode.
• “VOICE” appears.
•
To change the call type, hold down [Digital Button] for 1 second
the standby mode. After changing, the transceiver automatically
enters the application selection mode.
w Push [CH Up] or [CH Down] to select “MSG.”
e Push [Digital Button] again to enter the message selec-
tion mode.
• A preprogrammed message is displayed.
r
Push [CH Up] or [CH Down] to select a desired message.
• You can edit the contents of the message. See page 41 for details.
t Push [Digital Button] again to enter the Individual or Talk-
group ID selection mode.
• A preprogrammed ID name is displayed.
• When an ID name is not programmed, an ID code is displayed.
• The primarily ID can be preset to display first.
This function is usable in transceivers whose revision number is
2.9 or later. Ask your dealer for details.
in
y Push [CH Up] or [CH Down] to select the desired ID name
or ID code.
•
Depending on the presetting, you may be able to directly input the
ID. (The optional HM-152T is required.) See page 43 for details.
u Push [PTT] to transmit the message to the selected sta-
tion or talkgroup.
• “MSG TX” is displayed.
i Release [PTT].
• “MSG OK” is displayed if an acknowledgement is received from
the targeted station.
• “MSG FAIL” is displayed if no acknowledgment is received from
the targeted station.
o After a specified time period has passed, your transceiver
will return to the standby.
Convenient! (The optional HM-152T is required.)
Depending on the presetting, you may be able to use the
quick message selection/transmission.
➥ Push the desired digit key ([1] to [9] or [0]) to
sage selection mode
• The appropriate message is displayed.
➥ Hold down the desired digit key ([1] to [9] or [0]) for 1 sec-
ond to transmit the message, 1 to 10.
.
enter the mes-
1
2
3
4
5
6
7
8
9
10
11
12
13
14
15
16
40
Page 44

IDAS OPERATION
Key
[0]
[1]
[2]
[3]
[4]
[5]
[6]
[7]
[8]
[9]
Characters
0 ! ? ' " , ; : _ ( ) < > [ ]
1 (space) # * / + - = & % $ @ ^
2 A B C a b c
3 D E F d e f
4 G H I g h i
5 J K L j k l
6 M N O m n o
7 P Q R S p q r s
8 T U V t u v
9 W X Y Z w x y z
/
!
5
D Direct message input
The optional HM-152T is required.
q Push [Digital Button] to enter the application selection
mode.
• “VOICE” appears.
•
To change the call type, hold down [Digital Button] for 1 second
the standby mode. After changing, the transceiver automatically
enters the application selection mode.
w Push [CH Up] or [CH Down] to select “MSG.”
e Push [Digital Button] again to enter the message selec-
tion mode.
• A preprogrammed message is displayed.
r Push [CH Up] or [CH Down] to select a different message
to edit, if desired.
t Push [M] or [#] to enter the message editing mode.
• The first character blinks when [#] is pushed; the last character
blinks when [M] is pushed.
y Push the appropriate digit key, [0] to [9], until the desired
character is selected.
• See the table to the right for the selectable characters.
41
• Pushing [CH Up] enters a space; pushing [CH Down] deletes
the selected character.
u Push [#] to move the cursor to the right, push [M] to move
the cursor to the left.
i
Repeat steps t and y to enter the desired text message.
o Hold down [Digital Button] for 1 second to overwrite the
entered message into the message memory.
• Push [Digital Button] momentarily to cancel the editing and
return to the original message display.
• Selectable characters
in
Page 45

IDAS OPERATION
STAT POL
STATION1
The individual ID name is displayed.
5
D Transmitting a Status Polling Call
The transceiver can send a signal that causes the targeted
station to automatically transmit its current status.
q Push [Digital Button] to enter the application selection
mode.
• “VOICE” appears.
•
To change the call type, hold down [Digital Button] for 1 second
during standby operation. After changing, the transceiver automatically enters the application selection mode.
w Push [CH Up] or [CH Down] to select “STAT POL”.
e Push [Digital Button] again to enter the Individual ID se-
lection mode.
• A preprogrammed ID name is displayed.
• When an ID name is not programmed, an ID code is displayed.
• The primarily ID can be preset to display first.
This function is usable in transceivers whose revision number is
2.9 or later. Ask your dealer for details.
r Push [CH Up] or [CH Down] to select the desired ID name
or ID code.
• Depending on the presetting, you may be able to directly input
the ID. (The optional HM-152T is required.) See page 43 for details.
t Push [PTT] to transmit the status polling to the selected
station.
• “STAT POL” is displayed.
y Release [PTT].
• The status message is displayed if an acknowledgement and the
current status is received from the targeted station.
• “POL FAIL” is displayed if no acknowledgment and status is re-
ceived from the targeted station.
u After a specified time period has passed, your transceiver
will return to the standby mode.
1
2
3
4
5
6
7
8
9
10
11
12
13
14
15
16
42
Page 46

IDAS OPERATION
VOICE
12345
The entered Individual or Talkgroup ID
5
D Direct ID input
Depending on the presetting, you may be able to directly input
the desired ID. The optional HM-152T is required.
q Push [Digital Button] to enter the Individual or Talkgroup
ID selection mode, then push the appropriate digit key, [0]
to [9], to input the desired ID (up to 5 digits).
• Push [M] to delete an input digit.
w After inputting, push [PTT] to transmit to the station or talk-
group.
43
D Transmitting an Emergency Call
When [Emergency] (described in the instruction manual) is held
down for a specified time period, the emergency signal (digital
command) is transmitted once or repeatedly* on the emergency
channel. When no emergency channel is specified, the signal is
transmitted on the operating channel.
* When the Repeat Cancel function is ON, the transceiver cancels
repeating after receiving an acknowledgement.
When the Repeat Cancel function is OFF, the transceiver repeats
calling according to the number of repeat cycles, even after receiving an acknowledgement.
This function is usable in transceivers whose revision number is 3.0
or later. Ask your dealer for details.
Individual or Talkgroup type of emergency calls can be preset. If the call type is not preset, the default or selected call
type is used.
This function is usable in transceivers whose revision number
is 2.9 or later. Ask your dealer for details.
If you want to cancel the emergency call, hold down the key
again before transmitting the call.
The emergency call can be transmitted without a beep sounding, and the LCD lighting, depending on the presetting. (Silent
operation)
The transceiver can also be programmed to keep the microphone open during an emergency call, allowing monitoring of
the situation.
Ask your dealer for details.
Page 47

IDAS OPERATION
5
IMPORTANT: It is recommended to setup a separate emergency channel to provide reliable emergency call operation.
NOTE:
When the Digital Request ACK function is activated, the
transceiver transmits the emergency call with a request to
send back an acknowledgment.
This function is usable in transceivers whose revision number is 2.9 or later for the Individual call, and 3.0 or later for
the Talkgroup or All Call. Ask your dealer for details.
■ Transmitting Position data
When a GPS receiver is connected to the transceiver, the
position (longitude and latitude) data can be automatically
transmitted when:
• The GPS request status message is received
• A voice message is sent.
- Set the ‘Send with Login’ and ‘Send with Logoff’ items as
‘Enable.’
• A status message is sent.
- Set the ‘Send with Status Call’ item as ‘Enable.’
• A message is sent.
- Set the ‘Send with SDM Call’ item as ‘Enable.’
• A Call Alert is sent.
- Set the ‘Send with Call Alert’ item as ‘Enable.’
• An Emergency call is sent.
- Set the ‘Send with Emergency’ item as ‘Enable.’
• An Emergency call with Man Down is sent.
- Set the ‘Send at Man Down’ item as ‘Enable.’
Ask your dealer or system operator for connection details.
1
2
3
4
5
6
7
8
9
10
11
12
13
14
15
16
44
Page 48

IDAS OPERATION
5
■ Sending a Status message
Status message can be automatically transmitted.
The status message is transmitted when:
• The transceiver is turned ON or OFF
- Set the status message to be transmitted in ‘Power ON Status’
or ‘Power OFF Status’ item, respectively.
- Set the target station ID in ‘Power Status ID’.
• A voice message is sent.
- Set the ‘Send with Voice Call’ item to ‘Enable.’
- Set the status message to be transmitted in the ‘Send Status
Number’ item.
■ Sounding a Horn
An automatic honking function can be used if a horn is connected to the D-Sub 25-pin connector of the transceiver.
When a status message is received, the transceiver honks
the vehicle’s horn for the specified time period to indicate a
status message is has been received.
This function is convenient when the operator is away from
the transceiver.
Ask your dealer or system operator, or refer to the IC-F5061/
F6061 series service manual for connection and setting details.
■ Connecting a Printer
When a printer is connected to the D-sub 25-pin of the transceiver, the received SDM content and the caller station ID can
be printed out.
Ask your dealer or system operator for connection details.
■ Encryption function
The encryption function enables voice scrambling, which provides private digital communication between stations.
q Push [Scrambler/Encryption] to turn ON the encryption
function.
• “ ” appears.
w Push [Scrambler/Encryption] again to turn OFF the en-
cryption function.
• “ ” disappears.
45
Page 49

IDAS OPERATION
5
■ ATB Ring Back function
If enabled, this feature is effective when a subscriber attempts
to push [PTT] while the site is in an “All Trunks Busy” status,
and/or is still “Receiving a Downlink” at the time the [PTT] is
pushed.
In the event of an “All Trunks Busy” condition, and/or a condition of “Receiving a Downlink,” a quick [PTT] push results
in the transceiver going into a waiting for an open repeater
mode. When an open repeater signal is received by the transceiver, the transceiver handshakes and holds the channel for
the pre-programmed time period. After receiving a handshake
beep, the transceiver will hold the channel for this period before it releases it. The operator must then key up their transceiver to communicate. Failure of the operator to push [PTT]
before this timer expires results in a loss of the channel grant
and another push of the [PTT] will be required.
When the pre-programmed CH Reser ve Timeout timer
elapses, the transceiver returns to its default state.
• This function is usable in transceivers whose revision number is 4.4 or later. Ask your dealer for details.
1
2
3
4
5
6
7
8
9
10
11
12
13
14
15
16
46
Page 50

A-6565-2EX-u
© 2006–2012 Icom Inc.
1-1-32 Kamiminami, Hirano-ku, Osaka 547-0003, Japan
 Loading...