

Page 1

IBM TotalStorage DS8000
User’s Guid e
SC26-7623-03
Page 2

Page 3

IBM TotalStorage DS8000
User’s Guid e
SC26-7623-03
Page 4

Note:
Before using this information and the product it supports, read the information under Safety and environmental notices and
Notices.
Fourth Edition (April 2005)
© Copyright International Business Machines Corporation 2004, 2005. All rights reserved.
US Government Users Restricted Rights – Use, duplication or disclosure restricted by GSA ADP Schedule Contract
with IBM Corp.
Page 5

Contents
Figures . . . . . . . . . . . . . . . . . . . . . . . . . . . vii
Tables . . . . . . . . . . . . . . . . . . . . . . . . . . . .ix
About this guide . . . . . . . . . . . . . . . . . . . . . . . .xi
Safety and environmental notices . . . . . . . . . . . . . . . . . xiii
Safety notices . . . . . . . . . . . . . . . . . . . . . . . . . xiii
Environmental notices . . . . . . . . . . . . . . . . . . . . . . xiii
Product recycling . . . . . . . . . . . . . . . . . . . . . . . xiii
Disposing of products . . . . . . . . . . . . . . . . . . . . . xiii
Conventions used in this guide . . . . . . . . . . . . . . . . . . . xiii
Related information . . . . . . . . . . . . . . . . . . . . . . . xiv
DS8000 series library . . . . . . . . . . . . . . . . . . . . . xiv
Other IBM publications . . . . . . . . . . . . . . . . . . . . .xv
Ordering IBM publications . . . . . . . . . . . . . . . . . . . .xx
Web sites . . . . . . . . . . . . . . . . . . . . . . . . . . .xx
How to send your comments . . . . . . . . . . . . . . . . . . . . xxi
Summary of Changes for SC26-7623-03 IBM TotalStorage DS8000 User’s
Guide . . . . . . . . . . . . . . . . . . . . . . . . . . xxiii
Chapter 1. Introduction to IBM TotalStorage DS8000 series . . . . . . .1
DS8000 models . . . . . . . . . . . . . . . . . . . . . . . . .1
DS8100 (Model 921) . . . . . . . . . . . . . . . . . . . . . . .4
DS8300 (Models 922 and 9A2) . . . . . . . . . . . . . . . . . . .5
Model comparison . . . . . . . . . . . . . . . . . . . . . . . .5
DS8000 physical footprint . . . . . . . . . . . . . . . . . . . . .6
DS8000 performance features . . . . . . . . . . . . . . . . . . . .8
Interfaces of the DS8000 . . . . . . . . . . . . . . . . . . . . .8
IBM TotalStorage DS Storage Manager . . . . . . . . . . . . . . .9
DS command-line interface . . . . . . . . . . . . . . . . . . . .9
DS Open application programming interface . . . . . . . . . . . . .9
DS8000 hardware specifics . . . . . . . . . . . . . . . . . . . .10
Storage unit structure . . . . . . . . . . . . . . . . . . . . .10
IBM TotalStorage Management Console . . . . . . . . . . . . . . .11
Host systems that the storage unit supports . . . . . . . . . . . . .11
Processor memory . . . . . . . . . . . . . . . . . . . . . .15
Data management features . . . . . . . . . . . . . . . . . . . .15
RAID . . . . . . . . . . . . . . . . . . . . . . . . . . .15
Arrays across loops . . . . . . . . . . . . . . . . . . . . . .15
Storage System LPARs (logical partitions) . . . . . . . . . . . . . .15
Copy Services . . . . . . . . . . . . . . . . . . . . . . . .16
FlashCopy . . . . . . . . . . . . . . . . . . . . . . . . .18
Disaster recovery using Copy Services . . . . . . . . . . . . . . .19
Comparison of licensed functions . . . . . . . . . . . . . . . . .20
Parallel Access Volumes . . . . . . . . . . . . . . . . . . . .21
DS8000 limitations . . . . . . . . . . . . . . . . . . . . . . .21
Planning data migration . . . . . . . . . . . . . . . . . . . . . .22
How to select a data migration method . . . . . . . . . . . . . . .22
Chapter 2. Installing the DS8000 Storage Manager interface . . . . . . .25
© Copyright IBM Corp. 2004, 2005 iii
Page 6

Installing the IBM TotalStorage DS Storage Manager on the Windows operating
system using the graphical mode . . . . . . . . . . . . . . . . .26
Installing the IBM TotalStorage DS Storage Manager on the Windows operating
system in unattended (silent) mode . . . . . . . . . . . . . . . .37
Removing the IBM TotalStorage DS Storage Manager from a Windows
operating system . . . . . . . . . . . . . . . . . . . . . . .42
Removing the DS8000 Storage Manager from a Windows operating system
using the silent mode . . . . . . . . . . . . . . . . . . . . . .44
Upgrading the DS Storage Manager on a Windows operating system using the
graphical mode . . . . . . . . . . . . . . . . . . . . . . . .44
Upgrading the IBM TotalStorage DS Storage Manager on the Windows
operating system in unattended (silent) mode . . . . . . . . . . . . .51
Chapter 3. Installing the IBM TotalStorage DS8000 Storage Manager on the
Linux operating system . . . . . . . . . . . . . . . . . . . .53
Installing the IBM TotalStorage DS Storage Manager on a Linux operating
system using the graphical mode . . . . . . . . . . . . . . . . .53
Installing the IBM TotalStorage DS8000 Storage Manager on the Linux
operating system in unattended (silent) mode . . . . . . . . . . . . .63
Removing the IBM TotalStorage DS Storage Manager from a Linux operating
system . . . . . . . . . . . . . . . . . . . . . . . . . . .70
Removing the DS8000 Storage Manager from a Linux operating system using
the silent mode . . . . . . . . . . . . . . . . . . . . . . . .71
Upgrading the IBM TotalStorage DS Storage Manager on a Linux operating
system . . . . . . . . . . . . . . . . . . . . . . . . . . .72
Upgrading the IBM TotalStorage DS8000 Storage Manager on the Linux
operating system in unattended (silent) mode . . . . . . . . . . . . .79
Chapter 4. DS Storage Manager postinstallation instructions . . . . . .81
Internet browser support . . . . . . . . . . . . . . . . . . . . .81
Stop and start the DS Storage Manager Servers . . . . . . . . . . . .81
Stopping and restarting the DS Storage Manager servers on a Windows
operating system . . . . . . . . . . . . . . . . . . . . . .81
Stopping and restarting the DS Storage Manager servers on a Linux
operating system . . . . . . . . . . . . . . . . . . . . . .82
Starting the DS Storage Manager program . . . . . . . . . . . . . . .82
Starting the DS8000 Storage Manager on a Windows operating system . . .82
Starting the DS8000 Storage Manager on a Linux operating system . . . .82
Getting started with the DS Storage Manager console . . . . . . . . . .83
Activating licenses . . . . . . . . . . . . . . . . . . . . . .84
Chapter 5. IBM TotalStorage Management Console . . . . . . . . . .87
Logging onto the Management Console . . . . . . . . . . . . . . . .87
Logging off the Management Console . . . . . . . . . . . . . . . .87
Changing the Management Console password . . . . . . . . . . . . .88
Accessing the DS Storage Manager . . . . . . . . . . . . . . . . .88
Chapter 6. Administering user accounts . . . . . . . . . . . . . .91
Adding user accounts . . . . . . . . . . . . . . . . . . . . . .91
Modifying user accounts . . . . . . . . . . . . . . . . . . . . .91
Removing user accounts . . . . . . . . . . . . . . . . . . . . .92
Unlocking a user account . . . . . . . . . . . . . . . . . . . . .92
Unlocking an administrative password . . . . . . . . . . . . . . . .93
Chapter 7. Storage system logical partition . . . . . . . . . . . . .95
DS8300 LPAR implementation . . . . . . . . . . . . . . . . . . .95
iv DS8000 User’s Guide
|
||
|
||
|
||
|
||
Page 7

Required hardware components to build a storage image . . . . . . . . .96
I/O resources . . . . . . . . . . . . . . . . . . . . . . . .97
Processor and memory allocation . . . . . . . . . . . . . . . . .97
RIO-G interconnect separation . . . . . . . . . . . . . . . . . .98
Chapter 8. Optional feature codes for the DS8000 . . . . . . . . . . .99
Using parallel access volumes for S/390 and zSeries hosts . . . . . . . .99
Parallel access volumes . . . . . . . . . . . . . . . . . . . . 100
PAV requirements for the DS8000 . . . . . . . . . . . . . . . . 100
Overview of the input/output configuration program for the DS8000 . . . . 101
Guidelines for defining the logical control unit for the DS8000 . . . . . . 103
Reconfiguring an LCU with larger capacity 3390 volumes . . . . . . . . 104
Increasing the number of 3390s formatted within an LSS . . . . . . . . 104
Copy Services . . . . . . . . . . . . . . . . . . . . . . . . . 104
Copy Services overview . . . . . . . . . . . . . . . . . . . . 104
IBM TotalStorage Resiliency Family . . . . . . . . . . . . . . . . 105
Disaster recovery using Copy Services . . . . . . . . . . . . . . 106
Copy Services functions across a 2105 and 2107 . . . . . . . . . . 107
FlashCopy . . . . . . . . . . . . . . . . . . . . . . . . . .110
Reverse FlashCopy relationships . . . . . . . . . . . . . . . . . 111
FlashCopy to Metro Mirror source volumes . . . . . . . . . . . . .112
Multiple relationship FlashCopy . . . . . . . . . . . . . . . . .113
Persistent FlashCopy . . . . . . . . . . . . . . . . . . . . .113
Re-synchronizing FlashCopy volume pairs . . . . . . . . . . . . .114
Creating a Remote FlashCopy operation (Inband FlashCopy on the ESS
2105) . . . . . . . . . . . . . . . . . . . . . . . . . .114
Path connections . . . . . . . . . . . . . . . . . . . . . . . .116
Remote Mirror and Copy . . . . . . . . . . . . . . . . . . . . .116
Global Copy . . . . . . . . . . . . . . . . . . . . . . . .117
Global Mirror . . . . . . . . . . . . . . . . . . . . . . . .118
Metro Mirror . . . . . . . . . . . . . . . . . . . . . . . . 121
Consistency groups . . . . . . . . . . . . . . . . . . . . . . 122
Failover and failback operations . . . . . . . . . . . . . . . . . 123
z/OS Copy Services . . . . . . . . . . . . . . . . . . . . . . 124
z/OS Global Mirror . . . . . . . . . . . . . . . . . . . . . . 124
z/OS Metro/Global Mirror . . . . . . . . . . . . . . . . . . . . 125
Chapter 9. Migrating data to a storage unit . . . . . . . . . . . . . 127
How to select a data migration method . . . . . . . . . . . . . . . 127
Considerations for replacing existing storage . . . . . . . . . . . . . 128
Reformatting open systems host DDMs . . . . . . . . . . . . . . . 128
Overview of the logical volume management software . . . . . . . . . . 129
Copying a complete logical volume . . . . . . . . . . . . . . . . 129
Using mirroring to migrate data . . . . . . . . . . . . . . . . . 130
Using the migratepv command . . . . . . . . . . . . . . . . . 131
Using the direct copy method . . . . . . . . . . . . . . . . . . 132
Using backup and restore methods to migrate data . . . . . . . . . . . 133
Migrating data from an eServer i5 400 or iSeries host system to the DS8000 134
Migrating data from an S/390 or zSeries host system to the DS8000 storage
unit . . . . . . . . . . . . . . . . . . . . . . . . . . . . 134
Data migration from a UNIX-based host system to a DS8000 storage unit 135
Migrating data to a DS8000 storage unit using volume management
methods . . . . . . . . . . . . . . . . . . . . . . . . . 136
Migrating data using the direct copy method . . . . . . . . . . . . 137
Migrating data using backup and restore methods . . . . . . . . . . 137
Contents v
|
||
Page 8

Migrating data from a Windows 2000 or Windows Server 2003-based host
system . . . . . . . . . . . . . . . . . . . . . . . . . . 137
Migrating data between storage units . . . . . . . . . . . . . . . . 138
Moving workloads when migrating data between storage units . . . . . . 138
Offloading workloads when migrating data between storage units . . . . . 138
Chapter 10. Disaster recovery using Copy Services . . . . . . . . . . 141
Performing failover and subsequent failback operations . . . . . . . . . 141
Moving production to Site B after planned outages (failover) . . . . . . . 141
Returning production to local site after planned outages . . . . . . . . 143
Moving production to Site B after unplanned outages (failover) . . . . . . 145
Using Global Mirror for disaster recovery . . . . . . . . . . . . . . . 146
Setting up your environment to use Global Mirror . . . . . . . . . . . 147
Using Global Mirror for a planned failover and failback . . . . . . . . . 148
Using Global Mirror for an unplanned failover and failback . . . . . . . 149
Recovering with and without the fast reverse restore feature . . . . . . . 151
Appendix. Troubleshooting . . . . . . . . . . . . . . . . . . . 153
Analyzing generic alert traps . . . . . . . . . . . . . . . . . . . 153
Analyzing service information messages (SIMs) for S/390 and zSeries systems 153
Understanding problem status designations . . . . . . . . . . . . . . 154
Managing product-specific alert traps . . . . . . . . . . . . . . . . 154
Obtaining services for a storage unit . . . . . . . . . . . . . . . . 155
Analyzing normal operation problems . . . . . . . . . . . . . . . . 155
Managing informational messages from the storage unit . . . . . . . . 156
Managing the storage unit error messages . . . . . . . . . . . . . 156
Accessibility . . . . . . . . . . . . . . . . . . . . . . . . . 159
Notices . . . . . . . . . . . . . . . . . . . . . . . . . . . 161
Terms and conditions for downloading and printing publications . . . . . . 162
Trademarks . . . . . . . . . . . . . . . . . . . . . . . . . . 163
Electronic emission notices . . . . . . . . . . . . . . . . . . . . 164
Federal Communications Commission (FCC) statement . . . . . . . . 164
Industry Canada compliance statement . . . . . . . . . . . . . . 164
European community compliance statement . . . . . . . . . . . . . 164
Japanese Voluntary Control Council for Interference (VCCI) class A
statement . . . . . . . . . . . . . . . . . . . . . . . . 165
Korean Ministry of Information and Communication (MIC) statement . . . . 165
Taiwan class A compliance statement . . . . . . . . . . . . . . . 166
Glossary . . . . . . . . . . . . . . . . . . . . . . . . . . 167
. . . . . . . . . . . . . . . . . . . . . . . . . . . . . 167
Index . . . . . . . . . . . . . . . . . . . . . . . . . . . . 195
vi DS8000 User’s Guide
||
Page 9

Figures
1. A base model (with front cover off) and its main components . . . . . . . . . . . . . . .2
2. An expansion model (with front cover off) and its main components . . . . . . . . . . . .3
3. Maximum configuration for Model 921 . . . . . . . . . . . . . . . . . . . . . . .4
4. Maximum configuration for Models 922 and 9A2 . . . . . . . . . . . . . . . . . . . .5
5. DS8000 physical footprint. Dimensions are in centimeters (inches). . . . . . . . . . . . . .7
6. DS8300 LPAR resource allocation . . . . . . . . . . . . . . . . . . . . . . . .96
7. Storage image resource allocation in the processor complexes of the DS8300 . . . . . . . .97
8. Refreshing target volume — reverse restore . . . . . . . . . . . . . . . . . . . .112
© Copyright IBM Corp. 2004, 2005 vii
Page 10

viii DS8000 User’s Guide
Page 11

Tables
1. DS8000 model comparison chart . . . . . . . . . . . . . . . . . . . . . . . . .6
2. Comparison of licensed functions . . . . . . . . . . . . . . . . . . . . . . . . .20
3. Failover and failback implementation . . . . . . . . . . . . . . . . . . . . . . . 142
4. Failover and failback implementation . . . . . . . . . . . . . . . . . . . . . . . 145
© Copyright IBM Corp. 2004, 2005 ix
||
||
Page 12

x DS8000 User’s Guide
Page 13

About this guide
IBM TotalStorage DS8000 is a high-performance, high-capacity series of disk
storage that is designed to support continuous operations. This publication provides
information that allows you to effectively use the DS8000 storage unit.
Included among this information are procedures and guidelines for performing the
following tasks:
v Installing the IBM TotalStorage DS8000 Storage Manager on a Windows or Linux
operating system
v Using the Management Console to access the DS Storage Manager
v Using the optional features supported on the storage unit
v Migrating data to or between storage units
v Handling disaster recovery
v Analyzing problems
Customers
or service representatives who install, set up, and use the DS8000
storage unit should use this publication.
© Copyright IBM Corp. 2004, 2005 xi
Page 14

xii DS8000 User’s Guide
Page 15

Safety and environmental notices
This section contains information about safety notices that are used in this guide
and environmental notices for this product.
Safety notices
Use this process to find information about safety notices.
To find the translated text for a danger or caution notice:
1. Look for the identification number at the end of each danger notice or each
caution notice. In the following examples, the numbers 1000 and 1001 are the
identification numbers.
DANGER
A danger notice indicates the presence of a hazard that has the
potential of causing death or serious personal injury.
1000
CAUTION:
A caution notice indicates the presence of a hazard that has the potential
of causing moderate or minor personal injury.
1001
2. Find the number that matches in the IBM TotalStorage Solutions Safety Notices
for IBM Versatile Storage Server and IBM TotalStorage Enterprise Storage
Server, GC26-7229.
Environmental notices
This section identifies the environmental guidelines that pertain to this product.
Product recycling
This unit contains recyclable materials.
Recycle these materials at your local recycling sites. Recycle the materials
according to local regulations. In some areas, IBM provides a product take-back
program that ensures proper handling of the product. Contact your IBM
representative for more information.
Disposing of products
This topic contains information about how to dispose of products.
This unit might contain batteries. Remove and discard these batteries, or recycle
them, according to local regulations.
Conventions used in this guide
The following typefaces are used to show emphasis:
© Copyright IBM Corp. 2004, 2005 xiii
Page 16

boldface
Text in boldface represents menu items and lowercase or mixed-case
command names.
italics Text in italics is used to emphasize a word. In command syntax, it is used
for variables for which you supply actual values.
monospace
Text in monospace identifies the data or commands that you type, samples of
command output, or examples of program code or messages from the
system.
Related information
The tables in this section list and describe the following publications:
v The publications that make up the IBM
®
TotalStorage
™
DS8000 series library
v Other IBM publications that relate to the DS8000 series
v Non-IBM publications that relate to the DS8000 series
See
“Ordering IBM publications” on page xx for information about how to order
publications in the IBM TotalStorage DS8000 series publication library. See “How to
send your comments” on page xxi for information about how to send comments
about the publications.
DS8000 series library
These customer publications make up the DS8000 series library.
Unless otherwise noted, these publications are available in Adobe portable
document format (PDF) on a compact disc (CD) that comes with the storage unit. If
you need additional copies of this CD, the order number is SK2T-8803. These
publications are also available as PDF files by clicking on the Documentation link
on the following Web site:
http://www-1.ibm.com/servers/storage/support/disk/ds8100/index.html
See “Ordering IBM publications” on page xx for information about ordering these
and other IBM publications.
Title Description
Order
Number
IBM
®
TotalStorage
®
DS:
Command-Line Interface
User’s Guide
This guide describes the commands that you can use from the
command-line interface (CLI) for managing your DS8000 configuration and
Copy Services relationships. The CLI application provides a set of
commands that you can use to write customized scripts for a host system.
The scripts initiate predefined tasks in a Copy Services server application.
You can use the CLI commands to indirectly control Remote Mirror and
Copy and FlashCopy
®
configuration tasks within a Copy Services server
group.
SC26-7625
(See Note.)
IBM TotalStorage
DS8000: Host Systems
Attachment Guide
This guide provides guidelines for attaching the DS8000 to your host
system and for migrating to fibre-channel attachment from a small
computer system interface.
SC26-7628
(See Note.)
IBM TotalStorage
DS8000: Introduction
and Planning Guide
This guide introduces the DS8000 product and lists the features you can
order. It also provides guidelines for planning the installation and
configuration of the storage unit.
GC35-0495
xiv DS8000 User’s Guide
Page 17

Title Description
Order
Number
IBM TotalStorage
Multipath Subsystem
Device Driver User’s
Guide
This publication describes how to use the IBM Subsystem Device Driver
(SDD) on open-systems hosts to enhance performance and availability on
the DS8000. SDD creates redundant paths for shared logical unit
numbers. SDD permits applications to run without interruption when path
errors occur. It balances the workload across paths, and it transparently
integrates with applications.
SC30-4096
IBM TotalStorage
DS8000: User’s Guide
This guide provides instructions for setting up and operating the DS8000
and for analyzing problems.
SC26-7623
(See Note.)
IBM TotalStorage DS
Application Programming
Interface Reference
This publication provides reference information for the IBM TotalStorage
DS application programming interface (API) and provides instructions for
installing the Common Information Model Agent, which implements the
API.
GC35-0493
IBM TotalStorage
DS8000 Messages
Reference
This publication provides explanations of error, information, and warning
messages that are issued from the DS8000 user interfaces.
GC26-7659
Note: No hardcopy book is produced for this publication. However, a PDF file is available from the following Web
site: http://www-1.ibm.com/servers/storage/support/disk/ds8100/index.html
Other IBM publications
Other IBM publications contain additional information that is related to the DS
product library.
The following list is divided into categories to help you find publications that are
related to specific topics. Some of the publications are listed under more than one
category. See “Ordering IBM publications” on page xx for information about ordering
these and other IBM publications.
Title Description
Order
Number
Data-copy services
z/OS DFSMS Advanced
Copy Services
This publication helps you understand and use IBM Advanced Copy
Services functions. It describes three dynamic copy functions and several
point-in-time copy functions. These functions provide backup and recovery
of data if a disaster occurs to your data center. The dynamic copy functions
are peer-to-peer remote copy, extended remote copy, and coupled
extended remote copy. Collectively, these functions are known as remote
copy. FlashCopy, SnapShot, and concurrent copy are the point-in-time copy
functions.
SC35-0428
IBM Enterprise Storage
Server
This publication, from the IBM International Technical Support Organization,
introduces the Enterprise Storage Server and provides an understanding of
its benefits. It also describes in detail the architecture, hardware, and
functions, including the advanced copy functions, of the Enterprise Storage
Server.
SG24-5465
Implementing Copy
Services 0n S/390
This publication, from the IBM International Technical Support Organization,
tells you how to install, customize, and configure Copy Services on an
Enterprise Storage Server that is attached to an S/390 or zSeries host
system. Copy Services functions include peer-to-peer remote copy,
extended remote copy, FlashCopy®, and concurrent copy. This publication
describes the functions, prerequisites, and corequisites and describes how
to implement each function into your environment.
SG24-5680
Safety and environmental notices xv
Page 18

Title Description
Order
Number
IBM TotalStorage ESS
Implementing Copy
Services in an Open
Environment
This publication, from the IBM International Technical Support Organization,
tells you how to install, customize, and configure Copy Services on UNIX,
Windows NT®, Windows 2000, Sun Solaris, HP-UX, Tru64, OpenVMS, and
iSeries host systems. The Copy Services functions that are described
include peer-to-peer remote copy and FlashCopy. This publication describes
the functions and shows you how to implement them into your environment.
It also shows you how to implement these functions in a high-availability
cluster multiprocessing environment.
SG24-5757
Fibre channel
Fibre Channel
Connection (FICON) I/O
Interface: Physical Layer
This publication provides information about the fibre-channel I/O interface.
This book is also available as a PDF file from the following Web site:
http://www.ibm.com/servers/resourcelink/
SA24-7172
Fibre Transport Services
(FTS): Physical and
Configuration Planning
Guide
This publication provides information about fibre-optic and ESCON-trunking
systems.
GA22-7234
IBM SAN Fibre Channel
Switch: 2109 Model S08
Installation and Service
Guide
This guide describes how to install and maintain the IBM SAN Fibre
Channel Switch 2109 Model S08.
SC26-7350
IBM SAN Fibre Channel
Switch: 2109 Model S08
User’s Guide
This guide describes the IBM SAN Fibre Channel Switch and the IBM
TotalStorage ESS Specialist. It provides information about the commands
and how to manage the switch with Telnet and the Simple Network
Management Protocol.
SC26-7349
IBM SAN Fibre Channel
Switch: 2109 Model S16
Installation and Service
Guide
This publication describes how to install and maintain the IBM SAN Fibre
Channel Switch 2109 Model S16. It is intended for trained service
representatives and service providers.
SC26-7352
IBM SAN Fibre Channel
Switch: 2109 Model S16
User’s Guide
This guide introduces the IBM SAN Fibre Channel Switch 2109 Model S16
and tells you how to manage and monitor the switch using zoning and how
to manage the switch remotely.
SC26-7351
Implementing Fibre
Channel Attachment on
the ESS
This publication, from the IBM International Technical Support Organization,
helps you install, tailor, and configure fibre-channel attachment of
open-systems hosts to the Enterprise Storage Server. It provides you with a
broad understanding of the procedures that are involved and describes the
prerequisites and requirements. It also shows you how to implement
fibre-channel attachment.
SG24-6113
Open-systems hosts
ESS Solutions for Open
Systems Storage:
Compaq AlphaServer,
HP, and Sun
This publication, from the IBM International Technical Support Organization,
helps you install, tailor, and configure the Enterprise Storage Server when
you attach Compaq AlphaServer (running Tru64 UNIX), HP, and Sun hosts.
This book does not cover Compaq AlphaServer that is running the
OpenVMS operating system. This book also focuses on the settings that
are required to give optimal performance and on the settings for device
driver levels. This book is for the experienced UNIX professional who has a
broad understanding of storage concepts.
SG24-6119
xvi DS8000 User’s Guide
Page 19

Title Description
Order
Number
IBM TotalStorage ESS
Implementing Copy
Services in an Open
Environment
This publication, from the IBM International Technical Support Organization,
tells you how to install, customize, and configure Copy Services on UNIX or
Windows 2000 host systems. The Copy Services functions that are
described include peer-to-peer remote copy and FlashCopy. This
publication describes the functions and shows you how to implement them
into your environment. It also shows you how to implement these functions
in a high-availability cluster multiprocessing environment.
SG24-5757
Implementing Fibre
Channel Attachment on
the ESS
This publication, from the IBM International Technical Support Organization,
helps you install, tailor, and configure fibre-channel attachment of
open-systems hosts to the Enterprise Storage Server. It gives you a broad
understanding of the procedures that are involved and describes the
prerequisites and requirements. It also shows you how to implement
fibre-channel attachment.
SG24-6113
S/390 and zSeries hosts
Device Support
Facilities: User’s Guide
and Reference
This publication describes the IBM Device Support Facilities (ICKDSF)
product that are used with IBM direct access storage device (DASD)
subsystems. ICKDSF is a program that you can use to perform functions
that are needed for the installation, the use, and the maintenance of IBM
DASD. You can also use it to perform service functions, error detection, and
media maintenance.
GC35-0033
z/OS Advanced Copy
Services
This publication helps you understand and use IBM Advanced Copy
Services functions. It describes three dynamic copy functions and several
point-in-time copy functions. These functions provide backup and recovery
of data if a disaster occurs to your data center. The dynamic copy functions
are peer-to-peer remote copy, extended remote copy, and coupled
extended remote copy. Collectively, these functions are known as remote
copy. FlashCopy, SnapShot, and concurrent copy are the point-in-time copy
functions.
SC35-0428
DFSMS/MVS V1:
Remote Copy Guide
and Reference
This publication provides guidelines for using remote copy functions with
S/390 and zSeries hosts.
SC35-0169
Fibre Transport Services
(FTS): Physical and
Configuration Planning
Guide
This publication provides information about fibre-optic and ESCON-trunking
systems.
GA22-7234
Implementing ESS Copy
Services on S/390
This publication, from the IBM International Technical Support Organization,
tells you how to install, customize, and configure Copy Services on an
Enterprise Storage Server that is attached to an S/390 or zSeries host
system. Copy Services functions include peer-to-peer remote copy,
extended remote copy, FlashCopy, and concurrent copy. This publication
describes the functions, prerequisites, and corequisites and describes how
to implement each function into your environment.
SG24-5680
ES/9000, ES/3090:
IOCP User Guide
Volume A04
This publication describes the Input/Output Configuration Program that
supports the Enterprise Systems Connection (ESCON) architecture. It
describes how to define, install, and configure the channels or channel
paths, control units, and I/O devices on the ES/9000 processors and the
IBM ES/3090 Processor Complex.
GC38-0097
IOCP User’s Guide, IBM
e(logo)server zSeries
800 and 900
This publication describes the Input/Output Configuration Program that
supports the zSeries 800 and 900 servers. This publication is available in
PDF format by accessing ResourceLink at the following Web site:
www.ibm.com/servers/resourcelink/
SB10-7029
Safety and environmental notices xvii
Page 20

Title Description
Order
Number
IOCP User’s Guide, IBM
e(logo)server zSeries
This publication describes the Input/Output Configuration Program that
supports the zSeries server. This publication is available in PDF format by
accessing ResourceLink at the following Web site:
www.ibm.com/servers/resourcelink/
SB10-7037
S/390: Input/Output
Configuration Program
User’s Guide and
ESCON
Channel-to-Channel
Reference
This publication describes the Input/Output Configuration Program that
supports ESCON architecture and the ESCON multiple image facility.
GC38-0401
IBM z/OS Hardware
Configuration Definition
User’s Guide
This guide provides conceptual and procedural information to help you use
the z/OS Hardware Configuration Definition (HCD) application. It also
explains:
v How to migrate existing IOCP/MVSCP definitions
v How to use HCD to dynamically activate a new configuration
v How to resolve problems in conjunction with MVS/ESA HCD
SC33-7988
OS/390: Hardware
Configuration Definition
User’s Guide
This guide provides detailed information about the input/output definition file
and about how to configure parallel access volumes. This guide discusses
how to use Hardware Configuration Definition for both OS/390
®
and z/OS
V1R1.
SC28-1848
OS/390 V2R10.0: MVS
System Messages
Volume 1 (ABA - ASA)
This publication lists OS/390 MVS
™
system messages ABA to ASA. GC28-1784
Using IBM 3390 Direct
Access Storage in a VM
Environment
This publication provides device-specific information for the various models
of the 3390 and describes methods you can use to manage storage
efficiently using the VM operating system. It provides guidance on
managing system performance, availability, and space through effective use
of the direct access storage subsystem.
GG26-4575
Using IBM 3390 Direct
Access Storage in a
VSE Environment
This publication helps you use the 3390 in a VSE environment. It includes
planning information for adding new 3390 units and instructions for
installing devices, migrating data, and performing ongoing storage
management activities.
GC26-4576
Using IBM 3390 Direct
Access Storage in an
MVS Environment
This publication helps you use the 3390 in an MVS environment. It includes
device-specific information for the various models of the 3390 and
illustrates techniques for more efficient storage management. It also offers
guidance on managing system performance, availability, and space
utilization through effective use of the direct access storage subsystem.
GC26-4574
z/Architecture Principles
of Operation
This publication provides a detailed definition of the z/Architecture™. It is
written as a reference for use primarily by assembler language
programmers and describes each function at the level of detail needed to
prepare an assembler language program that relies on a particular function.
However, anyone concerned with the functional details of z/Architecture will
find this publication useful.
SA22-7832
SAN
xviii DS8000 User’s Guide
Page 21

Title Description
Order
Number
IBM OS/390 Hardware
Configuration Definition
User’s Guide
This guide explains how to use the Hardware Configuration Data
application to perform the following tasks:
v Define new hardware configurations
v View and modify existing hardware configurations
v Activate configurations
v Query supported hardware
v Maintain input/output definition files (IODFs)
v Compare two IODFs or compare an IODF with an actual configuration
v Print reports of configurations
v Create graphical reports of a configuration
v Migrate existing configuration data
SC28-1848
IBM SAN Fibre Channel
Switch: 2109 Model S08
Installation and Service
Guide
This guide describes how to install and maintain the IBM SAN Fibre
Channel Switch 2109 Model S08.
SC26-7350
IBM SAN Fibre Channel
Switch: 2109 Model S08
User’s Guide
This guide describes the IBM SAN Fibre Channel Switch and the IBM
TotalStorage ESS Specialist. It provides information about the commands
and how to manage the switch with Telnet and the Simple Network
Management Protocol (SNMP).
SC26-7349
IBM SAN Fibre Channel
Switch: 2109 Model S16
Installation and Service
Guide
This publication describes how to install and maintain the IBM SAN Fibre
Channel Switch 2109 Model S16. It is intended for trained service
representatives and service providers.
SC26-7352
IBM SAN Fibre Channel
Switch: 2109 Model S16
User’s Guide
This guide introduces the IBM SAN Fibre Channel Switch 2109 Model S16
and tells you how to manage and monitor the switch using zoning and how
to manage the switch remotely.
SC26-7351
Implementing Fibre
Channel Attachment on
the ESS
This publication, from the IBM International Technical Support Organization,
helps you install, tailor, and configure fibre-channel attachment of
open-systems hosts to the Enterprise Storage Server. It provides you with a
broad understanding of the procedures that are involved and describes the
prerequisites and requirements. It also shows you how to implement
fibre-channel attachment.
SG24-6113
Seascape family
IBM Enterprise Storage
Server
This publication, from the IBM International Technical Support Organization,
introduces the Enterprise Storage Server and provides an understanding of
its benefits. It also describes in detail the architecture, hardware, and
functions, including the advanced copy functions, of the Enterprise Storage
Server.
SG24-5465
IBM Enterprise Storage
Server Performance
Monitoring and Tuning
Guide
This guide, from the IBM International Technical Support Organization,
provides guidance on the best way to configure, monitor, and manage your
Enterprise Storage Server to ensure optimum performance.
SG24-5656
IBM Versatile Storage
Server: Introduction and
Planning Guide
This publication introduces the IBM Versatile Storage Server
™
and lists the
features you can order. It also provides planning information for both 2105
Models B09 and 100.
GC26-7223
Implementing the IBM
Enterprise Storage
Server in Your
Environment
This publication, from the IBM International Technical Support Organization,
can help you install, tailor, and configure the Enterprise Storage Server in
your environment.
SG24-5420
Storage management
Safety and environmental notices xix
Page 22

Title Description
Order
Number
Device Support
Facilities: User’s Guide
and Reference
This publication describes the IBM Device Support Facilities (ICKDSF)
product used with IBM direct access storage device (DASD) subsystems.
ICKDSF is a program that you can use to perform functions that are
needed for the installation, the use, and the maintenance of IBM DASD.
You can also use it to perform service functions, error detection, and media
maintenance.
GC35-0033
IBM TotalStorage
Solutions Handbook
This handbook, from the IBM International Technical Support Organization,
helps you understand what makes up enterprise storage management. The
concepts include the key technologies that you must know and the IBM
subsystems, software, and solutions that are available today. It also
provides guidelines for implementing various enterprise storage
administration tasks so that you can establish your own enterprise storage
management environment.
SG24-5250
Ordering IBM publications
This section tells you how to order copies of IBM publications and how to set up a
profile to receive notifications about new or changed publications.
IBM publications center
The publications center is a worldwide central repository for IBM product
publications and marketing material.
The IBM publications center offers customized search functions to help you find the
publications that you need. Some publications are available for you to view or
download free of charge. Yo u can also order publications. The publications center
displays prices in your local currency. You can access the IBM publications center
through the following Web site:
http://www.ibm.com/shop/publications/order
Publications notification system
The IBM publications center Web site offers you a notification system for IBM
publications.
If you register, you can create your own profile of publications that interest you. The
publications notification system sends you a daily e-mail that contains information
about new or revised publications that are based on your profile.
If you want to subscribe, you can access the publications notification system from
the IBM publications center at the following Web site:
http://www.ibm.com/shop/publications/order
Web sites
The following Web sites provide information about the IBM TotalStorage DS8000
series and other IBM storage products.
Type of Storage Information Web Site
Concurrent Copy for S/390 and
zSeries host systems
http://www.storage.ibm.com/software/sms/sdm/
xx DS8000 User’s Guide
Page 23

Type of Storage Information Web Site
Copy Services command-line
interface (CLI)
http://www-1.ibm.com/servers/storage/support/software/cscli.html
DS8000 series publications http://www-1.ibm.com/servers/storage/support/disk/ds8100/index.html
Click Documentation.
FlashCopy for S/390 and zSeries
host systems
http://www.storage.ibm.com/software/sms/sdm/
Host system models, operating
systems, and adapters that the
storage unit supports
http://www.ibm.com/servers/storage/disk/ds8000/interop.html
Click Interoperability matrix.
IBM Disk Storage Feature Activation
(DSFA)
http://www.ibm.com/storage/dsfa
IBM storage products http://www.storage.ibm.com/
IBM TotalStorage DS8000 series http://www-1.ibm.com/servers/storage/disk/ds8000
IBM version of the Java (JRE) that is
often required for IBM products
http://www-106.ibm.com/developerworks/java/jdk/
Multiple Device Manager (MDM) http://www.ibm.com/servers/storage/support/
Click Storage Virtualization.
Remote Mirror and Copy (formerly
PPRC) for S/390 and zSeries host
systems
http://www.storage.ibm.com/software/sms/sdm/
SAN fibre channel switches http://www.ibm.com/storage/fcswitch/
Storage Area Network Gateway and
Router
http://www-1.ibm.com/servers/storage/support/san/index.html
Subsystem Device Driver (SDD) http://www-1.ibm.com/servers/storage/support/software/sdd.html
z/OS Global Mirror (formerly XRC)
for S/390 and zSeries host systems
http://www.storage.ibm.com/software/sms/sdm/
How to send your comments
Your feedback is important to help us provide the highest quality information. If you
have any comments about this information or any other DS8000 series
documentation, you can submit them in the following ways:
v e-mail
Submit your comments electronically to the following e-mail address:
starpubs@us.ibm.com
Be sure to include the name and order number of the book and, if applicable, the
specific location of the text you are commenting on, such as a page number or
table number.
v Mail
Fill out the Readers’ Comments form (RCF) at the back of this book. Return it by
mail or give it to an IBM representative. If the RCF has been removed, you can
address your comments to:
International Business Machines Corporation
RCF Processing Department
Safety and environmental notices xxi
Page 24

Department 61C
9032 South Rita Road
TUCSON AZ 85775-4401
xxii DS8000 User’s Guide
Page 25

Summary of Changes for SC26-7623-03 IBM TotalStorage
DS8000 User’s Guide
This document contains terminology, maintenance, and editorial changes. Technical
changes or additions to the text and illustrations are indicated by a vertical line to
the left of the change. This summary of changes describes new functions that have
been added to this release.
New Information
This edition includes the following new information:
v Chapter 2, the section Upgrading the DS Storage Manager on Windows, in silent
mode was added to show the steps for upgrading the DS Storage Manager.
v Chapter 3, the section Upgrading the DS Storage Manager on Linux, in silent
mode was added to show the steps for upgrading the DS Storage Manager.
v Chapter 8, the section FlashCopy information was added to explain how to set
up a Remote FlashCopy operation, which allows a source volume of a remote
mirror and copy volume pair on a source (local) storage unit to be sent across
paths (acting as a conduit) to a target storage unit to enable a FlashCopy pair to
be established at the target site. This eliminates the need for a network
connection to the target site solely for the management of FlashCopy.
Changed
Information
The following information was updated or changed:
v Chapter 2, the section Installing the DS Storage Manger on the Windows
operating system using the graphical mode was updated to include information
about new version checking and progress windows.
v Chapter 3, the section Installing the DS Storage Manger on the Linux operating
system using the graphical mode was updated to include information about new
version checking and progress windows.
© Copyright IBM Corp. 2004, 2005 xxiii
Page 26

xxiv DS8000 User’s Guide
Page 27

Chapter 1. Introduction to IBM TotalStorage DS8000 series
IBM TotalStorage DS8000 is a high-performance, high-capacity series of disk
storage that is designed to support continuous operations. DS8000 series models
(machine type 2107) use the IBM POWER5
™
server technology that is integrated
with the IBM Virtualization Engine
™
technology. DS8000 series models consist of a
storage unit and one or two management consoles, two being the recommended
configuration. The graphical user interface (GUI) or the command-line interface
(CLI) allows you to logically partition storage and use the built-in Copy Services
functions. For high-availability, hardware components are redundant.
You can read the following information to familiarize yourself with the DS8000
series:
v DS8000 series models, including a model comparison chart
v DS8000 series performance features
v DS8000 series interfaces
v DS8000 series hardware specifics
v Supported systems for open systems, S/390®, and zSeries
®
hosts
v Data management elements
v Copy Services
v Data migration
DS8000 models
The DS8000 series offers various choices of base and expansion models, so you
can configure storage units that meet your performance and configuration needs.
DS8100
The DS8100 (Model 921) features a dual two-way processor complex and
support for one expansion frame.
DS8300
The DS8300 (Models 922 and 9A2) features a dual four-way processor
complex and support for one or two expansion frames. The Model 9A2
supports two IBM TotalStorage System LPARs (Logical Partitions) in one
storage unit.
The DS8000 expansion frames (Models 92E and 9AE) expand the capabilities of
the base models. You can attach the Model 92E to either the Model 921 or the
Model 922 to expand their capabilities. You can attach the Model 9AE to expand
the Model 9A2.
Figure 1 on page 2 provides a high-level view at the components for the DS8100
and DS8300 base models (Models 921, 922, and 9A2).
© Copyright IBM Corp. 2004, 2005 1
Page 28

The following notes provide additional information about the labeled components on
Figure 1:
1. The rack power area of the base models provides redundant power supplies
(two primary power supplies), power control cards, and backup battery
assemblies to help protect data in the event of a loss of external power. Model
921 contains two batteries. Model 922 and Model 9A2 contain three batteries to
support the 4-way processors.
2. All base models allow up to eight disk enclosures, which contain the disk drives.
In a maximum configuration, each base model can hold up to 128 disk drives.
3. All base models contain one Management Console (MC), a keyboard, and
display. The Management Console is the focal point for configuration, copy
services management, and maintenance activities.
4. All base models contain two processor enclosures. The processor enclosures
contain the computer electronic complex (CEC). The Model 921 processor
enclosures have 2-way processors. Processor enclosures on the Model 922 and
Model 9A2 have 4-way processors.
5. All base models contain I/O enclosures and adapters. The I/O enclosures hold
the adapters and provide connectivity between the adapters and the processors.
Both device adapters and host adapters are installed in the I/O enclosure.
Figure
2 on page 3 provides a high-level view at the components for the expansion
models (Models 92E and 9AE).
1vxc4x
Disk Enclosures and
Disk Drive Sets
Management Console,
Keyboard and Display
Processor
Enclosures
I/O Enclosures
and Adaptors
Rack Power
1
2
3
4
5
Figure 1. A base model (with front cover off) and its main components
2 DS8000 User’s Guide
Page 29

The following notes provide additional information about the labeled components on
Figure 2:
1. The rack power area of each expansion model provides redundant power
supplies (two primary power supplies) and power control cards. If the expansion
unit contains I/O enclosures or the extended power line disturbance (PLD)
feature, three backup battery assemblies are also installed to help protect data
in the event of a loss of external power.
2. All expansion models allow up to 16 disk enclosures, which contain the disk
drives. In a maximum configuration, each expansion model can hold 256 disk
drives.
3. Expansion models can contain I/O enclosures and adapters if they are the first
expansion units that are attached to either a Model 922 or a Model 9A2. The
second expansion model in a 922 or 9A2 configuration cannot have I/O
enclosures and adapters, nor can any expansion unit that is attached to a
Model 921. If the expansion unit contains I/O enclosures, the enclosures provide
connectivity between the adapters and the processors. The adapters contained
in the I/O enclosures can be either device or host adapters.
1vxc86
Disk Enclosures and
Disk Drive Sets
I/O Enclosures
and Adaptors
Rack Power
1
2
3
Figure 2. An expansion model (with front cover off) and its main components
Chapter 1. Introduction to IBM TotalStorage DS8000 series 3
Page 30
DS8100 (Model 921)
The IBM TotalStorage DS8100, which is Model 921, offers many features.
These features include:
v Dual two-way processor complex
v Up to 128 disk drives, for a maximum capacity of 38.4 TB
v Up to 128 GB of processor memory (cache)
v Up to 16 fibre-channel/FICON or ESCON
®
host adapters
The DS8100 model can support one expansion frame. With one expansion frame,
you can expand the capacity of the Model 921 as follows:
v Up to 384 disk drives, for a maximum capacity of 115.2 TB
Note: IBM service representatives can upgrade a Model 921 in the field when you
order a model conversion to a Model 922 or Model 9A2.
Figure 3 shows the maximum configuration of a Model 921, which is the 921 base
model plus one 92E expansion model.
Fans/Plenum
Fan
Sense
RPC
Fan
Sense
PPS
PPS
Disk Drive
Set
Disk Drive
Set
Disk Drive
Set
Disk Drive
Set
Processor
2-way
Processor
2-way
I/O
Enclosures
Adapters
I/O
Enclosures
Adapters
I/O
Enclosures
Adapters
I/O
Enclosures
Adapters
Battery
Battery
Fans/Plenum
PPS
PPS
Disk Drive
Set
Disk Drive
Set
Disk Drive
Set
Disk Drive
Set
Disk Drive
Set
Disk Drive
Set
Disk Drive
Set
Disk Drive
Set
1w2rzq
Base Model 921
128 Drives
Expansion Model 92E
256 Drives
Management Console
Keyboard Display
Ethernet Switches
Figure 3. Maximum configuration for Model 921
4 DS8000 User’s Guide
Page 31

DS8300 (Models 922 and 9A2)
IBM TotalStorage DS8300 models (Model 922 and Model 9A2) offer higher
performance and capacity than the DS8100. The Model 9A2 also enables you to
create two storage system LPARs (or images) within the same storage unit.
Both DS8300 models offer the following features:
v Dual four-way processor complex
v Up to 128 disk drives, for a maximum capacity of 38.4 TB
v Up to 256 GB of processor memory (cache)
v Up to 16 fibre-channel/FICON or ESCON host adapters
The DS8300 models can support either one or two expansion frames. With
expansion frames, you can expand the Model 922 and 9A2 as follows:
v With one expansion frame, you can support the following expanded capacity and
number of adapters:
– Up to 384 disk drives, for a maximum capacity of 115.2 TB
– Up to 32 fibre-channel/FICON or ESCON host adapters
v With two expansion frames, you can support the following expanded capacity:
– Up to 640 disk drives, for a maximum capacity of 192 TB
Figure
4 shows the maximum configuration of a Model 922 and 9A2. Both of these
models can attach up to two expansion models. Model 922 uses the 92E expansion
model. Model 9A2 uses the 9AE expansion model.
Model comparison
DS8000 models vary on the processor types that they use, their disk capacity, and
other supported features.
Fans/Plenum
Fan
Sense
RPC
Fan
Sense
Fan
Sense
PPS
PPS
Battery
Disk Drive
Set
Disk Drive
Set
Disk Drive
Set
Disk Drive
Set
Processor
4-way
Processor
4-way
I/O
Enclosures
Adapters
I/O
Enclosures
Adapters
I/O
Enclosures
Adapters
I/O
Enclosures
Adapters
Battery
Battery
Fans/Plenum
PPS
PPS
Battery
Disk Drive
Set
Disk Drive
Set
Disk Drive
Set
Disk Drive
Set
Disk Drive
Set
Disk Drive
Set
Disk Drive
Set
Disk Drive
Set
I/O
Enclosures
Adapters
I/O
Enclosures
Adapters
I/O
Enclosures
Adapters
I/O
Enclosures
Adapters
Battery
Battery
Fans/Plenum
PPS
PPS
Disk Drive
Set
Disk Drive
Set
Disk Drive
Set
Disk Drive
Set
Disk Drive
Set
Disk Drive
Set
Disk Drive
Set
Disk Drive
Set
1w2rxh
Base Model 922 or 9A2
128 Drives
Expansion Model 92E or 9AE
256 Drives
Expansion Model 92E or 9AE
256 Drives
Management Console
Keyboard Display
Ethernet Switches
Figure 4. Maximum configuration for Models 922 and 9A2
Chapter 1. Introduction to IBM TotalStorage DS8000 series 5
Page 32

Table 1 compares the various supported features that are available on different
DS8000 model configurations.
Table 1. DS8000 model comparison chart
Base
model
Images
(logical
partitions)
Expansion
models
Processor
type
Disk
drives
Processor
memory
Host
adapters
Model 921
1 image
None 2-way
Up to 128
disks
(maximum
capacity of
38.4 TB)
Up to 128
GB
Up to 16
host
adapters
With 1
expansion
model
(92E)
2-way
Up to 384
disks
(maximum
capacity of
115.2 TB)
Up to 128
GB
Up to 16
host
adapters
Model 922
1 image
None 4-way
Up to 128
disks
(maximum
capacity of
38.4 TB)
Up to 256
GB
Up to 16
host
adapters
With 1
expansion
model
(92E)
4-way
Up to 384
disks
(maximum
capacity of
115.2 TB)
Up to 256
GB
Up to 32
host
adapters
With 2
expansion
models
(92E)
4-way
Up to 640
disks
(maximum
capacity of
192 TB)
Up to 256
GB
Up to 32
host
adapters
Model 9A2
2 images
None 4-way
Up to 128
disks
(maximum
capacity of
38.4 TB)
Up to 256
GB
Up to 16
host
adapters
With 1
expansion
model
(9AE)
4-way
Up to 384
disks
(maximum
capacity of
115.2 TB)
Up to 256
GB
Up to 32
host
adapters
With 2
expansion
models
(9AE)
4-way
Up to 640
disks
(maximum
capacity of
192 TB)
Up to 256
GB
Up to 32
host
adapters
Note: IBM service representatives can upgrade a Model 921 in the field when you
order a model conversion to a Model 922 or a Model 9A2.
DS8000 physical footprint
The physical footprint dimensions, caster locations, and cable openings for a
DS8000 unit help you plan your installation site.
6 DS8000 User’s Guide
Page 33

Figure 5 shows the overall physical footprint of a DS8000 unit.
The following dimensions are labeled on Figure 5:
1. Front cover width
2. Front service clearance
3. Back cover widths
4. Back service clearance
5. Clearance to allow front cover to open
6. Distance between casters
7. Depth of frame without covers
8. Depth of frame with covers
9. Minimum dimension between casters and outside edges of frames
84.7
(33.3)
64.5
(25.4)
5.1
(2.0)
58.9
(23.2)
76.2
(30.0)
45.7
(18.0)
34.8
(13.7)
16
(6.3)
90.0
(35.4)
Cable
Opening
85.3
(33.6)
106.7
(42.0)
118.3
(46.6)
121.9
(48.0)
1wnto5
8.55
(3.4)
9.37
(3.7)
7
8
9
6
5
5
1
2
3
3
4
(2x)
Figure 5. DS8000 physical footprint. Dimensions are in centimeters (inches).
Chapter 1. Introduction to IBM TotalStorage DS8000 series 7
Page 34

DS8000 performance features
The DS8000 series is designed to provide you with high-performance, connectivity,
and reliability allowing your workload to be easily consolidated into a single storage
subsystem.
The following list provides an overview of some of the features that are associated
with the DS8000 series:
POWER5 processor technology
The DS8000 features IBM POWER5 server technology. Depending on
workload, the maximum host I/O operations per second of the DS8100
Model 921 is up to three times the maximum operations per second of the
ESS Model 800. The maximum host I/O operations per second of the
DS8300 Model 922 or 9A2 is up to six times the maximum of the ESS
model 800.
Industry standard fibre channel disk drives
The DS8000 series offers a selection of fibre channel disk drives, including
300 GB drives, allowing a DS8100 to scale up to 115.2 TB of capacity and
a DS8300 to scale up to 192 TB of capacity.
Four-port fibre channel/FICON adapters
These new adapters not only enhance connectivity, but increase
configuration flexibility because the individual ports can be configured to
support fibre channel or FICON.
HOST attachments
The DS8100 offers up to 16 host adapters (64 FCP/FICON ports) and the
DS8300 offers up to 32 host adapters (128 FCP/FICON ports), further
increasing your ability to share your disk storage.
IBM Standby Capacity on Demand
The IBM Standby Capacity on Demand (Standby CoD) offering allows the
installation of inactive disk drives that can be easily activated as business
needs require. With this offering, up to four Standby CoD disk drive sets (64
disk drives) can be factory or field installed into your system. To activate,
you logically configure the disk drives for use—a non-disruptive activity that
does not require intervention from IBM. Upon activation of any portion of
the Standby CoD disk drive set, you must place an order with IBM to initiate
billing for the activated set. At that time, you can also order replacement
Standby CoD disk drive sets.
Online Information Center
The online Information Center is an information database that provides you
the opportunity to quickly familiarize yourself with the major aspects of the
DS8000 and to easily recognize the topics for which you might require more
information. It provides information regarding user assistance for tasks,
concepts, reference, user scenarios, tutorials, and other types of user
information. Because the information is all in one place rather than across
multiple publications, you can access the information that you need more
efficiently and effectively.
Interfaces of the DS8000
The DS8000 provides management interfaces that contain management tools and
utilities to help you increase productivity.
8 DS8000 User’s Guide
Page 35

IBM TotalStorage DS Storage Manager
The IBM TotalStorage DS Storage Manager is a program interface that is used to
perform logical configurations and Copy Services management functions.
The DS Storage Manager program is installed as a GUI (graphical mode) or as an
unattended (silent mode) installation for the supported operating systems. It can be
accessed from any location that has network access using a Web browser. It offers
you the following choices:
Simulated configuration
You install this component on your PC or the Master Console which
provides the ability to create or modify logical configurations when your
storage unit is disconnected from the network. After creating the
configuration, you can save it and then apply it to a network attached
storage unit at a later time.
Real-time configuration
This component is preinstalled on your HMC. It provides you the ability to
create logical configurations and use Copy Services features when your
storage unit is attached to the network. This component provides you with
real-time (online) configuration support.
DS command-line interface
The IBM TotalStorage DS Command-Line Interface (CLI) enables open systems
hosts to invoke and manage FlashCopy and Metro and Global Mirror functions
through batch processes and scripts.
The command-line interface provides a full-function command set that allows you to
check your storage unit configuration and perform specific application functions
when necessary.
The following list highlights a few of the specific types of functions that you can
perform with the DS command-line interface:
v Check and verify your storage unit configuration
v Check the current Copy Services configuration that is used by the storage unit
v Create new logical storage and Copy Services configuration settings
v Modify or delete logical storage and Copy Services configuration settings
Note:
Yo u cannot install the DS CLI on a Windows 64-bit operating system.
DS Open application programming interface
The DS Open application programming interface (API) is a nonproprietary storage
management client application that supports routine LUN management activities,
such as LUN creation, mapping and masking, and the creation or deletion of RAID5
and RAID10 volume spaces. The DS Open API also enables Copy Services
functions such as FlashCopy and Remote Mirror and Copy (formally known as
peer-to-peer remote copy).
The IBM TotalStorage DS Open API helps integrate DS configuration management
support into storage resource management (SRM) applications, which allow
customers to benefit from existing SRM applications and infrastructures. The DS
Open API also enables the automation of configuration management through
customer-written applications. Either way, the DS Open API presents another option
Chapter 1. Introduction to IBM TotalStorage DS8000 series 9
Page 36

for managing storage units by complementing the use of the IBM TotalStorage DS
Storage Manager web-based interface and the DS command-line interface.
You must implement the DS Open API through the IBM TotalStorage Common
Information Model (CIM) agent, a middleware application that provides a
CIM-compliant interface. The DS Open API uses the CIM technology to manage
proprietary devices as open system devices through storage management
applications. The DS Open API allows these storage management applications to
communicate with a storage unit.
DS8000 hardware specifics
The DS8000 models offer a high degree of availability and performance through the
use of redundant components that can be replaced while the system is operating.
You can use the DS8000 models with a mix of different operating systems and
clustered and nonclustered variants of the same operating systems.
Contributing to the high degree of availability and reliability are the structure of the
DS8000 storage unit, the host systems it supports, and its processor memory and
processor speeds.
Storage unit structure
The design of the storage unit, which contains the base model and the expansion
models, contributes to the high degree of availability that is associated with the
DS8000. The primary components that support high availability within the storage
unit are the storage server, the processor complex, and the rack power control card.
The storage unit also has redundant fibre switches, with fibre fabric connections to
both processor complexes. The entire power system at all levels is fully redundant.
There are redundant private LAN networks between each storage unit and the
management consoles (even if there is only one management console).
Storage unit
A storage unit consists of a storage server and two or more storage (disk)
enclosures that are packaged in one or more racks with associated power
supplies, batteries, and cooling.
Storage server
A storage server consists of two processor complexes, two or more I/O
enclosures, and a pair of rack power control cards.
Processor complex
A processor complex controls and manages the storage unit to perform the
function of the storage server. The two processor complexes form a
redundant pair such that if either processor complex fails, the remaining
processor complex performs all storage server functions.
Rack power control card
A redundant pair of rack power control (RPC) cards coordinate the power
management within the storage unit. The RPC cards are attached to the
service processors in each processor complex, the primary power supplies
in each rack, and indirectly to the fan/sense cards and storage enclosures
in each rack.
Multi-path subsystem device driver
The IBM TotalStorage Multi-path subsystem device driver (SDD) provides
load balancing and enhanced data availability capability in configurations
with more than one I/O path between the host server and the DS8000
10 DS8000 User’s Guide
Page 37

series system. Load balancing can help reduce or eliminate I/O bottlenecks
that occur when many I/O operations are directed to common devices that
are using the same I/O path. The SDD also helps eliminate a potential
single point of failure by automatically rerouting I/O operations when a path
failure occurs, thereby supporting enhanced data availability capability.
IBM TotalStorage Management Console
The IBM TotalStorage Management Console is the focal point for configuration,
copy services management, and maintenance activities.
The Management Console is a dedicated workstation that is physically located
(installed) inside your DS8100 and DS8300 and can automatically monitor the state
of your system, notifying you and IBM when service is required. The Management
Console can also be connected to your network to enable centralized management
of your system using the IBM TotalStorage DS Command-Line Interface or the
storage management software that uses the IBM TotalStorage DS Open API.
To provide continuous availability of customer access to the management console
functions, having a second management console is recommended. This second
management console can be provided in two ways:
v External (outside the 2107) - This console is generally installed in the
customer-provided rack. It uses the same hardware as the internal management
console.
v Internal (a second management console that resides within a second 2107) -
This console can be cabled together with the primary internal management
console of the first 2107.’
Host systems that the storage unit supports
The DS8000 storage unit provides a variety of host attachments so that you can
consolidate storage capacity and workloads for open-systems hosts, S/390 hosts,
and eServer
™
zSeries hosts.
The DS8100 Model 921 supports a maximum of 16 host adapters and 4 device
adapter pairs, and the DS8300 Models 922 and 9A2 supports a maximum of 32
host adapters and 8 device adapter pairs.
You can configure the storage unit for any of the following system adapter types
and protocols:
v Fibre-channel adapters, for support of fibre-channel protocol (FCP) and fibre
connection (FICON®) protocol
v Enterprise Systems Connection Architecture
®
(ESCON) adapters
For
fibre-channel attachments, you can establish zones. The zones must contain a
single port that is attached to a system adapter with the desired number of ports
that are attached to the storage unit. By establishing zones, you reduce the
possibility of interactions between system adapters in switched configurations. You
can establish the zones by using either of two zoning methods:
v Port number
v Worldwide port name (WWPN)
You
can configure switch ports that are attached to the storage unit in more than
one zone. This enables multiple system adapters to share access to the storage
Chapter 1. Introduction to IBM TotalStorage DS8000 series 11
Page 38

unit fibre-channel ports. Shared access to a storage unit fibre-channel port might
come from host platforms that support a combination of bus adapter types and the
operating systems.
Attaching a DS8000 series to an open-systems host with
fibre-channel adapters
You can attach a DS8000 series to an open-systems host with fibre-channel
adapters.
Fibre channel is a 1 Gbps or 2 Gbps, full-duplex, serial communications technology
to interconnect I/O devices and host systems that are separated by tens of
kilometers.
The IBM TotalStorage DS8000 series supports SAN connections at 1 Gbps to 4
Gbps with 2 Gbps host bus adapters. The DS8000 series negotiates automatically
and determines whether it is best to run at 1 Gbps link or 2 Gbps link. The IBM
TotalStorage DS8000 series detects and operates at the higher link speed.
Fibre channel transfers information between the sources and the users of the
information. This information can include commands, controls, files, graphics, video,
and sound. Fibre-channel connections are established between fibre-channel ports
that reside in I/O devices, host systems, and the network that interconnects them.
The network consists of elements like switches, bridges, and repeaters that are
used to interconnect the fibre-channel ports.
Fibre-channel (SCSI-FCP) attached open-systems hosts that the
storage unit supports
You can attach the DS8000 storage unit to fibre-channel (SCSI-FCP) attached
open-systems hosts.
Each storage unit fibre-channel adapter has four ports. Each port has a unique
worldwide port name (WWPN). Yo u can configure the port to operate with the
SCSI-FCP upper-layer protocol. Shortwave adapters and longwave adapters are
available on the storage unit.
Fibre-channel adapters for SCSI-FCP support provide the following configurations:
v A maximum of 64 host ports for DS8100 Model 921 and a maximum of 128 host
ports for DS8300 Models 922 and 9A2
v A maximum of 509 host logins per fibre-channel port
v A maximum of 2000 N-port logins per storage image
v Access to all 63.7KB LUNs per target (one target per host adapter), depending
on host type
v Either arbitrated loop, switched fabric, or point-to-point topologies
The
storage unit supports the following host systems for shortwave fibre-channel
attachment and longwave fibre-channel attachment:
v IBM eServer iSeries
™
servers that run an IBM OS/400
®
operating system
v IBM eServer i5 servers that run an IBM i5/OS
™
operating system
v IBM RS/6000®, pSeries®, eServer p5, RS/6000 SP™, and pSeries SP server that
run an IBM AIX
®
operating system
v IBM zSeries servers that run the Linux
™
operating system
v IBM zSeries servers that run the z/VM
®
operating system
v Apple Macintosh servers
12 DS8000 User’s Guide
Page 39

v Fujutsu PRIMEPOWER servers that run the Solaris operating system
v Hewlett-Packard servers that run an HP Tru64 UNIX
®
operating system
v Hewlett-Packard servers that run an HP OpenVMS operating system
v Hewlett-Packard servers that run an HP-UX operating system
v Intel-based servers that run a Microsoft
®
Windows
®
2000 operating system
v Intel-based servers that run a Microsoft Windows Server 2003 operating system
for both 32-bit and 64-bit configurations
v Intel-based servers that run a Novell NetWare operating system
v IBM servers that run the IBM SAN Volume Controller operating system
v IBM servers that run the IBM SAN File System operating system
v iSCSI Gateway servers that run a Microsoft Windows 2000, Microsoft Windows
2003, or UNIX operating system
v Linux servers that run a Red Hat Linux, Red Flag Linux, Asianux, and SUSE
Linux operating system
v SGI servers that run an IRIX operating system
v Sun servers that run a Solaris operating system
See
the Interoperability Matrix at
http://www.ibm.com/servers/storage/disk/ds8000/interop.html for details about types,
models, adapters, and the operating systems that the storage unit supports.
ESCON-attached S/390 and zSeries hosts that the storage unit
supports
You can attach the DS8000 storage unit to the ESCON-attached S/390 and zSeries
hosts.
With ESCON adapters, the storage unit provides the following configurations:
v A maximum of 32 host ports for DS8100 Model 921 and a maximum of 64 host
ports for DS8300 Models 922 and 9A2
v A maximum of 64 logical paths per port
v Access to 16 control-unit images (4096 CKD devices) over a single ESCON port
on the storage unit
v Zero to 64 ESCON channels; two per ESCON host adapter
v Tw o ESCON links with each link that supports up to 64 logical paths
A DS8100 storage unit supports up to 16 host adapters that provide a maximum
of 32 ESCON links per machine. A DS8300 storage unit supports up to 32 host
adapters that provide a maximum of 64 ESCON links per machine.
Note:
ESCON host channels limit the number of devices per channel to 1024. To
fully access 4096 devices on a storage unit, it is necessary to connect a
minimum of four ESCON host channels to the storage unit. Yo u can access
the devices through a switch to a single storage unit ESCON port. This
method exposes four control-unit images (1024 devices) to each host
channel.
The FICON bridge card in ESCON director 9032 Model 5 enables a FICON bridge
channel to connect to ESCON host adapters in the storage unit. The FICON bridge
architecture supports up to 16 384 devices per channel. This enables you to attach
other control units or other storage units to the same host channel up to the limit
that the host supports.
Chapter 1. Introduction to IBM TotalStorage DS8000 series 13
Page 40

The storage unit supports the following operating systems for S/390 and zSeries
hosts:
v Transaction Processing Facility (TPF)
v Virtual Storage Extended/Enterprise Storage Architecture (VSE/ESA™)
v z/OS
®
v z/VM
v Linux
For
details about models and the operating system versions and releases that the
storage unit supports for these host systems, see the Interoperability Matrix at
http://www.ibm.com/servers/storage/disk/ds8000/interop.html.
FICON-attached S/390 and zSeries hosts that the storage unit
supports
You can attach the DS8000 storage unit to FICON-attached S/390 and zSeries
hosts.
Each storage unit fibre-channel adapter has four ports. Each port has a unique
world wide port name (WWPN). You can configure the port to operate with the
FICON upper-layer protocol. When configured for FICON, the fibre-channel port
supports connections to a maximum of 128 FICON hosts. On FICON, the
fibre-channel adapter can operate with fabric or point-to-point topologies. With
fibre-channel adapters that are configured for FICON, the storage unit provides the
following configurations:
v Either fabric or point-to-point topologies
v A maximum of 64 host ports for DS8100 Model 921 and a maximum of 128 host
ports for DS8300 Models 922 and 9A2
v A maximum of 509 channel connections per fibre-channel port
v A maximum of 2048 logical paths on each fibre-channel port
v Access to all 32 control-unit images (8000 CKD devices) over each FICON port
Note: FICON host channels limit the number of devices per channel to 16 384. To
fully access 65 280 devices on a storage unit, it is necessary to connect a
minimum of four FICON host channels to the storage unit. Yo u can access
the devices through a switch to a single storage unit FICON port. This
method exposes 64 control-unit images (16 384 devices) to each host
channel.
The storage unit supports the following operating systems for S/390 and zSeries
hosts:
v Transaction Processing Facility (TPF)
v Virtual Storage Extended/Enterprise Storage Architecture (VSE/ESA)
v z/OS
v z/VM
v Linux
For
details about models, versions of operating systems, and releases that the
storage unit supports for these host systems, see the Interoperability Matrix at
http://www.ibm.com/servers/storage/disk/ds8000/interop.html.
14 DS8000 User’s Guide
Page 41

Processor memory
The DS8100 Model 921 offers up to 128 GB of processor memory and the DS8300
Models 922 and 9A2 offer up to 256 GB of processor memory. The Non-Volatile
Storage (NVS) scales to the selected processor memory size, which can also help
optimize performance.
Data management features
The DS8000 storage unit is designed with the following management features that
allow you to securely process and access your data according to your business
needs even if it is 24 hours a day and 7 days a week.
RAID
Redundant array of independent disks (RAID) is a method of configuring multiple
disk drives in a storage subsystem for high availability and high performance.
The collection of two or more disk drives presents the image of a single disk drive
to the system. In the event of a single device failure, data can be read or
regenerated from the other disk drives in the array. With RAID implementation, the
storage unit offers fault-tolerant data storage. The storage unit supports RAID
implementation on the storage unit device adapters. The storage unit supports
groups of disk drive modules (DDMs) in both RAID 5 and RAID 10.
RAID 5
RAID 5 is a method of spreading volume data plus data parity across multiple disk
drives. RAID 5 increases performance by supporting concurrent accesses to the
multiple DDMs within each logical volume.
RAID 10
RAID 10 implementation provides data mirroring from one DDM to another DDM.
RAID 10 stripes data across half of the disk drives in the RAID 10 configuration.
The other half of the array mirrors the first set of disk drives. In some cases, RAID
10 offers faster data reads and writes than RAID 5 because it does not need to
manage parity. However, with half of the DDMs in the group used for data and the
other half used to mirror that data, RAID 10 disk groups have less capacity than
RAID 5 disk groups.
Arrays across loops
The arrays across loops helps prevent data loss.
The storage unit provides arrays across loops on open-systems, S/390, and zSeries
hosts. For RAID 10, arrays across loops provides mirroring across two loops, which
prevents loss of the array during loop failure.
Storage System LPARs (logical partitions)
The DS8300 Model 9A2 exploits LPAR technology, allowing you to run two separate
storage server images.
Each Storage System LPAR has access to:
v 50 percent of the processors
v 50 percent of the processor memory
Chapter 1. Introduction to IBM TotalStorage DS8000 series 15
Page 42

v Up to 16 host adapters
v Up to 320 disk drives (up to 96 TB of capacity)
With these separate resources, each Storage System LPAR can run the same or
different versions of microcode, and can be used for completely separate
production, test, or other unique storage environments within this single physical
system. This may enable storage consolidations where separate storage
subsystems were previously required, helping to increase management efficiency
and cost effectiveness.
Copy Services
Copy Services is a collection of functions that provides disaster recovery, data
migration, and data duplication functions. Copy Services runs on the IBM
TotalStorage DS8000 storage unit and supports open systems and zSeries
environments.
Many design characteristics and advanced functions of the DS8000 contribute to
protection of your data. DS8000 has a number of advanced Copy Services
functions that are part of the IBM TotalStorage Resiliency family. These functions
are supported also on the previous generation of storage systems called the IBM
TotalStorage Enterprise Storage Server (ESS).
Copy Services include the following types of functions:
v FlashCopy, which is a point-in-time copy function
v Remote mirror and copy functions (previously known as Peer-to-Peer Remote
Copy or PPRC), which includes:
– IBM TotalStorage Metro Mirror (previously known as Synchronous PPRC)
– IBM TotalStorage Global Copy (previously known as PPRC Extended
Distance)
– IBM TotalStorage Global Mirror (previously known as Asynchronous PPRC)
v z/OS Global Mirror (previously known as Extended Remote Copy [XRC])
You
can manage Copy Services functions through a command-line interface called
the IBM TotalStorage DS CLI and a new Web-based interface called the IBM
TotalStorage DS Storage Manager. The DS Storage Manager allows you to set up
and manage the following types of data-copy functions from any point from which
network access is available:
FlashCopy
The FlashCopy feature enables you to create full volume copies of data.
When you set up a FlashCopy operation, a relationship is established
between source and target volumes, and a bitmap of the source volume is
created. Once this relationship and a bitmap are created, the target volume
can be accessed as though all the data had been physically copied. While
a relationship between the source and target volume exists, a background
process copies the tracks from the source to the target volume.
FlashCopy is an optional function. To use it, you must purchase the
point-in-time 2244 function authorization model, which is 2244 Model PTC.
Remote
Mirror and Copy
The remote mirror and copy feature is a flexible data mirroring technology
that allows replication between volumes on two or more disk storage
systems. Yo u can also use this feature for data backup and disaster
recovery.
16 DS8000 User’s Guide
Page 43

Remote mirror and copy is an optional function. To use it, you must
purchase the remote mirror and copy 2244 function authorization model,
which is 2244 Model RMC.
DS8000 storage units can participate in remote mirror and copy solutions
with the ESS Model 750, ESS Model 800, and DS6000 storage units.
The remote mirror and copy feature can operate in the following modes:
Metro Mirror
Provides real-time mirroring of logical volumes between two
DS8000s that can be located up to 300 km from each other. It is a
synchronous copy solution where write operations are completed on
both copies (local and remote site) before they are considered to be
completed.
Global Copy
Copies data nonsynchronously and over longer distances than is
possible with Metro Mirror. When operating in Global Copy mode,
the source volume sends a periodic, incremental copy of updated
tracks to the target volume instead of a constant stream of updates.
This causes less impact to application writes for source volumes
and less demand for bandwidth resources, while allowing a more
flexible use of the available bandwidth.
Global Mirror
Provides a long-distance remote copy feature across two sites
using asynchronous technology. Global Mirror operations provide
the following benefits:
v Support for virtually unlimited distance between the local and
remote sites, with the distance typically limited only by the
capabilities of the network and the channel extension technology.
This ″unlimited″ distance enables you to choose your remote site
location based on business needs and enables site separation to
add protection from localized disasters.
v A consistent and restartable copy of the data at the remote site,
created with minimal impact to applications at the local site.
v Data currency where, for many environments, the remote site
lags behind the local site on an average of 3 to 5 seconds,
minimizing the amount of data exposure in the event of an
unplanned outage. The actual lag in data currency that you
experience can depend upon a number of factors, including
specific workload characteristics and bandwidth between the
local and remote sites.
v Dynamic selection of the desired recovery point objective, based
upon business requirements and optimization of available
bandwidth.
v Session support whereby data consistency at the remote site is
internally managed across up to eight DS8000 machines that are
located across the local and remote sites.
v Efficient synchronization of the local and remote sites with
support for failover and failback modes, helping to reduce the
time that is required to switch back to the local site after a
planned or unplanned outage.
z/OS Global Mirror
The z/OS Global Mirror function mirrors data on the storage unit to a
Chapter 1. Introduction to IBM TotalStorage DS8000 series 17
Page 44

remote location for disaster recovery. It protects data consistency across all
volumes that you have defined for mirroring. The volumes can reside on
several different storage units. The z/OS Global Mirror function can mirror
the volumes over several thousand kilometers from the source site to the
target recovery site. DS8000 storage complexes support z/OS Global Mirror
only on zSeries hosts.
With z/OS Global Mirror, you can suspend or resume service during an
outage. Yo u do not have to end your current data-copy session. You can
suspend the session, then restart it. Only data that changed during the
outage needs to be resynchronized between the copies.
The z/OS Global Mirror function is an optional function. To use it, you must
purchase the remote mirror for z/OS 2244 function authorization model,
which is 2244 Model RMZ.
z/OS Metro/Global Mirror (3-site z/OS Global Mirror and Metro Mirror)
This mirroring capability uses z/OS Global Mirror to mirror primary site data
to a location that is a long distance away and also uses Metro Mirror to
mirror primary site data to a location within the metropolitan area. This
enables a z/OS 3-site high availability and disaster recovery solution for
even greater protection from unplanned outages.
The z/OS Metro/Global Mirror function is an optional function. To use it, you
must purchase both of the following functions:
v Remote mirror for z/OS (2244 Model RMZ)
v Remote mirror and copy function (2244 Model RMC) for both the primary
and secondary storage units
FlashCopy
The IBM TotalStorage FlashCopy feature provides a point-in-time copy capability for
logical volumes. FlashCopy creates a physical point-in-time copy of the data, with
minimal interruption to applications, and makes it possible to access immediately
both the source and target copies.
The primary objective of FlashCopy is to create a copy of a source volume on the
target volume. This copy is called a point-in-time copy. When you initiate a
FlashCopy operation, a FlashCopy relationship is created between the source
volume and target volume. A FlashCopy relationship is a ″mapping″ of a FlashCopy
source volume and a FlashCopy target volume. This mapping allows a point-in-time
copy of the source volume to be copied to the target volume. The FlashCopy
relationship exists between the volume pair from the time that you initiate a
FlashCopy operation until the DS8000 copies all data from the source volume to the
target volume or until you delete the FlashCopy relationship, if it is a persistent
FlashCopy.
The point-in-time copy that is created by FlashCopy is typically used when you
need a copy of the production data to be produced with minimal application
downtime. It can be used for online back up, testing of new applications, or for
creating a database for data-mining purposes. The copy looks exactly like the
original source volume and is an instantly available, binary copy.
FlashCopy supports the following copy options:
Data Set FlashCopy
Data Set FlashCopy allows a FlashCopy of a data set in a zSeries
environment.
18 DS8000 User’s Guide
Page 45

Multiple relationship FlashCopy
Multiple relationship FlashCopy allows a source to have FlashCopy
relationships with multiple targets simultaneously. This flexibility allows you
to establish up to 12 FlashCopy relationships on a given logical unit number
(LUN), volume, or data set, without needing to first wait for or cause
previous relationships to end.
Refresh target volume (also known as incremental FlashCopy)
Refresh target volume provides the ability to ″refresh″ a LUN or volume
involved in a FlashCopy relationship. When a subsequent FlashCopy
operation is initiated, only data that updates the target and the source to the
same point-in-time state is copied. The direction of the ″refresh″ can also
be reversed. The LUN or volume that was defined as the target can now
become the source for the LUN or the volume that was defined as the
source (now the target).
Persistent FlashCopy
Persistent FlashCopy allows the FlashCopy relationship to remain even
after the FlashCopy operation completes. You must explicitly delete the
relationship.
Establish FlashCopy on existing Remote Mirror and Copy source
The establish FlashCopy on an existing Remote Mirror and Copy source
volume option allows you to establish a FlashCopy relationship where the
target volume is also the source of an existing remote mirror and copy
source volume. This enables you to create full or incremental point-in-time
copies at a local site and then use remote mirroring commands to copy the
data to the remote site.
This feature is represented by the Establish target on existing Metro
Mirror source selection in the GUI.
Consistency group commands
Consistency group commands allow the DS8000 to freeze I/O activity to a
LUN or volume until you issue the FlashCopy consistency group command.
Consistency groups help create a consistent point-in-time copy across
multiple LUNs or volumes, and even across multiple DS8000 systems. This
function is available through the use of command-line interface commands.
Inband commands over remote mirror link
In a remote mirror environment, inband commands are issued to a source
volume of a remote mirror and copy volume pair on a local storage unit and
sent across paths (acting as a conduit) to a remote storage unit to enable a
FlashCopy pair to be established at the remote site. This eliminates the
need for a network connection to the remote site solely for the management
of FlashCopy. This function is available through the use of command-line
interface commands.
Disaster recovery using Copy Services
One of the main reasons for using Copy Services functions is in preparation for a
possible disaster by backing up, copying, and mirroring your data at the production
and recovery sites.
You can create a disaster recovery solution using any of the following functions.
These functions help improve a disaster recovery process by allowing a much
shorter recovery time with little or no data loss.
Chapter 1. Introduction to IBM TotalStorage DS8000 series 19
Page 46

Note: In a remote mirror and copy environment, when two storage units are set up
in two geographically distinct locations, we refer to the sites as Site A (the
production site) and Site B (the recovery site).
Failover and failback operations
A failover is the process of temporarily switching production to a backup
facility (normally your recovery site) following a planned outage, such as a
scheduled maintenance period or an unplanned outage, such as a disaster.
A failback operation is the process of returning production to its original
location. These operations use remote mirror and copy functions to help
reduce the time that is required to synchronize volumes after sites are
switched during planned or unplanned outages.
Global Mirror
The Global Mirror function provides a two-site extended distance remote
copy option for disaster recovery and backup solution for the zSeries and
open systems environments. This solution is based on existing Global Copy
and FlashCopy functions. With Global Mirror, the data that the host writes to
the storage unit at the production site is asynchronously shadowed to the
storage unit at the recovery site. Global Mirror operates over high-speed,
Fibre Channel communication links and is designed to maintain a consistent
and restartable copy of data at a recovery site that can be located at
virtually unlimited distance from the production site.
Comparison of licensed functions
A key decision that you must make in planning for a disaster is deciding which
licensed functions to use to best suit your environment.
Table 2 provides a brief summary of the characteristics of the Copy Services
features that are available for the storage unit.
Table 2. Comparison of licensed functions
Licensed function Description Advantages Considerations
Metro Mirror Synchronous data
copy at a distance
No data loss, rapid
recovery time for
distances up to 300
km.
Slight performance
impact.
Global Copy Continuous copy
without data
consistency
Nearly unlimited
distance, suitable for
data migration, only
limited by network
and channel
extenders
capabilities.
Copy is normally
fuzzy but can be
made consistent
through
synchronization.
Global Mirror Asynchronous copy Nearly unlimited
distance, scalable,
and low recovery
point objective
(RPO). The RPO is
the time needed to
recover from a
disaster; that is, the
total system
downtime.
RPO might grow
when link bandwidth
capability is
exceeded.
20 DS8000 User’s Guide
Page 47

Table 2. Comparison of licensed functions (continued)
Licensed function Description Advantages Considerations
z/OS Global Mirror Asynchronous copy
controlled by z/OS
host software
Nearly unlimited
distance, highly
scalable, and very
low RPO.
Additional host server
hardware and
software is required.
The RPO might grow
if bandwidth
capability is
exceeded or host
performance might be
impacted.
Parallel Access Volumes
The use of parallel access volumes (PAVs) enables a single zSeries server to
simultaneously process multiple I/O operations to the same logical volume, which
can help to significantly reduce device queue delays. This is achieved by defining
multiple addresses per volume.
With dynamic parallel access volumes, the assignment of addresses to volumes is
automatically managed to help the workload meet its performance objectives and
minimize overall queuing.
You must configure both your storage unit and operating system to use PAVs. You
can use the logical configuration definition to define PAV-bases, PAV-aliases, and
their relationship in the storage unit hardware. This unit address relationship creates
a single logical volume, allowing concurrent I/O operations.
The storage unit supports concurrent or parallel data transfer operations to or from
the same volume from the same system or system image for S/390 or zSeries
hosts. An S/390 with PAV software support enables multiple users and jobs to
simultaneously access a logical volume. Read and write operations can be
accessed simultaneously to different domains. (The domain of an I/O operation is
the specified extents to which the I/O operation applies.)
DS8000 limitations
The following list describes known limitations for the DS8000.
v The 65,520 cylinder 3390 volume is not supported with z/OS Global Mirror and
z/OS Metro/Global Mirror.
v The amount of physical capacity within a 2107 system that can be logically
configured for use will be enforced by the 2107 licensed machine code (LMC) to
maintain compliance with the extent of IBM authorization established for licensed
functions activated on the machine. The 2107 LMC will not allow the logical
configuration of physical capacity beyond the extent of IBM authorization (except
when activating Standby CoD capacity).
v The deactivation of an activated licensed function, or a lateral change or
reduction in the license scope, is a disruptive activity and requires a machine IML
(Model 921 and Model 922) or reboot of the affected image (Model 9A2). A
lateral change is defined as changing the license scope from fixed block (FB) to
count key data (CKD) or from CKD to FB. A reduction is defined as changing the
license scope from all physical capacity (ALL) to only FB or only CKD capacity.
v The following activities are disruptive:
Chapter 1. Introduction to IBM TotalStorage DS8000 series 21
Page 48

– Model conversions. In addition, data may not be preserved during the model
conversion.
– Field attachment of the first Model 92E expansion unit to a Model 922.
– Field attachment of the first Model 9AE expansion unit to a Model 9A2.
– Removal of an expansion unit model from the base unit model. Data may not
be preserved during this activity.
v
Some DS8000 functions are not available or supported in all environments. You
can find current information about supported environments, prerequisites, and
minimum operating systems levels at the following IBM Web site:
http://www.ibm.com/servers/storage/disk/ds8000/interop.html
Planning data migration
The planning and methods of data migration for the DS8000 vary by environment.
The DS8000 supports over 90 operating systems. Yo u can migrate data to a
storage unit from these host and operating system environments.
When you plan for data migration, consider the following factors:
Note:
The following lists do not cover every possibility. They provide a high-level
view of some of the tools and factors that you can consider when moving
data.
v The system:
– Is it UNIX based? You will probably use some variation of a logical volume
manager.
– Is it a zSeries or S/390? Yo u will probably use IBM
®
TotalStorage
®
Global
Mirror, Remote Mirror and Copy (when available).
– Is it z/OS? Yo u will probably use DFDSS, though there are many choices.
– Is it VM? Yo u might use DASD Dump Restore or PTAPE.
– Is it VSE? Yo u might use the VSE fastcopy or ditto commands.
Your system administrator selects the data migration method that is the best
compromise between efficiency and impact on the users of the system.
v The storage unit:
– Are the storage units involved the same with the same level of licensed
management code?
– Are the storage units different? In which case you want to ensure that the new
configuration is large enough to accommodate the existing data. You also
want to ensure that the virtual disks are similar in configuration to the disk
drives that they are replacing.
v Time and complexity involved:
– Typically data migration requires that updates or changes cease while the
movement occurs. Also, depending on the amount of data that you are
moving and your migrating method, data could be unavailable for an extended
period of time, perhaps several hours.
– Could the complexity and time involved require the services of IBM through
International Global Services? Contact your IBM representative for more
information.
How to select a data migration method
Your system administrator selects the data migration method that is the best
compromise between efficiency and impact on the users of the system.
22 DS8000 User’s Guide
Page 49

Most methods of data migration affect the everyday operation of a computer
system. When data is moved, the data must be in a certain state, typically requiring
that updates or changes cease while the movement occurs. Depending on the
amount of data that you are moving and your migrating method, data could be
unavailable for an extended period of time, perhaps several hours. The following
factors might contribute to the migration time:
v Creating new logical volumes or file systems
v Modifying configuration files
v Receiving integrity checks
The
following items are more than likely among the topics considered by your
system administrator to determine the best method to use to migrate your data:
v Management software provides simple robust methods that you can generally
use during production without disturbing users.
v The AIX logical volume manager (LVM) provides methods that you can use at
any time without disrupting user access to the data. You might notice a small
performance degradation, but this is preferable to shutting down databases or
requiring users to log off the system.
Notes:
– AIX and HP-UX 11 .xx ship with logical volume management (LVM)
software as part of the base operating system. LVM provides
complete control over all disks and file systems that exist on an AIX
system. HP-UX has similar volume management software.
– Sun Microsystems has a basic volume management product called
Solstice, which is available for the Solaris systems.
– Linux systems also use the LVM.
v Methods that use backup and restore procedures generally have the most impact
on the system usage. They require that databases and file systems be in
quiescent states to ensure a valid snapshot of the data.
Chapter 1. Introduction to IBM TotalStorage DS8000 series 23
Page 50

24 DS8000 User’s Guide
Page 51

Chapter 2. Installing the DS8000 Storage Manager interface
The DS8000 Storage Manager is installed using a graphical or silent mode for the
Windows and Linux operating systems. It can be accessed using a Web browser
from any location that has network access.
You can install the DS8000 Storage Manager on a PC that has the following
minimum footprint requirements. Also, ensure you have installed a supported
browser.
Requirement Minimum Value
Disk 600 MB
Memory 512 MB Real Memory
Processor Pentium 4 Processor at 1.4 GHz
Supported browsers:
v Internet Explorer 6.x
v Netscape 6.2
v Netscape 7.x
Supported
operating systems:
v Windows Server 2003 Enterprise and Standard Edition
v Windows 2000 Advance Server, Server, and Professional, each with SP4
v Windows XP Professional SP1 and SP1a
v Windows XP Professional SP2
v Linux (Red Hat Enterprise Linux 2.1)
Note:
The DS8000 Storage Manager is not supported on any Windows 64-bit
operating system.
Note: Animations must be turned on in your browser if you want to observe the
installation progress bars that are associated with the DS Storage Manager
installation. Use the following instructions for your specific browser:
v Internet Explorer
1. From the Tools menu, select Internet Options.
2. Select the Advanced tab and scroll down to the Multimedia section.
3. Check Play animation in web pages.
v Netscape
1. From the Edit menu, select Preferences.
2. Double-click on Privacy and Security.
3. Select Images and select as many times as the image specifies in
the Animated image should loop section.
Firewall
installation alert
Note:
During the installation process, it is possible to receive several alerts for
Java processes that are trying to access ports on the local computer. When
this occurs, allow the Java processes to access the ports; otherwise, the
installation might fail.
© Copyright IBM Corp. 2004, 2005 25
Page 52

After you have installed the DS8000 Storage Manager, the following results occur:
v Activation of the IBM TotalStorage DS Storage Manager server and the IBM
TotalStorage DS Network Interface server. These servers are set to automatic
startup so that when you start your computer these servers are automatically
activated.
v Activation of the IBM TotalStorage DS8000 Storage Manager application, which
includes the real-time and simulated manager components. Both these
components can be installed on the same machine and are integrated into the
user interface. They are designed to help you create and manage the physical
and logical configurations of your storage complexes, storage units, and storage
images. Plus, the real-time manager component provides you the opportunity to
use the Copy Services features you have purchased.
Real-time manager
This component (preinstalled on the HMC) provides logical configuration and
Copy Services features to a network attached DS8000.
Simulated manager
This component (installed using the IBM TotalStorage DS8000 Storage
Manager installation CD) provides the ability to create or modify logical
configurations when you are disconnected from the network. After creating
the configuration, you can save it and then apply it to a network-attached
DS8000 at a later time.
Installing the IBM TotalStorage DS Storage Manager on the Windows
operating system using the graphical mode
Use the following steps to install the IBM TotalStorage DS Storage Manager in your
Windows environment using the graphical mode. When you are installing on a
DS8000 storage unit, you are generally installing the offline management type. This
management type allows you to plan and construct storage unit configurations
without being connected to the network. However, you cannot use the Copy
Services or parallel access volumes (PAVs) features while disconnected from the
network.
Before you install the IBM TotalStorage DS Storage Manager, verify that the
prerequisite software and hardware are installed on your system. The installation
program checks for prerequisites and stops if any prerequisites are missing.
Note:
The DS Storage Manager is not supported on any Windows 64-bit operating
system.
1. Log on as a user with administrator authority.
2. Insert the IBM TotalStorage DS Storage Manager CD into the CD-ROM drive.
The IBM TotalStorage DS Storage Manager program starts within 15 - 30
seconds if you have autorun mode set on your system. The LaunchPad
window is displayed.
If the LaunchPad window does not display, go to the CD-ROM drive using
Windows Explorer or a command prompt and perform one of the following
steps:
a. Type LaunchPad at the command prompt and press Enter. The
LaunchPad window is displayed.
b. Locate and double-click the LaunchPad.bat reference in Windows
Explorer.
26 DS8000 User’s Guide
|
|
|
|
|
|
Page 53
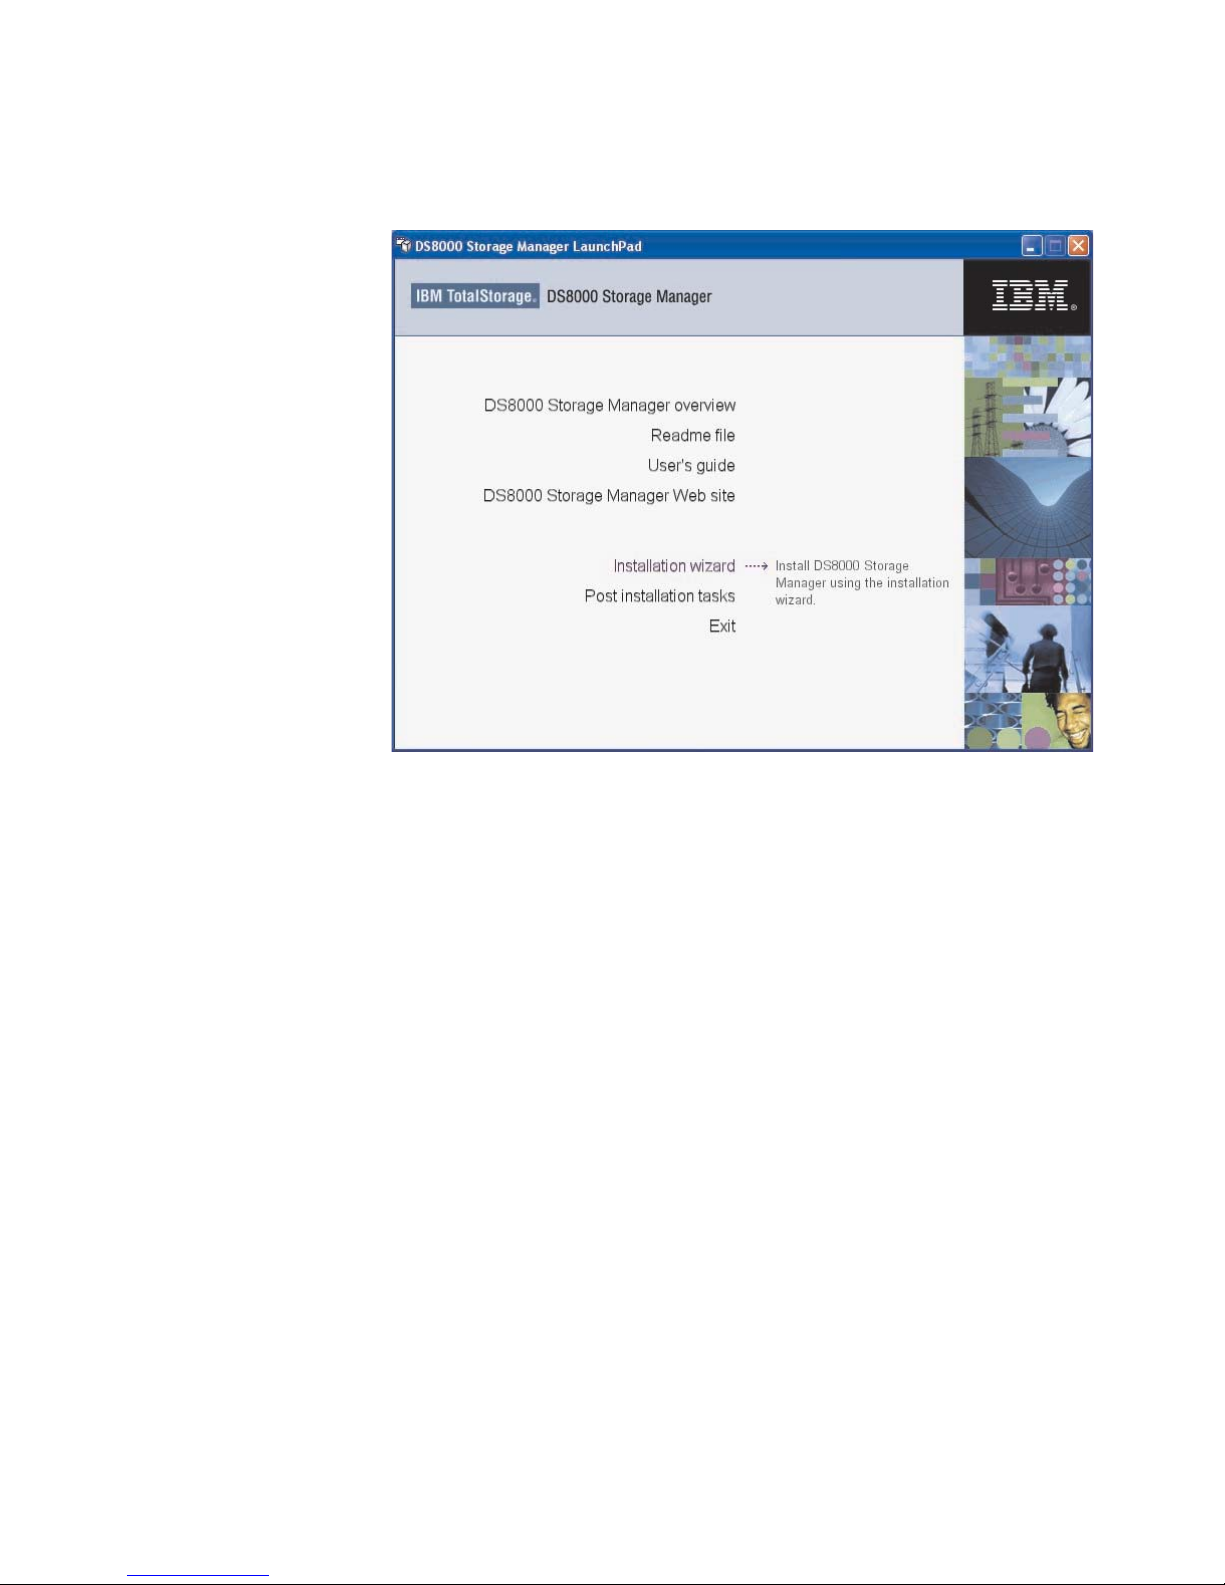
Note: If you are viewing the folder with Windows Explorer with the option
selected to hide the extensions for unknown file types, find the
LaunchPad file with the file type of MS-DOS Batch file.
Launchpad window
3. Choose one of the following options that are listed on the LaunchPad window:
DS8000 Storage Manager overview
Provides information about the IBM TotalStorage DS Storage Manager
software.
Readme file (recommended selection)
Provides last minute product information that was not provided in these
installation instructions.
User’s guide
Provides specific installation instructions.
DS8000 Storage Manager Web site
Provides information from the product Web site.
Installation wizard
Starts the IBM TotalStorage DS Storage Manager installation program.
Post installation tasks
Provides information about configuring the IBM TotalStorage DS Storage
Manager.
Exit
Exits the IBM TotalStorage DS Storage Manager LaunchPad program.
4. Click the Readme file selection on the LaunchPad to check for information
that might supersede the information in this guide.
5. Click the Installation wizard selection on the LaunchPad to start the
installation program.
Chapter 2. Installing the DS8000 Storage Manager 27
Page 54

Note: The LaunchPad window remains open behind the installation wizard so
that you can access product information during the installation process.
There might be a slight delay while the software loads on your system. After
the software loads, a DOS prompt window opens to display the following
message:
Initializing InstallShield Wizard...
Preparing Java (tm) Virtual Machine .............................
. ......................................................
The Welcome window of the IBM TotalStorage DS Storage Manager
installation program displays if no problems are discovered during the initial
system check. If an error is discovered (for example, the operating system
does not match the prerequisite), an error message is displayed and the
installation program exits.
f2c00372
DS8000 Storage Manager Installer Welcome window
6. Click Next to continue, or click Cancel to exit the installation. When you click
Next, the License Agreement window displays.
28 DS8000 User’s Guide
Page 55

License Agreement window
Note:
Anytime you click Cancel on any of the installation windows, a
message asking for you to confirm that you want to exit is displayed.
7. Read the license agreement and click your acceptance or nonacceptance of
the agreement. If you accept, the Next button is highlighted. Click Next to
continue or click Cancel to exit the installation. When you click Next, the
Destination Directory window is displayed.
Destination Directory window
8. Choose the directory on the Destination Directory window where you want to
install the application by using one of the following options. Clicking Next after
Chapter 2. Installing the DS8000 Storage Manager 29
|
Page 56

any one of the options causes the server installation checking window (a
window for each server) to display if the DS Storage Manager is installed on
your system, or if the Server Parameters window is displayed.
a. Click the Next button to accept the default (recommended) directory that is
shown in the window.
b. Type a fully qualified directory path into the Directory Name path to
designate your own directory. Then click the Next button.
c. Click the Browse button and a directory window is displayed. Scroll to the
directory that you want to use for the application. Click it and click OK. The
directory path is displayed in the Directory Name field. Click Next to
continue.
d. Click Cancel to exit the installation process.
9. Observe the message on each of the next two Installation Checking windows
and click Next on each window to continue. If the servers have not been
installed, the Server Parameters window is displayed with default values in the
input fields. Go to Step 10 to proceed with the Server Parameters window.
The DS Storage Manager Server Installation Checking window is displayed if
the DS Storage Manager server is already installed on your system. A
message is displayed on the window that indicates which version of the server
is installed and whether the installation process will install a newer version of
the server. To continue the installation process, you must click Next or click
Cancel to exit the installation process.
When you click Next, the DS Network Interface Server Installation Checking
window is displayed with a message. This message indicates the version of
the DS Network Interface server that is installed on your system and whether
the installation process will install a newer version of the server. To continue
the installation process, you must click Next or click Cancel to exit the
installation process.
When you click Next, the Installation Confirmation window is displayed. If your
installation process has taken you through these two checking windows, go to
Step 16 on page 34.
10. Click Next to accept the default values that are displayed on the Server
Parameters window. All fields must contain a value before you can proceed to
the next step.
30 DS8000 User’s Guide
|
|
|
|
|
|
|
|
|
|
|
|
|
|
|
|
|
|
|
|
|
|
Page 57

Windows Server Parameters window
You can change the default values by supplying the following information:
a. Host Name — The host name of the physical machine where the DS
Storage Manager Server is installed. The host name must resolve to a
physical network node on the server. When multiple network cards exist in
the server, the host name or IP address must resolve to one of the network
cards. The value that you specify for the host name is used as the value of
the hostName property in WebSphere Application Server configuration files.
Specify the host name value in one of the following formats:
v The fully qualified domain name servers (DNS) host name string; for
example, xmachine.manhattan.ibm.com.
v The default short DNS host name string; for example, xmachine.
v The numeric IP address; for example, 9.127.255.3.
v The generic name localhost or its equivalent IP address; for example,
127.0.0.1.
Note:
The specified value for the host name is stored by WebSphere
Application Server into its internal configuration files. If you specified
the host name in the fully qualified form or the short host name
string, do not change the host name after the DS Storage Manager
Server installation. If you do, the host name and the name that you
specified for the configuration file no longer match. If you do change
the host name, you must manually edit all the WebSphere
Application Server configuration files that contain references to the
old name to reflect the new name. If you specified the host name in
the form of the numeric IP address, you must use a fixed IP address
for the computer (you cannot use DHCP to obtain a dynamic IP
address for it). The above restrictions do not exist if you specified
the host name in the form as localhost.
b. HTTP Port — The port number that the DS Storage Manager Server uses.
The port number must be a port that is not being used by another process
on the system. After the DS Storage Manager Server is installed, you must
Chapter 2. Installing the DS8000 Storage Manager 31
Page 58

include this port number in the URL to access the console. That URL is the
protocol name, plus the fully qualified host name, plus the port, plus
DS8000/console; for example, http://myhost.com:8451/DS8000/console.
c. HTTPS Port — The port that the DS Storage Manager Server uses for
secure HTTP transport (HTTPS).
d. Bootstrap/RMI Port — The port that the DS Storage Manager Server uses
for the bootstrap port.
e. SOAP Port — The port that the DS Storage Manager Server uses for
Simple Object Access Protocol (SOAP).
f. Server help Port — The port for the Eclipse help Server. This port is the
one that the help system (based on Eclipse technology) uses to receive
requests for help files.
Note:
The values that are used in the Server Parameters window fields must
not conflict with existing port assignments that are already on the
system or reserved for use by another application.
11. Click Next after you have ensured that all the input fields on the Server
Parameters window are complete. The SSL Configuration window is displayed.
This window allows you to supply the fully qualified name of the two server key
files generated before or during the DS8000 Storage Manager installation.
Windows SSL Configuration window
12. Follow the instructions on the window.
a. First, designate whether you want to generate a new SSL certificate by
selecting Generate the self-signed certificates during installation. This
is the most likely selection when you are installing DS8000 Storage
Manager for the first time. You can also select Use existing SSL
certificates. This choice is most likely made when the key files already
exist and you do not want to generate new key files.
b. Complete the rest of the fields on the window. Provide the fully qualified
path to the key file and trust file by using the Browse button. The key file
and trust file are identified by an extension of .jks.
32 DS8000 User’s Guide
Page 59
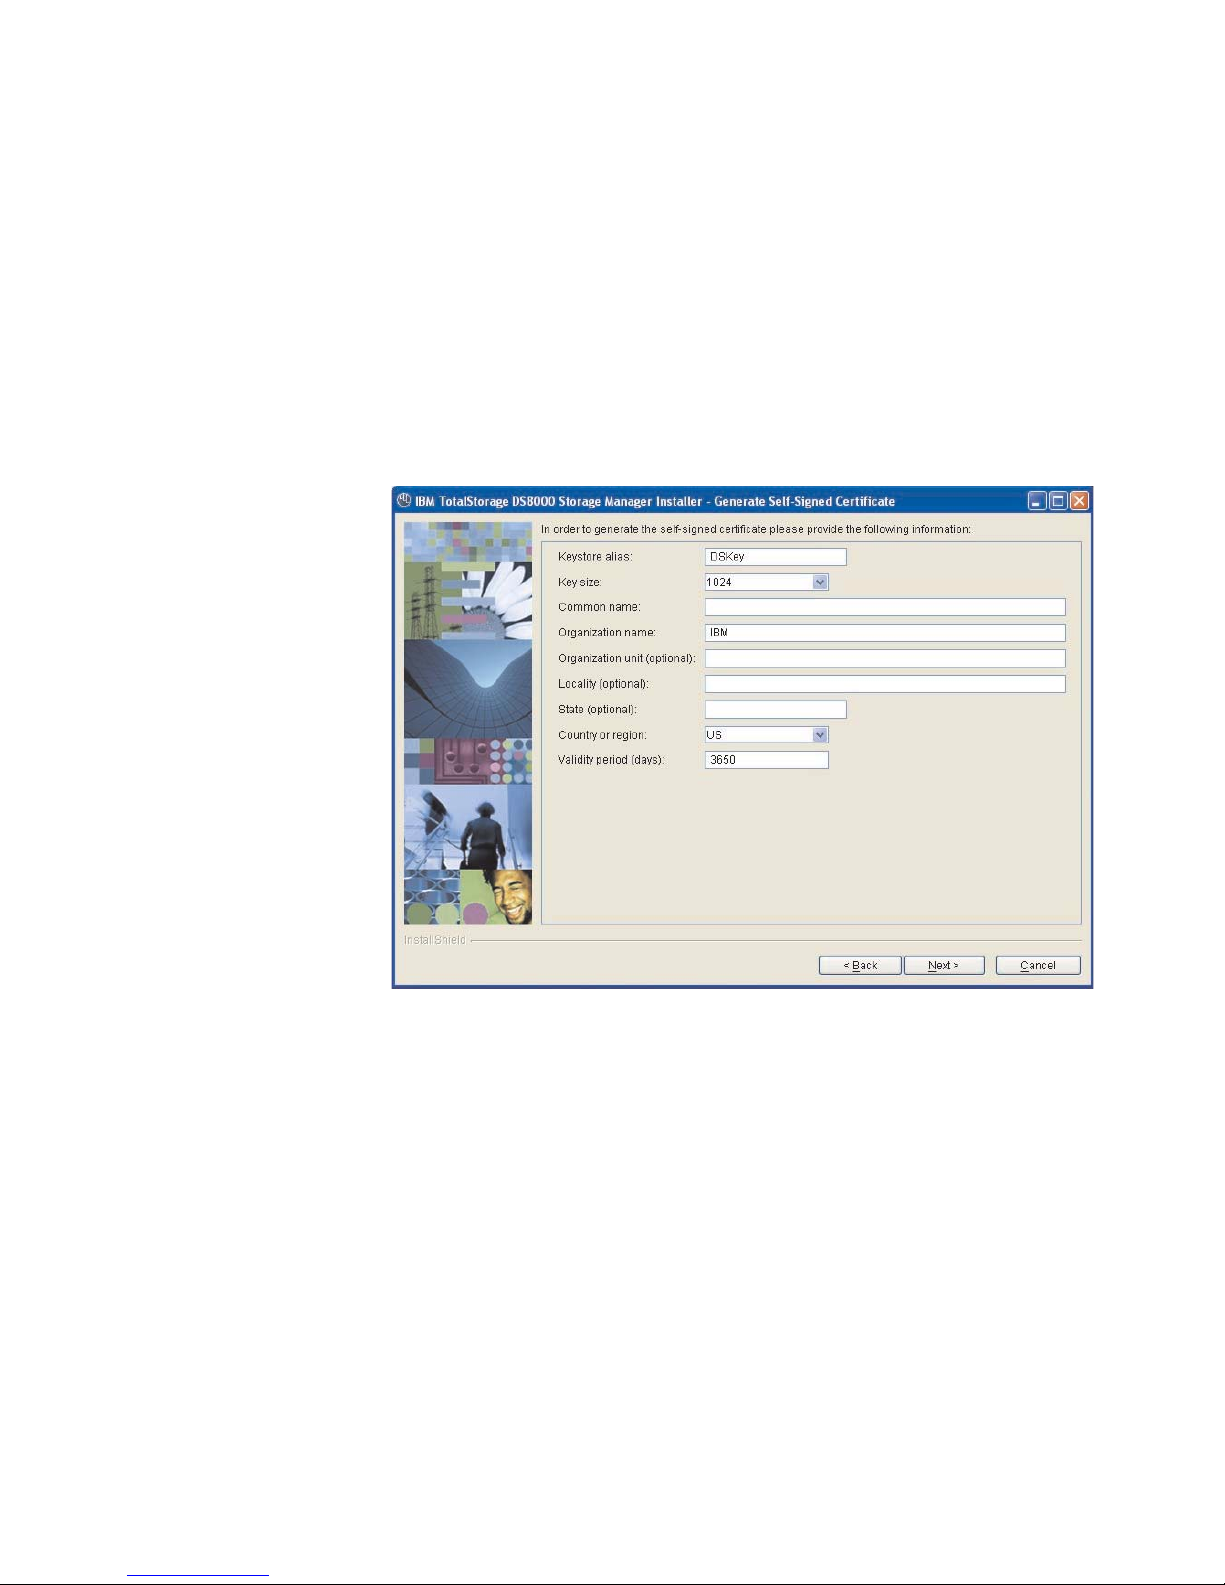
c. Supply a password for each file. The password must be a minimum of
six-characters and it cannot contain any blanks.
13.
Click Next to continue the installation process. If you have selected Generate
the self-signed certificates during installation, the Generate Self-Signed
Certificate window is displayed. If you selected Use existing SSL certificates,
the Installation Confirmation window is displayed.
Note: When you select Generate self-signed certificates during installation
and the key files already exist on the system at the specified location,
clicking Next causes a message to display. It asks you to designate
whether you want to have the system delete existing application server
certificates if they exist on the location and to generate others. The
default is NO which means keep the existing application server
certificates.
Windows Generate Self-Signed Certificate window
14. Complete each of the input fields with the required information. Use the
following as a guide to provide the needed information.
Keystore alias
This is the alias for the self-signed certificate. It uniquely identifies the
certificate within the keystore file. It is a good practice to use a unique
name related to the server name.
Key size
Two key sizes are available, 512 and 1024. 1024 is the default.
Common name
This name is the primary, universal identity for the certificate. If your
system contains the secured WebSphere environment, this name must
be valid in the configured user registry.
Organization name
The name of your company
Organization unit (optional)
The name of a department or division within your company. Remember
Chapter 2. Installing the DS8000 Storage Manager 33
Page 60

that you are building a profile for the certificate. As a security measure
the more specific the information the more secure your system.
Locality (optional)
The city or location where your company resides.
State (optional)
The state or province where your company resides.
Country or region
The two-character designator that identifies the country where your
company is located. Use the pull-down menu to make this selection.
Validity period (days)
Specifies the lifetime of the certificate in days.
The information that you provide is used to build a profile for the certificate.
This information is used during identity processing to ensure validation of any
processing that is occurring. It is part of the security measures that are used
during SSL connectivity.
Click Next to continue, or click Cancel to exit the installation.
15. Click Next. The Installation Confirmation window is displayed. This window
displays both the location where the product will be installed and the total size
needed for the installation.
Windows Installation Confirmation window
16. Click the Install button on the Installation Confirmation window to begin the
installation process. There are several progress windows that are displayed.
There is no required interaction on your part for each of the progress windows
that are displayed. However, you can choose to cancel (not recommended) the
installation on any of the progress windows with varying consequences.
The installation process performs the following actions:
a. If the two servers (DS Storage Manager Server and DS Network Interface
Server) are already installed on your system, they are stopped in the
following order of windows:
1) The Embedded IBM WebSphere Application Server - Express server
(part of the DS Storage Manager Server) window is stopped first.
2) The service window (DS Network Interface Server) is stopped next.
34 DS8000 User’s Guide
|
|
|
|
|
|
|
|
|
|
|
|
Page 61

3) The WS Help System (part of the DS Storage Manager Server) window
is stopped, if it was not stopped before by the Embedded IBM
WebSphere Application Server.
b. If one or both of the servers are not installed or have to be upgraded on
your system, they are installed or upgraded in the following order (the
progress of the installation is indicated on the associated progress
window):
1) DS Storage Manager Server Installation Progress window
2) DS Network Interface Server Installation Progress window
Note:
Yo u can click Cancel (not recommended) during the DS Network
Interface Server installation process. The process does not stop
immediately when the Cancel button is clicked. Rather, the process
continues to install all the files that are associated with this part of
the installation. These files remain installed and are not reinstalled
upon reactivation of the installation process.
A confirmation message is displayed that asks you to confirm that
you want to cancel the installation.
c. The Components Installation Progress (displaying the installation or
upgrade progress of the DS Storage Manager product applications) is
displayed after the servers have been installed or upgraded.
Note:
Yo u can click Cancel (not recommended) during the components
installation process. The installation process stops immediately
when the Cancel button is clicked. A window with a confirmation
message is displayed. For a new installation, when you confirm that
you want to stop the process, all the files that have been copied up
to the point that the Cancel button was clicked are uninstalled. You
then are exited from the installation process.
When
this part of the installation is completed, the system starts both servers:
first the DS Network Interface Server and then the DS Storage Manager
Server. Wait for the servers to be started before going to the next step. When
the servers have been started, the Installer Finish window is displayed.
17. Click Finish to exit the installation process. When the installation process
exits, a file (postinstallation.txt) is displayed, containing the postinstallation
tasks. Follow the instructions in this text file to complete the postinstallation
tasks.
Chapter 2. Installing the DS8000 Storage Manager 35
|
|
|
|
|
|
|
|
|
|
|
|
|
|
|
|
|
|
|
|
|
|
|
|
|
|
|
|
|
|
|
|
|
|
|
Page 62

Windows DS8000 Storage Manager Installer Finish window
Note:
If the installation fails, you must exit the installation process and check
the install log for error messages.
18. If the Finish window indicates that the installation fails, check the installation
log for error messages. The installation log is located in xxx\logs\install.log,
where xxx is the destination directory where the IBM TotalStorage DS Storage
Manager is installed (for example, c:\Program Files\IBM\DS8000 Storage
Manager) .
Errors fall into two categories: system or incorrect values that are designated
during the installation process. Use the following guidelines to correct these
errors.
v If the error is due to a system problem, correct it and reinstall the DS8000
Storage manager using either the interactive or silent mode of installation.
v If the error is due to a wrong installation parameter value, restart the
installation using the steps that are described in this procedure or the steps
that are described in the silent mode of installation. Navigate to the Server
Parameters window and insert the correct values. Then finish the installation
process.
19. Complete the postinstallation tasks. If, when exiting the installation wizard, the
postinstallation.txt file does not automatically open, manually open it from the
LaunchPad window, and follow the instructions to complete the postinstallation
tasks.
20. Exit the LaunchPad program by clicking Exit on the LaunchPad window.
36 DS8000 User’s Guide
|
|
|
|
|
|
|
|
|
|
|
|
|
|
|
|
|
|
|
|
Page 63

Installing the IBM TotalStorage DS Storage Manager on the Windows
operating system in unattended (silent) mode
Use the following steps to install the IBM TotalStorage DS Storage Manager in your
Windows environment using the unattended (silent) mode. When you are installing
on a DS8000 storage unit, you are generally installing the offline management type.
This management type allows you to plan and construct storage unit configurations
without being connected to the network. However, you cannot use the Copy
Services or parallel access volumes (PAVs) features while disconnected from the
network.
Before you install the IBM TotalStorage DS Storage Manager, verify that the
prerequisite software and hardware are installed on your system. The installation
program checks for prerequisites and stops if any prerequisites are missing.
Note: The DS Storage Manager is not supported on any Windows 64-bit operating
system.
The unattended (silent mode) installation option allows you to run the installation
program unattended. Use this method of installation to customize a response file
and to issue a command from a command prompt window. The response file is a
template on the IBM TotalStorage DS Storage Manager CD.
Perform the following steps to install the IBM TotalStorage DS Storage Manager in
your Windows environment using the unattended mode:
1. Log on to your Windows system as an administrator.
2. Insert the IBM TotalStorage DS Storage Manager installation CD into the
CD-ROM drive. If the interactive mode starts, click the Exit selection on the
LaunchPad window to exit.
3. Locate the response file (responsefile.txt) in the root directory of your CD and
copy it to a directory of your choosing on your system, or open a command
prompt window and generate the template response file.
To generate the template response file, perform the following steps:
a. Ensure that your command prompt is located at the root directory of the
CD-ROM drive.
b. Type setup.exe -options-template <responsefile-
path>\<responsefile>, where responsefile-path is the path where you
want the response file to be created, and responsefile is the name of the
response file that you want to create.
c. Press the Enter key and wait for the program to create the response file.
4. Open the response file using a text editor and modify the default options with
the values that you want.
Follow these guidelines when you modify the default options:
v Remove the three # characters from the beginning of each line that contains
a parameter (if you generated the response file as shown before). Change
the parameter default value to the value that you want for that option. Yo u
must enclose all values in double quotation marks (″<value>″).
v Verify that all paths generated or modified in the response file are correct.
There are some cases when the generated file displays an incorrect string
representing the path of the installation location. For example, the parameter
″-P installLocation = ″C:Program FilesMy Product″″ is wrong and must be
″-P product.installLocation = ″<directory where you want the DS Storage
Manager installed>″″
Chapter 2. Installing the DS8000 Storage Manager 37
|
|
|
|
|
|
|
|
|
|
Page 64

v Ensure that the entered values for the ports values are available and not
used by other applications on your system. Use the command ″netstat -a″ to
verify the ports in use on your system.
v Specify two passwords for the SSL keys files. These passwords must
observe the following criteria:
– The passwords must contain at least 6 characters.
– Use the following options within the responsefile.txt file to set these
options:
- For the keystore use:
-W wasSslConfiguration.keystorePassword="your_keystore_password"
- For the truststore use:
-W wasSslConfiguration.truststorePassword="<your_truststore_password>"
Note: These options do not have default values. If you do not set
these values, the installation process fails.
5. Save the modifications to the response file.
6. Type the following command at the command prompt and press the Enter key
on your keyboard to start the installation process in silent mode: setup.exe
-options <responsefile-path>\<responsefile> -silent where
v responsefile-path — represents the path where the response file resides.
v responsefile — represents the relative name of the response file that you
used or created (for example, responsefile.rsp or responsefile.txt).
7. Wait for the installation program to install the product. This can take 5 - 10
minutes.
Note: During this processing, the installation process checks to see if the DS
Storage Manager server and DS Network Interface Server are already
installed and if they are the current version or have to be upgraded. If
they are already installed and need to be upgraded, the installation
process performs this function using the already set values from the
previous server installation, found on the system in the server
configuration files, for all the associated values. The specified values in
the response file are ignored.
8. Check the install log file for any possible error messages. This file is located in
the xxx\logs\install.log directory, where xxx is the destination directory where
the IBM TotalStorage DS Storage Manager is installed.
9. Start the IBM TotalStorage DS Storage Manager, if no errors are evident.
10. Perform the postinstallation tasks when the DS Storage Manager has been
installed successfully. Yo u can access the instructions for the postinstallation
tasks from the postinstallation.txt file, in the doc directory on the product CD.
The following is an example of the template response file that is created when you
process the previous steps.
38 DS8000 User’s Guide
|
|
|
|
|
|
|
|
|
|
Page 65

################################################################################
#
# InstallShield Options File
#
# Wizard name: Setup
# Wizard source: setup.jar
# Created on: Tue Jul 27 09:02:47 EEST 2004
# Created by: InstallShield Options File Generator
#
# This file contains values that were specified during a recent execution of
# Setup. It can be used to configure Setup with the options specified below when
# the wizard is run with the "-options" command line option. Read each setting’s
# documentation for information on how to change its value.
#
# A common use of an options file is to run the wizard in silent mode. This lets
# the options file author specify wizard settings without having to run the
# wizard in graphical or console mode. To use this options file for silent mode
# execution, use the following command line arguments when running the wizard:
#
# -options "responsefile.txt"
#
################################################################################
-silent
################################################################################
#
# IBM TotalStorage DS8000 Storage Manager Install Location
#
# The install location of the product. Specify a valid directory into which the
# product should be installed. If the directory contains spaces, enclose it in
# double-quotes.
#
-P product.installLocation="C:\Program Files\IBM\DS8000StorageManager"
################################################################################
#
# User Input Field - hostname
#
# The fully-qualified host name of the machine where DS Storage Manager Server
# will be installed.
#
-W wasExpressConfig.hostname="localhost"
################################################################################
#
# User Input Field - httpPort
#
# The port number that the HTTP transport in the application server will use.
# This value must not conflict with existing port assignments on the system.
#
-W wasExpressConfig.httpPort="8451"
################################################################################
#
# User Input Field - httpsPort
#
# The port number that the HTTPS transport in the application server will use
# for secure HTTP transport. This value must not conflict with existing port
# assignments on the system.
#
-W wasExpressConfig.httpsPort="8452"
Chapter 2. Installing the DS8000 Storage Manager 39
Page 66

################################################################################
#
# User Input Field - bootstrapPort
#
# The address for the bootstrap function and the port number for the Java Remote
# Method Invocation (RMI) connector in the application server. This value must
# not conflict with existing port assignments on the system.
#
-W wasExpressConfig.bootstrapPort="8453"
################################################################################
#
# User Input Field - soapPort
#
# The address for the Simple Object Access Protocol (SOAP) connector in the
# application server. This value must not conflict with existing port
# assignments on the system.
#
-W wasExpressConfig.soapPort="8454"
################################################################################
#
# User Input Field - helpPort
#
# The port for Eclipse
# This value must not conflict with existing port assignments on the system.
#
-W wasExpressConfig.helpPort="8455"
################################################################################
#
# User Input Field - certificateOption
#
# Select one of the following options concerning the SSL certificates.
# Legal values are: "generate" (the default value) - Generate the
# self-signed certificates during installation. "use" - Use existing
# certificates. For example, to specify that the "generate" option is selected,
# use -W wasSslConfiguration.certificateOption="generate"
#
-W wasSslConfiguration.certificateOption="generate"
################################################################################
#
# User Input Field - keystoreFileName
#
# The absolute path of the keystore file.
#
-W wasSslConfiguration.keystoreFileName="C:\Program
Files\IBM\SMServer\keys\SMServerKeyFile.jks"
################################################################################
#
# User Input Field - keystorePassword
#
# The password for the keystore file.
#
-W wasSslConfiguration.keystorePassword="<your_keystore_password>"
40 DS8000 User’s Guide
Page 67

################################################################################
#
# User Input Field - truststoreFileName
#
# The absolute path of the truststore file.
#
-W wasSslConfiguration.truststoreFileName="C:\Program
Files\IBM\SMServer\keys\SMServerTrustFile.jks"
################################################################################
#
# User Input Field - truststorePassword
#
# The password for the truststore file.
#
-W wasSslConfiguration.truststorePassword="<your_truststore_password>"
################################################################################
#
# Delete server certificates option
#
# Option to delete certificates files if they exist.Legal values are: "yes" - in
# order to delete application server certificates if they exist on the location,
# and to generate others, or "no" (the default value) - in order to keep the
# existing application server certificates.
#
-G deleteCertificates=yes
################################################################################
#
# User Input Field - keystoreAlias
#
# The alias for the self-signed digital certificate, which is used to uniquely
# identify the certificate within the keystore file. If you have only one
# certificate in each keystore file, you can assign any value to the label.
# However, it is good practice to use a unique label related to the server name.
#
-W CertificateParams.keystoreAlias="DSKey"
################################################################################
#
# User Input Field - keySize
#
# The key size. That must be between 512 and 1024 and must be multiple of
# 64b.The only two allowed values are 512 or 1024. If you enter other values it
# takes the default value 1024.
#
-W CertificateParams.keySize="1024"
################################################################################
#
# User Input Field - commonName
#
# The common name is the primary, universal identity for the certificate; it
# should uniquely identify the principal that it represents. In a WebSphere
# environment, certificates frequently represent server principals, and the
# common convention is to use common names of the form "host_name" and
# "server_name". The common name must be valid in the configured user registry
# for the secured WebSphere environment.
#
Chapter 2. Installing the DS8000 Storage Manager 41
Page 68

Removing the IBM TotalStorage DS Storage Manager from a Windows
operating system
You can remove the IBM TotalStorage DS Storage Manager from your Windows
operating system by using the Windows Add/Remove Programs facility.
1. Navigate to your Control Panel and open the Add/Remove program facility.
2. Scroll the list of currently installed programs and click the listing for IBM
TotalStorage DS8000 Storage Manager.
3. Click the Change/Remove button, and the Welcome window for the Uninstaller
is displayed.
Uninstaller Welcome window
4. Click Next to continue or click Cancel to exit the removal process. When you
click Next, the Confirmation window is displayed showing the directory from
which the IBM TotalStorage DS Storage Manager GUI program will be removed.
Uninstaller Windows Confirmation window
42 DS8000 User’s Guide
Page 69

5. Click Remove to continue or Cancel to stop the removal and exit the
uninstallation process. Click Back to return to the previous window. When you
click Remove, the Uninstallation Progress window is displayed. When the
uninstallation process is finished, the Finish window is displayed, which contains
a statement about the success or failure of the uninstallation process.
During the uninstallation process, the following system checks occur:
v A check of your system to detect if DS Storage Manager Server is used by
other programs on the system and if not used, removes it from the system.
Otherwise, the DS Storage Manager Server is not removed from your
system.
v A check of your system to detect if DS Network Interface Server is used by
other programs on the system and if not used, removes it from the system.
Otherwise, the DS Network Interface Server is not removed from your
system.
v A check to determine whether any of the files to be removed are locked
because they are in use by another process. If a locked file has been
detected, you can perform the following:
a. From Windows services, set the IBM WebSphere Application Server V5
- DS Storage Manager and IBM DS Network Interface Server services
to Manual startup type.
b. Reboot the computer.
c. Proceed once again with the removal of the DS Storage Manager.
Another
reason files could be locked is because you changed the host name
you installed the DS Storage Manager. See the DS Storage Manager
installation instructions for more information on host names and how to
resolve a changed host name.
When the uninstallation process is finished, the Uninstaller Finish window is
displayed. The Uninstaller Finish window provides a statement about the
success or failure of the uninstallation process.
If the uninstall program cannot remove some information from your system, the
Reboot window is displayed. Yo u must reboot so that previously locked files are
released and automatically deleted.
Uninstaller Finish window
6. Click Finish to complete the removal process and exit the GUI part of the
uninstallation program.
Chapter 2. Installing the DS8000 Storage Manager 43
Page 70

7. Close the Add/Remove Programs window.
8. Restart your system, if required (now or later) to complete the removal process.
Removing the DS8000 Storage Manager from a Windows operating
system using the silent mode
You can remove the IBM TotalStorage DS Storage Manager from your Windows
operating system by using the silent (unattended mode).
1. Log on to your Windows operating system with administrator authority.
2. Open the Command Prompt window.
3. Navigate to the directory where the DS8000 Storage Manager is installed.
4. Type <dest_path>\_uninst\uninstall.exe -silent, where <dest_path> is the
path where the DS8000 Storage Manager is installed.
5. Wait for the program to remove the DS8000 Storage Manager.
6. Restart your system if required (now or later) to complete the removal of the
program.
Upgrading the DS Storage Manager on a Windows operating system
using the graphical mode
Use this process to upgrade the DS Storage Manager to the latest level using the
graphical mode for a Windows operating system.
You must have the latest DS Storage Manager CD-ROM or you must download the
latest version from the Web site.
Note:
The DS Storage Manager is not supported on any Windows 64-bit operating
system.
1. Log on as a user with administrator authority.
2. Insert the IBM TotalStorage DS Storage Manager CD into the CD-ROM drive.
The IBM TotalStorage DS Storage Manager program starts within 15 - 30
seconds if you have autorun mode set on your system. The LaunchPad
window is displayed.
If the LaunchPad window does not display, go to the CD-ROM drive using
Windows Explorer or a command prompt and perform one of the following
steps:
a. Type LaunchPad at the command prompt and press Enter. The
LaunchPad window is displayed.
b. Locate and double-click the LaunchPad.bat reference in Windows
Explorer.
Note: If you are viewing the folder with Windows Explorer with the option
selected to hide the extensions for unknown file types, find the
LaunchPad file with the file type of MS-DOS Batch file.
44 DS8000 User’s Guide
|
|
|
|
|
|
|
|
|
|
|
|
|
|
|
|
|
|
|
|
|
|
|
Page 71

Launchpad window
3. Choose one of the following options that are listed on the LaunchPad window:
DS8000 Storage Manager overview
Provides information about the IBM TotalStorage DS Storage Manager
software.
Readme file (recommended selection)
Provides last minute product information that was not provided in these
installation instructions.
User’s guide
Provides specific installation instructions.
DS8000 Storage Manager Web site
Provides information from the product Web site.
Installation wizard
Starts the IBM TotalStorage DS Storage Manager installation program.
Post installation tasks
Provides information about configuring the IBM TotalStorage DS Storage
Manager.
Exit
Exits the IBM TotalStorage DS Storage Manager LaunchPad program.
4. Click the Readme file selection on the LaunchPad to check for information
that might supersede the information in this guide.
5. Click the Installation wizard selection on the LaunchPad to start the upgrade
program.
Note: The LaunchPad window remains open behind the installation wizard so
that you can access product information during the upgrade process.
Chapter 2. Installing the DS8000 Storage Manager 45
|
|
|
|
|
|
|
|
|
|
|
|
|
|
|
|
|
|
|
|
|
|
|
|
|
|
|
Page 72
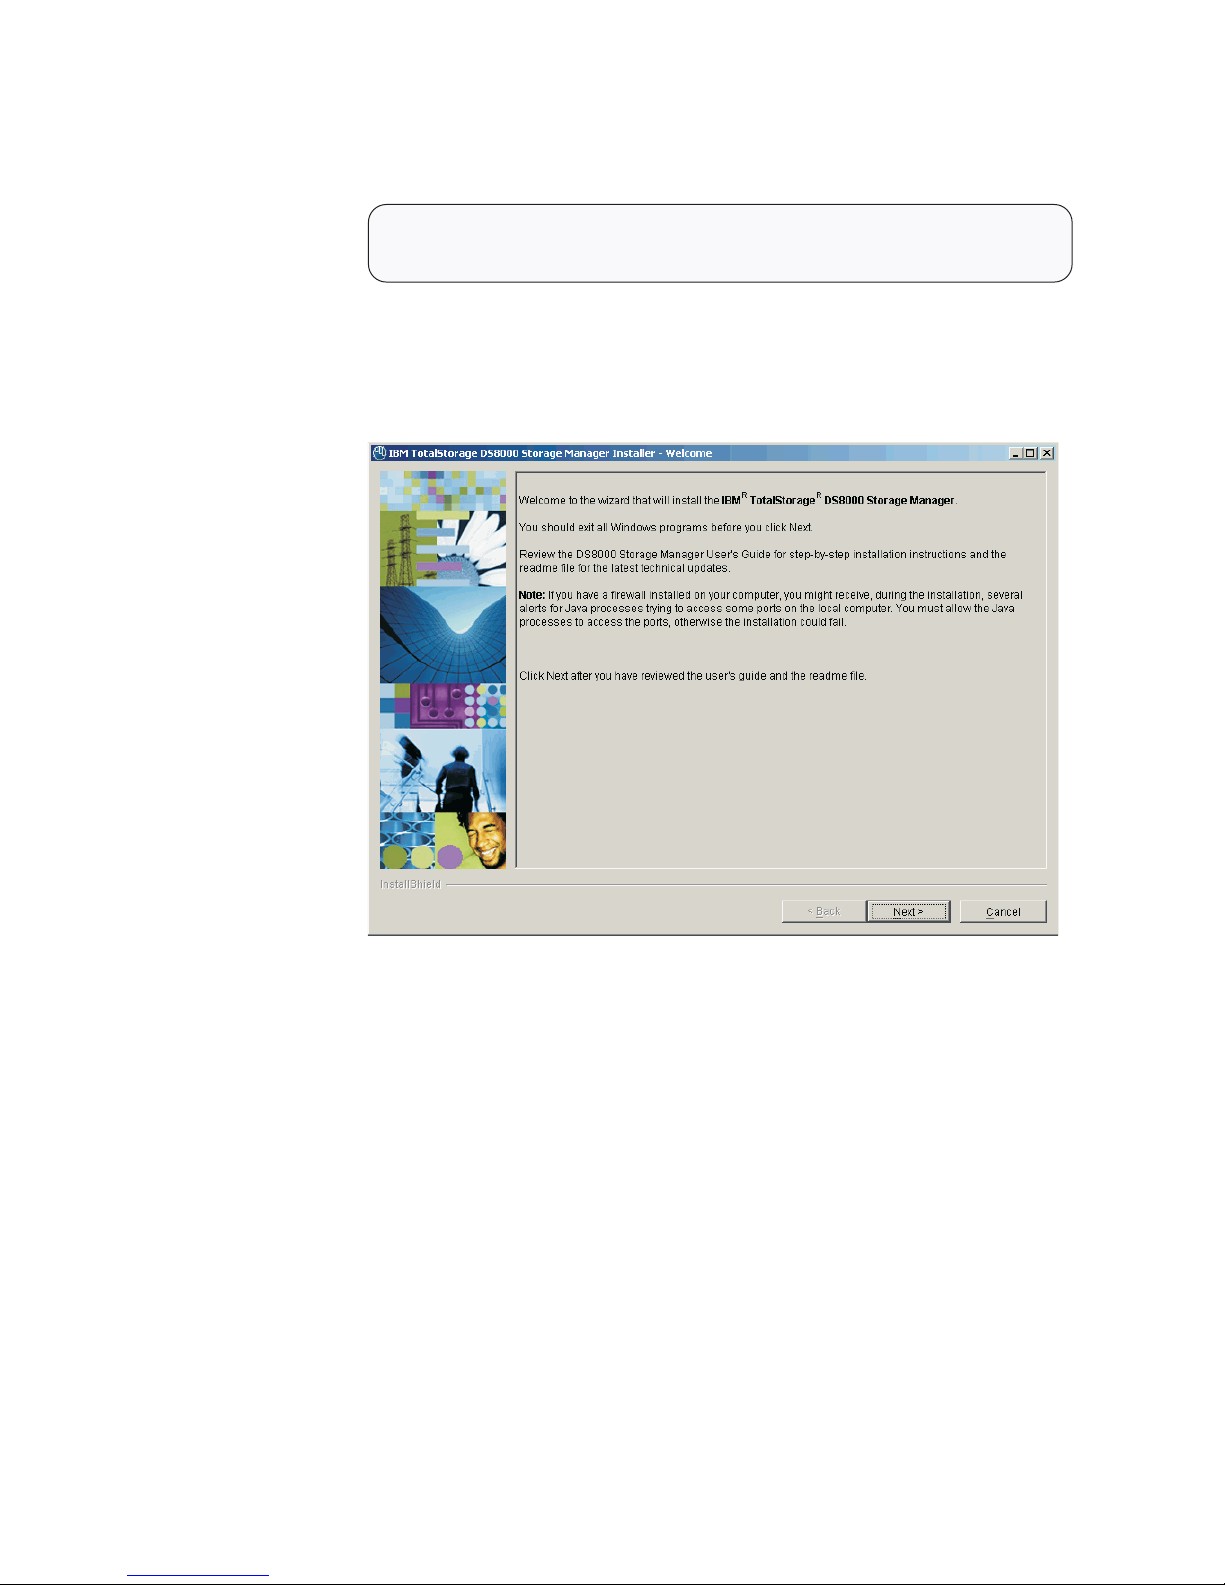
There might be a slight delay while the software loads on your system. After
the software loads, a DOS prompt window opens to display the following
message:
Initializing InstallShield Wizard...
Preparing Java (tm) Virtual Machine .............................
. ......................................................
The Welcome window of the IBM TotalStorage DS Storage Manager upgrade
program displays if no problems are discovered during the initial system check.
If an error is discovered (for example, the operating system does not match
the prerequisite), an error message is displayed and the upgrade program
exits.
f2c00372
DS8000 Storage Manager Installer Welcome window
6. Click Next to continue, or click Cancel to exit the upgrade process. When you
click Next, the License Agreement window displays.
46 DS8000 User’s Guide
|
|
|
|
|
|
|
|
|
|
|
|
|
|
|
|
|
|
Page 73

License Agreement window
Note: Anytime you click Cancel on any of the upgrade windows, a message
that asks you to confirm that you want to exit is displayed.
7. Read the license agreement and click your acceptance or nonacceptance of
the agreement. If you accept, the Next button is highlighted. Click Next to
continue or click Cancel to exit the upgrade process. When you click Next, the
Product Version check window is displayed.
f2c00371
Product Version Check window
8. Observe the information that is displayed on the Product Version Check
window regarding the version of the product that is already installed on your
Chapter 2. Installing the DS8000 Storage Manager 47
|
|
|
|
|
|
|
|
|
|
|
|
|
|
Page 74

system and the action that the wizard will perform. If you agree, click Next or
click Cancel to exit the upgrade process. When you click Next, the DS
Storage Manager Server Installation Checking window is displayed if the DS
Storage Manager service is installed on your system.
f2c00370
DS Storage Manager Server Installation Checking window
9. Observe the information that is displayed on the DS Storage Manager Server
Installation Checking window regarding the version of the DS Storage Manager
Server that is already installed on your system and the action that the wizard
will perform. If you agree, click Next or click Cancel to exit the upgrade
process. When you click Next, the DS Network Interface Server Installation
Checking window is displayed if the DS Network Interface service is installed
on your system.
48 DS8000 User’s Guide
|
|
|
|
|
|
|
|
|
|
|
|
|
|
Page 75
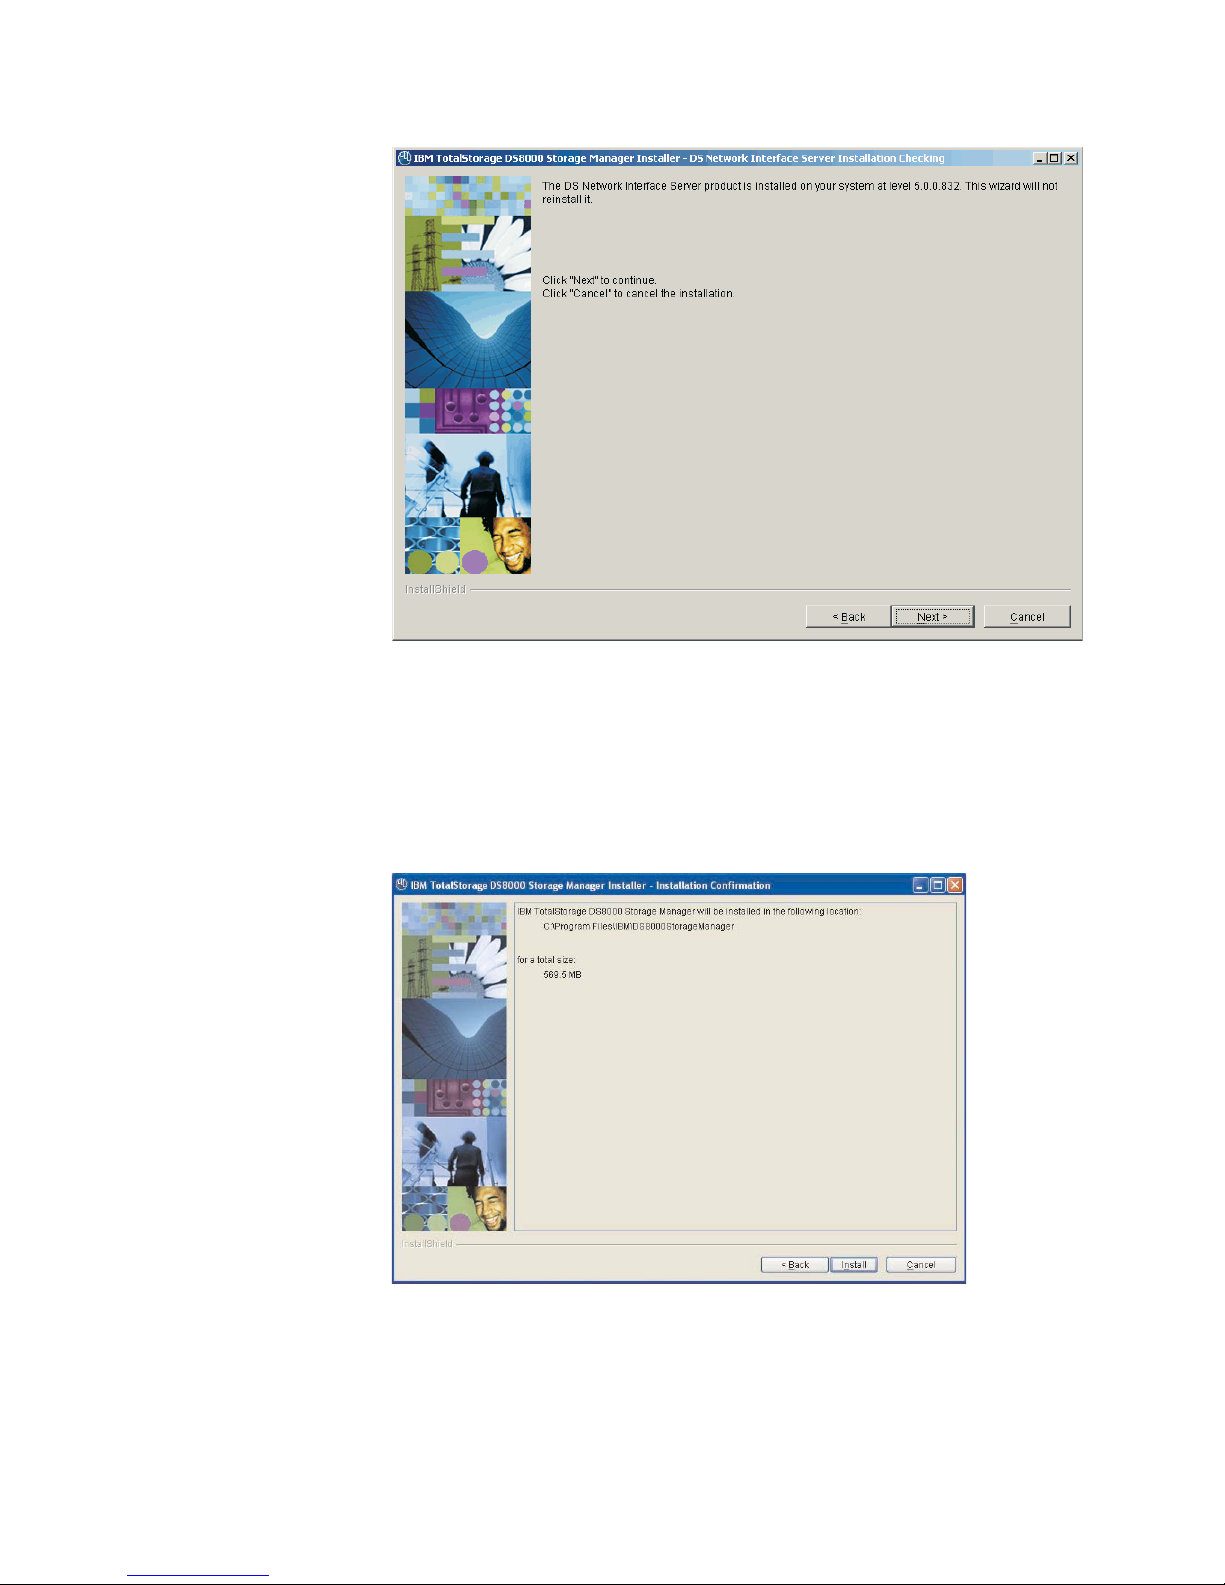
f2c00369
DS Network Interface Server Installation Checking window
10. Observe the information that is displayed on the DS Network Interface Server
Installation Checking window regarding the version of the DS Network
Interface Server that is already installed on your system and the action that the
wizard will perform. If you agree, click Next or click Cancel to exit the upgrade
process. When you click Next, the Installation Confirmation window is
displayed. This window displays both the location where the product will be
installed and the total size that is required for the installation.
Windows Installation Confirmation window
11. Click the Install button on the Installation Confirmation window to begin the
installation process. There are several progress windows that are displayed.
There is no required interaction on your part for each of the progress windows
that are displayed. However, you can choose to cancel (not recommended) the
installation on any of the progress windows with varying consequences.
The installation process performs the following actions:
Chapter 2. Installing the DS8000 Storage Manager 49
|
|
|
|
|
|
|
|
|
|
|
|
|
|
|
|
|
|
|
Page 76

a. If the two servers (DS Storage Manager Server and DS Network Interface
Server) are already installed on your system, they are stopped in the
following order of windows:
1) The Embedded IBM WebSphere Application Server - Express server
(part of the DS Storage Manager Server) window is stopped first.
2) The service window (DS Network Interface Server) is stopped next.
3) The WS Help System (part of the DS Storage Manager Server) window
is stopped, if it was not stopped before by the Embedded IBM
WebSphere Application Server.
b.
If one or both of the servers are not installed or have to be upgraded on
your system, they are installed or upgraded in the following order (the
progress of the installation is indicated on the associated progress
window):
1) DS Storage Manager Server Installation Progress window
2) DS Network Interface Server Installation Progress window
Note:
Yo u can click Cancel (not recommended) during the DS Network
Interface Server installation process. The process does not stop
immediately when the Cancel button is clicked. Rather, the process
continues to install all the files that are associated with this part of
the installation. These files remain installed and are not reinstalled
upon reactivation of the installation process. A confirmation message
is displayed asking you to affirm that you want to cancel the
installation.
c. The Components Installation Progress (displaying the installation or
upgrade progress of the DS Storage Manager product applications) is
displayed after the servers have been installed or upgraded.
Note:
Yo u can click Cancel (not recommended) during the components
installation process. The installation process stops immediately when
the Cancel button is clicked. A window with a confirmation message
is displayed. For a new installation, when you confirm that you want
to stop the process, all the files that have been copied up to the
point that the Cancel button was clicked are uninstalled. You are
then exited from the installation process.
When
this part of the installation is completed, the system starts both servers:
first the DS Network Interface Server and then the DS Storage Manager
Server. Wait for the servers to be started before proceeding to the next step.
When the servers have been started, the Installer Finish window is displayed.
12. Click Finish to exit the installation process. When the installation process
exits, a file (postinstallation.txt) is displayed that contains the postinstallation
tasks. Follow the instructions in this text file to complete the postinstallation
tasks.
50 DS8000 User’s Guide
|
|
|
|
|
|
|
|
|
|
|
|
|
|
|
|
|
|
|
|
|
|
|
|
|
|
|
|
|
|
|
|
|
|
|
|
|
|
|
|
|
Page 77

Windows DS8000 Storage Manager Installer Finish window
Note:
If the installation fails, you must exit the installation process and check
the install log for error messages.
13. If the Finish window indicates that the installation fails, check the installation
log for error messages. The installation log is located in xxx\logs\install.log,
where xxx is the destination directory where the IBM TotalStorage DS Storage
Manager is installed (for example, c:\Program Files\IBM\DS8000 Storage
Manager) .
Errors fall into two categories: system or incorrect values that are designated
during the installation process. Use the following guidelines to correct these
errors.
v If the error is due to a system problem, correct it and reinstall the DS8000
Storage manager using either the interactive or silent mode of installation.
v If the error is due to a wrong installation parameter value, restart the
installation using the steps that are described in this procedure or the steps
that are described in the silent mode installation process. Navigate to the
Server Parameters window and insert the correct values. Finish the
installation process.
14. Complete the postinstallation tasks. If, when exiting the installation wizard, the
postinstallation.txt file does not automatically open, manually open it from the
LaunchPad window, and follow the instructions to complete the postinstallation
tasks.
15. Exit the LaunchPad program by clicking Exit on the LaunchPad window.
Upgrading the IBM TotalStorage DS Storage Manager on the Windows
operating system in unattended (silent) mode
Use the following steps to upgrade the IBM TotalStorage DS Storage Manager in
your Windows environment using the unattended (silent) mode.
Chapter 2. Installing the DS8000 Storage Manager 51
|
|
|
|
|
|
|
|
|
|
|
|
|
|
|
|
|
|
|
|
|
|
|
|
|
|
|
|
|
Page 78

Note: The DS Storage Manager is not supported on any Windows 64-bit operating
system.
The unattended (silent mode) upgrade option allows you to run the upgrade
program unattended. Use this method of upgrade to issue a command from a
command prompt window, in the root directory of the IBM TotalStorage DS Storage
Manager CD.
Perform the following steps to upgrade the IBM TotalStorage DS Storage Manager
in your Windows environment using the unattended mode:
1. Log on to your Windows system as an administrator.
2. Insert the IBM TotalStorage DS Storage Manager upgrade CD into the CD-ROM
drive. If the interactive mode starts, click the Exit selection on the LaunchPad
window to exit.
3. Type the following command at the command prompt and press the Enter key
to start the upgrade process in silent mode: setup.exe -silent
4. Check the install log file for any possible error messages. This file is located in
the xxx\logs\install.log directory, where xxx is the destination directory where
the IBM TotalStorage DS Storage Manager is installed.
5. Start the IBM TotalStorage DS Storage Manager, if no errors are evident.
6. Perform the postinstallation tasks when the DS Storage Manager has been
installed successfully. Yo u can access the instructions for the postinstallation
tasks from the postinstallation.txt file, in the doc directory on the product CD.
52 DS8000 User’s Guide
|
|
|
|
|
|
|
|
|
|
|
|
|
|
|
|
|
|
|
|
|
Page 79

Chapter 3. Installing the IBM TotalStorage DS8000 Storage
Manager on the Linux operating system
This section provides and overview of the installation, upgrade, and uninstall
processes and instructions associated with the IBM TotalStorage DS8000 Storage
Manager on the Linux operating system.
You can choose to install the IBM TotalStorage DS8000 Storage Manager on the
Linux (Red Hat Enterprise Linux 2.1) operating system using either of the following
modes:
v Graphical mode – allows you to use an online installation wizard that guides you
through the installation process providing prompts and information needed to
complete the installation.
v Unattended mode (also called silent mode) – allows you to customize a response
file and issue a command to complete the installation process.
Installing the IBM TotalStorage DS Storage Manager on a Linux
operating system using the graphical mode
You can install the IBM TotalStorage DS Storage Manager in your Linux
environment using the graphical mode.
Note: During the installation process, do not interrupt the program by abnormal
methods, because an interruption can cause unpredictable effects in the
system. Abnormal methods include using CTRL-C, closing the launchpad
window which is open behind the installation windows, or shutting down the
power source. To interrupt the installation process normally, use the Windows
application Cancel button.
Perform the following steps to install the IBM TotalStorage DS Storage Manager.
1. Log on as a user with root authority.
2. Create a mount point or choose an existing mount point.
3. Determine where you want to mount the DS8000 Storage Manager CD. For
example, imagine you have decided to mount the CD in a CD-ROM drive
known as /dev/cdrom at mount point /mnt/cdrom. When the time comes for you
to mount the CD in this drive, you perform the following steps:
a. Insert the CD in the CD-ROM drive.
b. Type the following command at the command prompt: # mount -o ro
/dev/cdrom /mnt/cdrom
4. Choose the destination paths for the DS8000 Storage Manager components
and be sure that you have enough space available on the chosen destination.
The installation program (installer) provides a default installation location
(/opt/IBM/DS8000StorageManager) for the component. Yo u can override this
by using the installer browse function. When you click Next, the installer
analyzes the available space for the location that you provide. If there is not
enough space, you cannot proceed to the next panel in the installation
process.
5. Change the current directory to the mount point for the CD-ROM drive. For
example, if the CD was mounted at the /mnt/cdrom mount point, type the
following command: # cd /mnt/cdrom
6. Run the wizard launcher, launchpad_linux, by typing the following command: #
./launchpad_linux. The installation in graphical mode begins with a
© Copyright IBM Corp. 2004, 2005 53
Page 80

LaunchPad facility to launch the installation program wizard.
Launchpad window
The LaunchPad facility provides links for you to view various text files, such
as:
DS8000 Storage Manager overview
Provides information about the IBM TotalStorage DS Storage Manager
software.
Readme file (recommended selection)
Provides last minute product information that was not provided in these
installation instructions.
User’s guide
Provides the instructions, in HTML format, associated with installing the
DS8000 Storage Manager.
DS8000 Storage Manager Web site
Provides information from the product Web site.
Installation wizard
Starts the IBM TotalStorage DS Storage Manager installation program.
Post installation tasks
Provides information about configuring the IBM TotalStorage DS Storage
Manager.
Exit
Exits the IBM TotalStorage DS Storage Manager LaunchPad program.
7. Click the README selection on the LaunchPad window to ensure that you
have the latest installation information. The README file can provide
additional information that supersedes information in this guide.
Note: Yo u can also access the README.txt file located in the doc
subdirectory on the IBM TotalStorage DS8000 Storage Manager CD.
54 DS8000 User’s Guide
Page 81

8. Click the Installation wizard selection on the LaunchPad to start the
installation.
Note: The LaunchPad window remains open (behind the wizard) during the
installation. Yo u can access product information after the installation has
started. The LaunchPad returns to the foreground when the installation
is complete. You can click Exit to close the LaunchPad.
There might be a slight delay while the software loads on your system. After
the software loads, a Command prompt window opens to display the following
message:
Initializing InstallShield Wizard...
Preparing Java (tm) Virtual Machine .............................
. ......................................................
The Welcome window of the IBM TotalStorage DS Storage Manager
installation program displays.
DS8000 Storage Manager Installer Welcome window
9. Click Next to continue, or click Cancel to exit the installation. When you click
Next, the License Agreement window is displayed.
Chapter 3. Installing on the Linux operating system 55
Page 82

License Agreement window
Note:
Anytime you click Cancel on any of the installation windows a message
asking for you to confirm that you want to exit is displayed.
10. Read the license agreement and click your acceptance or nonacceptance of
the agreement. If you accept, the Next button is highlighted. Click Next to
continue or click Cancel to exit the installation. When you click Next, the
Destination Directory window is displayed.
Destination Directory window
11. Choose the directory on the Destination Directory window where you want to
install the application by using one of the following options. Clicking Next after
any one of the options causes the server installation checking windows (a
56 DS8000 User’s Guide
|
|
Page 83

window for each server) to display if the DS Storage Manager is installed on
your system, or the Server Parameters window is displayed.
a. Click the Next button to accept the default (recommended) directory that is
shown in the Linux Destination Directory window.
b. Type a fully qualified directory path into the Directory Name path to
designate your own directory. Then click the Next button.
c. Click the Browse button and a directory window is displayed. Scroll to the
directory that you want to use for the application. Click it and click OK. The
directory path is displayed in the Directory Name field. Click Next to
continue.
d. Click Cancel to exit the installation process.
12.
Observe the message on each of the next two server installation checking
windows, and click Next on each window to continue. If the servers have not
been installed, the Server Parameters window is displayed with default values
in the input fields. Go to Step 13 to proceed with the Server Parameters
window.
The DS Storage Manager Server Installation Checking window is displayed if
the DS Storage Manager server is already installed on your system. A
message is displayed on the window that indicates which version of the server
is installed and whether the installation process installs a newer version of the
server. To continue the installation process, you must click Next, or click
Cancel to exit the installation process.
When you click Next, the DS Network Interface Server Installation Checking
window is displayed with a message. This message indicates the version of
the DS Network Interface server that is installed on your system and whether
the installation process installs a newer version of the server. To continue the
installation process, you must click Next, or click Cancel to exit the installation
process.
When you click Next, the Installation Confirmation window is displayed. If your
installation process has taken you through these two checking windows, go to
Step 19 on page 61 to proceed with the installation.
13. Click Next after you ensure that all the fields on the Server Parameters
window contain acceptable values. All fields must contain a value before you
can proceed to the next step. You can change the default values by supplying
the following information:
Chapter 3. Installing on the Linux operating system 57
|
|
|
|
|
|
|
|
|
|
|
|
|
|
|
|
|
|
|
|
|
|
|
|
|
|
|
|
Page 84

Linux Server Parameters window
a. Host Name — The host name of the physical machine where the DS
Storage Manager Server is installed. The host name must resolve to a
physical network node on the server. When multiple network cards exist in
the server, the host name or IP address must resolve to one of the network
cards. The value that you specify for the host name is used as the value of
the hostName property in WebSphere Application Server configuration files.
Specify the host name value in one of the following formats:
v The fully qualified domain name servers (DNS) host name string; for
example, xmachine.manhattan.ibm.com.
v The default short DNS host name string; for example, xmachine.
v The numeric IP address; for example, 9.127.255.3.
v The generic name localhost or its equivalent IP address; for example,
127.0.0.1.
Note:
The specified value for the host name is stored by WebSphere
Application Server into its internal configuration files. If you specified
the host name in the fully qualified form or the short host name
string, do not change the host name after the DS Storage Manager
Server installation. If you do, the host name and the name that you
specified for the configuration file no longer match. If you do change
the host name, you must manually edit all the WebSphere
Application Server configuration files that contain references to the
old name to reflect the new name. If you specified the host name in
the form of the numeric IP address, you must use a fixed IP address
for the computer (you cannot use DHCP to obtain a dynamic IP
address for it). The above restrictions do not exist if you specified
the host name as localhost.
b. HTTP Port — The port number that DS Storage Manager Server uses.
The port number must be a port that is not being used by another process
on the system. After DS Storage Manager Server is installed, you must
include this port number in the Web address for opening the console. This
58 DS8000 User’s Guide
|
|
|
|
|
|
|
|
|
|
|
|
|
|
|
|
|
|
|
|
|
|
|
|
|
|
|
|
|
|
|
|
|
Page 85

Web address is the protocol name, plus the fully qualified host name, plus
the port, plus DS8000/Console. An example is
http://myhost.com:8451/DS8000/Console
c. HTTPS Port — The port that DS Storage Manager Server uses for secure
HTTP transport (HTTPS).
d. Bootstrap/RMI Port — The port that DS Storage Manager Server uses for
bootstrap port.
e. SOAP Port — The port that DS Storage Manager Server uses for Simple
Object Access Protocol (SOAP).
f. Server help port — The port for the Eclipse help Server. This is the port
that the help system (based on Eclipse technology) uses to receive
requests for help files.
Note:
The values used in the Server Parameters window fields must not
conflict with existing port assignments that are already on the system or
reserved for use by another application.
14. Click Next when the Server Parameters window is complete. The SSL
Configuration window is displayed. This window allows you to supply the fully
qualified name of the two server key that are files generated before or during
the DS8000 Storage Manager installation.
Linux SSL Configuration window
15. Follow the instructions on the window.
a. First, designate whether you want to generate a new SSL certificate by
selecting Generate the self-signed certificates during installation. This
is the most likely selection when you are installing the DS8000 Storage
Manager for the first time. You can also select Use existing SSL
certificates. This choice is most likely made when the key files already
exist and you do not want to generate new key files.
b. Complete the rest of the fields on the window. Provide the fully qualified
path to the key file and trust file by using the Browse button. The key file
Chapter 3. Installing on the Linux operating system 59
|
|
|
|
|
|
|
|
|
|
|
|
|
|
|
Page 86
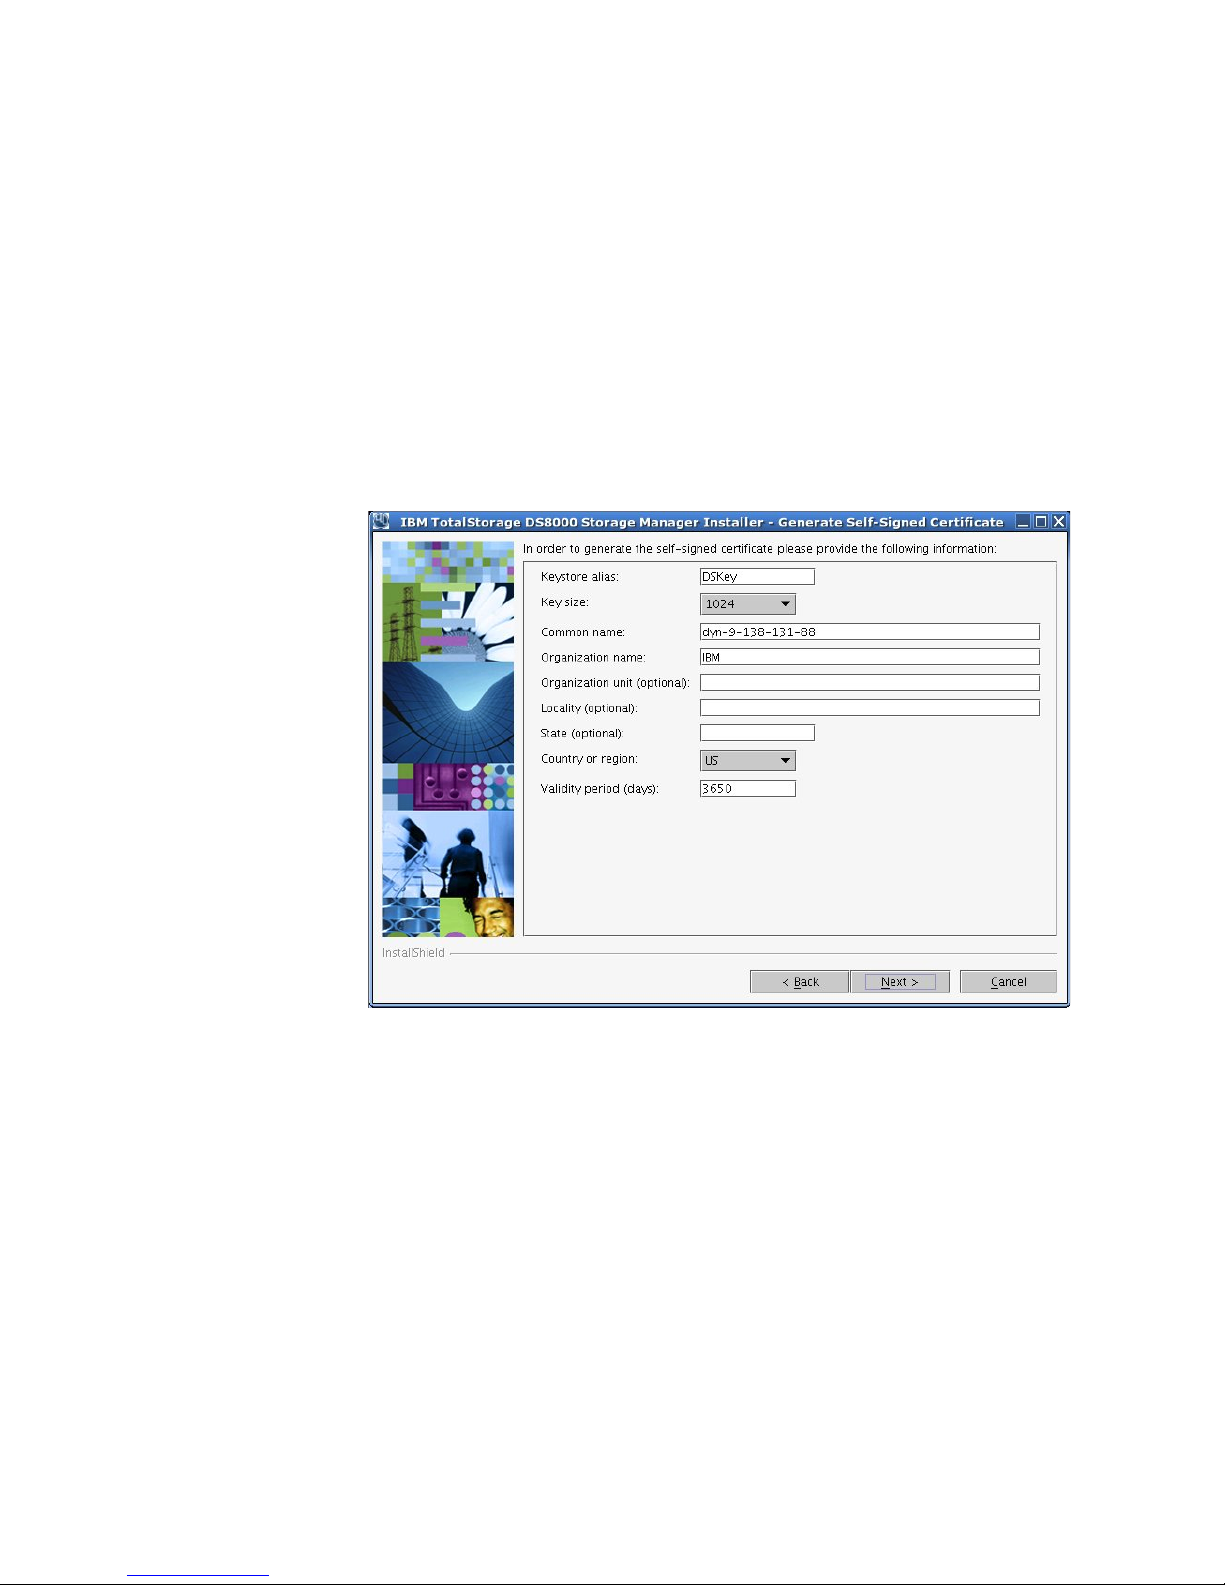
and trust file are identified by an extension of .jks. Also, provide a
password for each file. The password must be a minimum of six characters
and cannot contain any blanks.
16. Click Next to continue the installation process. If you have selected Generate
the self-signed certificates during installation, the Generate Self-Signed
Certificate window is displayed. If you selected Use existing SSL certificates,
the Installation Confirmation window is displayed.
Note: When you select Generate self-signed certificates during installation
and the key files already exist on the system at the specified location,
clicking Next displays a message. The message asks you to designate
whether you want to have the system delete existing application server
certificates if they exist on the location and to generate others. The
default is NO, which means that you want to keep the existing
application server certificates.
Linux Generate Self-Signed Certificate window
17. Complete each of the input fields with the required information. Use the
following as a guide to provide the needed information.
Keystore alias
This is the alias for the self-signed certificate. It uniquely identifies the
certificate within the keystore file. It is a good practice to use a unique
name that is related to the server name.
Key size
Two key sizes are available, 512 and 1024. 1024 is the default.
Common name
This name is the primary, universal identity for the certificate. If your
system contains the secured WebSphere environment, this name must
be valid in the configured user registry.
Organization name
The name of your company
60 DS8000 User’s Guide
Page 87

Organization unit (optional)
The name of a department or division within your company. Remember
that you are building a profile for the certificate. As a security measure
the more specific the information the more secure your system.
Locality (optional)
The city or location where your company resides.
State (optional)
The state or province where your company resides.
Country or region
The two-character designator that identifies the country where your
company is located. Use the pulldown menu to make this selection.
Validity period (days)
Specifies the lifetime of the certificate in days.
The information that you provide is used to build a profile for the certificate.
This information is used during identity processing to ensure validation of any
processing that is occurring. It is part of the security measures that is used
during SSL connectivity.
Click Next to continue, or click Cancel to exit the installation.
18. Click Next. The Installation Confirmation window is displayed. This window
displays both the location where the product will be installed and the total size
that is needed for the installation
Linux Installation Confirmation window
19. Click the Install button on the Installation Confirmation window to begin the
installation process. There are several progress windows that are displayed.
There is no required interaction on your part for each of the progress windows
that are displayed. However, you can choose to cancel (not recommended) the
installation on any of the progress windows with varying consequences.
The installation process performs the following actions:
a. If the two servers (DS Storage Manager Server and DS Network Interface
Server) are already installed on your system, they are stopped in the
following order of windows:
1) The Embedded IBM WebSphere Application Server - Express server
(part of the DS Storage Manager Server) window is stopped first.
2) The service window (DS Network Interface Server) is stopped next.
Chapter 3. Installing on the Linux operating system 61
|
|
|
|
|
|
|
|
|
|
|
|
Page 88

3) The WS Help System (part of the DS Storage Manager Server) window
is stopped, if it was not stopped before by the Embedded IBM
WebSphere Application Server.
b. If one or both of the servers are not installed or have to be upgraded on
your system, they are installed or upgraded in the following order (the
progress of the installation is indicated on the associated progress
window):
1) DS Storage Manager Server Installation Progress window
2) DS Network Interface Server Installation Progress window
Note:
Yo u can click Cancel (not recommended) during the DS Network
Interface Server installation process. The process does not stop
immediately when the Cancel button is clicked. Rather, the process
continues to install all the files that are associated with this part of
the installation. These files remain installed and are not reinstalled
upon reactivation of the installation process.
A confirmation message is displayed that asks you to confirm that
you want to cancel the installation.
c. The Components Installation Progress (displaying the installation or
upgrade progress of the DS Storage Manager product applications) is
displayed after the servers have been installed or upgraded.
Note:
Yo u can click Cancel (not recommended) during the components
installation process. The installation process stops immediately
when the Cancel button is clicked. A window with a confirmation
message is displayed. For a new installation, when you confirm that
you want to leave, all the files that have been copied up to the point
that the Cancel button was clicked are uninstalled. You then are
exited from the installation process.
When
this part of the installation is completed, the system starts both servers:
first the DS Network Interface Server and then the DS Storage Manager
Server. Wait for the servers to be started before going to the next step. When
the servers have been started, the Installer Finish window is displayed.
20. Click Finish to exit the installation process. When the installation wizard exits,
a file (postinstallation.txt) is displayed, containing the postinstallation tasks.
Follow the instructions in the postinstallation text file to complete the
postinstallation tasks. If the installation failed, you must exit the installation
process and check the install log for error messages.
62 DS8000 User’s Guide
|
|
|
|
|
|
|
|
|
|
|
|
|
|
|
|
|
|
|
|
|
|
|
|
|
|
|
|
|
|
|
Page 89
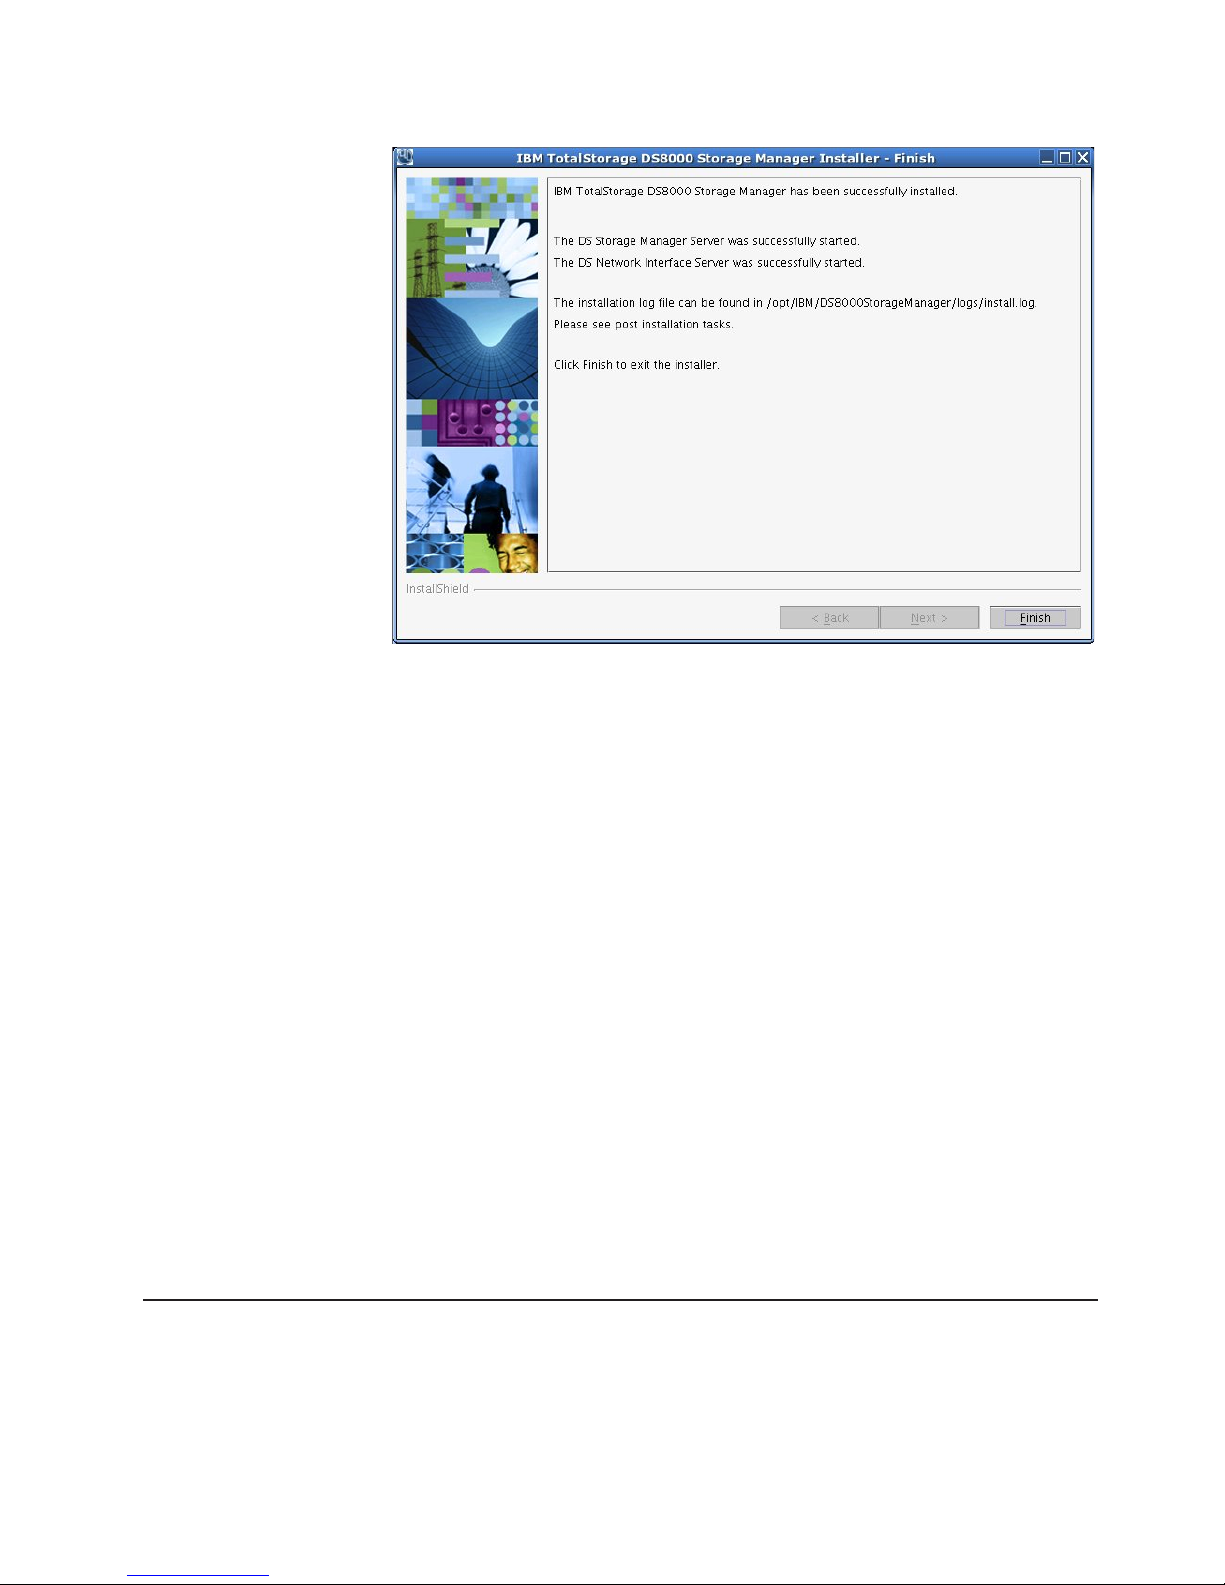
Linux DS8000 Storage Manager Installer Finish window
21. If the Finish window indicates that the installation failed, check the installation
log for error messages. The installation log is located in xxx/logs/install.log,
where xxx is the destination directory where the IBM TotalStorage DS Storage
Manager is installed.
Errors fall into two categories: system or incorrect values that are designated
during the install process. Use the following guidelines to correct these errors:
v If the error is due to a system problem, correct it and reinstall the GUI using
either the graphical or silent mode of install.
v If the error is due to a wrong installation parameter value, restart the
installation using the steps that are described in this procedure or the steps
that are described in the silent mode install. Navigate to the Console Server
Parameters window and insert the correct values. Then finish the
installation.
22.
Check the postinstallation instructions after the installation has completed. The
postinstallation.txt file is displayed immediately after the installation of the DS
Storage Manager finishes processing. If the postallation.txt file does not
display, click the Post installation tasks link on the LaunchPad window to
access these instructions. These instructions provide reminders and the steps
to help you start using the DS Storage Manager.
23. Exit the LaunchPad program by clicking Exit on the LaunchPad window.
24. Type the following command when you are finished using the IBM TotalStorage
DS Storage Manager CD and want to remove it from your computer: # umount
/mnt/cdrom where /mnt/cdrom is where the CD is mounted.
Installing the IBM TotalStorage DS8000 Storage Manager on the Linux
operating system in unattended (silent) mode
You can install the IBM TotalStorage DS Storage Manager in your Linux
environment using the unattended (silent) mode.
Chapter 3. Installing on the Linux operating system 63
Page 90

The unattended (silent) installation option allows you to run the installation program
unattended. Use this method of installation to customize a response file and to
issue a command from a command prompt window. The response file is a template
on the IBM TotalStorage DS Storage Manager CD.
Perform the following steps to install the IBM TotalStorage DS Storage Manager in
your Linux environment using the unattended mode:
1. Log on as a user with root authority.
2. Create a mount point or choose an existing mount point.
3. Determine where you want to mount the DS8000 Storage Manager CD. For
example, imagine you have decided to mount the CD in a CD-ROM drive
known as /dev/cdrom at mount point /mnt/cdrom. When the time comes for you
to mount the CD in this drive, perform the following steps:
a. Insert the CD in the CD-ROM drive.
b. Type the following command at the command prompt: # mount -o ro
/dev/cdrom /mnt/cdrom
4. Choose the destination paths for the DS8000 Storage Manager components
and be sure you have enough available space on the chosen destination. The
installation program (installer) provides a default installation location
(/opt/IBM/DS8000StorageManager) for the component. Yo u can override this
by using the product.installLocation parameter (option) from the response file
used by the silent installation.
5. Change the current directory to the mount point for the CD-ROM drive. For
example, if the CD was mounted at the /mnt/cdrom mount point, type the
following command: # cd /mnt/cdrom
6. Read the README.txt file located on the DS8000 Storage Manager CD to
check for information that might supersede the information in these installation
instructions.
7. Copy the template response file (responsefile.txt) from the root directory of the
product CD to a location on your system in order to modify it according to your
installation parameters. The response file contains all the installation
parameters whose values can be modified during an interactive installation.
8. Modify your copy of the response file in accordance with the following
guidelines:
a. Open the response file using a text editor. Remember that you must
enclose all values in double quotation marks (″<value>″).
b. Replace the parameters values with the appropriate values for each
uncommented option.
c. For the port values, ensure that they are free for use (not used or reserved
for use by other applications on your system). Use the command netstat
-an to verify the ports that are in use on your system.
d. Yo u must specify two passwords for the SSL keys files. These passwords
must observe the following criteria:
v The passwords must contain at least 6 characters.
v Use the following options within the responsefile.txt file to set these
options:
– For the keystore use:
-W wasSslConfiguration.keystorePassword="your_keystore_password"
– For the truststore use:
64 DS8000 User’s Guide
Page 91

-W wasSslConfiguration.truststorePassword="<your_truststore_password>"
Note: These options do not have default values. If you do not set the
values, the installation process fails.
e.
Save the changes made to the response/options file.
9. Type ./setup.linux -options <responsefile-path>/<responsefile> in the same
Command Prompt window in which you changed the current directory to the
root of the CD, to start the DS8000 Storage Manager installation program in
silent mode.
<responsefile-path>
Designates the path where the response file was created before
<responsefile>
Designates the relative name of the response file that you created and
modified before
10.
Wait for the DS8000 Storage Manager installation program to install the
product. This can take 5 - 10 minutes.
Note: During this processing, the installation process checks to see if the DS
Storage Manager server and DS Network Interface Server are already
installed and if they are the current version or need to be upgraded. If
they are already installed and need to be upgraded, the installation
process performs this function using the already set values from the
previous installation, found on the system in the server configuration
files, for all the associated values. The specified values in the response
file are ignored.
11. Review the log file for any possible error messages, after the installation
program completes. If there are no errors, the installation program completed
successfully. The log file is located in xxx/logs/install.log, where xxx is the
destination directory where the DS8000 Storage Manager was installed. The
install.log file contains a trace of the installation actions.
12. Perform the postinstallation tasks after the installation has completed. Yo u can
read the instructions for the postinstallation tasks in the postinstallation.txt in
the doc directory on the product CD.
The following is an example of the template response file that is created when you
process the previous steps.
Chapter 3. Installing on the Linux operating system 65
|
|
|
|
|
|
|
|
|
|
Page 92

################################################################################
#
# InstallShield Options File
#
# Wizard name: Setup
# Wizard source: setup.jar
# Created on: Tue Jul 27 09:02:47 EEST 2004
# Created by: InstallShield Options File Generator
#
# This file contains values that were specified during a recent execution of
# Setup. It can be used to configure Setup with the options specified below when
# the wizard is run with the "-options" command line option. Read each setting’s
# documentation for information on how to change its value.
#
# A common use of an options file is to run the wizard in silent mode. This lets
# the options file author specify wizard settings without having to run the
# wizard in graphical or console mode. To use this options file for silent mode
# execution, use the following command line arguments when running the wizard:
#
# -options "responsefile.txt"
#
################################################################################
-silent
################################################################################
#
# IBM TotalStorage DS8000 Storage Manager Install Location
#
# The install location of the product. Specify a valid directory into which the
# product should be installed. If the directory contains spaces, enclose it in
# double-quotes.
#
-P product.installLocation="/opt/IBM/DS8000StorageManager"
################################################################################
#
# User Input Field - hostname
#
# The fully-qualified host name of the machine where DS Storage Manager Server
# will be installed.
#
-W wasExpressConfig.hostname="localhost"
################################################################################
#
# User Input Field - httpPort
#
# The port number that the HTTP transport in the application server will use.
# This value must not conflict with existing port
# assignments on the system.
#
-W wasExpressConfig.httpPort="8451"
################################################################################
#
# User Input Field - httpsPort
#
# The port number that the HTTPS transport in the application server will use
# for secure HTTP transport. This value must not conflict with existing port
# assignments on the system.
-W wasExpressConfig.httpsPort="8452"
################################################################################
#
66 DS8000 User’s Guide
Page 93

# User Input Field - bootstrapPort
#
# The address for the bootstrap function and the port number for the Java Remote
# Method Invocation (RMI) connector in the application server. This value must
# not conflict with existing port assignments on the system.
#
-W wasExpressConfig.bootstrapPort="8453"
################################################################################
#
# User Input Field - soapPort
#
# The address for the Simple Object Access Protocol (SOAP) connector in the
# application server. This value must not conflict with existing port
# assignments on the system.
#
-W wasExpressConfig.soapPort="8454"
################################################################################
#
# User Input Field - helpPort
#
# The port for Eclipse
# This value must not conflict with existing port assignments on the system.
#
-W wasExpressConfig.helpPort="8455"
################################################################################
#
# User Input Field - certificateOption
#
# Select one of the following options concerning the SSL
# certificates. Legal values are: "generate" (the default value) - Generate the
# self-signed certificates during installation. "use" - Use existing
# certificatesFor example, to specify that the "generate" option is selected,
# use -W wasSslConfigurationPanel.certificateOption="generate"
#
-W wasSslConfiguration.certificateOption="generate"
################################################################################
#
# User Input Field - keystoreFileName
#
# The absolute path of the keystore file.
#
-W wasSslConfiguration.keystoreFileName="/opt/IBM/
SMServer/keys/SMServerKeyFile.jks"
################################################################################
#
# User Input Field - keystorePassword
#
# The password for the keystore file.
#
-W wasSslConfiguration.keystorePassword="<your_keystore_password>"
################################################################################
Chapter 3. Installing on the Linux operating system 67
Page 94

#
# User Input Field - truststoreFileName
#
# The absolute path of the truststore file.
#
-W wasSslConfiguration.truststoreFileName="/opt/IBM/
SMServer/keys/SMServerTrustFile.jks"
################################################################################
#
# User Input Field - truststorePassword
#
# The password for the truststore file.
#
-W wasSslConfiguration.truststorePassword="<your_truststore_password>"
################################################################################
#
# Delete server certificates option
#
# Option to delete certificates files if they exist.Legal values are: "yes" - in
# order to delete application server certificates if they exist on the location,
# and to generate others, or "no" (the default value) - in order to keep the
# existing application server certificates.
#
-G deleteCertificates=yes
################################################################################
#
# User Input Field - keystoreAlias
#
# The alias for the self-signed digital certificate, which is used to uniquely
# identify the certificate within the keystore file. If you have only one
# certificate in each keystore file, you can assign any value to the label.
# However, it is good practice to use a unique label related to the server name.
#
-W CertificateParams.keystoreAlias="DSKey"
################################################################################
#
# User Input Field - keySize
#
# The key size. That must be between 512 and 1024 and must be multiple of
# 64b.The only two allowed values are 512 or 1024. If you enter other values it
# takes the default value 1024.
#
-W CertificateParams.keySize="1024"
################################################################################
#
# User Input Field - commonName
#
# The common name is the primary, universal identity for the certificate; it
# should uniquely identify the principal that it represents. In a WebSphere
# environment, certificates frequently represent server principals, and the
# common convention is to use common names of the form "host_name" and
# "server_name". The common name must be valid in the configured user registry
# for the secured WebSphere environment.
#
68 DS8000 User’s Guide
Page 95

-W CertificateParams.commonName=""
################################################################################
#
# User Input Field - organizationName
#
# The name of your organization.
#
-W CertificateParams.organizationName="IBM"
################################################################################
#
# User Input Field - organizationUnit
#
# The organization unit (a department or division). For a self-signed
# certificate, these fields are optional. However, commercial CAs might require
# them.
#
-W CertificateParams.organizationUnit=""
################################################################################
#
# User Input Field - localityName
#
# The location (city). For a self-signed certificate, these fields are optional.
# However, commercial CAs might require them.
#
-W CertificateParams.localityName=""
################################################################################
#
# User Input Field - state
#
# The state or province (if applicable). For a self-signed certificate, these
# fields are optional. However, commercial CAs might require them.
#
-W CertificateParams.state=""
################################################################################
#
# User Input Field - country
#
# The two-letter identifier of the country/region in which the server belongs.
# For a self-signed certificate, these fields are optional. However, commercial
# CAs might require them.
#
-W CertificateParams.country="US"
################################################################################
#
# User Input Field - validity
#
# The lifetime of the certificate in days.
#
-W CertificateParams.validity="3650"
Chapter 3. Installing on the Linux operating system 69
Page 96

Removing the IBM TotalStorage DS Storage Manager from a Linux
operating system
You can remove theIBM TotalStorage DS Storage Manager by following the steps in
this procedure.
1. Log on as root to the system where the DS8000 Storage Manager is installed.
2. Type: # <dest_path>/_uninst/uninstall to run the uninstallation program,
uninstall, from the _uninst subdirectory of <dest_path>. <dest_path> is the path
where the IBM TotalStorage DS Storage Manager is installed. If you used the
default path, it is /opt/IBM/DS8000StorageManager. The Uninstaller Welcome
window is displayed.
Uninstaller Welcome window
3. Click Next to continue or click Cancel to exit the removal process. When you
click Next, the Confirmation window is displayed showing the directory from
which the IBM TotalStorage DS Storage Manager GUI program will be removed.
Uninstaller Linux Confirmation window
70 DS8000 User’s Guide
Page 97
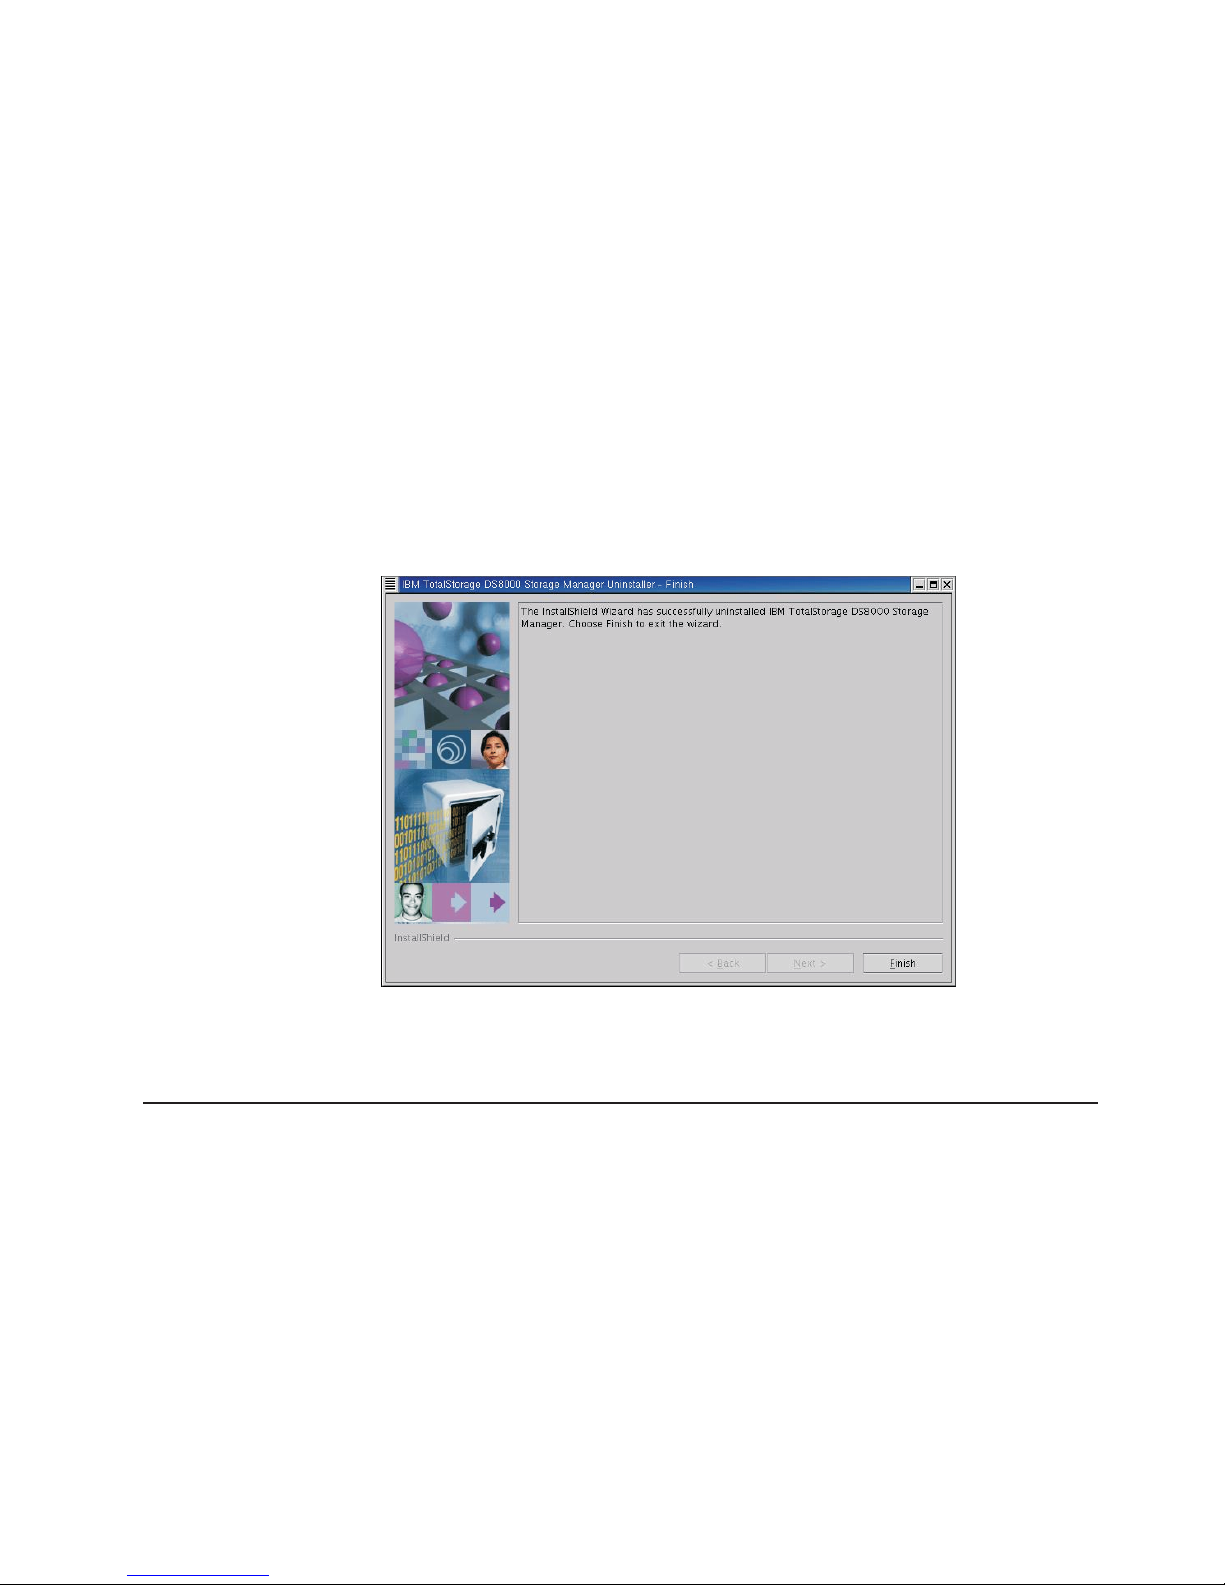
4. Click Remove to continue or Cancel to stop the removal and exit the
uninstallation process. Click Back to return to the previous window. When you
click Remove, the Uninstaller Uninstallation Progress window is displayed.
When the uninstallation process is finished, the Finish window is displayed
containing a statement about the success or failure of the uninstallation process.
During the uninstallation process, the following system checks are made:
v A check of your system to detect if DS Storage Manager Server is used by
other programs on the system and if not used, removes it from the system.
Otherwise, the DS Storage Manager Server is not removed from your
system.
v A check of your system to detect if DS Network Interface Server is used by
other programs on the system and if not used, removes it from the system.
Otherwise, the DS Network Interface Server is not removed from your
system.
When the uninstall process is finished, the Uninstaller Finish window is
displayed containing a statement about the success or failure of the
uninstallation process.
Uninstaller Finish window
5. Click Finish to complete the removal process and exit the uninstallation
program.
Removing the DS8000 Storage Manager from a Linux operating system
using the silent mode
You can remove the IBM TotalStorage DS Storage Manager from your Linux
operating system by using the silent (unattended mode).
1. Log on as root to the system where the DS8000 Storage Manager is installed.
2. Type # <dest_path>\_uninst\uninstall.exe -silent, where <dest_path> is the
path where the DS8000 Storage Manager is installed. This runs the
uninstallation program.
3. Wait for the program to remove the DS8000 Storage Manager.
Chapter 3. Installing on the Linux operating system 71
Page 98

Upgrading the IBM TotalStorage DS Storage Manager on a Linux
operating system
Use this process to upgrade the DS Storage Manager to the latest level.
Note: During the upgrade process, do not interrupt the program by abnormal
methods, because an interruption can cause unpredictable effects in the
system. Abnormal methods include using CTRL-C, closing the launchpad
window which is open behind the upgrade windows, or shutting down the
power source. To interrupt the upgrade process normally, use the Cancel
button displayed on an upgrade window.
Perform the following steps to upgrade the IBM TotalStorage DS Storage Manager.
1. Log on as a user with root authority.
2. Create a mount point or choose an existing mount point.
3. Determine where you want to mount the DS8000 Storage Manager CD. For
example, imagine you have decided to mount the CD in a CD-ROM drive
known as /dev/cdrom at mount point /mnt/cdrom. When the time comes for you
to mount the CD in this drive, perform the following steps:
a. Insert the CD in the CD-ROM drive.
b. Type the following command at the command prompt: # mount -o ro
/dev/cdrom /mnt/cdrom
4. Choose the destination paths for the DS8000 Storage Manager components
and be sure that you have enough space available on the chosen destination.
The upgrade program (installer) provides a default installation location
(/opt/IBM/DS8000StorageManager) for the component. Yo u can override the
default installation location by using the installer browse function. When you
click Next, the installer analyzes the available space for the location that you
provide. If there is not enough space, you cannot proceed to the next panel in
the upgrade process.
5. Change the current directory to the mount point for the CD-ROM drive. For
example, if the CD was mounted at the /mnt/cdrom mount point, type the
following command: # cd /mnt/cdrom.
6. Run the wizard launcher, launchpad_linux, by typing the following command: #
./launchpad_linux. The upgrade in graphical mode begins with a LaunchPad
facility to launch the upgrade program wizard.
72 DS8000 User’s Guide
|
|
|
|
|
|
|
|
|
|
|
|
|
|
|
|
|
|
|
|
|
|
|
|
|
|
|
|
|
|
|
|
|
Page 99

Launchpad window
The LaunchPad facility provides links for you to view various text files, such
as:
DS8000 Storage Manager overview
Provides information about the IBM TotalStorage DS Storage Manager
software.
Readme file (recommended selection)
Provides last minute product information that was not provided in these
upgrade instructions.
User’s guide
Provides the instructions, in HTML format, associated with installing and
upgrading the DS8000 Storage Manager.
DS8000 Storage Manager Web site
Provides information from the product Web site.
Installation wizard
Starts the IBM TotalStorage DS Storage Manager upgrade program.
Post installation tasks
Provides information about configuring the IBM TotalStorage DS Storage
Manager.
Exit
Exits the IBM TotalStorage DS Storage Manager LaunchPad program.
7. Click the README selection on the LaunchPad window to ensure that you
have the latest installation and upgrade information. The README file can
provide additional information that supersedes information in this guide.
Note: Yo u can also access the README.txt file located in the doc
subdirectory on the IBM TotalStorage DS8000 Storage Manager CD.
8. Click the Installation wizard selection on the LaunchPad to start the upgrade.
Chapter 3. Installing on the Linux operating system 73
|
|
|
|
|
|
|
|
|
|
|
|
|
|
|
|
|
|
|
|
|
|
|
|
|
|
|
|
|
Page 100

Note: The LaunchPad window remains open (behind the wizard) during the
upgrade. Yo u can access product information after the upgrade has
started. The LaunchPad returns to the foreground when the upgrade is
complete. Yo u can click Exit to close the LaunchPad.
There might be a slight delay while the software loads on your system. After
the software loads, a Command prompt window opens to display the following
message:
Initializing InstallShield Wizard...
Preparing Java (tm) Virtual Machine .............................
. ......................................................
The Welcome window of the IBM TotalStorage DS Storage Manager
installation program displays.
DS8000 Storage Manager Installer Welcome window
9. Click Next to continue, or click Cancel to exit the upgrade process. When you
click Next, the License Agreement window is displayed.
74 DS8000 User’s Guide
|
|
|
|
|
|
|
|
|
|
|
|
|
|
|
|
|
|
|
 Loading...