

Ibiza DJLIGHT65 Instruction Manual
PARTY LED LIGHT SET
DDJJLLIIGGHHTT6655
GB – INSTRUCTION MANUAL
F - MANUEL D’UTILISATION
D – BEDIENUNGSANLEITUNG
NL - HANDLEIDING
SLO – NAVODILA ZA UPORABO
ES – MANUAL DE INSTRUCCIONES
PT – MANUAL DE INSTRUÇÕES
RO – MANUAL DE UTILIZARE
©Copyright LOTRONIC 2016 DJLIGHT65
1
GB
Unpacking Instructions
Immediately upon receiving a fixture, carefully unpack the carton, check the contents to ensure that all parts are
present and have been received in good condition. Notify the freight company immediately and retain packing
material for inspection if any parts appear to be damaged from shipping or the carton itself shows signs of
mishandling. Keep the carton and all packing materials. In the event that a fixture must be returned to the
factory, it is important that the fixture be returned in the original factory box and packing.
Safety Instructions
Please read these instructions carefully, they include important information about the installation, usage and
maintenance of this product.
• Please keep this User Guide for future reference. If you sell the unit to another user, be sure that he also
receives this instruction booklet.
• Always make sure that you are connecting to the proper voltage, and that the line voltage you are connecting
to is not higher than that stated on the decal or rear panel of the fixture.
• This product is intended for indoor use only!
• To prevent risk of fire or shock, do not expose fixture to rain or moisture. Make sure there are no flammable
materials close to the unit while operating.
• The unit must be installed in a location with adequate ventilation, at least 1m from adjacent surfaces. Be sure
that no ventilation slots are blocked.
• Always disconnect from power source before servicing or replacing fuse and be sure to replace with same fuse
size and type.
• Maximum ambient temperature (Ta) is 104° F (40°C). Do not operate the fixture at temperatures higher than
this.
• In the event of a serious operating problem, stop using the unit immediately. Never try to repair the unit by
yourself. Repairs carried out by unskilled people can lead to damage or malfunction. Please contact the nearest
authorized technical assistance center. Always use the same type of spare parts.
• Make sure the power cord is never crimped or damaged.
• Never disconnect the power cord by pulling or tugging on the cord.
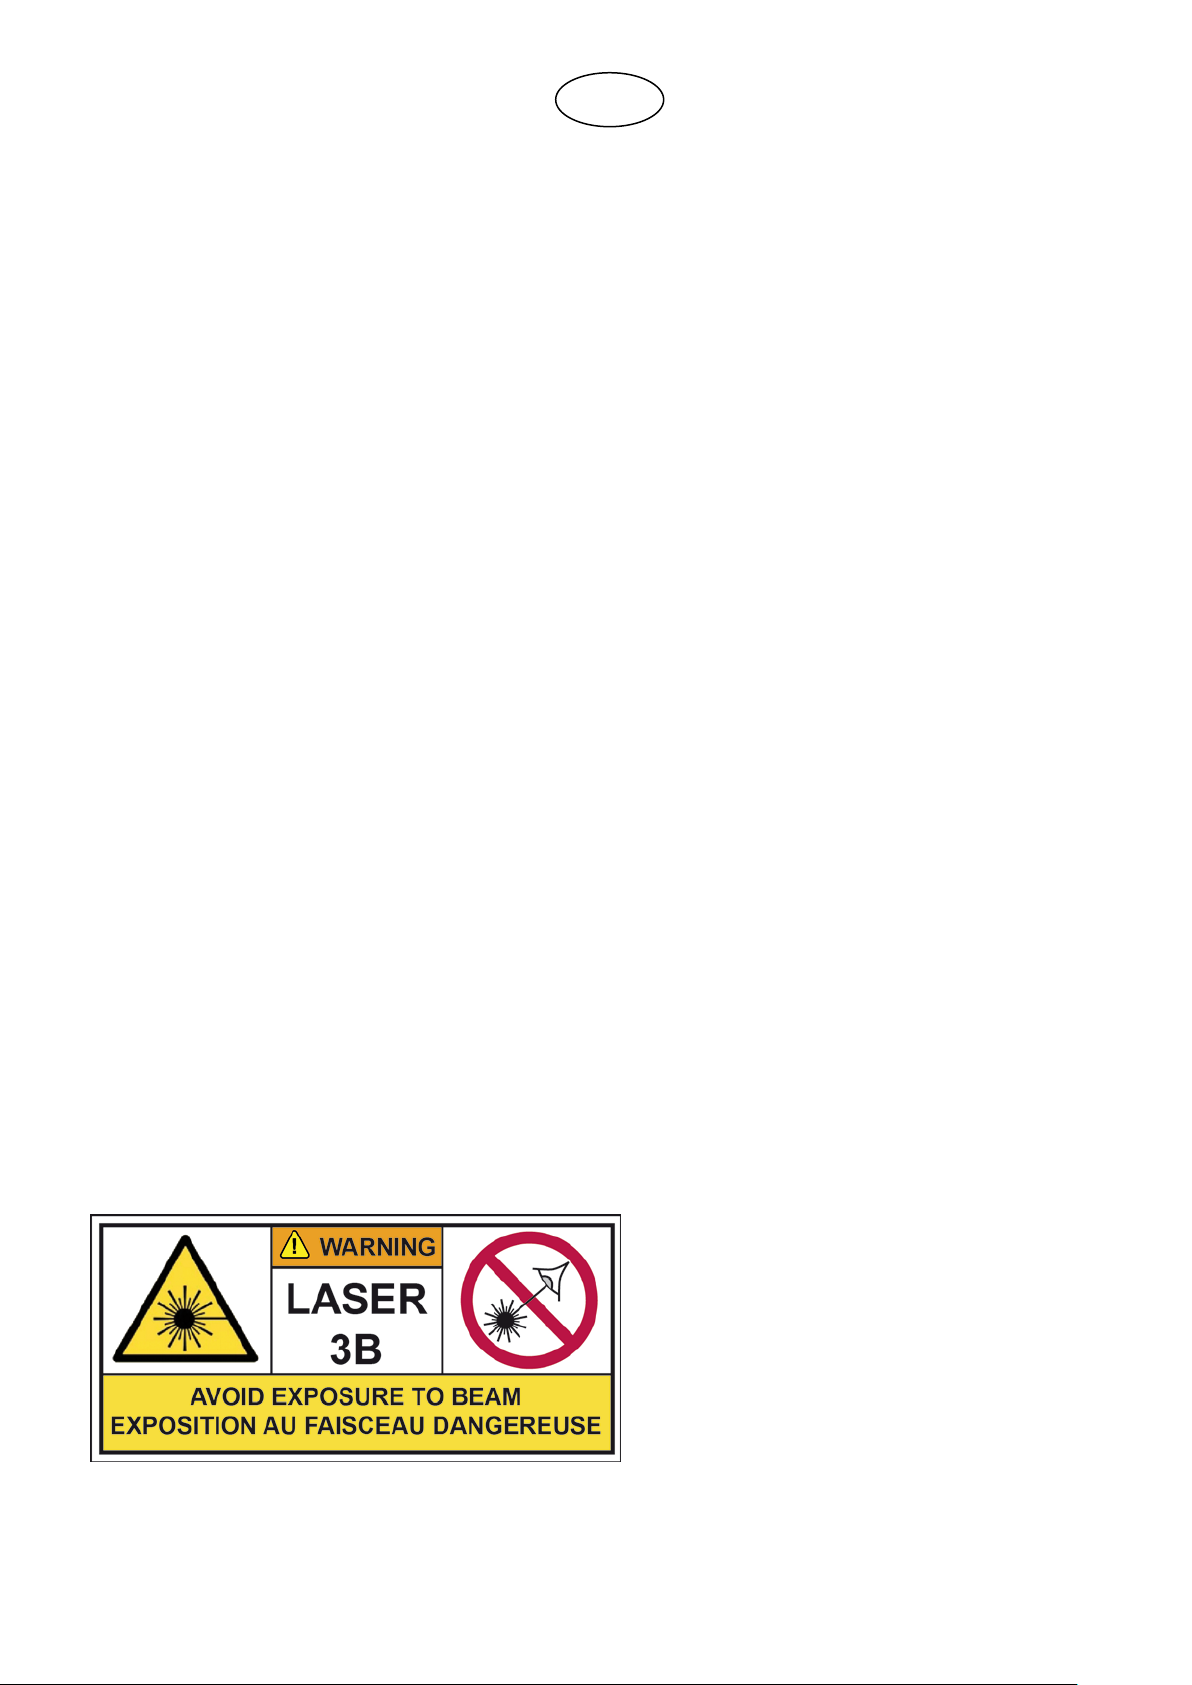
• Avoid direct eye exposure to the light source while it is on.
• DISCONNECT DEVICE: Where the MAINS plug or an appliance coupler is used as the disconnect device, the
disconnect device shall remain readily operable.
• The light source contained in this luminaire shall only be replaced by the manufacturer or his service agent or a
similar qualified person.
©Copyright LOTRONIC 2016 DJLIGHT65
2
Specifications
AutP: PAR auto operation
AP01-AP13: PAR light
effect
↔
S01-S32: PAR light
speed
AutF: Laser auto
operation
AF01-AF07: Laser
effects
↔
S01-S32: Laser effect
speed
↔
N00-N09: Motor
speed
AutN: Light set auto
operation
AN01-An10: Light
effects
↔
S01-S32: Light set
speed
↔
N00-N09: Motor
speed
SouP: PAR sound
activated
SP01-SP13: PAR light effect
SouF: Laser Sound
activated
SF01-SF07: Laser light effect
SouN: Light set sound
activated
SN01-SN10: Light set sound
activated
Power supply ....................................................................................... AC 220-240, 50/60Hz
Consumption ................................................................................................................. 60W
PAR cans ............................................................................................ 12 x 1W RGBW LED x 2
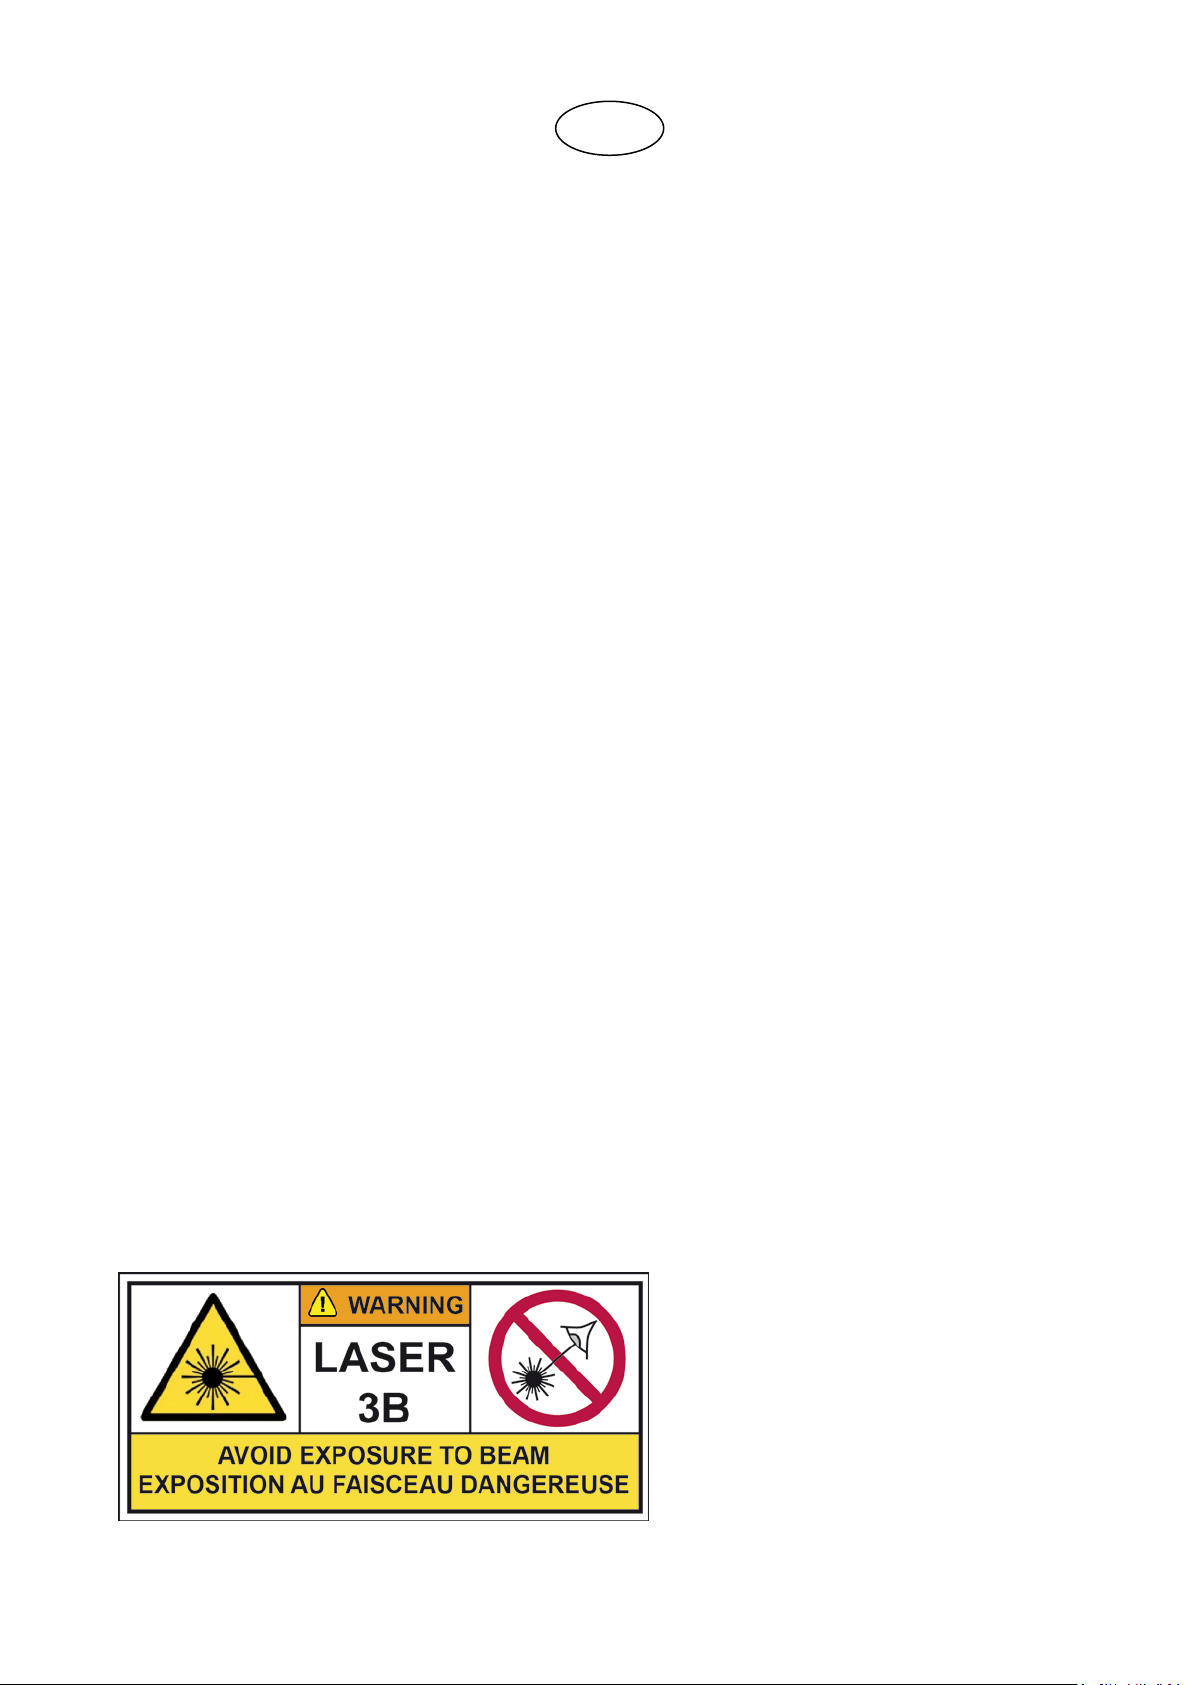
Laser ........................................................................................... Red: 100mW; green 30mW
Laser class ............................................................................................................................ 3
Height ................................................................................................................. 1.80m max.
Weight........................................................................................................................... 6.7kg
Installation of the units
Before positioning the light stand, ensure the stability of the installation site. Drive the screw into the screw hole
on the stand. Make sure that the units can’t fall from the stand. The manufacturer cannot be held responsible
for damages due to bad installation of the units.
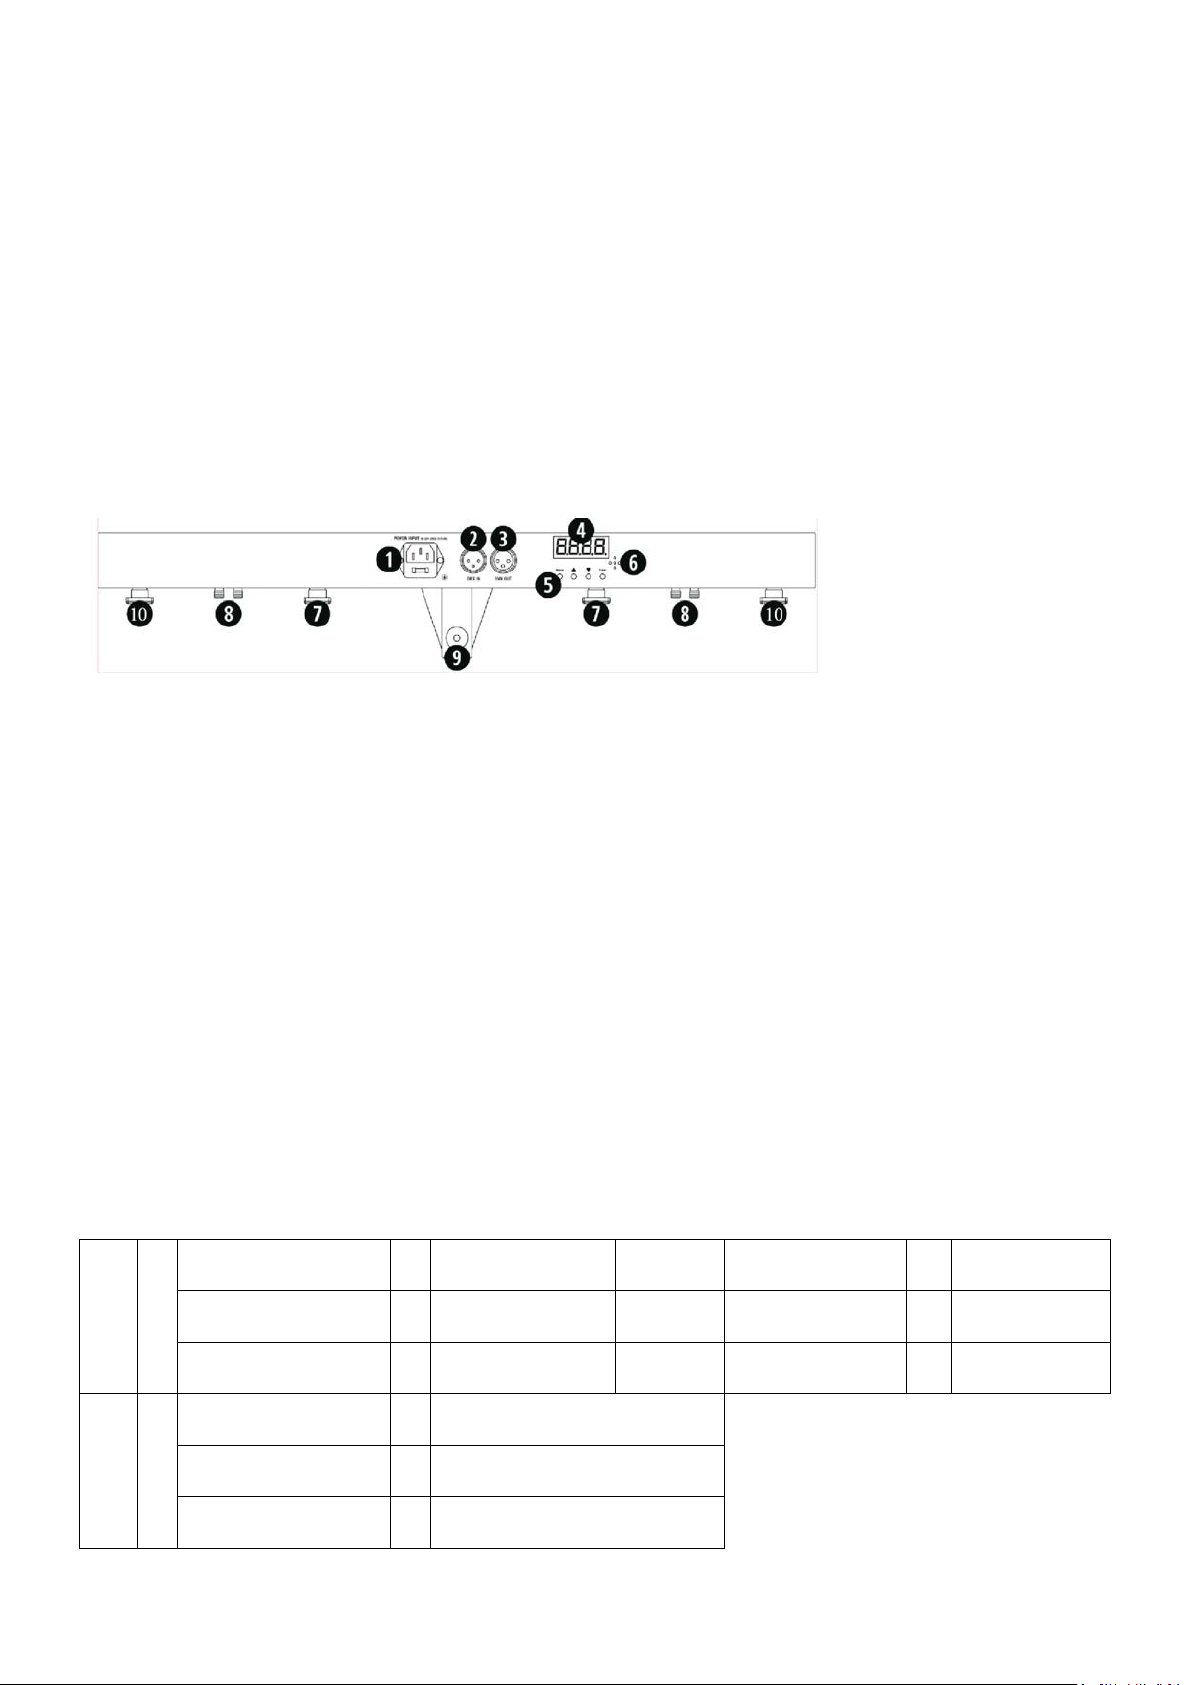
Connections
1. Power supply input: Attach the IEC mains cable here. Built-in fuse
2. DMX input: 3-pin XLR connector for DMX512 signal input
3. DMX output: 3-pin XLR connector for DMX512 signal output
4. LED display: Display of the functions and menu buttons to control the operating mode
5. MENU buttons: See below for operation
6. Mic: Built-in microphone for sound controlled operation
7. PAR can mounts: Attach the PAR cans to the controller bar at the 2 points shown
8. PAR & Laser connections: Connect the PAR & laser at the 2 points shown
9. Light stand socket: Tighten the screw to secure the controller bar to the light stand
10. Laser mounts: Fasten the Laser units to the controller bar at the 2 points shown.
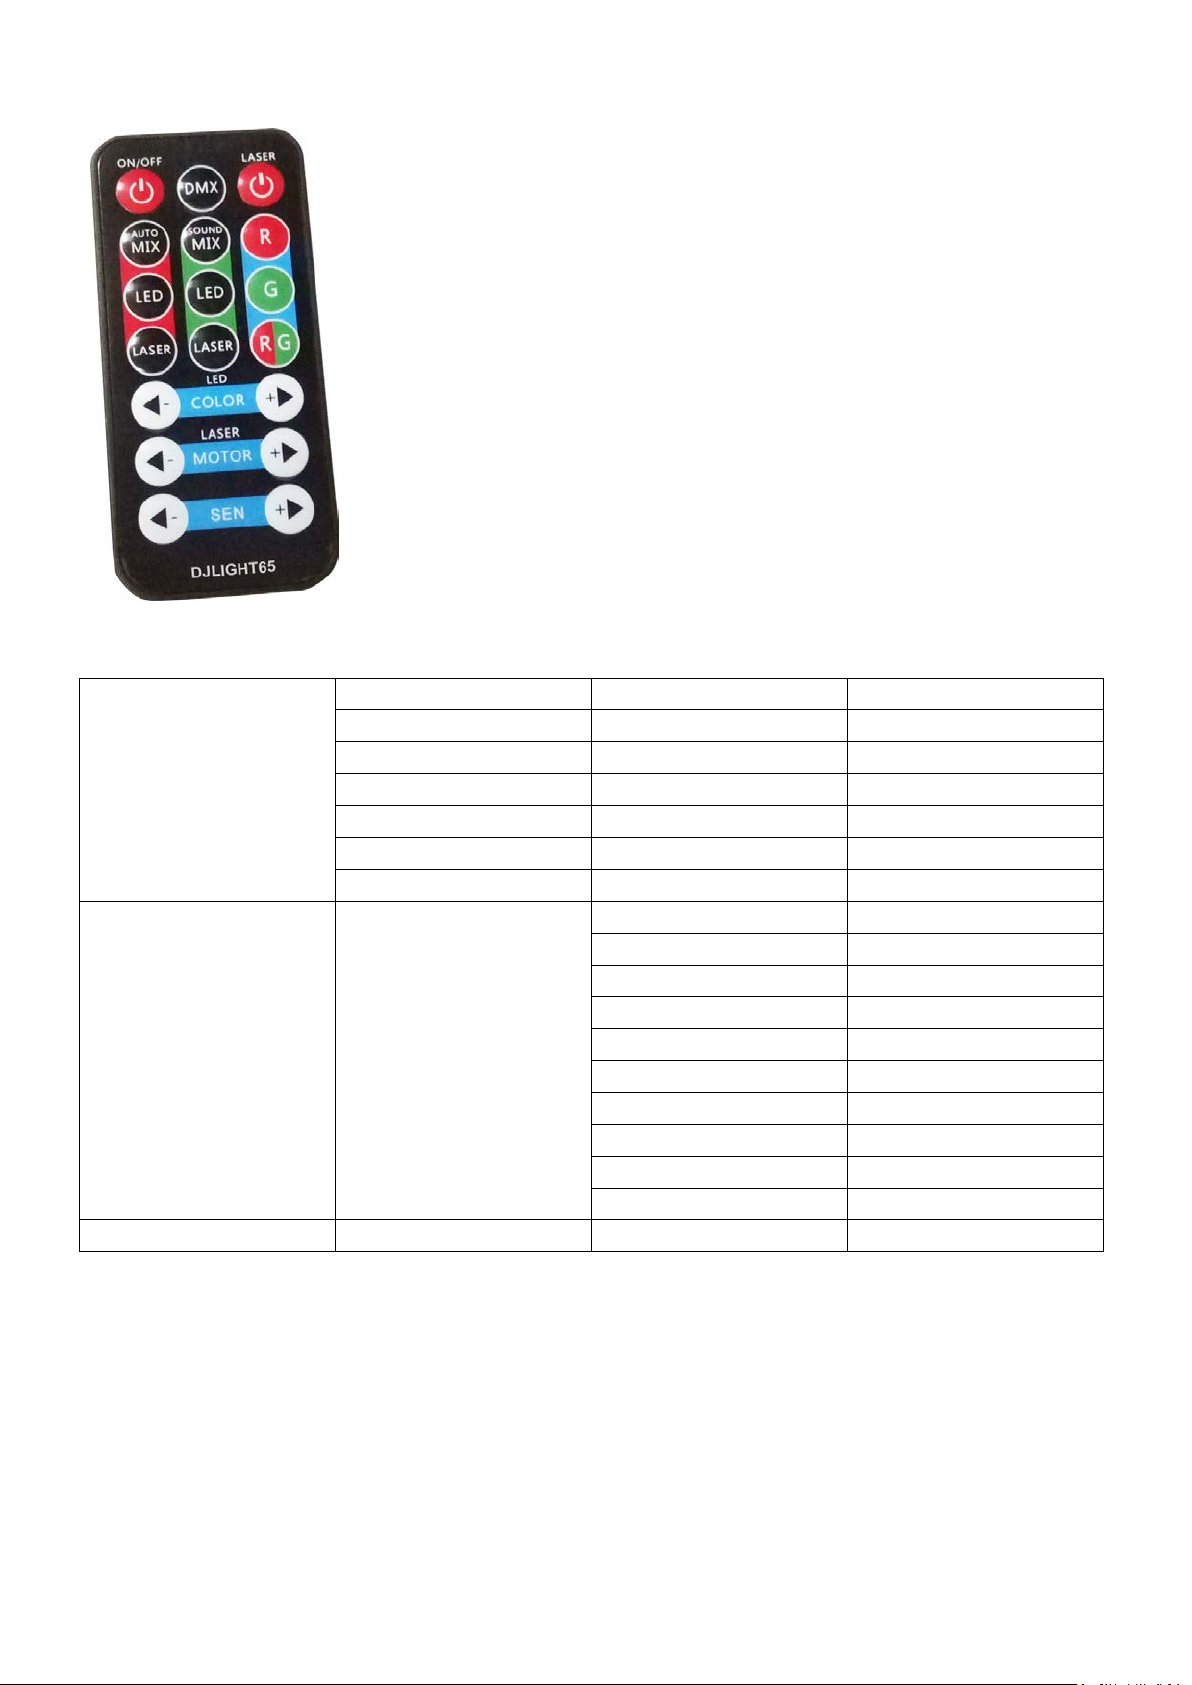
MENU BUTTONS
You can set the operating mode of the unit via the 4 function buttons on the controller bar. Press the MENU
button to display the different functions (see table below for a detailed description of the functions). Use the UP
and DOWN arrow buttons to make your selection. Once you have chosen your desired function, press the ENTER
button to confirm the change.
Button Specifications:
Auto
↔
Sou
↔
©Copyright LOTRONIC 2016 DJLIGHT65
↔
↔
↔
↔
↔
↔
3
COL
R 0-255
Red
G 0-255
Green
B 0-255
Blue
W 0-255
White
S00-32
Strobe
N01-32
Motor
speed
3CH
Channels
7CH
Channels
11CH
Channels
↔
↔
COLO
↔
DMX
SLA
SYS
D001/d512
↔
SLAN
ASEN
↔
↔
SN01-SN04 Sound-activated sensitivity
↔
Operation
DMX address code setting: Press “MENU” button. When the digital LED displays d001-d512, press “UP” or
“Down” to set the address code. The code ranges from 001-512.
When controlling the unit(s) with a DMX controller, each unit must be set to a specific DMX address. You can set
either all units to the same DMX address or you can set every unit to a different DMX address. If all units are set
to the same DMX address, they are all synchronized and operate the same way.
If every unit has its own DMX address, they will receive the DMX signal that is specific to their address and you
can control every unit separately. The DMX address is determined by the number of channels. The units can
work either in 3-channel, 7-channel or 11-channel mode. If you set the starting address to 1, the second unit
must be set either to 4 (1+3 in 3-CH mode) or to 8 (1-7 in 7-CH mode) or to 12 (1+11 in 11-CH mode), etc.
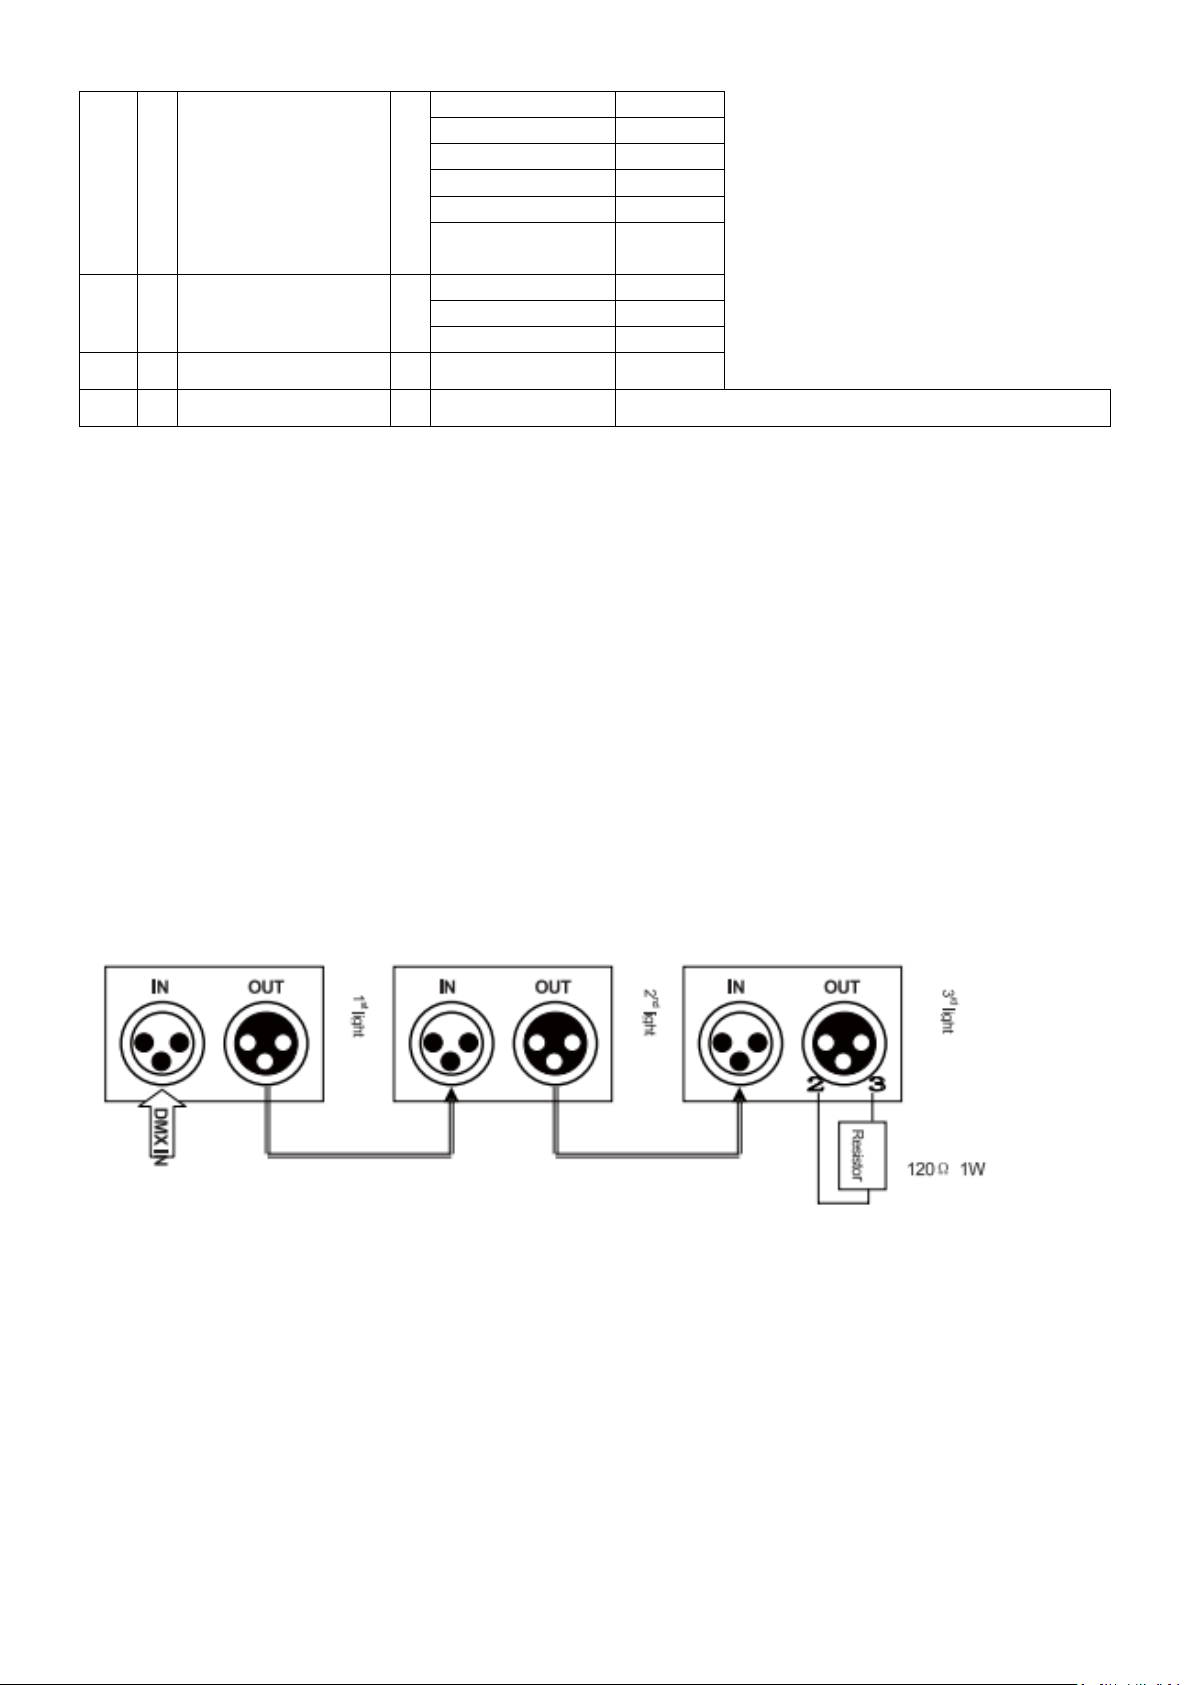
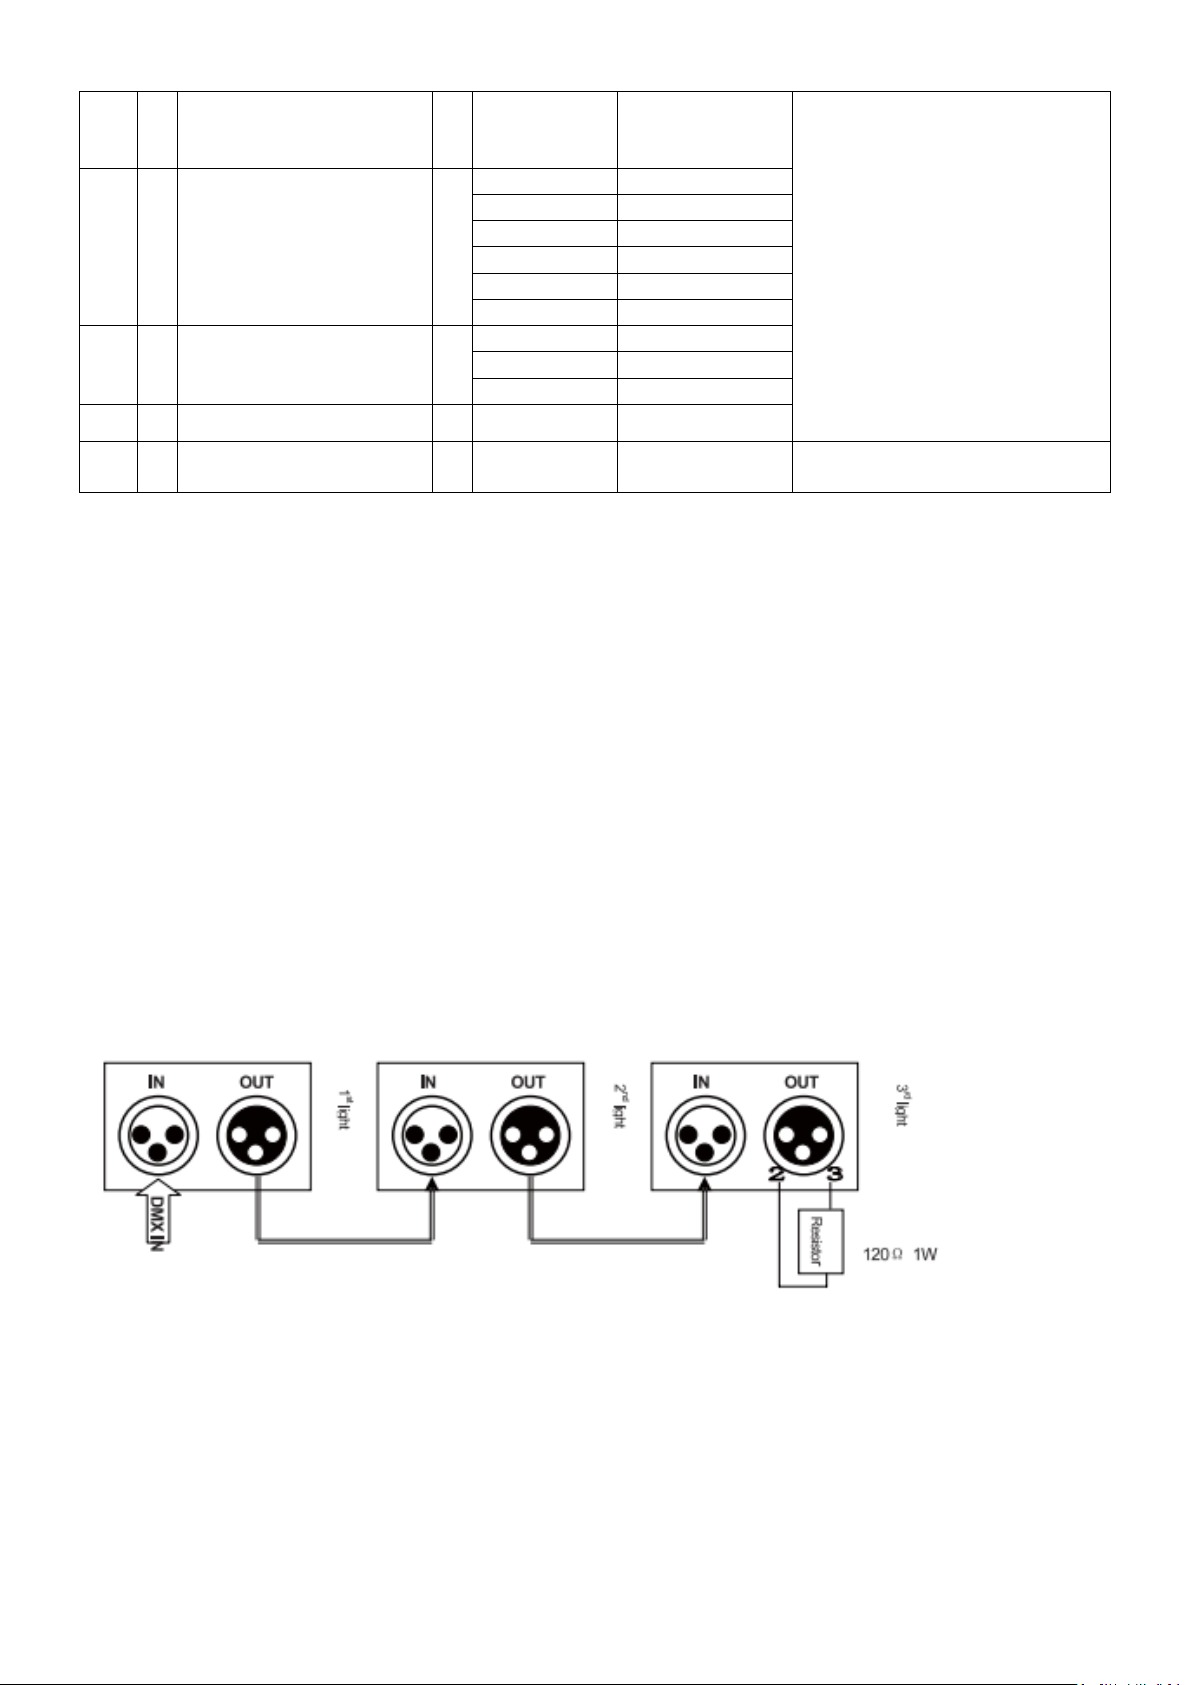
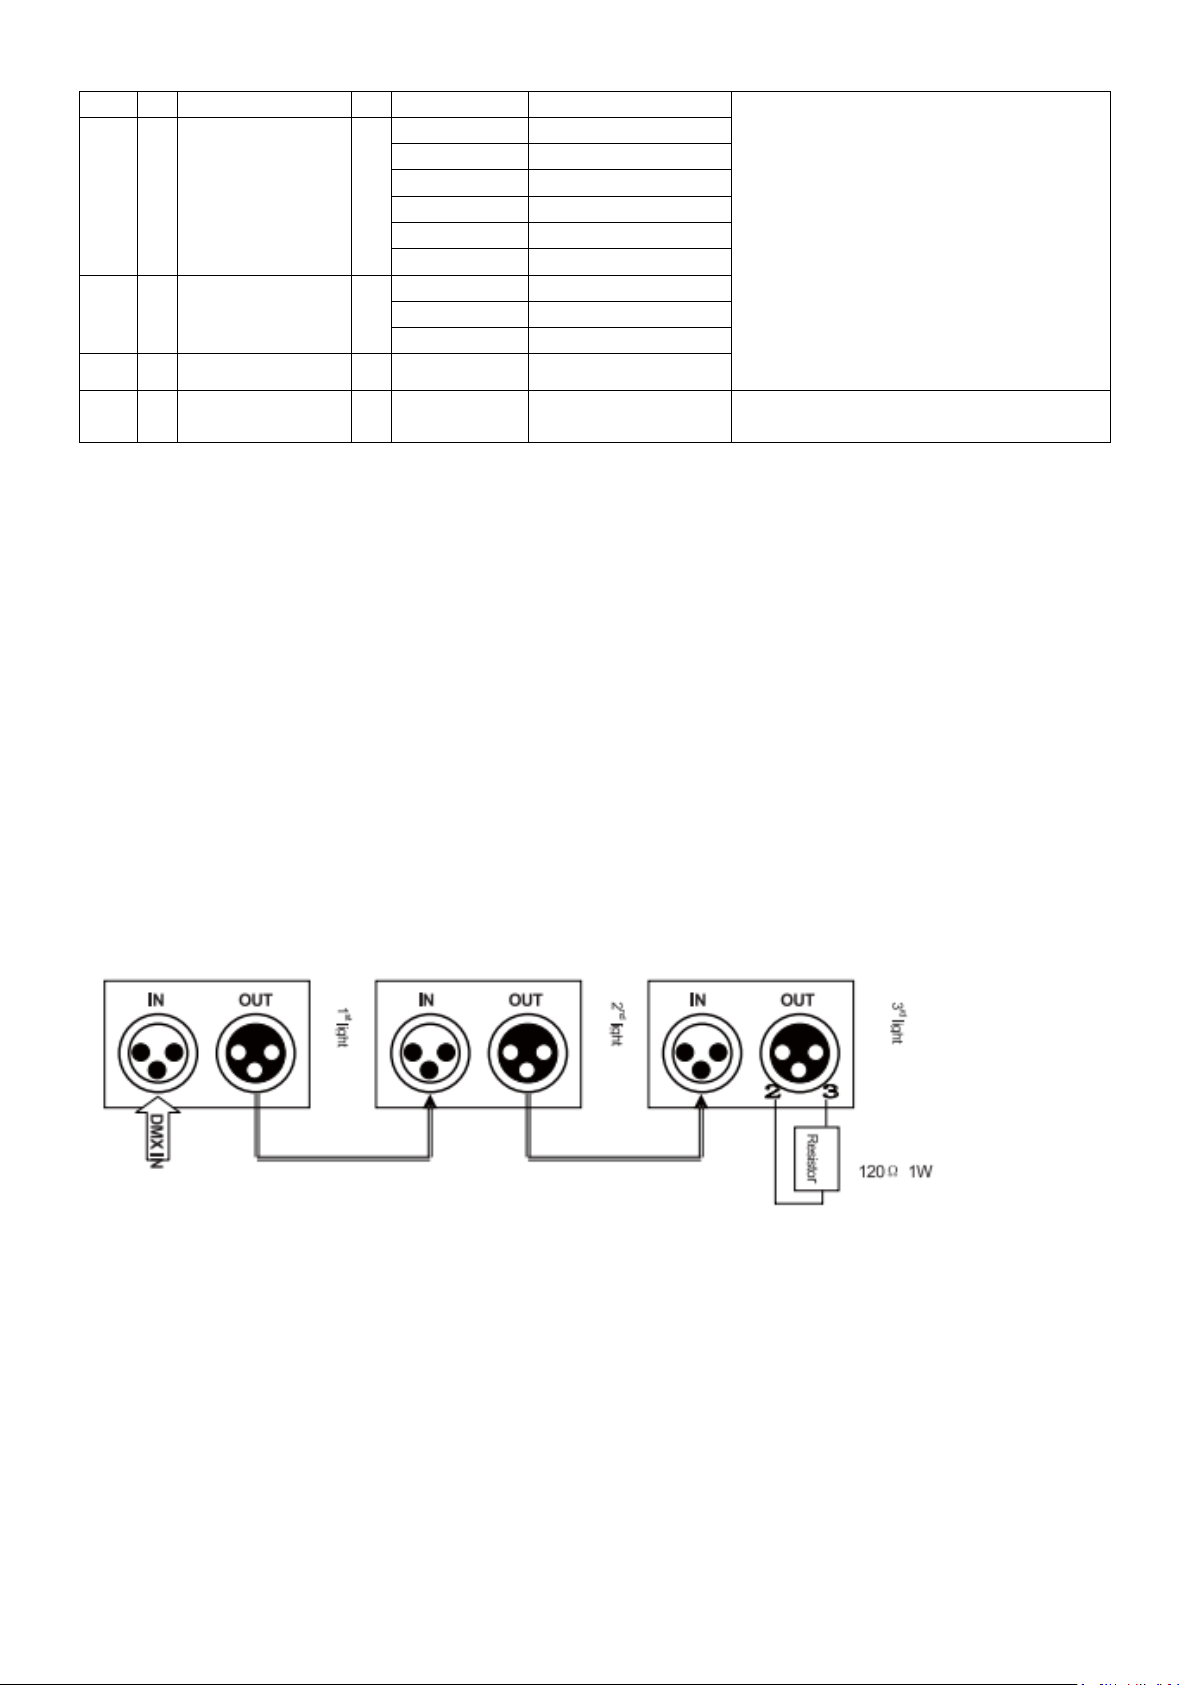
Connection of Signal Cable
You can use the 3-pin XLR cable to connect the OUT socket of the first light and the IN socket of the following
light. Connect all the lights as below:
A DMX signal terminator is recommended on the last unit of the chain. DMX terminator is a XLR connector with
a 120Ω resistor between the pin 2 and pin 3 of the XLR connector
4
©Copyright LOTRONIC 2016 DJLIGHT65
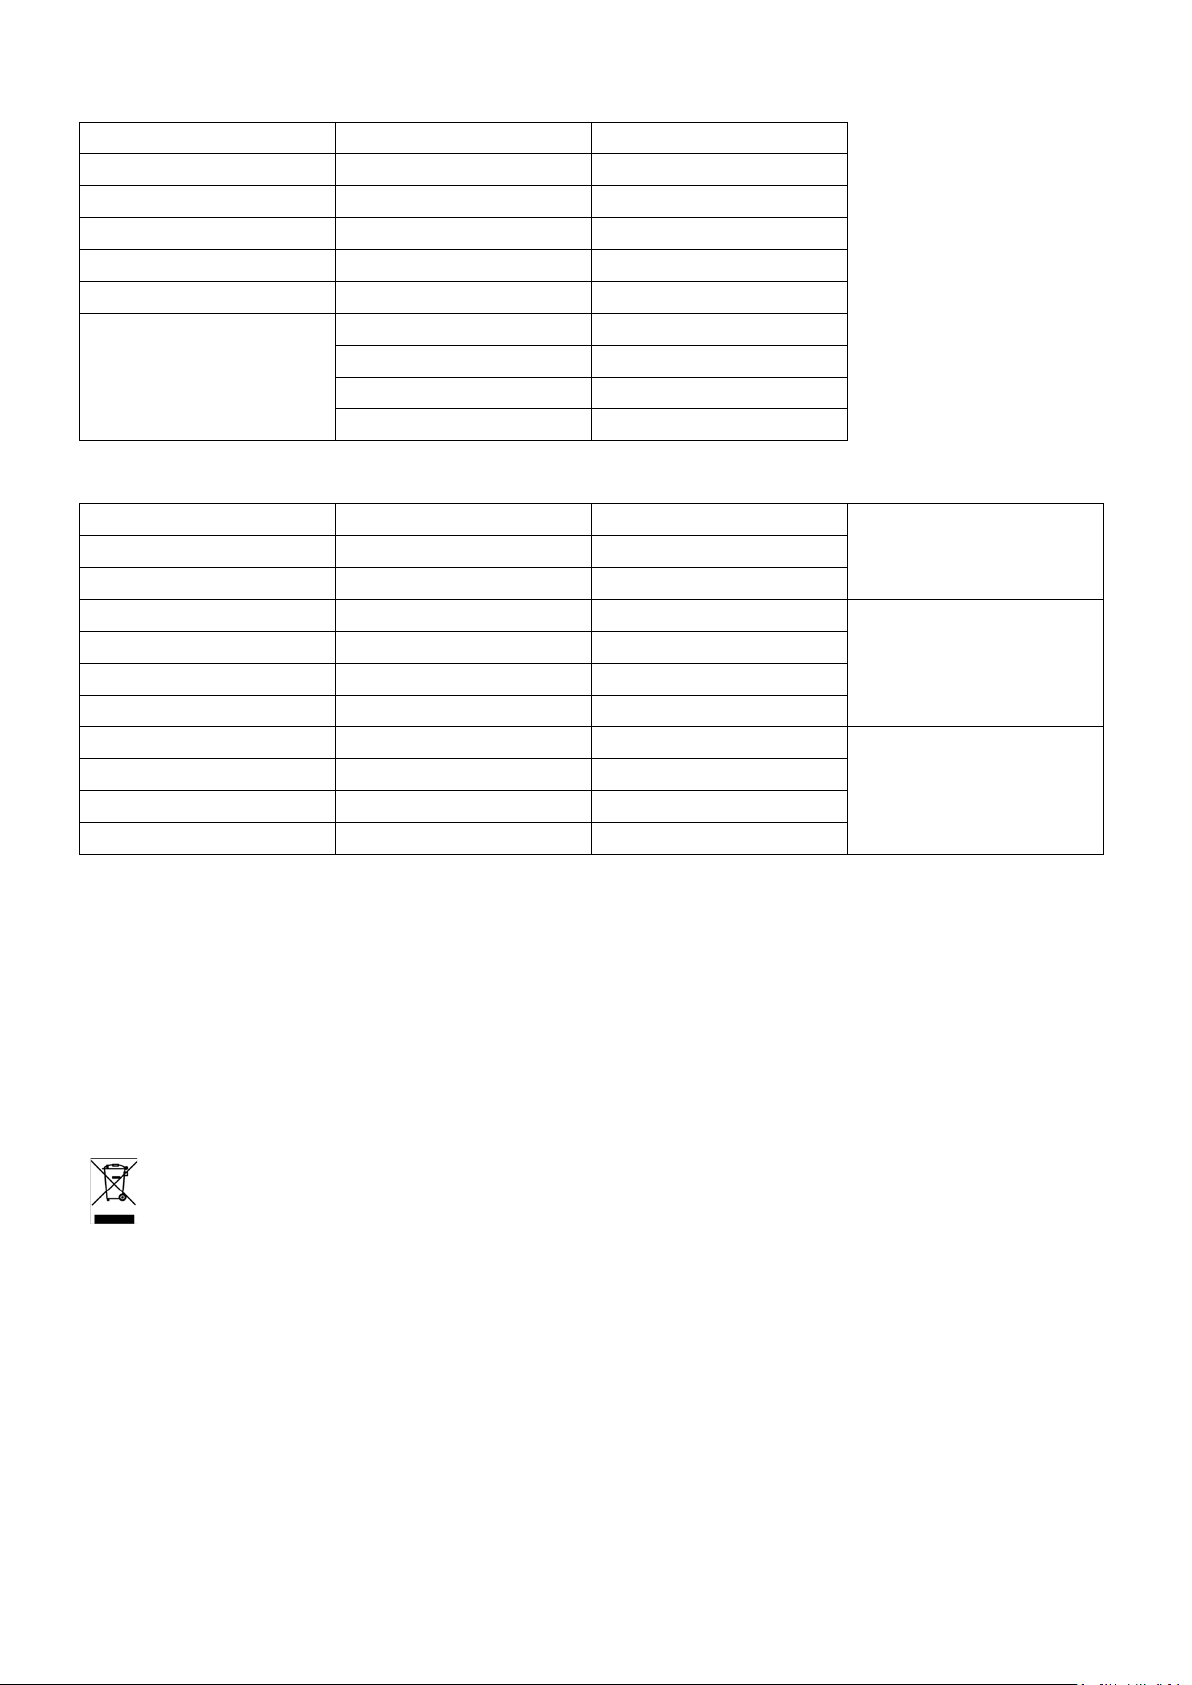
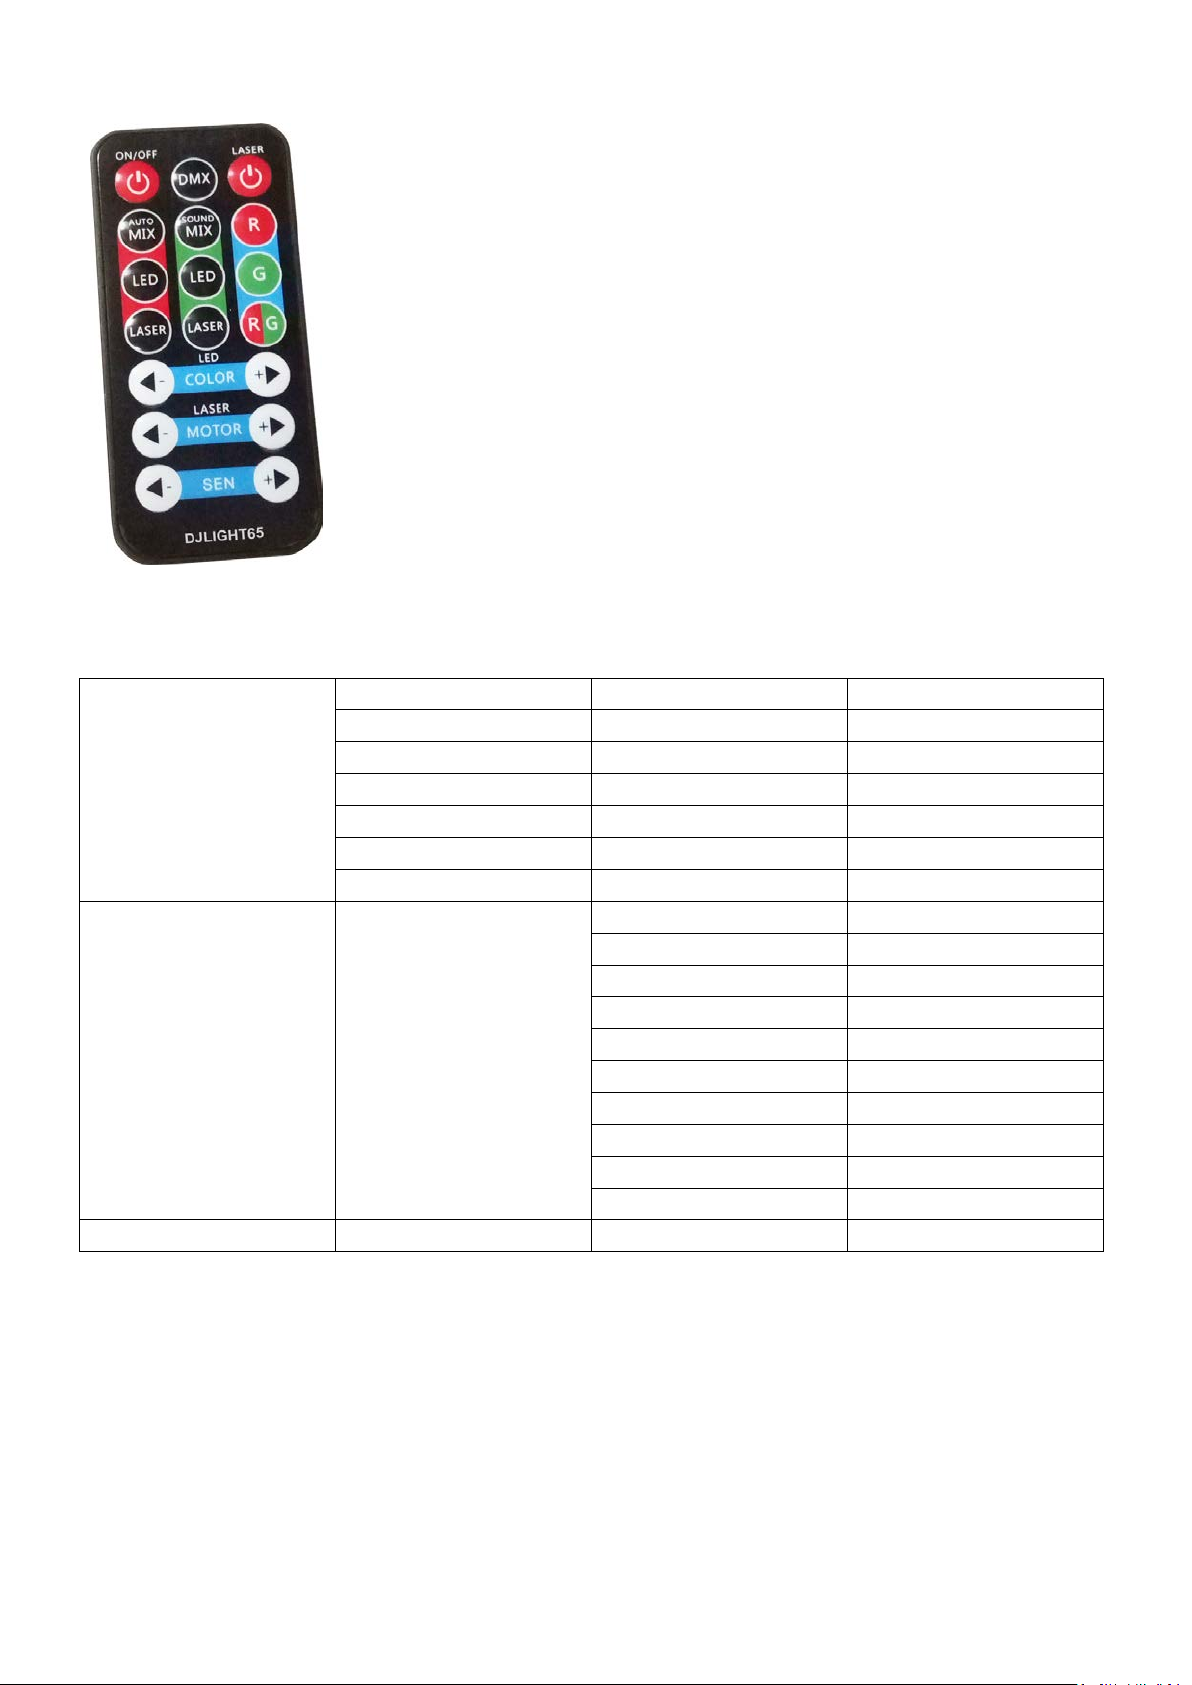
Remote Control:
0-9
Black out
10-49
AFXX
50-89
ALXX
90-129
ANXX
130-169
SPXX
170-209
SFXX
210-255
SNXX
0-19
AP-01
20-39
AP-02
40-59
AP-02
60-79
AP-04
80-99
AP-05
100-119
AP-06
120-139
AP-07
140-159
AP-08
160-179
AP-09
180-255
AP-10
CH3
Changing speed
0-255
3-CHANNEL OPERATION:
ON/OFF
DMX Mode
LASER: LASER ON/OFF
AUTO MIX: Auto Mode with PAR-LASER Effects
SOUND MIX: Sound Mode wi th PAR-LASER Effects
R: Red Laser ON
LED / Auto Mode: Par Effects
LED / Sound Mode: Par Effects
G: Green Laser ON
LASER : Laser Auto Mode
LASER: Laser Sound Mode
RG:RG Laser ON
COLOR -/+ : Color & Speed slow /fast
LASER MOTOR: Motor slow/fast
SEN -/+: Sensitivity -/+
CH1
CH2 APXX-SNXX
©Copyright LOTRONIC 2016 DJLIGHT65
5
7-CHANNEL OPERATION
CH1
0-255
R
CH2
0-255
G
CH3
0-255
B
CH4
0-255
W
CH5
0-255
Strobe
CH6
0-255
Motor
0-9
NO
10-99
R
100-199
G
200-255
R+G
CH1
0-255
R
CH2
0-255
G
CH3
0-255
Motor
CH4
0-255
R
CH5
0-255
G
CH6
0-255
B
CH7
0-255
W
CH8
0-255
R
CH9
0-255
G
CH10
0-255
Motor
CH11
0-255
Strobe
CH7
11-CHANNEL OPERATION
Laser
PAR
Laser
Fixture Cleaning
The cleaning of internal and external optical lenses and/or mirrors must be carried out periodically to optimize
light output. Cleaning frequency depends on the environment in which the fixture operates: damp, smoky or
particularly dirty surrounding can cause greater accumulation of dirt on the unit’s optics.
• Clean with soft cloth using normal glass cleaning fluid.
• Always dry the parts carefully.
• Clean the external optics at least every 20 days. Clean the internal optics at least every 30/60 days.
This marking indicat es that this product shou ld not be disposed with ot her household wastes thr oughout
the EU. To prevent possibl e harm to the environment or human health fr om uncontrolled waste dispos al,
recycle it respons ibly to promot e the sustain able reuse of material r esources. To return your use d device,
please use the return and collect ion systems or contact the r etailer where the product was purc hased. They can
take this product for environmental safe recycling.
©Copyright LOTRONIC 2016 DJLIGHT65
6
F
Déballage
Dès réception de l’appareil, ouvrez le carton et vérifiez que le contenu est complet et en bon état. Sinon,
prévenez immédiatement le transporteur et conservez l’emballage s’il montre des signes de mauvais
traitements. Conservez le carton et tous les matériaux d’emballage afin de pouvoir transporter l’appareil en
toute sécurité.
Consignes de sécurité
Lisez attentivement ce manuel qui contient des informations importantes sur l’installation, l’utilisation et
l’entretien de cet appareil.
• Conservez le manuel pour référence ultérieure. Si l’appareil change un jour de propriétaire, assurez-vous que
le nouvel utilisateur est en possession du manuel.
• Assurez-vous que la tension secteur convient à cet appareil et qu’elle ne dépasse pas la tension d’alimentation
indiqué sur la plaque signalétique de l’appareil.
• Uniquement pour utilisation à l’intérieur!
• Afin d’éviter tout risque d’incendie ou de choc électrique, ne pas exposer cet appareil à la pluie ou à
l’humidité. Assurez-vous qu’aucun objet inflammable ne se trouve à proximité de l’appareil pendant son
fonctionnement.
• Installez l’appareil à un endroit bien ventilé à une distance minimum de 1m de toute surface. Assurez-vous que
les fentes de ventilation ne sont pas bloquées.
• Débranchez l’appareil du secteur avant toute manipulation ou entretien. Lorsque vous remplacez le fusible,
utilisez uniquement un fusible qui présente exactement les mêmes caractéristiques que l’ancien.
• La température ambiante ne doit pas dépasser 40°C. Ne pas faire fonctionner l’appareil à des températures
supérieures.
• En cas de dysfonctionnement, arrêtez immédiatement l’appareil. N’essayez jamais de réparer l’appareil par
vous-même. Une réparation mal faite peut entraîner des dommages et des dysfonctionnements. Contactez un
service technique agréé. Utilisez uniquement des pièces détachées identiques aux pièces d’origine.
• Assurez-vous que le cordon d’alimentation n’est jamais écrasé ni endommagé.
• Ne jamais débrancher l’appareil en tirant sur le cordon.
• Ne pas exposer vos yeux à la source lumineuse.
• Lorsque le cordon d'alimentation ou un coupleur d'appareil est utilisé comme dispositif de déconnexion, ce
dispositif doit rester facilement accessible;
Si un interrupteur omnipolaire est utilisé comme dispositif de déconnexion, l'emplacement sur l'appareil et la
fonction de l'interrupteur doit être décrite, et le commutateur doit rester facilement accessible
• Les lampes utilisées dans ce jeu de lumière ne peuvent être remplacées que par le fabricant ou un service de
réparation agréé ou un technicien qualifié.
©Copyright LOTRONIC 2016 DJLIGHT65
7

Caractéristiques techniques
AutP: Fonctionnement
automatique du PAR
AP01-AP13:
Effets du PAR
↔
S01-S32:
Vitesse du PAR
AutF: Fonctionnement
AF01-AF07:
↔
S01-S32:
Vitesse du
Laser
↔
N00-N09:
Vitesse du
moteur
AutN: Fonctionnement
AN01-An10:
Effets de
↔
S01-S32:
Vitesse des
↔
N00-N09:
Vitesse du
SouP: PAR activé par le son
SP01-SP13:
Effets du PAR
SouF: Laser activé par le son
SF01-SF07:
Effets Laser
Alimentation ........................................................................................ AC 220-240, 50/60Hz
Consommation .............................................................................................................. 60W
Projecteurs PAR ................................................................................. 12 x 1W RGBW LED x 2
Laser ......................................................................................... Rouge: 100mW; vert: 30mW
Laser class ............................................................................................................................ 3
Hauteur ............................................................................................................... 1,80m max.
Poids ............................................................................................................................. 6,7kg
Installation
Avant d’installer le jeu de lumière, vérifiez la solidité du support. Vissez les projecteurs sur la barre transversale.
Assurez-vous qu’ils sont fixement attachés sur la barre et ne risquent pas de tomber. Nous déclinons toute
responsabilité pour des dommages dus à une mauvaise installation.
Connexions
1. Entrée d’alimentation avec fusible intégré. Branchez les cordon IEC ici.
2. Entrée DMX: Connecteur XLR à 3 broches pour l’entrée du signal DMX
3. Sortie DMX: Connecteur XLR à 3 broches pour la sortie du signal DMX
4. Afficheur à LED: Affichage des fonctions et touches de MENU pour régler le mode de fonctionnement.
5. Touches MENU: Voir les fonctions ci-dessous
6. Microphone intégré pour le mode contrôlé par la musique
7. Points de fixation des projecteurs PAR
8. Connecteurs pour le PAR & et le laser
9. Fixation de la barre sur le support: Serrez la vis pour fixer la barre de contrôle sur le support
10. Points de fixation des lasers
TOUCHES MENU
Vous pouvez régler le mode de fonctionnement au moyen des 4 boutons sur la barre de commande. Appuyez
sur la touche MENU pour afficher les différentes fonctions (voir tableau ci-dessous). Faites votre sélection au
moyen des touches UP et DOWN. Lorsque vous avez sélectionnée la fonction désirée, appuyez sur ENTER pour
confirmer.
Menu:
Auto
Sou
©Copyright LOTRONIC 2016 DJLIGHT65
automatique du Laser
↔
automatique de tous les effets
↔
↔
↔
↔
↔
↔
Effets Laser
lumière
8
effets
moteur
SouN: Ensemble activé par le
son
SN01-SN10:
Effets de
lumière
R 0-255
Rouge
G 0-255
Vert
B 0-255
Bleu
W 0-255
Blanc
S00-32
Strobo
N01-32
Vitesse moteur
3CH
Canaux
7CH
Canaux
11CH
Canaux
Sensibilité en mode
activé par le son
↔
COL
DMX
SLA
SYS
COLO
↔
D001/d512
↔
SLAN
↔
ASEN
↔
↔
↔
↔
SN01-SN04
Fonctionnement
Réglage de l’adresse DMX: Appuyez sur la touche MENU. Lorsque que d001-d512 s’affiche, appuyez sur les
touches UP/DOWN pour régler l’adresse. Les adresses vont de 001-512.
Lorsque vous contrôlez le(s) appareil(s) au moyen d’un contrôleur DMX, chaque appareil doit avoir son adresse
DMX. Vous pouvez attribuer la même adresse DMX à tous les appareils ou bien attribuer une adresse DMX
différente à chaque appareil. Si tous les appareils ont la même adresse, ils fonctionnent tous de la même
manière et en même temps. Si chaque appareil dispose de sa propre adresse, il recevra le signal spécifique à son
adresse et vous pouvez contrôler tous les appareils séparément.
L’adresse DMX est déterminée par le nombre de canaux. Cet ensemble peut fonctionner en 3, 7 ou 11 canaux. Si
vous mettez l’adresse de départ à 1, l’appareil suivant devra avoir l’adresse 4 (1+3 en mode 3 canaux) ou 8 (1+7
en mode 7 canaux) ou 12 (1+11 en mode 11 canaux), etc.
Connexion du câble signal
Branchez le cordon XLR sur la fiche de sortie OUT du premier appareil et la fiche d’entrée IN du deuxième.
Branchez toutes les lampes comme indiqué ci-dessous.
Une résistance de fin de ligne est recommandée sur le dernier appareil de la chaîne. Il s’agit d’une résistance de
120Ω à installer entre pin 2 et pin 3 du connecteur XLR.
©Copyright LOTRONIC 2016 DJLIGHT65
9
Télécommande:
0-9
Black out
10-49
AFXX
50-89
ALXX
90-129
ANXX
130-169
SPXX
170-209
SFXX
210-255
SNXX
0-19
AP-01
20-39
AP-02
40-59
AP-02
60-79
AP-04
80-99
AP-05
100-119
AP-06
120-139
AP-07
140-159
AP-08
160-179
AP-09
180-255
AP-10
CH3
Changement de vitesse
0-255
MODE 3 CANAUX:
Marche/Arrêt
DMX: Mode DMX
LASER : M/A du laser
AUTO MIX: PAR & Laser sont en mode automatique
SOUND MIX: PAR & Laser sont en mode audio
R : Laser rouge allumé
LED / Auto: PAR en mode automatique
LED / Sound: PAR en mode audio
G : Laser vert allumé
LASER: Laser en mode automatique
LASER: Laser en mode audio
RG : Laser rouge+vert allumé
COLOR -/+ : Couleurs + vitesse
SEN -/+: Baisse/augmente la sensibilité sonore en mode audio
CH1
CH2 APXX-SNXX
©Copyright LOTRONIC 2016 DJLIGHT65
10
Mode 7 CANAUX
CH1
0-255
R
CH2
0-255
G
CH3
0-255
B
CH4
0-255
W
CH5
0-255
Strobo
CH6
0-255
Moteur
0-9
NO
10-99
R
100-199
G
200-255
R+G
CH1
0-255
R
CH2
0-255
G
CH3
0-255
Moteur
CH4
0-255
R
CH5
0-255
G
CH6
0-255
B
CH7
0-255
W
CH8
0-255
R
CH9
0-255
G
CH10
0-255
Moteur
CH11
0-255
Strobo
CH7
MODE 11 CANAUX
Laser
PAR
Laser
Nettoyage de l’appareil
Nettoyez régulièrement les lentilles internes et externes e/ou miroirs afin d’optimiser la puissance lumineuse. La
fréquence de nettoyage dépend des conditions d’utilisation. Un environnement humide, enfumé ou
particulièrement sale favorise l’accumulation de poussière sur les optiques.
• Utilisez un chiffon doux et du nettoyant à vitres classique.
• Séchez toutes les pièces soigneusement.
• Nettoyez les optiques externes au moins une fois toutes les 3 semaines et les optiques internes tous les 1-2
mois.
Ce symbole signifie q ue cet appareil ne do it être mis aux d échets ménagers dan s aucun pays
de la Communauté européenne afin d’éviter de nuire à l’environnement et à la santé humaine.
Il convient d’en disposer d’une manière responsable afin de promouvoir la réutilisation des
matériaux. Pour retourn er votre appareil usagé, merci d ’utiliser les systèmes de ret ours et de
ramassage mis en plac e ou d e contacter votre reven deur chez qui vous a vez achet é l’app areil.
Ils peuvent reprendre cet appareil pour un recyclage écologique.
©Copyright LOTRONIC 2016 DJLIGHT65
11

D
Auspacken
Sofort nach Empfang vorsichtig den Karton auspacken und den Inhalt überprüfen. Alle Teile müssen vollzählig
und in einwandfreiem Zustand sein. Sofort die Transportfirma benachrichtigen und das Verpackungsmaterial
aufbewahren, wenn Teile Transportschäden aufweisen. Verpackungsmaterial auch für späteren Transport des
Geräts aufbewahren.
Sicherheitshinweise
Diese Anleitung sorgfältig vor der ersten Inbetriebnahme lesen. Sie enthält wichtige Informationen über
Installation, Gebrauch und Instandhaltung des Geräts.
• Die Anleitung für spätere Bezugnahme aufbewahren und an den nächsten Bediener weitergeben.
• Stets die Netzspannung vor Anschluss des Geräts überprüfen Sie muss mit der auf der Rückseite des Geräts
angegebenen Spannung übereinstimmen und darf auf keinen Fall höher sein.
• Dieses Gerät ist nur für Innengebrauch!
• Um Brand und Stromschlag zu vermeiden, das Gerät vor Regen und Feuchtigkeit schützen. Keine brennbaren
Materialien während des Betriebs in der Nähe des Geräts lassen.
• Das Gerät muss an einem gut belüfteten Ort und in mindestens 1m Entfernung zur nächsten Fläche angebracht
werden. Darauf achten, dass die Belüftungsschlitze nicht blockiert oder verstopft sind.
• Immer erst das Gerät vom Netz trennen, bevor es gewartet oder die Sicherung ersetzt wird. Die Sicherung nur
durch eine identische ersetzen.
• Die Raumtemperatur darf 40°C nicht überschreiten. Das Gerät niemals bei höheren Temperaturen betreiben.
• Bei Betriebsstörungen das Gerät sofort ausschalten. Das Gerät niemals selbst reparieren. Reparaturen dürfen
nur von einem Fachmann vorgenommen werden. Alle verwendeten Ersatzteile müssen mit den Originalteilen
identisch sein.
• Vergewissern Sie sich, dass das Netzkabel nicht zerquetscht oder beschädigt werden kann.
• Beim Abziehen des Netzsteckers nur am Stecker ziehen, niemals am Kabel.
• Niemals direkt in die Lichtquelle blicken.
• Wenn das Gerät über den Netzstecker ausgeschaltet wird, muss die Steckdose jederzeit leicht zugänglich
bleiben
• Die Leuchtmittel dürfen nur vom Hersteller, von einem anerkannten Fachbetrieb oder einem erfahrenen
Techniker ersetzt werden.
©Copyright LOTRONIC 2016 DJLIGHT65
12

Technische Daten
AutP: PAR
Automatikbetrieb
AP01-AP13:
PAR Effekte
↔
S01-S32: PAR
Geschwindigkeit
AutF: Laser
Automatikbetrieb
AF01-AF07:
Laser Effekte
↔
S01-S32: Laser
Geschwindigkeit
↔
N00-N09: Motor
Geschwindigkeit
AutN:
AN01-An10:
↔
S01-S32:
aller Geräte
↔
N00-N09: Motor
SouP: PAR
Musiksteuerung
SP01-SP13:
PAR Effekte
SouF: Laser
Musiksteuerung
SF01-SF07:
Laser Effekte
SouN: Musiksteuerung aller
Geräte
SN01-SN10:
steuerung aller
Versorgung ........................................................................................... AC 220-240, 50/60Hz
Verbrauch ...................................................................................................................... 60W
PAR Strahler ...................................................................................... 12 x 1W RGBW LED x 2
Laser .............................................................................................. Rot: 100mW; grün 30mW
Laserklasse ........................................................................................................................... 3
Höhe ................................................................................................................... 1.80m max.
Gewicht ......................................................................................................................... 6,7kg
Installation
Bevor Sie das Gerät aufstellen, vergewissern Sie sich, dass die Standfläche stabil ist. Strahler fest an den
Querbalken anschrauben. Vergewissern Sie sich, dass die Geräte nicht herunterfallen können. Wir übernehmen
keine Haftung für Schäden aufgrund unsachgemäßer Montage.
Anschlüsse
1. IEC Netzanschlussbuchse mit Sicherung
2. DMX Eingang: 3-pol. XLR Eingangsverbinder für das DMX Signal
3. DMX Ausgang: 3-pol. XLR Ausgangsverbinder für das DMX Signal
4. LED Display: Aneige der Funktionen und Menütasten zur Bestimmung der Betriebsart
5. MENU Tasten: Weitere Informationen s.u.
6. Eingebautes Mikrofon für die musikgesteuerte Betriebsart
7. Befestigungspunkte der PAR Strahler
8. PAR & Laser Anschluss
9. Befestigungsschraube der Controllerstange am Stativ. Schraube gut festziehen
10. Befestigungspunkte der Laser.
MENU TASTEN
Sie können die Betriebsart mit den 4 Tasten auf der Controllerstange einstellen. MENU Taste drücken, um die
verschiedenen Funktionen anzuzeigen (detaillierte Beschreibung s. Tabelle unten). Mit den UP & DOWN Tasten
die Wahl machen und mit ENTER bestätigen.
Funktionen:
Auto
↔
Automatikbetrieb
Sou
↔
©Copyright LOTRONIC 2016 DJLIGHT65
↔
↔
↔
↔
↔
↔
Alle Effekte
Musik-
13
Geschwindig-keit
Geschwindigkeit
Geräte
COL
R 0-255
Rot
G 0-255
Grün
B 0-255
Bau
W 0-255
Weiss
S00-32
Strobe
N01-32
Motorgeschwindigkeit
3CH
Kanäle
7CH
Kanäle
11CH
Kanäle
Empfindlichkeit bei
Musiksteuerung
↔
COLO
↔
DMX
SLA
SYS
D001/d512
↔
SLAN
↔
ASEN
↔
↔
↔
SN01-SN04
Betrieb
Einstellung der DMX Adresse: “MENU” Taste drücken. Wenn d001-d512 erscheint, mit den UP/DOWN Tasten die
Adresse zwischen 01 und 512 einstellen.
Wenn die Geräte von einem DMX Controller gesteuert werden, muss jedes Gerät eine DMX Adresse haben. Sie
können entweder allen Geräten dieselbe DMX Adresse zuweisen, oder jedem Gerät eine andere. Wenn alle
Geräte dieselbe DMX Adresse besitzen, arbeiten sie alle synchron. Wenn jedes Gerät seine eigene DMX Adresse
besitzt, empfangen sie nur das Signal, dass ihrer Adresse entspricht und sie können separat gesteuert werden.
Die DMX Adresse wird von der Anzahl Kanäle bestimmt. Die Geräte können entweder im 3-Kanal, im 7-Kanal
oder im 11-Kanal gesteuert werden. Wenn Sie die Startadresse auf 1 einstellen, muss das zweite Gerät entweder
auf 4 (1+3 im 3-Kanalbetrieb), auf 8 (1+7 im 7-Kanalbetrieb) oder auf 12 (1+11 im 11-Kanalbetrieb) usw.
eingestellt werden.
Anschluss des Signalkabels
Das 3-pol. XLR Kabel an die OUT Buchse des ersten und an die IN Buchse des zweiten Geräts anschließen. Alle
Strahler wie nachstehend angegeben miteinander verbinden.
Ein DMX Endwiderstand muss an den XLR Verbinder des letzten Geräts angeschlossen werden. Es handelt sich
um einen 120 Ohm Abschlusswiderstand, der zwischen Stift 2 und 3 geschlossen wird.
©Copyright LOTRONIC 2016 DJLIGHT65
14
 Loading...