How it Works
Log In / Sign Up
Buy Points
How it Works
FAQ
Contact Us
Questions and Suggestions
Users
Ibanez
Loading...
S
SW15-S
SW15-U
SW20
2
SW25DX
SW35
SW65
2
SW80
SWX100
SWX20
SWX35
SWX65
T
T10
T15
T150S
T20
T30
2
T30II
T35
T80
T80II
T80N
TA20
TA225
3
TA225DX
TA25
2
TA25 Troubadour
TA35
TB100H
TB100R
TB15
2
TB150R
TB15R
3
TB212
TB225
2
TB25
TB25R
2
TB25,TB25R
TB412A
TB412S
TB50R
TBX
TBX65R
TC7
TK999HT
TK999OD
tm5
TN120
TN412A
TN412S
Troubadour 225
Troubadour T15II
Troubadour T80II
Troubadour T80IISM
ts10
ts5
ts7
2
TS808
4
TS808DX
TS808DX Tube Screamer Overdrive Pro
TS808HW
TS808 Tube Screamer
TS808 Tube Screamer Reissue
ts9
4
TS9B
TS9DX
TS9 Tube Screamer
TSA112C
TSA15H
TSA15H Head
TSA30
2
TSA30H
2
TSA5TVR-BZ
TSA5TVR-E
TSA5TVR-H
TSA5TVR-J
TSA5TVR-N
TSA5TVR-Q
TSA5TVR-S
TSA5TVR-U
TSAI5
TSAI5H
TSAII2C
TSMini Tube Screamer Mini
TUBE SCREAMER AMPLIFIER
Tube Screamer mini
Tube Screamer TS9
U
UE400
UE405
2
V
VBG
VBG Valbee
W
Waldorf Iridium
WD7
WD7JR
WD7 WEEPING DEMON
wh10
2
WH10V2
wholetone
WT80
WT80-E
WT80-Q
Loading...
Loading...
Nothing found
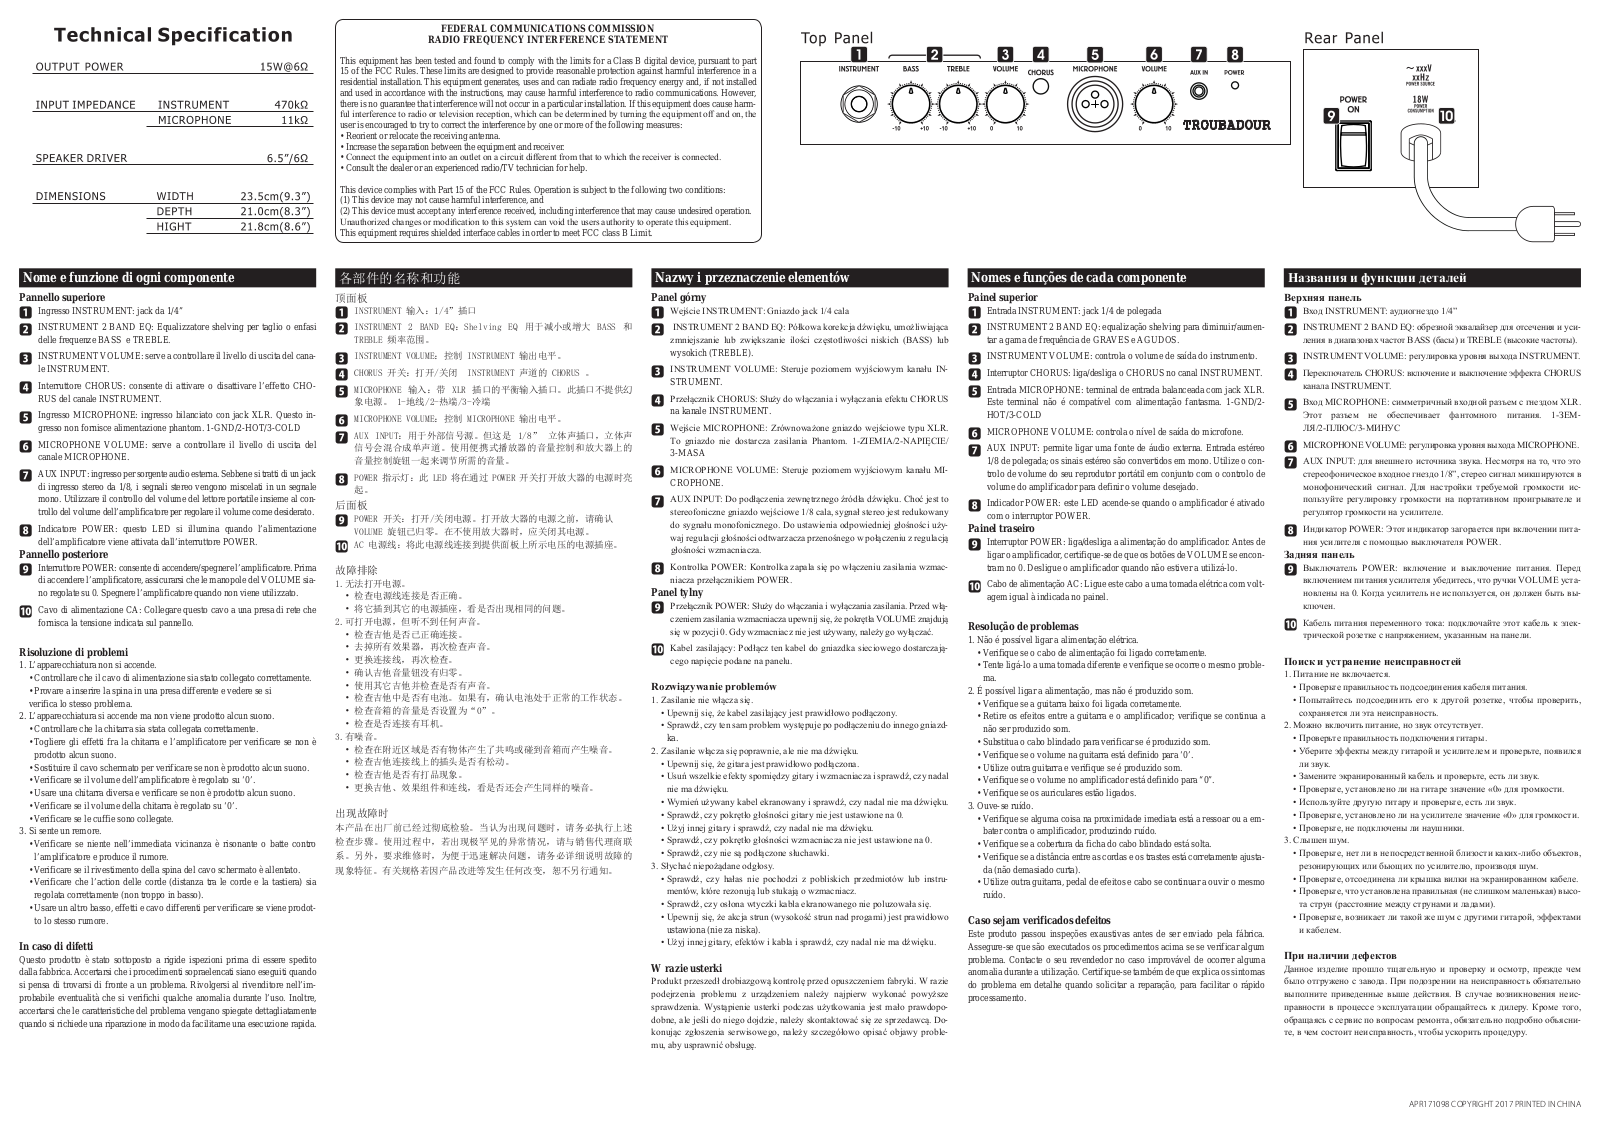
Troubadour T15II
Owner’s Manual [en, zh, de, fr, es, it, jp, pl, pt, ru]
4 pgs
1.6 Mb
0
Table of contents
Loading...
Ibanez Troubadour T15II Owner’s Manual [en, zh, de, fr, es, it, jp, pl, pt, ru]
...
Ibanez Owner’s Manual [en, zh, de, fr, es, it, jp, pl, pt, ru]
Download
Specifications and Main Features
Frequently Asked Questions
User Manual
Download
Loading...
+
hidden pages
Unhide
You need points to download manuals.
1 point = 1 manual.
You can buy points or you can get point for every manual you upload.
Buy points
Upload your manuals