


FCC ID : PJIHQP50AH000
ATTACHMENT E -3.
- USER’S MANUAL -
REPORT NO. : HCT-F04-0709 HYUNDAI C–TECH
63
FUNCTION SETUP
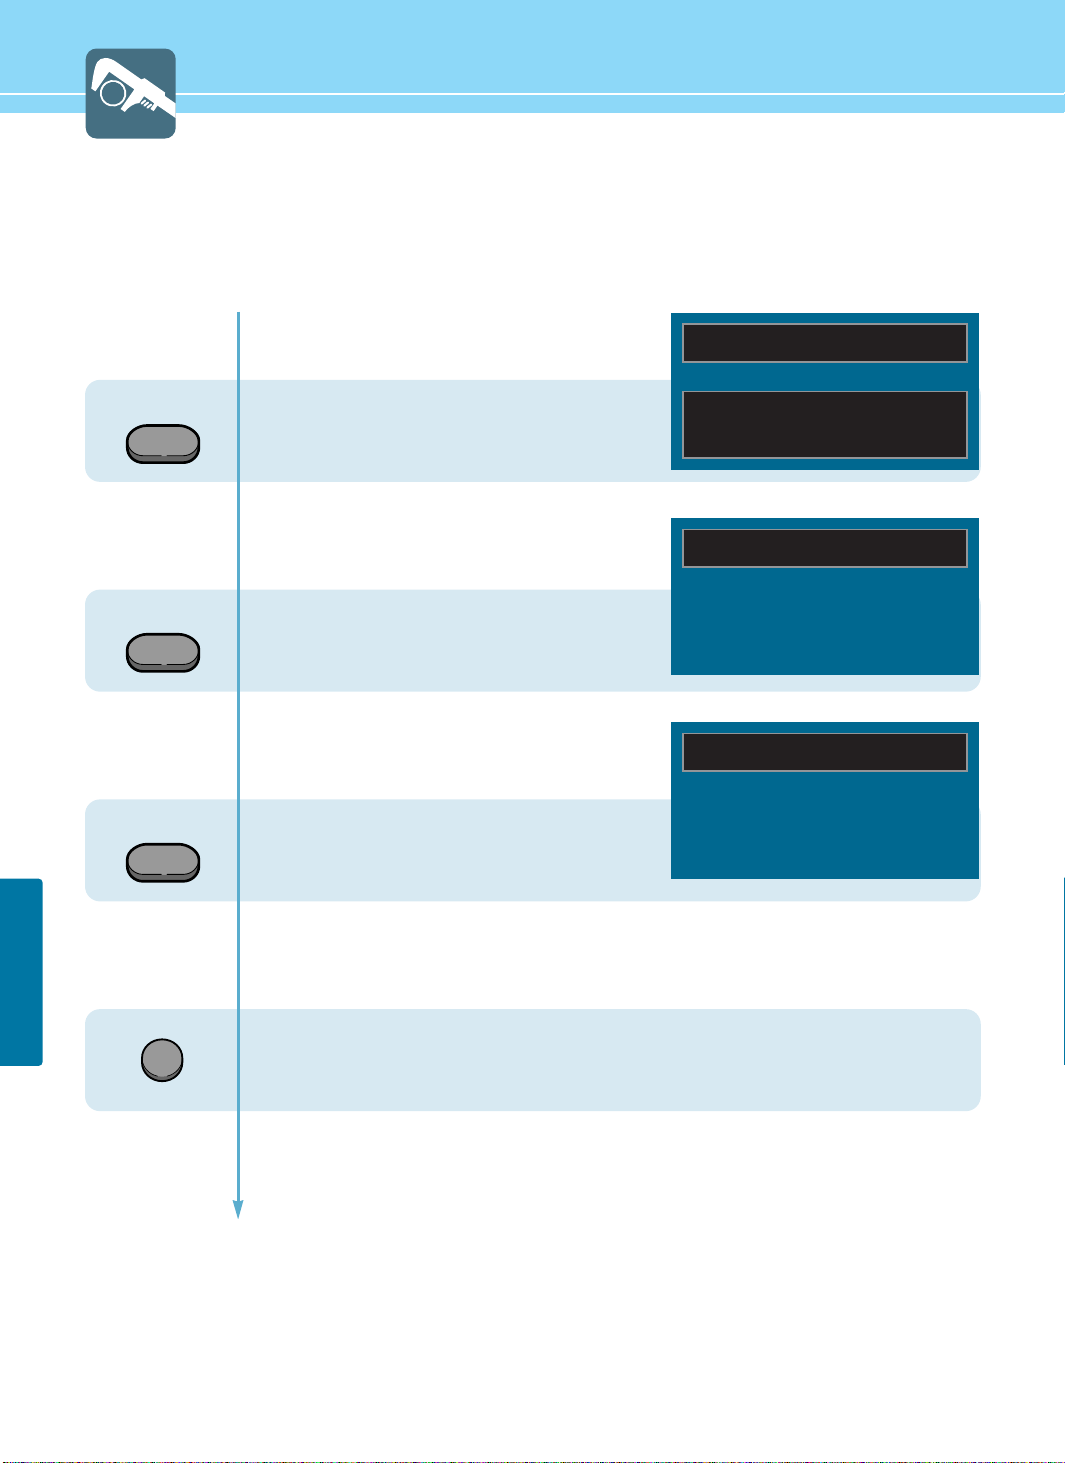
Displaying Information
You can view the channel information and setting status by pressing the “INFO” button on the remote control.
In case of applying TV input
Press INFO button.
In case of applying VIDEO input
Press INFO button.
In case of applying PC input
Press INFO button.
If the EXIT button is pressed, the menu disappears.
INFO
INFO
INFO
AIR - 020
12 : 30 AM
PICTURE MODE : STANDARD
SOUND MODE : USER
MTS MODE : MONO
INPUT SIGNAL : MONO
VIDEO - NTSC
12 : 30 AM
PC - 1024x768 70Hz
12 : 30 AM
EXIT
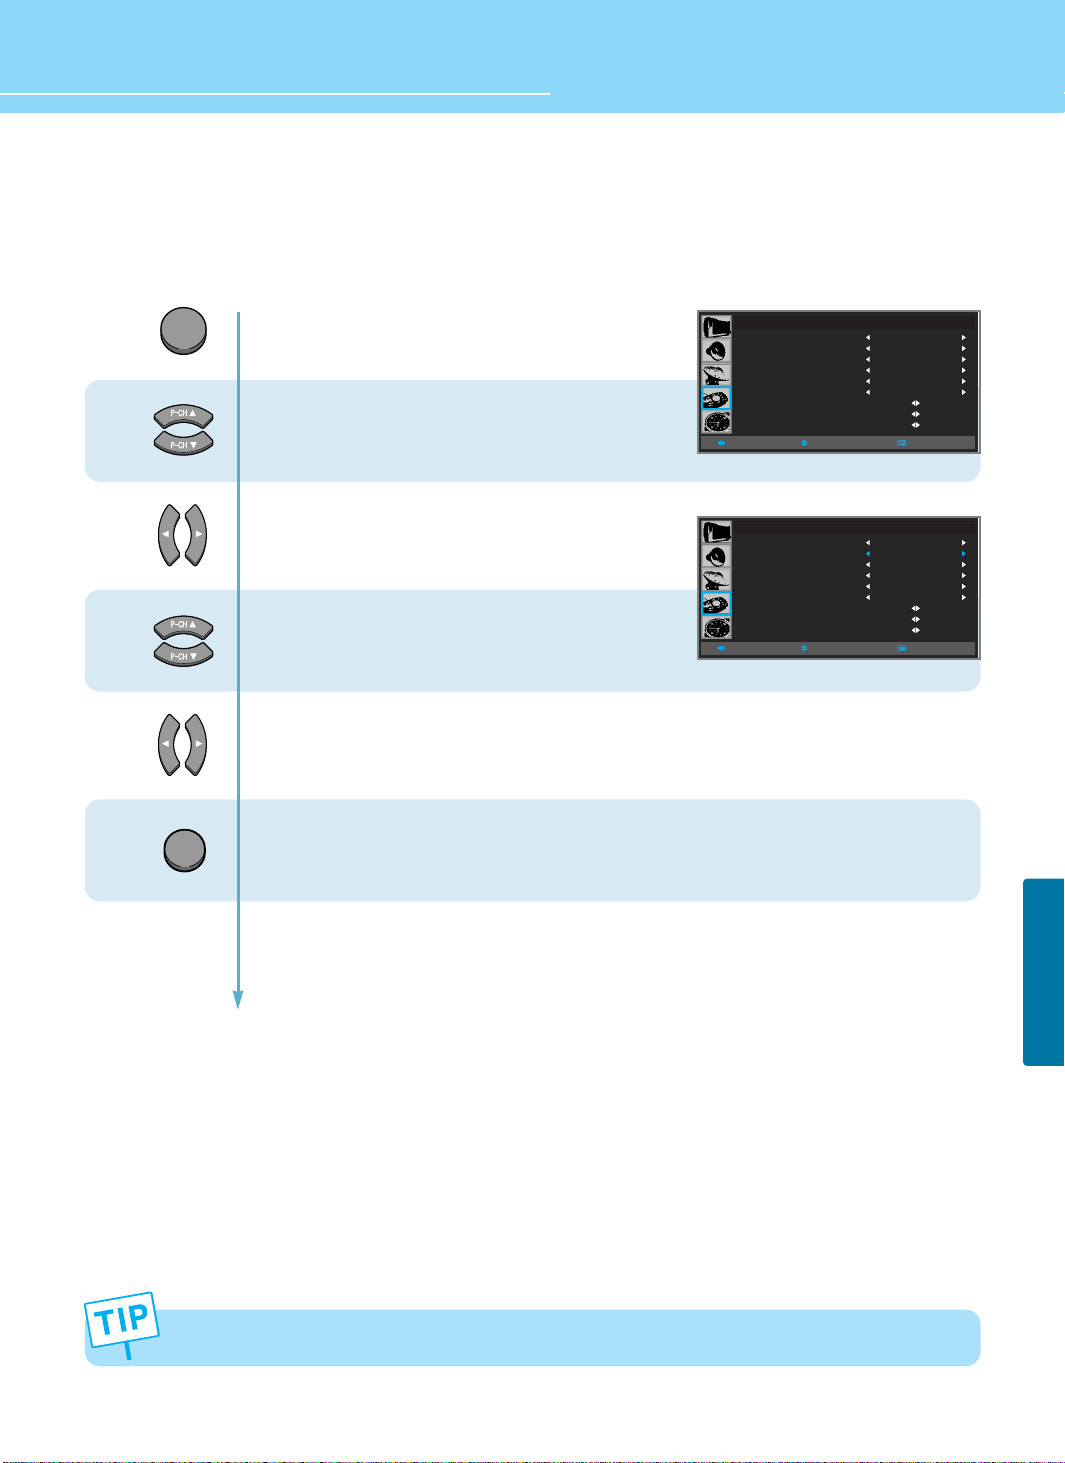
How to Set Key-Lock
This is to lock the control buttons on the front bottom of PDP.
64
FUNCTION SETUP
HYUNDAI Plasma Display
1
2
3
4
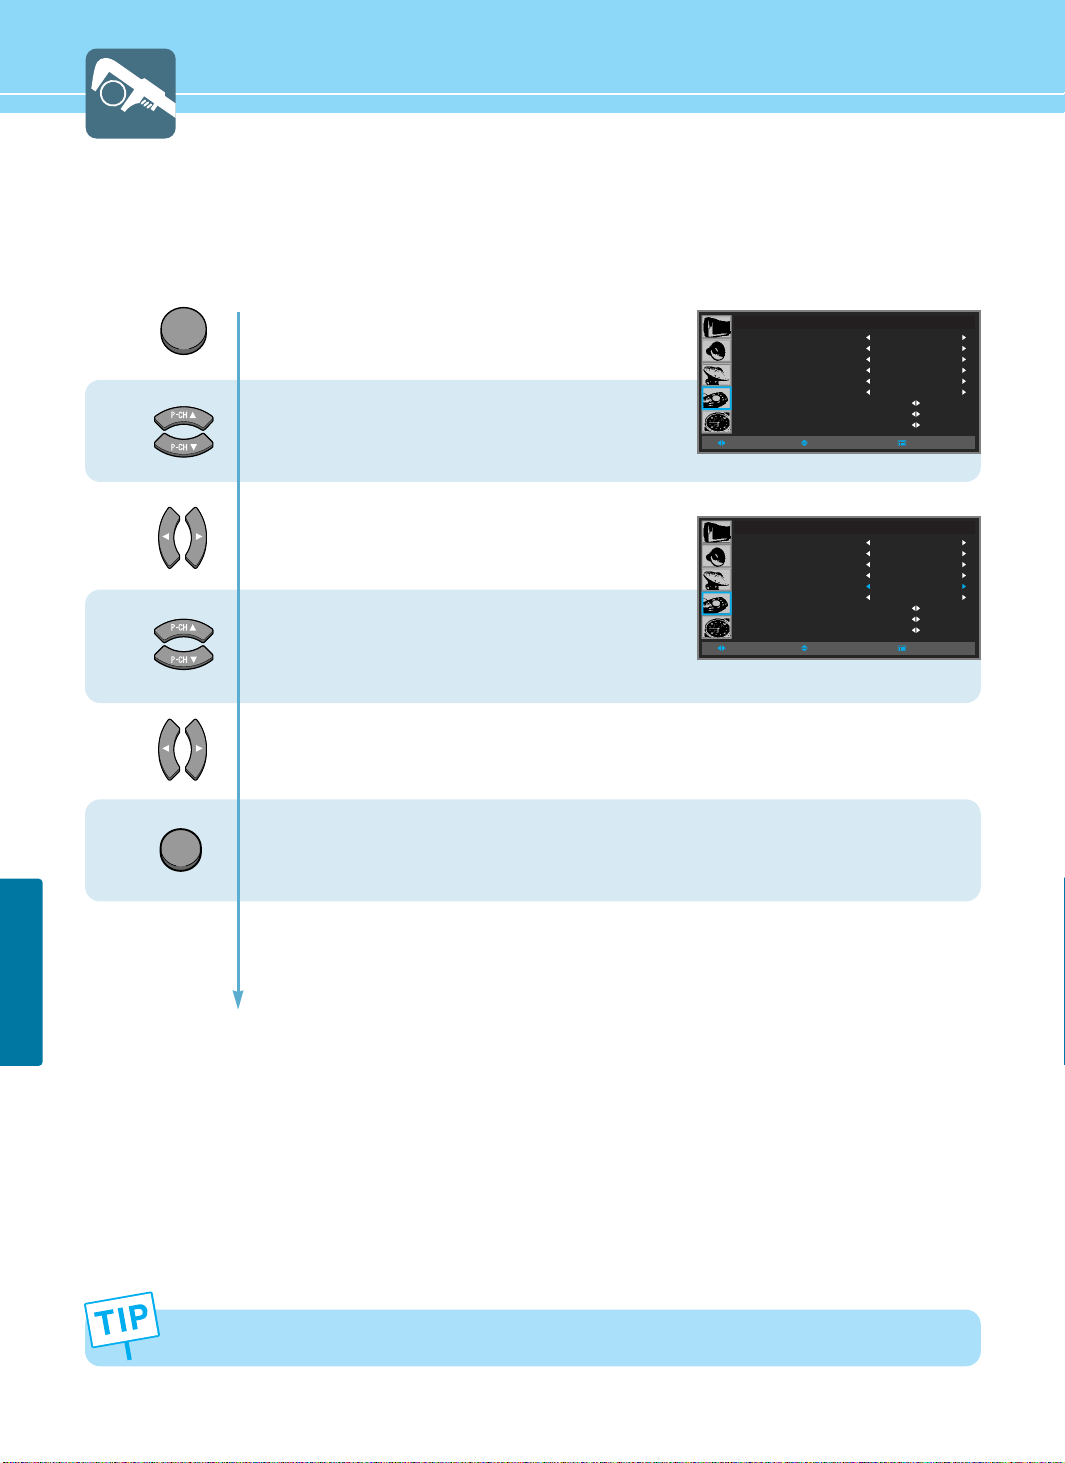
Press Menu button.
Menu items appear on the screen.
Press Up and Down buttons to move to
“FUNCTION” icon.
Press Left and Right buttons to select
“FUNCTION”.
Press Up and Down buttons to move to
“KEY LOCk”.
Press Left and Right buttons to
ON/OFF.
Press MENU button after the setting is done, and Menu goes to the previous menu. If the EXIT
button is pressed, the menu disappears.
FUNCTION
ASPECT RATIO
KEY LOCK
PIXEL SHIFT
FULL WHITE
DPMS
LANGUAGE
IMAGE ADJUST
CAPTION
V-CHIP
WIDE
OFF
OFF
OFF
OFF
ENGLISH
MOVESELECT MENU
When the AC power supply is cut off, key-lock function is automatically off.
EXIT
MENU
ASPECT RATIO
KEY LOCK
PIXEL SHIFT
FULL WHITE
DPMS
LANGUAGE
IMAGE ADJUST
CAPTION
V-CHIP
FUNCTION
MOVESELECT MENU
WIDE
ON
OFF
OFF
OFF
ENGLISH
65
FUNCTION SETUP
3
MENU
4
4
EXIT
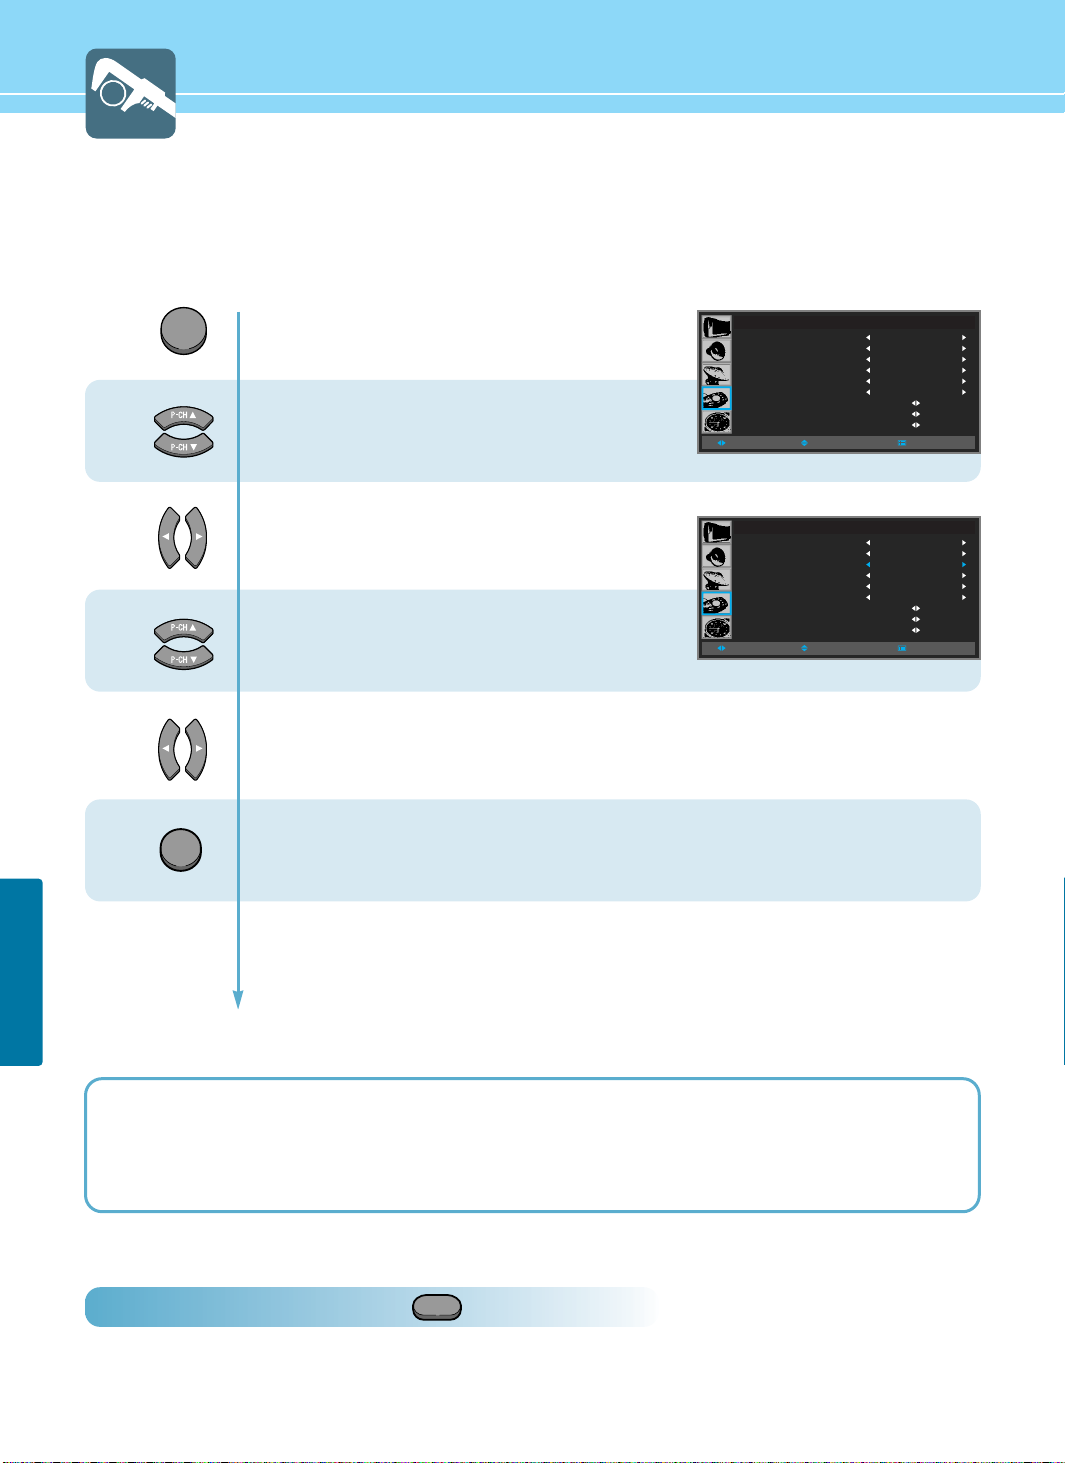
Press Menu button.
Menu items appear on the screen.
Press Up and Down buttons to move to
“FUNCTION” icon.
Press Left and Right buttons to select
“FUNCTION”.
Press Up and Down buttons to move to
“PIXEL SHIFT” or “FULL WHITE”.
Press Left and Right buttons to
“ON/OFF”.
Press MENU button after the setting is done, and Menu goes to the previous menu.
If the EXIT button is pressed, the menu disappears.
While FULL WHITE is activated, if you wish to switch the mode to Off or wish to use other function,
press any of buttons on the remote control unit or any of control keys on the PDP unit. Then the
menu screen will appear again. Press the left or right button to deactivate the current mode.
WIPER
Using the Pixel Shift / Full White / Wiper Function
This feature is designed to reduce image sticking effects during displaying a static picture.
(Brightness degradation is caused by the scale effects of a panel, which is characteristic of a PDP.)
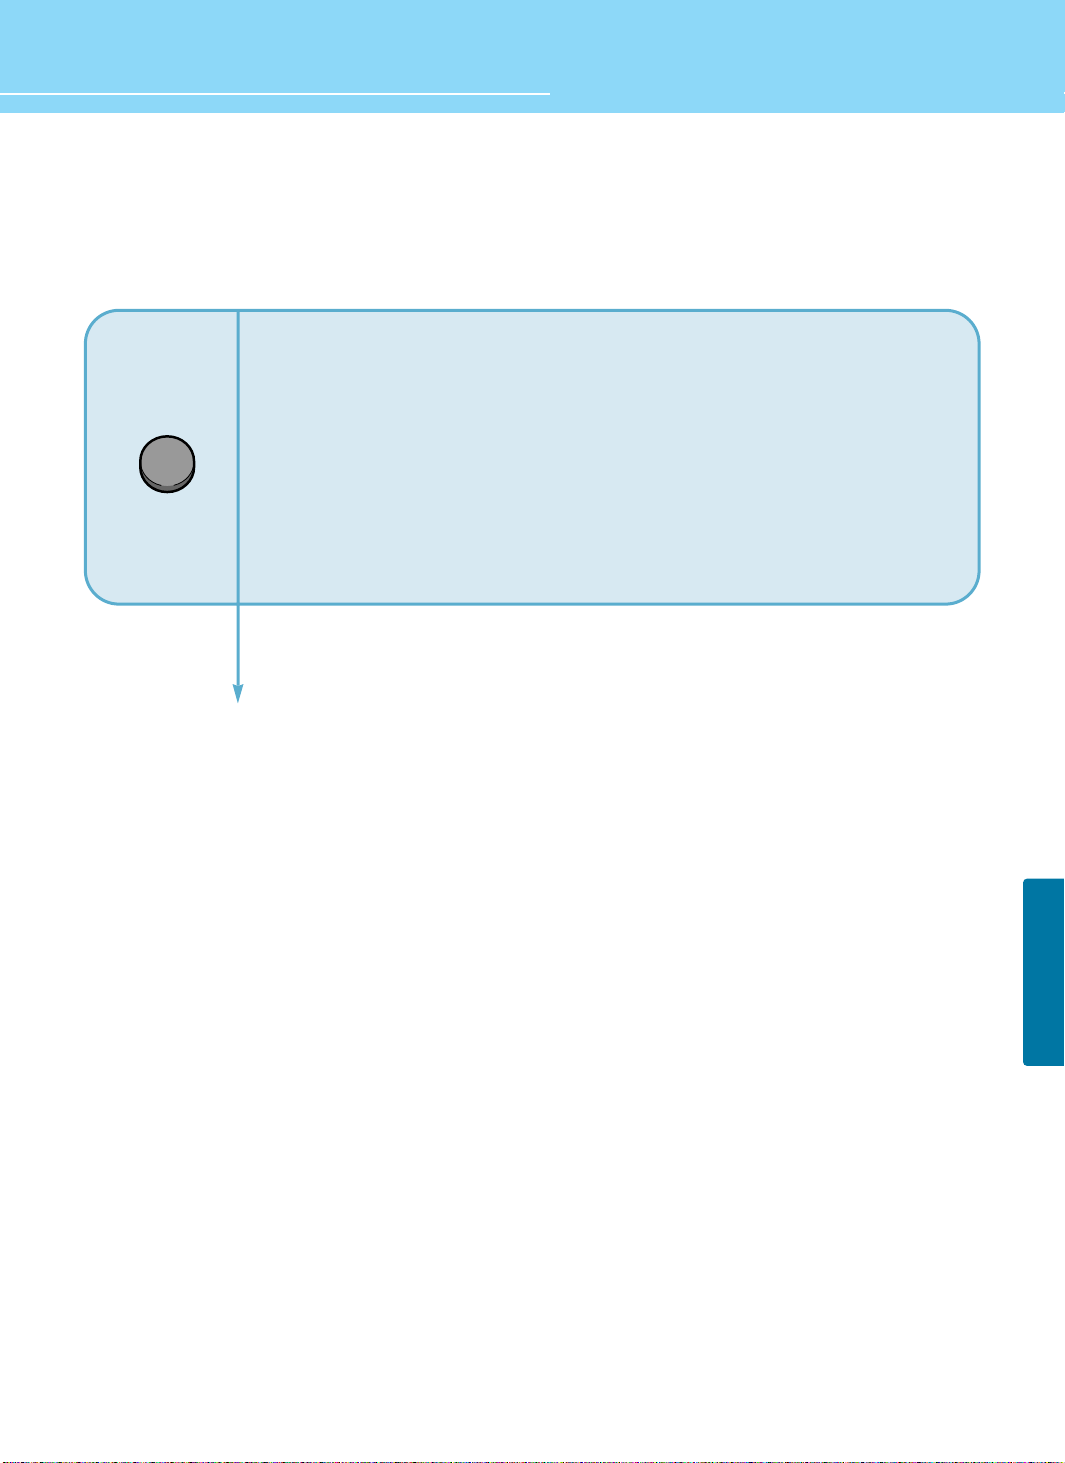
How To Directly Select Wiper : Press button.
The image sticking (brightness degradation) is eliminated as white bars are moving in the right direction.
It may take from several minutes up to several hours to remove the image sticking. If a fixed pattern is displayed for a
long time, you can prevent the latent image by switching FULL WHITE to On for 2 or 3 minutes on a hourly basis.
The image sticking effect is influenced by the brightness of a fixed pattern and its display time. It is recommended that
you reduce the level of the brightness by using picture controls (See page 36) when a fixed pattern is displayed for a
long time.
1
2
FUNCTION
ASPECT RATIO
KEY LOCK
PIXEL SHIFT
FULL WHITE
DPMS
LANGUAGE
IMAGE ADJUST
CAPTION
V-CHIP
WIDE
OFF
OFF
OFF
OFF
ENGLISH
MOVESELECT MENU
ASPECT RATIO
KEY LOCK
PIXEL SHIFT
FULL WHITE
DPMS
LANGUAGE
IMAGE ADJUST
CAPTION
V-CHIP
FUNCTION
MOVESELECT MENU
WIDE
OFF
OFF
OFF
OFF
ENGLISH
How to Freeze Picture
The user can temporarily stop the playing picture.
66
FUNCTION SETUP
HYUNDAI Plasma Display
Press Still button.
Playing picture is stopped.
- Under multi-screen mode(PIP, TWIN), the main picture stops.
To deselect Still function.
Press Still button once more.
STILL
How to Set DPMS
When in PC mode, you can activate Power Saving mode.
67
FUNCTION SETUP
1
2
3
DPMS feature is available for PC mode only.
MENU
4
EXIT
Press Menu button.
Menu items appear on the screen.
Press Up and Down buttons to move to
“FUNCTION” icon.
Press Left and Right buttons to select
“FUNCTION”.
Press Up and Down buttons to move to
“DPMS”.
Press Left and Right buttons to
“ON/OFF”.
Press MENU button after the setting is done, and Menu goes to the previous menu.
If the EXIT button is pressed, the menu disappears.
FUNCTION
ASPECT RATIO
KEY LOCK
PIXEL SHIFT
FULL WHITE
DPMS
LANGUAGE
IMAGE ADJUST
CAPTION
V-CHIP
WIDE
OFF
OFF
OFF
OFF
ENGLISH
MOVESELECT MENU
ASPECT RATIO
KEY LOCK
PIXEL SHIFT
FULL WHITE
DPMS
LANGUAGE
IMAGE ADJUST
CAPTION
V-CHIP
FUNCTION
MOVESELECT MENU
WIDE
OFF
OFF
OFF
ON
ENGLISH
Choosing the Your Languages
When you start using your TV for the first time, you must select your language preference in order to display main
menus and sub menues, etc.
68
FUNCTION SETUP
HYUNDAI Plasma Display
1
2
3
MENU
4
EXIT
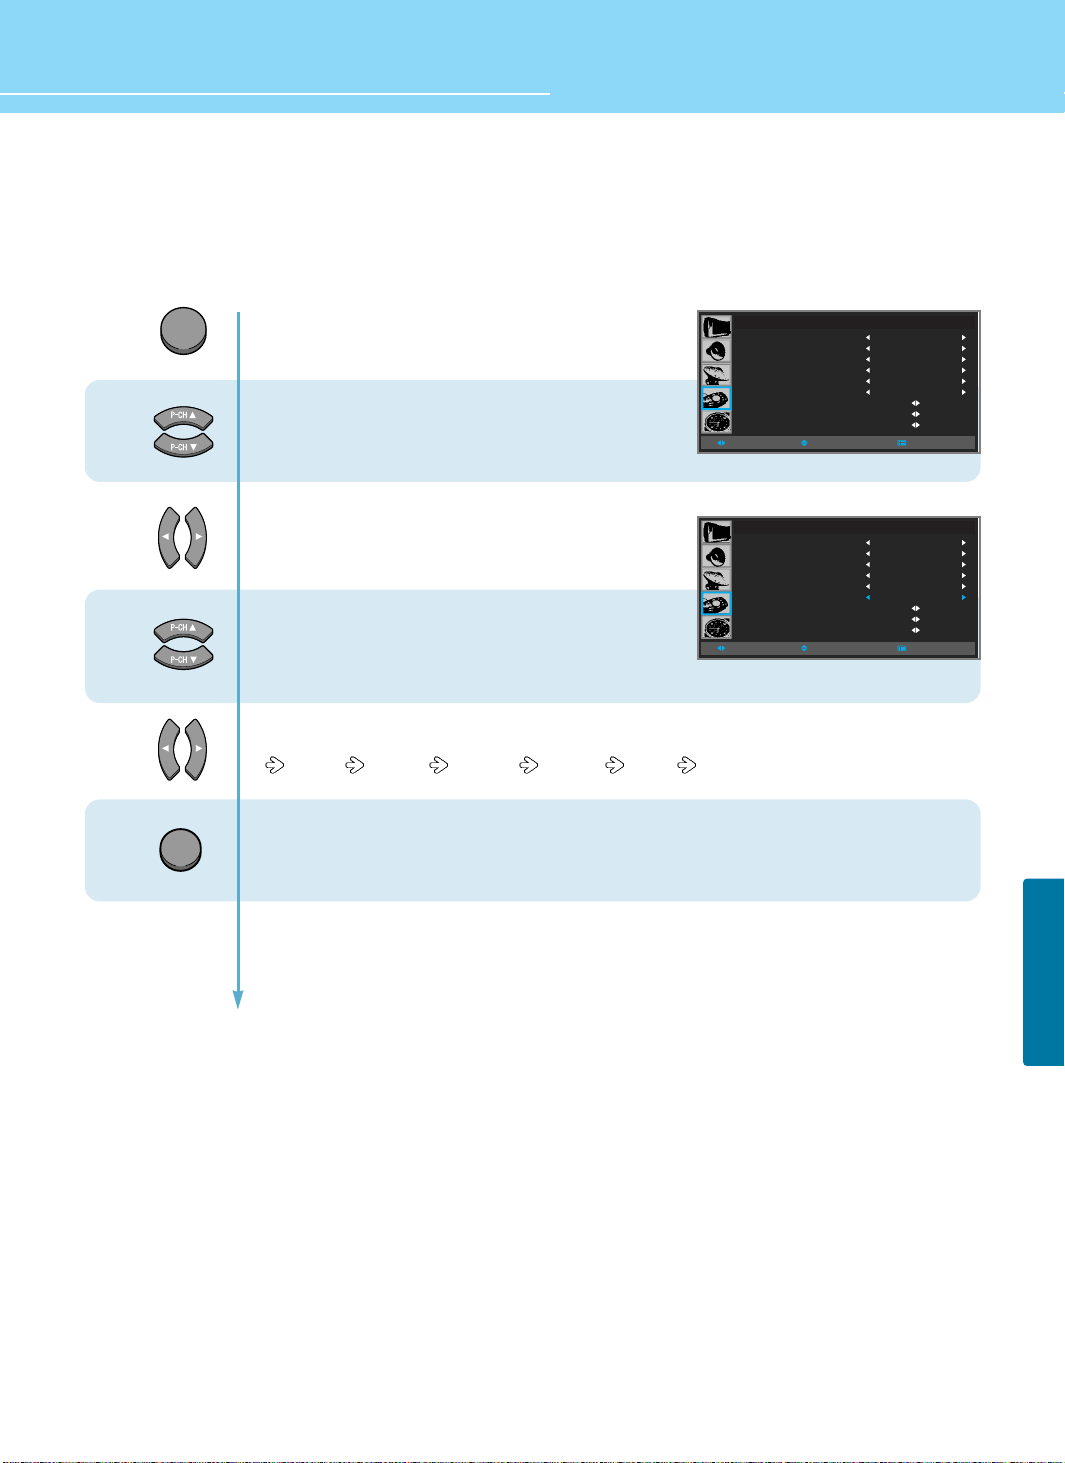
Press Menu button.
Menu items appear on the screen.
Press Up and Down buttons to move to
“FUNCTION” icon.
Press Left and Right buttons to select
“FUNCTION”.
Press Up and Down buttons to move to
“LANGUGE”.
Press Left and Right button, then the menu changes in order below.
English French German Spanish Italian
Press MENU button after the setting is done, and Menu goes to the previous menu.
If the EXIT button is pressed, the menu disappears.
FUNCTION
ASPECT RATIO
KEY LOCK
PIXEL SHIFT
FULL WHITE
DPMS
LANGUAGE
IMAGE ADJUST
CAPTION
V-CHIP
WIDE
OFF
OFF
OFF
OFF
ENGLISH
MOVESELECT MENU
ASPECT RATIO
KEY LOCK
PIXEL SHIFT
FULL WHITE
DPMS
LANGUAGE
IMAGE ADJUST
CAPTION
V-CHIP
FUNCTION
MOVESELECT MENU
WIDE
OFF
OFF
OFF
OFF
ENGLISH
How to Set Image Adjust in PC Mode
69
FUNCTION SETUP
1
2
3
MENU
4
5
6
EXIT
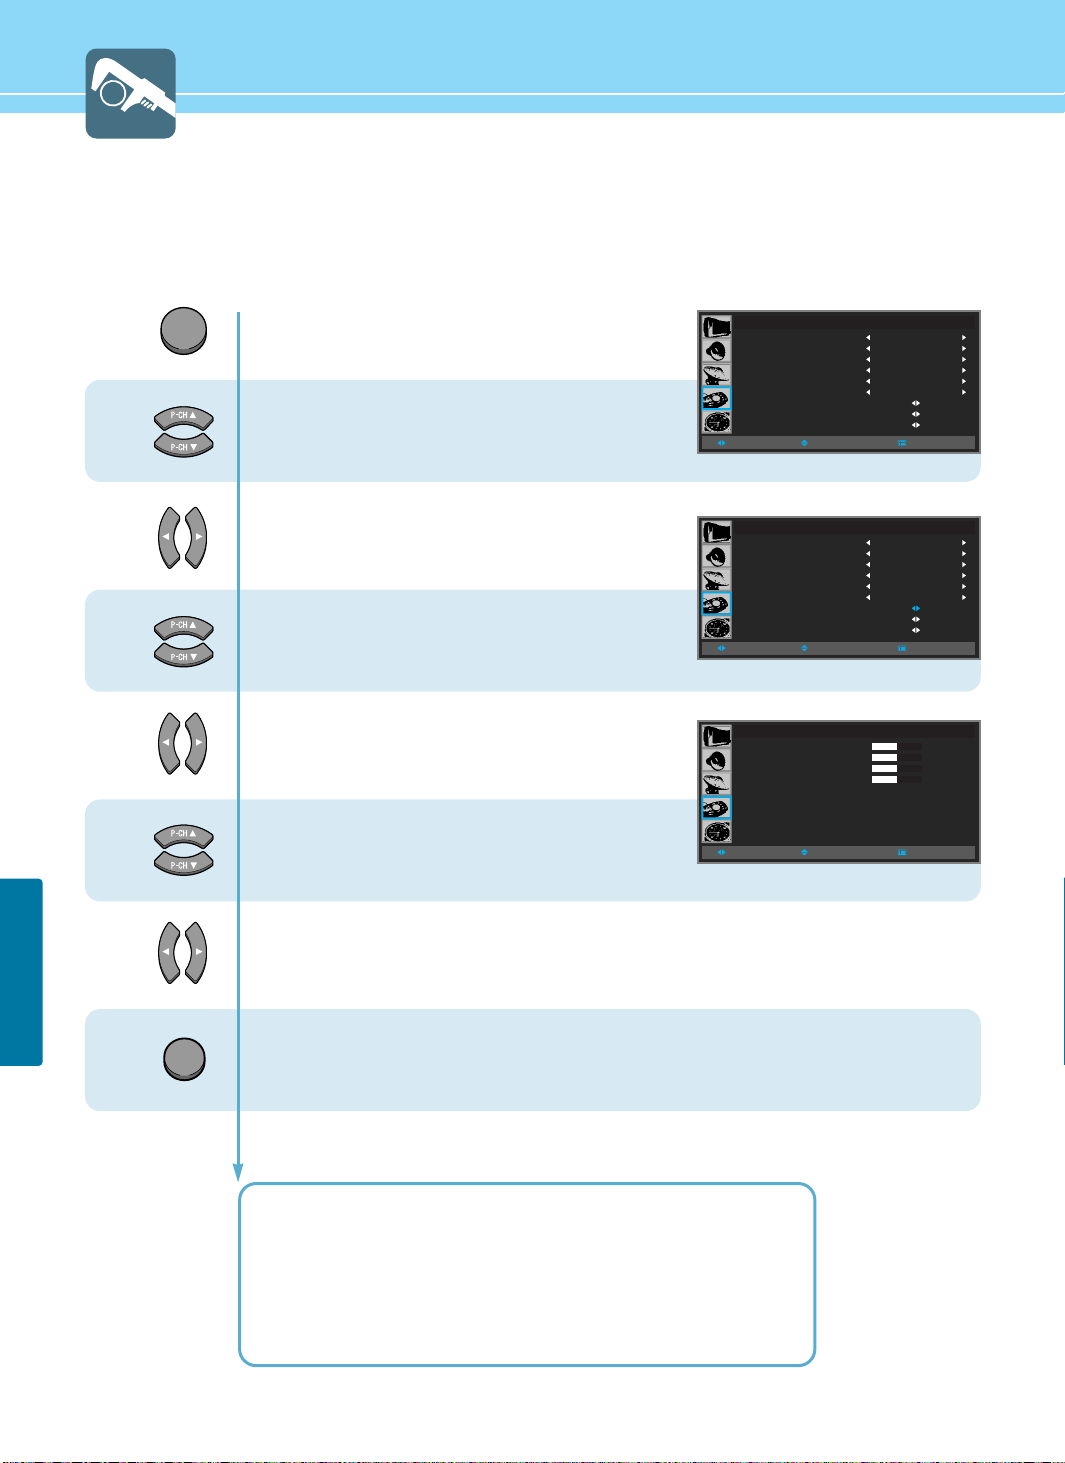
Press Menu button.
Menu items appear on the screen.
Press Up and Down buttons to move to
“FUNCTION” icon.
Press Left and Right buttons to select
“FUNCTION”.
Press Up and Down buttons to move to
“IMAGE ADJUST”.
Press Left and Right buttons to select
“IMAGE ADJUST”.
Image adjust menu appears.
Press Up and Down buttons to chosse
Item.
Press Left and Right buttons to adjust.
Press MENU button after the setting is done, and Menu goes to the previous menu.
If the EXIT button is pressed, the menu disappears.
HORIZONTAL POSITION : To adjust the horizontal position of the picture.
VERTICAL POSITION : To adjust the vertical position of the picture.
FREQUENCY : To adjust to reduce the noise on the picture.
PHASE : To adjust to eliminate the shake of the picture.
Auto ADJUST : Horizontal/vertical positions are automatically adjusted.
FUNCTION
ASPECT RATIO
KEY LOCK
PIXEL SHIFT
FULL WHITE
DPMS
LANGUAGE
IMAGE ADJUST
CAPTION
V-CHIP
WIDE
OFF
OFF
OFF
OFF
ENGLISH
MOVESELECT MENU
ASPECT RATIO
KEY LOCK
PIXEL SHIFT
FULL WHITE
DPMS
LANGUAGE
IMAGE ADJUST
CAPTION
V-CHIP
H POSITION
V POSITION
FREQUENCY
PHASE
AUTO ADJUST
IMAGE ADJUST
FUNCTION
MOVESELECT MENU
MOVESELECT MENU
WIDE
OFF
OFF
OFF
OFF
ENGLISH
+000
+000
+000
+000

HYUNDAI Plasma Display
FUNCTION SETUP
- This function is provided in only PC mode.
- When executing PC AUTO, optimum picture can be obtained if the setting is made under the full pattern.
- You can store up to six modes by activating PC AUTO function.
If you exceed six modes, the first stored mode information will be removed and a newly stored mode will be
stored.
70
How To Directly Select Auto Track : Press button.
Automatically adjust Horizontal/Vertical position of the picture.
PC AUTO

71
FUNCTION SETUP
Viewing Closed Captions
Your TV decodes and displays the closed captions that are broadcast with certain TV shows. These captions are
usually subtitles for the hearing impaired or foreignlanguage translations. All VCRs record the closed caption signal
from television programs, so home-recorded video tapes also provide closed captions. Most prerecorded commercial
video tapes provide closed captions as well. Check for the closed caption symbol in your television schedule and on
the tape’s packaging :
* The Caption feature does not work with DVD or DTV signals.
1
2
3
MENU
4
5
6
Press Menu button.
Menu items appear on the screen.
Press Up and Down buttons to move to
“FUNCTION” icon.
Press Left and Right buttons to select
“FUNCTION”.
Press Up and Down buttons to move to
“CAPTION”.
Press Left and Right buttons to select
“CAPTION”.
Caption menu appears.
Caption is highlighted.
Press Left and Right buttons to “ON/OFF”.
Press the Down button and then go to step 6
if you need to set the Mode.
Press Left and Right buttons to select
“TEXT or CAPTION”.
Press the Down button and then go to step 7
if you need to depending on the particular broadcast, it might be
necessary to make changes to "Channels" and "Field"
Continued on next page ......
FUNCTION
ASPECT RATIO
KEY LOCK
PIXEL SHIFT
FULL WHITE
DPMS
LANGUAGE
IMAGE ADJUST
CAPTION
V-CHIP
WIDE
OFF
OFF
OFF
OFF
ENGLISH
MOVESELECT MENU
CC
ASPECT RATIO
KEY LOCK
PIXEL SHIFT
FULL WHITE
DPMS
LANGUAGE
IMAGE ADJUST
CAPTION
V-CHIP
CAPTION
MODE
CHANNEL
FIELD
CAPTION
MODE
CHANNEL
FIELD
FUNCTION
MOVESELECT MENU
CAPTION
MOVESELECT MENU
CAPTION
WIDE
OFF
OFF
OFF
OFF
ENGLISH
ON
CAPTION
CHANNEL1
FIELD1
ON
TEXT
CHANNEL1
FIELD1
MOVESELECT MENU
 Loading...