

Hyundai C19F06110 Users Manual
Type No. C19F06110
www.imageQuest.co.kr
ImageQuest F910
Pefect Flat Monitor
NEXT
User’ Guide

U.S.A.
BACK
U.S.FEDERAL COMMUNICATIONS COMMISSION
RADIO FREQUENCY INTERFERENCE STATEMENT
INFORMATION TO THE USER
NOTE : This equipment has been tested and found to comply with the limits for a
Class B digital device pursuant to Part 15 of the FCC Rules.
These limits are designed to provide reasonable protection against harmful
interference in a residential installation.
This equipment generates, uses, and can radiate radio frequency energy and, if
not installed and used in accordance with the instructions, may cause harmful
interference to radio communications.
However, there is no guarantee that interfer ence will not occur in a particular
installation.
If this equipment does cause harmful interference to radio or television reception,
which can be determined by turning the equipment off and on, the user is
encouraged to try to correct the interference by one or more of the following
measures:
NEXT
Reorient or relocate the receiving antenna.
Increase the separation between the equipment and receiver.
Connect the equipment into an outlet of a circuit different from that to which
the receiver is connected.
Consult the dealer or an experienced radio/TV technician for assistance.
Changes or modification not expressly approved by the party responsible for
compliance could void the user’s authority to operate the equipment.
Connecting of peripherals requires the use of grounded shielded signal cables.

DECLARATION OF CONFORMITY
BACK
WE HYUNDAI ELECTRONICS INDUSTRIES CO., LTD.
Ami-ri Bubal-Eub Ichon-Si Kyungki-Do
467-860 KOREA
declare under our sole responsibility that the product:
Kind of equipment : COLOR MONITOR
Type-Designation : C19F06110
to which this declaration relates is in conformity with the
following standard(s) or other normative document(s)
Safety : EN60950 : 1992 + A1, A2, A3, A4
EMC : EN 55 022/1994, EN 50 082-1/1992
IEC 801-2/1991, IEC 801-3/1984, IEC 801-4/1988
following the provisions of the Low Voltage Directive 73/23/EEC,
93/68/EEC and the EMC Directive 89/336/EEC.
NEXT
Accredited testlaboratory:
TÜV Rheinland
Am Grauen Stein
51105 Köln
KOREA / JUNE. 16, 2000 HONG KI, KIM
(Place and date of issue) (Name and signature of
authorized person)
F 910
BACK
Contents
Perfectly Flat 3D Monitor
1. Introduction ...............................1/20
2. Safety Information ...................1/20
3. Installing the monitor ..............3/20
3-1. Packing List ....................................3/20
Fastening the swivel and tilt base ...
3-2.
3-3. Selecting a suitable location .........4/20
3-4. Connecting the monitor ................5/20
3-5. Setting the refresh rate.................8/20
Preset Timing Table.......................8/20
4. Adjusting the picture.....................9/20
4/20
NEXT
4-1. Using the On Screen Display........10/20
4-2. Direct access buttons...................10/20
4-3. OSD Adjustments.........................11/20
5. Display power management.........16/20
Reducing power consumption...........16/20
6. Troubleshooting.............................17/20
7. Specifications.................................20/20

F 910
BACK
1. Introduction
2. Safety Information
Perfectly Flat 3D Monitor
NEXT
This manual contains instructions for installing and operating Hyundai
DeluxScan F910.
Hyundai DeluxScan F910 is a highly ergonomic color display unit;
• 19” diagonal Flat 0.25mm dot pitch CDT
• Supporting high screen refresh rates and full scan flicker-free picture quality
• With On Screen Display menus for user control
• 100-240V AC input voltage
• VESA DPMS (Display Power Management Signaling)
• VESA DDC1/2B compatibility
• 3D Image view enabled function(By wearing 3D glasses)
When you set up and use your display unit, follow the safety instructions below.
• Do not use the display unit in humid environments like bathrooms, damp
cellars, swimming pools, etc.
• This equipment must be connected to an earthed outlet which is close to the
display unit and accessible in case you need to disconnect the display.
• Do not connect an extension cord.
• Never insert objects into the openings on the outside of the device as you can
come into contact with live electrical components. This can cause fire or give
strong electrical shocks.
• Slots in the cabinet are provided for ventilation. Do not block the ventilation
slots in the display unit cabinet.
• Do not under any circumstances open the display unit cabinet.
1/20

F 910
BACK
Cleaning and Maintenance
Perfectly Flat 3D Monitor
NEXT
• To avoid risk of electric shock, do not disassemble the display unit cabinet.
The unit is not user-serviceable. Remember to unplug the display unit from the
power outlet before cleaning.
• Do not use alcohol (methyl, ethyl or isopropyl) or any strong dissolvent. Do not
use thinner or benzene, abrasive cleaners or compressed air.
• Do not wipe the screen with a cloth or sponge that could scratch the surface.
• To clean your antistatic screen, use water and a special microfiber screen
cleaning tissue used in optical lens cleaning, or lightly dampen a soft, clean
cloth with water or a mild detergent.
• To clean display unit cabinet, use a cloth lightly dampended with a mild
detergent.
• During the transportation of the monitor, the swivel base has to be removed in
every case.
Please take more than 15 minutes rest in case headache or eye-strain
occurs while enjoying 3D image for long time wearing 3D glasses.
2/20
F 910
UK
America/Canada
Japan
Australia
Korea
Europe
South Africa
BACK
3. Installing the
monitor
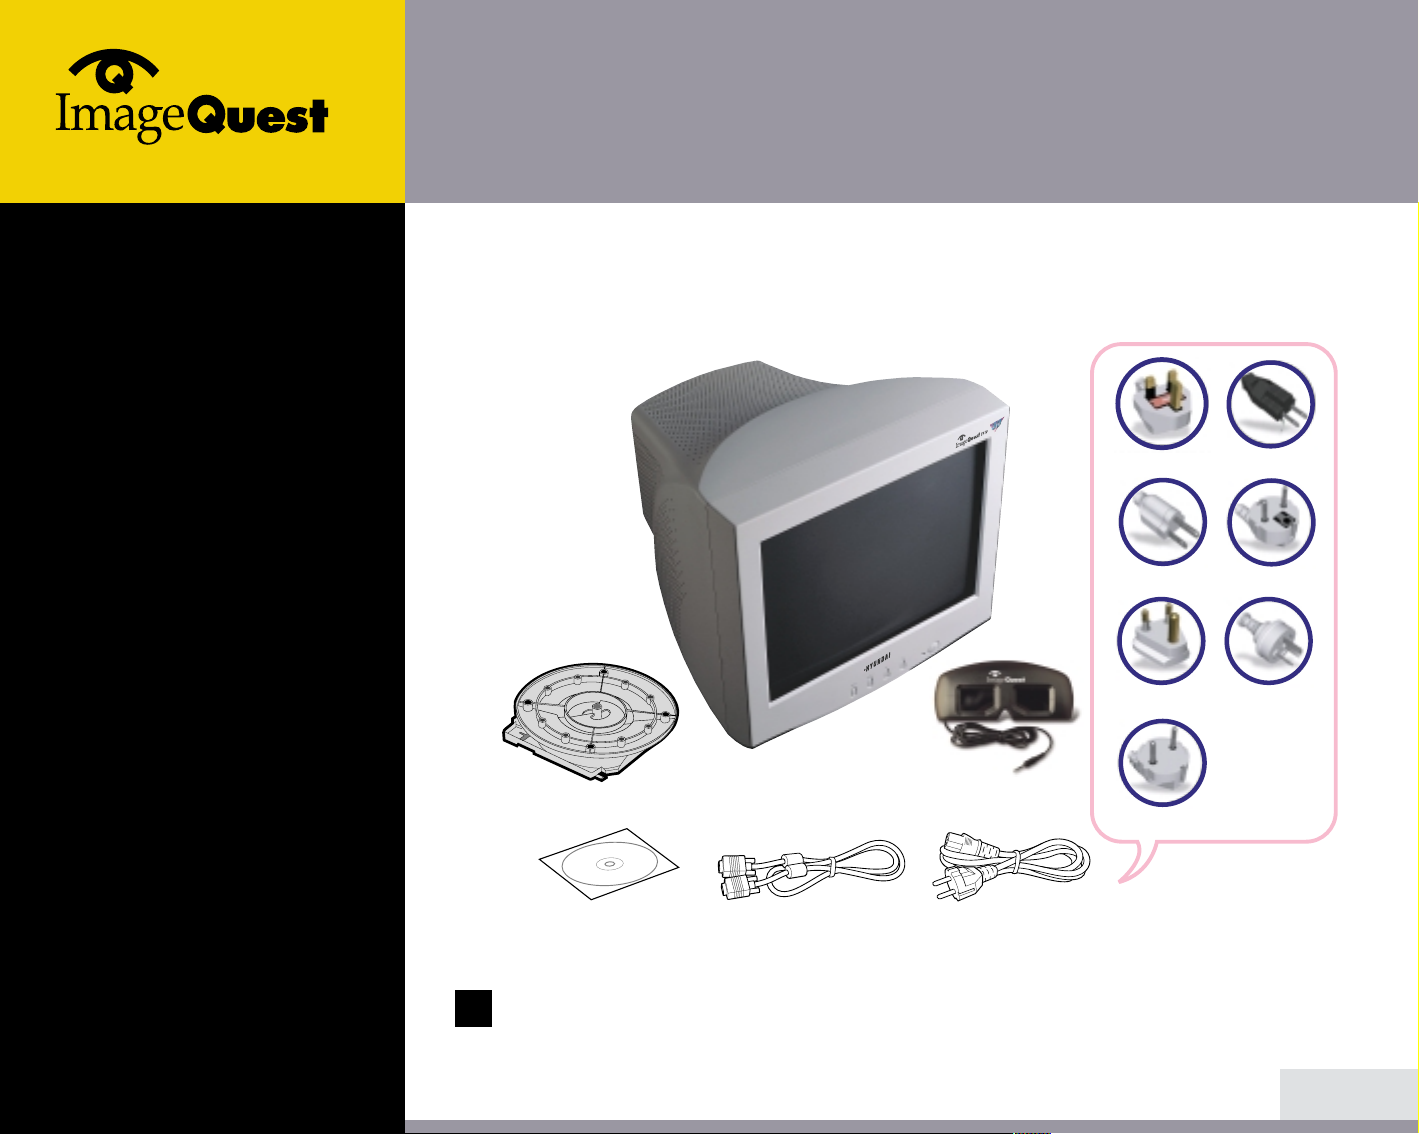
3-1. Packing List
Perfectly Flat 3D Monitor
The following items should be found in the packaging.
Monitor
NEXT
3D Glasses(Optional)
Tilt and Swivel
Compact Disk
Above power cord can be changed upon different voltage areas. Please
!
contact your dealer if anything is missing or damaged.
Signal Cable
Power cord
3/20
F 910
BACK
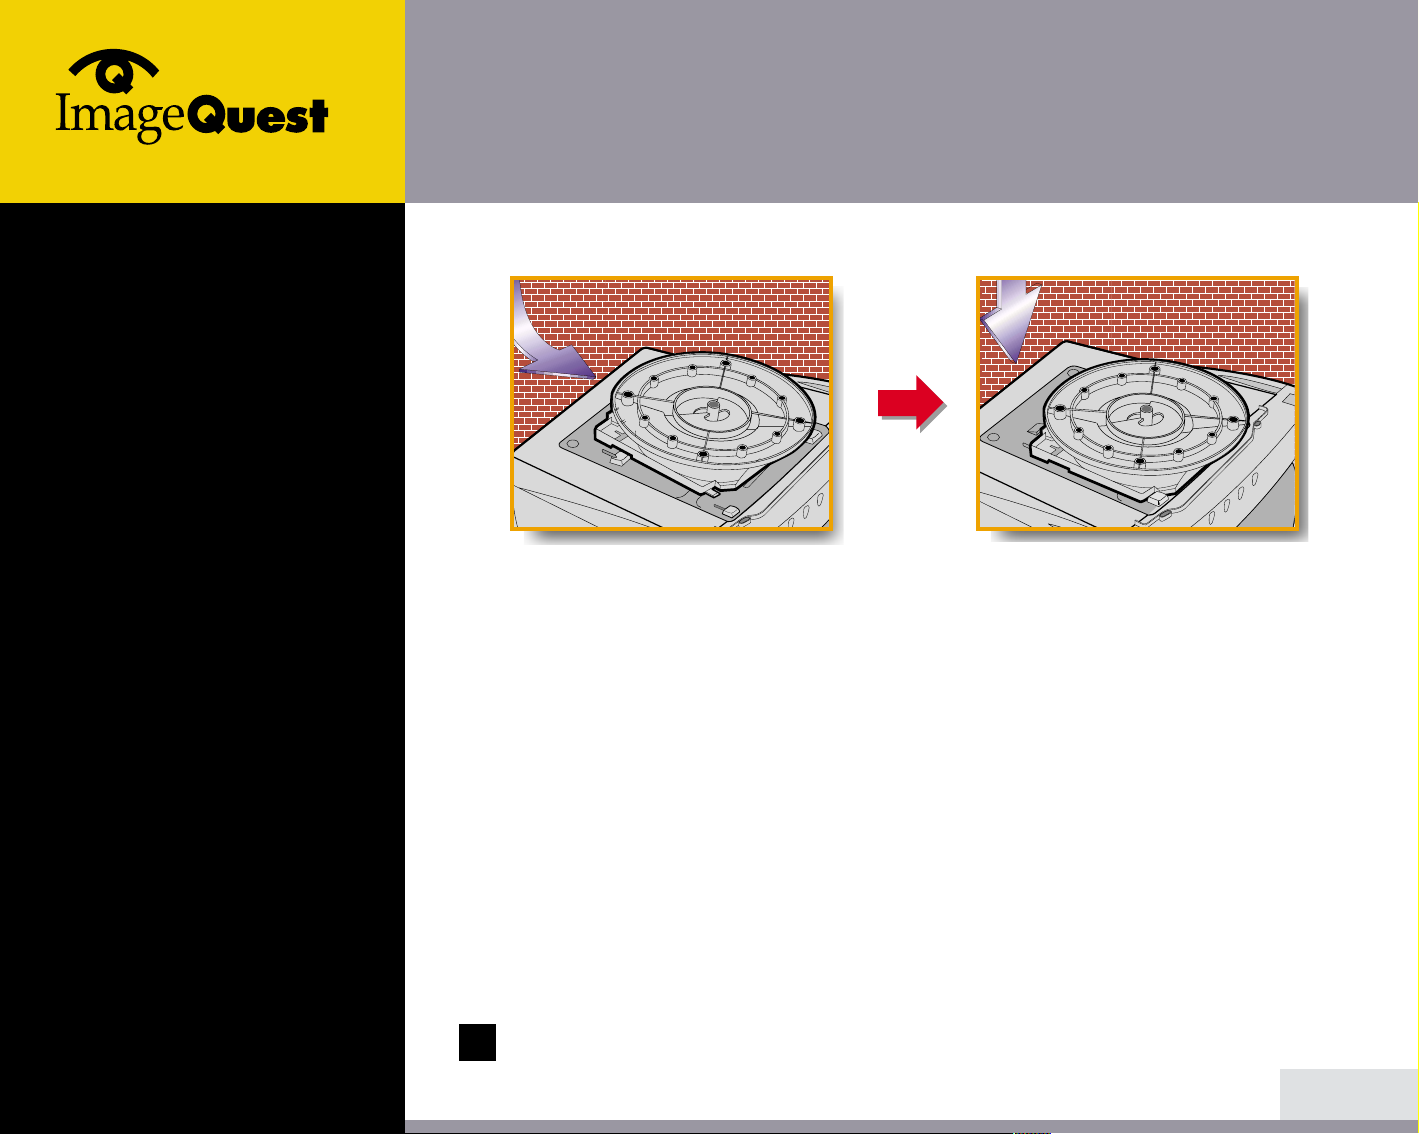
3-2. Fastening the swivel
and tilt base
3-3. Selecting a suitable
location
Perfectly Flat 3D Monitor
NEXT
• Place the base against the bottom of the monitor so that the base fasteners are
aligned with appropriate slots.
• Push the base towards the front of the monitor until the latch locks into
position.
• Place the monitor at least 30cm from other electrical or heat-emitting
equipment and allow at least 10cm on each side for ventilation.
• Place the monitor in a position where no light shines directly onto or is
reflected on the screen.
• To reduce eye strain, avoid installing the display unit against a bright
background such as a window.
• Position the monitor so that the top of the screen is no higher than eye level.
• Position the monitor directly in front of you at a comfortable reading distance
(around 45 to 90cm)
!
Please set up refresh rate(vertical frequency) as more than 120Hz to
decrease screen flicker coming through 3D glasses on perfrming 3D image.
4/20
 Loading...