

Humminbird 898c Quick Operation Manual
Quick Operations Guide for Hum mi nbird 898c
Dockside preparations
1) Power up unit/EXIT to escape warnings
2) Insert SD card in either slot under the 898c label
3) Check read out boxes on left to insure de pth and posi ti o n rea dou t s ar e active
Recovery area preparations (on site)
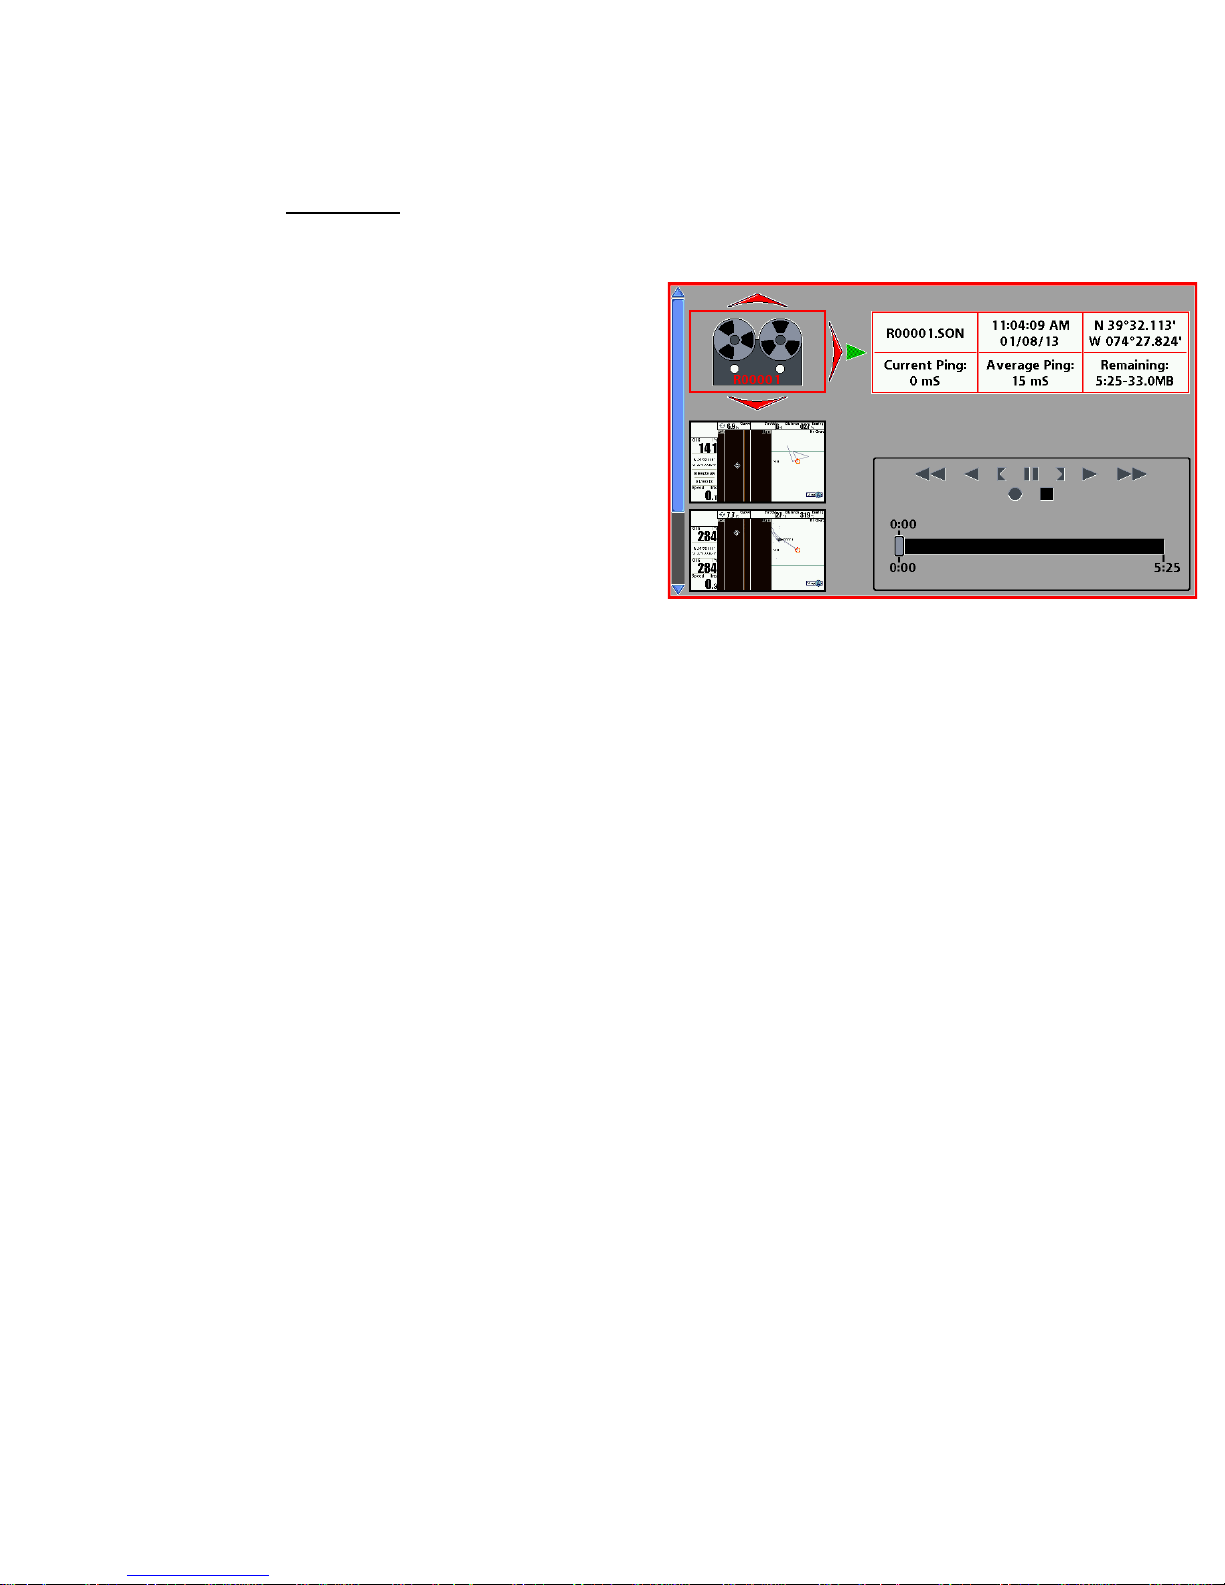
1) Start Log Book entry
2) Press View Button to get to the Record View:
1) Press Menu 1x
2) Right arrow over to begin recording
3) Screen will now say “Stop Recording”,
indicating that you are currently recording
4) Exit 1x, then View button or “Hot” key to
desired view
3) NOTE: “Recording” should be flashi ng at the
top of any view during all on-site efforts
4) Press View button 3x or use Middle “hot” key to enter Side Imaging view
Recovery efforts
Technique #1 (using buoys as visual)
1) Enter desired view (either the side image/chart combination or side image only) using “hot”
keys
2) When a crab pot is seen on screen throw buoy to approximate pot area.
3) Using the buoy as visual aid, deploy grapple gear and encircle buoy/pot
a) Once hooked in pot, retrieve line and once over pot PRESS AND HOLD “MARK” button.
Waypoint # will appear on screen.
4) Use a larger grapple anchor to get a second, heavier line in pot and remove pot
5) Mark in log book the fate of this pot (include Way point #)
-Recovered (R) /partial recovery (PR) /aborted recovery (A)
Technique # 2 (using waypoints)
1) Enter desired view (either the side image/chart combination or side image only) using “hot”
keys
a) If using combo view, press menu button once, make active side = LEFT
b) Exit
c) When a crab pot is seen on the side imaging screen, move cursor over target using the
arrow button. Press and hold the MARK button. Waypoint # will appear on screen. Write down
WP#.
d) EXIT to reactivate scrolling side scan image
6) Recoveries can be performed in desired view
a) Use recovery methods to retrieve pot or continue surveying
b) Mark in log book the fat e of this pot (include WP #)
a) Recovered (R)/ partial rec ov er y (PR)/ aborted recovery (A)
c) Do not erase WP #s

Quick Operations Guide for Hum mi nbird 898c
End of Recovery efforts
1. Write down begin and end ti mes for surveying/pot recovery for that day and number of pot s
recovered in Log Book
2. STOP RECORDING
a. From any screen view, hit Menu 1x
b. Arrow right in Stop Recording option
c. Exit
3. Export waypoints to Memory Card
a. In any view press “Menu” 2x.
b. Arrow left or right to highlight “NAV” tab and press down arrow to highlight “waypoints,
routes, tracks”-Press Right arrow
c. Arrow up to highlight “options”-press Right arrow
d. Down arrow to “select all and…”- press Right arrow
e. Down arrow to “Export”-press Right arrow
f. Right arrow for “YES”
Erasing tracks
1. With Chart as active screen (either full chart screen or split with right side “Active”)
2. Menu 1x
3. Scroll down to Clear Current Track
a. Arrow right 2x
4. Exit to desired screen
Erasing Waypoints
1. Please contact Stockton before deleting any “true” waypoints to verify they are saved. All
erroneous or accidental points can be deleted as needed
2. In any View
a. Menu 2x
b. Arrow to NAV tab
c. Arrow down to Waypoints, Tracks and Routes
d. Arrow right
e. Arrow down to highlight waypoint or camera image to be deleted
f. Right arrow to select delete
3. To delete large quantities of waypoints
a. Menu 2x
b. Arrow to NAV tab
c. Arrow down to Waypoints, Tracks and Routes- Arrow right
d. Arrow up to “Options”- Arrow right
i. To delete all- arrow down to “select all and…”- arrow right>delete>Yes>
ii. To delete selected- arrow down to “Select multiple and…”- arrow>delete>.
Select desired Waypoint # - Arrow> waypoint goes blue. Continue selecting to
highlight all desired waypoints to delete.
iii. Arrow UP to “Done”->Yes>
 Loading...