


Y5
User Guide
2017

Contents
Exciting New Features
Installing Applications
Getting Started
Screen recorder 1
Sharing applications using a microSD card 3
Uninstalling an application 3
Locking and unlocking the screen 4
Touchscreen gestures 5
Status and notification icons 6
Home screen 8
Notifications 13
Accessing applications 16
Personalizing your phone 19
Entering text 22
Calls and Contacts
Making calls 23
Answering or rejecting a call 25
Functions available during a call 26
Answering a third-party call 27
Making a conference call 28
Viewing the call log 28
Call settings 29
Creating a contact 30
Importing or exporting contacts 31
Managing contacts 32
Finding a contact 33
Viewing contacts from different accounts 34
Adding a contact to your favorites 34
Contact groups 34
Messaging and Email
Sending a message 37
Replying to a message 37
Searching for messages 38
Deleting threads 38
Managing messages 38
Blocking spam messages 39
Managing common phrases 39
Adding a message signature 39
i

Adding an email account 39
Sending an email 40
Checking your emails 41
Managing VIP contacts 41
Account settings 42
Camera and Gallery
Accessing the viewfinder 43
Taking a photo 43
Capture modes 43
Time-lapse mode 48
Panoramic shots 48
Launching the camera from Gallery 50
Shooting a video 50
Video settings 51
Camera settings 51
Contents
Viewing photos and videos 52
Adding notes to an image 54
Organizing photos and videos 54
Sharing images or videos 56
Editing an image 56
Using Camera or Gallery to scan a QR code 57
Music and Video
Adding songs to your phone 58
Searching for local music 58
Listening to music 58
Controlling playback using a smart headset 59
Creating a playlist 60
Playing a playlist 60
Setting a song as the ringtone 61
Playing a video 61
Accessing the Internet
Connecting to the Internet using mobile data 62
Connecting to the Internet using Wi-Fi 62
Sharing your mobile Internet with other devices 63
Transferring data using Bluetooth 66
Transferring data using Wi-Fi Direct 67
Backup and Restore
Using the Backup application to back up and restore data 69
Restoring factory settings 70
Updating your phone 70
OTA updates 70
ii

File Management
Viewing files 72
Creating folders 72
Renaming files 72
Copying, moving, or deleting files 73
Creating or extracting archives 73
Excluding small images 73
Storing private files in a safe 74
Power Management
Viewing battery usage statistics 75
Reducing power consumption 75
Enabling the Ultra power plan 75
Closing background applications when the screen is locked 76
Preventing background applications from accessing the Internet 76
Contents
Configuring display and sound settings 76
Phone Manager
Optimizing your system 77
Managing data usage 77
Harassment filter 77
Battery management 78
Tools
Calendar 79
Clock 80
Weather 82
Notepad 83
Calculator 84
Sound recorder 84
Mirror 85
Settings
Enabling location access 87
Increasing indoor positioning accuracy 87
Configuring the display settings 88
Sound settings 88
Changing the screen unlock method 89
Gestures and navigation settings 90
Airplane mode 90
Using the floating dock 91
Setting your SIM card PIN 92
Setting up an account 93
Setting the date and time 93
iii

Changing the system language 94
Viewing your phone's specifications 94
Viewing the available storage space 94
Encrypting a microSD card 94
Formatting the microSD card 95
Accessibility Features
About your phone's accessibility features 96
TalkBack 96
Magnification gestures 98
Using the power button to end a call 99
Adjusting the screen response time 99
Color correction 99
Contents
iv

Exciting New Features
Screen recorder
Use the screen recorder feature to record video game footage or teach friends and family how to
use phone features.
To protect your privacy, unlock your phone before recording your screen.
Starting the recording
Start recording the screen using one of the following methods:
l Press the volume up and power buttons simultaneously and select the desired recording
mode.
You can choose from HD mode or Mini mode. Mini mode records in a lower resolution, resulting
in smaller file sizes and faster upload speeds.
l Audio will also be recorded, therefore make sure that you are in a quiet environment.
l Recording will stop automatically when you make or receive a call.
l When making a screen recording, you will not be able to use the recording feature in other
applications.
l Longer recordings will take up more space on your phone's internal storage, so ensure
there is enough space before recording.
Stopping the recording
Stop recording the screen using one of the following methods:
l Press the volume up and power buttons simultaneously.
1

Exciting New Features
l Touch the screen recording icon in the upper left corner of the status bar.
Open the notification panel and touch to share your screen recording.
By default, screen recordings are stored in Gallery, within the Screen recordings folder.
2

Installing Applications
Sharing applications using a microSD card
Save installation packages to a microSD card to share them with other phones.
Installation packages from third-party sources may contain viruses or malicious software and
should be installed with caution. Only install applications from trusted sources.
1 Insert the microSD card containing the installation package into your phone.
2 Open Files, locate the installation package on the microSD card, and then touch to
install.
A warning message may be displayed during the installation process. Always read these
messages carefully. If you wish to proceed with the installation, touch Settings and then turn
on the Unknown sources switch to allow your phone to install third-party applications. After
you have finished installing the application, touch Settings > Advanced settings > Security
and turn off the Unknown sources switch to prevent your phone from installing applications
downloaded from unofficial sources.
After installation, the application will be visible on your home screen.
Uninstalling an application
Free up space on your phone and boost performance by removing unused applications.
Some pre-installed system applications cannot be removed.
l On the home screen, touch and hold the application you want to uninstall and drag it to the
icon.
l Touch Settings > Apps, select the application you want to uninstall, and then touch Uninstall.
3
Getting Started
Locking and unlocking the screen
Locking the screen
l Press the power button to manually lock the screen.
l The screen will lock automatically and enter sleep mode after it has been idle for a certain
period to reduce power consumption and prevent unintended operations.
To change the screen sleep time, open Settings, touch Display > Sleep, and then
select a time.
Your phone will continue to receive messages, notifications, and incoming calls when the screen
is locked. The status indicator will flash green when you receive new notifications. When you
receive an incoming call, the screen will turn on and display the caller information.
Unlocking the screen
When the screen is off, press the power button to wake the screen. Slide your finger in any
direction to unlock the screen.
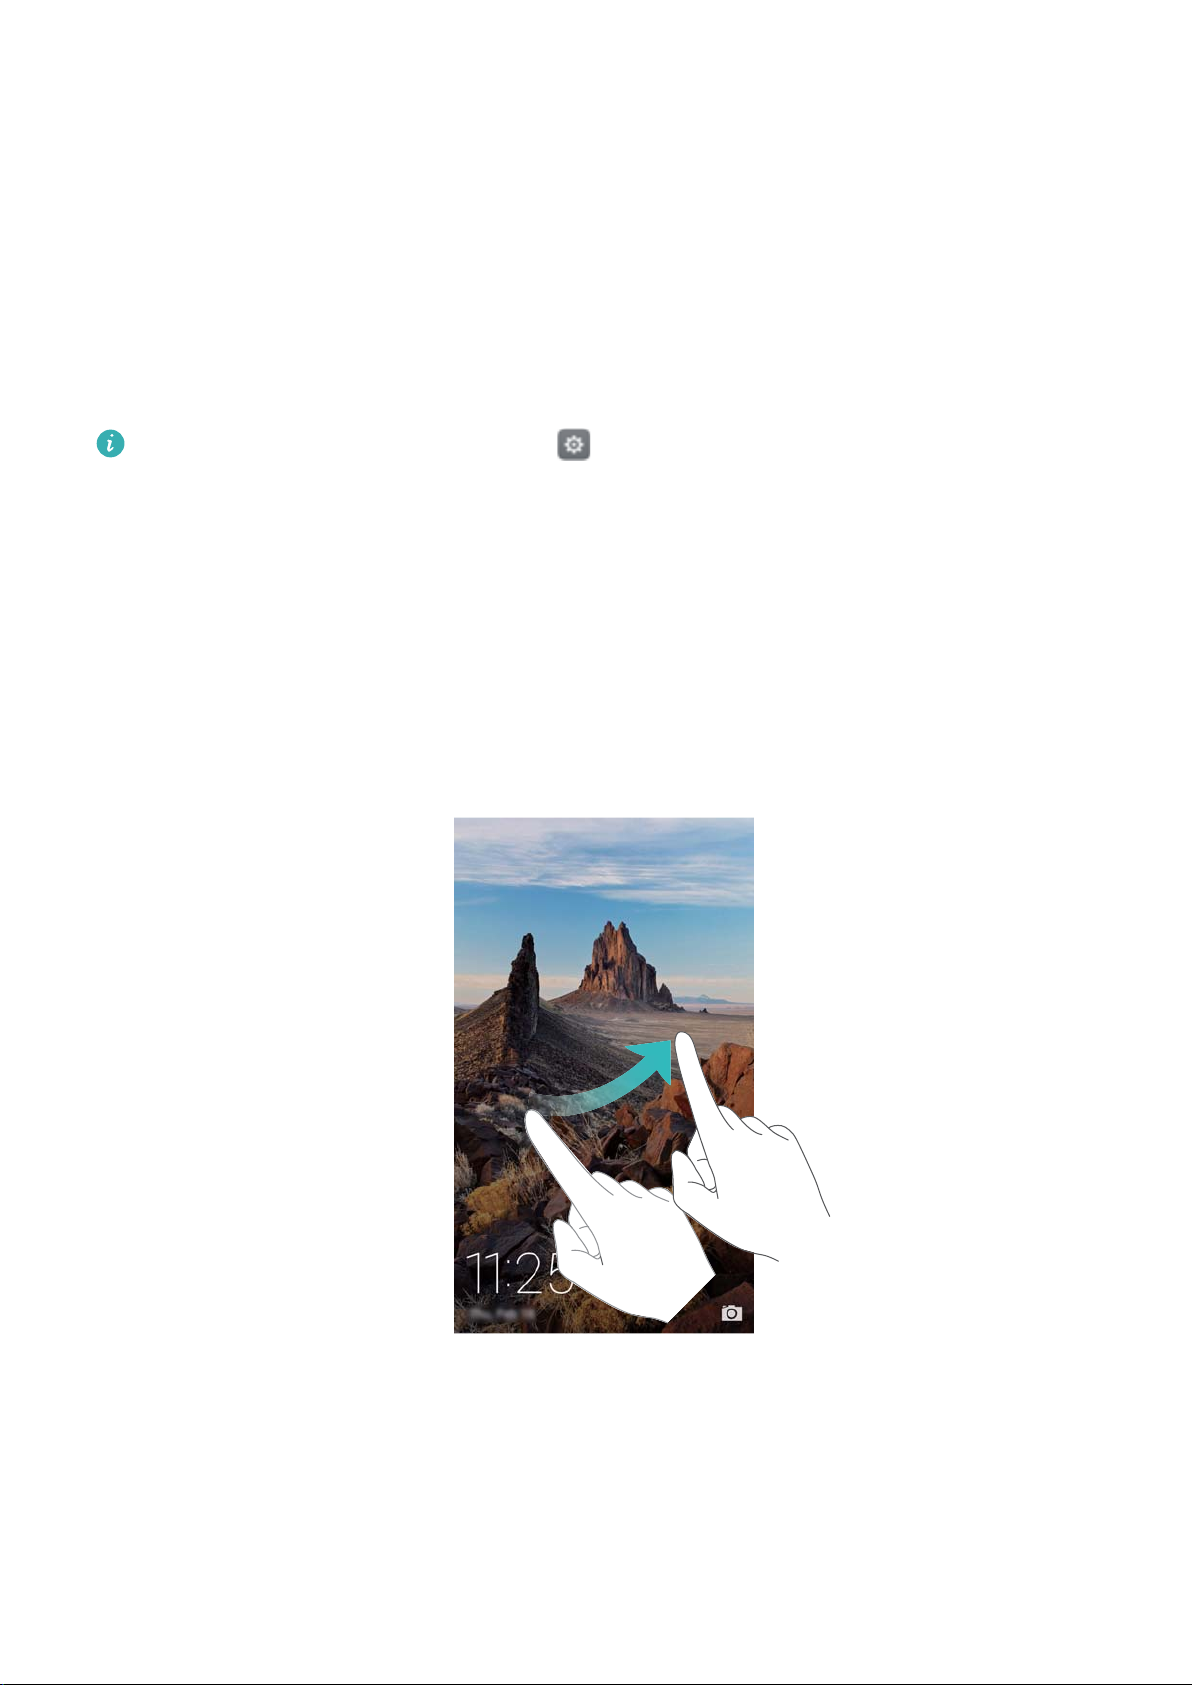
Magazine Unlock
Use Magazine Unlock to create your own selection of lock screen images and bring your lock
screen to life.
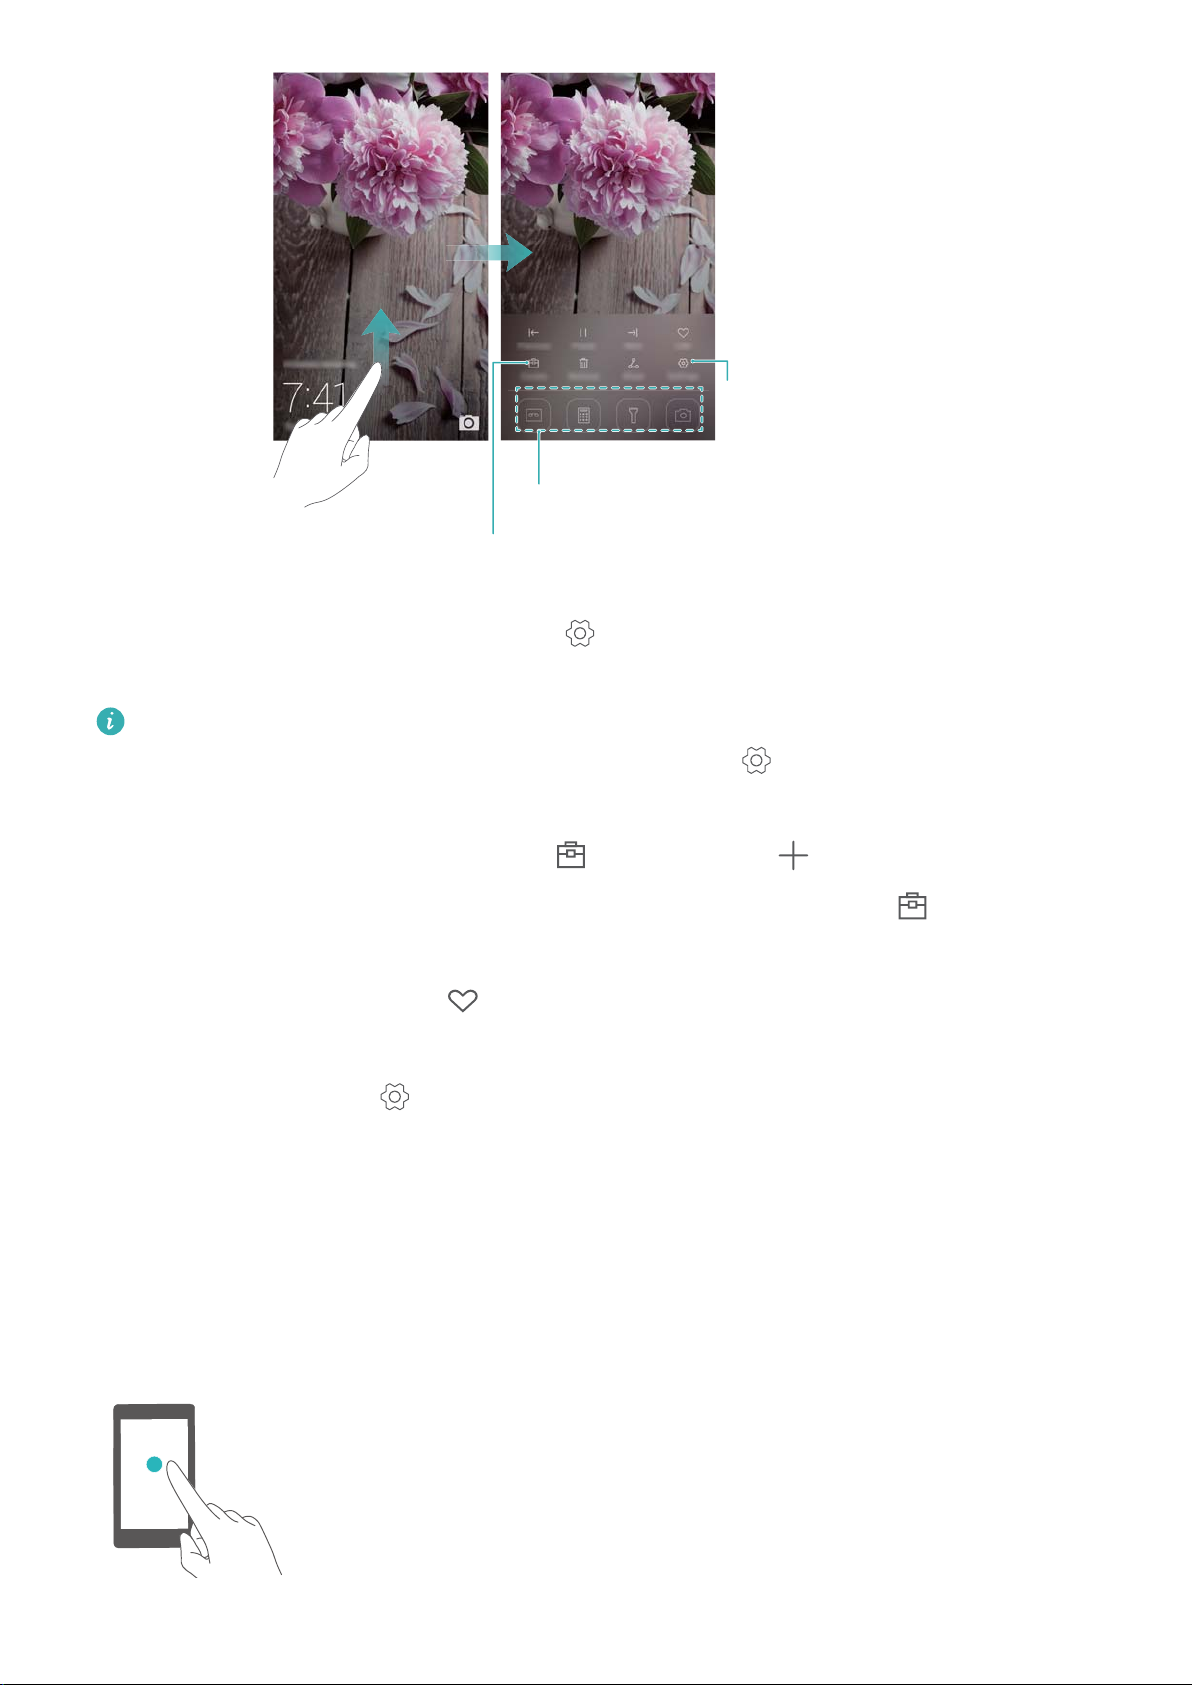
Swipe up from the bottom of the lock screen to display the Magazine Unlock options.
4
View, add, or delete images from your Magazine
Unlock covers
App shortcuts
Configure update
method for Magazine
Unlock covers and
subscription type
Getting Started
Add magazines to the viewing list: Touch > Subscriptions to add your favorite
magazines to the viewing list.
Updating your Magazine Unlock covers requires an Internet connection. Set your phone to
update over Wi-Fi to avoid excessive data usage. Touch , and then turn on the Auto-
update over Wi-Fi switch.
Manage Magazine Unlock covers: Touch , and then touch . Select the desired images
to add them to the viewing list. To delete covers from the viewing list, touch , and then touch
and hold the desired image and select Remove.
Add covers to favorites: Touch
to add the current cover to your favorites. Images that
have been added to your favorites will not be deleted from the viewing list after an online update.
Delete old covers: Touch , and then turn on the Auto-delete covers older than 3 months
switch. Covers older than 3 months will be automatically deleted from the viewing list. Covers in
your favorites will not be deleted.
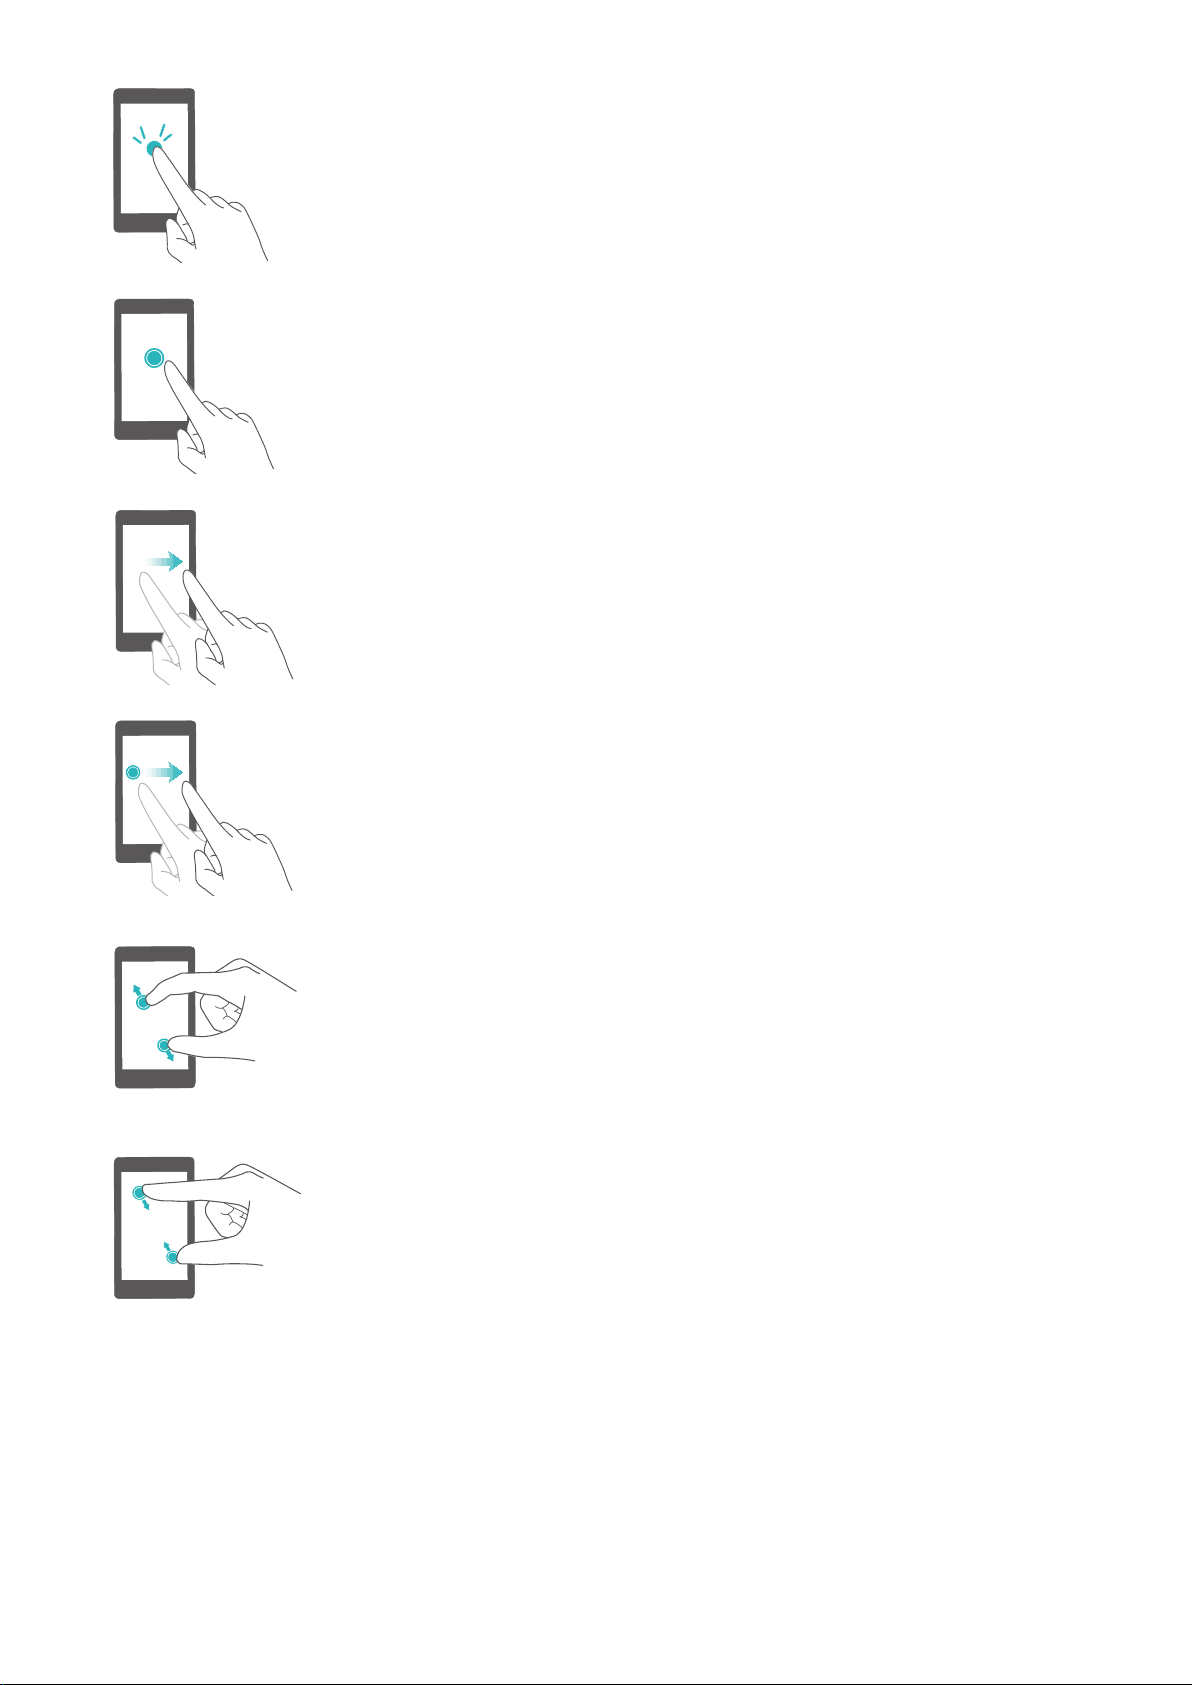
Touchscreen gestures
Use simple touchscreen gestures to perform a variety of tasks, such as open applications, scroll
through lists, and zoom images.
Touch: Touch an item once. For example, touch to select
an option or open an application.
5
Getting Started
Double touch: Touch the target area of the screen twice
in quick succession. For example, double touch an
image in full screen mode to zoom in or out.
Touch and hold: Touch and hold the target area of the
screen for at least 2 seconds. For example, touch and
hold a blank area on the home screen to access the
home screen editor.
Swipe: Swipe your fingers on the screen. For example,
in the Notifications tab, swipe left or right on a
notification to dismiss it. Swipe vertically or horizontally
to go to other home screens, scroll through a document,
and more.
Drag: Touch and hold an item, and then move it to
another position. For example, use this gesture to
rearrange applications and widgets on the home screen.
Spread fingers apart: Spread two fingers apart on the
screen. For example, spread two fingers apart to zoom in
on a picture or web page.
Pinch fingers together: Pinch two fingers together on
the screen. For example, pinch two fingers together to
zoom out on an image.
Status and notification icons
Status icons
Status icons are displayed on the right-hand side of the status bar. Status icons display
information about your phone's status, such as network connection information, signal strength,
battery level, and time.
6
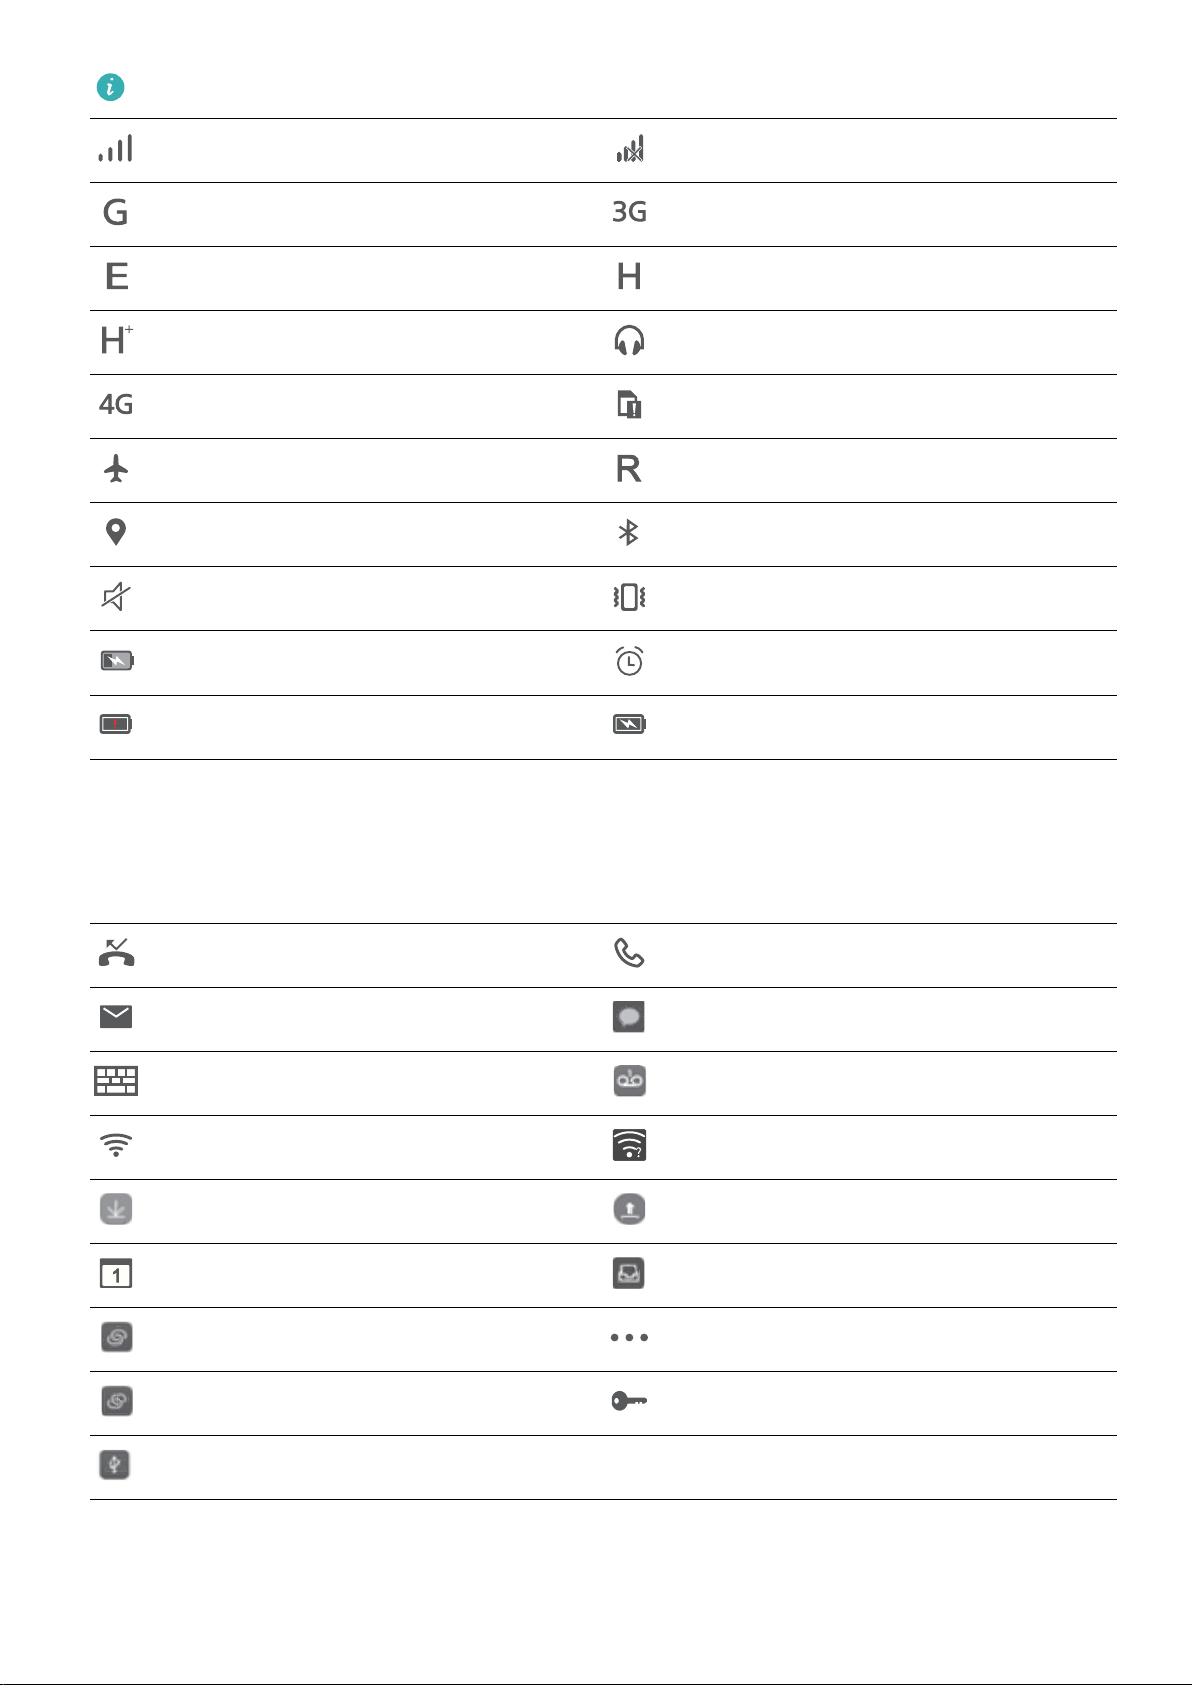
Status icons may vary according to your region or carrier.
Signal strength No signal
Connected over GPRS Connected over 3G
Connected over EDGE Connected over HSPA
Connected over HSPA+ Headset inserted
Connected over LTE No SIM card found
Airplane mode enabled Roaming
Receiving location data from GPS Bluetooth enabled
Silent mode enabled Vibration mode enabled
Getting Started
Charging Alarm enabled
Battery low Battery full
Notification icons
Notification icons are displayed on the left-hand side of the status bar when you receive a new
message, notification, or reminder.
Missed calls Call in progress
New emails New messages
Select an input method New voicemail
Connected over Wi-Fi Wi-Fi network available
Downloading data Uploading data
Upcoming events Phone memory full
Portable Wi-Fi hotspot enabled More notifications
USB tethering enabled Connected to a VPN
USB debugging enabled
7
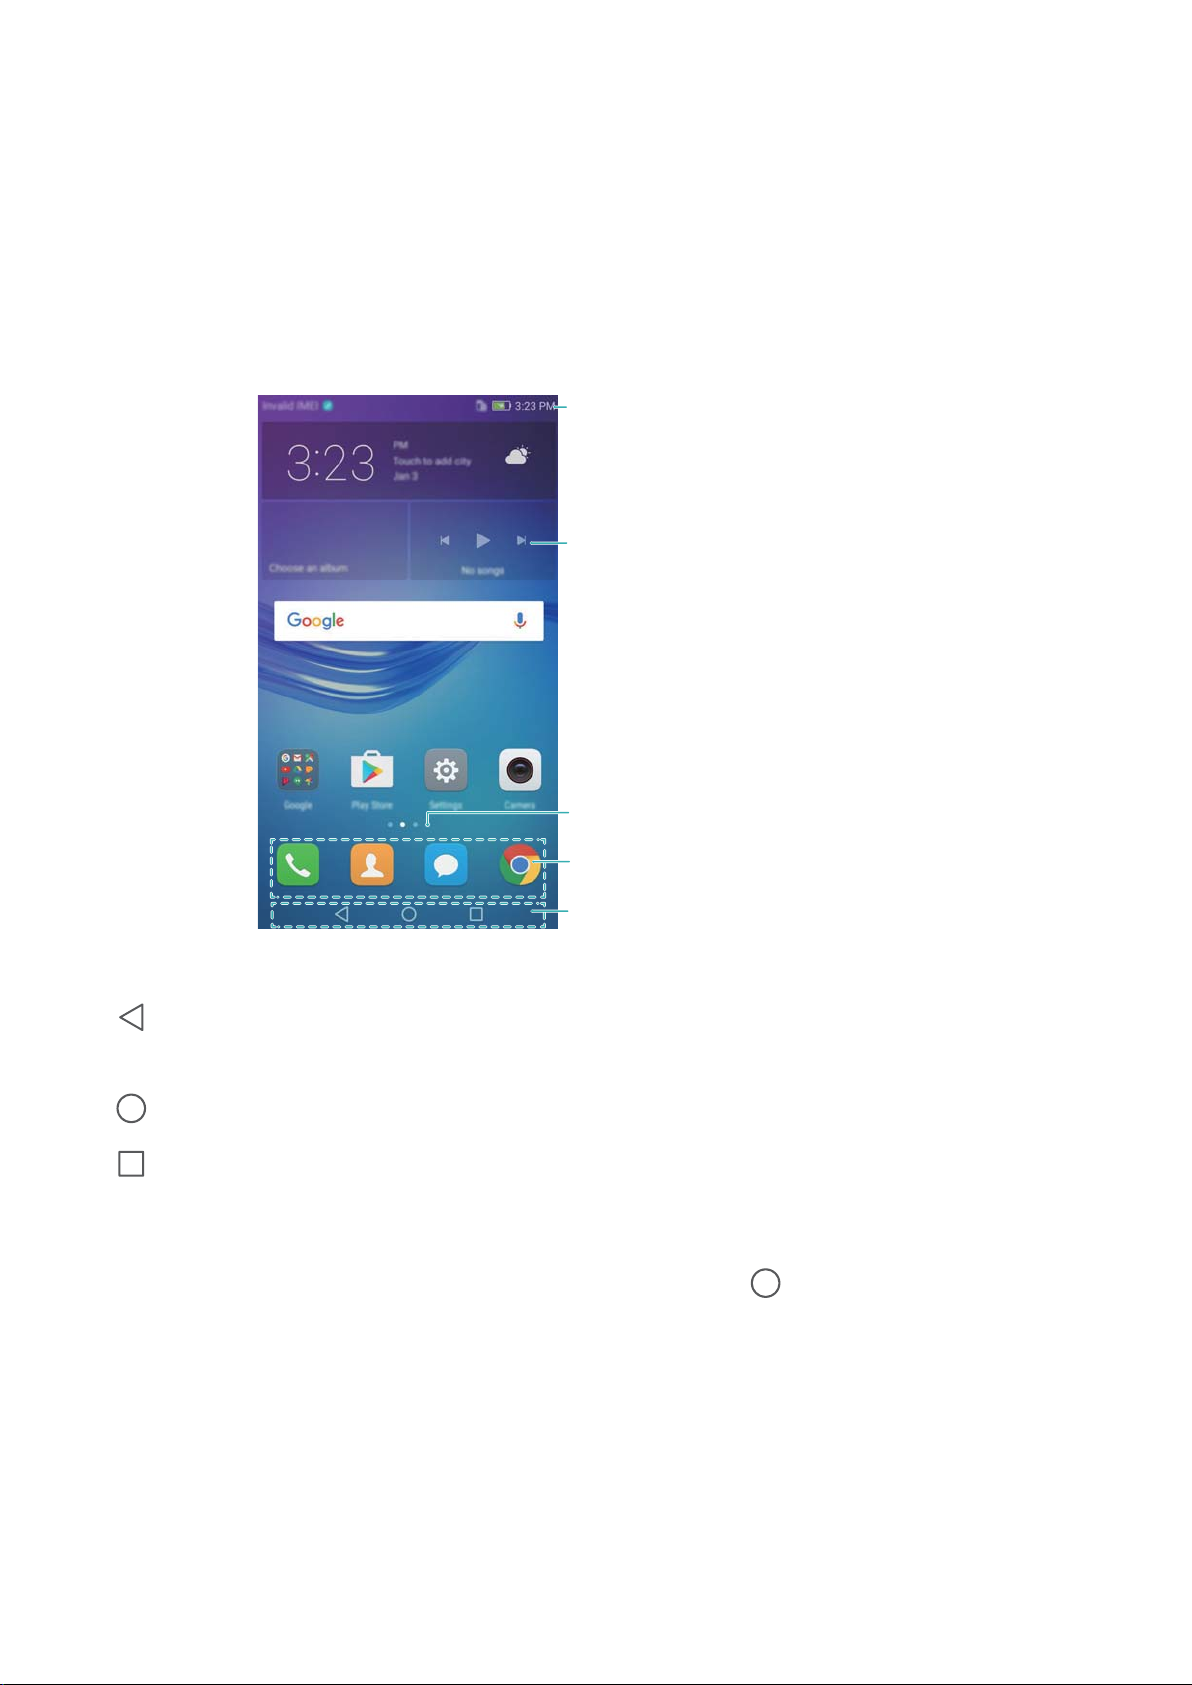
Status bar: Displays notifications and status
icons
Main screen: Displays application icons,
desktop folders, and widgets
Screen position indicator: Indicates
which home screen is displayed
Dock: Displays frequently used applications
Navigation bar: Displays virtual navigation
keys
Getting Started
Home screen
Getting to know your home screen
Your home screens are where you can find your favorite widgets and all your applications. The
application list has been removed to give you a more convenient and direct path to your
applications.
Virtual navigation bar keys:
l Back: Touch to return to the previous screen or close an application. When entering text,
touch to close the onscreen keyboard.
l Home: Touch to return to the home screen.
l Recent: Touch to access the list of recently used applications.
Switching between home screens
Swipe left or right to view the extended home screens. Touch Home to return to the default
home screen.
8

Getting Started
On the home screen, pinch two fingers together or touch and hold a blank area on the screen to
access the home screen editor. You can:
l Set the default home screen: Touch at the top of the home screen to set the chosen
home screen as the default home screen.
l Move a home screen: Drag the home screen to the desired location.
l Add a home screen: Touch on the home screen furthest to the left or right.
l Delete a blank home screen: Touch at the bottom of a blank screen.
Automatic screen rotation
When you rotate your phone, some applications will automatically adjust the screen orientation
to make them easier to use. This feature also lets you use tilt-controlled applications.
Swipe down from the status bar to open the notification panel, and then touch Auto-rotate in the
Shortcuts tab to enable or disable automatic screen rotation.
9
Getting Started
Organizing applications and widgets on the home screen
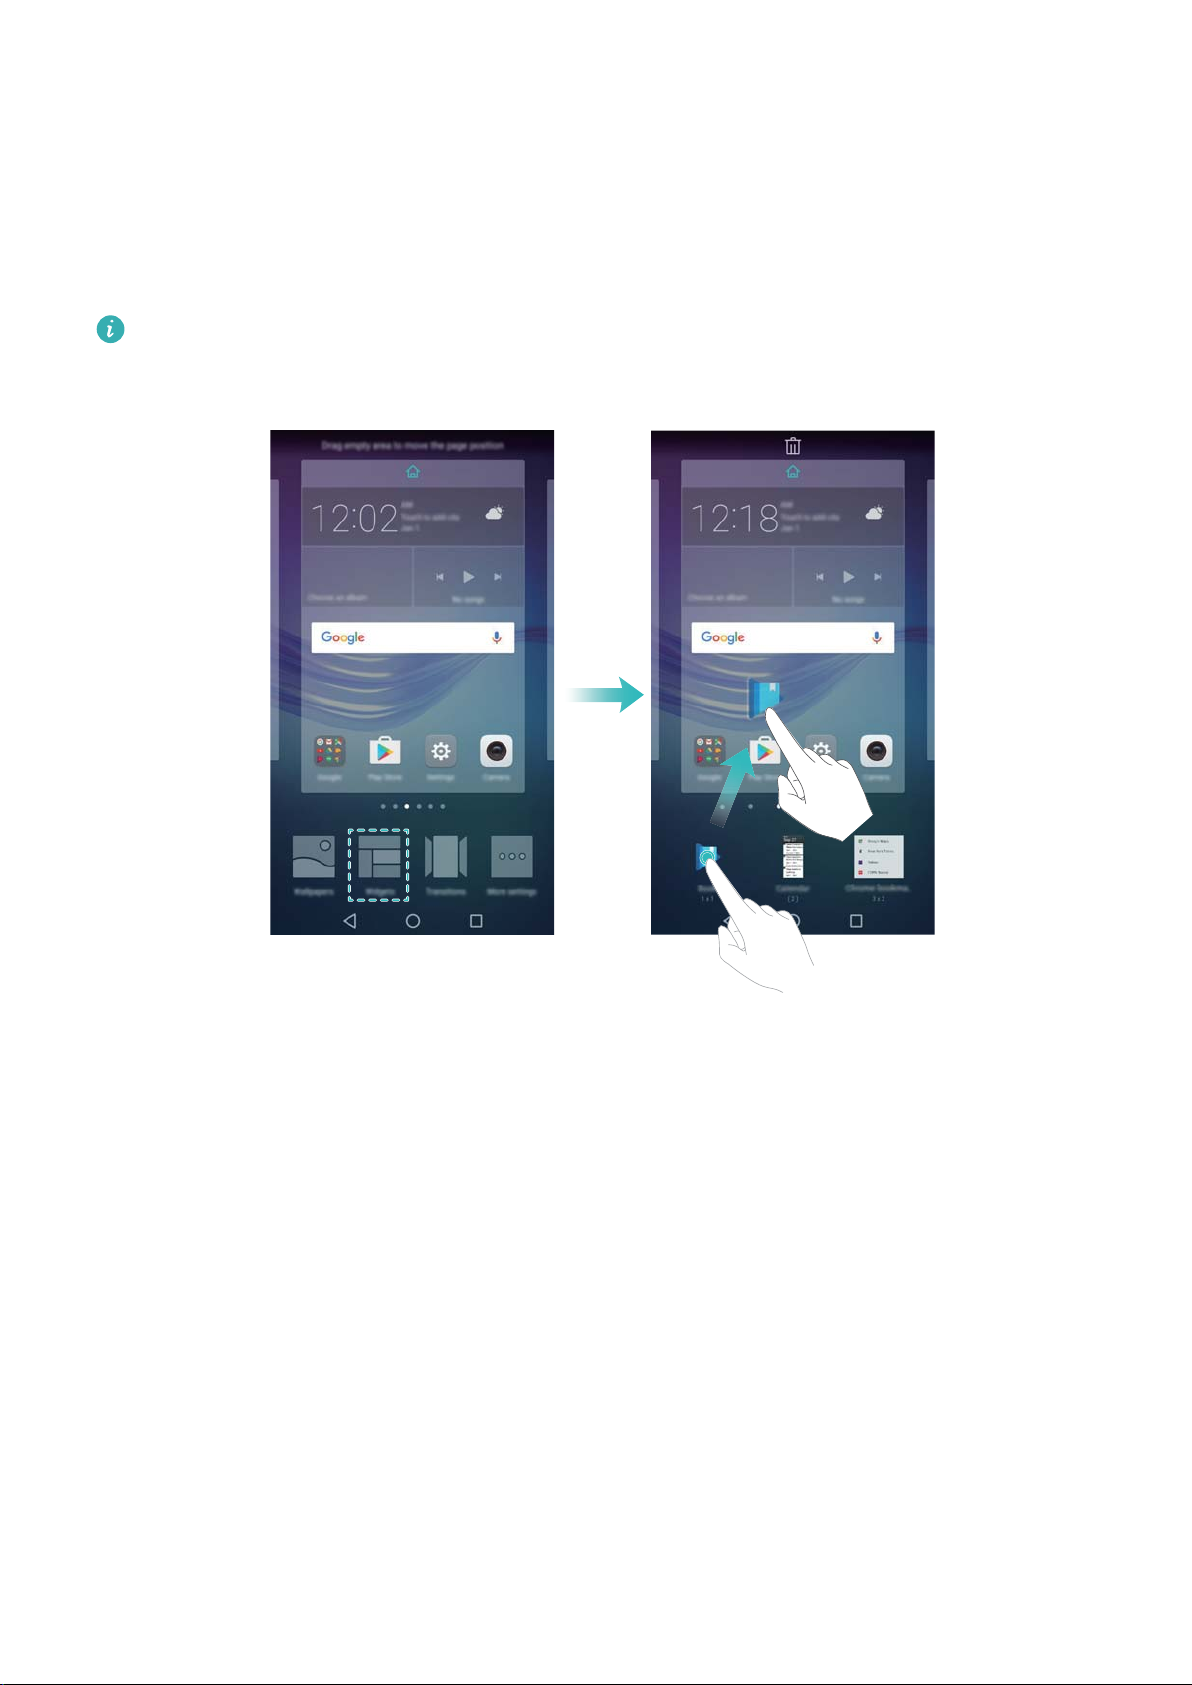
Adding a widget to the home screen
Add frequently used widgets to the home screen for quick access.
On the home screen, pinch two fingers together to open the home screen editor. Touch Widgets
and select a widget. Touch and hold the widget and drag it to a blank area on the home screen.
You must have enough space on the home screen to add widgets. If there is not enough
space, add another home screen or free up some space.
Moving a widget or icon
On the home screen, touch and hold an application icon or widget until your phone vibrates. You
can then drag the application icon or widget to the desired location.
10
Getting Started
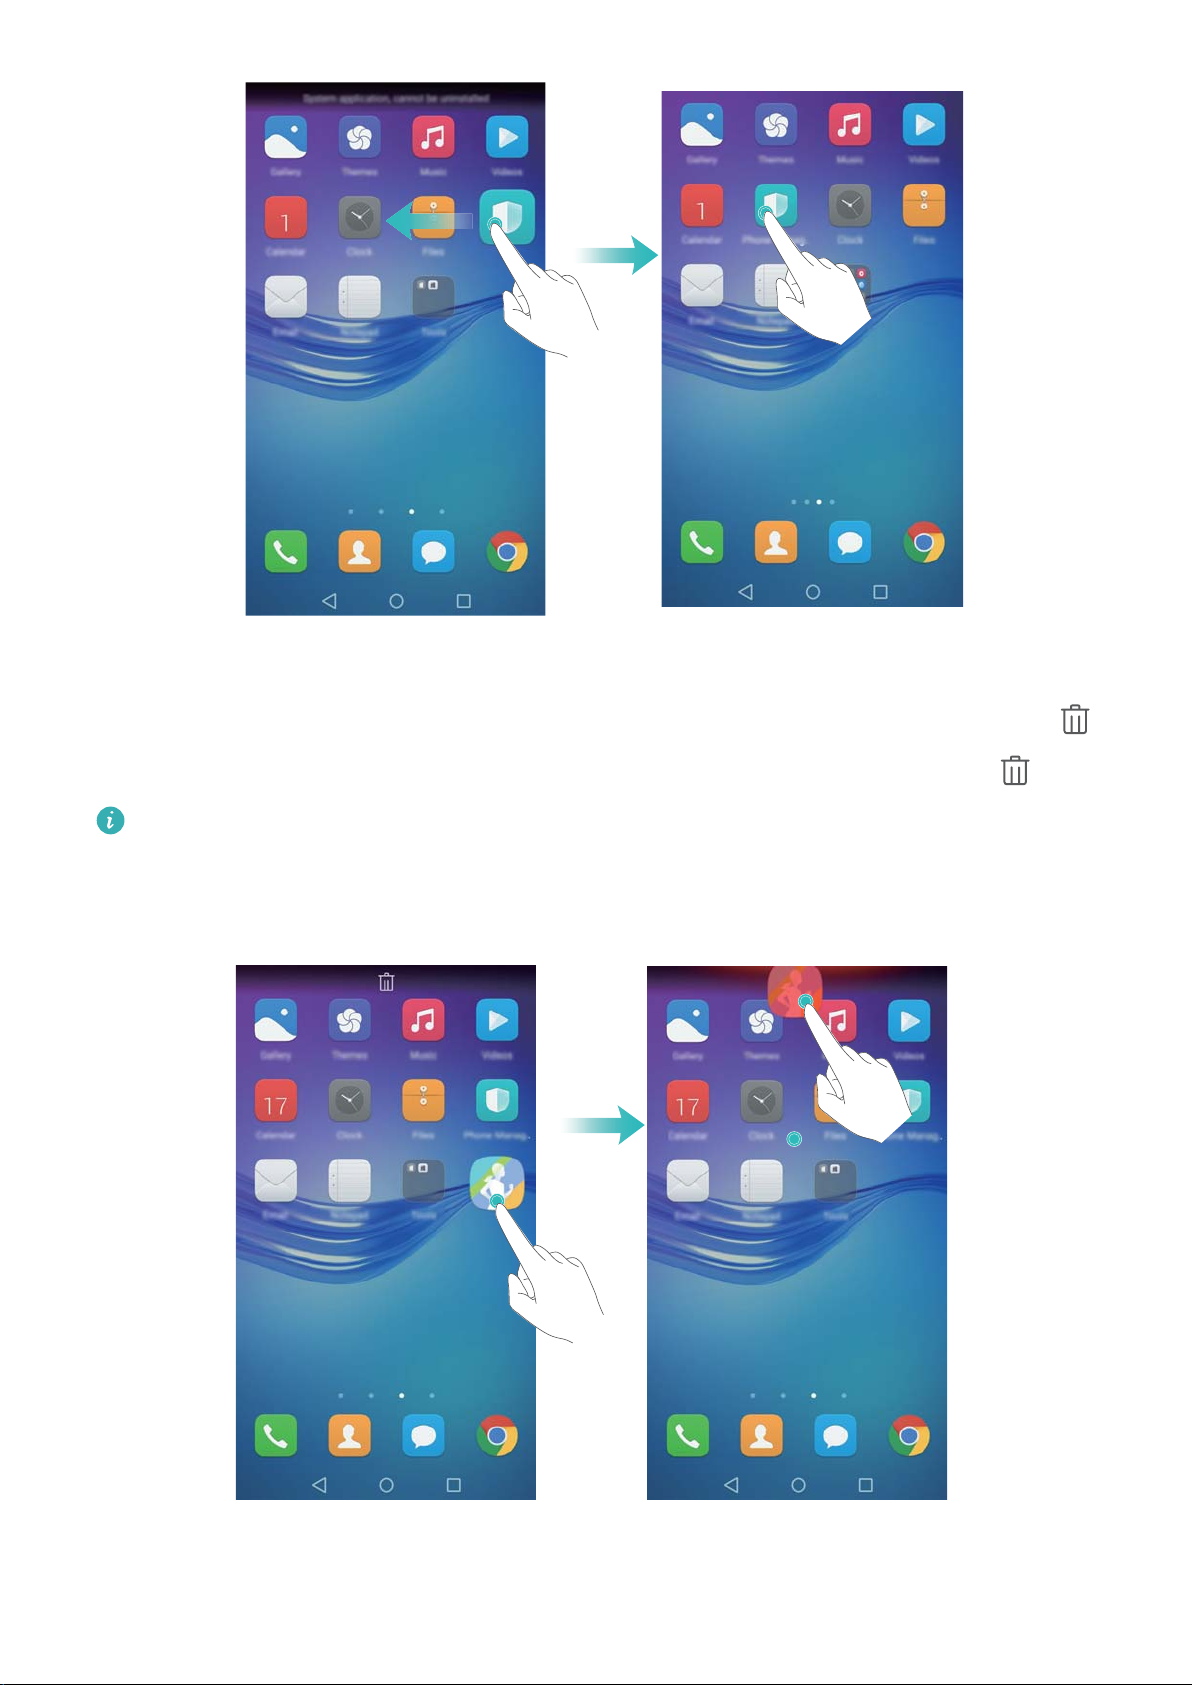
Deleting a widget or icon
On the home screen, touch and hold the application icon or widget you want to delete until
is displayed at the top of the screen. Drag the unwanted application icon or widget to .
After you have moved/deleted an application icon, a blank space will appear on the home
screen. You can sort application icons automatically; for more information, see Aligning
home screen applications automatically.
11
Getting Started
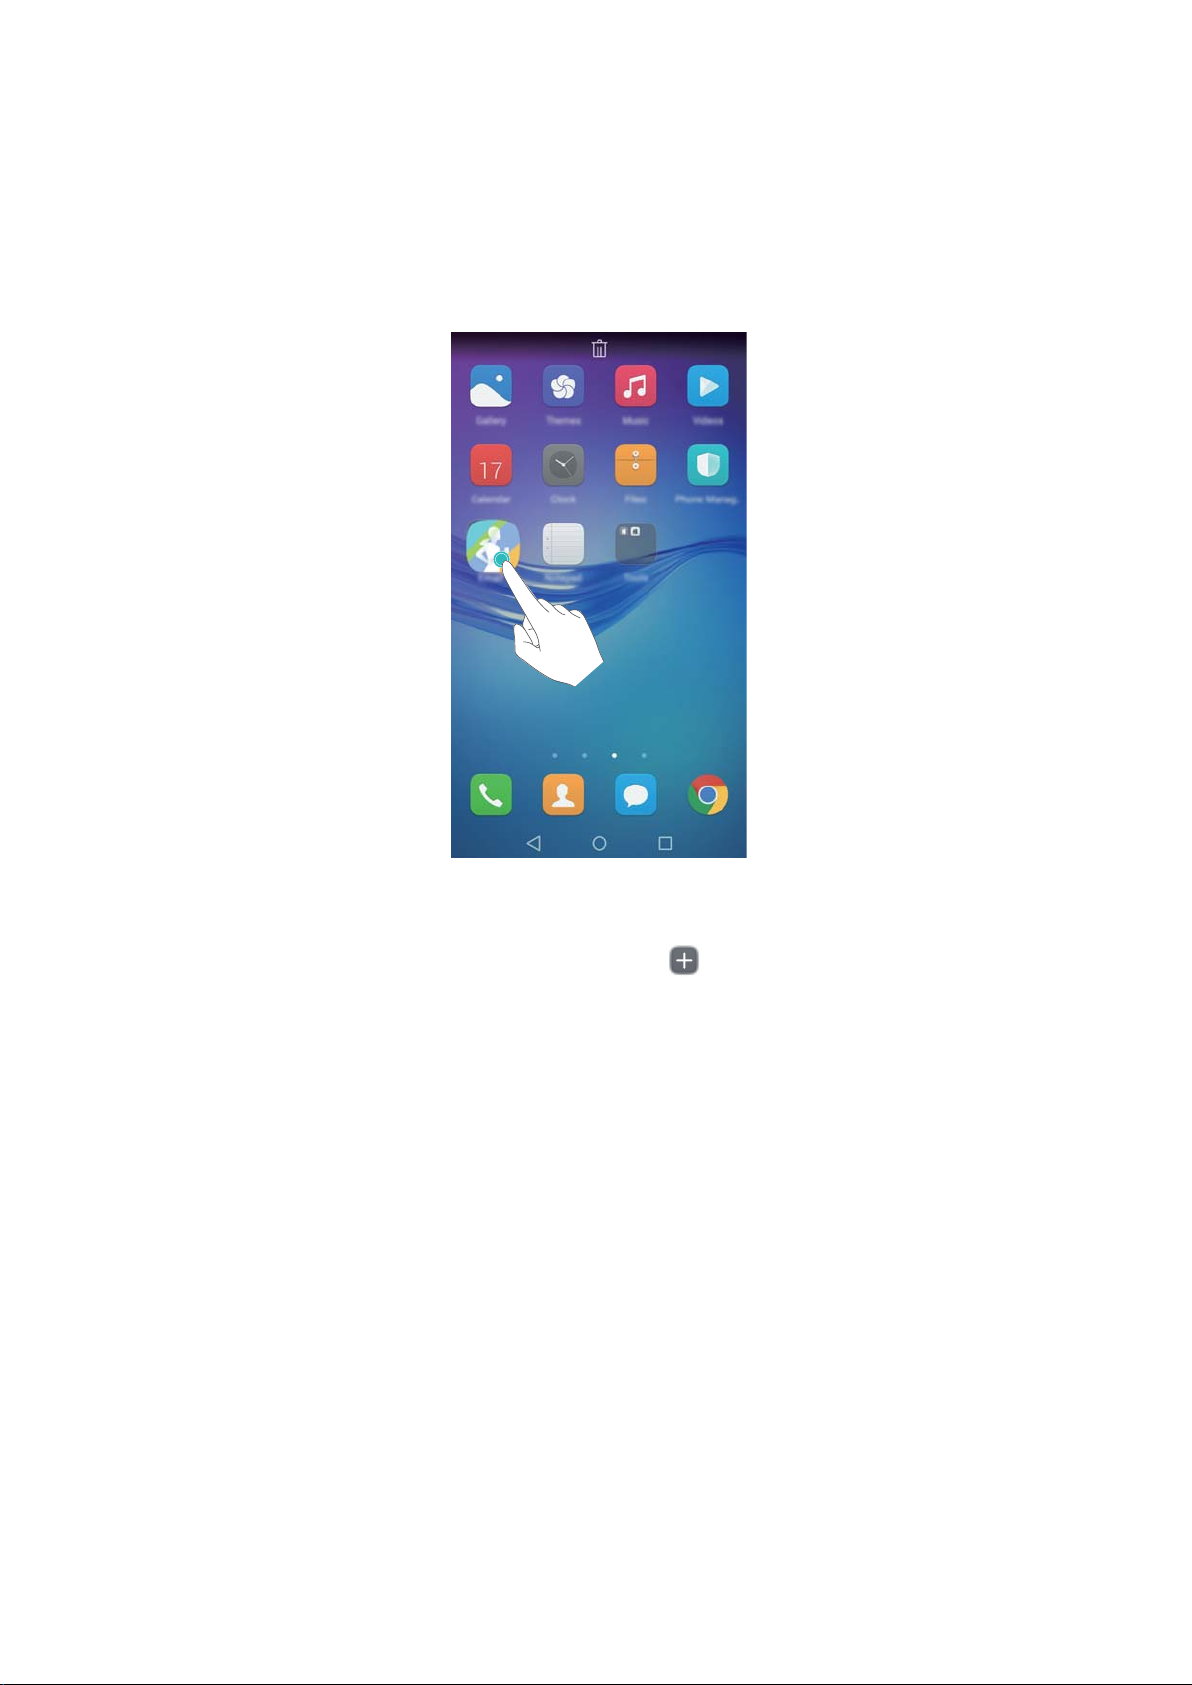
Creating a folder
Create home screen folders to organize your applications by type. For example, you can create
a Games folder that contains all of your game applications.
On the home screen, drag an icon on top of another icon to create a folder containing both
applications. To rename the folder, open the folder, and then touch the folder name.
Hiding applications
On the home screen, spread two fingers apart. Touch Add, select the applications you want
to hide, and then touch OK. Applications will not appear on the home screen after they have
been hidden.
12

Getting Started
To restore a hidden application to the home screen, touch Add on the hidden
applications screen, deselect the desired application, and then touch OK.
Notifications
Status indicator
The status indicator changes color and flashes to indicate the following:
l Steady red (not charging): The battery level is critically low and the phone will turn off
automatically.
l Steady red (when charging): The battery level is critically low.
13

Getting Started
l Steady green (when charging): The battery is almost full or already full. Unplug the charger
when the battery level reaches 100%.
l Flashing green (not charging): You have unread messages, notifications, or missed calls.
Notification badges
Notification badges appear in the top right corner of application icons.
The badge number indicates the number of new notifications. Open the corresponding
application to view more details about the notifications.
To disable notification badges for an application, pinch two fingers together on the home
screen to open the home screen editor, and then touch More settings > Badge app icons
and turn off the switch next to the corresponding application.
Notification panel
Swipe down from the status bar and open the notification panel to view notifications.
Swipe left on the notification panel to go to the shortcuts tab.
Swipe up on the screen, or touch Back or Home to close the notification panel.
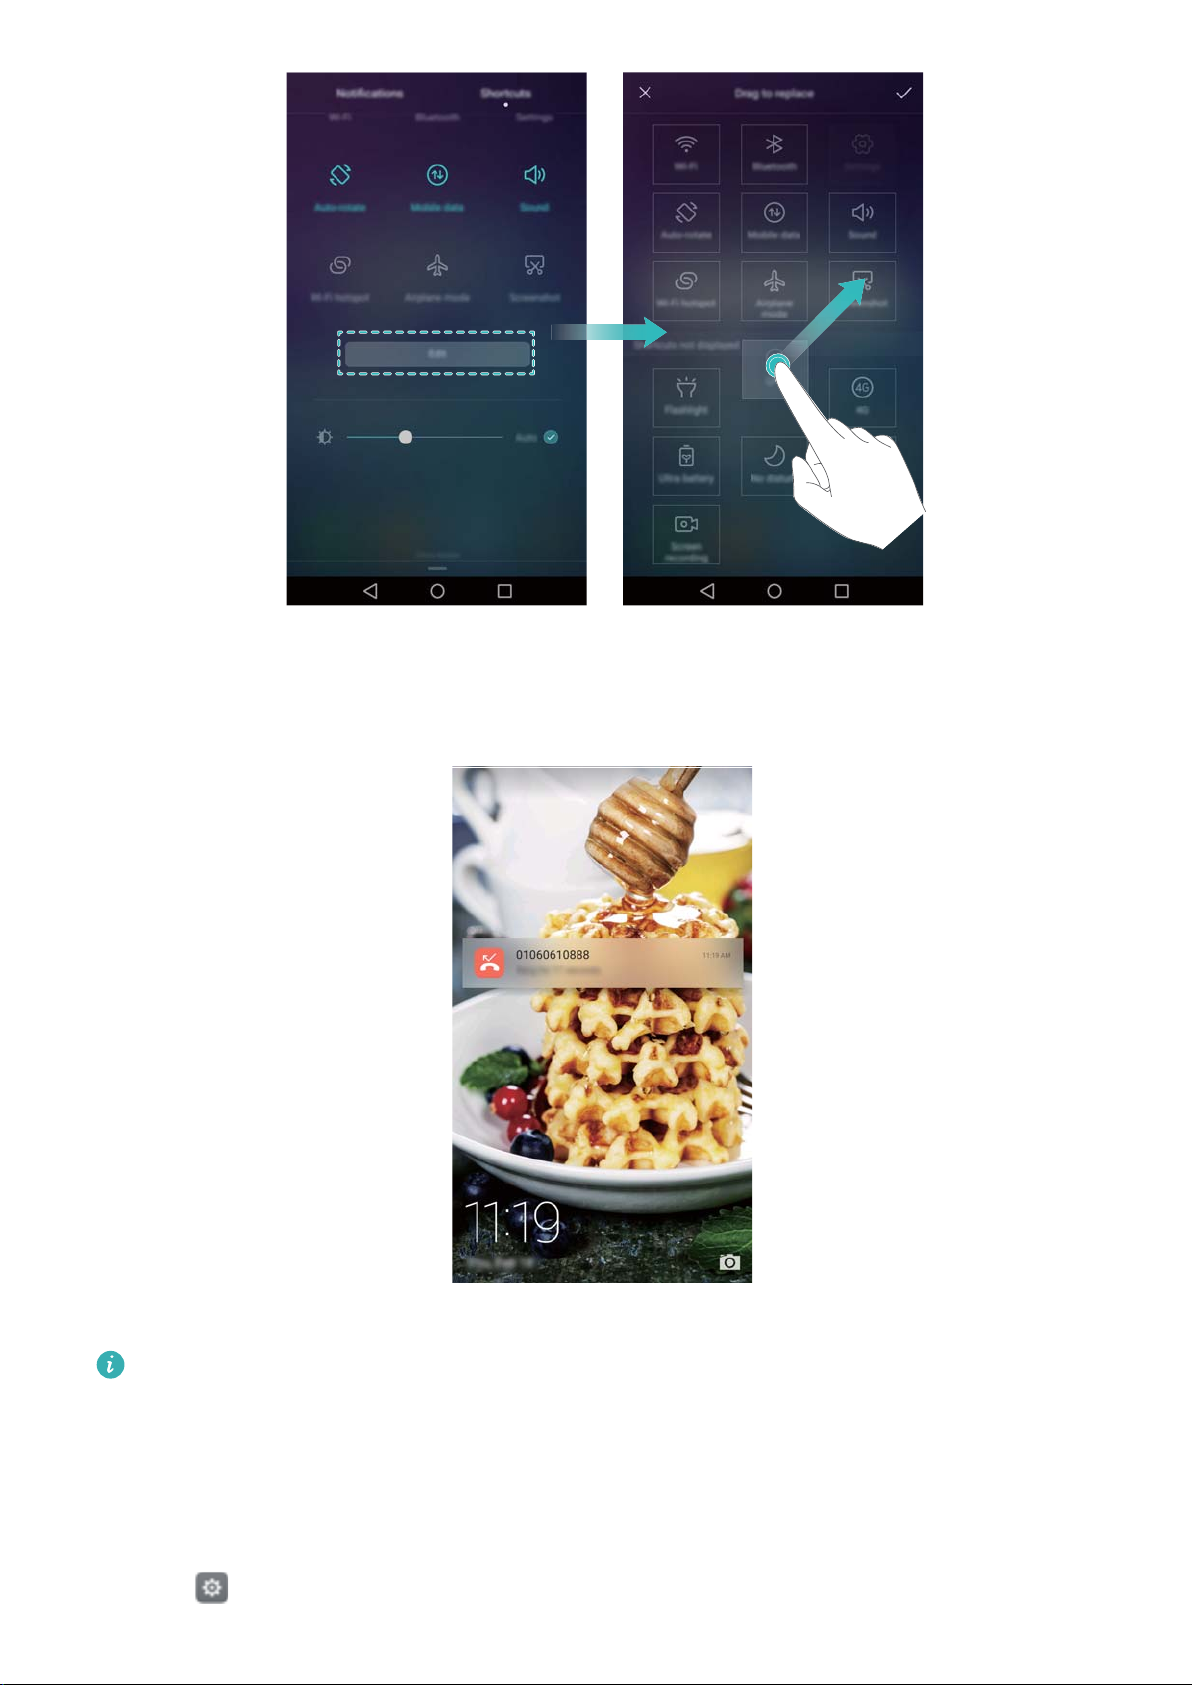
Customize shortcut switches: Swipe up on the shortcuts tab, and then touch Edit. Drag
the shortcut switch to the desired location for easier access.
14
Getting Started
Viewing notifications on the lock screen
New notifications (such as missed calls and messages) are displayed on the lock screen.
Swipe right on a lock screen notification to view its details.
By default, your phone will only display lock screen notifications for certain applications. If
you want to enable lock screen notifications for more applications, see Managing notification
permissions.
Managing notification permissions
Disable notifications for an application to prevent unnecessary disturbances.
1 Open
Settings.
15

Getting Started
2 Touch Notification panel & status bar > Notification center, and then select the desired
application.
3 Enable or disable notification settings as desired.
Display notifications in do not disturb mode: Select the desired application in Notification
center, and then turn on the Priority display switch. Notifications will still be displayed when
Allow only priority interruptions is enabled in do not disturb mode.
Notification and status bar settings
Change the notification and status bar settings to customize how notifications and status
reminders are displayed.
Open Settings, and then touch Notification panel & status bar to configure the drop-down
and display settings for the notification and status bar.
Configuring the drop-down settings for the notification bar
l Touch Drag actions > Smart selection. When you open the notification panel, your phone will
go to the notifications tab if you have new notifications, otherwise it will go to the shortcuts tab.
l Touch Drag actions > Determine from drag position. Swipe down from the left of the status
bar to open to the notifications tab, or swipe down from the right of the status bar to open the
shortcuts tab.
l Turn on the Notification panel switch to access the notification panel when the screen is
locked.
You cannot access the notification panel from the lock screen if you have set a screen lock
password.
Configuring the display content for the notification and status bar
Turn the Display carrier name, Display network speed, and Remaining battery percentage
switches on or off to configure the content that is displayed in the status bar.
Turn off the Show notification icons switch to hide notification icons in the status bar.
Accessing applications
Opening and switching between applications
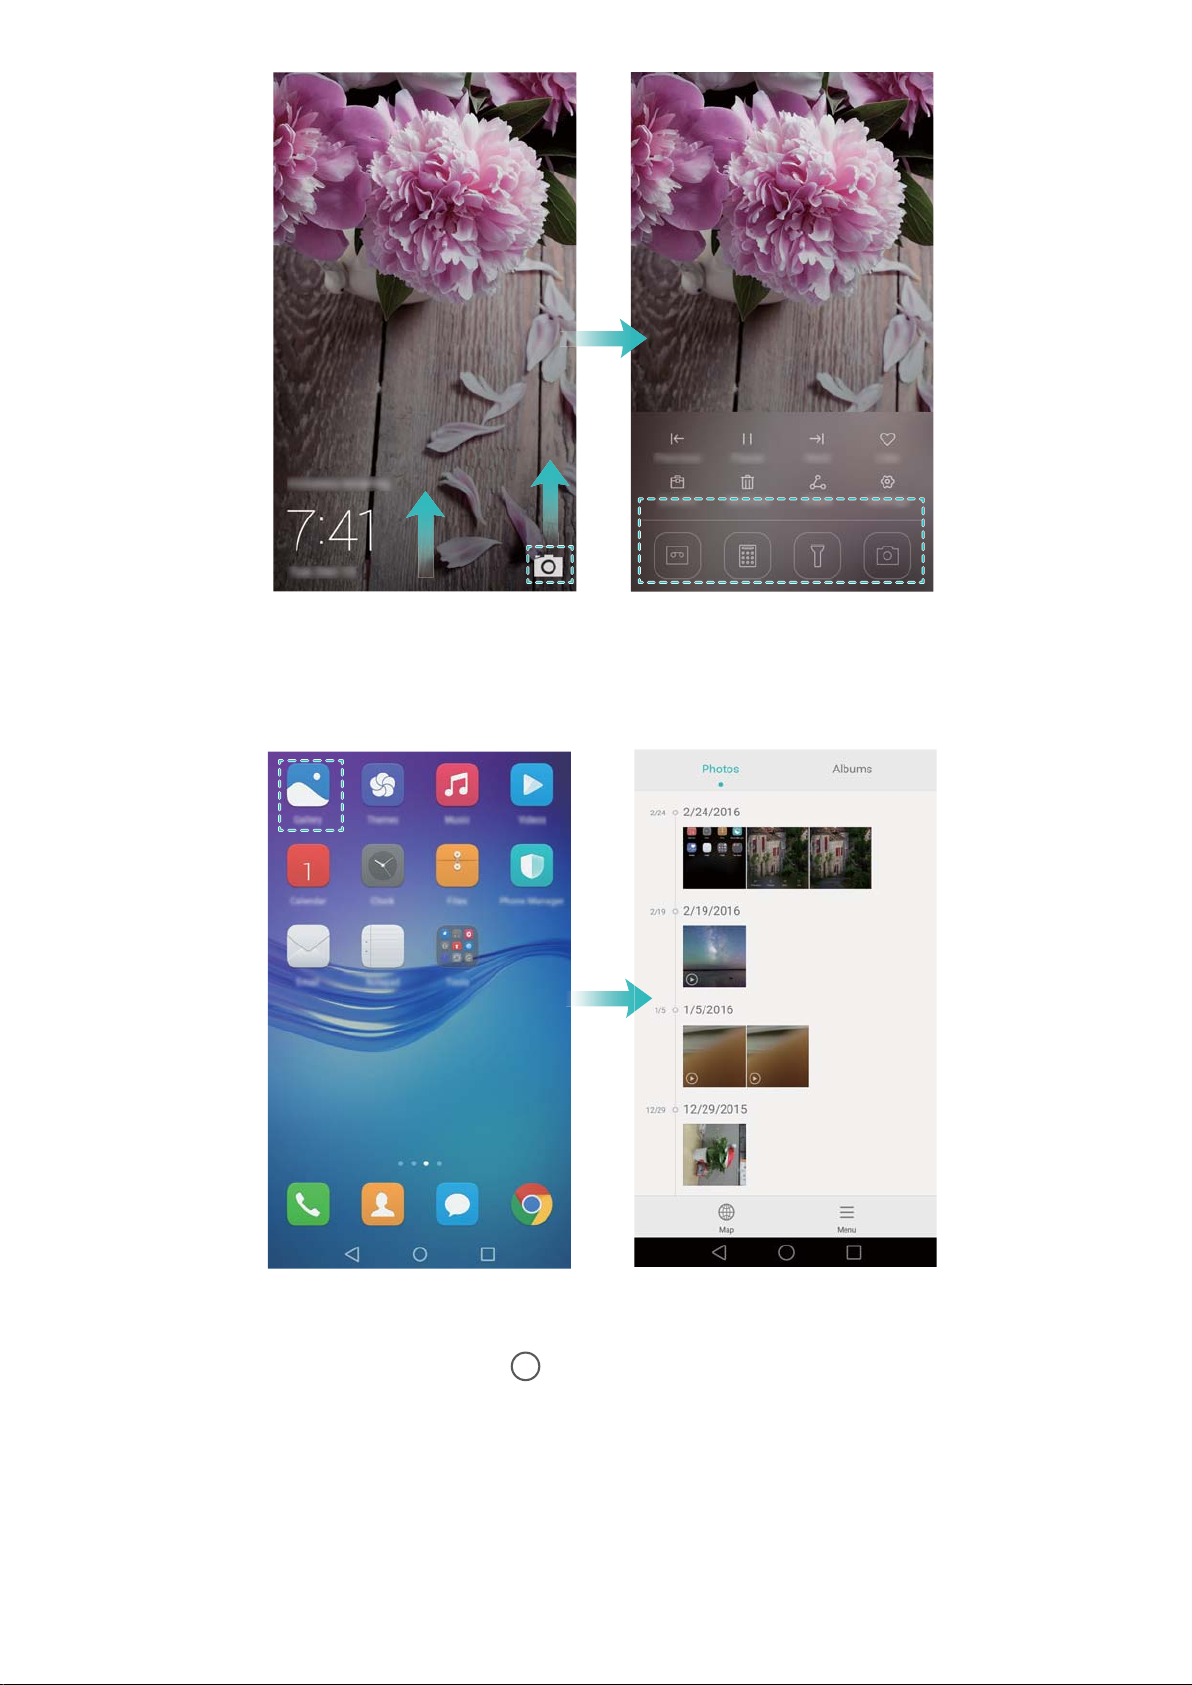
Opening applications from the lock screen
Swipe up on the lock screen and touch
swipe up from the bottom of the screen and touch a shortcut icon to quickly launch the
corresponding application.
to launch the camera application. You can also
16
Getting Started
Opening an application from the home screen
On the home screen, touch an icon to open the corresponding application.
Switching between applications
To switch to another application, touch Home to return to the home screen, and then touch
the icon of the application you want to open.
17
Getting Started
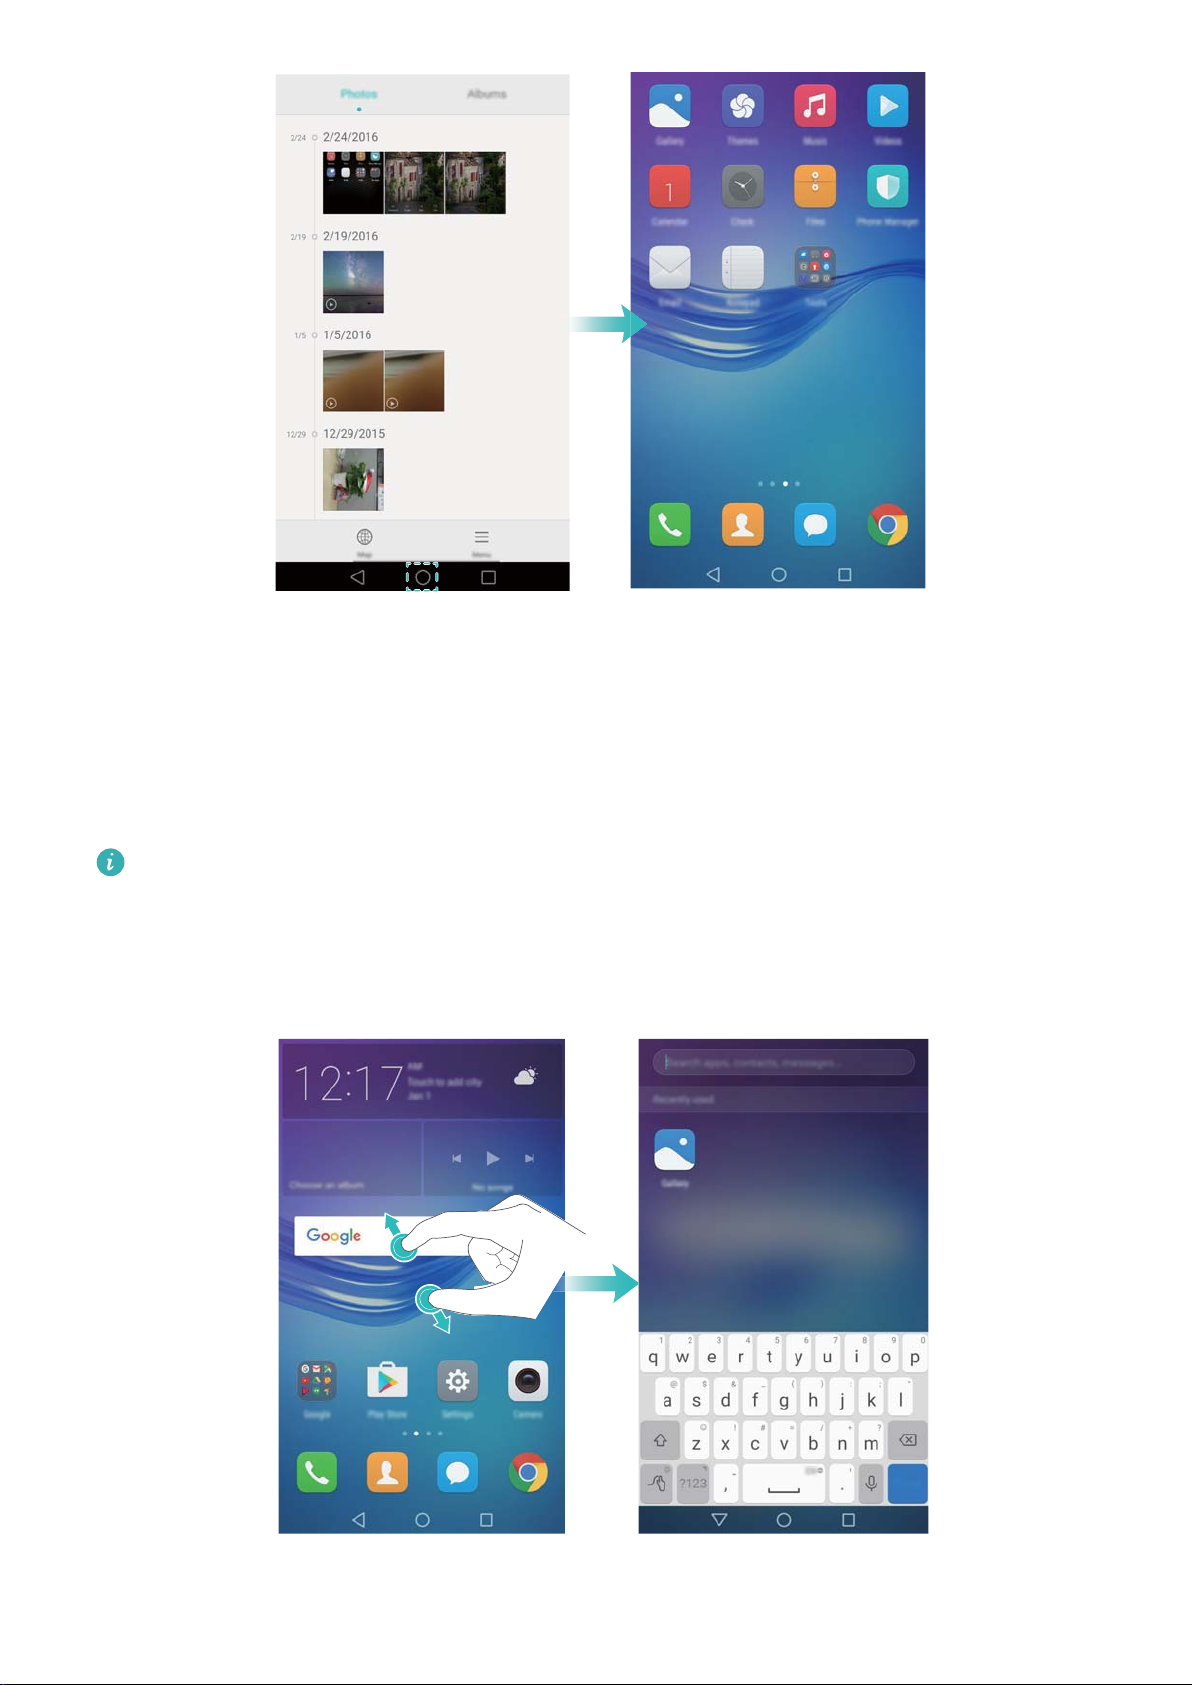
Searching for applications
Finding applications
Swipe down from the middle of the screen to access the search bar, and then enter the name of
an application. The search results will be displayed underneath the search bar. For more
information, see Finding applications quickly.
Hidden applications are not listed in the search results.
Finding hidden applications
On the home screen, spread two fingers apart to view your hidden applications.
18
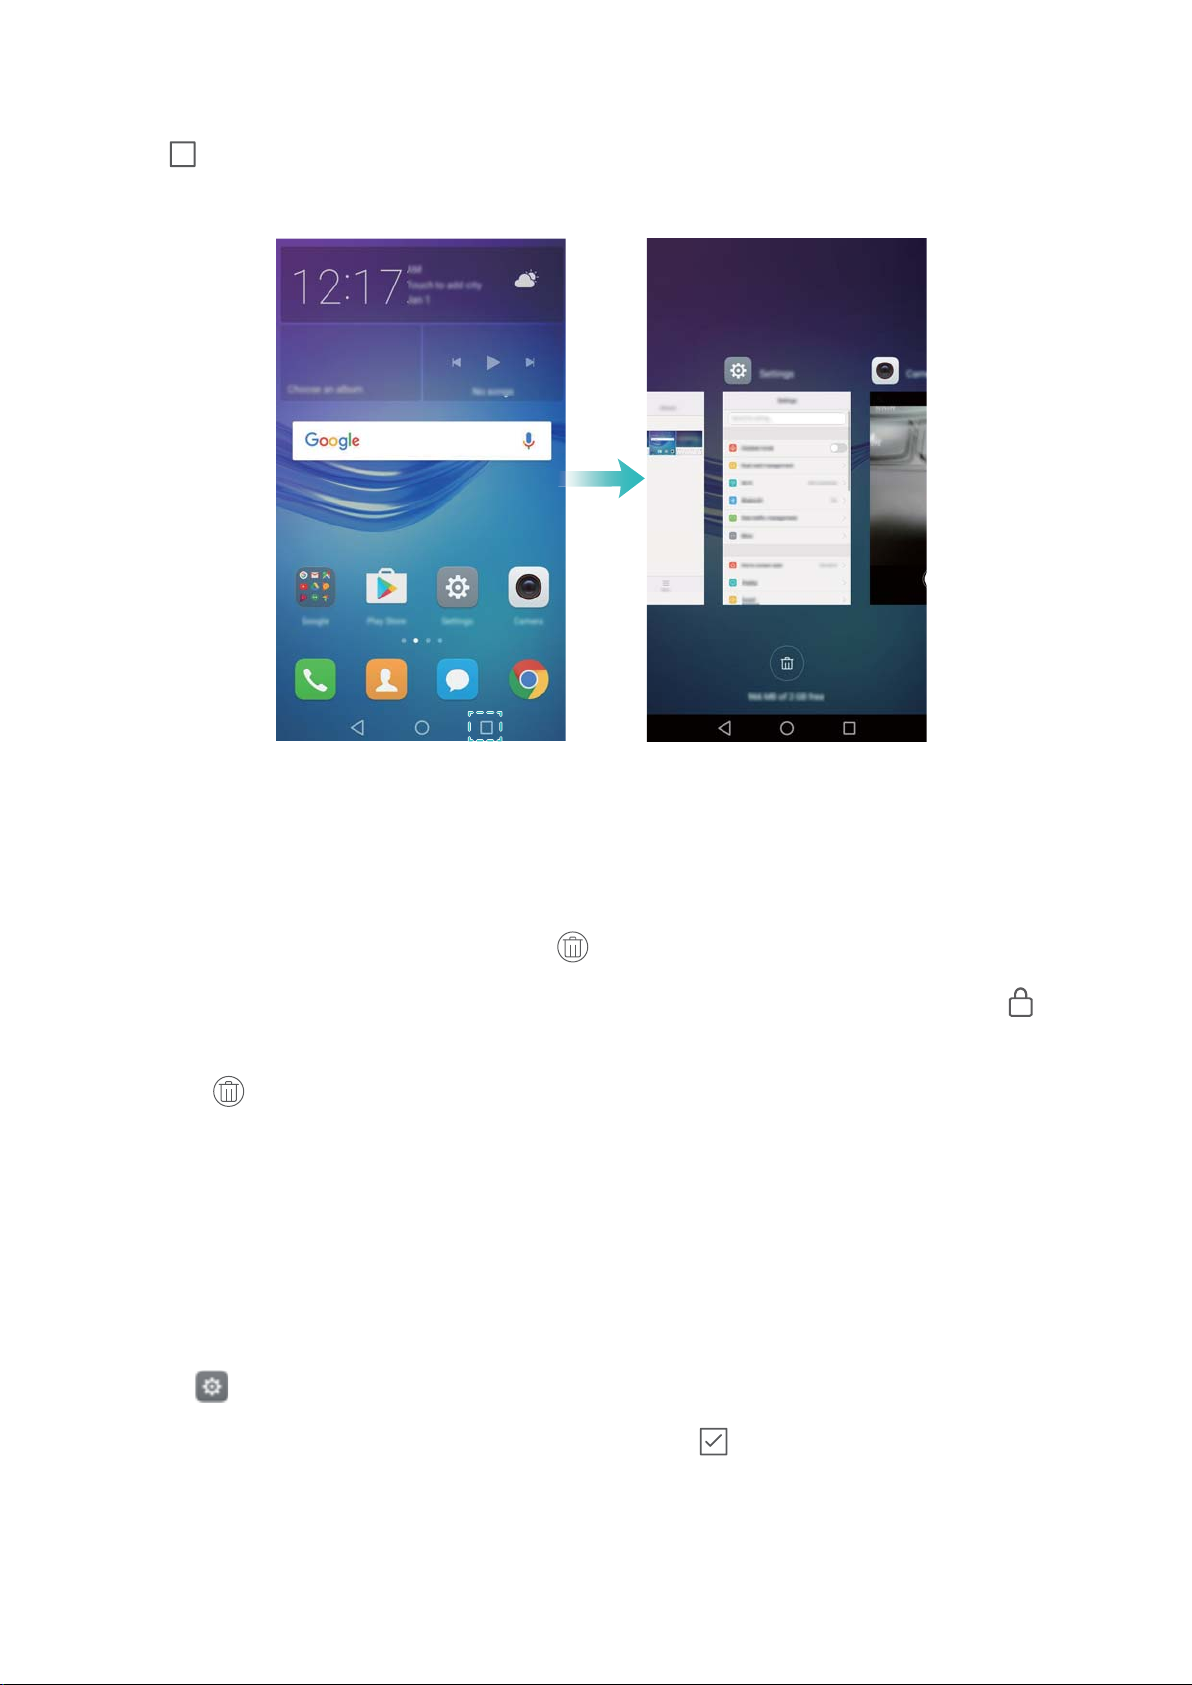
Viewing recently used applications
Touch Recent to display the list of recently used applications.
Getting Started
l View more applications: Swipe left or right on the screen to view more recently used
applications.
l Open an application: Touch a thumbnail to open the corresponding application.
l Close an application: Swipe up on a thumbnail to close the corresponding application.
l Close all unlocked applications: Touch to close all unlocked applications.
l Lock or unlock an application: Swipe down on a thumbnail to lock an application. will
appear above an application once it has been locked. Locked applications cannot be closed by
touching . Swipe down again on the thumbnail to unlock the application.
Personalizing your phone
Simple home screen
The simple home screen mode uses large icons and fonts to display content in a more easy-to-
read layout.
1 Open Settings.
2 Touch Home screen style > Simple, and then touch to enable the simple home screen.
3 On the simple home screen, you can:
l Touch application icons or widgets to open them.
l Touch and hold an icon to open the home screen editor and add or delete application icons.
19
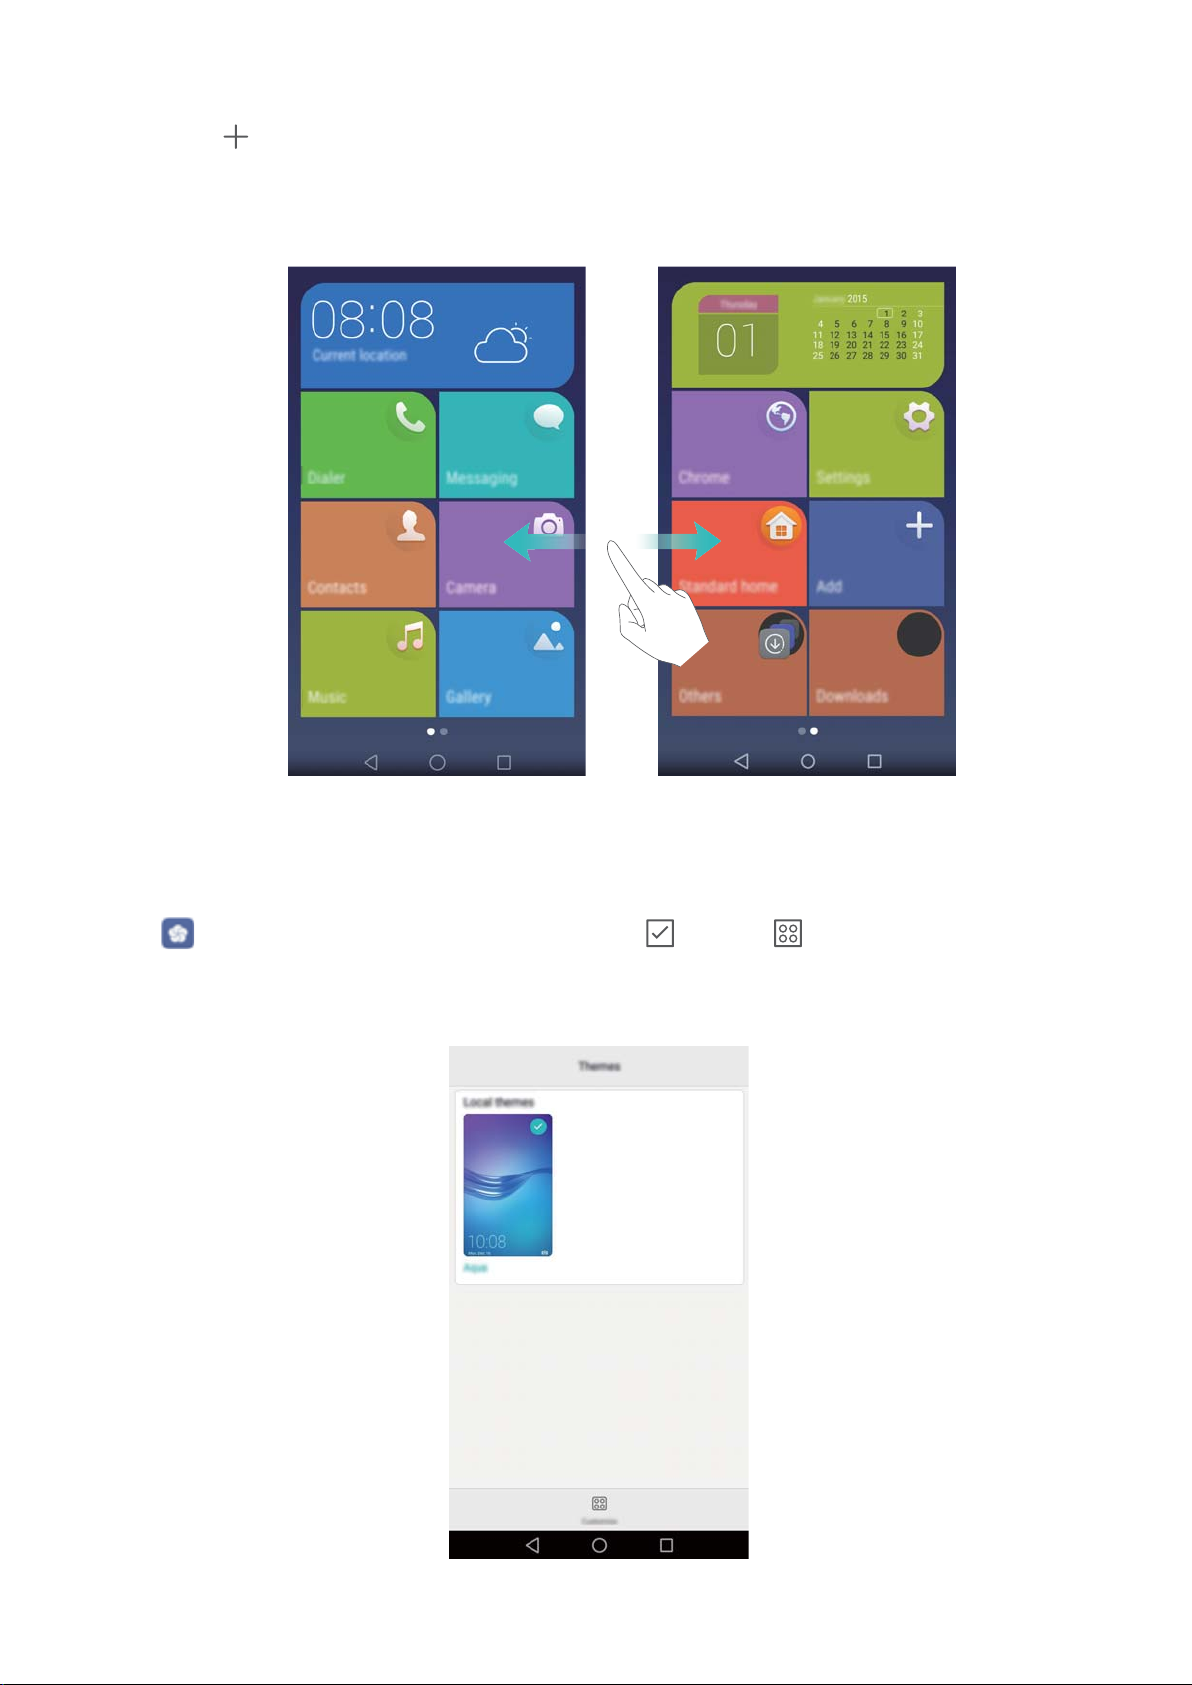
l Touch Others to open the application list and view or open applications.
l Touch to add contacts or applications to the home screen.
l Touch Standard home to exit the simple home screen.
Getting Started
Changing the theme
Personalize your phone's home screen using a wide range of themes and wallpapers.
Open Themes, select a theme, and then touch . Touch to mix and match lock
screen methods, wallpapers, application icons, and more.
20

Getting Started
Changing the wallpaper
Set your favorite images or photos as your phone's wallpaper.
1 Open Settings and select Display.
2 Touch Wallpaper, and then touch Lock screen wallpaper or Home screen wallpaper.
3 In the Wallpapers or Live wallpaper tab, select an image, and then follow the onscreen
instructions to set it as the wallpaper.
Turn on the Shake to change switch. The wallpaper will change every time you shake your
phone. Turn on the Random change switch. Configure Interval or Album to display. Your
phone will automatically change the wallpaper at the specified time interval.
You can also open Gallery, touch and hold an image, and then touch > Set as >
Wallpaper. Follow the onscreen instructions to set the image as the wallpaper.
Assigning a ringtone to a contact
Assign a unique ringtone to each contact so that you can easily tell who is contacting you.
1 Open
Contacts.
2 Select the desired contact, and then touch Phone ringtone.
3 Select the desired ringtone or music file, and then touch .
For more information on how to configure call and message ringtones and vibration settings, see
Sound settings.
Changing the font size
The phone's font size can be increased to make words easier to read.
Open Settings, and then touch Display > Font size to set the system font size.
21
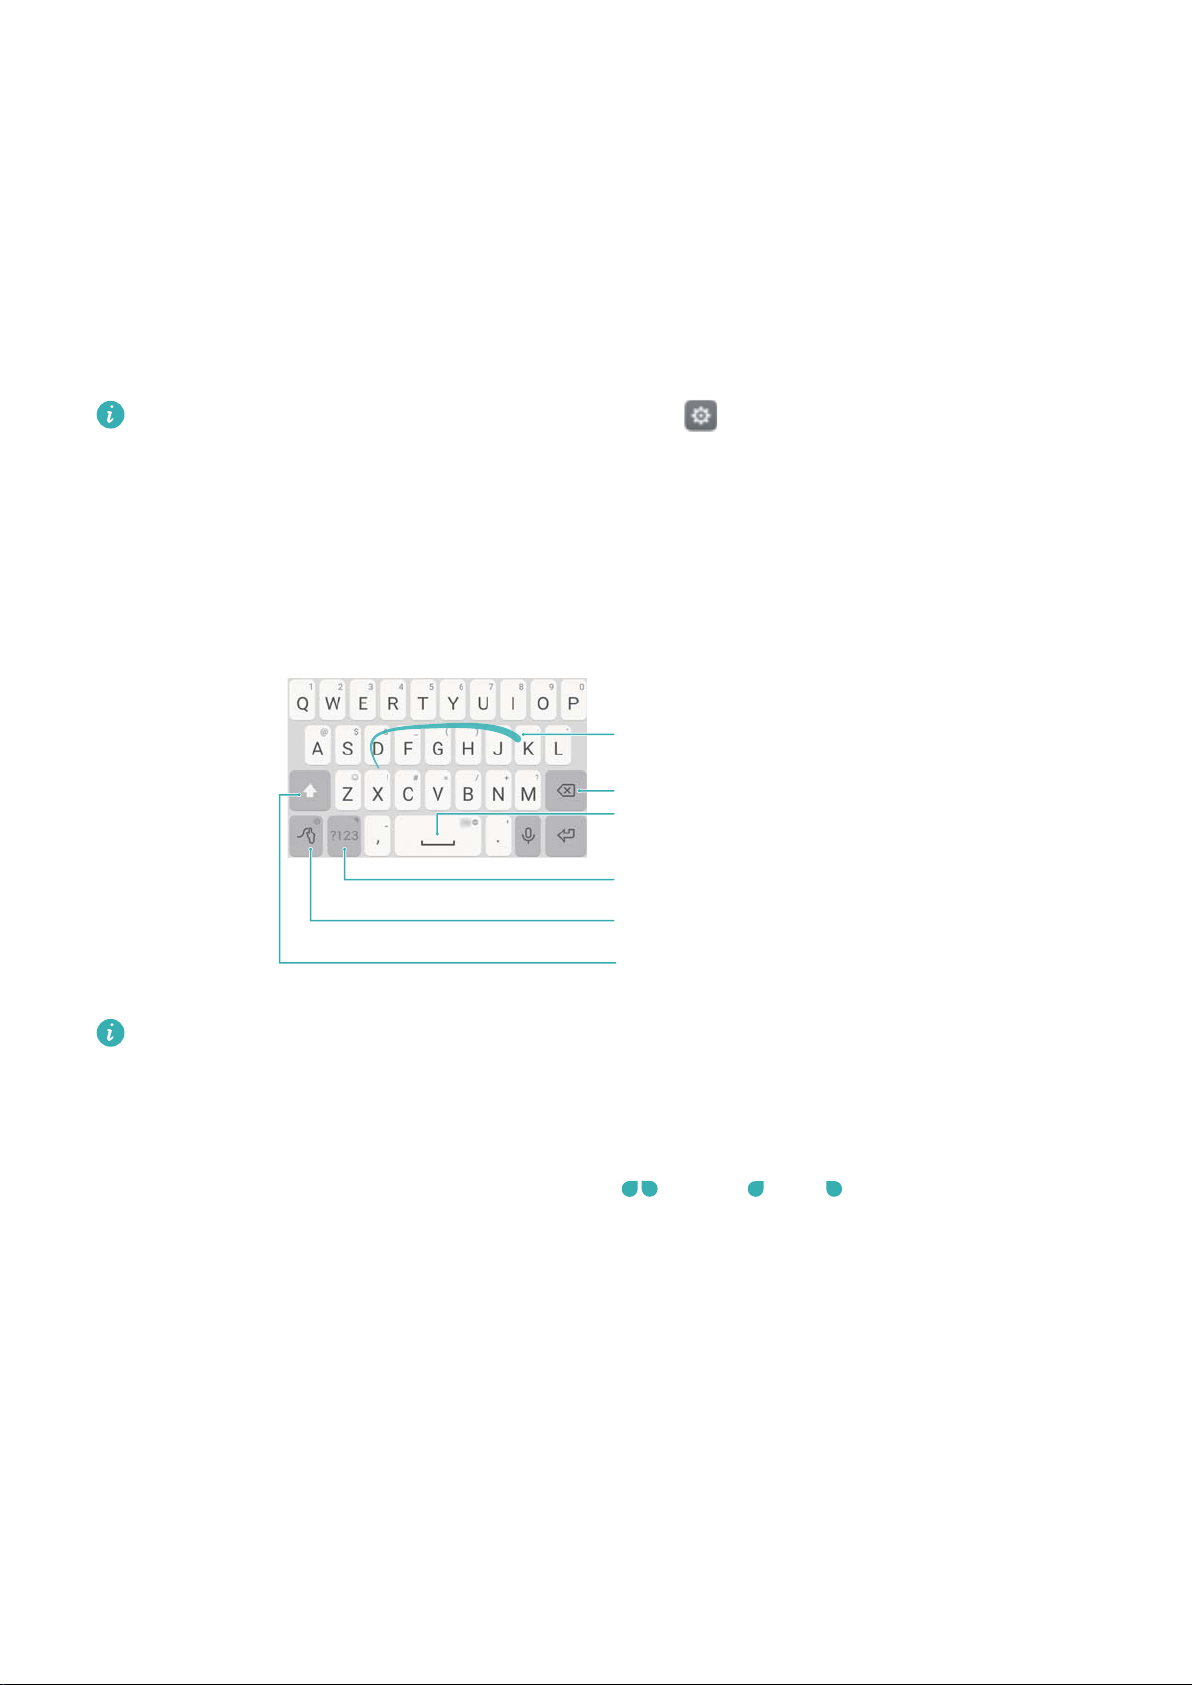
Backspace
Enter a space
Enter numbers and symbols
Input method settings
Swipe letters to input words
Toggle between upper and lower case
Getting Started
Entering text
Switching text input methods
Switch between text input methods as desired.
1 On the text input screen, swipe down from the status bar to open the notification panel.
2 Touch Select input method in the Notifications tab, and then select the desired input
method.
If there are no input methods to choose from, go to Settings, touch Advanced settings
> Language & input > Default keyboard > Configure input methods, and then turn on
the switch next to the corresponding input method.
Huawei Swype input method
Quickly enter words by swiping on the keyboard.
Huawei Swype input supports a wide range of languages.
Editing text
You can select, cut, copy, and paste text on your phone.
l Select text: Touch and hold the text to bring up
. Drag or to select more or less
text, or touch Select all to select all text.
l Copy text: Select text and touch Copy.
l Cut text: Select text and touch Cut.
l Paste text: Touch and hold where you want to insert the text, and then touch Paste.
l Share text: Select text, and then touch Share to select a sharing method.
22

Calls and Contacts
1
2
1
2
1
2
Making calls
Smart dialing
Enter the name, initials, or number of a contact in the dialer. Your phone will display matching
contacts.
1 Open
Dialer.
2 Enter the name or initials of a contact in the dialer (for example, Howard Smith or HS). Your
phone will search your contacts and call log and list the results above the dialer.
3 From the list, select the contact you want to call. If your phone has dual SIM support, touch
or
to make a call.
4 Touch to end the call.
Making a call from Contacts
1 Open Contacts.
2 Touch the search bar and enter the name or initials of the person you want to call. For more
information on searching for contacts, see Finding a contact.
3 Touch the contact number. If your phone has dual SIM support, touch the contact's phone
number, and then touch
Making a call from the call log
View incoming and outgoing calls in the call log and dial the corresponding numbers.
1 Open
Dialer.
or
to initiate the call.
2 Slide the list up and down to view all calls. Touch the name or number of the person that you
want to call. If your phone has dual SIM support, touch
Making an emergency call
In the event of an emergency, you can make emergency calls from your phone, even without a
SIM card. However, you must be in an area with cellular coverage.
or
to make a call.
23
1
2
1
2
Calls and Contacts
1 Open Dialer.
2 Enter the emergency number for your location in the dialer, and then touch .
The ability to make emergency calls can depend on local regulations and carriers in your
area. Poor network reception or environmental interference may prevent your call from being
connected. Never rely solely on your phone for essential communication during
emergencies.
Speed dialing
Configure speed dialing for people you call frequently. Simply touch and hold a number key to
dial their number.
1 is the default key for voicemail. It cannot be used as a speed-dial number.
1 Open Dialer.
2 Touch and hold a number key to associate it with a contact.
3 Return to the dialer and touch and hold a number key to call the associated contact. If you
are using a dual SIM phone, touch and hold a number key, and then select
the associated contact.
To delete a key association, open the dialer and touch > Settings > Speed dial. Select
the contact association you want to remove, and then touch Clear assigned number.
or
Making an international call
Before making a long-distance call, contact your carrier to activate an international calling or
roaming service.
to call
1 Open Dialer.
2 On the dialer screen, touch and hold the 0 key to enter a + symbol, and then enter the
country code, area code, and phone number.
3 Touch
Auto redial
. If your phone has dual SIM support, touch
or
.
Use auto redial to keep redialing a contact's number until your call is connected.
l The first time a call does not connect or is interrupted, your phone will display the single redial
screen. Touch to redial the number once.
24
Calls and Contacts
l If a call does not connect after the first redial attempt, your phone will display the infinite redial
screen. Touch to redial the number until the call connects.
l Ensure you touch promptly. The redial screen will close if you don't redial within 10
seconds.
l To cancel a redial attempt, touch .
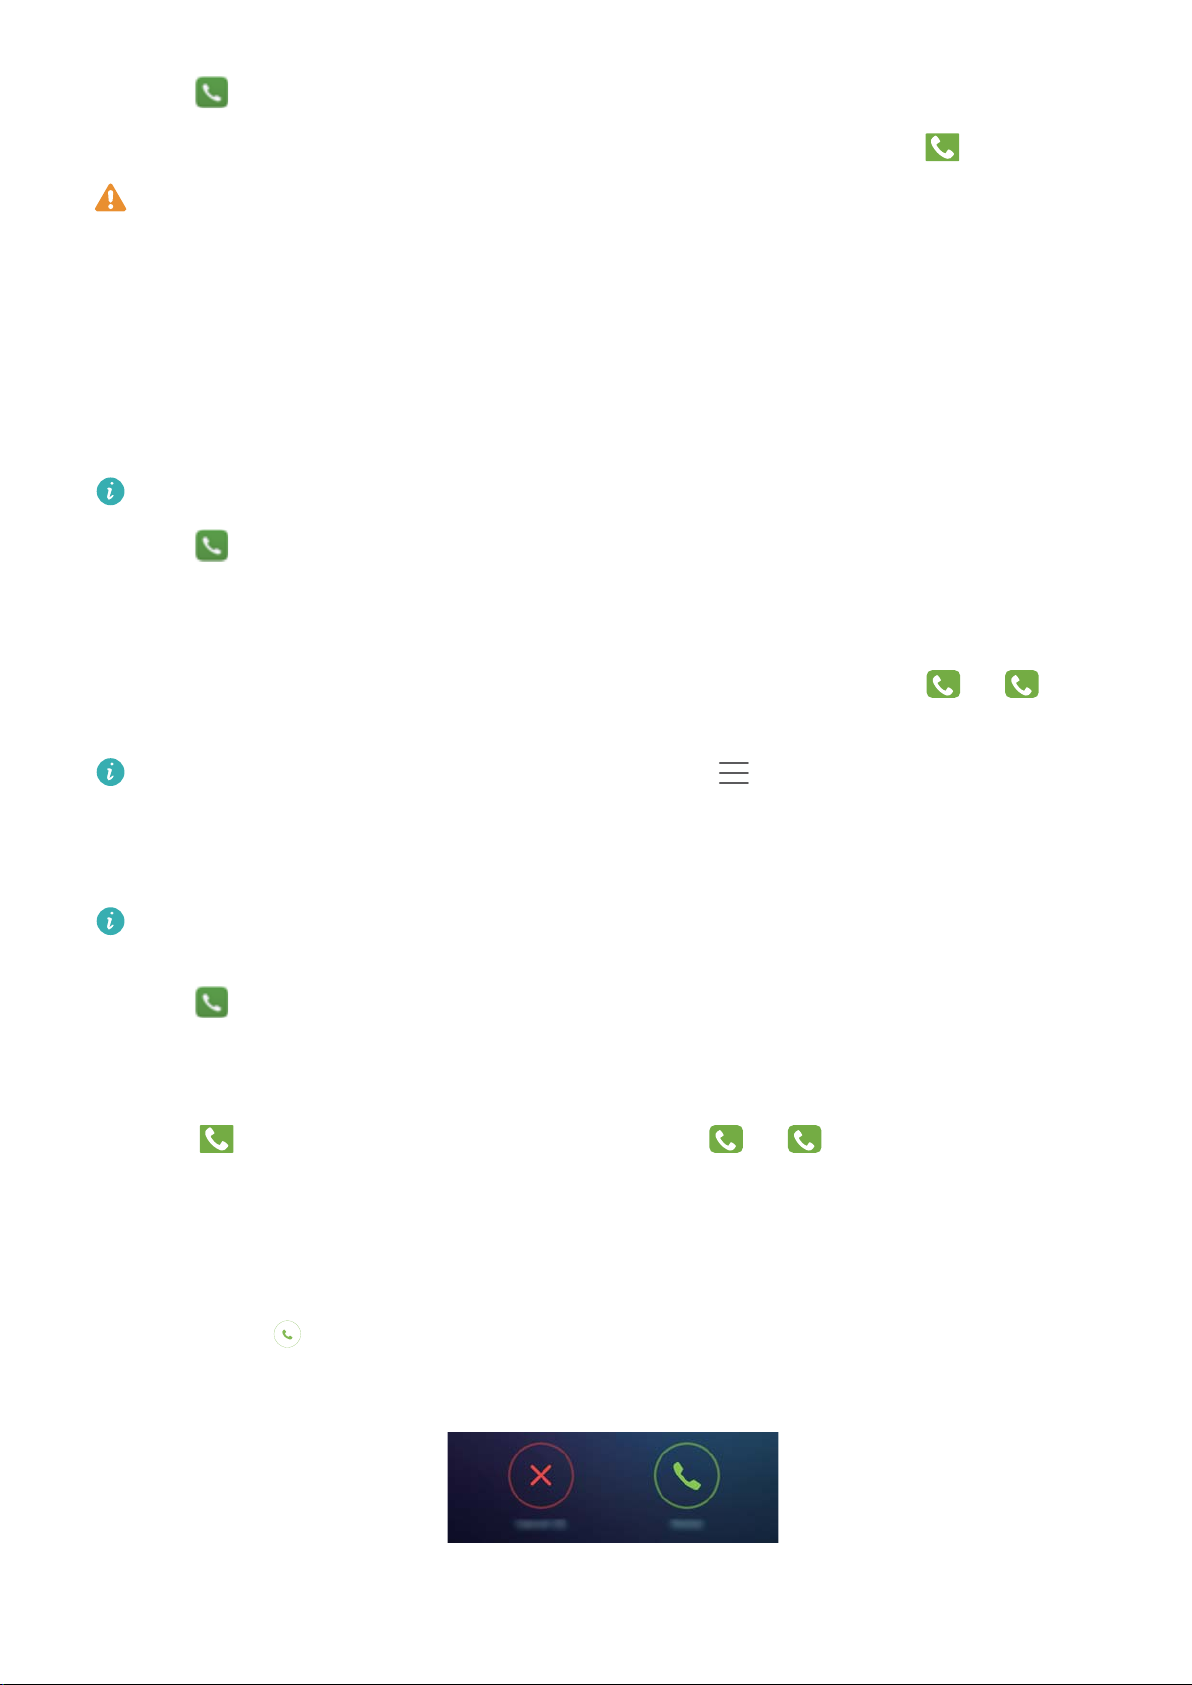
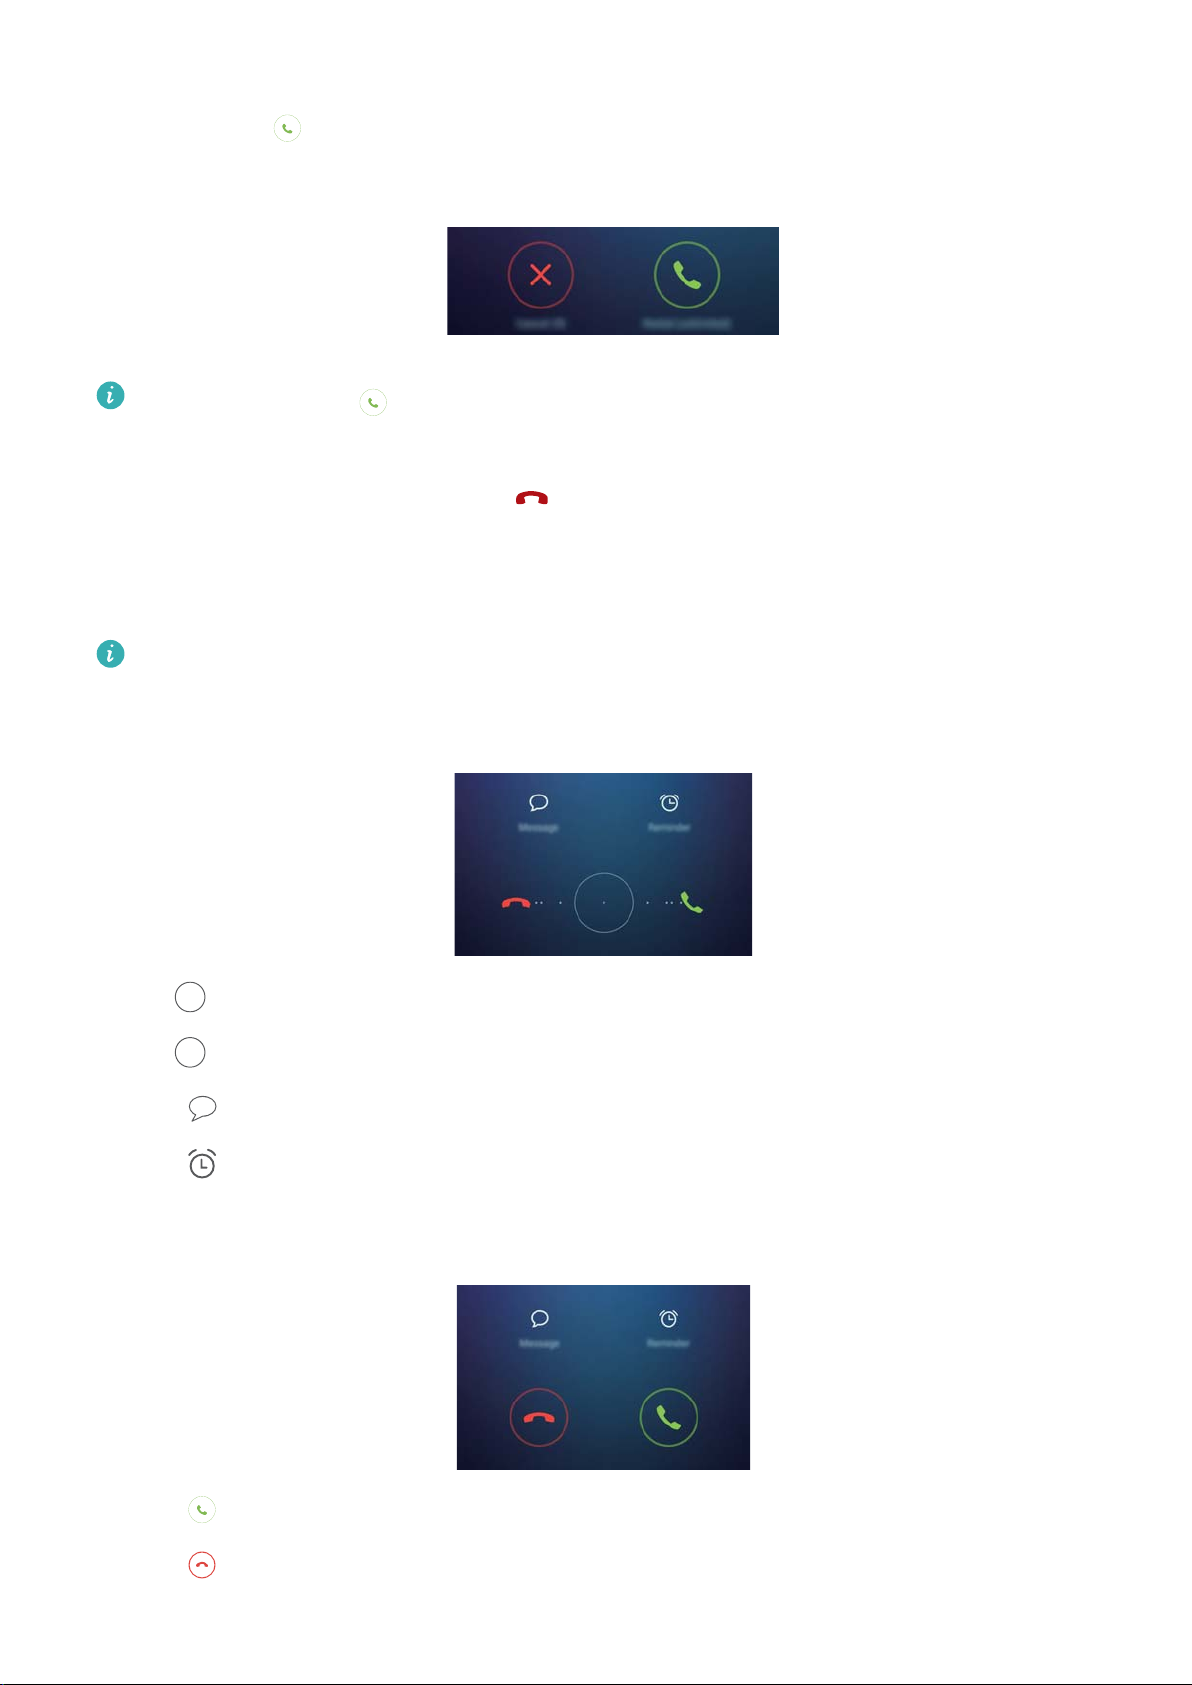
Answering or rejecting a call
When a call comes in, you can press the volume button to mute the ringtone.
While the screen is locked:
l Drag right to answer the call.
l Drag left to reject the call.
l Touch to reject the call and send an SMS.
l Touch to configure a callback reminder.
While the screen is unlocked:
l Touch to answer the call.
l Touch to reject the call.
25
 Loading...