

Page 1

7210011
Issue
03
Date
2011-12-10
HUAWE I TECHNOLOGIES CO., LTD.
HUAWEI VP9050 Executive Video Terminal
V200R001
User Guide
Page 2

Copyright © Huawei Technologies Co., Ltd
Huawei Technologies Co., Ltd. provides customers with comprehensive technical support and service. For any
assistance, please contact our local office or company headquarters.
Huawei Technologies Co., Ltd.
Address: Huawei Industrial Base
Bantian, Longgang
Shenzhen 518129
People's Republic of China
Website: http://www.huawei.com
Email: vcsupport@huawei.com
Copyright © Huawei Technologies Co., Ltd. 2011. All rights reserved.
No part of this document may be reproduced or transmitted in any form or by any means without prior written
consent of Huawei Technologies Co., Ltd.
The product described in this manual may include copyrighted software of Huawei Technologies Co., Ltd and
possible licensors. Customers shall not in any manner reproduce, distribute, modify, decompile, disassemble,
decrypt, extract, reverse engineer, lease, assign, or sublicense the said software, unless such restrictions are
prohibited by applicable laws or such actions are approved by respective copyright holders under licenses.
Trademarks and Permissions
, , and are trademarks or registered trademarks of Huawei Technologies Co., Ltd.
Other trademarks, product, service and company names mentioned are the property of their respective owners.
Notice
Some features of the product and its accessories described herein rely on the software installed, capacities and
settings of local network, and may not be activated or may be limited by local network operators or network
service providers. Thus the descriptions herein may not exactly match the product or its accessories you purchase.
Huawei Technologies Co., Ltd reserves the right to change or modify any information or specifications contained
in this manual without prior notice or obligation.
NO WARRANTY
THE CONTENTS OF THIS MANUAL ARE PROVIDED “AS IS”. EXCEPT AS REQUIRED BY
APPLICABLE LAWS, NO WARRANTIES OF ANY KIND, EITHER EXPRESS OR IMPLIED, INCLUDING
BUT NOT LIMITED TO, THE IMPLIED WARRANTIES OF MERCHANTABILITY AND FITNESS FOR A
PARTICULAR PURPOSE, ARE MADE IN RELATION TO THE ACCURACY, RELIABILITY OR
CONTENTS OF THIS MANUAL.
TO THE MAXIMUM EXTENT PERMITTED BY APPLICABLE LAW, IN NO CASE SHALL HUAWEI
TECHNOLOGIES CO., LTD BE LIABLE FOR ANY SPECIAL, INCIDENTAL, INDIRECT, OR
CONSEQUENTIAL DAMAGES, OR LOST PROFITS, BUSINESS, REVENUE, DATA, GOODWILL OR
ANTICIPATED SAVINGS.
Import and Export Regulations
Customers shall comply with all applicable export or import laws and regulations and will obtain all necessary
governmental permits and licenses in order to export, re-export or import the product mentioned in this manual
including the software and technical data therein.
Issue 03 (2011-12-10) Huawei Proprietary and Confidential
i
Page 3

HUAWEI VP9050 Executive Video Terminal
User Guide
About This Document
Copyright © Huawei Technologies Co., Ltd
Purpose
This document is intended for users who need to configure, use, and be familiar with the
HUAWEI VP9050 desktop integrated video terminal.
Related Versions
About This Document
The following table lists the product versions related to this document.
Product Name Version
HUAWEI VP9050 desktop integrated video terminal V200R001
Intended Audience
This document is intended for:
Administrators
Administrators have access to all functions on both the Web interface and user interface.
Access to the Settings, Utilities or Diagnostics screen is reserved for administrators and
requires the administrator password. For details about how to set the administrator
password, see section 10.1 "Setting the Administrator Password."
Ordinary users
Ordinary users have access to some functions on the Web interface and user interface.
Organization
The following table lists the contents of this document.
Chapter Content
1 Installation and
Preparation
2 Touch Panel Describes the home screen and touch operations.
Issue 03 (2011-12-10) Huawei Proprietary and Confidential
Describes the main functions, appearance, and menus of the
terminal, as well as installation procedures.
ii
Page 4
HUAWEI VP9050 Executive Video Terminal
User Guide
About This Document
Copyright © Huawei Technologies Co., Ltd
Chapter Content
3 Network Settings Describes how to set the network.
4 Video Settings Describes how to set the video.
5 Audio Settings Describes how to set the audio.
6 Conference Initiation Describes how to initiate a conference.
7. Conference Control Describes conference control functions.
8 Video and Audio Describes how to adjust video attributes and volume.
9 Captions Describes how to create and share a caption.
10 Security Describes how to set the administrator password.
11 Terminal as a Display Describes how to use the terminal as a display for a PC.
12 Remote Management
from the Web Interface
13 Maintenance and
Troubleshooting
A Precautions
B Technical Specifications Lists main specifications of the ViewPoint 8053.
C Videoconferencing
Room Layout
D Glossary Describes important terms in the document.
E Acronyms and
Abbreviations
Conventions
Describes how to log in to the terminal from the Web
interface.
Describes common encountered faults during the use of the
terminal as well as methods for locating and rectifying these
faults.
Provides important safety information to ensure safe
operation.
Provides advice on the videoconferencing room layout for
optimal conference experience.
Lists the acronyms and abbreviations used in this document,
and their full spellings.
Symbol Conventions
The following describes symbols that may be found in this document.
Symbol Description
Issue 03 (2011-12-10) Huawei Proprietary and Confidential
Indicates a hazard with a high level of risk, which if not
avoided, will result in death or serious injury.
Indicates a hazard with a medium or low level of risk, which if
not avoided, could result in minor or moderate injury.
iii
Page 5

HUAWEI VP9050 Executive Video Terminal
User Guide
About This Document
Copyright © Huawei Technologies Co., Ltd
Symbol Description
Indicates a potentially hazardous situation, which if not
avoided, could result in equipment damage, data loss,
performance degradation, or unexpected results.
General Conventions
The following table describes general conventions that may be found in this document.
Convention Description
Times New Roman Normal paragraphs are in Times New Roman.
Boldface
Italic Book titles are in italics.
Courier New
Indicates a tip that may help you solve a problem or save time.
Provides additional information to emphasize or supplement
important points of the main text.
Names of files, directories, folders, and users are in boldface.
For example, log in as user root.
Examples of information displayed on the screen are in
Courier New.
Command Conventions
The following table describes command conventions that may be found in this document.
Convention Description
Boldface
Italic Command arguments are in italics.
[ ]
{ x | y | ... }
[ x | y | ... ]
{ x | y | ... } *
[ x | y | ... ] *
The keywords of a command line are in boldface.
Items (keywords or arguments) in square brackets [ ] are
optional.
Optional items are grouped in braces and separated by vertical
bars. One item is selected.
Optional items are grouped in brackets and separated by
vertical bars. One item is selected or no item is selected.
Optional items are grouped in braces and separated by vertical
bars. A minimum of one item or a maximum of all items can
be selected.
Optional items are grouped in brackets and separated by
vertical bars. Several items or no item can be selected.
Issue 03 (2011-12-10) Huawei Proprietary and Confidential
iv
Page 6

HUAWEI VP9050 Executive Video Terminal
User Guide
About This Document
Copyright © Huawei Technologies Co., Ltd
GUI Conventions
The following describes GUI conventions that may be found in this document.
Convention Description
Boldface
>
Keyboard Operations
The following describes keyboard operations that may be found in this document.
Format Description
Key
Key 1+Key 2
Key 1, Key 2
Buttons, menus, parameters, tabs, windows, and dialog titles
are in boldface. For example, click OK.
Multi-level menus are in boldface and separated by the ">"
signs. For example, choose File > Create > Folder.
Press the key. For example, press Enter and press Tab.
Press the keys concurrently. For example, pressing
Ctrl+Alt+A means the three keys should be pressed
concurrently.
Press the keys in turn. For example, pressing Alt, A means the
two keys should be pressed in turn.
Mouse Operations
The following describes mouse operations that may be found in this document.
Action Description
Click
Double-click
Drag
Select and release the primary mouse button without moving
the pointer.
Press the primary mouse button twice continuously and
quickly without moving the pointer.
Press and hold the primary mouse button and move the pointer
to a certain position.
Issue 03 (2011-12-10) Huawei Proprietary and Confidential
v
Page 7

HUAWEI VP9050 Executive Video Terminal
User Guide
Contents
Copyright © Huawei Technologies Co., Ltd
Contents
About This Document .................................................................................................................... ii
Purpose ................................................................................................................................................................... ii
Related Versions ..................................................................................................................................................... ii
Intended Audience .................................................................................................................................................. ii
Organization ........................................................................................................................................................... ii
Conventions .......................................................................................................................................................... iii
1 Installation and Preparation ....................................................................................................... 1
1.1 Features ............................................................................................................................................................ 1
1.2 System Components ......................................................................................................................................... 2
1.2.1 Basic Components .................................................................................................................................. 2
1.2.2 Optional Components ............................................................................................................................. 2
1.3 Appearance of the Terminal.............................................................................................................................. 2
1.3.1 Positions of the Components ................................................................................................................... 2
1.3.2 Indicators ................................................................................................................................................ 7
1.4 System Connection ........................................................................................................................................... 7
1.4.1 Connecting the Terminal ......................................................................................................................... 7
1.4.2 Connecting the External Devices ............................................................................................................ 9
1.5 Uncovering the Lens ...................................................................................................................................... 10
1.6 Starting/Shutting Down the System ............................................................................................................... 10
1.6.1 Starting the System ............................................................................................................................... 10
1.6.2 Shutting Down the System .................................................................................................................... 10
2 Touch Panel .................................................................................................................................. 11
3 Network Settings......................................................................................................................... 13
3.1 Using the Settings Wizard .............................................................................................................................. 13
3.2 Setting Basic Parameters ................................................................................................................................ 13
3.3 Configuring an IP LAN .................................................................................................................................. 14
3.3.1 Status Indicators of the LAN Interface ................................................................................................. 14
3.3.2 Setting IP Parameters ............................................................................................................................ 15
3.3.3 Setting H.323 Parameters ...................................................................................................................... 16
3.3.4 Setting SIP Parameters .......................................................................................................................... 17
3.3.5 Setting SNMP Parameters ..................................................................................................................... 18
3.3.6 Setting QoS Parameters ........................................................................................................................ 19
Issue 03 (2011-12-10) Huawei Proprietary and Confidential
vi
Page 8

HUAWEI VP9050 Executive Video Terminal
User Guide
Contents
Copyright © Huawei Technologies Co., Ltd
3.3.7 Setting Firewall Parameters .................................................................................................................. 20
3.3.8 Setting Network Diagnostics Parameters .............................................................................................. 22
3.4 Configuring the 3G Network .......................................................................................................................... 22
3.4.1 Inserting a 3G Data Card ...................................................................................................................... 22
3.4.2 Setting 3G Parameters ........................................................................................................................... 23
3.4.3 Setting 3G Dial-up Parameters and Establishing a Dial-up Connection ............................................... 24
4 Video Settings .............................................................................................................................. 27
4.1 Configuring the Built-In Camera ................................................................................................................... 27
4.2 Configuring the External Camera ................................................................................................................... 28
4.2.1 Getting to Know the Video Input Interface ........................................................................................... 28
4.2.2 Getting to Know the Video Output Interface ........................................................................................ 28
4.2.3 Setting Camera Input Parameters .......................................................................................................... 29
4.2.4 Setting Camera Output Parameters ....................................................................................................... 31
4.3 Selecting and Controlling a Camera ............................................................................................................... 32
4.3.1 Selecting a Camera................................................................................................................................ 32
4.3.2 Adjusting the Focal Length of a Camera ............................................................................................... 33
4.3.3 Controlling a Camera ............................................................................................................................ 33
4.4 Saving and Using Camera Presets .................................................................................................................. 33
4.4.1 Saving a Camera Preset ......................................................................................................................... 34
4.4.2 Moving a Camera to a Preset ................................................................................................................ 34
4.4.3 Deleting All Camera Presets ................................................................................................................. 34
4.5 Setting the Video Resolution and Refresh Rate .............................................................................................. 35
5 Audio Settings ............................................................................................................................. 36
5.1 Connecting an Audio Device .......................................................................................................................... 36
5.2 Setting Audio Parameters ............................................................................................................................... 36
6 Conference Initiation ................................................................................................................. 39
6.1 Initiating a Conference Using Different Methods .......................................................................................... 39
6.1.1 Initiating a Conference from the Favorite Conferences Screen ............................................................ 39
6.1.2 Initiating a Conference from the Conference History Screen ............................................................... 40
6.1.3 Initiating a Conference from the Address Book Screen ........................................................................ 41
6.1.4 Initiating a Conference from the Call Screen ........................................................................................ 41
6.1.5 Scheduling a Conference ...................................................................................................................... 41
6.2 Answering Incoming Calls and Ending a Conference .................................................................................... 42
6.2.1 Setting the Answering Mode ................................................................................................................. 42
6.2.2 Ending a Conference ............................................................................................................................. 42
6.3 Setting Conference Parameters ...................................................................................................................... 42
6.4 Setting Up an H.239 Dual-Stream Conference .............................................................................................. 44
6.4.1 Designating the Dual Streams ............................................................................................................... 44
6.4.2 Enabling the H.239 Mode ..................................................................................................................... 44
6.4.3 Sharing a Presentation ........................................................................................................................... 45
6.4.4 Viewing the Combined Picture of the Presentation and the Video ........................................................ 45
Issue 03 (2011-12-10) Huawei Proprietary and Confidential
vii
Page 9

HUAWEI VP9050 Executive Video Terminal
User Guide
Contents
Copyright © Huawei Technologies Co., Ltd
6.5 Joining an Authentication Conference............................................................................................................ 45
6.6 Managing the Address Book .......................................................................................................................... 47
6.6.1 Managing the Local Address Book ....................................................................................................... 47
6.6.2 Setting Network Address Book Parameters .......................................................................................... 49
7 Conference Control ..................................................................................................................... 51
7.1 Customizing the Option Bar ........................................................................................................................... 51
7.2 Customizing the Conference Control Screen ................................................................................................. 51
7.3 Using Conference Control Functions ............................................................................................................. 52
7.3.1 Viewing Sites ........................................................................................................................................ 52
7.3.2 Broadcasting Sites ................................................................................................................................. 53
7.3.3 Giving the Floor to a Site ...................................................................................................................... 54
7.3.4 Displaying Sites Requesting for the Floor ............................................................................................ 54
7.3.5 Placing a Call ........................................................................................................................................ 54
7.3.6 Disconnecting a Site.............................................................................................................................. 54
7.3.7 Deleting a Site ....................................................................................................................................... 54
7.3.8 Muting and Unmuting the Microphone ................................................................................................. 55
7.3.9 Muting and Unmuting the Speaker ....................................................................................................... 55
7.3.10 Requesting for Chair Control Rights ................................................................................................... 55
7.3.11 Requesting for the Floor ...................................................................................................................... 55
7.3.12 Setting the Continuous Presence ......................................................................................................... 56
7.3.13 Enabling and Disabling Voice Activation ........................................................................................... 56
7.3.14 Releasing Chair Control Rights .......................................................................................................... 56
7.3.15 Enabling Discussion ............................................................................................................................ 56
7.3.16 Adding Sites ........................................................................................................................................ 57
7.3.17 Extending a Conference ...................................................................................................................... 57
7.3.18 Ending a Conference ........................................................................................................................... 57
8 Video and Audio ......................................................................................................................... 59
8.1 Adjusting the Video Display Effects .............................................................................................................. 59
8.1.1 Adjusting the Local Video Effects......................................................................................................... 59
8.1.2 Configuring the Built-In Camera .......................................................................................................... 60
8.1.3 Adjusting Video Parameters .................................................................................................................. 60
8.1.4 Customizing the Status Icons to Be Displayed on Screens ................................................................... 62
8.1.5 Adjusting the Picture Offset .................................................................................................................. 62
8.1.6 Adjusting the Sampling Phase ............................................................................................................... 63
8.2 Adjusting Audio Effects ................................................................................................................................. 63
8.3 Adjusting the Volume ..................................................................................................................................... 64
8.4 Adjusting the Screen Layout .......................................................................................................................... 64
8.5 Selecting a Video Source ................................................................................................................................ 65
8.6 Hiding the Local Video .................................................................................................................................. 66
9 Captions ........................................................................................................................................ 67
9.1 Configuring Captions ..................................................................................................................................... 67
Issue 03 (2011-12-10) Huawei Proprietary and Confidential
viii
Page 10

HUAWEI VP9050 Executive Video Terminal
User Guide
Contents
Copyright © Huawei Technologies Co., Ltd
9.2 Creating a Caption .......................................................................................................................................... 68
9.3 Sharing a Caption ........................................................................................................................................... 69
9.4 Sending an Instant Message ........................................................................................................................... 70
10 Security........................................................................................................................................ 71
10.1 Setting the Administrator Password ............................................................................................................. 71
10.2 Restricting Screen Access Using the Administrator Password ..................................................................... 71
10.3 Enabling H.235 Encryption .......................................................................................................................... 72
10.4 Allowing Remote Login ............................................................................................................................... 72
11 Terminal as a Display............................................................................................................... 73
11.1 Switching Between the Conference Mode and the PC Mode ....................................................................... 73
11.2 Adjusting the Display Effect......................................................................................................................... 73
11.3 Answering a Call .......................................................................................................................................... 73
12 Remote Management from the Web Interface .................................................................... 75
12.1 Allowing Login from the Web Interface ....................................................................................................... 75
12.2 Configuring a Web Browser ......................................................................................................................... 75
12.3 Logging In to the Terminal from the Web Interface ..................................................................................... 76
12.4 Functions Provided on the Web Interface ..................................................................................................... 77
12.4.1 Exporting the Address Book ............................................................................................................... 78
12.4.2 Modifying Records of an Address Book ............................................................................................. 78
12.4.3 Importing an Address Book ................................................................................................................ 78
12.4.4 Customizing Shortcut Icons ................................................................................................................ 78
12.4.5 Navigation ........................................................................................................................................... 79
12.4.6 Site List ............................................................................................................................................... 79
12.4.7 Conference Control Page .................................................................................................................... 79
13 Maintenance and Troubleshooting ....................................................................................... 81
13.1 Routine Maintenance.................................................................................................................................... 81
13.1.1 Checking the Working Environment Periodically ............................................................................... 81
13.1.2 Checking Cable Connection Periodically ........................................................................................... 81
13.1.3 Viewing the System Status .................................................................................................................. 82
13.1.4 Viewing the System Information......................................................................................................... 82
13.1.5 Viewing Logs ...................................................................................................................................... 83
13.2 Software Upgrade ......................................................................................................................................... 83
13.2.2 Upgrading the Software Locally Using a Computer ........................................................................... 84
13.2.3 Upgrading the Software Using the Minimum System ........................................................................ 87
13.3 Diagnostics ................................................................................................................................................... 88
13.4 Troubleshooting ............................................................................................................................................ 91
A Precautions ............................................................................................................................. 102
B Technical Specifications ...................................................................................................... 106
C Videoconferencing Room Layout ...................................................................................... 108
Issue 03 (2011-12-10) Huawei Proprietary and Confidential
ix
Page 11

HUAWEI VP9050 Executive Video Terminal
User Guide
Contents
Copyright © Huawei Technologies Co., Ltd
D Glossary .................................................................................................................................. 109
E Acronyms and Abbreviations ............................................................................................ 112
Issue 03 (2011-12-10) Huawei Proprietary and Confidential
x
Page 12

HUAWEI VP9050 Executive Video Terminal
User Guide
1 Installation and Preparation
Copyright © Huawei Technologies Co., Ltd
1 Installation and Preparation
1.1 Features
The HUAWEI VP9050 is a high-end video terminal developed by Huawei. It is suitable for
personal use. This product can make a point-to-point call, hold a multi-point conference, and
be used as the display of a PC. It is a real-time video terminal that can meet the requirements
of personal users.
Executive Video Terminal
21.5 inch wide-screen LCD touch panel
Embedded camera
Double built-in microphones
Double built-in speakers
Microphone and headset jacks
H.239 Dual-Stream Conference
The terminal complies with the H.239 standard. It can transmit two video channels to the
remote site at the same time.
The presentation can be the video or desktop contents.
The presentation can be displayed on the screen or the monitor together with the video or
can be displayed separately.
High-Speed High-Quality Video Transmission
Maximum call bandwidth: 4 Mbit/s
H.264 protocol
Abundant Continuous Presence modes (including picture-in-picture, bi-screen,
tri-screen)
Maximum resolution: 1080p pixels and progressive scanning)
Simple Installation
The interfaces are simple and easy to be identified.
The cables are convenient to connect.
Issue 03 (2011-12-10) Huawei Proprietary and Confidential
1
Page 13
HUAWEI VP9050 Executive Video Terminal
User Guide
1 Installation and Preparation
Copyright © Huawei Technologies Co., Ltd
1.2 System Components
The system components of the terminal include basic videoconferencing components and
optional components.
1.2.1 Basic Components
The basic videoconferencing components are listed in Table 1-1.
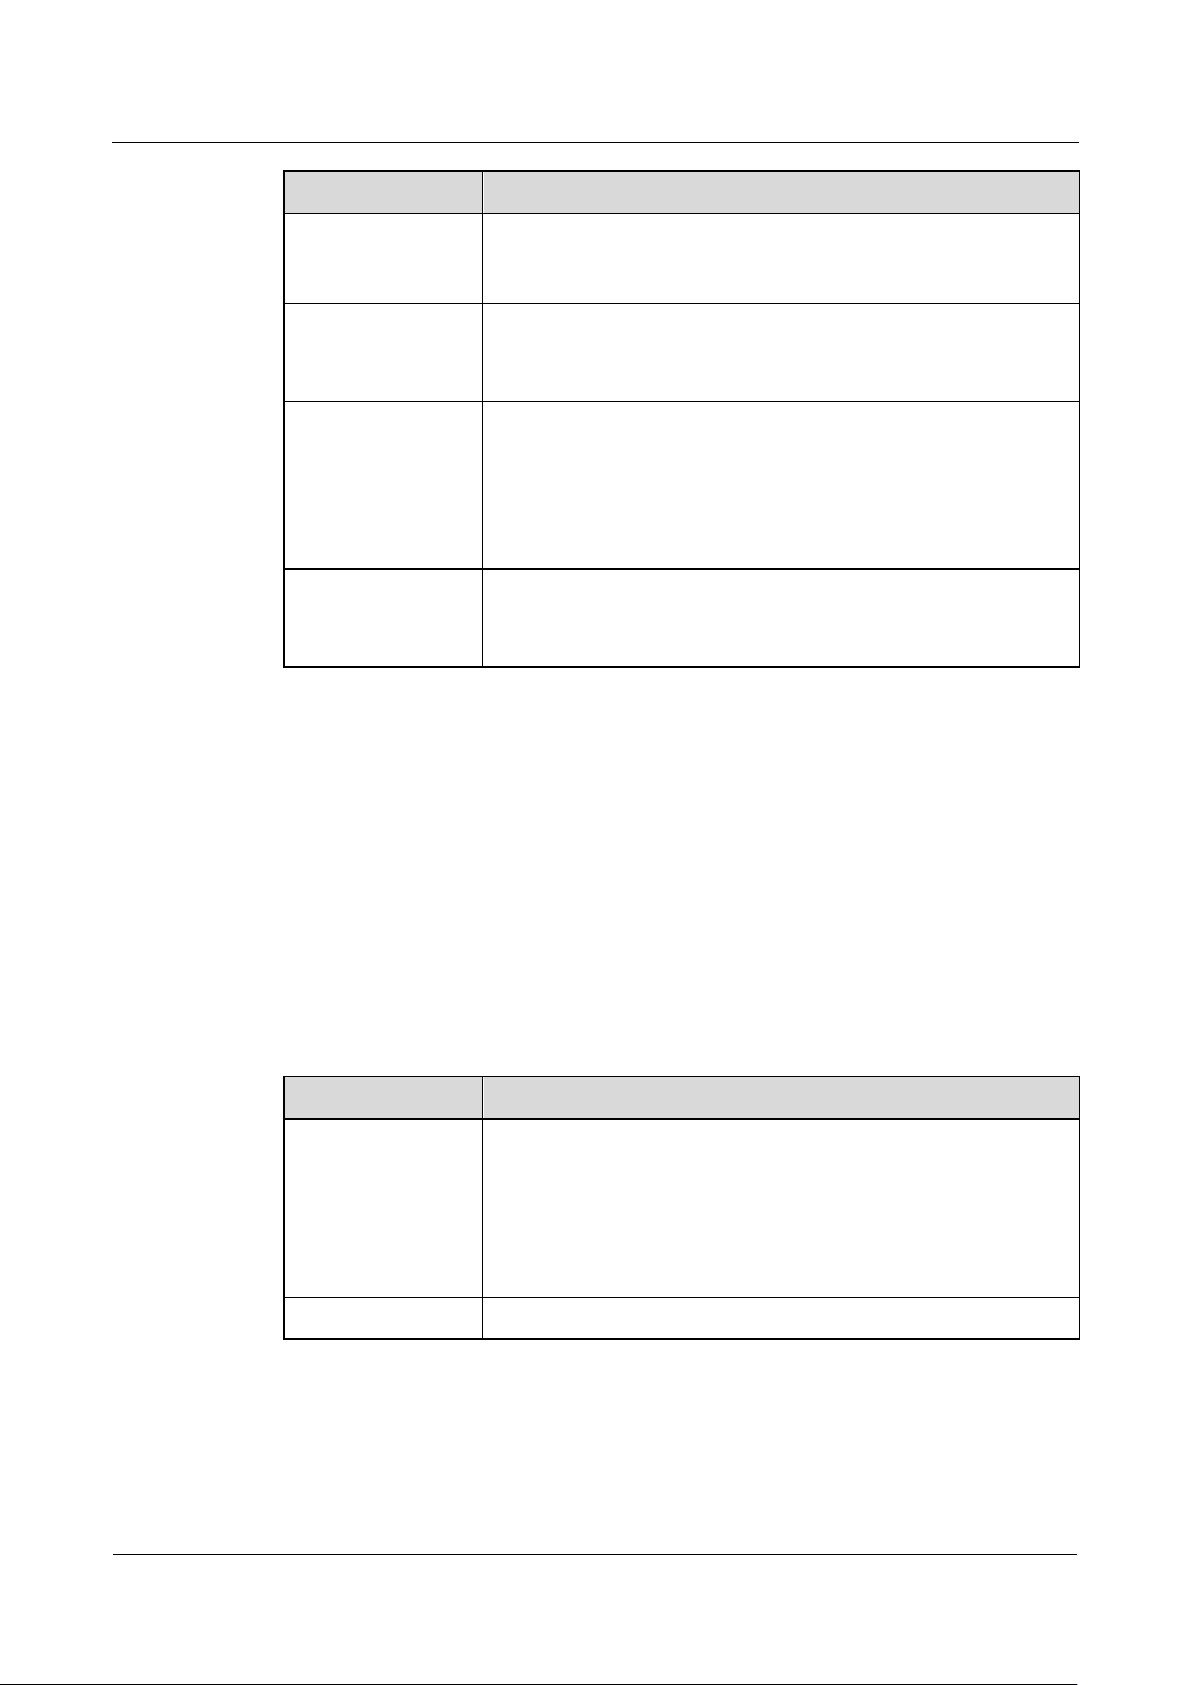
Table 1-1 Basic videoconferencing components
Name Description
HUAWEI VP9050
Remote control It is used to control the terminal.
Power module/Power cable It is used to connect to the power socket.
DVI-SXGA cable
Network cable It is used to connect to a local area network (LAN).
It includes the host that is used for processing the
video and audio data, camera, display, and interfaces.
It is used to connect a video input device and a video
output device.
1.2.2 Optional Components
You can purchase the following optional components:
Headset
Microphone
Audio cable with a 3.5 mm connector
1.3 Appearance of the Terminal
1.3.1 Positions of the Components
You can find out the components of the terminal and their functions according to following
figures.
Front View
Figure 1-1 shows the front view of the terminal.
Issue 03 (2011-12-10) Huawei Proprietary and Confidential
2
Page 14

HUAWEI VP9050 Executive Video Terminal
User Guide
1 Installation and Preparation
Copyright © Huawei Technologies Co., Ltd
Figure 1-1 Front view of the terminal
Camera lens
You can uncover the camera lens and adjust the focus.
Microphone
The terminal has one microphone on the left side and one on the right side.
Screen
LCD touch panel.
Power key of the screen
Power off the display of the terminal. After you power off the display, the status of the
conference system does not get affected.
Screen menu key
Press this key to display the screen menu where you can adjust the brightness and other
characteristics of the image displayed on the screen.
Auto
Press this key to automatically adjust display parameter settings.
Up and down keys
Press these keys to move the highlight bar on the menu.
Press these keys to adjust the parameters displayed on the screen.
Issue 03 (2011-12-10) Huawei Proprietary and Confidential
3
Page 15

HUAWEI VP9050 Executive Video Terminal
User Guide
1 Installation and Preparation
Copyright © Huawei Technologies Co., Ltd
Speaker
The terminal has two speakers on the left and right sides.
Microphone key
Press this key to mute or unmute the local microphones.
Mode switching key
Press this key to switch the screen to conference mode or PC mode.
Terminal power key
When the terminal is powered on, press this key to power it off or restart it.
When the terminal is powered off, this key is unavailable.
Screen status indicator
Shows the screen's power supply status.
Terminal status indicator
Shows the terminal's power supply and operating status.
Rear View
Figure 1-2 shows the rear view of the terminal.
Issue 03 (2011-12-10) Huawei Proprietary and Confidential
4
Page 16
HUAWEI VP9050 Executive Video Terminal
User Guide
1 Installation and Preparation
Copyright © Huawei Technologies Co., Ltd
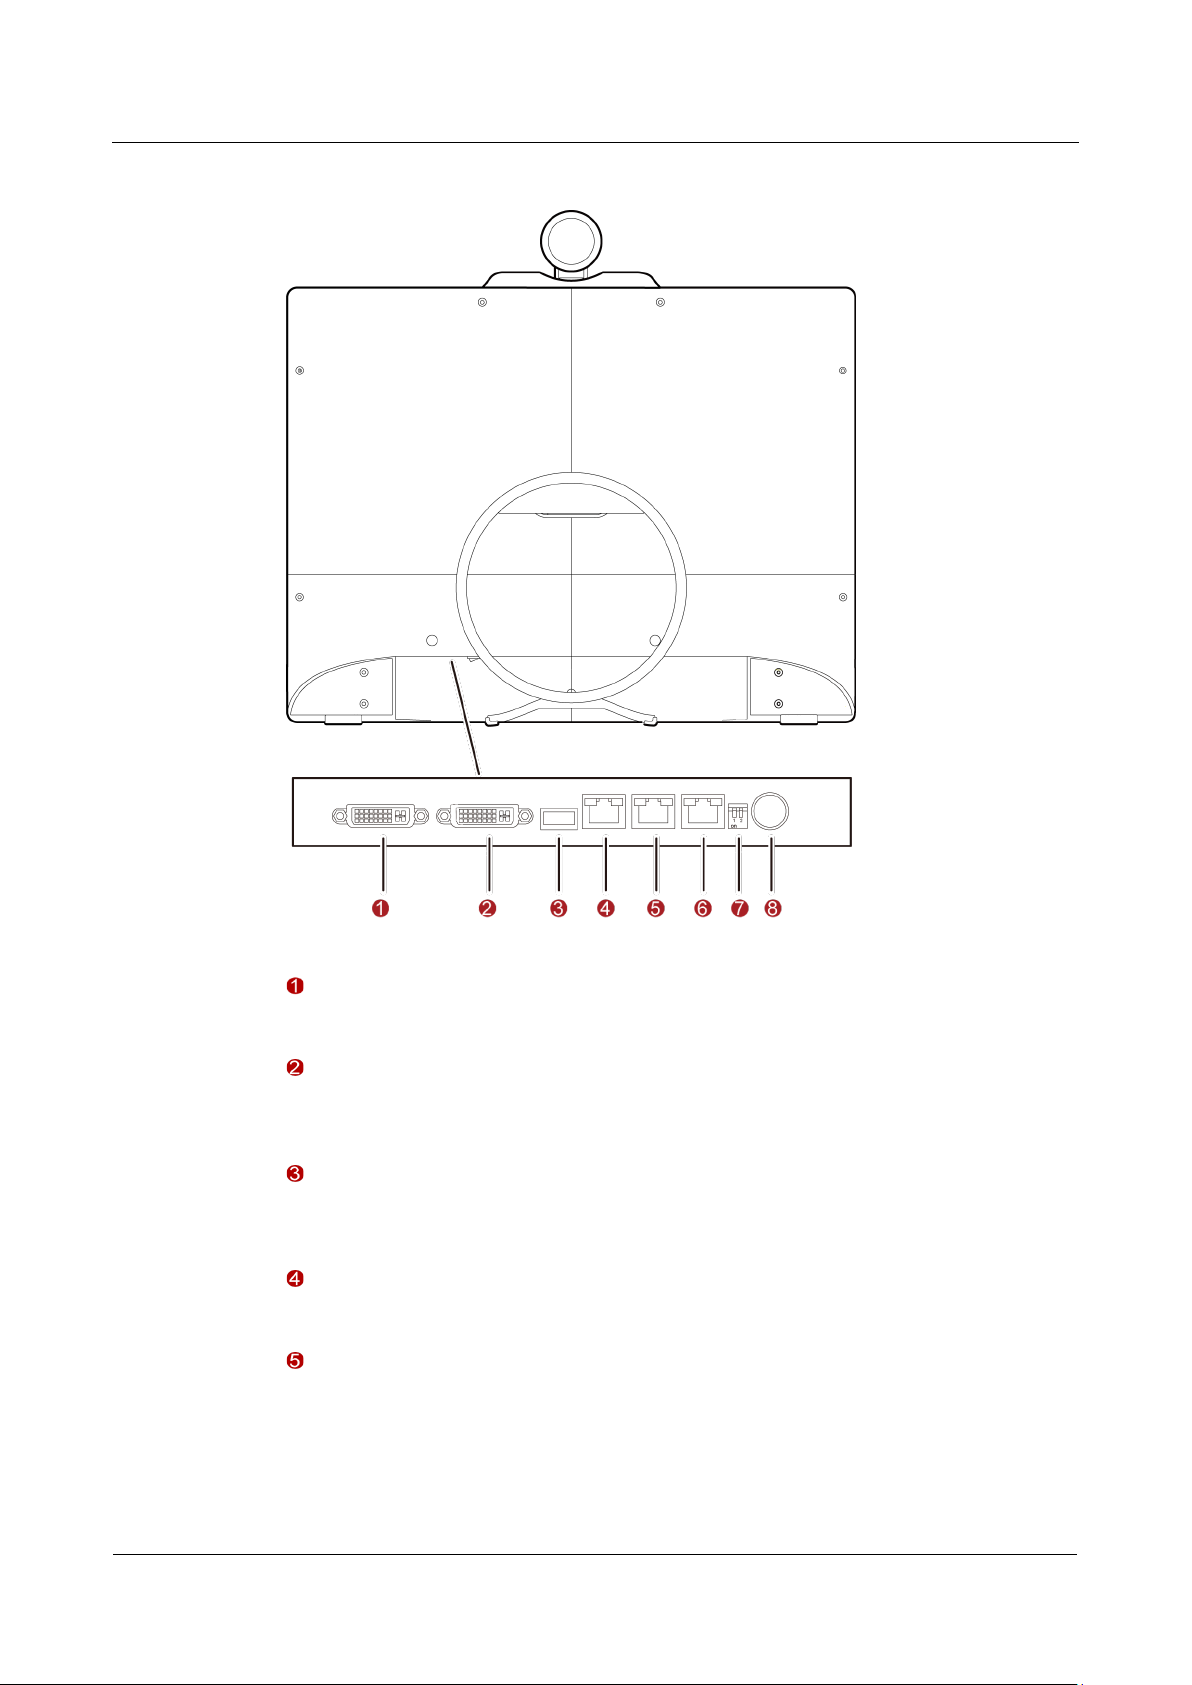
Figure 1-2 Rear view of the terminal
Power switch
Press this key to power on or power off the terminal.
DVI/VGA OUT interface
This interface is the video output interface of the terminal. It can be used to connect to a
monitor, such as a TV or a projector.
DVI/VGA IN interface
This interface is the video input interface of the terminal. It can be used to connect to devices
such as a PC and an external camera.
USB port
This port is used to connect to a 3G data card.
Serial port
This interface is used by the technicians to debug the terminal. Common users are
recommended not to use this interface.
This interface can be connected to an external camera's serial port to control that camera.
Issue 03 (2011-12-10) Huawei Proprietary and Confidential
5
Page 17

HUAWEI VP9050 Executive Video Terminal
User Guide
1 Installation and Preparation
Copyright © Huawei Technologies Co., Ltd
Network interface
This interface is the network interface provided by terminal.
DIP
It is not recommended for common users to use this switch.
Power cable interface
You can use the power cable to connect the terminal to the power supply.
The USB port of the product is reserved currently.
Right View
Figure 1-3 shows the right view of the terminal.
Figure 1-3 Right view of the terminal
Headset jack
This jack is used to connect to the headset. Then, you can hear the sound through the headset.
Microphone jack
This jack is used to connect to the microphone. Then, sounds can be inputted through the
external microphone.
AUDIO IN jack
This is the audio input interface of the terminal. It can be used to connect to the external audio
input device, such as a PC.
AUDIO OUT jack
Issue 03 (2011-12-10) Huawei Proprietary and Confidential
6
Page 18

HUAWEI VP9050 Executive Video Terminal
User Guide
1 Installation and Preparation
Copyright © Huawei Technologies Co., Ltd
This is the audio output interface of the terminal. It can be used to connect to the recording
and monitoring devices, such as a recorder.
If you need to purchase the optional components, the diameter of the headset, microphone, and audio
cable connector should be 3.5 mm.
If the AUDIO OUT jack is connected to an external audio device, do not place the audio device near
the embedded microphone to avoid the spontaneous phenomenon.
1.3.2 Indicators
The indicator beside the keys on the front panel illuminates in one of three colors. Figure 1-3
shows the location of the indicator. Table 1-2 describes the indicator status.
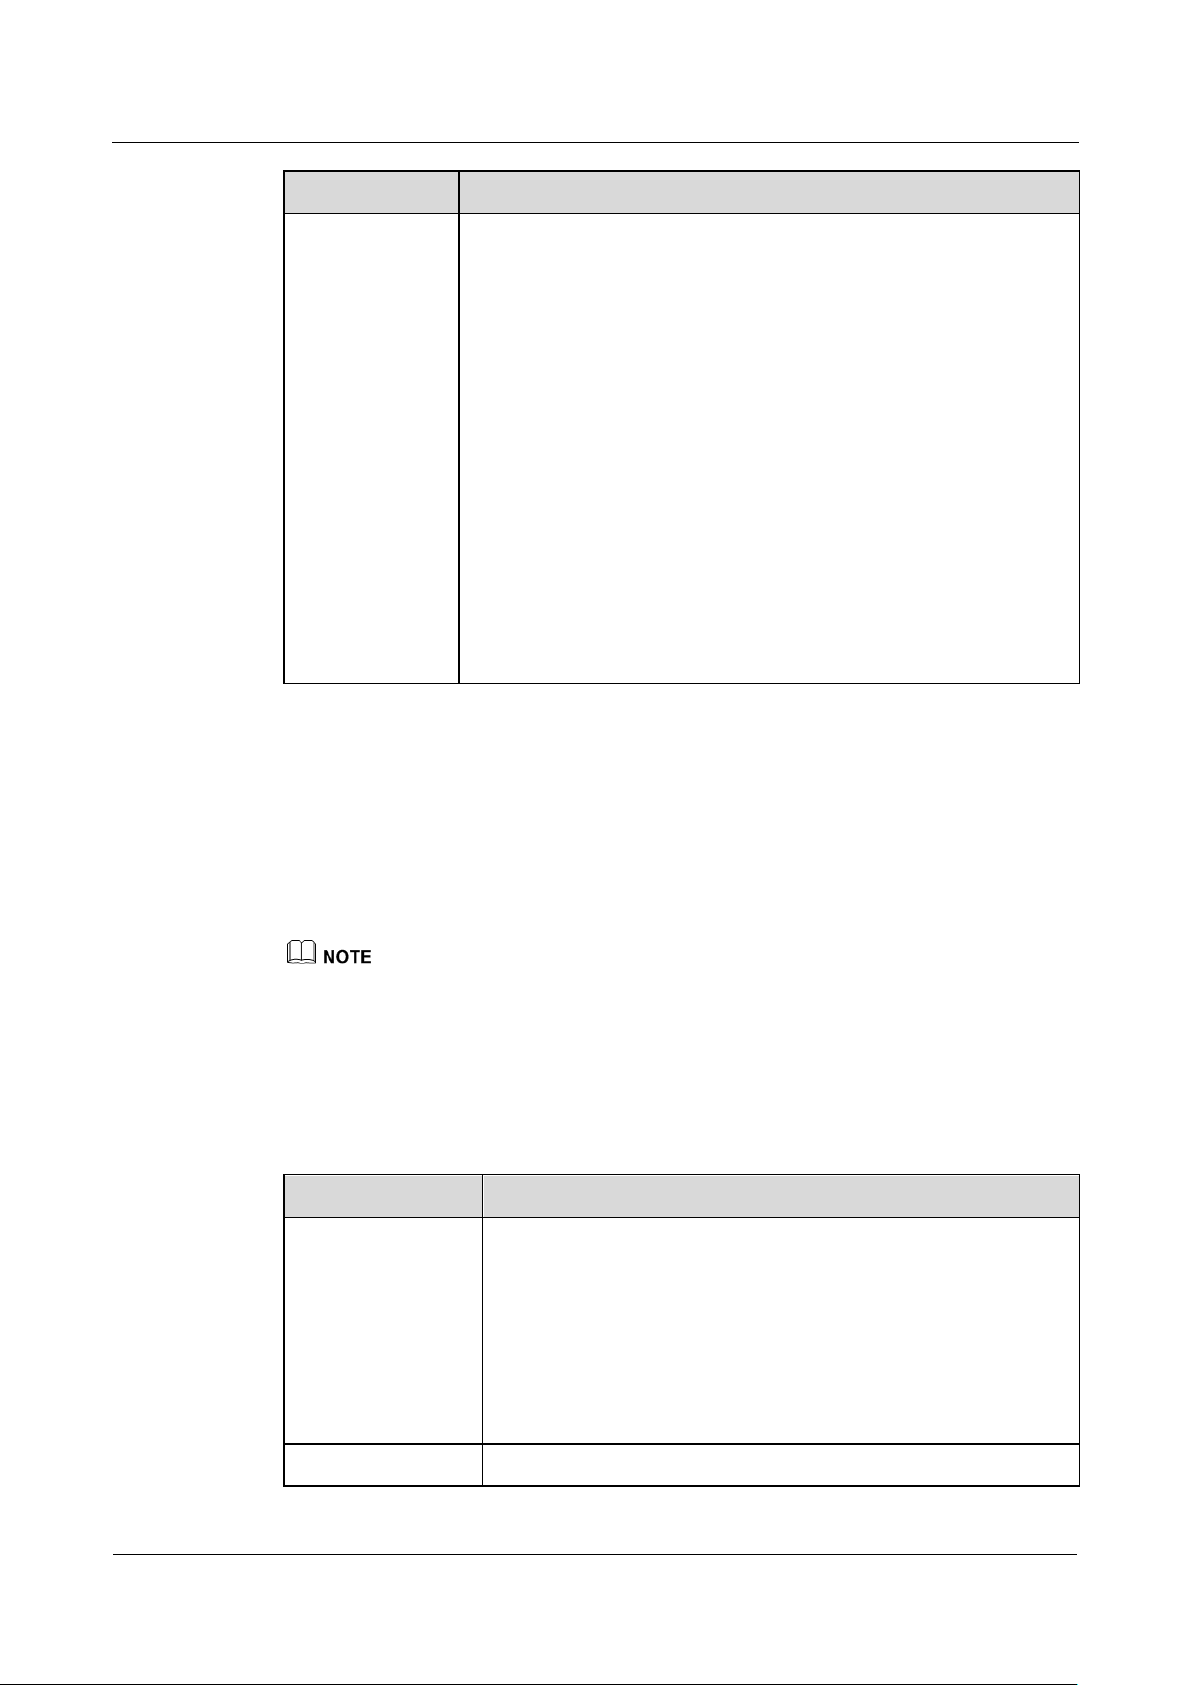
Table 1-2 Description of the indicator status
Status Description
Slow blinking green The terminal is starting up, or the software is
upgrading.
Steady green
Very slow blinking green
Fast blinking green
When the terminal is running, check whether the indicator is green and steady on.
1.4 System Connection
This section describes how to install the system. Please follow these precautions before
connecting:
Before connecting any components, disconnect the power supply.
It is recommended to use the provided power module, power cable, and other cables.
Do not connect the cables with wet hands.
1.4.1 Connecting the Terminal
Connect the system in the sequence – .
The terminal is operating properly.
The terminal is in sleep mode or in a conference.
The terminal is faulty.
Issue 03 (2011-12-10) Huawei Proprietary and Confidential
7
Page 19

HUAWEI VP9050 Executive Video Terminal
User Guide
1 Installation and Preparation
Copyright © Huawei Technologies Co., Ltd
Figure 1-4 Connecting the terminal
Video output: Connect the DVI/VGA OUT interface to the monitor that can be a TV or a
projector.
If the video is to be output to the terminal only, skip this step.
PC video input: Connect the DVI/VGA IN interface to the DVI/VGA output interface on
the PC.
LAN connection: Connect the LAN1 interface to the network interface on the network
device by using the provided network cable.
Power supply connection: Connect the power interface to the power socket by using the
provided power cable and power module.
Issue 03 (2011-12-10) Huawei Proprietary and Confidential
8
Page 20

HUAWEI VP9050 Executive Video Terminal
User Guide
1 Installation and Preparation
Copyright © Huawei Technologies Co., Ltd
If you connect the terminal to a PC, it is recommended to connect the terminal and the PC to two power
sockets that are close to each other.
1.4.2 Connecting the External Devices
Connect the terminal to external devices according to Figure 1-5.
Figure 1-5 Connecting to external devices
You can prepare the headset, external microphone, and audio cables according to your needs.
Connect the cables according to Figure 1-5.
Headset/Microphone jack: If you do not want others to hear the input and output sound
of the terminal, connect the headset jack to a headset and connect the microphone jack to
a microphone.
AUDIO IN jack: If you want to use the terminal as a display and output PC sound,
connect the AUDIO IN jack to the audio output jack on the PC by using an audio cable.
AUDIO OUT jack: If you want to record the sound outputted from the terminal, connect
the AUDIO OUT jack to the input jack of the recording or monitoring device by using an
audio cable.
Issue 03 (2011-12-10) Huawei Proprietary and Confidential
9
Page 21

HUAWEI VP9050 Executive Video Terminal
User Guide
1 Installation and Preparation
Copyright © Huawei Technologies Co., Ltd
1.5 Uncovering the Lens
Do not remove the provided cover of the lens with force.
Do not touch the lens with fingers.
1.6 Starting/Shutting Down the System
Before starting the system, ensure that the power module and power cable are connected to
the corresponding devices properly.
1.6.1 Starting the System
Press the switch on the rear panel of the terminal.
After the terminal is powered on, it displays the startup logo and plays the startup music.
1.6.2 Shutting Down the System
Three modes are available to shut down the terminal:
When the terminal is powered on, you can press the power switch on the rear panel to
power off the terminal.
You can press POWER on the remote control
From the terminal's web interface, choose Maintenance > Shut Down. On the displayed
page, select Shut Down to power off the terminal and its display.
Issue 03 (2011-12-10) Huawei Proprietary and Confidential
10
Page 22

HUAWEI VP9050 Executive Video Terminal
User Guide
2 Touch Panel
Copyright © Huawei Technologies Co., Ltd
(1) Video window
(2)/(3) Operation items
(4) Local IP address
(5) Shortcut menu
(6) Status icon
(7) Display/Hide the shortcut menu
Power on the display and the HUAWEI VP9050. The home screen, as shown in Figure 2-1,
appears after the startup.
Figure 2-1 Home screen
2 Touch Panel
Control the touch panel with the following actions:
Tap: Touch once to select an item or perform functions on a highlighted item.
Slide: Touch and drag your finger leftward and rightward to toggle between the zones
displayed in the center on the home screen, or upwards and downwards to move to items
in lists.
Issue 03 (2011-12-10) Huawei Proprietary and Confidential
11
Page 23

HUAWEI VP9050 Executive Video Terminal
User Guide
2 Touch Panel
Copyright © Huawei Technologies Co., Ltd
All items and buttons support touch operations. The shortcut menu cannot be displayed using
the remote control. However, the remote control has buttons corresponding to the menu items.
The touch panel must be calibrated before use. To calibrate the touch panel:
Step 1 From the home screen, choose Utilities > Touch Panel Calibration.
Step 2 Follow the onscreen instructions to calibrate the screen.
Step 3 Save the settings.
----End
The user interface for performing functions using the touch panel is similar to that using the
remote control. Unless otherwise specified, the operations using the remote control are used
as examples.
Issue 03 (2011-12-10) Huawei Proprietary and Confidential
12
Page 24

HUAWEI VP9050 Executive Video Terminal
User Guide
3 Network Settings
Copyright © Huawei Technologies Co., Ltd
3.1 Using the Settings Wizard
The Wizard can help to set the basic parameters, camera parameters, and network parameters
of the terminal quickly and conveniently.
To use the settings Wizard, do the following:
3 Network Settings
Step 1 From the home screen, select Settings.
Step 2 Choose Installation > Wizard, and then set parameters as required.
For details, see section 3.2 "Setting Basic Parameters", section 3.3.3 "Setting H.323
Parameters", section 3.3.4 "Setting SIP Parameters", and section 4.2.4 "Setting Camera
Output Parameters."
----End
3.2 Setting Basic Parameters
Before using the HUAWEI VP9050, certain basic parameters, such as the site name, system
time, and answering mode of the local site.
To se t the terminal's basic parameters, do the following:
Step 1 Choose Settings > General.
Step 2 Select General, and then set the parameters listed in Table 3-1.
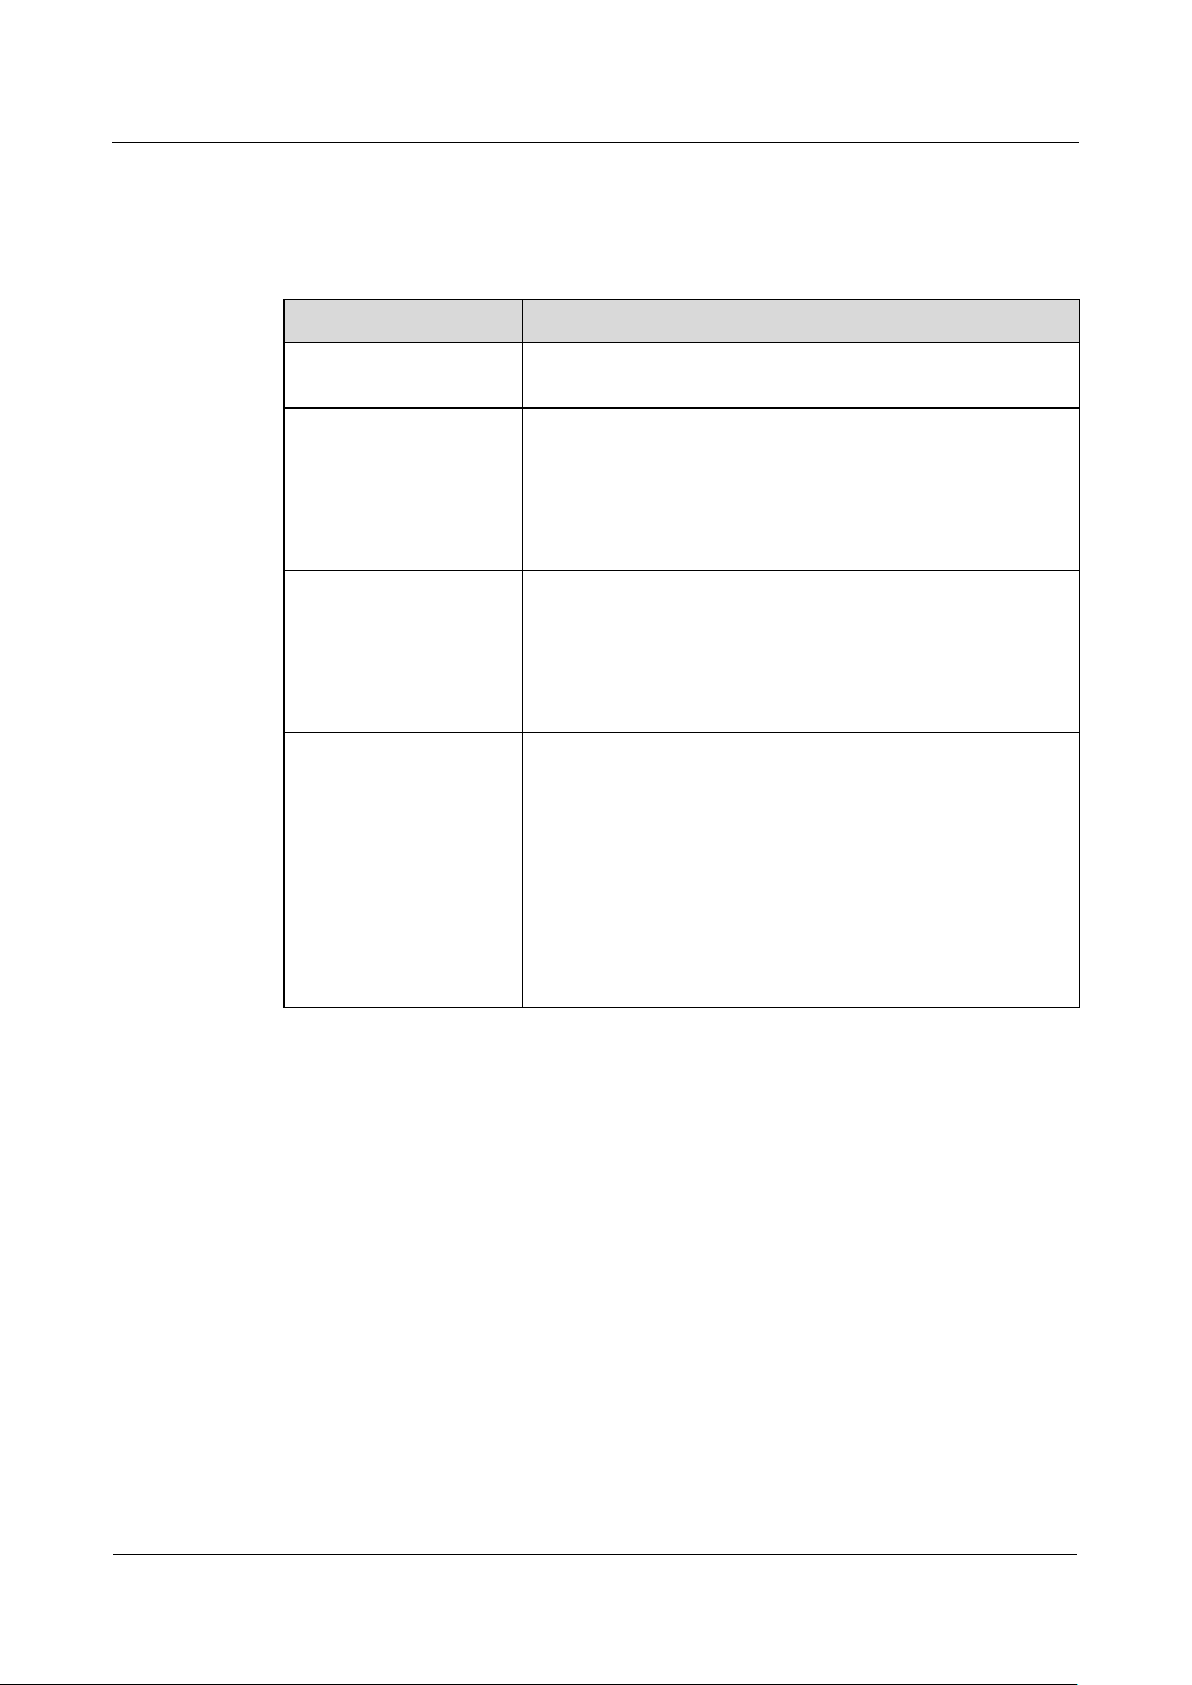
Table 3-1 Basic parameters
Parameter Description
Site name
Location
Issue 03 (2011-12-10) Huawei Proprietary and Confidential
The site name will be superimposed on the local video indicating the
site of the terminal. When the site joins a multipoint conference, the
site name of the terminal is displayed in the conference site list.
This specifies the terminal location. After a location is selected, the
terminal automatically adjusts the time zone to a value that
corresponds to the location.
13
Page 25

HUAWEI VP9050 Executive Video Terminal
User Guide
3 Network Settings
Copyright © Huawei Technologies Co., Ltd
The terminal can be customized for multiple languages. For details, consult the
Parameter Description
Language
Time format
System time
Answer call
automatically
Open to all users
This specifies the language that will be displayed on the screen of the
terminal.
NOTE
local device provider.
This specifies the format in which the time is displayed. You can
select between the 24-hour format and the 12-hour format.
The system time will be the time recorded against events in the
terminal logs; if set correctly, the terminal logs will accurately reflect
the time that events occurred.
If this function is enabled, the terminal answers incoming calls
automatically.
If this function is disabled, when there is an incoming call, the user is
prompted to answer or reject the call using the remote control.
By default, this function is disabled.
This specifies whether to open the Do not disturb function to all
users.
If the Do not disturb function is available to all users, they can select
Utilities from the home screen to display the Utilities screen, and
then select Do Not Disturb (Off) or Do not Disturb (On) to enable
or disable the function.
Called site at
startup
Step 3 Save the settings.
----End
A site that is called particularly often can be set as the Called site at
startup.
This site can be selected from the site list which contains the sites
defined in the address book.
After settings this parameter, you must set Call times.
3.3 Configuring an IP LAN
The IP LAN parameters of the terminal must be set so that the terminal can communicate with
other network devices.
3.3.1 Status Indicators of the LAN Interface
The status indicators on the LAN interface can quickly provide information about the current
network connection.
There are two indicators working together to indicate the network connection, as shown in
Table 3-2.
Issue 03 (2011-12-10) Huawei Proprietary and Confidential
14
Page 26

HUAWEI VP9050 Executive Video Terminal
User Guide
3 Network Settings
Copyright © Huawei Technologies Co., Ltd
Table 3-2 Status indicators of the LAN interface
Indicator Status Connection Status
The orange indicator is off.
The orange indicator is on.
The green indicator blinks.
The green indicator is off.
3.3.2 Setting IP Parameters
The IP parameters of the terminal must be set to allow video communications over an IP
LAN.
To set the terminal's IP parameters, do the following:
Step 1 Choose Settings > Network > IP, and then set the parameters listed in Table 3-3.
Table 3-3 IP parameters
Parameter Description
The LAN interface is in 10 M network interface
mode.
The LAN interface is in 100 M network interface
mode.
Data is being transmitted. The green indicator turns
off each time a frame of data has been transmitted.
No data is being transmitted or the network is not
reachable.
Connection type
Local IP address
Subnet mask
Alternate IP
address
Alt. subnet mask
DNS server
address
Static IP: The IP address of the terminal is assigned by the network
administrator. If this mode is selected, you must enter the local IP
address, subnet mask, and gateway IP address.
Dynamic IP: The terminal automatically obtains the IP address from
the network. If this mode is selected, you do not need to set other
parameters.
PPPoE: The terminal accesses the broadband network in dial-up
mode, such as the Asymmetric Digital Subscriber Line (ADSL). If
the Point-to-Point Protocol over Ethernet (PPPoE) mode is selected,
you must set the user name and the password.
These specify the IP address and subnet mask of the terminal.
The main IP address and the alternate IP address must be in different
network segments. The alternate IP address and the IP address of the
gatekeeper (GK) must be in different network segments.
If the connection type is set to Static IP, the IP address of the domain
name service (DNS) server is available to be set. After the IP address
of the DNS server is set, domain names can be used for the GK server
address and the SIP server address. The DNS server will translate the
domain name to the IP addresses of the GK server and the SIP server.
Issue 03 (2011-12-10) Huawei Proprietary and Confidential
15
Page 27
HUAWEI VP9050 Executive Video Terminal
User Guide
3 Network Settings
Copyright © Huawei Technologies Co., Ltd
Parameter Description
Network interface
mode
This specifies the working mode of both the network interfaces of the
terminal.
Auto detection: When accessing the network, the terminal
automatically communicates with the remote network device to
determine the best network mode.
10 Mbit/s and half duplex: The transmission rate is 10 Mbit/s. Data
cannot be sent and received at the same time.
10 Mbit/s and full duplex: The transmission rate is 10 Mbit/s. Data
can be sent and received at the same time.
100 Mbit/s and half duplex: The transmission rate is 100 Mbit/s.
Data cannot be sent and received at the same time.
100 Mbit/s and full duplex: The transmission rate is 100 Mbit/s.
Data can be sent and received at the same time.
TIP
If the working mode of the network interface of the remote network device is
not known, set this parameter to Auto detection. Otherwise, the terminal may
fail to access the network properly.
Step 2 Select Save to save the settings.
----End
3.3.3 Setting H.323 Parameters
The H.323 parameters must be set when the GK is used in the conference system.
The GK is the network isolator of the videoconferencing system and is used to manage the network
bandwidth, terminal authentication, and address translation. It enables calls to be made to fixed site
names and not to variable IP addresses.
To set the terminal's H.323 parameters, do the following:
Step 1 Choose Settings > Network > IP > H.323, and then set the parameters listed in Table 3-4.
Table 3-4 H.323 parameters
Parameter Description
Enable GK This specifies whether the terminal registers with the GK.
If this parameter is enabled, the terminal registers with the GK
after startup. After the terminal registers with the GK
successfully, it can call a remote site using the site number, site
name (defined in the address book), or IP address. For a
conference attended by IP sites, the GK must be used.
If this parameter is disabled, the terminal does not register with
the GK, and it can call a remote site using only the IP address.
GK address This specifies the IP address of the server where the GK is installed.
Issue 03 (2011-12-10) Huawei Proprietary and Confidential
16
Page 28
HUAWEI VP9050 Executive Video Terminal
User Guide
3 Network Settings
Copyright © Huawei Technologies Co., Ltd
Parameter Description
E1.64
H.323 ID
Password
Use VoIP gateway
VoIP gateway
address
Step 2 Save the settings.
----End
This specifies the site number of a terminal. This number can be
used to call the corresponding terminal if the terminal is registered
with the GK. The site number can contain only digits.
This specifies the name that is used by the GK to identify a terminal
registered with it.
The name can consist of digits and letters.
This specifies the password used by a terminal to register with the
GK. The GK authenticates the validity of a terminal by checking
this password.
NOTE
For successful GK authentication, the password set on the terminal should be
the same as the preset password on the GK.
If Use VoIP gateway is selected, VoIP gateway address must be
set. Then you can place calls to terminals connected to the VoIP
gateway.
3.3.4 Setting SIP Parameters
When the Session Initiation Protocol (SIP) is used for video communications, the SIP
parameters of the terminal, such as whether to register with the SIP server, must be set.
To set the terminal's SIP parameters, do the following:
Step 1 Choose Settings > Network > IP > SIP, and then set the parameters listed in Table 3-5.
Table 3-5 SIP parameters
Parameter Description
Register with server This specifies whether the terminal registers with the SIP server.
Enable: After the terminal is registered with the SIP server
successfully, it can call a remote site using the site number, site
name, or IP address.
Disable:The terminal does not register with the SIP server, and it
can call another site using only the IP address.
Server address This specifies the IP address of the SIP server.
Issue 03 (2011-12-10) Huawei Proprietary and Confidential
17
Page 29

HUAWEI VP9050 Executive Video Terminal
User Guide
3 Network Settings
Copyright © Huawei Technologies Co., Ltd
Parameter Description
Enable proxy server
Proxy server address
Conference Service
Number
Site number
User name
Password
When the terminal needs to register with the IP multimedia
subsystem (IMS) for deploying services, enable the proxy server
and set its address.
NOTE
Borne by the standard IP protocol, the IMS uses voice over IP (VoIP)
applications based on the standard SIP applications of the 3rd Generation
Partnership Project (3GPP) to provide fixed and mobile multimedia services
for operators.
The proxy server needs to forward the registration request from the
terminal to the SIP server in the IMS network when the terminal is
registering with the IMS network.
Before initiating a conference from the terminal on an IMS
network, you must set this parameter and ensure that the terminal
setting is consistent with the setting on the IMS network device.
The conference service number can be obtained from the
administrator of the IMS network device.
This specifies the site number of the local terminal. When the local
terminal is registered with the SIP server, another terminal can call
the local terminal using this site number. The site number can
contain only digits.
The user name is used by the SIP server to identify the local
terminal after the terminal is registered with the SIP server. The
user name and the password can contain only digits and letters.
Step 2 Save the settings.
----End
3.3.5 Setting SNMP Parameters
When the terminal needs to be managed by the MediaManager remotely, the Simple Network
Management Protocol (SNMP) parameters of the terminal must be set.
The terminal communicates with the ViewPoint MediaManager (MediaManager for short),
which is the software for managing network elements over SNMP. Considered as a network
element, the terminal is managed by the MediaManager remotely. Using the MediaManager,
the following operations can be performed on the terminal:
Setting terminal parameters, such as IP parameters, H.323/SIP parameters, E1/4E1
parameters, firewall parameters, network address book parameters, video input
parameters, video output parameters, audio input parameters, and whether to enable Web
access
Importing records to or exporting records from the network address book
Querying terminal status
Querying the terminal alarms
Diagnosing the network faults on the terminal
Restarting or upgrading the terminal
Issue 03 (2011-12-10) Huawei Proprietary and Confidential
18
Page 30
HUAWEI VP9050 Executive Video Terminal
User Guide
3 Network Settings
Copyright © Huawei Technologies Co., Ltd
To set the terminal's SNMP parameters, do the following:
Step 1 Choose Settings > Network > IP > SNMP, and then set the parameters listed in Table 3-6.
Table 3-6 SNMP parameters
Parameter Description
Enable SNMP
Get community name
Set community name
Trap server address 1
Trap server address 2
Trap server address 3
Enabling SNMP allows the administrator to manage the
terminal remotely using the MediaManager.
This specifies the read-only SNMP community name. The
character string can consist of any characters on the keyboard
and its length ranges from 0 to 32 characters. The SNMP
version and the corresponding protocol parameters on the
network management side need to be consistent with those on
the terminal side.
This specifies the read-write SNMP community name. The
character string can consist of any characters on the keyboard
and its length ranges from 0 to 32 characters. The SNMP
version and the corresponding protocol parameters on the
network management side need to be consistent with those on
the terminal side.
This specifies the IP address that receives trap packets and is
the IP address of the computer where the service client of the
videoconferencing network management system is installed.
A trap is a message sent from a device being managed (for
example, a terminal) to the videoconferencing network
management system. The message is used to report emergent
and important events. Trap packets are sent to a preset target
trap device.
For details about the videoconferencing network management
system, see the HUAWEI iManager V2000 User Manual.
Step 2 Save the settings.
----End
3.3.6 Setting QoS Parameters
You can configure quality of service (QoS) settings to set the mode of processing IP data
packets in a conference call.
To set the terminal's QoS parameters, do the following:
Step 1 Choose Settings > Network > IP > QoS, and then set the parameters listed in Table 3-7.
Issue 03 (2011-12-10) Huawei Proprietary and Confidential
19
Page 31

HUAWEI VP9050 Executive Video Terminal
User Guide
3 Network Settings
Copyright © Huawei Technologies Co., Ltd
Table 3-7 QoS parameters
Parameter Description
QoS type Select either of the following:
Priority: If this option is selected, set the IP priority and the service
type.
DiffServ: If this option is selected, set the Differentiated Services
Code Point (DSCP).
IP priority
Service type
DSCP
This specifies the priority of data packets sent by the terminal and
forwarded by a network device. The value ranges from 0 to 7. The
higher the value, the higher the priority.
The network provides five types of service for the terminal to send
and receive data packets.
Normal: The network devices transmit the data packets without
special processing.
Minimum delay: The data packets are transmitted at the highest
rate with minimum delay.
Maximum throughput: A large amount of data packets can be
transmitted on the network.
Highest reliability: The data packets can be transmitted to the
remote site completely and correctly.
Minimum cost: The data packets of equal traffics are transmitted at
the minimum cost.
This specifies the service level of data packets sent by the terminal
during transmission.
The value ranges from 0 to 63. The higher the value, the higher the
service level.
Step 2 Save the settings.
----End
3.3.7 Setting Firewall Parameters
Ensure that the firewall settings are applicable to the H.323 videoconferencing system.
Otherwise, the system and the firewall will need to be configured to allow the video
conference to pass the firewall.
Using Network Address Translation (NAT) technology, a device within the LAN can use a
dedicated internal IP address and an external IP address that can be used for communication
with external devices. If your LAN uses NAT technology, set the IP address of the NAT public
network for the terminal.
To set the terminal's firewall parameters, do the following:
Step 1 Choose Settings > Network > IP > Firewall, and then set the parameters listed in Table 3-8.
Issue 03 (2011-12-10) Huawei Proprietary and Confidential
20
Page 32

HUAWEI VP9050 Executive Video Terminal
User Guide
3 Network Settings
Copyright © Huawei Technologies Co., Ltd
Table 3-8 Firewall parameters
Parameter Description
Enable H.460
Use NAT
NAT address
Port settings
H.323 call port
RAS source port
The private network accesses the public network using the NAT
device. Therefore, if the terminal is installed in the private network,
you must select one of the following options as required so that the
terminal can call the videoconferencing system or other terminals in
the public network:
When the terminal communicates with the other vendors devices,
select Enable H.460.
When the Terminal communicates with the Huawei devices, select
Use NAT or Enable H.460.
If Use NAT is selected, set the IP address of the terminal in the
public network.
Normal: All the port numbers cannot be changed.
Port convergence: The port numbers used in H.323 converge, to
efficiently save port resources.
Same port send/receive: The terminal sends and receives media
streams using the same port.
This specifies the communication port used by a remote site for
receiving and sending call signaling during communication between
local and remote sites. The default value is 1720.
This specifies the communication port used by the local site for
receiving and sending Registration, Admission and Status (RAS)
signaling during communication between local and remote sites. The
default value is 1719.
RAS destination
port
Audio port
Video port
SIP call port
Local listen port
Server listen port
Step 2 Save the settings.
This specifies the communication port used by a remote site for
receiving and sending RAS signaling during communication between
local and remote sites. The default value is 1719.
This specifies the communication port used by the local site for
receiving audio packets during communication between local and
remote sites. The default value is 10002.
This specifies the communication port used by the local site for
receiving video packets during communication between local and
remote sites. The default value is 10004.
This specifies the communication port used by the local site for
receiving and sending SIP call signaling during communication
between local and remote sites. The default value is 5060.
This specifies the local SIP listen port of the terminal. The default
value is 5060.
This specifies the listen port of the SIP server with which the
terminal is registered. The default value is 5060.
Issue 03 (2011-12-10) Huawei Proprietary and Confidential
21
Page 33

HUAWEI VP9050 Executive Video Terminal
User Guide
3 Network Settings
Copyright © Huawei Technologies Co., Ltd
----End
3.3.8 Setting Network Diagnostics Parameters
Before a network tool can be used to diagnose the terminal using terminal ports, the relevant
port settings must be configured.
Step 1 Choose Settings > Network > IP > Network diagnostics.
Set H.323 call port, RAS source port, RAS destination port, and SIP call port.
After Check network connection automatically after exiting conference is enabled,
the terminal automatically performs ping operations after exiting a conference to check
the connections on the network where the terminal is located. The diagnostic results can
be viewed from logs.
The names of the ports set in this section are the same as those of certain ports set in Table 3-8 of section
3.3.7 "Setting Firewall Parameters." Their functions, however, are different. The ports in this section are
used for network diagnostics and the ports in section 3.3.7 "Setting Firewall Parameters" are used for
calling.
Step 2 Save the settings.
----End
3.4 Configuring the 3G Network
Before setting the 3G parameters, ensure that the terminal license supports 3G networks. For
details about how to check whether the terminal license supports 3G networks, see section
13.1.4 "Viewing the System Information."
3.4.1 Inserting a 3G Data Card
To use the terminal for video communications over a 3G network, a 3G data card must be
inserted into the terminal's USB port.
The 3G data card used with the terminal must be provided by Huawei. For details, contact the supplier.
If a 3G data card has been inserted and if the license of the terminal provides 3G data card
functions, the terminal performs detection as follows:
If the data card is a designated Huawei data card, the terminal detects it automatically,
and a message appears on the screen indicating that a data card is available.
If the data card is not a designated Huawei data card, the terminal fails to detect it, and a
message appears on the screen indicating that no data card is available.
The terminal supports only one 3G data card at a time. If multiple 3G data cards are inserted,
the terminal uses only the first data card that is ready and does not use the others.
When you insert or remove a data card, the following icons appear on the upper right corner
of the screen:
Issue 03 (2011-12-10) Huawei Proprietary and Confidential
indicates that a data card is connected to the terminal.
22
Page 34

HUAWEI VP9050 Executive Video Terminal
User Guide
3 Network Settings
Copyright © Huawei Technologies Co., Ltd
indicates that a data card has been removed, or the network connection of the data
card is faulty.
3.4.2 Setting 3G Parameters
To set the terminal's 3G parameters, do the following:
Step 1 Choose Settings > Network > 3G > 3G Settings, and then set the parameters listed in Table
3-9.
Table 3-9 3G parameters
Parameter Description
Enable 3G
network
IP address
type
IP address
After enabling the 3G network, you can initiate an H.323 or SIP video
conference using the terminal over the 3G network.
This specifies the mode for obtaining an IP address. The default value is
Dynamic. It is recommended that you use the default value.
Dynamic: The terminal obtains an IP address dynamically and
automatically from the network.
Static: The terminal uses an assigned IP address to connect to a specific
server.
If IP address type is set to Dynamic, the IP address assigned by the
server is displayed in this text box only after a Point to Point Protocol
(PPP) connection is established successfully. After being registered with
the GK using the assigned IP address, the terminal can call remote sites
using the relevant numbers, names, or IP addresses over the 3G network.
If IP address type is set to Static, you can enter the IP address
manually.
Authenticatio
n mode
When the terminal is connected to a 3G network in PPP dial-up mode, the
authentication mode can be set to PAP or CHAP to prevent the access by
unauthorized users. The default value is CHAP. It is recommended that
you use the default value.
If you set the authentication mode to password authentication protocol
(PAP), the user name and the password are transmitted over the network
using plaintext. If the user name and the password are captured during
transmission, the network security is at great risk. Therefore, you can use
the PAP mode when the network security requirement is comparatively
lower.
If you set the authentication mode to the Challenge-Handshake
Authentication Protocol (CHAP), only the user name is transmitted over
the network. Therefore, this authentication mode provides a higher
security level than the PAP mode. In CHAP authentication mode, each
inquiry message for authentication is unpredictable and unique,
preventing recurring network attacks.
Issue 03 (2011-12-10) Huawei Proprietary and Confidential
23
Page 35

HUAWEI VP9050 Executive Video Terminal
User Guide
3 Network Settings
Copyright © Huawei Technologies Co., Ltd
Parameter Description
Dialing mode The default value is Manual.
Auto: If this option is selected, the terminal initiates a PPP dial-up
connection automatically. The billing system starts charging after the
dial-up connection is established successfully. If you use the monthly fee
mode, using the automatic mode for the PPP dial-up connection is
recommended.
Manual: If this option is selected, the terminal does not initiate the PPP
dial-up connection automatically. If you pay the fee based on connection
duration, using the manual mode for the PPP dial-up connection is
recommended.
Step 2 Save the settings.
----End
3.4.3 Setting 3G Dial-up Parameters and Establishing a Dial-up Connection
Step 1 Choose Settings > Network > 3G > 3G Dialing, and then set the parameters listed in Table
After a PPP dial-up connection is established, the terminal can obtain the IP address allocated
by the server and can make calls over the 3G network.
Before connecting to the 3G network, ensure that:
The terminal is connected with a 3G data card successfully.
The 3G network is enabled.
To set the terminal's 3G dial-up parameters, do the following:
3-10.
Table 3-10 3G dial-up parameters
Parameter Description
Switch to
3G network
USB device
This specifies the 3G network operator.
Click Search to search for the existing 3G network operators.
This specifies the type of the data card. The available options are Wideband
Code Division Multiple Access (WCDMA) and CDMA2000.
APN
This specifies the name of the network access point. If a WCDMA data card
is used, you must set this parameter.
For details, contact your operator.
Number
Issue 03 (2011-12-10) Huawei Proprietary and Confidential
This specifies the number used to connect to the 3G network. If a WCDMA
data card is used, you must set this parameter.
For details, contact your operator.
24
Page 36

HUAWEI VP9050 Executive Video Terminal
User Guide
3 Network Settings
Copyright © Huawei Technologies Co., Ltd
Parameter Description
User name
Password
Step 2 Save the settings.
----End
After setting 3G dial-up parameters, do the following to establish a 3G dial-up connection:
From the home screen, choose Utilities > 3G Dialing > Connect. The server allocates an IP
address to the terminal after the dial-up connection is established.
To query the terminal's IP address, choose Settings > Network > 3G. The IP address displayed on the
screen is the one allocated by the server.
These specify the user name and password used to connect to the 3G
network.
For details, contact your operator.
Issue 03 (2011-12-10) Huawei Proprietary and Confidential
25
Page 37

Page 38

HUAWEI VP9050 Executive Video Terminal
User Guide
4 Video Settings
Copyright © Huawei Technologies Co., Ltd
4 Video Settings
4.1 Configuring the Built-In Camera
The terminal has a built-in camera on its top. The camera presets and other parameters cannot
be set from the web interface or from the user interface controlled by the remote control.
When the local video is displayed, however, you can manually rotate the lens to obtain the
optimal video quality.
You must configure the video output parameters of the built-in camera for better video effects.
To set the video output parameters of the built-in camera, do the following:
Step 1 Choose Settings > Video > Video Output.
Step 2 Select LCD.
LCD is the output interface of the built-in camera.
Step 3 Set the video output parameters listed in Table 4-1.
Table 4-1 Video output parameters
Parameter Description
Stretch mode
The terminal adjusts the input video based on the encoding format
of the video.
Stretch: Stretch the video to full-screen mode without locking
the aspect ratio of the video.
No stretch: Stretch the video to full-screen mode after locking
the aspect ratio of the video. Black borders may appear at the
four sides of the video display.
Intelligent stretch: The system cuts the video to a proper size,
and then stretches the video to full-screen mode after locking the
aspect ratio. For example, to change a wide-screen video to a
narrow-screen video, the system cuts the left and right sections
of the wide-screen video, and then stretches the video to
full-screen mode.
Display local video
Display remote video
Display H.239
Issue 03 (2011-12-10) Huawei Proprietary and Confidential
This specifies the content displayed on the interface. You can
choose between local video, remote video, local presentation, and
remote presentation.
27
Page 39

HUAWEI VP9050 Executive Video Terminal
User Guide
4 Video Settings
Copyright © Huawei Technologies Co., Ltd
Parameter Description
Display H.239
automatically
Small window
position
Step 4 Save the settings.
----End
This specifies whether the presentation is output from the LCD
interface automatically.
Only the LCD interface supports this function.
This specifies the position of the small window displayed on the
main screen. The small window can be displayed in the lower right
corner, lower left corner, upper right corner, or upper left corner.
By default, the small window is displayed in the lower right
corner.
To switch the layout to picture-in-picture mode, choose either of
the following methods:
From the option bar, select Layout and then .
Press on the remote control consecutively until the layout
is switched to picture-in-picture mode.
4.2 Configuring the External Camera
In addition to the built-in camera, the terminal can also be connected to an external camera.
You can control a camera connected to the terminal and configure camera presets.
4.2.1 Getting to Know the Video Input Interface
The terminal supports various camera models, such as SONY EVI-HD1, CANON V50,
HUAWEI HD camera.
Table 4-2 describes the specifications of the video input interface.
Table 4-2 Specifications of the video input interface
Video Input
Interface
DVI/VGA IN DVI-I DVI, VGA, and YPrPb Camera PTZ
PTZ is an acronym for Pan, Tilt, and Zoom. A PTZ camera supports panning, tilting, and zooming
control.
Type Receivable Input Format Control
4.2.2 Getting to Know the Video Output Interface
When connecting displays to the terminal, choose cables based on the relevant interfaces.
Issue 03 (2011-12-10) Huawei Proprietary and Confidential
28
Page 40

HUAWEI VP9050 Executive Video Terminal
User Guide
4 Video Settings
Copyright © Huawei Technologies Co., Ltd
Table 4-3 describes the specifications of the video output interfaces of the terminal. The
display contents vary with the interfaces to which the displays are connected. In the following
table, ① indicates local video; ② indicates local presentation; ③ indicates remote video;
④ indicates remote presentation.
Table 4-3 Specifications of the video output interface
Video Output
Interface
Interface
Type
Output
Format
Video
Displayed
Whether User
Interface Can Be
Displayed
DVI/VGA
OUT
DVI-I
DVI, VGA,
and YPrPb
①②③④
Yes
Use the cable that is provided to connect a display to the terminal based on the content to be
displayed and the interface on the display.
Please use the cables provided along with the terminal. Other cables may not be able to ensure the
desired quality. It is recommended that you contact the device supplier to purchase the relevant cables.
Table 4-4 Interfaces and cables
Interface → Format Required by a
Cable to Be Used
Display
DVI-I interface → DVI format DVI extension cable
DVI-I interface → SXGA/VGA
DVI-SXGA cable
format
DVI-I interface → YPrPb format DVI-YPrPb (component video) cable
4.2.3 Setting Camera Input Parameters
When cameras of certain models are used along with the terminal, the parameters for these
cameras must be set. For details about how to install and operate a camera, see the documents
provided in the camera package.
To set the input parameters of a camera connected to the terminal, do the following:
Step 1 Choose Settings > Video > Video Input.
Step 2 Select DVI/VGA IN.
Step 3 Set the parameters listed in Table 4-5.
Table 4-5 Camera input parameters
Parameter Description
Camera name
This specifies the name of a camera. During a conference, you can
switch between cameras based on their names.
Issue 03 (2011-12-10) Huawei Proprietary and Confidential
29
Page 41

HUAWEI VP9050 Executive Video Terminal
User Guide
4 Video Settings
Copyright © Huawei Technologies Co., Ltd
Parameter Description
Camera type
This specifies the type of the camera connected. The terminal supports
camera models from multiple manufacturers. The control commands
vary with different cameras. Therefore, select the camera type
correctly to ensure that the camera can be controlled properly.
Serial port
This specifies the serial port that is connected to the camera control
interface. You can select either COM1 or None.
Select the serial port that is being used. Otherwise, the camera cannot
be controlled.
Initial position
If Auto is selected, the camera automatically determines its initial
position after startup. Generally, the camera keeps its original
position.
If camera presets have been defined, such as Preset 1, the presets
can be selected. Then the camera moves to the corresponding preset
after startup.
Moving speed
This specifies the speed for turning the camera and moving the camera
lens.
Select Slow for accurate positioning.
Select Fast for quick positioning.
Select Medium for medium pace positioning.
Input source This specifies the input source resolution.
Mirroring
Stretch mode
This specifies whether the terminal displays a reflection of an input
video, wherein the right and left sides of the original are reversed. By
default, Normal is selected. If the terminal is used in a Huawei
telepresence system, select Horizontal mirroring.
Normal: The input video will not be reversed.
Horizontal mirroring: The terminal displays a reflection of the
input video, wherein the right and left sides of the original are
reversed like the reflection of something seen in a mirror.
The terminal adjusts the input video based on the encoding format of
the video.
Stretch: Stretch the video to full-screen mode without locking the
aspect ratio of the video.
No stretch: Stretch the video to full-screen mode after locking the
aspect ratio of the video. Black borders may appear at the four sides
of the video display.
Intelligent stretch: The system cuts the video to a proper size, and
then stretches the video to full-screen mode after locking the aspect
ratio. For example, to change a wide-screen video to a
narrow-screen video, the system cuts the left and right sections of
the wide-screen video, and then stretches the video to full-screen
mode.
Issue 03 (2011-12-10) Huawei Proprietary and Confidential
30
Page 42

HUAWEI VP9050 Executive Video Terminal
User Guide
4 Video Settings
Copyright © Huawei Technologies Co., Ltd
Table 4-6 Common settings parameter
Parameter Description
Remote control
This specifies whether a remote site can control the local camera
during a call. By default, Allow is selected.
Serial port type
This specifies the type of the serial port of the camera that is
connected to the terminal. You can select between RS232 and RS422.
The COM serial ports on the rear panel of the terminal are dual-mode
ports that can be used as both RS232 and RS422 interfaces.
Step 4 Save the settings.
----End
4.2.4 Setting Camera Output Parameters
When cameras of certain models are used along with the terminal, the parameters for these
cameras must be set. For details about how to install and operate a camera, see the documents
provided with the camera.
To set the output parameters of a camera connected to the terminal, do the following:
Step 1 Choose Settings > Video > Video Output.
Step 2 Select DVI/VGA OUT.
Step 3 Set the parameters listed in Table 4-7.
Table 4-7 Camera output parameters
Parameter Description
Name
This specifies the name of an output interface to simplify identifying
and using the interface during a conference.
Output mode This specifies the format of the video received by the display.
VGA: Select this option if connecting the display to a DVI/VGA
OUT interface using a DVI-SXGA conversion cable.
DVI: Select this option if connecting the display to a DVI/VGA
OUT interface using a DVI extension cable.
YPrPb: Select this option if connecting the display to a DVI/VGA
OUT interface using a DVI-YPrPb conversion cable.
Video resolution For details about how to set the video resolution, see Table 4-10.
Refresh rate For details about how to set the refresh rate, see Table 4-11.
Issue 03 (2011-12-10) Huawei Proprietary and Confidential
31
Page 43

HUAWEI VP9050 Executive Video Terminal
User Guide
4 Video Settings
Copyright © Huawei Technologies Co., Ltd
Parameter Description
Stretch mode This specifies whether to adjust a video to fit the video into the screen.
Stretch: The aspect ratio can be changed.
No stretch: The aspect ratio remains unchanged.
Intelligent stretch: The system cuts the video to a proper size, and
then stretches the video to full-screen mode after locking the aspect
ratio. For example, to change a wide-screen video to a
narrow-screen video, the system cuts the left and right sections of
the wide-screen video, and then stretches the video to full-screen
mode.
Display local
video
Display remote
video
Display H.239
Table 4-8 Common settings parameter
Parameter Description
GUI
Step 4 Save the settings.
----End
This specifies the content displayed on the interface. You can choose
between local video, remote video, local presentation, and remote
presentation.
During a conference, you can display the video on one display and the
user interface on another display by setting GUI to the output
interface that has been connected to the display dedicated for
displaying the user interface. In this case, the user interface will not
cover the conference video. By default, the LCD interface is selected.
4.3 Selecting and Controlling a Camera
4.3.1 Selecting a Camera
To control a camera, first select the camera.
If the terminal is not in a conference, only the local camera can be controlled. If the terminal
is in a conference, both the local and remote cameras can be controlled.
To select a camera to be controlled, do the following:
Step 1 Press twice consecutively, and then select Select camera.
Step 2 Select the camera to be controlled from remote cameras and the camera connected to the
terminal.
The text on the upper left corner indicates the camera (local or remote) that is currently being controlled.
Issue 03 (2011-12-10) Huawei Proprietary and Confidential
32
Page 44

HUAWEI VP9050 Executive Video Terminal
User Guide
4 Video Settings
Copyright © Huawei Technologies Co., Ltd
----End
4.3.2 Adjusting the Focal Length of a Camera
You can change the magnification of distant objects by adjusting the focal length of the
corresponding camera. This function is not available on the touch panel.
To adjust the focal length of a camera, do the following:
Step 1 Press twice consecutively, and then select Adjust Focus.
Step 2 Adjust the focal length as required.
When adjusting the focal length, press the up and down arrow keys to switch between local and remote
cameras. The text on the upper left corner indicates the camera (local or remote) that is currently being
controlled.
----End
4.3.3 Controlling a Camera
You can exercise PTZ control over a camera connected to the terminal or a remote camera.
Before you use PTZ functions, ensure that the Video System Control Architecture (VISCA)
cable is connected to the COM interface of the terminal properly and that the relevant
configuration is correct.
To control a camera, do the following:
Step 1 Press twice consecutively, and then select Camera Control.
Step 2 From the camera control screen, you can:
Press to switch between local and remote cameras. The text on the upper left
corner indicates the camera that is currently being controlled (local or remote).
Press arrow keys to turn the camera lens.
Press to zoom in or to zoom out. This zooming in or zooming out function is
not available on the touch panel.
----End
4.4 Saving and Using Camera Presets
A camera preset refers to pre-saved camera configurations. Each camera preset saves the
zooming level and direction of the camera.
If a camera supports pan, tilt, and zoom (PTZ) functions, you can create a maximum of nine
camera presets. Each camera preset saves the camera number, zooming level, and camera
direction. A camera preset remains valid until you delete it or change it.
Table 4-9 describes the features of camera presets.
Issue 03 (2011-12-10) Huawei Proprietary and Confidential
33
Page 45

HUAWEI VP9050 Executive Video Terminal
User Guide
4 Video Settings
Copyright © Huawei Technologies Co., Ltd
Table 4-9 Features of camera presets
Terminal
Local 9 No
Remote 6 Yes
Number of Camera
Presets
4.4.1 Saving a Camera Preset
If you select a number to save a camera preset and if another camera preset is already saved to
that number, the new camera preset replaces the original one.
To save a camera preset, do the following:
Step 1 Select a camera, and then adjust the camera.
Step 2 Press , and then select Save Preset. Scroll to a number by pressing arrow keys, and then
press to save the camera preset.
----End
4.4.2 Moving a Camera to a Preset
Whether Data Is Lost After
Restart
After you move a camera to a preset, the camera automatically adjusts its zooming level and
direction to the preset values.
To move a camera to a preset, do the following:
Step 1 Press , and then select Select Position.
Step 2 Scroll to a camera preset by pressing arrow keys, and then press to move the camera to
the corresponding preset.
----End
4.4.3 Deleting All Camera Presets
If the camera presets saved on the terminal are no longer required, they can be deleted.
All the camera presets saved on the terminal can be deleted at the same time; however, the
presets cannot be deleted one at a time.
To delete all camera presets, do the following:
Step 1 Press , and then select Delete All Camera Presets.
Step 2 Confirm that you want to delete all camera presets as prompted.
----End
Issue 03 (2011-12-10) Huawei Proprietary and Confidential
34
Page 46

HUAWEI VP9050 Executive Video Terminal
User Guide
4 Video Settings
Copyright © Huawei Technologies Co., Ltd
4.5 Setting the Video Resolution and Refresh Rate
After the terminal is properly connected, video output parameters must be set to obtain the
desired video quality. Table 4-10 describes the video resolutions available in each output
mode.
Table 4-10 Video resolutions available in each output mode
Output Mode Video Resolution
VGA 800 x 600, 1024 x 768, 1280 x 1024, 720p
DVI 800 x 600, 1024 x 768, 1280 x 1024, 720p, 1080p, 1080i
YPrPb 720p, 1080p, 1080i
DVI(AUDIO) 720p, 1080p, 1080i
DVI+VGA 800v600, 1024 x 768, 1280 x 1024, 720p
DVI+YPrPb 720p, 1080p, 1080i
DVI(AUDIO)+V
GA
DVI(AUDIO)+Y
PrPb
Generally, a greater resolution value contributes to clearer video quality. The video resolution
selected needs to match the resolution of the display. A higher refresh rate contributes to
smoother video. The refresh rate selected should match the refresh rate of the display.
The following table lists the available refresh rates for each resolution.
Table 4-11 Available refresh rates for each resolution
Video Resolution Refresh Rate (Hz)
800×600 60, 75, 85
1024×768 60, 75, 85
1280×1024 60
720p
720p
720p, 1080p, 1080i
If the output mode is set to VGA, DVI+VGA, or
DVI(AUDIO)+VGA, set the refresh rate to 60.
If the output mode is set to DVI, YPrPb, DVI(AUDIO),
DVI+YPrPb, or VI(AUDIO)+YPrPb, set the refresh rate to 50 or
60.
1080p 24, 25, 30
1080i 50, 60
Issue 03 (2011-12-10) Huawei Proprietary and Confidential
35
Page 47

HUAWEI VP9050 Executive Video Terminal
User Guide
5 Audio Settings
Copyright © Huawei Technologies Co., Ltd
5.1 Connecting an Audio Device
Equipped with a microphone and a speaker, the terminal also provides AUDIO IN and
AUDIO OUT interfaces for connecting to external audio devices. Figure 1-3 shows the
interface location and Table 5-1 describes the audio interfaces.
If the AUDIO OUT interface is connected to an external speaker, audio can be output from the
terminal to the external speaker, obtaining increased volume and better quality.
5 Audio Settings
Table 5-1 Description of audio interfaces
Audio Input Interface Type
AUDIO IN Headset interface Mono audio channel/Stereo line input
AUDIO OUT MAIN Headset interface Mono audio channel/Stereo line output
5.2 Setting Audio Parameters
Before connecting the terminal to an audio device, set the audio parameters correctly to obtain
better audio effects.
To set the terminal's audio parameters, do the following:
Step 1 Choose Settings > Audio, and then set the parameters listed in Table 5-2 and Table 5-3.
Features of the Audio That Can Be
Received
Issue 03 (2011-12-10) Huawei Proprietary and Confidential
36
Page 48

HUAWEI VP9050 Executive Video Terminal
User Guide
5 Audio Settings
Copyright © Huawei Technologies Co., Ltd
Table 5-2 Audio input parameters
Parameter Description
Left audio source
Right audio
source
Using this tab, the names of the MIC and AUDIO IN interfaces can
be set. A name can indicate the input interface so that you can
identify the interface during a conference. The length of the value
cannot exceed 128 bytes.
In addition, the MIC or AUDIO IN interface can be enabled so that
the audio output by the device to which the MIC or AUDIO IN
interface is connected are input; the MIC or AUDIO IN interface can
also be enabled so that the audios output by the device to which the
MIC or AUDIO IN interface is connected are not input.
The parameters on this tab specify audio sources for the left and right
audio channels in stereo mode.
By default, the MIC 1 and AUDIO IN L interfaces are the input
sources for the left audio channel; the MIC 2 and AUDIO IN R
interfaces are the input sources for the right audio channel.
To adjust the volume of MIC and AUDIO IN interface, move the
sliders.
Table 5-3 Volume and sound effect parameters
Parameter Description
Volume
You can move the slider using the arrow keys to adjust the volume of
the speaker and alert tones.
Sound Effect
Step 2 Save the settings.
----End
For details, see Table 8-4.
Issue 03 (2011-12-10) Huawei Proprietary and Confidential
37
Page 49

Page 50

HUAWEI VP9050 Executive Video Terminal
User Guide
6 Conference Initiation
Copyright © Huawei Technologies Co., Ltd
6 Conference Initiation
6.1 Initiating a Conference Using Different Methods
The home screen provides multiple methods to initiate a conference. You can choose one
based on the actual situation.
You can define multiple sites on the terminal and call these sites at the same time to initiate a
multipoint conference. During the multipoint conference, all the sites can hear the voice and
view the video of the other sites.
6.1.1 Initiating a Conference from the Favorite Conferences Screen
When initiating a conference from the Favorite Conferences screen, you only need to change
the settings of the preset parameters to complete the conference configuration. Then you can
initiate the conference.
To initiate a conference from the Favorite Conferences screen, do the following:
Step 1 From the home screen, select Favorite Conferences to display the Favorite Conferences
screen.
Step 2 Select a conference, and then perform the following operations as required:
Press or on the remote control twice consecutively to initiate the conference.
Select to delete the conference from the favorite conferences.
Select to edit the conference, for example, to add a site to the conference or
change the settings of the conference parameters listed in Table 6-1.
Table 6-1 Conference parameters
Parameter Description
Rate This specifies the conference rate.
Continuous
presence
Issue 03 (2011-12-10) Huawei Proprietary and Confidential
This specifies the maximum number of site videos that can be viewed
simultaneously during the conference. After the continuous presence is
broadcast, the present sites can view the videos of multiple sites at the
same time.
To disable the continuous presence, select OFF.
39
Page 51

HUAWEI VP9050 Executive Video Terminal
User Guide
6 Conference Initiation
Copyright © Huawei Technologies Co., Ltd
Parameter Description
Anonymous
H.323
sites/Anonymo
us PSTN sites
These specify the numbers of H.323 and PSTN sites that can join the
conference anonymously. An anonymous site is a site whose site number
is not defined. For example, if one of the parameters is set to 5, a
maximum of five anonymous sites of the corresponding type can join the
conference. If you set the parameter to 0, no anonymous site can join the
conference.
Conference
control
password
This specifies the conference access password that can be used in the
following two ways:
During a conference, a site that wants to host the conference needs to
enter this password to obtain the chair control rights.
An anonymous site needs to enter this password to join an
authentication conference.
H.235
conference
This specifies whether the H.235 security protocol needs to be used to
encrypt media streams.
Insecure conference: All the information in the conference will not be
encrypted.
Secure media conference: Media streams will be encrypted.
Paying site This specifies who pays for the conference.
Local site: The local site pays for the conference.
Another site: Another site pays for the conference. If this option is
selected, the paying account and the paying password must be set.
----End
6.1.2 Initiating a Conference from the Conference History Screen
Sites that have been called and the conferences that have been held are all entered in the
conference history.
To initiate a conference from the Conference History screen, do the following:
Step 1 From the home screen, select Conference History to display the Conference History screen.
Step 2 Select an entry, and then do the following:
If the selected entry is a site, press or on the remote control to initiate a
two-party conference.
If the selected entry is a conference, press or on the remote control twice
consecutively to initiate a multi-party conference.
Press to edit the entry or to delete the entry.
----End
Issue 03 (2011-12-10) Huawei Proprietary and Confidential
40
Page 52

HUAWEI VP9050 Executive Video Terminal
User Guide
6 Conference Initiation
Copyright © Huawei Technologies Co., Ltd
6.1.3 Initiating a Conference from the Address Book Screen
If sites to participate in a conference are stored in the local address book, you can define these
sites and set conference parameters from the Address Book screen to initiate a conference.
To initiate a conference from the Address Book screen, do the following:
Step 1 From the home screen, select Address Book to display the Address Book screen.
Step 2 Select a site or multiple sites participating in the conference.
If you select a site, you can press on the remote control, and then select Place Call
to place a call to the site immediately or Create Conference to initiate a conference.
If you select multiple sites, you can press on the remote control to initiate a
conference.
Press to edit the selected site or to delete the selected site.
----End
6.1.4 Initiating a Conference from the Call Screen
You can initiate a two-party conference by defining the site to participate in the conference
and setting the call rate and call type from the Call screen.
To initiate a conference from the Call screen, do the following:
Step 1 From the home screen, select Call to display the Call screen.
From the home screen, you can access the Call screen directly by pressing a number key on the remote
control.
Step 2 Enter the name, IP address, or telephone number of the site. Then set the call rate and call
type.
Step 3 Press on the remote control to call the other party.
----End
6.1.5 Scheduling a Conference
You can schedule a conference to be held during a specific period.
The terminal supports the function to schedule conferences when H.323, E1, or 4E1 lines are
used.
To schedule a conference, do the following:
Step 1 Choose Utilities > Schedule Conference.
Step 2 Schedule a conference using either of the following methods:
Select a conference from Favorite Conferences, set Start date, Time format, Start
time, and Conference duration (ranging from 30 min to 360 min), and then select OK.
Issue 03 (2011-12-10) Huawei Proprietary and Confidential
41
Page 53

HUAWEI VP9050 Executive Video Terminal
User Guide
6 Conference Initiation
Copyright © Huawei Technologies Co., Ltd
Select Create, set site and conference parameters, set Start date, Time format, Start
time, and Conference duration (ranging from 30 min to 360 min), and then select OK.
----End
After a conference is scheduled successfully, you can find the conference by selecting
Schedule Conference and then Scheduled Conferences.
6.2 Answering Incoming Calls and Ending a Conference
The mode for answering incoming calls can be set.
6.2.1 Setting the Answering Mode
Two answering modes are available on the terminal: answering incoming calls manually and
answering incoming calls automatically.
To set the answering mode, do the following:
Step 1 Select Settings > General.
If the automatic answering function is enabled, the terminal answers incoming calls
automatically.
If the automatic answering function is disabled, when there is an incoming call, a message
appears on the screen indicating that a remote terminal is calling. Use the remote control to
answer or reject the call.
The automatic answering function is disabled by default.
Step 2 Save the settings.
----End
6.2.2 Ending a Conference
To end or exit from a conference, end the relevant call.
To end a conference, do the following:
Step 1 Press on the remote control.
Step 2 When a message is displayed, confirm that you want to end the call or exit from the
conference.
----End
6.3 Setting Conference Parameters
The factory settings and default settings of the conference parameters can help the conduct of
conferences. The parameters can also be set based on actual requirements.
To initiate a dual-stream conference, set the video and H.239 parameters. To initiate a
single-stream conference, only the video parameters need to be set.
Issue 03 (2011-12-10) Huawei Proprietary and Confidential
42
Page 54

HUAWEI VP9050 Executive Video Terminal
User Guide
6 Conference Initiation
Copyright © Huawei Technologies Co., Ltd
To set conference parameters, do the following:
Step 1 Select Settings > Conference, and then set the parameters listed in Table 6-2.
Table 6-2 Conference parameters
Parameter Description
Audio protocol
Video protocol
Video resolution
Video frame rate
Enable H.239
Dynamic bandwidth
This specifies the audio protocol used by the terminal to encode and
decode the audio.
This specifies the video protocol used by the terminal to encode and
decode the video. In a non-multi-stream conference, the video
protocol is the video protocol used by the local terminal.
You can select a proper format based on the video protocol that is
already set.
When the video protocol is set to auto, the video format can be
Sharp or Smooth.
When Sharp is selected, the system prioritizes the frame rate. When
Smooth is selected, the system prioritizes the video resolution.
This specifies the video frame rate, that is, the frequency at which
the imaging device produces unique frames. The higher the frame
rate, the smoother and clearer the video. It is recommended that you
select Auto.
After this check box is selected, presentations can be shared during
point-to-point calls.
If this function is enabled, when the ratio of the packet loss caused
by insufficient bandwidth in the network increases, the terminal
decreases the conference bandwidth automatically until the packet
loss does not occur constantly in the network or the conference
bandwidth is decreased to 64 kbit/s. Using the policy of dynamically
adjusting the bandwidth, the terminal can stabilize the bandwidth
within one minute after packet loss occurs in the network.
When the network condition is good, select Disable.
When the network condition is poor, select Enable.
Conference line
type
Conference
bandwidth
Select conference
control operation
Step 2 Save the settings.
Issue 03 (2011-12-10) Huawei Proprietary and Confidential
This specifies the type of the line used during a multipoint
conference.
If Auto is selected and the terminal is registered with a GK, an IP
line is preferentially used for the multipoint conference.
The default value is Normal.
When the terminal accesses network using an IP line, set the
conference bandwidth to Limited to enhance the quality of the
video conference.
This specifies the conference control options to be displayed on the
Conference Control screen.
43
Page 55

HUAWEI VP9050 Executive Video Terminal
User Guide
6 Conference Initiation
Copyright © Huawei Technologies Co., Ltd
----End
6.4 Setting Up an H.239 Dual-Stream Conference
During an H.239 dual-stream conference, two independent video stream channels, that is, the
video and the presentation, can be transmitted; furthermore, two channels of video from the
local site can be transmitted or two channels of video from a remote site can be received at the
same time.
If the license on the terminal does not support H.239, the terminal can receive presentation, but cannot
share presentation.
6.4.1 Designating the Dual Streams
Input sources and output destinations for the video and presentation must be chosen.
Choosing Input Sources
If multiple video-source devices are connected to the video input interfaces of the terminal,
you can choose a channel of video as the source of the local video and another channel as the
source of the local presentation.
The priority of the video is higher than that of the presentation, as shown from the following
aspects:
After a conference is initiated, the remote sites view the video of the local site before the
presentation.
During the layout switch in continuous presence mode, the remote sites can always view
the video of the local site.
Choosing Output Destinations
During an H.239 dual-stream conference, if local video and presentation and remote video
and presentation exist simultaneously and if multiple monitors are used at the local site, you
can set the output interfaces for the videos and presentations as required.
6.4.2 Enabling the H.239 Mode
After enabling the H.239 mode, the video and the presentation can be sent simultaneously
during a conference.
For details about how to enable the H.239 mode, see section 6.3 "Setting Conference
Parameters." By default, the H.239 mode is enabled on the terminal.
The H.239 mode supports Presentation and Live.
Presentation: When the video is switched, the presentation remains unchanged. This
mode is used when the presentation carries images, such as slides.
Live: The presentation viewed by each site is switched along with the video. This mode
is used when the presentation carries videos.
Issue 03 (2011-12-10) Huawei Proprietary and Confidential
44
Page 56

HUAWEI VP9050 Executive Video Terminal
User Guide
6 Conference Initiation
Copyright © Huawei Technologies Co., Ltd
6.4.3 Sharing a Presentation
If the video source of the presentation has been configured, and the presentation parameters
have been set, you can connect a computer to the terminal to share files stored on the
computer. When you are sharing files on the computer, the remote sites can view your video
and the desktop contents of the computer. You can press to start or stop sharing a
presentation.
You can select one of the following modes for sharing a presentation based on the
configuration:
Auto: The terminal automatically sends the video along with the presentation. This
option is available when the H.239 mode is set to Live.
Manual: Use the remote control to share a presentation.
6.4.4 Viewing the Combined Picture of the Presentation and the Video
During a conference, a combined picture of the video and the presentation can be viewed by
pressing on the remote control or selecting Layout from the option bar.
For details, see section 8.2 "Adjusting the Screen Layout."
6.5 Joining an Authentication Conference
If the number of sites that are expected to join the conference is not known, you can set the
number of anonymous sites, and then hold an authentication conference. A site can join the
authentication conference by calling the conference access number.
Figure 6-1 shows how to join an authentication conference.
Issue 03 (2011-12-10) Huawei Proprietary and Confidential
45
Page 57

HUAWEI VP9050 Executive Video Terminal
User Guide
6 Conference Initiation
Copyright © Huawei Technologies Co., Ltd
Figure 6-1 Procedure for joining an authentication conference
Setting the number of anonymous sites: Set the number of anonymous sites when
initiating a conference. Set numbers of anonymous sites of all types as listed in Tabl e 6-1,
for example, Anonymous H.323 sites.
Setting the authentication password: Set the Conference control password when
initiating a conference. This password can serve as the authentication password, which
an anonymous site needs to enter to join an authentication conference. If the Conference
control password is left blank, anonymous sites can join the conference without
entering any password.
Obtaining the access number of the authentication conference: After the authentication
conference is initiated, a terminal can obtain the access number from the message which
is displayed when the terminal requests chair control rights successfully; the chair site
can also obtain the access number by choosing Diagnostics > Status > Conference.
Anonymous sites can obtain the access number and the authentication password from the
chair site using other methods.
Joining the authentication conference by anonymous sites: Anonymous PSTN sites can
join the conference by calling the access number of the audio authentication conference
and anonymous IP sites can join the conference by calling the access number of the
video authentication conference.
To join an authentication conference, do the following:
Step 1 Check the necessary resource preparations using the following methods:
From the chair site: Check that the anonymous site resources are available in the
conference to be called, and the access number of the video or audio authentication
conference and the authentication password have been obtained.
From the local site: Check that the site has been registered with the GK.
Step 2 Press on the remote control to display the Call screen.
Issue 03 (2011-12-10) Huawei Proprietary and Confidential
46
Page 58

HUAWEI VP9050 Executive Video Terminal
User Guide
6 Conference Initiation
Copyright © Huawei Technologies Co., Ltd
Step 3 Obtain the access number of the authentication conference.
Step 4 Set Type and Rate. Select the highest rate supported by the local terminal for Rate to boost
the call success rate.
Step 5 Select Call.
If no password is set for the authentication conference, the terminal can join the conference
directly after a language is specified.
If a terminal requests chair control rights during an authentication conference, the password
for the authentication conference (that is, the conference password) is required.
----End
6.6 Managing the Address Book
The address book stores site information. You can add, edit, and delete site entries.
The address book spares users from entering site information when initiating conferences,
saving time and preventing entry of incorrect addresses.
You can save sites in Dialed, Received, and Missed on the Conference History screen to the
address book.
6.6.1 Managing the Local Address Book
Site information can be added to, deleted from, or edited in the local address book.
From the home screen, select Address Book to display the Address Book screen.
Creating a Site
You can create a site in the local address book and save the site.
To create a site, do the following:
Step 1 In the Address Book screen, select Create Site to display the Create Site screen.
Step 2 Set the parameters of a site.
The parameters that need to be set are listed in Table 6-3.
Table 6-3 Parameters of a site
Parameter Description
Name
Issue 03 (2011-12-10) Huawei Proprietary and Confidential
This specifies the name of a site and can consist of letters and
digits. The site name is displayed on the video.
47
Page 59

HUAWEI VP9050 Executive Video Terminal
User Guide
6 Conference Initiation
Copyright © Huawei Technologies Co., Ltd
Parameter Description
Category
This specifies the conferencing scenario of a site. The following
describes different options:
If the site attends conferences hosted using traditional
videoconferencing systems, select Ordinary site.
If the site attends conferences hosted using Huawei telepresence
systems, select Telepresence site.
If the site is a Cisco TelePresence site and attends conferences
held using Huawei videoconferencing systems, select CT site.
Number This specifies the site number used to make calls between sites.
IP, SIP, and H.323 Phone site numbers are allocated by the
videoconferencing service provider.
PSTN site numbers are telephone numbers.
Type
This specifies the line used by the terminal to access the
videoconferencing network.
Rate
This specifies the rate supported by the terminal over the
corresponding access line used by the site.
It is recommended that you select the highest rate.
IP address This specifies the IP address of the site.
Step 3 Select Save.
----End
Creating a Group
If certain sites join a conference regularly, they can be defined as a group.
To create and define a group, do the following:
Step 1 On the Address Book screen, select Create Group to display the Create Group screen.
Step 2 Enter a name for the group in the text box. The name cannot consist of only digits.
Step 3 Select the sites to be added to the group from the address book. Each selected site is marked
with a tick (√) before the site name and all the sites that are added to the group appear in the
site list.
Step 4 Select Save.
----End
Modifying
To modify the parameter settings of a defined site or group, scroll to the site or the group, and
then select , after the site name or the group name.
Issue 03 (2011-12-10) Huawei Proprietary and Confidential
48
Page 60

HUAWEI VP9050 Executive Video Terminal
User Guide
6 Conference Initiation
Copyright © Huawei Technologies Co., Ltd
Deleting
To delete a site or a group from the local address book, scroll to the site or the group, and then
select , after the site name or the group name.
Searching
The displayed querying results are filtered in real time based on the contents entered in
Search. For example, after you enter W in the text box, the sites whose names start with W
are displayed in the site list. To perform an exact search for a site, enter the whole name of the
site in the text box.
6.6.2 Setting Network Address Book Parameters
To download the network address book, the terminal must access the File Transfer Protocol
(FTP) server where the address book is stored.
Setting Parameters Related to the Network Address Book Server
The network address book is available on the terminal only after parameters used for
communications with the network address book server have been correctly set.
To set parameters related to the network address book server, do the following:
Step 1 From the home screen, select Settings, enter the administrator password (if set), and then
select OK to display the Settings screen.
Step 2 Choose Settings > Network > Network Address Book, and then set the parameters listed in
Table 6-4.
Table 6-4 Parameters of the network address book
Parameter Description
Enable network
address book
Synchronize
automatically
Give local
records
precedence when
records duplicate
This specifies whether the network address book is enabled. If this
function is enabled, set the following parameters.
If this function is enabled, the terminal downloads records from the
network address book to the local network address book. When the
terminal is restarted for the first time, a message prompting you to
update the local address book is displayed. Afterwards, no such
message is displayed.
If this function is enabled and if certain records in the local address
book are duplicates of the relevant records in the network address
book, the records in the local address book remain unchanged after the
local address book is updated.
Issue 03 (2011-12-10) Huawei Proprietary and Confidential
49
Page 61

HUAWEI VP9050 Executive Video Terminal
User Guide
6 Conference Initiation
Copyright © Huawei Technologies Co., Ltd
Parameter Description
Prompt users
during address
book update
Clear local
records during
update
Server address
File path This specifies the file path of the network address book on the server.
User name
Password
Step 3 Save the settings.
If this function is enabled and if the versions of the network address
book and the local address book are different, a message will be
displayed, prompting you to update the local address book. After the
update, site information in the network address book is downloaded to
the local address book.
NOTE
The local address book determines whether updates are required by comparing
the versions of network and local address books instead of the records in the
address books.
If this function is enabled, the terminal clears the local address book
automatically when the local address book is updated.
This specifies the IP address of the server where the network address
book is stored.
These specify the user name and password used by the terminal when
the terminal accesses the network address book.
----End
Downloading a Network Address Book
You can download a network address book manually or enable the terminal to download a
network address book automatically.
If Synchronize automatically is selected from the Address Book screen, the terminal
downloads a network address book automatically after startup. If this function is not selected,
or if the network address book needs to be updated again, select Update from the Address
Book screen.
The downloaded address book is saved in the vCard format. The extension of the filename is vcf.
Issue 03 (2011-12-10) Huawei Proprietary and Confidential
50
Page 62

HUAWEI VP9050 Executive Video Terminal
User Guide
7 Conference Control
Copyright © Huawei Technologies Co., Ltd
7 Conference Control
7.1 Customizing the Option Bar
You can customize icons on the option bar to facilitate access to the corresponding screens.
The icons that you can customize on the option bar are Conference control, Presentation
source, and Layout.
To hide the option bar
If no operation is performed for 15 seconds, the option bar is hidden automatically. To
hide the option bar immediately, press the left arrow key or .
To display the option bar
In full screen mode, press .
To customize the option bar, do the following:
Step 1 Select on the option bar to display the Customize Option Bar screen.
If an administrator password has been set, you must enter the password to display the Customize
Option Bar screen.
Step 2 Select the conference control options to be added to the option bar.
You can move the position of an option by selecting Up or Down.
Step 3 Select OK.
----End
7.2 Customizing the Conference Control Screen
You can customize the Conference control screen by specifying the conference control
options to be displayed on the screen.
To customize the conference control screen, do the following:
Step 1 From the home screen, select Settings, enter the administrator password (if set), and then
select OK to display the Settings screen.
Step 2 Select Conference > Select conference control operation, and then select the conference
control options as required.
Issue 03 (2011-12-10) Huawei Proprietary and Confidential
51
Page 63

HUAWEI VP9050 Executive Video Terminal
User Guide
7 Conference Control
Copyright © Huawei Technologies Co., Ltd
Step 3 Select Save to save the settings.
----End
7.3 Using Conference Control Functions
7.3.1 Viewing Sites
You can view a single site or view multiple sites in turn.
On the View Site screen, you can view a single site or view multiple sites in turn at preset
intervals.
Table 7-1 Conference control functions
Function Name Description
View Site
Broadcast Site
Give Floor
Lock Presentation
Sites Requesting Floor
An ordinary site can view only one site at a time. The chair site
can view one site at a time or multiple sites in turn at preset
intervals.
All the sites in the conference are forced to view the
broadcasting site.
The chair site can broadcast one site at a time or multiple sites in
turn at preset intervals.
This function is used to give floor to a site. The other sites in the
conference view the site that is given the floor. In addition, their
microphones are muted.
This function is used to restrict the presentation sharing right of
a site or a conference. The following two options are available:
Locking site presentation: After the chair site locks the
presentation of an ordinary site, such as site A, only site A has
the right of sharing presentation.
Locking conference presentation: After the chair site locks the
conference presentation, a site can share its presentation only
when no presentation is currently being shared.
This function is used to display all the sites that are requesting
for the floor.
Call Site
Disconnect Site You can disconnect all the sites present at a conference.
Delete Site You can delete sites from an ongoing conference.
Mute/Unmute MIC
Issue 03 (2011-12-10) Huawei Proprietary and Confidential
You can call an absent site on the site list to enable the site to
join the conference.
To call all absent sites to enable them to join the conference,
select Call All.
After you have muted the microphone of a site, the other sites in
the conference cannot hear the site. To enable the site to be
heard, unmute the microphone of the site.
52
Page 64

HUAWEI VP9050 Executive Video Terminal
User Guide
7 Conference Control
Copyright © Huawei Technologies Co., Ltd
Function Name Description
Mute/Unmute Speaker
After you have muted the speaker of a site, the site cannot hear
the current conference. To enable the site to hear the conference,
unmute the speaker.
Voice Activation
This function is used during discussion. The site with the loudest
voice is viewed by the other sites in the conference.
Request Chair
An ordinary site can use this function to request for chair control
rights.
Request Floor
This function is used to request for the floor, especially when
another site is being broadcast.
Release Chair
The chair site can use this function to release chair control
rights. After the chair control rights are released, another site can
request to become the chair site.
Discussion
You can use this function to cancel the following conference
control functions that are currently being used:
Broadcasting sites
Muting the microphone
Muting the speaker
Giving the floor
Extend Conference This function is used to extend a conference.
Add Site
This function is used to add sites to an ongoing conference. The
sites join the current conference after being added.
At the chair site, you can select Add Site from the Conference
Control screen, and then select Address Book to add a site from
the address book or select Others to create a new site and add
the site to the conference.
Revoke Presentation
This function is used by the chair site to revoke the presentation
sharing right from a site during a dual-stream conference when
the presentation mode is set to Presentation. The site whose
presentation sharing right has been revoked stops sharing the
presentation.
Revoke Chair
This function is available only to the site that initiates or pays for
the conference. After the chair control rights are revoked, no
chair site exists in the conference. Sites in the conference can
request to become the chair site afterwards.
Set Continuous
Presence
This function is used to view multiple site videos
simultaneously.
End Conference This function is used to end a conference.
7.3.2 Broadcasting Sites
All the sites (except for the broadcasting site) are forced to view the broadcasting site.
Issue 03 (2011-12-10) Huawei Proprietary and Confidential
53
Page 65

HUAWEI VP9050 Executive Video Terminal
User Guide
7 Conference Control
Copyright © Huawei Technologies Co., Ltd
The chair site can broadcast any of the sites participating in a conference (except for an
audio-only site) or broadcast multiple sites (including the chair site) in turn at preset intervals.
When a site is being broadcast, all non-chair sites are forced to view the broadcasting site
while the chair site can view any of the sites participating in the conference.
To stop broadcasting a site, select Stop or Discussion.
After the chair site stops broadcasting a site, all the sites in the conference can view any other
site. Stop is available when there is a broadcasting site in the conference.
7.3.3 Giving the Floor to a Site
The chair site can give the floor to a site and mute all the other sites by performing the Give
Floor operation.
If the chair site uses the Give Floor function to give the floor to a site, the video and audio of
this site are broadcast and the microphones of all the other sites except for the chair site are
muted. To give the floor to a site, access the Give Floor screen, scroll to the site, and then
press .
To exit the Give Floor mode, select Discussion on the chair site.
7.3.4 Displaying Sites Requesting for the Floor
The chair site can use this function to view the sites that are currently requesting for the floor.
During a conference, if a non-chair selects Request Floor, the site is added to the list of sites
requesting for the floor. The chair site can select a site from the list to give the floor to the site.
Then the site is broadcast and the microphones of all the other sites (except for the chair site)
are muted.
The list of sites requesting for the floor is cleared after the chair site gives floor to a site.
7.3.5 Placing a Call
This function is used to place a call to a site that is not present in the conference. The site
joins the conference after answering the call.
If the conference is charged, the resources of the videoconferencing system and your account balance
determine whether the called site can join the conference properly.
You can select Call All on the Call screen. Then the system automatically calls all the sites
that are not present in the conference to enable them to join the conference.
7.3.6 Disconnecting a Site
The chair site can disconnect a participating site from the conference. After the disconnection,
the site exits the conference automatically.
7.3.7 Deleting a Site
During a conference, the chair site can delete a site that has joined the conference or is not
present in the conference.
After being deleted, the site is not associated to the conference anymore and is not included in
the site list. To enable the site to join the conference again, the chair site needs to add the site
Issue 03 (2011-12-10) Huawei Proprietary and Confidential
54
Page 66

HUAWEI VP9050 Executive Video Terminal
User Guide
7 Conference Control
Copyright © Huawei Technologies Co., Ltd
to the conference by performing the Add Site operation, and then the system will place a call
to the site.
7.3.8 Muting and Unmuting the Microphone
After you have muted the microphone of a site, the other sites in the conference cannot hear
the site. To enable the site to be heard, unmute the microphone of the site.
On the Mute/Unmute Microphone screen, select a site. Then you can mute or unmute the
microphone of the site based on the following relevant status icons:
: Indicates that the microphone of the site is not muted. You can press to mute
the microphone.
: Indicates that the microphone of the site is muted. You can press to unmute
the microphone.
7.3.9 Muting and Unmuting the Speaker
After you have muted the speaker of a site, the site cannot hear the current conference. To
enable the site to hear the conference, unmute the speaker.
On the Mute/Unmute Speaker screen, select a site. Then you can mute or unmute the
speaker of the site based on the following relevant status icons:
: Indicates that the speaker of the site is not muted. You can press to mute the
speaker.
: Indicates that the speaker of the site is muted. You can press to unmute the
speaker.
7.3.10 Requesting for Chair Control Rights
More conference control rights are available on the chair site than those available on a
non-chair site.
This function of requesting chair control is available to non-chair sites only and can be
successfully implemented only when no chair site exists in the conference.
Audio-only sites cannot request chair control rights.
7.3.11 Requesting for the Floor
If a non-chair site wants to speak during a conference, the site can request the floor from the
chair site.
The Request Floor operation is available when a chair site exists in the conference. After a
site requests the floor, the request is submitted to the chair site. Then the chair site can
determine whether to give the floor to the site.
If the chair site gives the floor to the site, the site is broadcast and the microphones of all
the other non-chair sites are muted.
If the chair site does not give the floor to the site, the conference status remains
unchanged.
Issue 03 (2011-12-10) Huawei Proprietary and Confidential
55
Page 67

HUAWEI VP9050 Executive Video Terminal
User Guide
7 Conference Control
Copyright © Huawei Technologies Co., Ltd
7.3.12 Setting the Continuous Presence
The continuous presence function is used to display the videos of two or more sites on the
same monitor simultaneously. The number of sites whose videos are displayed and the layout
of the videos vary according to continuous presence modes.
This function is available only when continuous presence resources have been reserved for the
conference.
To set the continuous presence, do the following:
Select a pane. From the drop-down list box in the displayed dialog box, select the site whose
video is to be displayed in the pane. Then select OK.
If a site already exists in the pane selected, the new site will replace the original site.
You can select Delete All to delete all the sites in the continuous presence.
7.3.13 Enabling and Disabling Voice Activation
The voice activation function is used during ongoing discussions in the conference. The site
with the loudest voice is viewed by the other sites in the conference.
You can select the sensitivity based on experience after enabling the voice activation function.
The videoconferencing system sets a threshold based on the sensitivity selected. If the
volume of one or multiple sites exceeds the threshold, the video of the site with the
highest volume is broadcast.
If no site exceeds the threshold, the conference status remains unchanged.
7.3.14 Releasing Chair Control Rights
A non-chair site can request chair control rights only after the chair site releases the chair
control rights.
For a non-chair site, the following four conference control functions are available: requesting
chair control rights, requesting the floor, viewing sites, and revoking chair control rights. The
chair site, however, has all the conference control rights.
The function of revoking chair control rights is available only to the site that initiates or pays for the
conference.
7.3.15 Enabling Discussion
The chair site can enable the discussion function as required to cancel certain ongoing
conference control operations, such as broadcasting sites.
This Discussion function is used to cancel the following operations performed by the chair
site:
Broadcasting sites
Muting the speaker
Muting the microphone
Giving the floor
The discussion function provides the following features:
Issue 03 (2011-12-10) Huawei Proprietary and Confidential
56
Page 68

HUAWEI VP9050 Executive Video Terminal
User Guide
7 Conference Control
Copyright © Huawei Technologies Co., Ltd
Audio: The microphones of all the sites are not muted and the sounds of all the sites are
mixed and then broadcast to every site.
Video: The video viewed by each site remains unchanged and each site can view the
video of any other site.
7.3.16 Adding Sites
During a conference, the chair site can add certain sites to the current conference as required.
If a site is successfully added to the conference, the site becomes a participant in the
conference. You can add a site from the address book or create a new site.
7.3.17 Extending a Conference
If a conference is estimated not to be complete by the scheduled time, the chair site can
extend the conference by selecting Extend Conference.
Before extending a conference, the chair site needs to ensure that the videoconferencing
resources and the account balance are sufficient. To increase the chances of success, the chair
site should not extend the conference too long at a time. It is recommended that the chair site
extends the conference by 30 minutes at a time, and this can be done multiple times if
necessary.
7.3.18 Ending a Conference
If a conference is complete before the scheduled time, the chair site can end the conference in
advance by selecting End Conference.
During a conference, the chair site can press on the Conference Control screen, and
then select End Conference to end the conference immediately.
Issue 03 (2011-12-10) Huawei Proprietary and Confidential
57
Page 69

Page 70

HUAWEI VP9050 Executive Video Terminal
User Guide
8 Video and Audio
Copyright © Huawei Technologies Co., Ltd
8 Video and Audio
8.1 Adjusting the Video Display Effects
You can adjust the video display effects by adjusting local video effects (such as the
brightness and the saturation), the picture offset, the sampling phase.
8.1.1 Adjusting the Local Video Effects
To adjust local video effects, set the corresponding parameters as required, for example the
brightness, contrast, and saturation.
To set the local video parameters, do the following:
Step 1 Choose Settings > Display > Video Parameters > Camera.
Step 2 Set the parameters listed in Table 8-1.
Table 8-1 Parameters of video effects
Parameter Description
Brightness
level
Contrast
Saturation
Room light
Adjusts the video output level to brighten or darken the video displayed on
a monitor.
Adjusts color levels to facilitate the distinction between two colors. The
higher the contrast, the greater the degree of difference between the light
and dark extremes of the displayed image.
Adjusts the grayscale of each color. The higher the saturation, the brighter
a color.
The terminal adjusts the video effects based on the set Room light,
improving the video quality.
Set this parameter based on the brightness of the room and the display
effects of the camera.
If the room is bright and the local video looks pale, set this parameter to
Bright.
If the room is dim and the local video looks dark, set this parameter to
Dark.
----End
Issue 03 (2011-12-10) Huawei Proprietary and Confidential
59
Page 71

HUAWEI VP9050 Executive Video Terminal
User Guide
8 Video and Audio
Copyright © Huawei Technologies Co., Ltd
8.1.2 Configuring the Built-In Camera
To enable the terminal's built-in camera to produce the best possible video quality, adjust the
camera's parameter settings based on the environment where terminal is placed. To configure
the built-in camera, do the following:
Step 1 Choose Settings > Display > Video Parameters > Camera.
Step 2 Select camera, and set the parameters listed in Table 8-2.
Table 8-2 Built-in camera parameters
Parameter Description
Automatic
exposure
Room light
Brightness
Contrast
Saturation
Aperture
This specifies whether to use automatic exposure mode.
The terminal adjusts the video effects based on the set Room light,
improving the video quality.
Set this parameter based on the brightness of the room and the display
effects of the camera.
If the room is bright and the local video looks pale, set this parameter to
Bright.
If the room is dim and the local video looks dark, set this parameter to
Dark.
If the video quality is still not satisfactory after you set Room light,
fine-tune this parameter.
This specifies the ratio of the luminance of black to that of white. If the
ratio increases, the number of perceptible degrees from black to white
increases, and video colorfulness improves.
This adjusts the grayscale of each color. The higher the saturation, the
brighter a color.
Sharpen video edges and contours to preserve the impression of clarity and
fine details. Over-sharpening will make video less realistic.
Noise
reduction
Color
temperature
----End
8.1.3 Adjusting Video Parameters
If the HUAWEI HD camera is connected to the HUAWEI VP9050, set the camera parameters,
such as the exposure mode, white balance mode, aperture, and noise reduction. Then, you can
view the video on the monitor.
To adjust the video parameters, do the following:
Issue 03 (2011-12-10) Huawei Proprietary and Confidential
The greater the value of this parameters is, the less the noise of the video is
but the more lost video details are. Therefore, set this parameter as required.
This adjusts the video's overall color temperature.
60
Page 72

HUAWEI VP9050 Executive Video Terminal
User Guide
8 Video and Audio
Copyright © Huawei Technologies Co., Ltd
Step 1 Choose Settings > Display > Video Parameters > DVI/VGA IN.
Step 2 Set the parameters listed in Table 8-3.
Table 8-3 HUAWEI HD camera parameters
Parameter Description
Exposure
mode
White
balance
Aperture
This specifies the mode of using natural light. You can select one of the
following modes:
Auto: In this mode, the VPC500 and the VPC520 automatically select
the optimum configuration based on the ambient environment. You can
set the shutter delay as required to prevent poor video quality caused by
the vibration of the VPC500 and the VPC520.
Manual: In this mode, you can manually adjust the brightness gain,
shutter rate, and aperture.
Iris priority: In this mode, you need to manually adjust the aperture.
The C500 can automatically select the corresponding shutter rate.
Shutter priority: In this mode, you need to manually adjust the shutter
rate. The VPC500 and the VPC520 can automatically select a proper
aperture. This mode is mainly used for shooting moving objects.
Spotlight: If the light reflected from a surface is very bright, you can
select this mode to obtain optimum video effects.
Brightness: In this mode, you can manually adjust the brightness.
This specifies the white balance to enable the camera to accurately
recognize the white color and deliver a more vivid video. The default
value is Auto.
Sharpen video edges and contours to preserve the impression of clarity
and fine details. Over-sharpening will make video less realistic.
Contrast
Brightness
Hue
Noise
reduction
Video
resolution
Image
inversion
Backlight
compensation
This specifies the ratio of the luminance of black to that of white. If the
ratio increases, the number of perceptible degrees from black to white
increases, and video colorfulness improves.
This specifies the video output level that changes the brightness of the
video displayed on a monitor.
The hue of a video defines the video brightness. The more bright elements
a video contains, the vivider the video looks. On the contrary, the more
dark elements a video contains, the dimmer the video looks. A color video
can have multiple hues.
The greater the value of this parameters is, the less the noise of the video
is but the more lost video details are. Therefore, set this parameter as
required.
This specifies the camera's video output format.
This rotates the video input from the camera by 180 degrees. When the
camera is hanged, enable this function.
If the background of the video input from the camera is dark, enable this
function.
Issue 03 (2011-12-10) Huawei Proprietary and Confidential
61
Page 73

HUAWEI VP9050 Executive Video Terminal
User Guide
8 Video and Audio
Copyright © Huawei Technologies Co., Ltd
Parameter Description
Set output
resolution
automatically
----End
If this function is enabled, the terminal adjusts the camera's video output
format based on the conference video format.
For example, in the case of 720p60 conferences, the terminal
automatically sets the camera's video output format to 720p60.
8.1.4 Customizing the Status Icons to Be Displayed on Screens
The status icons to be displayed on screens can be customized as required.
Packet Loss Icon
Choose Settings > Display > Packet Loss Threshold.
The terminal compares the packet loss rate on the current network with threshold A and
threshold B, and uses the following policy to determine the packet loss icon displayed on the
user screen:
Threshold A must be smaller than threshold B and the threshold must range from 0.1% to 100%.
If the packet loss rate is equal to or smaller than threshold A, no packet loss icon is
displayed.
If the packet loss rate is greater than threshold A and smaller than threshold B,
(packet loss icon) is displayed.
If the packet loss rate is greater than threshold B, (packet loss icon) is displayed.
Other Icons
Status icons can be seen on the relevant screen when both the following conditions are met:
The icon to be displayed on screens has been set using the method described in this
section.
The function that corresponds to the status icon has been enabled or is available.
Choose Settings > Display > Icon overlap. Select the icons to be displayed on screens.
8.1.5 Adjusting the Picture Offset
Pictures output or input from the Digital Visual Interface (DVI), SXGA interface, or YPrPb
interface (of the DVI-1 type), such as the computer desktop with the resolution of VGA when
displayed on the monitor screen, may deviate from their normal positions. In this case, set the
picture offset to adjust the picture position.
To adjust the picture offset, do the following:
Step 1 Choose Settings > Display > Image Offset.
Step 2 Select a video interface, and then set the picture offset by moving the slider.
Issue 03 (2011-12-10) Huawei Proprietary and Confidential
62
Page 74

HUAWEI VP9050 Executive Video Terminal
User Guide
8 Video and Audio
Copyright © Huawei Technologies Co., Ltd
----End
8.1.6 Adjusting the Sampling Phase
When color distortion occurs in a picture on the screen, adjust the sampling phase.
To adjust the sampling phase, do the following:
Step 1 Choose Settings > Display > Sampling Phase.
Step 2 Set the sampling phase by moving the slider.
----End
8.2 Adjusting Audio Effects
You can adjust the audio effects, such as the audio input, sound effect, volume, and stereo.
For details about how to adjust the audio input, volume, and stereo, see 5.2 "Setting Audio
Parameters." This section only describes how to adjust the sound effect.
Choose Settings > Audio > Sound Effect, and then set the parameters listed in Table 8-4.
Table 8-4 Audio parameters
Parameter Description
Network jitter
This is a sound adjustment method. A higher network jitter
contributes to a better audio connectivity. In a conference, the lip
movements and voice of a speaker may not be synchronous. To
solve this problem, users can adjust the network jitter value.
When the terminal uses a wired network for video
communications, it is recommended that you use the default
value of this parameter.
Acoustic echo
cancellation
If echo cancellation is enabled, the terminal removes echo in the
audio input from the MIC1 and MIC2 interfaces using the echo
cancellation function.
If echo cancellation is disabled, the terminal does not remove
echo in the audio input from the MIC1 and MIC2 interfaces
using the echo cancellation function.
By default, this function is enabled.
Music mode
Enable: Ringtone is played on incoming calls.
Disable: The speaker of the terminal is muted.
Ringtone
Audio channel balance
Issue 03 (2011-12-10) Huawei Proprietary and Confidential
After a ringtone is selected, the terminal plays the ringtone when
there is an incoming call.
This is used to adjust the balance of the left and right audio
channels in dual-audio-channel mode.
63
Page 75

HUAWEI VP9050 Executive Video Terminal
User Guide
8 Video and Audio
Copyright © Huawei Technologies Co., Ltd
Parameter Description
Bass
Middle
To obtain different audio effects, you can adjust the equalizers
by moving the sliders.
Treble
Locally output sound
from AUDIO IN
AUDIO IN mixes with
If this function is enabled, you can hear input from the AUDIO
IN interface at the local site.
This is used to output the AUDIO IN source to remote sites.
MIC
Virtual surround
If this function is enabled, the terminal simulates multiple
speakers. In conjunction with Virtual center channel gain,
Virtual surround gain, Distance for perceiving virtual
sounds settings, this function enhances the surround sound field
effect.
Virtual center channel
gain
This parameter gives the effect that sounds are coming from the
terminal’s center. Drag the slider to adjust the volume.
Virtual surround gain This parameter adjusts the stereo sound effect.
Distance for perceiving
virtual sounds
This parameter sets the distance between conference participants
and the terminal speaker.
8.3 Adjusting the Volume
To obtain the optimal conference audio effect, you can adjust audio output in multiple modes.
If the terminal is in a conference, you can press or on the remote control to
increase or decrease the volume heard at the local site. The volume from the PC and the
whole conference system is adjusted accordingly.
In PC mode, the terminal is used as a display. You cannot adjust the volume using the touch
panel or remote control.
For details about how to set the volume and other audio parameters, see chapter 5 "Audio Settings."
If a headset is used, you will hear conference audio through the headset.
8.4 Adjusting the Screen Layout
The screen layout can be adjusted using two methods. Press on the remote control to
switch between layouts. Alternatively, select Layout from the option bar to display a screen
from which a desired layout can be selected.
The LCD and DVI/VGA OUT video output interfaces support the combined picture function.
To adjust the screen layout, choose either of the following methods:
Issue 03 (2011-12-10) Huawei Proprietary and Confidential
64
Page 76

HUAWEI VP9050 Executive Video Terminal
User Guide
8 Video and Audio
Copyright © Huawei Technologies Co., Ltd
Pressing on the remote control to switch between the full screen, picture in
picture, 2 panes, and 3 panes.
Selecting Layout from the option bar to display the following screen from which you
can select a desired layout:
− Remote video in full-screen mode
− Local video in full-screen mode
− A combination of the local video, remote video, local presentation, or remote
presentation in picture-in-picture, two-pane, or three-pane mode
Figure 8-1 Adjusting the Screen Layout
Besides the six layout icons shown in the preceding figure, the icon for the local or remote
presentation may be seen if:
A presentation source is connected to the local site. In this case, the icon for the local
presentation is displayed.
The local site receives the presentation shared by a remote site. In this case, the icon for
the remote presentation is displayed.
The icon for the local or remote presentation disappears once the local presentation source is
disconnected or the sharing of the remote presentation stops.
Before a conference starts, you can set the position of the small window in picture-in-picture
mode. For details, see section 4.1 "Configuring the Built-In Camera."
8.5 Selecting a Video Source
You can set video input interfaces for the local video, local presentation, and remote video.
Local Video Source
Press , and then select a camera or other video sources.
Local Presentation Source
After a conference starts, select Presentation source from the option bar. From the
Presentation source screen, select a local presentation source.
Issue 03 (2011-12-10) Huawei Proprietary and Confidential
65
Page 77

HUAWEI VP9050 Executive Video Terminal
User Guide
8 Video and Audio
Copyright © Huawei Technologies Co., Ltd
For details about how to perform operations on the option bar, see section 7.1 "Customizing the Option
Bar."
Remote Video Source
During a conference, you can select to view a remote video source.
To select a remote video source, press on the remote control, and then select a camera.
Each remote video source is identified by a camera icon. In certain cases, however, the device connected
to the remote terminal is not a camera.
8.6 Hiding the Local Video
During a conference, you can hide the local video if you do not want the video to be seen by
remote sites. After this function is enabled, the local site is displayed as a blue screen at
remote sites.
To hide the local video, choose Utilities > Hide Video (Off), and then, if prompted, confirm
that you want to enable the function to hide the local video.
After the function to hide the local video is enabled, appears in the lower right corner
of a screen in full-screen mode. In addition, appears on the home screen, indicating that
the local microphone is muted.
Issue 03 (2011-12-10) Huawei Proprietary and Confidential
66
Page 78

HUAWEI VP9050 Executive Video Terminal
User Guide
9 Captions
Copyright © Huawei Technologies Co., Ltd
9.1 Configuring Captions
During a conference, you can create a caption, and then overlay the caption on the video sent
by the local site. The caption can be overlaid on the top, in the middle, or at the bottom of the
video.
The terminal supports T.140 and non-T.140 captions. Table 9-1 describes the differences
between these two types of captions.
9 Captions
Table 9-1 Differences between T.140 and non-T.140 captions
Non-T.140 Caption T.140 Caption
A non-T.140 caption will be
superimposed on the local video.
SIP and H.323 terminals can send and
receive captions.
No restriction is imposed on the
terminals that send or receive
non-T.140 captions.
Non-T.140 captions can be sent only
from terminals in a conference, and
cannot be sent from the
ResourceManager that is the
videoconferencing management
software.
A T.140 caption will be sent to remote sites and
displayed on the remote displays without being
superimposed on the local video.
Only H.323 terminals can send and receive
captions.
If a T.140 caption is shared, both the sending and
receiving parties in a conference must support
T.140 captions. Otherwise, a terminal that does not
support T.140 captions cannot receive the shared
T.140 caption.
If both the sending and receiving parties in a
conference support T.140 captions, a T.140
caption can be sent using any of the following
methods:
Sending the caption from the chair site
Sending the caption from the ResourceManager
NOTE
Captions can be sent from either party in a point-to-point
call.
The terminals' software is different from each other. Therefore, you may need to set only
certain parameters instead of all of them when you prepare a caption.
Step 1 Choose Settings > Caption, and then set the parameters listed in Table 9-2.
Issue 03 (2011-12-10) Huawei Proprietary and Confidential
67
Page 79

HUAWEI VP9050 Executive Video Terminal
User Guide
9 Captions
Copyright © Huawei Technologies Co., Ltd
Table 9-2 Caption parameters
Parameter Description
Font size
Bold
Transparency
Background color
Font color
Effect
Scrolling speed
This specifies the font size for banners and middle
captions.
This specifies whether the font of banners and middle
captions is in bold.
This specifies the background effect when a banner or a
middle caption is displayed.
This specifies the background color when a banner or a
middle caption is displayed. Up to 64 colors are
available.
This specifies the font color for banners or middle
captions in the foreground. Up to 64 colors are
available.
A middle caption can contain multiple lines of text. The
height of each line is the maximum font height on this
line. The text can be aligned left, centered, aligned right,
and roll upward.
Middle captions can roll. This parameter specifies the
rolling speed. You can set the speed based on the
preview effect.
Sharing mode
Step 2 Save the settings.
----End
9.2 Creating a Caption
To create a caption, do the following:
Step 1 From the home screen, select Utilities > Caption > New.
Step 2 Set the caption parameters listed in Table 9-3.
Table 9-3 Caption parameters
Parameter Description
(Caption
Name)
This specifies the name of a caption. Each caption can contain text on the
top, in the middle, and at the bottom of the screen.
This specifies the type of the caption to be shared,
T.140 or non-T.140.
For details about the differences between T.140 and
non-T.140 captions, see section Table 9-1.
Issue 03 (2011-12-10) Huawei Proprietary and Confidential
68
Page 80

HUAWEI VP9050 Executive Video Terminal
User Guide
9 Captions
Copyright © Huawei Technologies Co., Ltd
Parameter Description
Visible
This specifies whether the caption is to be displayed at the current
position. For example, if you select this option in Bottom, the bottom
caption is displayed.
Height
The height of a top caption ranges from 5% to 30% of the screen height.
The height of a bottom caption ranges from 5% to 20% of the screen
height. The step for adjustment is 5%. The height of a middle caption
cannot be adjusted. The system automatically adjusts the height of a
middle caption based on the remaining space of the screen apart from the
top and bottom captions.
Effect The captions at different positions can have different special effects.
Top caption: The top caption can contain multiple lines of text. In
restricted areas, the text can be aligned left, middle, or right. The top
caption cannot roll.
Middle caption: The middle caption can contain multiple lines of text.
The height of each line is the maximum font height on this line. In
restricted areas, the text can be aligned left, middle, or right. The middle
caption can roll upwards in display.
Bottom caption: The caption can contain only one line of text. In
restricted areas, the text can be aligned left, middle, or right. The bottom
caption can roll leftwards in display.
Transparency
This specifies the background effect of the caption. The available options
are translucent, solid, and transparent.
Background
color
Font color
This specifies the background color of the caption. The system supports a
maximum of 64 colors.
This specifies the font color of the caption in the foreground. The system
supports a maximum of 64 colors.
Font size
This specifies the font size of the caption. The available options are tiny,
less, small, medium, large, biggish, and huge.
Font bold This specifies whether the font of the caption is in bold.
----End
9.3 Sharing a Caption
After you create a caption, it can be shared with remote sites.
To share a caption, do the following:
Step 1 Select Utilities > Caption.
Step 2 Select the desired caption, and then select Share.
----End
Issue 03 (2011-12-10) Huawei Proprietary and Confidential
69
Page 81

HUAWEI VP9050 Executive Video Terminal
User Guide
9 Captions
Copyright © Huawei Technologies Co., Ltd
9.4 Sending an Instant Message
During a conference, instant messages can be sent to remote sites.
Both the sending party and the receiving party support T.140 captions. For details about how
to configure T.140 captions, see section 9.1 "Configuring Captions."
Instant messages are a type of T.140 captions. During a conference, a site can send instant
messages to a desired site.
Instant messaging is not supported by SIP sites or audio-only sites.
Step 1 Display the option bar during a conference by referring to the method described in section 7.1
"Customizing the Option Bar."
Step 2 Select from the option bar.
Step 3 From the displayed Instant Message dialog box, select the site to which a message is to be
sent.
Step 4 Enter the message.
Step 5 Send the message.
----End
Issue 03 (2011-12-10) Huawei Proprietary and Confidential
70
Page 82

HUAWEI VP9050 Executive Video Terminal
User Guide
10 Security
Copyright © Huawei Technologies Co., Ltd
10 Security
10.1 Setting the Administrator Password
You can set the administrator password to restrict access to certain screens.
To set the administrator password, do the following:
Step 1 Choose Settings > Security > Password, and then set the parameters listed in Table 10-1.
Table 10-1 Encryption parameters
Parameter Description
Administrator Password The administrator password is left blank by default.
The password must consist of only letters (uppercase and
lowercase) and digits, with a maximum of 32 characters.
Encrypt utilities
Encrypt diagnostics
Step 2 Save the settings.
----End
After this function is enabled, the administrator password must
be entered to access the Utilities screen.
After this function is enabled, the administrator password must
be entered to access the Diagnostics screen.
10.2 Restricting Screen Access Using the Administrator Password
After the administrator password is set and certain screens are encrypted, users are required to
enter the administrator password to access these screens.
The administrator can encrypt the following screens:
Settings screen
Utilities screen
Diagnostics screen
Customize Option Bar screen
Issue 03 (2011-12-10) Huawei Proprietary and Confidential
71
Page 83

HUAWEI VP9050 Executive Video Terminal
User Guide
10 Security
Copyright © Huawei Technologies Co., Ltd
Ordinary users can access the preceding screens only after the correct administrator password
is entered.
For details about how to set the administrator password, see section 10.1 "Setting the
Administrator Password."
10.3 Enabling H.235 Encryption
H.235 encryption encrypts media streams using a negotiated encryption algorithm and key.
The encrypted media streams can be decrypted with the negotiated algorithm and key,
preventing unauthorized access.
To enable H.235 encryption, do the following:
Step 1 Choose Settings > Security > Encryption Policy to select an H.235 encryption policy.
Disable: No media stream is encrypted.
Enable: Media streams are forced to be encrypted. If this option is selected, the terminal
can attend only an encrypted conference.
Maximum interconnectivity: The media streams are encrypted only when a call can be
set up. If the other party does not support encryption, no media stream is forced to be
encrypted.
Step 2 Save the settings.
----End
10.4 Allowing Remote Login
You can specify whether a user can log in to the terminal remotely from the web interface or
over Telnet. A user that logs in to the terminal remotely can manage the terminal from the
Web or Telnet interface.
To allow the terminal to be logged in to remotely, do the following:
Step 1 Select Settings > Security, and then do the following:
Select Web Login to enable the login from the web interface and set the user name and
password of the administrator.
The administrator user name and password can be composed of only letters (uppercase and
lowercase) and digits. The user name can contain a maximum of 128 characters and the
password can contain a maximum of 32 characters. The user name of the administrator cannot
be left blank and is case sensitive.
Select Telnet login to enable the login over Telnet. After the login, a user can query the
system status and logs and maintain the terminal on the Telnet interface.
By default, the user name and password used for logging in to the terminal over Telnet are
both debug. The administrator should keep the password properly to prevent unauthorized
login over Telnet.
Step 2 Save the settings.
----End
Issue 03 (2011-12-10) Huawei Proprietary and Confidential
72
Page 84

HUAWEI VP9050 Executive Video Terminal
User Guide
11 Terminal as a Display
Copyright © Huawei Technologies Co., Ltd
11 Terminal as a Display
11.1 Switching Between the Conference Mode and the PC Mode
In PC mode, the terminal is used as a display. If the terminal is in PC mode, you cannot access
the web interface or the user interface controlled by the remote control.
The terminal automatically enters the conference mode and functions as a display when it is
being started. You can press the menu key on the terminal to switch to the PC mode after the
terminal is started. For details about the menu key, see Figure 1-1.
11.2 Adjusting the Display Effect
When the terminal is used as a display, you can press the menu key on the front panel to
adjust parameters such as Image Setting, Color, Misc, and Language for the display. For the
location of the menu key, see section 1.3 "Appearance of the Terminal."
11.3 Answering a Call
In PC mode, the terminal plays alert tones on incoming calls, but does not allow any calls to
be answered. Therefore, you must manually switch to the conference mode to answer a call.
Issue 03 (2011-12-10) Huawei Proprietary and Confidential
73
Page 85

Page 86

HUAWEI VP9050 Executive Video Terminal
User Guide
12 Remote Management from the Web Interface
Copyright © Huawei Technologies Co., Ltd
12 Remote Management from the Web
12.1 Allowing Login from the Web Interface
Users can log in to the terminal from the web interface only after the administrator of the
terminal allows them to do so.
From the remote control user interface, the option of allowing users to access the terminal
from the web interface can be set. For details, see section 10.4 "Allowing Remote Login."
Interface
12.2 Configuring a Web Browser
Before accessing the terminal from the web interface, the browser must be configured.
This section takes Window XP as an example and describes how to configure Internet
Explorer 6 and Firefox 3.0.10. Other versions of Internet Explorer and Firefox can be
configured using the method for configuring Internet Explorer 6 and Firefox 3.0.10.
It is not recommended that earlier versions of Firefox than 3.0.10 be used.
To configure a Web browser for accessing the terminal, do the following:
Step 1 Launch Internet Explorer.
Step 2 Choose Tools > Internet Options. In the displayed dialog box, click the Security tab.
Step 3 Click Custom Level. In the displayed dialog box, enable Active Scripting and all the
parameters under Downloads, and then click OK.
Step 4 Click Trusted sites, and then Sites to display the Trusted sites dialog box.
Step 5 Enter the IP address of the terminal, click Add, and then click OK.
Step 6 Click the Privacy tab, set the slider label to Medium, and then click OK.
If operations described in Step 4 are not carried out, from the Internet Explorer menu bar, choose Tools >
Pop-up Blocker > Turn Off Pop-up Blocker to disable the pop-up blocker.
The method for configuring Firefox is similar to that of configuring Internet Explorer.
Issue 03 (2011-12-10) Huawei Proprietary and Confidential
75
Page 87

HUAWEI VP9050 Executive Video Terminal
User Guide
12 Remote Management from the Web Interface
Copyright © Huawei Technologies Co., Ltd
Launch Firefox. From the menu bar, choose Tools > Options. On the Main tab, enable Show
the Downloads window when downloading a file and on the Privacy tab, enable Accept
cookies from sites. Then click OK.
----End
12.3 Logging In to the Terminal from the Web Interface
Before managing the terminal from the web interface, you must log in to the terminal from the
web interface.
You can log in to the web interface of the terminal from a computer and use all the functions
provided on the web interface.
To log in to the terminal from the web interface, do the following:
Step 1 Launch Internet Explorer.
Step 2 In the address bar, enter the IP address of the terminal, for example, 192.168.1.1.
Step 3 Press Enter on the keyboard. Then the page for logging in to the web interface of the terminal
is displayed.
Step 4 In User name and password, enter the default user name admin and the default password
admin respectively.
Step 5 Select a language from the Language drop-down list box.
Step 6 Select Log on PC to display the home page of the web interface as shown in Figure 12-1.
Issue 03 (2011-12-10) Huawei Proprietary and Confidential
76
Page 88

HUAWEI VP9050 Executive Video Terminal
User Guide
12 Remote Management from the Web Interface
Copyright © Huawei Technologies Co., Ltd
languages
name
displaying logs
icons
displaying messages
The user name and password can be composed of only letters (uppercase and lowercase) and digits.
The user name can contain a maximum of 128 characters and the password can contain a maximum
of 32 characters. The user name cannot be left blank and is case sensitive. By default, both the user
name and the password are admin.
A ma ximum of three users can access the web interface of the terminal simultaneously.
After logging in from the web interface, the administrator can configure the system; a common user,
however, can perform only personal settings and cannot configure the system.
Figure 12-1 Home page of the web interface
1. Shortcut bar 2. Menu bar 3. Button for
collapsing the menu
6. Area for
7. Desktop
8. Area for
4. Drop-down list box
for switching between
9. Status icons
----End
12.4 Functions Provided on the Web Interface
The functions provided by a terminal are reorganized on the web interface for greater ease of
use.
The following are the special functions which you can implement on the web interface:
Importing and exporting the address book
Customizing the shortcut icons on the shortcut bar and the desktop
User-friendly functions used to control a conference, including the conference control
page, site list, site template, and conference template
Monitoring videos
5. Area for
displaying the site
Issue 03 (2011-12-10) Huawei Proprietary and Confidential
77
Page 89

HUAWEI VP9050 Executive Video Terminal
User Guide
12 Remote Management from the Web Interface
Copyright © Huawei Technologies Co., Ltd
12.4.1 Exporting the Address Book
You can export the address book on a terminal to another storage medium, such as a disk on a
computer.
The exported address book is saved in the vCard format. The extension of the filename is vcf.
For example, you can export the records from the address book of terminal A, modify the
records, and then import these records to the address book of terminal B.
To export the address book, do the following:
Step 1 Log in to the terminal from the web interface, and then choose Address Book > Address
Book to display the Address Book page.
Step 2 Click Export.
Step 3 Save the address book as file A.
----End
12.4.2 Modifying Records of an Address Book
After exporting the address book, you can modify the site entries.
Open file A using a text editor. Based on the parameter notes in the file, modify file A so that
the file is applicable to terminal B. Then, save the modified file as file B.
12.4.3 Importing an Address Book
You can import the modified address book to a terminal, after which the records in the address
book are displayed on the address book page of the web interface.
To import an address book, do the following:
Step 1 Log in to the terminal from the web interface, and then choose Address Book > Address
Book to display the Address Book page.
Step 2 Click Import, and then select file B to be imported.
Step 3 Click Import to import the records saved in file B to the address book of terminal B.
----End
12.4.4 Customizing Shortcut Icons
You can customize the shortcut icons on the shortcut bar and the desktop on the web interface
as required so that you can perform the desired operations more conveniently.
To customize shortcut icons, do the following:
Step 1 Log in to the terminal from the web interface, and then choose System Settings > Personal to
display the Personal page.
Step 2 Click the Style Management tab.
Step 3 Click Shortcut on the quick launch bar to display the Shortcut on the quick launch bar
dialog box.
Issue 03 (2011-12-10) Huawei Proprietary and Confidential
78
Page 90

HUAWEI VP9050 Executive Video Terminal
User Guide
12 Remote Management from the Web Interface
Copyright © Huawei Technologies Co., Ltd
Step 4 Add a shortcut icon.
----End
12.4.5 Navigation
Navigation helps you to find required functions.
To view the navigation, do the following:
Log in to the terminal from the web interface, and then choose Help > Navigation to display
the Navigation page.
12.4.6 Site List
If there are many sites on the address book page, conference-related pages, or other pages,
you can sort the sites in a site list based on the name, number, rate, line type, online status,
type, and sequence number of the sites.
In a site list, click a letter range button (such as A–E) in the upper right area to display the
sites whose names start
A: If a site name starts with a Chinese character, the initial letter is the first letter of the Pinyin of the
character.
a
with letters in that range.
12.4.7 Conference Control Page
The conference control page of the web interface is a user-friendly page which enables users
to use conference control functions, select a site group, and sort the sites. From the conference
control page, conference control functions can be more conveniently used.
The description in this section is not applicable if the terminal accesses an IMS network and
manages conferences from the Portal provided by the IMS network.
Setting a Template for Viewing Sites Automatically
A viewing order of sites can be preset, saved in a template, and thereafter conveniently
viewed in the order saved in the template without additional configuration. To set a template
for viewing sites automatically, do the following:
Log in to the terminal from the web interface, and then as the chair site, choose Conference >
Conference Control to display the conference control page for the chair site. Configure a
template as required on the page for viewing sites.
To view the sites in the order saved in a template, click Use Template, and then select the
desired template from the drop-down list box.
Issue 03 (2011-12-10) Huawei Proprietary and Confidential
79
Page 91

HUAWEI VP9050 Executive Video Terminal
User Guide
12 Remote Management from the Web Interface
Copyright © Huawei Technologies Co., Ltd
Setting a Grouping Template
Using grouping templates, different sites can be classified. In a template, the sites are
identified by the defined site names. Using a grouping template, specific sites can be found
quickly. To set a grouping template, do the following:
Choose Address Book > Site Template to display the page for defining grouping templates.
Create a grouping template.
After the sites contained in a grouping template join a conference, the name of the grouping
template is displayed in the drop-down list box on the
conference control page for the chair site or non-chair sites.
A template saved successfully is displayed in the Template name drop-down list box.
Monitoring Videos
On the conference control page for the chair site, you can view the video and presentation of a
remote site in real time. You can also adjust the sizes of the video and presentation. In this
way, the status and video quality of the remote site can be monitored.
Issue 03 (2011-12-10) Huawei Proprietary and Confidential
80
Page 92

HUAWEI VP9050 Executive Video Terminal
User Guide
13 Maintenance and Troubleshooting
Copyright © Huawei Technologies Co., Ltd
13 Maintenance and Troubleshooting
13.1 Routine Maintenance
An administrator must check the working environment, cable connection, communication
network connection, and audio-visual input and output of the terminal periodically, to ensure
that the terminal and its peripheral equipment work properly.
13.1.1 Checking the Working Environment Periodically
To ensure that the terminal can be used properly, it is essential for the administrator to check
the working environment periodically.
Table 13-1 lists the items that need to be checked.
If one of the following items cannot meet the corresponding requirement, it is recommended
that you power off the terminal and then take measures to improve the environment. Ensure
that the terminal is used only when all the following items meet the relevant requirements.
Table 13-1 Checking the working environment
Item Requirement
Ambient temperature 0°C to 40°C
Relative humidity 10% to 80%
13.1.2 Checking Cable Connection Periodically
Check the audio-visual and communication cables periodically.
Issue 03 (2011-12-10) Huawei Proprietary and Confidential
81
Page 93

HUAWEI VP9050 Executive Video Terminal
User Guide
13 Maintenance and Troubleshooting
Copyright © Huawei Technologies Co., Ltd
Audio-Visual Cables
Periodically (once a week is recommended) check whether the cables connecting the terminal
to the peripheral equipment and the power supply are securely connected.
If the cables are connected properly, power on the terminal to test the connectivity. If any of
the cables are loose, connect them securely.
Communication Cables
Periodically (once a week is recommended) power on the terminal, and then check whether
the communication cables connected to the terminal work properly using the following
method:
Place calls to other terminals using different communication methods, such as accessing a
broadband network.
If a call is set up successfully, it indicates that the communication cable works properly
in the corresponding access mode.
If a call cannot be set up properly, check whether the cables are connected correctly and
securely and whether the communication parameters are set properly. If the problem
persists, contact the network administrator to check the network.
13.1.3 Viewing the System Status
To perform diagnostics against line connection, first view the network connection status.
To view the network connection status, do the following:
Step 1 Select Diagnostics from the home screen or press on the remote control.
Step 2 Select Status to view the following items:
Line status: You can view the IP address, gatekeeper status, network interface status,
local site number, SIP information, and running duration.
Input interface status: You can view the information about the video input from the input
interfaces of the terminal. For example, DVI/VAG IN DVI 720p 60 Hz indicates that the
input mode, video resolution, and refresh rate of the DVI/VAG IN interface are DVI,
720p, and 60 Hz respectively.
3G network status: If the license supports the connection to a data card and if a data card
is connected to the USB port of the terminal, you can view the current network,
connection status, IP address, last connection time, and connection duration.
----End
13.1.4 Viewing the System Information
System information includes the version and specifications of the terminal.
To view the system information, do the following:
Step 1 From the home screen, select Diagnostics to display the Diagnostics screen.
Step 2 Select System Information to view the following items:
Issue 03 (2011-12-10) Huawei Proprietary and Confidential
82
Page 94

HUAWEI VP9050 Executive Video Terminal
User Guide
13 Maintenance and Troubleshooting
Copyright © Huawei Technologies Co., Ltd
Version information: terminal model, terminal serial number, software version, and
hardware information.
Specifications: main features supported by the terminal, such as the 3G network, audio
protocol, video protocol, interfaces, bandwidth, and dual-stream mode.
----End
13.1.5 Viewing Logs
The logs on the terminal record key events during the running of the terminal. These logs may
be useful during the maintenance and troubleshooting of the terminal.
The terminal can save a maximum of 10000 logs. When the memory for recording the logs is
full, a new log can still be recorded. The latest log will replace the oldest one.
The logs are sorted by time. Turn pages to view more entries. To display the details of a log,
scroll to the log, and then select Details.
A log records the following information:
Error name defined by the system
Time when the error occurred
Error level
Error type defined by the system
Detailed reasons
Select Query to search for logs based on different conditions.
To view logs, do the following:
Step 1 From the home screen, select Diagnostics to display the Diagnostics screen.
Step 2 Select Logs to display the Logs screen.
----End
13.2 Software Upgrade
The terminal supports upgrading the software locally and upgrading the software using the
minimum system.
During the upgrade, do not power off the terminal to prevent faults that cannot be rectified.
Table 13-2 describes the differences between the two upgrade methods.
Issue 03 (2011-12-10) Huawei Proprietary and Confidential
83
Page 95

HUAWEI VP9050 Executive Video Terminal
User Guide
13 Maintenance and Troubleshooting
Copyright © Huawei Technologies Co., Ltd
Table 13-2 Methods for upgrading the terminal software
Method Usage
Upgrading the
software locally
After obtaining the upgrade software, connect a computer to the
terminal directly or over the local area network, and then upgrade
the terminal.
Upgrading the
software using the
minimum system
Set the terminal to the upgrade state forcibly. Connect a computer
to the terminal directly or using a switch, turn the switch on the
rear panel of the terminal to Load, and then upgrade the terminal.
NOTE
If the hardware of the terminal works properly, the software can always
be upgraded successfully.
If upgrading the software locally fails, you can use this method.
Before the upgrade, note the following:
Read the Release Notes to understand the contents to be upgraded and precautions
required to be taken during the upgrade.
Check whether the current software version is earlier than the target version.
Back up the settings on the terminal, such as the communication settings and the address
book.
13.2.2 Upgrading the Software Locally Using a Computer
You can use a computer to upgrade the software of the terminal locally.
Before upgrading, note the following prerequisites:
A copy of the destination software version is available on the computer.
The computer is connected to the terminal using a straight through network cable,
crossover network cable, or switch.
Upgrading a Single Terminal
You can upgrade a single terminal using the upgrade program installed on the computer.
To upgrade a single terminal, do the following:
Step 1 Power on the computer and the terminal.
Step 2 Extract the compressed file of the upgrade software on the computer.
Step 3 Run UpgradeTool.exe to display the window as shown in Figure 13-1.
Issue 03 (2011-12-10) Huawei Proprietary and Confidential
84
Page 96

HUAWEI VP9050 Executive Video Terminal
User Guide
13 Maintenance and Troubleshooting
Copyright © Huawei Technologies Co., Ltd
Figure 13-1 Upgrading the software locally using a computer
Step 4 Click Browser, and then find the file in .dat format.
Step 5 Enter the IP address of the terminal, such as 192.168.1.1.
Step 6 Click Upgrade.
----End
Upgrading Multiple Terminals at a Time
You can upgrade multiple terminals at a time using the upgrade program installed on the
computer.
To upgrade multiple terminals at a time, do the following:
Step 1 Power on the computer and the terminal.
Step 2 Extract the compressed file of the upgrade software on the computer.
Step 3 Run UpgradeTool.exe to display the window as shown in Figure 13-1.
Step 4 Click Browser, and then find the file in .dat format.
Step 5 Click to display the window as shown in Figure 13-2.
Issue 03 (2011-12-10) Huawei Proprietary and Confidential
85
Page 97

HUAWEI VP9050 Executive Video Terminal
User Guide
13 Maintenance and Troubleshooting
Copyright © Huawei Technologies Co., Ltd
Figure 13-2 Upgrading multiple terminals at a time
Step 6 Enter the number of the terminals to be upgraded, 10 in this example, in the area that is
circled in red and marked as 1.
Step 7 Enter the IP addresses of the terminals to be upgraded in the area that is circled in red and
marked as 2.
Step 8 Click Upgrade.
To increase upgrade efficiency when the network bandwidth is insufficient, press Ctrl+ALT+C in the
window as shown in Figure 13-2, and then set the upgrade policy in the displayed window.
----End
Upgrading Certain Selected Software Modules
You can upgrade certain selected software modules using the upgrade program installed on
the computer.
To upgrade certain selected software modules, do the following:
Step 1 Power on the computer and the terminal.
Step 2 Extract the compressed file of the upgrade software on the computer.
Step 3 Run UpgradeTool.exe to display the window as shown in Figure 13-1.
Step 4 Click Browser, and then find the file in .dat format.
Issue 03 (2011-12-10) Huawei Proprietary and Confidential
86
Page 98

HUAWEI VP9050 Executive Video Terminal
User Guide
13 Maintenance and Troubleshooting
Copyright © Huawei Technologies Co., Ltd
Step 5 Press Ctrl+ALT+P to display the window as shown in Figure 13-3.
Figure 13-3 Selecting the software modules to be upgraded
Step 6 Select the software modules to be upgraded, such as Web. A tick appears in the check box
beside the selected module.
Step 7 Click Pack File to pack the software modules to be upgraded into a file in .dat format, and
then save the file to the computer.
Step 8 Close the window as shown in Figure 13-3.
Step 9 In the window as shown in Figure 13-1, click Browser, and then find the .dat file created and
saved in Step 7.
Step 10 Click Upgrade.
----End
13.2.3 Upgrading the Software Using the Minimum System
If upgrading the software locally failed, the software should be upgraded using the minimum
system.
Before upgrading, note the following prerequisites:
A copy of the destination software version is available on the computer.
Issue 03 (2011-12-10) Huawei Proprietary and Confidential
87
Page 99

HUAWEI VP9050 Executive Video Terminal
User Guide
13 Maintenance and Troubleshooting
Copyright © Huawei Technologies Co., Ltd
The computer is connected to the terminal using a crossover network cable or a switch.
Replace the current software during the upgrade if the versions of the current and
destination software are the same.
Turn the switch on the rear panel of the terminal to Load, and then restart the terminal.
The IP address of the terminal is changed to 172.16.21.114. Ensure that the IP addresses of
the computer and the terminal are in the same network segment.
To upgrade the software using the minimum system, do the following:
Step 1 Change the IP address of the computer to a static IP address, such as 172.16.21.114, and then
set the subnet mask to 255.255.252.0.
Step 2 Turn the switch on the rear panel of the terminal to Load.
Step 3 Restart the computer and the terminal.
Step 4 Extract the compressed file of the upgrade software on the computer.
Step 5 Run UpgradeTool.exe to display the upgrade window.
Step 6 Select all the items, click Browser, and then find the file in .dat format.
Step 7 Enter the IP address of the terminal, that is, 172.16.21.114. Then click Upgrade.
Step 8 After the upgrade, turn the switch on the rear panel of the terminal to Norm.
Step 9 Restart the terminal.
----End
13.3 Diagnostics
On the terminal, you can perform sound and color bar tests, network tests, and loopback tests.
Figure 13-4 shows the diagnostic model of the terminal.
Issue 03 (2011-12-10) Huawei Proprietary and Confidential
88
Page 100

HUAWEI VP9050 Executive Video Terminal
User Guide
13 Maintenance and Troubleshooting
Copyright © Huawei Technologies Co., Ltd
Figure 13-4 Diagnostic model of the terminal
Figure 13-4 shows the diagnostics of three modules, including the audio module, video
module, and network send/receive module.
Normal audio signal streams are as follows:
Local microphone → 1 → 5 → communication network → 6 → 7 → remote speaker
Local speaker ← 2 ← 5 ← communication network ← 6 ← 8 ← remote microphone
Normal video signal streams are as follows:
Local camera → 3 → 5 → communication network → 6 → 9 → remote display
Local display ← 4 ← 5 ← communication network ← 6 ← 10 ← remote camera
Sound and Color Bar Tests
Table 13-3 describes sound and color bar tests.
Table 13-3 Sound and color bar tests
Test Item to Be Tested/Objective Signal Stream
Sound test 2 audio output 2 → speaker
Color bar test 4 video output 4 → display
To perform a sound test, choose Diagnostics > Sound & Color Bar Test > Sound Test.
The terminal plays an embedded tone to test the audio output quality.
To perform a color bar test, and then choose Diagnostics > Sound & Color Bar Test >
Color Bar Test. The terminal displays 6 color bars on the display to test the color output
quality.
Loopback Tests
The terminal can transmit audio or video data on a channel to simulate the actual application
and test whether the output is satisfactory. You can perform a local loopback test to check the
local network connection or a remote loopback test to check the remote network connection.
Issue 03 (2011-12-10) Huawei Proprietary and Confidential
89
 Loading...