

Page 1

Wonderful Communication, Mobile Life.
HUAWEI PC Suite
User Manual
Page 2

Copyright © Huawei Technologies Co., Ltd. 2009. All rights reserved.
No part of this document may be reproduced or transmitted in any form or by any
means without prior written consent of Huawei Technologies Co., Ltd.
The product described in this manual may include copyrighted software of Huawei
Technologies Co., L t d and possible licenso rs. Customers shall not in any manner
reproduce, distribute, modify, decompile, disassemble, decrypt, extract, reverse
engineer, lease, assign, or sublicense the said software, unless such restrictions are
prohibited by applicable laws or such actions are approved by respective copyright
holders under licenses.
Trademarks and Permissions
, HUAWEI, and are trademarks or registered trademarks of Huawei
Technologies Co., L t d.
Other trademarks, product, service and company names mentioned are the
property of their respective owners.
Notice
Some features of the product and its accessories described herein rely on the
software installed, capacities and settings of local network, and may not be
activated or may be limited by local network operators or network service
providers, thus the descriptions herein may not exactly match the product or its
accessories you purchase.
Huawei Technologies Co., Ltd reserves the right to change or modify any
information or specifications contained in this manual without prior notice or
obligation.
NO WARRANTY
THE CONTENTS OF THIS MANUAL ARE PROVIDED “AS IS”. EXCEPT AS
REQUIRED BY APPLICABLE LAWS, NO WARRANTIES OF ANY KIND,
EITHER EXPRESS OR IMPLIED, INCLUDING BUT NOT LIMITED TO, THE
IMPLIED WARRANTIES OF MERCHANTABILITY AND FITNESS FOR A
PARTICULAR PURPOSE, ARE MADE IN RELATION TO THE ACCURACY,
RELIABILITY OR CONTENTS OF THIS MANUAL.
TO THE MAXIMUM EXTENT PERMITTED BY AP PLICABLE LAW, IN NO
CASE SHALL HUAWEI TECHNOLOGIES CO., LTD BE LIABLE FOR ANY
Page 3

SPECIAL, INCIDENTAL, INDIRECT, OR CONSEQUENTIAL DAMAGES, OR
LOST PROFITS, BUSINESS, REVENUE, DATA, GOODWILL OR
ANTICIPATED SAVINGS.
Import and Export Regulations
Customers shall comply with all applicable export or import laws and regulations
and will obtain all necessary governmental permits and licenses in order to export,
re-export or import the product mentioned in this manual including the software
and technical data therein.
Page 4

Contents
1 Description of the PC Suite GUI ..........................................................................................1
Setting the Connection Wizard......................................................................................1
GUI Introduction ...........................................................................................................2
2 SMS.......................................................................................................................................4
Creating and Sending a Message ..................................................................................4
Inbox..............................................................................................................................4
Outbox ...........................................................................................................................6
3 Phonebook.............................................................................................................................7
Managing the Phonebook of the Communication Device............................................7
Managing the Phonebook of the SIM/USIM Card .......................................................8
Importing and Exporting Contacts................................................................................9
4 Calendar (Optional).............................................................................................................11
Creating an Appointment.............................................................................................11
Creating a Task............................................................................................................13
5 File Manager .......................................................................................................................14
Importing Local Files ..................................................................................................14
6 Data Synchronization (Optional) ........................................................................................15
Synchronizing Logs.....................................................................................................15
Synchronizing Contacts and Calendar Appointments.................................................15
7 Settings and Information Query..........................................................................................17
Switching a Language .................................................................................................17
Connection Wizard......................................................................................................17
Startup Settings............................................................................................................17
8 Backup and Restoration Management................................................................................19
Backing Up Information..............................................................................................19
Restoring Information .................................................................................................19
Managing Logs............................................................................................................20
9 Animation Editor.................................................................................................................22
Opening the Animation Editor ....................................................................................22
i
Page 5

Adding a Frame ...........................................................................................................22
Copying a Frame .........................................................................................................22
Adding a Picture..........................................................................................................23
Flipping a Picture.........................................................................................................23
Adjusting the Picture Color.........................................................................................24
Inverting the Picture Color..........................................................................................24
Resizing a Picture........................................................................................................25
Applying Animation Effects........................................................................................25
Saving an Animation ...................................................................................................26
Previewing an Animation............................................................................................26
10 Image Editor......................................................................................................................27
Viewing a PC Picture...................................................................................................27
Viewing a Device Picture............................................................................................27
Rotating a Picture ........................................................................................................28
Cutting a Picture..........................................................................................................28
Copying a Picture ........................................................................................................28
Zooming In or Out on a Picture...................................................................................29
Flipping a Picture.........................................................................................................29
Adjusting the Picture Color.........................................................................................29
Applying Picture Effects .............................................................................................30
Adding Text.................................................................................................................30
Capturing a Screen Picture..........................................................................................30
Inverting the Picture Color..........................................................................................31
Previewing a Picture....................................................................................................31
11 Music Playlist Management..............................................................................................32
Uploading a Music Playlist from the PC to the Communication device....................32
Renaming a PC Playlist...............................................................................................32
Adding a PC Playlist ...................................................................................................33
Creating a PC Playlist..................................................................................................33
Editing a PC Playlist....................................................................................................33
Deleting a PC Playlist..................................................................................................34
Refreshing PC Playlists...............................................................................................34
ii
Page 6

Editing a Device Playlist .............................................................................................34
Refreshing Device Playlists.........................................................................................35
12 Media Player .....................................................................................................................36
Playing an Audio or a Video File ................................................................................36
Changing the Size of the Video Screen.......................................................................36
Playing the Previous Audio or Video File...................................................................37
13 FAQs..................................................................................................................................38
14 Acronyms and Abbreviations............................................................................................39
iii
Page 7

1 he PC Suite GUI
Setting the Connect
With the PC Scuite, you can choose one of the following connection modes to connect the
ommunication
y USB
y Bluetooth
Serial c
y able
Connecting Through the USB or Serial Cable
Double-click th1. e shortcut icon of the PC Suite on the desktop.
Choose Tools
2. : USB or
Select a connection mode to connect the communication device to the PC
Serial Cable.
3. Click Next.
Then the system automatically searches all devices connected to the PC.
4. Select a device in the device list, and click Finish to complete t
Co
nnecting Through Bluetooth
1. Double-click the shortcut icon of the PC Suite on the desktop.
Choose Tool
displayed.
2.
Select the connection mode to connect the communication device to the PC:
Bluetooth.
Click Next.
3.
Then the system automatically searches all Bluetooth devices connected to the P
Select a device in the Bluetooth device list and click Connect.
4.
If the connection fails, the system prom
can use the Bluetooth port detection softw
etooth ports. Select a corresponding port from the port list. Click Test to check
Blu
ther the selected port can be used.
whe
5. Clic
k Finish to complete the connection.
Note:
y
You can choose Tools > Connection Guide to set or change parameters of the
Connection Wizard.
Description of t
ion Wizard
device to the PC:
> Connection Guide to display the Connection Wizard dialog box.
he connection.
s > Connection Guide to display the Connection Wizard dialog box is
C.
pts you for the connection failure. Then you
are on the PC to detect the available
1
Page 8
y
When you connect the communication device to the PC, the PC Suite displays a
message prompting that the
communication device from the PC, the PC Suite displays a message prompting
that no device is av
y Now, the Connection Guide only supports IVT, Widcomm and Microsoft
Bluetooth drivers.
PC is detecting the device; when you disconnect the
ailable.
GUI Introduc
tion
Shortcut Icons
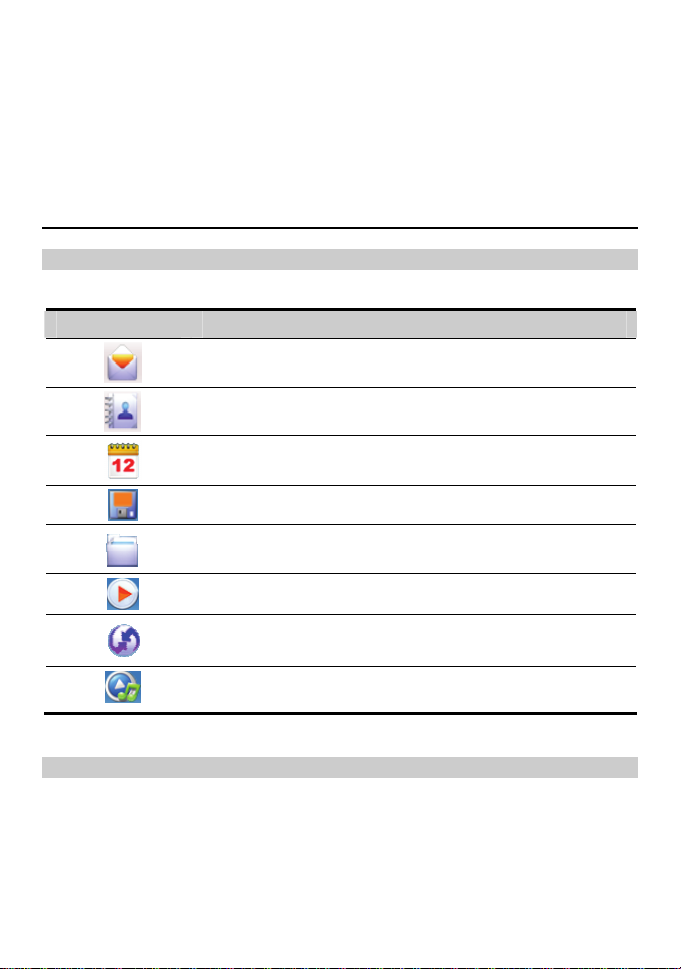
T owing table lists ns provided by the PC Suite. he foll the shortcut ico
Icon Application
Display the SMS view.
Display the Phonebook view.
Display the Calendar view.
Display the Back up and Restore view.
Display the File Manager view.
Display the Music Playlist view.
Display the Synchronization view.
Display the Media player, the Image player and the Animation
player drop-down combo box.
Status Information
The following table lists the status information that can be displayed by the PC Suite.
2
Page 9

Status Indicates …
Information
Network
connection status
Status of the network connection:
: The PC is connected to the network.
y
: The PC is disconnected from the network.
y
3
Page 10

2 SMS
The PC Su
outbox me
ite supports the SMS. By using the PC Suite, you can manage the inbox and
ssages saved on your communication device.
Creating and Sending a Message
1. Click .
2.
Click
3. Enter the recipient number by using one of the following met
y Click Send To. Then select er dialog box.
y Enter the phone number of the recipient directly.
4. Enter the message content.
5. After editing the message, you can do as follows:
y Click Send: to send the message.
Click Save: to save the message as a draft.
y
y Click Close: to exit editing of
the message is saved as a draft; if you click No, the
click Cancel, the Edit dialo
Note:
nbox
I
The inbox stores the received messages.
To access the inbox, do
.
a phone number in the Select num b
the message. In the Prompt dialog box, if you click Yes,
message cannot be saved; if you
g box is returned.
y You can send group messages to up to 100 phone n
be separated by a semicolon (;) or a comma (,).
y You can enter up to 2,048 characters in a message each time.
as follows:
hods:
umbers. Each number should
1. Click
2. oose Device > Inbox to access
Ch the inbox.
Or ccess the inbox.
choose SIM/USIM > Inbox to a
.
4
Page 11

Se hing for a Message arc
Click . Then enter the name or the phone number of the message sender, or enter part
of the m
essage content in the text box.
Note:
y You
can enter part of the message content to search for a message.
y Wh
en you search for a message, a list of the matched messages is displayed and
updated automatically according to the information you enter. No result is
displayed when no matched message is found.
Viewing a Message
To view a ssage in the inbox, do as follows:
1. Access inbox
2. Click the message to be read.
3. Rig
y New: W
y Reply
Forward: Forward the message to another person.
y
Save Number: In the New Contact dialog box, enter other information (including the
y
y Delete: Delete the message.
y Clear All: Clear all the messages in the inbox.
y Search: Search a message.
y Move to Local: Move a message to the local PC.
y Move All to Local: Move all the messages to the local PC.
Note:
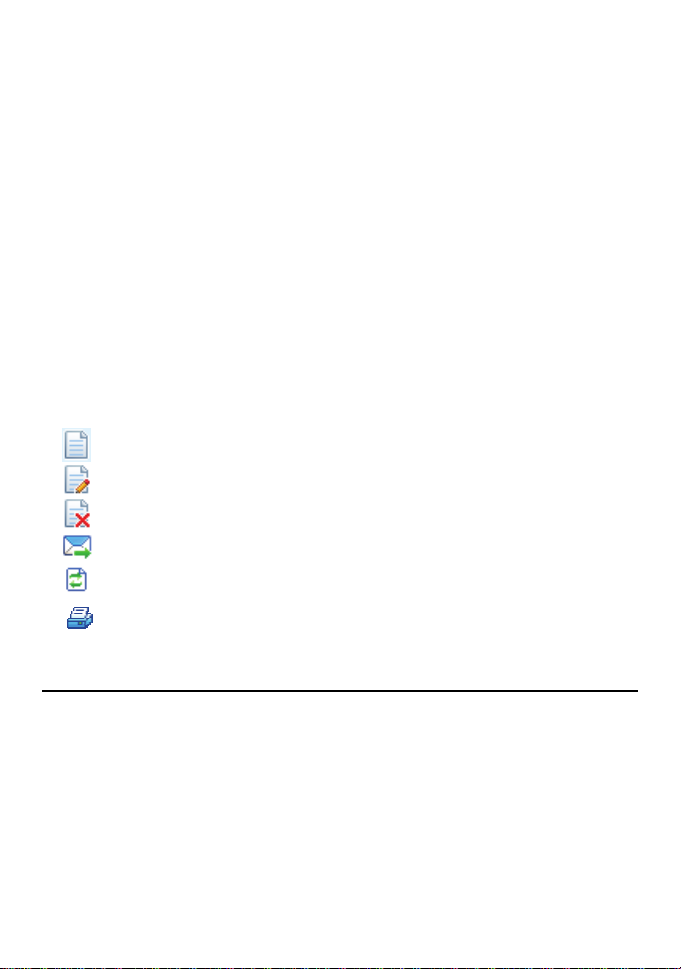
You can also click the following shortcut icons displayed above the message list to perform
the related operations:
me
the and find the message you want to read.
name and the phone number of the message sender, message content, received
The
e and the state of this message are displayed in the box below the message list.
tim
ht-click the message to be read for the following options:
rite a new message
: In the Edit dialog box, edit a message and send it to the message sender.
contact name, office number, home number, email address, and notes) about the contact,
and save the contact.
y You can hold down Shift or Ctrl to select multiple messages by clicking the
selected messages; or, you can press Ctrl+A to select all the messages in the
list.
y You can forward only one message at a time.
y
: Create a new message.
y
: Delete the selected message.
: Reply to the selected message.
y
5
Page 12

y : Forward the selected message.
: Refresh the message list.
y
y
: Print messages.
Outbox
The outbox stores the sent messages, including the messages sent successfully and
unsuccessfully
To access the outbox, do as follows:
.
1. Click
2. Choose Device Outbox (or choose SIM/USIM > Outbox) to access the outbox.
Note:
.
>
o view and search for a message in the outbox, see
y For details abo
"Inbox" in chapter 2 "
y ough group messages, you cannot directly call the number of a recipient.
Thr
ut how t
SMS."
6
Page 13

3 Phonebook
With the PC Suite, you can manage
Managing the Phonebook
contacts in the phonebook conveniently.
of the Communication
Device
To access the phonebook of the comm unication device, do as follows:
1. Click .
2. ick Device. Cl
Crea ing a Contact t
To te a contact, do as follows: crea
1. Click .
2. ter the contact information
En .
3. Save to save the contact.
Click
Note:
The contact information cannot be empty or contain only spaces or linefeeds.
Searching for a Contact
Click . Then enter the contact information in the text box.
Note:
y You can enter any par
y When you search for a contact, a list of matched contacts in the current group is
displayed and updated automatically according to the information you enter. No
result is displayed when no matched contact is found.
t of the contact information to search for a contact.
Viewin
g a Contact
o view a contact, do as follows:
T
7
Page 14
1. Access the phonebook of the communication device, and
view.
2. Click the contact to be viewed.
The detailed information about the contact is displayed in the box below the contact
list.
3. Right-click the contact to be viewed for the following options:
y New Contact: Create a new contact.
y Edit Contact: Edit the contact.
y Delet
e Contact: Delete the contact.
y Remo
ve from group: Remove the contact from a group.
y Send:
Send a message or a business card to the mobile number of the contact.
y Import:
y Expo
y Expo
y Copy: C
y Cut: Cu
Paste: P
y
Y
the related operations:
y
y
y
y
Import the contact.
rt Selected Contacts: Export selected contacts.
rt All Contacts: Export all contacts.
opy the contact.
t the contact.
aste the contact.
ou can also click the following shortcut icons displayed above the contact list to perform
: Create a new contact.
: Edit the seley cted contact.
: Delete the selected contact.
: Send a message or a business card to the mobile number of the contact.
: Refresh the contact list.
find the contact you want to
: Print the contact.
y
Managing the Phonebook of the SIM/USIM Card
If a SIM/U the
SIM/U
he operations on the contacts saved on the SIM/USIM card are similar to those to the
T
contacts saved on your com
of the Communication Dev
Note:
SIM card is used on your communication device, you can save contacts on
SIM
card.
munication device. For details, see "Managing the Phonebook
ice."
y our network service provider to confirm whether a SIM/USIM card is
Contact y
y SIM
requir
ed.
The /USIM card is supplied by your networ
about the SIM/USIM card, contact your netw
ork service provider.
k service provider. For details
8
Page 15

Importing and Exporting Contacts
You can export all contacts from your co
*.htm, *.txt, *.xls, *.vcf, *.mdb, or *.csv
ication device or the SIM/USIM card to a *.htm, *.txt, *.xls, or *.vcf file. You can
commun
also imp cation
ort the contacts from a *.vcf or *.mdb file to the phonebook of the communi
device o
r the SIM/USIM card.
Note:
y In the local phonebook, select one or more contacts. Drag the contact(s) to the
SIM/USIM card in the navigation tree. Then the contact(s) are exported to the
phonebook of the SIM/USIM card.
y You can import the contacts from a *.vcf or *.mdb file to the SIM/USIM card,
or export the contacts from the SIM/USIM card to a *.htm, *.txt, *.xls, *.vcf,
*.mdb, or *.csv file only when the SIM/USIM card is used on your
communication device.
mmunication device or the SIM/USIM card to a
file, or export part of the contacts from your
Importing Contacts
You can import the contacts from a *.vcf or *.mdb file to your communication device or
the SIM/USIM card.
1. Click
2. Click Device or SIM/USIM in the navigation tree.
3. Right-click the contact list and choose Import.
4. Select the file to be imported and click Open.
5. Click OK.
Note:
.
y The number of contacts that can be saved on the SIM/USIM card depends on
the capacity of the SIM/USIM card.
y When contacts are imported to the SIM/USIM card, if the storage space of the
SIM/USIM card is full, the PC Suite stops importing automatically. The
imported contacts are not affected.
Exporting Contacts
You can export contacts from your communication device and the SIM/USIM card. The
exported contacts can be saved in a *.htm, *.txt, *.xls, *.vcf, *.mdb, or *.csv file.
9
Page 16

1. Click .
2. Click Device or SIM/USIM in the nav
3. You can perform the following operati
y Right-click the contact list and choose Export All
y Select one or more contacts and then right-click the selected contact(s) to choose Export
Selected Contacts.
4. Select the file to save the exported
5. Enter the file name and click Save.
Note:
You can hold down Shift or Ctrl to select multiple contacts by clicking the
co ts; ontac
r, you can hold Ctrl+A to select all the contacts in the list.
igation tree.
ons:
Contacts.
contacts.
10
Page 17

4 Calendar (Optiona
B nction of the PC Suite, you can plan your scy using the calendar fu
a
ppointment and task arra
Creating an Appo
1. Click .
2. Click Appointment in the navigation tree.
3. Click
4. In the Appointment dialog box, enter the information about the appointment.
5. Click OK to save the appointment.
Vi wing an Appointment e
about the appoi
Searching for an Appointment
Click . Then enter the subject, location of the appointment to be searched for in the
text box.
Note:
You can also click the following sh ons displayed above the appointment list to
f operations:
per orm the related
.
ntment is displayed in the box below the appointment list.
y You can enter part of the appointment informatio
y When you search for an appointment, a list of the matched appointment
updated automatically according to the information you enter. No result is
displayed when no matched appointment is found.
ngements.
intment
ortcut ic
hedules, such as
n to search for an appointment.
s is
l)
In the appointment list, click the appointment to be viewed. Then the detailed information
: Create a new appointment.
y
: Edit the selected appointment.
y
11
Page 18
y : Delete the selected appointment.
: Refresh the appointment list.
y
y
: Print the appointment.
Import
ing and Exporting Appointments
You can lendar appointments from the communication device, or import the
export the ca
calendar appointments to the communication device. The following types of files can be
imported or exported:
y *.csv: comma separated values (CSV) files of Microsoft Excel
y *.vcs: Calendar files
y *.htm: web page file
y *.txt: Text file
y *.xls: Standard Excel file
y *.mdb: Access database file
Importing Appointments
You can import the appointments from a *.vcs file on the PC to the communication device.
1. Click
2. Click Appointment in the navigation tree.
3. Right-click the appointment list and choose Import.
4. Select the format of the file to be imported.
5. Click
6. In the Open dialog box, select the path of the file to be imported and select the file.
7. Click OK.
.
.
Exporting Appointments
You can export the appointments from your communication device to the PC.
1. Click
2. Click Appointment in the navigation tree.
3. You can perform the following operations:
y Right-click the appointment list and choose Export All.
y Select one or more appointments and then right-click to choose Export Select.
4. In the Select export format dialog box, select the format of the exported file (Such as:
*.htm, *.txt, *.xls, *.csv, *.vcs).
5. Click
6. In the Open dialog box, select the path of the file to be exported and select the file.
7. Click OK.
.
.
12
Page 19

Creating a Task
1. Click .
2. Click Task in the navigation tree.
Note:
eration details, see "Creating an Appointment" in chapter 4 "Calendar
For op
(Optional)."
13
Page 20

5 r
With the PC Suite, you can manage th
conveniently.
Impor ting
In he File Manager view, you can manage local files and files on the communication t
device, such as creating a folder, deleting a file, and copy
files from local to the communication device as follows:
1.
Click
in the left pane and all the files saved on the communication device in the right pane.
2. In the right pane for displaying the files saved on the communicat
path of the file to be imported.
3. In the left pane for displaying the local files, select the file to be e
communication device. Click
communication device
file in the left pane.
Note:
Local Files
to display the File Manager view. Then you can view all the local files
; or right-click the selected file, choose Copy, and then paste the
y When importing a local file to the communica
a folder that supports the corresponding file format. For example, a video
can be imported to only the folder that supports video files or the folder that is
named Others.
y On the PC Suite, the following picture formats are supported: *.bmp, *.jpg,
*.gif, *.png, *.wbmp and *.jpeg; the follow
*.mp3, *.wma, *.mid, *.wav and *.mpga; the following video form
supported: *.avi and *.wmv; the following e-book format is supported: *.txt
and *.doc; the following Java formats are supported: *.jad and *.jar.
y The operations of managing the files saved on the communication device are
similar to those of managing the local files. You can import the files
communication device to local.
e files saved on the PC or the communication device
to export the file to the speci
File Manage
ing a file. You can also import the
ion device, select the
xported to the
fied path on the
tion device, you should designate
ing audio formats are supported:
file
ats are
from the
14
Page 21

6 Data Synchronization (Optional)
With the PC Suite, you can synchronize the contacts and calendar appointments between
the PC and the communication device.
Synchronizing Logs
1. Click .
2. Click Log, Select the synchronization log to be viewed from Synchronization Log
Info form list.
3. You can perform the following operations:
y Click Open to view the synchronization information, including the start time, end time,
content, mode, and result of the synchronization, synchronization source between the PC
and the communication device, number of conflicts, and list of the synchronization logs.
y Click Delete to delete the selected synchronization log.
y Click Clear to clear all the synchronization logs saved on the PC.
Synchronizing Contacts and Calendar Appointments
1. Click .
2. Select one of the following synchronization modes:
y Auto select: When Auto select is selected, you need to select an option from the
Conflict options drop-down combo box according to the actual requirement.
y Slow synchronization: When Slow synchronization is selected, the updated contents on
the communication device are synchronized to the PC and the updated contents on the
PC are synchronized to the communication device.
3. Select a synchronization source from the Source drop-down combo box.
4. Select one of the following conflict options from the Conflict options drop-down
combo box.
y Same as PC: When any item on the communication device conflicts with that on the PC,
the item on the communication device keeps consistent with that on the PC.
y Same as Phone: When any item on the communication device conflicts with that on the
PC, the item on the PC keeps consistent with that on the communication device.
15
Page 22

y Ignore: The conflict between the items on the communication device and those on the
PC is ignored.
y Prompt user
the PC, the PC
5. Select the s
6. Click Start to start the synchronization.
: For any conflict between the items on the communication device and on
Suite prompts you to select an option in the displayed dialog box.
ynchronization contents, including Contact and Calendar.
16
Page 23

Switching a Language
The PC Suite provides multiple user interface languages for you.
When the PC Suite runs, you can choose Tools > language to switch languages.
Connection Wizard
7 Settings and Information Query
First time you start the PC Suite, the Connection Wizard dialog box is display
aut matical ou can select the mode of the connection betw
o een the communication
device and the PC. Otherwise, click Cancel to display the PC Suite window and select the
connection e as follows:
1. Choose Tools
2. Select the mode for connecting the communication device to the PC.
3. Click Next and select the device to be connected.
4. Click Finish.
Note:
ly. Y
mod
> Connect Guide to display the Connection Wizard dialog box.
The Connection Wizard dialog box is displayed
you start the PC Suite and make a successful connection. After that, the dialog box
will not be displayed when you start the software. If you want to set or change
parameters of the Connection Wizard,please see "Creating an Appoin
chapter 1 "Description of the PC Suite GUI."
automatically only the first time
ed
tment" in
Startup Settings
You can set the PC Suite to start automatically with Windows or minimize the window
startup.
1. Choose
2. Click General in the navigation tree.
3. Y following options:
y indows startup: The PC Suite starts autom
Launch on W atically with Windows.
Tools > Options.
ou can select the
17
after
Page 24

y Minim ndow on startup: The PC Suite window is automatically minimized after
4. Click OK to complete the settings.
ize wi
uite
the PC S is started.
18
Page 25

8 d Restoration
Backup an
Management
t
Wi h the PC te, you can back up the phonebook, messages, and calendar appointm e nts
on the communication device as well as the information on the SIM/USIM card to the PC
har ware, and restore them. You can also manage and maintain operation logs.
Backing Up Information
The backup function allows you to back up the phonebook, messages, and calendar
appointm nts on the communication device as well as the phonebook and messages on the
SIM ca
To back up information on the communication device, do as follows:
1. Clic
2. Clic
3. Select the contents to be backed up from the communication device.
4. Click Next.
5. Click Browse. The dialog b
6. Specify a location of the backup file and click Save
7. Click Next. The file is backed up.
8. If th
y Click
y Click
Note:
Sui
d
e
rd.
k
to display the Back up and restore view.
k
on the right of Back up r red contents on haequi ndset to.
ox for selecting the location of the backup file is displayed.
e backup succeeds, you can do as follows:
View to open the backup folder.
Done to return to the Back up and restore view
y The communication device has been connected to the PC properly.
y There is enough space for storing the backup file on the PC.
.
Restoring Informa
The restoration function allows you to restore the phonebook, me
appointments on the communication device as well as the phonebo
SIM card.
tion
19
ssages, and calendar
ok and messages on the
Page 26

To restore information on the communication device, do as follows:
1. Click
2. Click
3. Click Browse. The dialog box for selecting a file is displayed.
4. Select the file to be restored and click Open.
5. Click Next.
6. Select the contents to be restored to t
7. Click Next to restore the contents su
If the restoration fails, a dialog box for prompting the failure is displayed.
Click Don
8. e.
Note:
Mana
The log ng
logs, deleti d clearing logs. A log contains such contents as the time,
backup c
to display the Back up and restore view.
on the right of Restore required contents on handset from.
he communication device.
ccessfully.
The phonebook and calendar appointments have been backed up on the PC.
ging Logs
management function allows you to manage and maintain logs, including viewi
ng logs, sorting logs, an
ontents, model of the communication device, and path.
Viewing Logs
1. Click to display the Back up and restore view.
2. Click
The Back up and
restoration logs.
De ting Logs
le
To om the history records, do as follows:
delete logs fr
1. Sel
2. Clic elect log is displayed.
3. Click OK to delete the selected log.
on the right of View history record.
restore log window is displayed with the details about backup and
ect a log.
k Delete. The dialog box asking you whether to delete the s
Sorting Logs
To re- s ort logs by time, backup contents, model of the communication device, or path of
backup file, click the corresponding title above the logs.
20
Page 27

Clearing Logs
To clear logs from the history records, do as follows:
1.
Click Clear. The dialog box askin
2. Click OK to
clear all the logs.
g you whether to clear the logs is displayed.
21
Page 28

9 Animation Editor
With the animation editor , you can make or edit animations.
Opening the Animation Editor
1. Click to display the File Manager view. Then you can view all the local files in
the left pane and all the files saved on the communic
2. Right-click a local picture in the *.gif
The main interface of the animation e
d
A ding a Frame
Click or choose Image > Create to add a blank frame to the picture list. Select this
frame and right-click on the canvas to Add picture, Switch picture, Remove picture, se
Ani
mation effects or set Picture properties.
Note:
If an animation is being played,
format and choose Edit with pc suite editor.
ditor is displayed.
ation device in the right pane.
t
is not available.
Copying a Frame
This function allows you to copy the current frame.
Note:
Only one frame can be selected or copied.
1. Selec e.
2. Right-c the frame and choose Copy or directly choose Image > Co
t a fram
lick py.
After the frame selected from the picture list is copied successfully, all the frames
following it move backwards by one position.
22
Page 29

ng a Picture Addi
You can ad apshot or from a folder.
To add a
1. Click
2. Select the snapshot mode in the SetCaptu
y Free area: Drag the cross cursor to capture a random area on the screen.
y Fixed area: Set the height and width of the picture to be captured in the
3. Click e to capture a screen picture and display it on Snapshot Wizard.
4. Click K to add the captured picture to the picture list.
To add a picture from a folder to the picture list, do as foll
1. Sel
2. Rig
3. Select a picture file in the displayed dialog box.
4. Click Open to add the selected picture to the picture list.
Note:
d a picture through screen sn
picture through screen snapshot, do as follows:
or choose Image > Capture t
SetCaptureTy
ect a frame from the pic ture list.
ht-click on the canvas and choose Add picture or directly choose Image > Add
pict
pe dialog box.
Captur
O
ure.
y If a blank frame is selected, the opened picture is displayed in the blank frame.
y If a non-blank frame is selected, the opened picture is displayed after the
non-blank frame in the picture list.
y If the picture format is not supported, the picture cannot be displayed and a
message is prompted.
y To replace a picture, right-click it and choose Switch picture (this option is
available only for the current frame with a focus).
o display the Snapshot Wizard window.
reType dialog box.
ows:
Flipping a Picture
This function allows you to flip a picture horizontally or vertically and turn it left or right
by 90 degrees.
1. Select a picture.
2. Click
3. Click
or choose Image > Flip horizontally to flip the picture horizontally.
or choose Image > Flip vertically to flip the picture vertically.
Note:
If an animation is being played, no picture can be flipped.
23
Page 30

Adjusting the Picture Color
This function allows you to adjust the luminance, saturation, and color of a picture.
Adjusting the Luminance
To adjust the luminance of a picture, do as follows:
1. Select a picture from the picture list.
2. Choose Image > Adjust color to d
3. Move the Luminance slider to set a l
varies with the luminance value.
4. Click OK.
Adjusting the Contrast
To adjust the contrast of a picture, do as follows:
1. Select ture from the picture list.
2. Choose Image > Adjust color to display the Color setting dialog box.
3. Move the Contrast slider to set a contrast value. The contrast of the picture varies with
4. Click OK.
a pic
the contrast value.
Adjusting the Color
You can
adjust the color of a picture by moving the Red, Green, and Blue sliders.
1. Sele
ct a picture from the picture list.
2. Choose to display the Color setting dialog box.
3. Move the Red, Green, and Blue sliders to
4. Click OK.
Note:
Image > Adjust color
the picture varies with the values you set.
After adjusting the luminance, contrast, and color of a picture
dialog box, if you click Resume, the picture is restored to its
the Color setting dialog box is d
isplay the Color setting dialog box.
uminance value. The luminance of the picture
set the corresponding values. The color of
in the Color setting
original state before
isplayed.
Inverting the Picture Color
Th ws you to invert the color of a picture. is function allo
1. Select a picture from the picture list.
2. Click
or choose Image > Invert colors to invert the color of the picture.
24
Page 31

Note:
inverted.
layed,
is not available and no picture color can be If an animation is being p
Resizing a Picture
Thi the canvas size. s function allows you to adjust a p e to ictur
1. Select a p re from the picture list. ictu
2. Click
size
Note:
Applying Animation
This function allows you to apply animation effects to a picture and save the picture.
The following animation effects
fading, appearing, compound
1. Select cture from the picture list. a pi
2. Click
choose Animation effects) to display the Animation effects dialog box.
Set the background (the following options are supported: Apply
3. color as background,
Apply background picture, Apply previous frame as background).
4. Select animation effects from
5. Select the Apply to this fram
selected animation effects to t
6. Click
7. Click All the frames with animation effects are displayed in the pictu
Note:
or choose Image > Set to canvas size to adjust the picture to the canvas
.
If an an ation is
im being played,
adjusted to the canvas size.
is not available and no picture can be
Effects
are supported: zooming, expanding, ascending, descending,
ing, blinds, and swiveling.
or choose Image > Animation effects (or right-click the picture and
the list of animation effects.
e only or Apply to all frames check box to apply the
he current frame or all frames.
to preview the ani
OK.
mation effects.
re list.
If an animation is being played,
cannot be generated.
is not available and animation ef
25
fects
Page 32

Saving an Animation
This function allows you to save an animation as a file.
1. Click
2. Enter a name (or keep the default file name unchanged) and save the file in the .gif
format
3. Click Save.
te:
No
or choose File > Save to display the Save As dialog box.
file
.
y If a file has been save
file is overwritten dire
y If a file is edited with th
being edited and save
d, the Save As dialog box is not displayed, and the source
ctly.
e file management function, it is saved on the PC after
d.
Previe ng an Animation wi
This functio llows u to preview the effects of an animation and stn a yo op an animation that
is being played.
y Click
y Click
Note:
to play the pictures in the picture list in sequence.
to stop the animation that is being played.
If is no picture in the picture list, no animation is displayed in the plthere
ay area.
26
Page 33

0 Image Editor 1
With the im tor, you can view, preview, rotate, copy, cut, zoom, and flip a picture. age edi
You can also set the luminance, color, saturation, and hue of a picture.
Viewing a PC Picture
This function allows you to view pic
supported, including *.
To view a picture saved on t
1. Display the PC Suite ma
2. Click
the left pane.
3. Select the picture to be viewed. Then right-click the picture and choose Edit with P
Suite editor.
The image editor is opened, where the selected picture is loaded.
4.
Note:
For pictures in the *.gif format, after you right-click a picture and choose
with PC Suite editor, you can edit it by using only the animation editor r
than the image editor
jpg, *.png, *.bmp, *.gif, and *.wbmp.
to display the File Manager view. Then you can view all
tures saved on the PC. Multiple picture formats are
he PC, do as follows:
in window.
the local files in
Edit
ather
Viewing a Device Picture
This function allows you to v
picture formats are supported
To view a picture saved on the communication device, do as fo
1. Display the PC Suite main window.
2. Click
on the communication device in the right pane.
3. Select the picture to be viewed. Then double-click the picture to open it.
to display the File Manager view. Then you can view all the files saved
iew pictures saved on the communication device. Multiple
, including *.jpg, *.png, *.bmp, *.gif, and *.wbmp.
llows:
C
27
Page 34

Note:
pictur
For es saved on the phone, you can only view rath
Rota
ting a Picture
To rotate
a picture, do as follows:
1. Access the main window of the PC Suite.
2. Click
maximize the window and click
3. Choose
4. Click
Note:
5. Click
degrees.
and click multimedia to display the drop-down list. Or click to
.
from the drop-down list to open the image editor.
or choose File > Open to select a picture to be rotated.
You can also select a picture t
view. Then right-click and cho
editor.
or to rotate the selected picture clockwise or anticlockwise by 90
o be rotated from the left pane of the File Manager
ose Edit with PC Suite editor to open the image
er than edit them.
Cutting a Picture
To
cut a picture, do as follows:
1. Open the image editor.
2. Click
3. Drag the cross cursor on the picture to enclose the area to be cut.
4. Click
clipboard. You can paste the cut picture to a specified directory.
or choose File > Open to select a picture to be cut.
or choose Edit > Cut to cut the picture. The cut picture is saved on the
Copying a Picture
To copy a picture, do as follows:
1. Open the image editor.
2. Click
3. Drag the cross cursor on the picture to enclose the area to be copied.
4. Choose Edit > Copy.
5. Choose File > New to add a blank picture.
or choose File > Open to select the picture to be copied.
28
Page 35

6. Choose File > Paste. The copied picture is displayed in the new picture.
Zooming In or Out a Picture
To zoom in or zoom out a picture, do as follows:
1. Open the image editor.
2. Click
3. Click.
In addition, you can directly select the zoom proportion from the proportion drop-down
combo box.
or choose File > Open to select the picture to be zoomed in or zoomed out
or to zoom in or zoom out the picture in the proportion of one third.
Flipping a Picture
To flip a picture, do as follows:
1. Open the image editor .
2. Click
3. Click
or choose File > Open to select the picture to be flipped.
or to flip the picture horizontally or vertically.
Adjusting the Picture Color
To adjust the color of a picture, do as follows:
1. Open the image editor.
2. Click
3. Click
Light/Contrast dialog box. Then you c
y Color: Move the Red, Green, and Blue slider
the color of the picture.
y Light&Contrast: Move the Light and Contrast slider
of the picture.
4. Click OK to confirm the adjustment, click Re
Cancel to cancel the a
To adjust the hue and satur
1. Ch
2. Mov of
the picture.
3. Click OK to confirm the adjustment, click Reset to reset the hue and saturation of a
picture, and click Cancel to cancel the adjustment.
or choose File > Open to select a picture for adjusting the color.
or choose Image > Color Light/Contrast to display the Color
djustment.
ation of a picture, do as follows:
o
ose Image > Hue/Saturation.
e the Hue and Saturation sliders in the dialog box to set the hue and saturation
an perform the following operations:
s to set the corresponding values to change
s to set the light and the contrast
set to reset the picture color, and click
29
Page 36

ts Applying Picture Effec
The following picture effects are supported: Relief, Erode, Dilate, Noise, Sharp and
Mosaic.
To apply effects to a picture, do as follows:
1. Open the image editor .
2. Click
or choose File > Open to select a picture for applying effects.
3. Click
4. Sele
5. Click OK to confirm the adjustment, click Reset to reset the picture effects, and click
Cancel to cancel the adjustment.
or choose Image > Effects to display the Effect window.
ct effects to be applied to the picture.
Adding Te xt
To add text, as follows:
1. itor.
2. Click
3. Click
4. Choose Text Toolbar to set text properties, including the font, size, bold, italic, color,
5. Choose Add T ext to enter the text
6. Click outside the text entry box. The entered text is embedded in the picture.
do
Open the image ed
or choose File > Open to select a picture for adding text.
entry box to display the
. The text entry box is displayed on the picture. Then right-click the text
choosing Add text and you can display the font toolbar by cho
underline and literal aspect of the
shortcut menu, you can display the Text dialog box by
text.
.
osing T ext Toolbar.
Capturing a Screen Picture
To capture a screen picture, do as follows:
1. Open t mage editor. he i
2. Click
3. Select the screen capture mode.
y Free area: Drag the cross cursor to capture the picture in random area.
y Fixed area: Set the height and width of the picture to be captured.
4. Click OK.
Capture the pictur
5. e within the specified area. Befor the captured picture is displayed e
on the image editor, if a picture has been previously edited on the image editor, you are
prompted to save it.
to display the Set Capture Ty pe dialog box.
30
Page 37

6. Click or choose File > Save to save the picture to PC.
Note:
y If a file has been saved, the Save As dialog box is not displayed, and the source
file is overwritten directly.
a file has not been saved, ed. Select a path,
y the Save As dialog box is display
If
d then save the file.
an
Inverting the Picture Color
To invert the color of a picture, do as follows:
1. Open the image editor.
2. Click
3. Choose age > Invert Color to invert the color of the picture.
or choose File > Open to select a picture for inverting color.
Im
Previewing a Picture
To preview a picture, do as follows:
1. Open the image editor.
2. Click
3. Select a portion of the picture.
4. Select Select area or Whole area from the Preview area drop-down combo box.
Select the preview mode from the Location drop-down combo box: Center, Tile or
Stretch
or choose File > Open to select the pictu
.
re to be previewed.
31
Page 38

11
By using the playlist from the PC
to the co t of the PC; delete the
music fi e
playlist.
Uploading a Music Playlist fr
music playlist function of the PC Suite, you can upload a
mm ication device; rename, add, create, and edit a playlis
un
le
from the device playlist, or change the order of playing the music in the devic
Music Playlist Management
om the PC to the
Communication device
Th ws you to upload a playlist from the PC to the communication device.
is function allo
For example, playlist 1 that contains music files A, B, C, and D is saved on the PC, and
playlist 2 that contains music fil
you upload playlist 1 on the PC to playlist 2 on the communication device, the system
If
modifies playlist 2 on the communication device to playlist 1. Music files A, B, and, C on
the communication device are not overwritten by music files A, B, and C in playlist 1 on
the PC, and only music file D in playlist 1 is uploaded from the PC to the communication
device.
After displaying the Music Playlist view, do as follows:
1. Select the playlist to be uploaded from the PC.
2. Select the playlist to be overwritten from the communication device.
3. Click
to upload the playlist.
es A, B, and C is saved on the communication device.
Renaming a PC Playlist
After displaying the Music Playlist view, do as follows:
1. Select the PC playlist to be renamed.
2. Right-click the playlist and choose Rename.
3. Enter a playlist name.
Note:
The newly entered playlist name cannot be identical with other playlist names.
32
Page 39

Adding a PC Playlist
After displaying the Music Playlist view, do as follow
1. Click
displayed.
2. Select one or more playlists.
3. Click Open to add the playlist(s) to the left pane.
Note:
, or right-click in the left pane and choose Add. The Open dialog box is
The formats of the playlists that can be added are
s:
*.m3u and *.wpl.
Creating a PC Playlist
After displaying the Music Playlist view, do as follows:
1. Click
box is displayed.
the playlist in the right pane.
3. Click OK. The Save As dialog box is displayed.
4. Enter a playlist name.
5. Click Save to save the new playlist to the specified directory.
, or right-click in the left pane and choose New. The New Pla t dialo
to add the music to 2. Select m files from the left pane in the dialog box. Click usic
Editing a PC Playlist
This fun
ction allows you to add the music file to the PC playlist, delete the music file from
the PC p
laylist, or change the order of playing the music in the PC playlist.
After dis
playing the Music Playlist view, do as follows:
1. Sele
ct the PC playlist to be edited.
2. Click
box is displayed.
3. In the dialog box, you can perform the following operations:
y Add: Select a music file in the supported format in the left pane. Click
y Delete: Select a music file in the right pane. Click
Delet
y Down
Down to move it down by one position.
, or right-click in the left pane and choose Edit. The Edit Playlist dialog
e to delete it.
: Select a music file in the right pane. Click
, or right-click the file and choose
, or right-click the file and choose
ylis g
.
33
Page 40

y Up: Select a music file in the right pane. Click , or right-click the file and choose Up
m
to ove it up by one position.
4. Click to save the edit.
Note:
OK
y
m. is not available when you select the file at the botto
is not available when you select the file on the top.
y
Deleting a PC Playlist
After displaying the Music Playlist view, do as follows:
1. Select the PC playlist to be deleted.
2. Click
displayed asking you whether to delete the playlist.
3. Click Yes to delete the file from the PC; click No to delete the file from the list; click
Cancel to cancel the deletion.
, or right-click the playlist and choose Delete. The Information dialog box is
Refreshing PC Playlists
After displaying the Music Playlist view, do as follows:
Click
on the PC.
, or right-click in the left pane and choose Refresh to refresh the playlists saved
Editing a Device Playlist
This function allows you to add the music file to the device playlist, delete the music file
from the device playlist, or change the order of playing the music in the device playlist.
After displaying the Music Playlist view, do as follows:
1. Select the device playlist to be edited.
2. Click
displayed.
3. In the dialog box, you can perform the following operations:
y Add: Select a music file in the left pane. Click
y Delete: Select a music file in the right pane. Click
Delete to delete it.
, or right-click the list and choose Edit. The Edit Playlist dialog box is
.
, or right-click the file and choose
34
Page 41

y Down: Select a music file in the right pane. Click , or right-click the file and choose
Down to move it down by one position.
y Up: Select a music file in the right pane. Click
to move it up by one position.
4. Click OK to save the edit.
Note:
is not available when you select the file at the bottom.
y
is not available when you select the file on the top.
y
y If the file to be selected is not saved on the communication device,
switch to Add from PC.
, or right-click the
file and choose Up
you can
Refreshing Device Play
After displaying the Music Playlist view, do as follows:
Click
on the communication device.
, or right-click in the right pane and choose Refresh to refresh the playlists saved
lists
35
Page 42

12 Media Player
media player, you can open the selected audio or video files, play audio or video
With the
s, play a file in full screen, pause a file, resume playing a file, play the previous or next
file
just the playing sp , close a playlist, and adjust the volume.
file, ad eed, stop playing a file
aying an Audio or a Video File
Pl
This function allows you les in the following formats: *.mp3,
.mp4, *.wav, *.3gp, *.3gp2, *.wma, *.amr, *.rm and *.mid
*
Display the PC Suite ain window.
1. m
ck
2. Cli
m and click
3. Choose
Choose File > Open. he dialog box for opening a file is displayed.
4. T
5. S file (audio and video files can
Open.
. The audio or video file is played automatically (in 100% screen for the video).
6
Move the volume slider to adjust the volume.
7.
8. Wh
9.
Choose
e:
Not
and click m list. Or click ultimedia to display the drop-down to
aximize the window
elect audio or video be selected at the same time). Click
en the file finishe andby state.
File > Close to close the playlist.
y If the file form stem prompts you and stops
playing the fil
y If multiple audio or video files are selected, the files are played in turn till the
end.
to play audio or video fi
.
from the drop-down list to open the media player.
s playing, the media player is in st
at is incorrect or not supported, the sy
e.
Changing the Size of the Video Screen
Right-click on the video screen, and then choose Full Screen, 50%, 100% or 200% from
the shortcut menu to change the size of the video screen (the default size is 100%).
36
Page 43

Note:
y When a video is played or paused, you can change the size of the video screen.
y You can also click
to change the video screen to the Full Screen.
Playing the Previous Audio or Video File
Click on the player to play the previous audio or video file.
Note:
You can click
corresponding operations on the audio or video that is played or paused (you can
also select the options from the Play drop-down menu).
, , , , or to perform the
37
Page 44

13 FAQs
Why Only Part of the Pasted Content Is Displayed When I Edit a Message?
When you edit a message, a maximum of 2048 characters can be entered in the message. If
the pasted information exceeds the limit, the extra part will be deleted automatically.
Why Telephone Numbers Cannot Be Pasted?
A valid phone number can contain only 0123456789#*+. Ensure that no other character is
contained in the cut or copied text.
38
Page 45

14 Acronyms and Abbreviations
Numerics
3G The Third Generation
A
APN Access Point Name
D
DNS Domain Name Server
G
GPRS General Packet Radio Service
GSM Global System for Mobile communications
S
SIM Subscriber Identity Module
U
USIM UMTS Service Identity Module
W
WINS Windows Internet Name Service
39
 Loading...