

Page 1
DRAFT - Revised 10/16/02
Entering an Internet address
With Pocket Internet Explorer and a connection to the Internet,
you can view Web sites on your iPAQ h2200 by typing an address
or Universal Resource Locator (URL) in the Address bar.
Web sites that use HTML 4.0, DHTML, animated GIF images,
✎
and Java applets may not work correctly in Pocket Internet
Explorer without additional software.
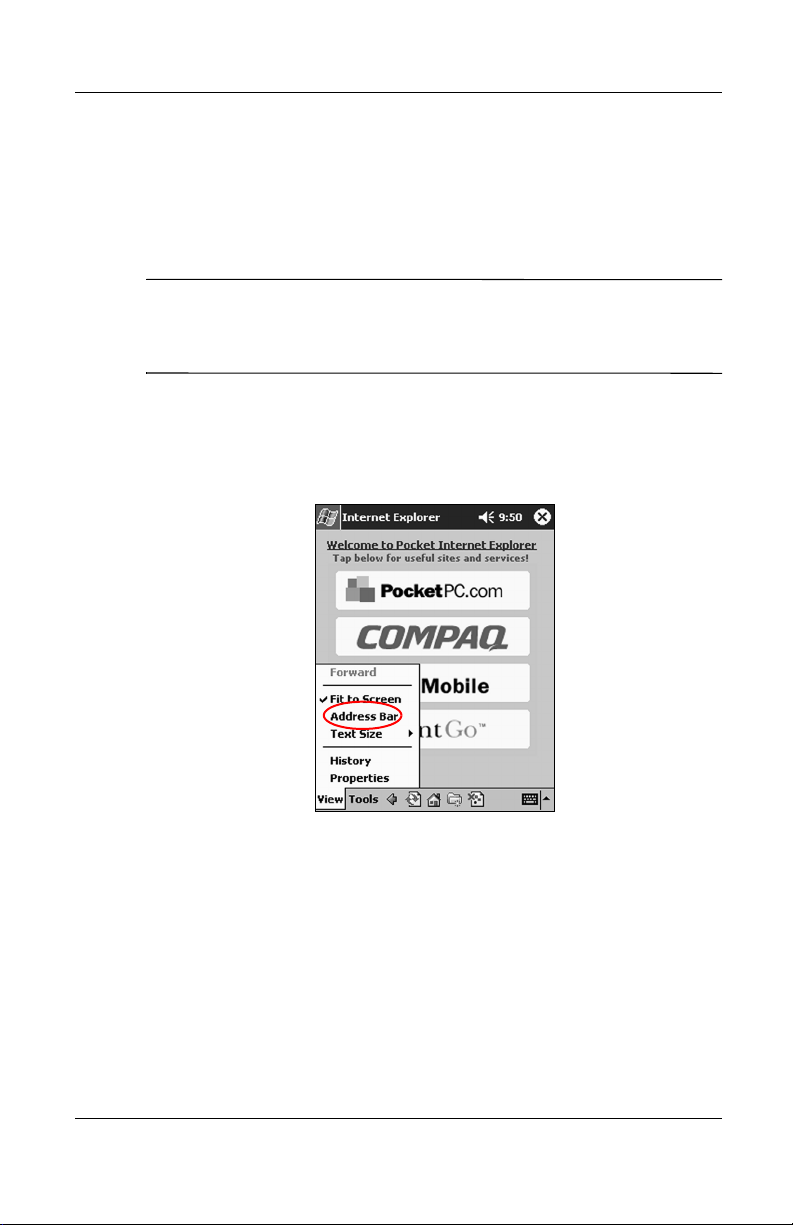
To enter an Internet address:
1. From the Start menu, tap Internet Explorer.
2. Tap View, then Address Bar.
Connecting
Reference Guide 2–13
hp CONFIDENTIAL 11/27/02
File: ch2-Connecting.fm PN: 293146-001
Page 2

DRAFT - Revised 10/16/02
Connecting
3. Enter the address (URL) in the Address bar.
4. Tap the Go icon.
Using a Favorites List
With Pocket Internet Explorer and a connection to the Internet,
you can view Web sites on your iPAQ h2200 Series by selecting a
Web site from your Favorites list.
To select a Web site from your Favorites list:
1. From the Start menu, tap Internet Explorer.
2. Tap the Favorites icon and the Web site you want to view.
2–14 Reference Guide
hp CONFIDENTIAL 11/27/02
File: ch2-Connecting.fm PN: 293146-001
Page 3

DRAFT - Revised 10/18/02
Using E-mail
To send and receive e-mail messages, synchronize your iPAQ
h2200 unit with your computer using Microsoft ActiveSync or
connect to the Internet or your network through an e-mail service.
If you are connecting through an e-mail service, you must set up a
remote connection using a modem card, ethernet card, 802.11X
card, or a Bluetooth-enabled device.
If you are using ActiveSync to send and receive e-mail messages,
you will see the name of the folder you are using at the bottom of
the screen. If you are using an e-mail service, use that folder to
send and receive e-mail.
3
Communications
The Inbox on your iPAQ h2200 unit is similar to the Inbox on
your computer. E-mail is saved in five default folders:
■ Inbox
■ Outbox
■ Deleted Items
■ Drafts
■ Sent Items
Setting up E-mail
If you are using an Internet or network connection, you must set
up an e-mail service.
Reference Guide 3–1
hp CONFIDENTIAL 11/27/02
File: ch3-Communication.fm PN: 293146-001
Page 4
Communications
If you are using ActiveSync to send and receive e-mail, you do
✎
not need to set up an e-mail service. Skip to the section
“Creating/Sending E-mail.”
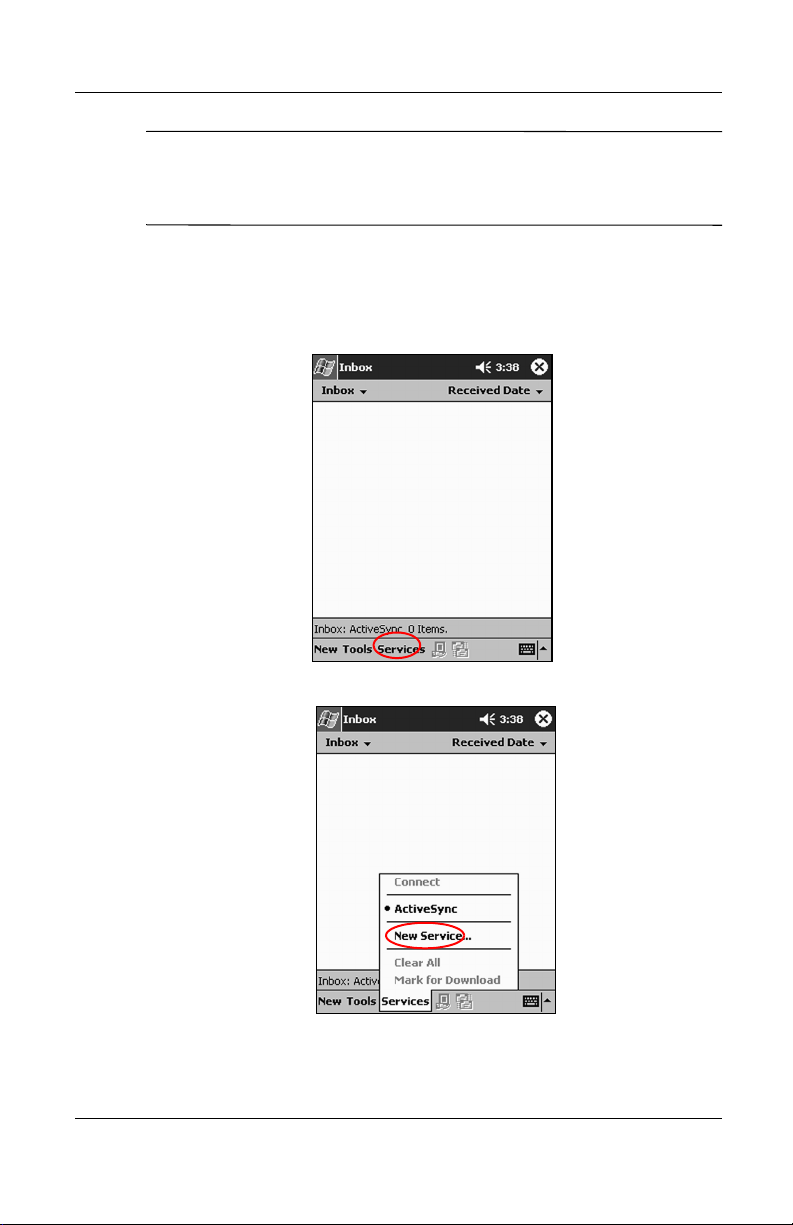
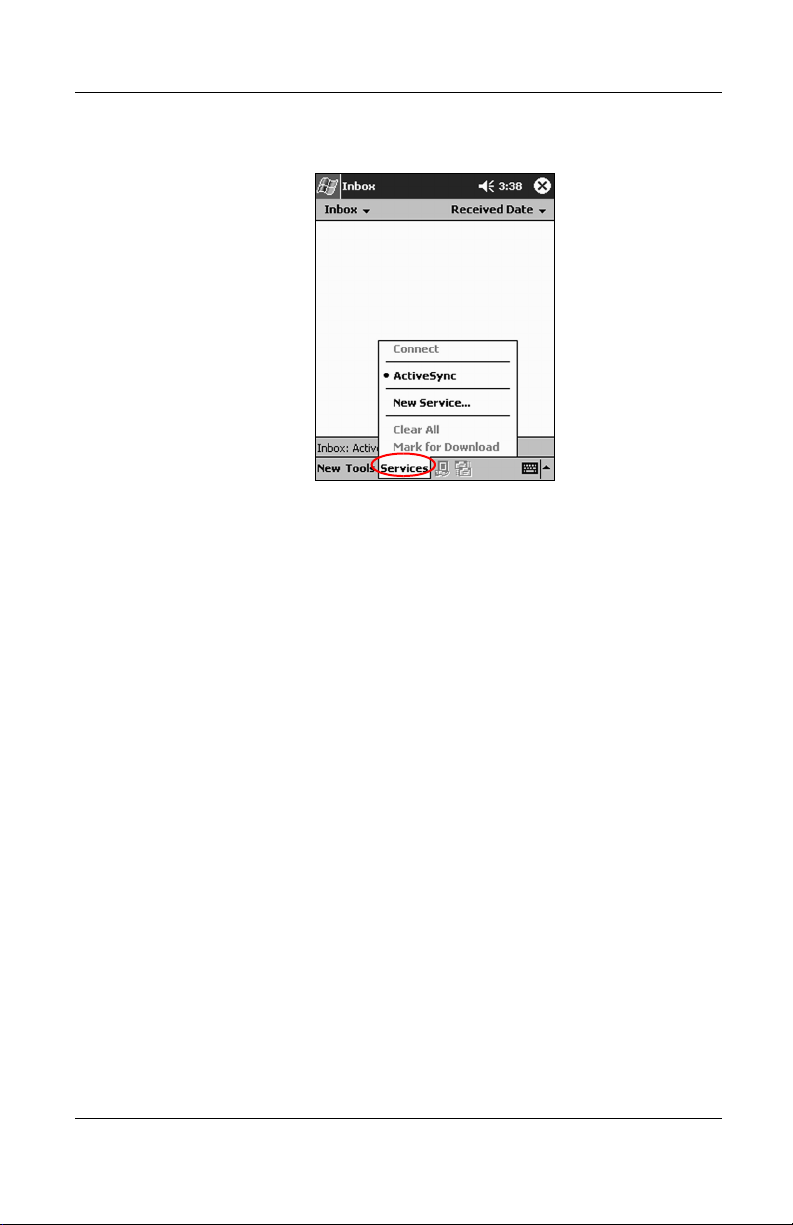
To set up an e-mail service:
1. From the Start menu, tap Inbox.
2. Tap Services.
DRAFT - Revised 10/18/02
3. Tap New Service.
3–2 Reference Guide
hp CONFIDENTIAL 11/27/02
File: ch3-Communication.fm PN: 293146-001
Page 5
DRAFT - Revised 10/18/02
Communications
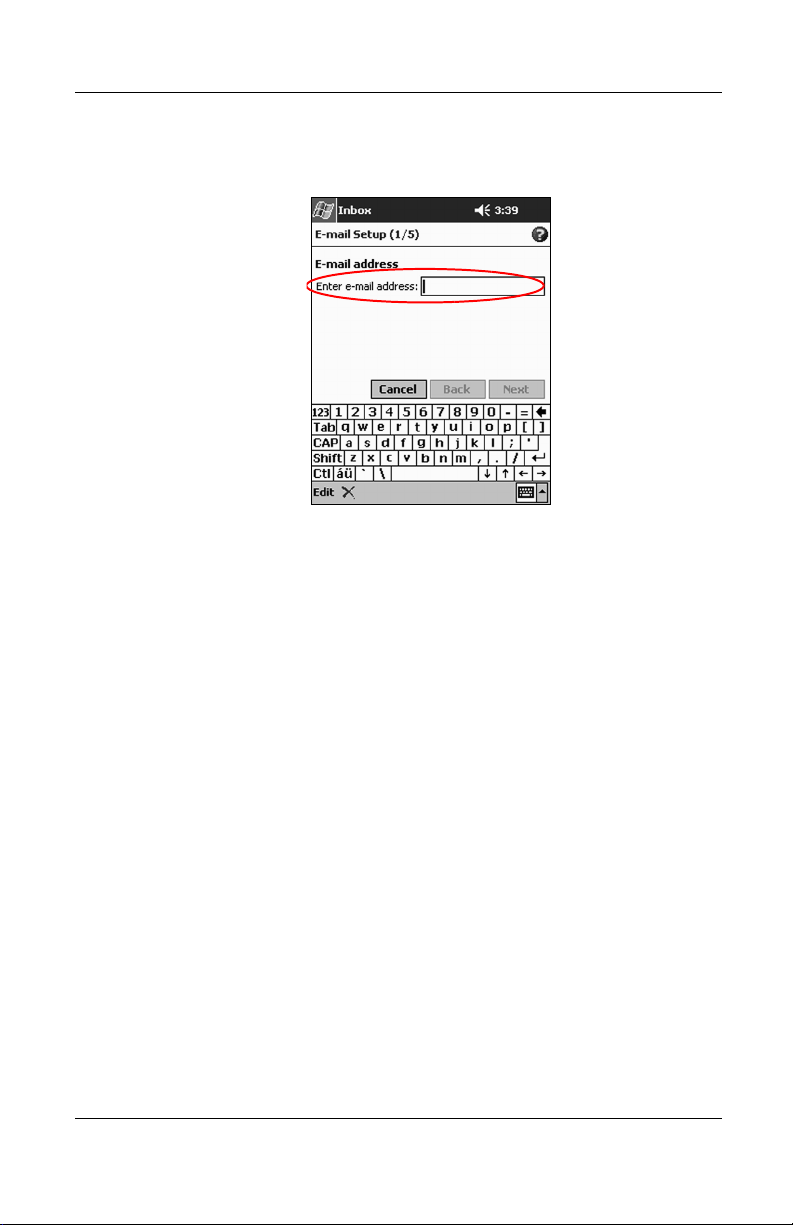
4. Enter e-mail address information in the next five screens,
then tap Next when finished with each one.
Tap th e “
?” icon for help on each screen.
Creating/sending E-mail
To create and send e-mail messages through an e-mail service,
from the Start menu, tap Inbox > Services, then select the e-mail
service you want to use.
If you are using Microsoft ActiveSync to send and receive e-mail,
you do not need to set up an e-mail service, simply complete the
following instructions.
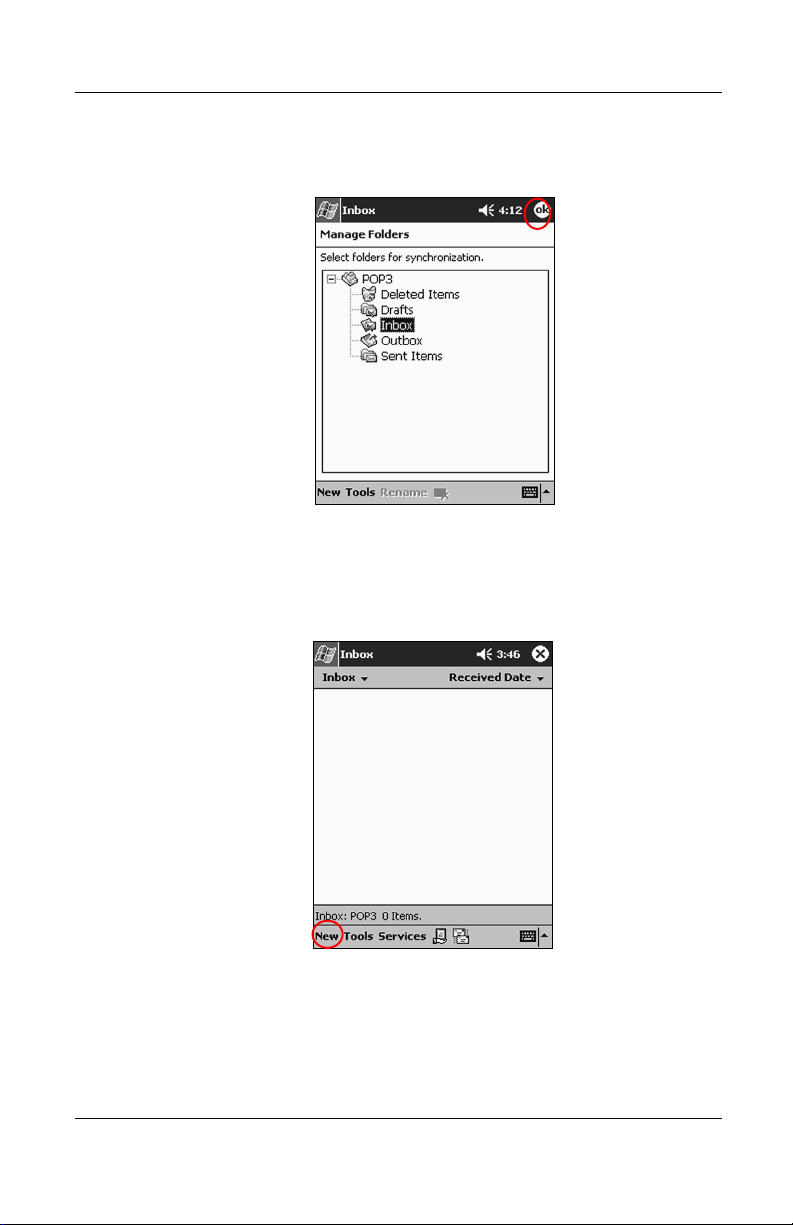
1. From the Start menu, tap Inbox.
Reference Guide 3–3
hp CONFIDENTIAL 11/27/02
File: ch3-Communication.fm PN: 293146-001
Page 6

Communications
2. Tap New to write a new e-mail.
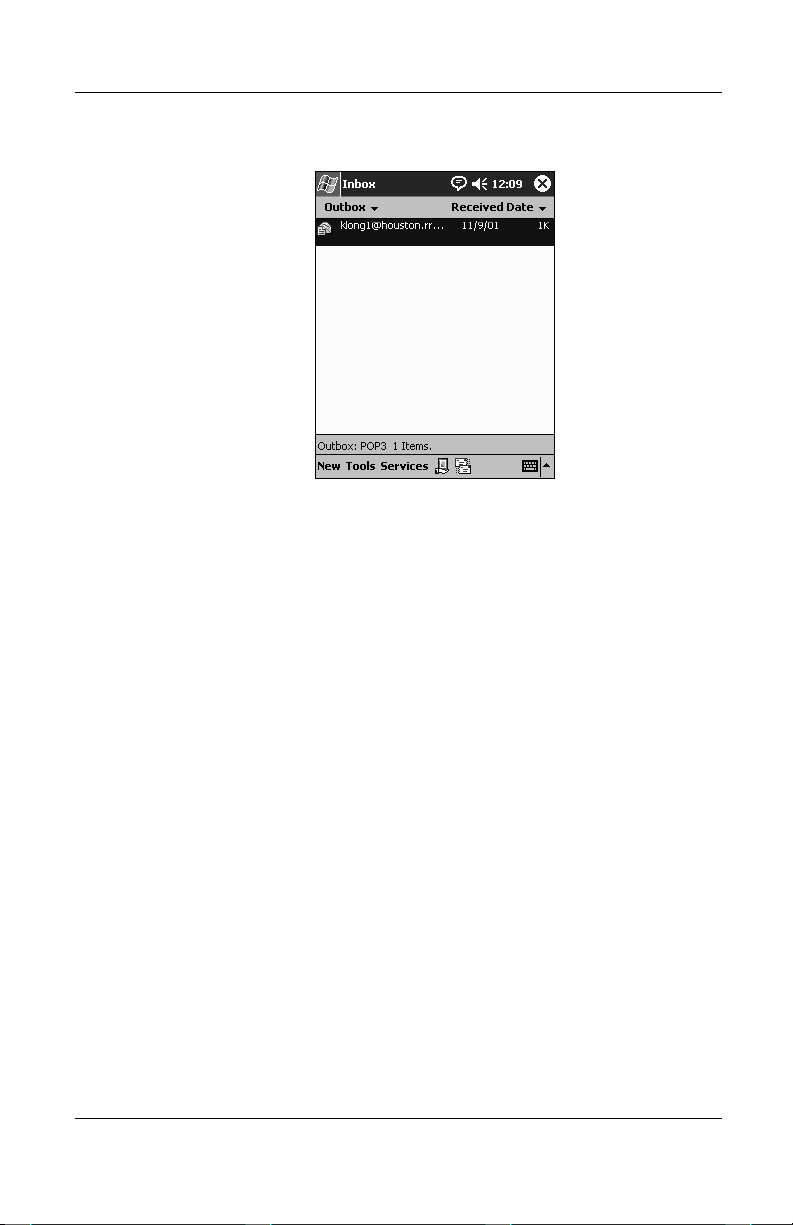
3. When the e-mail is complete, tap Send to place the e-mail in
the Outbox.
The e-mail is sent when you synchronize or it is sent
automatically if you are connected to the Internet or your
network through an e-mail service.
DRAFT - Revised 10/18/02
3–4 Reference Guide
hp CONFIDENTIAL 11/27/02
File: ch3-Communication.fm PN: 293146-001
Page 7
DRAFT - Revised 10/18/02
4. If you do not want to send your e-mail yet, tap OK to leave
your e-mail in the Drafts folder.
Adding an Attachment
1. From the Start menu, tap Inbox.
Communications
2. Tap New to write a new e-mail.
Reference Guide 3–5
hp CONFIDENTIAL 11/27/02
File: ch3-Communication.fm PN: 293146-001
Page 8

Communications
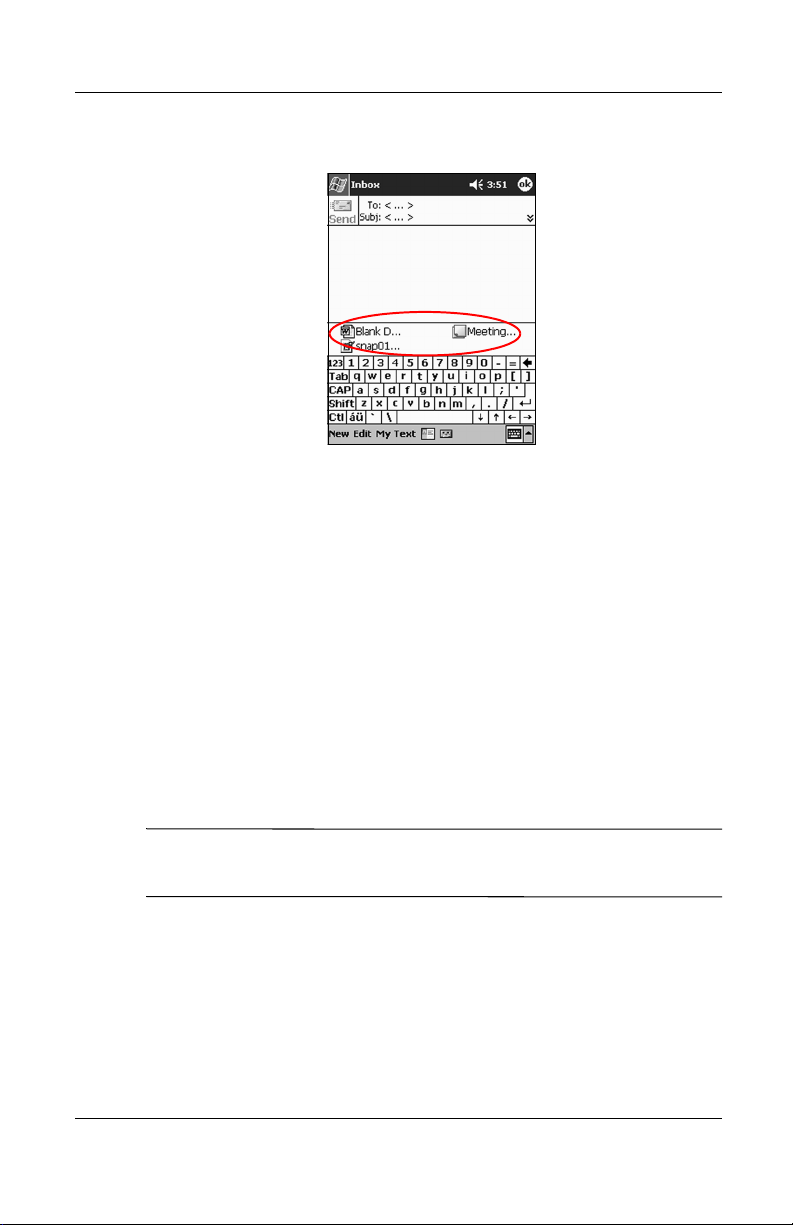
3. Tap the Edit tab.
4. Tap Add Attachment to see all folders in My Documents.
5. Tap the file to be attached.
DRAFT - Revised 10/18/02
3–6 Reference Guide
hp CONFIDENTIAL 11/27/02
File: ch3-Communication.fm PN: 293146-001
Page 9
DRAFT - Revised 10/18/02
See the file name you selected below the body of the e-mail.
Receiving E-mail
To receive e-mail, synchronize your iPAQ h2200 unit Inbox with
your computer using Microsoft ActiveSync or connect to the
Internet or your network through an e-mail service.
Communications
Use the ActiveSync folder to receive e-mail through ActiveSync.
The name of the folder you are using is at the bottom of the
screen. If you are using an e-mail service, use that folder to
receive e-mail.
If you are using ActiveSync, you can synchronize your personal
folders from Outlook on your computer with Inbox on your iPAQ
h2200 unit.
If you are using ActiveSync, you do not receive e-mail
✎
attachments by default; you must select this option in ActiveSync.
1. From the Start menu, tap Inbox.
Reference Guide 3–7
hp CONFIDENTIAL 11/27/02
File: ch3-Communication.fm PN: 293146-001
Page 10
Communications
2. Tap Services.
3. Tap the e-mail service you want to use.
4. If you have not set up an e-mail service, synchronize your
iPAQ h2200 unit with your computer.
a. From the Start menu, click Programs then click
DRAFT - Revised 10/18/02
ActiveSync.
b. Click Sync.
Opening E-mail
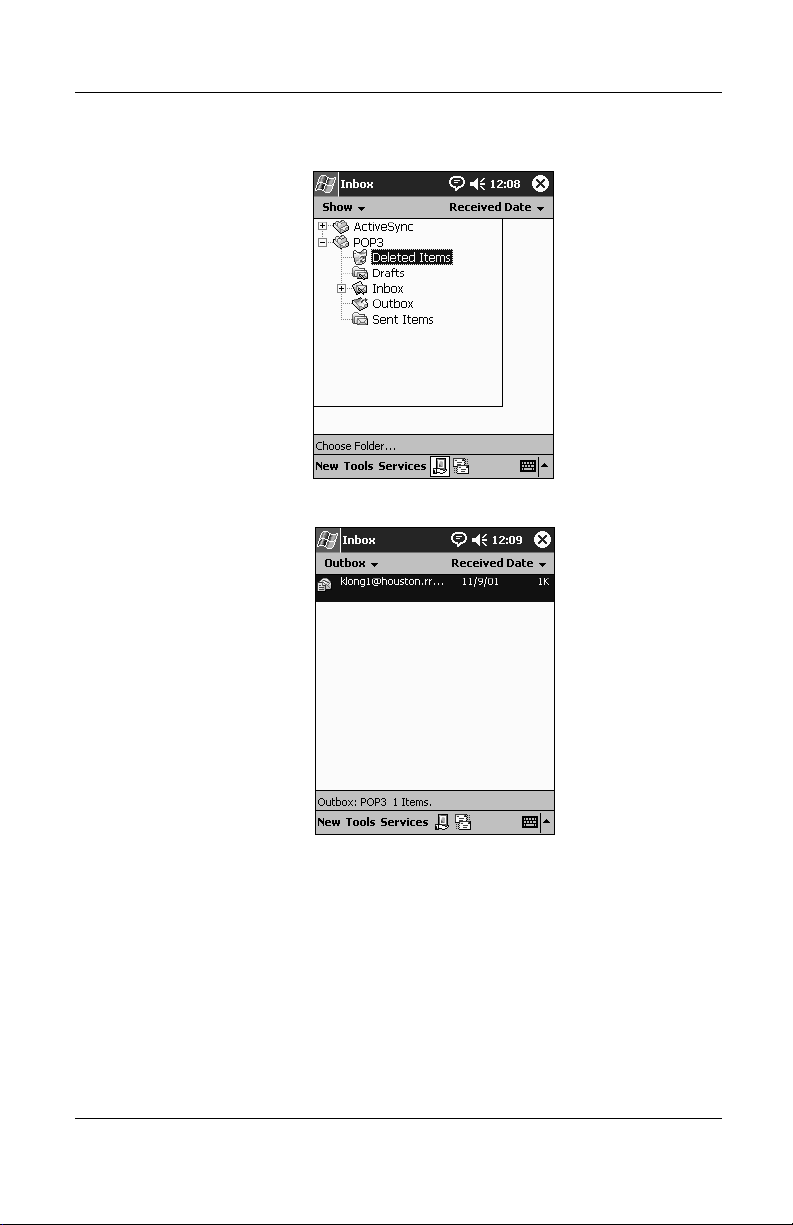
1. From the Start menu, tap Inbox.
2. Tap the down arrow next to Inbox to see a list of your folders
3–8 Reference Guide
hp CONFIDENTIAL 11/27/02
File: ch3-Communication.fm PN: 293146-001
Page 11
DRAFT - Revised 10/18/02
3. Tap the folder where you have saved the e-mail.
4. Tap the e-mail message to open it.
Communications
Deleting E-mail
When you delete e-mail, it is placed in the Deleted Items folder,
but the e-mail is not permanently deleted until you tap Empty
Deleted Items from the To ol s menu.
1. From the Start menu, tap Inbox.
2. Tap the folder where you have saved the e-mail.
Reference Guide 3–9
hp CONFIDENTIAL 11/27/02
File: ch3-Communication.fm PN: 293146-001
Page 12

Communications
3. Tap and hold the e-mail to be deleted.
4. Tap Delete to move the e-mail to the Deleted Items folder.
DRAFT - Revised 10/18/02
3–10 Reference Guide
hp CONFIDENTIAL 11/27/02
File: ch3-Communication.fm PN: 293146-001
Page 13
DRAFT - Revised 10/18/02
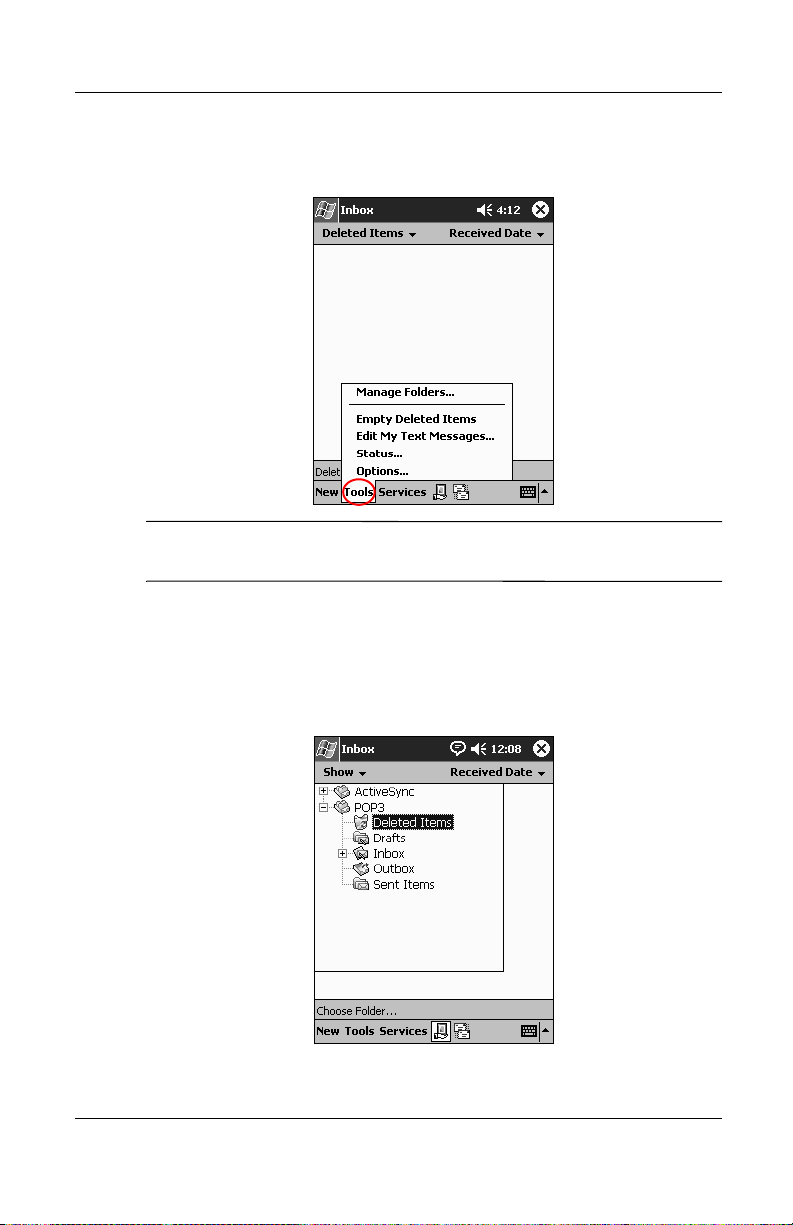
5. Tap Tools, then Empty Deleted Items to permanently delete
the e-mail.
CAUTION: When you delete e-mail from your h2200 Series, you
Ä
also delete it from your personal computer.
Communications
Moving E-mail
1. From the Start menu, tap Inbox.
2. Tap the folder where you have saved the e-mail.
Reference Guide 3–11
hp CONFIDENTIAL 11/27/02
File: ch3-Communication.fm PN: 293146-001
Page 14
Communications
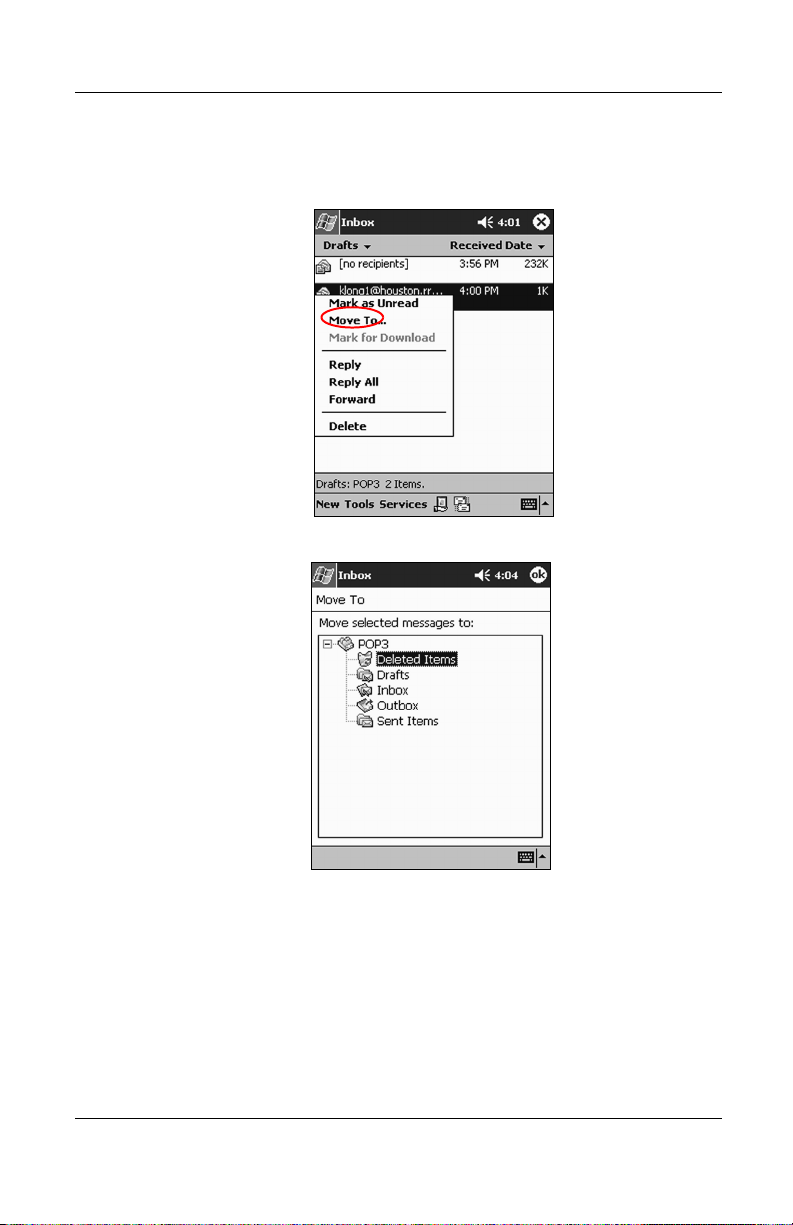
3. Tap and hold the e-mail to be moved.
4. Tap Move To.
5. Tap the folder where the e-mail will be moved.
DRAFT - Revised 10/18/02
6. Tap OK to move the e-mail.
3–12 Reference Guide
hp CONFIDENTIAL 11/27/02
File: ch3-Communication.fm PN: 293146-001
Page 15
DRAFT - Revised 10/18/02
Opening a Folder
If you are using Microsoft ActiveSync, open the default folders or
open your personal folders that you have synchronized from
Outlook on your computer with the Inbox on your iPAQ h2200
Series.
If you are using an e-mail service, open the default folders or
open any folder that you have created.
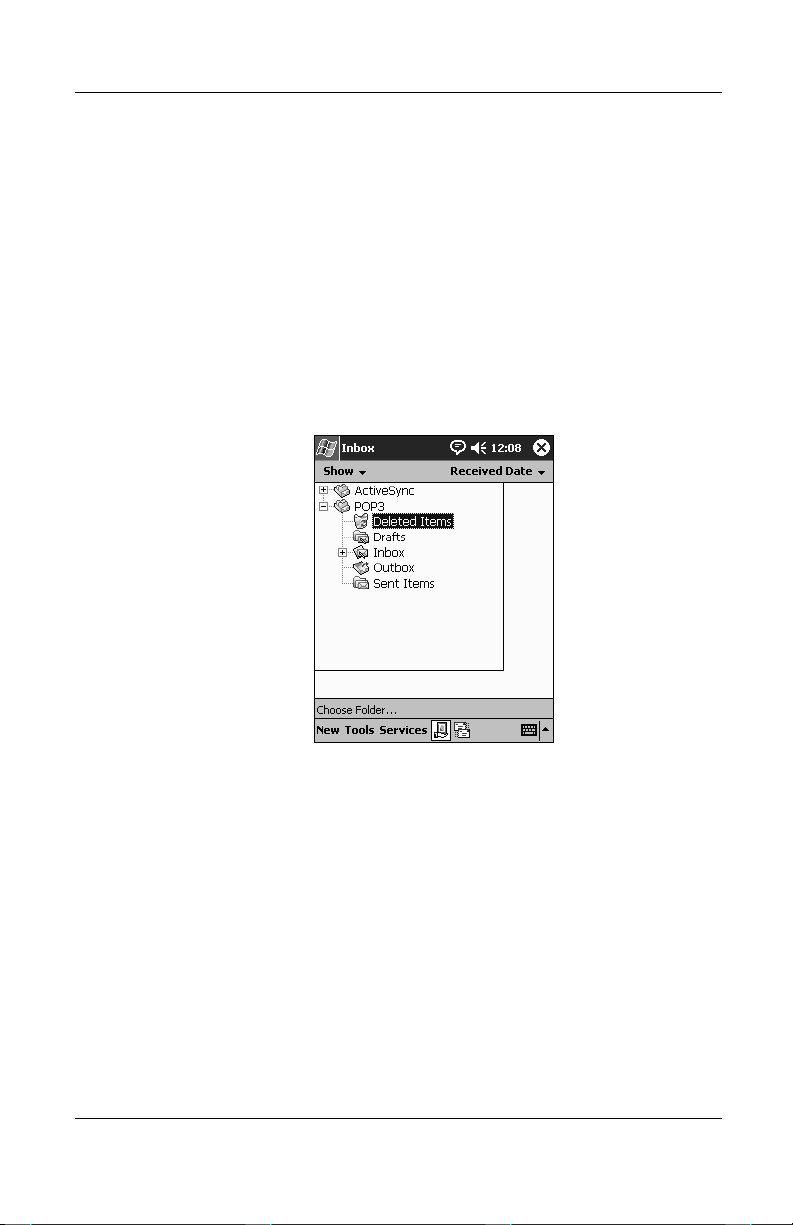
1. From the Start menu, tap Inbox.
2. Tap the down arrow next to Inbox to see a list of your folders.
Communications
Reference Guide 3–13
hp CONFIDENTIAL 11/27/02
File: ch3-Communication.fm PN: 293146-001
Page 16
DRAFT - Revised 10/18/02
Communications
3. Tap a folder to see the e-mail in that folder.
Managing Folders
Use folders to organize your e-mail if you are using an e-mail
service, and create additional folders that you can rename or
delete.
If you are using Microsoft ActiveSync, you cannot create
additional folders in the Inbox. However, you can synchronize
your personal folders from Outlook on your computer with Inbox
on your iPAQ h2200 Series. You cannot rename or delete these
folders in Inbox.
1. From the Start menu, tap Inbox.
3–14 Reference Guide
hp CONFIDENTIAL 11/27/02
File: ch3-Communication.fm PN: 293146-001
Page 17
DRAFT - Revised 10/18/02
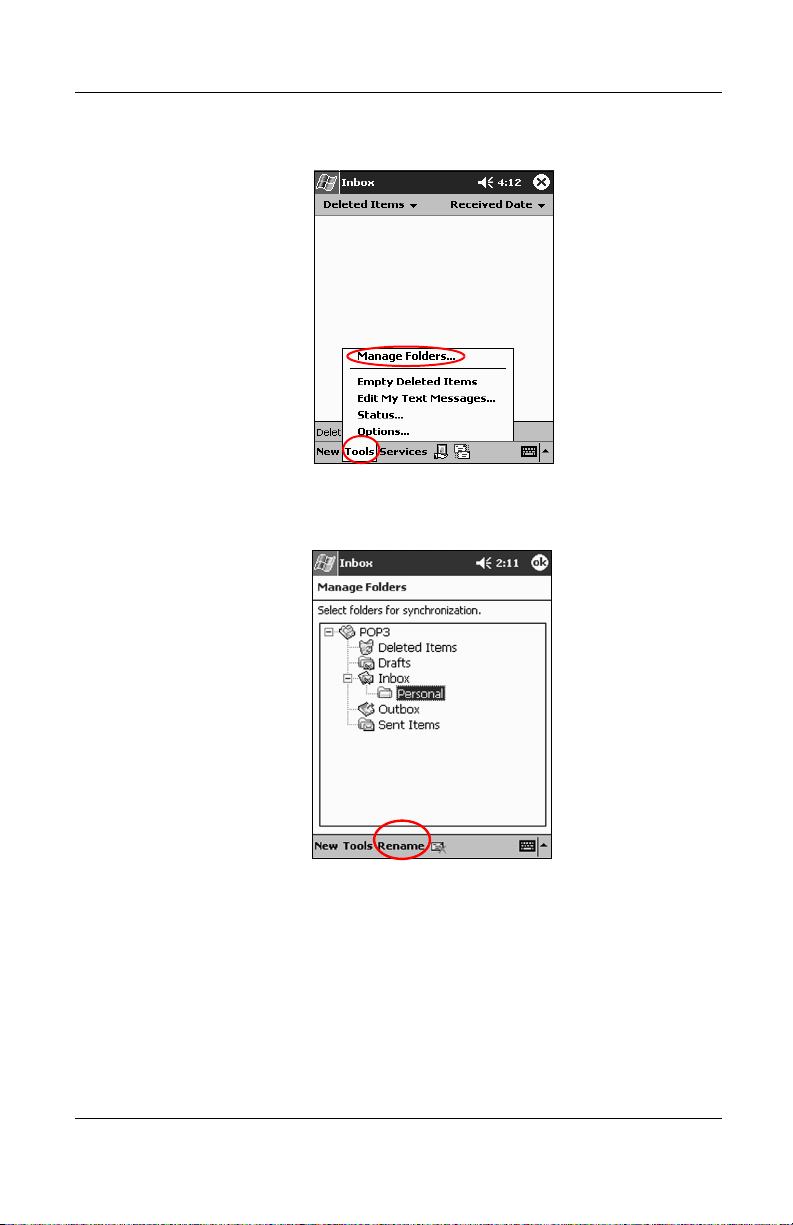
2. Tap Tools, then Manage Folders.
3. Tap New to create a new folder.
4. Tap Rename to rename a folder.
Communications
5. Tap Remove Folder to delete a folder you created.
6. Tap Ye s to permanently delete the folder.
Reference Guide 3–15
hp CONFIDENTIAL 11/27/02
File: ch3-Communication.fm PN: 293146-001
Page 18
DRAFT - Revised 10/18/02
Communications
Using the Contacts Application
Enter information about friends, family members, or business
associates in the Contacts application.
Use Contacts to:
■ Create a contact
■ View and edit a contact
■ Categorize your contacts
■ Delete a contact
Press the Contact application button to navigate quickly to
✎
Contacts.
Creating a Contact
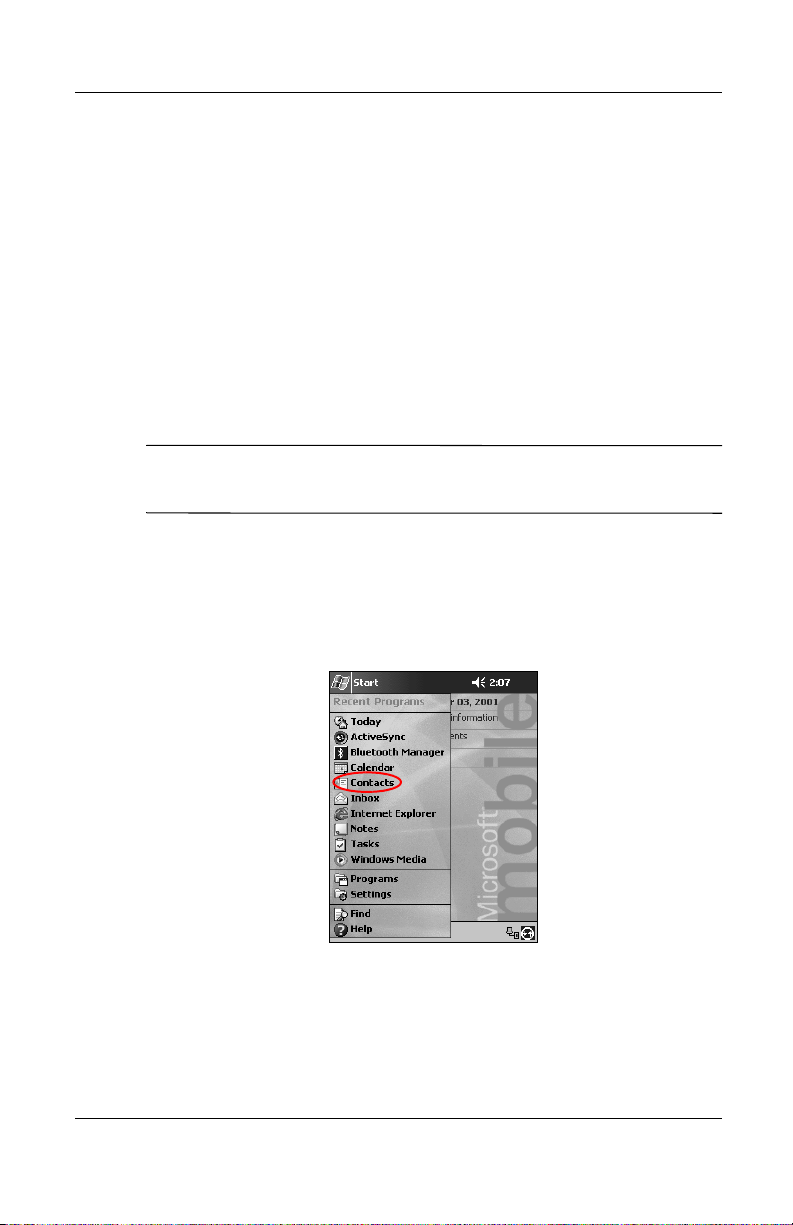
To create a contact from the Start menu or To da y screen:
1. From the Start menu, tap Contacts.
3–16 Reference Guide
hp CONFIDENTIAL 11/27/02
File: ch3-Communication.fm PN: 293146-001
Page 19
DRAFT - Revised 10/18/02
Communications
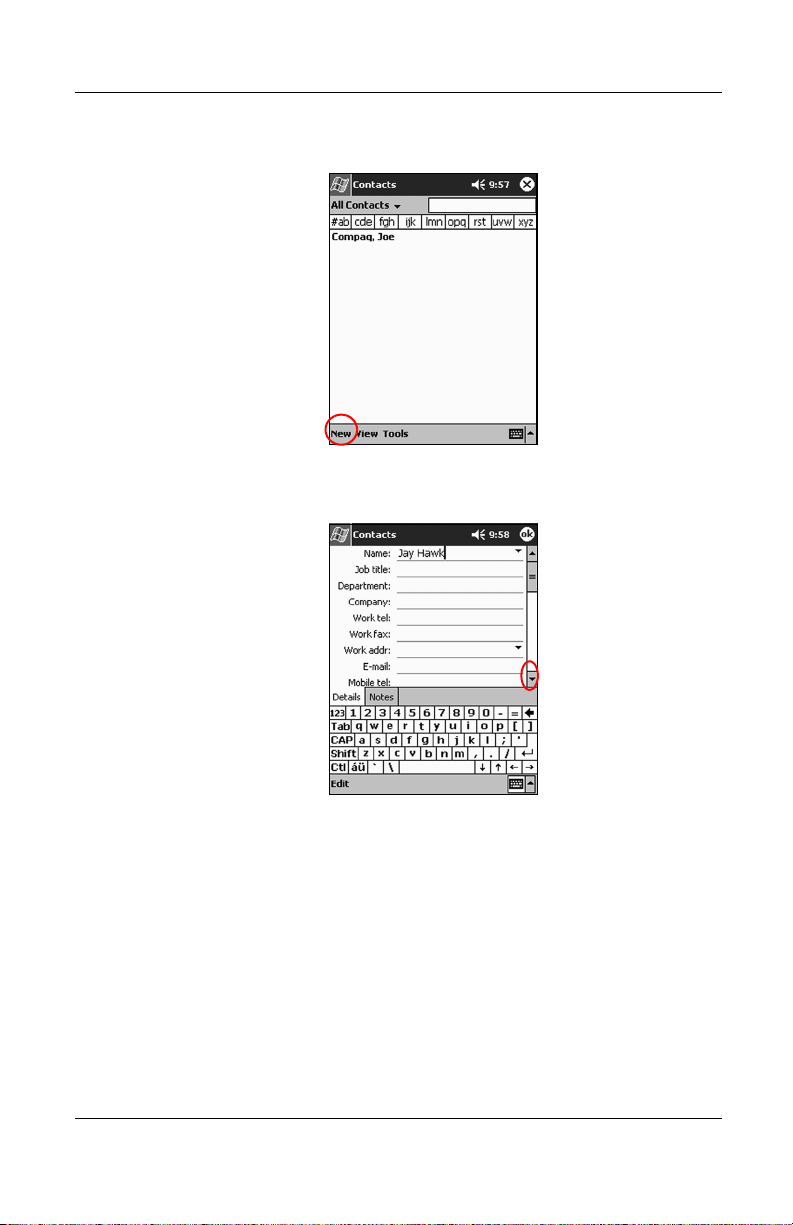
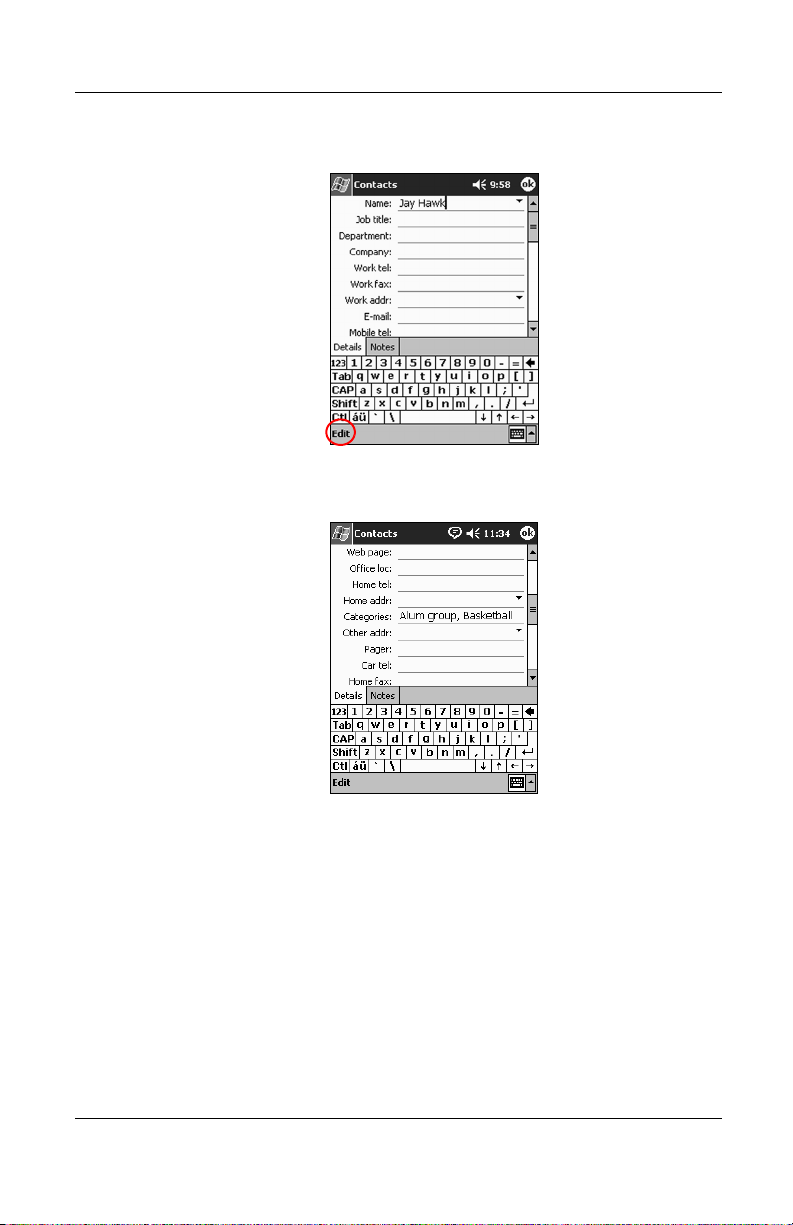
2. Tap New to create a new contact.
3. Tap any item and enter information. Scroll down to see more
fields.
4. Tap the down arrow next to any item and enter additional
details about the item.
a. For example, tap the Name down arrow to enter the
contact’s title, first, middle, and last name, and suffix.
b. Tap anywhere outside the box to stop entering details.
Reference Guide 3–17
hp CONFIDENTIAL 11/27/02
File: ch3-Communication.fm PN: 293146-001
Page 20
DRAFT - Revised 10/18/02
Communications
5. Tap OK to save the contact information and return to the list
of contacts.
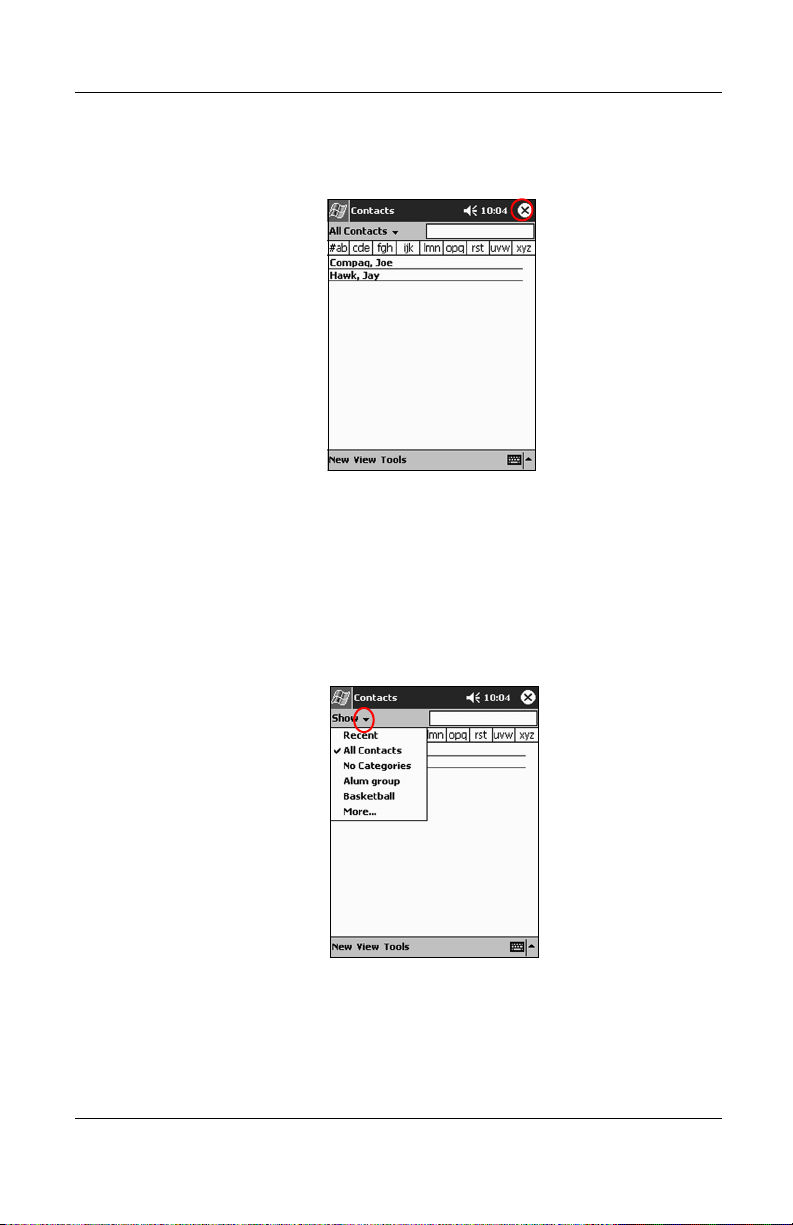
Viewing a list of Contacts
To display a list of your contacts from the last category selected:
1. From the Start menu, tap Contacts.
2. Tap the down arrow next to the category name to see the list
of categories.
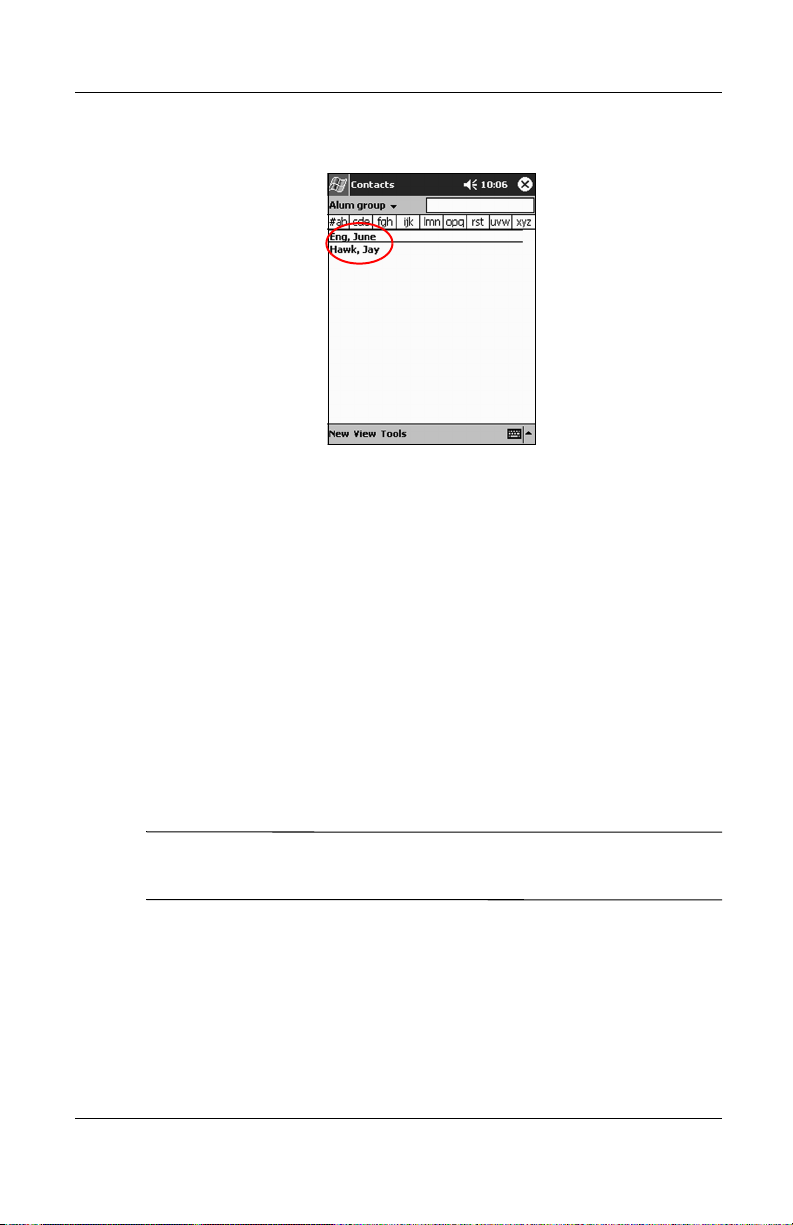
3. Tap a category name to see a list of contacts placed in that
category.
3–18 Reference Guide
hp CONFIDENTIAL 11/27/02
File: ch3-Communication.fm PN: 293146-001
Page 21
DRAFT - Revised 10/18/02
4. Tap a contact’s name.
Editing Contact Information
1. Tap a contact’s name.
2. Tap Edit to see the contact information.
3. Edit the contact information.
Communications
4. Tap OK to save the contact information and return to the list
of contacts.
Categorizing Contacts
You can use categories to filter your list of contacts. This helps to
view and edit your contact information.
After you create a new category, assign a contact to that category,
✎
so the category displays in the list of categories.
1. From the Start menu, tap Contacts.
2. Tap a contact’s name.
Reference Guide 3–19
hp CONFIDENTIAL 11/27/02
File: ch3-Communication.fm PN: 293146-001
Page 22
Communications
3. Tap Edit to see the contact information.
4. Tap the Categories field to see a list of available categories.
You may have to scroll down to see the Categories field.
DRAFT - Revised 10/18/02
3–20 Reference Guide
hp CONFIDENTIAL 11/27/02
File: ch3-Communication.fm PN: 293146-001
Page 23

DRAFT - Revised 10/18/02
Communications
5. Tap the Add/Delete tab to create a category.
6. Enter the name of the new category, then tap Add.
7. Tap OK to place your contact in the category.
8. Tap the Categories field again to place your contact in
additional categories.
9. Tap additional category names to select them, then tap OK to
list the categories you selected in the Categories field.
10. Tap OK to save the category information and return to the list
of contacts.
Reference Guide 3–21
hp CONFIDENTIAL 11/27/02
File: ch3-Communication.fm PN: 293146-001
Page 24

DRAFT - Revised 10/18/02
Communications
Deleting Contacts
CAUTION: If you delete a contact on your iPAQ h2200 Series and
Ä
synchronize Contacts with your computer, you also delete the contact
in Outlook on your computer.
1. From the Start menu, tap Contacts to see a list of your
contacts from the last category selected.
2. Tap the down arrow next to the category name to see a list of
categories.
3. Tap a category name to see a list of contacts placed in that
category.
4. Tap and hold a contact’s name to see a popup menu.
3–22 Reference Guide
hp CONFIDENTIAL 11/27/02
File: ch3-Communication.fm PN: 293146-001
Page 25

DRAFT - Revised 10/18/02
Communications
5. Tap Delete Contact to remove the contact from the list.
6. Tap Ye s to delete the contact permanently.
Reference Guide 3–23
hp CONFIDENTIAL 11/27/02
File: ch3-Communication.fm PN: 293146-001
Page 26

DRAFT - Revised 10/18/02
Communications
Using the Universal Remote
The Universal Remote (Nevo) transforms your h2200 unit into a
sophisticated and easy-to-use wireless home control. Use Nevo to
access and control up to 20 infrared (IR) controlled devices in the
home or office, such as televisions, VCRs, DVDs, audio, lights,
fans, blinds, and other home automation devices.
The universal remote comes pre-programmed with codes for
thousands of infrared supported devices. You can download other
codes from the Nevo web site (www.mynevo.com
The Universal Remote program, Nevo, is preinstalled on select
✎
iPAQ h2200 Series models equipped with a Consumer Infrared
module.
With the Universal Remote, you can:
■ Control and operate infrared supported office, entertainment,
and home automation equipment
).
■ Set up Favorite channels
■ Share the remote with others
■ Create unique personal settings
The first time you run Nevo, only two icons will display in the
device wheel:
■ The add devices icon
■ The add activities icon
3–24 Reference Guide
hp CONFIDENTIAL 11/27/02
File: ch3-Communication.fm PN: 293146-001
Page 27

DRAFT - Revised 10/18/02
Using Configuration Icons
Use the configuration icons to customize, select user menus, or
select rooms. The configuration icons are located at the bottom of
the main Nevo screen.
Tap th e customize icon to add, edit, and delete devices
and activity, also customize Home, screens, or
Favorites. This allows additional customization for
controlling equipment in different rooms.
Tap th e user icon to specify user defined favorites or
device settings.You can add, edit, and delete user
settings.
Tap th e room icon to select a device in a specific
room. You can add, edit, and delete room
assignmensts.
Adding a Device
Communications
Before you can use Nevo to control a device, you must add the
device to the device wheel. You can set up the univeral remote to
control up to 12 devices in a room.
To add a device to the device wheel:
1. From the Start menu, select Nevo
Reference Guide 3–25
hp CONFIDENTIAL 11/27/02
File: ch3-Communication.fm PN: 293146-001
Page 28

Communications
2. Look for your device on the wheel.
3. Select one of the following:
a. Tap the Add Devices icon.
b. Tap the device if the wrench icon displays.
c. Tap the wrench icon, then tap Add Device.
DRAFT - Revised 10/18/02
4. Tap Next.
3–26 Reference Guide
hp CONFIDENTIAL 11/27/02
File: ch3-Communication.fm PN: 293146-001
Page 29

DRAFT - Revised 10/18/02
Communications
5. Select your device from the Device list, then tap Next.
6. Select the setup method. It is recommended to search for your
device by the manufacturer’s brand name.
7. Tap Next.
Reference Guide 3–27
hp CONFIDENTIAL 11/27/02
File: ch3-Communication.fm PN: 293146-001
Page 30

Communications
8. Select your device from the Selection list.
9. Tap the test icon to test whether you can power on and off
your device. If not, try another code and repeat this step.
DRAFT - Revised 10/18/02
10. Tap Next.
3–28 Reference Guide
hp CONFIDENTIAL 11/27/02
File: ch3-Communication.fm PN: 293146-001
Page 31

DRAFT - Revised 10/18/02
Communications
11. Enter a name for the device, then tap Next.
12. Select an icon for your device. The universal remote
automatically assigns an icon to your device, but you can
change it.
13. Tap Next to view your device on the wheel.
Reference Guide 3–29
hp CONFIDENTIAL 11/27/02
File: ch3-Communication.fm PN: 293146-001
Page 32

DRAFT - Revised 10/18/02
Communications
Turning on a Device
1. From the Start menu, select Nevo.
2. Click a device on the wheel to position it at the top of the
wheel.
3. Tap the Power button.
Adding Activities
To customize the keys on devices to switch activities:
1. Tap the Activity icon.
3–30 Reference Guide
hp CONFIDENTIAL 11/27/02
File: ch3-Communication.fm PN: 293146-001
Page 33

DRAFT - Revised 10/18/02
2. Click Next.
3. Click Next.
Communications
4. Record the keystrokes for commanding multiple operations
into one activity.
Reference Guide 3–31
hp CONFIDENTIAL 11/27/02
File: ch3-Communication.fm PN: 293146-001
Page 34

Communications
5. Tap the Customize icon and select Finish Wizard.
6. Assign a name to the activity, then click Next.
DRAFT - Revised 10/18/02
3–32 Reference Guide
hp CONFIDENTIAL 11/27/02
File: ch3-Communication.fm PN: 293146-001
Page 35

DRAFT - Revised 10/18/02
Communications
7. Assign an icon to the activity. Activities are designated in
gold on the wheel.
8. Click Next.
9. Notice the activity on the wheel.
Reference Guide 3–33
hp CONFIDENTIAL 11/27/02
File: ch3-Communication.fm PN: 293146-001
Page 36

Communications
DRAFT - Revised 10/18/02
3–34 Reference Guide
hp CONFIDENTIAL 11/27/02
File: ch3-Communication.fm PN: 293146-001
Page 37

DRAFT - Revised 10/08/02
4
Using Bluetooth
Select models of the iPAQ h2200 Series are equipped with
built-in Bluetooth technology that allows short-range connections
and provides fast, reliable, and secure wireless communication.
With Bluetooth, you can perform the following tasks between two
Bluetooth devices, within range, without a physical connection:
■ Exchange contacts, calendar items, and tasks
■ Send or exchange business cards
■ Transfer files
■ Access dial-up networks
■ Synchronize with a computer
■ Partner with a cell phone
■ Connect to serial ports
■ Connect to Bluetooth wireless local area networks (WLANs)
■ Print to a Bluetooth printer
■ Create a personal area network (PAN) to chat, play
games, etc.
Reference Guide 4–1
hp CONFIDENTIAL 10/23/02
File: ch4-Bluetooth.fm PN: 293146-001
Page 38

DRAFT - Revised 10/08/02
Using Bluetooth
Use of dial-up networks and WLANs may require separately
purchased additional hardware and compatible equipment, in
addition to a standard WLAN infrastructure and a separately
purchased service contract.
Use of dial-up and wireless Internet, e-mail, corporate networks,
✎
and other wireless communications, such as Bluetooth-enabled
devices, may require separately purchased additional hardware
and other compatible equipment, in addition to a standard
Wireless LAN (WLAN) infrastructure and a separately purchased
service contract. Check with your service provider for availability
and coverage in your area. Not all Web content may be available.
Some Web content may require installation of additional
software.
Getting Acquainted with Bluetooth
Before you start using Bluetooth to establish wireless
connections, take a few minutes and familiarize yourself with:
■ Terms used in this chapter
■ Supported services
■ Bluetooth settings
■ Bluetooth Manager
4–2 Reference Guide
hp CONFIDENTIAL 10/23/02
File: ch4-Bluetooth.fm PN: 293146-001
Page 39

DRAFT - Revised 10/08/02
Understanding Terms
The following are Bluetooth terms used throughout this chapter.
The Term... Means...
Authentication The user must verify a numeric passkey
Authorization The user must approve a connection or
Bluetooth neighborhood
or device group
Bonding (Paired devices) To create a trusted connection between
Device address The unique electronic address of a
Using Bluetooth
before a connection or activity can be
completed.
activity before it can be completed.
A collection of Bluetooth devices.
your device and another. Once a bond is
created, the two devices become paired.
A trusted device does not require
authentication or authorization.
Bluetooth device.
Device discovery The location and recognition of another
Bluetooth device.
Device name The name a Bluetooth device provides
when discovered by another device.
Encryption A method of protecting data.
Link key A key used to securely pair devices.
Passkey A code you enter to authenticate
connections or activities requested by
other devices.
Personal Information
Manager (PIM)
Profiles A collection of Bluetooth settings.
Service discovery Determining which applications you have
Reference Guide 4–3
hp CONFIDENTIAL 10/23/02
File: ch4-Bluetooth.fm PN: 293146-001
A collection of applications used to
manage daily business tasks
(e.g., Contacts, Calendar, and Tasks).
in common with other devices.
Page 40

DRAFT - Revised 10/08/02
Using Bluetooth
Reviewing Supported Services
The functions that Bluetooth supports are called services. You
can only communicate with Bluetooth devices that support the
following services:
■ Serial Port (COM port)
■ LAN Access
■ Dial-up Networking
■ Information Exchange
■ File Transfer
■ Print
■ Personal Area Network (PAN)
4–4 Reference Guide
hp CONFIDENTIAL 10/23/02
File: ch4-Bluetooth.fm PN: 293146-001
Page 41

DRAFT - Revised 10/08/02
Working with Bluetooth Settings
Open Bluetooth Settings by tapping on the Bluetooth icon in the
lower-right corner of the Tod ay screen.
When the Bluetooth icon is blue, Bluetooth is active. When the
icon is grayed with a red X, Bluetooth is inactive.
Using Bluetooth
From the tabs in Bluetooth Settings, you can:
■ Turn the hardware on and off
■ Select a user profile
■ Change your iPAQ h2200 Series Bluetooth name
■ Specify security settings
■ Define settings for sharing and connecting
■ View software and port information
You must use the arrows to the right of the tab names to scroll
through the tabs.
Reference Guide 4–5
hp CONFIDENTIAL 10/23/02
File: ch4-Bluetooth.fm PN: 293146-001
Page 42

DRAFT - Revised 10/08/02
Using Bluetooth
Opening Bluetooth Settings
From the Tod ay screen, tap the Bluetooth icon.
Turning ON Bluetooth
You can apply or remove power to the Bluetooth hardware from
Bluetooth Settings.
To preserve battery power, it is recommended that you enable
✎
(turn on) Bluetooth only when using it.
When Bluetooth is off, no incoming or outgoing connections are
possible.
To turn on Bluetooth:
1. From the Tod ay screen, tap the Bluetooth icon.
2. Tap the Tu rn o n button to enable.
Tap th e Turn off button to disable.
✎
4–6 Reference Guide
hp CONFIDENTIAL 10/23/02
File: ch4-Bluetooth.fm PN: 293146-001
Page 43

DRAFT - Revised 10/08/02
Using Bluetooth
Working with the Bluetooth Manager
Using Bluetooth Manager, you can:
■ Establish connections
■ Display shortcuts
■ Exchange business cards
■ Control the on-screen display
The first screen that displays is My Shortcuts.
Opening Bluetooth Manager
1. On the Tod ay screen, tap Start.
2. Tap Programs, then Bluetooth Manager.
Reference Guide 4–7
hp CONFIDENTIAL 10/23/02
File: ch4-Bluetooth.fm PN: 293146-001
Page 44

DRAFT - Revised 10/08/02
Using Bluetooth
Locating and Selecting a Device
Several tasks will require you to locate a device and connect to it.
When you are required to locate a device, the Bluetooth browser
automatically assists by searching for other Bluetooth devices.
Once you locate a device, tap it to select. You will be returned to
the previous window.
Understanding Profiles
Use profiles to quickly enable selected personal settings in
multiple environments.
Creating a Profile
A new profile does not automatically become active. You must
select it from the Current Profile list to activate it.
To create a profile:
1. From the Tod ay screen, tap the Bluetooth icon.
2. From the General tab, tap the Profile icon.
4–8 Reference Guide
hp CONFIDENTIAL 10/23/02
File: ch4-Bluetooth.fm PN: 293146-001
Page 45

DRAFT - Revised 10/08/02
3. Tap the New button.
4. Enter a descriptive name.
5. Select an existing profile to use as a template.
4
5
6. Tap OK.
Using Bluetooth
Activating a Profile
When a new profile is created, you will need to activate it.
To activate a profile:
1. Create a profile.
2. From the Tod ay screen, tap the Bluetooth icon.
3. From the General tab, select it from the Current Profile
down arrow list.
4. Tap
Reference Guide 4–9
OK.
hp CONFIDENTIAL 10/23/02
File: ch4-Bluetooth.fm PN: 293146-001
Page 46

DRAFT - Revised 10/08/02
Using Bluetooth
Renaming a Profile
1. From the Tod ay screen, tap the Bluetooth icon.
2. From the General tab, tap the Profile icon.
3. Select a profile from the Add/Delete Profiles list.
4. Tap the Rename button.
5. Enter a new descriptive name.
6. Tap Enter.
7. Tap OK.
Deleting a Profile
1. From the Tod ay screen, tap the Bluetooth icon.
2. From the General tab, tap the Profile icon.
3. Select a profile from the Add/Delete Profiles list.
4. Tap the Delete button.
5. Tap Ye s to confirm you want to delete the profile.
6. Tap OK.
Saving Configuration Settings in a Profile
You can save the iPAQ h2200 Series Bluetooth configuration
settings to any profile.
To save configuration settings:
1. From the Tod ay screen, tap the Bluetooth icon.
2. From the
4–10 Reference Guide
General tab, tap the Profile icon.
hp CONFIDENTIAL 10/23/02
File: ch4-Bluetooth.fm PN: 293146-001
Page 47

DRAFT - Revised 10/08/02
3. Select a profile from the Add/Delete Profiles list or create a
new one.
4. Tap OK.
5. Set up your iPAQ h2200 Series. You should specify the
desired connection, sharing, and security settings in all
Bluetooth Settings tabs.
6. Tap OK to close the Bluetooth Settings. The changes are
automatically saved.
Bluetooth must be turned on for changes to be saved.
✎
Setting Accessibility Properties
You may want to enter or change accessibility properties to define
how your iPAQ h2200 Series interacts with other Bluetooth
devices.
Using Bluetooth
Entering a Device Name
The device name is what other devices see when they locate your
device.
To enter a device name:
1. From the Tod ay screen, tap the Bluetooth icon.
2. Tap the Accessibility tab.
3. Highlight the name in the Name field and enter a new one.
4. Tap OK to save your changes.
Reference Guide 4–11
hp CONFIDENTIAL 10/23/02
File: ch4-Bluetooth.fm PN: 293146-001
Page 48

DRAFT - Revised 10/08/02
Using Bluetooth
Allowing Others to Locate Your Device
You can allow other devices to search and locate your iPAQ
h2200 Series.
If another remote device has your device’s address, that device
✎
may be able to locate and connect to you even though you did not
select for your device to be discovered.
To allow others to locate your device:
1. From the Tod ay screen, tap the Bluetooth icon.
2. Tap the Accessibility tab.
3. Select Other devices can discover me.
4. Tap OK to save the changes.
Pairing Devices
You can pair devices so that they must exchange a computer
generated key prior to each connection. The security key is also
called a “Link Key.” It is generated from a unique Bluetooth
device address, a random number, and a user-defined password.
Once two devices are paired, they have a trusted relationship with
each other that can be verified using a link key. No additional
input is needed from the user. Therefore, connections and
activities can be performed between the devices without constant
authorization from the user.
To pair devices:
1. From the Tod ay screen, tap Start.
2. Tap Programs, then Bluetooth Manager.
3. Tap Tools, then Paired devices.
4. Tap Add.
4–12 Reference Guide
hp CONFIDENTIAL 10/23/02
File: ch4-Bluetooth.fm PN: 293146-001
Page 49

DRAFT - Revised 10/08/02
5. Tap the Lookup icon.
6. Tap a device.
7. Enter a password in the Passkey field.
Using Bluetooth
8. Tap OK.
9. Enter the same passkey into the other device.
Some devices, such as mobile phones, need to be placed in a
✎
mode to accept a bond from another device. Refer to that device’s
user instructions for more information.
Reference Guide 4–13
hp CONFIDENTIAL 10/23/02
File: ch4-Bluetooth.fm PN: 293146-001
Page 50

DRAFT - Revised 10/08/02
Using Bluetooth
Unpairing Devices
You can remove a paired relationship between devices.
1. From the Tod ay screen, tap Start.
2. Tap Programs, then Bluetooth Manager.
3. Tap Tools, then Paired devices.
4. Tap a device name.
5. Tap Remove.
6. Tap Ye s to remove the pairing.
Allowing Connections
You can determine if all devices or only paired devices can
connect to your iPAQ h2200 Series.
Allowing All Devices to Connect
1. From the Tod ay screen, tap the Bluetooth icon.
2. Tap the Accessibility tab.
3. Select Allow other devices to connect, then All devices.
4. Tap OK.
CAUTION: This allows any device, even those unknown to you, to
Ä
connect to your iPAQ h2200 unit. Once they are connected, security
settings for specific services will apply as specified in the Bluetooth
Settings.
4–14 Reference Guide
hp CONFIDENTIAL 10/23/02
File: ch4-Bluetooth.fm PN: 293146-001
Page 51

DRAFT - Revised 10/08/02
Allowing Paired Devices to Connect
Paired devices share and exchange an internally generated Link
Key prior to each connection. The Link Key is derived from a
unique Bluetooth device address, a random number, and
user-defined password.
This feature allows only devices that you trust to connect to your
iPAQ h2200 Series.
To allow paired devices to connect:
1. From the Tod ay screen, tap the Bluetooth icon.
2. Tap the Accessibility tab.
3. Select Allow other devices to connect, then Paired
devices only.
4. Tap OK.
Enabling Bluetooth Services
Using Bluetooth
You can select to have certain services enabled:
■ Automatically when Bluetooth is activated
■ When you permit the connection
■ When a passkey or link key is correctly entered
You can use any of these security options when transferring files,
creating a serial port connection, exchanging business card
information, configuring dial-up networking, joining a personal
network, and connecting to a headset.
Reference Guide 4–15
hp CONFIDENTIAL 10/23/02
File: ch4-Bluetooth.fm PN: 293146-001
Page 52

DRAFT - Revised 10/08/02
Using Bluetooth
Automatically Enabling Services
You can allow devices to connect without any authorization.
When Bluetooth is on, it is ready for connections.
To automatically enable services:
1. From the Tod ay screen, tap the Bluetooth icon.
2. Tap the tab for the service you want to enable: File Transfer,
Information Exchange, Serial Port, Dial-up Networking,
Audio Gateway, or Personal Network Server.
3. Select Enable service.
4. Tap OK.
Requiring Authorization to Access Services
If you elect to require authorization to access services, you must
authorize each connection. Your iPAQ h2200 Series will ask you
if the connection should be permitted.
To require authorization to access services:
1. From the Tod ay screen, tap the Bluetooth icon.
2. Tap the tab for the service you want to enable: File Transfer,
Information Exchange, Serial Port, Dial-up Networking,
Audio Gateway, or Personal Network Server.
3. Select Authorization required.
4. Tap OK.
4–16 Reference Guide
hp CONFIDENTIAL 10/23/02
File: ch4-Bluetooth.fm PN: 293146-001
Page 53

DRAFT - Revised 10/08/02
Using Bluetooth
Requiring a Passkey or Bond to Access Services
To establish a connection, the other device must have a passkey or
an established bond for added security. You can add data
encryption to this type of security.
A passkey is a code you enter to authenticate connections
requested by other devices. The passkey must be known and used
by both parties or the connection will not be allowed.
If... Then...
Both devices successfully
enter the known passkey
You wa nt to require a
passkey exchange each time
you transmit information
To require a passkey or bond:
1. From the Tod ay screen, tap the Bluetooth icon.
A bond is created between the devices.
You do not have to enter the passkey
again to exchange information.
You must remove the bond (“Unpairing
Devices”) prior to establishing the
connection.
2. Tap the tab for the service you want to enable: File Transfer,
Information Exchange, Serial Port, Dial-up Networking,
Audio Gateway, or Personal Network Server.
3. Select Authentication (Passkey) required.
4. Select Encryption Required if you want to require all data
exchanged between the devices to be encrypted.
5. Tap OK.
Reference Guide 4–17
hp CONFIDENTIAL 10/23/02
File: ch4-Bluetooth.fm PN: 293146-001
Page 54

DRAFT - Revised 10/08/02
Using Bluetooth
Setting a Shared Folder
You can determine the folder that other devices can access when
they connect to your iPAQ h2200 Series.
To set a shared folder:
1. From the Tod ay screen, tap the Bluetooth icon.
2. Tap the File Transfer tab.
3. Tap the Folder icon and locate a desired file folder.
4. Tap OK.
4–18 Reference Guide
hp CONFIDENTIAL 10/23/02
File: ch4-Bluetooth.fm PN: 293146-001
Page 55

DRAFT - Revised 10/08/02
Selecting Business Card Information
Two Bluetooth devices can exchange business card information
electronically. You can determine the information about you that
is sent to another device upon request. This information comes
from the Contacts list in Pocket Outlook.
The default selection is “None.”
To select business card information:
1. Create a contact in the Contacts application that includes
your name, title, and other relevant information.
2. From the Tod ay screen, tap the Bluetooth icon.
3. Tap the Information Exchange tab.
4. Tap the Contacts icon.
Using Bluetooth
5. Choose your contact from the list.
6. Tap OK.
Reference Guide 4–19
hp CONFIDENTIAL 10/23/02
File: ch4-Bluetooth.fm PN: 293146-001
Page 56

DRAFT - Revised 10/08/02
Using Bluetooth
Connecting to Other Devices
Use ActiveSync, serial and dial-up connections to communicate
with other Bluetooth devices. Establish a partnership with a cell
phone and set up the Bluetooth services it offers.
Identifying the Communications Port
You can identify the virtual COM ports used to create a serial
port connection. You may need to identify these COM ports for
activities such as printing.
The inbound COM port is used when other devices initiate a
serial connection. The outbound COM port is used when you
initiate a serial connection to another device.
To identify the communications port:
1. From the Tod ay screen, tap the Bluetooth icon.
2. Tap the Serial Port tab.
3. Note the names of your inbound and outbound COM ports.
4. Tap OK.
Establishing an ActiveSync Connection
You can set up an ActiveSync partnership with a Bluetooth
enabled computer.
To establish an ActiveSync connection:
1. From the Tod ay screen, tap Start.
2. Tap Programs, then Bluetooth Manager.
3. Tap New, then Connect.
4–20 Reference Guide
hp CONFIDENTIAL 10/23/02
File: ch4-Bluetooth.fm PN: 293146-001
Page 57

DRAFT - Revised 10/08/02
4. Tap “ActiveSync via Bluetooth,” then tap Next.
5. Follow the Connection Wizard instructions.
Using Bluetooth
Establishing a Serial Connection
Use the wireless Bluetooth serial port connection just as you
would a physical serial cable connection. You must configure the
application that will use the connection to the correct serial port.
Reference Guide 4–21
hp CONFIDENTIAL 10/23/02
File: ch4-Bluetooth.fm PN: 293146-001
Page 58

DRAFT - Revised 10/08/02
Using Bluetooth
To establish a serial connection:
1. From the Tod ay screen, tap Start.
2. Tap Programs, then Bluetooth Manager.
3. Tap New, then Connect.
4. Tap “Explore a Bluetooth device,” then tap Next.
5. Follow the connection wizard instructions.
Using Dial-Up Networking
When using dial-up networking, the remote device providing the
dial-up networking service, and the remote computer to which
you are connecting must both have telephone access.
Devices that can provide dial-up networking include Bluetooth:
■ Mobile phones
■ Desktop computers
■ Modems
Configuring Dial-Up Connections
To configure the dial-up networking settings:
1. From the Tod ay screen, tap the Bluetooth icon.
2. Tap the Dial-Up Networking tab.
3. Select a communications port from the COM Port list.
4. Select a baud rate from the Baud Rate down arrow list
(typical rate is 57600).
5. Select the type of flow control to use from the Flow Control
down arrow list (typical setting is Hardware [RTS/CTS]).
6. Tap OK.
4–22 Reference Guide
hp CONFIDENTIAL 10/23/02
File: ch4-Bluetooth.fm PN: 293146-001
Page 59

DRAFT - Revised 10/08/02
Using Dial-Up Networking
To connect to a device that provides telephone access:
1. From the Tod ay screen, tap Start.
2. Tap Programs, then Bluetooth Manager.
3. Tap New, then Connect.
4. Tap “Connect to the Internet,” then tap Next.
5. Follow the connection wizard instructions.
Once you have created the dial-up networking shortcut with a
✎
device, tap and hold the shortcut icon in the My Shortcuts tab of
the Bluetooth Manager, then tap Connect.
6. Tap New Connection.
7. Tap OK.
Using Bluetooth
8. Enter a name in the Connection Name field.
9. Enter a phone number. You have to enter the country code
and area code depending on where you are calling.
10. Tap OK to begin dialing.
Some mobile phones require a bond between device (see the
✎
section “Pairing Devices”).
Establishing a Cell Phone Partnership
You can establish a partnership with a cell phone, then setup the
Bluetooth services it offers.
To establish a cell phone partnership:
1. From the Tod ay screen, tap Start.
2. Tap Programs, then Bluetooth Manager.
Reference Guide 4–23
hp CONFIDENTIAL 10/23/02
File: ch4-Bluetooth.fm PN: 293146-001
Page 60

Using Bluetooth
3. Tap New, then Connect.
4. Tap “Partner with a cell phone,” then tap Next.
5. Follow the Connection Wizard instructions.
DRAFT - Revised 10/08/02
4–24 Reference Guide
hp CONFIDENTIAL 10/23/02
File: ch4-Bluetooth.fm PN: 293146-001
Page 61

DRAFT - Revised 10/08/02
Working with Files
You can exchange information with a connected device. You can
use the Bluetooth File Explorer to:
■ Navigate through the directories
■ View files and folders
■ Create new folders
■ Send and receive files from a remote device
■ Delete and rename files on a remote device
Creating a File Transfer Connection
1. From the Tod ay screen, tap Start.
2. Tap Programs, then Bluetooth Manager.
3. Tap New, then Connect.
Using Bluetooth
4. Tap “Browse files on a remote device,” then tap Next.
5. Follow the Connection Wizard instructions.
Sending Files
1. Tap and hold a file transfer shortcut icon, then tap Connect.
2. Tap File, then Tap Send a File… .
3. Locate a file to send.
4. Tap the file to automatically send it.
5. Tap OK.
Reference Guide 4–25
hp CONFIDENTIAL 10/23/02
File: ch4-Bluetooth.fm PN: 293146-001
Page 62

DRAFT - Revised 10/08/02
Using Bluetooth
Creating a Folder on a Remote Device
1. Tap and hold a file transfer shortcut icon, then tap Connect.
2. Navigate to the location you want for the new folder.
3. Tap File, then Create a folder.
4. Enter a folder name while New Folder is highlighted, then
tap Enter.
5. Tap OK.
Receiving a File from a Remote Device
1. Tap and hold a file transfer shortcut icon, then tap Connect.
2. Navigate to the file location on the remote device.
3. Tap the file.
4. Tap File, then tap Get.
5. Tap OK.
Deleting a File from a Remote Device
1. Tap and hold a file transfer shortcut icon, then tap Connect.
2. Navigate to the file location on the remote device.
3. Tap the file.
4. Tap File, then tap Delete.
5. Tap Ye s to verify you want to delete the selected file.
6. Tap OK.
4–26 Reference Guide
hp CONFIDENTIAL 10/23/02
File: ch4-Bluetooth.fm PN: 293146-001
Page 63

DRAFT - Revised 10/08/02
Sending Information via Bluetooth
Use Pocket Outlook to send contacts, calendar information, and
tasks to a remote device using Bluetooth.
To send information using Bluetooth:
1. Open the Calendar, Contacts, or Tasks application from the
Start menu or tap Start, then Programs.
2. Tap and hold the item to send, then select “Send via
Bluetooth.”
3. Tap the name of destination device.
4. Tap OK.
Using Bluetooth
Reference Guide 4–27
hp CONFIDENTIAL 10/23/02
File: ch4-Bluetooth.fm PN: 293146-001
Page 64

DRAFT - Revised 10/08/02
Using Bluetooth
Using Business Cards
Using the business card exchange, you can:
■ Send a business card to one or more devices
■ Request a business card from one or more devices
■ Exchange business cards with one or more devices
You must establish a default contact name to send or exchange
business card information.
You must first specify your default business card on the
Information Exchange tab in Bluetooth Settings. This name
becomes the default for business card transfers.
4–28 Reference Guide
hp CONFIDENTIAL 10/23/02
File: ch4-Bluetooth.fm PN: 293146-001
Page 65

DRAFT - Revised 10/08/02
Sending Business Cards
1. From the Tod ay screen, tap Start.
2. Tap Programs, then Bluetooth Manager.
3. Tap the Business card icon.
Using Bluetooth
You can open the business card exchange by tapping Too ls ,
✎
Business Card Exchange in the Bluetooth Manager.
4. Tap the Send icon.
5. Tap the device where you want to send your business card.
6. Tap OK.
Reference Guide 4–29
hp CONFIDENTIAL 10/23/02
File: ch4-Bluetooth.fm PN: 293146-001
Page 66

DRAFT - Revised 10/08/02
Using Bluetooth
Requesting Business Cards
1. From the Tod ay screen, tap Start.
2. Tap Programs, then Bluetooth Manager.
3. Tap the Business card icon.
4. Tap the Request icon.
5. Tap the device you want to request a business card.
6. Tap OK.
Exchanging Business Cards
You can exchange business card information with another device.
If available, the device’s information will be sent directly into
your Contacts list in Pocket Outlook.
To exchange business cards:
1. From the Tod ay screen, tap Start.
2. Tap Programs, then Bluetooth Manager.
3. Tap the Business card icon.
4. Tap the Exchange icon.
5. Tap the device where you want to exchange your
business card.
6. Tap OK.
4–30 Reference Guide
hp CONFIDENTIAL 10/23/02
File: ch4-Bluetooth.fm PN: 293146-001
Page 67

DRAFT - Revised 10/08/02
Working with Connections
You can create shortcuts to open and view status information for
all connections.
Creating a Shortcut
Creating a shortcut to one or more services does not establish
a connection. It only places a shortcut to that service on the
Shortcut tab of the Bluetooth Manager.
To create a shortcut:
1. From the Tod ay screen, tap Start.
2. Tap Programs, then Bluetooth Manager.
3. Tap New, then Connect.
4. Select a type of service, then tap Next.
5. Follow the connection wizard instructions.
Using Bluetooth
Paired devices are designated by a checkmark.
✎
Deleting a Shortcut
1. From the Tod ay screen, tap Start.
2. Tap Programs, then Bluetooth Manager.
3. Tap and hold the connection icon or list name to be deleted.
4. Tap Delete from the menu.
5. Tap Ye s to verify the selected shortcut should be deleted.
6. Tap OK.
Reference Guide 4–31
hp CONFIDENTIAL 10/23/02
File: ch4-Bluetooth.fm PN: 293146-001
Page 68

DRAFT - Revised 10/08/02
Using Bluetooth
Viewing Shortcuts
You can view shortcuts as icons or in a list format.
1. From the Tod ay screen, tap Start.
2. Tap Programs, then Bluetooth Manager.
3. Tap View.
4. Tap List or Icon.
5. Tap OK.
Opening a Connection
1. From the Tod ay screen, tap Start.
2. Tap Programs, then Bluetooth Manager.
3. Tap and hold the icon or list name, then tap Connect.
4. Tap OK.
Viewing Connection Status
You can view:
■ Connection’s name
■ Device’s name
■ Connection status
■ Length of connection
■ Signal strength
4–32 Reference Guide
hp CONFIDENTIAL 10/23/02
File: ch4-Bluetooth.fm PN: 293146-001
Page 69

DRAFT - Revised 10/08/02
To view the connection status:
1. From the Tod ay screen, tap Start.
2. Tap Programs, then Bluetooth Manager.
3. Tap and hold an active connection icon or list name, then
tap Status.
4. Tap OK.
Closing a Connection
1. From the Tod ay screen, tap Start.
2. Tap Programs, then Bluetooth Manager.
3. Tap and hold the connection icon or list name.
4. Tap Disconnect from the menu.
5. Tap OK.
Using Bluetooth
Viewing Connection Information
1. From the Tod ay screen, tap Start.
2. Tap Programs, then Bluetooth Manager.
3. Tap and hold the connection icon or list name.
4. Tap Properties from the menu.
5. Tap OK.
Reference Guide 4–33
hp CONFIDENTIAL 10/23/02
File: ch4-Bluetooth.fm PN: 293146-001
Page 70

Using Bluetooth
DRAFT - Revised 10/08/02
4–34 Reference Guide
hp CONFIDENTIAL 10/23/02
File: ch4-Bluetooth.fm PN: 293146-001
Page 71

DRAFT - Revised 10/14/02
The iPAQ h2200 Series can help you keep track of your schedule
by using it to:
■ See information at a glance on the Today screen
■ Set appointments and create reminders with the Calendar
■ Create a task list
Using the Today Screen
When you first turn on your iPAQ h2200 Series, the Toda y screen
displays. Use the Tod ay screen to view:
5
Scheduling
■ Owner information
■ Upcoming appointments
■ Unread and unsent messages
■ Tasks that need to be completed
Creating information
From the Tod ay screen, create new information, including:
■ Appointments
■ Contacts
■ E-mail
■ Excel Workbook Information
Reference Guide 5–1
hp CONFIDENTIAL 12/5/02
File: ch5-Scheduling.fm PN: 293146-001
Page 72

Scheduling
DRAFT - Revised 10/14/02
■ Notes
■ Tasks
■ Word documents
1. Tap
, or from the Start menu, tap Tod ay.
2. Tap New.
3. Tap an option to create a new item.
4. Tap OK when finished creating new item.
Changing information
From the Today screen, you can change:
■ Owner information
■ Upcoming appointments
■ Unread and unsent messages
■ Tasks that need to be completed
For more information on changing these items, see the
appropriate instructions for each task in this guide. For example,
to create a new appointment, see the “Scheduling Appointments”
later in this guide.
5–2 Reference Guide
hp CONFIDENTIAL 12/5/02
File: ch5-Scheduling.fm PN: 293146-001
Page 73

DRAFT - Revised 10/14/02
1. From the Start menu, tap Tod ay.
2. Tap the information you want to change.
3. Enter or change the information.
4. Tap OK to save changes and return to the To da y screen.
Changing Settings
Scheduling
From the Tod ay Settings screen, you can:
■ Add a picture as the background
■ Select the information you see
■ Set the order of the information
■ Decide when to see the Tod ay screen
1. From the Start menu, tap Settings > Today.
Reference Guide 5–3
hp CONFIDENTIAL 12/5/02
File: ch5-Scheduling.fm PN: 293146-001
 Loading...