

Page 1
Installing a Hood Lock (Smart Cover Lock)
and Hood Sensor on HP Workstations
The installation location for the hood lock on some HP workstations, such as the xw6200, is located under
the top panel of the unit. If this is the case with your workstation, use this document and the Smart Cover
Lock and Hood Sensor Installation Guide, included in this kit, to install the hood lock and hood sensor.
NOTE: For detailed instructions on installing and removing components on your HP Workstation, refer to
the Service and Technical Reference Guide for your unit. For HP Workstation support information, visit
www.hp.com/go/bizsupport.
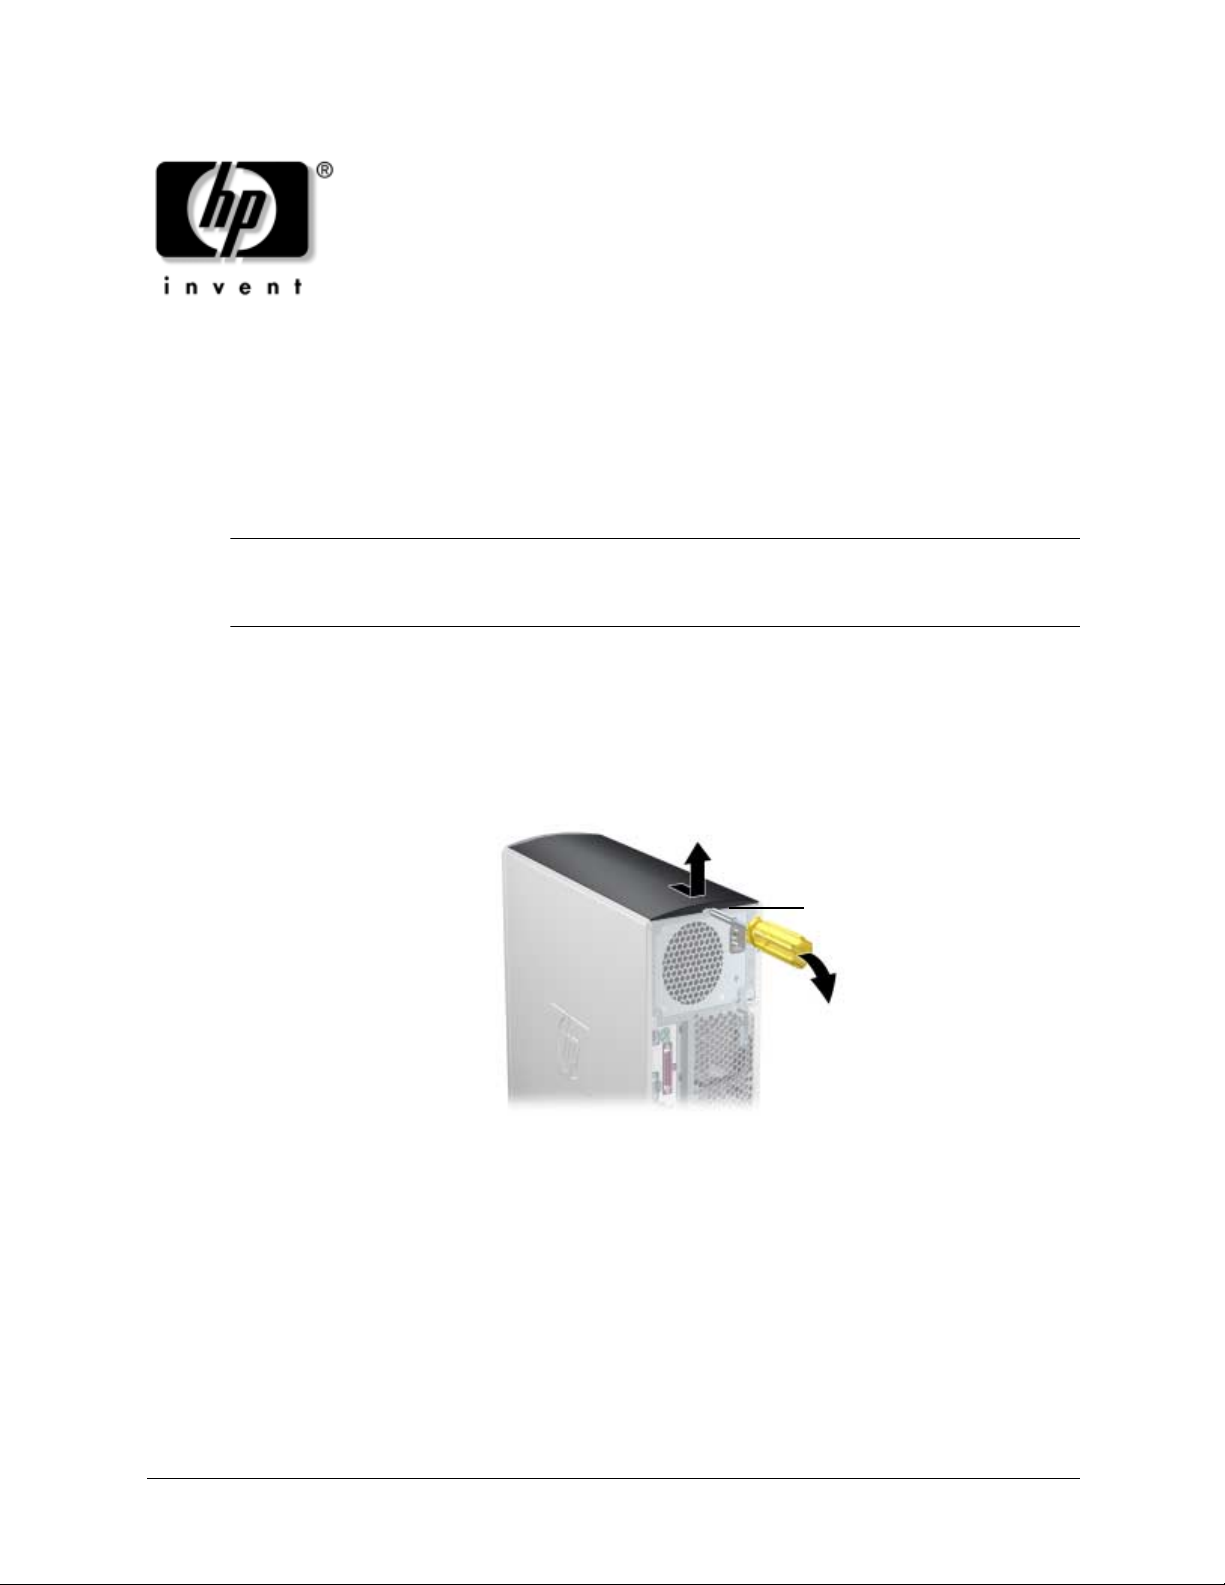
Removing the Top Panel
To remove the top panel:
1. Disconnect power from the system, remove the hood cover, and remove the front bezel.
2. Insert a flat-blade screw driver into the slot 1 as shown.
1
3. Gently pull down on the screw driver to disengage the cover from the unit.
4. Slide the cover back about an inch and then lift it off the unit.
1
Page 2

Identifying the Hood Lock Installation Location
The following illustration shows the hood lock installation location.
Connecting the Hood Sensor
The hood sensor cable on some workstations, such as the xw6200 and xw8200, does not connect to the
system board. Instead, the hood sensor cable connects to the front control panel cable. The front control
panel cable is located beneath the hard drive cage.
2
© 2004 Hewlett-Packard Development Company, L.P. The HP Invent logo is a registered
trademark of Hewlett-Packard Development Company, L.P.
367829-001
Page 3

フード ロック (スマート カバー ロック) およびフード
センサーの HP ワーク ステーシ ョ ンへのイ ンス ト ール
xw6200 などの HP ワーク ステーショ ンにフード ロックをインストールする位置は、ユニットの
トップ パネルの下と な り ます。 お使いのワーク ステーシ ョ ンでのイ ン ス トール位置も ト ップ パ
ネルの下で あ る 場合、 本書お よ び、 このキ ッ ト に同梱さ れてい る 『
Sensor Installation Guide
てください。
注記 : お使いの HP ワークステーショ ンへのコンポーネン トのイ ンス ト ールおよび取り 外しの詳細は、 お
使いの製品の 『Service and Technical Reference Guide』 を参照 し て く だ さ い。 HP ワーク ステーシ ョ ンのサ
ポー ト 情報は、 以下の We b サイ ト を参照してください。
www.hp.com/go/bizsupport
』を参照して、フード ロックおよびフード センサーをインス ト ールし
Smart Cover Lock and Hood
トップ パネルの取 り外 し
トップ パネルを取 り 外すには、 以下の手順に従い ます。
1. システムの電源を切断し、 フード カバーを取り 外し、 フロ ン ト ベゼルを取 り 外し ます。
2. 以下の図の よ う に、 マ イ ナ ス ドライバをスロット 1 に差 し 込みます。
1
3. ゆっ く り と ド ラ イバを下げ、 ユニッ ト からカバーを離します。
4. カバーを約 3 センチ程度後方にスラ イ ド させた後、 カバーを持ち上げ、 ユニッ トから取り
外します。
1
Page 4

フード ロ ッ クのイ ン ス ト ール位置の確認
以下の図に、 フ ー ド ロ ッ クの イ ン ス ト ール位置 を示 し ます。
フード セ ンサーの接続
xw6200 、 xw8200 な ど の ワ ー ク ステーシ ョ ンの場合、 フー ド センサー ケーブルは、 システム
ボード には接続し ません。 フー ド センサー ケーブルをフ ロ ン ト コン ト ロール パネル ケーブル
に接続し ま す。 フ ロ ン ト コント ロール パネル ケーブルは、 ハード ディ スク ドライブ ケージの
下にあ り ます。
2
© 2004 Hewlett-Packard Development Company, L.P. The HP Invent logo is a registered
trademark of Hewlett-Packard Development Company, L.P.
367829-001
 Loading...