

Page 1

H P D e s k W r i t e r 6 9 0 C P r i n t e r M a c i n t o s h P r i n t i n g
Macintosh Printing
The HP DeskWriter 690C printer comes with a Driver Installation Disk
which contains the printer driver. Before the printer can print, the software
that enables the computer to communicate with the printer must be
installed.
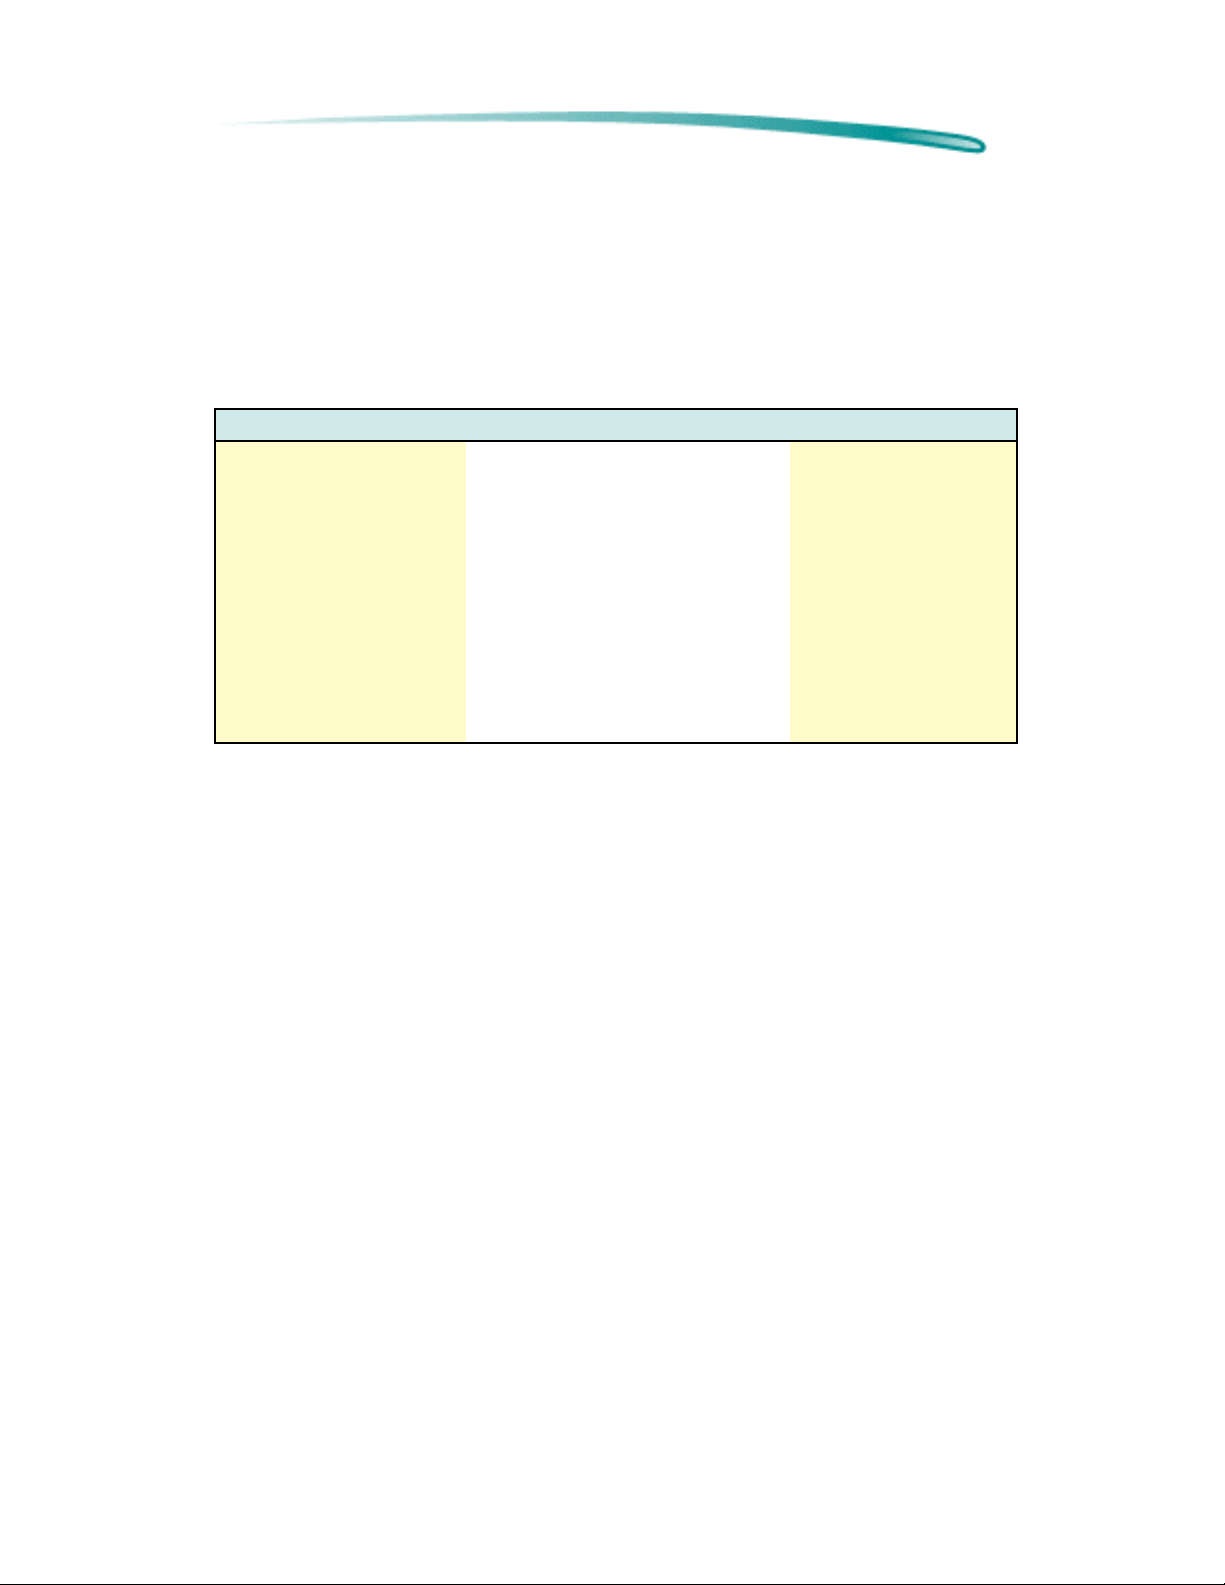
Look at the system requirements shown below to determine your system’s
compatibility with the printer driver.
System Requirements
Note If you find only one serial port on your computer, your older
model of Macintosh computer is not supported for use with
this printer. If you do use this type of computer you will
experience an unexpected printing of garbled text the first
time your computer is turned on. To remedy this problem,
either upgrade your computer or always turn on the computer
before you turn on the printer.
Minimum System Requirements
Macintosh system software version 7.1
69030/33 MHz with at least 4 MB of system memory
Power PC with at least 8 MB of system memory
At least 7.5 MB free hard disk space
Recommended System Requirements
Macintosh system software version 7.5 or later
Power PC with at least 16 MB of system memory
At least 7.5 MB free hard disk space
Page 2

H P D e s k W r i t e r 6 9 0 C P r i n t e r I n s t a l l i n g t h e P r i n t e r D r i v e r
Installing the Printer Driver
This section provides instructions for installing the printer driver. The
default installation procedure copies the printer driver contained on the HP
Driver Installation Disk to the correct location in the System folder.
The driver installer provides both Easy and Customize installation options.
all
Use the Easy Install option to install
locations on your hard disk. Use the Customize option to install only
selected portions of the printer software. See the ReadMe files on the
Driver Installation disk for further information about the Customize option.
What about QuickDraw GX?
The standard printer software supplied with the HP DeskWriter 690C
printer is QuickDraw compatible, but
after installing the printer driver, the printer driver does not appear in the
Chooser, make sure that the QuickDraw GX extension is disabled in the
extension manager, restart your computer, open the Chooser, and select
the printer.
of the printer software in the correct
not
compatible with QuickDraw GX. If,
Note
Installation Procedure
1. Switch your computer on.
2. Insert the Driver Installation Disk.
3. Double-click the Installer icon.
4. Select Easy (recommended) or Customize installation.
5. Follow the instructions on the screen.
Note
6. You may also wish to install the Truetype fonts at this time (see
7. You must select the HP DeskWriter 690C printer in your Chooser
8. After you have finished the printer driver installation, align the print
Before installing the printer driver, make a copy of the disks,
turn off any virus protection applications, and quit any open
applications.
If the installer finds a file with the same name, it replaces it
with the most current version.
“Font Information” below).
before you can start printing.
cartridges as described in “Aligning the Printer Cartridges.”
Page 3
H P D e s k W r i t e r 6 9 0 C P r i n t e r I n s t a l l i n g t h e P r i n t e r D r i v e r
Font Information
You can choose to install any or all of the 27 TrueType fonts contained on
the Font Installation disk. Each font requires between 36K and 64K of hard
disk space.
Available Fonts
TrueType Fonts from the Fonts Installation Disk
Arial Black New Century Schoolbook CG Poster Bodini
Arial Narrow New Century Schoolbook Italic Graphite Light
Arial Narrow Italics New Century Schoolbook Bold Graphite Light Narrow
ITC Avant Garde New Century Schoolbook Bold Italic
ITC Avant Garde Bold ITC Zapf Chancery
ITC Bookman ITC Zapf Dingbats PL Benguiat Frisky
ITC Bookman Italic Bernhard Modern Phyllis
ITC Bookman Bold Cooper Black Signet Roundhand
ITC Bookman Bold Italic Dom Casual
Lucida Casual
Lucida Casual Italic
Milestones
Installing and Using Fonts
The Font Installer copies the font files to the Fonts Folder in the System
Folder.
Installing the Truetype fonts
1. Insert the Fonts Installation disk
2. Double-click on the Installer icon.
3. Follow the instructions on the screen.
4. After the installation is complete, restart your computer.
PostScript Compatibility
PostScript fonts are compatible with the HP DeskWriter 690C printer.
Creating high-quality output using Type 1 fonts requires Adobe Type
Manager (ATM).
Page 4

H P D e s k W r i t e r 6 9 0 C P r i n t e r I n s t a l l i n g t h e P r i n t e r D r i v e r
Font Priorities
If a system has both ATM and TrueType fonts installed, the printer driver
uses the following in order to choose printer outline fonts for printing.
1. ATM fonts
2. TrueType fonts
3. Screen fonts (when no printer outline fonts are available)
Note
TrueType (and Type 1) fonts are variable-sized fonts,
sometimes called outline fonts. Bitmapped or screen fonts
are fixed size fonts.
Removing Fonts
If previous HP printer drivers have been used, some fonts that are no
longer needed can be deleted with the following steps.
To delete unneeded font folders:
1. Open the System Folder.
2. Open the Preferences Folder.
3. If you see a DeskWriter Fonts Folder or an HP Fonts Folder drag it
to the trash.
4. Choose Empty Trash from the Special menu.
Page 5

H P D e s k W r i t e r 6 9 0 C P r i n t e r I n s t a l l i n g t h e P r i n t e r D r i v e r
Removing Extra Printer Drivers
Users with limited hard disk space may choose to remove printer drivers
not being used.
To remove extra printer drivers:
1. Open the System folder.
2. Locate and open the Extensions folder in the Systems folder.
3. Click the icon for the printer driver you want to remove.
4. Drag the icon to the Trash, then choose Empty Trash from the
Special menu.
5. Close the Extensions folder and the System folder.
Choosing a Printer
Before printing, you must choose the HP DeskWriter 690C as the printer
you wish to use, even if it’s the only printer connected to your computer. To
do this, select Chooser from the Apple menu.
If the printer is connected directly to your computer:
1. Click the icon for the HP DeskWriter 690C.
2. Click the icon indicating the port to which you connected the
printer. (Both the printer and modem ports are serial ports and can
accommodate the printer.)
If the printer is connected via a network:
1. Make sure AppleTalk is active.
2. Click the icon for the HP DeskWriter 690C.
3. If your network is divided into zones click the zone for your printer.
4. Select HP DeskWriter 690C.
Page 6
H P D e s k W r i t e r 6 9 0 C P r i n t e r I n s t a l l i n g t h e P r i n t e r D r i v e r
Sharing Printers
You can place an icon representing the printer on your desktop. Desktop
printer icons are necessary in order to share printers with other network
users. It is also a convenient way to use a printer no matter where it is
physically located.
Creating a Desktop Printer Icon
To create a desktop printer icon:
1. Choose Chooser from the Apple menu.
2. Click Create. A printer icon appears on your desktop.
3. Close the Chooser.
To share the printer:
1. Click the icon for the printer to be shared.
2. Choose Sharing from the File menu.
3. Specify whether other users can use the printer or not.
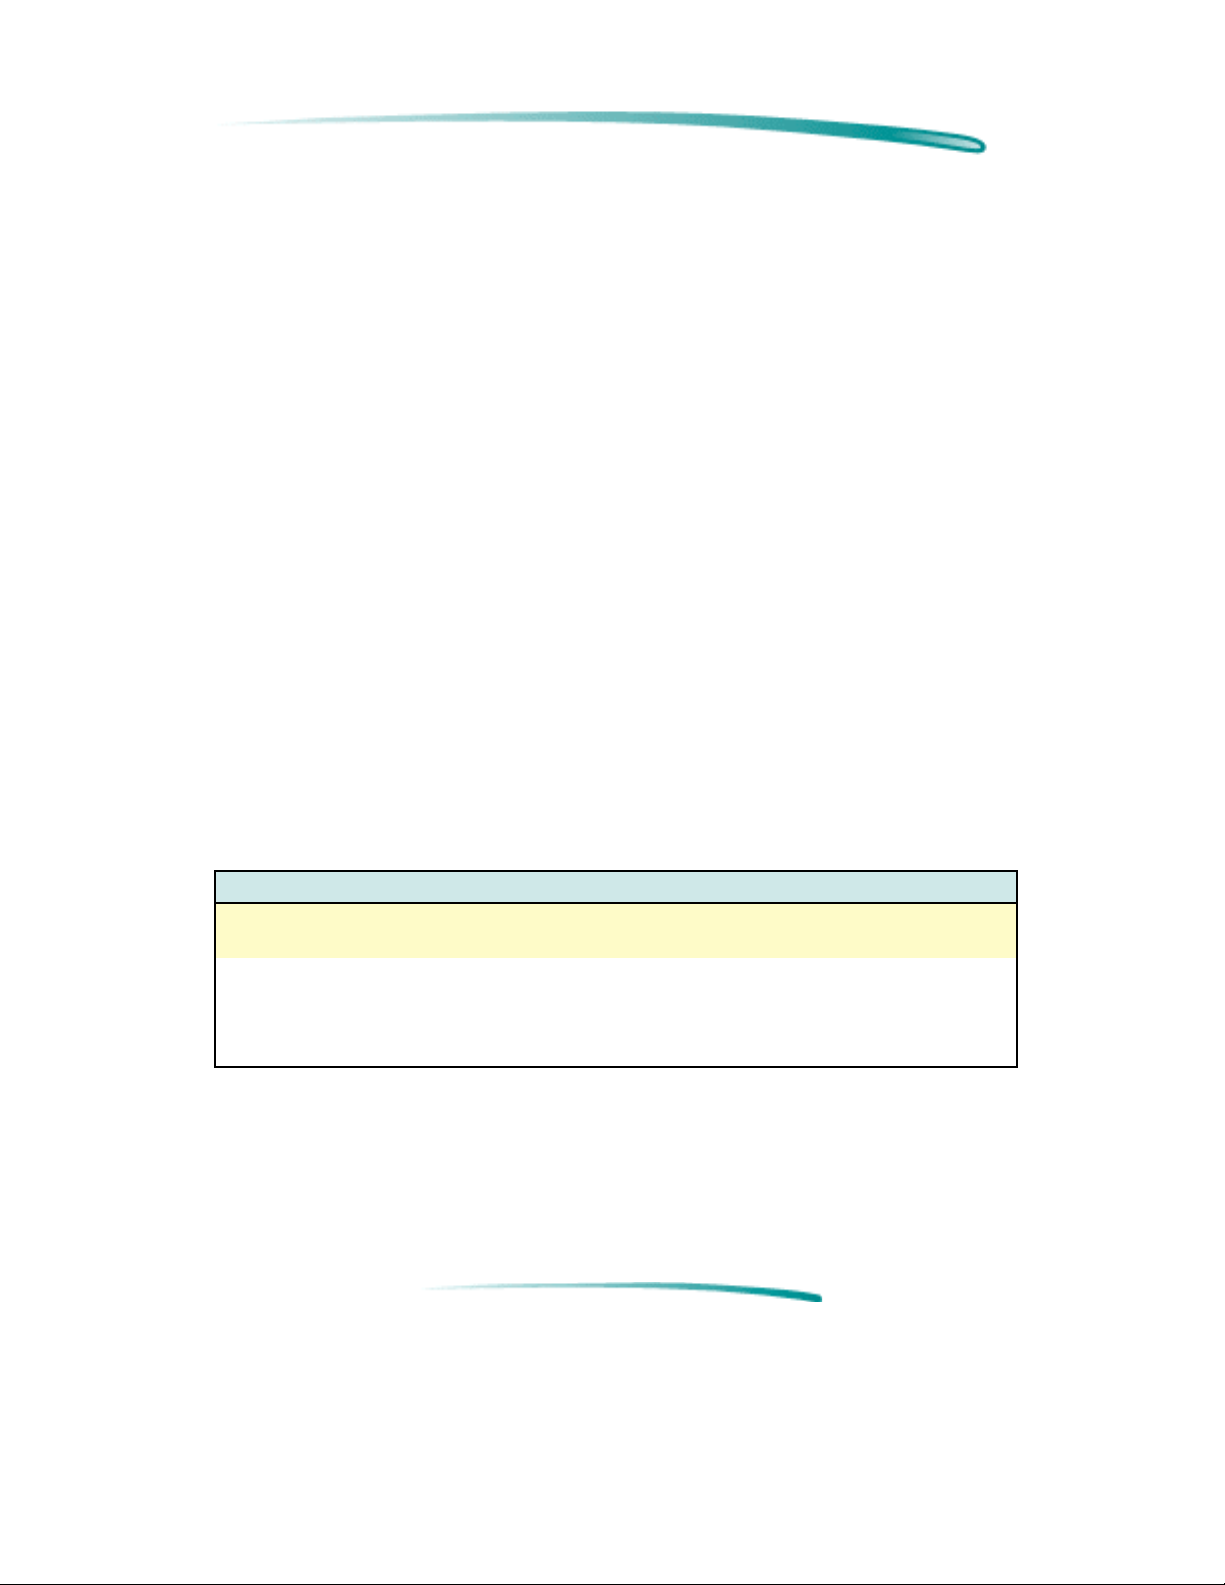
Printer Icon Sharing Options
Sharing options
Other systems may also use this printer Provides access to all specified network users,
groups, and guests.
Share this printer Provides access only to specified users, groups,
and guests.
User/Group, Guest Use the Users and Groups Control Panel dialog
box to restrict access to unqualified users.
Deleting a Desktop Printer Icon
To delete a desktop printer, make sure the print queue is empty, then drag
the icon to the Trash.
Page 7

H P D e s k W r i t e r 6 9 0 C P r i n t e r A b o u t t h e P r i n t e r D r i v e r
About the Printer Driver
The print driver software communicates the printer’s features and design
to your computer. The HP ColorSmart technology within the HP printer
driver analyzes your documents for the best quality printout every time you
print. ColorSmart identifies each element on a page - text, graphics,
photographs - and automatically applies the appropriate colors and ink
amounts to each of them.
The DeskWriter 690C Printer Driver Provides:
Background or foreground printing.
Desktop printer icons.
Drag and drop printing to the desktop printer icon.
Printing status messages, allowing you to view the jobs in queue;
stop, pause, or remove jobs; change the printing order of the jobs
in queue.
Added options to the Print and Page Setup dialog boxes allowing
print quality control.
27 TrueType fonts.
Laser-quality text and graphics printing in portrait and landscape
orientations.
Exceptional print quality even when mixing text and graphics on
the same page.
Near photographic quality when printing images using the Photo
Cartridge. HP color printers use ColorSmart technology allowing
halftone pattern removal, edge sharpening, and tone smoothing.
Print preview.
“Back to front” printing.
Multiple copy printing.
A default save for the print settings so that documents print the
same way every time.
Reduce or enlarge options. Reducing a document allows you to fit
the document’s contents to sizes corresponding to the printer’s
media capabilities . Enlarging a document allows you to more
easily see the documents contents. Reducing or enlarging a
document for printing does not affect the page dimensions in the
application.
Page 8

H P D e s k W r i t e r 6 9 0 C P r i n t e r A b o u t t h e P r i n t e r D r i v e r
Languages Supported
The Printer Driver Supports:
English Italian Dutch
French Spanish Swedish
German Portuguese Japanese
Page 9

H P D e s k W r i t e r 6 9 0 C P r i n t e r U s i n g t h e P r i n t e r D r i v e r
Using the Printer Driver
The printer driver provides dialog boxes for communicating specific
printing instructions to the printer.
Select the general print settings, such as the paper size and type,
the page orientation, and so forth, from within a software
application by choosing Page Setup from the File menu. This
displays the Page Setup dialog box.
Select specific print settings, such as intensity, halftoning patterns,
and color matching, from within the software application by
choosing Options from either the Page Setup or the Print dialog
boxes. This displays the Options dialog box. In general, leaving
the Options settings at Auto allows ColorSmart to provide the best
printing possible.
Page Setup
Before printing, choose Page Setup from the File menu.
The Page Setup Dialog Box
Page 10

H P D e s k W r i t e r 6 9 0 C P r i n t e r U s i n g t h e P r i n t e r D r i v e r
Page Setup Options
HP DeskWriter 690C Page Setup Options
Media Size: The pop-up menu displays selections supported by the printer.
Media: The media may be either plain paper or one of HP’s special
media types.
Orientation: Portrait or landscape.
Reduce/Enlarge Valid range: 25% – 400%.
Flip Horizontal Allows the printout to be reversed horizontally.
Two-sided Printing Allows manual duplex (two-sided) printing.
Use HP Photo Cartridge Allows the HP Photo cartridge (installed in place of the black
print cartridge) to be used to print high-quality photographs.
Save as Default Save the current settings as the default settings for the Page
Setup and ColorSmart options.
Service Opens the Service dialog box, which is used for print cartridge
maintenance.
Options Opens the ColorSmart Options dialog box which is used to
change some of the ColorSmart options.
Help Opens the HP DeskWriter 690C on-screen help.
Custom... Allows you define custom paper for the printer.
Margins... Provides access to the margin settings menu for the program
from which you are printing.
Print... Provides immediate access to the Print menu.
{Current Program} Help Opens the on-screen help provided by the program from which
you are printing.
Default... Allows you to change the default settings for document layout.
Apply Size and Orientation
To:
Allows you to apply size and orientation changes to selected
sections of a document, or the whole document.
Page 11

H P D e s k W r i t e r 6 9 0 C P r i n t e r U s i n g t h e P r i n t e r D r i v e r
Printing Documents
When printing from the Finder, you can select multiple documents for
printing in succession. These documents need not have the same
specifications nor have been created with the same software application.
The printing specifications for each document are used when that
document is printed. However, the printer does not notify you if the
documents require different sizes or types of paper. Choose Print from the
File menu to see the Print Dialog box.
How to Print
Two ways to access the Print Dialog
From within an application: Choose Print from the File menu.
From the Finder: Select the document you want to print by clicking on the
document icon(s) and choosing Print from the File menu.
Page 12

H P D e s k W r i t e r 6 9 0 C P r i n t e r U s i n g t h e P r i n t e r D r i v e r
The Print Dialog
Print Options
HP DeskWriter 690C Print Options
Quality:
Pages: Print all pages or a specified range of pages.
Copies: Print multiple copies of a document. (The range is 1 to 9999.)
Print in Grayscale Print color documents in grayscale (black and white and
Print Back to Front Print the last page of a document first so that the first page is
Preview Display a preview of the printer output.
Options... Provides access to the ColorSmart Options dialog.
Help Opens the HP DeskWriter 690C on-screen help.
Table continued on next page
Best
Normal
EconoFast
shades of gray).
on top of the stack in the output tray. This provides documents
in the correct order when printing is complete
Page 13

H P D e s k W r i t e r 6 9 0 C P r i n t e r U s i n g t h e P r i n t e r D r i v e r
Print Options (Cont.)
HP DeskWriter 690C Print Options
Print...
This heading contains two
pull-down menus which allow
you to:
Range... If you elect to
{Current Program} Help Opens the on-screen help provided by the program from which
Print Selection Only Allows you to print selected text only. (To activate this
Select printable
items:
Select the pages
from within the
document you
wish to print:
(Active only if
Document is
selected above)
use “All Pages In
Range” (see
above), this
button allows you
to select:
you are printing.
selection, highlight a block of text within the document that you
wish to print
before opening the Print dialog box.)
Document (see below)
Summary Info
Annotations
Styles
AutoText Entries
Key Assignments
All Pages in Range
Odd Pages
Even Pages
The “Range...” button (see below) applies
to this section.
Use Print Dialog Page Range (See
“Pages...” above)
All (Print all pages in the document)
Current Page (Prints only the page
upon which the cursor was placed within
the document. Typically, the page
currently on screen)
Pages: (Allows you to define a wide
range of pages from within the document
to print.)
Options Dialog Box
Note If your software application offers the option of printing back-
and
to-front
you also select the printer driver’s Back-to-Front
option, the document will print front-to-back...the two
commands
offset
each other.
Page 14

H P D e s k W r i t e r 6 9 0 C P r i n t e r U s i n g t h e P r i n t e r D r i v e r
Printing in Color
The HP DeskWriter 690C printer prints in color when using a colorcapable application. To print in color, be sure you have created colored
text or pictures within a document, then turn on color printing in the
application.
The quality of the color printing depends partly on how the four inks black, cyan, yellow, and magenta - are placed on the printed page. HP’s
ColorSmart technology enables the printer to intelligently analyze
documents at the time of printing to provide the best color output.
ColorSmart identifies each element on a page - text, simple graphics, or
compels graphics such as photographic images - and automatically
applies the appropriate color settings.
It‘s a good idea to print draft copies of color documents in grayscale using
the black print cartridge. Grayscale printing is much faster than color
printing, and printing grayscale drafts helps conserve color cartridges. To
print in grayscale, set Grayscale in the Print dialog.
To open the ColorSmart dialog:
1. Choose Page Setup from the File menu.
2. Click Options.
ColorSmart Options
HP DeskWriter 690C ColorSmart Options
Intensity:
Used to compensate for
environmental and media
variations by adjusting the
amount of ink used. Users
can specify:
Halftoning: Auto (Default...uses Scatter)
Bleed Control: Auto (Default)
Color Matching: Auto (Default)
Auto (This is the default setting which uses a sophisticated
algorithm to control the amount of ink used based on the media
type and other factors.)
Lightest
Lighter
Normal
Darker
Darkest
Scatter
Pattern.
On
Off
Text/Graphics
Photographic
ColorSync.
Page 15

H P D e s k W r i t e r 6 9 0 C P r i n t e r U s i n g t h e P r i n t e r D r i v e r
ColorSync Support
Macintosh system support for ColorSync
System 7.0.1 Supports ColorSync
System 7.0 and earlier Does not support ColorSync
Background Printing
Turning the background printing option on enables you to work on other
documents while printing. When background printing is on, a copy of your
document is saved in the PrintMonitor Documents folder, a temporary
folder in the Systems folder on your hard disk. This copy is then sent to the
printer. Although background printing lets you regain control of your
computer sooner; the actual printing of the document is slower.
If you send several documents to the printer, a queue forms in the
PrintMonitor Documents folder. Documents print in the order received.
To use background printing, select the Chooser from the Apple menu,
select the printer you are using, and turn-on background printing.
The HP PrintMonitor
Access the PrintMonitor by double-clicking the icon for the printer. Use the
HP Print Monitor during Background Printing to:
See which file is currently printing.
View and re-arrange the order of files waiting to be printed.
Cancel a file from printing.
Remove a file from the print queue.
Establish preferences for the level of notification used when the
printer needs attention.
Note
Using the PrintMonitor
You cannot directly print a file from the HP PrintMonitor. The
HP PrintMonitor prints in the background until the
PrintMonitor Documents folder is empty.
To open the HP PrintMonitor
During background printing: Select HP PrintMonitor from the Application menu in the top
right corner of the menu bar.
When the printer is inactive: Double-click the HP PrintMonitor icon in the Extensions folder.
With desktop printer icons Double-click the desktop printer icon while printing.
Page 16

H P D e s k W r i t e r 6 9 0 C P r i n t e r U s i n g t h e P r i n t e r D r i v e r
Once the HP PrintMonitor is displayed you can change the settings by
choosing Preferences from the File menu.
Note
By default, the HP PrintMonitor is not displayed during
printing. To automatically display the HP PrintMonitor during
printing, change the settings in the Preferences dialog box.
Page 17

H P D e s k W r i t e r 6 9 0 C P r i n t e r O p t i m i z i n g P e r f o r m a n c e
Optimizing Performance
The print driver is designed to deliver the best possible performance.
However, printer output speed can be affected by the amount of available
system memory (RAM) and the amount of available disk space.
The following list provides ideas on how to enhance the printer’s
performance:
Increase the amount of RAM in your computer. The printer driver
requires at least 8 MB of RAM. Use additional memory (4 MB or
more) to increase the printer’s flexibility in using applications.
Limit the number of documents and programs that you open at one
time.
Free system memory (RAM) by removing start-up screens, INITs,
and control panels from the System Folder.
Turn off background printing.
Decrease the Disk Cache in the Memory Control Panel.
Remove unneeded fonts.
Servicing the Print Cartridge
The printer software Service dialog box provides access to cleaning and
alignment routines. Use the cleaning routines only when necessary
because they cause the print cartridges to use large amounts of ink.
1. Choose Page Setup from the File menu.
2. Click Service.
Alternatively, select the desktop printer icon and click Print Cartridge
Cleaning or Print Cartridge Alignment from the Print menu.
The Service Dialog Box
Page 18

H P D e s k W r i t e r 6 9 0 C P r i n t e r O p t i m i z i n g P e r f o r m a n c e
Cleaning
The HP DeskWriter 690C provides multiple levels of maintenance for
cleaning the printer cartridge.
Clean (also referred to as “Surface Clean”)
Standard Clean
Prime
Click Start to initiate the Clean process, then click Clean to initiate the
clean cycle. A test page prints after the cycle finishes.
If not satisfied with the results, continue with the Standard Clean cycle. A
test page prints after the Standard Clean finishes.
If still not satisfied, continue with the Prime procedure.
Caution
Priming extracts large amounts of ink and should not be
performed as a routine operation.
Aligning
Before you begin printing for the first time, or after you replace one or both
of your printer cartridges, you will need to align the color and black
cartridges with one another. To begin the alignment procedure, click Align
in the Service dialog box, and follow the instructions given on the screen.
Page 19

H P D e s k W r i t e r 6 9 0 C P r i n t e r T r o u b l e s h o o t i n g
Troubleshooting
HP periodically provides updates of the printer software. These updates
may include enhancements that improve printer performance.
Problems and Solutions
Problem Solution
Printer won’t print. Open the Chooser and verify that the correct printer is
selected.
Printer icon does not appear
on the left side of the
Chooser.
The printer name does not
appear on the right side of
the Chooser or the HP
DeskWriter family printer is
not listed.
Power light is On, the
Resume light is Off.
Make sure that the printer is turned on.
Make sure that the printer driver icon is in the Extensions
Folder.
Make sure the printer is turned on.
Open the Chooser and make sure AppleTalk is active.
Check that the printer appears in the Chooser then close all
applications and restart. If this doesn’t work it may be
necessary to reinstall the printer driver software.
Using On-line Help
Two types of on-line help provide information about the printer software.
Printer Software Help
Type of help Provides How to access/where to find
Balloon Help Pop-up information about
options in the dialog
boxes when you move
the mouse cursor over
certain parts of the
screen.
ReadMe Files Release notes and
current information.
1. Choose Show Balloons from the Help
menu in the upper right corner of the
menu bar. (If this option is not
available Balloon help is already on.)
2. To turn off Balloon help, choose Hide
Balloons from the Help menu.
1. On the Driver Installation Disk.
2. On the Fonts Installation Disk.
 Loading...