

Page 1

VA-1809 Instruction Manual
(Temporary/not complete)
February 9, 2005
Page 2

Contents
1. Before operation .................................................................................................................. 1
1.1 Foreword .................................................................................................................. 1
1.2 Safety precautions .................................................................................................... 1
1.3 How the manual is configured (いらない?) ................................................. 2
1.4 What is packed with the VA-1809............................................................................ 2
2. Concerning the VA-1809..................................................................................................... 3
2.1 Introduction .............................................................................................................. 3
2.2 Features and main functions..................................................................................... 3
2.3 Parts and their functions........................................................................................... 4
2.3.1 VA-1809 front panel..................................................................................... 4
2.3.2 VA-1809 rear panel ...................................................................................... 5
2.3.3 VA-1809 on-screen display .......................................................................... 6
2.4 Concerning the internal data .................................................................................... 6
3. Concerning CF cards ........................................................................................................... 8
3.1
Introduction .............................................................................................................. 8
3.2 Usable CF cards ....................................................................................................... 8
3.2.1 Type.............................................................................................................. 8
3.2.2 Amount of data that can be registered ......................................................... 8
3.2.3 How to insert the CF cards........................................................................... 9
3.2.4 How to eject the CF cards CF ...................................................................... 9
4. Menu structure ................................................................................................................... 10
4.1
ANALYZE ............................................................................................................. 10
4.2 PROGRAM EXE ................................................................................................... 11
4.3 SETUP.................................................................................................................... 12
4.4 SAVE MENU ......................................................................................................... 13
5. Connections with peripherals ............................................................................................ 14
5.1 Example of connections when using the VA-1809 as a monitor............................ 14
5.2 Example of connections when using the VA-1809 as a repeater............................ 15
5.3 Connections for isolating the HDMI input sound for output ................................. 16
5.4
Example of connections when outputting on-screen displays to an analog monitor
................................................................................................................................16
6. Simple setup ...................................................................................................................... 17
6.1 Setting the VA-1809's HDMI equipment performance using
the internal program provided at the time of shipment .................................... 17
6.1.1 Loading the program.................................................................................. 17
6.1.2 Internal program data................................................................................. 18
6.2 Connecting the signal source, and displaying the HDMI input images on
the LCD screen....................................................................................................... 18
7. Detailed setup .................................................................................................................... 19
7.1 HDMI equipment performance settings................................................................. 19
7.1.1 Creating the program data.......................................................................... 19
7.1.1.1 Copying the program data.......................................................... 19
i
Page 3

7.1.1.2 Editing the program data (SINK, EDID) ................................... 20
7.1.1.3 Creating groups.......................................................................... 21
7.1.2
Executing the program data (LOAD)......................................................... 22
7.1.2.1 Executing the data from ANALYZE EXE ................................. 22
7.1.2.2 Executing the data from PROGRAM Edit................................. 23
7.2 LCD screen settings ............................................................................................... 24
7.3 CONFIG SETUP.................................................................................................... 25
7.3.1 Setting the trigger for log execution .......................................................... 25
7.3.2 Program execution mode ........................................................................... 26
7.3.3 Adjusting the speaker volume.................................................................... 27
7.3.4 Setting the hot plug button ......................................................................... 27
8. How to display the measurement results ........................................................................... 28
8.1 ERROR Report....................................................................................................... 28
8.2 VIDEO TIMING VIDEO TIMING ....................................................................... 28
8.3 InfoFrame AVI........................................................................................................ 31
8.4 InfoFrame SPD....................................................................................................... 31
8.5 InfoFrame Audio .................................................................................................... 31
8.6 InfoFrame MPEG................................................................................................... 31
8.7 ACP Packet............................................................................................................. 31
8.8 ISRC1 Packet ......................................................................................................... 32
8.9 ISRC2 Packet ......................................................................................................... 32
8.10 Channel Status........................................................................................................ 32
8.11 Audio Timing ......................................................................................................... 32
8.12 HDCP ..................................................................................................................... 33
8.13 (DDC Monitor........................................................................................................ 33
9.
Other functions .................................................................................................................. 33
9.1 Hot plug function ................................................................................................... 33
9.2 Log function ........................................................................................................... 33
10. Error table .......................................................................................................................... 33
11.
Product specifications........................................................................................................ 33
12.
Terms .................................................................................................................................33
ii
Page 4
1. Before operation
1.1 Foreword
Thank you very much for purchasing this model VA-1809 video signal generator. This
manual contains details on the operation procedures to be followed when the VA-1809 is
used, the checkpoints and precautions to be observed, and other useful information.
Refer to its instructions when using the generator.
Ensure that the manual is kept in a safe place where it can be referred to at any time.
1.2 Safety precautions
Improper handling may result in malfunctioning. Before using the VA-1809, please read
through these instructions to ensure that you will operate the generator correctly.
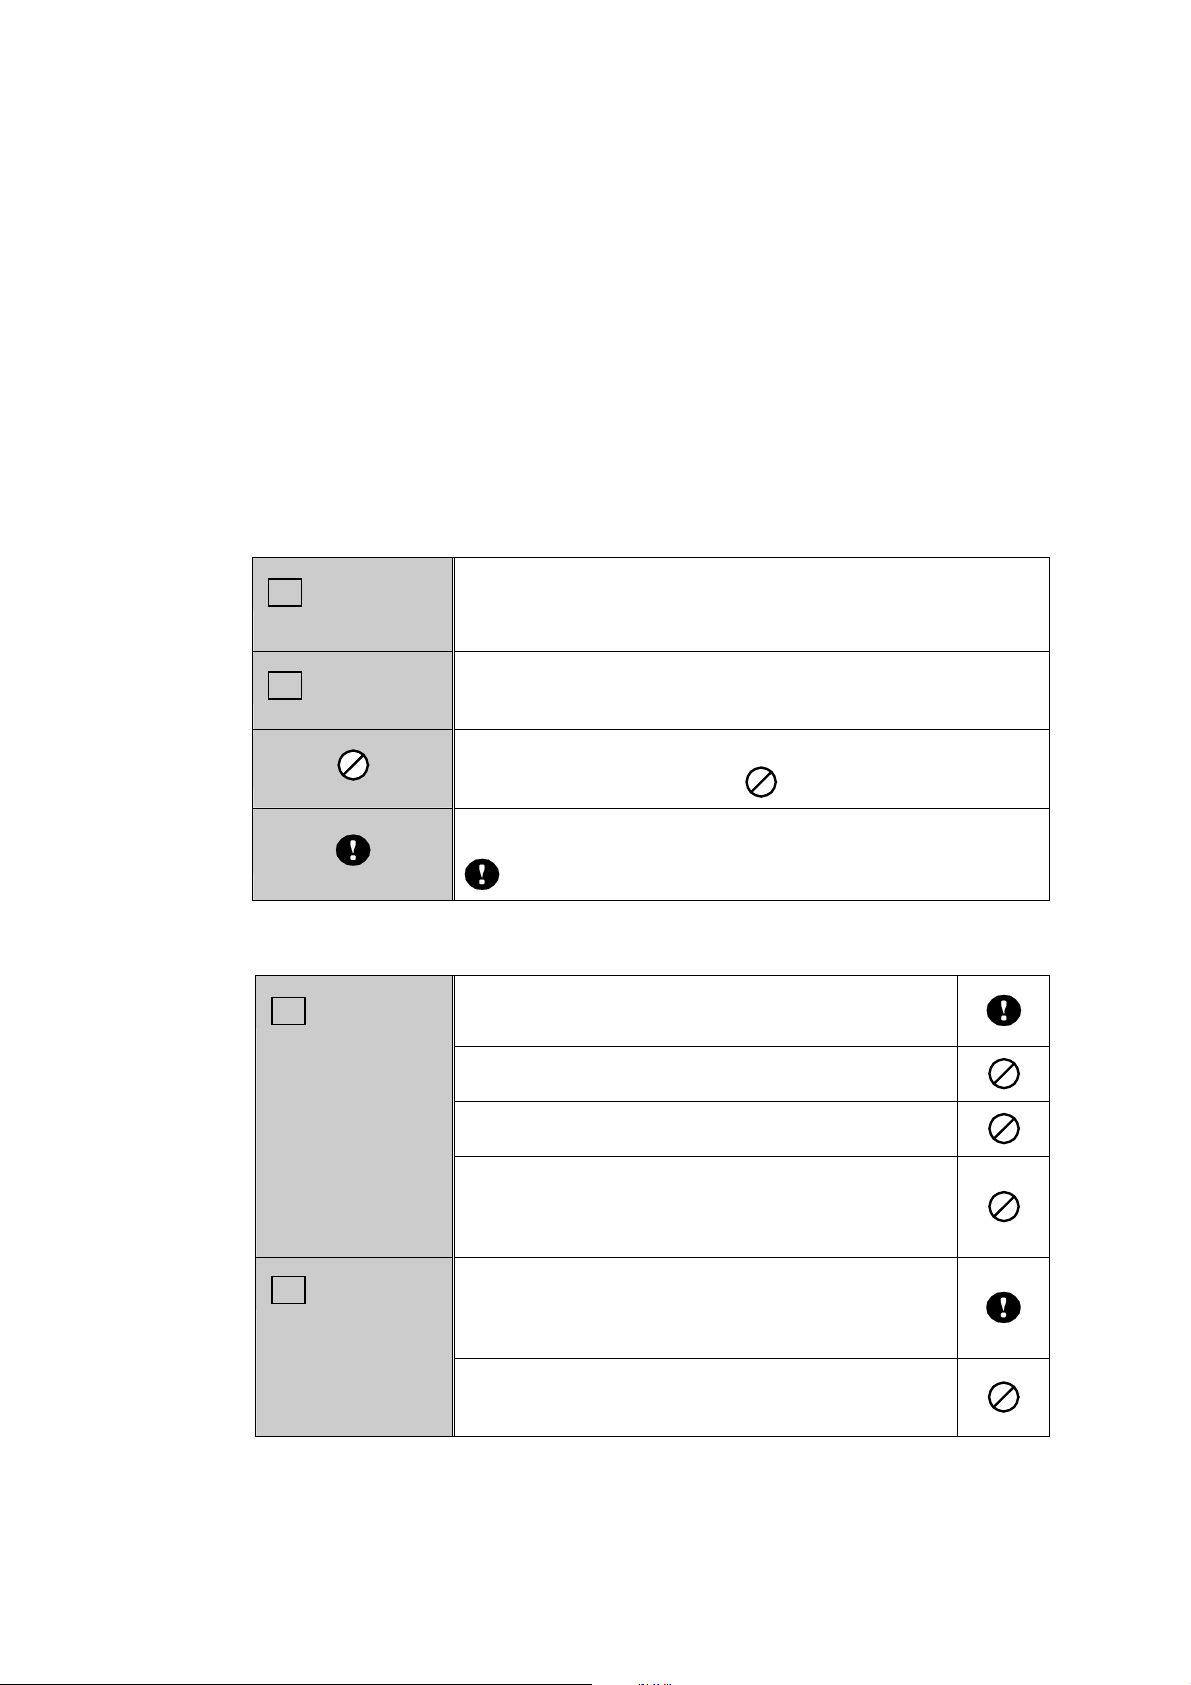
■ Meaning of symbols used in the manual
WARNING
CAUTION
■ To ensure safe operation
WARNING
CAUTION
This indicates the possibility of grave bodily harm (including death or
serious injury) and/or loss of the generator's original functions as a
result of operating the generator incorrectly.
This indicates the possibility of bodily harm, loss of the generator's
original functions and/or damage to property as a result of operating the
generator incorrectly.
This indicates an action which is prohibited. Specific details are
indicated by a picture or text near
.
This indicates an action which is mandatory or whose execution must
be instructed. Specific details are indicated by a picture or text near
.
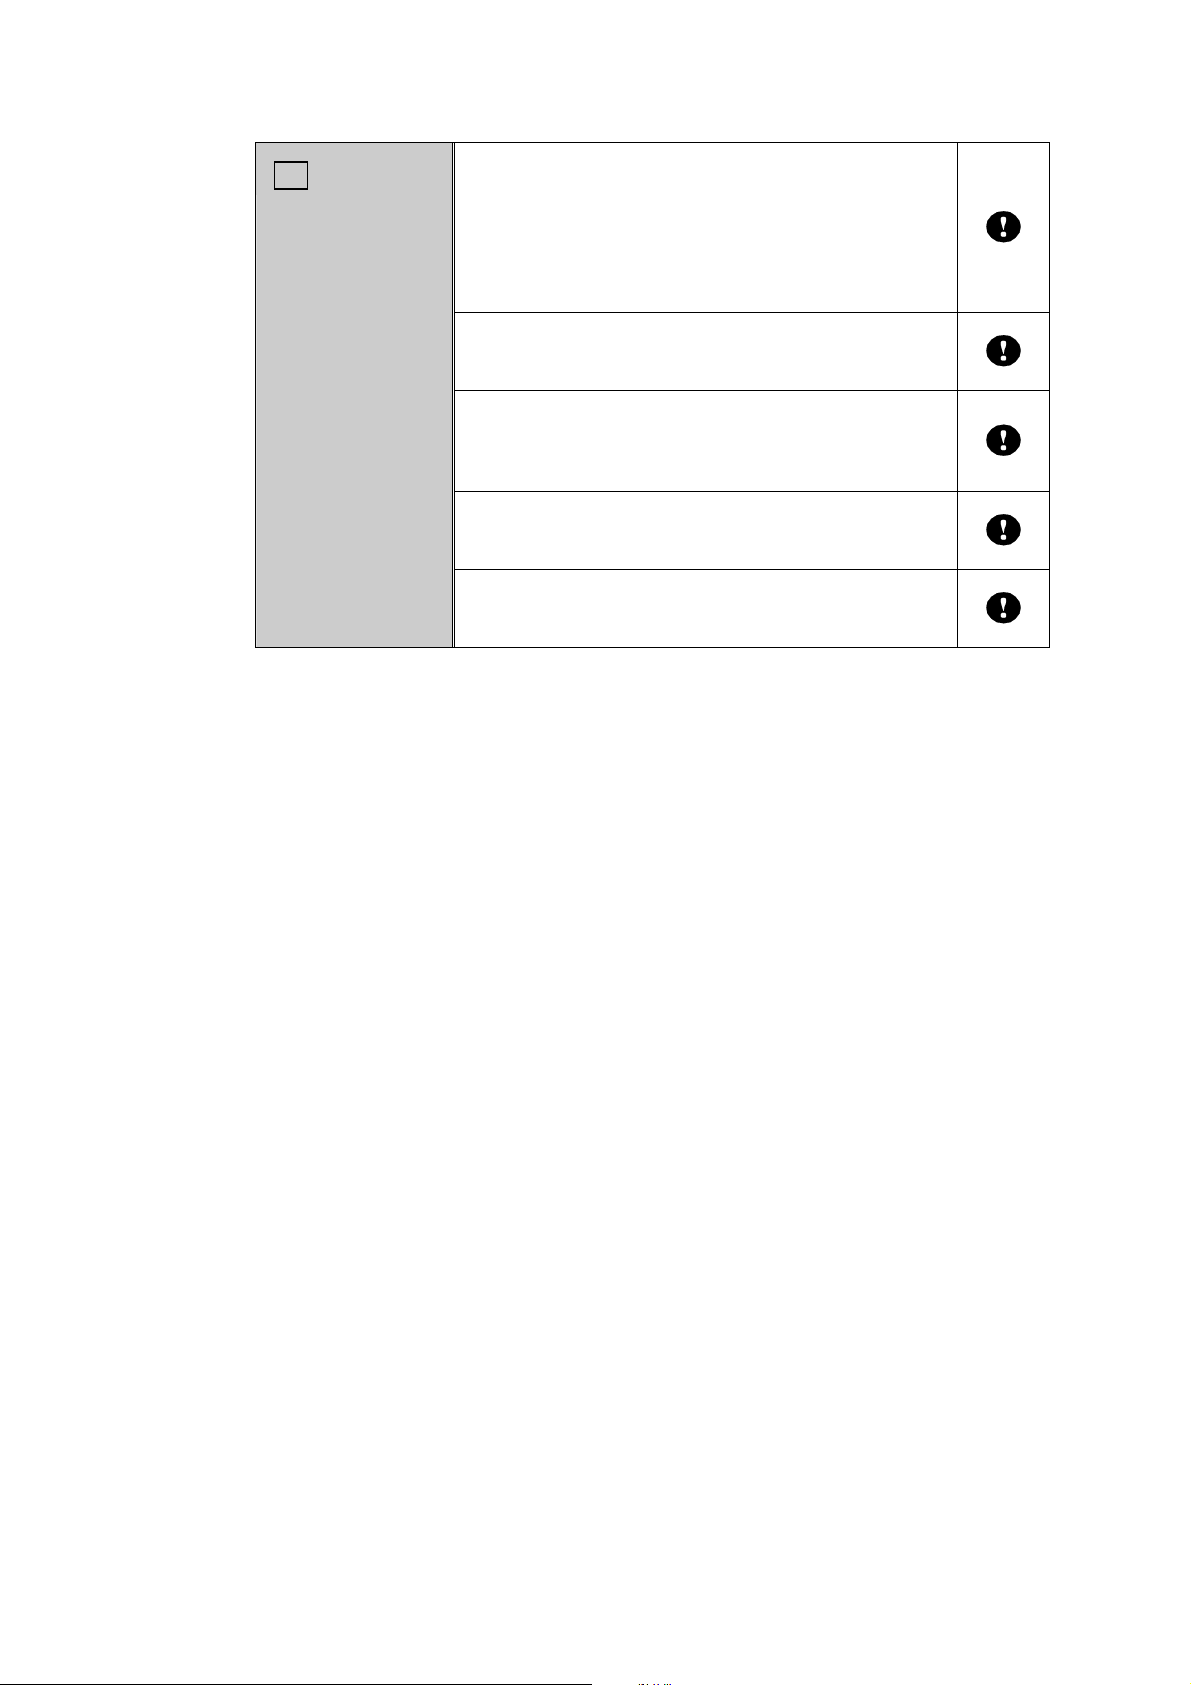
Always take hold of the molded part of the plug when
disconnecting the power cord.
Do not use force to bend the power cord or bunch it up for
use. This may cause a fire.
Do not place heavy objects on top of the power cord. This
may damage the cord, causing a fire or electrical shock.
Do not spill liquids inside the generator or drop
inflammable objects or metal parts into it. Operating the
generator under these conditions may cause a fire, electric
shocks and/or malfunctioning.
Install the generator in a stable location. Do not stand it on
one of its side panels. Doing so may generate heat,
causing the inside temperature to rise and possibly resulting
in trouble.
Do not subject the generator to impact. Doing so may
possibly result in trouble. Take special care when moving
the generator.
1
Page 5
When connecting the VA-1809 to the display, connect the
CAUTION
frame ground (FG) terminals on both units together by
connecting the FG cable provided. If the FG terminals are
not connected together, some extremely high-cost
components (such as the output digital-to-analog converter)
inside the VA-1809 may fail. Take special care with
equipment in the process of development.
When disconnecting the VA-1809 from the display, first
disconnect the connecting cable, and then disconnect the FG
cable.
Always use the POWER switch on the rear panel to turn the
power on and off. Turning the power on or off by
connecting or disconnecting the power cable may destroy
the PC card.
When accuracy is a high-priority consideration, leave the
VA-1809 standing for 10 to 15 minutes with its power on,
and use the VA-1809 after its operation has stabilized.
In the unlikely event that trouble or malfunctioning should
occur, disconnect the power cable, and contact your dealer
or an Astrodesign sales representative.
1.3 How the manual is configured
This manual contains the instructions for operating the VA-1809. It is configured as
shown below with sections devoted to operation, precautions and other aspects. Please
read through the manual carefully to ensure that you will operate the generator correctly.
1.4 What is packed with the VA-1809
The following items have been provided with this generator. Use only the items
supplied for these parts since use of any other items may give rise to trouble.
■ Standard items
• VA-1809
• VA-1809 instruction manual (what you are reading): 1 copy
• Compact Flash (CF) card (64MB): 1 pc
• CF card case: 1 pc
• Power cable: 1 unit (*1)
• FG cable (1.5 meters): 1 unit (*1)
*1: These cables are designed for used with the VA-1809 only.
• SP-1809
2
Page 6

2. Concerning the VA-1809
2.1 Introduction
This HDMI (High-Definition Multimedia Interface) protocol analyzer (henceforth
referred to in this manual as the VA-1809) allows the protocols required in the
development of HDMI transmitters to be checked. Its LCD screen on the front panel
enables the output images to be easily monitored, and its ability to rewrite extended
display identification data (EDID) allows various kinds of monitors to be simulated. It
comes with output HDMI connectors so that it can be used as a repeater. It can also be
used in the development and manufacture of DVD players and set-top boxes which are
equipped with HDMI connectors.
2.2 Features and main functions
■ LCD screen and VGA output connector provided
The LCD screen on the front panel enables the HDMI output images to be easily
monitored. Signals can also be output from the VGA output connector at the same
time as their images appear on the front panel LCD screen.
■ Built-in speaker and COAX OUT connector incorporated
The speaker and COAX OUT connector enable the output sound to be monitored
using methods other than HDMI. (Only linear PCM 2-channel sound can be heard
through the speaker.)
■ EDID rewriting supported
The EDID rewriting capability allows various kinds of monitors to be simulated.
■ Analyze function
This function makes it possible to check whether, for instance, the HDMI output data
complies with the HDMI standard.
■ Switching between receiver and repeater functions
Users can switch the VA-1809's functions from receiver (monitor) to repeater or vice
versa.
■ CF card data registration
This function allows the EDID contents and analysis results to be stored on CF cards
3
Page 7
2.3 Parts and their functions
The key functions differ depending on the unit's function and its mode. For details, refer
to the descriptions of the operations outlined in each section.
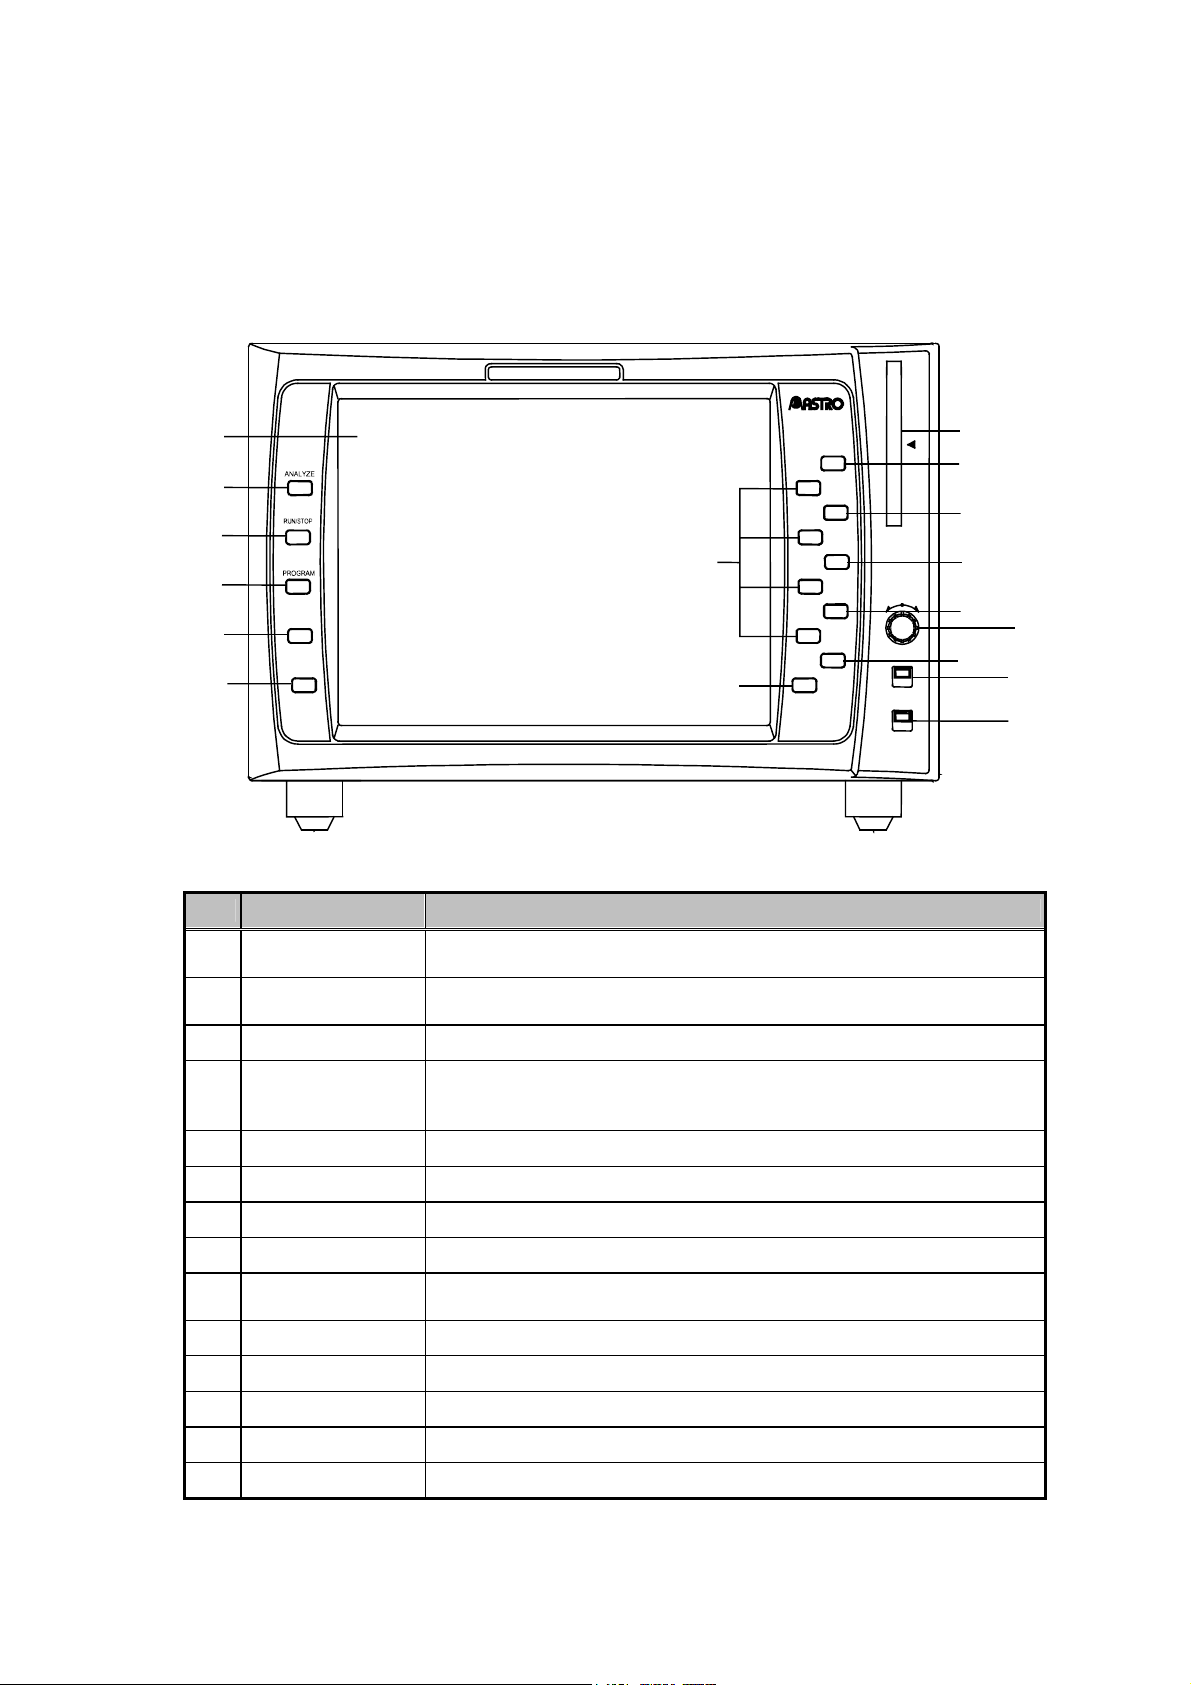
2.3.1 VA-1809 front panel
2
3
4
5
6
7
1
10
11
8
12
13
15
14
9
16
17
Fig. Front panel
No Button Description of function
1
CF card slot
2
LCD screen
3
ANALYZE button Analysis is initiated by pressing this button.
4
RUN/STOP button
5
PROGRAM button The contents of programs can be edited by pressing this button.
6
SAVE The settings or analysis results can be stored by pressing this key.
7
SETUP Various settings can be performed by pressing this key.
8
F1, F2, F3, F4 Settings or programs can be selected by pressing these function buttons.
9
SHIFT
10
HOTPLUG The HotplugDetect signal can be changed by pressing this key.
11
LOG A log of the input statuses can be displayed by pressing this key.
12
MENU The menus can be turned on or off by pressing this key.
13
ENTER Settings can be selected and entered by pressing this key.
14
ESC Settings can be exited by pressing this key.
This is where the CF cards are inserted. Before removing a CF card, be
absolutely sure to turn off the power.
The HDMI input images, analysis results, etc. are displayed on this
screen.
When this button is pressed while the input status is being updated, the
status is stopped on the screen (LCD, VGA) output. When it is pressed
again, the input status is updated.
The functions of the function keys can be extended by pressing these
keys together with the shift key.
4
Page 8
15
Rotary encoder
16
LOCK switch 1
17
LOCK switch 2
When this is rotated while the MENU key is ON, menus or programs can
be selected.
This is the operation lock switch. When it is set to ON, none of the
panel keys can be operated.
This is the picture ON switch. It enables the rear panel images to be set
to ON or OFF.
Always remember to handle the CF cards with great care. When inserting or
ejecting a card, follow the instructions in section 3.2.3 "How to insert the CF
cards" or section 3.2.4 "How to eject the CF cards."
CAUTION
Failing to take the steps in the prescribed sequence may cause the CF card
data to be destroyed. In such a case, the CF card will no longer be
recognized even when it is re-inserted.
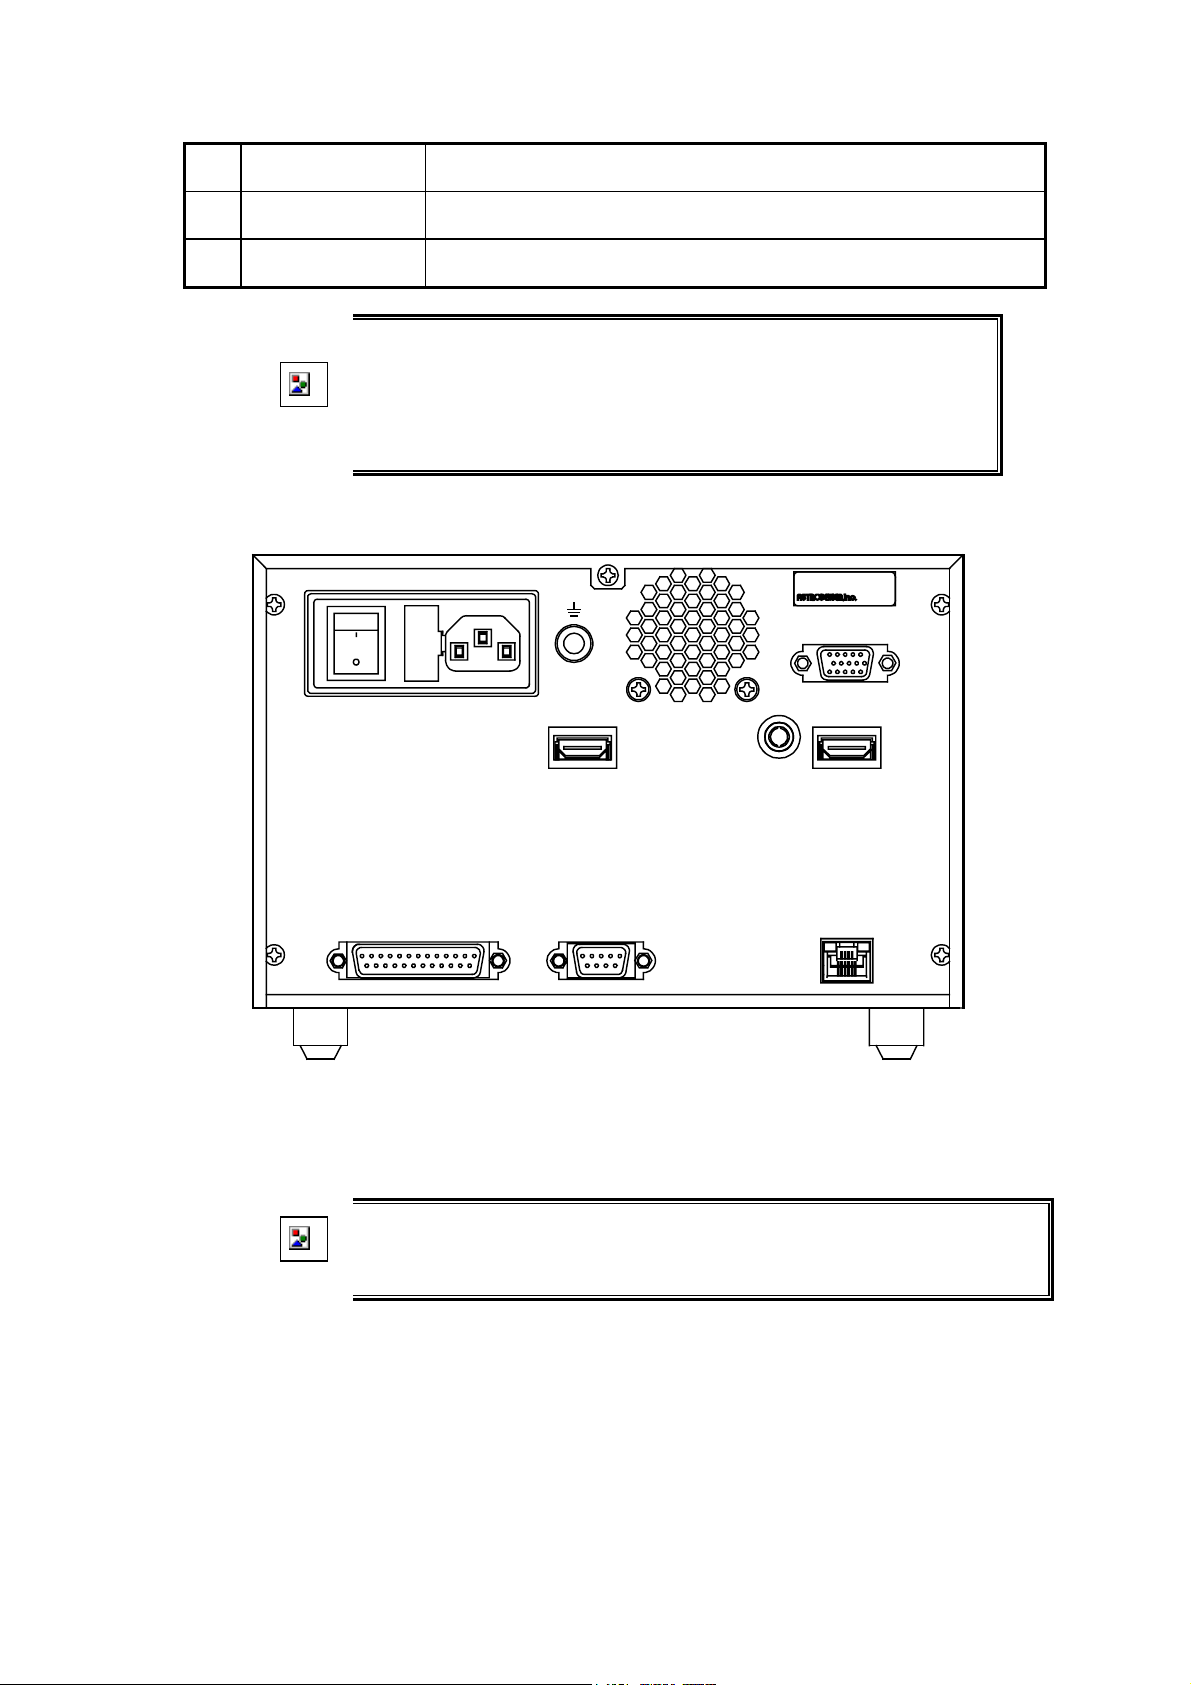
2.3.2 VA-1809 rear panel
POWER AC IN(100-240V) T5A
MODEL ;
SER.No ;
MADE IN J APAN
EXT MONITOR(VGA)
HDMI IN
COAX OUT HDMI OUT
I/O
RS-232C
LAN
(1) AC input socket: Connect the power cable here. This socket supports
100-120V and 200-240V supply voltages.
Be absolutely sure to use this switch to turn the power on and off. Turning the
power on or off by connecting or disconnecting the power cable may destroy the PC
CAUTION
card.
(2) Frame ground (FG) terminal: This is connected to the corresponding FG
terminal on the unit connected to the VA-1809.
(3) <3> HDMI IN connector: The HDMI output signals of the DVD player,
set-top box, etc. are supplied to this connector.
(4) HDMI OUT connector: The HDMI signals are output from this connector to
the input connector on the HDMI TV set, monitor, etc.
(5) COAX (coaxial) OUT connector: This is the digital audio output connector.
5
Page 9

(6) LAN Ethernet port (10/100BaseTX): This port is used to connect to a LAN
using an Ethernet cable.
(7) RS-232C connector (9-pin male): This connector is used to connect a
personal computer using an RS-232C cable.
(8) I/O connector (25-pin female): This connector is used to implement optional
functions.
(9) EXT MONITOR (VGA) connector: The same output signals as the ones
displayed on the LCD screen are output from this connector in analog form.
Resolution is fixed at 1024 × 768 (at 60 Hz).
2.3.3 VA-1809 on-screen display
Info Video Timing
Info AVI InfoFrame
Info SPD InfoFrame
Info Audio InfoFrame
Info Mpeg InfoFrame
Inof Channel Status Bit
Info Audio Timing
Info HDCP
Info DDC Monitor
ESC -> TOP
HDMI Receiver
H = 31.47 kHz
ANALYZE
ERROR REPORT
ERROR
NO ERROR
NO ERROR
NO ERROR
NO ERROR
NO ERROR
NO ERROR
NO ERROR
NO ERROR
DOTCLK = 25.175MHz
V = 59.93 Hz
DETAILS
INC
DEC
DIRECT NUM
(1) Title bar: This is where the titles of the on-screen display contents are
displayed.
(2) Description area: This is where details of the analysis results, etc. are
displayed.
(3) Help bar: Advice on the key operations is available here.
(4) Timing bar: The input timing data information appears here.
(5) Status icon: The types, statuses, etc. of the input and output signals are
displayed using icons.
(6) Key menu: The meanings of the FUNC buttons on the right side of the menu
displays are indicated here.
2.4 Concerning the internal data
6
Page 10

The data of one program is stored on the EPROM of the VA-1809 main unit (for details,
refer to ???). This program data consists of EDID data and SINK data.
The data can be used as the source data for outputting data or copying it onto CF cards.
7
Page 11
3. Concerning CF cards
3.1 Introduction
Analysis results can be stored in the VA-1809 by using CF cards. Alternatively, the
EDID data edited on a personal computer can be stored on CF cards using the software
supplied with the VA-1809, and this data can then be developed by the VA-1809 if the CF
card containing it is inserted into the VA-1809 main unit.
Program data, EDID data, SINK data, analysis data and Config data can be registered and
edited on PC cards.
3.2 Usable CF cards
3.2.1 Type
The type of CF card whose operation in the VA-1809 has been verified is listed
below.
• CF card (64MB) supplied as a standard accessory
Compact flash card model SDCFB-64-760MP made by Mitsubishi Plastics
(SanDisk Corporation)
CF cards come with many and varied specifications. As such, if a card whose
operation in the VA-1809 has not been verified is used, the read/write operations
CAUTION
may be unstable or the card may not function at all.
3.2.2 Amount of data that can be registered
Shown below is the amount of data that can be registered on a PC card.
Table Amount of data that can be registered
Number of programs (EDID, SINK) 100 (no.101 to no.200)
Analysis data
Config data
Log data
Amount of data
8
Page 12

3.2.3 How to insert the CF cards
(1) Point the CF card in the direction of the arrow shown on the top of the
card, and insert.
Insert it all the way in.
A beep is now heard.
A beep is hard when the card is locked into place.
3.2.4 How to eject the CF cards CF
(1) Check that the data on the CF card is not being accessed.
(2) Turn off the power, and then eject the card.
It takes 2 or 3 seconds after the EJECT button is pressed and the card is ejected before
the LED goes off. This is because processes are being undertaken inside the
Point
VA-1809 to eject the CF card.
Do not attempt to perform any operations during this time.
Be absolutely sure to adhere to the above sequence of steps when inserting or ejecting
the CF card. Action taken in any other sequence may destroy the CF card data. In
CAUTION
addition, the CF card will no longer be recognized even when it is re-inserted.
9
Page 13

A
A
A
r
A
A
A
A
4. Menu structure
4.1 ANALYZE
The ANALYZE menu is used when measuring the input HDMI statuses.
The menu is configured as shown below when the ANALYZE button is pressed while the
on-screen display is blank.
* For further details, refer to the pages of the items concerned.
Press F1 ( F2 , F3 or F4 ) + SHIFT .
TOP
ERROR
REPORT
Error table display
Input Video Timing
VI InfoFrame
Input Video Timing measurement results
VI InfoFrame measurement results
P.
△△
P.
△△
SPD InfoFrame
SPD InfoFrame measurement results
P.
△△
udio InfoFrame
MPEG InfoFrame
CP Packet
udio InfoFrame measurement results
MPEG InfoFrame measurement results
CP Packet measurement results
ISRC1 Packet
ISRC1 measurement results
P.
△△
P.
△△
P.
△△
P.
△△
ISRC2 Packet
Channel Status Bit
udio Timing
HDCP
ISRC2 measurement results
Channel Status Bit measurement results
HDMI Audio measurement results
HDCP constant measurement results
DDC Monito
DDC Line Monitor display
P.
△△
P.
△△
P.
△△
P.
△△
P.
△△
INC
Program execution (LOAD)
P.DEC
△△
DIRECT NUM
10
Page 14

4.2 PROGRAM EXE
The PROGRAM EXE menu is used when copying or editing program data and when
editing execution lists for group execution.
The menu is configured as shown below when the PROGRAM button is pressed while
the on-screen display is blank.
* For further details, refer to the pages of the items concerned.
PROGRAM
PROGRAM
TOP
EXE
Program editing PROGRAM
F1
F2
COPY
List Edit
F1F3
F2
Program copying Program
EDID EditProgram Edit
SINK Edit
Group setting
EDID editing
SINK editing
P.
△△
P.
△△
P.
△△
P.
△△
11
Page 15

A
A
A
A
A
A
A
r
4.3 SETUP
The SETUP menu is used when setting the LCD screen of the VA-1809 or performing the
unit's settings.
The menu is configured as shown below when the PROGRAM button is pressed while
the on-screen display is blank.
* For further details, refer to the pages of the items concerned.
* ??? denotes an initial (factory) setting.
F1
F2
DISPLAY SETUPSETUP
LCD screen settings
P.
CONFIG SETUP
VA-1809 unit settings
△△
Brightness(with OSD)
Contrast(with OSD)
Brightness
Trigger settings for log execution
Contrast
Back Light
nalysis Trigge
P.
NALYSIS
HOTPLUG button execution mode
Speaker Volume
HOTPLUG button execution mode
Brightness with OSD setting
Contrast with OSD setting
Brightness setting
Contrast setting
Backlight setting
△△
P.
△△
P.
△△
LL
Video Timing
VI InfoFrame
SPD InfoFrame
udio InfoFrame
MPEG InfoFrame
Channel Status Bit
udio
HDCP
Program Mode
Program Group Mode
Volume setting
Manual ModeHotPlug Mode
uto Mode
P.
△△
12
Page 16

4.4 SAVE MENU
The SAVE menu is used when the current statuses are to be stored.
The menu is configured as shown below when the SAVE button is pressed while the
on-screen display is blank.
* For further details, refer to the pages of the items concerned.
F1
F2
F3
F4
SAVE ProgramSAVE MENU
SAVE Group List
SAVE Analyze Data
SAVE Config
Program data saving
Group list saving
Measurement result saving
Unit setting saving
P.
△△
P.
△△
P.
△△
P.
△△
13
Page 17
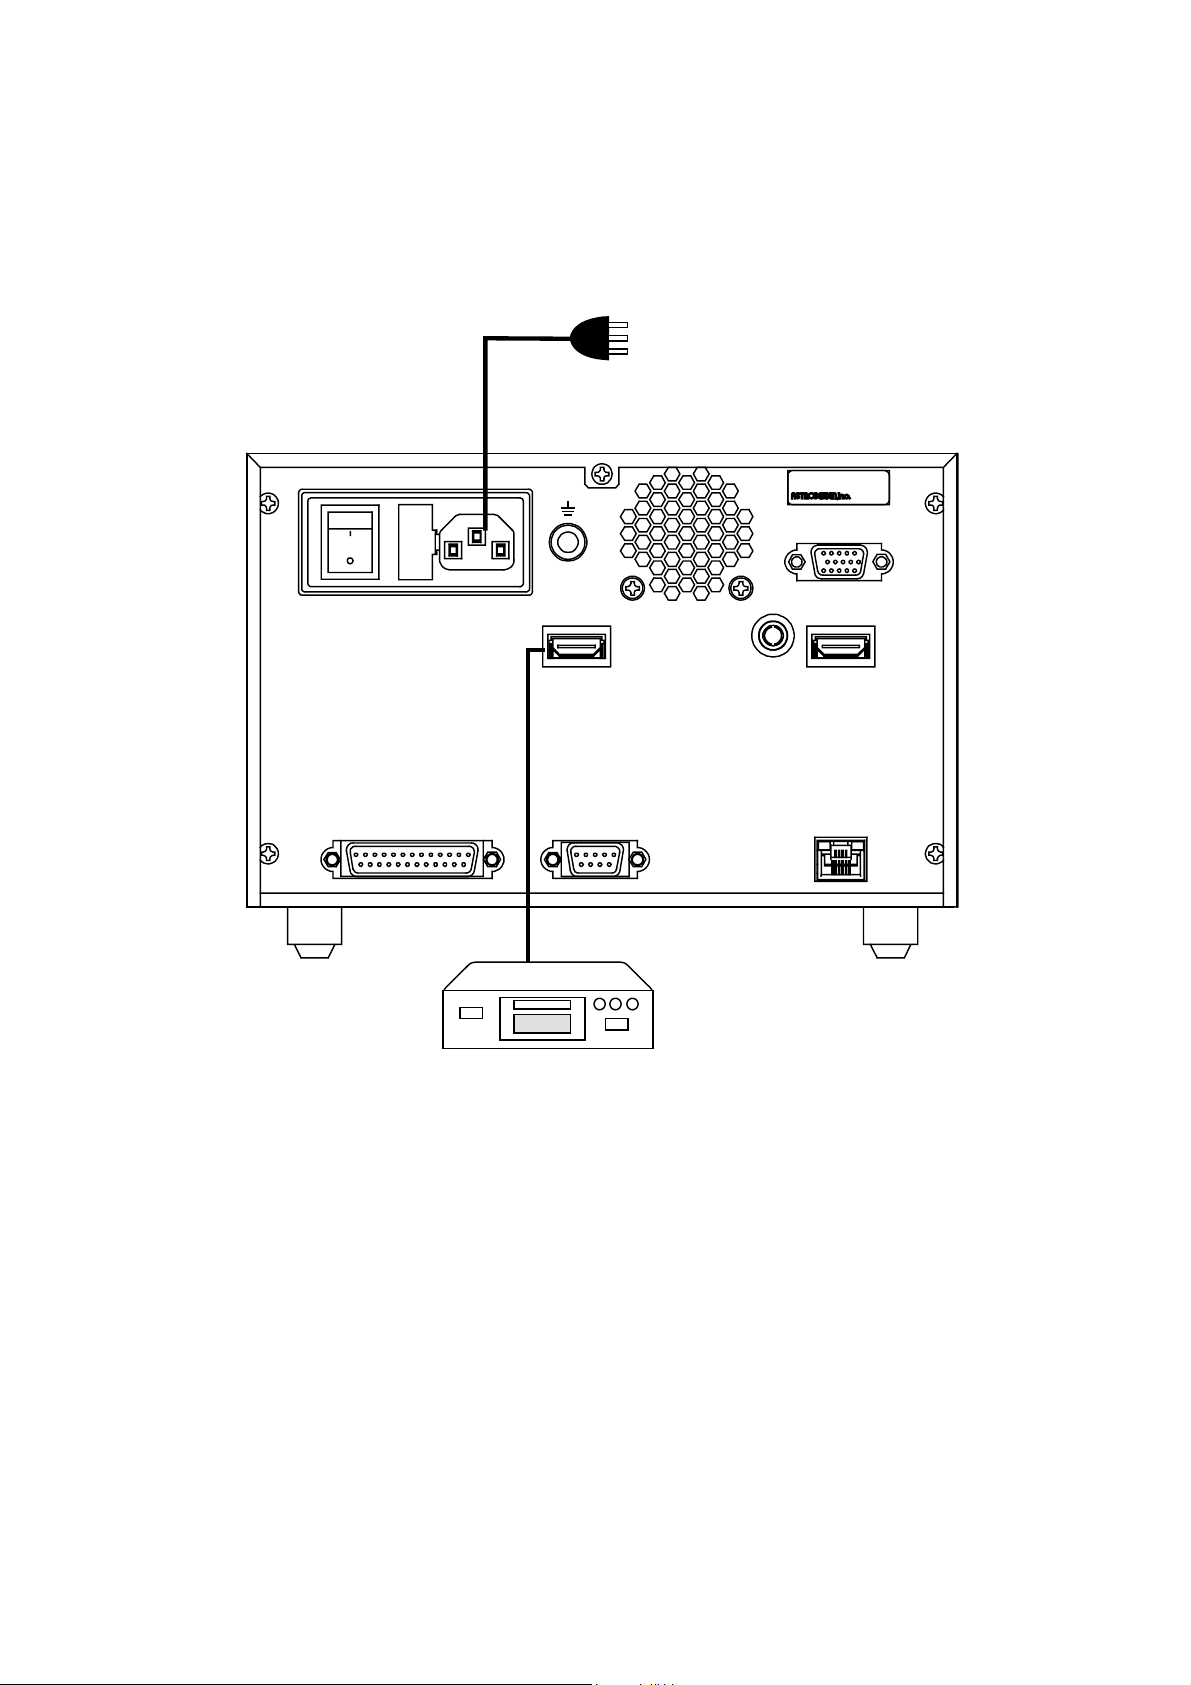
5. Connections with peripherals
5.1 Example of connections when using the VA-1809 as a monitor
* For details on the VA-1809 settings, refer to page ???.
付属電源ケーブル
Power cable supplied with VA-1809
POWER AC IN(100-240V) T5A
I/O
HDMI IN
RS-232C
MODEL ;
SER.No ;
EXT MONITOR(VGA)
COAX OUT HDMI OUT
LAN
MADE IN J APAN
DVD player or other unit equipped with
HDMIの出力端子を持った装置
HDMI output connector
DVDプレーヤ ー等
14
Page 18
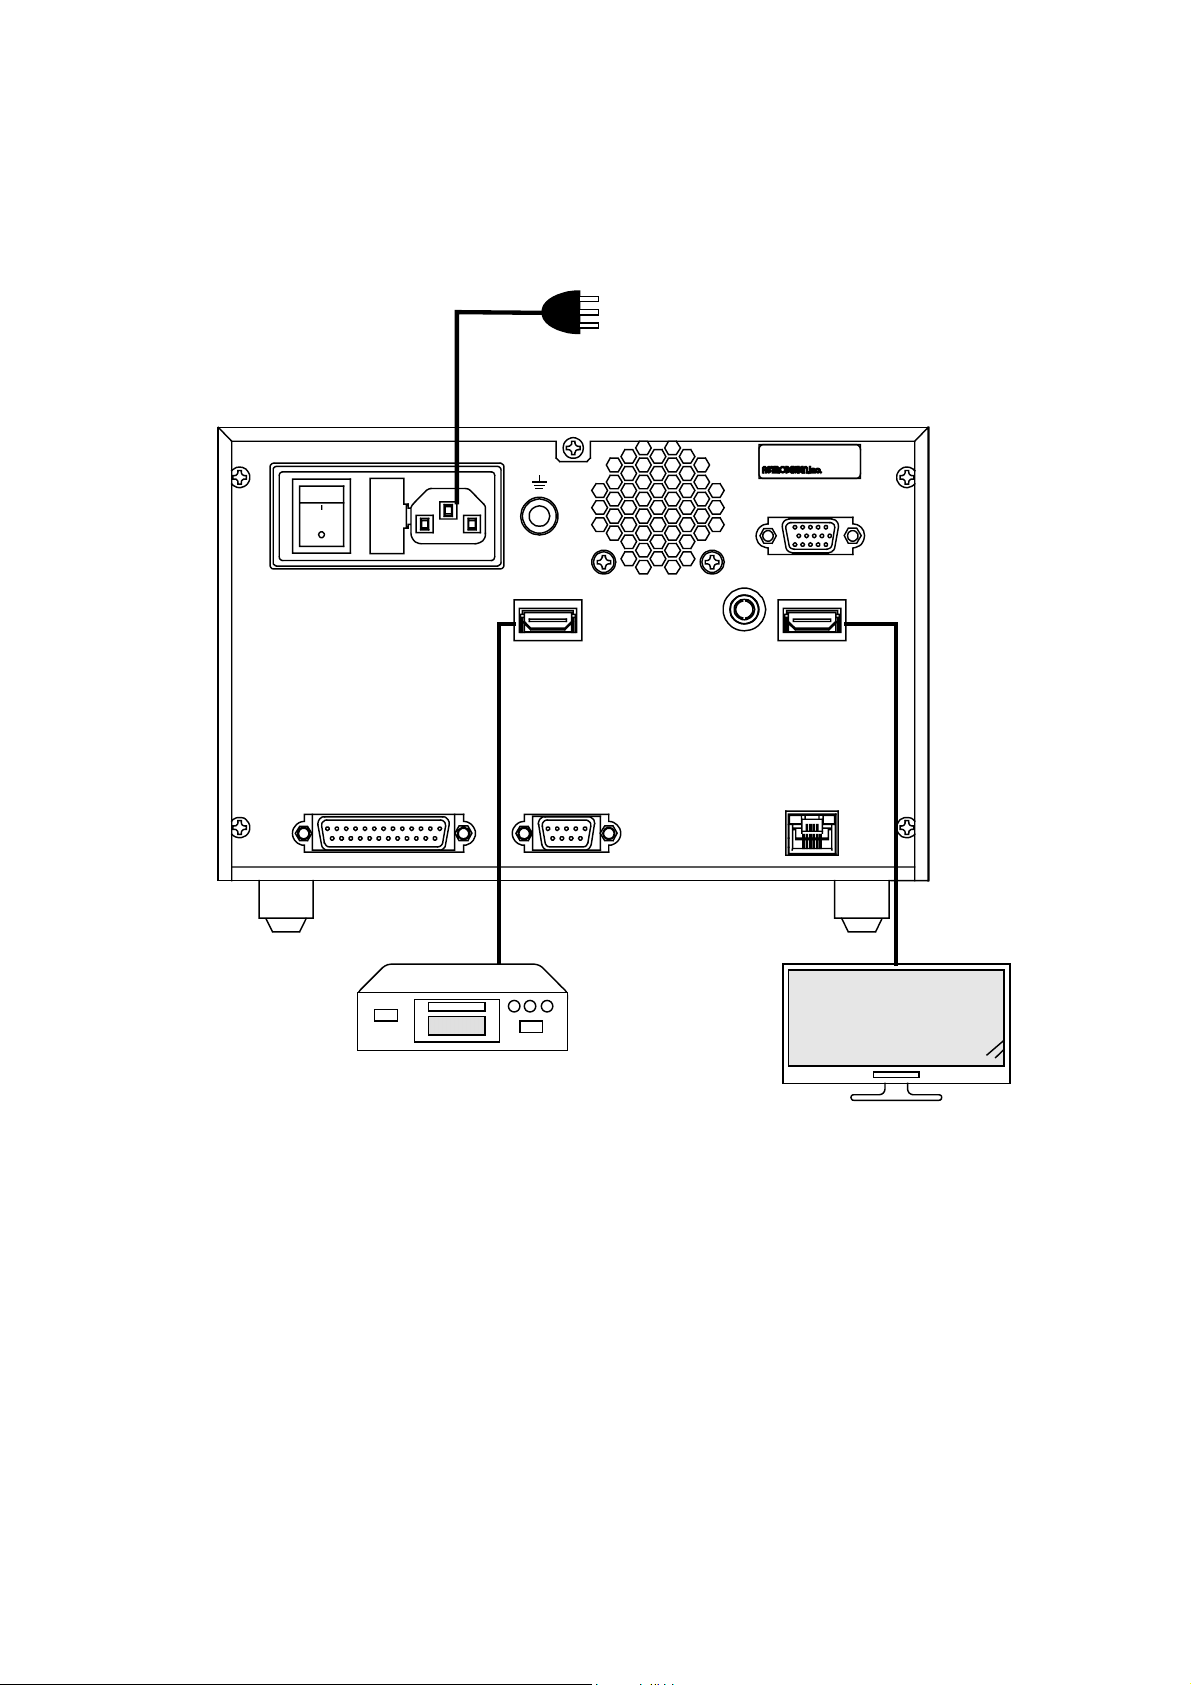
5.2 Example of connections when using the VA-1809 as a repeater
* For details on the VA-1809 settings, refer to page ???.
Power cable supplied with VA-1809
POWER AC IN(100-240V) T5A
I/O
DVD player or other unit equipped with
HDMIの出力端子を持った装置
HDMI output connector
DVDプレーヤー等
付属電源ケーブル
HDMI IN
RS-232C
MODEL ;
SER.No ;
COAX OUT HDMI OUT
MADE IN J APAN
EXT MONITOR(VGA)
LAN
LCD TV or other unit equipped with
HDMIの入力端子を持った装置
HDMI input connector
LC D TV 等
15
Page 19

A
5.3 Connections for isolating the HDMI input sound for output
* For details on the VA-1809 settings, refer to page ???.
DVD player or other unit equipped with
HDMIの出力端子を持った装置
DVDプレーヤー等
HDMI output connector
HDMI IN
5.4 Example of connections when outputting on-screen displays to an
analog monitor
MODEL ;
SER.No ;
MADE IN JAPAN
EXT MONITOR(VGA)
COAX OUT HDMI OUT
V amplifier or output unit equipped with
C O A X 入力のある装置
COAX input connector
AVアンプ等
Speaker
スピーカー
* Displays with the XGA screen resolution are output regardless of the performance
(EDID) of the monitor connected to the analog D-SUB output connector. Ensure that
the monitor connected can receive XGA.
HDMI IN
MODEL ;
SER.No ;
EXT MONITOR(VGA)
COAX OUT HDMI OUT
MADE IN JA PAN
Monitor equipped with
ア タナログ入力端子のあるモニ
analog input connectors
* The monitor must be able to output
※XG A が出力できること
displays with the XGA resolution.
16
Page 20
6. Simple setup
6.1 Setting the VA-1809's HDMI equipment performance using the internal
program provided at the time of shipment
The performance of the VA-1809 can be changed using the internal program provided at
the time of shipment. Select the number of the program to be set from the ones listed
below, and load the program by following the steps below. To return the VA-1809 to the
factory settings, refer to page ???.
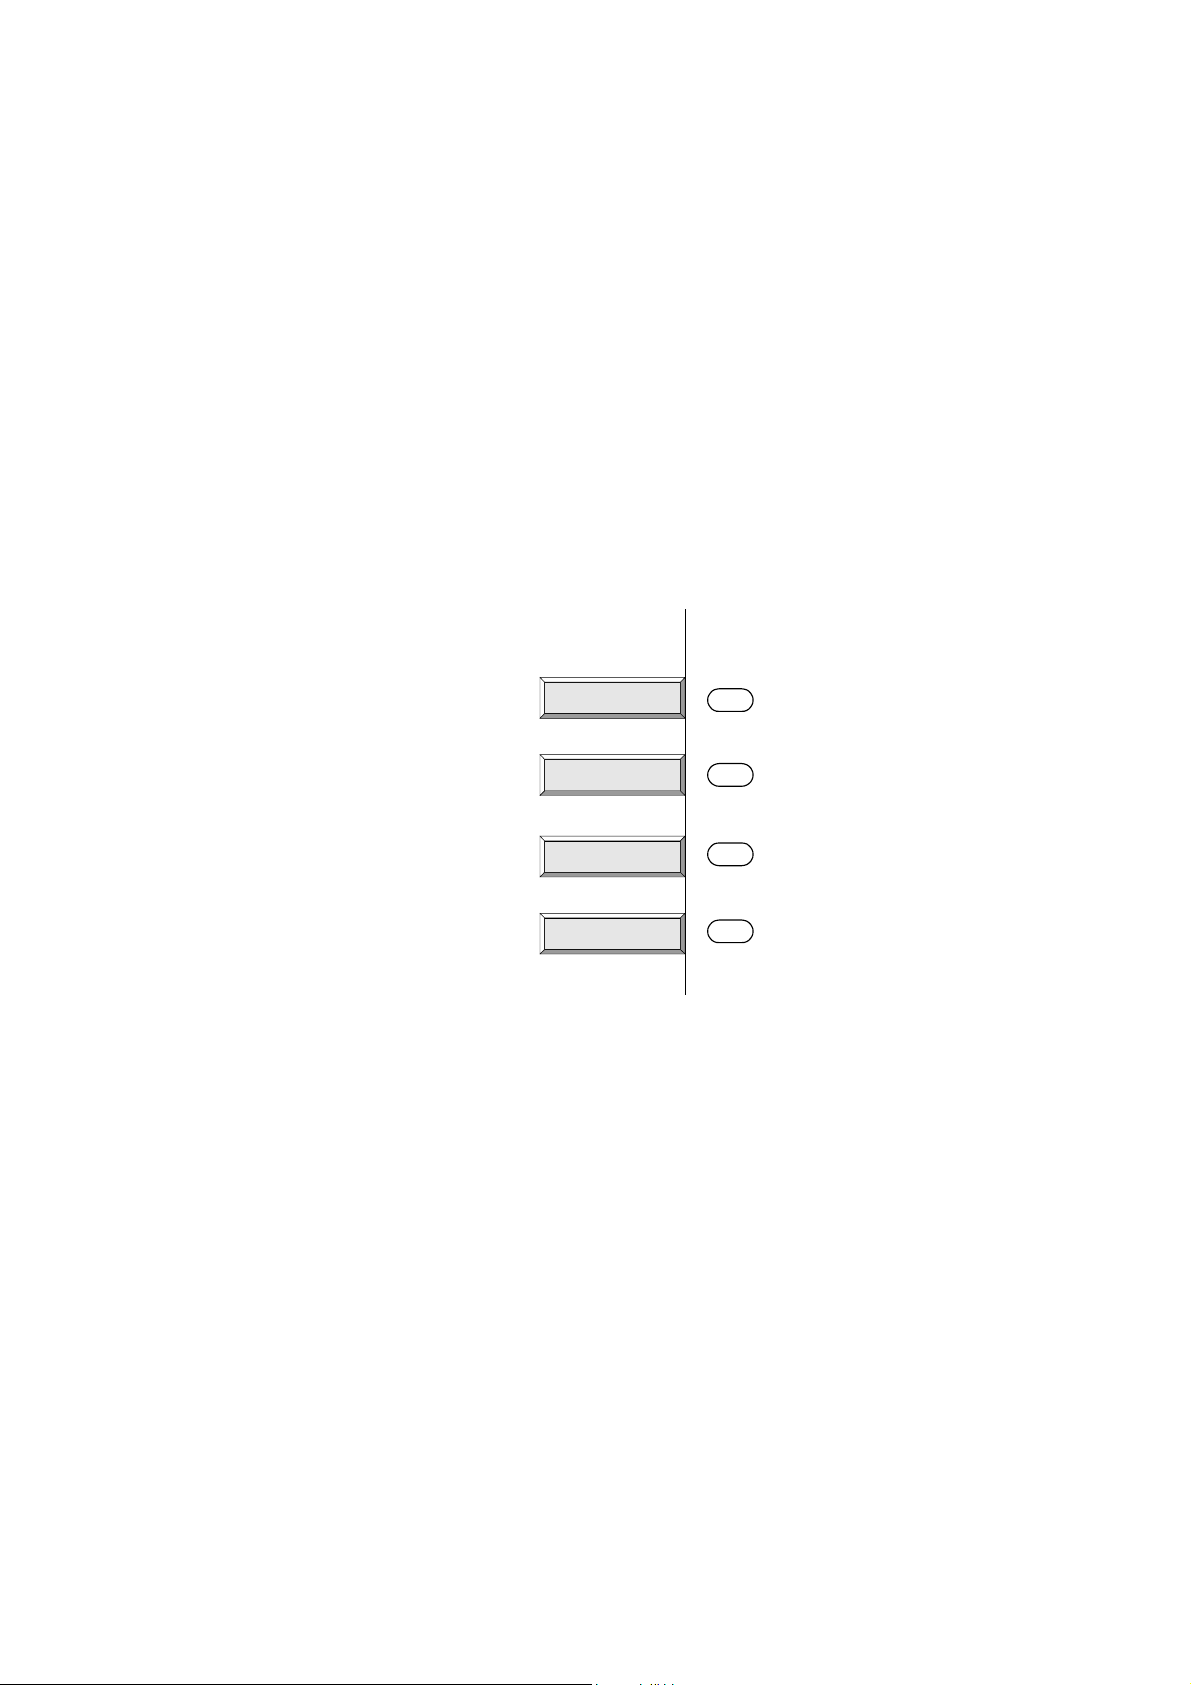
6.1.1 Loading the program
(1) Press the ANALYZE button. The key menu appears as shown below.
--------------------KEY MENU 表示------------------
DETAILS
INC
DEC
DIRECT NUM
(2) Press DIRECT NUM [F4] on the key menu.
F1
F2
F3
F4
--------------------リスト表示------------------
(3) From the list, select the program data to be loaded.
* The cursor is moved using the rotary key, and the selection is entered using
the ENTER key.
* Select the program data based on the performance of the HDMI equipment
from section 6.1.2.
(4) The program is now loaded.
* Program No.??? was loaded at the factory prior to shipment.
17
Page 21

6.1.2 Internal program data
From the performances listed below, select the data of the program selected in
section 6.1.1.
Using the VA-1809 as a receiver → Program No.???
Using the VA-1809 as a repeater → Program No.???
Using the VA-1809 as a receiver that supports SD → Program No.???
Using the VA-1809 as a receiver that supports HD → Program No.???
Setting the audio reception performance of the VA-1809 to PCM/2 channels →
Program No.???
Setting the audio reception performance of the VA-1809 to PCM/8 channels →
Program No.???
* Even if 8-channel audio signals are supplied to the VA-1809, only the front 2
channels will be output.
* For details on EDIDs, refer to the appendix.
6.2 Connecting the signal source, and displaying the HDMI input images
on the LCD screen
After executing the steps in section 6.1, refer to "Example of connections when using the
VA-1809 as a receiver" under "Connections with peripherals," and connect the DVD
player or other signal source to the HDMI input connector of the VA-1809.
The images output from the DVD player appear on the LCD screen while its sound is
output from the speaker.
18
Page 22

7. Detailed setup
7.1 HDMI equipment performance settings
The performance of the HDMI receiver is stored in the EDID and HDCP registers and
relayed when the data is read by the HDMI transmitter. By rewriting this data in the
VA-1809, various kinds of monitors can be simulated.
The data can be registered as a program and stored on a CF card or as an internal pattern.
This section describes the procedures from creating to executing the program data.
7.1.1 Creating the program data
The program data creation screen is displayed when the PROGRAM button is
pressed from TOP. The menu tree is as shown below.
PROGRAM
TOP
PROGRAM
EXE
Program editing
7.1.1.1 Copying the program data
F1
COPY
F2
List Edit
F1F3
F2
EDID EditProgram Edit
SINK Edit
Program copying
Group setting
EDID editing
SINK editing
The procedure for creating the program data using existing program data is set
forth below.
TOP → PROGRAMEXE[PROGRAM] → COPY[F1]
(1) Selecting the program data to serve as the basis for editing
[Rotary key] to move the cursor → [ENTER] to enter the selection
Move the cursor using the [Rotary key], and select the program data which will
serve as the basis for editing. To enter the data, press ENTER.
---------------------ソース選択画面を挿入---------------------------------
19
Page 23

(2) Selecting the program data to be deleted
1) Saving the data as the existing program data
[Rotary key] to move the cursor → [ENTER] to enter the selection
Move the cursor using the [Rotary key], and select the program data to
be overwritten. To enter the data, press ENTER.
-----------------------------------リスト表示-画面--------------------------------
2) Saving the data as a program with a new number
New card number →
[Rotary key] to select a 3-digit program number + [ENTER] →
FIX [F1]
Select the 3-digit program number, and press FIX.
---------------------番号選択画面-----------------------------------
7.1.1.2 Editing the program data (SINK, EDID)
TOP → ProgramEdit [PROGRAM] → Program Edit [F1]
(1) Selecting the program data to serve as the basis for editing
[Rotary key] to move the cursor → [ENTER] to enter the selection
Move the cursor using the [Rotary key], and select the program data which will
serve as the basis for editing. To enter the data, press ENTER.
--------------------------リスト表示画面---------------------------------------
(2) Editing the EDID or SINK data
1) Edit the EDID data among the program data.
EDID Setup [F1] → [Rotary key] to select address to be edited +
[ENTER] → [Rotary key] to change data + [ENTER] → FIX [F1]
After selecting the address to be edited, change its value. Upon
completion of the editing, press FIX.
20
Page 24

2) Edit the SINK data among the program data.
SINK Setup [F1] → [Rotary key] or F2 or F3 to select item to be set
→ Switch to check button ON
Details of the items are listed below.
Item Details
Repeater For using the VA-1809 as a repeater.
Receiver For using the VA-1809 as a receiver (simple monitor).
DVI For using the VA-1809 as a DVI monitor (repeater).
HDMI For using the VA-1809 as an HDMI monitor (repeater).
HDCP ON For using the VA-1809 as a monitor (repeater) that supports HDCP.
HDCP OFF
For using the VA-1809 as a monitor (repeater) that does not support
HDCP.
* When using the VA-1809 as a receiver, no signals will be output from the
HDMI connector or COAX OUT connector.
* When using the VA-1809 as DVI monitor (repeater), no sound can be input.
* If HDMI pictures using HDCP are input when HDCP is supported, they cannot
be output from the VGA output connector.
* To save the program data on a card or as an internal pattern, move to SAVE
MENU.
* To read the data saved, the execution mode must be set to PROGRAM MODE.
Refer to page ???.
* When reading saved data, refer to page ???.
7.1.1.3 Creating groups
The VA-1809 enables the data in up to ten program to be selected from among all
the program data and executed.
Proceed as instructed in the steps below.
TOP → PROGRAMEXE[PROGRAM] → LISTEdit[F1]
(1) Select the numbers of the programs in the group to be executed.
[Rotary key] to select numbers of programs to be executed →
[ENTER] to enter the selection
----------------------------選択画面表示-------------------------------------
(2) Select the program data to be executed.
[Rotary key] to select program data → [ENTER] to enter selection
----------------------------選択画面表示-------------------------------------
21
Page 25

* To execute group data, the execution mode must be set to PROGRAM GROUP
MODE. Refer to page ???.
* When executing group data, refer to ??? on page ???.
7.1.2 Executing the program data (LOAD)
Execute the program data or group data created by following ??? on page ???.
* Either the program data is selected directly or the data in the groups is selected
depending on the execution mode established by the VA-1809's settings. For
the execution mode settings, refer to ??? on page ???.
One method of executing the program data is to select ANALYZE EXE using the
ANALYZE button from TOP, and another method is to select PROGRAM EXE
using the PROGRAM button from TOP.
7.1.2.1 Executing the data from ANALYZE EXE
TOP
ANALYZE
ERROR
REPORT
F1
DETAILS
F2
INC
F3
DEC
F4
DIRECT NUM
The program data can be ???executed??? during measurement by executing it
from ANALYZE EXE.
TOP → ANALYZE EXE [ANALYZE]
(1) Using INC and DEC to execute the program data
INC[F2] or DEC[F3]
INC is used to execute the data in the program whose number follows the number
of the current program whereas DEC is used to execute the data in the program
whose number precedes the number of the current program.
(2) Using DIRECT NUM to execute the program data
DIRECT NUM [F4] → [Rotary key] to select program data to be executed →
[ENTER] to execute the data
----------------------------------リスト表示---------------------------------------
From the list, select the program data to be executed, and execute it.
22
Page 26

7.1.2.2 Executing the data from PROGRAM Edit
Program data can be changed also by executing it from PROGRAM EXE.
TOP → PROGRAM EXE[PROGRAM]
(1) Using INC and DEC to execute the program data
INC[F2] or DEC[F3]
INC is used to execute the data in the program whose number follows the number
of the current program whereas DEC is used to execute the data in the program
whose number precedes the number of the current program.
(2) Using DIRECT NUM to execute the program data
DIRECT NUM [F4] → [Rotary key] to select program data to be executed →
[ENTER] to execute the data
----------------------------------リスト表示---------------------------------------
From the list, select the program data to be executed, and execute it.
23
Page 27

7.2 LCD screen settings
DISPLAY SETUP is used to perform the LCD screen settings. Align the cursor with the
items concerned, and change their values.
TOP → SETUP MENU[SETUP] → DISPLAY SETUP[F1]
SETUP
(1) Setting the background brightness for on-screen displays
Set the brightness of the background when on-screen displays appear.
F1
LCD screen settings
P.
△△
Brightness(with OSD)DISPLAY SETUP
Contrast(with OSD)
Brightness
Contrast
Back Light
Brightness with OSD setting
Contrast with OSD setting
Brightness setting
Contrast setting
Backlight setting
→ [Rotary key] or [F1 or F2] to select the item whose value is to be changed →
[ENTER] to enter the selection
→ [Rotary key] or [F1 or F2] to change the value → [ENTER] to enter the selection
Align the cursor with BRIGHTNESS (with OSD), and adjust the value. It can be
changed to any value from -50 to +50.
(2) Setting the background contrast for on-screen displays
Set the contrast of the background when on-screen displays appear.
→ [Rotary key] or [F1 or F2] to select the item whose value is to be changed →
[ENTER] to enter the selection
→ [Rotary key] or [F1 or F2] to change the value → [ENTER] to enter the selection
Align the cursor with CONTRAST (with OSD), and adjust the value. It can be changed
to any value from -50 to +50.
(3) Setting the brightness under normal conditions
Set the brightness of the LCD screen under normal conditions.
→ [Rotary key] or [F1 or F2] to select the item whose value is to be changed →
[ENTER] to enter the selection
→ [Rotary key] or [F1 or F2] to change the value → [ENTER] to enter the selection
Align the cursor with BRIGHTNESS, and adjust the value. It can be changed to any
value from -50 to +50.
24
Page 28

A
A
A
A
A
ALLA
r
(4) Setting the contrast of the LCD screen under normal conditions
Set the contrast of the LCD screen under normal conditions.
→ [Rotary key] or [F1 or F2] to select the item whose value is to be changed →
[ENTER] to enter the selection
→ [Rotary key] or [F1 or F2] to change the value → [ENTER] to enter the selection
Align the cursor with CONTRAST, and adjust the value. It can be changed to any value
from -50 to +50.
7.3 CONFIG SETUP
The VA-1809's unit settings are established using CONFIG SETUP.
TOP → SETUP MENU[SETUP] → CONFIG SETUP[F2]
The menu is configured as shown below.
F2
SETUP
CONFIG SETUP
VA-1809 unit settings
nalysis Trigge
Trigger settings for log execution
P.
△△
NALYSIS
HOTPLUG button execution mode
P.
Speaker Volume
Volume setting
P.
△△
△△
MPEG InfoFrame
Channel Status Bit
Program Group Mode
HOTPLUG button execution mode
Video Timing
VI InfoFrame
SPD InfoFrame
udio InfoFrame
udio
HDCP
Program Mode
Manual ModeHotPlug Mode
uto Mode
P.
△△
7.3.1 Setting the trigger for log execution
→ [F1 or F2] to select trigger item of ANALYSIS TRIGGER →
[ENTER] to enter selection or ??selection-to-be??
Set the trigger for capturing the log for log execution.
Align the cursor with the trigger for setting ANALYSIS TRIGGER, and change
the ON/OFF status of the check button.
25
Page 29

For details on the logs, refer to ??? on page ???. See below for details on the
triggers.
* When a multiple number of triggers have been selected, they will all be OR-ed.
Item Details
ALL All the changes listed below trigger the capture.
Video Timing
AVI InfoFrame
SPD InfoFrame
Audio
InfoFrame
MPEG
InfoFrame
ACP Packet
ISRC1 Packet
ISRC2 Packet
Channel Status
Bit
Audio A change in the ACR definition (N/CTS) triggers the capture.
HDCP The ??? of HDCP triggers the capture.
DDC Monitor?
A change in Video Timing of the input HDMI triggers the
capture.
A change in AVI InfoFrame of the input HDMI triggers the
capture.
A change in SPD InfoFrame of the input HDMI triggers the
capture.
A change in Audio InfoFrame of the input HDMI triggers the
capture.
A change in MPEG InfoFrame of the input HDMI triggers the
capture.
A change in ACP Packet of the input HDMI triggers the
capture.
A change in ISRC1 Packet of the input HDMI triggers the
capture.
A change in ISRC2 Packet of the input HDMI triggers the
capture.
A change in Channel Status Bit in the input HDMI Audio
stream triggers the capture.
7.3.2 Program execution mode
→ [F1 or F2] to select mode of ANALYSIS MODE →
[ENTER] to enter selection
Set the program execution mode.
Align the cursor with the mode for setting ANALYZE MODE, and change the
ON setting of the check button.
The following settings are available for the execution mode.
26
Page 30

Details of the modes are given below.
Item Details
PROGRAM Mode All the programs are executed.
PROGRAM GROUP
Mode
Only the programs selected by PROGRAM GROUP EDIT
are executed.
* For details on PROGRAM GROUP EDIT, refer to ???
on page ???.
7.3.3 Adjusting the speaker volume
Use the rotary key to adjust the volume of the VA-1809's built-in speaker. The
volume of the sound delivered from the HDMI output and COAX OUT
connectors cannot be adjusted.
PAGE 2 [F3] → [F1 or F2] to select SPEAKER VOLUME →
[ENTER] to enter selection
→ [Rotary key] to adjust SPEAKER VOLUME value.
* Either 2 channels (1 stream) of a maximum of 8 channels (4 streams) with
frequencies from 32 to 96 kHz for linear PCM only or both channels of 2
channels with frequencies from 176.4 to 192 kHz can be output as the sound.
7.3.4 Setting the hot plug button
PAGE 2 [F3] → [F1 or F2] to select HOTPLUG MODE →
[ENTER] to enter selection
The settings available when the HOTPLUG button is pressed can be performed.
Item Details
AUTO MODE Low changes to high when the button is pressed once.
Any time from 10ms to 200ms can be selected at the low
period. Use the rotary key to select it.
* This length also applies to changes in the hotplug signals
when other processes are undertaken.
MANUAL MODE The level is reversed when the button is pressed once.
* In MANUAL MODE, the value selected using MANUAL is retained even
when the hotplug signal must be changed (such as while EDID is being
changed) during normal operation. For this reason, the mode should normally
be kept at AUTO MODE.
27
Page 31

A
A
r
A
A
A
A
8. How to display the measurement results
The HDMI signal timings can be measured and the InfoFrame and other data can be decoded and
displayed by pressing the ANALYZE button. The area of the menu where the measurement
results are displayed is structured as shown below.
TOP
NALYZE
REPORT
ERROR
Press F1 ( F2 , F3 or F4 ) + SHIFT .
DETAILS
Error table display
8.1 ERROR Report
Input Video Timing
VI InfoFrame
SPD InfoFrame
udio InfoFrame
MPEG InfoFrame
CP Packet
ISRC1 Packet
ISRC2 Packet
Channel Status Bit
udio Timing
HDCP
DDC Monito
Input Video Timing measurement results
AVI InfoFrame measurement results
SPD InfoFrame measurement results
Audio InfoFrame measurement results
MPEG InfoFrame measurement results
CP Packet measurement results
ISRC1 measurement results
ISRC2 measurement results
Channel Status Bit measurement results
HDMI Audio measurement results
HDCP constant measurement results
DDC Line Monitor display
P.
△△
TOP → ANALYSIS [ANALYZE]
This operation sequence is used to list any errors in any the measurement items.
----------------------------------ERROR REPORT 表示-----------------------------------------------
8.2 VIDEO TIMING VIDEO TIMING
TOP → ANALYSIS [ANALYZE] → DETAILS [F1] → Video Timing [F1]
This operation sequence is used to measure the input timings.
----------------------------------Video TIming 表示-----------------------------------------------
28
Page 32
The items displayed are listed below.
Fig. Details of items measured
Item Fig. Details
Hor.FREQUENCY Horizontal sync frequency
Hor.PERIOD HP Horizontal sync period
Hor.SYNC HS Horizontal sync width
Hor.BAKCP HB Horizontal sync back porch width
Hor.DISP HD Horizontal display width
Hor.FRONTP HP Horizontal sync front porch width
Hor.Polarity Horizontal sync polarity
Ver.FREQUENCY Vertical sync frequency
Ver.TOTAL VT Vertical sync period
Ver.SYNC VS Vertical sync width
Ver.BACKP VB Vertical sync back porch width
Ver.DISP VD Vertical display width
Ver.FRONTP VP Vertical sync front porch width
Ver.Polarity Vertical sync polarity
* Measurements cannot be performed properly when HDMI signals with timings
exceeding the restrictions have been input.
29
Page 33

Data Enable
HSYNC
Data Enable
HSYNC
VSYNC
Fig. Vertical sync signal
HP
VT
HFHDHBHS
VFVDVB VS
Data Enable
HSYNC
VSYNC
Fig. Vertical sync signal (in non-interlace mode)
Fig. Vertical sync signal (in interlace mode)
VFVDVBVS
VT
30
Page 34

8.3 InfoFrame AVI
TOP → ANALYSIS [ANALYZE] → DETAILS[F1] → InfoFrame AVI [F2]
This operation sequence is used to decode AVI InfoFrame of the input and display it.
----------------------------------InfoFrame AVI 表示画面-----------------------------------------------
For further details of the display, refer to the HDMI and EIA specifications.
8.4 InfoFrame SPD
TOP → ANALYSIS[ANALYZE] → DETAILS[F1] → InfoFrame SPD[F3]
----------------------------------InfoFrame SPD 表示画面-----------------------------------------------
This operation sequence is used to decode SPD InfoFrame of the input and display it.
For further details of the display, refer to the EIA specifications.
8.5 InfoFrame Audio
TOP → ANALYSIS [ANALYZE] → DETAILS[F1] → InfoFrame Audio[F4]
----------------------------------InfoFrame Audio 表示画面-----------------------------------------------
This operation sequence is used to decode Audio InfoFrame of the input and display it.
For further details of the display, refer to the HDMI and EIA specifications.
8.6 InfoFrame MPEG
TOP → ANALYSIS [ANALYZE] → DETAILS[F1] → more[SHIFT] →
InfoFrame MPEG[F1]
----------------------------------InfoFrame Mpeg 表示画面-----------------------------------------------
This operation sequence is used to decode MPEG InfoFrame of the input and display it.
For further details of the display, refer to the EIA specifications.
8.7 ACP Packet
TOP → ANALYSIS [ANALYZE] → DETAILS[F1] → more[SHIFT] →
ACP Packet[F2]
----------------------------------APC Pakcet 表示画面-----------------------------------------------
This operation sequence is used to decode ACP Packet of the input and display it.
For further details of the display, refer to the HDMI specifications.
31
Page 35

8.8 ISRC1 Packet
TOP → ANALYSIS [ANALYZE] → DETAILS[F1] → more[SHIFT] →
ISRC1 Packet[F3]
----------------------------------ISRC1 Packet 表示画面-----------------------------------------------
This operation sequence is used to decode ISRC1 Packet of the input and display it.
For further details of the display, refer to the HDMI and DVD audio specifications.
8.9 ISRC2 Packet
TOP → ANALYSIS [ANALYZE] → DETAILS[F1] → more[SHIFT] →
ISRC2 Packet[F4]
----------------------------------ISRC2 Packet 表示画面-----------------------------------------------
This operation sequence is used to decode ISRC2 [ACP???] Packet of the input and
display it.
Refer to the HDMI specifications.
8.10 Channel Status
TOP → ANALYSIS [ANALYZE] → DETAILS[F1] → more[SHIFT] →
more[SHIFT]→ Channel Status[F1]
----------------------------------Channel Status 表示画面-----------------------------------------------
This operation sequence is used to decode the Channel Status Bit of the input HDMI
audio stream and display it.
Refer to the IEC60958 specifications.
8.11 Audio Timing
TOP → ANALYSIS [ANALYZE] → DETAILS[F1] → more[SHIFT] →
more[SHIFT]→ Audio Timing[F2]
----------------------------------Audio TIming 表示画面-----------------------------------------------
This operation sequence is used to display the constants (N, CTS) used to regenerate the
Audio Clock of the input HDMI Audio and the volume level of the input HDMI Audio.
For details on the audio clock regeneration, refer to the HDMI specifications.
* The volume level can be displayed only when PCM sound is input.
32
Page 36

8.12 HDCP
TOP → ANALYSIS [ANALYZE] → DETAILS[F1] → more[SHIFT] →
more[SHIFT]→ HDCP[F3]
----------------------------------HDCP 表示画面-----------------------------------------------
This operation sequence is used to display the constants used during HDCP certification.
For details on the display, refer to the HDCP specifications.
8.13 (DDC Monitor)
TOP → ANALYSIS [ANALYZE] → DETAILS[F1] → more[SHIFT] →
more[SHIFT]→ DDC Monitor[F3]
----------------------------------DDC Monitor 表示画面-----------------------------------------------
This operation sequence enables details of the communication on the input HDMI DDC
line to be displayed.
9. Other functions
9.1 Hot plug function
The hot plug status can be changed by pressing the HOTPLUG button. For the
HOTPLUG button settings, refer to ??? on page ???.
9.2 Log function
10. Error table
11. Product specifications
12. Terms
33
 Loading...