

Page 1

HP Thunderbolt 3 PCIe Card
Installation
Introduction
This installation guide explains how to install the Thunderbolt™ 3 PCIe card into an HP workstation.
Kit contents
NOTE: Kit contents might vary depending on your computer model.
• HP Thunderbolt 3 PCIe card
• General-Purpose Input/Output (GPIO) cable
• DisplayPort cables (2)
• Installation instructions (this document)
• Warranty information
Before you begin
IMPORTANT: For optimal Thunderbolt 3 performance, install a PCI Express graphics card.
To view QuickSpecs and determine the compatibility of this product with your HP computer, see
http://www.hp.com/go/productbulletin.
Page 2

Warnings and cautions
WARNING! Any surface or area of the equipment marked with this symbol indicates the presence
of a hot surface or hot component. If this surface is contacted, the potential for injury exists. To reduce
the risk of injury from a hot component, enable the surface to cool before touching.
WARNING! Any surface or area of the equipment marked with this symbol indicates the presence
of an electrical shock hazard. To reduce the risk of injury from electrical shock, do not open any
enclosed area marked with this symbol.
WARNING! To reduce the risk of electric shock or damage to your equipment:
- Do not disable the power cord grounding plug. The grounding plug is an important safety feature.
- Plug the power cord in a grounded (earthed) outlet that is easily accessible at all times.
- Disconnect power from the equipment by unplugging the power cord from the electrical outlet.
WARNING! To reduce the risk of serious injury, read the Safety & Comfort Guide. It describes the proper
computer setup, posture, health, and work habits for computer users, and provides important electrical
and mechanical safety information. This guide is located at http://www.hp.com/ergo and on the
documentation CD (if one is included with the product).
WARNING! If a product is shipped in packaging marked with this symbol, , the product must
always be lifted by two persons to avoid personal injury due to product weight.
CAUTION: Static electricity can damage the electronic components of the computer. Before beginning
these procedures, be sure you discharge static electricity by briefly touching a grounded metal object.
CAUTION: To prevent damage to the computer, observe the following Electrostatic Discharge (ESD)
precautions while performing the system parts removal and replacement procedures.
- Work on a static-free mat.
- Wear a static strap to ensure that any accumulated electrostatic charge is discharged from your body
to the ground.
- Create a common ground for the equipment you are working on by connecting the static-free mat,
static strap, and peripheral units to that piece of equipment.
NOTE: HP accessories are for use in HP computer products. They have been extensively tested for
reliability and are manufactured to high quality standards.
2 HP Thunderbolt 3 PCIe Card Installation
Page 3

Step 1—Accessing the internal components of the computer
1. If you need help preparing the computer for this installation, consult the removal and replacement
procedures in the HP Customer Self Repair Services Media Library at http://www.hp.com/go/sml.
2. Load the correct BIOS onto the workstation, as follows:
a. Go to http://www.hp.com/drivers.
b. Enter the computer product number.
c. Select the model.
NOTE: Any model selection displays the correct BIOS.
d. Select your language and operating system.
e. In Download Index, select BIOS.
f. Download and install the most recent BIOS.
3. Power down the computer, and then disconnect the power cord.
4. Power down all external devices, and then disconnect them from the computer.
5. Remove the access panel.
HP Thunderbolt 3 PCIe Card Installation 3
Page 4
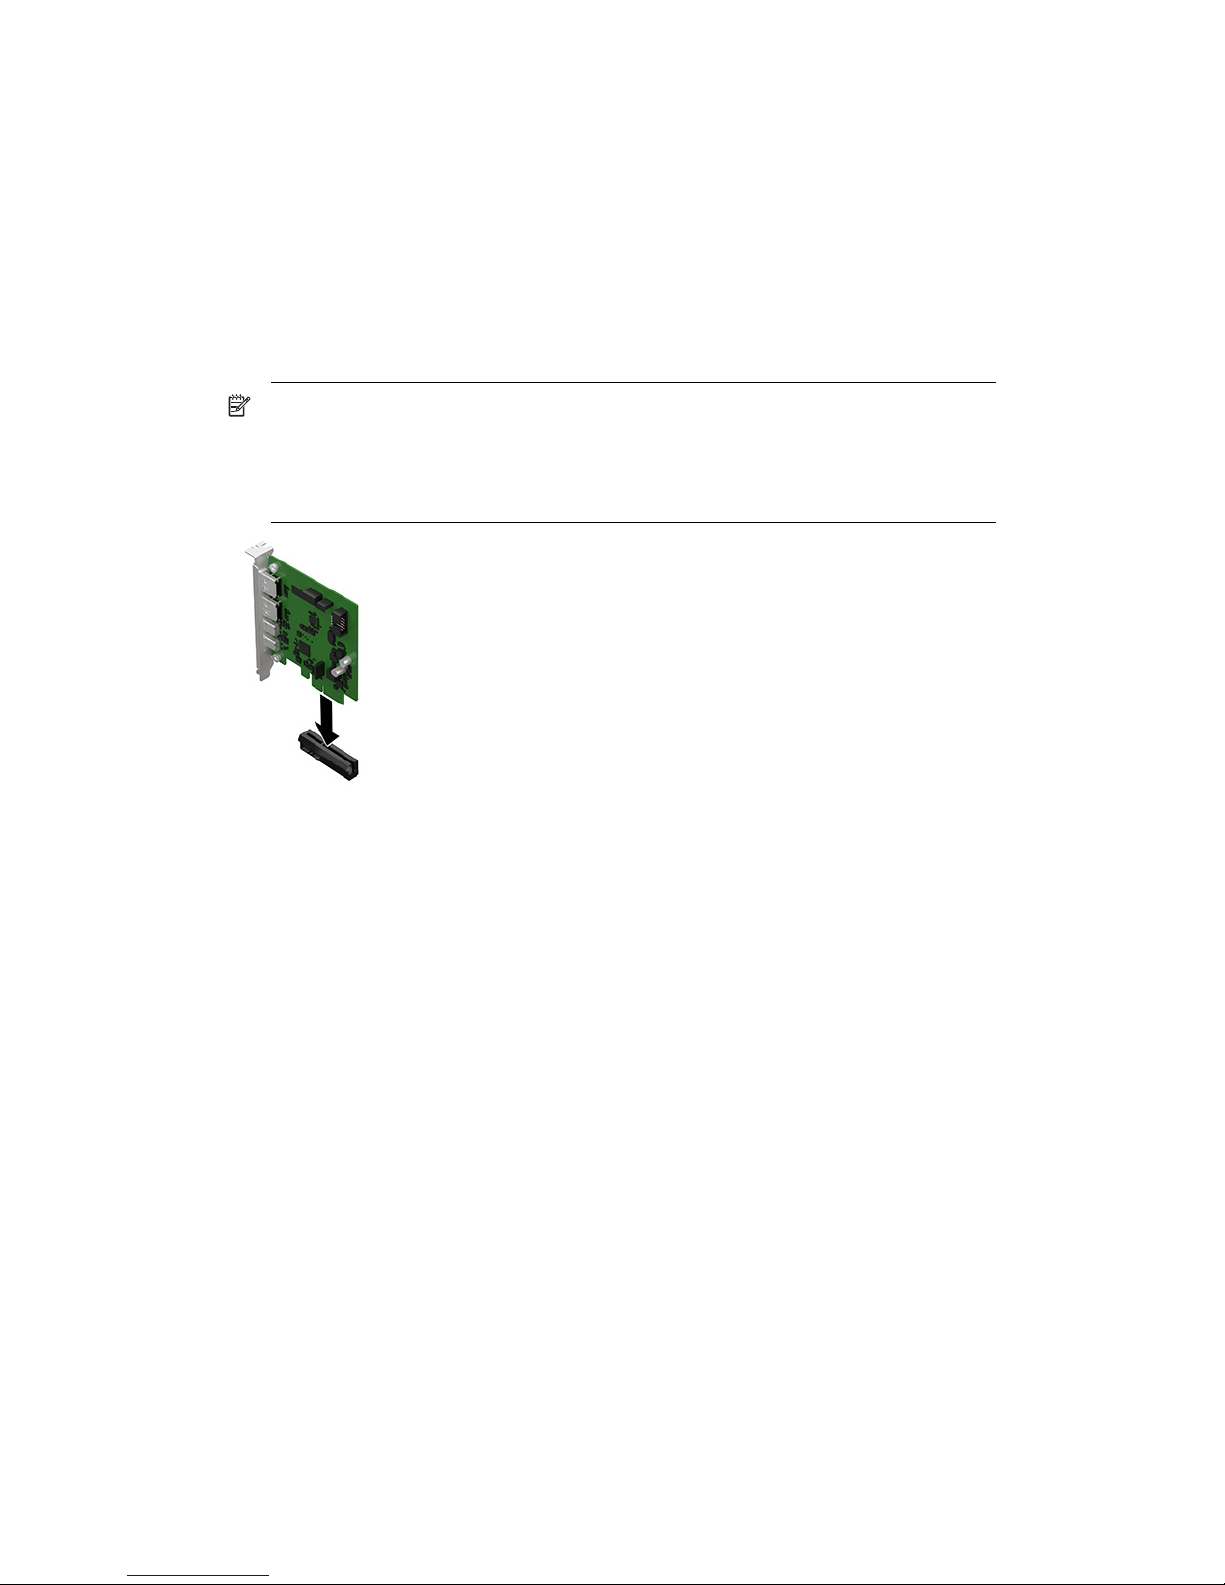
Step 2—Installing the Thunderbolt 3 PCIe card
1. Ground yourself, and then remove the PCIe card from the package.
2. Place the computer on a flat, clean, static-free surface.
3. Install the PCIe card into the correct PCIe slot by sliding the bracket on the end of the card into the slot on
the back of the chassis, and then press the card firmly down into the socket on the system board.
NOTE: You must install the card into the correct PCIe slot, as follows. The slot closest to the
processor is slot 1.
• HP Z8 G4: PCIe slot 1
• HP Z6 G4: PCIe slot 6
• HP Z4 G4: PCIe slot 4
4 HP Thunderbolt 3 PCIe Card Installation
Page 5

4. Connect the GPIO cable to the connector on the upper-right corner of the card, and then connect the
other end of the cable to the system board connector labeled PD129.
NOTE: System board appearance might vary. See the System Board Overview located on the service
panel to determine the location of the header. If there are other PCIe cards installed, be sure to route
the GPIO cable underneath the cards.
5. The back of the card includes four connectors:
- (1)
—
Thunderbolt 3 ports (A and B)
- (2)—DisplayPorts (DP IN A and DP IN B)
Attach the Thunderbolt cables (sold separately) and DisplayPort cables to the back of the card.
HP Thunderbolt 3 PCIe Card Installation 5
Page 6

6. Connect the other end of the Thunderbolt cables (sold separately) to a Thunderbolt device. Connect the
other end of the DisplayPort cables to a graphics card.
NOTE: If you are only using one Thunderbolt port, connect the Thunderbolt device to the
Thunderbolt port labeled A, and then connect the graphics card to the DisplayPort labeled DP IN A. HP
recommends connecting the graphics card to both DisplayPorts.
6 HP Thunderbolt 3 PCIe Card Installation
Page 7

Step 3—Reassembling the computer
1. Reinstall the access panel.
2. Reconnect external devices and power cord, and restore power to all external devices.
HP Thunderbolt 3 PCIe Card Installation 7
Page 8

Step 4—Loading the Thunderbolt 3 PCIe card driver
© Copyright 2018 HP Development Company, L.P.
Thunderbolt and the Thunderbolt logo are trademarks of Intel Corporation or its subsidiaries in the U.S. and/or other countries.
The information contained herein is subject to change without notice. The only warranties for HP products and services are set
forth in the express warranty statements accompanying such products and services. Nothing herein should be construed as
constituting an additional warranty. HP shall not be liable for technical or editorial errors or omissions contained herein.
First Edition: June 2018
PRINTER: Replace this box with Printed- In (PI)
Statement(s) as per spec.
NOTE: This box is simply a placeholder. PI
Statement(s) do not have to fit inside the box but
should be placed in this area.
L31829-001
*L31829-001*
1. Go to http://www.hp.com/support, and follow the on-screen instructions to find your product.
2. Select Software and Drivers, and then select Go.
3. Select Driver – Controller.
4. Download and install the driver.
 Loading...