

Page 1

user guide
hp StorageWorks
secure fabric OS version 1.0
Product Version: 1.0
First Edition (June 2003)
Part Number: AA–RU57A–TE
This user guide outlines how to set up the Secure Fabric OS feature in an existing Storage Area
Network (SAN). Topics discussed include activating the Secure Fabric OS license and creating
Secure Fabric policies.
Page 2

© Copyright 1999-2003 Hewlett-Packard Development Company, L.P.
Hewlett-Packard Company makes no warranty of any kind with regard to this material, including, but not limited to,
the implied warranties of merchantability and fitness for a particular purpose. Hewlett-Packard shall not be liable for
errors contained herein or for incidental or consequential damages in connection with the furnishing, performance,
or use of this material.
This document contains proprietary information, which is protected by copyright. No part of this document may be
photocopied, reproduced, or translated into another language without the prior written consent of Hewlett-Packard.
The information contained in this document is subject to change without notice.
BROCADE, the Brocade B weave logo, Brocade: the Intelligent Platform for Networking Storage, SilkWorm, and
SilkWorm Express, are trademarks or registered trademarks of Brocade Communications Systems, Inc. or its
subsidiaries in the United States and/or in other countries.
Microsoft® and Windows® are U.S. registered trademarks of Microsoft Corporation.
Hewlett-Packard Company shall not be liable for technical or editorial errors or omissions contained herein. The
information is provided “as is” without warranty of any kind and is subject to change without notice. The warranties
for Hewlett-Packard Company products are set forth in the express limited warranty statements for such products.
Nothing herein should be construed as constituting an additional warranty.
Printed in the U.S.A.
Secure Fabric OS Version 1.0 User Guide
First Edition (June 2003)
Part Number: AA–RU57A–TE
Page 3

3Secure Fabric OS Version 1.0 User Guide
contents
Contents
About this Guide. . . . . . . . . . . . . . . . . . . . . . . . . . . . . . . . . . . . . . . . . . . . . . . . . . . .7
Overview. . . . . . . . . . . . . . . . . . . . . . . . . . . . . . . . . . . . . . . . . . . . . . . . . . . . . . . . . . . . . . . . . . 8
Intended Audience . . . . . . . . . . . . . . . . . . . . . . . . . . . . . . . . . . . . . . . . . . . . . . . . . . . . . . . 8
Related Documentation . . . . . . . . . . . . . . . . . . . . . . . . . . . . . . . . . . . . . . . . . . . . . . . . . . . 8
Conventions . . . . . . . . . . . . . . . . . . . . . . . . . . . . . . . . . . . . . . . . . . . . . . . . . . . . . . . . . . . . . . . 9
Document Conventions . . . . . . . . . . . . . . . . . . . . . . . . . . . . . . . . . . . . . . . . . . . . . . . . . . . 9
Text Symbols . . . . . . . . . . . . . . . . . . . . . . . . . . . . . . . . . . . . . . . . . . . . . . . . . . . . . . . . . . . 9
Getting Help . . . . . . . . . . . . . . . . . . . . . . . . . . . . . . . . . . . . . . . . . . . . . . . . . . . . . . . . . . . . . . 11
HP Technical Support . . . . . . . . . . . . . . . . . . . . . . . . . . . . . . . . . . . . . . . . . . . . . . . . . . . 11
HP Storage Website . . . . . . . . . . . . . . . . . . . . . . . . . . . . . . . . . . . . . . . . . . . . . . . . . . . . . 11
HP Authorized Reseller . . . . . . . . . . . . . . . . . . . . . . . . . . . . . . . . . . . . . . . . . . . . . . . . . . 11
1 Introducing Secure Fabric OS. . . . . . . . . . . . . . . . . . . . . . . . . . . . . . . . . . . . . . . . . .13
Security of Management Channels. . . . . . . . . . . . . . . . . . . . . . . . . . . . . . . . . . . . . . . . . . . . . 14
Secure Shell . . . . . . . . . . . . . . . . . . . . . . . . . . . . . . . . . . . . . . . . . . . . . . . . . . . . . . . . . . . 14
Sectelnet . . . . . . . . . . . . . . . . . . . . . . . . . . . . . . . . . . . . . . . . . . . . . . . . . . . . . . . . . . . . . . 15
Telnet . . . . . . . . . . . . . . . . . . . . . . . . . . . . . . . . . . . . . . . . . . . . . . . . . . . . . . . . . . . . . . . . 15
Switch-to-Switch Authentication Using PKI . . . . . . . . . . . . . . . . . . . . . . . . . . . . . . . . . . . . . 16
Fabric Configuration Server Switches . . . . . . . . . . . . . . . . . . . . . . . . . . . . . . . . . . . . . . . . . . 17
Fabric Management Policy Set. . . . . . . . . . . . . . . . . . . . . . . . . . . . . . . . . . . . . . . . . . . . . . . . 19
Available Secure Fabric OS Policies . . . . . . . . . . . . . . . . . . . . . . . . . . . . . . . . . . . . . . . . 19
2 Adding Secure Fabric OS to the Fabric. . . . . . . . . . . . . . . . . . . . . . . . . . . . . . . . . . .21
Adding Secure Fabric OS to the Fabric . . . . . . . . . . . . . . . . . . . . . . . . . . . . . . . . . . . . . . . . . 22
Identifying the Current Version of Fabric OS . . . . . . . . . . . . . . . . . . . . . . . . . . . . . . . . . . . . 23
Adding Secure Fabric OS to Switches Shipped with Fabric OS v3.1.x or v4.1.x . . . . . . . . . 24
Customizing the Account Passwords. . . . . . . . . . . . . . . . . . . . . . . . . . . . . . . . . . . . . . . . 24
Verifying or Activating the Secure Fabric OS and Zoning Licenses. . . . . . . . . . . . . . . . 25
Adding Secure Fabric OS to Switches that Require Upgrading. . . . . . . . . . . . . . . . . . . . . . . 27
Upgrading to a Compatible Version of Fabric OS. . . . . . . . . . . . . . . . . . . . . . . . . . . . . . 28
Page 4

Contents
4 Secure Fabric OS Version 1.0 User Guide
Customizing the Account Passwords. . . . . . . . . . . . . . . . . . . . . . . . . . . . . . . . . . . . . . . . 29
Verifying or Activating the Secure Fabric OS and Zoning Licenses. . . . . . . . . . . . . . . . 30
Installing the PKICERT Utility . . . . . . . . . . . . . . . . . . . . . . . . . . . . . . . . . . . . . . . . . . . . 30
Using the PKICERT Utility to Obtain the CSR File . . . . . . . . . . . . . . . . . . . . . . . . . . . . 31
Obtaining the Digital Certificate File. . . . . . . . . . . . . . . . . . . . . . . . . . . . . . . . . . . . . . . . 34
Distributing Digital Certificates to the Switches . . . . . . . . . . . . . . . . . . . . . . . . . . . . . . . 35
Verifying Installation of the Digital Certificates . . . . . . . . . . . . . . . . . . . . . . . . . . . . . . . 38
Re-creating PKI Objects If Required . . . . . . . . . . . . . . . . . . . . . . . . . . . . . . . . . . . . . . . . 39
Adding Secure Fabric OS to a Core Switch 2/64 . . . . . . . . . . . . . . . . . . . . . . . . . . . . . . . . . . 41
Installing a Supported CLI Client on a Computer Workstation . . . . . . . . . . . . . . . . . . . . . . . 45
3 Creating Secure Fabric OS Policies. . . . . . . . . . . . . . . . . . . . . . . . . . . . . . . . . . . . . .47
Default Fabric and Switch Accessibility . . . . . . . . . . . . . . . . . . . . . . . . . . . . . . . . . . . . . . . . 48
Enabling Secure Mode . . . . . . . . . . . . . . . . . . . . . . . . . . . . . . . . . . . . . . . . . . . . . . . . . . . . . . 49
Modifying the FCS Policy . . . . . . . . . . . . . . . . . . . . . . . . . . . . . . . . . . . . . . . . . . . . . . . . . . . 54
Changing the Position of a Switch Within the FCS Policy . . . . . . . . . . . . . . . . . . . . . . . 55
Failing over the Primary FCS Switch . . . . . . . . . . . . . . . . . . . . . . . . . . . . . . . . . . . . . . . 56
Creating Secure Fabric OS Policies Other Than the FCS Policy. . . . . . . . . . . . . . . . . . . . . . 58
Creating a MAC Policy . . . . . . . . . . . . . . . . . . . . . . . . . . . . . . . . . . . . . . . . . . . . . . . . . . 59
Creating an SNMP Policy . . . . . . . . . . . . . . . . . . . . . . . . . . . . . . . . . . . . . . . . . . . . . 60
Telnet Policy . . . . . . . . . . . . . . . . . . . . . . . . . . . . . . . . . . . . . . . . . . . . . . . . . . . . . . . 62
HTTP Policy . . . . . . . . . . . . . . . . . . . . . . . . . . . . . . . . . . . . . . . . . . . . . . . . . . . . . . . 64
API Policy . . . . . . . . . . . . . . . . . . . . . . . . . . . . . . . . . . . . . . . . . . . . . . . . . . . . . . . . . 65
Management Server Policy . . . . . . . . . . . . . . . . . . . . . . . . . . . . . . . . . . . . . . . . . . . . 66
Serial Port Policy. . . . . . . . . . . . . . . . . . . . . . . . . . . . . . . . . . . . . . . . . . . . . . . . . . . . 67
Front Panel Policy . . . . . . . . . . . . . . . . . . . . . . . . . . . . . . . . . . . . . . . . . . . . . . . . . . . 68
Creating an Options Policy . . . . . . . . . . . . . . . . . . . . . . . . . . . . . . . . . . . . . . . . . . . . . . . 70
Creating a DCC Policy. . . . . . . . . . . . . . . . . . . . . . . . . . . . . . . . . . . . . . . . . . . . . . . . . . . 71
Creating an SCC Policy . . . . . . . . . . . . . . . . . . . . . . . . . . . . . . . . . . . . . . . . . . . . . . . . . . 74
Managing Secure Fabric OS Policies . . . . . . . . . . . . . . . . . . . . . . . . . . . . . . . . . . . . . . . . . . . 76
Saving Changes to Secure Fabric OS Policies. . . . . . . . . . . . . . . . . . . . . . . . . . . . . . . . . 77
Activating Changes to Secure Fabric OS Policies . . . . . . . . . . . . . . . . . . . . . . . . . . . . . . 77
Adding a Member to an Existing Policy . . . . . . . . . . . . . . . . . . . . . . . . . . . . . . . . . . . . . 78
Removing a Member from a Policy. . . . . . . . . . . . . . . . . . . . . . . . . . . . . . . . . . . . . . . . . 79
Deleting a Policy . . . . . . . . . . . . . . . . . . . . . . . . . . . . . . . . . . . . . . . . . . . . . . . . . . . . . . . 80
Aborting All Uncommitted Changes . . . . . . . . . . . . . . . . . . . . . . . . . . . . . . . . . . . . . . . . 80
Aborting a Secure Fabric OS Transaction . . . . . . . . . . . . . . . . . . . . . . . . . . . . . . . . . . . . 81
Page 5

Contents
5Secure Fabric OS Version 1.0 User Guide
4 Managing Secure Fabric OS . . . . . . . . . . . . . . . . . . . . . . . . . . . . . . . . . . . . . . . . . .83
Viewing Secure Fabric OS-Related Information . . . . . . . . . . . . . . . . . . . . . . . . . . . . . . . . . . 84
Displaying General Secure Fabric OS Information About a Fabric . . . . . . . . . . . . . . . . 84
Viewing the Secure Fabric OS Policy Database . . . . . . . . . . . . . . . . . . . . . . . . . . . . . . . 85
Displaying Individual Secure Fabric OS Policies . . . . . . . . . . . . . . . . . . . . . . . . . . . . . . 86
Displaying Status of Secure Mode. . . . . . . . . . . . . . . . . . . . . . . . . . . . . . . . . . . . . . . . . . 88
Displaying and Resetting Secure Fabric OS Statistics . . . . . . . . . . . . . . . . . . . . . . . . . . . . . . 90
Displaying Secure Fabric OS Statistics . . . . . . . . . . . . . . . . . . . . . . . . . . . . . . . . . . . . . . 91
Resetting Secure Fabric OS Statistics . . . . . . . . . . . . . . . . . . . . . . . . . . . . . . . . . . . . . . . 92
Managing Passwords . . . . . . . . . . . . . . . . . . . . . . . . . . . . . . . . . . . . . . . . . . . . . . . . . . . . . . . 94
Modifying Passwords in Secure Mode . . . . . . . . . . . . . . . . . . . . . . . . . . . . . . . . . . . . . . 96
Modifying the FCS Switch Passwords or the Fabric-wide User Password. . . . . . . . 96
Modifying the Non-FCS Switch Admin Password . . . . . . . . . . . . . . . . . . . . . . . . . . 97
Using Temporary Passwords . . . . . . . . . . . . . . . . . . . . . . . . . . . . . . . . . . . . . . . . . . . . . . 97
Creating a Temporary Password for a Switch. . . . . . . . . . . . . . . . . . . . . . . . . . . . . . 98
Removing a Temporary Password from a Switch . . . . . . . . . . . . . . . . . . . . . . . . . . . 99
Resetting the Version Number and Time Stamp . . . . . . . . . . . . . . . . . . . . . . . . . . . . . . . . . 100
Adding Switches and Merging Secure Fabrics. . . . . . . . . . . . . . . . . . . . . . . . . . . . . . . . . . . 101
Troubleshooting . . . . . . . . . . . . . . . . . . . . . . . . . . . . . . . . . . . . . . . . . . . . . . . . . . . . . . . . . . 106
Frequently Asked Questions. . . . . . . . . . . . . . . . . . . . . . . . . . . . . . . . . . . . . . . . . . . . . . . . . 108
General . . . . . . . . . . . . . . . . . . . . . . . . . . . . . . . . . . . . . . . . . . . . . . . . . . . . . . . . . . . . . . 108
Management Access. . . . . . . . . . . . . . . . . . . . . . . . . . . . . . . . . . . . . . . . . . . . . . . . . . . . 109
Digital Certificates and PKI Objects . . . . . . . . . . . . . . . . . . . . . . . . . . . . . . . . . . . . . . . 110
Merging Fabrics . . . . . . . . . . . . . . . . . . . . . . . . . . . . . . . . . . . . . . . . . . . . . . . . . . . . . . . 111
Passwords. . . . . . . . . . . . . . . . . . . . . . . . . . . . . . . . . . . . . . . . . . . . . . . . . . . . . . . . . . . . 111
A Secure Fabric OS Commands and Secure Mode Restrictions . . . . . . . . . . . . . . . . . .113
Secure Fabric OS Commands. . . . . . . . . . . . . . . . . . . . . . . . . . . . . . . . . . . . . . . . . . . . . . . . 114
Command Restrictions in Secure Mode . . . . . . . . . . . . . . . . . . . . . . . . . . . . . . . . . . . . . . . . 117
Secure Fabric OS Commands . . . . . . . . . . . . . . . . . . . . . . . . . . . . . . . . . . . . . . . . . . . . 117
Zoning Commands. . . . . . . . . . . . . . . . . . . . . . . . . . . . . . . . . . . . . . . . . . . . . . . . . . . . . 118
Miscellaneous Commands . . . . . . . . . . . . . . . . . . . . . . . . . . . . . . . . . . . . . . . . . . . . . . . 119
B Removing Secure Fabric OS Capability . . . . . . . . . . . . . . . . . . . . . . . . . . . . . . . . .121
Preparing the Fabric for Removal of Secure Fabric OS Policies . . . . . . . . . . . . . . . . . . . . . 122
Disabling Secure Mode. . . . . . . . . . . . . . . . . . . . . . . . . . . . . . . . . . . . . . . . . . . . . . . . . . . . . 123
Deactivating the Secure Fabric OS License on Each Switch . . . . . . . . . . . . . . . . . . . . . . . . 125
Uninstalling Related Items from the Host . . . . . . . . . . . . . . . . . . . . . . . . . . . . . . . . . . . . . . 126
Page 6

Contents
6 Secure Fabric OS Version 1.0 User Guide
Index . . . . . . . . . . . . . . . . . . . . . . . . . . . . . . . . . . . . . . . . . . . . . . . . . . . . . . . . . .127
Tables
1 Document Conventions . . . . . . . . . . . . . . . . . . . . . . . . . . . . . . . . . . . . . . . . . . . . . . . . . . . 9
2 FCS Policy States. . . . . . . . . . . . . . . . . . . . . . . . . . . . . . . . . . . . . . . . . . . . . . . . . . . . . . . 54
3 Valid Methods for Specifying Policy Members. . . . . . . . . . . . . . . . . . . . . . . . . . . . . . . . 59
4 Read and Write Behaviors of SNMP Policies . . . . . . . . . . . . . . . . . . . . . . . . . . . . . . . . . 60
5 Telnet Policy States . . . . . . . . . . . . . . . . . . . . . . . . . . . . . . . . . . . . . . . . . . . . . . . . . . . . . 63
6 HTTP Policy States . . . . . . . . . . . . . . . . . . . . . . . . . . . . . . . . . . . . . . . . . . . . . . . . . . . . . 64
7 API Policy States . . . . . . . . . . . . . . . . . . . . . . . . . . . . . . . . . . . . . . . . . . . . . . . . . . . . . . . 65
8 Management Server Policy States . . . . . . . . . . . . . . . . . . . . . . . . . . . . . . . . . . . . . . . . . . 66
9 Serial Port Policy States. . . . . . . . . . . . . . . . . . . . . . . . . . . . . . . . . . . . . . . . . . . . . . . . . . 67
10 Front Panel Policy States . . . . . . . . . . . . . . . . . . . . . . . . . . . . . . . . . . . . . . . . . . . . . . . . . 69
11 Options Policy States . . . . . . . . . . . . . . . . . . . . . . . . . . . . . . . . . . . . . . . . . . . . . . . . . . . . 70
12 DCC Policy States . . . . . . . . . . . . . . . . . . . . . . . . . . . . . . . . . . . . . . . . . . . . . . . . . . . . . . 72
13 SCC Policy States . . . . . . . . . . . . . . . . . . . . . . . . . . . . . . . . . . . . . . . . . . . . . . . . . . . . . . 74
14 Secure Mode Information . . . . . . . . . . . . . . . . . . . . . . . . . . . . . . . . . . . . . . . . . . . . . . . . 88
15 Secure Fabric OS Statistics . . . . . . . . . . . . . . . . . . . . . . . . . . . . . . . . . . . . . . . . . . . . . . . 90
16 Login Account Behavior with Secure Mode Disabled and Enabled . . . . . . . . . . . . . . . . 95
17 Moving Switches Between Fabrics . . . . . . . . . . . . . . . . . . . . . . . . . . . . . . . . . . . . . . . . 102
18 Recovery Processes . . . . . . . . . . . . . . . . . . . . . . . . . . . . . . . . . . . . . . . . . . . . . . . . . . . . 106
19 Secure Fabric OS Commands . . . . . . . . . . . . . . . . . . . . . . . . . . . . . . . . . . . . . . . . . . . . 114
20 Secure Fabric OS Commands Executable on Specific Switches
When Secure Mode Is Enabled . . . . . . . . . . . . . . . . . . . . . . . . . . . . . . . . . . . . . . . . . . . 117
21 Zoning Commands Executable on the Primary FCS Switch . . . . . . . . . . . . . . . . . . . . . 118
22 Miscellaneous Commands Executable on Specific Switches . . . . . . . . . . . . . . . . . . . . 119
Page 7

7Secure Fabric OS Version 1.0 User Guide
about this
guide
About this Guide
About this Guide
This user guide provides information to help you:
■ Create policies to customize fabric management access.
■ Specify specific switches and devices.
■ Manage the fabric-wide Secure Fabric OS parameters through a single switch.
■ Enable and disable Secure Fabric OS as desired.
■ Contact technical support for additional assistance.
“About this Guide” topics include:
■ Overview, page 8
■ Conventions, page 9
■ Getting Help, page 11
Page 8

About this Guide
8 Secure Fabric OS Version 1.0 User Guide
Overview
This section covers the following topics:
■ Intended Audience
■ Related Documentation
Intended Audience
This book is intended for use by System Administrators who are experienced with
the following:
■ HP StorageWorks Fibre Channel SAN Switches.
■ HP StorageWorks Fabric OS v3.1.x or later.
Related Documentation
For a list of related documents included with this product, see the “Related
Documents” section of the Release Notes that came with this product.
For the latest information, documentation, and firmware releases, please visit the
following HP StorageWorks website:
http://www.hp.com/country/us/eng /
prodserv/storage.html
For information about Fibre Channel standards, visit the Fibre Channel Industry
Association website, located at:
http://www.fibrechannel.org
.
Page 9
About this Guide
Secure Fabric OS Version 1.0 User Guide
9
Conventions
Conventions consist of the following:
■ Document Conventions
■ Text Symbols
Document Conventions
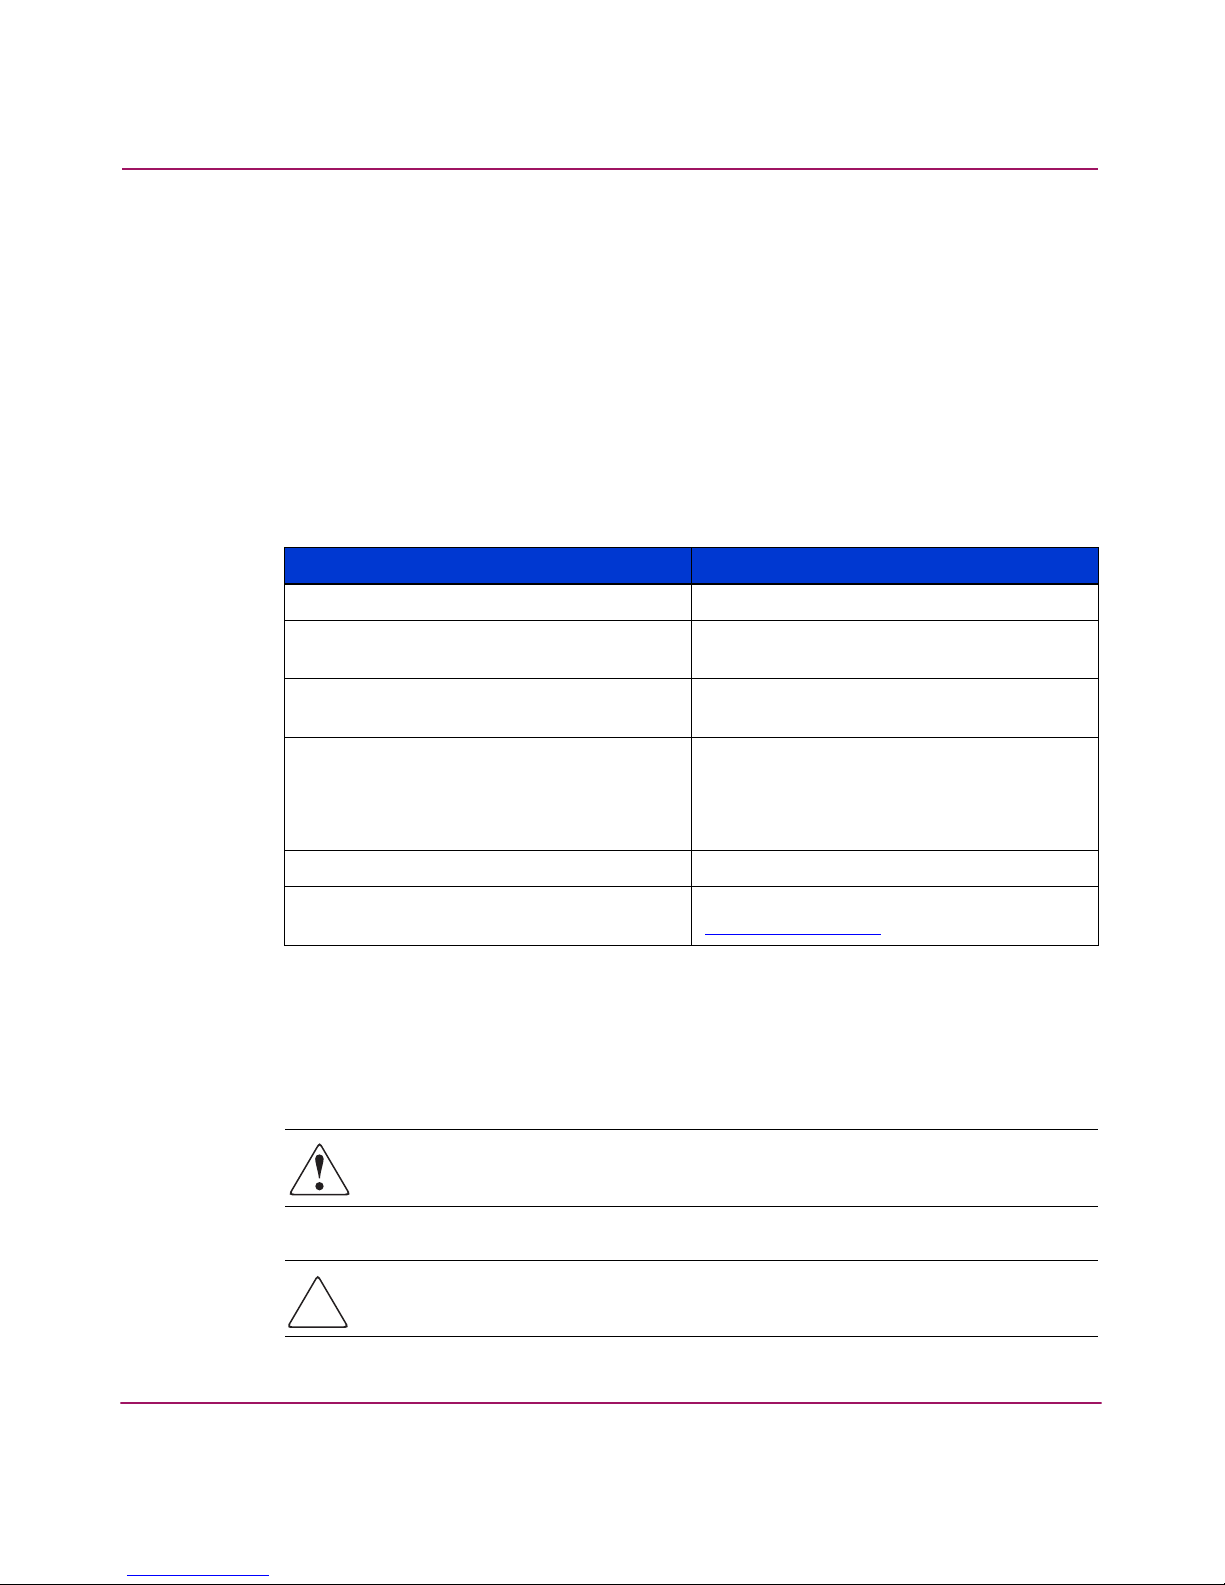
The document conventions included in Table 1 apply in most cases.
Text Symbols
The following symbols may be found in the text of this guide. They have the
following meanings.
WARNING: Text set off in this manner indicates that failure to follow
directions in the warning could result in bodily harm or death.
Caution: Text set off in this manner indicates that failure to follow directions
could result in damage to equipment or data.
Table 1: Document Conventions
Element Convention
Cross-reference links Blue text: Figure 1
Key and field names, menu items,
buttons, and dialog box titles
Bold
File names, application names, and text
emphasis
Italics
User input, command and directory
names, and system responses (output
and messages)
Monospace font
COMMAND NAMES are uppercase
monospace font unless they are
case-sensitive
Variables <monospace, italic font>
Website addresses Blue, underlined sans serif font text:
http://www.hp.com
Page 10

About this Guide
10 Secure Fabric OS Version 1.0 User Guide
Note: Text set off in this manner presents commentary, sidelights, or interesting points
of information.
Page 11

About this Guide
Secure Fabric OS Version 1.0 User Guide
11
Getting Help
If you still have a question after reading this guide, contact an HP authorized
service provider or access our website:
http://www .hp.com
.
HP Technical Support
Telephone numbers for worldwide technical support are listed on the following
HP website:
http://www .hp.com/support/
. From this website, select the country
of origin.
Note: For continuous quality improvement, calls may be recorded or monitored.
Be sure to have the following information available before calling:
■ Technical support registration number (if applicable)
■ Product serial numbers
■ Product model names and numbers
■ Applicable error messages
■ Operating system type and revision level
■ Detailed, specific questions
HP Storage Website
The HP website has the latest information on this product, as well as the latest
drivers. Access storage at:
http://www.hp.com/country/us/eng/prodserv/
storage .html
. From this website, select the appropriate product or solution.
HP Authorized Reseller
For the name of your nearest HP authorized reseller:
■ In the United States, call 1-800-345-1518.
■ In Canada, call 1-800-263-5868.
■ Elsewhere, see the HP website for locations and telephone numbers:
http://www.hp .com
.
Page 12

About this Guide
12 Secure Fabric OS Version 1.0 User Guide
Page 13

13Secure Fabric OS Version 1.0 User Guide
1
Introducing Secure Fabric OS
Secure Fabric OS is an optionally licensed product that provides customizable
security restrictions through local and remote management channels on an HP
StorageWorks fabric. Secure Fabric OS allows the administrator to:
■ Create policies to customize fabric management access and to specify which
switches and devices can join the fabric
■ View statistics related to attempted policy violations
■ Manage the fabric-wide Secure Fabric OS parameters through a single switch
■ Create temporary passwords specific to a login account and switch
■ Enable and disable Secure Fabric OS
Secure Fabric OS uses digital certificates based on public key infrastructure (PKI)
to provide switch-to-switch authentication.
This chapter provides the following information:
■ Security of Management Channels, page 14
■ Switch-to-Switch Authentication Using PKI, page 16
■ Fabric Configuration Server Switches, page 17
■ Fabric Management Policy Set, page 19
Page 14

Introducing Secure Fabric OS
14 Secure Fabric OS Version 1.0 User Guide
Security of Management Channels
You can use Secure Fabric OS to increase the security of the local and remote
management channels, including Fabric Manager, Web Tools, standard SNMP
applications, Management Server, and a supported command line interface (CLI)
client such as sectelnet.
You can specify the access allowed through a channel by customizing the Secure
Fabric OS policy for that channel. Secure Fabric OS policies are available for
telnet (includes sectelnet and Secure Shell), SNMP, Management Server, HTTP,
and Application Programing Interface (API). Fabric Manager and Web Tools both
use HTTP and API to access the switch.
Once a digital certificate is installed on the switch, Fabric OS v2.6.1, v3.1.x, and
v4.1.x all encrypt sectelnet, API, and HTTP passwords automatically, regardless
of whether Secure Fabric OS is enabled.
Note: The “Telnet” button in Web Tools can be used to launch telnet only (not sectelnet
or Secure Shell), and is disabled when Secure Mode is enabled.
Secure Shell
Fabric OS v4.1.x supports Secure Shell (SSH), which is a fully encrypted protocol
for CLI. Use of SSH requires installation of a SSH client on the host computer. It
does not require a digital certificate on the switch.
SSH access is configurable by the Telnet policy that is available through Secure
Fabric OS. However, Fabric OS v4.1.x supports SSH whether or not Secure Fabric
OS is licensed.
If you want to restrict CLI access over the network to SSH, disable telnet as
described under “Telnet” on page 15.
SSH clients are available in the public domain, and can be located by searching on
the Internet. Any client that supports Version 2 of the protocol is supported, such
as PuTTy or F-Secure.
Fabric OS v4.1.x also supports the following ciphers for session encryption and
Hash Message Authentication Codes (HMACs)—a hash function based message
authentication code:
■ Ciphers: AES128-CBC, 3DES-CBC, Blowfish-CBC, Cast128-CBC, and RC4
■ HMACs: HMAC-MD5, HMAC-SHA1, HMAC-SHA1-96, HMACMD5-96.
Page 15

Introducing Secure Fabric OS
15Secure Fabric OS Version 1.0 User Guide
Note: The first time a SSH client is launched, a message displays indicating that the
server’s host key is not cached in the registry.
For more information about SSH, refer to the HP StorageWorks Fabric Operating
System Procedures Version 3.1.x/4.1.x User Guide.
Sectelnet
Sectelnet is a secure form of telnet that encrypts passwords only. It is available in
the public domain and through HP. Fabric OS v4.1.x includes the sectelnet server;
and you must install the client on the host computer.
Sectelnet can be used as soon as a digital certificate is installed on the switch.
Sectelnet access is configurable by the Telnet policy.
Telnet
Standard telnet is not available when Secure Mode is enabled.
If you want to remove all telnet access to the fabric, you can disable telnet through
the telnetd option of the configure command. You do not have to
disable the switch in order to select this option. For more information about the
configure command, refer to the HP StorageWorks Fabric OS Version
3.1.x/4.1.x Reference Guide.
Page 16

Introducing Secure Fabric OS
16 Secure Fabric OS Version 1.0 User Guide
Switch-to-Switch Authentication Using PKI
Secure Fabric OS uses digital certificates based on PKI and switch World Wide
Names (WWNs) to identify the authorized switches and prevent the addition of
unauthorized switches to the fabric. A PKI Certificate Installation utility
(PKICERT) is provided for generating Certificate Signing Requests (CSRs) and
installing digital certificates on switches. For information about how to use the
PKICERT utility, see “Adding Secure Fabric OS to the Fabric” on page 22.
Page 17

Introducing Secure Fabric OS
17Secure Fabric OS Version 1.0 User Guide
Fabric Configuration Server Switches
Fabric Configuration Server (FCS) switches are one or more switches that you
specify as trusted switches (switches that are in a physically secure area) for use in
managing Secure Fabric OS. These switches should be both electronically and
physically secure. You can specify a Primary FCS switch and one or more Backup
FCS switches, to provide failover ability in case the Primary FCS switch fails.
You specify the FCS switches by listing their WWNs in a specific policy called
the FCS policy. The first switch that is listed in this policy and is participating in
the fabric acts as the Primary FCS switch, and distributes the following
information to the other switches in the fabric:
■ Zoning configuration
■ Secure Fabric OS policies
■ Fabric password database
■ SNMP community strings
■ System date and time
Note: The role of the FCS switch is separate from the role of the principal switch, which
assigns Domain IDs. The role of the principle switch is not affected by whether Secure
Mode is enabled.
When Secure Mode is enabled, only the Primary FCS switch can propagate
management changes to the fabric. When a new switch joins the fabric, the
Primary FCS switch verifies the digital certificate and then provides the current
configuration, overwriting the existing configuration of the new switch.
Because the Primary FCS distributes the zoning configuration, zoning databases
do not merge when new switches join the fabric. Instead, the zoning information
on the new switches is overwritten when the Primary FCS downloads zoning to
these switches, if Secure Mode is enabled on all the switches. For more
information about merging fabrics, see “Adding Switches and Merging Secure
Fabrics” on page 101.
The remaining switches listed in the FCS policy act as Backup FCS switches. If
the Primary FCS switch becomes unavailable for any reason, the next switch in
the list becomes the Primary FCS switch. A minimum of one Backup FCS switch
is strongly recommended to reduce the possibility of having no Primary FCS
Page 18

Introducing Secure Fabric OS
18 Secure Fabric OS Version 1.0 User Guide
switch available. You can designate a single Primary FCS switch and as many
Backup FCS switches as desired; however, all FCS switches should be physically
secure.
Any switches not listed in the FCS policy are defined as Non-FCS switches. Root
and Factory accounts are disabled on Non-FCS switches.
For information about customizing the FCS policy and configuration download
restrictions while in Secure Mode, see “Enabling Secure Mode” on page 49.
Page 19

Introducing Secure Fabric OS
19Secure Fabric OS Version 1.0 User Guide
Fabric Management Policy Set
Secure Fabric OS supports the creation of a number of specific policies that you
can use to customize specific aspects of the fabric. Each supported policy is
recognized by a specific name. By default, only the FCS policy exists when
Secure Mode is first enabled.
You can create, display, modify, and delete the Secure Fabric OS policies. You can
also create and save a policy without activating it immediately, to allow
implementation at a future time. Once you save policy changes, the new policies
are persistent, meaning that they are saved in flash memory and remain available
after switch reboot or power cycle.
The group of existing policies is referred to as the Fabric Management Policy Set
(FMPS), which includes an Active Policy Set and a Defined Policy Set. The
Active Policy Set contains the policies that are activated and currently in effect.
The Defined Policy Set contains all the policies that have been defined, whether
activated or not. Both policy sets are distributed to all switches in the fabric by the
Primary FCS switch.
You can create and manage the Secure Fabric OS policies by CLI or Fabric
Manager.
Available Secure Fabric OS Policies
You can use Secure Fabric OS to create the following supported Secure Fabric OS
policies:
■ Fabric Configuration Server (FCS) policy: This policy specifies the Primary
FCS and Backup FCS switches.
■ Management Access Control (MAC) policies: These policies restrict
management access to switches. The following specific MAC policies are
provided:
— Read and Write SNMP policies: Restrict which SNMP hosts are allowed
read and write access to the fabric.
— Telnet policy: Restricts the workstations that can use sectelnet or SSH to
connect to the fabric (telnet is not available when Secure Fabric OS is
enabled).
— HTTP policy: Restricts the workstations that can use HTTP to access the
fabric.
— API policy: Restricts the workstations that can use API to access the
fabric.
Page 20

Introducing Secure Fabric OS
20 Secure Fabric OS Version 1.0 User Guide
— Management Server policy: Restricts management server access to
specified devices.
— Serial Port policy: Restricts serial port access to specified switches.
— Front Panel policy: Restricts front panel access to switches that are
physically secure.
■ Options policy: You can use this policy to specify the types of WWNs that can
be used for zoning.
■ Device Connection Control (DCC) policies: You can use this policy to
manage which Fibre Channel device ports are allowed to connect to which
Fibre Channel switch ports.
■ Switch Connection Control (SCC) policy: You can use this policy to manage
which switches can join the fabric.
Page 21

21Secure Fabric OS Version 1.0 User Guide
2
Adding Secure Fabric OS to
the Fabric
Secure Fabric OS is supported by Fabric OS v2.6.1, v3.1.x, and v4.1.x, and can be
added to fabrics that contain any combination of these versions. The procedure for
adding Secure Fabric OS to a switch depends on whether the switch is shipped
with one of these versions installed or requires upgrading.
The following switches can be upgraded for use with Secure Fabric OS:
■ StorageWorks 1 Gb SAN switches running Fabric OS v2.3+ to v2.6.1
■ StorageWorks 2 Gb SAN switches running Fabric OS v3.0+ to v3.1.x
■ Core Switch 2/64 or SAN Switch 2/32 switches running Fabric OS v4.0+ to
v4.1.x
This chapter provides the following information:
■ Adding Secure Fabric OS to the Fabric, page 22
■ Identifying the Current Version of Fabric OS, page 23
■ Adding Secure Fabric OS to Switches Shipped with Fabric OS v3.1.x or
v4.1.x, page 24
■ Adding Secure Fabric OS to Switches that Require Upgrading, page 27
■ Adding Secure Fabric OS to a Core Switch 2/64, page 41
■ Installing a Supported CLI Client on a Computer Workstation, page 45
Page 22

Adding Secure Fabric OS to the Fabric
22 Secure Fabric OS Version 1.0 User Guide
Adding Secure Fabric OS to the Fabric
To implement Secure Fabric OS in a fabric, each switch in the fabric must have
the following:
■ A compatible version of Fabric OS
■ An activated Secure Fabric OS security license
■ An activated Zoning license (zoning is essential to Secure Fabric OS
mechanisms)
■ The required PKI objects
■ A digital certificate
The following steps are required to set up a fabric for use with Secure Fabric OS:
■ Identify the versions of Fabric OS currently installed on each switch and
determine which switches require upgrading to support Secure Fabric OS.
Instructions are provided under “Identifying the Current Version of
Fabric OS” on page 23.
■ For each switch that was shipped with Fabric OS v3.1.x or v4.1.x installed,
follow the instructions provided under “Adding Secure Fabric OS to Switches
Shipped with Fabric OS v3.1.x or v4.1.x” on page 24.
■ For each switch that must be upgraded for use with Secure Fabric OS, follow
the instructions provided under “Adding Secure Fabric OS to Switches that
Require Upgrading” on page 27.
■ For the HP StorageWorks Core Switch 2/64 with any version of Fabric OS
v4.x, follow the instructions provided under “Adding Secure Fabric OS to a
Core Switch 2/64” on page 41.
■ Install a supported CLI client on each computer workstation that you intend to
use to access the fabric. Instructions are provided under “Installing a
Supported CLI Client on a Computer Workstation” on page 45.
Note: If one or more switches are not capable of enforcing the Secure Fabric OS
policies, they may segment from the fabric.
Page 23

Adding Secure Fabric OS to the Fabric
23Secure Fabric OS Version 1.0 User Guide
Identifying the Current Version of Fabric OS
Before continuing, identify the version of Fabric OS on each switch in the fabric
and determine which switches must be upgraded. To upgrade a switch, see
“Upgrading to a Compatible Version of Fabric OS” on page 28.
To identify the current version of Fabric OS installed on each switch in the fabric:
1. Open a CLI connection (serial or telnet) to one of the switches in the fabric.
2. Log into the switch as Admin. The default password is password.
3. Enter the version command.
Example for entering the version command on an HP StorageWorks 2 Gb
SAN switch:
4. Repeat step 1 through step 3 for each switch in the fabric.
switch:admin> version
Kernel: 2.4.2
Fabric OS: v4.1.x
Made on: Fri Jan 3 23:02:08 2003
Flash: Jan 3 18:03:35 2003
BootProm: 4.1.17
switch:admin>
Page 24

Adding Secure Fabric OS to the Fabric
24 Secure Fabric OS Version 1.0 User Guide
Adding Secure Fabric OS to Switches Shipped with Fabric OS
v3.1.x or v4.1.x
This section applies to the following switches:
■ StorageWorks SAN Switch 2/8 EL or StorageWorks SAN Switch 2/16
shipped with Fabric OS v3.1.x
■ StorageWorks SAN Switch 2/32 shipped with Fabric OS v4.1.x
All switches that are shipped with Fabric OS v3.1.x or v4.1.x installed already
have the required PKI objects and a digital certificate.
To set up Secure Fabric OS on a switch shipped with Fabric OS v3.1.x or v4.1.x:
1. Change the account passwords from default values as described in
“Customizing the Account Passwords” on page 24.
2. If switches running Fabric OS v3.1.x will be in the same fabric as switches
running Fabric OS v4.1.x, set the Core processor ID (PID) on the v3.1.x
switches accordingly. Refer to the HP StorageWorks Fabric Operating System
Procedures Version 3.1.x/4.1.x User Guide for instructions.
3. Ensure that the switch has an activated Secure Fabric OS and Zoning Software
License as described in “Verifying or Activating the Secure Fabric OS and
Zoning Licenses” on page 25.
Customizing the Account Passwords
You are prompted to customize the account passwords at the first login. Changing
the passwords immediately is recommended. Until you change the passwords
from the default values, you are prompted to change them each time you log in,
and the passwd command remains disabled.
Note: In addition to customizing the passwords for the User, Admin, Factory, and Root
accounts, setting both the Boot PROM and Recovery passwords is strongly
recommended. For instructions on setting these passwords, refer to the
HP
StorageWorks Fabric Operating System Procedures Version 3.1.x/4.1.x User Guide
.
Page 25

Adding Secure Fabric OS to the Fabric
25Secure Fabric OS Version 1.0 User Guide
To log in and change the passwords:
1. Open a CLI connection (serial or telnet) to the switch.
2. Log into the switch as Admin. The default password is password.
The firmware prompts you to change all passwords.
3. Change all the passwords to secure passwords, using between 8 and 40
alphanumeric characters for each password, with a different password for
each account.
The new passwords must be different from the default values.
Note: Record the passwords and store in a secure place. Recovering passwords can
require significant effort and result in fabric downtime.
Verifying or Activating the Secure Fabric OS and Zoning Licenses
The Secure Fabric OS and Zoning features are included in the Fabric OS and can
be activated by entering a corresponding license key, available from HP. You must
activate the licenses on each switch for which you want to implement Secure
Fabric OS.
You can activate a license through the CLI or through Web Tools. This section
provides CLI instructions only. For instructions on activating a license through
Web Tools, refer to the HP StorageWorks Web Tools Version 3.1.x/4.1.x User
Guide.
To verify or activate a software license through the CLI:
1. Open a CLI connection (serial or telnet) to the switch.
2. Log into the switch as Admin. The default password is password.
3. Enter the licenseshow command to determine whether the license is
already activated.
A list of all the activated licenses displays. The Secure Fabric OS license
displays as Security license.
Page 26

Adding Secure Fabric OS to the Fabric
26 Secure Fabric OS Version 1.0 User Guide
Example:
4. If the Secure Fabric OS and Zoning licenses are already listed, the features are
already available and you do not need to complete the remaining steps. If
either license is not listed, continue with step 5.
5. Contact HP to purchase the required license key.
6. Once you receive the key, enter the following:
licenseadd “key”
Where key is the license key string exactly as provided by HP, and is case
sensitive. It can be copied from the e-mail in which it was provided directly
into the CLI.
Example:
7. Enter the licenseshow command to verify that the license was
successfully activated.
If the license is listed, the feature is immediately available (the Secure Fabric
OS license displays as Security license).
switch:admin> licenseshow
1A1AaAaaaAAAA1a:
Web license
Zoning license
Trunking license
Security license
switch:admin>
switch:admin> licenseadd “aAaaaaAaAaAaAaA”
adding license key “aAaaaaAaAaAaAaA”
done.
switch:admin>
Page 27

Adding Secure Fabric OS to the Fabric
27Secure Fabric OS Version 1.0 User Guide
Adding Secure Fabric OS to Switches that Require Upgrading
This section applies to the following switches:
■ HP StorageWorks switches running Fabric OS v2.6.1
■ HP StorageWorks switches running a Fabric OS previous to v3.1.x
■ HP StorageWorks switches running a Fabric OS previous to v4.1.x
To set up the Secure Fabric OS on a switch that was shipped without Fabric OS
v3.1.x or v4.1.x preinstalled:
1. If switches running Fabric OS v2.6.1 or v3.1.x will be in same fabric as
switches running Fabric OS v4.1.x, set the Core PID on the v2.6.1 and v3.1.x
switches accordingly. Refer to the HP StorageWorks Fabric Operating System
Procedures Version 3.1.x/4.1.x User Guide for instructions.
2. Back up the configuration and upgrade the switch to Fabric OS v2.6.1, v3.1.x,
or v4.1.x, as appropriate to the switch, as described in “Upgrading to a
Compatible Version of Fabric OS” on page 28.
3. Change the account passwords from the default values, as described in
“Customizing the Account Passwords” on page 29.
4. The remaining steps are determined by whether Secure Fabric OS was already
in use on the switch.
— If Secure Fabric OS was already in use on the switch, the upgrade is
complete. You can verify the existing policy set by entering the
secpolicyshow command.
— If Secure Fabric OS was not already in use on the switch, continue with
step 5.
5. Verify or activate the Secure Fabric OS and Zoning licenses, as described in
“Verifying or Activating the Secure Fabric OS and Zoning Licenses” on
page 30.
6. Download and install the PKICERT utility on the computer workstation, as
described in “Installing the PKICERT Utility” on page 30.
7. Create a file containing the CSRs from all the switches that require
certificates, as described in “Using the PKICERT Utility to Obtain the CSR
File” on page 31.
8. Obtain digital certificates from HP, as described in “Obtaining the Digital
Certificate File” on page 34.
Page 28

Adding Secure Fabric OS to the Fabric
28 Secure Fabric OS Version 1.0 User Guide
9. Distribute the certificates to the switches, as described in “Distributing Digital
Certificates to the Switches” on page 35.
10. Verify that digital certificates are installed on all the switches, as described in
“Verifying Installation of the Digital Certificates” on page 38.
Upgrading to a Compatible Version of Fabric OS
Secure Fabric OS is supported by Fabric OS v2.6.1, v3.1.x, and v4.1.x, and can be
implemented in fabrics that contain any combination of these versions.
You can upgrade the following switches for use with Secure Fabric OS:
■ HP StorageWorks switches running Fabric OS v2.6+ to v2.6.1
■ HP StorageWorks switches running Fabric OS v3.0+ to v3.1.x
■ HP StorageWorks switches running Fabric OS v4.0+ to v4.1.x
Note: Switches running Fabric OS v2.6.1 or v3.1.x must have the Core PID set to “1”
in order to join a fabric with switches running Fabric OS v4.1.x. For information on
setting the Core PID, refer to the
HP StorageWorks Fabric Operating System Procedures
Version 3.1.x/4.1.x User Guide
.
If Secure Fabric OS is already implemented on a switch that is being upgraded,
you can upgrade while the switch is in Secure Mode.
To install the required versions of Fabric OS on each switch in the fabric:
1. Obtain the required firmware from the switch provider, according to the type
of switch.
2. Open a CLI connection (serial or telnet) to one of the switches in the fabric.
3. Back up the configuration by entering the configupload command and
completing the prompts.
This also backs up the security policies, if Secure Fabric OS was already in
use on the switch.
4. Log into the switch as Admin. The default password is password.
5. Download the firmware to the computer workstation or server.
Page 29

Adding Secure Fabric OS to the Fabric
29Secure Fabric OS Version 1.0 User Guide
6. Download the required firmware from the computer to the switch. The
download process depends on the type of switch and management interface.
Refer to the HP StorageWorks Fabric Operating System Procedures Version
3.1.x/4.1.x User Guide for download instructions specific to the type of switch
and management interface.
Note: If Secure Mode is already enabled on the switch, you can leave it enabled
during the download, which preserves the security policies.
For information about merging fabrics that have Secure Mode enabled, see “Adding
Switches and Merging Secure Fabrics” on page 101.
7. Reboot the switch.
Note: The PKI objects that are required by Secure Fabric OS are created automatically
the first time the switch is booted up.
8. Repeat this procedure for each switch in the fabric.
Customizing the Account Passwords
After installing a new version of Fabric OS, you are prompted to customize the
account passwords at the first login. Until you change the passwords from the
default values, you are prompted to change them each time you log in, and the
passwd command remains disabled.
Note: In addition to customizing the passwords for the User, Admin, Factory, and Root
accounts, setting the Boot PROM and Recovery passwords is strongly recommended for
Fabric OS v4.1.x (does not apply to v2.6.1 or v3.1.x). For instructions on setting these
passwords, refer to the
HP StorageWorks Fabric Operating System Procedures Version
3.1.x/4.1.x User Guide
.
To log in and change the passwords:
1. Open a CLI connection (serial or telnet) to the switch.
2. Log into the switch as Admin. The default password is password.
The firmware prompts you to change all passwords.
Page 30

Adding Secure Fabric OS to the Fabric
30 Secure Fabric OS Version 1.0 User Guide
3. Change all the passwords to secure passwords, using between 8 and 40
alphanumeric characters for each password, with a different password for
each account.
The new passwords must be different from the default values.
Note: Record the passwords and store in a secure place. Recovering passwords can
require significant effort and result in fabric downtime.
Verifying or Activating the Secure Fabric OS and Zoning Licenses
See the instructions provided under “Verifying or Activating the Secure Fabric OS
and Zoning Licenses” on page 25.
Installing the PKICERT Utility
The PKI Certificate Installation utility (named PKICERT Utility) is provided by
HP and is used to generate CSRs and install digital certificates on switches. The
utility must be installed on a computer workstation.
To install the PKICERT utility on a Sun Solaris workstation, follow the
instructions provided in the PKICERT utility ReadMe file.
To install the PKICERT utility on a PC:
1. Obtain the PKICERT utility from HP.
2. Open the utility zip file and click Extract.
3. Specify the desired installation location. The default location is
c:\security.
The utility is installed to a subdirectory named nt_pki. For example,
c:\security\nt_pki.
4. Review the ReadMe file for current information about the utility.
Page 31

Adding Secure Fabric OS to the Fabric
31Secure Fabric OS Version 1.0 User Guide
Using the PKICERT Utility to Obtain the CSR File
The PKICERT utility makes it possible to retrieve CSRs from all the switches in
the fabric and save them into a CSR file in XML format.
Note: If this procedure is interrupted by a switch reboot, the CSR file is not generated
and the procedure must be repeated.
To obtain the CSR file for the fabric:
1. Open the PKICERT utility by choosing Start > Run and entering the
installation location of the utility. The default location is
c:\security\nt_pki\pkicert.exe.
The utility prompts for the events log file name.
Example:
2. Type a filename for the events log and press Enter. The file is automatically
created at the PKICert installation location.
The utility prompts for the function that you want to perform.
Example:
PKI CERTIFICATE INSTALLATION UTILITY 1.0.1
All events and errors will be recorded in an event/error log file. The
default name for the file is shown in brackets. New event/error information
is always appended to the file if it already exists. To accept the default
file name, press enter. Otherwise enter the name you prefer.
[pki_events.log] =>
PKI CERTIFICATE INSTALLATION UTILITY 1.0.1
FUNCTIONS
1) Retrieve CSRs from switches & write a CSR file
2) Install Certificates contained in a Certificate file
3) Generate a Licensed-Product/Installed- Certificates report
4) Help using PKI-Cert to get & install certificates
q) Quit PKI Certificate installation utility
Enter choice> 1
Page 32

Adding Secure Fabric OS to the Fabric
32 Secure Fabric OS Version 1.0 User Guide
3. Type 1 to select CSR retrieval and press Enter.
The utility prompts for the method of specifying fabric addresses.
Example:
4. Specify the desired method for entering the fabric addresses:
■ To manually enter the fabric address:
a. Type 1 and press Enter.
The utility prompts for the IP address or switch name of a switch in the
fabric. Only one switch name or IP address is required for each fabric.
b. Type the IP address or switch name of one of the switches in the fabric
and press Enter.
You must insert at least one valid IP address to continue, and the
corresponding switch must be operating and available.
c. When you are done entering IP addresses, press Enter again to end the
list.
■ To read the fabric addresses from a file:
a. Type 2 and press Enter.
The utility prompts for the path and filename of the file. The addresses in
the file must be IP addresses or switch names, each on a separate line.
b. Type the path and filename of the file that contains the fabric addresses
and press Enter.
The utility prompts for the path and filename of the CSR file you want to
create.
PKI CERTIFICATE INSTALLATION UTILITY 1.0.1
Choose a method for providing fabric addresses
1) Manually enter fabric address
2) Read addresses from a file (name to be given)
q) Quit PKI Certificate installation utility
Enter choice> 1
Page 33

Adding Secure Fabric OS to the Fabric
33Secure Fabric OS Version 1.0 User Guide
Example:
5. Type the desired path and filename for the CSR file to be created, then enter
y if the address was entered correctly. If not, enter n and reenter the
address.
6. Enter y if you want to include licensed product data in the file. If not, enter
n.
7. Enter y if you want to retrieve CSRs from all switches in the fabric, even
those that already have digital certificates installed. Enter n if you only want
to retrieve CSRs from switches that do not already have a digital certificate.
Note: If you retrieve CSRs and request digital certificates for switches that already have
digital certificates, the same digital certificates will be provided again. This does not
cause a problem except for the time required to retrieve CSRs and load digital
certificates to a very large fabric.
The utility displays the success/failure of CSR retrieval.
Example:
PKI CERTIFICATE INSTALLATION UTILITY 1.0.1
GET CERTIFICATE SIGNING REQUESTS
Enter the Path/file-name of the CSR output file to create.
(Note: an extension of '.xml' will be appended to your name)
===>
PKI CERTIFICATE INSTALLATION UTILITY
Retrieving CSR's from 1 fabric(s)
1. Got a CSR for Switch: Name="U3_122", WWN="100000606980075c"
2. Got a CSR for Switch: Name="U3_123", WWN="100000606980075d"
Write CSRs to file:c:\security\nt_pki\CSRfile.xml
Success getting CSRs & writing them to a CSR file.
Page 34

Adding Secure Fabric OS to the Fabric
34 Secure Fabric OS Version 1.0 User Guide
8. Press Enter to return to the Functions screen.
Example:
9. Enter q if you want to quit the utility.
Obtaining the Digital Certificate File
HP provides the digital certificates in an XML file that is generated in response to
the CSRs. Generally, the digital certificate file is provided by e-mail within a few
minutes of request.
To obtain the digital certificate file, contact HP and provide the following
information:
■ The CSR file generated in the previous procedure
■ E-mail address
■ Technical contact
■ Phone
■ Country
HP provides a confirmation number and the digital certificate file, which contains
a certificate for each CSR submitted.
Save the digital certificate file on a secure workstation. The recommended
location is in the Secure Fabric OS directory, for example:
c:\security\nt_pki\<confirmation number>.xml. Making a
backup copy of the digital certificate file and storing it in a secure location is
recommended.
PKI CERTIFICATE INSTALLATION UTILITY 1.0.1
FUNCTIONS
1) Retrieve CSRs from switches & write a CSR file
2) Install Certificates contained in a Certificate file
3) Generate a Licensed-Product/Installed- Certificates report
4) Help using PKI-Cert to get & install certificates
q) Quit PKI Certificate installation utility
Enter choice>
Page 35

Adding Secure Fabric OS to the Fabric
35Secure Fabric OS Version 1.0 User Guide
Distributing Digital Certificates to the Switches
You can use the PKICERT utility to distribute the digital certificates to the
switches in the fabric. The utility ensures that each digital certificate is installed
on the correctly corresponding switch.
If the utility is run without any task argument, it defaults to Interactive User mode,
in which it prompts for the required input.
Note: If this procedure is interrupted by a switch reboot, the certificate is not loaded
and the procedure must be repeated.
To load digital certificates onto one or more switches:
1. Choose Start > Run and enter the installation location of the PKICERT
utility. The default location is c:\security\nt_pki\pkicert.exe.
The utility prompts for the events log file name.
Example:
2. Type a filename for the events log and press Enter. The file is automatically
created at the PKICert installation location.
The utility prompts for the function that you want to perform.
PKI CERTIFICATE INSTALLATION UTILITY 1.0.1
All events and errors will be recorded in an event/error log file. The
default name for the file is shown in brackets. New event/error information
is always appended to the file if it already exists. To accept the default
file name, press enter. Otherwise enter the name you prefer.
[pki_events.log] =>
Page 36

Adding Secure Fabric OS to the Fabric
36 Secure Fabric OS Version 1.0 User Guide
Example:
3. Type 2 to install the certificates and press Enter.
The utility prompts for the method of specifying fabric addresses.
Example:
4. Specify the desired method for entering the fabric addresses:
■ To manually enter the fabric address:
a. Type 1 and press Enter.
The utility prompts for the IP address or switch name of a switch in the
fabric.
b. Type the IP address or switch name of one of the switches in the fabric
and press Enter.
You must enter at least one valid IP address to continue, and the
corresponding switch must be operating and available. Only one switch
name or IP address is required for each fabric.
c. When you are done entering IP addresses, press Enter again to end the
list.
PKI CERTIFICATE INSTALLATION UTILITY 1.0.1
FUNCTIONS
1) Retrieve CSRs from switches & write a CSR file
2) Install Certificates contained in a Certificate file
3) Generate a Licensed-Product/Installed- Certificates report
4) Help using PKI-Cert to get & install certificates
q) Quit PKI Certificate installation utility
Enter choice> 2
PKI CERTIFICATE INSTALLATION UTILITY 1.0.1
Choose a method for providing fabric addresses
1) Manually enter fabric address
2) Read addresses from a file (name to be given)
q) Quit PKI Certificate installation utility
Enter choice> 1
Page 37

Adding Secure Fabric OS to the Fabric
37Secure Fabric OS Version 1.0 User Guide
■ To read the fabric addresses from a file:
a. Type 2 and press Enter.
The utility prompts for the path and filename of the file. The addresses in
the file must be IP addresses or switch names, each on a separate line.
b. Type the path and filename of the file that contains the fabric addresses
and press Enter.
The utility prompts for the path and filename of the digital certificate file
provided by HP.
Example:
5. Type the path and filename of the digital certificate file and press Enter.
6. If the returned path and filename is correct, enter y. If the information is
incorrect, type n, press Enter, and reenter the path and filename and verify it
is correct.
The new certificates are loaded onto the switches and the success or failure of
each certificate displays.
Example:
PKI CERTIFICATE INSTALLATION UTILITY 1.0.1
LOAD CERTIFICATES
Enter the Path/file-name of the Certificates input file.
===> c:\security\nt_pki\CSRfile.xml
PKI CERTIFICATE INSTALLATION UTILITY
Load Certificates onto 1 fabric(s)
1. Loaded Certificate on Switch primaryfcsswitch:
WWN-10:00:00:60:69:11:fc:52
2. Loaded Certificate on Switch backupfcsswitch:
WWN-10:00:00:60:69:11:fc:54
2 Certificates were loaded.
0 Certificate loads failed.
Press Enter to Continue.
Page 38

Adding Secure Fabric OS to the Fabric
38 Secure Fabric OS Version 1.0 User Guide
Note: Sectelnet can be used as soon as a digital certificate is installed on the switch.
7. Press Enter to return to the Functions screen.
Example:
8. Enter q to quit the utility.
Verifying Installation of the Digital Certificates
You can verify the installation of the digital certificates through the CLI.
To verify that digital certificates are installed on all the switches in the fabric:
1. Log into one of the switches in the fabric as Admin.
2. Display the PKI objects:
■ For Fabric OS v4.1.x, enter pkishow. If the switch is a Core Switch
2/64, enter this command on both logical switches.
■ For Fabric OS v2.6.1 and v3.1.x, enter configshow “pki”.
The command displays the status of the PKI objects.
Note: “Root Certificate” is an internal PKI object. “Certificate” is the digital certificate.
Example, displaying PKI objects on Fabric OS v4.1.x:
PKI CERTIFICATE INSTALLATION UTILITY 1.0.1
FUNCTIONS
1) Retrieve CSRs from switches & write a CSR file
2) Install Certificates contained in a Certificate file
3) Generate a Licensed-Product/Installed- Certificates report
4) Help using PKI-Cert to get & install certificates
q) Quit PKI Certificate installation utility
Enter choice>
Page 39

Adding Secure Fabric OS to the Fabric
39Secure Fabric OS Version 1.0 User Guide
Displaying PKI objects on Fabric OS v2.6.1 and v3.1.x:
3. Verify that Certificate shows Exist.
If the certificate shows as Empty, but the other objects show as Exist,
repeat the procedure provided in “Distributing Digital Certificates to the
Switches” on page 35.
If any of the other objects show as Empty, re-create them as described in
“Re-creating PKI Objects If Required” on page 39.
4. Repeat this procedure for the remaining switches in the fabric.
Re-creating PKI Objects If Required
The PKI objects (except for the digital certificate) are automatically generated the
first time Fabric OS v2.6.1, v3.1.x, or v4.1.x is booted. If any of the PKI objects
appears to be missing, the switch segments from the fabric. The PKI objects on
Fabric OS v2.6.1, v3.1.x, and v4.1.x can be regenerated by rebooting the switch.
In addition, the PKI objects on Fabric OS v4.1.x can be regenerated through the
CLI.
To use the CLI to re-create the PKI objects on Fabric OS v4.1.x:
Note: Secure Mode must be disabled to perform this procedure.
1. Log into the switch as Admin.
switch:admin> pkishow
Passphrase : Exist
Private Key : Exist
CSR : Exist
Certificate : Exist
Root Certificate: Exist
switch:admin>
switch:admin> configshow “pki”
Passphrase : Exist
Private Key : Exist
CSR : Exist
Certificate : Exist
Root Certificate: Exist
switch:admin>
Page 40

Adding Secure Fabric OS to the Fabric
40 Secure Fabric OS Version 1.0 User Guide
2. Enter the pkicreate command. If the switch is a Core Switch 2/64, enter
this command on both logical switches.
The pkicreate command does not work if Secure Mode is already
enabled.
3. Enter the pkishow command. If the switch is a Core Switch 2/64, enter
this command on both logical switches.
The command displays the status of the PKI objects.
Example, recreating PKI objects on Fabric OS v4.1.x:
4. Repeat for any other switches, as required.
5. If the switch was segmented from the fabric, log into the switch and enter the
switchdisable and switchenable commands.
switch:admin> pkicreate
Installing Private Key and Csr...
Switch key pair and CSR generated...
Installing Root Certificate...
switch:admin>
switch:admin> pkishow
Passphrase : Exist
Private Key : Exist
CSR : Exist
Certificate : Exist
Root Certificate: Exist
switch:admin>
Page 41

Adding Secure Fabric OS to the Fabric
41Secure Fabric OS Version 1.0 User Guide
Adding Secure Fabric OS to a Core Switch 2/64
This procedure applies to all Core Switch 2/64 switches, whether they are shipped
with Fabric OS v4.1.x or require upgrading to Fabric OS v4.1.x.
Note: If Secure Fabric OS is utilized on one of the logical switches in a Core Switch
2/64, it must be utilized on the other logical switch if they are in the same fabric, and is
strongly recommended if they are in separate fabrics.
Placing the logical switches in separate fabrics is not recommended.
To set up Secure Fabric OS on a Core Switch 2/64:
1. Open a telnet or SSH session to the IP address of either of the logical
switches.
Sectelnet can also be used if the switch was shipped with Fabric OS v4.1.x
(and therefore already has a digital certificate).
Note: Switches shipped with Fabric OS v4.1.x have separate login accounts for each
logical switch. Logical switch 0 has User0, Admin0, Factory0, Root0, and logical switch
2 has User1, Admin1, Factory1, Root1.
2. Enter the version command.
This shows the firmware version installed on the active control processor (CP)
card.
If the firmware is Fabric OS v4.0.0c or later, you can also enter the
firmwareshow command for more detailed information about which
firmware versions are installed on the partitions within both CP cards.
Page 42

Adding Secure Fabric OS to the Fabric
42 Secure Fabric OS Version 1.0 User Guide
Example:
3. If the firmware version is not Fabric OS v4.1.x or later, back up the
configuration and install Fabric OS v4.1.x on both CP cards. For instructions,
see “Upgrading to a Compatible Version of Fabric OS” on page 28.
4. Log into one logical switch and change the account passwords from the
default values, as described in “Customizing the Account Passwords” on
page 29, then log into the other logical switch and change the passwords from
the default values.
5. If the logical switches are in separate fabrics, synchronize the fabrics by
connecting them to a common external Network Time Protocol (NTP) server.
Note: For switches running Fabric OS v4.1.x, the server must support a full NTP client.
For switches running Fabric OS v2.6.1 or v3.1.x, the server can be SNTP or NTP. If the
fabric contains any switches running Fabric OS v4.1.x, the server must support a full
NTP client.
.
a. Open a telnet or SSH session to either of the logical switches.
b. Enter the following:
tsclockserver ipaddr
Where ipaddr is the IP address of the NTP server.
c. You can verify the IP address by reentering the command with no
operand, which displays the current setting.
switch:admin> version
Kernel: 2.4.2
Fabric OS: v4.0.2
Made on: Fri Feb 1 23:02:08 2002
Flash: Fri Feb 1 18:03:35 2002
BootProm: 4.1.13b
switch:admin>
switch:admin> firmwareshow
Local CP (Slot 5, CP0): Active
Primary partition: v4.0.2
Secondary Partition: v4.0.2
Remote CP (Slot 6, CP1): Standby
Primary partition: v4.0.2
Secondary Partition: v4.0.2
switch:admin>
Page 43

Adding Secure Fabric OS to the Fabric
43Secure Fabric OS Version 1.0 User Guide
d. Repeat for the other logical switch.
Example:
6. Using the procedure described in “Verifying or Activating the Secure Fabric
OS and Zoning Licenses” on page 25, ensure that both logical switches have:
■ An activated Secure Fabric OS license
■ An activated Zoning license
Note: Only one license key is required to enable the same feature on both logical
switches.
7. If the firmware was upgraded, perform the following steps:
a. Download and install the PKICERT utility on the computer workstation,
if not already installed, as described in “Installing the PKICERT Utility”
on page 30.
b. Use the PKICERT utility to create a file containing the CSRs of all the
switches in the fabric, as described in “Using the PKICERT Utility to
Obtain the CSR File” on page 31.
c. Obtain digital certificates from HP, as described in “Obtaining the Digital
Certificate File” on page 34.
d. Use the PKICERT utility to load the certificates onto both logical
switches, as described in “Distributing Digital Certificates to the
Switches” on page 35.
switch0:admin> tsclockserver "132.163.135.131"
switch:admin> tsclockserver
132.163.135.131
switch0:admin>
switch0:admin>login
login: admin
Password: xxxxxx
switch1:admin> tsclockserver "132.163.135.131"
switch1:admin> tsclockserver
132.163.135.131
switch1:admin>
Page 44

Adding Secure Fabric OS to the Fabric
44 Secure Fabric OS Version 1.0 User Guide
e. Verify that the digital certificates are installed on both logical switches, as
described in “Verifying Installation of the Digital Certificates” on
page 38. The pkishow command referenced in this procedure must be
executed from both logical switches. If necessary, see “Re-creating PKI
Objects If Required” on page 39.
Page 45

Adding Secure Fabric OS to the Fabric
45Secure Fabric OS Version 1.0 User Guide
Installing a Supported CLI Client on a Computer Workstation
Standard telnet sessions work only until Secure Mode is enabled. Once Secure
Mode is enabled, you can use the following telnet clients:
■ Sectelnet—A secure form of telnet that is supported for switches running
Fabric OS v2.6.1, v3.1.x, or v4.1.x. For instructions on installing the sectelnet
client, see “Installing a Supported CLI Client on a Computer Workstation” on
page 45.
■ SSH—A secure form of telnet that is supported only for switches running
Fabric OS v4.1.x. Fabric OS v4.1.x supports any SSH client that supports
version 2 of the protocol (for example, PuTTy or F-Secure). Refer to the HP
StorageWorks Fabric Operating System Procedures Version 3.1.x/4.1.x User
Guide for client installation instructions.
Sectelnet is provided on the HP website and is also available in the public domain.
It can be used as soon as a digital certificate is installed on the switch.
To install the sectelnet client on a Solaris workstation:
1. Obtain the Solaris version of the sectelnet file from HP and copy the file onto
the workstation computer.
2. Decompress the tar file and install it to a location that is known to the
computer, such as in the directory containing the standard telnet file. The
location must be defined in the path environmental variable.
Sectelnet is immediately available.
To install the sectelnet client on a PC workstation:
1. Obtain the PC version of the sectelnet file from HP and copy the file onto the
workstation computer.
2. Double-click the zipped file to decompress it.
3. Double-click the setup.exe file.
4. Install sectelnet.exe to a location that is known to the computer, such as in the
directory containing telnet.exe. The location must be defined in the path
environmental variable.
Sectelnet.exe is available as soon as Setup completes.
Page 46

Adding Secure Fabric OS to the Fabric
46 Secure Fabric OS Version 1.0 User Guide
Page 47

47Secure Fabric OS Version 1.0 User Guide
3
Creating Secure Fabric OS
Policies
You can use the Secure Fabric OS policies to customize access to the fabric. The
FCS policy is the only required policy; all other policies are optional.
Implementing Secure Fabric OS policies involves the following steps:
■ Determining which trusted switch you want to use to manage Secure
Fabric OS. This switch should be in a physically secure area.
■ Enabling Secure Mode in the fabric, and specifying the trusted switch and one
or more backup trusted switches. This automatically creates the FCS policy.
■ Determining which additional Secure Fabric OS policies you would like to
implement in the fabric, then creating and activating those policies. To ensure
the desired access, you must create an access policy for each management
channel that you intend to use.
■ Verifying that the Secure Fabric OS policies you have created are operating as
you intend. Testing a variety of scenarios to verify optimal policy settings is
recommended. For troubleshooting information, see “Troubleshooting” on
page 106.
This chapter provides the following information:
■ Default Fabric and Switch Accessibility, page 48
■ Enabling Secure Mode, page 49
■ Modifying the FCS Policy, page 54
■ Creating Secure Fabric OS Policies Other Than the FCS Policy, page 58
■ Managing Secure Fabric OS Policies, page 76
Page 48

Creating Secure Fabric OS Policies
48 Secure Fabric OS Version 1.0 User Guide
Default Fabric and Switch Accessibility
Following is the default fabric and switch access when Secure Mode is enabled
but no additional Secure Fabric OS policies are customized:
■ Switches:
— Only the designated switch can be used to make Secure Fabric OS
changes.
— Any switch can join the fabric.
— All switches in the fabric can be accessed through the serial port.
— All switches in the fabric that have front panels can be accessed through
the front panel.
■ Computer hosts and workstations:
— Any computer can access the fabric by SNMP.
— Any computer can access any switch in the fabric by CLI (such as by
sectelnet or SSH).
— Any computer can establish an HTTP connection to any switch in the
fabric.
— Any computer can establish an API connection to any switch in the fabric.
■ Devices:
— All devices can access the management server.
— Any device can connect to any Fibre Channel port in the fabric.
■ Zoning: Node WWNs can be used for WWN-based zoning.
Page 49

Creating Secure Fabric OS Policies
49Secure Fabric OS Version 1.0 User Guide
Enabling Secure Mode
Secure Mode is enabled and disabled on a fabric-wide basis. You can enable and
disable Secure Mode as often as desired; however, all Secure Fabric OS policies,
including the FCS policy, are deleted each time Secure Mode is disabled, and
must be re-created the next time it is enabled. You can back up the Secure Fabric
OS database using the configupload command. For more information about
this command, refer to the HP StorageWorks Fabric OS Version 3.1.x/4.1.x
Reference Guide.
You can enable Secure Mode using the secmodeenable command. This
command must be entered through a sectelnet, SSH, or serial connection to the
switch that you want to designate as the Primary FCS switch. The command fails
if any switch in the fabric is not capable of enforcing Secure Fabric OS policies. If
the Primary FCS switch fails to participate in the fabric, the Primary FCS role
moves to the next available switch listed in the FCS policy.
Note: If Secure Mode is enabled on one of the logical switches in a Core Switch 2/64,
it must be enabled on the other logical switch if they are in the same fabric, and is
strongly recommended if they are in separate fabrics.
Placing the logical switches on the same Core Switch 2/64 in separate fabrics is not
recommended.
Enabling Secure Mode accomplishes the following:
■ Creates the FCS policy. The secmodeenable command prompts for the
FCS policy members. No other Secure Fabric OS policies exist until you
create them, and no other Secure Fabric OS-related changes occur to the
fabric other than the implementation of the FCS policy.
■ Distributes the policy set (initially consisting only of the FCS policy) to all
switches in the fabric.
■ Requires specification of the passwords specific to Secure Mode.
■ Fastboots all switches to bring the fabric up in Secure Mode.
■ Once the fastboots are complete, Secure Mode enables you to create other
Secure Fabric OS policies.
Page 50

Creating Secure Fabric OS Policies
50 Secure Fabric OS Version 1.0 User Guide
The following restrictions apply when Secure Mode is enabled:
■ Standard telnet cannot be used after Secure Mode is enabled. However,
sectelnet can be used as soon as a digital certificate is installed on the switch.
SSH can be used at any time.
■ A number of commands can be entered only from the FCS switches. See
“Command Restrictions in Secure Mode” on page 117 for a list of these
commands.
■ If downloading a configuration:
— Download the configuration to the Primary FCS switch. A configuration
downloaded to a Backup FCS switch or Non-FCS switch is overwritten
by the next fabric-wide update from the Primary FCS switch.
— The active FCS policy in the configdownload file must be identical to the
active FCS policy already implemented in the fabric. The active FCS
policy cannot be modified by downloading a configuration with different
information.
— The defined FCS policy in the configdownload file must have at least one
switch in common with the fabric’s defined FCS policy.
— If the configuration file is modified in a text editor, maintain both a
Defined and an Active Security Policy Set (do not delete either).
For information about displaying the existing Secure Fabric OS policies, see
“Managing Secure Fabric OS Policies” on page 76.
To enable Secure Mode in the fabric:
Note: Enabling Secure Mode fastboots all the switches in the fabric.
1. Ensure that all switches in the fabric have the following items:
■ Fabric OS v2.6.1, v3.1.x, or v4.1.x
■ An activated Secure Fabric OS license
■ An activated Zoning license
■ Digital certificate
2. Ensure that any zoning configuration downloads have completed on all
switches in the fabric.
Page 51

Creating Secure Fabric OS Policies
51Secure Fabric OS Version 1.0 User Guide
3. Open a sectelnet or SSH connection to the switch that you intend to be the
Primary FCS switch.
The login prompt displays.
Note: Most Secure Fabric OS commands must be executed on the Primary FCS switch.
You can enter the secmodeenable command through a sectelnet or SSH connection
only.
4. Log into the switch as Admin.
5. Terminate any other sectelnet or SSH sessions in the fabric (when using the
secmodeenable command, no other sessions should be active).
6. Enter the secmodeenable command with no operands to use the
command’s interactive mode, or enter the following:
secmodeenable “fcsmember;...;fcsmember”
Where fcsmember is the Domain ID, WWN, or switch name of the
Primary and Backup FCS switches, with the Primary FCS switch listed first.
The command confirms the current login, requests the new passwords
required for Secure Mode, creates and activates the FCS policy, distributes the
information to all switches in the fabric, activates the local zoning
configurations, then fastboots all the switches in the fabric.
7. Enter the following passwords at the prompts, using unique passwords that are
different from the default values and contain between 8 and 40 alphanumeric
characters:
■ Root password for the FCS switch
■ Factory password for the FCS switch
■ Admin password for the FCS switch
■ User password for the fabric
■ Admin password for the Non-FCS switches
Note: The Root and Factory accounts are disabled on the Non-FCS switches.
All passwords are saved. The new FCS list and passwords are distributed to all
switches in the fabric.
Page 52

Creating Secure Fabric OS Policies
52 Secure Fabric OS Version 1.0 User Guide
Note: Record the passwords and store in a secure place. Recovering passwords may
require significant effort and result in fabric downtime.
For a sample CLI session, see the example provided on the following page.
The example enables Secure Mode and specifies three FCS switches, one each
by Domain ID, WWN, and switch name, on Fabric OS v3.1.x (v4.1.x may
differ slightly), using the command’s interactive mode.
primaryfcs:admin> secmodeenable
This is an interactive session to create a FCS list.
Current FCS list is empty
Enter WWN, Domain, or switch name (Leave blank when done): 2
Switch WWN is 10:00:00:60:69:11:fc:54
Current FCS list:
10:00:00:60:69:11:fc:54
Enter WWN, Domain, or switch name (Leave blank when done):
10:00:00:60:69:11:fc:55
Switch WWN is 10:00:00:60:69:11:fc:55
Current FCS list:
10:00:00:60:69:11:fc:54
10:00:00:60:69:11:fc:55
Enter WWN, Domain, or switch name (Leave blank when done): Switch 24
Switch WWN is 10:00:00:60:69:11:fc:56
Current FCS list:
10:00:00:60:69:11:fc:54
10:00:00:60:69:11:fc:55
10:00:00:60:69:11:fc:56
Enter WWN, Domain, or switch name (Leave blank when done):
Are you done? (yes, y, no, n): [no] y
Is the FCS correct? (yes, y, no, n): [no] y
New FCS switch root password:
Re-enter new password:
New FCS switch factory password:
Re-enter new password:
New FCS switch admin password:
Re-enter new password:
New FCS switch user password:
Re-enter new password:
New Non FCS switch admin password:
Re-enter new password:
Saving passwd...done.
Page 53

Creating Secure Fabric OS Policies
53Secure Fabric OS Version 1.0 User Guide
Saving Defined FMPS ...
done
Saving Active FMPS ...
done
Committing configuration...done.
Secure mode is enabled.
Saving passwd...done.
Rebooting...
primaryfcs:admin>
Page 54

Creating Secure Fabric OS Policies
54 Secure Fabric OS Version 1.0 User Guide
Modifying the FCS Policy
Only one FCS policy can exist, and it cannot be empty or deleted if Secure Mode
is enabled. The FCS policy is named FCS_POLICY.
Changes made to the FCS policy are saved to permanent memory only after the
changes have been saved or activated, and can be aborted if desired (see
“Managing Secure Fabric OS Policies” on page 76).
You can modify the FCS policy through the following methods:
■ Using the secpolicyfcsmove command to change the position of a
switch in the list, as described in “Changing the Position of a Switch Within
the FCS Policy” on page 55.
■ Using the secfcsfailover command to fail over the Primary FCS
switch to the next switch in the list, as described in “Failing over the Primary
FCS Switch” on page 56.
■ Using the secpolicyadd command to add members, as described in
“Adding a Member to an Existing Policy” on page 78.
■ Using the secpolicyremove command to remove members, as
described in “Removing a Member from a Policy” on page 79.
The possible FCS policy states are shown in Ta ble 2.
Table 2: FCS Policy States
Policy State Characteristics
No policy, or policy with
no entries
Not possible if Secure Mode is enabled.
Policy with one entry A Primary FCS switch is designated but no Backup FCS switches. If the
Primary FCS switch becomes unavailable for any reason, the fabric is
left without an FCS switch.
Policy with multiple entries A Primary FCS switch and one or more Backup FCS switches are
designated. If the Primary FCS switch becomes unavailable for any
reason, the next switch in the list becomes the Primary FCS switch.
Page 55

Creating Secure Fabric OS Policies
55Secure Fabric OS Version 1.0 User Guide
Changing the Position of a Switch Within the FCS Policy
You can change the order in which switches are listed in the FCS policy using the
secpolicyfcsmove command. The list order determines which Backup FCS
switch becomes the Primary FCS switch if the current Primary FCS switch fails.
To modify the order of FCS switches:
1. From a sectelnet or SSH session, log into the Primary FCS switch as Admin.
2. Enter the following:
secpolicyshow “Defined”, FCS_POLICY
This displays the WWNs of the current Primary FCS and Backup FCS
switches.
3. Enter the following:
secpolicyfcsmove From, To
Where:
■ From is the position number of the FCS switch that you want to move.
■ To is the position to which you want to move the FCS switch.
Note: You can also activate the command’s interactive mode by entering it with no
operands.
Page 56

Creating Secure Fabric OS Policies
56 Secure Fabric OS Version 1.0 User Guide
Example, moving a Backup FCS switch from position 2 to position 3 in the
FCS list using interactive mode:
4. Enter the secpolicyactivate command.
Failing over the Primary FCS Switch
The secfcsfailover command is used to fail over the Primary FCS role to
the Backup FCS switch from which you enter the command. This can be used to
recover from events such as a lost Ethernet connection to the Primary FCS switch.
In addition to failing over the Primary FCS role, this command moves the new
Primary FCS switch to the top of the list in the FCS policy.
Note: Disabling a switch or removing it from the fabric does not change the order of
the FCS policy.
During FCS failover, all transactions in process on the current Primary FCS are
aborted.
primaryfcs:admin> secpolicyfcsmove
Pos Primary WWN DId swName.
=================================================
1 Yes 10:00:00:60:69:10:02:18 1 switch5.
2 No 10:00:00:60:69:00:00:5a 2 switch60.
3 No 10:00:00:60:69:00:00:13 3 switch73.
Please enter position you’d like to move from : (1..3) [1] 2
Please enter position you’d like to move to : (1..3) [1] 3
____________________________________________________
DEFINED POLICY SET
FCS_POLICY
Pos Primary WWN DId swName.
__________________________________________________
1 Yes 10:00:00:60:69:10:02:18 1 switch5.
2 No 10:00:00:60:69:00:00:13 3 switch73.
3 No 10:00:00:60:69:00:00:5a 2 switch60.
____________________________________________________
primaryfcs:admin>
Page 57

Creating Secure Fabric OS Policies
57Secure Fabric OS Version 1.0 User Guide
To fail over the Primary FCS switch:
1. From a sectelnet or SSH session, log in as Admin to the Backup FCS switch
that you want to designate as the new Primary FCS switch.
2. Enter the secfcsfailover command.
The Backup FCS switch becomes the new Primary FCS switch, and the FCS
policy is modified so that the new and previous Primary FCS switches have
exchanged places.
For a sample CLI session, see the example provided on the following page.
Entering secfcsfailover from the Backup FCS switch “fcsswitchc”,
then secpolicyshow:
Entering secpolicyshow from the current Primary FCS switch,
“fcsswitcha”:
fcsswitchc:admin> secFCSfailover
This switch is about to become the Primary FCS switch.
All transactions of the current Primary FCS switch will be aborted.
ARE YOU SURE (yes, y, no, n): [no] y
WARNING!!!
The FCS policy of Active and Defined Policy sets have been changed.
Review them before you issue secPolicyActivate again.
fcsswitchc:admin>
fcsswitchc:admin> secPolicyshow "active","FCS_POLICY"
____________________________________________________
ACTIVE POLICY SET
FCS_POLICY
Pos Primary WWN DId swName
__________________________________________________
1 Yes 10:00:00:00:00:00:33:3c 3 fcsswitchc
2 No 10:00:00:00:00:00:11:1c 1 fcsswitcha
3 No 10:00:00:00:00:00:22:2c 2 fcsswitchb
fcsswitchc:admin>
fcsswitcha:admin> secPolicyshow "active","FCS_POLICY"
____________________________________________________
ACTIVE POLICY SET
FCS_POLICY
Pos Primary WWN DId swName.
__________________________________________________
1 Yes 10:00:00:00:00:00:11:1c 1 fcsswitcha
2 No 10:00:00:00:00:00:22:2c 2 fcsswitchb
3 No 10:00:00:00:00:00:33:3c 3 fcsswitchc
fcsswitcha:admin> logout
Page 58

Creating Secure Fabric OS Policies
58 Secure Fabric OS Version 1.0 User Guide
Creating Secure Fabric OS Policies Other Than the FCS Policy
The FCS policy is automatically created when Secure Mode is enabled. You can
create the other Secure Fabric OS policies after Secure Mode is enabled. The
member list of each policy determines the devices or switches to which the policy
applies.
If a policy does not exist, then no Secure Fabric OS controls are in effect for that
aspect of the fabric. If a policy exists but has no members, that functionality is
disabled for all switches in the fabric. Once you add the first member to a policy,
that functionality becomes disabled for all switches except the listed members.
Note: Save policy changes frequently; changes are lost if the switch is rebooted before
the changes are saved.
Each supported policy is identified by a specific name, and only one policy of
each type can exist except for DCC policies. The policy names are case sensitive
and must be entered in all upper case. You can create multiple DCC policies using
the naming convention DCC_POLICY_nnn, with nnn representing a unique
string.
Note: It is strongly recommended that you upload and save a copy of the Secure
Fabric OS database after creating the desired Secure Fabric OS policies. The
configupload command can be used to upload a copy of the configuration file,
which contains all the Secure Fabric OS information. For more information about this
command, refer to the
HP StorageWorks Fabric OS Version 3.1.x/4.1.x Reference
Guide
.
Policy members can be specified by device port WWN, switch WWN, Domain
IDs, or switch WWN, depending on the policy. The valid methods for specifying
policy members are listed in Tabl e 3.
Page 59

Creating Secure Fabric OS Policies
59Secure Fabric OS Version 1.0 User Guide
Note: If IP addresses are used, you can use “0” in an octet to indicate that any number
can be matched for that octet. For example, 192.168.11.0 would allow access for all IP
devices in the network 192.168.11.
If Domain IDs or switch names are used, the corresponding switches must be in the
fabric for the command to succeed.
Creating a MAC Policy
You can create MAC policies to restrict the following management access to the
fabric:
■ Access by hosts using SNMP, telnet/sectelnet/SSH, HTTP, or API
■ Access by device ports using Management Server
■ Access through switch serial ports and front panels
Table 3: Valid Methods for Specifying Policy Members
Policy Name
IP
Address
Device
Port
WWN
Switch
WWN
Domain
IDs
Switch
Names
FCS_POLICY No No Yes Yes Yes
MAC Policies No No No No No
RSNMP_POLICY YesNoNoNoNo
WSNMP_POLICY YesNoNoNoNo
TELNET_POLICY YesNoNoNoNo
HTTP_POLICY YesNoNoNoNo
API_POLICY YesNoNoNoNo
MS_POLICY NoYesNoNoNo
SERIAL_POLICY No No Yes Yes Yes
FRONTPANEL_POLICY No No Yes Yes Yes
OPTIONS_POLICY For information about valid input, see “Creating an
Options Policy” on page 70.
DCC_POLICY_nnn No Yes Yes Yes Yes
SCC_POLICY No No Yes Yes Yes
Page 60

Creating Secure Fabric OS Policies
60 Secure Fabric OS Version 1.0 User Guide
Note: Providing fabric access to proxy servers is strongly discouraged. When a proxy
server is included in a MAC policy for IP-based management, such as the
HTTP_POLICY, all IP packets leaving the proxy server appear to originate from the
proxy server. This could result in allowing any hosts that have access to the proxy server
to access the fabric.
By default, all access is allowed; no MAC policies exist until they are created by
the administrator.
Creating an SNMP Policy
You can create read and write SNMP policies to specify which SNMP hosts are
allowed read and write access to the fabric. The SNMP hosts must be identified by
IP address.
■ RSNMP_POLICY (read access)
Only the specified SNMP hosts can perform read operations on the fabric.
■ WSNMP_POLICY (write access)
Only the specified SNMP hosts can perform write operations to the fabric.
Any host granted write permission by the WSNMP policy is automatically granted
read permission by the RSNMP policy.
Note: Once an SNMP policy is created, it must contain all members of the FCS policy,
to ensure consistent read/write access to the Primary FCS switch.
Table 4 lists the expected read and write behaviors resulting from combinations of
the RSNMP and WSNMP policies.
Table 4: Read and Write Behaviors of SNMP Policies
RSNMP Policy
WSNMP
Policy
Read Result Write Result
Non-existent Non-existent Any host can read Any host can write
Non-existent Empty Any host can read No host can write
Non-existent Host B in policy Any host can read Only B can write
Page 61

Creating Secure Fabric OS Policies
61Secure Fabric OS Version 1.0 User Guide
To create an SNMP or WSNMP policy:
1. From a sectelnet or SSH session, log into the Primary FCS switch as Admin.
2. Enter the following:
secpolicycreate policy_name, “member;...;member”
Where:
■ policy_name is WSNMP_POLICY or RSNMP_POLICY.
■ member is one or more IP addresses in dot-decimal notation. You can
enter “0” in an octet to indicate that any number can be matched in that
octet.
3. To save or activate the new policy, enter the secpolicysave or the
secpolicyactivate command.
If neither of these commands are entered, the changes are lost when you log
out. For more information about these commands, see “Saving Changes to
Secure Fabric OS Policies” on page 77 and “Activating Changes to Secure
Fabric OS Policies” on page 77.
Empty Non-existent This combination is not supported. If the WSNMP policy is not
defined the next time the Secure Fabric OS policies are saved
or activated, the RSNMP policy fails.
Empty Empty No host can read No host can write
Empty Host B in policy Only B can read Only B can write
Host A in policy Non-existent This combination is not supported. If the WSNMP policy is not
defined the next time the Secure Fabric OS policies are saved
or activated, the RSNMP policy fails.
Host A in policy Empty Only A can read No host can write
Host A in policy Host B in policy A and B can read Only B can write
Table 4: Read and Write Behaviors of SNMP Policies (Continued)
RSNMP Policy
WSNMP
Policy
Read Result Write Result
Page 62

Creating Secure Fabric OS Policies
62 Secure Fabric OS Version 1.0 User Guide
Example:
Creating a WSNMP and an RSNMP policy to allow only IP addresses that
match 192.168.5.0 read and write access to the fabric:
Telnet Policy
You can create the Telnet policy to specify the workstations that can use sectelnet
or SSH to connect to the fabric. The policy is named TELNET _POLICY and
contains a list of the IP addresses for the trusted workstations (workstations that
are in a physically secure area).
Note: Static host IP addresses are required to implement this policy effectively.
Do not
use DHCP for hosts that are in the TELNET_POLICY, because as soon as the IP
addresses change, the hosts will no longer be able to access the fabric.
Restricting output (such as placing a session on “hold” by use of a command or
keyboard shortcut) is not recommended.
This policy pertains to sectelnet, which can be utilized as soon as a digital
certificate is installed on the switch, and SSH. It does not pertain to telnet access
because telnet is not available in Secure Mode.
Note: An empty TELNET_POLICY blocks all telnet access. To prevent this, keep one or
more members in the Telnet policy. If you require an empty Telnet policy, leave a
meaningful entry in the API, HTTP, or SERIAL policies to provide some form of access
to the switch.
If you want to restrict CLI access over the network to SSH, disable telnet as described
under “Telnet” on page 15.
The possible telnet policy states are shown in Table 5.
primaryfcs:admin> secPolicyCreate "WSNMP_POLICY", "192.168.5.0"
WSNMP_POLICY has been created.
primaryfcs:admin>
primaryfcs:admin> secPolicyCreate "RSNMP_POLICY", "192.168.5.0"
RSNMP_POLICY has been created.
primaryfcs:admin>
Page 63

Creating Secure Fabric OS Policies
63Secure Fabric OS Version 1.0 User Guide
To create a telnet policy:
1. From a sectelnet or SSH session, log into the Primary FCS switch as Admin.
2. Enter the following:
secpolicycreate policy_name, “member;...;member”
Where:
■ policy_name is TELNET_POLICY.
■ member is one or more IP addresses in dot-decimal notation. You can
enter “0” in an octet to indicate that any number can be matched in that
octet.
3. To save or activate the new policy, enter the secpolicysave or the
secpolicyactivate command.
If neither of these commands are entered, the changes are lost when you log
out. For more information about these commands, see “Saving Changes to
Secure Fabric OS Policies” on page 77 and “Activating Changes to Secure
Fabric OS Policies” on page 77.
Example, creating a telnet policy to allow anyone on a network
“192.168.5.0/24” to access the fabric through a sectelnet or SSH session:
Table 5: Telnet Policy States
Policy State Description
No policy Any host can connect by sectelnet or SSH to the fabric.
Policy with no entries No host can connect by sectelnet or SSH to the fabric.
Policy with entries Only specified hosts can connect by sectelnet or SSH to the
fabric.
primaryfcs:admin> secPolicyCreate "TELNET_POLICY", "192.168.5.0"
TELNET_POLICY has been created.
primaryfcs:admin>
Page 64

Creating Secure Fabric OS Policies
64 Secure Fabric OS Version 1.0 User Guide
HTTP Policy
You can create the HTTP policy to specify which workstations can use HTTP to
access the fabric. This is useful for applications that use internet browsers, such as
Web Tools.
The policy is named HTTP_POLICY and contains a list of IP addresses for
devices and workstations that are allowed to establish HTTP connections to the
switches in the fabric.
The possible HTTP policy states are shown in Tabl e 6.
To create an HTTP policy:
1. From a sectelnet or SSH session, log into the Primary FCS switch as Admin.
2. Enter the following:
secpolicycreate policy_name, “member;...;member”
Where:
■ policy_name is HTTP_POLICY.
■ member is one or more IP addresses in dot-decimal notation. You can
enter “0” in an octet to indicate that any number can be matched in that
octet.
3. To save or activate the new policy, enter the secpolicysave or the
secpolicyactivate command.
If neither of these commands are entered, the changes are lost when you log
out. For more information about these commands, see “Saving Changes to
Secure Fabric OS Policies” on page 77 and “Activating Changes to Secure
Fabric OS Policies” on page 77.
Table 6: HTTP Policy States
Policy State Characteristics
No policy All hosts can establish an HTTP connection to any switch in
the fabric.
Policy with no entries No host can establish an HTTP connection to any switch in
the fabric.
Policy with entries Only specified hosts can establish an HTTP connection to
any switch in the fabric.
Page 65

Creating Secure Fabric OS Policies
65Secure Fabric OS Version 1.0 User Guide
Example, creating an HTTP policy to allow anyone on a network
“192.168.5.0/24” to establish an HTTP connection to any switch in the fabric:
API Policy
The API policy can be used to specify which workstations can use API to access
the fabric and to limit write access to the Primary FCS.
The policy is named API_POLICY and contains a list of the IP addresses that are
allowed to establish an API connection to switches in the fabric.
The possible API policy states are shown in Table 7 .
To create an API policy:
1. From a sectelnet or SSH session, log into the Primary FCS switch as Admin.
2. Enter the following:
secpolicycreate policy_name, “member;...;member”
Where:
■ policy_name is API_POLICY.
■ member is one or more IP addresses in dot-decimal notation. You can
enter “0” in an octet to indicate that any number can be matched in that
octet.
primaryfcs:admin> secPolicyCreate "HTTP_POLICY", "192.168.5.0"
HTTP_POLICY has been created.
primaryfcs:admin>
Table 7: API Policy States
Policy State Characteristics
No policy All workstations can establish an API connection to any
switch in the fabric.
Policy with no entries No host can establish an API connection to any switch in the
fabric.
Policy with entries Only specified hosts can establish an API connection to any
switch in the fabric, and write operations can only be
performed on the Primary FCS switch.
Page 66

Creating Secure Fabric OS Policies
66 Secure Fabric OS Version 1.0 User Guide
3. To save or activate the new policy, enter the secpolicysave or the
secpolicyactivate command.
If neither of these commands are entered, the changes are lost when you log
out. For more information about these commands, see “Saving Changes to
Secure Fabric OS Policies” on page 77 and “Activating Changes to Secure
Fabric OS Policies” on page 77.
Example, creating an API policy to allow anyone on a network
“192.168.5.0/24” to establish an API connection to any switch in the fabric:
Management Server Policy
You can create the Management Server policy to restrict management server
access to specified devices. Fabric configuration and control functions can be
performed only by requesters that are directly connected to the Primary FCS
switch.
The policy is named MS_POLICY and contains a list of device port WWNs for
which the management server implementation in Fabric OS (designed according
to FC-GS-3 standard) accepts and acts on requests.
The possible Management Server policy states are shown in Table 8 .
To create a Management Server policy:
1. From a sectelnet or SSH session, log into the Primary FCS switch as Admin.
2. Enter the following:
secpolicycreate policy_name, “member;...;member”
Where:
■ policy_name is MS_POLICY.
■ member is a device WWN.
primaryfcs:admin> secPolicyCreate "API_POLICY", "192.168.5.0"
API_POLICY has been created.
primaryfcs:admin>
Table 8: Management Server Policy States
Policy State Characteristics
No policy All devices can access the management server.
Policy with no entries No devices can access the management server.
Policy with entries Specified devices can access the management server.
Page 67

Creating Secure Fabric OS Policies
67Secure Fabric OS Version 1.0 User Guide
3. To save or activate the new policy, enter the secpolicysave or the
secpolicyactivate command.
If neither of these commands are entered, the changes are lost when you log
out. For more information about these commands, see “Saving Changes to
Secure Fabric OS Policies” on page 77 and “Activating Changes to Secure
Fabric OS Policies” on page 77.
Example, creating an MS_POLICY that allows access through a device that
has a WWN of 12:24:45:10:0a:67:00:40:
Serial Port Policy
You can create the Serial Port policy to restrict serial port access to switches that
are physically secure. The policy is named SERIAL_POLICY and contains a list
of switch WWNs, Domain IDs, or switch names for which serial port access is
enabled.
The Serial Port policy is checked before the account login is allowed. If the Serial
Port policy exists and the switch is not included in the policy, the session is
terminated.
The possible Serial Port policy states are shown in Tabl e 9.
primaryfcs:admin> secPolicyCreate "MS_POLICY", "12:24:45:10:0a:67:00:40"
MS_POLICY has been created.
primaryfcs:admin>
Table 9: Serial Port Policy States
Policy State Characteristics
No policy All serial ports of the switches in the fabric are enabled.
Policy with no entries All serial ports of the switches in the fabric are disabled.
Policy with entries Only specified switches can be accessed through the serial
ports.
Page 68

Creating Secure Fabric OS Policies
68 Secure Fabric OS Version 1.0 User Guide
To create a Serial Port policy:
1. From a sectelnet or SSH session, log into the Primary FCS switch as Admin.
2. Enter the following:
secpolicycreate policy_name, “member;...;member”
Where:
■ policy_name is SERIAL_POLICY.
■ member is a switch WWN, domain ID, or switch name. If a domain ID
or switch name is used to specify a switch, the associated switch must be
present in the fabric for the command to succeed.
3. To save or activate the new policy, enter the secpolicysave or the
secpolicyactivate command.
If neither of these commands are entered, the changes are lost when you log
out. For more information about these commands, see “Saving Changes to
Secure Fabric OS Policies” on page 77 and “Activating Changes to Secure
Fabric OS Policies” on page 77.
Example, creating a SERIAL_POLICY that allows serial port access to a
switch that has a WWN of 12:24:45:10:0a:67:00:40:
Front Panel Policy
You can create the Front Panel policy to restrict front panel access to switches that
are physically secure. This policy applies only to SAN Switch 2/16, since no other
switches contain front panels. The policy is named FRONTPANEL_POLICY and
contains a list of switch WWNs, Domain IDs, or switch names for which front
panel access is enabled.
The possible Front Panel policy states are shown in Table 1 0.
primaryfcs:admin> secPolicyCreate "SERIAL_POLICY",
"12:24:45:10:0a:67:00:40"
SERIAL_POLICY has been created.
primaryfcs:admin>
Page 69

Creating Secure Fabric OS Policies
69Secure Fabric OS Version 1.0 User Guide
To create a Front Panel policy:
1. From a sectelnet or SSH session, log into the Primary FCS switch as Admin.
2. Enter the following:
secpolicycreate “policy_name”, “member;...;member”
Where:
■ policy_name is FRONTPANEL_POLICY.
■ member is a switch WWN, domain ID, or switch name. If a domain ID
or switch name is used to specify a switch, the associated switch must be
present in the fabric for the command to succeed.
3. To save or activate the new policy, enter the secpolicysave or the
secpolicyactivate command.
If neither of these commands are entered, the changes are lost when you log
out. For more information about these commands, see Saving Changes to
Secure Fabric OS Policies” on page 77 and Activating Changes to Secure
Fabric OS Policies” on page 77.
Example, creating a Front Panel policy to allow only domains 3 and 4 to use
the front panel:
Table 10: Front Panel Policy States
Policy State Characteristics
No policy All the switches in the fabric have front panel access
enabled.
Policy with no entries All the switches in the fabric have front panel access
disabled.
Policy with entries Only specified switches in the fabric have front panel access
enabled.
primaryfcs:admin> secPolicyCreate "FRONTPANEL_POLICY", "3; 4"
FRONTPANEL_POLICY has been created.
primaryfcs:admin>
Page 70

Creating Secure Fabric OS Policies
70 Secure Fabric OS Version 1.0 User Guide
Creating an Options Policy
You can create an Options policy to specify whether Node WWNs can be used to
add members to zones. The use of node WWNs can introduce ambiguity because
the node WWN may also be used for one of the device ports, as may be true with
a host bus adapter (HBA).
This policy is named OPTIONS_POLICY and has only one valid value,
“NoNodeWWNZoning”. Adding this value to the policy prevents use of Node
WWNs for WWN-based zoning. If the policy does not exist or is empty, node
WWNs can be used for WWN-based zoning. You can create only one Options
policy. This policy cannot be used to control use of port WWNs for zoning.
By default, use of Node WWNs is allowed; the Options policy does not exist until
it is created by the administrator.
The possible Options policy states are shown in Tabl e 11.
To create an Options policy:
1. Log into the Primary FCS switch as Admin from a sectelnet or SSH session.
2. Enter the following:
secpolicycreate OPTIONS_POLICY, “NoNodeWWNZoning”
3. To save or activate the new policy, enter the secpolicysave or the
secpolicyactivate command.
If neither of these commands are entered, the changes are lost when you log
out. For more information about these commands, see “Saving Changes to
Secure Fabric OS Policies” on page 77 and “Activating Changes to Secure
Fabric OS Policies” on page 77.
4. If you want the change to affect current transactions, disable then re-enable
the switch by entering the switchdisable and switchenable
commands. This stops any current traffic between devices that are zoned
using node names.
Table 11: Options Policy States
Policy State Characteristics
No policy Node WWNs can be used for WWN-based zoning.
Policy with no entries Node WWNs can be used for WWN-based zoning.
Policy with entries Node WWNs cannot be used for WWN-based zoning.
Page 71

Creating Secure Fabric OS Policies
71Secure Fabric OS Version 1.0 User Guide
Example:
Creating a DCC Policy
You can create DCC policies to manage which device ports are allowed to connect
to which switch ports. The devices can be initiators, targets, or intermediate
devices such as SCSI routers and loop hubs.
The same device port can be bound to one or more switch ports, and the same
device and switch ports may be listed in multiple DCC policies. If a device port is
specified in a DCC policy, that port is allowed access to the fabric only if it is
connected to one of the designated switch ports. Similarly, if a switch port is
specified in a DCC policy, it permits connections only from the specified devices.
Device ports that are not specified in a DCC policy are allowed to connect only to
switch ports that are not specified in a DCC policy.
You can create multiple DCC policies, using the naming convention
DCC_POLICY_nnn, where nnn represents a unique string. One DCC policy per
switch or group of switches is recommended instead of a separate DCC policy for
each port. This saves memory and improves performance.
You can specify device ports by device WWN and switch ports by either switch
WWN, Domain ID, or switch name followed by the port or area number. For
example:
■ deviceWWN;switchWWN(port or area number)
■ deviceWWN;domainID(port or area number)
■ deviceWWN;switchname(port or area number)
By default, all device ports are allowed to connect to all switch ports; no DCC
policies exist until they are created by the administrator.
The possible DCC policy states are shown in Tab le 1 2.
primaryfcs:admin> secPolicyCreate “OPTIONS_POLICY”, “NoNodeWWNZoning”
OPTIONS_POLICY has been created.
primaryfcs:admin>
Page 72

Creating Secure Fabric OS Policies
72 Secure Fabric OS Version 1.0 User Guide
Note: When a DCC violation occurs, the related port is automatically disabled and
must be re-enabled using the portenable command.
To create a DCC policy:
1. From a sectelnet or SSH session, log into the Primary FCS switch as Admin.
2. Enter the following:
secpolicycreate DCC_POLICY_nnn, “member;...;member”
Where:
■ DCC_POLICY_nnn is the name of the DCC policy you want to create,
and nnn is a string consisting of up to 19 alphanumeric or underscore
characters to differentiate it from any other DCC policies.
■ member contains device and switch port information; deviceWWN;
switch(port).
— The “switch” can be the switch WWN, Domain ID, or switch name.
— The port can be specified by port or area number. Designating ports
automatically includes the devices currently attached to those ports.
The ports can be specified using any of the following syntax methods:
(1-6) Selects ports 1 through 6.
(*) Selects all ports on the switch.
Table 12: DCC Policy States
Policy State Characteristics
No policy Any device can connect to any switch port in the fabric.
Policy with no entries Any device can connect to any switch port in the fabric. An
empty policy is the same as no policy.
Policy with entries If a device WWN is specified in a DCC policy, that device is
only allowed access to the fabric if connected to a switch
port listed in the same policy.
If a switch port is specified in a DCC policy, it permits
connections only from devices that are listed in the policy.
WWNs that are not specified in a DCC policy are allowed
to connect to the fabric at any switch ports that are not
specified in a DCC policy.
Switch ports and WWNs may exist in multiple DCC policies.
Page 73

Creating Secure Fabric OS Policies
73Secure Fabric OS Version 1.0 User Guide
[*] Selects all ports and all devices attached to those ports.
[3, 9] Selects ports 3 and 9 and all devices attached to those ports.
[1-3, 9] Selects ports 1, 2, 3, 9, and all devices attached to those ports.
3. To save or activate the new policy, enter the secpolicysave or the
secpolicyactivate command.
If neither of these commands are entered, the changes are lost when you log
out. For more information about these commands, see “Saving Changes to
Secure Fabric OS Policies” on page 77 and “Activating Changes to Secure
Fabric OS Policies” on page 77.
Example, creating a DCC policy “DCC_POLICY_server” that includes
device “11:22:33:44:55:66:77:aa” and port 1 and port 3 of switch domain 1:
Creating a DCC policy “DCC_POLICY_storage” that includes device WWN
“22:33:44:55:66:77:11:bb,” all ports of switch domain 2, and all currently
connected devices of switch domain 2:
Creating a DCC policy “DCC_POLICY_abc” that includes device
“33:44:55:66:77:11:22:cc” and ports 1-6 and port 9 of switch domain 3:
Creating a DCC policy “DCC_POLICY_example” that includes devices
44:55:66:77:22:33:44:dd and 33:44:55:66:77:11:22:cc, ports 1-4 of switch
domain 4, and all devices currently connected to ports 1-4 of switch domain 4:
primaryfcs:admin> secPolicyCreate “DCC_POLICY_server”,
“11:22:33:44:55:66:77:aa;1(1,3)”
primaryfcs:admin>
primaryfcs:admin> secPolicyCreate “DCC_POLICY_storage”,
“22:33:44:55:66:77:11:bb;2[*]”
primaryfcs:admin>
primaryfcs:admin> secPolicyCreate “DCC_POLICY_abc”,
“33:44:55:66:77:11:22:cc;3(1-6,9)”
primaryfcs:admin>
primaryfcs:admin> secPolicyCreate “DCC_POLICY_example”,
“44:55:66:77:22:33:44:dd;33:44:55:66:77:11:22:cc;4[1-4]”
primaryfcs:admin>
Page 74

Creating Secure Fabric OS Policies
74 Secure Fabric OS Version 1.0 User Guide
Creating an SCC Policy
You can create an SCC policy to manage which switches can join the fabric.
Switches are checked against the policy each time:
■ Secure Mode is enabled.
■ The fabric is initialized with Secure Mode enabled.
■ An E_Port to E_Port connection is made.
The policy is named SCC_POLICY, and can accept members listed as WWNs,
Domain IDs, or switch names. You can only create one SCC policy.
By default, any switch is allowed to join the fabric; the SCC policy does not exist
until it is created by the administrator.
Note: Once an SCC policy is created, it must list all the switches in the fabric to prevent
switches from being segmented from the fabric.
In particular, ensure that the SCC policy lists all the members of the FCS policy, to
ensure consistent access to the Primary FCS switch.
The possible SCC policy states are shown in Table 1 3.
To create an SCC policy:
1. Log into the Primary FCS switch as Admin from a sectelnet or SSH session.
2. Enter the following:
secpolicycreate SCC_POLICY, “member;...;member”
Where member indicates a switch that you want to be able to join the fabric.
Switches can be specified by WWN, Domain ID, or switch name. You can
enter an asterisk (*) to indicate all switches in the fabric.
Table 13: SCC Policy States
Policy State Characteristics
No policy All switches can be in the fabric.
Policy with no entries The SCC policy cannot be empty. The policy must contain all
the FCS switches.
Policy with entries The SCC policy must contain all the FCS switches but it can
also contain additional switches.
Page 75

Creating Secure Fabric OS Policies
75Secure Fabric OS Version 1.0 User Guide
3. To save or activate the new policy, enter the secpolicysave or the
secpolicyactivate command.
If neither of these commands are entered, the changes are lost when you log
out. For more information about these commands, see “Saving Changes to
Secure Fabric OS Policies” on page 77 and “Activating Changes to Secure
Fabric OS Policies” on page 77.
Example, creating an SCC policy that allows switches that have Domain IDs 2
and 4 to join the fabric:
primaryfcs:admin> secPolicyCreate "SCC_POLICY", “2;4”
primaryfcs:admin>
Page 76

Creating Secure Fabric OS Policies
76 Secure Fabric OS Version 1.0 User Guide
Managing Secure Fabric OS Policies
All Secure Fabric OS transactions can be performed through the Primary FCS
switch only, except for sectransabort, secfcsfailover,
secstatsreset, and secstatsshow.
You can create multiple sessions to the Primary FCS switch, from one or more
hosts. However, the software allows only one Secure Fabric OS transaction at a
time. If a second Secure Fabric OS transaction is started, it fails. The only
secondary transaction that can succeed is the sectransabort command.
All policy modifications are saved only in volatile memory until you save or
activate the changes.
You can perform the following functions on existing Secure Fabric OS policies:
■ Saving Changes to Secure Fabric OS Policies, page 77
Save changes to flash memory without actually implementing the changes
within the fabric. This saved but inactive information is known as the Defined
Security Policy Set.
■ Activating Changes to Secure Fabric OS Policies, page 77
Simultaneously save and implement all the policy changes you have made
since the last time you activated changes. The activated policies are known as
the Active Security Policy Set.
■ Adding a Member to an Existing Policy, page 78
Add one or more members to a policy. Once the policy has at least one
member, that aspect of the fabric becomes closed to access by all
devices/switches that are not listed in that policy.
■ Removing a Member from a Policy, page 79
Remove one or more members from a policy. If you remove all the members
from a policy, that aspect of the fabric becomes closed to all access.
You cannot remove the last member from the FCS_POLICY, because a
Primary FCS switch must be designated.
■ Deleting a Policy, page 80
Delete an entire policy. However, keep in mind that doing so opens up that
aspect of the fabric to all access.
■ Aborting All Uncommitted Changes, page 80
Abort all the changes to the Secure Fabric OS policies since the last time
changes were saved or activated.
Page 77

Creating Secure Fabric OS Policies
77Secure Fabric OS Version 1.0 User Guide
■ Aborting a Secure Fabric OS Transaction, page 81
From any switch in the fabric, abort a Secure Fabric OS-related transaction
that has become frozen (such as due to a failed host) and is preventing other
Secure Fabric OS transactions.
Saving Changes to Secure Fabric OS Policies
You can save changes to Secure Fabric OS policies without activating them by
entering the secpolicysave command. This saves the changes to the
Defined Policy Set.
Note: Until the secpolicysave or secpolicyactivate command is issued,
all policy changes are in volatile memory only, and are lost if the switch reboots or the
current session is logged out.
To save changes to the Secure Fabric OS policies without activating the changes:
1. From a sectelnet or SSH session, log into the Primary FCS switch as Admin.
2. Enter the secpolicysave command.
Example:
Activating Changes to Secure Fabric OS Policies
In order to implement any changes to the Secure Fabric OS policies, you must
enter the secpolicyactivate command. This saves the changes to the
Active Policy Set and activates all policy changes since the last time the command
was issued. You cannot activate an individual policy; all changes to the entire
policy set are activated by the command.
Note: Until a secpolicysave or secpolicyactivate command is issued,
all policy changes are in volatile memory only, and are lost upon rebooting.
primaryfcs:admin> secPolicySave
Committing configuration...done.
Saving Define FMPS ...
done
primaryfcs:admin>
Page 78

Creating Secure Fabric OS Policies
78 Secure Fabric OS Version 1.0 User Guide
To activate changes to the Secure Fabric OS policies:
1. From a sectelnet or SSH session, log into the Primary FCS switch as Admin.
2. Enter the secpolicyactivate command.
Example:
Adding a Member to an Existing Policy
Once you add the first member to a policy, the policy is closed to access by all
unlisted switches. You can add members using the secpolicyadd command.
To add a member to an existing Secure Fabric OS policy:
1. From a sectelnet or SSH session, log into the Primary FCS switch as Admin.
2. Enter the following:
secpolicyadd policy_name, “member;...;member”
Where:
■ policy_name is the name of the Secure Fabric OS policy to which you
want to add members.
■ member is the item that you want to add to the policy, identified by
device or switch IP address, switch Domain ID, device or switch WWN,
or switch name.
3. If you want to implement the change immediately, enter the secpolicyactivate
command.
Example, adding a member to the MS_POLICY using the device WWN:
primaryfcs:admin> secPolicyActivate
About to overwrite the current Active data.
ARE YOU SURE (yes, y, no, n): [no] y
Committing configuration...done.
Saving Defined FMPS ...
done
Saving Active FMPS ...
done
primaryfcs:admin>
primaryfcs:admin> secPolicyAdd "MS_POLICY", "12:24:45:10:0a:67:00:40"
Member(s) have been added to MS_POLICY.
primaryfcs:admin>
Page 79

Creating Secure Fabric OS Policies
79Secure Fabric OS Version 1.0 User Guide
Adding an SNMP manager to WSNMP_POLICY:
Adding 2 devices to the DCC policy, to attach Domain 3’s ports 1 and 3
(WWNs of devices are 11:22:33:44:55:66:77:aa and
11:22:33:44:55:66:77:bb):
Removing a Member from a Policy
If you remove all the members from a policy, that policy becomes closed to all
access. You cannot remove the last member from the FCS_POLICY, because a
Primary FCS switch must be designated.
To remove a member from a Secure Fabric OS policy:
1. From a sectelnet or SSH session, log into the Primary FCS switch as Admin.
2. Enter the following:
secpolicyremove policy_name, “member;...;member”
Where:
■ policy_name is the name of the Secure Fabric OS policy.
■ member is the device or switch that you want to remove from the policy,
and identified by IP address, switch Domain ID, device or switch WWN,
or switch name.
3. If you want to implement the change immediately, enter the
secpolicyactivate command.
Example, removing a member that has a WWN of 12:24:45:10:0a:67:00:40
from MS policy:
primaryfcs:admin> secPolicyAdd "WSNMP_POLICY", "192.168.5.21"
Member(s) have been added to WSNMP_POLICY.
primaryfcs:admin>
primaryfcs:admin> secPolicyAdd "DCC_POLICY_abc",
"11:22:33:44:55:66:77:aa;11:22:33:44:55:66:77:bb;3(1,3)"
primaryfcs:admin>
primaryfcs:admin> secPolicyRemove "MS_POLICY","12:24:45:10:0a:67:00:40"
Member(s) have been removed from MS_POLICY.
primaryfcs:admin>
Page 80

Creating Secure Fabric OS Policies
80 Secure Fabric OS Version 1.0 User Guide
Deleting a Policy
If you delete a Secure Fabric OS policy, that aspect of the fabric becomes open to
all access.
To delete a Secure Fabric OS policy:
1. From a sectelnet or SSH session, log into the Primary FCS switch as Admin.
2. Enter the following:
secpolicydelete policy_name
Where policy_name is the name of the Secure Fabric OS policy.
3. If you want to implement the change immediately, enter the
secpolicyactivate command.
Note: You cannot delete the FCS_POLICY.
Example:
Aborting All Uncommitted Changes
You can use the secpolicyabort command to abort all Secure Fabric OS
policy changes that have not yet been saved. This function can be performed only
from the Primary FCS switch.
To abort all unsaved changes:
1. From a sectelnet or SSH session, log into the Primary FCS switch as Admin.
2. Enter the secpolicyabort command.
All changes since the last time the secpolicysave or
secpolicyactivate commands were entered are aborted.
primaryfcs:admin> secPolicyDelete "MS_POLICY"
About to delete policy MS_POLICY.
Are you sure (yes, y, no, n):[no] y
MS_POLICY has been deleted.
primaryfcs:admin>
Page 81

Creating Secure Fabric OS Policies
81Secure Fabric OS Version 1.0 User Guide
Example:
Aborting a Secure Fabric OS Transaction
You can use the sectransabort command to abort a single Secure Fabric
OS transaction. This makes it possible to abort a transaction that has become
frozen due to a failed host (if a switch goes down, the transaction aborts by
default). This command cannot be used to abort an active transaction.
You can perform this function from any switch in the fabric.
To abort a Secure Fabric OS transaction:
1. From a sectelnet or SSH session, log into the Primary FCS switch as Admin.
2. Enter the sectransabort command.
Any Secure Fabric OS transaction that was in process is aborted (except for
the transaction of entering this command).
Example:
primaryfcs:admin> secPolicyAbort
Unsaved data has been aborted.
primaryfcs:admin>
primaryfcs:admin> secTransAbort
Transaction has been aborted.
primaryfcs:admin>
Page 82

Creating Secure Fabric OS Policies
82 Secure Fabric OS Version 1.0 User Guide
Page 83

83Secure Fabric OS Version 1.0 User Guide
4
Managing Secure Fabric OS
Secure Fabric OS v2.6.1, v3.1.x, and v4.1.x can be managed through Fabric
Manager and sectelnet. In addition, SSH is supported for Fabric OS v4.1.x. When
Secure Mode is enabled, all Secure Fabric OS administrative operations, all
Zoning commands, and some Management Server commands must be executed
on the Primary FCS switch. For a list of the commands and related restrictions,
see “Secure Fabric OS Commands and Secure Mode Restrictions” on page 113.
This chapter provides the following information:
■ Viewing Secure Fabric OS-Related Information, page 84
■ Displaying and Resetting Secure Fabric OS Statistics, page 90
■ Managing Passwords, page 94
■ Resetting the Version Number and Time Stamp, page 100
■ Adding Switches and Merging Secure Fabrics, page 101
■ Troubleshooting, page 106
■ Frequently Asked Questions, page 108
Page 84

Managing Secure Fabric OS
84 Secure Fabric OS Version 1.0 User Guide
Viewing Secure Fabric OS-Related Information
You can view the following Secure Fabric OS-related information in relation to a
fabric:
■ General Secure Fabric OS-related information about a fabric
■ The Secure Fabric OS policy sets (Active and Defined)
■ Information about one or more Secure Fabric OS policies
For information about viewing the Secure Fabric OS statistics, see “Displaying
and Resetting Secure Fabric OS Statistics” on page 90.
Displaying General Secure Fabric OS Information About a Fabric
You can use the secfabricshow command to display general Secure Fabric
OS-related information about a fabric.
To display general Secure Fabric OS-related information:
1. Open a sectelnet or SSH session to the Primary FCS switch and log in as
Admin.
2. Enter the secfabricshow command.
The command displays the switches in the fabric and their status (ready, error,
busy).
Example:
primaryfcs:admin> secfabricshow
Role WWN DId Status Enet IP Addr Name
=========================================================
non-FCS 10:00:00:60:69:10:03:23 1 Ready 192.168.100.148 "nonfcs"
Backup 10:00:00:60:69:00:12:53 2 Ready 192.168.100.147 "backup"
Primary 10:00:00:60:69:22:32:83 3 Ready 192.168.100.135 "primaryfcs"
___________________________________________
Secured switches in the fabric: 3
primaryfcs:admin>
Page 85

Managing Secure Fabric OS
85Secure Fabric OS Version 1.0 User Guide
Viewing the Secure Fabric OS Policy Database
You can use the secpolicydump command to display the Secure Fabric OS
policy database, which consists of the Active and Defined Security Policy Sets.
This command displays information without page breaks.
To view the Secure Fabric OS policy database:
1. From a sectelnet or SSH session, log into the Primary FCS switch as Admin.
2. Enter the following:
secpolicydump listtype, policy_name
Where:
■ listtype is the type of Secure Fabric OS policy set, and can be
“Active”, “Defined”, or an asterisk (*), which displays both versions of
the policy. If a list type is not entered, both versions of the Secure Fabric
OS policy display.
■ policy_name is the name of the Secure Fabric OS policy. If you do
not specify a policy name, the command displays all the policies in the
specified policy set.
If you do not specify any operands, the command displays all policies in both
the Active and Defined Policy Sets.
Page 86

Managing Secure Fabric OS
86 Secure Fabric OS Version 1.0 User Guide
Example, displaying all policies in both Active and Defined Policy Sets.
Displaying Individual Secure Fabric OS Policies
You can use the secpolicyshow command to view information about one or
more specified Secure Fabric OS policies. This command displays information
with page breaks.
primaryfcs:admin> secPolicyDump
____________________________________________________
DEFINED POLICY SET
FCS_POLICY
Pos Primary WWN DId swName
__________________________________________________
1 Yes 10:00:00:60:69:30:15:5c 1 primaryfcs
HTTP_POLICY
IpAddr
__________________________________________________
192.555.52.0
____________________________________________________
____________________________________________________
ACTIVE POLICY SET
FCS_POLICY
Pos Primary WWN DId swName
__________________________________________________
1 Yes 10:00:00:60:69:30:15:5c 1 primaryfcs
HTTP_POLICY
IpAddr
__________________________________________________
192.555.52.0
192.555.53.1
192.555.54.2
192.555.55.3
____________________________________________________
primaryfcs:admin>
Page 87

Managing Secure Fabric OS
87Secure Fabric OS Version 1.0 User Guide
To display information about a specific Secure Fabric OS policy:
1. From a sectelnet or SSH session, log into the Primary FCS switch as Admin.
2. Enter the following:
secpolicyshow listtype, policy_name
Where:
■ listtype is the type of Secure Fabric OS policy set, and can be
“Active”, “Defined”, or an asterisk (*), which displays both versions of
the specified policy.
■ policy_name is the name of the Secure Fabric OS policy. If you do
not specify a policy name, the command displays all the policies in the
specified policy set.
If you do not specify any operands, the command displays all policies in both
the Active and Defined Policy Sets.
Example, showing all the policies in the Defined Security Policy Set.
Showing the active version of the FCS policy.
primaryfcs:admin> secpolicyshow "defined"
____________________________________________________
DEFINED POLICY SET
FCS_POLICY
Pos Primary WWN DId swName
__________________________________________________
1 Yes 10:00:00:60:69:30:15:5c 1 primaryfcs
HTTP_POLICY
IpAddr
__________________________________________________
192.155.52.0
192.155.53.1
192.155.54.2
192.155.55.3
192.155.56.4
____________________________________________________
primaryfcs:admin>
Page 88

Managing Secure Fabric OS
88 Secure Fabric OS Version 1.0 User Guide
Displaying Status of Secure Mode
You can use the secmodeshow command to determine whether Secure Mode
is enabled.
To determine whether Secure Mode is enabled:
1. From a sectelnet or SSH session, to the Primary FCS switch and log in as
Admin.
2. Enter the secmodeshow command.
The command displays the status of Secure Mode, the version number and
time stamp, and the list of switches in the FCS policy.
Example:
Table 1 4 identifies the information that displays if Secure Mode is enabled.
primaryfcs:admin> secPolicyshow "active","FCS_POLICY"
____________________________________________________
ACTIVE POLICY SET
FCS_POLICY
Pos Primary WWN DId swName
__________________________________________________
1 Yes 10:00:00:60:69:30:15:5c 1 primaryfcs
____________________________________________________
primaryfcs:admin>
primaryfcs:admin> secmodeshow
Secure Mode: ENABLED.
Version Stamp: 10354, Thu Oct 4 10:23:32 2001.
Pos Primary WWN DId swName
=================================================
1 Yes 10:00:00:60:69:11:fc:53 2 primaryfcs.
2 No 10:00:00:60:69:11:fc:55 1 backupswitch.
primaryfcs:admin>
Table 14: Secure Mode Information
Column Heading Indicates
Pos Position of switch in FCS list
Primary “Yes” if switch is Primary FCS, “no” if not.
Page 89

Managing Secure Fabric OS
89Secure Fabric OS Version 1.0 User Guide
WWN WWN of each FCS switch
DId Domain ID of each FCS switch
swName Switch name of each FCS switch
Table 14: Secure Mode Information
Column Heading Indicates
Page 90

Managing Secure Fabric OS
90 Secure Fabric OS Version 1.0 User Guide
Displaying and Resetting Secure Fabric OS Statistics
You can view a number of statistics regarding attempted violations of the Secure
Fabric OS policies. Attempted policy violations include events such as the
following:
■ A DCC policy exists that defines which devices are authorized to access
which switch (port) combinations, and a device that is not listed in the policy
tries to access one of the defined switch (port) combinations.
■ An attempt is made to log into an account with an incorrect password.
The statistics for all DCC policies are added together.
Note: Rebooting the switch resets all the statistics.
You can also monitor Secure Fabric OS statistics through Fabric Watch.
Each statistic indicates the number of times the monitored event has occurred
since the statistics were last reset (secstatsreset command). For the Telnet
policy, this includes all the automated login attempts made by the sectelnet or SSH
client software, in addition to the actual attempts made by the user.
The names of the Secure Fabric OS statistics and their definitions are provided in
Table 1 5.
Table 15: Secure Fabric OS Statistics
Statistic Definition
TELNET_POLICY The number of attempted violations to the Telnet policy
HTTP_POLICY The number of attempted violations to the HTTP policy.
API_POLICY The number of attempted violations to the API policy.
RSNMP_POLICY The number of attempted violations to the RSNMP policy.
WSNMP_POLICY The number of attempted violations to the WSNMP policy.
MS_POLICY The number of attempted violations to the MS policy.
SERIAL_POLICY The number of attempted violations to the Serial policy.
FRONTPANEL_POLICY The number of attempted violations to the Front Panel policy.
SCC_POLICY The number of attempted violations to the SCC policy.
DCC_POLICY The number of attempted violations to the DCC policy.
LOGIN The number of invalid logins attempts.
Page 91

Managing Secure Fabric OS
91Secure Fabric OS Version 1.0 User Guide
Displaying Secure Fabric OS Statistics
You can use the secstatsshow command to display statistics for one or all
Secure Fabric OS policies, depending on the operand entered. This command can
be issued on any switch.
INVALID_TS
(invalid timestamps)
A received packet has a timestamp that differs from the time of the
receiving switch by more than the maximum allowed difference.
INVALID_SIGN
(invalid signatures)
A received packet has a bad signature.
INVALID_CERT
(invalid certificates)
A received certificate is not properly signed by the root CA of the
receiving switch.
SLAP FAIL
(SLAP
1
failures)
A port fails to SLAP with another switch. Reasons could be bad
certificates, a bad signature, the other side not doing SLAP, or SLAP
packets are received out of sequence.
SLAP_BAD_PKT
(SLAP* bad packets)
SLAP packets are received with a bad transaction ID.
TS_OUT_SYNC
(TS out of synchronization)
The time server is out of synchronization with the Primary FCS switch.
NO_FCS
(no fabric configuration
server)
The number of times the switch lost contact with all the switches in its
FCS list.
INCOMP_DB (incompatible
Secure Fabric OS database)
Secure Fabric OS databases are incompatible; may be due to
different version numbers, time stamps, FCS policies, or Secure Mode
status.
ILLEGAL_CMD
(illegal command)
The number of times a command is issued on a switch where it is not
allowed (such as entering secmodedisable on a Non-FCS
switch).
1. SLAP (Switch Link Authentication Protocol) is the switch-to-switch authentication process.
Table 15: Secure Fabric OS Statistics (Continued)
Statistic Definition
Page 92

Managing Secure Fabric OS
92 Secure Fabric OS Version 1.0 User Guide
To display Secure Fabric OS statistics:
1. Log into any switch as Admin from a sectelnet or SSH session.
2. Enter the following:
secstatsshow name, list
Where:
■ name is the name of a Secure Fabric OS statistic or the policy that relates
to the statistic. The valid statistic names are listed in Tab le 1 5. You can
enter an asterisk (*) to indicate all statistics.
■ list is a list of the Domain IDs for which to display the statistics. You
can enter an asterisk (*) to indicate all switches in the fabric. The default
value is that of the local switch.
If neither operand is specified, all statistics for all policies are displayed.
The statistic and number of related attempted policy violations are displayed.
Example, displaying Secure Fabric OS statistics for the Management Server
policy:
Resetting Secure Fabric OS Statistics
You can use the secstatsreset command to reset statistics for a particular
policy or all policies to zero. This command can be issued on any switch.
Recording and resetting the statistics allows you to identify changes in traffic
patterns since the statistics were last reset.
To reset a statistic counter to zero:
1. Log into any switch as Admin from a sectelnet or SSH session.
2. If desired, enter the secstatsshow command and record the current
statistics.
primaryfcs:admin> secstatsshow "MS_POLICY"
Name Value
====================
MS 20
primaryfcs:admin>
Page 93

Managing Secure Fabric OS
93Secure Fabric OS Version 1.0 User Guide
3. Reset the statistics by entering the following:
secstatsreset name, list
Where:
■ name is the name of the statistic or the policy that relates to the statistic.
The valid statistic names are listed in Tab le 1 5. You can enter an asterisk
(*) to indicate all Secure Fabric OS statistics.
■ list is a list of the Domain IDs for which to reset the statistics. You can
enter an asterisk (*) to indicate all switches in the fabric. The default
value is that of the local switch.
If neither operand is specified, all statistics for all Secure Fabric OS
policies are reset to zero.
The specified statistics are reset to zero.
Example, resetting all statistics on a local switch to zero:
Resetting the DCC_POLICY statistics on domains 1 and 69:
primaryfcs:admin> secstatsreset
About to reset all security counters.
Are you sure (yes, y, no, n):[no] y
Security statistics reset to zero.
primaryfcs:admin>
primaryfcs:admin> secstatsreset "DCC_POLICY", "1;69"
Reset DCC_POLICY statistic.
primaryfcs:admin>
Page 94

Managing Secure Fabric OS
94 Secure Fabric OS Version 1.0 User Guide
Managing Passwords
When Secure Mode is enabled, the following conditions apply:
■ The passwd command can be entered only on the Primary FCS switch.
■ The Root and Factory accounts can be accessed only from the FCS switches
(attempting to use them from a Non-FCS switch generates an error message).
■ The Admin account remains available from all switches, but two passwords
are implemented—one for all FCS switches and one for all Non-FCS
switches.
■ You can create and remove temporary passwords for specific switches,
allowing you to provide temporary access to another user.
The User account remains available fabric-wide regardless of whether Secure
Mode is enabled. The characteristics of the different accounts when Secure Mode
is enabled and disabled are described in Table 1 6.
If a digital certificate is installed, the sectelnet, API, and HTTP passwords are
automatically encrypted, regardless of whether Secure Mode is enabled.
Note: Record and store the passwords in a secure place; recovering passwords may
require significant effort and result in fabric downtime.
For information about recovering lost passwords, refer to the
HP StorageWorks Fabric
Operating System Procedures Version 3.1.x/4.1.x User Guide
.
This section provides the following information:
■ Modifying Passwords in Secure Mode, page 96
— Modifying the FCS Switch Passwords or the Fabric-wide User Password,
page 96
— Modifying the Non-FCS Switch Admin Password, page 97
■ Using Temporary Passwords, page 97
— Creating a Temporary Password for a Switch, page 98
— Removing a Temporary Password from a Switch, page 99
Page 95

Managing Secure Fabric OS
95Secure Fabric OS Version 1.0 User Guide
Table 16: Login Account Behavior with Secure Mode Disabled and Enabled
Login Account Secure Mode Disabled Secure Mode Enabled
User
Recommended for all
non-administrative options.
Can use to modify User
password.
Available on all switches.
Password is specific to each
switch; can modify using
passwd command.
Available on all switches. Can
create temporary passwords.
Password is fabric wide; can
modify using passwd command
on the Primary FCS switch.
Admin
Recommended for all
administrative options.
Can use to modify Admin
and User passwords.
Available on all switches.
Password is specific to each
switch; can modify using
passwd command.
Available on all switches. Can
create temporary passwords.
Two passwords:
One for all FCS switches; can
modify using passwd command
on the Primary FCS switch.
One for all Non-FCS switches; can
modify using
secnonfcspasswd command
on the Primary FCS switch.
Factory
Created for switch
initialization purposes; not
recommended for
administrative operations.
Can use to modify Factory,
Admin, and User
passwords.
Available on all switches.
Password is specific to each
switch; can modify using
passwd command.
Available on FCS switches only.
However, can temporarily enable
Root and Factory accounts on
Non-FCS switches by creating a
temporary password.
Password is common to all FCS
switches; can modify using
passwd command on the Primary
FCS switch.
Root
Created for debugging
purposes; not
recommended for
administrative operations.
Can use to modify Root,
Factory, Admin, and User
passwords.
Available on all switches.
Password is specific to each
switch; can modify using
passwd command.
Available on FCS switches only.
However, can temporarily enable
Root and Factory accounts on
Non-FCS switches by creating a
temporary password.
Password is common to all FCS
switches; can modify using
passwd command on the Primary
FCS switch.
Page 96

Managing Secure Fabric OS
96 Secure Fabric OS Version 1.0 User Guide
Modifying Passwords in Secure Mode
The passwd command can be used to modify the fabric-wide User password
and the passwords for the FCS switches. The secnonfcspasswd can be used
to modify the Admin password for Non-FCS switches.
Modifying the FCS Switch Passwords or the Fabric-wide User Password
You can use the passwd command to modify the passwords for the following
accounts when Secure Mode is enabled:
■ The fabric-wide User account
■ The Admin, Root, and Factory accounts on the FCS switches
To modify the passwords:
1. From a sectelnet or SSH session, log into the Primary FCS switch as Admin,
Root, or Factory, depending on which password you want to modify (use the
account for which you want to modify a password or a higher level account).
2. Enter the passwd command.
3. Enter the new passwords at the prompts. The passwords can be anywhere
from 8 to 40 alphanumeric characters in length.
The passwords are distributed to all switches in the fabric and saved in the
Secure Fabric OS database. Any existing telnet connections to the switches
are terminated and must be re-initiated if access is required.
Example:
primaryfcs:admin> passwd
For username - admin
Old password:
New password:
Re-enter new password:
For username - user
New password:
Re-enter new passwd:
primaryfcs:admin>
Page 97

Managing Secure Fabric OS
97Secure Fabric OS Version 1.0 User Guide
Modifying the Non-FCS Switch Admin Password
You can modify the password for the Admin account on Non-FCS switches using
the secnonfcspasswd command. Secure Mode must be enabled to use this
command.
To modify the Admin password for Non-FCS switches:
1. From a sectelnet or SSH session, log into the Primary FCS switch as Admin.
2. Enter the secnonfcspasswd command.
3. Enter the new Non-FCS Admin password at the prompt. The password can be
anywhere from 8 to 40 alphanumeric characters in length.
This password becomes the Admin password for all Non-FCS switches in the
fabric.
4. Re-enter the new Non-FCS Admin password at the prompt.
The password is distributed to all switches in the fabric and saved in the
Secure Fabric OS database. Any existing Admin-level telnet connections to
these Non-FCS switches are terminated.
Example:
Using Temporary Passwords
You can create and remove a temporary password to grant temporary access to a
specific switch and login account without compromising the confidentiality of the
regular passwords. The regular passwords also remains in effect. Temporary
passwords are automatically lost after a switch reboot.
primaryfcs:admin> secnonfcspasswd
Non FCS switch password:
Re-enter new password:
Committing configuration...done.
primaryfcs:admin>
Page 98

Managing Secure Fabric OS
98 Secure Fabric OS Version 1.0 User Guide
Creating a Temporary Password for a Switch
You can create a temporary password using the sectemppasswdset
command. You must specify a login account and a switch Domain ID.
To create a temporary Admin password on a Non-FCS switch:
1. From a sectelnet or SSH session, log into the Primary FCS switch as Admin.
2. Enter the following:
sectemppasswdset domain, login_name
Where:
■ domain is the Domain ID of the switch for which you want to set a
temporary password.
■ login_name is the login account for which you want to set the
temporary password.
3. Enter the Admin password at the prompt.
4. Enter an alphanumeric password between 8 and 40 characters in length.
5. Re-enter the password exactly as entered the first time.
Example, creating a temporary password for the Admin account on a switch
that has a Domain ID of 2:
primaryfcs:admin> sectemppasswdset 2, ”admin”
Set remote switch admin password: swimming
Re-enter remote switch admin password: swimming
Committing configuration........done
Password successfully set for domain 2 for admin.
primaryfcs:admin>
Page 99

Managing Secure Fabric OS
99Secure Fabric OS Version 1.0 User Guide
Removing a Temporary Password from a Switch
You can use the sectemppasswdreset command to remove the temporary
password. The regular password remains in effect.
To remove the temporary password from a switch:
1. From a sectelnet or SSH session, log into the Primary FCS switch as Admin.
2. Enter the following:
sectemppasswdreset domain, login_name
Where:
■ domain is the Domain ID of the switch for which you want to remove
the temporary password.
■ login_name is the login account to which the temporary password
applies.
You can enter the command with no parameters to reset all temporary
passwords in the fabric.
Example, removing a temporary password for the Admin account from a
switch that has a Domain ID of 2.
switch:admin> sectemppasswdreset 2, “admin”
Committing configuration.....done
Password successfully reset on domain 2 for admin
switch:admin>
Page 100

Managing Secure Fabric OS
100 Secure Fabric OS Version 1.0 User Guide
Resetting the Version Number and Time Stamp
When a change is made to any information in the Secure Fabric OS database
(zoning, policies, passwords, or SNMP), the current time stamp and a version
number are attached to the Secure Fabric OS database.
This information is used to determine which database is preserved when two or
more fabrics are merged. The database of the fabric with the oldest time stamp is
kept. When merging fabrics, ensure that the time stamp of the database you want
to preserve is non-zero, then set the time stamp of all other fabrics to zero. To
ensure that the time stamp of a fabric is non-zero, modify a policy and enter the
secpolicysave or secpolicyactivate command.
To display the version number and time stamp of a fabric:
1. From a sectelnet or SSH session, log into the Primary FCS switch as Admin.
2. Enter the secstatsshow command.
To reset the time stamp of a fabric to zero:
1. From a sectelnet or SSH session, log into the Primary FCS switch as Admin.
2. Enter the secversionreset command.
If the fabric contains no FCS switch, you can enter the secversionreset
command on any switch.
 Loading...