

Page 1
1
2
4
5
1
2
4
3
5
1
3
HP
StorageWorks
6000 Virtual
Library System
Disk Array
Installation
Rack requirements:
HP supports the HP System E racks and the
HP 10000 Series racks for use with the virtual
library system (VLS). Other racks might also be
suitable, but have not been tested with the VLS.
Caution: Make sure that the rack and all
equipment mounted in the rack has a
reliable ground connection. Verify that the
total current of the rack components does
not exceed the current rating of the power
distribution unit or outlet receptacles.
Caution: Parts can be damaged by
electrostatic discharge. Keep parts in their
containers until needed. Ensure that you
are properly grounded when touching
static sensitive components.
1
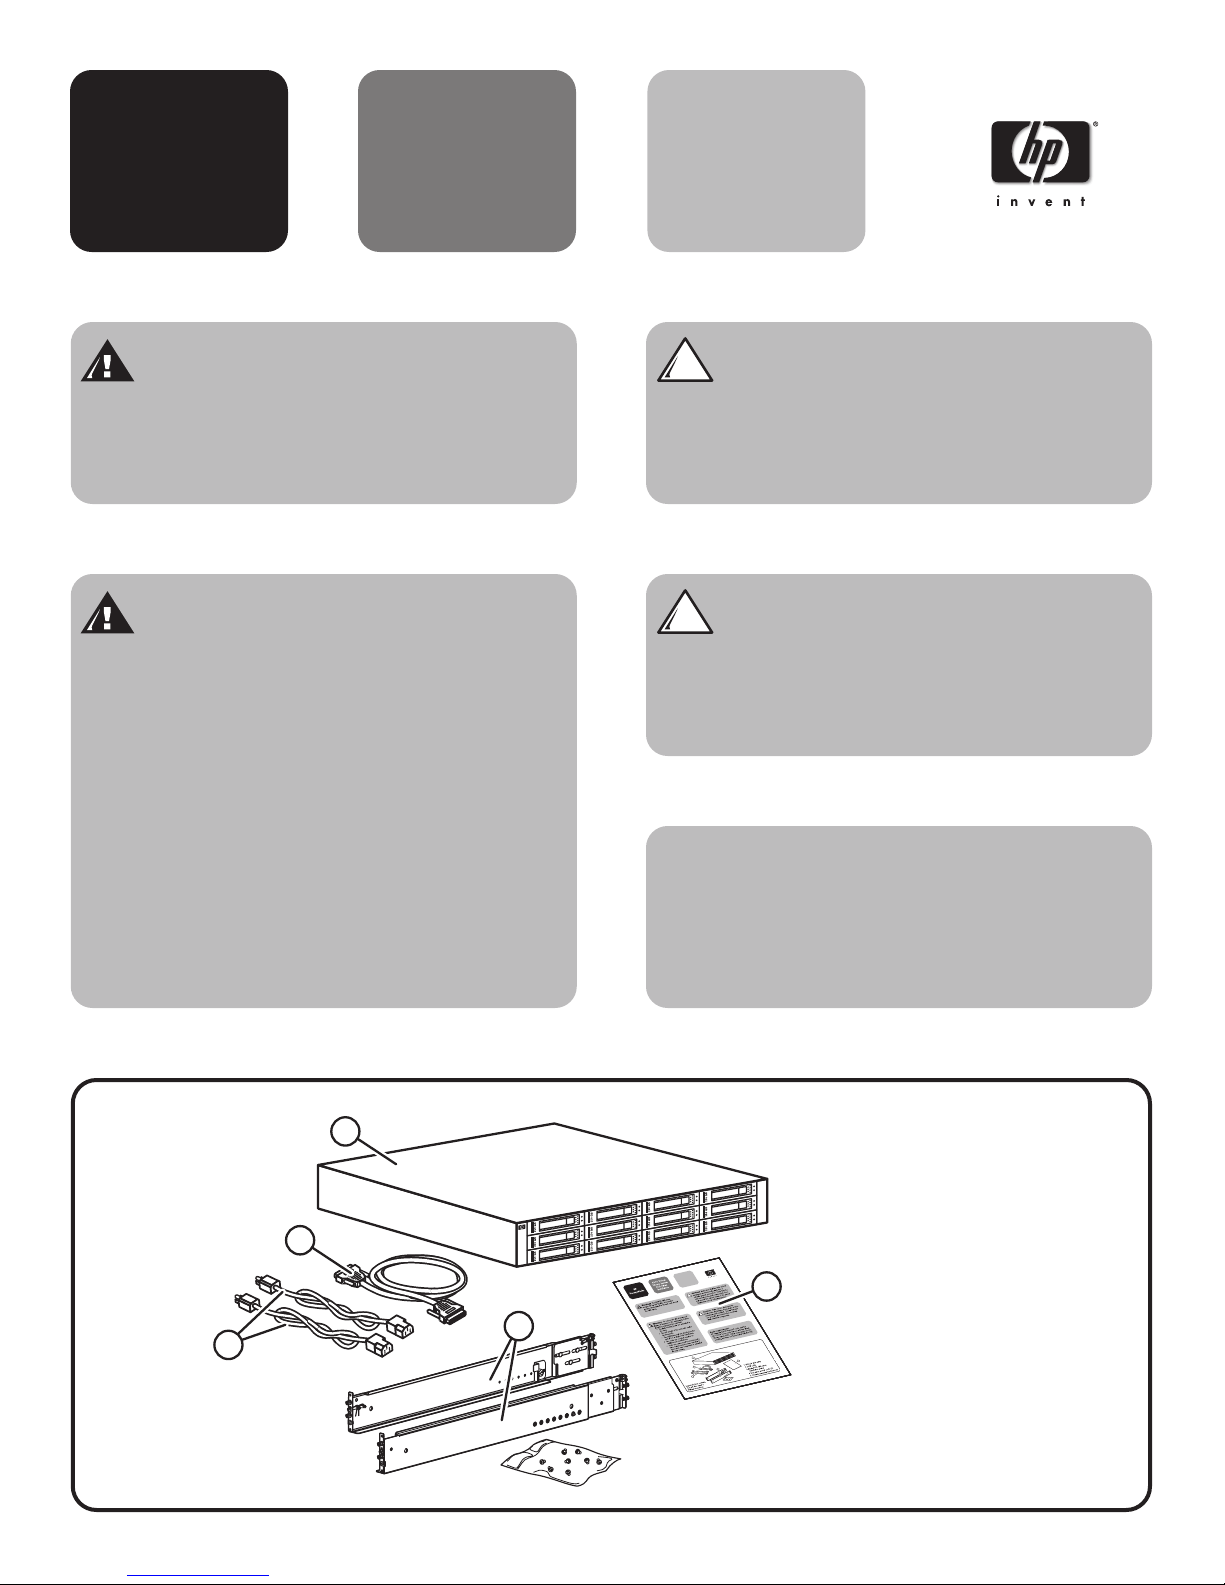
Inspect the box contents.
You will also need a
Phillips screwdriver.
Warning: The MSA20 disk array
weighs 24 kg (53 lb) full. At least two
people are required to lift and rack mount
the disk array.
Warning: To reduce the risk of personal
injury or damage to the equipment, before
installing equipment be sure that:
• The rack leveling jacks are extended to
the floor.
• The full weight of the rack rests on the
leveling jacks.
• The stabilizing feet are attached to the
rack if it is a single-rack installation.
• The racks are coupled together in
multiple-rack installations.
• Only one component is extended at a
time. A rack may become unstable if
more than one component is extended
for any reason.
1 MSA20 disk array
2 SCSI cable
3 Printed VLS disk array
installation poster
4 Disk array power cords (2)
5 2U rack mounting hardware kit
Page 2
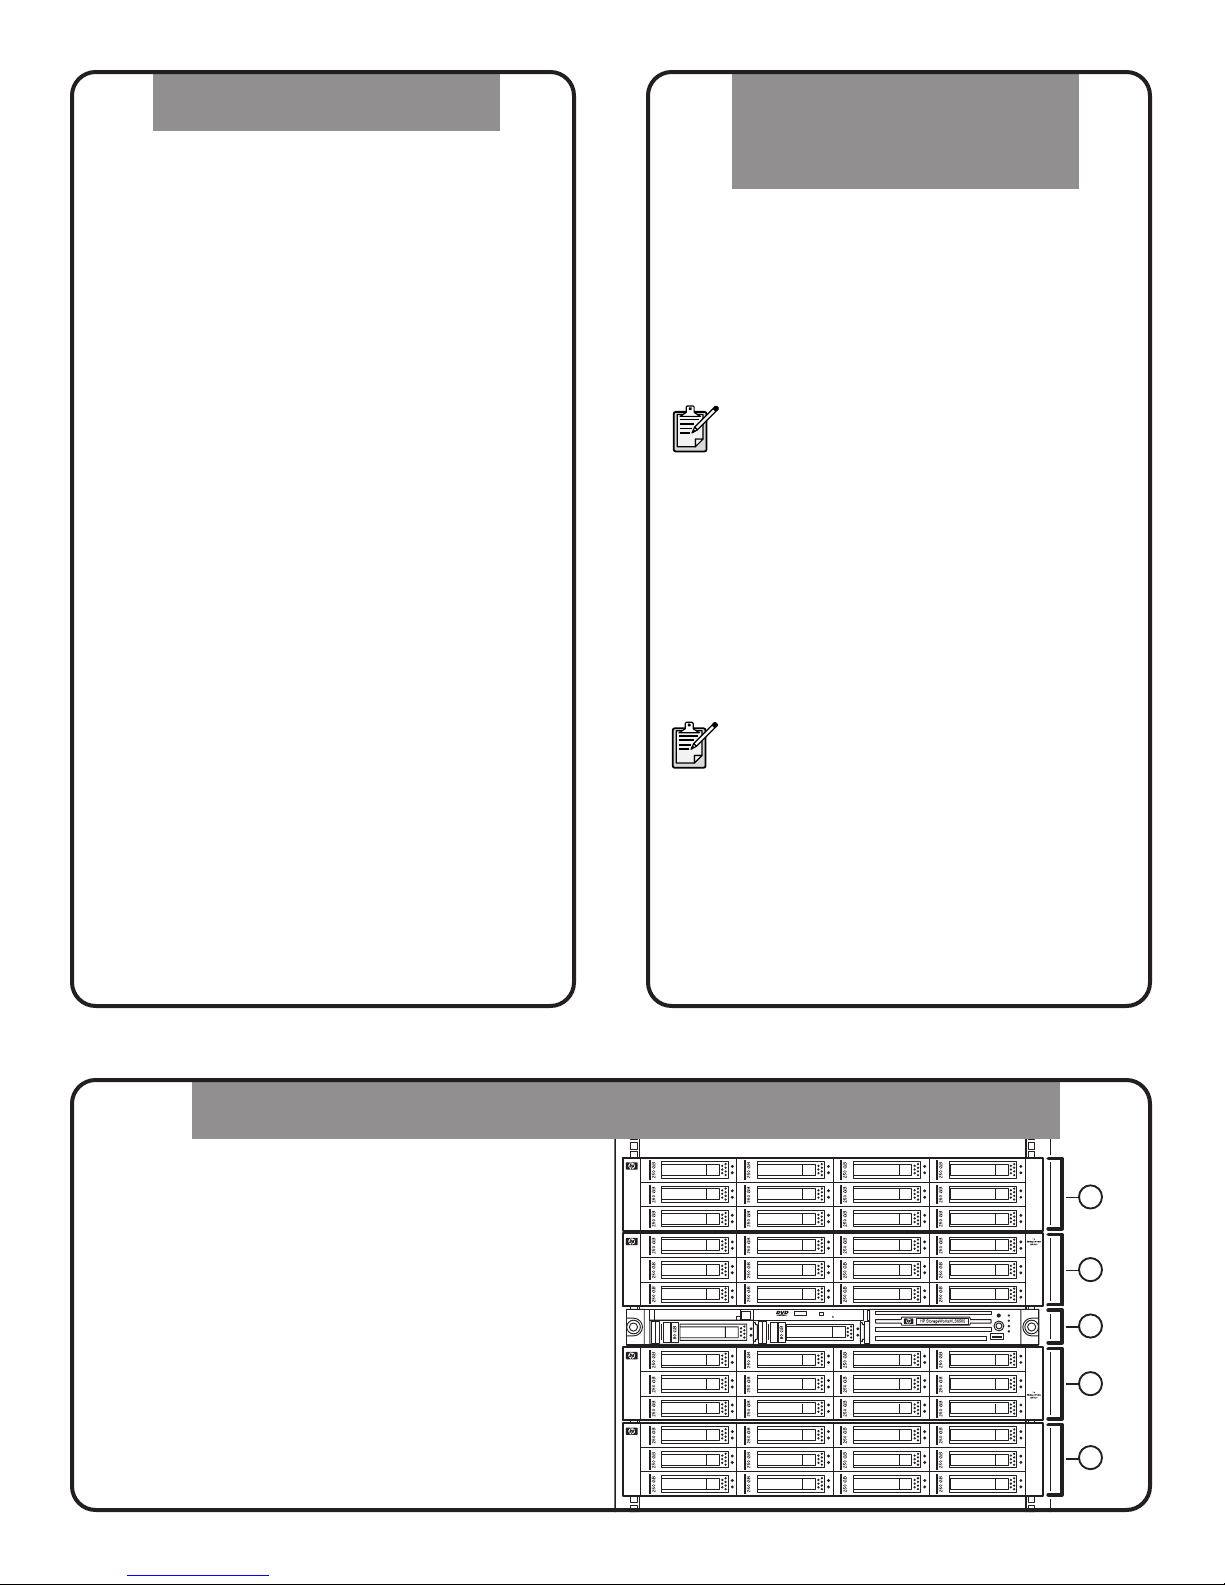
1
2
3
4
5
Installing the disk array(s) in the rack
4
Install the capacity
license shipped with
the capacity bundle
HP recommends that you mount the disk arrays
in the following order.
1 Disk array 4
2 Disk array 3
3 Node
4 Disk array 1
5 Disk array 2
Note: If the VLS node is not installed, install and
cable it before installing the disk array(s). See the
HP StorageWorks 6000 Virtual Library System
Node Installation poster.
3
Power down the node
If you are adding a disk array to an operating
VLS, power down the node. If not, skip this step.
To power down the node:
1. Verify that any backup or restore operation has
completed and that the VLS is idle.
2. Open a serial session and log in as the
administrator as follows:
a. Connect a PC or workstation to the serial port
on the rear of the VLS using the null-modem
serial cable provided.
b. Establish a CLI session using a terminal
emulation program, such as Windows
Hyperterminal.
c. Enter administrator for the username.
d. Enter admin for the password.
3. Initiate a shutdown of the VLS by entering:
shutdownSystem and then press Enter
4.When the VLS has completed its shutdown
operation, press the node Power On/Standby
button to place the node in standby mode.
When the node activates standby power mode,
the system power LED changes to amber.
2
If you are installing a capacity bundle or an
existing disk array to the VLS base configuration,
install the capacity license for the additional
disk array following the instructions in the
HP StorageWorks 6000 Virtual Library System
User Guide. Otherwise, skip this step.
Note: The VLS 2.5TB capacity bundle
contains an MSA20 disk array and the
capacity license for the disk array. If you
want to add an existing MSA20 disk
array to the VLS, you must purchase the
capacity license for the disk array
separately.
Note: As an option, you can add an
additional disk array to the VLS before
installing its capacity license. However, a
capacity violation will occur when the VLS
node is powered up, disabling the VLS
storage capacity so that the VLS is unable
to perform read/write operations. Later,
when the capacity license is installed and
the VLS is rebooted, the VLS storage
capacity is re-enabled.
Page 3

5
Use the 2U rack mounting template as a guide to indicate
where on the rack the rails for the disk array are to be
mounted.
a. At the front of the rack, with the front of the template facing
you, align the lower edge of the template with the bottom
of the rack (or the top of the previous rack component). Be
sure that the lower edge of the template is level.
b. Push the template tabs into the holes in the rack uprights to
hold the template in place.
c. Use a permanent marker pen to indicate the holes in the
rack uprights into which the scissor-like locking latches are
to be inserted, as specified by the template.
d. Repeat these steps to mark the back of the rack, using the
information on the back of the template as a guide to the
required location of the locking latches in this case.
Warning: The pins in the rails are
load-bearing. Do not remove the pins
except to replace them with the pins for
round-hole racks.
6
If the holes in the rack uprights are round
instead of square, remove the standard pins from
the rails and replace them with the round-hole
pins provided in the rack mounting hardware kit.
Identify the left (L) and right (R) rack rails by
markings stamped into the rails.
Slide the front end of the right rack rail toward
the inside front of the rack until the locking latch
engages with the marked hole in the front rack
upright.
7
Extend the back end of the rail toward the inside
rear of the rack until the locking latch engages
with the marked hole in the rear rack upright.
1
1
2
8
Loosen the locknut on the shipping bracket, and
move the bracket to the rearmost position on the
rail. Repeat steps 6 and 7 for the left rack rail.
Page 4

Cabling
12
Connect the AC input socket of each disk array
power supply to an AC power source.
Hardware installation is complete. You may now
power up the disk array(s) and then the node as
described in the HP StorageWorks 6000 Virtual
Library System User Guide.
4
3
1
2
11
Connect the VHDCI connector on the disk array to
the appropriate VHDCI connector on the node as
shown.
1. VHDCI connector A1, connect to disk array 1
2. VHDCI connector A2, connect to disk array 2
3. VHDCI connector B1, connect to disk array 3
4. VHDCI connector B2, connect to disk array 4
9
Align the disk array with the rails, and slide it
into the rack.
1
2
10
Remove the
mounting
bracket
covers, and
tighten the
thumbscrews
to secure the
disk array to
the rack.
Replace the
mounting
bracket
covers.
© Copyright 2005 Hewlett-Packard Development Company, L.P.
First Edition (May 2005)
Part Number: AF728-96002
*AF728-96002*
AF728-96002
 Loading...