

Page 1
Data Migration
User’s Guide
First Edition (April 2009)
Part Number: T2558-96333
Page 2

© Copyright 2009 Hewlett-Packard Development Company, L.P.
Hewlett-Packard Company makes no warranty of any kind with regard to this material, including, but not limited to, the
implied warranties of merchantability and fitness for a particular purpose. Hewlett-Packard shall not be liable for errors
contained herein or for incidental or consequential damages in connection with the furnishing, performance, or use of this
material.
This document contains proprietary information, which is protected by copyright. No part of this document may be
photocopied, reproduced, or translated into another language without the prior written consent of Hewlett-Packard. The
information contained in this document is subject to change without notice.
Microsoft®, Windows®, and Windows NT® are U.S. registered trademarks of Microsoft Corporation.
Hewlett-Packard Company shall not be liable for technical or editorial errors or omissions contained herein. The information
is provided "as is" without warranty of any kind and is subject to change without notice. The warranties for Hewlett-Packard
Company products are set forth in the express limited warranty statements for such products. Nothing herein should be
construed as constituting an additional warranty.
HP StorageWorks Storage Mirroring Data Migration User’s Guide
First Edition (April 2009)
Part Number: T2558-96333
Double-Take, GeoCluster, Double-Take for Virtual Systems, TimeData, netBoot/i, winBoot/i, Double-Take Cargo, sanFly, Livewire, NSI, Balance,
Double-Take ShadowCaster, and associated logos are registered trademarks or trademarks of Double-Take Software, Inc. and/or its subsidiaries in the United
States and/or other countries. Microsoft, Windows, and the Windows logo are trademarks or registered trademarks of Microsoft Corporation in the United
States and/or other countries. All other trademarks are the property of their respective companies.
© 2009 Double-Take Software, Inc. All rights reserved.
Page 3

Storage Mirroring Data Migration overview
Storage Mirroring Data Migration is a comprehensive workload migration solution. It
allows you to move an entire server, known as a source, by mirroring an image of that
source to another server, known as the target. The source and target servers can be
physical or virtual. The image of the source contains the server's system state (operating
system, server configuration, and installation applications) and all of the source server’s
data. You can also migrate just a source's data, in which case the target's system state
(operating system, server configuration, and installed applications) will be used with the
source's data.
Storage Mirroring Data Migration uses patented data replication technology that allows
users to continue accessing and changing data during the migration. As changes are
made on the source, replication keeps the image of the source stored on the target up-todate. Storage Mirroring Data Migration replicates, in real-time, only the file changes, not
the entire file, allowing you to more efficiently use resources. When you are ready to
cutover to the new server, Storage Mirroring Data Migration applies the source system
state and after a reboot, the source is available and running on what was the target
server hardware.
3 of 49
Page 4

Storage Mirroring Data Migration requirements
Each Storage Mirroring Data Migration server must meet minimum requirements. Verify
that each server meets the requirements for the function of that machine. Additionally,
the machine where you will be running the Storage Mirroring Data Migration console
must also meet some basic requirements.
Source server requirements
● Operating system—Storage Mirroring Data Migration can migrate a physical or
virtual source server running any of the following operating system editions.
● Windows Server 2008 Enterprise, Standard, Web, Small Business Server,
Enterprise x64, or Standard x64
● Windows Server 2003 or 2003 R2 Enterprise, Standard, Web, Small
Business Server, Enterprise x64, or Standard x64. Each of the Windows
2003 operating systems require Service Pack 1 or later.
● System memory—There are different memory requirements depending on the
system architecture you are using. Be sure you have at least the minimum amount
of memory for your environment. You should consider having at least the
recommended amount of system memory.
Architecture Minimum System Memory Recommended System Memory
32-bit 128 MB At least 512 MB
64-bit 512 MB At least 1024 MB
● Disk space for program files—This is the amount of disk space, approximately
130 MB, needed on the source to hold the Storage Mirroring Data Migration
program files.
● File system—Storage Mirroring Data Migration supports the same file system
formats that Microsoft supports: FAT, FAT32, and NTFS.
● Server name—Storage Mirroring Data Migration includes Unicode file system
support, but your server name must be in ASCIIformat.
● Network protocols—Your servers must use TCP/IP with static IPaddressing.
● Junction points—Only domain controller junction points will be replicated. Any
user-created junction points will be replicated as two unlinked copies of the data.
4 of 49
Page 5

Target server requirements
● Operating system—Your target operating system will depend on the kind of target
you are using.
● Physical or existing virtual—If your target is a physical server or an existing
virtual server, it can have any of the following Windows operating system
editions.
● Windows Server 2008 Enterprise, Standard, Web, Small Business
Server, Enterprise x64, or Standard x64
● Windows Server 2003 or 2003 R2 Enterprise, Standard, Web, Small
Business Server, Enterprise x64, or Standard x64. Each of the
Windows 2003 operating systems require Service Pack 1 or later.
● Provisioned virtual—If your target will be provisioned (automatically created
during the migration process) you must have a physical host machine where
Storage Mirroring Data Migration can create the new virtual server. Your
physical host machine can be either of the following operating systems.
● Windows 2008 Hyper-V
● VMware ESX 3.01 or later with HotRemove patch #692138 with an
existing virtual machine running Windows Server 2003 or 2003 R2
Enterprise or Standard Edition. The existing virtual must have Storage
Mirroring Data Migration installed and licensed on it before you can
start the migration process. The architecture (32-bit or 64-bit) of the
source and existing virtual must be the same. When you are ready for
cutover the existing virtual will create the new virtual server, mount
disks, format disks, and so on.
● System memory—There are different memory requirements depending on the
system architecture you are using. Be sure you have at least the minimum amount
of memory for your environment. You should consider having at least the
recommended amount of system memory.
Architecture Minimum System Memory Recommended System Memory
32-bit 128 MB At least 512 MB
64-bit 512 MB At least 1024 MB
● Disk space for program files—This is the amount of disk space, approximately
130 MB, needed on the target to hold the Storage Mirroring Data Migration
program files.
5 of 49
Page 6

● Disk space for data files—This is the amount of disk space on the target to hold
all of the source data files. This will be dependent on the applications you are
running and the amount of data files you have.
● Disk space for system state image—This is the amount of disk space on the
target to hold the image of the source system state. You should have at least 5 GB
of space on the target. The more applications you are running on the source, the
larger the system state image will be. Therefore, you may need additional space if
you source has many applications.
● Disk types—Thin-provisioned virtual disks on VMware ESX are not supported
because they cannot be shared by two virtual machines simultaneously.
● Server name—Storage Mirroring Data Migration includes Unicode file system
support, but your server name must be in ASCIIformat.
● Network protocols—Your servers must use TCP/IP with static IPaddressing.
Console requirements
The Storage Mirroring Data Migration console can be run from a source or target to
perform migrations. It can also be run from a source or target to install to other Storage
Mirroring Data Migration servers. However, you cannot run the console on a machine
and install a Storage Mirroring Data Migration server on that same machine.
The Storage Mirroring Data Migration console can be run on any of the source server
operating systems listed above. It can also be run from a Windows XP or Vista machine.
Microsoft .NET Framework version 3.5 Service Pack 1 is required to run the console.
6 of 49
Page 7

Installation
You will need to install and license the Storage Mirroring Data Migration console first.
From the console, you will be able to install your Storage Mirroring Data Migration
servers. Make sure before installing on your servers, you verify the type of server
licensing you will use.
The following sections are included in this section.
● Installing the Storage Mirroring Data Migration console
● Licensing your console
● Storage Mirroring Data Migration server licensing
● Installing a Storage Mirroring Data Migration server
7 of 49
Page 8

Installing the Storage Mirroring Data Migration console
Install the Storage Mirroring Data Migration console first. From the console, you will be
able to install your Storage Mirroring Data Migration servers.
You will not be able to install a Storage Mirroring Data Migration server on the
Note:
same machine where you are running the Storage Mirroring Data Migration
console.
1. Close any open applications.
2. Start the installation program using the appropriate instructions, depending on your
media source.
● CD—Load the Storage Mirroring Data Migration CD into the local CD-ROM
drive. If auto-run is enabled, the installation program will start automatically.
To manually start the program, select Start, Run and specify <cd_
drive>:\autorun.exe.
● Web download—Launch the .exe file that you downloaded from the web.
3. When the installation program begins, the Storage Mirroring Setup Launcher
appears allowing you to install software and view documentation for various
applications from HP. The listed applications will depend on which products are
included on the CD or in the web download. To install Storage Mirroring Data
Migration, select Storage Mirroring Data Migration from the list of products and
then select Install Storage Mirroring Data Migration.
4. Depending on your version of Windows and the components you have installed,
you may see an initial screen indicating that you should install Microsoft .NET
Framework. If you do not see this screen, your server already has the appropriate
version of Microsoft .NET. The best practice is to install Microsoft .NET before
installing Storage Mirroring Data Migration. Clicking Install will continue the
installation program and give you the opportunity to install or skip the Microsoft
.NET installation. Clicking Cancel will exit the installation program.
The Microsoft .NET installation is via a web download. If your server does
Note:
5. Review and accept the HP license agreement to continue with the installation
program. Click Next to continue.
not have an Internet connection, you must manually install Microsoft .NET
from the Storage Mirroring Data MigrationCD or from a copy from the
Microsoft web site.
8 of 49
Page 9

6. Select where you want to install Storage Mirroring Data Migration and click Next to
continue.
7. Click Install to begin the installation process.
8. After the files have completed copying, click Finish to exit the installation program.
The Storage Mirroring Data Migration console installation is complete.
9 of 49
Page 10

Licensing your console
The Storage Mirroring Data Migration console is used to perform Storage Mirroring Data
Migration installations on other servers, and it is used as a license manager to manage
your Storage Mirroring Data Migration source server licenses. Before you can install
Storage Mirroring Data Migration on source servers or before you can manage your
source server licenses, you must first license your Storage Mirroring Data Migration
console. Licensing the console links the console to a specific machine. Any user on that
machine can use the console, but the console license cannot be used on another
console running on another machine. You will not be able to manage the source server
licenses on one console with another console. The recommended configuration is to
select one machine that will be used to perform all Storage Mirroring Data Migration
server installations and to handle all Storage Mirroring Data Migration source server
licensing.
If you want to perform an installation on a target server or on a source server
that will be using a Storage Mirroring license, you do not need to license the
Storage Mirroring Data Migration console.
Note:
You will not be able to install a Storage Mirroring Data Migration server on the
same machine where you are running the Storage Mirroring Data Migration
console.
1. Open the Storage Mirroring Data Migration console and select Tools, Licensing.
2. Enter your License and click Generate. A valid license will automatically populate
the Server Information.
3. You need to provide the Server Information from this console to anHPpartner
company.
● If you have Internet access from this console, click on the link Get Unlock
Code. You will be taken to a form on the HP partner web site. The Server
Information will be filled in automatically. Enter the remaining information
and submit the form.
● If you do not have Internet access from this console, write down the Server
Information. From a machine with Internet access, go to
https://activate.doubletake.com/hp_data-migration/. (Note there is an
underscore in the URL http://activate.doubletake.com/hp_data-migration/.)
Fill in the information on the form, including the Server Information, and
submit the form.
● If you do not have Internet access, contact your reseller by phone. You will
need the Server Information to give to your reseller.
10 of 49
Page 11

4. After you or your reseller have submitted the required information and the Server
Information, you will be provided an unlock code via e-mail. Enter that code in the
Unlock Code field and click Unlock.
Once your console has a valid Unlock Code, you can install on the number of sources
assigned to that license. This is listed as the Total migration licenses. The Currently
available licenses field identifies the number of migration licenses you have available
for use. If desired at a later time, you can purchase and enter a new license that will add
to your remaining number of migration licenses.
11 of 49
Page 12

Storage Mirroring Data Migration server licensing
Storage Mirroring Data Migration has two different licensing strategies.
License
Storage
Mirroring
Data
Migration
migration
license
Purchase
Requirements
for the
Source
You must
purchase a
Storage
Mirroring Data
Migration
migration
license for
each source
you want to
migrate.
Purchase
Requirements
for the
Target
No license is
required for the
target when
using a
Storage
Mirroring Data
Migration
migration
license on the
source.
Server
Installation
You must use
the Storage
Mirroring
Data
Migration
console to
install
Storage
Mirroring
Data
Migration on
each server.
Migration
Timeline
You must
complete the
migration
before the
Storage
Mirroring
Data
Migration
licenses
expires.
Additional
Storage
Mirroring
Data
Migration
migration
licenses can
be
purchased
and added
to the
Storage
Mirroring
Data
Migration
console.
Console
Locking
Requirements
The Storage
Mirroring Data
Migration
console must be
licensed to a
particular
machine in order
to manage the
Storage Mirroring
Data Migration
source server
licenses. License
management on
the console
shows you the
number of
migration
licenses used
and remaining.
1
12 of 49
Page 13

License
Storage
Mirroring
license
Purchase
Requirements
for the
Source
Purchase
Requirements
for the
Target
You must purchase a Storage
Mirroring license for both the
source and target.
Server
Installation
If Storage
Mirroring is
not already
installed on
each server,
you can use
the Storage
Mirroring
Data
Migration
console to
install
Storage
Mirroring
Data
Migration on
each server.
You will
need a
Storage
Mirroring
activation
code for each
server for the
installation.
Migration
Timeline
There is no
expiration
date with
this license.
After the
migration,
the Storage
Mirroring
licenses can
be used on
the servers
for high
availability
workload
optimization,
or the
licenses can
be reused to
migrate
other
servers.
Console
Locking
Requirements
The Storage
Mirroring Data
Migrationconsole
does not have to
be licensed to a
particular
machine when
using it to install
with Storage
Mirroring
licenses.
1
1
The Storage Mirroring Data Migration console can be used in mixed environments
where some servers are being migrated using Storage Mirroring Data Migration licenses
and others migrations are using Storage Mirroring licenses.
13 of 49
Page 14

Installing a Storage Mirroring Data Migration server
Before you can perform a migration, you must have Storage Mirroring Data Migration
installed on both the source and target. You must use the Storage Mirroring Data
Migration console to perform Storage Mirroring Data Migration installations on these
servers. You can also use the Storage Mirroring Data Migration console to perform
Storage Mirroring installations.
You cannot install a Storage Mirroring Data Migration server on the same
machine where you are running the Storage Mirroring Data Migration console.
Note:
In order to perform the installation across a NAT or firewall, you must have the
Microsoft WMI and File Share ports open. See Microsoft Windows ports in the
Using firewalls section.
1. If your Storage Mirroring Data Migration servers have Microsoft .NET version 3.5
Service Pack 1 or later, you can skip this step and go to step number 2. If your
Storage Mirroring Data Migration servers do not have Microsoft .NETversion 3.5
Service Pack 1 or later, you must make it available in your Storage Mirroring Data
Migration console installation directory before you start your Storage Mirroring
Data Migration server installations.
a. Locate the file \NetFx\v3.5SP1\dotnetfx35.exe on the Storage Mirroring Data
Migration CD or download .NET version 3.5 Service Pack 1 from the
Microsoft web site.
b. If you downloaded the file, rename the file, if necessary, so that it is
dotnetfx35.exe. In order for the .NET file to be located during the server
installation, the file name must be dotnetfx35.exe.
c. Copy the dotnetfx35.exe file to your Storage Mirroring Data Migration
installation directory. By default, the installation directory is \Program
Files\StorageWorks\Storage Mirroring. With this file in this location, it will be
installed during the Storage Mirroring Data Migration server installation.
2. If your Storage Mirroring Data Migration servers are all the same architecture (32bit or 64-bit), you can skip this step and go to step number 3. If your Storage
Mirroring Data Migration servers are different architectures and you installed your
Storage Mirroring Data Migration console from CDmedia, then all necessary files
will be available for your server installation and you can go to step number 3. If
your Storage Mirroring Data Migration servers are different architectures and you
downloaded your media from the web, you will need to make additional files
14 of 49
Page 15

available in your Storage Mirroring Data Migration console installation directory
before you start your Storage Mirroring Data Migration server installations.
a. In your Storage Mirroring Data Migration console installation directory (by
default, \Program Files\StorageWorks\Storage Mirroring), look for the i386
and x64 directories. Only one of them will exist depending on the file you
downloaded and installed. If you originally downloaded a file with i386 in the
file name, you have only files for 32-bit machines. If you originally
downloaded a file with x64 in the file name, you have only files for 64-bit
machines.
b. Create the directory that does not exist. At this point, you should have
\Program Files\StorageWorks\Storage Mirroring\i386 and \Program
Files\StorageWorks\Storage Mirroring\x64.
c. Downloaded the file for the architecture that you need and copy it to your
Storage Mirroring Data Migration console machine.
d. Double-click the file to open it in WinZip.
e. Disable (uncheck) the option When done unzipping open \autorun.exe.
Make sure this option is off because you will not be able to install the files
because you already have the Storage Mirroring Data Migration console
installed.
f. Change the directory Unzip to folder to the \i386 or \x64 directory that you
created earlier. The directory name should correspond to the architecture of
the file you downloaded.
g. Click Unzip. After the files are unzipped, the additional files will be available
for the Storage Mirroring Data Migration console to use.
3. Open the Storage Mirroring Data Migration console and click Prepare from the left
navigation pane.
4. Identify the server where you want to install Storage Mirroring Data Migration.
● Server—Specify the name of the server. You can also click Browse to select
the name from Active Directory or from a network drill-down list.
● User name—Specify a user that is a member of the Double-Take Admin
security group on the source. If your source is the only domain controller in
your network, the account must also be a local account in the local
administrators group.
● Password—Specify the password associated with the User name you
entered.
● Domain—If you are working in a domain environment, specify the Domain.
● License Type—Specify the type of license to be used on the server.
● Source—The specified machine will be used as a source, meaning it
contains the data to be migrated. The installation will automatically
15 of 49
Page 16

push a Storage Mirroring Data Migration license to the source. You
must complete the migration before the license expiration date. Your
Storage Mirroring Data Migration console must be licensed to install
Storage Mirroring Data Migration licenses on source servers. Click the
Licensing button to open the console licensing dialog box. For
instructions on console licensing, see Licensing your console.
● Target—The specified machine will be used as a target, meaning it will
become the source after the migration is complete. The installation will
automatically push a Storage Mirroring Data Migrationlicense to the
target. You must complete the migration before the license expiration
date. Your Storage Mirroring Data Migration console does not need to
be licensed to install Storage Mirroring Data Migration licenses on
target servers.
● Other Activation Code—The specified machine can be used as a
source or target, but you must supply a Storage Mirroring activation
code to be assigned to the server. There is no expiration date for a
Storage Mirroring license.
5. Click Add to add your server to the list of servers where Storage Mirroring Data
Migration will be installed.
6. Repeat steps 2 and 3 for each server where you want to install Storage Mirroring
Data Migration.
7. Click Next to continue.
8. Review the servers where you will be installing Storage Mirroring Data Migration
then click Install.
9. Monitor the progress of the installations from the Install monitor page.
10. When all of the installations are complete, click Finish to exit back to the Monitor
page.
16 of 49
Page 17

Storage Mirroring Data Migration console
The Storage Mirroring Data Migration console is the user interface that manages,
monitors, and controls your migration solutions. It is also the license manager for all of
your Storage Mirroring Data Migration servers. To open the console, select Start,
Programs, Storage Mirroring, Storage Mirroring Data Migration Console.
On the left pane of the console are static navigation buttons which initiate workflows and
display monitoring pages. In essence, these navigation buttons control what is displayed
in the main window.
Each time you open the Storage Mirroring Data Migration console, it will automatically
open to the Monitor page. Any existing jobs will be displayed. If there are no existing
jobs, the display will be blank.
Note:
The Storage Mirroring Data Migration console requires a 1024x768 minimum
screen resolution.
17 of 49
Page 18

Clearing console security credentials
By default, the Storage Mirroring Data Migration console caches security credentials.
Also by default, the cache is saved when you close the console, allowing you to reuse
the credentials when you reuse the console. This setting is controlled by the Tools,
Save credentials cache menu option. When the option is selected with a checkmark,
the security credentials cache will be saved. When the option is disabled and no
checkmark is displayed, the security credentials cache will be deleted when the console
is closed. At any time, you can clear the security credentials cache by selecting Tools,
Clear credentials cache.
18 of 49
Page 19

Server migration
When migrating a server, you can migrate a physical or virtual source to an existing
physical or virtual target. You can also migrate to a provisioned virtual target, which
means Storage Mirroring Data Migration can create the virtual machine for you during
the migration process.
The following sections are included in this section.
● Migrating a source to an existing target
● Migrating a source to a provisioned virtual machine on a VMware ESX target
● Migrating a source to a provisioned virtual machine on a Hyper-V target
19 of 49
Page 20

Migrating a source to an existing target
Use the following instructions to migrate a source to an existing physical or virtual target.
1. Click Migrate Server from the left navigation pane.
2. Identify the source server that you want to migrate.
● Server—Specify the name of the source server. You can also click Browse
to select the name from Active Directory or from a network drill-down list.
● User name—Specify a user that is a member of the Double-Take Admin
security group on the source. If your source is the only domain controller in
your network, the account must also be a local account in the local
administrators group.
● Password—Specify the password associated with the User name you
entered.
● Domain—If you are working in a domain environment, specify the Domain.
3. Click Next to continue.
4. Identify the target server. This is the server that, after the migration, will become
your new source.
● Provision a new virtual machine for this migration—Do not select this
option. This option is only for migrating to an automatically provisioned (nonexisting) virtual machine hosted on a VMware ESXserver or a Hyper-V
server.
● Server—Specify the name of the existing target server. You can also click
Browse to select the name from Active Directory or from a network drill-down
list.
● User name—Specify a user that is a member of the Double-Take Admin
security group on the target. If your source is the only domain controller in
your network, the account must also be a local account in the local
administrators group.
● Password—Specify the password associated with the User name you
entered.
● Domain—If you are working in a domain environment, specify the Domain.
5. Click Next to continue.
6. By default, Storage Mirroring Data Migration selects your entire source for
migration. It automatically excludes particular files that cannot be used during the
migration. If desired, you can exclude other files that you do not want to migrate,
but be careful when excluding data. Excluded volumes, folders, and/or files may
compromise the integrity of your installed applications. There are some volumes,
20 of 49
Page 21

folders, and files that you will be unable to exclude, because they are required for
migration. For example, the boot volume cannot be excluded because that is
where the system state information is stored. Volumes, folders, and files that are
marked with a checkmark are included. If there is no checkmark, the item is
excluded. Expand and collapse the directory tree and click on an item to add or
remove a checkmark. Once you have configured the data to migrate, click Next to
continue.
The Select all and Deselect all buttons allow you to quickly select or
Note:
deselect all user data on your server. These buttons do not change the
selection of system state data, which is defined by Storage Mirroring Data
Migration and cannot be modified manually.
7. Specify if your target server is in a LAN or WAN environment with respect to your
source.
● LAN migration—If your migration is across a LAN, the source name and the
IP address(es) will be applied to the target server. Specify which network
adapters on the target that you want to take over for the network adapters on
the source.
● WAN migration—If your migration is across a WAN, the source name will be
applied to the target server, but the IP address(es) of the source will not be
used. Instead, the IP address(es) of the target will be used. If desired, you
can select to Update DNS Servers, which will allow you to specify how to
resolve server names and IP addresses. If you do not select Update DNS
Servers, you must manually modify DNS after the migration is complete.
8. Click Next to continue.
9. If you selected to update your DNS servers for a WAN migration, specify your DNS
update options.
● DNS Domains—Click Add and specify the name of your DNS Domain.
Repeat this for each DNS domain. If you want to remove a domain, highlight
the name and click Remove.
● User name—Highlight a DNS domain and specify a user account that has
privileges to update DNS.
● Password—Specify the password associated with the user account you
entered.
● DNS Servers—Click Add and specify the IP address of a DNS server in the
DNS domain. Repeat this for each DNS server in the DNS domain. If you
want to remove a server, highlight the address and click Remove.
● IP addresses—Click Add and specify an IP address on the source and the
IP address on the target that will take over for that source IP address. Repeat
21 of 49
Page 22

this for each IPaddress. If you want to remove an IPaddress, highlight the
address and click Remove.
Once you have your DNS updates configured, click Test DNS to
determine if your DNS updates will be successful.
10. Click Next to continue.
11. Specify your migration shutdown options.
● Wait for user intervention before cutover—Specify if you want to perform a
manual or automatic cutover. If you select manual, Storage Mirroring Data
Migration will pause the migration process after the source data has been
mirrored to the target, which allows you time to coordinate any other tasks.
Replication will continue during this time. If you do not wait for user
intervention and cutover is automatic, the source will cutover to the target
immediately after the mirror is complete. If your source is running
applications, it is important that you select manual cutover by enabling this
user intervention option. During the manual intervention time, you can stop
your applications that are running on the source. This lets you stop services
cleanly on the source and let that final application data be replicated and
applied on the target. This helps ensure your applications will start cleanly on
the target after cutover.
● Shut down the source server—Specify if you want to shut down the source
server before the source is cutover to the target, which avoids identity
conflicts on the network. The shutdown will occur after mirroring is completed
but before the source system state is applied to the target server.
12. Click Next to continue.
13. At this point, Storage Mirroring Data Migration validates that your target server is
compatible to become your source. Errors are designated by a red circle with a
white X. (A question mark icon is an unknown error.) Warnings are designated by a
yellow triangle with a black exclamation point. A successful validation is
designated by a green circle with a white checkmark. You must correct any errors
before you can enable protection. You must revalidate the selected server until the
validation check passes without errors. Once the validation is successful, click
Next to continue.
14. At the Migration summary page, you can review the choices you have made and
you can also configure optional settings. If you need to make any changes to the
selections you made, click Back to return to the previous pages. If you want to
configure optional settings, click Configure. Once you have completed your
configuration, click Finish to start the migration.
15. Monitor the progress of the migration mirror on the Monitor page.
16. When the migration mirror has completed, the target will automatically reboot to
complete the migration process, if you disabled user intervention. If you enabled
22 of 49
Page 23

user intervention, when the migration mirror is complete, the status will change to
Ready for Cutover. Use this time to complete any necessary tasks. When you are
ready to complete the migration, click Cutover on the Monitor page toolbar to
complete the migration process.
Once the target server has been rebooted, it will become the source server.
Because the Windows product activation is dependent on hardware, you may
need to reactivate your Windows registration after migration. Follow the onscreen prompts to complete the reactivation.
If your source was disconnected from the network during the cutover process,
the original job that was mirroring the data will still be active on that machine.
Note:
Do not bring that machine back on the network. If you do, the original job will
attempt to begin mirroring data again which could result in data loss. While the
machine is still disconnected from the network, stop the Storage Mirroring
service, delete the file connect.sts located in the Storage Mirroring Data
Migration installation directory, and then restart the Storage Mirroring. This will
delete the original job. After the original job is deleted, you can bring the
machine on the network if desired.
23 of 49
Page 24

Migrating a source to a provisioned virtual machine on a VMware ESX target
Use the following instructions to migrate a source to a provisioned virtual machine on a
VMware ESX target.
1. Click Migrate Server from the left navigation pane.
2. Identify the source server that you want to migrate.
● Server—Specify the name of the source server. You can also click Browse
to select the name from Active Directory or from a network drill-down list.
● User name—Specify a user that is a member of the Double-Take Admin
security group on the source. If your source is the only domain controller in
your network, the account must also be a local account in the local
administrators group.
● Password—Specify the password associated with the User name you
entered.
● Domain—If you are working in a domain environment, specify the Domain.
3. Click Next to continue.
4. Identify the target server. This is the server that, after the migration, will become
your new source.
● Provision a new virtual machine for this migration—Enable this option to
migrate to an automatically provisioned (non-existing) virtual machine hosted
on a VMware ESXserver.
● Server—Specify the name of the target server. This is the name of the host
VMware ESX server.You can also click Browse to select the name from
Active Directory or from a network drill-down list.
● User name—Specify the root user or another user that has the administrator
role on the VMware ESX server.
● Password—Specify the password associated with the User name you
entered.
● Domain—This option is not needed for a VMware ESXserver.
5. Click Next to continue.
6. By default, Storage Mirroring Data Migration selects your entire source for
migration. If desired, you can exclude volumes that you do not want to migrate, but
be careful when excluding data. Excluded volumes may compromise the integrity
of your installed applications. There are some volumes that you will be unable to
exclude, because they are required for migration. For example, the boot and
24 of 49
Page 25

system volumes cannot be excluded because that is where the system state
information is stored. For non-boot and non-system volumes, you can exclude
them if necessary. Volumes marked with a checkmark are included. If there is no
checkmark, the volume is excluded. Click on an item to add or remove a
checkmark. Once you have configured the data to migrate, click Next to continue.
The Select all and Deselect all buttons allow you to quickly select or
Note:
deselect all user data on your server. These buttons do not change the
selection of system state data, which is defined by Storage Mirroring Data
Migration and cannot be modified manually.
7. Choose a datastore on the target to store the protected data and system state
information that will be incoming from the source server. You can only select a
target datastore that has enough free space available. The amount of necessary
disk space is noted at the bottom of the page.
If the size of the datastore is identical to the size of the disk on the source
and there is less than 20 MB of free space on that source, you may run out
Note:
of disk space on the datastore due to differences in how the virtual disk
block size is formatted. In this case, make sure that your datastore has at
least 20 MB more disk space than the size of the disk on the source.
8. Click Next to continue.
9. Specify the volumes to create on the new virtual machine.
● Selected Data—This displays the amount of data, in gigabytes, currently on
the source volume.
● Source Size—This displays the size, in gigabytes, of the volume on the
source.
● Provisioned Volume—Specify the size, in gigabytes, of the volume to be
created on the new virtual.
10. Choose the Virtual Recovery Appliance that will be used to create the new virtual
machine. The Virtual Recovery Appliance must have both Windows and Storage
Mirroring Data Migration installed and licensed on it.
● Server—Specify the name of the Virtual Recovery Appliance that exists on
the ESX server. The drop-down list will only display virtual machines that are
running and have an operating system capable of performing a recovery (for
example, a 64-bit source can only be migrated using a 64-bit Virtual
Recovery Appliance).
● User name—Specify a user that is a member of the Double-Take Admin
security group on the Virtual Recovery Appliance. The user must also be a
member of the local administrators group.
25 of 49
Page 26

● Password—Specify the password associated with the User name you
entered.
● Domain—If you are working in a domain environment, specify the Domain.
11. Click Next to continue.
12. Configure the new virtual machine.
● VMware Console display name—By default, the source name will be used
to create the new virtual machine display name.
● Map replica virtual network IPto target networks—You will need to
identify how you want to handle the network mapping. The Replica VM
Network IP lists the IP addresses on the source. Map each one to a Target
Network, which is a virtual network on the VMware ESX server.
● Number of processors—Specify how many processors to configure on the
virtual machine. The number of processors on the source is displayed.
● Amount of memory—Specify the amount of memory, in megabytes, to
configure on the virtual machine. The amount of memory on the source is
displayed.
13. Click Next to continue.
14. Specify your migration shutdown options.
● Wait for user intervention before cutover—Specify if you want to perform a
manual or automatic cutover. If you select manual, Storage Mirroring Data
Migration will pause the migration process after the source data has been
mirrored to the target, which allows you time to coordinate any other tasks.
Replication will continue during this time. If you do not wait for user
intervention and cutover is automatic, the source will cutover to the target
immediately after the mirror is complete. If your source is running
applications, it is important that you select manual cutover by enabling this
user intervention option. During the manual intervention time, you can stop
your applications that are running on the source. This lets you stop services
cleanly on the source and let that final application data be replicated and
applied on the target. This helps ensure your applications will start cleanly on
the target after cutover.
● Shut down the source server—Specify if you want to shut down the source
server before the source is cutover to the target, which avoids identity
conflicts on the network. The shutdown will occur after mirroring is completed
but before the source system state is applied to the target server.
15. Click Next to continue.
16. At the Migration summary page, you can review the choices you have made and
you can also configure optional settings. If you need to make any changes to the
selections you made, click Back to return to the previous pages. If you want to
26 of 49
Page 27

configure optional settings, click Configure. Once you have completed your
configuration, click Finish to start the migration.
17. Monitor the progress of the migration mirror on the Monitor page.
18. When the migration mirror has completed, the target will automatically reboot to
complete the migration process, if you disabled user intervention. If you enabled
user intervention, when the migration mirror is complete, the status will change to
Ready for Cutover. Use this time to complete any necessary tasks. When you are
ready to complete the migration, click Cutover on the Monitor page toolbar to
complete the migration process.
Once the virtual machine has been rebooted, it will become the source server.
If your source was disconnected from the network during the cutover process,
the original job that was mirroring the data will still be active on that machine.
Do not bring that machine back on the network. If you do, the original job will
attempt to begin mirroring data again which could result in data loss. While the
Note:
machine is still disconnected from the network, stop the Storage Mirroring
service, delete the file connect.sts located in the Storage Mirroring Data
Migration installation directory, and then restart the Storage Mirroring. This will
delete the original job. After the original job is deleted, you can bring the
machine on the network if desired.
27 of 49
Page 28

Migrating a source to a provisioned virtual machine on a Hyper-V target
Use the following instructions to migrate a source to a provisioned virtual machine on a
Hyper-V target.
1. Click Migrate Server from the left navigation pane.
2. Identify the source server that you want to migrate.
● Server—Specify the name of the source server. You can also click Browse
to select the name from Active Directory or from a network drill-down list.
● User name—Specify a user that is a member of the Double-Take Admin
security group on the source. If your source is the only domain controller in
your network, the account must also be a local account in the local
administrators group.
● Password—Specify the password associated with the User name you
entered.
● Domain—If you are working in a domain environment, specify the Domain.
3. Click Next to continue.
4. Identify the target server. This is the server that, after the migration, will become
your new source.
● Provision a new virtual machine for this migration—Enable this option to
migrate to an automatically provisioned (non-existing) virtual machine hosted
on a Hyper-V server.
● Server—Specify the name of the target server. This is the name of the host
Hyper-V server. You can also click Browse to select the name from Active
Directory or from a network drill-down list.
● User name—Specify a user that is a member of the Double-Take Admin
security group on the target. If your source is the only domain controller in
your network, the account must also be a local account in the local
administrators group.
● Password—Specify the password associated with the User name you
entered.
● Domain—If you are working in a domain environment, specify the Domain.
5. Click Next to continue.
6. By default, Storage Mirroring Data Migration selects your entire source for
migration. If desired, you can exclude volumes that you do not want to migrate, but
be careful when excluding data. Excluded volumes may compromise the integrity
28 of 49
Page 29

of your installed applications. There are some volumes that you will be unable to
exclude, because they are required for migration. For example, the boot and
system volumes cannot be excluded because that is where the system state
information is stored. For non-boot and non-system volumes, you can exclude
them if necessary. Volumes marked with a checkmark are included. If there is no
checkmark, the volume is excluded. Click on an item to add or remove a
checkmark. Once you have configured the data to migrate, click Next to continue.
The Select all and Deselect all buttons allow you to quickly select or
Note:
deselect all user data on your server. These buttons do not change the
selection of system state data, which is defined by Storage Mirroring Data
Migration and cannot be modified manually.
7. Specify the volumes to create on the new virtual machine.
● Selected Data—This displays the amount of data, in gigabytes, currently on
the source volume.
● Source Size—This displays the size, in gigabytes, of the volume on the
source.
● Provisioned Volume—Specify the size, in gigabytes, of the volume to be
created on the new virtual.
● Controller Type—Specify the type of controller, IDEor SCSI, to be used for
each volume. The boot volume must be an IDEcontroller.
8. Click Next to continue.
9. Specify the volume and folder on the target server where the new virtual machine
will be created and click Next to continue.
10. Configure the new virtual machine.
● Hyper-V Manager display name—By default, the source name will be used
to create the new virtual machine display name.
● Map replica virtual network IPto target networks—You will need to
identify how you want to handle the network mapping. The Replica VM
Network IP lists the IP addresses on the source. Map each one to a Target
Network, which is a virtual network on the Hyper-V server.
● Number of processors—Specify how many processors to configure on the
virtual machine. The number of processors on the source is displayed.
● Amount of memory—Specify the amount of memory, in megabytes, to
configure on the virtual machine. The amount of memory on the source is
displayed.
11. Click Next to continue.
12. Specify your migration shutdown options.
29 of 49
Page 30

● Wait for user intervention before cutover—Specify if you want to perform a
manual or automatic cutover. If you select manual, Storage Mirroring Data
Migration will pause the migration process after the source data has been
mirrored to the target, which allows you time to coordinate any other tasks.
Replication will continue during this time. If you do not wait for user
intervention and cutover is automatic, the source will cutover to the target
immediately after the mirror is complete. If your source is running
applications, it is important that you select manual cutover by enabling this
user intervention option. During the manual intervention time, you can stop
your applications that are running on the source. This lets you stop services
cleanly on the source and let that final application data be replicated and
applied on the target. This helps ensure your applications will start cleanly on
the target after cutover.
● Shut down the source server—Specify if you want to shut down the source
server before the source is cutover to the target, which avoids identity
conflicts on the network. The shutdown will occur after mirroring is completed
but before the source system state is applied to the target server.
13. Click Next to continue.
14. At the Migration summary page, you can review the choices you have made and
you can also configure optional settings. If you need to make any changes to the
selections you made, click Back to return to the previous pages. If you want to
configure optional settings, click Configure. Once you have completed your
configuration, click Finish to start the migration.
15. Monitor the progress of the migration mirror on the Monitor page.
16. When the migration mirror has completed, the target will automatically reboot to
complete the migration process, if you disabled user intervention. If you enabled
user intervention, when the migration mirror is complete, the status will change to
Ready for Cutover. Use this time to complete any necessary tasks. When you are
ready to complete the migration, click Cutover on the Monitor page toolbar to
complete the migration process.
Once the virtual machine has been rebooted, it will become the source server.
You must install Integration Services after cutover for SCSI drives and mouse
drivers to function correctly on the new virtual machine.
Your Hyper-V virtual machine will not start if the amount of memory it is
Note:
configured to start with is more than the free physical memory available. This
may happen if the amount of free physical memory changes after you have
created your migration job. In this case, you must manually modify the virtual
machine's memory settings and then manually start the virtual machine.
30 of 49
Page 31

If your source was disconnected from the network during the cutover process,
the original job that was mirroring the data will still be active on that machine.
Do not bring that machine back on the network. If you do, the original job will
attempt to begin mirroring data again which could result in data loss. While the
machine is still disconnected from the network, stop the Storage Mirroring
service, delete the file connect.sts located in the Storage Mirroring Data
Migration installation directory, and then restart the Storage Mirroring. This will
delete the original job. After the original job is deleted, you can bring the
machine on the network if desired.
31 of 49
Page 32

Migrating data to an existing target
Use the following instructions to migrate data from your source to an existing physical or
virtual target.
1. Click Migrate Data from the left navigation pane.
2. Identify the source that contains the data that you want to migrate.
● Server—Specify the name of the source server. You can also click Browse
to select the name from Active Directory or from a network drill-down list.
● User name—Specify a user that is a member of the Double-Take Admin
security group on the source. If your source is the only domain controller in
your network, the account must also be a local account in the local
administrators group.
● Password—Specify the password associated with the User name you
entered.
● Domain—If you are working in a domain environment, specify the Domain.
3. Click Next to continue.
4. Identify the target server. This is the server that, after the migration, will contain the
source data. The target must be an existing physical or virtual server.
● Server—Specify the name of the existing target server. You can also click
Browse to select the name from Active Directory or from a network drill-down
list.
● User name—Specify a user that is a member of the Double-Take Admin
security group on the target. If your source is the only domain controller in
your network, the account must also be a local account in the local
administrators group.
● Password—Specify the password associated with the User name you
entered.
● Domain—If you are working in a domain environment, specify the Domain.
5. Click Next to continue.
6. By default, Storage Mirroring Data Migration selects all of the data on your source
for migration. It automatically excludes system state information. If desired, you can
exclude other files that you do not want to migrate, but be careful when excluding
data. Excluded volumes, folders, and/or files may compromise the integrity of your
installed applications. Volumes, folders, and files that are marked with a
checkmark are included. If there is no checkmark, the item is excluded. Expand
and collapse the directory tree and click on an item to add or remove a checkmark.
Once you have configured the data to migrate, click Next to continue.
32 of 49
Page 33

The Select all and Deselect all buttons allow you to quickly select or
Note:
deselect all user data on your server. These buttons do not change the
selection of system state data, which is defined by Storage Mirroring Data
Migration and cannot be modified manually.
7. Specify the location on the target to store the data from the source. The location
you specify must be a full path including the volume. For example, you might enter
C: or C:\directory.
8. Click Next to continue.
9. Specify your migration shutdown options.
● Wait for user intervention before cutover—Specify if you want to perform a
manual or automatic cutover. If you select manual, Storage Mirroring Data
Migration will pause the migration process after the source data has been
mirrored to the target, which allows you time to coordinate any other tasks.
Replication will continue during this time. If you do not wait for user
intervention and cutover is automatic, Storage Mirroring Data Migration will
terminate the migration job immediately after the mirror is complete. If your
source is running applications, it is important that you select manual cutover
by enabling this user intervention option. During the manual intervention
time, you can stop your applications that are running on the source. This lets
you stop services cleanly on the source and let that final application data be
replicated and applied on the target. This helps ensure your applications will
start cleanly on the target after cutover.
● Shut down the source server—Specify if you want to shut down the source
server before the migration job is terminated.
10. At the Migration summary page, you can review the choices you have made and
you can also configure optional settings. If you need to make any changes to the
selections you made, click Back to return to the previous pages. If you want to
configure optional settings, click Configure. Once you have completed your
configuration, click Finish to start the migration.
11. Monitor the progress of the migration mirror on the Monitor page.
12. When the migration mirror has completed, the migration job is automatically
terminated, if you disabled user intervention. If you enabled user intervention,
when the migration mirror is complete, the status will change to Ready for
Cutover. Use this time to complete any necessary tasks. When you are ready to
complete the migration, click Cutover on the Monitor page toolbar to complete the
migration process and terminate the migration job.
33 of 49
Page 34

Note:
If your source was disconnected from the network during the cutover
process, the original job that was mirroring the data will still be active on
that machine. Do not bring that machine back on the network. If you do,
the original job will attempt to begin mirroring data again which could
result in data loss. While the machine is still disconnected from the
network, stop the Storage Mirroring service, delete the file connect.sts
located in the Storage Mirroring Data Migration installation directory, and
then restart the Storage Mirroring. This will delete the original job. After
the original job is deleted, you can bring the machine on the network if
desired.
34 of 49
Page 35
Monitoring a job
Once you have a job established or imported, you can easily monitor the status of the
migration from the Monitor page.
When viewing the Monitor page, the main window is divided into two sections. The top
pane displays overview monitoring information, while the bottom pane displays detailed
data. You can hide the details pane by clicking on the Hide details text. You can display
the details pane by clicking on the Show details text.
There is also a toolbar on the Monitor page for specific job and monitoring controls.
Overview status information
Overview information is provided for each job at the top of the Monitor page.
Column Description
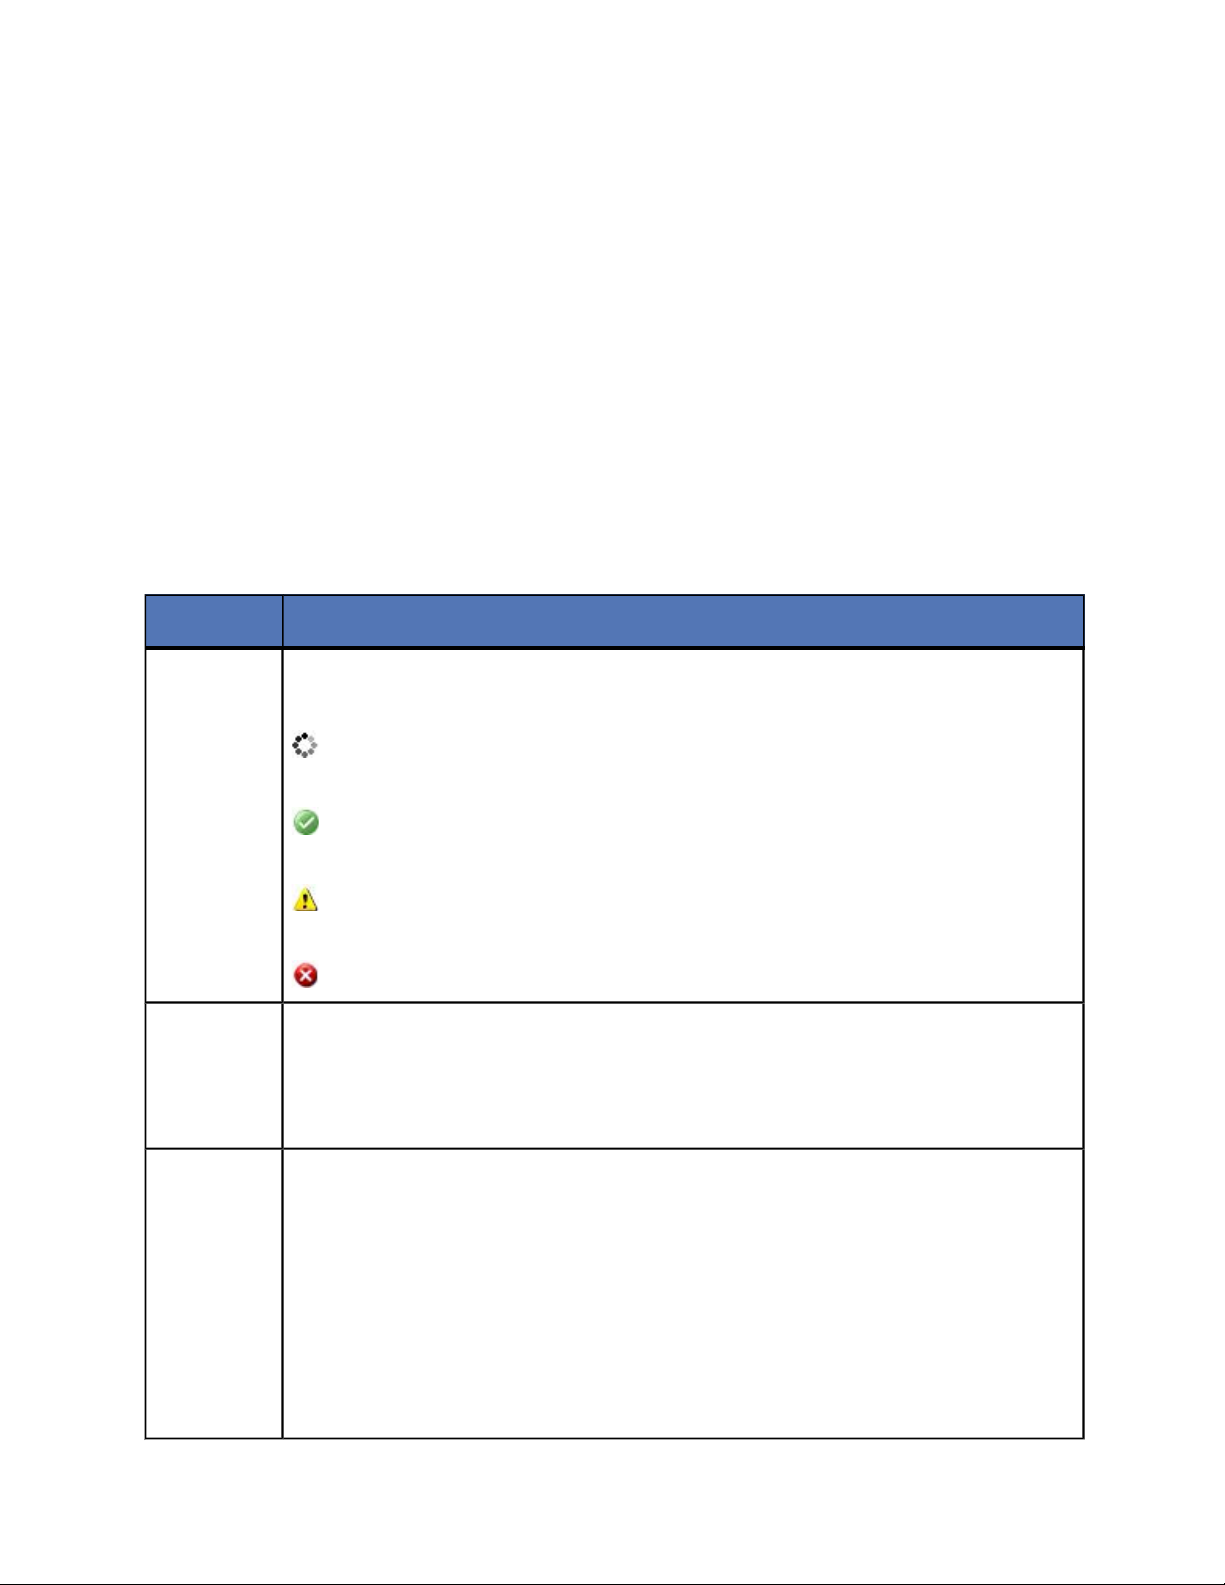
The first unlabeled column is an icon that indicates at-a-glance the status
of the job.
The black, moving circular icon indicates the console is attempting to
process the job to determine the status and statistics.
<no label>
Job Type
Status
The white checkmark inside a green circle indicates the job is in a
good state.
The black exclamation point inside a yellow triangle indicates the job
is in a warning state.
The white X inside a red circle indicates the job is in a bad state.
● Server Migration—This type of job is migrating an entire server,
including the data and system state from the source to the target.
● Data Migration—This type of job is migrating only data from the
source to the target.
There are many different status messages that keep you informed of the
progress of your jobs. Most of the status messages are informational and
do not require any administrator interaction. If you see error messages,
check the job details.
If the Status is Communication Error, the issue could be several things
such as the source server is unavailable or the client has invalid
credentials for the source. If it is a problem with the source server,
perhaps the Storage Mirroring service is not running, resolve the problem
35 of 49
Page 36

Column Description
on the source. If the source appears to have no issues, try refreshing the
job credentials through the Update credentials toolbar button.
For more details on error messages, review the log file located in the \log
subdirectory of your Storage Mirroring Data Migration installation
directory.
Source The name of your source server is displayed.
Target The name of your target server is displayed.
When mirroring, this is the estimated time remaining to complete the
Time
Remaining
mirror. For various reasons, this calculation is an estimate. For example,
some file components, like alternate data streams, cannot be included in
mirror calculations, or the size of the data set may have changed after the
mirror started.
When mirroring, this is the estimated percentage of the mirror that is
%
Complete
complete. For various reasons, this calculation is an estimate. For
example, some file components, like alternate data streams, cannot be
included in mirror calculations, or the size of the data set may have
changed after the mirror started.
Detailed status information
Detailed information is provided for each job at the bottom of the Monitor page.
Section
Detailed
Item
Description
● Server Migration—This type of job is migrating
an entire server, including the data and system
Job
properties
Job type
state from the source to the target.
● Data Migration—This type of job is migrating only
data from the source to the target.
36 of 49
Page 37

Section
Job
properties
Detailed
Item
Job Status
Description
There are many different status messages that keep you
informed of the progress of your jobs. Most of the status
messages are informational and do not require any
administrator interaction. If you see error messages,
check the job details.
If the Job Status is Communication Error, the issue
could be several things such as the source server is
unavailable or the client has invalid credentials for the
source. If it is a problem with the source server, perhaps
the Storage Mirroring service is not running, resolve the
problem on the source. If the source appears to have no
issues, try refreshing the job credentials through the
Update credentials toolbar button.
For more details on error messages, review the log file
located in the \log subdirectory of your Storage Mirroring
Data Migration installation directory.
Job
properties
Job
properties
Job
properties
Job
properties
Connection
Properties
Connection
Properties
Time
Remaining
Source
server
Target
server
Image
Location
Total sent
data
Total sent
compressed
When mirroring, this is the estimated time remaining to
complete the mirror. For various reasons, this
calculation is an estimate. For example, some file
components, like alternate data streams, cannot be
included in mirror calculations, or the size of the data
set may have changed after the mirror started.
The name of your source server is displayed.
The name of your target server is displayed.
This is the location on the target server where the
source image is stored.
This is the total amount of data (mirroring and
replication) that has been sent from the source to the
target.
This is the total amount of compressed data (mirroring
and replication) that has been sent from the source to
the target. If compression is disabled, this statistic will
be the same as Total sent data.
37 of 49
Page 38

Section
Detailed
Item
Description
● Transmitting—The job is transmitting data.
Connection
Properties
Connection
Properties
Connection
Properties
Mirror
statistics
Transmit
status
Target
status
Cutover
available
Mirror
status
● Stopped—The job is stopped.
● Paused—The job is paused.
● Error—There is a transmission error.
● Processing—The target is processing data.
● Paused—The target is paused.
● Yes—The mirror is complete and the source is
ready for cutover.
● No—The mirror is not yet complete, so the source
is not yet ready for cutover.
● Calculating—The amount of mirror data is being
calculated.
● Mirroring—Data is being mirrored.
● Idle—There is no data to mirror.
● Paused—The mirror is paused.
● Stopped—The mirror is stopped.
● Unknown—The console is trying or unable to
determine the mirror status.
Mirror
statistics
Mirror
statistics
Mirror
statistics
Mirror
percent
complete
Mirror
remaining
Mirror
skipped
This is the estimated percentage of the mirror that is
complete. For various reasons, this calculation is an
estimate. For example, some file components, like
alternate data streams, cannot be included in mirror
calculations, or the size of the data set may have
changed after the mirror started.
This is the estimated amount of mirroring data that still
has to be transmitted. For various reasons, this
calculation is an estimate. For example, some file
components, like alternate data streams, cannot be
included in mirror calculations, or the size of the data
set may have changed after the mirror started.
This is the amount of mirroring data that has been
skipped (because the data is not different on the source
and target).
38 of 49
Page 39

Section
Replication
statistics
Detailed
Item
Replication
status
Description
● Replicating—Data is being replicated.
● Pending—Replication is pending.
● Stopped—Replication is stopped.
● Out of memory—Kernel memory has been
exhausted.
● Watchdog—The Storage Mirroring service is not
receiving replication operations from the Storage
Mirroring driver.
● Unknown—The console is trying or unable to
determine the replication status.
Replication
statistics
Bytes sent
This is the total amount of replication data that has been
sent from the source to the target.
This is the total amount of compressed replication data
Replication
statistics
Bytes sent
compressed
that has been sent from the source to the target. If
compression is disabled, this statistic will be the same
as Bytes sent.
Replication
statistics
Bytes
queued
This is the total amount of replication data that is in
queue on the source.
Monitor page toolbar
The Monitor page has its own toolbar buttons for job and monitoring controls.
Toolbar
Icon
Tooltip
Text
New
activity
Description
The large shield icon on the far left of the toolbar opens a
small menu that lets you select an action to perform. Select
Migrate Data or Migrate Server.
Import
jobs
Stop
monitoring
job
The smaller shield icon with the green circle with white plus
sign allows you to launch the import jobs workflow.
The smaller shield icon with the red circle with white line
removes the job from the console Monitor page. The job
remains active, but is no longer visible from the console. To
see the job again, import it using the Import jobs button. If
39 of 49
Page 40

Toolbar
Icon
Tooltip
Text
you want to permanently delete the job, use the Delete job
button.
Resume The green triangle icon resumes the selected job.
The red square icon stops the selected job. The image of the
source, at the time the job was stopped, is still available to
complete a migration, but the image is no longer being
Stop
updated with data changes from the source. If you want to
use the job again, you must restart it using the Resume
button. When you restart a job, a remirror will automatically
be performed.
Description
Cutover
Update
credentials
Delete job
View
details
The blue dot with a curved arrow over it starts the cutover
process.
The keys icon allows you to specify credentials for the
source and target. If the Password associated with a
specified User name changes after a job has been started,
Storage Mirroring Data Migration will attempt to update the
credentials it is using. If the automatic update is not
successful, the monitor page will report Invalid credentials.
In this case, you will need to manually update the credentials
that the job is using the Update credentials button.
The trash can icon permanently deletes the selected job.
The image of the source, at the time the job was deleted, is
still available to complete the migration, but the image is no
longer being updated with data changes from the source. If
you want to use the job again, you must re-create it using the
New activity button.
The paper with magnify glass icon toggles between
displaying and hiding the details at the bottom of the Monitor
page.
40 of 49
Page 41

Toolbar
Icon
Tooltip
Text
OK
Warning
Error
Description
The green circle with the white checkmark icon toggles
between displaying and hiding those jobs that are in a good
state. The number of jobs in the good state is also displayed
on the toolbar button.
The yellow triangle with the black exclamation point icon
toggles between displaying and hiding those jobs that are in
a warning state. The number of jobs in the warning state is
also displayed on the toolbar button.
The red circle with the white X icon toggles between
displaying and hiding those jobs that are in an error state.
The number of jobs in the error state is also displayed on the
toolbar button.
To the right of all of the toolbar buttons is a summary of the
number of jobs displayed by the good, warning, and error
state toggle buttons. The total number of jobs available for
display in this console is also displayed.
41 of 49
Page 42

Importing a job
You can import existing Storage Mirroring Data Migration jobs into the console using the
following instructions.
1. From the Monitor page, select Import jobs on the toolbar.
2. Identify the import server. This is the target server that you are migrating to.
● Server—Specify the name of the target server. You can also click Browse to
select the name from Active Directory or from a network drill-down list.
● User name—Specify a user that is a member of the Double-Take Admin
security group on the target.
● Password—Specify the password associated with the User name you
entered.
● Domain—If you are working in a domain environment, specify the Domain.
3. Click Next to continue.
4. Mark those jobs that you want to import into the console with a checkmark.
5. Click Finish to complete the import.
The Monitor page will automatically appear with the imported job.
42 of 49
Page 43

Using compression
To help reduce the amount of bandwidth needed to transmit Storage Mirroring Data
Migration data, compression allows you to compress data prior to transmitting it across
the network. In a WAN environment this provides optimal use of your network resources.
If compression is enabled, the data is compressed before it is transmitted from the
source. When the target receives the compressed data, it decompresses it and then
writes it to disk.
By default, compression is set to None, which means it is disabled. The compression
levels can be set at Minimum, Medium, or Maximum. Each level requires more
overhead than the previous level of compression. If you notice an impact on performance
while compression is enabled in your environment, either adjust to a lower level of
compression or leave compression disabled.
43 of 49
Page 44

Limiting bandwidth
Bandwidth limitations are available to restrict the amount of network bandwidth used for
Storage Mirroring Data Migration data transmissions. When a bandwidth limit is
specified, Storage Mirroring Data Migration never exceeds that allotted amount. The
bandwidth not in use by Storage Mirroring Data Migration is available for all other
network traffic.
● Do not limit bandwidth—Storage Mirroring Data Migration will transmit data using
100% bandwidth availability.
● Place this limit on the bandwidth—Enter a value in kilobytes per second to limit
data transmission. This is the maximum amount of data that will be transmitted per
second.
44 of 49
Page 45

Routing transmission
By default, Storage Mirroring Data Migration will select a default route for transmissions.
The default route is the first connection listed in the NICbinding order on the target. If
you want to select a different route for Storage Mirroring Data Migration transmissions,
you can select a different IP address on the target using the Storage Mirroring Data
Migration Route option, or you can reorder the bindings on the target server (Network
Connections, Advanced, Advanced Settings, Adapters and Bindings).
45 of 49
Page 46

Configuring e-mail notification
E-mail notification sends specific Storage Mirroring Data Migration events to userdefined e-mail addresses. If you want to use e-mail notification, you will need to identify
who will receive the messages, what messages they will receive, and your e-mail server
configuration.
● Recipients—Specify the e-mail address that each Storage Mirroring Data
Migration e-mail message should be sent to and click Add New. The e-mail
address will be inserted into the list of addresses. Each address is limited to 256
characters, and you can add up to 256 e-mail addresses. If you want to remove an
address from the list, highlight the address and click Remove. If you want to
remove all of the addresses from the list, click Clear.
● Notifications—Specify which events that you want to be sent via e-mail. You can
select Error, Warning, and/or Information.
If you have enabled manual cutover, so that user intervention is required
Note:
before cutover, and you have configured e-mail notification, you will
receive notifications when the migration mirror is complete and cutover is
ready, regardless of the notification events you have selected.
● Server Setup—Specify your e-mail server configuration.
● Mail Server—Specify the name of your SMTP mail server.
● Log on to SMTP server—If your SMTP server requires a login, enable this
option and specify a User name and Password.
● User name—Specify a user account with privileges to send e-mail
messages from your SMTP server.
● Password—Specify the password associated with the User Name you
entered.
● From Address—Specify the e-mail address that you want to appear in the
From field of each Storage Mirroring Data Migration e-mail message. The
address is limited to 256 characters.
● Subject prefix—Specify default text that will appear on every Storage
Mirroring Data Migration e-mail message. This will help distinguish Storage
Mirroring Data Migration messages from other messages.
● Add event description to prefix—Specify if you want the description of the
event appended to the Subject prefix. The subject line is limited to 150
characters, so only the first 150 characters of the combined Subject prefix
and event description will be displayed.
46 of 49
Page 47

Note:
Make sure you configure your e-mail client so that the Storage Mirroring
Data Migration e-mail notification messages do not get blocked by a spam
filter or sent to a junk mail folder.
47 of 49
Page 48

Using firewalls
If your servers are on opposite sides of a NAT or firewall, you will need to configure your
hardware to accommodate Storage Mirroring Data Migrationcommunications. You must
have the hardware already in place and know how to configure the hardware ports. If
you do not, see the reference manual for your hardware.
In a NAT or firewall environment, you must have a static mapping where a single,
internal IP address is always mapped in a one-to-one correlation to a single, external IP
address. Storage Mirroring Data Migration cannot handle dynamic mappings where a
single, internal IP address can be mapped to any one of a group of external IP
addresses managed by the router.
Storage Mirroring Data Migration ports
Storage Mirroring Data Migration port information is stored in configuration files. By
default, ports 6320, 6330, and 6340 are used. If you have to modify which ports are used,
you will have to modify two configuration files. Be careful when modifying these
configuration files. If you modify them incorrectly, Storage Mirroring Data Migration may
no longer work correctly.
1. Open the file JobMgr.dll.config in your Storage Mirroring Data Migration installation
directory. By default, this is \Program Files\StorageWorks\Storage Mirroring. You
may need to associate the .config file extension with Notepad or another text
editor.
2. Locate the following lines near the top of the configuration file.
<add key="IdentificationPort" value="6320"/>
<add key="LivewirePort" value ="6340"/>
<add key="VRAPort" value="6330"/>
3. Change the port numbers as necessary. Do not change any other information.
4. Save the configuration file.
5. Repeat steps 1 through 4 with the file Livewire.exe.config, using the same port
numbers for each key as you used in the JobMgr.dll.config file. The ports must
match between all Storage Mirroring Data Migration servers and clients.
6. If you changed the IdentificationPort in the configuration files, you must also
change a port in Storage Mirroring because Storage Mirroring Data Migration also
relies on that port setting.
48 of 49
Page 49

a. Select Start, Programs, Storage Mirroring, Management Console.
b. Locate your server in the server tree in the left pane of the Management
Console.
Note:
All of your Storage Mirroring Data Migration servers and clients must have the same port
configuration.
If your server is not listed, select Insert, Server. Type the machine name
or IPaddress and click OK.
c. Right-click the server in the left pane of the Management Console and select
Properties.
d. On the Network tab, modify the Communications Port to match the
IdentificationPort in the configuration files.
e. Click OK.
f. Repeat steps b through e for all of your Storage Mirroring Data Migration
servers.
Microsoft Windows ports
If you are migrating to a provisioned virtual machine, Storage Mirroring Data Migration
will use WMI (Windows Management Instrumentation) which uses RPC (Remote
Procedure Call). By default, RPC will use ports at random above 1024, and these ports
must be open on your firewall. RPC ports can be configured to a specific range by
specific registry changes and a reboot. See the Microsoft Knowledge Base article
154596 for instructions.
Storage Mirroring Data Migration also relies on other Microsoft Windows ports.
● Microsoft File Share uses ports 135 through 139 for TCP and UDP
communications.
● Microsoft Directory uses port 445 for TCP and UDP communications.
These ports must be open on your firewall. Check your Microsoft documentation if you
need to modify these ports.
Hardware ports
You need to configure your hardware so that the Storage Mirroring Data Migration and
Microsoft Windows ports are open. Since communication occurs bi-directionally, make
sure you configure both incoming and outgoing traffic.
There are many types of hardware on the market, and each can be configured differently.
See your hardware reference manual for instructions on setting up your particular router.
49 of 49
 Loading...