

HP SSC-12-2K5, SSC-48-5K0, SSC-24-4K0 User Manual
HP COMPACT
Sinewave Inverter with integrated Battery Charger and AC Transfer Switch
S
OLAR ENERGY AUSTRALIA PTY LTD
ACN
081 639 938
S
YDNEY
.
4 B
EAUMONT RD MT KURING-GAI
NSW 2080 TEL (02) 9457 2277 FAX (02) 9457 2255
M
ELB
.
1/15N
ICOLE CLOSE BAYSWATER NTH
VIC 3153 TEL (03) 9761 5877 FAX (03) 97617789
E
MAIL
sales@solaraustralia.com.au W
EB SITE
www.solaraustralia.com.au
O
PERATION
& I
NSTALLATION MANUAL
Serial No: _____________________
Model No: ______________________
M
ODELS
: SSC-12-2K5
SSC-24-4K0
SSC-48-5K0
T
EMPERATURE SENSOR
SSC- TS-01
R
EMOTE DISPLAY
SSC- REM-01
Solar Energy Australia
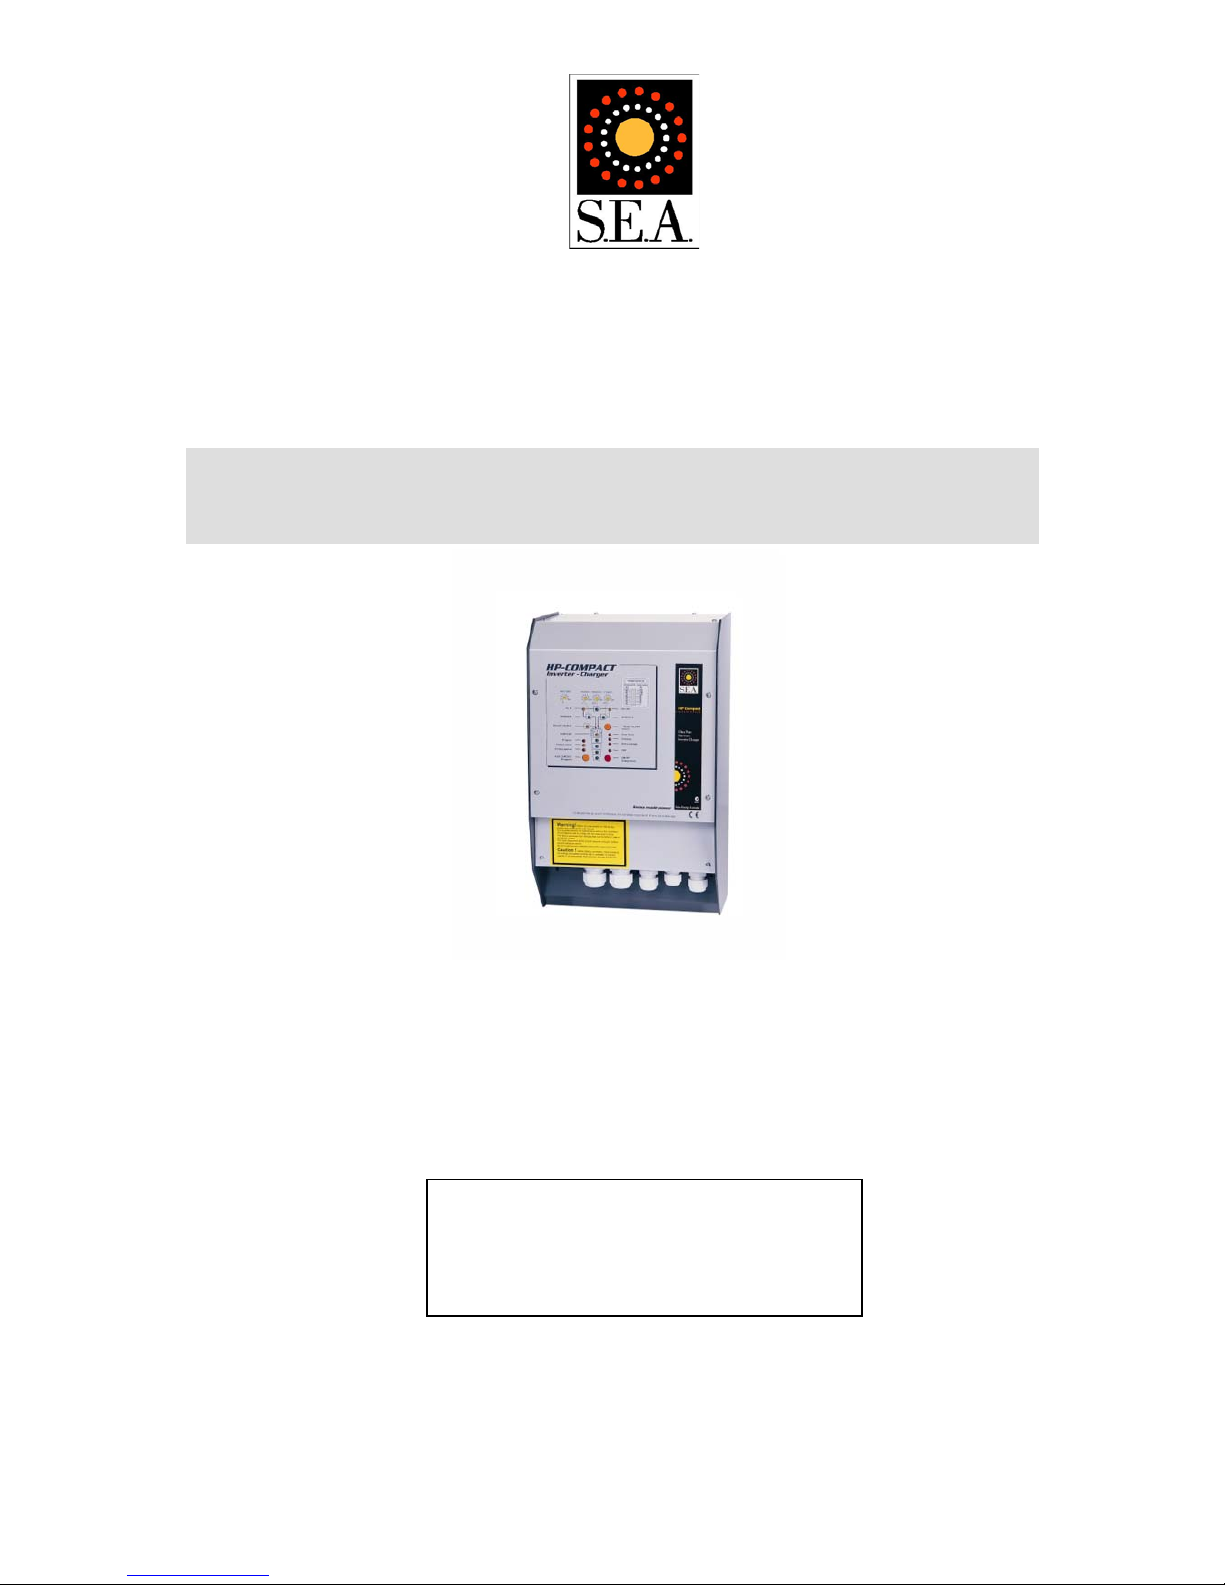
HP
Compact
User Manual HP COMPACT Rev 0803
SSC-1602A
Page 2
T
RUE SINEWAVE OUTPUT
V
ERY LOW TOTAL HARMONIC DISTORTION
(THD)
E
XTREMELY HIGH EFFICIENCY
B
ATTERY SAVING STANDBY CIRCUIT
B
UILT IN HIGH CAPACITY BATTERY CHARGER
F
AST ACTING
AC S
YNCHRONISED TRANSFER SWITCH
O
VERLOAD PROTECTED
P
OWER FACTOR CORRECTION
CONTENTS
G
ENERAL INFORMATION
3
WARRANTY 4
I
NTRODUCTION
Basic Schematic
Main Functions
Battery Connections
5
6
6
I
NSTALLATION
7
OPERATION 9
C
HARGER INFORMATION
12
POWER SHARING 13
STATE OF CHARGE MONITOR 14
MULTIFUNCTION CONTACT 14
R
EMOTE DISPLAY
14
PROGRAMMING CHARGING VOLTAGES 15
PROGRAMMING AUX CONTACTS 19
DISABLING FUNCTIONS 20
MAINTENANCE 20
S
PECIFICATIONS
21

Solar Energy Australia
HP
Compact
User Manual HP COMPACT Rev 0803
SSC-1602A
Page 3
G
ENERAL INFORMATION
Operating instructions
This manual is a part of the delivery package of every HP COMPACT inverter-charger. It serves as guidelines for safe
and efficient operation of the HP COMPACT. The instructions are only valid for use with the following models and ac-
cessories.
•
HP COMPACT SSC-12-2K5
• HP COMPACT SSC-24-4K0
•
HP COMPACT SSC-48-5K0
• Temperature sensor SSC-TS-01
• Remote Display SSC-REM-01
Any personnel who installs an HP COMPACT and/or works with it must be fully familiar with the contents of this man-
ual and must follow exactly all the warnings and safety instructions. Installation of, or any work on the HP COMPACT
must be carried out by a qualified and trained personnel. Installation and application must comply with the respective lo-
cal installations codes and safety regulations.
Quality and Warranty
During production and assembling, all HP COMPACT Inverter/Chargers go through many testing procedures. Every HP
COMPACT has its own serial number, which helps to refer back to its original data in the event of controls or repairs.
That is why you should never remove the identification plate showing the serial number and must ensure you return your
warranty card as soon as possible.
The warranty period for your HP COMPACT is 2 Years from date of purchase, see “Warranty Terms & Conditions” for
full details.

Solar Energy Australia
HP
Compact
User Manual HP COMPACT Rev 0803
SSC-1602A
Page 4
P
LEASE COMPLETE AND RETURN YOUR WARRANTY CARD
SOLAR ENERGY AUSTRALIA WARRANTY Terms and Conditions
Solar Energy Australia considers reliability of your power system/inverter as absolutely critical. We would rather avoid
any potential inconvenience by being proactive. Many external influences can affect the reliability of an inverter, none of
which are under the control of Solar Energy Australia. For these reasons we request that you register your warranty within
60 days of purchase. Warranties that are not registered receive a 6 month warranty.
These terms and conditions do not exclude your rights under the statutory or implied warranty within your state or
territory.
Solar Energy Australia warrant this product against defects in material or workmanship, to the original purchaser only for
an initial period of 6 months from date of purchase, when in normal use and service. The warranty period will be extended
to a total of two (2) years when you register your warranty within 60 days of purchase. No warranty will be provided on
units, which have not been paid for in full.
This warranty does not extend to products which have been opened, altered or repaired by persons other than authorised
by Solar Energy Australia or to products which become defective due to acts of God, fire, sabotage, vandalism,
contaminated fluids, negligence or failure to operate, house and maintain the product in accordance with instructions
provided in this manual.
It is extremely important that all installation and operating instructions contained within this manual are strictly
adhered to. Failure to do so will void your warranty.
Units, which are to be permanently installed/used within 1km of
the coast should use the marine version of our product, this will help to avoid corrosion problems, which are not covered
under the terms of this warranty.
Solar Energy Australia will use the information you supply to carry out a system check, to attempt to avoid any problems
before they occur. Solar Energy Australia will repair or replace the defective product in accordance with its best
judgement. For service under warranty, the buyer or installer must contact Solar Energy Australia to obtain appropriate
paper work and shipping instructions before returning the unit. To make a warranty claim you must produce proof of
purchase when returning the unit. Units returned without prior authorisation or warranty registration will be delayed. The
buyer will pay all charges incurred in returning the product to the factory including, installers time. Solar Energy Australia
will pay return freight charges, if the product is found to be defective, within the terms of the warranty. Repair or
replacement of any unit does not extend the original warranty terms in any way.
This warranty does not cover repairs made necessary due to the product coming in contact with dirt, abrasives, moisture,
rust, corrosion, varnish or other similar, insufficient system maintenance, failure due to poor quality or poor condition
batteries, failure to use the appropriate AC transfer switch or wiring carried out by inappropriately qualified personnel.
Solar Energy Australia will in no way be held responsible for any losses incurred due to the malfunctioning or failure of a
product.
Suitably qualified personnel must carry out all AC & DC permanent wiring. Failure to do so will void warranty.
To register your warranty you must do the following:
Return your completed warranty registration card within 60 days of purchase.
This can be faxed to ++61 3 9761 7789 or mailed to: Solar Energy Australia Pty Ltd,
Unit 2 / 4 Beaumont Road, Mount Kuring-Gai, NSW, 2080.
Fixed installations must provide a picture of the installation from a distance of 1 metre; household installations
must supply a second picture showing the structure housing the inverter.
Circuit diagram of installation. This can be obtained from your installer and may be a generic diagram.
Circuit diagrams and pictures can be emailed to
sales@solaraustralia.com.au
or posted.
If the above items are not received, they may be requested before work can commence on any faulty units, but please be
aware, Solar Energy Australia is here to help. Help us to help you.
These measures are put in place to ensure you have years of trouble free service from your Solar Energy Australia
inverter. If you have any questions about this warranty please do not hesitate to contact us.
Solar Energy Australia
HP
Compact
User Manual HP COMPACT Rev 0803
SSC-1602A
Page 5
Caution:
Even when an HP COMPACT has been completely disconnected, there can still be deadly voltages present at the OUTPUT. To remove these voltages you must switch the COMPACT ON with the ON/OFF switch. After one minute the electronics are discharged and any work can now be safely carried out.
Caution:
In normal use lead-acid and lead-gel batteries give out explosive gases. Never smoke or allow a spark or
flame in the vicinity of batteries. The batteries must always be stored or placed in a well ventilated area, they should
be placed in such a way that there is no danger of short circuiting through carelessness. Never charge frozen batteries
.
The HP COMPACT is not to be used or sold for life support equipment or applications
.
Special Precautions
•
While working on batteries there should always be a second person close to you or within your voice range, in case
help is needed.
•
Plenty of fresh water and soap must be ready at hand so that in case of acid coming in contact with skin , eyes and
clothes, the areas in question can be thoroughly washed.
•
If acid enters the eyes, you must thoroughly wash the eyes with cold running water for at least 15 minutes. It is recommended that you immediately consult a medical doctor.
•
Baking powder neutralizes battery acid electrolyte. Always keep some at hand.
•
Special care must be taken when working with metal tools near or on the batteries. With tools such as screwdrivers,
spanners etc. short-circuits can result. Sparks produced by the short-circuit can cause an explosion.
•
When working on batteries all personal metal items such as rings, necklaces and bracelets must be removed. Batteries are so powerful that short-circuit with these items can melt them and thus cause severe burns. Always follow the
battery manufacturers instructions.
•
Under certain conditions your HP COMPACT or a connected generator can start automatically. While working on
an electrical installation you must ensure that these appliances are disconnected before commencing any work.
6p
8p
RJ11
OFF
AC OUT
Over Temp.
Overload
AC IN
SOLAR CHARGE
Contact manual
Contact active
Program
COMPACT
AUXILIARY CONTACT ON/ OFF
INVERTER - CHARGER
(Select)
RCC-01
INVERTER
CHARGER
(Program) (Change status)
Battery
Low/High
RESET
ALARM
10
20
30
40
50
60
70
TRANSFER
Ch
arg
er
Inv
ert
er
5
10
20
40
60
80
100
130
160
A %
EQUALIZE
SOLAR
AUX. CONT
.
L
PE
N
L
PE
N
Remote control
BATTERY
CT35
100nF
1uF
10nF
10nF
1uF
150A
1uF
4x2,7M
Ω
Remote control
Temp.
Max
.
6m
Max. 40m
AC OUT
Filter
Microprocessor,
Control, Adjustment
Display
Inverter
Charger
Remote control
Solarmodule
Temp. Sensor
Battery
Input
230Vac
Output
230Vac
A
C IN
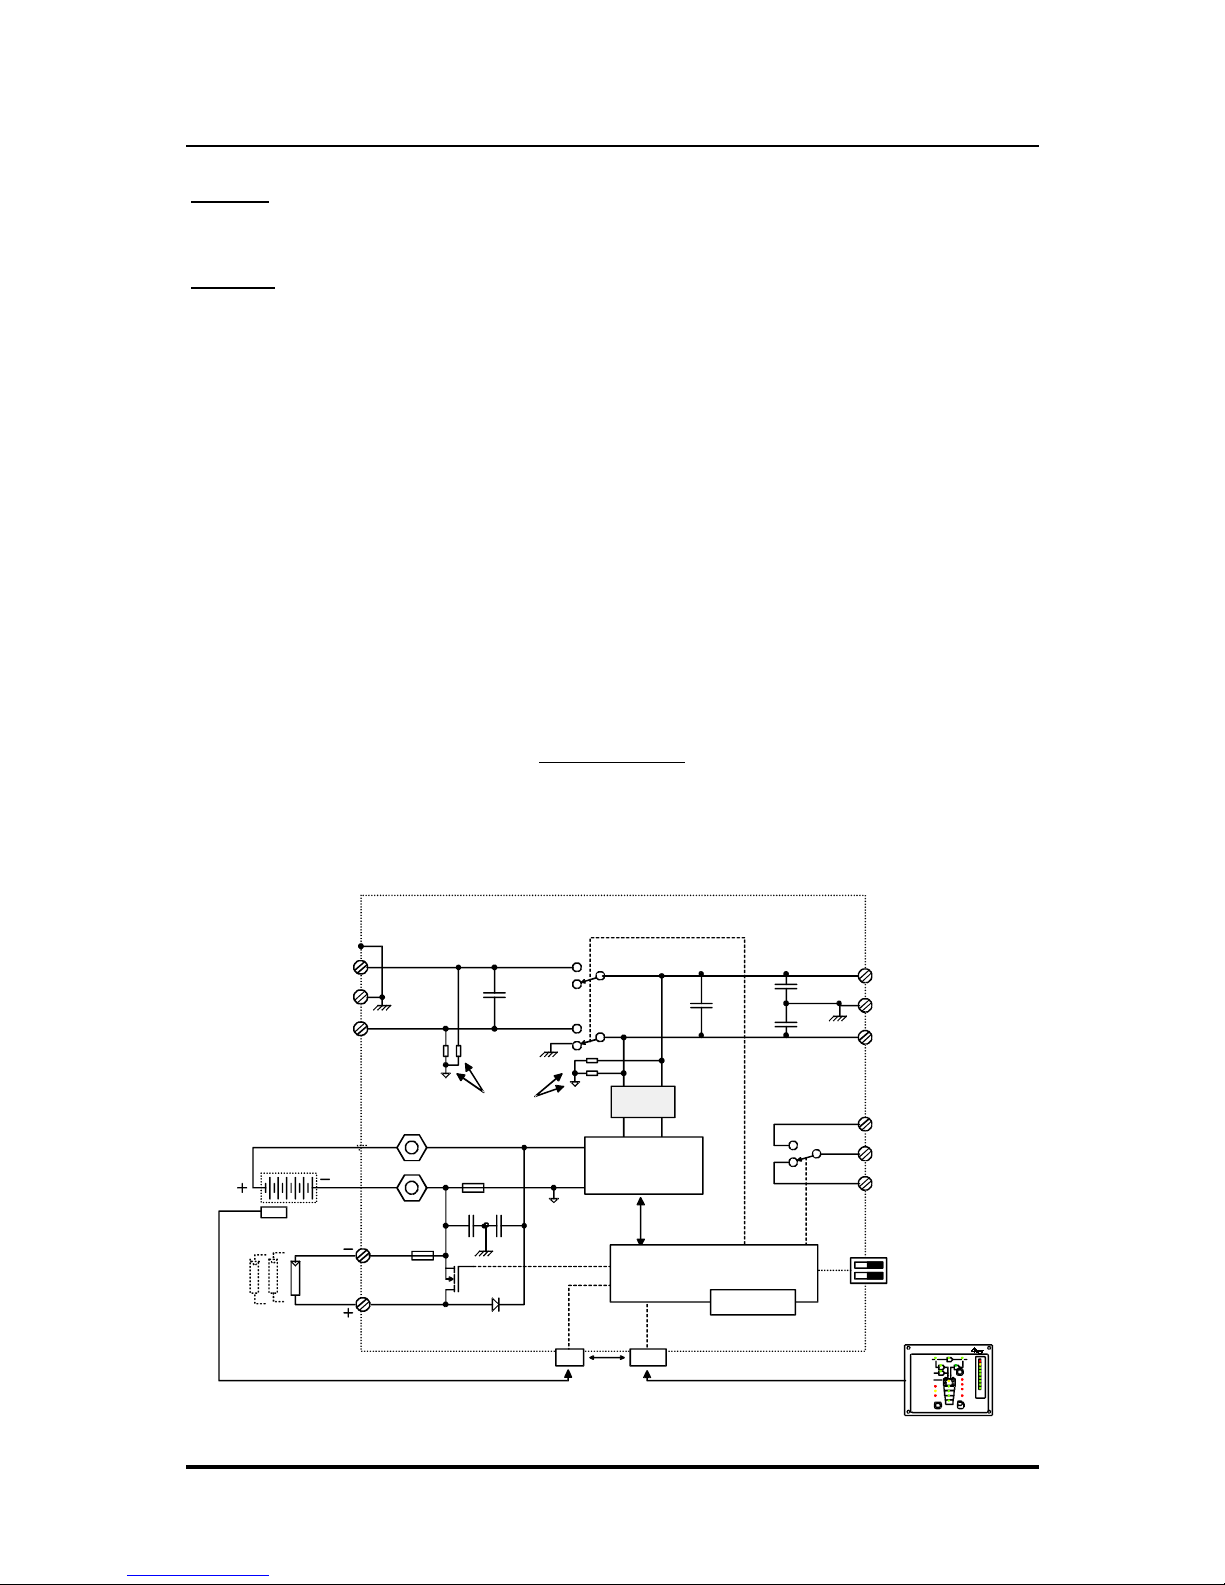
I
NTRODUCTION
The COMPACT is a sine wave inverter with integrated battery charger and AC transfer switch.
with many additional functions.
Basic schematic
Solar Energy Australia
HP
Compact
User Manual HP COMPACT Rev 0803
SSC-1602A
Page 6
Description of main functions
1. The Inverter
The sinewave-inverter section of your HP COMPACT generates a sinewave AC voltage with an exceptionally precise voltage and stabilized frequency. In order to start large electric motors, the user has the possibility to employ a short-startpower which is 3-times the nominal power of the HP COMPACT.
The inverter is protected against overload and short-circuit. A power-stage with the latest MOS-FET power transistors, a
torroidal transformer, and a fast regulating system make-up a robust and reliable inverter with very high efficiency. A 1-20
Watt adjustable load detection system serves to provide the smallest energy consumption and ensures a long life for the
battery.
2. The Transfer system
HP COMPACT can be connected to an AC input source, eg. a stand-by motor generator, AC grid, shore power or a caravan
park. With the transfer system, on one side you have AC voltage which is used to run the load, on the other side the batteries are being charged. The distribution of energy between the AC loads and battery charger is automatic.
3. The Battery charger
The built-in battery charger is capable of charging the batteries quickly and completely. A microprocessor controlled, 3 to
4 Step charging process ensures the optimum charging of the batteries. The desired charging current can be set continuously
from 0 – 100%. The battery charger can be used for lead-acid or gel batteries. Thanks to the floating charge ability of your
Compact, the batteries can remain continuously connected.
4. The solar charge regulator (SSC-xx-xxx-s models only)
With the built-in solar regulator, the HP COMPACT is a complete solar-power-center. In a solar installation this regulator
ensures that the batteries are charged correctly. With the COMPACT, batteries can be charged with a generator and with the
solar modules at the same time. The charging of batteries with both energy sources is carried out fully automatically.
5. Remote display (optional)
A remote display can be connected to your HP COMPACT. All operating elements and displays with the exception of the
load detection level adjustment are available on the remote display. The remote display is supplied with a 20m long cable.
This cable can be up to 40m long. On the remote display output power and charging current are also shown.
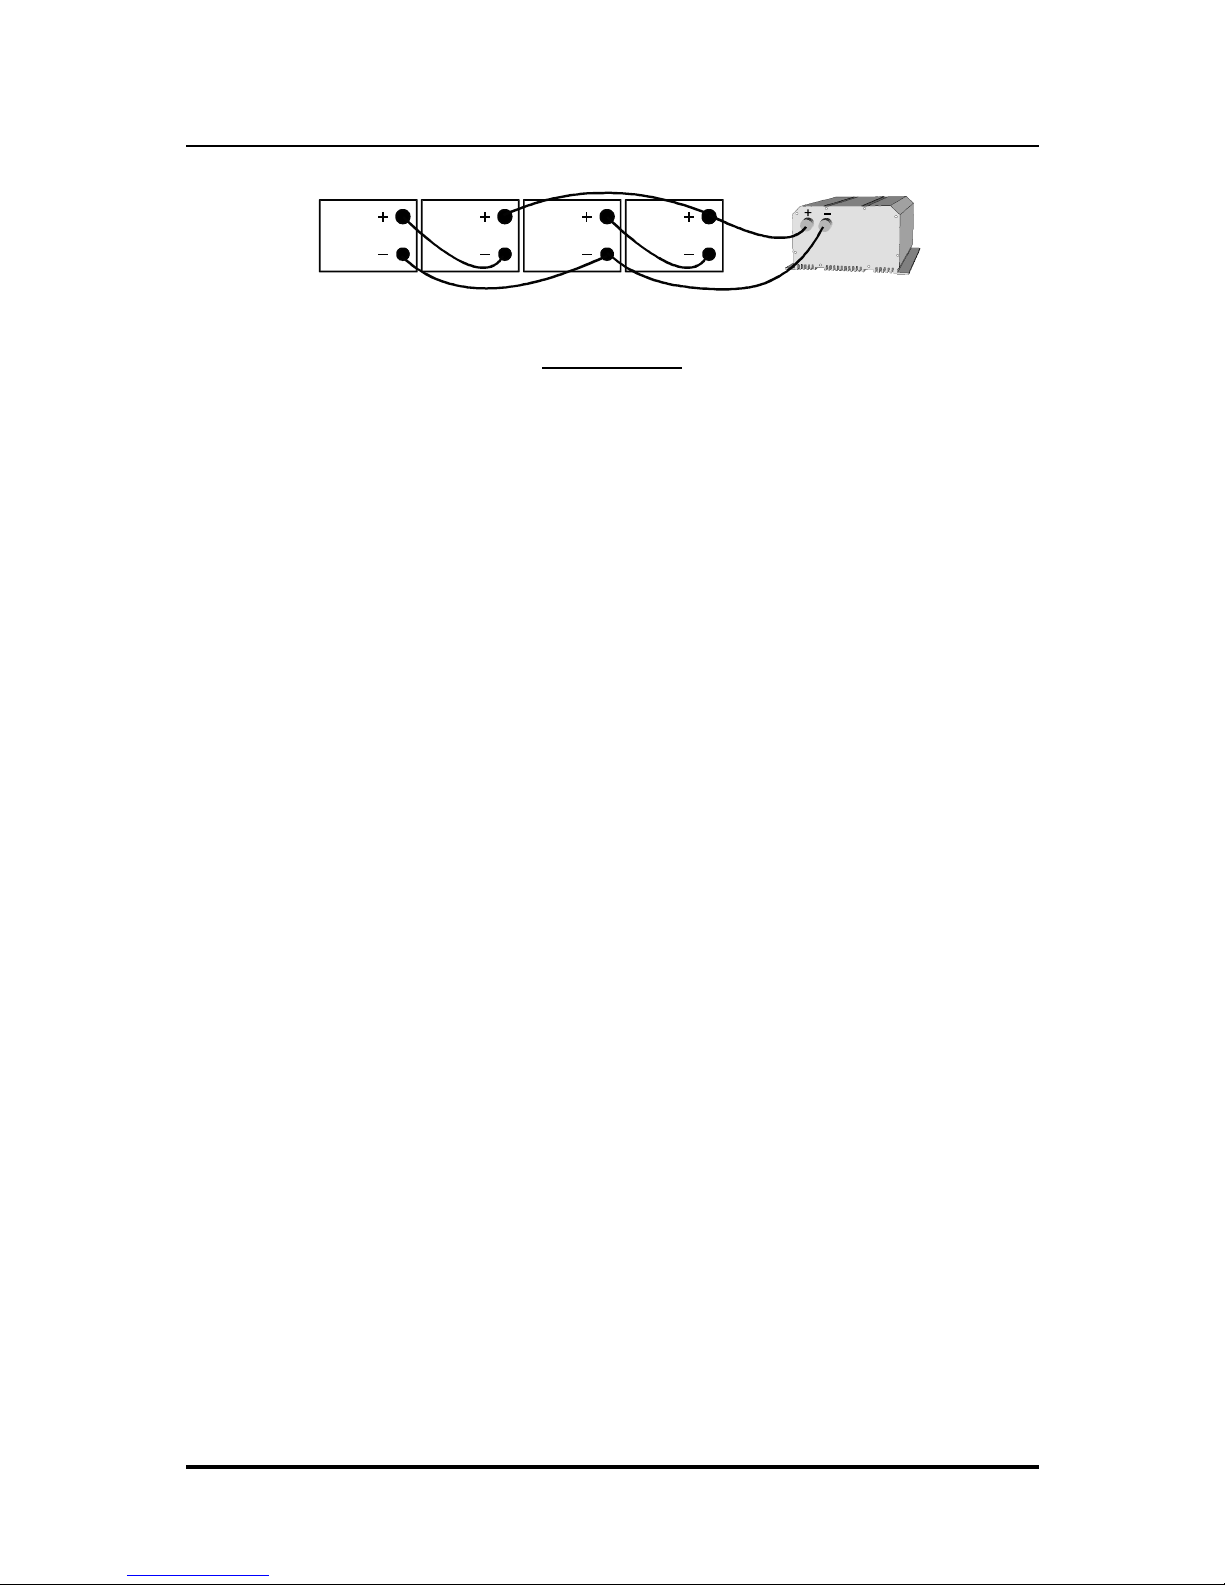
Battery connections
Lead-acid batteries are normally available in blocks of 2V, 6V or 12V . In most cases, to generate the necessary operating
voltage and the capacity of the batteries for the HP COMPACT many batteries have to be connected together in parallel and
or in series. Three examples are shown:
12V
12V
12V
1. Parallel Connection
:
Maximum 2 batteries in parallel.
2V
2V
2V
2V
2V
2V
12V
48V
12V
12V
12V
12V
2V
2V
2V
2V
2V
2V
24V
2V
2V
2V
2V
2V
2V
2. Series Connection
Solar Energy Australia
HP
Compact
User Manual HP COMPACT Rev 0803
SSC-1602A
Page 7
3. Parallel- Series Connection:
12V
12V
12V
12V
24V
I
NSTALLATION
Location
The location of the HP COMPACT must be chosen by the following criteria:
•
Protection from unauthorized access and children.
•
Dry dust free room, no condensation, no rodents. Power sheds MUST have 4 walls and a lockable door
•
Never install directly over the battery and never in a cabinet together with the batteries.
•
Keep ventilation holes free. The ventilation of the HP COMPACT is designed in such a way that it will work most
efficiently when mounted vertically.
•
In mobile installations it is important to keep vibrations to a minimum.
Mounting
1. HP Compact
The HP COMPACT can be installed in any desired location but only vertically. Screw the fixing bracket to the wall, and
hang the HP Compact onto this bracket, insert two screws at the bottom of the unit. In motor vehicles, the HP COMPACT
must be fixed on vibration reducing mounts. The HP COMPACT must not be fixed on a combustible wall, as the back of
the casing can get hot and reach up to 80 degree Celsius.
All connecting cables and also the mounted battery cables , must be fixed with strain relief clamps.
The battery cables must be as short as possible,. your installer will calculate the appropriate size cables.
To protect the battery cable, a fuse corresponding to the conductor cross section must be fixed directly on to the battery.
All cables must be tightly screwed in place. For safety, a yearly maintenance program is recommended. In mobile installations, maintenance must be carried out more often.
Connections
1. General instructions on connecting
All connections for the HP Compact are done by removing the cover plate above the cable glands.
The cable connection on the terminals AC INPUT / AC OUTPUT must be carried out with a No 3 screwdriver, the connection on the AUX RELAY terminal must use a No 2 screwdriver.
The conductor cross section on the terminals AC INPUT / AC OUTPUT / 15A 230VAC of the connecting cable must be
comply with local regulations.
Connections must be done by qualified personnel. Material such as cable, connectors and distribution boxes, fuses
etc. used in the installation must comply with the respective valid low-voltage installation rules and regulations
Applicable Standards.
AS4509.
Remote Home Power systems
AS4086.
Secondary batteries for use with Stand Alone Power systems
AS 3010.1
Generators
The Protection cover must be closed after installation and remain ON at all times.
 Loading...