

Page 1

HP Remote Device Access
vCAS User Guide
Software Version: 8.1
Document Release Date: June 2014
Software Release Date: June 2014
Page 2

Legal Notices
Warranty
The only warranties for HP products andservices are set forth in the express warranty statements
accompanying such products and services. Nothing herein should be construed as constituting an
additional warranty. HP shall not be liable for technical or editorial errors oromissions contained herein.
The information containedherein is subject to change without notice.
Restricted Rights Legend
Confidential computersoftware. Valid license from HP required for possession, use or copying.
Consistent with FAR 12.211 and 12.212, Commercial Computer Software, Computer Software
Documentation, and Technical Data for Commercial Items are licensed to the U.S. Government under
vendor's standard commercial license.
Copyright Notice
© Copyright 2014 Hewlett-Packard Development Company, L.P.
Trademark Notices
Microsoft® and Windows® are U.S. registered trademarks of Microsoft Corporation.
UNIX® is a registered trademark of The OpenGroup.
Page 2 of 65HP Remote Device Access 8.1:vCAS User Guide
Page 3

Contents
Contents 3
About This Document 6
Document Revision History 6
Chapter 1: Understanding the vCAS 7
About Remote Device Access (RDA) 8
About the Customer Access System (CAS) 8
Chapter 2: Installing the vCAS 9
Summary of Network Ports for Virtual CAS (vCAS) Installation 10
Install the vCAS on VMware ESX/ESXi 12
Verifying Prerequisites 12
Importing to VMware ESX/ESXi 12
Install onOracle VM VirtualBox 18
Verifying Prerequisites 18
Importing to VirtualBox 18
Install onVMware Player 21
Verifying Prerequisites 21
Importing to VMware Player 22
Install onVMware Server 24
Chapter 3: Configuring Your vCAS 25
Verify Prerequisites 25
Configure YourvCAS 25
Add the Virtual CAS to the RAP 27
Chapter 4: Managing your vCAS 29
Monitor HP's Activity 29
Understanding the Activity Graph 29
Active Tunnels 30
Logins 30
Blocked Tunnels 31
Blocked Logins 32
Controlling Access 33
Page 3 of 65HP Remote Device Access 8.1:vCAS User Guide
Page 4

Contents
Tunnel Access Control 33
Grant Access 34
Login Access Control 35
PerformingOptional Configuration 36
Authentication 36
Email Alerts 37
Preferences 38
Send Logs to a Remote Log Server 40
Become a Central Logs Collector 40
Software Updates 41
Managing Automatic Settings 42
Managing Software Channels 43
Managing Optional SoftwarePackages 43
Managing Manual Actions 44
Downloading Source Code 44
Viewing the Log 45
LogRefresh Rate 46
Chapter 5: Troubleshooting Information 47
Test the Virtual CASNetwork Check Tool 47
Run the Virtual CASNetwork Check Tool 47
Check Manual Setup 48
Logging on to the Console 48
Changing yourPassword 48
Running the Manual Setup Command 48
Repeat Setup 49
Preserve and Restore vCAS Settings 49
Start Fresh 49
Appendix A: Starting a Virtual CAS at System Startup using VirtualBox 50
Configure Linux Hosts 50
Configure Windows Hosts 50
VirtualBox Extension Pack 51
VirtualBox Control Service 51
HP Remote Device Access 8.1:vCAS User Guide Page 4 of 65
Page 5

Contents
VirtualBox Control Service system tray application 52
Use VBoxVmService 53
Create a scheduledtask 54
Test the autostart 55
Appendix B: Release Notes 57
Fixed Problems and Enhancements 57
Known Issues 57
Apply the Update 57
Access the Kit 57
HP RDA CAS New Packages 58
HP RDA CAS Ubuntu Changelog Summary 58
hp-rdacas 58
hp-rdacas (1:14.06-37604) stable; urgency=low 58
hp-rdacas (1:14.04-37038) stable; urgency=low 58
libterm-emit-perl 59
libterm-emit-perl (0.0.3-1) 59
Appendix C: License 60
HP Remote Device Access 8.1:vCAS User Guide Page 5 of 65
Page 6

About This Document
The vCAS User Guide provides the necessary information to install, manage, and troubleshoot your
Virtual Customer Access System (vCAS).
Document Revision History
Edition Software Version Publication Date
Edition 1 RDA 7.1 June 2012
Edition 2 RDA 7.2 December 2012
Edition 3 RDA 7.3 June 2013
Edition 4 RDA 8.1 June 2014
Page 6 of 65HP Remote Device Access 8.1:vCAS User Guide
Page 7

Chapter 1: Understanding the vCAS
The Virtual Customer Access System (vCAS) is a pre-packaged virtual appliance. It is a small but
complete operating system, with HP's CAS softwarepre-installed.
The vCAS contains the software necessary for HP to securely access your network (depending on your
access control settings) and provides support for your systems and devices. In addition to its service
gateway capabilities, it includes advanced forms of the following:
Components Description
Authentication The vCAS uses a single sign-on authentication mechanism based on HP's
DigitalBadge infrastructure - an X.509 certificate-basedpublic key
infrastructure.When an HP Support Agent logs on to orthrough a virtual CAS, the
strong authentication is performed at HP's perimeter servers and at your vCAS.This
helps protect you from unwanted intrusion.
Access
Control
Audit Logs View detailed audit logs of activity on the vCAS. The log details the HP Support
Manageability The vCAS has an integrated patch and update mechanism.Select to have patches
OpenSSH
Software and
X.509
Extensions
Control who can access your network and what systems, ports, and protocols you
allow. The intuitive web interface enables you to disable all access or enable wideopen access as desired.
Agent's e-mail address, the date andtime of the support session, and the details of
the target to which the HP Support Agent is connected.
andupdates applied automatically, or manually apply them. Youcan also view
changelogs of all updates and get the source codefor the entire appliance.
The vCAS is based on a stripped-down Ubuntu server Linux distribution. It contains
the following HP supplied software components:
Note: To allow updates, the customer has to allow https access to a
specific server in HP, if not the client will have to manually perform this
step.
The OpenSSH software provides basic SSH connectivity and is enhanced by adding
a digital certificate authentication and other security extensions (see RDA Security
Extensions). Currently, a modified version 6.1p1 with the X.509 patches (written by
Roumen Petrov)is used.
RDA Security
Extensions
RDA CAS
User Interface
and
Management
Includes components for secure auditing, logging, and access control functionality.
The primary components of this package are NSS and PAM libraries which enable
the CAS to automatically create accounts for authenticated DigitalBadge users and
to containtheir activities.
A web-based user interface and the code to automatically create accounts for
authenticated DigitalBadge users. The web UI supports both Firefox and Internet
Explorer browsers and should work on other popular browsers. The lighttpd web
server is used to host the pages. The user interface provides initial configuration
features, access control, audit logs, software updates, and appliance setup.
Page 7 of 65HP Remote Device Access 8.1:vCAS User Guide
Page 8

Chapter 1: Understanding the vCAS
About Remote Device Access (RDA)
Remote Device Access (RDA) is an HP solution that allows HP Support Agents to connect securely from
the HP network to systems on a customer's network. RDA provides problem diagnosis, troubleshooting,
andproactive support activities.
About the Customer Access System (CAS)
A CustomerAccess System (CAS) acts as a gateway for HP to access your network. HP Support
Agents use your CAS to provide support to you. It is a single point of control for you. You decide who from
HP can access what parts of your network, and when.
A CAS comes in many forms. A CAS can be as simple as one of yourown servers on which you allow HP
to access the SSH. It could be the lightweight instant CAS that you run in yourweb browser or be a
dedicated server where you have installed a full physical CAS kit. It may even be a virtual appliance, for
example, the vCAS.
HP Remote Device Access 8.1:vCAS User Guide Page 8 of 65
Page 9

Chapter 2: Installing the vCAS
This chapter describes installing the vCAS on the following systems:
l VMware ESX/ESXi 4.0 or later
l Oracle VM VirtualBox 4.2 or later
l VMware Player 5.0.0 or later
l VMware Server(we highly recommend NOT to use VMware Server as it is unsupported since 2011)
The two main steps to running your vCAS are:
1. Import the virtual appliance
2. Configure the virtual appliance
Page 9 of 65HP Remote Device Access 8.1:vCAS User Guide
Page 10

Summary of Network Ports for Virtual CAS (vCAS) Installation
The following table summarizes all ports that might be used for a vCAS installation. Seefor ports that are required for basic system operation.
Table 2.1 vCAS Connectivity - Firewall/Port Requirements
Protocol Ports Source Destination Function Configurable Optional
TCP 22 HP Remote
Access
Connectivity
System
(RACS)
TCP 443 Customer's
Web
Browser
UDP 53 Virtual CAS DNS Server DomainName Service (DNS) - Host
UDP 123 Virtual CAS Network Time Server Network Time Protocol No Recommended
TCP 80 or web
proxy port
TCP 80 Virtual CAS onsite-ocsp.verisign.com OCSP (Online Certificate Status
TCP 443or web
proxy port
Virtual CAS onsitecrl.verisign.com or
Virtual CAS h20529.www2.hp.com or
Virtual CAS SSH Tunnel Yes Required
Virtual CAS HTTPS port for web UI for managing
Virtual CAS
name resolution
HTTP (Unencrypted) Daily fetch of HP
Web Proxy
Web Proxy
Class 2 CA certificate revocation list
(CRL)
Protocol) for certificate revocation check
HTTPS connection to the HP RDA CAS
Kit serverto download updates
No Required
No Required
No Recommended
No Recommended
No Recommended
TCP 22 Customer's
SSH Client
TCP 25 Virtual CAS Customer-Designated
Virtual CAS SSH command-line access for Virtual
SMTP Server
No Optional
CAS management
Email notifications No Optional
Page 10 of 65HP Remote Device Access 8.1:vCAS User Guide
Page 11

Table 2.1 vCAS Connectivity - Firewall/Port Requirements, continued
Protocol Ports Source Destination Function Configurable Optional
TCP 514 Virtual CAS Logging Server Syslog remote logging (unencrypted) Yes Optional
UDP 514 Virtual CAS Logging Server Syslog remote logging (unencrypted) Yes Optional
TCP other Virtual CAS Target System Customer-specified TCP port and
application protocol SSH-forwarded from
HP via the relay application
UDP other Virtual CAS Target System Customer-specified TCP port and
application protocol SSH-forwarded from
HP via the relay application
Yes Optional
Yes Optional
HP Remote Device Access 8.1:vCAS User Guide Page 11 of 65
Page 12
Install the vCAS on VMware ESX/ESXi
You can install the vCAS on a VMware ESX or ESXi server using a VMware vSphere Client.
Verifying Prerequisites
Beforeyou install the vCAS, verify the following prerequisites:
l Make sure you have access to a VMware VSphere Server and that VMware vSphereClient is installed
l Make sure to downloadthe vCAS .ova image or that it is available via URL
l Make sure you have access to a VMware vSphere Server
Importing to VMware ESX/ESXi
To import the vCAS on a VMwareESX/ESXi Server, complete the following steps:
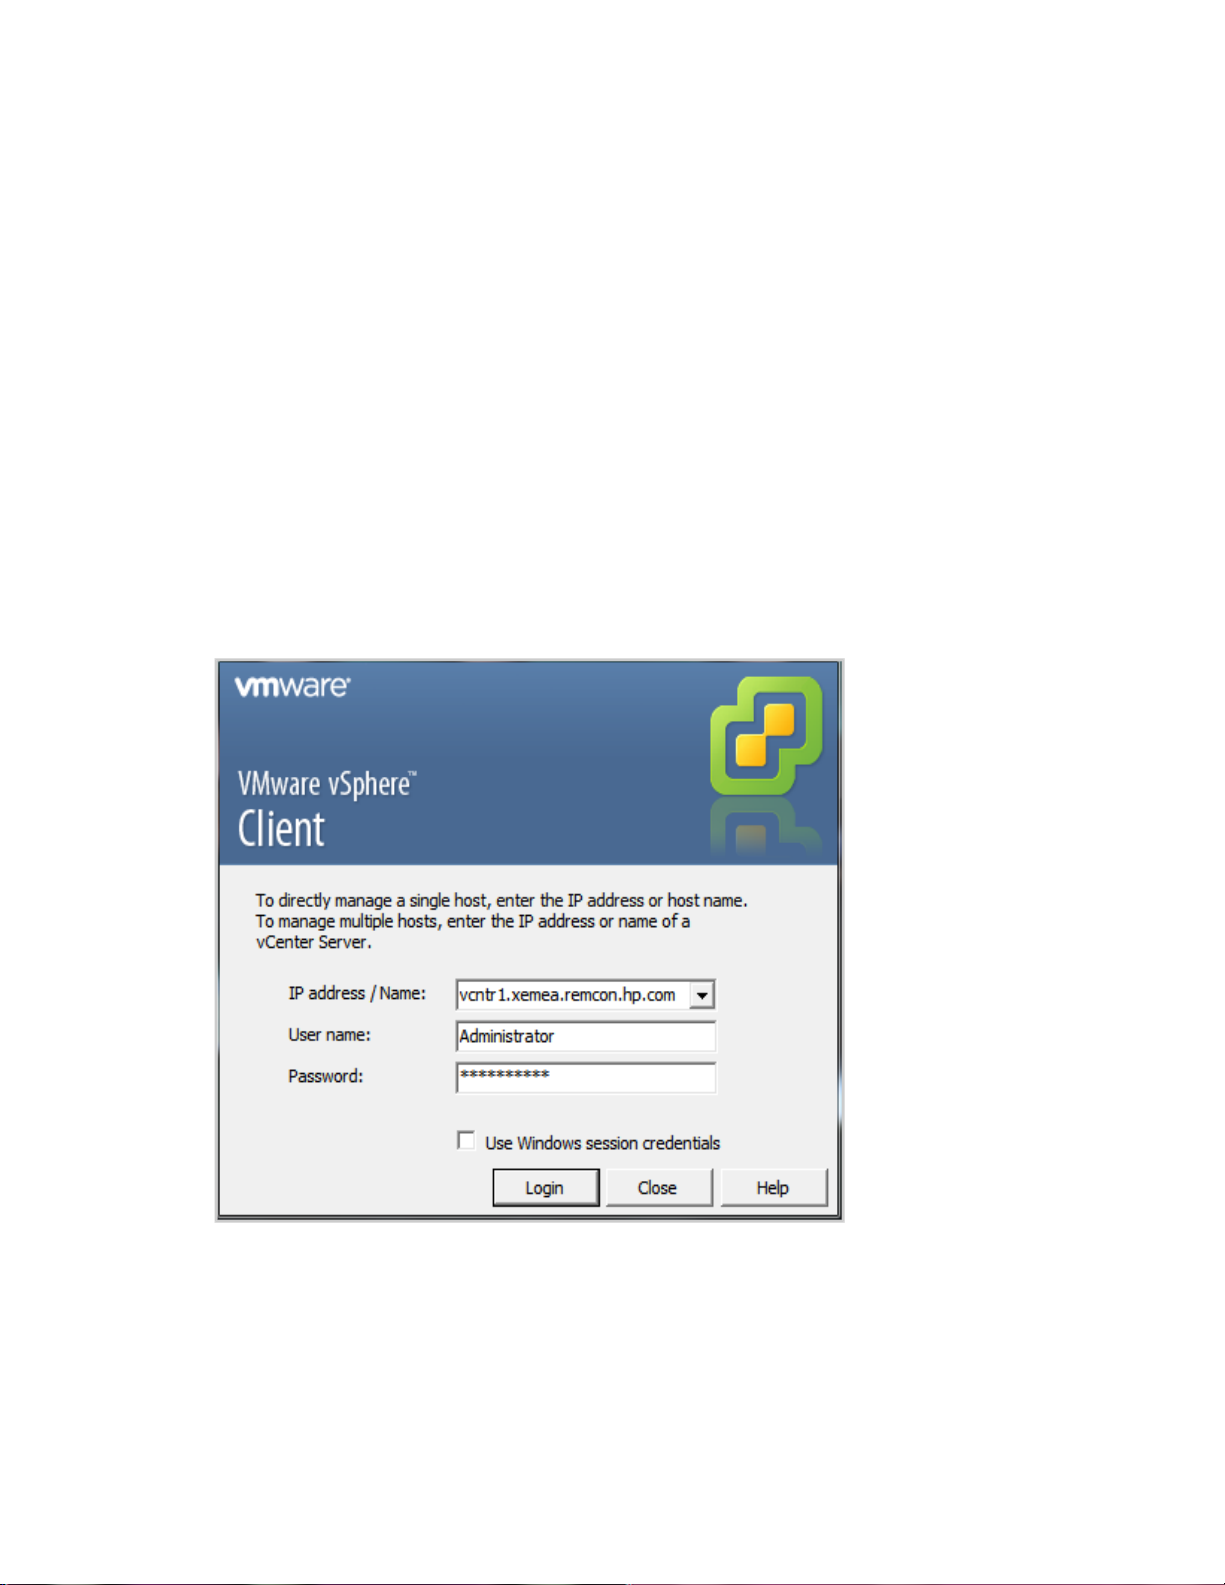
1. To launch the VMware vSphere client, double-click the VMwarevSphere Client icon.
The VMware vSphere Client login window appears.
2. Log on to the vSphere Client. Use any Windows account that has administrator rights.
3. Click Login. ThevSphere Client main window appears.
Page 12 of 65HP Remote Device Access 8.1:vCAS User Guide
Page 13
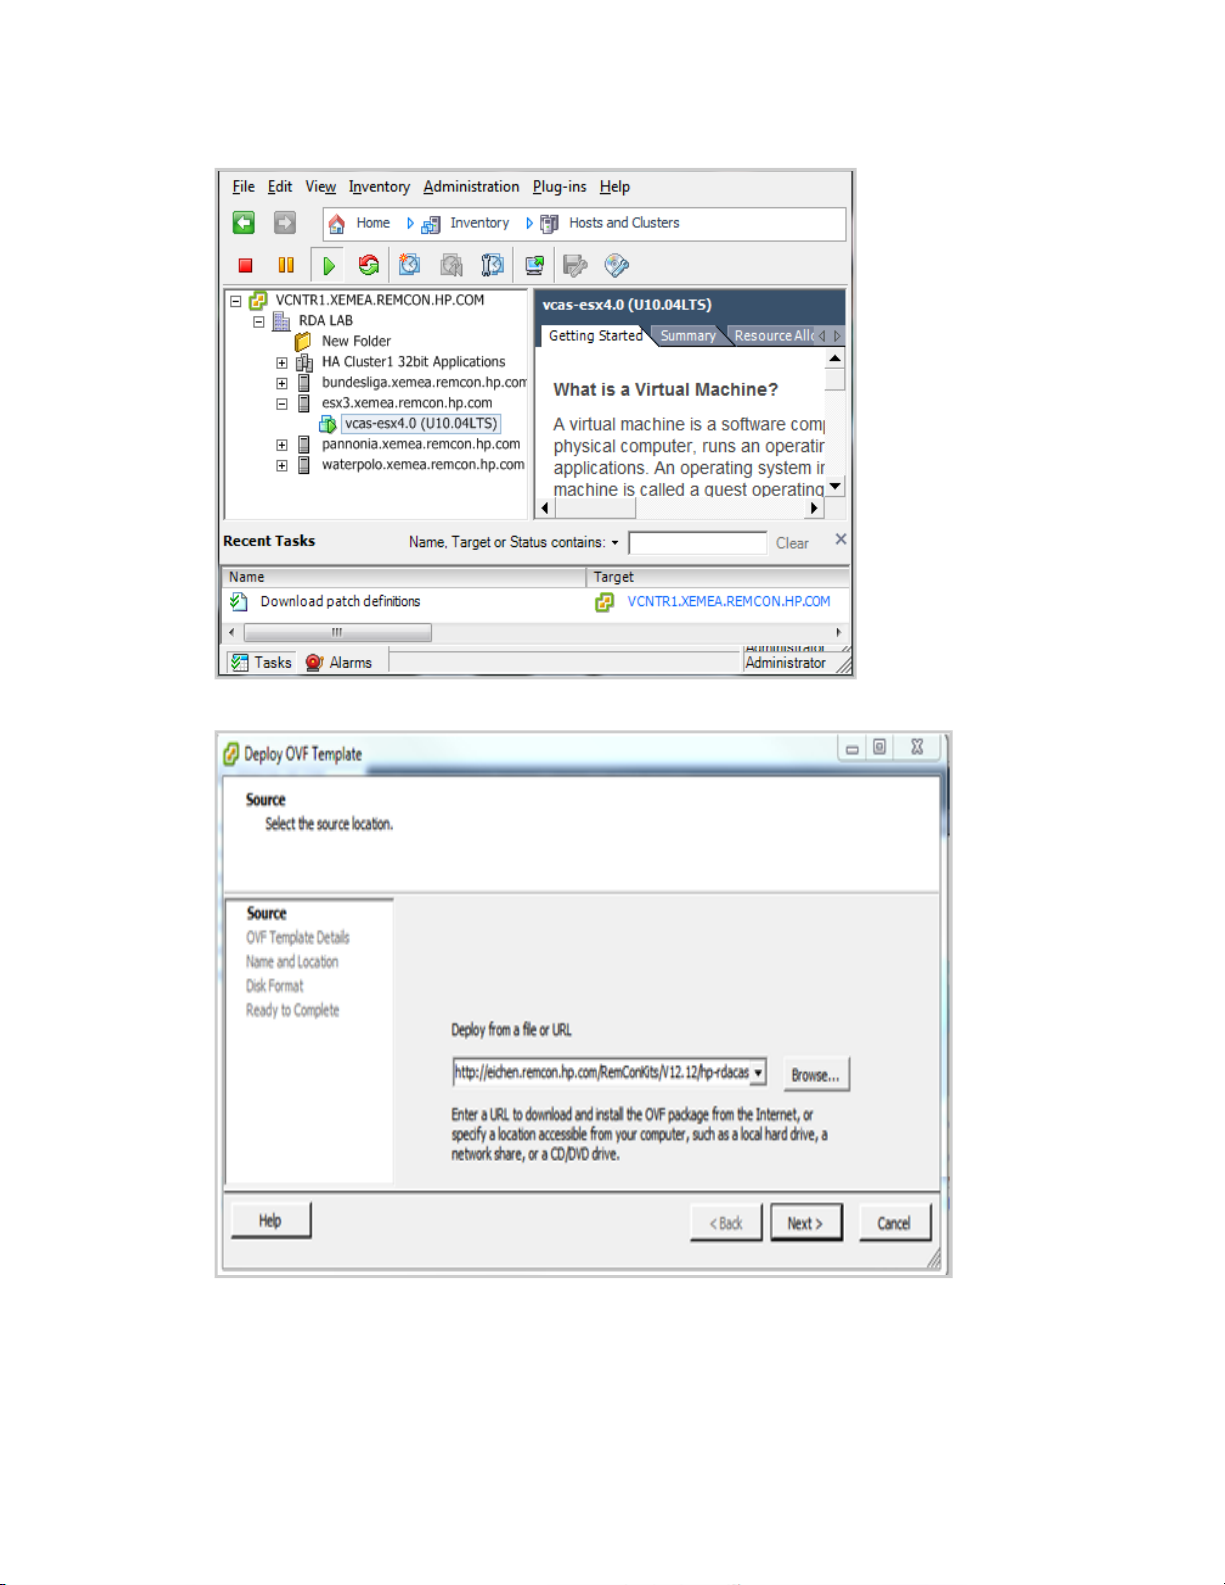
4. Click File, then Deploy OVF Template. The Deploy OVF Template wizard appears.
5. Select source location.
6. Click Browse to search yourfile system for the ovf or.ova file, or entera URL to the .ova file located
on the Internet. TheOVF Template Details page appears.
HP Remote Device Access 8.1:vCAS User Guide Page 13 of 65
Page 14
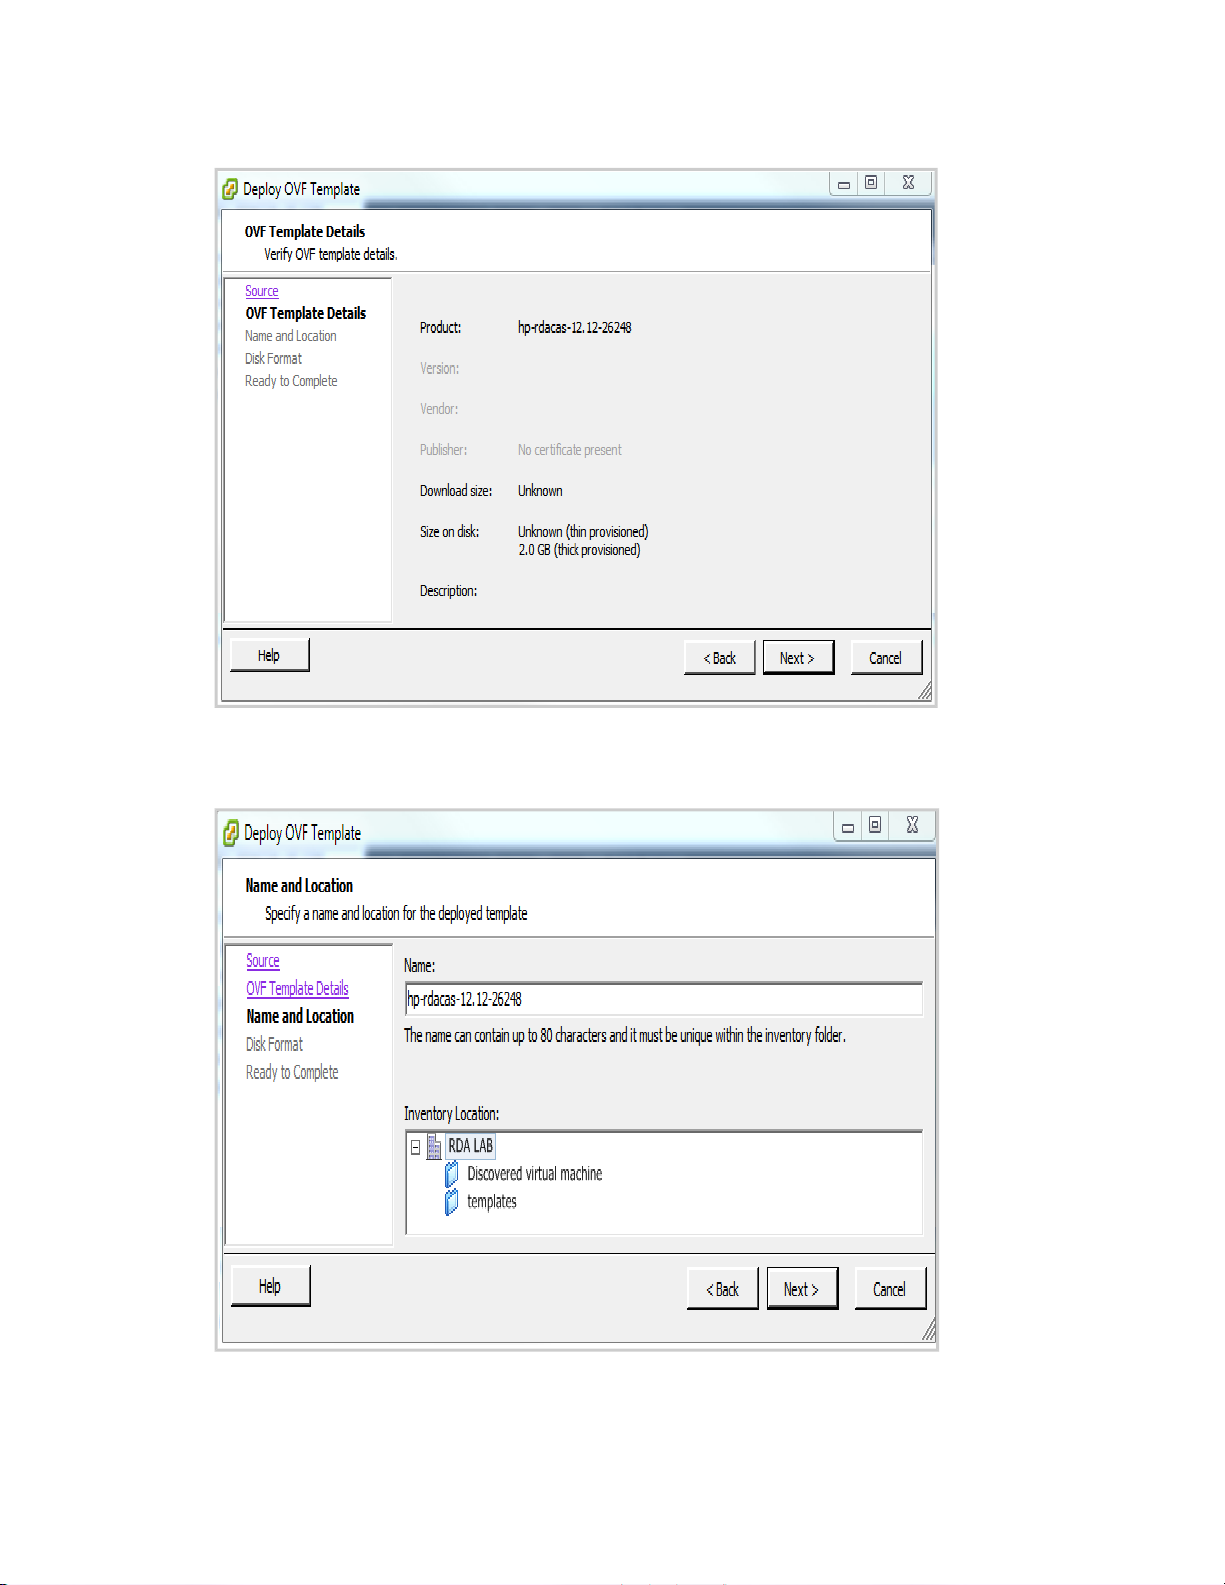
7. Verify OVF template details. Click Next.
8. The Name andLocation page appears.
HP Remote Device Access 8.1:vCAS User Guide Page 14 of 65
Page 15
9. Enter the name of the deployed template and select the location. Click Next. The Disk Format page
appears.
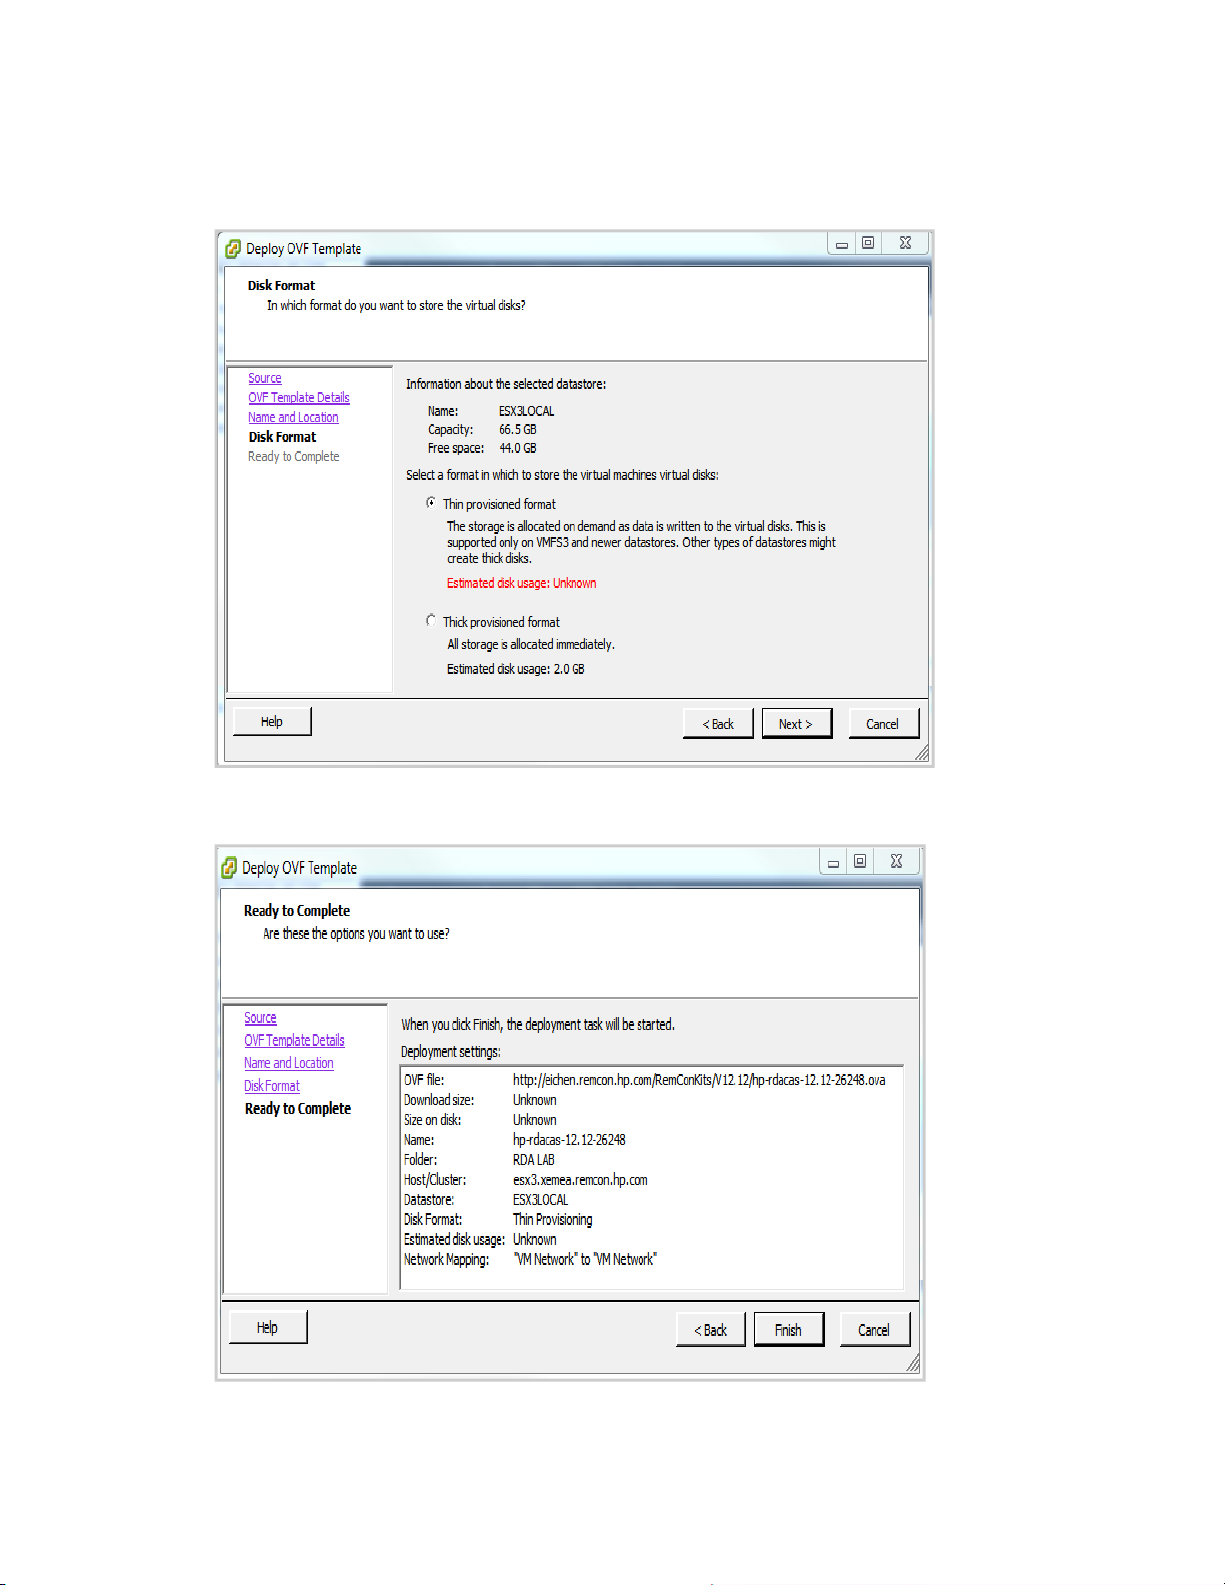
10. Select the disk format to storethe virtual machine disks, and click Next.TheReady to Complete page
appears.
HP Remote Device Access 8.1:vCAS User Guide Page 15 of 65
Page 16
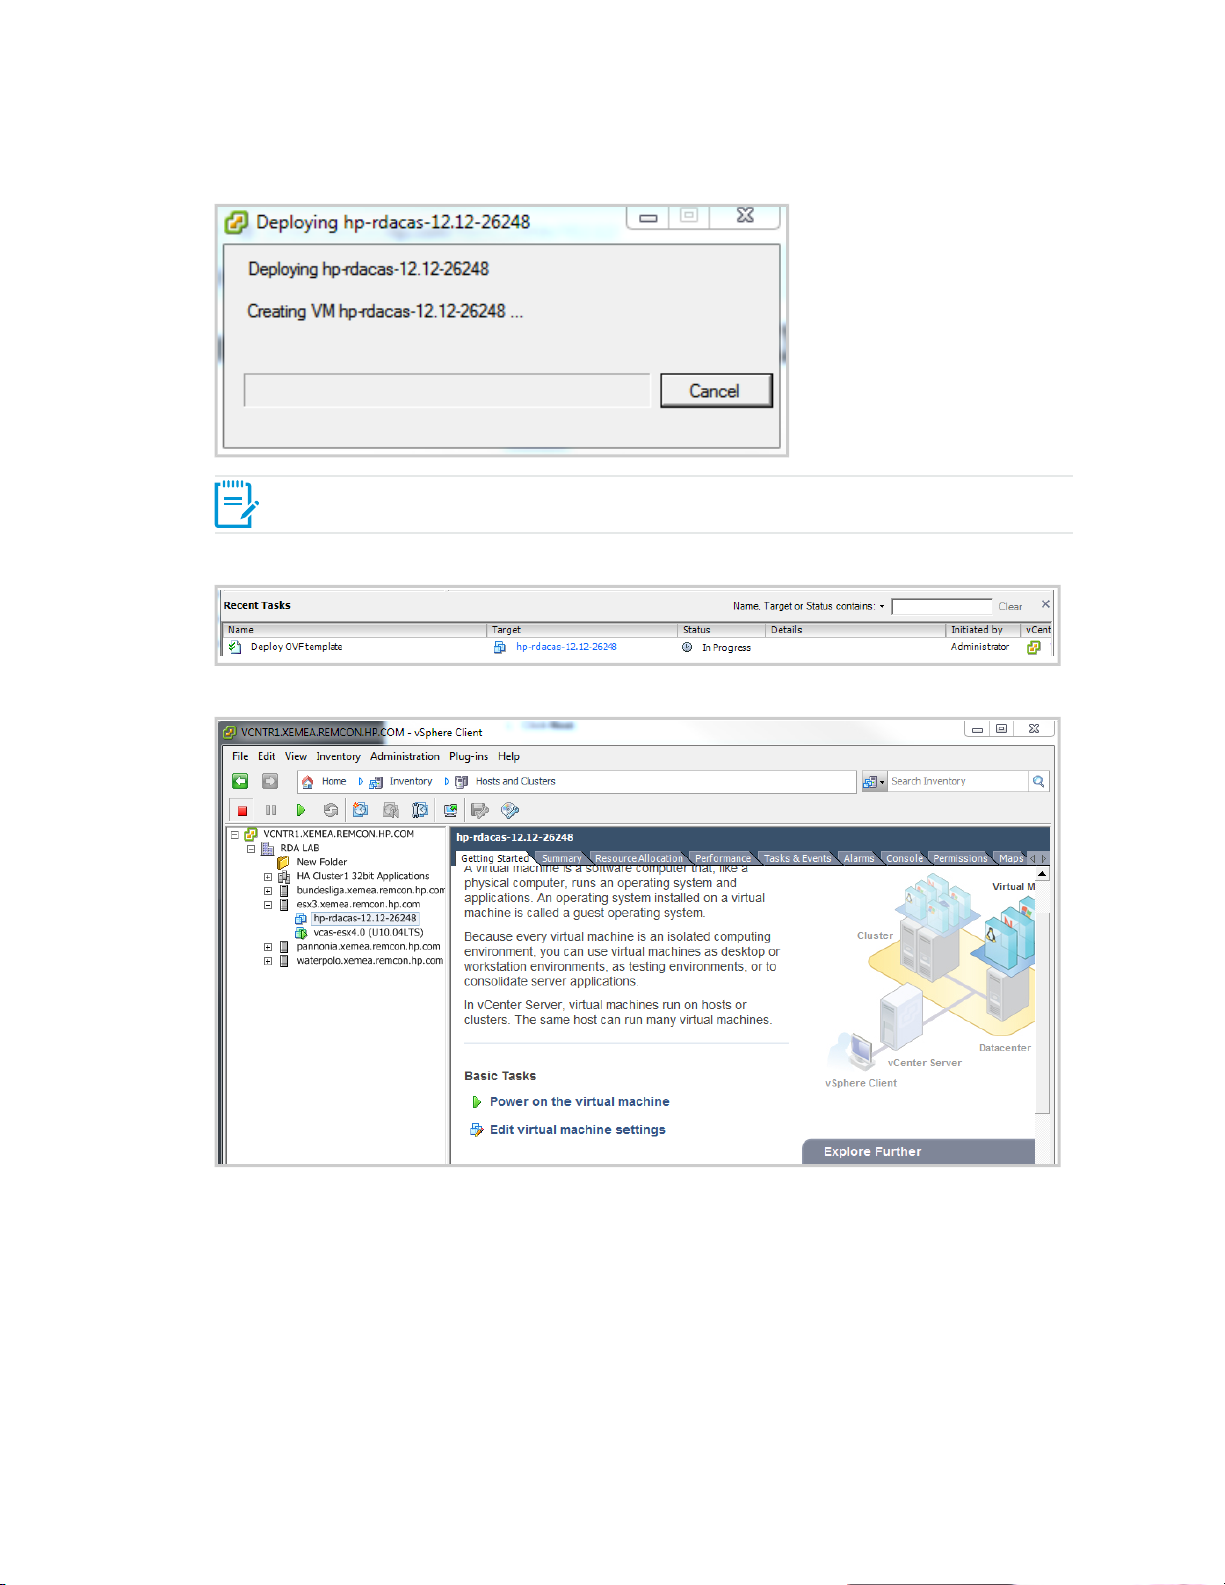
11. Review the deployment settings and click Finish.The Deploying dialog box appears.
Note: The new vCAS takes a few minutes to create.
12. The progress of the import task appears in the vSphere Client Status panel.
The vSphere Client window appears.
13. Select the newly created vCAS appliance andclick Power on the virtual machine.The vCAS
appliance starts and the console output displays in the Console tab.
HP Remote Device Access 8.1:vCAS User Guide Page 16 of 65
Page 17
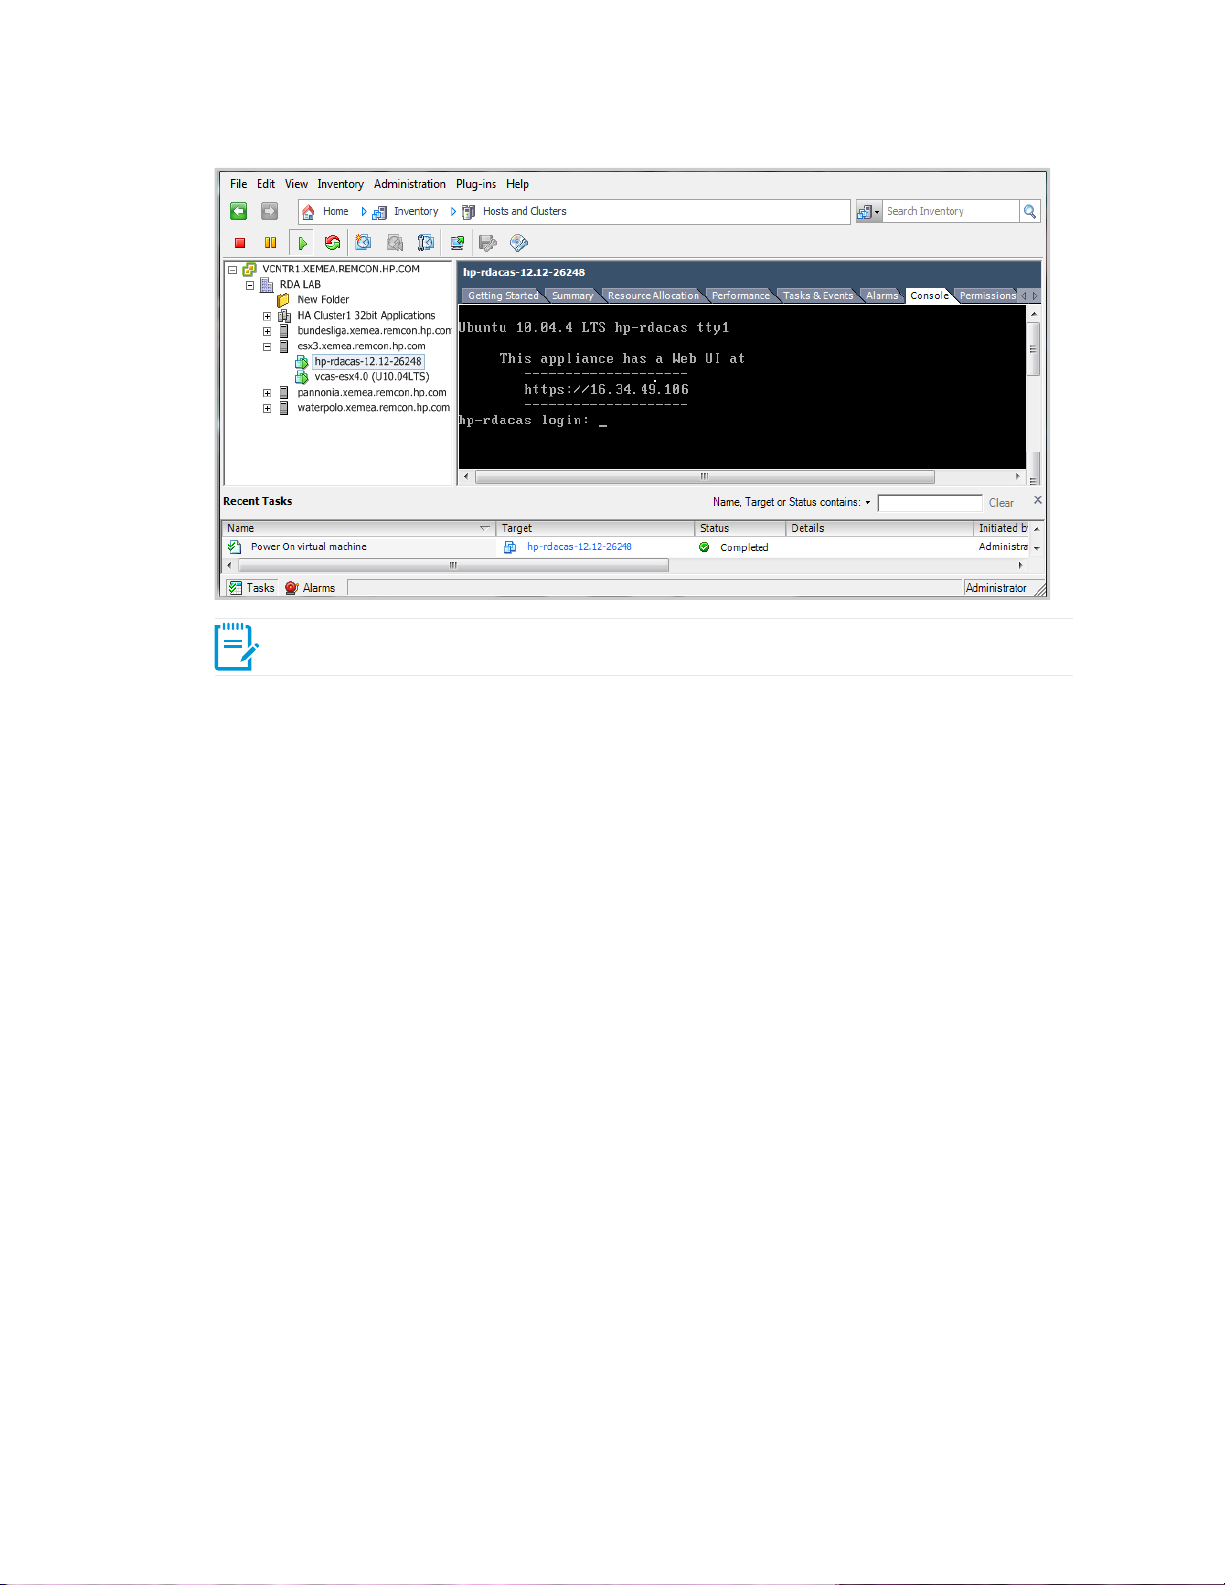
Note: The first time it starts, it reconfigures itself and then reboots.
Once it completes rebooting, the URL for the management UI appears.
14. Enter the URL into a web browser and follow the vCAS initial configuration instructions.
HP Remote Device Access 8.1:vCAS User Guide Page 17 of 65
Page 18
Install on Oracle VM VirtualBox
You can install the vCAS on a VirtualBox Hypervisor. It takes less than five minutes to complete.
Verifying Prerequisites
Beforeyou install the vCAS, verify the following prerequisites:
l Make sure VirtualBox is installed. For more information about VirtualBox, go to:
https://www.virtualbox.org/wiki/Downloads.
l Make sure to downloadthe vCAS .ova image.
Importing to VirtualBox
To import the vCAS into a VirtualBox Hypervisor, complete the following steps:
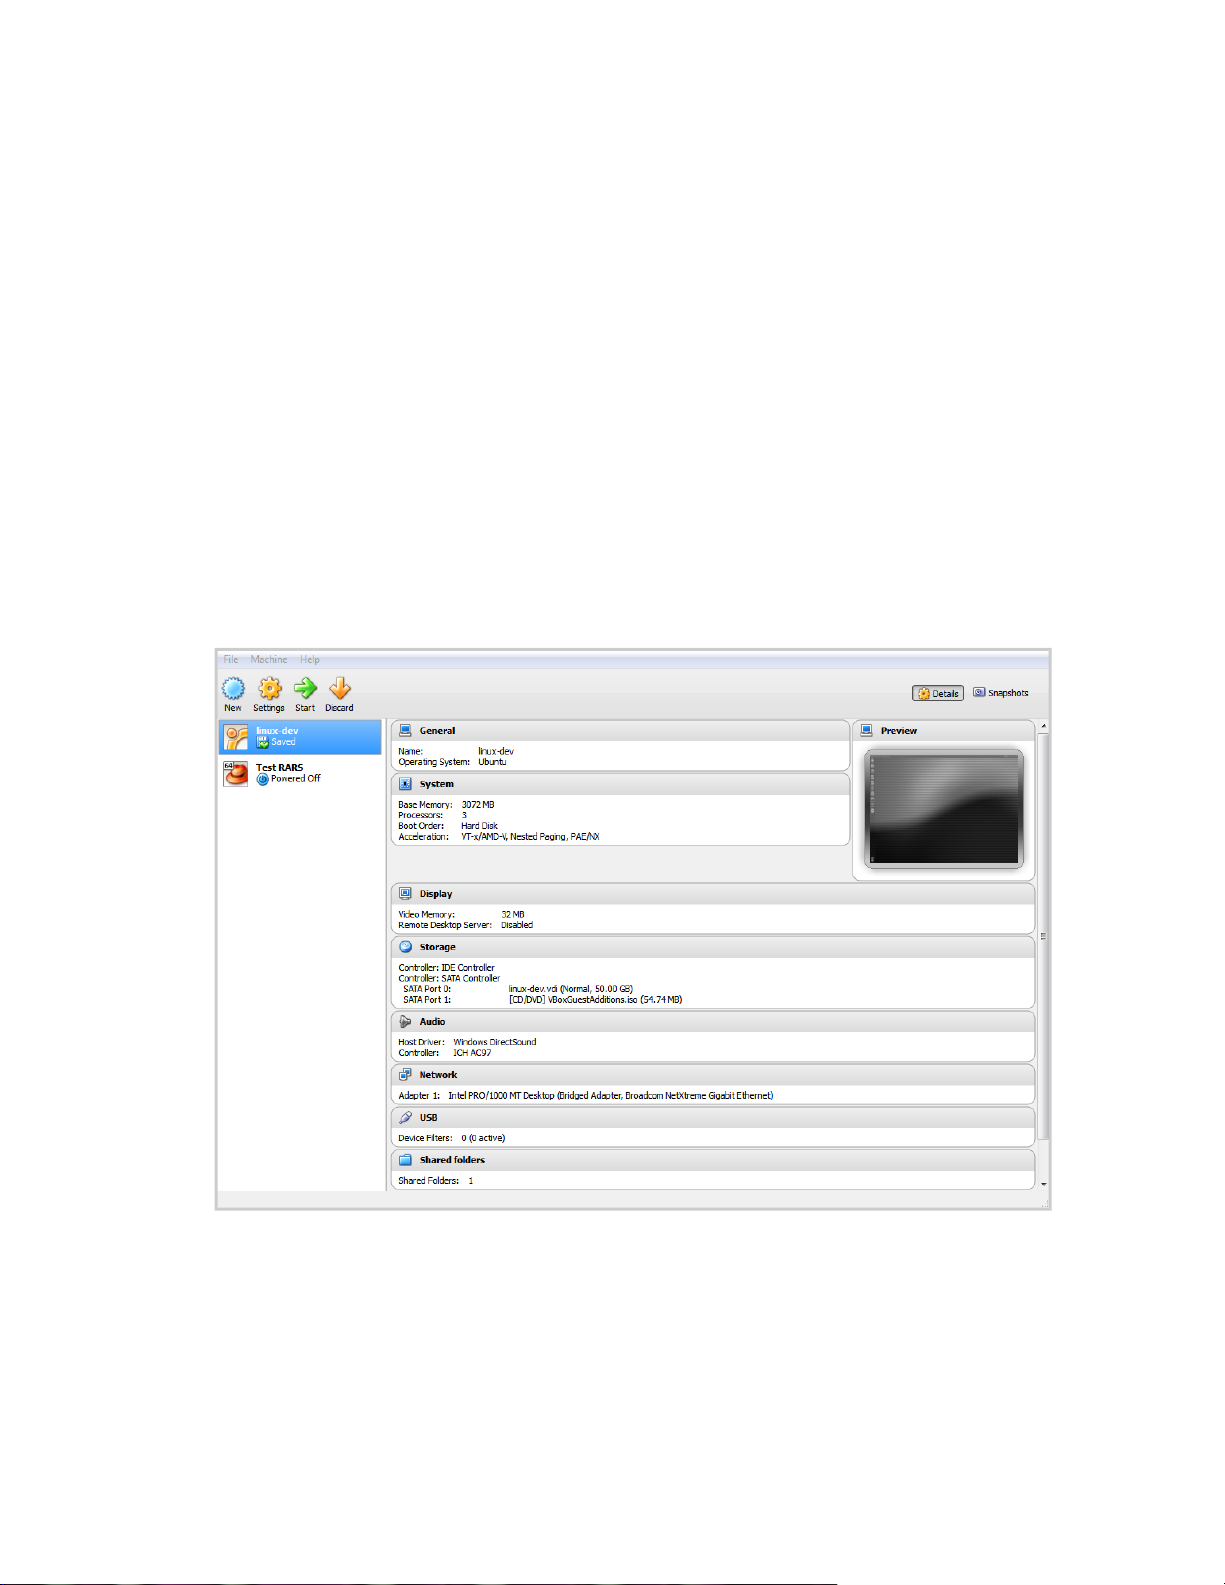
1. Launch the Oracle VM VirtualBox Manager. The Oracle VM VirtualBox Manager appears.
2. Click File, then Import Appliance. The Import Virtual Appliance wizard appears.
HP Remote Device Access 8.1:vCAS User Guide Page 18 of 65
Page 19
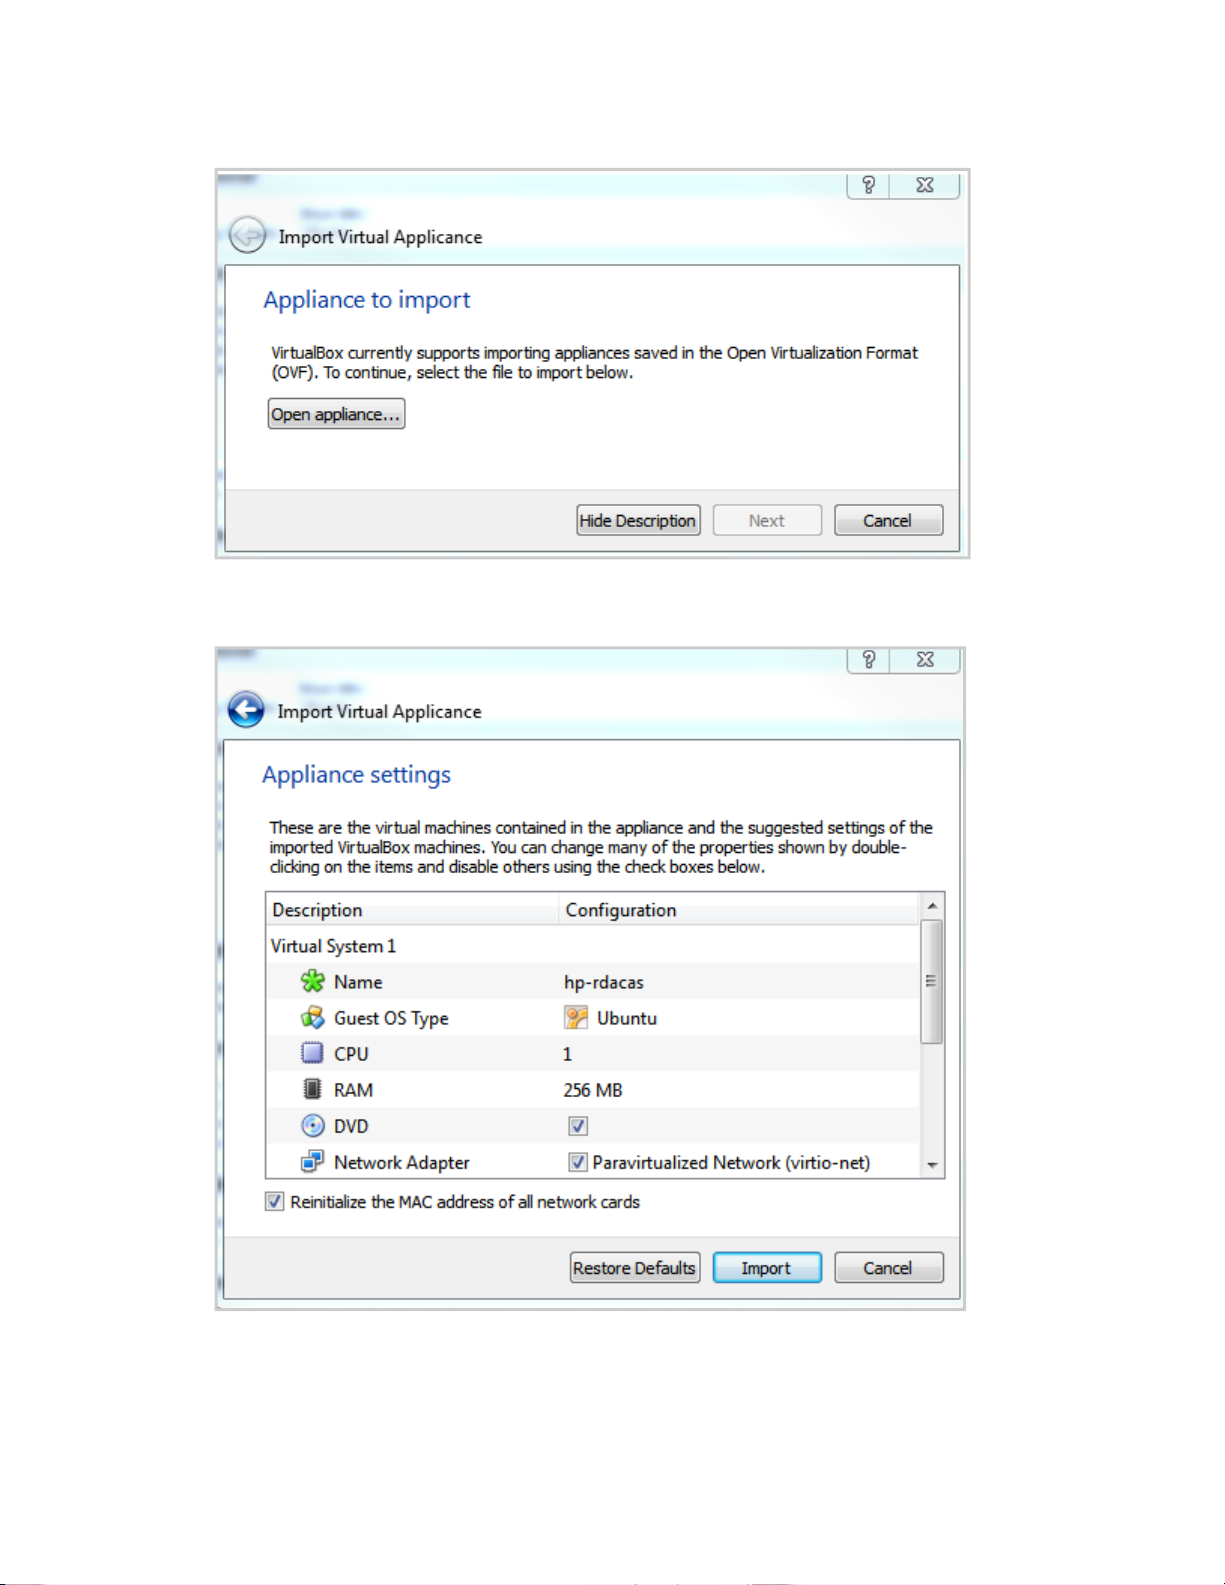
3. Click Open appliance to select and import the vCAS .ova file, then click Next.
The Appliance settings pageappears.
4. Select the Reinitialize the MAC address of all network cards check box, and then click Import.
The Importing Appliance dialogbox appears.
HP Remote Device Access 8.1:vCAS User Guide Page 19 of 65
Page 20

Note: The new vCAS takes a few minutes to create.
The Oracle VM VirtualBox Manager window appears.
5. Select the newly created vCAS appliance and click Start.
The vCAS appliance starts and the console output displays in a new window. The first time it starts, it
reconfigures itself and then reboots. Once it completes rebooting, the URL for the management UI
appears.
HP Remote Device Access 8.1:vCAS User Guide Page 20 of 65
Page 21

6. Enter the URLinto a web browser and follow the vCAS initial configuration instructions.
7. (Optional but recommended) You can configure VirtualBox to automatically start your vCAS
appliance at boot time. Complete this configuration from within VirtualBox.
Install on VMware Player
You can install the vCAS on a VMware Player Hypervisor.
Verifying Prerequisites
Beforeyou install the vCAS, verify the following prerequisites:
l Make sure VMware Player is installed. For more informationabout it, go to:
https://my.vmware.com/web/vmware/free#desktop_end_user_computing/vmware_player/5_0
l Make sure to downloadthe vCAS .ova image.
HP Remote Device Access 8.1:vCAS User Guide Page 21 of 65
Page 22

Importing to VMware Player
To import the vCAS into a VMware Player Hypervisor, complete the following steps:
1. Launch the VM Player. The VMware Player appears.
2. Click Open a Virtual Machine. The OpenVirtual Machine window appears.
HP Remote Device Access 8.1:vCAS User Guide Page 22 of 65
Page 23

3. Click Open to select the .ova file. The Import Virtual Machine window appears.
4. Click Import to import the vCAS .ova file. The VMware Player window appears.
5. Select the newly created vCAS appliance and click Play virtual machine.
The vCAS appliance starts and the console output displays in the same window.
HP Remote Device Access 8.1:vCAS User Guide Page 23 of 65
Page 24

Note: The first time it starts, it reconfigures itself and then reboots.
Once it completes rebooting, the URL for the management UI appears.
6. Enter the URL into a web browser and follow the vCAS initial configuration instructions.
Install on VMware Server
We have tested the latest vCAS onVMware Server 1.0.1 and VMware Server2.0.2. It is strongly
recommended that you do not install vCAS on VMwareServer1.0.1 and 2.0.2. VMware Server was
declareddiscontinued in January 2010 and general support endedon June 30, 2011.
Caution: There are potential security issues associated with usingVMware Server.
If you still wish to use VMware Server, please contact a HP Support engineer.
HP Remote Device Access 8.1:vCAS User Guide Page 24 of 65
Page 25

Chapter 3: Configuring Your vCAS
This chapter contains initial configurationsteps you must complete before using your vCAS.
Verify Prerequisites
Beforeusing your new vCAS, verify the following prerequisites:
l Make sure you allocate a static IP address to your vCAS. Initially it boots DHCP to get a temporary IP
address (so you can configure it). However, it will not operate with a DHCP address. To allocate a
static IP address, contact your administrator.
l Make sure you have the following network information:
n Subnet Mask
n Gateway address
n DNS server address(es)
n NTP server name and address
n Web proxy (the following is an example: http://web-proxy.mycorp.com:8080)
Contact your administrator for this information.
n A hostnamefor your vCAS and an administrative password. You also need to select yourtimezone.
Configure Your vCAS
Beforeusing your new vCAS, you must perform the following initial configuration steps:
1. When the vCAS boots for the first time, a message appears on the vCAS console, which provides
you with a URL for the Web enabled management interface. Enter this URLinto your web browser.
Note: If your site does not supply a DHCP server for an initial IPaddress, thenyou must
follow the manual configurationsteps in the following section "Troubleshooting Information"
on page 47.
2. When you enter the URL, your browser prompts you for a username and password for the vCAS. The
administrative username is hp-admin and the initial password is Invent. It is strongly recommended
to change this password. After you log on, the HPRDA Customer Access Server License appears.
Page 25 of 65HP Remote Device Access 8.1:vCAS User Guide
Page 26

Chapter 3: Configuring Your vCAS
3. Read the licensing terms. If you agree to the terms, thenselect the Yes, I have read the accept the
software license terms check box. You must accept the license to connect to the vCAS.
4. Click Close. Once you accept the license, the CAS Setup dialog box appears.
HP Remote Device Access 8.1:vCAS User Guide Page 26 of 65
Page 27

Chapter 3: Configuring Your vCAS
5. Enter values in the Network Configuration and the NTP Servers fields. The Network Configuration
andthe NTP Servers fields are required fields. If you are unsure of the correct values, then contact
your network administrator.
When you change the administratorpassword, a message appears informing you that you need to log
on again. When you change the IP address of the vCAS, a messageappears informing you a
countdown to an automatic redirect of your browser to the new vCAS address begins.
6. When the countdown reaches zero, your browser is automatically redirected to the new vCAS
address. Your vCAS is now ready for use and the main vCAS control panel appears.
Initial configuration is complete. To edit the configuration parameters, select Tools, and then Setup
from the main menu.
Add the Virtual CAS to the RAP
A Virtual CAS (vCAS) is treated as another SSH Direct CAS, but for it to work correctly, the Type,
Authentication Methods and the Login Methods must be set correctly.
Add your vCAS to the RCTS through the New Order process oradd it to an existing order. In both cases
you end up with a CAS with default settings. Make the following changes to make sure that you can
connect to the CAS (as shown in "Figure 3.1 CAS Configuration in the RCTS".
HP Remote Device Access 8.1:vCAS User Guide Page 27 of 65
Page 28

Chapter 3: Configuring Your vCAS
1. Set Type to RDACAS in the General section.
2.
Click Add in the SSH section, and set the Auth Methods to publickey ; keyboard-
interactive ; password .
This makes surethat the profile sends DigitalBadge information to the CAS.
3.
Set Login method to email .
Figure 3.1 CAS Configuration in the RCTS
4. Click Submit to complete the changes.
HP Remote Device Access 8.1:vCAS User Guide Page 28 of 65
Page 29

Chapter 4: Managing your vCAS
Set up a vCAS to allow HP Support Agents access into yournetwork. Monitor or review the connections
that HP Support Agents make to and through the vCAS.You can also configureautomatic updates to your
vCAS, set it up as a syslog receiverfor your network, or addextensionpackages for additional support
capabilities.The following sections describe these management actions.
Monitor HP's Activity
Use the vCAS Activity Graph to monitor active connections through your vCAS and to terminate them if
necessary. Use the Active Tunnels and Logins tab to view the current logins to yourvCAS and the tunnels
running through it that go to other systems and devices in your network. The Blocked Tunnels and Logins
tab displays the access attempts that your vCAS has blocked and allows you to grant future access for
those attempts.
Understanding the Activity Graph
The vCAS has an Activity Graph that enables you to visualize who is accessing your systems and what
systems are being accessed. When there is noactivity, a faded green CAS icon displays in the middle of
the Activity Graph.When connections are active, it displays a graphical representation of the connections
as they occur. Click the relevant section of the graph to terminate part or all of the connections. The
following image displays.
The Activity Graph provides three ways to quickly terminate various tunnels.The following table describes
how to terminate tunnels using the Activity Graph by:
Method Description
1 User To rapidly terminate all tunnels originated by a given user, click the relevant user box on the
left side of the Activity Graph. When the terminate action is confirmed, all tunnels which are
originated by that user are immediately terminated, regardless of the target system.
2 Target To rapidly terminate all tunnels targeting a given system within your network, click the target
box on the right side of the Activity Graph. When the terminate action is confirmed, all
tunnels which target that system are immediately terminated, regardless of who originated
the tunnel.
3 All
Tunnels
To rapidly terminate all active tunnels, click either the HP or CASbox in the middle of the
Activity Graph. Whenthe terminate action is confirmed, all active tunnels are immediately
terminated, regardless of their target or who originated them.
Page 29 of 65HP Remote Device Access 8.1:vCAS User Guide
Page 30

Chapter 4: Managing your vCAS
Active Tunnels
When an HP Support Agent is running a connection through your vCAS to elsewhere in your network, the
connection appears as an active tunnel on your vCAS. Each active tunnel displays on the Active Tunnels
andLogins tab, as a row in the Active Tunnels table.
Figure 4.1 Active Tunnels Table
The Active Tunnels screen contains the following columns:
Table 4.1 Active Tunnels
Column Description
User The name of the user who initiated the tunnel.
From The short host name or IP address of the system (within HP) where the tunnel
originates.
Target The short host name or IP address of the system (within your network) where the
tunnel emerges.
Port The port on the target system to which the tunnel is directed.
Proto The traffic protocol (tcp or udp) used by the tunnel.
Start Thetime in ISO 8601format when the tunnel started.
Duration The length of time that the tunnel has been active.
Action Click to force the tunnel to close and to terminate all traffic through that tunnel.
Note: If there are no active tunnels, then No active tunnels appears in the table.
Logins
If an HP Support Agent or local useris logged on to a command shell on yourvCAS, their session appears
on the Active Tunnels and Logins tab, in the Logged-In Users table.
HP Remote Device Access 8.1:vCAS User Guide Page 30 of 65
Page 31

Chapter 4: Managing your vCAS
Figure 4.2 Logged-In Users
The Logged-In Users screen contains the following columns:
Table 4.2 Logged-In Users
Column Description
User The user who is currently loggedon to the vCAS.
PID The process ID of the user's login session.
Start The time in ISO 8601 format when the login session was initiated.
Duration The length of time the user is logged on to the system.
Action Click to force a termination of the user's login session.
Note: If there are no active tunnels, then No active tunnels appears in the table.
Blocked Tunnels
Any attempt to opena tunnel by HP will be blocked, unless you have allowed HP to access your vCAS
andnetwork. You can view recently blocked tunnels onthe Blocked Tunnels and Logins tab, in the
Recently Blocked Tunnels table.
Each time anattempt to opena tunnel is blocked, it aggregates into the Recently Blocked Tunnels table. A
unique tunnel attempt is defined by the User, Target, Proto, and Port combination. When a tunnel attempt
is made multiple times within a 72 hour period, the Count is incremented.
Figure 4.3 Recently Blocked Tunnels
HP Remote Device Access 8.1:vCAS User Guide Page 31 of 65
Page 32

Chapter 4: Managing your vCAS
The Recently Blocked Tunnels screencontains the following columns:
Table 4.3 Recently Blocked Tunnels
Column Description
User The user who attempted to initiate a tunnel.
Target The host name or IP address of the system (within your network) where the tunnel
was to emerge.
Proto The protocol (TCP or UDP) which the blocked tunnel was to support.
Port The port in the target system to which the blocked tunnel was directed.
Count The number of times within the last 72 hours that this tunnel request was blocked.
Last Attempt The time in ISO 8601format that the last attempt to initiate this tunnel was made.
Action Click to add the tunnel definitionto the list of Permitted Tunnels.
Note: If there are no blocked user logins within the last 72 hours, then No recently blocked
tunnels appears in the table.
Blocked Logins
Blocked user login attempts display in rows in the Recently Blocked Login Attempts table.
Figure 4.4 Recently Blocked Login Attempts
The Recently Blocked LoginAttempts screen contains the following columns:
Table 4.4 Recently Blocked Login Attempts
Column Description
User The user who attempted to login to the vCAS.
Count The number of times, within the last 72 hours, that this user's login attempts have
been blocked.
Last Attempt The time in ISO 8601format that the user attempted to login to the vCAS.
Action Click to add the user to the list of Permitted Shell Logins.
Note: If there are no blocked user logins within the last 72 hours, then No recently denied user
logins appears in the table.
HP Remote Device Access 8.1:vCAS User Guide Page 32 of 65
Page 33

Chapter 4: Managing your vCAS
Controlling Access
The Access Control tab allows you definewho can tunnel through yourvCAS into your network and to
what and where they can connect. It also allows you define who can log on to a command shell on your
vCAS. The Access Control tab also allows administrators to changethe access control for tunnel access
anduser login access.
Tunnel Access Control
Tunnel access control allows administrators to control the access a user has to open a tunnel to a target
within the customer's network. Access control types display as radiobuttons onthe GUI.
The following table describes each of the access control types:
Table 4.5 Access Control Types
Access Control Action Description
Open Access Allows
access to all
HP users
Closed Access Denies
access to all
HP users
Whitelist Access Allows
access to the
HP users as
perthe
Permitted
Tunnels list
You can view user andtunnel information in the Permitted Tunnels table.
Figure 4.5 Permitted Tunnels
Allows any HP user with a valid DigitalBadgeauthentication
access to the vCAS and any of the targets configured to it.
Denies access to or through the vCAS for all users.
Allows HP users with a valid DigitalBadgeauthentication access
throughthe vCAS if they are configured in a whitelist. Access is
closed for users who are not configured in this list.
HP Remote Device Access 8.1:vCAS User Guide Page 33 of 65
Page 34

Chapter 4: Managing your vCAS
The Permitted Tunnels screen contains the following columns:
Table 4.6 Permitted Tunnels
Access Control Description
User Displays the name of the user to be granted access. Any displays when all
users are allowed access.
Target Displays the name of the host to which access is to be granted. Any displays
when a user can access any system within the customer's network.
Port Displays the name of the port on the target to which access is to be granted.
Any displays when a user can access all ports onthe target.
Proto Displays the protocol the user has been granted access to. This can be oneof
TCP/UDP/ANY. ANY displays whenTCP and UDP traffic is allowed.
Action
Note: If there are no access control entries, then No entries defined at this table displays in
the table.
To add new values to the Permitted Tunnels table, click Add Whitelist Entry. The Grant Access dialog
box appears. For more information about the Grant Access dialog box, see "Grant Access" below".
Click to edit a field. Click to delete the valuein the field.
Note: When you click or , the Grant Access dialogbox
appears with the fields pre-populated with the current values.
Grant Access
The Grant Access Dialog box allows you to add or modify information entered in the Permitted Tunnels
table.
Figure 4.6 Grant Access dialog box
The Grant Access dialog box contains the following fields:
HP Remote Device Access 8.1:vCAS User Guide Page 34 of 65
Page 35

Chapter 4: Managing your vCAS
Table 4.7 Grant Access
Access Control Description
User The name of the user who is granted access. This is a required field. This is the
username, not the e-mail address.
Target (optional) The name of the host which access is granted. This field is optional.
Note: A blank field indicates that any target system may beaccessed.
Port (optional) The name of the port on the target to which access is to be granted. This field is
optional.
Note: A blank field indicates that any port on the specified target may
be accessed.
Protocol The protocol the user has been granted access to. You can select one of the
following options, TCP, UCP or Any Protocol.
To accept your changes, click OK. Click Cancel to cancel and exit the Grant Access dialog box.
Login Access Control
The Login Access Control allows administrators to control the access a user has to connect directly to the
vCAS. When a user logs on for the first time, they are automatically added to the following Permitted Shell
Logins:
l Allow Shell Access-When a user first logs on, the user is automatically addedto the Allow Shell
Access option and the default access is set to enabled. The administrator can use the list of users in
the Permitted Shell Logins table to subsequently revoke this access, if so desired.
l Deny Shell Access-When a user first logs on, the useris automatically added and the default access
is set to disabled. The administrator can use the list of users in the Permitted Shell Logins tableto
subsequently grant access, if so desired. If access is not granted the user is blocked on the next
attempt and appears in the Blocked Tunnels and Logins tab.
Figure 4.7 Login Access Control
The Permitted Shell Logins table contains the following columns:
HP Remote Device Access 8.1:vCAS User Guide Page 35 of 65
Page 36

Chapter 4: Managing your vCAS
Table 4.8 Permitted Shell Logins
Access Control Description
User The name of the user for which access is or is not granted.
Access Allowed This check box indicates if access is allowedor denied. A selected check box
indicates access is allowed. A clear check box indicates access is denied.
Action Click to delete a user account from the vCAS.
Performing Optional Configuration
From the Tools menu, you can configure the following options:
l Authentication
l Email Alerts
l Licensing
l Preferences
l Remote Logging
l Setup
l Software Updates
Authentication
Incoming connections are authenticated using X.509certificates. Some of these certificates are revoked
before they expire. The Authentication dialog box allows administrators to select the way the vCAS
checks the setting of the X.509 certificates. There are three options for certificate revocation checking:
OCSP, CRL, and No Check.
Figure 4.8 Authentication
HP Remote Device Access 8.1:vCAS User Guide Page 36 of 65
Page 37

Chapter 4: Managing your vCAS
The following table describes the three options for certificate revocation checking:
Table 4.9 Certificate Revocation Checking
Access Control Description
OCSP The Online Certificate Status Protocol (OCSP)is an Internet protocol used for
obtainingthe revocationstatus of an X.509 digital certificate.
CRL Certificate Revocation List (CRL) is a list of certificates (a list of serial numbers
for certificates)that have beenrevoked or are no longer vaild, and therefore
should not be relied upon.
No Check This indicates that no checking of revoked certificates will bedone.
The administratorshould select the revocationchecking mechanism for the vCAS. If it is unclear which to
select, then click Auto Select and the vCAS will select an appropriate option. While the vCAS is
performing this auto configuration, a set of workinggears appears to the right of the revocation checking
options.
The Authentication Level section of the Authentication dialog box allows you to select between singlefactor and two-factor authentication for login and tunnel access throughthe vCAS. The two-factor
authentication is more secure and is the default mode.
Email Alerts
Your vCAS has the ability to notify you via e-mail when certain events take place. To enable this feature
complete the following steps:
1. Select Tools, then Email Alerts. The Email Alerts screen appears.
2. In the System section, enter your e-mail address andyour corporate SMTP mail server.
HP Remote Device Access 8.1:vCAS User Guide Page 37 of 65
Page 38

Chapter 4: Managing your vCAS
3. In the General Alerts section, select the alerts you want to receive. All changes made in this dialog
box take effect immediately.
4. Click Close.
Preferences
You can changethe way the vCAS looks orbehaves.The following image displays the Preferences dialog
box.
The Preferences dialog box contains the following fields:
Table 4.10 vCAS Preferences
Field Description
Status Refresh
Rate
Theme Use this to change the theme, or colorof the user interface. A short list of
Tunnel Graphic Use this to change the way the Activity Graph presents tunnels. There are four
Use this to changehow often your browser polls the vCAS for updates of status
information, such as Active Tunnels. The availablerangeis once every 15
seconds to once every 60 seconds (in 15 secondincrements). If this slider is at
the left, then automatic status polling is turned off.
themes are available. The default theme is UI Darkness.
options to choose from; Join, Branch (the default), Fan and Off. This option only
changes how the information is visually represented.
HP Remote Device Access 8.1:vCAS User Guide Page 38 of 65
Page 39

Chapter 4: Managing your vCAS
The following image displays the Join Tunnel Graphic option:
Figure 4.9 Join Tunnel Graphic
The following image displays the Branch Tunnel Graphic option:
Figure 4.10 Branch Tunnel Graphic
The following image displays the Fan Tunnel Graphic option:
Figure 4.11 Fan Tunnel Graphic
HP Remote Device Access 8.1:vCAS User Guide Page 39 of 65
Page 40

Chapter 4: Managing your vCAS
Send Logs to a Remote Log Server
If your site has a centralized Syslog log server, you may configure your vCAS to send log messages to
your centralized log server.
To send logs to a remote log server, complete the following steps:
1. Select Tools, then Remote Logging.
The Remote Logging dialog box appears.
2. Select the Enable Remote Logging check box to enable remote logging.
3. Enter the IP address and port number for your centralized log server.
4. Select the UDP or TCP protocol.
5. Click OK. YourvCAS is now configured to sendlog messages to your centralized log server.
Become a Central Logs Collector
Your vCAS runs the standard rsyslog daemon. You can configure it as a central log collector but you need
to have root access to perform the configuration.
Note: This procedureis not recommended due to the low disk space where the vCAS is
configured (unless you increase the virtual disk space of yourvCAS). Before performing these
steps, increase the size of the virtual disk space of yourvCAS by using your host machine's
management tools.
To configure your vCAS as a central log collector, complete the following steps:
1. To receive messages, edit the rsyslog configuration file (sudo vi /etc/rsyslog.conf) and
uncomment one or both of the following sets of lines depending on whether you wish to use UDP or
TCP syslog forwarding:
$ModLoad imudp
$UDPServerRun 514
$ModLoad imtcp
HP Remote Device Access 8.1:vCAS User Guide Page 40 of 65
Page 41

Chapter 4: Managing your vCAS
$InputTCPServerRun 514
2. Add the following directive beforethe $FileOwner directive:
$FailOnChownFailure off
Save your changes and exit.
3. (Optional but Recommended)To direct incoming messages to files based on the sending host, create
a file in the /etc/rsyslog.d directory (sudo vi /etc/rsyslog.d/10-other-hosts.conf)
with the following contents:
$template DynFile,"/var/log/other/%HOSTNAME%.log"
:hostname, !startswith, "hp-rdacas" ?DynFile
& ~
Note: The last line is an ampersand, a space, and a tilde. Do not forget the space. If you
have changed your vCAS host name, use that host name instead of hp-rdacas.
4. Create the directory where you want to add the host specific files. Make sure this is writeable:
mkdir /var/log/other
chmod 755 /var/log/other
chown syslog:syslog /var/log/other
5. After editing the configuration files and creating your directory, restart rsyslog:
restart rsyslog
You should now be able to direct syslog messages from other system to your vCAS. Those
messages should appear in system specific files in the /var/log/other directory. Failureto make
this directory writeable will result in the off system log messages being co-mingled with the vCAS log
messages. Failure to perform step 2 may also cause co-mingled log messages.
Note: Configuring your other systems to send their logs to your vCAS is outside the scope
of this document. For more information, refer to the documentation for the particular logger
(s) you have on those systems.
Software Updates
You can manage softwareupdates in the Software Updates dialog box. The Software Updates dialog box
contains the following sections:
Note: It is highly recommended that the tcp port 443 is open on the vCAS in order to be able to
connect to the HP RDA CAS Kit server to download updates. See "Table2.1 vCAS
Connectivity - Firewall/Port Requirements" for further information. This is the only way you can
update your vCAS so if a critical patch is released and yourvCAS is unableto connect to the
HP RDA CAS Kit serverthen you may need to reinstall.
HP Remote Device Access 8.1:vCAS User Guide Page 41 of 65
Page 42

Chapter 4: Managing your vCAS
l Automatic Settings
l Software Channels
l Optional Software Packages
l Manual Actions
l Source Code
The following image displays the Software Updates dialogbox.
Figure 4.12 Software Updates
Managing Automatic Settings
The Automatic Settings section allows administrators to specify how often the vCAS will check for
software updates and what action to take when updates are available.
You can select the following options:
Option Description
Never The vCAS will not perform any periodic checks for software
updates, but manual checking is allowed.
Daily The vCAS will check at a randomly chosen time on a daily
basis (same time each day, not randomly each day).
HP Remote Device Access 8.1:vCAS User Guide Page 42 of 65
Page 43

Chapter 4: Managing your vCAS
Option Description
Weekly The vCAS will check at a random time of the day on Sunday
(same time each Sunday).
Monthly The vCAS will check at a random time of the first day of each
month (same time each month).
When a periodic check indicates that updates are available, the
vCAS does one of the following:
Note: If the randomly generated time is unsuitable,
then you can changethe option to Never and back to
your periodic choice and a new time is selected.
Only notify about available
updates
Install updates without
confirmation
Sends an email message to the administrator (see "Email
Alerts" onpage 37)but nofurther action is taken.
Downloads and installs the update packages automatically.
Managing Software Channels
The Software Channels section allows administrators to select the channel from where to get the software
updates. Normally only the Stable Releases are checked. However, from time to time, HP may make prerelease versions available. When these releases are available, they will be tagged as either Test Releases
or Unstable Releases. It is recommended that you do NOT check the Test Releases or Unstable
Releases, unless you want to try out a specific pre-release feature.
The Software Channels section contains the following options:
l Stable Releases-Normal released software versions.
l Test Release-Software madeavailable for testing as release candidates.
l Unstable Releases-Software which is undergoing active development and may not be entirely stable.
Managing Optional Software Packages
The Optional Software Packages section allows administrators to optionally install the ProCurve Network
Tools orthe vCAS Support Tools software packages.
ProCurve Network Tools
Install this optional software if you have some ProCurve switches in yournetwork and would like to allow
HP Service Engineers to use these tools when diagnosing any potential issue with a ProCurve switch.
vCAS Support Tools
Install this optional software if you experience any issues with the normal operation of your vCAS and
would like to check the configuration for any potential errors, such as improperly configured network
settings.
HP Remote Device Access 8.1:vCAS User Guide Page 43 of 65
Page 44

Chapter 4: Managing your vCAS
Managing Manual Actions
The Manual Actions section allows administrators to manually control updates. It also displays how long it
has been since the last update. The following tableshows the buttons available in this section:
Check Now Click Check Now to compare the currently installed software against the latest
available software. This checks if there are any updates available for installation. When
you click Check Now, the update check launches a new dialog box. If there areno
updates available, then This appliance is up-to-date appears, otherwise it shows the
available updates.
View
Changelogs
Upgrade
Now
The following image displays the Update Check dialog box.
Figure 4.13 Update Check
If updates are available, thenclick View Changelogs to see the changes that were
implemented in the updates.
If you are satisfied that all of the available updates are required, then click Upgrade
Now to start the software upgrade in a new dialog box.
When you select one of the Manual Action buttons, a detailedstatus on the progress of
the action appears in the command status of the Update Check dialog box.
When the action completes, the Gears icon is removedand the command status displays at the bottom of
the dialogbox.
Downloading Source Code
The source codefor the vCAS appliance is freely availablefor download. You may download the complete
source by clicking Download Source or you may request a copy from your HP account representative.
HP Remote Device Access 8.1:vCAS User Guide Page 44 of 65
Page 45

Chapter 4: Managing your vCAS
When the code is downloaded, the source files is placed in the /usr/src directory on the vCAS.
Note: This is a lengthy operation which may take the better part of a day to complete.
Viewing the Log
The HP RDA Customer Access Server screen allows administrators to view sessions and events in a
tabular view, for example, tunnels that werepermitted and denied by the vCAS. The following image
displays the HP RDA Customer Access Server Log screen.
Figure 4.14 RDACASLog
HP Remote Device Access 8.1:vCAS User Guide Page 45 of 65
Page 46

Chapter 4: Managing your vCAS
The HP RDA Customer Access Server Logscreencontains the following columns:
Table 4.11 RDA CAS Log
Column Description
Start The time in ISO 8601 format that the sessions or event was started.
End The time in ISO 8601format that the session was completed.
Duration The duration of the session.
User The user who initiated the event or session.
Action The short description of the event orsession.
Details The details of the loggedevent orsession.
Note: If no connections occurred, thenNo activity has been logged appears in the table.
Log Refresh Rate
The Log Refresh Rate changes how often yourbrowser will poll the vCAS for updates to log information.
The available rangeis once every 15seconds to once every 60 seconds (in 15 second increments). If the
slider is moved all the way to the left, automatic status polling will be turned off.
HP Remote Device Access 8.1:vCAS User Guide Page 46 of 65
Page 47

Chapter 5: Troubleshooting Information
This chapter contains troubleshooting information. Readthis chapter to learn more about common
problems and actions.
Test the Virtual CASNetwork Check Tool
The Virtual CASNetwork Check Tool checks connectivity between the Virtual CAS and otherelements in
the network. Any user can runthe tool and it does not requireany privileges.
The following table shows the checks the tool performs:
Check Decsription
Network Settings Verifies that the IP address and default routerare on the same network
andthat the current running settings (IPaddress, netmask, default
gateway) match the saved configuration settings (for example, those in
/etc/network/interfaces).
Default Router Probes the default router with arping.
Checking the DNS
Servers
Targets Verifies that the targets behind the CASare reachable. A warning
RARS Verifies that the HP Repository Server URLis accessible.
Web Proxy Verifies that the web proxy is reachable.
Certificate Revoke List Verifies that the Virtual CAScan reach the VeriSign website. If CRL
Verifies that the DNSservers are reachable by probingwith ping. If that
fails, then it verifies with netcat.
displays if:
1. Access is closed
2. Access is open
3. Access is not restricted to specific targets. For example, users can
connect to any host behind the CAS.
checking is turned off, a warning displays.
Run the Virtual CASNetwork Check Tool
To run the tool, enter the following:
casnetcheck
The following is a sample of the output:
Checking network configuration.........................................[OK]
Checking if the default router is reachable............................[OK]
Page 47 of 65HP Remote Device Access 8.1:vCAS User Guide
Page 48

Chapter 5: Troubleshooting Information
Checking if the DNS Servers are reachable..............................[OK]
Checking if the targets are reachable..................................
[WARN]
Closed access will block all tunnel attempts
Checking if the RARS are reachable.....................................[OK]
Checking if the web proxy is reachable.................................[OK]
Checking if the CRL site is reachable..................................
[WARN]
The CRL is not being checked.
Check Manual Setup
When your Virtual CAS boots for the first time, it tries to get an IP address from a DHCP server in your
network.This address is then availablefor you to access the Web-basedmanagement interface. If there
is no DHCP server available, then the vCAS does not have an initial IP address and the Web-based
management interface is not accessible.To perform the initial setup, you must use the console window.
Logging on to the Console
To log on to the console, complete the following steps:
1. Open the console window for the vCAS.
2. Click in the window to focus the window.
3. Click Return to get a login prompt.
4. Log on as the user hp-admin. Thepasswordis Invent.
Changing your Password
The first time you log on to the system, you need to change yourpassword. The operating system prompts
you to enter the initial password, then to enter your new password twice.Please note this new password.
Running the Manual Setup Command
To run the cassetup commandfrom the console window, complete the following steps:
1.
Enter cassetup.
2. At the command prompt, click Return (it prompts you for your setup values. To clear the values and
start again, select Control-C.Once it has all the values, it configures your vCAS).
Once configured, you may use the web UI to manage your vCAS (command line tools are also
available for management).
HP Remote Device Access 8.1:vCAS User Guide Page 48 of 65
Page 49

Chapter 5: Troubleshooting Information
Repeat Setup
If you encounter problems with the vCAS, then rerun the vCAS setup script. Rerunning the vCAS setup
script can clear-up problems with the appliance. You can invoke the setup again from the web UI,but it is
easierto run from the command line. Log on to a command shell on the appliance or use the console
window, and invoke the cassetup command. Use the hp-admin account or any other account with root
privileges.
To get cassetup help, use the -h switch:
sudo cassetup -h
To re-apply all current settings, use batch mode (-b):
sudo cassetup -b
To get the setup questions and run it without any options.It will prompt you for initial setup options:
sudo cassetup
Preserve and Restore vCAS Settings
vCAS settings are located in the four files contained in the/etc/rda directory:
/etc/rda/access_control.conf Access Control settings
/etc/rda/alert_control.conf Email Alert settings (some)
/etc/rda/ca-certificates.conf Certificate Authorities
/etc/rda/remcon.conf Master settings for the appliance
To edit the contents of these files, use the setup tools in the web UI or the command line.
You can save the settings by saving these files to another system.Youcan also restore them to the same
or anothervCAS.
After you edit these files, run cassetup -b to apply yourchanges.
Start Fresh
It is easy to setup a vCAS. If you encounter problems, thendelete the older vCAS appliance, and then
install and configure the new appliance using the same settings as before.This usually takes a few
minutes. Everytime you complete this step, remember to select a new random MAC address for the
vCAS's network interface.
HP Remote Device Access 8.1:vCAS User Guide Page 49 of 65
Page 50

Appendix A: Starting a Virtual CAS at System Startup using VirtualBox
VirtualBox does not support startingvirtual machines automatically when systems startup. This appendix
describes how to configure both Linux and Windows hosts to start their vCAS VMs at system startup.
Configure Linux Hosts
A compressed startupscript is packaged on the vCAS andis available at:/usr/share/doc/hp-
rdacas/examples/vboxvmstartup.gz. Copy this script to /etc/init.d on the VirtualBox host system,
uncompress it, and follow the steps in the script for installation.
For example, assume that your VirtualBox host is named "berfle" and your username on that system is
"ferd".
Logon to the vCAS and copy the script to "berfle":
scp /usr/share/doc/hp-rdacas/examples/vboxvmstartup.gz ferd@berfle:
Then, log on to the VirtualBox host "berfle" as user"ferd" and copy the compressed script to /etc/init.d
anduncompress it:
sudo cp vboxvmstartup.gz /etc/init.d/
sudo gunzip /etc/init.d/vboxvmstartup.gz
Follow the steps in the script to complete the installation and configuration.
This script has beentested on Ubuntu 10.04 (Lucid) and Red Hat Enterprise Linux (RHEL) 5.
Configure Windows Hosts
There are three different methods to setup a vCAS so that it automatically starts on a Windows host:
l VirtualBox Control Service
l VBox VMService
l Create a scheduledtask
VirtualBox Control Service is the easiest to configure. It requires you to install a third party application
which runs the vCAS in "headless" mode as a service whenthe Windows host starts. It provides a nice
system tray application.
VBoxVmService is similar to VirtualBox Control Service. It requires you to install a third party application
which runs the vCAS in "headless" mode as a service whenthe Windows host starts. VBoxVmService
setup is more complex than VirtualBox Control Service.
Create a scheduledtask does not requireinstalling additional software anduses the Windows task
scheduler. Create a scheduled task requires the most configuration.
For the above three methods the autostarted vCAS cannot bemanaged using VBoxManage command or
the VirtualBox GUI. This is because services never runin the same session as users' applications.
Page 50 of 65HP Remote Device Access 8.1:vCAS User Guide
Page 51

Appendix A: Starting a Virtual CAS at System Startup using VirtualBox
VirtualBox Extension Pack
Irrespective of the approach you choose, you should install the VirtualBox Extension Pack. This allows
you to connect to the vCAS over VirtualBox RDP. You should also configure the port number that you use
to connect to the vCASover RDP. Thedefault port is 3389 but do NOT use this as it may be in use by the
Windows host.
l Downloadthe VirtualBox Extension Pack
l Install the extensionpack by opening the pack
l Enable the VRDP server on the vCAS:
VBoxManage modifyvm hp-rdacas --vrde on
Configure the VRDP port that the vCAS uses to a valueother than the default 3389:
VBoxManage modifyvm hp-rdacas --vrdeport 33890
VirtualBox Control Service
VirtualBox Control Service is a free application that allows you to start VirtualBox VMs as a service when
the Windows host boots. It is easy to install and configure.
l DownloadVirtual Control Service. Choose the 32 bit or 64 bit kit as appropriate for your Windows host.
l
Unzip the kit to a local folder, for example,C:\Program Files\vboxctrl
l Edit the configuration file as follows:
[VBoxCtrl]
VboxInstallPath=C:\Program Files\Oracle\VirtualBox
VboxUserHome=c:\Users\<windows user name>\.VirtualBox
VmName=hp-rdacas
ShutdownCommand=savestate
ServiceName=VirtualBox hp-rdacas
Loglevel=1
Priority=Normal
l Make sure that VboxInstallPath is set to the folder where VirtualBox is installed and
VboxUserHome is set to the location of your .VirtualBox home folder.
n On a 64 bit host, install the service by running:
vboxctrl64.exe -i
l Verify that the services is installed correctly by opening the Services management console (Start-
Run-services.msc), see the following image:
HP Remote Device Access 8.1:vCAS User Guide Page 51 of 65
Page 52

Appendix A: Starting a Virtual CAS at System Startup using VirtualBox
Figure A.1 Service management Console
VirtualBox Control Service system tray application
The VirtualBox Control Service kit also comes with a system tray helper application vboxctrltray to
control vboxcrl services. This application provides some good features but it is not essential; it us up to
you to decide whether you wish to use this.
To configure it, complete the following steps:
1. Edit the vboxctrltray configuration file vboxctrltray.ini as follows:
; Example configuration file for vboxctrltray
; Edit to match your vboxctrl service(s)
[vm1]
ConfigFile=C:\Program Files\vboxctrl\vboxctrl64.ini
2. Start this system tray applicationby running the executable:
C:\Program Files\vboxctrl>vboxctrltray.exe
An icon appears on your system.
3. Right click the icon and set the application to start up when you logon:
Onenice feature of vboxctrltray is that it provides a menu item for opening a VDP console to the
HP Remote Device Access 8.1:vCAS User Guide Page 52 of 65
Page 53

Appendix A: Starting a Virtual CAS at System Startup using VirtualBox
vCAS:
Use VBoxVmService
VBox VmService is a Windows application that allows you to run Oracle's VirtualBox VMs from within a
native Windows service entity.
It is easy to install and configure. The installation instructions are with the kit in a file called Howto.txt .
The VBoxVmService needs to run under a particular useraccount. It may be beneficial to create a
separate user account for this, for example, vboxadmin. The followingis a sample
VBoxVMService.ini that uses this account.
[Settings]
ServiceName=VBoxVmService
RunAsUser=.\vboxadmin
UserPassword=vbox-admin-1
VBOX_USER_HOME=C:\Users\<windows user account>\.VirtualBox
RunWebService=no
PauseShutdown=5000
[Vm0]
VmName=myvcas
ShutdownMethod=savestate
AutoStart=yes
Oneissue not highlightedin Howto.txt is that the RunAsUser (the name of the account under which the
service should run)needs to have the Logon on as a service right. To grant vobadmin this right, openthe
local Group Policy Editor (Start> Run >gpedit.msc) and add vboxadmin to the list of users with this
right.
HP Remote Device Access 8.1:vCAS User Guide Page 53 of 65
Page 54

Appendix A: Starting a Virtual CAS at System Startup using VirtualBox
Figure A.2 Local Group Policy Editor Logon
Make sure that you set a system wide environment variable named VBOX_USER_HOME pointing at your
VirtualBox configuration directory. On Windows 7, this is typically C:\Users\<windows
username>\.VirtualBox where <windows username> is the name of the user that installed
VirtualBox.
Similar to the scheduled task approach, a vCAS started in this way cannot be managed using
VBoxManage or the VirtualBox GUI. As before you need to use an RDP viewer to connect to the vCAS.
Create a scheduled task
To create a scheduledtask to start the vCAS using VBoxHeaedless.exe., complete the following
steps:
1. Set a system wide environment variablenamed VBOX-USER_HOME pointing at yourVirtualBox
configuration directory. On Windows 7, this is C:\ Users\<windows
username>\.VirtualBox where <windows username> is the name of the userthat installed
VirtualBox.
2. Create a batch script named startvcas. bat as follows:
@echo off
set log="%VBOX_USER_HOME%\startvcas_log.txt"
echo Starting the vCAS at system start > %log%
time /T >> %log%
whoami >> %log%
echo %VBOX_USER_HOME% >> %log%
"%VBOX_INSTALL_PATH%\VBoxHeadless.exe" -startvm hp-rdacas >> %log%
3. Save startvcas.bat in the %VBOX_USER_HOME% directory.
Create a scheduledtask from the commandline as follows:
HP Remote Device Access 8.1:vCAS User Guide Page 54 of 65
Page 55

Appendix A: Starting a Virtual CAS at System Startup using VirtualBox
SCHTASKS /Create /SC ONSTART /TN "Start vCAS on system boot" /RU SYSTEM /RL
HIGHEST /TR "%VBOX_USER_HOME%\startvcas.bat
When you use this approach, if the host system is shut down, the vCAS is powered off without saving its
state. You can create a shutdown script to save the state of the vCASat shutdown.
To create a shutdown script to save the state of the vCASat shutdown, complete the following steps:
1. Create a batch script named shutdownvas.bat as follows:
@echo off
set log="%VBOX_USER_HOME%\shutdownvcas_log.txt"
echo Saving vCAS state on shutdown > %log%
time /T >> %log%
whoami >> %log%
echo %VBOX_USER_HOME% >> %log%
"%VBOX_INSTALL_PATH%\VBoxManage.exe" controlvm hp-rdacas savestate >>
%log%
2. Save startvcas.bat in the %VBOX_USER_HOME% directory .
3. Open the local GroupPolicy Editor(Start> Run >gpedit.msc).
4.
Add shutdowncas.bat as a Windows shutdown script.
Figure A.3 Local Group Policy Editor Shutdown
When the Windows host system is shut down, the vCAS should have its state saved.
Test the autostart
Once you have configured the vCAS to start usingone of the methods, you should test that everything is
working by rebooting your Windows host. When it reboots yourvCAS should be running without requiring
HP Remote Device Access 8.1:vCAS User Guide Page 55 of 65
Page 56

Appendix A: Starting a Virtual CAS at System Startup using VirtualBox
you to login. Test this by connecting to the vCASweb interface or by sshing to the vCAS.
When you logonto the Windows host, you will not be able to manage the vCAS usingthe
VirtualBoxGUIor the VBoxManage command. Insteadyou use a RDP viewer such as mstsc.exe to
connect to the console. If you used the VirtualBox Control Service, you can use vboxctrltray to start
andstop the vCAS.
HP Remote Device Access 8.1:vCAS User Guide Page 56 of 65
Page 57

Appendix B: Release Notes
This appendix contains the release notes for Virtual CAS version 14.06.
Fixed Problems and Enhancements
This maintenance release of the Virtual CAS provides the following enhancements:
l Support for Virtual DigitalBadge on Windows 8.
l OS package upgrade (installation of latest Ubuntu 10.04 Lucid patches)
l Minor bug fixes. For moreinformation, see "HP RDA CAS Ubuntu Changelog Summary" onthe next
page.
Known Issues
l OCSP certificate checking does not work with a web proxy server. This is a current limitation with the
OpenSSH X.509 patches that the Virtual CAS uses.
l VMware Serverhas reached end of life and is unsupported software. We recommend that you upgrade
current 10.06 systems running on VMware Serverto Virtual CAS 14.06 by doing a fresh install of
version 14.06.
Note: VMware no longersupports VMware Server. VMwareServer contains known security
vulnerabilities that VMware will not fix.
Apply the Update
l Loginto the Virtual CAS Web UI and select Tools > Software Updates in the top menu.
l Click Check Now. You should see a list of packages that will be updated.
l To update your Virtual CAS, click Upgrade Now.
l Go to the Virtual CAS base URL, for example, https://vcas.example.com.
l Click Help and select About. You should see "14.06-xxx" indicating the Virtual CAS has been
updated. Please note that you may have to clearyour web browser's cache and restart yourweb
browser for the web UI changes to take effect.
Access the Kit
The VMware ESX(i) and VMware Player kit is available at the following link:
https://h20529.www2.hp.com/apt/hp-rdacas-14.06-37616.ova
The Oracle VirtualBox kit is available at the following link:
https://h20529.www2.hp.com/apt/hp-rdacas-14.06-37616-vbox.ova
Remote Device Access Documentation is available at the following link:http://www.hp.com/go/rda-docs
Page 57 of 65HP Remote Device Access 8.1:vCAS User Guide
Page 58

HP RDA CAS New Packages
HP RDA CAS New Packages
Package Version
hp-rdacas-ca-certificates 1:14.06-37616
hp-rdacas-network-tools 1:14.06-37616
hp-rdacas-support-tools 1:14.06-37616
HP RDA CAS Ubuntu Changelog Summary
Package Source Old Version Latest Version
hp-rdacas hp-rdacas 1:13.06-35275 1:14.06-37616
hp-rdacas-linux-firmware hp-rdacas 1:13.06-35275 1:14.06-37616
hp-rdacas-relay hp-rdacas 1:13.06-35275 1:14.06-37616
hp-rdacas-upgrade hp-rdacas 1:13.06-35275 1:14.06-37616
libterm-emit-perl libterm-emit-perl 0.0.2-1 0.0.3-1
hp-rdacas
l 1:14.06-37616Fri, 06 June 2014 14:19:12
l 1:14.04-37038 Fri, 06 June 2014 14:19:12
hp-rdacas (1:14.06-37604) stable; urgency=low
l
AM9590 - Update vCAS to handle Virtual DigitalBadge.
-- Eoin O Conghaile <eoin.oconghaile@hp.com> Fri, 06 June 2014 14:19:12 +0100
hp-rdacas (1:14.04-37038) stable; urgency=low
l AM1091 - Better curl error reporting duringvCAS CRL updates
l AM1108 - vCAS UI non-responsive when log file is too large
l AM2012 - cassetup rejects uppercase hostnames. Uppercase is allowed but we always have
lowercase hostnames
-- Eoin Ó Conghaile < eoin.oconghaile@hp.com > Fri, 06June 2014 14:19:12 +0100
HP Remote Device Access 8.1:vCAS User Guide Page 58 of 65
Page 59

HP RDA CAS New Packages
libterm-emit-perl
l 0.0.3-1 Tue, 25 Oct 2011 12:55:08 -0600
libterm-emit-perl (0.0.3-1)
l
Initial Release.
-- Michael Spratte <mike@smtp.mike.remcon.hp.com>Tue, 25 Oct 2011 12:55:08 -0600
HP Remote Device Access 8.1:vCAS User Guide Page 59 of 65
Page 60

Appendix C: License
HP License Agreement
PLEASE READ THIS HP LICENSE AGREEMENT ("AGREEMENT") CAREFULLY. THIS
AGREEMENT IS A LEGAL AGREEMENT BETWEEN YOU (eitheran individual or A single LEGAL
entity) ("YOU") AND HEWLETT-PACKARD COMPANY ("HP"). USE OF THE SOFTWARE
INCLUDING, WITHOUT LIMITATION, ANY DOCUMENTATION, AND/OR ANY ANCILLARY
SOFTWARE, IS SUBJECT TO THE LICENSE TERMS SET FORTH BELOW AND THE APPLICABLE
"HP SOFTWARE PRODUCT 'AS-IS' WARRANTY STATEMENT" FOR THIS SOFTWARE THAT IS
PROVIDED TO YOU IN A SEPARATE DOCUMENT.
By CHECKING THE BOX NEXT TO "Yes, I have read and accept the software license terms.", OR BY
COPYING, INSTALLING, OR OTHERWISE USING THE SOFTWARE, you INDICATE YOUR
ACCEPTANCE OF AND agreeTO BE BOUND BY AND COMPLY WITH THE FOLLOWING TERMS
AND CONDITIONS, THE "AS IS" WARRANTY STATEMENT, AND THE TERMS AND CONDITIONS
RELATING TO THE ANCILLARY SOFTWARE ("ANCILLARY TERMS"). USE OF ANCILLARY
SOFTWARE SHALL BE GOVERNED BY THE ANCILLARY TERMS CORRESPONDING TO THAT
SOFTWARE, EXCEPT THAT THE DISCLAIMER OF WARRANTIES AND LIMITATION OF
LIABILITIES PROVISIONS CONTAINED IN THE APPLICABLE "AS IS" WARRANTY STATEMENT
SHALL ALSO APPLY TO SUCH ANCILLARY SOFTWARE. IF YOU CHOOSE TO ACCEPT THIS
AGREEMENT WITHOUT REVIEWING SUCH ANCILLARY TERMS YOU WILL BE DEEMED TO
HAVE ACCEPTED SUCH ANCILLARY TERMS.
IF YOU DO NOT AGREE TO ALL SUCH TERMS AND CONDITIONS AND DO NOT PLACE A CHECK
IN THE APPLICABLE BOX, THEN (A) HP GRANTS YOU NO LICENSE TO THE SOFTWARE, (B)
YOU MAY NOT COPY, INSTALL, OR OTHERWISE USE THE SOFTWARE, AND (C) UPON THE
PROMPT RETURN OF THE SOFTWARE TO HP YOU WILL RECEIVE A FULL REFUND OF ANY
APPLICABLE LICENSE FEES ACTUALLY PAID BY YOU.
DEFINITIONS
• "Ancillary Software" means all or any portion of Software providedunderpublic, opensource, or third
party license terms. HP Ancillary Software, if any, is identified by either noting the relevant party's
ownership within each Ancillary Software program file and/or by providing information in the "README"
file that is provided as part of the download of the Software.
• "Delivery" means (the date on which HP makes Software available for electronic transmission to or
download by Customer.
• "Device" means a controller, processor, orother hardware and related operating system Software.
• "Documentation" means the end user manual, Specifications, application notes, and other technical
documentation sold or otherwise made generally available by HP for Use of Software, whether in tangible,
online, electronic, or other form.
• "HP Software" means Software other than Ancillary Software.
• "License Fee" means the fee or fees designated by HP for Use of Software set forth on this website, if
any, at the time this Agreement is entered into. Different License Fees may apply to particularSoftware if
more than one Software License is available for that Software.
• "Software" means one or more programs capable of operatingon a Device, associated media, and
related Documentation; "Firmware" means Software fixed in a Device and not removable in normal
operation.
Page 60 of 65HP Remote Device Access 8.1:vCAS User Guide
Page 61

Appendix C: License
• "Specifications" means specific technical information about Software which is published in HP manuals
andtechnical data sheets in effect on the date HP electronically transmits Software to Customer.
• "Use" means storing, loading, installing, executing or displaying Software on a single Device in
accordance with the Documentation. HP may also specify Use authorizations or restrictions in the terms
accompanying the Software.
LICENSE
• In return for the applicable License Fee, HP grants You a non-exclusive license to Use the Software in
conformance with the terms set forth herein. In the event of a conflict, the Ancillary Terms that accompany
the Softwarewill take precedence over the Use restrictions and authorizations specified by HP and the
terms set forth herein, and any additional Use restrictions or authorizations specified by HP will take
precedence over the terms set forth herein.
• Unless otherwise specified, in return for the applicable License Fee HP grants You a license to Use one
copy of the Softwareon one Device at any one time. Youmay only use Firmware to enablethe Device to
function in accordance with its Specifications.
• All Software licenses will beperpetual unless this Software is provided for evaluation purposes, in which
case the durationof this license is for the evaluation period only, or unless the Software license is
terminated or transferred in accordance with Section B.9. Unless stated otherwise in the description of the
Software for which this license applies, licenses granted for evaluation purposes shall be for a period of
thirty (30)days.
• Software is owned and copyrightedby Hewlett-Packard Development Company, L.P. orby third party
suppliers. This Agreement confers no title or ownership and is not a sale of any rights in the Software.
Third party suppliers are intendedbeneficiaries under these terms and conditions and may protect their
rights in the Software in the event of any infringement.
• Unless otherwise permitted by HP, You may only make copies or adaptations of the Software for
archival purposes or when copyingor adaptation is an essential step in the authorized Use of the Software
on a backup Device, provided that copies and adaptations are used in no other manner and provided
further that the Use on the backup Device is discontinued when the original or replacement Device
becomes operable.
• You must reproduce all copyright notices in or on the original Software on all permitted copies or
adaptations. You may not remove, deface, or obscure any Software product identification, copyright
notices, or proprietary notices.
• Updates, upgrades, enhancements, or other support may only be availableunderseparate HP Support
agreements. Nothing in this Agreement grants you any right to purchase or receive support services, and
HP is under no obligation to make such support available to you. HP reserves the right to requireadditional
licenses and fees for Software upgrades or other enhancements, or for Use of the Software on upgraded
Devices.
• You will not modify, reverse engineer, disassemble, decrypt, ordecompile the Softwarewithout HP's
prior written consent. Where You have otherstatutory rights, You will provide HP with reasonably detailed
information regarding any intended modifications, reverse engineering, disassembly, decryption, or
decompilation.
• You may only transfer this Agreement subject to HP's prior written authorization and payment to HP of
any applicable fee(s). Upon transfer of this Agreement, You will immediately deliver all copies of the
Software to the transferee. The transferee must agree in writing to the terms of this Agreement. All
Agreement terms and conditions will bebinding on involuntary transferees, notice of which is hereby
HP Remote Device Access 8.1:vCAS User Guide Page 61 of 65
Page 62

Appendix C: License
given. Your rights under this Agreement will automatically terminate upon transfer. Notwithstanding
anything in the foregoing to the contrary, if You transfer a Device to a third party, You may transfer the
associated Firmware without additional written authorization from HP.
• HP may terminate this Agreement or your or any transferee's orsublicensee's rights under this
Agreement uponnotice for failure to comply with its terms or conditions. Immediately upon any
termination, the Software and all copies of the Software will be destroyed or returned to HP. Copies of the
Software that are merged into adaptations, except for individual pieces of data in Youror any transferee's
or sublicensee's database, will beremoved and destroyed orreturned to HP. With HP's written consent,
onecopy of the Software may beretained subsequent to termination solely for archival purposes. At HP's
request, You will certify in writing to HP that You have complied with this Section.
• If the Software is licensed for use in the performance of a U.S. government prime contract or
subcontract, You agree that, consistent with FAR 12.211and 12.212, commercial computer software,
computer software documentation andtechnical data for commercial items are licensed undervendor's
standard commercial license.
• HP and its suppliers reserve all rights not expressly granted herein to You. Nothing herein should be
construed as granting You, by implication, estoppel or otherwise, a license relatingto Software other than
as expressly stated above in this Section. You have no right to rent or lease Software, to use or make the
Software available for commercial timesharing or service bureau purposes, or to copy Software onto or
otherwise make it available on, to, or through any public or distributed network.
GENERAL
• Except as expressly providedin Section B.9 above, You may not assign, delegate, or otherwise transfer
these terms and conditions orany rights or obligations hereunder without priorwritten consent from HP.
Any such attempted assignment, delegation, or other transfer will be null and void, and HP may terminate
this Agreement in the event thereof.
• If You export, re-export orimport Software, technology or technical data purchased hereunder, You
assume sole responsibility for complying and will comply with applicable laws and regulations, including
without limitation obtainingany required export and import authorizations. You will not export, re-export,
import, transfer or distribute Software to persons or entities listed on the U.S. Department of Commerce
DeniedPersons List, Entity List, oron any U.S. Treasury Department Designated Nationals exclusion
list, or to any country or to persons or entities in any country underU.S. economic embargo, or to any
persons or entities directly or indirectly involved in the development orproduction of nuclear, chemical,
biological weapons or in missile technology programs as specified in the U.S. Export Administration
Regulations (15 CFR 744). By accepting the terms and conditions of this Agreement, You confirm that
You are not such a restricted person, entity or country. HP may suspend or terminate this Agreement if
You are in violation of applicableregulations.
• Uponthirty (30) days' prior written notice, and no more thanonce duringany twelve-month period, HP (or
it's designee) may conduct an audit of Your records and facilities to verify Your compliance with this
Agreement. You will provide HP with access to the records, hardware, and employees reasonably
necessary for HP to exercise its rights underthis Section C.3. HP may make and maintain copies of such
records. In the event such an audit reveals an underpayment by You, Youshall immediately pay such
underpayment uponHP's request, together with the costs reasonably incurred by HP in connection with
the audit and seeking Your compliance with this Section C.3.
• This Agreement shall be construedin accordance with the laws of the State of California, without regard
to conflict of laws principles. The United Nations Convention on Contracts for the International Sale of
Goods does not apply.
HP Remote Device Access 8.1:vCAS User Guide Page 62 of 65
Page 63

Appendix C: License
• Provisions herein which by their nature extend beyond the termination of any sale or license of Software
will remain in effect until fulfilled.
• If any term or provision herein is determined to be illegal or unenforceable, the validity or enforceability of
the remainder of the terms or provisions herein will remain in full force and effect.
• Failure ordelay in enforcing any right or provision of this Agreement shall not be deemed a waiver of such
right or provision with respect to any subsequent breach.
• Except as specified herein, these terms and conditions constitute the entireagreement between HP and
You, and supersede any previous communications, representations or agreements between the parties,
whether oral or written, regarding transactions hereunder. Your additional or different terms and conditions
will not apply. The terms and conditions of this Agreement may not be changed except by a written
amendment signed by an authorized representative of each party.
________________________________________
HEWLETT-PACKARD SOFTWARE PRODUCT
"AS IS" WARRANTY STATEMENT
DISCLAIMER
TO THE EXTENT ALLOWED BY LOCAL LAW, THIS HP SOFTWARE PRODUCT ("SOFTWARE") IS
PROVIDED TO YOU "AS IS" WITHOUT WARRANTIES OR CONDITIONS OF ANY KIND,
WHETHER ORAL OR WRITTEN, EXPRESS OR IMPLIED. HP SPECIFICALLY DISCLAIMS ANY
IMPLIED WARRANTIES OR CONDITIONS OF MERCHANTABILITY, SATISFACTORY QUALITY,
NON-INFRINGEMENT AND FITNESS FOR A PARTICULAR PURPOSE. Some countries, states and
provinces do not allow exclusions of implied warranties or conditions, so the above exclusion may not
apply to you. You may have other rights that vary from country to country, state to state, or province to
province.
LIMITATION OF LIABILITY
EXCEPT TO THE EXTENT PROHIBITED BY LOCAL LAW, IN NO EVENT WILL HP OR ITS
SUBSIDIARIES, AFFILIATES OR SUPPLIERS BE LIABLE FOR DIRECT, SPECIAL, INCIDENTAL,
CONSEQUENTIAL OR OTHER DAMAGES (INCLUDING LOST PROFIT, LOST DATA, OR
DOWNTIME COSTS), ARISING OUT OF THE USE, INABILITY TO USE, OR THE RESULTS OF USE
OF THE SOFTWARE, WHETHER BASED IN WARRANTY, CONTRACT, TORT OR OTHER LEGAL
THEORY, AND WHETHER OR NOT ADVISED OF THE POSSIBILITY OF SUCH DAMAGES. Your
use of the Software is entirely at your own risk. Should the Software prove defective, you assume the
entire cost of all service, repair or correction. Some countries, states and provinces do not allow the
exclusion or limitation of liability for incidental or consequential damages, so the above limitation may not
apply to you.
NOTE
EXCEPT TO THE EXTENT ALLOWED BY LOCAL LAW, THESE WARRANTY TERMS DO NOT
EXCLUDE, RESTRICT OR MODIFY, AND ARE IN ADDITION TO, THE MANDATORY STATUTORY
RIGHTS APPLICABLE TO THE LICENSE OF THE SOFTWARE TO YOU.
________________________________________
HP Global Master Privacy Policy
Scope
HP Remote Device Access 8.1:vCAS User Guide Page 63 of 65
Page 64

Appendix C: License
This HP Global Master Privacy Policy applies to the collection, storage, processing, transfer, and use of
personal information concerning covered individuals. Personal information includes any data by which a
person can be identified or located, as well as any data to which HP has access in customer systems.
Personal information may be collected from coveredindividuals through a variety of means, including, as
examples, websites, other ordering channels, and service or employment processes. HP may also obtain
personal information about covered individuals from other publicly or commercially availablesources we
deem credible.
This global master policy governs customerand employee data protection policies; implementation
standards; rulebooks; business processes; applications; web, product, and service developments; and
technology roadmaps.
All HP employees, boardmembers, and contracted parties working on behalf of HP must comply with
these policies, even if local law is less restrictive. Specific practices are tailored to meet the legal,
regulatory, and cultural requirements of the countries and regions where HP operates.
Global Policy fundamentals
Ourprivacy policies reflect current global principles and standards onhandling personal information.
These principles include notice of data use, choice of data use, data access, data integrity, security,
onward transfer, and enforcement/oversight. We abide by the privacy laws in the countries where we do
business.
Master Policy principles
HP recognizes that the personal information it receives is held in a position of trust. We seek to fulfill that
trust by adhering to the following general principles regarding personal data.
Notice and choice of data use
• HP does not sell, rent or lease personal information of covered individuals
• HP provides notice and choice to individuals regarding the type of personal information collected and its
intendeduses
• HP reviews the purposes for which data is to becollected from covered individuals to ensure that our
data collection supports reasonablebusiness requirements.
• HP does not use personal information obtained from covered individuals for purposes that are
incompatible with the purposes stated in our notices.
Data access
• HP provides individuals with reasonable access to the personal information they provided to HP and the
ability to review and correct it, as applicable.
Data integrity
• HP takes reasonable steps to ensure that all applicable personal information is accurate, complete and
current.
Data security
• HP is committed to protecting personal informationagainst unauthorized use or disclosure.
Onward transfer
HP Remote Device Access 8.1:vCAS User Guide Page 64 of 65
Page 65

Appendix C: License
• HP does not transfer personal information provided by covered individuals to third parties unless those
third parties promise to give the data the equivalent level of protection that HP provides.
Enforcement/Oversight
• HP uses best commercial practices to obtain personal information by lawful and fair means.
• HP complies with relevant privacy and data protection laws in the locations in which HP operates.
HP addresses complaints or disputes regarding personal information promptly and courteously.
Policy #HP002-01
Versiondate: 21March, 2007
Current on-line statement
________________________________________
Open Source Software
Component Copyrights
This appliance uses Open Source software. The licenses for each component are found in the
/usr/share/doc/*/copyright files, where '*' is the packagename.
Common Licenses
The commonlicenses, often referenced by the above copyrights, can be found in /usr/share/common-
licenses/
Source Code Availability
You may request a copy of the source code used in this appliance by contacting your Hewlett-Packard
account representative (from whom you receivedthis appliance software). A physical copy of the source
code will be delivered to you. Alternately, you may enablesource codedistributions on the Update page
andreceive the source code electronically, deliveredto this appliance.
HP Remote Device Access 8.1:vCAS User Guide Page 65 of 65
 Loading...