

HP Proliant ML115
Configuring the server
Generation 5 Server
Installation Sheet
1. Connect all peripherals:
o Keyboard
o Mouse
o Monitor
NOTE: Refer to the HP ProLiant ML115 G5 Server Easy Set-up
CD contents for additional information and updates not
provided in this installation sheet.
2. Determine the server BIOS version:
a. Power up the server.
b. Press the Esc Key at the HP logo screen, and then press the
Pause Key to halt screen movement.
c. Note the server BIOS version.
d. Verify the server BIOS version against the latest BIOS
version listed for this server on HP website:
http://www.hp.com
e. If you don’t have the latest BIOS, update the BIOS now.
Refer to the HP Proliant ML115 G5 Server Maintenance
and Service Guide available on the HP website:
http://www.hp.com
Default boot priority
By default, the server searches for boot devices in the following
order:
1. DVD-ROM
2. Removable Devices
3. Hard Drive
4. Embedded NIC
Part number: 457546-002
February 2008 (Second Edition)
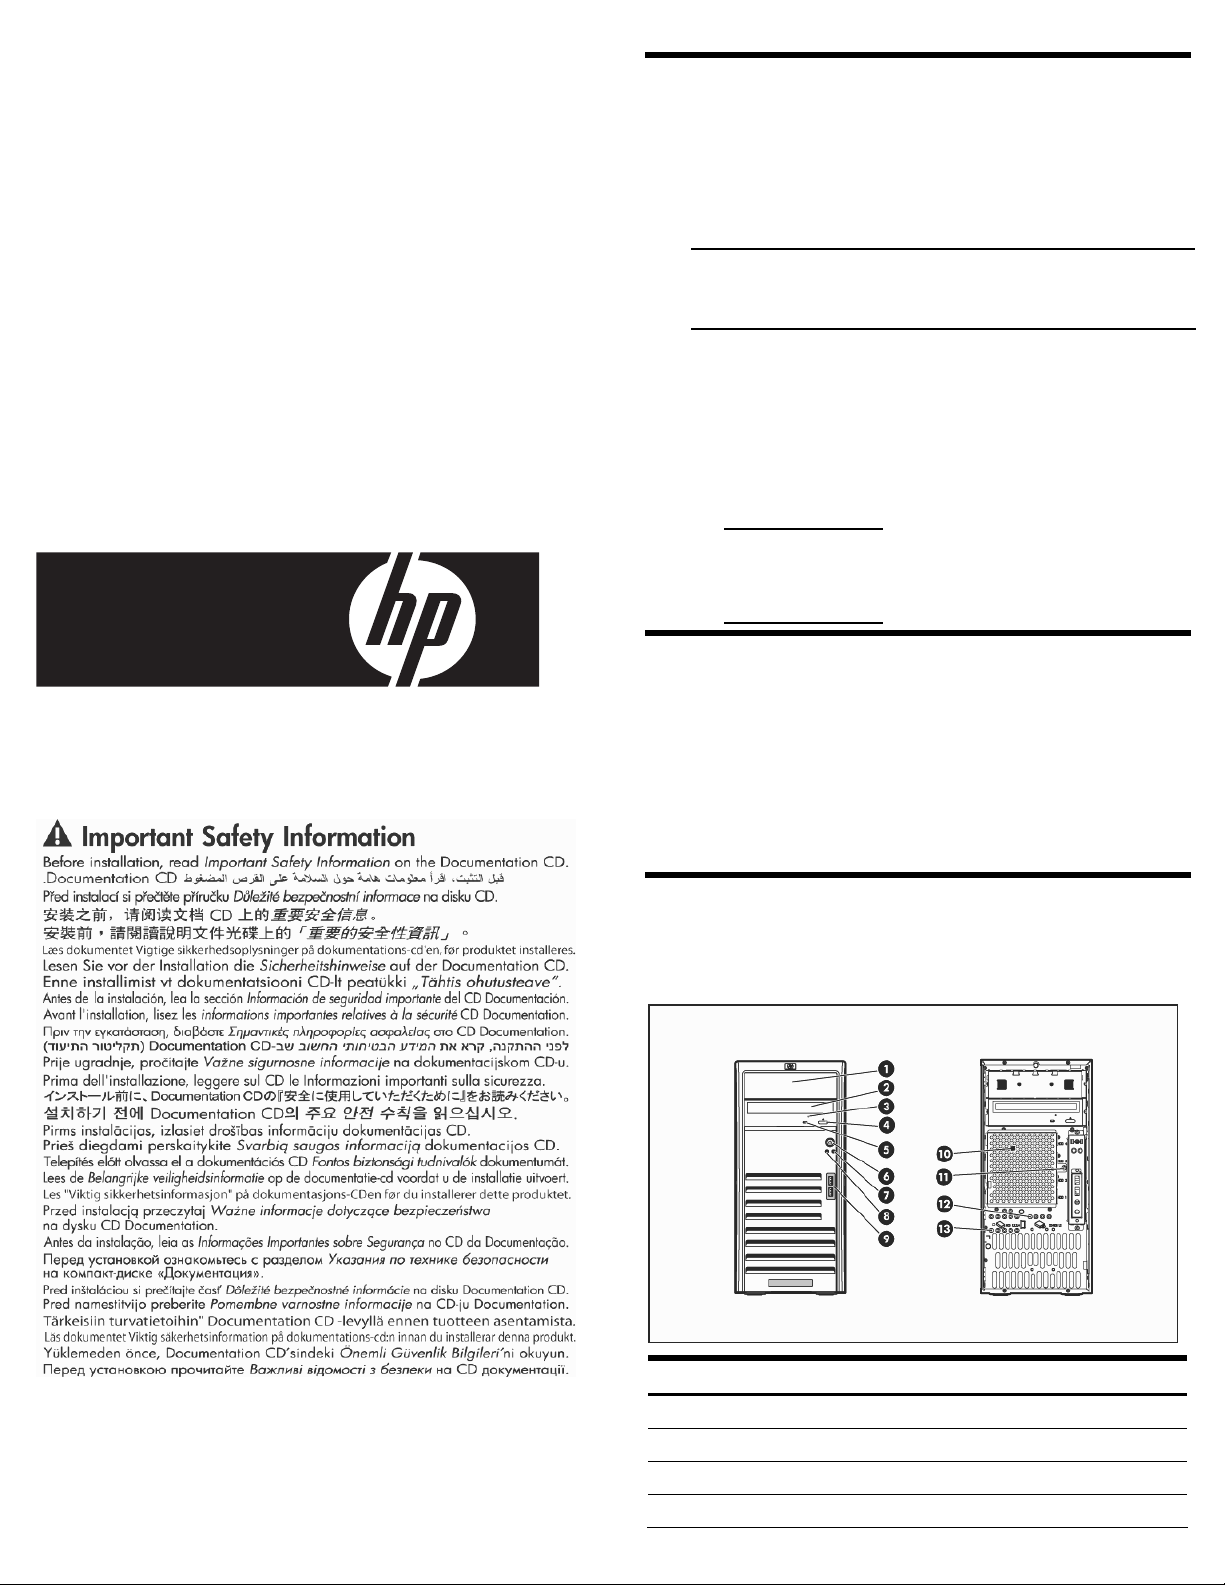
Identifying the server components
Front panel components
Item Description
1 Half height common bay
2 Optical drive
3 Optical drive activity indicator
4 Optical drive activity eject button
Item Description
5 Optical drive manual eject hole
6 Power button
7 Power LED indicator
8 Drive activity indicator
9 Front USB 2.0 ports
10 Hard drive EMI shield
11 Hard drive EMI shield screw
12 Optical drive spare screws
13 Hard drive spare screws
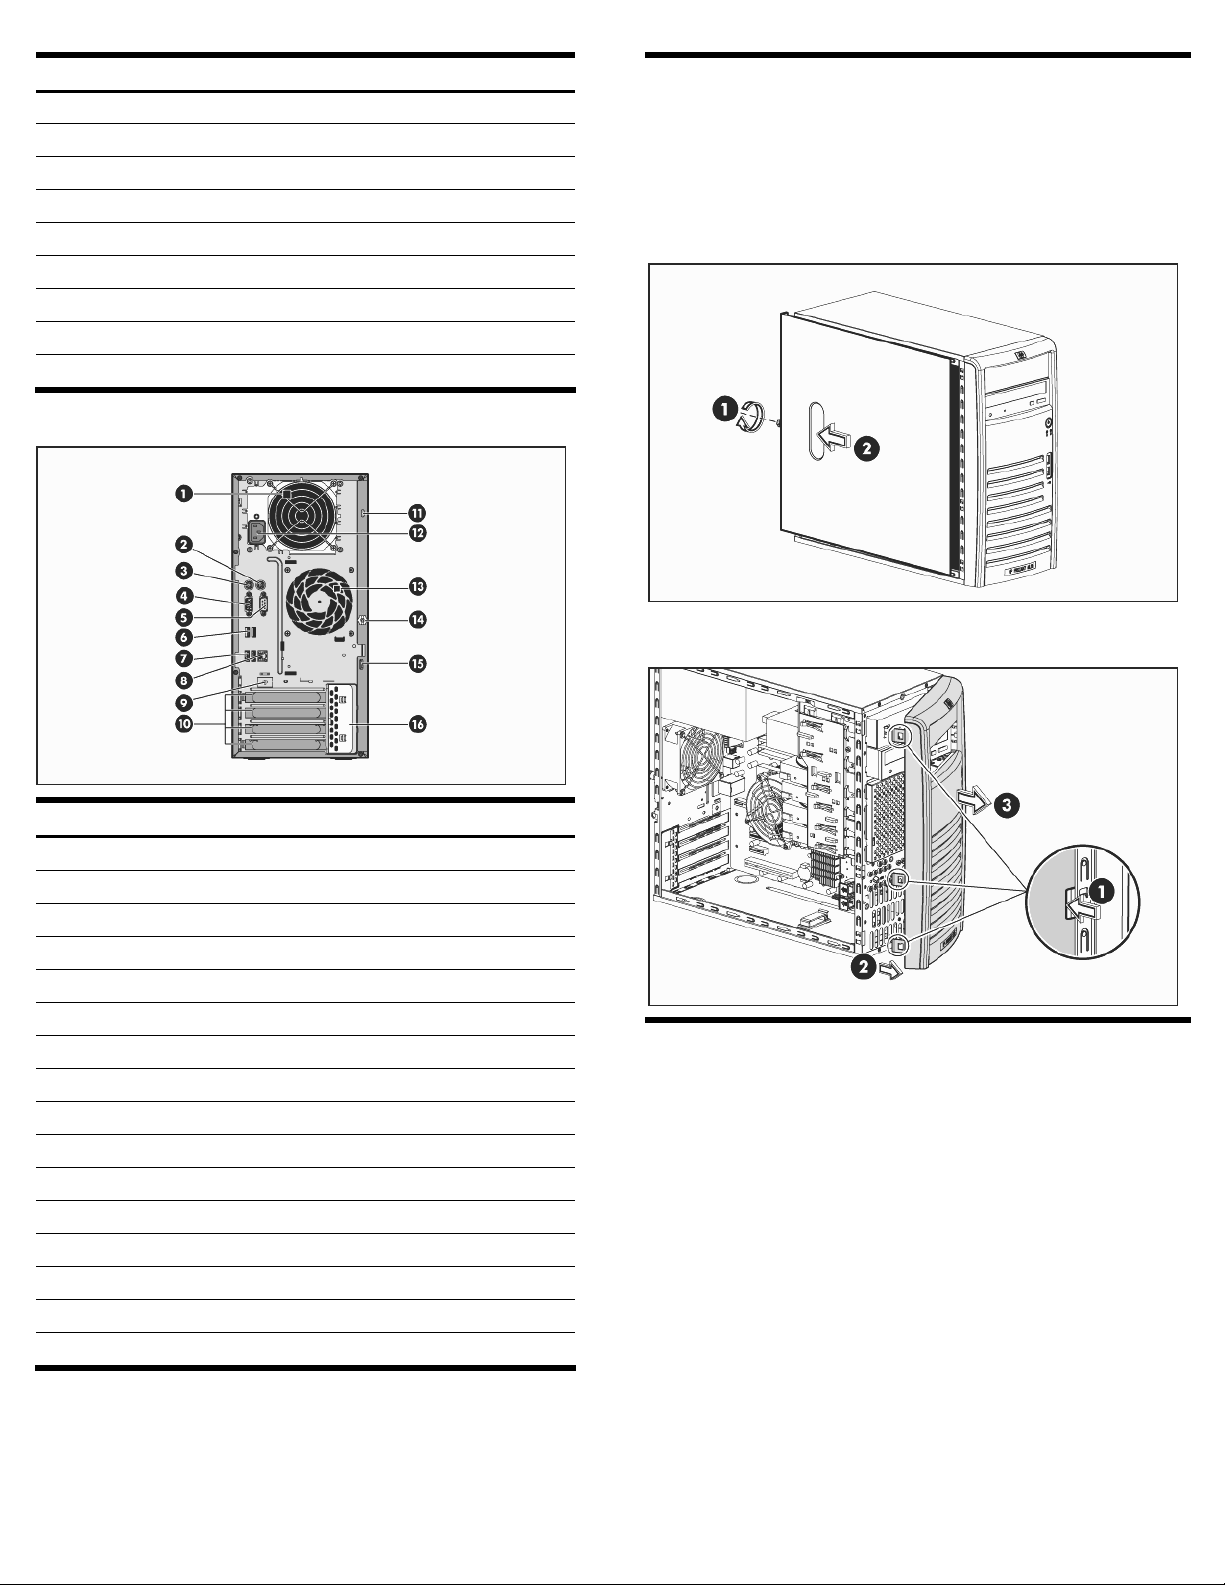
Rear panel components
Opening the server
The access panel and the front bezel are both detachable. You need
to remove these system covers before you can remove or replace a
server component.
Removing the access panel
Removing the front bezel
Item Description
1 PSU fan
2 PS/2 mouse port
3 PS/2 keyboard port
4 VGA port
5 Serial port A
6 Rear USB 2.0 port
7 Rear USB 2.0 port
8 LAN port (RJ-45)
9 HP LO100c Remote Management Card Port
10 PCI slot covers
11 Kensington lock notch
12 Power supply outlet
13 Rear system fan
14 Thumbscrew for access panel
15 Padlock tab
16 PCI slot cover lock
Installing the PCI accessory board
The server supports four PCI bus slots.
• One 32-bit/33-MHz 3.3V PCI bus slot
• One PCI Express x8 line with x8 slot
• One PCI Express x16 line with x16 slot
• One PCI Express x1 line with x1 slot

Removing the PCI slot cover lock
Removing the hard drive shield
Installing the PCI card
Installing mass storage devices
The four lower drive bays on the front panel can accommodate up to
four hard drives. The server supports both SATA and SAS drives.
WARNING: Power down the server before installing
hard drives.
CAUTION: Drives can be damaged by static electricity.
Before handling drives, touch an unpainted metal surface
to discharge static electricity.
Installing the SATA/SAS hard drive
Installing optical drives
The two upper drive bays on the front panel can accommodate up to
two optical drives.
WARNING: Power down the server before installing
optical drives.
CAUTION: Drives can be damaged by static electricity.
Before handling drives, touch an unpainted metal surface
to discharge static electricity.

Installing the optical drive
Installing memory
Installing the processor and cooler
The AMD AM2 socket in HP ProLiant ML115 G5 server supports
AMD Opteron 1XXX series, AMD Athlon 4450B and AMD Sempron
LE 1250 processors.
The server has four DIMM slots that support up to 8 GB maximum
system memory (2 GB in each of the four DIMM slots).
The following guidelines must be followed when memory modules
are being added or replaced:
• Use only DDRII 667/800 unbuffered ECC DIMMs in 512 MB, 1
GB or 2 GB configuration.
• Supported DIMM configurations are single DIMM, one pair (two
DIMMs), or two pairs (4 DIMMs). Channel A corresponds to the
1A and 3B slots, while channel B corresponds to the 2A and 4B
slots.
• For optimal 2 DIMMs configuration, populate 1A and 2A slot.
CAUTION: DIMMs can be damaged by improper handling.
Always use an anti-static wrist strap and grounding mat, and
discharge static electricity before touching DIMMs.
CAUTION: If there are ECC errors in the DIMM(s) during the
system start-up and the screen is blank, the system will emit 8
short beeps.
CAUTION: There is an arrow on the side of cooler that
shows you the correct installation.
Legal notices
© Copyright 2008 Hewlett-Packard Development Company, L.P.
The information contained herein is subject to change without notice. The
only warranties for HP products and services are set forth in the express
warranty statements accompanying such products and services. Nothing
herein should be construed as constituting an additional warranty. HP shall
not be liable for technical or editorial errors or omissions contained herein.
Microsoft, Windows, and Windows NT are U.S. registered trademarks of
Microsoft Corporation.
DIMM slots are structured to ensure proper installation. If you insert a
DIMM but it does not fit easily into the slot, you may have inserted it
incorrectly. Reverse the orientation of the DIMM and insert it again.
 Loading...