


Contents
1 Online Topics
HP Photosmart eStation C510 series - Print Apps...............................................................................................................3
HP Photosmart eStation C510 series - Description of the External Parts of the Product....................................................3
HP Photosmart eStation C510 series - Use the Removable Display...................................................................................6
HP Photosmart eStation C510 series - Purchase and Read Books, Magazines, and Newspapers..................................19
HP Photosmart eStation C510 series - Use the Apps........................................................................................................23
HP Photosmart eStation C510 series - Send and Receive Faxes with the eFax® Brand Online Fax Service..................26
HP Photosmart eStation C510 series - Load media...........................................................................................................28
HP Photosmart eStation C510 series - Print Documents...................................................................................................30
HP Photosmart eStation C510 series - Print Photos Saved on Your Computer................................................................31
HP Photosmart eStation C510 series - Print Envelopes....................................................................................................32
HP Photosmart eStation C510 series - Scan to a Computer.............................................................................................33
HP Photosmart eStation C510 series - Scan to a Memory Card.......................................................................................34
HP Photosmart eStation C510 series - Copy Text or Mixed Documents...........................................................................35
HP Photosmart eStation C510 series - Change Default Print Settings in Solution Center................................................36
HP Photosmart eStation C510 series - Edit and Use Printing Shortcuts...........................................................................36
HP Photosmart eStation C510 series - Cartridge Chip Information...................................................................................37
HP Photosmart eStation C510 series - Check the Estimated Ink Levels...........................................................................38
HP Photosmart eStation C510 series - Reset the product.................................................................................................38
HP Photosmart eStation C510 series - Use the Power Save Feature ..............................................................................39
HP Photosmart eStation C510 series - The Wrong Settings Are Showing in Menus on the Display.................................39
HP Photosmart eStation C510 series - Control Panel Display Is in the Wrong Language After Setup..............................39
HP Photosmart eStation C510 series - 'Incompatible Ink Cartridges' Error Message Appears on the Product
Display................................................................................................................................................................................40
HP Photosmart eStation C510 series - 'Non-HP Cartridges installed' Error Message Appears on the Product
Display................................................................................................................................................................................41
HP Photosmart eStation C510 series - Ink Cartridge Problem..........................................................................................43
HP Photosmart eStation C510 series - 'Printhead appears to be missing, not detected, incorrectly installed, or
incompatible' Error Message Appears on the Computer ...................................................................................................47
Contents
1

Contents
2

1 Online Topics
HP Photosmart eStation C510 series - Print Apps
You can use your printer to browse and print content without a computer.
The new HP Photosmart eStation opens up a whole new world of internet printing—right from your printer. The
enhanced HP Touchsmart display makes it easy to print your favorite web content without a PC. Choose from a
wide variety of Apps or even create your own, and produce impressive photos and everyday prints from anywhere.
Use the TouchSmart display and Print Apps—shortcuts to a variety of formatted web content—to print maps, photos,
Sudoku puzzles, coloring pages, calendars, news and more without a computer.
Learn how to use Print Apps at the
HP ePrintCenter.
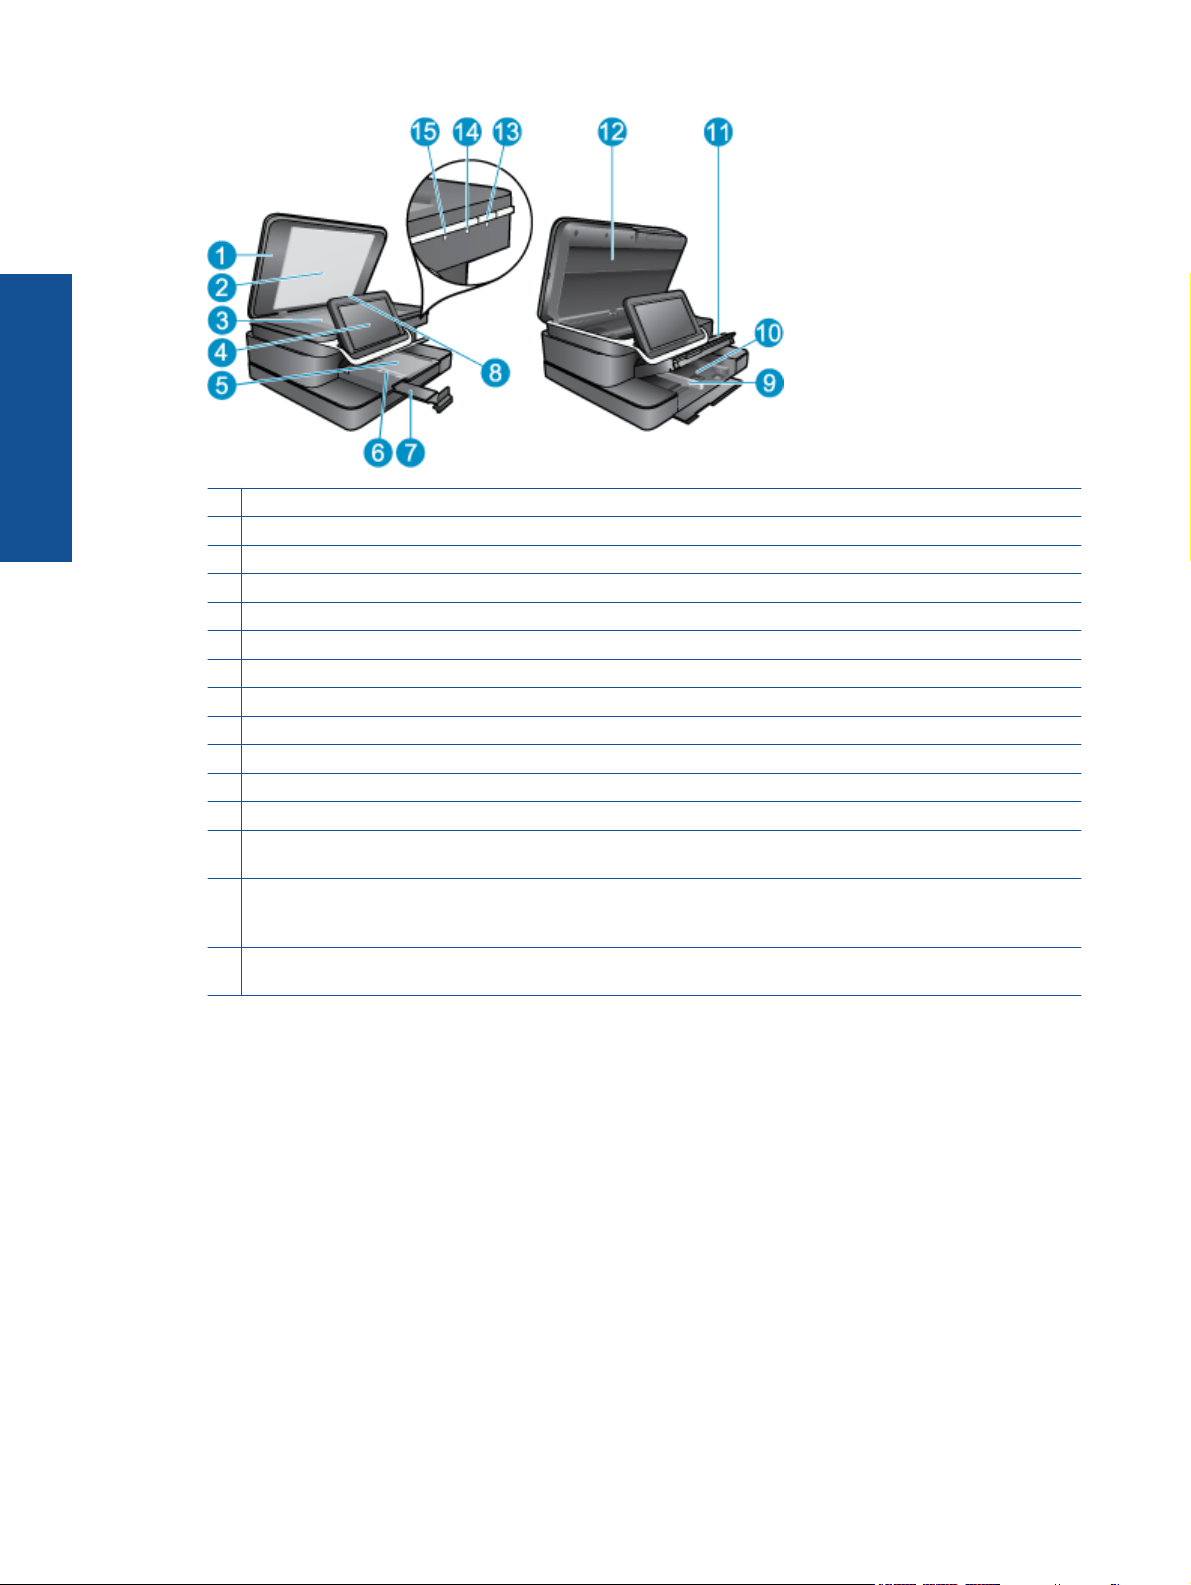
HP Photosmart eStation C510 series - Description of the External Parts of the Product
• Front view of the printer
Online Topics
Online Topics 3
Online Topics
Chapter 1
1 Lid
2 Lid backing
3 Glass
4 The HP eStation Zeen (also referred to as the removable color graphics display, the removable display, or the display).
5 Photo tray
6 Paper-width guide for the photo tray
7 Paper tray extender (also referred to as the tray extender)
8 Memory card slot for Secure Digital cards
9 Paper-width guide for the main tray
10 Main tray (also referred to as the input tray)
11 Output tray
12 Cartridge door
13 On: Turns the product on or off. When the product is off, a minimal amount of power is still used. To completely remove
power, turn off the product, and then unplug the power cord.
14 Wireless network indicator light: ON indicates the wireless radio on the main printer is on and has a network connection;
OFF indicates that the wireless radio on the main printer is off; BLINKING on and off indicates that the wireless radio
on the main printer is on but there is no network connection.
15 HP ePrint light: ON indicates there is an ePrint server connection; OFF indicates that there is no ePrint server
connection.
• Back view of the display
4 Online Topics

16 Headphone connector
17 Memory card slot for Secure Digital cards
18 Volume up
19 Volume down
20 Speaker
21 Docking connector
22 USB connector: For use when the display is undocked
23 Power connector: For use when the display is undocked
24 Power button
25 Wireless antenna
• Secondary display behind the removable display
Online Topics
26 Cancel
27 Copy Black
28 Copy Color
29 Paper Feed
30 Attention light
31 Docking connector for the removable display
HP Photosmart eStation C510 series - Description of the External Parts of the Product 5

Chapter 1
• Top and rear views of the printer
Online Topics
32 Printhead assembly
33 Cartridge access area
34 Model number and ink selectability label location
35 Rear USB port
36 Power connection (Use only with the power adapter supplied by HP.)
37 Two-sided printing accessory
HP Photosmart eStation C510 series - Use the Removable Display
This product’s removable display is also known as the HP eStation Zeen, or Zeen. Explore how easy it is to navigate
the screens and menus, customize your Home screen, and manage your apps. View animations to help you learn
how to get the most out of your HP eStation Zeen.
Tour of the Home screen
Navigation basics
Learn how to navigate and use the HP eStation Zeen.
6 Online Topics

Use the navigation controls
Use the navigation controls
Feature Feature Description
Touch this button to return to the Home screen from anywhere.
Touch this button to move to the previously-viewed screen.
Touch this button to show the menus that are available from
the screen you are viewing.
Touch the menu button from the Home screen to see the
following sub-menus: Manage Homepage, System
Notifications, System Dashboard, and Settings.
Rotate the display
You can view the display in either landscape or portrait orientation.
Online Topics
View more Home screen pages
To move between the pages, swipe left or right with your finger.
HP Photosmart eStation C510 series - Use the Removable Display 7

Online Topics
Chapter 1
Move through lists
To view contents below or above the screen area, swipe your finger up or down.
Move an app
Touch the tab above the Apps Favorites bar to view all of the apps. Touch and hold an app, then drag it to where
you want it.
NOTE: The only app you cannot move or remove is the Printer app; it must always be in the Apps Favorites
bar.
Pinch to shrink, stretch to zoom in
When viewing a photo in the HP Gallery app, you can pinch your fingers together on the screen to shrink the image,
and stretch your fingers apart to zoom in closer to the image.
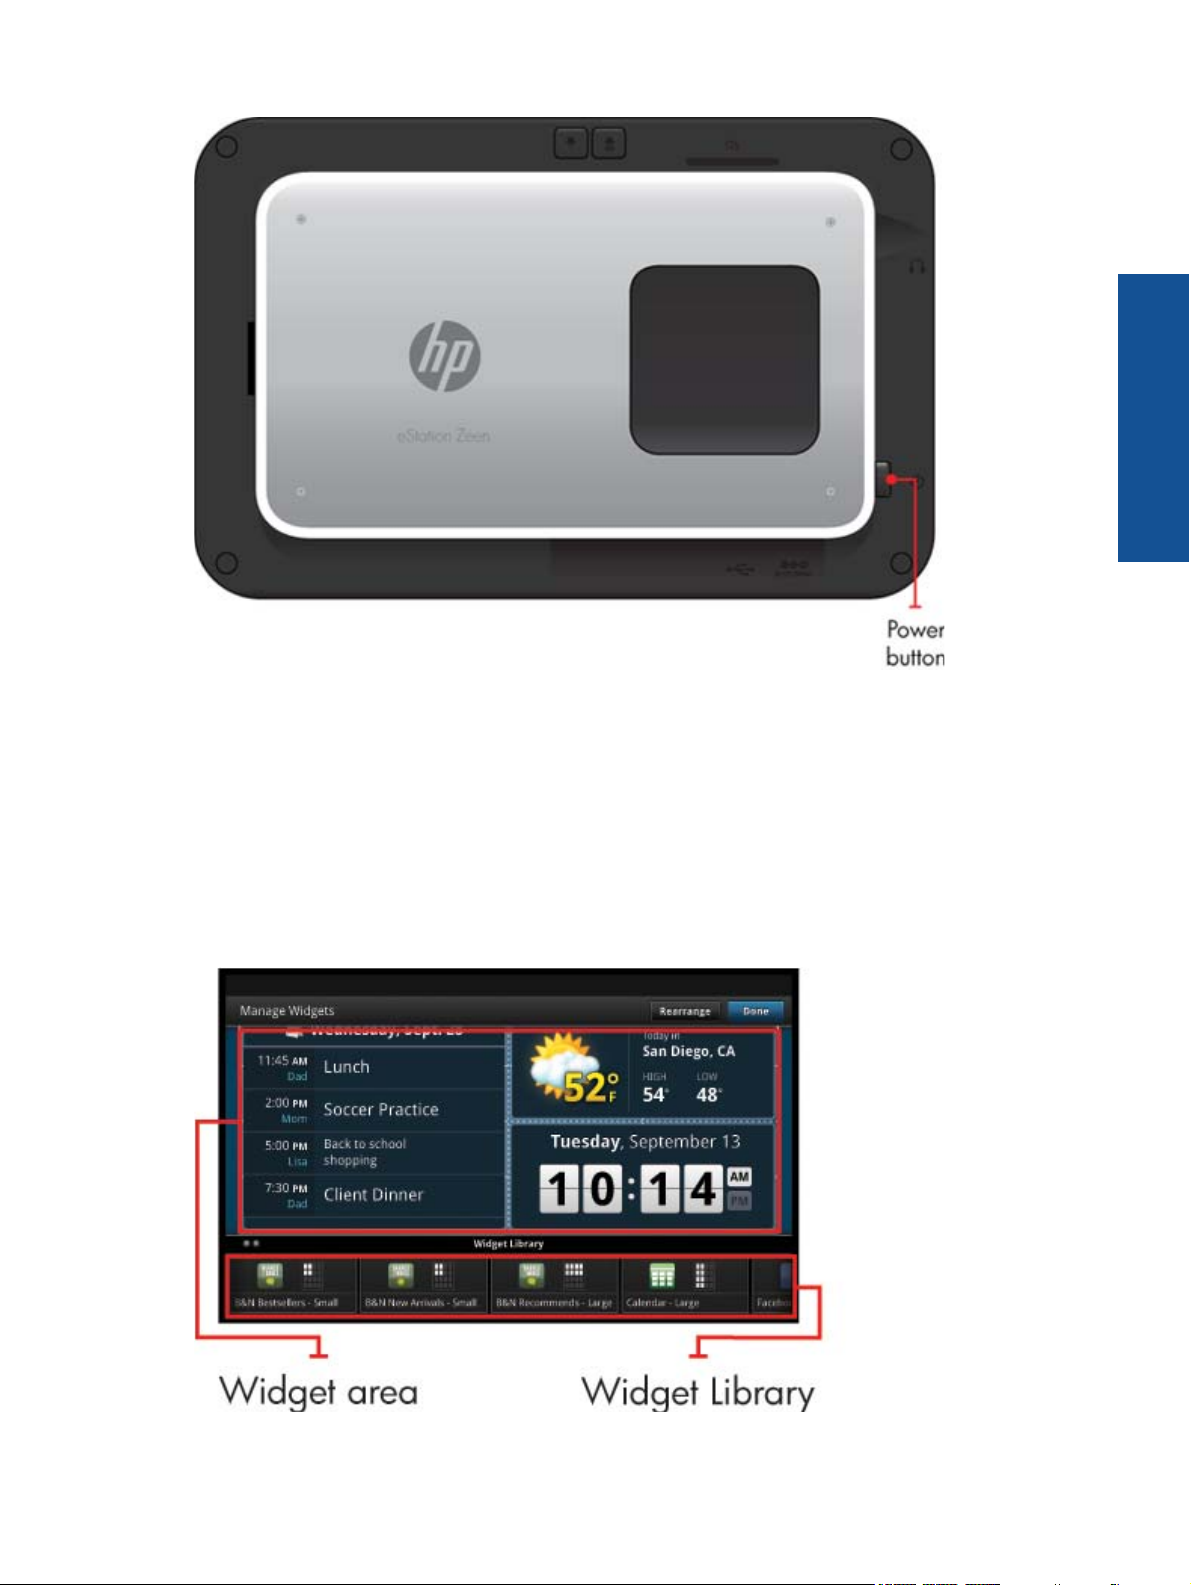
Power button options
When the HP eStation Zeen is removed from the main printer, you can reduce screen battery power usage (without
turning it off) by pressing the Power button on the back. Press the Power button again to return to the same screen
that displayed when you put it to sleep.
To turn off the battery power to the HP eStation Zeen while it is removed from the main printer, press and hold the
Power button on the back for a few seconds until the Power Options menu is displayed, then touch Shut Down.
From this menu, you also have the choice of disabling your wireless connection, muting screen sounds, or canceling.
If the Power Options menu does not appear when you press and hold the Power button for a few seconds, you
can perform a reset of the HP eStation Zeen.
Some error conditions require a reset of the HP eStation Zeen to resolve. You can perform a reset of the HP eStation
Zeen to recover from any of the following issues:
• The HP eStation Zeen is unresponsive to touch or button input for an extended period of time.
• The screen is frozen.
• The On button is unresponsive.
To perform a reset of the HP eStation Zeen, press and hold the Power button for at least 8 seconds.
8 Online Topics
Manage your Home screen
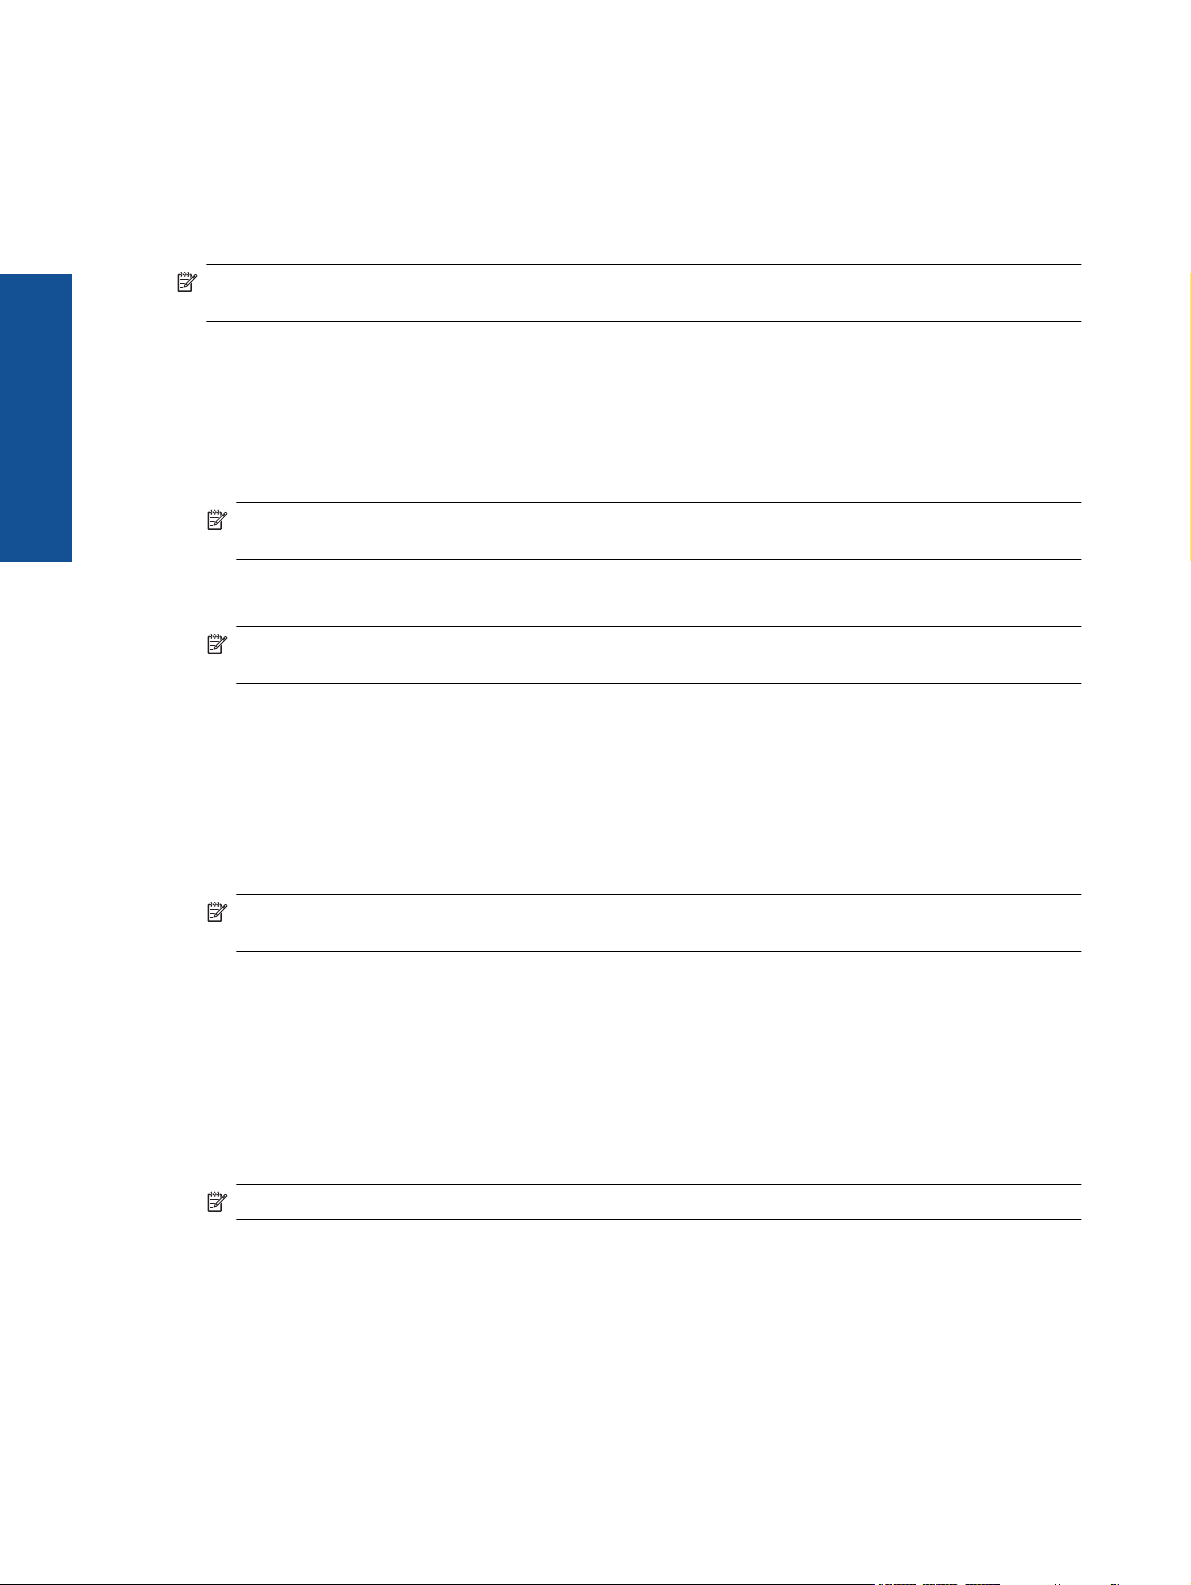
You can customize the widget area of your Home screen pages, add new pages, and rearrange pages.
Manage the widget area
You can customize the widget area of your Home screen pages by placing items of different sizes from the Widget
Library onto the 4 by 4 grid.
The product comes with three Home screen pages already populated. You can add up to five more for a total of
eight Home screen pages. You can move and remove items, and add widgets, apps, and bookmarks to a home
screen page.
Online Topics
HP Photosmart eStation C510 series - Use the Removable Display 9
Online Topics
Chapter 1
View the Widget Library
To view the Widget Library:
1. Touch the Widgets app, and then touch OK.
2. Swipe left and right with your finger to see all available widgets. The grid space that each widget covers is shown
in the small grid to the right of the widget icon in the Widget Library.
NOTE: You can also access the Manage Widgets screen/Widget Library by touching the Menu button and
selecting Manage Home screen, or by tapping the last (empty) home screen page.
3. View available apps to place into the widget area by touching Menu, then Add Applications.
4. View available bookmarks that can be placed in the widget area by touching Menu, then Add Bookmarks.
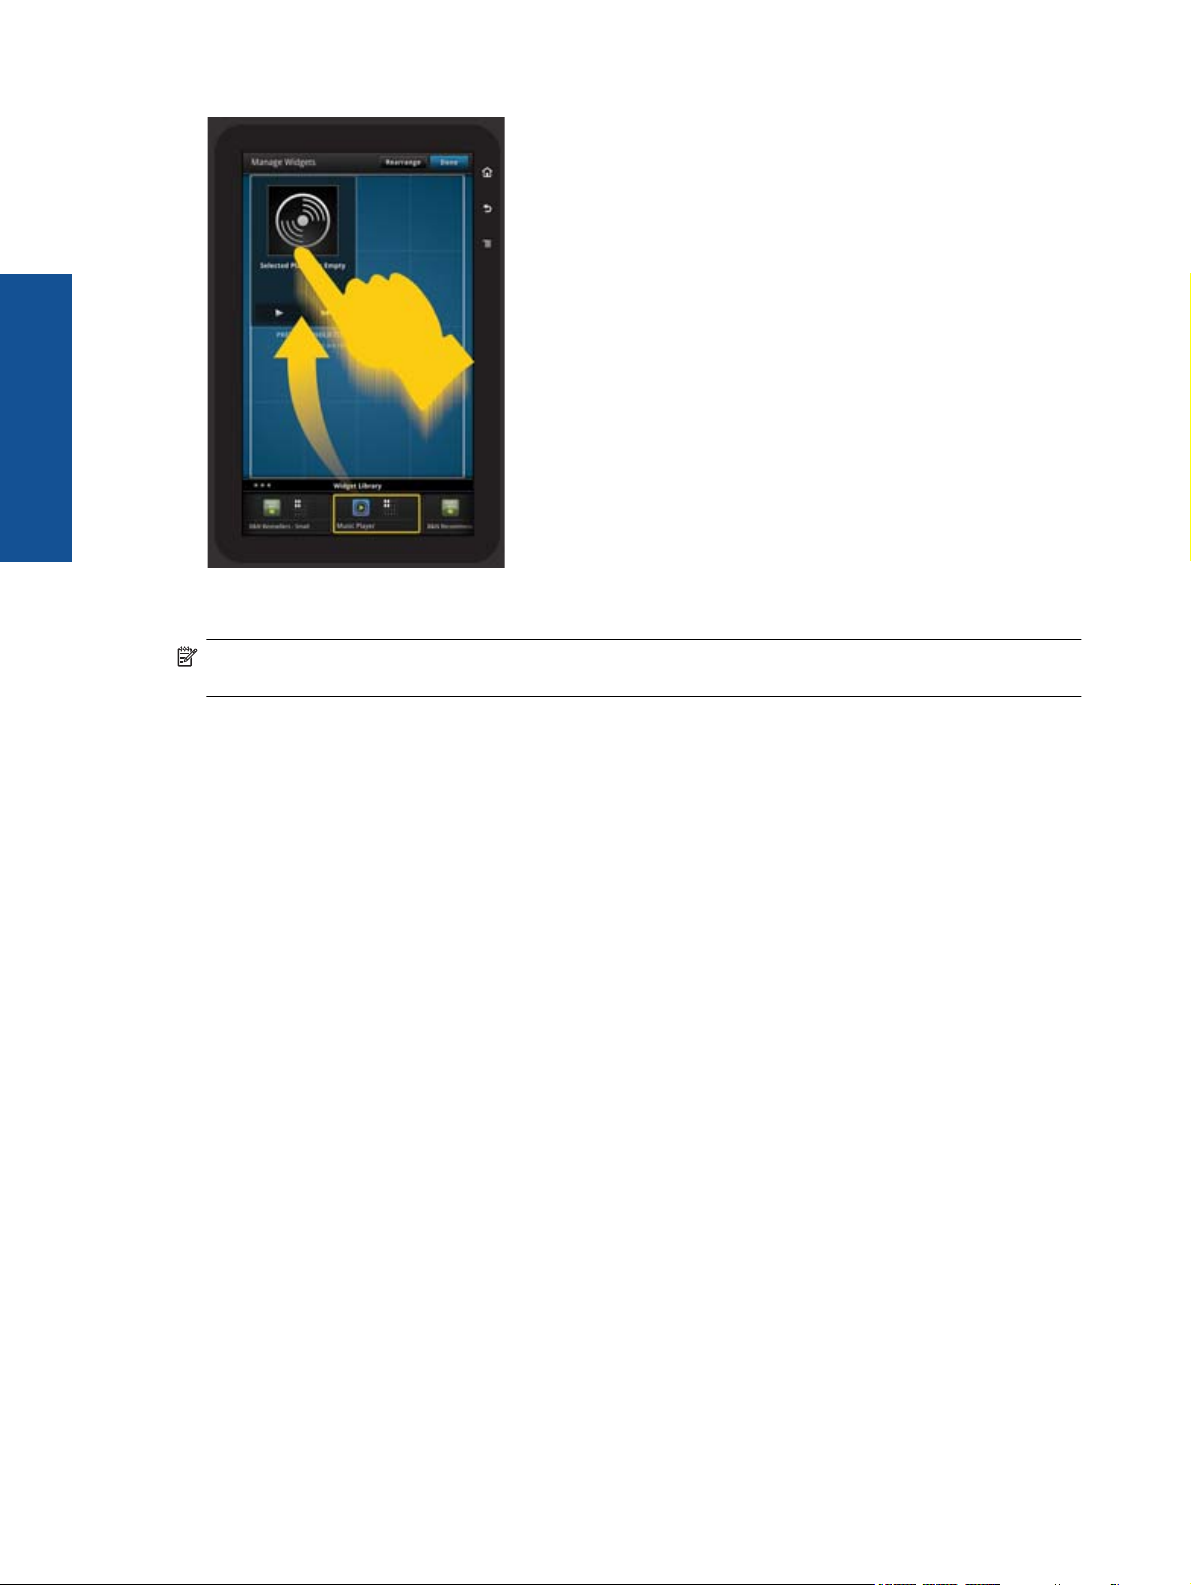
Place an item in the widget area
To place an item in the widget area:
1. Touch the Widgets app, and then touch OK.
NOTE: If you want to add a different type of item (an app or a bookmark instead of a widget), display that
type of item in the Widget Library by using the instructions in the previous section, “View the Widget Library”.
2. Swipe left or right with your finger to display the Home screen page where you want to place an item.
3. To place an item, drag it from the Widget Library to the widget area, and place it in the desired grid location.
NOTE: If there is an item in the grid location where you want to place the new item, you must either move
it or remove it before placing the new item.
4. When you are finished making changes, touch Done to save the changes and return to the Home screen.
Move an item in the widget area
To move an item within the widget area:
1. Touch the Widgets app, and then touch OK.
2. Swipe left or right with your finger to display the Home screen page where you want to move an item.
3. Touch and hold the item you want to move for a few seconds, then drag it to an open space in the widget area.
NOTE: If there is already an item in the area where you want to move an item, you must move it or remove
it before continuing.
4. When you are finished making changes, touch Done to save the changes and return to the Home screen.
Remove an item from the widget area
To remove an item from the widget area:
1. Touch the Widgets app, and then touch OK.
2. Swipe left or right with your finger to display the Home screen page where you want to remove an item.
3. Touch and hold the item you want to remove for a few seconds, then drag it into the Drop Widget Here to
Remove area on the bottom of the screen.
NOTE: When you remove an item, it is still available in the Widget Library.
4. When you are finished making changes, touch Done to save the changes and return to the Home screen.
Add a Home screen page
The product comes with three Home screen pages that already have items in the widget areas. You can add up to
five more for a total of eight Home screen pages.
10 Online Topics
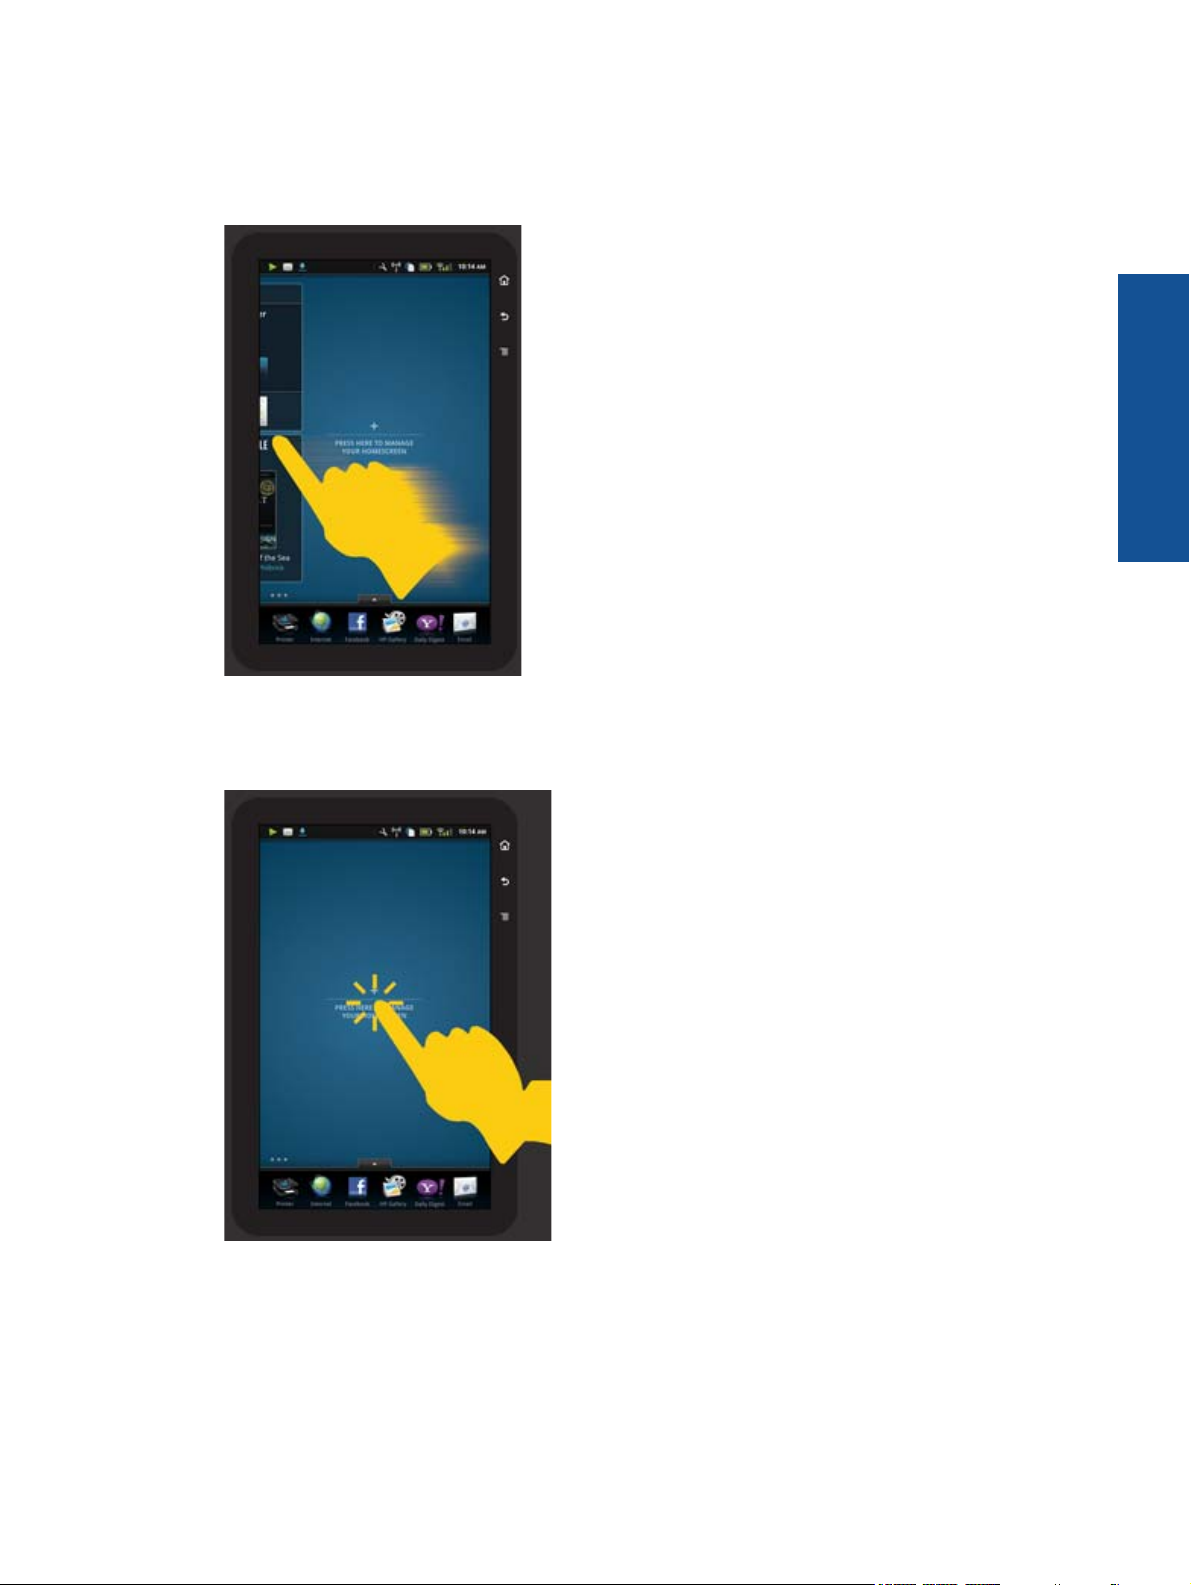
To add a new Home screen page:
1. From the Home screen, swipe your finger to the left, past each of the Home screen pages, until the empty page
appears.
Online Topics
2. Tap the empty Home screen page, and then touch OK to display the Manage Widget screen with the Widget
Library.
3. Press and hold a widget from the Widget Library, then drag it to the empty page to start populating the widget
area of a new Home screen page.
HP Photosmart eStation C510 series - Use the Removable Display 11
Online Topics
Chapter 1
4. When you are finished making changes, touch Done to save the changes and return to the Home screen.
NOTE: You can also access the area for adding a new Home screen page using the Widget App, or by touching
the Menu button and selecting Manage Home screen.
Remove a Home screen page
To remove a Home screen page:
1. Remove all of the items in the widget area.
2. Touch Done to save your changes and return to the Home screen.
Rearrange Home screen pages
To rearrange the order of your Home screen pages:
1. Touch Menu, touch Manage Home screen, and then touch OK to display the Manage Widgets screen.
2. Touch Rearrange on the upper right of the screen to display the Rearrange Pages screen.
3. Touch, hold, and drag Home screen pages to the desired location to reorder them.
4. Touch Done to save the changes and return to the Home screen.
12 Online Topics

Manage your apps
Your apps are stored in the App Favorites bar and the App Drawer. You can rearrange, add, sort and delete apps.
You can also add Web Bookmarks to your App Drawer.
View all apps in the App Drawer
Touch the tab at the top of the App Favorites bar to open the App Drawer.
Online Topics
Add apps
To add a new app, open the App Drawer and touch Add More at the bottom of the screen. Choose from any of the
available apps.
HP Photosmart eStation C510 series - Use the Removable Display 13

Online Topics
Chapter 1
NOTE: Make sure you have an internet connection to the HP eStation Zeen before attempting to add an app.
Sort apps
Apps in the App Drawer can be sorted alphabetically or by category. If you sort by category, the apps are grouped
by Apps, Print App, and Bookmarks.
To sort apps:
1. Open the App Drawer and touch Browse By at the bottom of the screen.
2. Touch Alphabetical or Category to select the sorting option you would like.
Add a Web Bookmark
You can choose from a selection of Web Bookmarks to add to your App Drawer. These bookmarks are shortcuts
to various websites.
To add a Web Bookmark:
1. Open the App Drawer and touch Add Bookmark at the bottom of the screen.
2. Touch Add Bookmark.
3. Touch the Bookmark you want to add to your App Drawer.
Delete apps
Some apps cannot be deleted and are grayed out when you access the delete feature.
To delete an app:
1. Open the App Drawer and touch Delete. The apps that cannot be deleted are now gray, and the ones that can
be deleted appear with an “X”.
2. Touch the app you want to delete.
3. Touch Cancel to cancel the deletion or Delete to continue with deleting the app.
4. Touch Done when you are finished deleting apps to return to the App Drawer.
Use the Dashboard settings
From the Dashboard you can access all the settings for the main printer and the HP eStation Zeen. You must dock
the HP eStation Zeen in the main printer to use some of the settings.
To access the System Dashboard screen and view all of the available settings, touch the Notifications bar, then
touch the Dashboard tab on the upper right of the screen.
14 Online Topics

Online Topics
Date and time settings
Touch Date & Time Settings on the upper right of the System Dashboard screen.
You can set the date, time, time zone, time format, and date format.
HP Photosmart eStation C510 series - Use the Removable Display 15
 Loading...