

Page 1
HP Photo Printing Quick Reference
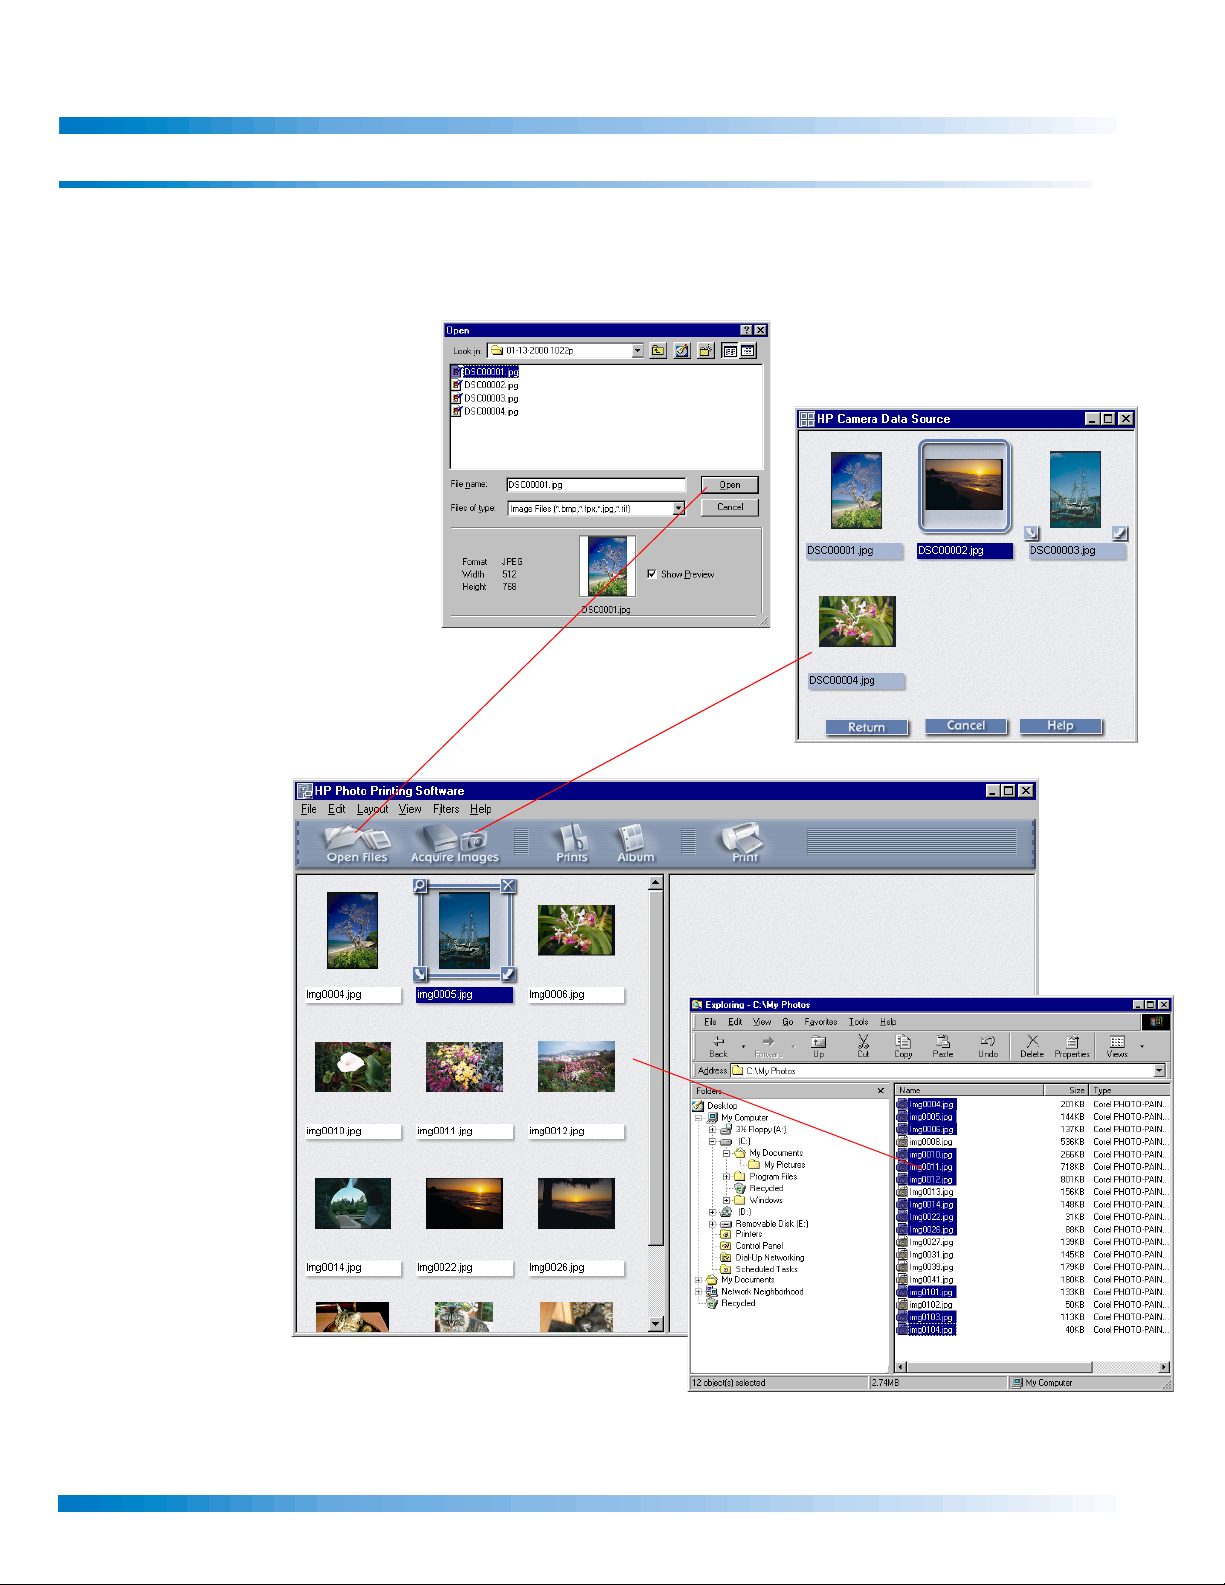
Bringing Images into the Photo Gallery
Use any of the following methods to add images to the photo gallery. The photo gallery is the left pane in the
HP Photo Printing Software, and is the starting point for creating prints and photo album pages.
a. Click
b. Click
c. Select files from
Open Files to search for
and open image files into the
photo gallery.
Acquire Images to
acquire images from your
attached camera, scanner, or
another TWAIN device.
Windows
Explorer, My
Computer, or the
desktop, then
drag-and-drop
them into the
photo gallery.
aaaa
bbbb
cccc
Copyright Hewlett-Packard Company, second edition, 2001. All rights reserved.
Page 1
Page 2
Bringing Images into the Photo Gallery, continued
Here are more ways you can add images to the photo gallery:
d. Drag images into the photo
gallery from any program
that supports the
function.
drop
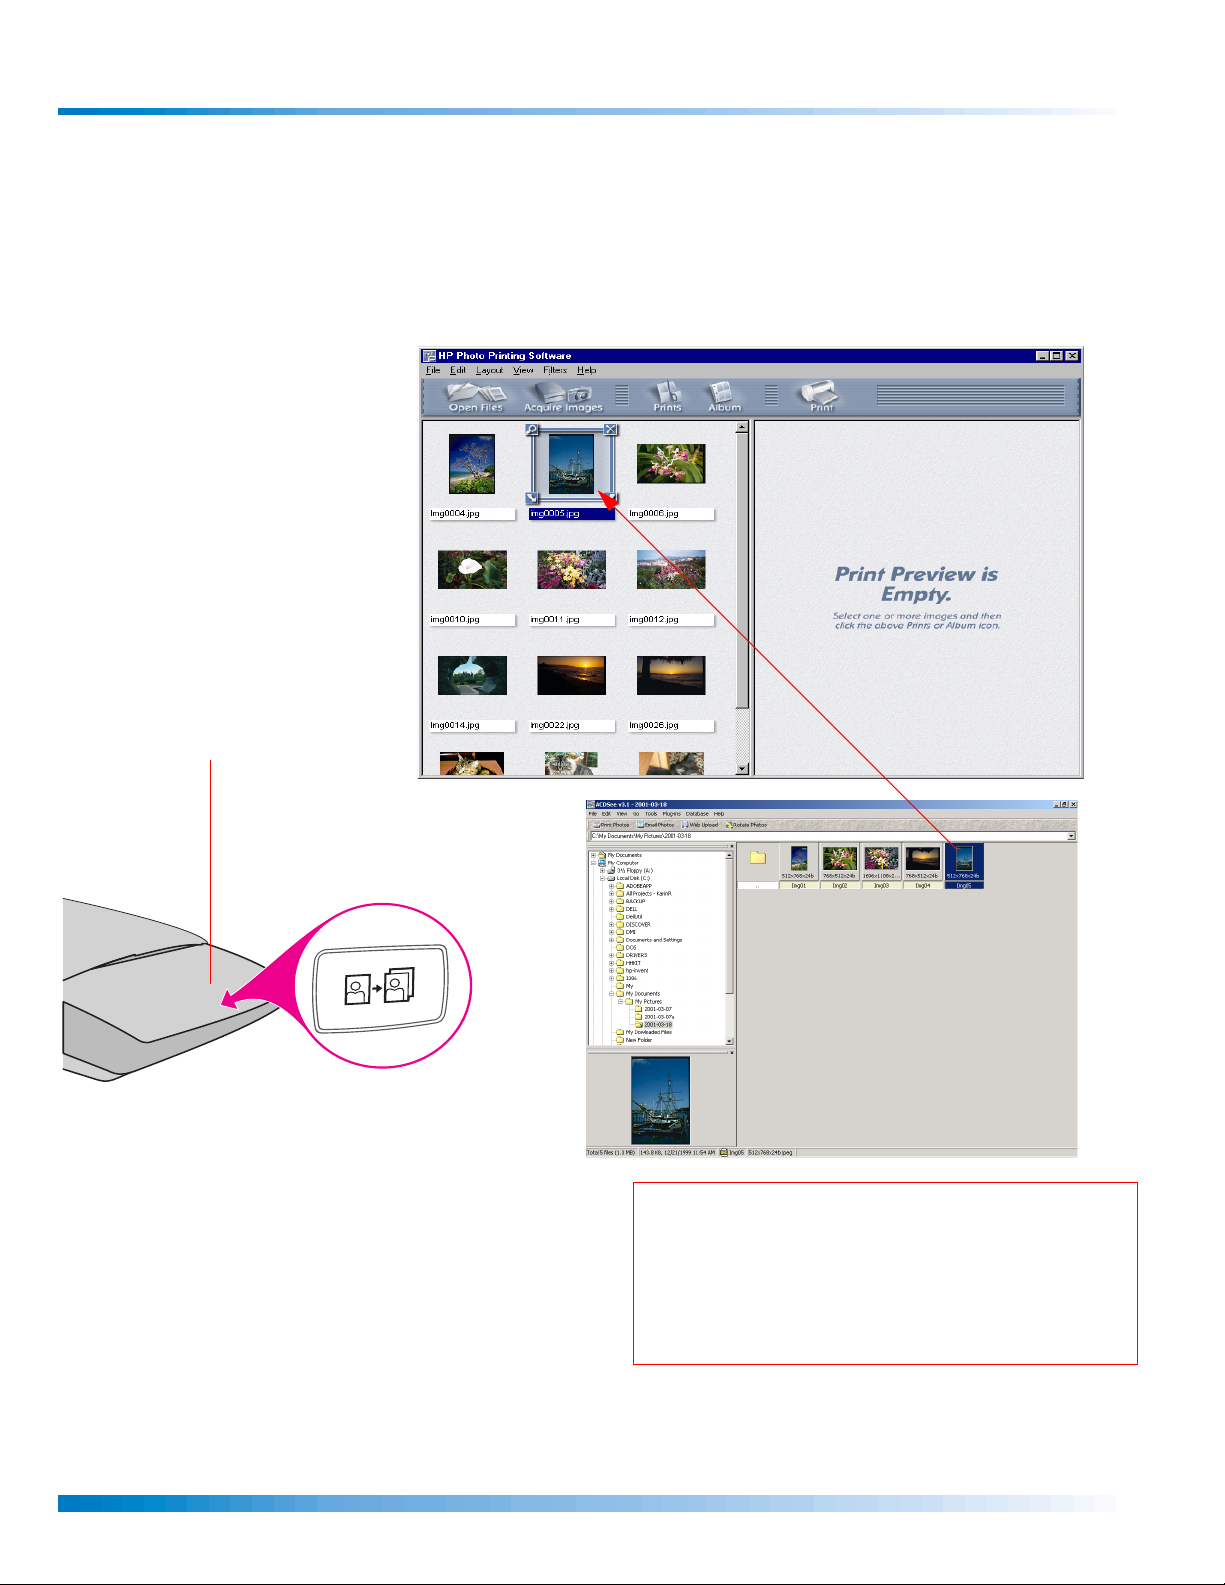
e. (Some devices only.) Press
the
Photo Reprint button on
your HP scanner or other
input device and follow the
instructions on screen.
drag-and-
dddd
e
f. (Some devices only.) Press the
Scan button on your
HP scanner or other input device. The scanned
image appears in the ACDSee software. In the
ACDSee software, click the
Print Photos button.
TIP: In the HP Photo Printing Software photo
gallery (left pane), right-click the image to
see a pop-up menu that lets you rotate, copy,
paste, save audio, and display the
properties for the image.
HP Photo Printing Quick Reference
Page 2
Page 3
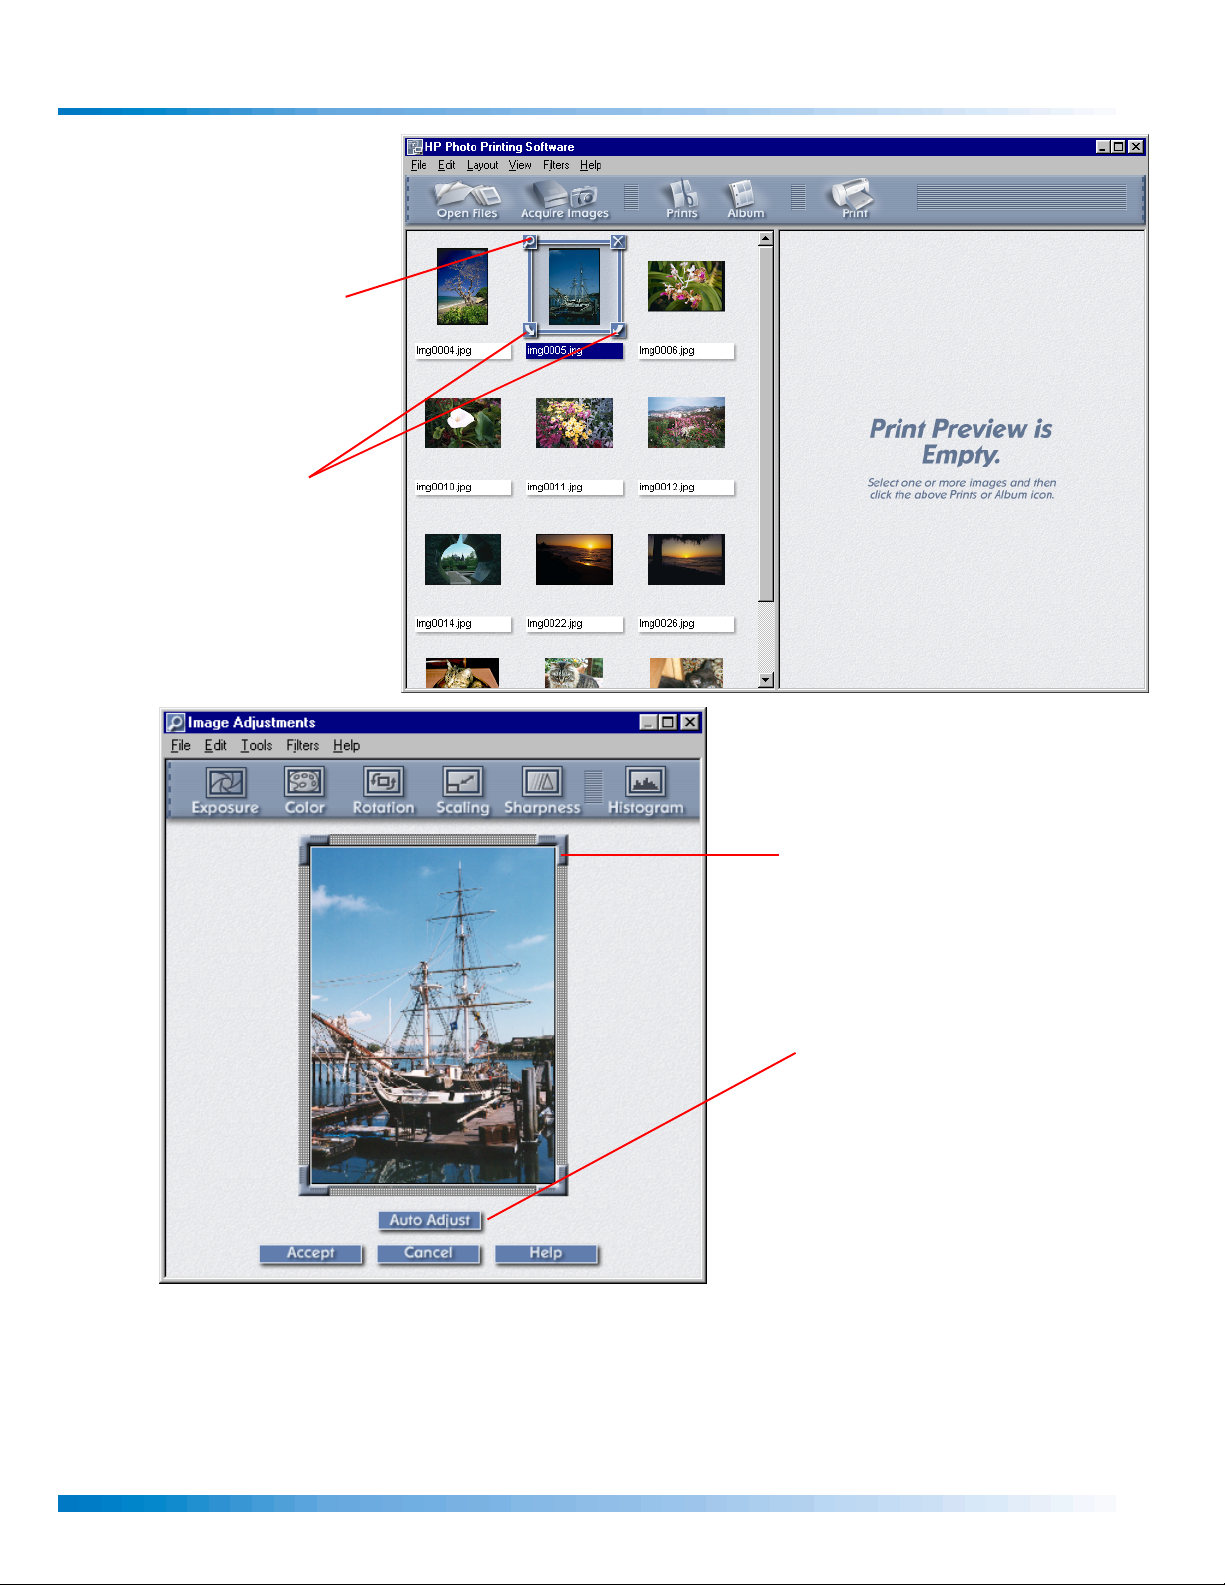
Adjusting Images
In the Photo Gallery, click
the magnifying glass or
double-click the image to
open the
window.
Image Adjustment
Use the
and
buttons to rotate the image
in the gallery.
Rotate Clockwise
Rotate Counterclockwise
In the
Image Adjustments
window, use the crop handles to
move the border of the photo
and to select the part of the
image you want to save.
Use the
automatically adjust exposure
and color at the same time.
Auto Adjust button to
HP Photo Printing Quick Reference
Page 3
Page 4

Using the Image Adjustment Tools
If you are not using Auto Adjust,
open a tool for adjusting
exposure, color, sharpness,
scaling, or rotation:
• Show only the tools you need,
and hide the rest.
• Tools remember where they
were when you last opened
them.
For example, open
the color tool and
the exposure tool.
Use the
eyedropper to
select a point on
the image that
should be white (a
highlight). Overall
image color will be
adjusted to make
the selected point
white.
Use the Auto button
to automatically
adjust color.
Use the Auto button
to automatically
adjust exposure.
Use Reset to undo
all changes for a
tool, or use
the
Edit menu for
more precise
control over what
functions you undo.
Undo in
HP Photo Printing Quick Reference
Page 4
Page 5

Creating Standard Size Prints
1. Select images to print from the gallery.
2. Click
Prints to open the Prints dialog
box.
3. Select the print size (or create a
new custom size).
4. Click
OK to preview the results.
The preview pages appear in the
preview area (right pane).
5. When you are satisfied with
your page layout and image
adjustments, you can save and
print your images.
To save, select
the
File menu.
Save Images from
To print your images, click
HP Photo Printing Quick Reference
Print.
Page 5
Page 6

Creating Automatic Photo Album Pages
Create photo album pages quickly and easily with the Auto-Layout
option. The software automatically creates album page layouts
based on the images you select, and optimizes pages for the best
use of space.
1. Select the images you would like to place
in your album.
3. Select Auto-Layout.
4. Select the
Album Page
Design to Page Size and Photo Size on
for your photo album pages.
2. Click
box.
Album to open the Album Pages dialog
5. Click
OK to preview the results. The preview
pages appear in the preview area (right pane).
6. To save your Album, select
File menu. To print your Album, click Print.
Save Album from the
HP Photo Printing Quick Reference
Page 6
Page 7

Creating Albums using a Template
Create photo album pages with the Templates option if you have
a favorite album layout, or if you want to customize your album
layout. The Templates option also allows you to create captions
for your photos.
1. Select the images you would like to place
in your album.
3. Select Templates.
4. Click the template you want to use.
5. Click
OK to preview the results.
2. Click
box.
Album to open the Album Pages dialog
6. From the preview, you can drag-anddrop to rearrange images, or doubleclick a caption box to add a caption.
7. When you are satisfied with your
page layout and image adjustments,
you can save and print your Album.
To save your Album, select
from the
To print your Album, click
File menu.
HP Photo Printing Quick Reference
Save Album
Print.
Page 7
 Loading...