

Page 1
HP Photo Imaging Quick Reference
A
Unloading Images
(*Some devices only)
To unload images from your image capture device (such as a digital camera), device with a memory card reader, or memory card,
do one of the following:
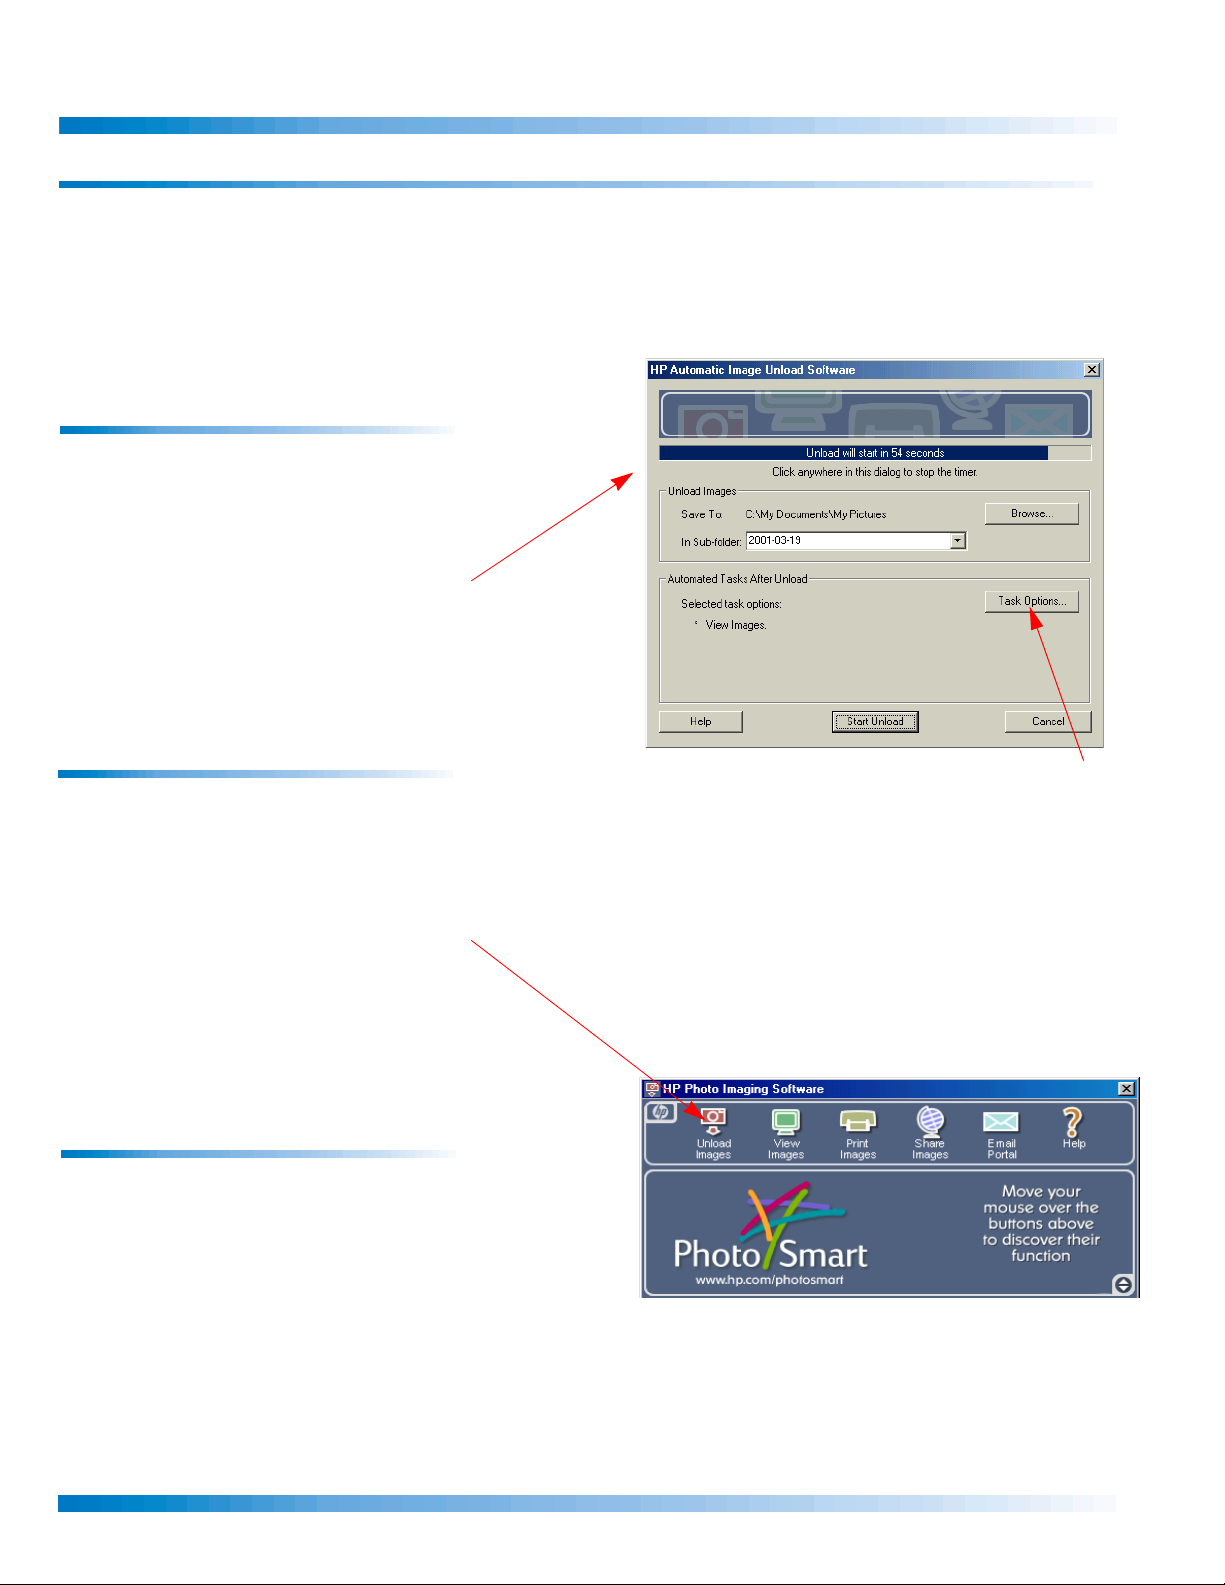
Unload images automatically
Unload images automatically
Unload images automaticallyUnload images automatically
Use this method to automatically unload images
when you connect your image capture device
(such as a digital camera) to the computer.
Connect your image capture device to the
computer. The HP Automatic Image Unload
Software (
images.
a) launches and unloads your new
aaaa
Unload images manually
Unload images manually
Unload images manuallyUnload images manually
Use this method to start the unload process
manually, or when you use a memory card
reader.
Click the Unload Images button on the HP Photo
Imaging Software window (
utomatic Image Unload Software launches.
Choose your unload settings and click Start
Unload.
Copy and paste images to the
Copy and paste images to the
Copy and paste images to the Copy and paste images to the
computer
computer
computercomputer
If your image capture device or memory card
reader appears as a drive letter, you can copy
images from that drive letter and paste them in
a folder on your computer (usually the C drive).
This is an alternative to the unload steps listed
above.
b). The HP
In the HP Automatic Image Unload Software window, click the Task
Options button to choose automated tasks that occur every time you
unload, such as:
• Printing your new photos
• Creating album pages
• Viewing images
• Deleting images from your image capture device or memory card
bbbb
*Some devices only: Some image capture devices (such as scanners) may have a different method for transferring images to your
computer. See the user documentation that came with your device for more information.
Copyright Hewlett-Packard Company, second edition, 2001. All rights reserved.
Page 1
Page 2
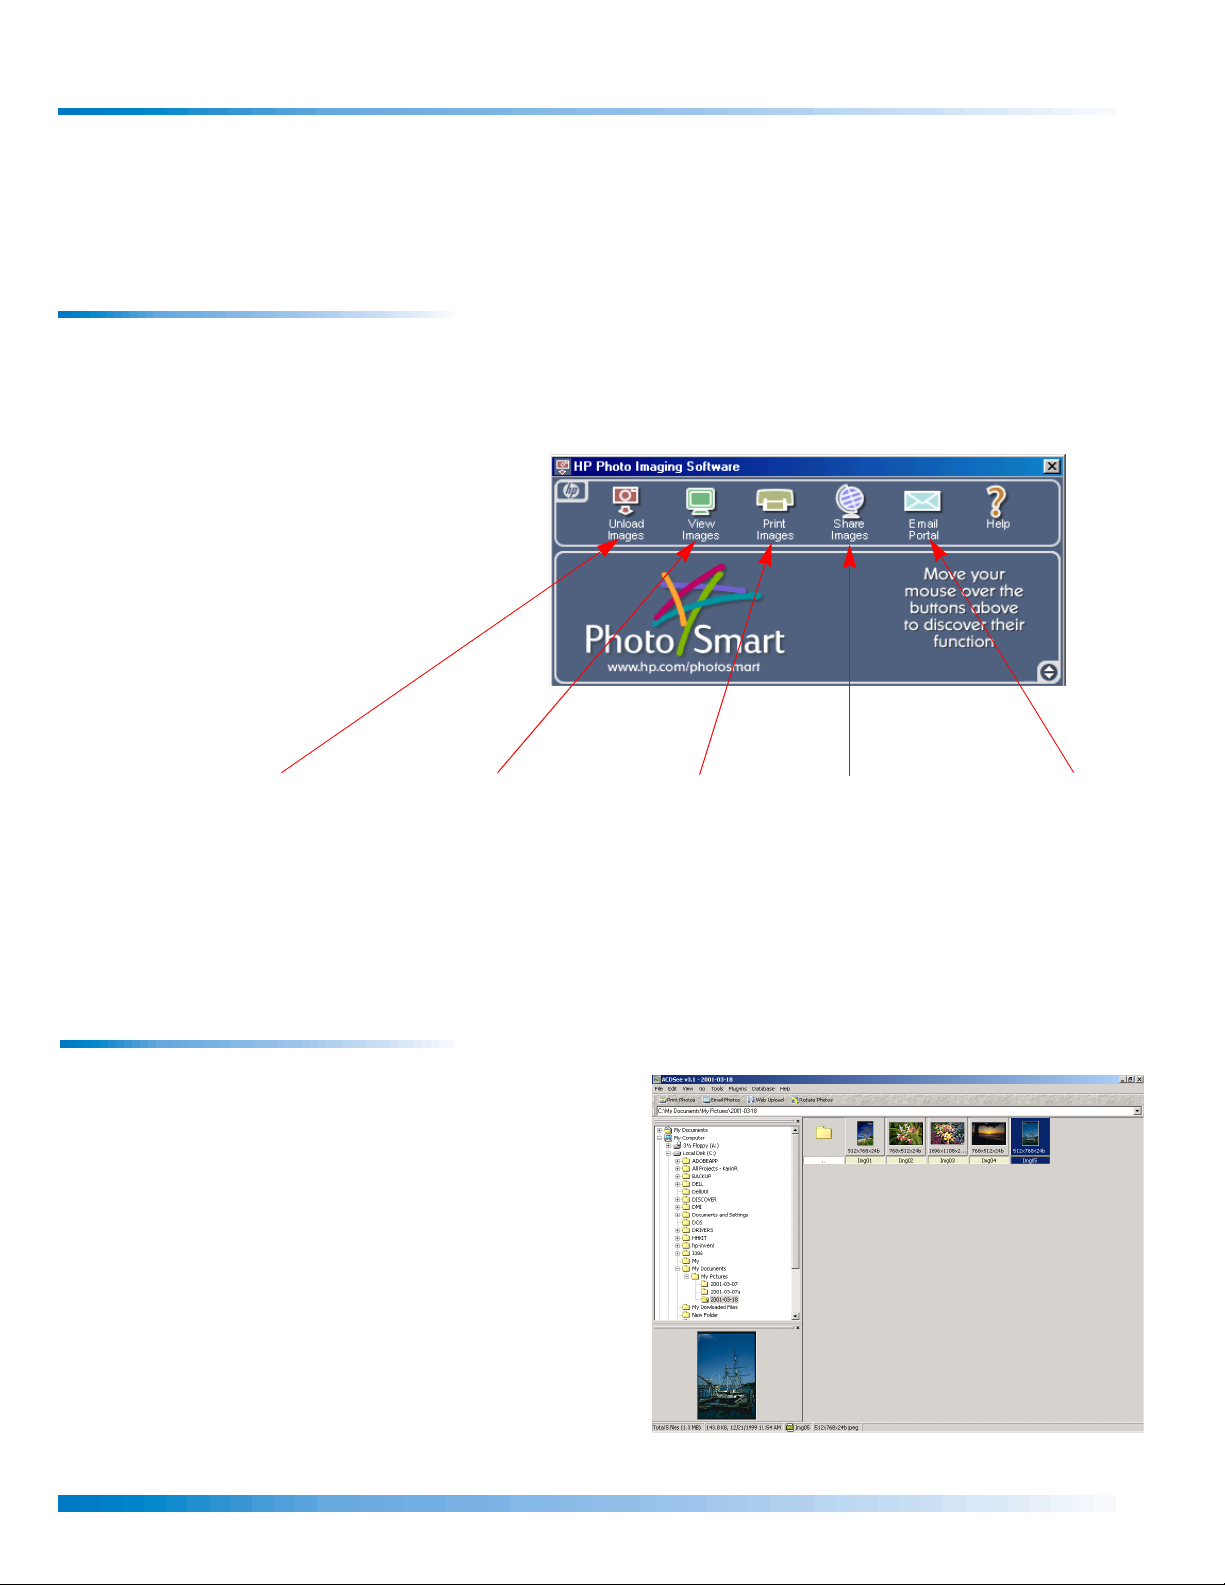
Working With Images on the Computer
To work with images after they are unloaded to your computer, start from the HP Photo Imaging Software or the
ACDSee software as follows:
HP Photo Imaging Software
The HP Photo Imaging Software provides a central point
for unloading, viewing, printing, and sharing your
images. To start this software:
1. Double click the HP Photo Imaging Software icon on
your computer desktop.
-or-
2. From the Windows Start menu, point to Programs.
Point to HP PhotoSmart, Photo Imaging, and click on
HP Photo Imaging Software.
Unload Images
Start the HP Automatic
Image Unload
Software to unload
images to your
computer.
(some devices only)
View Images
Start the ACDSee
Software to view
images. See the
ACDSee section
that follows.
Print Images
Start the HP Photo
Printing software to
adjust, make prints
and create photo
album pages.
ACDSee Software
Use the ACDSee software to view images on your computer before
you print or share them, or to browse the images saved on your
computer.
To open the ACDSee software:
1. On the HP Photo Imaging Software window, click View
Images.
-or-
2. From the Windows Start menu, point to Programs. Point to
ACD Systems, and then select ACDSee.
The ACDSee software launches.
Share Images
Upload images to
the web to share
with family and
friends.
Email Portal
Start the HP Email
Portal Software to
share images via
email.
HP Photo Imaging Quick Reference
Page 2
Page 3

Working With Images on the Computer (continued)
A
he foll
T
more information on the ACDSee software, see the online help available from the ACDSee software Help menu.
owing information describes the basic steps for using the ACDSee Software to work with images on your computer. For
How to View Images with the ACDSee
Software
1. In the left pane, select the folder to view. Images appear as
thumbnails in the right pane.
2. To change the orientation of an image, use the Rotate Photos
c) button on the toolbar.
(
How to Share and Print Images from the
CDSee Software
1. In the right pane, select the image or images you want to
share or print.
2. Use one of the following buttons to print or share the images.
These buttons will start an HP software program for
completing the task.
cccc
Print Photos
Print selected images as prints or photo
album pages.
Email Photos
Send the selected images in email to
friends and family.
Web Upload
Upload the selected images to the
web.
TIPS:
• To select multiple images in the ACDSee
Software window, press and hold the CTRL key
while you click on the images you want.
• If you want toolbar access to the ACDSee image
adjustment tools, turn on the ACDSee toolbar.
Click on the View menu, point to Browser Panes,
and click Toolbar.
To go back to the simplified task bar (shown in
screen above), repeat these steps.
HP Photo Imaging Quick Reference
Page 3
Page 4

How to Share Images Using Email
If you start from the HP Photo Imaging Software:
1. On the HP Photo Imaging Software window, click Email Portal. The HP Email
Por tal software launches.
2. Drag images from Windows Explorer into the Email Portal gallery (left
pane). Note that you can also drag images from other programs that
support drag and drop.
3. Choose the image size, which is the size of the final output (such as when the
image is printed).
4. Click Create Email. A new email message appears with your image or
images attached.
5. Compose, address and send the email message.
If you start from the ACDSee software:
1. In the ACDSee software, select the images you want to email and click the
Email Photos button. The Email Portal software launches and your selected
images display in the Email Portal gallery (left pane).
2. Choose the image size.
3. Click Create Email. A new email message appears with your image or
images attached.
4. Compose, address, and send the email message.
How to Share Images On the Web
If you start from the HP Photo Imaging Software:
1. On the HP Photo Imaging Software window, click Share Images. The HP
Share-to-Web software launches.
2. Drag images from Windows Explorer into the Share-to-Web gallery. (Note:
You can also drag images from other programs that support drag and drop.)
3. Click Begin Upload. The HP Share-to-Web wizard appears. Follow the
instructions on the screen to select a web site, and then post the images on
that site.
If you start from the ACDSee software:
1. In the ACDSee Software, select the images you want to share, and then click
the Web Upload button. The HP Share-to-Web software launches, and your
selected images display in the Share-to-Web gallery.
2. Click Begin Upload. The HP Share-to-Web wizard appears. Follow the
instructions on the screen to select a web site, and then post the images on
that site.
HP Photo Imaging Quick Reference
Page 4
Page 5

How to Print Images
The HP Photo Printing Software lets you easily create prints or album pages with
your images. Crop, rotate, or adjust the images to get them just the way you
want. Then, create pages that optimize the space on your pages for printing.
If you start from the HP Photo Imaging Software:
1. On the HP Photo Imaging Software window, click Print Images. The HP
Photo Printing software launches.
2. Select the images to print in the Photo Printing Software gallery (left pane).
3. Adjust images as desired.
4. Create pages in the Print Preview area, and then click the Print button to
print the pages.
If you start from the ACDSee software:
1. In the ACDSee software, select the images you want to print, and then click
the Print Photos button. The HP Photo Printing software launches, and your
selected images display in the Photo Printing Software gallery (left pane).
2. Select the images to print in the Photo Printing Software gallery.
3. Adjust images as desired.
4. Create pages in the Print Preview area, and then click the Print button to
print the pages.
TIP: View the HP Photo Printing Quick Reference to learn more about
printing and creating photo album pages. In the HP Photo Printing
Software window, click Help, and then click Quick Reference.
HP Photo Imaging Quick Reference
Page 5
 Loading...