

Page 1
UK
Multi-Protocol Print / Fax Server
NC-8100h
USER’S GUIDE
Please read this manual thoroughly before using the printer. You can print or view
this manual from the CD-ROM (supplied with your MFC) at any time, please keep
the CD-ROM in a convenient place for quick and easy reference at all times.
i
Page 2

Trademarks
Brother is a registered trademark of Brother Industries, Ltd.
HP, HP/UX,JetDirect and JetAdmin are trademarks of Hewllet-Packard
Company.
UNIX is a trademarks of UNIX Systems Laboratories.
Ethernet is trademark of Xerox Corporation.
Postscript is trademark of Adobe Systems Incorporated.
NetWare is a trademark of Novell, Inc.
Apple, Macintosh, LaserWriter, and AppleTalk are trademarks of Apple
Computer, Inc.
IBM, LAN Server, and AIX are trademarks of International Business Machines
Corporation.
LAN Manager, Windows, and MS-DOS are trademarks of Microsoft Corporation.
NC-8100h and BRAdmin are trademarks of Brother Industries Ltd.
All other brand and product names mentioned in this user’s guide are registered
trademarks or trademarks of respective companies.
Compilation and Publication
Under the supervision of Brother Industries Ltd., this manual has been compiled
and published, covering the latest product descriptions and specifications.
The contents of this manual and the specifications of this product are subject to
change without notice.
Brother reserves the right to make changes without notice in the specifications
and materials contained herein and shall not be responsible for any damages
(including consequential) caused by reliance on the materials presented, including
but not limited to typographical and other errors relating to the publication.
©2001 Brother Industries Ltd.
Shipment of the print server
If for any reason you must ship your print server, carefully package the print server to avoid
any damage during transit. It is recommended that you save and use the original packaging.
The print server should also be adequately insured with the carrier.
WARNING
When shipping the print server, put it into the anti-static bag to avoid damage.
ii
Page 3
Multi-Protocol Print / Fax Server
NC-8100h
USER’S GUIDE
For technical and operational assistance, please visit the Brother web site on
http://solutions.brother.com
If you have comments or suggestions, please write us at:
In Europe European Technical Services
1 Tame Street
Audenshaw
Manchester, M34 5JE
UK
In USA Printer Customer Support
Brother International Corporation
100 Somerset Corporate Blvd.
Bridgewater, NJ 08807
In CANADA Brother International Corporation (Canada), Ltd.
- Marketing Dept.
1, rue Hôtel de Ville
Dollard-des-Ormeaux, PQ, Canada H9B 3H6
Fax-Back System
Brother Customer Service has installed an easy to use Fax-Back System so you can get
instant answers to common technical questions and product information for all Brother
products. This is available 24 hours a day, 7 days a week. You can use the system to send the
information to any fax machine, not just the one you are calling from.
Please call 1-800-521-2846 (USA) or 1-800-681-9838 (Canada) and follow the voice prompts to
receive faxed instructions on how to use the system and your index of Fax-Back subjects.
DEALERS/SERVICE CENTERS (USA only)
For the name of an authorized dealer or service center, call 1-800-284-4357.
SERVICE CENTERS (Canada only)
For service center addresses in Canada, call 1-800-853-6660
INTERNET ADDRESS
For technical questions and downloading drivers: http://solutions.brother.com
iii
Page 4

Introduction
Overview
Features
The Brother NC-8100h Print / Fax Server allows your Brother MFC to
be attached and shared on a 10/100Mbit Ethernet Network. Web Based
Management and Administration utilities provide easy configuration and
management of your Brother MFC. Once installed and configured, the
NC-8100h allows your MFC machine to FAX documents over the
Internet; print and scan documents over a network. The NC-8100h is
even supplied with Brother’s Peer to Peer printing software allowing you
to easily share the machine as a small department printer.
Internet Fax
The Brother MFC can be assigned an E-mail address allowing you to
send, receive and forward documents on a Local Area Network and the
Internet to PC’s or other Internet Fax machines.
Network Printing
The Print / Fax server can be utilized as a print server providing printing
services for the Windows
95/98/Me, Windows
NT4.0/2000, Unix
Systems supporting the TCP/IP protocols, Novell Operating Systems
supporting IPX/SPX and Macintosh Networks supporting AppleTalk.
Network Scanning
You can scan documents into the Brother MFC and then E-mail them to
your PC for editing in Black & White or Color.
Management Utilities
The Web Based Management and BRAdmin Professional utilities provide
powerful easy to use management of Fax, network and E-mail settings.
iv
Page 5

TABLE OF CONTENTS
Overview...........................................................................................................................iv
Features .............................................................................................................................iv
IMPORTANT INFORMATION: REGULATIONS ........................................................xv
Federal Communications Commission (FCC) Declaration of Conformity
(For U.S.A. only) .............................................................................................................xv
Declaration of Conformity (Europe)...............................................................................xvi
CHAPTER ONE TCP/IP CONFIGURATION
ASSIGNING TCP/IP INFORMATION.................................................. 1-1
Overview ........................................................................................................................... 1-1
Using the MFC front panel to allocate an IP address. .................................................. 1-2
Using BRAdmin and the TCP/IP Protocol to set the IP address.................................. 1-2
Using BRAdmin and the IPX/SPX Protocol to set the IP address ............................... 1-3
Changing the IP Address using the BRAdmin application........................................... 1-4
Using DHCP to Configure the IP address ...................................................................... 1-5
Using ARP to Configure the Print / Fax server IP Address .......................................... 1-6
Using RARP to Configure the IP Address...................................................................... 1-7
Using BOOTP to Configure the IP Address ................................................................... 1-8
Changing the IP Address settings with the TELNET Console...................................... 1-9
Other Sources of Information ....................................................................................... 1-10
CHAPTER TWO FRONT PANEL SETUP MENU ............................2-1
LAN Main Setup Menu.................................................................................................... 2-1
1-Setup TCP/IP................................................................................................................. 2-1
1-BOOT METHOD........................................................................................................ 2-1
2-IP ADDRESS.............................................................................................................. 2-3
3-SUBNET MASK ........................................................................................................ 2-4
4-GATEWAY.................................................................................................................. 2-4
5-HOST NAME ............................................................................................................. 2-5
6-WINS Configuration................................................................................................... 2-5
7-WINS SERVER .......................................................................................................... 2-5
v
Page 6

2-Setup Internet................................................................................................................2-6
1-MAIL ADDRESS ....................................................................................................... 2-6
2-SMTP SERVER .......................................................................................................... 2-8
3-POP3 SERVER ........................................................................................................... 2-8
4-MAILBOX NAME ..................................................................................................... 2-8
5-MAILBOX PWD........................................................................................................ 2-9
3-Setup Mail RX............................................................................................................... 2-9
1-AUTO POLLING ....................................................................................................... 2-9
2-POLL FREQUENCY.................................................................................................. 2-9
3-HEADER .................................................................................................................... 2-9
4-DEL ERROR MAIL ................................................................................................. 2-10
5-NOTIFICATION....................................................................................................... 2-10
4-Setup Mail TX ............................................................................................................. 2-10
1-SENDER SUBJECT ................................................................................................. 2-10
2-SIZE LIMIT.............................................................................................................. 2-11
3-NOTIFICATION....................................................................................................... 2-11
5-Setup Relay.................................................................................................................. 2-12
1-RLY BROADCAST .................................................................................................. 2-12
2-RELAY DOMAIN .................................................................................................... 2-12
3-RELAY REPORT...................................................................................................... 2-12
6-Setup Misc. .................................................................................................................. 2-13
1-NETWARE ............................................................................................................... 2-13
2-NET FRAME............................................................................................................ 2-13
3-APPLETALK............................................................................................................ 2-13
4-DLC/LLC.................................................................................................................. 2-13
5-NETBIOS/IP............................................................................................................. 2-14
6-ETHERNET.............................................................................................................. 2-14
7-TIME ZONE............................................................................................................. 2-14
User Setting List ............................................................................................................. 2-15
Other Sources of Information ....................................................................................... 2-15
CHAPTER THREE WEB BASED MANAGEMENT
HOW TO USE THE WEB-BASED MANAGEMENT UTILITY ........3-1
Overview ........................................................................................................................... 3-1
How to Connect Using a Browser ................................................................................... 3-2
Password Information...................................................................................................... 3-2
Other Sources of Information ......................................................................................... 3-2
vi
Page 7

CHAPTER FOUR INTERNET FAX .....................................................4-1
Overview ........................................................................................................................... 4-1
Getting Connected.......................................................................................................... 4-2
Front Panel Key Functions............................................................................................. 4-2
Sending an Internet Fax................................................................................................... 4-3
Entering Text .................................................................................................................. 4-3
Using Scan to E-mail........................................................................................................ 4-5
Receiving E-mail or Internet Fax.................................................................................... 4-6
Receiving an Internet Fax to a PC .................................................................................. 4-7
Forwarding Received E-mail and Fax Messages ........................................................... 4-7
Relay Broadcasting .......................................................................................................... 4-8
Relay Broadcast from a MFC......................................................................................... 4-9
Relay Broadcast from a PC .......................................................................................... 4-10
TX Verification Mail....................................................................................................... 4-11
Setup Mail (TX).............................................................................................................. 4-11
Setup Mail (RX).............................................................................................................. 4-11
Error mail ....................................................................................................................... 4-12
Important information on Internet Fax ....................................................................... 4-12
Other Sources of Information ....................................................................................... 4-12
CHAPTER FIVE TCP/IP PRINTING
PRINTING FROM WINDOWS® NT® OR WINDOWS® 2000, LAN
SERVER AND WARP SERVER..............................................................5-1
Overview ........................................................................................................................... 5-1
Quick Tips:.....................................................................................................................5-1
®
Windows
Windows
(Printer Driver not yet installed)..................................................................................... 5-3
Standard TCP/IP Port Printing ....................................................................................... 5-3
IPP Printing from Windows
IPP printing from Windows
NT® 3.5x/NT® 4.0/2000 (TCP/IP) Configuration.......................................... 5-2
®
2000 Printing
®
2000 Clients..................................................................... 5-4
®
95/98/Me Clients.............................................................. 5-4
vii
Page 8

Windows® 2000 Printing
(Printer Driver already installed) ................................................................................... 5-4
Windows
Windows
®
NT® 4.0 Printing ............................................................................................. 5-5
®
NT® 4.0 Printing
(Printer Driver not yet installed)..................................................................................... 5-6
Windows
®
NT®4.0 Printing
(Printer Driver already installed) ................................................................................... 5-7
Windows
Windows
®
NT® 3.5x Printing ........................................................................................... 5-8
®
NT® 3.5x Printing
(Printer Driver not yet installed)..................................................................................... 5-8
Other Sources of Information ......................................................................................... 5-9
CHAPTER SIX PEER TO PEER PRINTING
HOW TO PRINT IN A WINDOWS® 95/98/ME PEER TO PEER
NETWORK ...............................................................................................6-1
Overview ........................................................................................................................... 6-1
Quick Tips:.....................................................................................................................6-1
TCP/IP Printing ............................................................................................................... 6-2
Installing the Brother Peer to Peer Software ................................................................. 6-3
Associating to the printer ................................................................................................ 6-4
Adding a Second Brother LPR Port ............................................................................... 6-4
Other Sources of Information ......................................................................................... 6-5
viii
Page 9

CHAPTER SEVEN NETBIOS PEER TO PEER PRINTING
HOW TO PRINTING USING NETBIOS ON WINDOWS
®
95/98/ME/NT®/2000...................................................................................7-1
Overview ........................................................................................................................... 7-1
Quick Tips:.....................................................................................................................7-1
Print / Fax Server Configuration .................................................................................... 7-2
Changing the workgroup/domain name using TELNET or BRCONFIG or a web
browser.............................................................................................................................. 7-3
NetBIOS Port Monitor for Windows
®
95/98/Me, NT®4.0/2000..................................... 7-4
Installing the Brother NetBIOS Port Monitor............................................................... 7-4
Associating the printer..................................................................................................... 7-5
Windows
Windows
Adding a Second NetBIOS Print Port ............................................................................ 7-6
Windows
Windows
®
95/98/Me....................................................................................................... 7-5
®
NT®4.0/2000 ................................................................................................. 7-5
®
95/98/Me....................................................................................................... 7-6
®
NT®4.0/2000 ................................................................................................. 7-6
Other Sources of Information ......................................................................................... 7-7
CHAPTER EIGHT
HOW TO CONFIGURE INTERNET PRINTING FOR WINDOWS
®
95/98/ME/NT®4.0/2000
INTERNET PRINTING INSTALLATION ............................................8-1
Overview ........................................................................................................................... 8-1
Quick Tips:.....................................................................................................................8-1
Brother Internet Print
General Information ........................................................................................................ 8-2
Brother Internet Print Configuring the Brother Print / Fax server............................. 8-3
Print / Fax server Configuration Checklist ..................................................................... 8-3
Brother Internet Print Using BRAdmin to Configure the Print / Fax server ............. 8-4
Brother Internet Print Using a Web Browser to configure the Print / Fax server...... 8-5
Brother Internet Print Using TELNET to Configure the Print / Fax server............... 8-6
ix
Page 10

Brother Internet Print Installing the BIP software on Windows
®
95/98/Me/NT®4.0/2000...................................................................................................... 8-7
Setup from CD-ROM..................................................................................................... 8-7
Adding a Second Brother Internet Port ....................................................................... 8-10
Windows
®
2000 IPP Printing......................................................................................... 8-11
Specifying a different URL............................................................................................ 8-12
Other Sources of Information ....................................................................................... 8-12
CHAPTER NINE NOVELL NETWARE PRINTING
HOW TO CONFIGURE NOVELL NETWARE PRINTING............... 9-1
Overview ........................................................................................................................... 9-1
Quick Tips:.....................................................................................................................9-1
General Information ........................................................................................................ 9-2
Creating a NDPS Printer Using NWADMIN for NetWare5 ......................................... 9-3
NDPS Manager................................................................................................................. 9-3
NDPS Broker .................................................................................................................... 9-3
Creating a Printer Agent ................................................................................................. 9-4
Configuring Netware 3 and NetWare 4 systems ............................................................ 9-5
Configuring the Brother Print / Fax server (Queue Server Mode in Bindery emulation
mode) using BRAdmin..................................................................................................... 9-6
Configuring the Brother Print / Fax server (Queue Server Mode in NDS mode) using
BRAdmin .......................................................................................................................... 9-7
Configuring the Brother Print / Fax server (Queue Server Mode in NDS mode) using
Novell NWADMIN and BRAdmin .................................................................................. 9-8
Configuring the Brother Print / Fax server (Remote Server Mode in NDS mode) using
Novell NWAdmin and BRAdmin .................................................................................. 9-10
Configuring the Brother Print / Fax server (Queue Server Mode in Bindery emulation
mode) using PCONSOLE and BRCONFIG ................................................................ 9-12
Configuring the Brother Print / Fax server (Queue Server Mode in NDS mode) using
PCONSOLE and BRCONFIG...................................................................................... 9-14
x
Page 11

Configuring the Brother Print / Fax server (Remote Printer Mode using PCONSOLE
and BRCONFIG............................................................................................................. 9-16
Other Sources of Information ....................................................................................... 9-19
CHAPTER TEN PRINTING FROM A MACINTOSH®...................10-1
System Requirements..................................................................................................... 10-1
Printer Driver Installation............................................................................................. 10-1
Printer Driver Selection................................................................................................. 10-2
Other Sources of Information ....................................................................................... 10-3
CHAPTER ELEVEN DLC PRINTING
PRINTING FROM WINDOWS® NT® OR WINDOWS® 2000 ............11-1
Overview ......................................................................................................................... 11-1
Quick Tips:................................................................................................................... 11-1
®
Configuring DLC on Windows
NT®/2000 ................................................................... 11-2
Windows
Windows
Windows
®
2000 Printer Setup ....................................................................................... 11-3
®
NT®4.0 Printer Setup ................................................................................... 11-4
®
NT® 3.5x Setup.............................................................................................. 11-5
Configuring DLC on Other Systems............................................................................. 11-5
Other Sources of Information ....................................................................................... 11-6
CHAPTER TWELVE UNIX PRINTING PRINTING FROM
UNIX/LINUX USING TCP/IP............................................................... 12-1
Overview ......................................................................................................................... 12-1
Quick Tips:................................................................................................................... 12-1
TCP/IP............................................................................................................................. 12-2
General TCP/IP UNIX Host Configuration ................................................................. 12-3
Linux Configuration ...................................................................................................... 12-6
HP/UX Configuration .................................................................................................... 12-7
xi
Page 12

IBM RS/6000 AIX Configuration.................................................................................. 12-8
Sun Solaris 2.x Configuration ....................................................................................... 12-9
SCO UNIX Configuration ........................................................................................... 12-10
DEC TCP/IP Servers for VMS(UCX)......................................................................... 12-11
TGV's Multinet............................................................................................................. 12-11
Wollongong's PATHWAY............................................................................................. 12-11
IBM/AS4000.................................................................................................................. 12-11
Other Systems............................................................................................................... 12-12
Other Sources of Information ..................................................................................... 12-13
CHAPTER THIRTEEN TROUBLESHOOTING .............................. 13-1
Overview ......................................................................................................................... 13-1
Installation problems ..................................................................................................... 13-2
Intermittent Problems.................................................................................................... 13-5
TCP/IP Troubleshooting ................................................................................................ 13-6
UNIX Troubleshooting................................................................................................... 13-7
Windows
Windows
Windows
®
NT®/LAN Server (TCP/IP) Troubleshooting.............................................. 13-9
®
95/98/Me Peer to Peer Print (LPR) Troubleshooting ................................ 13-9
®
95/98/Me Peer-to-Peer (HP JetAdmin compatible method)
Troubleshooting............................................................................................................ 13-10
Windows
®
95/98/Me/NT®4.0 Peer-to-Peer Print (NetBIOS) Troubleshooting ......... 13-10
Brother Internet Print (TCP/IP) Troubleshooting..................................................... 13-11
Windows
®
95/98/Me/2000 FTP/IPP Troubleshooting ................................................ 13-12
Novell NetWare Troubleshooting ................................................................................ 13-13
AppleTalk Troubleshooting.......................................................................................... 13-14
DLC/LLC Troubleshooting.......................................................................................... 13-15
xii
Page 13

Web Browser Troubleshooting (TCP/IP).................................................................... 13-15
Internet Fax Troubleshooting...................................................................................... 13-16
CHAPTER FOURTEEN
BROTHER NETWORK PC FAX SOFTWARE
INSTALLING AND USING THE BROTHER NETWORK PC FAX
SOFTWARE ............................................................................................14-1
Overview ......................................................................................................................... 14-1
Quick Tips:................................................................................................................... 14-1
Installing Network PC Fax ............................................................................................ 14-2
Setting Up User Information......................................................................................... 14-3
Setting Up Sending Information ................................................................................... 14-4
Setting Up Speed Dial .................................................................................................... 14-5
The Address Book........................................................................................................... 14-6
Setting Up a Group for Broadcasting ........................................................................... 14-7
Sending a File as a PC FAX Using the Simple Style .................................................... 14-9
Sending a File as a PC FAX using the Facsimile Style .............................................. 14-10
Updating other MFC’s through the Network. ........................................................... 14-11
Other Sources of Information ..................................................................................... 14-14
xiii
Page 14

APPENDIX APPENDIX A.................................................................... A-1
General Information ........................................................................................................A-1
APPENDIX B USING SERVICES .......................................................A-3
General..............................................................................................................................A-3
APPENDIX C
RELOADING THE PRINT / FAX SERVER FIRMWARE ................. A-4
General..............................................................................................................................A-4
Reloading firmware using BRAdmin..............................................................................A-5
Reloading using the FTP Protocol from a command prompt.......................................A-6
Reloading using the FTP Protocol from a Web Browser ..............................................A-7
APPENDIX D SPECIFICATIONS AND FUNCTION TABLE......... A-8
Specifications ....................................................................................................................A-8
xiv
Page 15

IMPORTANT INFORMATION: REGULATIONS
Federal Communications Commission (FCC) Declaration of Conformity (For U.S.A. only)
Responsible Party: Brother International Corporation
100 Somerset Corporate Boulvard
Bridgewater, NJ 09907-0911, USA
TEL: (908) 704-1700
declares, that the products
Product Name: Brother Network Card (BR-net)
Model Number: NC-8100h
complies with Part 15 of the FCC Rules. Operation is subject to the following two
conditions: (1) This device may not cause harmful interference, and (2) this device
must accept any interference received, including interference that may cause
undersired operation.
This equipment has been tested and found to comply with the limits for a Class B
digital device, pursuant to Part 15 of the FCC Rules. These limits are designed to
provide reasonable protection against harmful interference in a residential
installation. This equipment generates, uses, and can radiate radio frequency energy
and, if not installed and used in accordance with the instructions, may cause harmful
interference to radio communications. However, there is no guarantee that
interference will not occur in a particular installation. If this equipment does cause
harmful interference to radio or television reception, which can be determined by
turning the equipment off and on, the user is encouraged to try to correct the
interference by one or more of the following measures:
- Reorient or relocate the receiving antenna.
- Increase the separation between the equipment and receiver.
- Connect the equipment into an outlet on a circuit different from that to which the
receiver is connected.
- Consult the dealer or an experienced radio/TV technician for help.
Important
Changes or modifications not expressly approved by Brother Industries, Ltd. could
void the user’s authority to operate the equipment.
xv
Page 16

Industry Canada Compliance Statement (For Canada only)
This Class B digital apparatus complies with Canadian ICES-003.
Cet appareil numérique de la classe B est conforme a la norme NMB-003 du
Canada.
Declaration of Conformity (Europe)
We, Brother Industries, Ltd.,
15-1, Naeshiro-cho, Mizuho-ku, Nagoya 467-8561, Japan
declare that this product is in conformity with the following normative documents.
Safety: EN 60950,
EMC: EN 55022 Class B, EN 55024
following the provisions of the Low Voltage Directive 73/23/EEC and the
Electromagnetic Compatibility Directive 89/336/EEC (as amended by 91/263/EEC
and 92/31/EEC).
Issued by: Brother Industries, Ltd.
Information & Document Company
xvi
Page 17

CHAPTER 1 TCP/IP CONFIGURATION
CHAPTER ONE
11
TCP/IP Configuration
11
1
Assigning TCP/IP Information
11
Overview
The TCP/IP protocol requires that each device on the network have it's own
unique IP address. Use the following information to learn about IP address
configuration.
By default Brother Print / Fax servers have a sample IP address of 192.0.0.192,
however, you can easily change this IP address number to match with the IP
address details of your network. This can be done in any of the following ways:
1. MFC front panel setting.
2. BRAdmin application (for Windows
IPX/SPX or TCP/IP protocol).
3. DHCP, Reverse ARP (rarp) or BOOTP.
4. The ARP command.
5. Brother BRCONFIG NetWare utility (A Novell Network is necessary).
Other ways to CHANGE the IP address once it is already set:
1. MFC front panel
2. TELNET
3. HTTP (Web browser)
4. Other SNMP based management utility
These configuration methods are described in the following paragraphs.
The IP address you assign to the Print / Fax server must be on the same logical
network as your host computers, if it is not, you must properly configure the
subnet mask and the router (gateway).
®
95/98/Me/NT®4.0/2000 using the
1-1
Page 18

CHAPTER 1 TCP/IP CONFIGURATION
Using the MFC front panel to allocate an IP address.
Refer to chapter 2 for details on how to configure IP address information using
the MFC control panel. By using the front panel of the MFC, you can program
the IP address details at the same time that other MFC parameters are configured.
Using BRAdmin and the TCP/IP Protocol to set the IP address
If your PC has only the TCP/IP protocol, do the following:
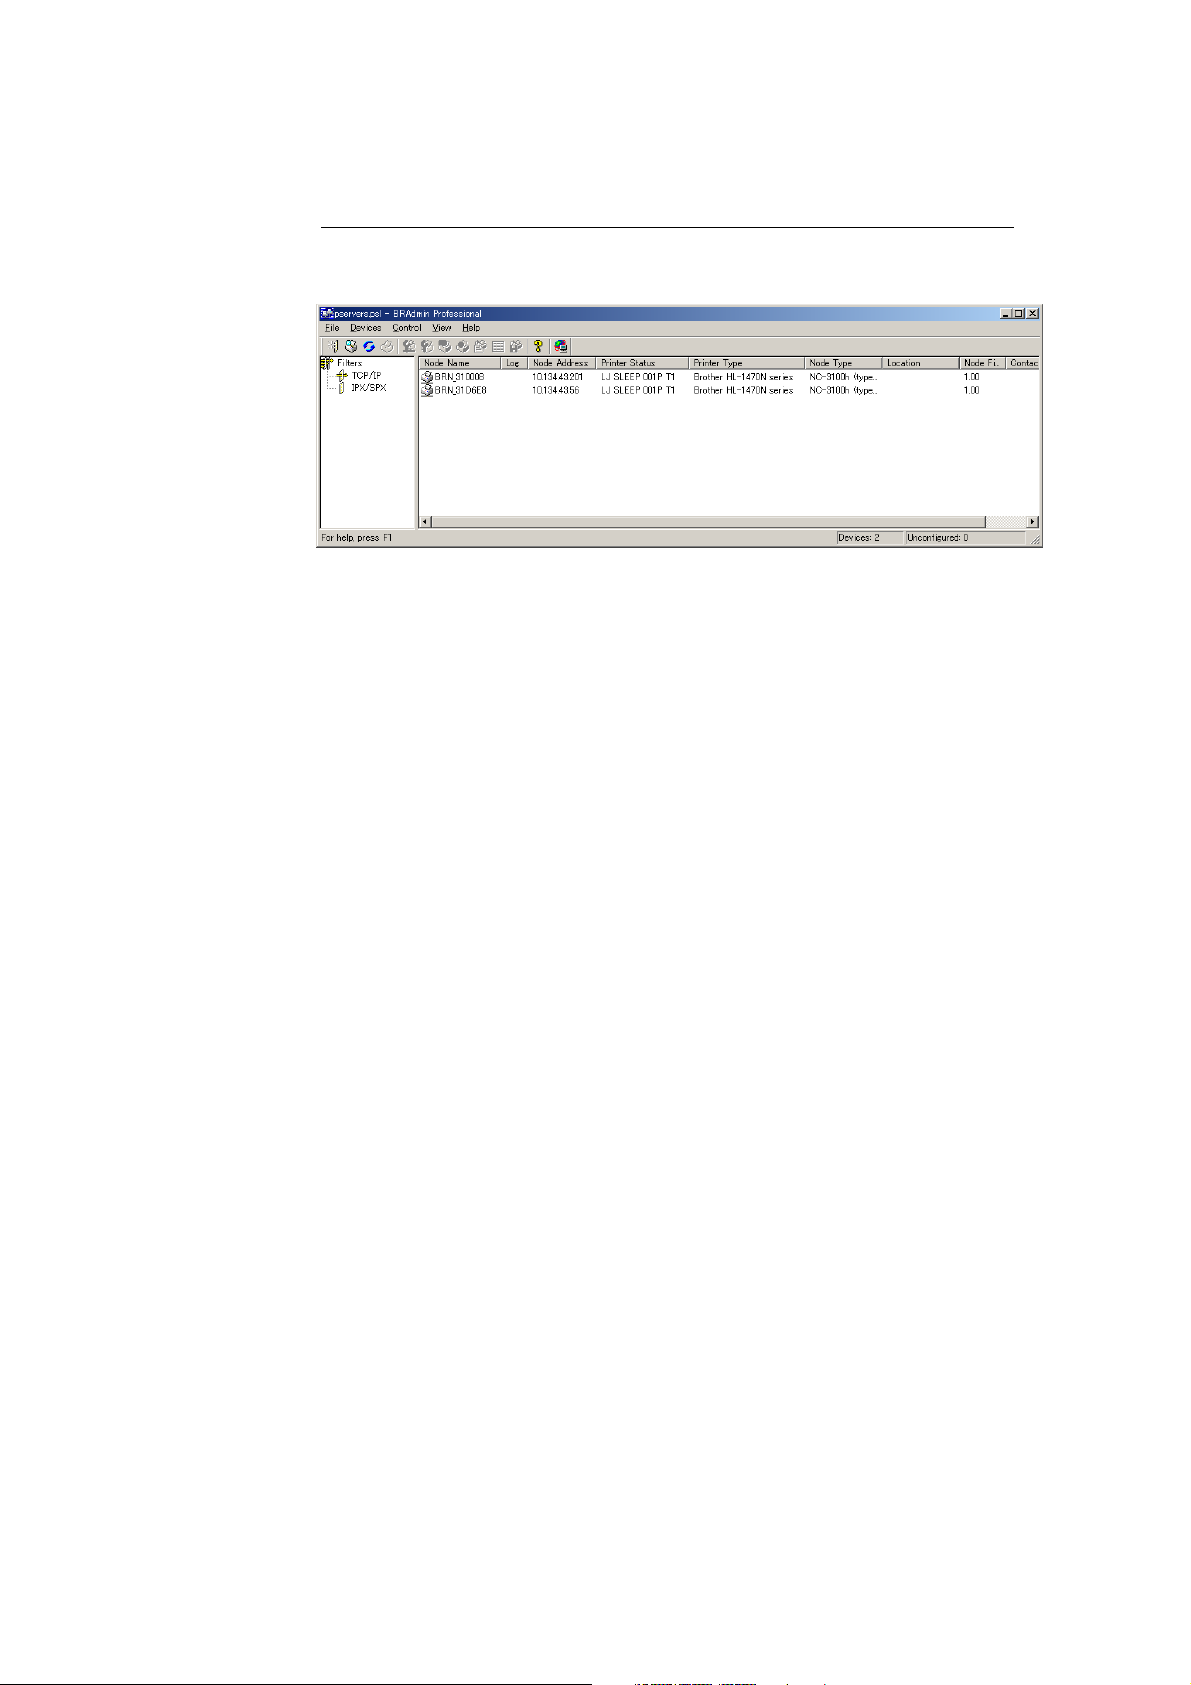
1. Select TCP/IP filter in the left frame of the main window.
2. Select the "Device" menu and choose the "Search Active Devices".
If the Print / Fax server is set to its factory default settings, it will not appear in
the BRAdmin screen, however, when you select the "Search Active Devices"
option, it will be found as an un-configured device.
3. Select the "Device" menu and choose the "Setup Unconfigured Device".
4. Select the MAC address of your Print / Fax server and click the
Configure button.
You can find the node name and MAC address by printing out the MFC
configuration page. Refer to the Quick Setup Guide for information on how to
print the configuration page on your Print / Fax server.
5. Input the IP address, Subnet mask and Gateway (If needed) of your Print
/ Fax server.
6. Click OK then select Close.
7. With the correctly programmed IP address, you will see the Brother
Print / Fax server in the device list.
1-2
Page 19

CHAPTER 1 TCP/IP CONFIGURATION
Using BRAdmin and the IPX/SPX Protocol to set the IP address
If your PC has Novell Netware Client software and is using the IPX/SPX
protocol, do the following:
1. Select IPX/SPX filter in the left frame of the main window.
2. Check the Print / Fax server name (the default node name will be
BRN_xxxxxx, where "xxxxxx" is the last six digits of the Ethernet
address (MAC address)).
If you cannot find your server name, select the "Device" menu and choose
"Search Active Devices" (you can also press the F4 key) and try again.
You can find the node name and MAC address by printing out the MFC
configuration page. Refer to the NC-8100h Quick Setup Guide for information
on how to print the configuration page on your Print / Fax server.
3. Select the Print / Fax server that you wish to configure and double click
it. You will be asked for a password. The default password is "access".
4. Select the TCP/IP tab and set the IP address, Subnet mask and Gateway
as needed.
5. Click OK.
1-3
Page 20
CHAPTER 1 TCP/IP CONFIGURATION
Changing the IP Address using the BRAdmin application
Start the BRAdmin application (from Windows® 95/98/Me/NT®4.0/2000).
The BRAdmin application can use the IPX/SPX or TCP/IP protocols to
communicate with the Brother Print / Fax server. As the default IP address of
Brother Print / Fax servers is 192.0.0.192, the Print / Fax server will probably be
incompatible with the IP address numbering scheme on your network. If you are
not using DHCP, BOOTP or RARP, you will want to change the IP address.
There are two ways that you can do this from within BRAdmin.
1. Use the IPX/SPX protocol.
2. Use the TCP/IP protocol and let BRAdmin find the Brother Print / Fax
server. Double click the Print / Fax Server you wish to change the IP
Address and enter the password.
3. Select the TCP/IP tab and change the IP Address as necessary.
1-4
Page 21

CHAPTER 1 TCP/IP CONFIGURATION
Using DHCP to Configure the IP address
Dynamic Host Configuration Protocol (DHCP) is one of several automated
mechanisms for IP address allocation. If you have a DHCP Server in your
network (typically a Unix, Windows
Print / Fax server will automatically obtains its IP address from DHCP server and
register its name with any RFC 1001 and 1002-compliant dynamic name
services.
If you do not want your Print / Fax server configured via DHCP, BOOTP or
RARP, you must set the BOOT METHOD to static, this will prevent the Print /
Fax server from trying to obtain an IP address from any of these systems. To
change the BOOT METHOD, use the MFC’s front panel, TELNET (using the
SET IP METHOD command), Web browser or by using the BRAdmin
application.
®
NT®/2000 or Novell Netware network) the
1-5
Page 22

CHAPTER 1 TCP/IP CONFIGURATION
Using ARP to Configure the Print / Fax server IP Address
If you are unable to use the BRAdmin application, MFC front panel and your
network does not use a DHCP server, you can also use the ARP command. ARP
is the simplest method of configuring the Print / Fax server IP address. The ARP
command is available on Windows
as Unix systems. To use arp enter the following command the command prompt:
arp -s ipaddress ethernetaddress
Where ethernetaddress is the Ethernet address (MAC address) of the Print / Fax
server and ipaddress is the IP address of the Print / Fax server. For example:
®
systems that have TCP/IP installed as well
Windows
Windows
®
Systems
®
Systems require the colon ":" character in-between each digit of the
Ethernet address.
arp -s 192.189.207.2 00:80:77:31:01:07
Unix Systems
Typically, Unix systems require the hash "-" character in-between each digit of
the Ethernet address.
arp -s 192.189.207.2 00-80-77-31-01-07
You must be on the same Ethernet segment (that is, there cannot be a router
between the Print / Fax server and operating system) to use the arp -s command.
If there is a router, you may use BOOTP or other methods described in this
chapter to enter the IP address.
If your Administrator has configured the system to deliver IP addresses using
BOOTP, DHCP or RARP your Brother Print / Fax server can receive an IP
address from any one of these IP address allocation systems, in which case, you
will not need to use the ARP command. The ARP command only works once.
For security reasons, once you have successfully configured the IP address of a
Brother Print / Fax server using the ARP command, you cannot use the ARP
command again to change the address. The Print / Fax server will ignore any
attempts to do this. If you wish to change the IP address again, use a Web
Browser, TELNET (using the SET IP ADDRESS command) the MFC’s front
panel or factory reset the Print / Fax server (which will then allow you to use the
ARP command again).
To configure the Print / Fax server and to verify the connection, enter the
following command ping ipaddress where the ipaddress is the IP address of the
Print / Fax server.
For example:
ping 192.189.207.2
1-6
Page 23

CHAPTER 1 TCP/IP CONFIGURATION
Using RARP to Configure the IP Address
Brother Print / Fax server IP address can be configured using the Reverse ARP
(rarp) facility on your host computer. This is done by editing the /etc/ethers file
(if this file does not exist, you can create it) with an entry similar to the
following:
00:80:77:31:01:07 BRN_310107
Where the first entry is the Ethernet address of the Print / Fax server and the
second entry is the name of the Print / Fax server (the name must be the same as
the one you put in the /etc/hosts file).
If the rarp daemon is not already running, start it (depending on the system the
command can be rarpd, rarpd -a, in.rarpd -a or something else; type man rarpd or
refer to your system documentation for additional information). To verify that the
rarp daemon is running on a Berkeley UNIX-based system, type the following
command:
ps -ax | grep -v grep | grep rarpd
For AT&T UNIX-based systems, type:
ps -ef | grep -v grep | grep rarpd
The Brother Print / Fax server will get the IP address from the rarp daemon when
it is powered on.
1-7
Page 24

CHAPTER 1 TCP/IP CONFIGURATION
Using BOOTP to Configure the IP Address
BOOTP is an alternative to rarp that has the advantage of allowing configuration
of the subnet mask and gateway. In order to use BOOTP to configure the IP
address make sure that BOOTP is installed and running on your host computer (it
should appear in the /etc/services file on your host as a real service; type man
bootpd or refer to your system documentation for information). BOOTP is
usually started up via the /etc/inetd.conf file, so you may need to enable it by
removing the "#" in front of the bootp entry in that file. For example, a typical
bootp entry in the /etc/inetd.conf file would be:
#bootp dgram udp wait /usr/etc/bootpd bootpd -i
Depending on the system, this entry might be called "bootps" instead of "bootp".
In order to enable BOOTP, simply use an editor to delete the "#" (if there is no
"#", then BOOTP is already enabled). Then edit the BOOTP configuration file
(usually /etc/bootptab) and enter the name, network type (1 for Ethernet),
Ethernet address and the IP address, subnet mask and gateway of the Print / Fax
server. Unfortunately, the exact format for doing this is not standardized, so you
will need to refer to your system documentation to determine how to enter this
information (many UNIX systems also have template examples in the bootptab
file that you can use for reference). Some examples of typical /etc/bootptab
entries include:
BRN_310107 1 00:80:77:31:01:07 192.189.207.3
and:
BRN_310107:ht=ethernet:ha=008077310107:\
ip=192.189.207.3:
Certain BOOTP host software implementations will not respond to BOOTP
requests if you have not included a download filename in the configuration file;
if this is the case, simply create a null file on the host and specify the name of
this file and its path in the configuration file.
As with rarp, the Print / Fax server will load its IP address from the BOOTP
server when the MFC is powered on.
1-8
Page 25

CHAPTER 1 TCP/IP CONFIGURATION
Changing the IP Address settings with the TELNET Console
You can also use the TELNET command to change the IP address.
Using TELNET is effective way, when you change the IP address. But a valid IP
address must already be programmed into the Print / Fax server.
If you are using the TELNET, you will be expected to enter the password of the
Print / Fax server. Press RETURN and enter the default password of "access" in
response to the "#" prompt (it will not echo).
You will be prompted for a user name. Enter anything in response to this prompt.
You will then get the Local> prompt. Type SET IP ADDRESS ipaddress, where
ipaddress is the desired IP address you wish to assign to the Print / Fax server
(check with your network manager for the IP address to use). For example:
Local> SET IP ADDRESS 192.189.207.3
You will now need to set the subnet mask by typing SET IP SUBNET subnet
mask, where subnet mask is the desired subnet mask you wish to assign to the
Print / Fax server (check with your network manager for the subnet mask to use).
For example:
Local> SET IP SUBNET 255.255.255.0
If you do not have any subnets, use one of the following default subnet masks:
255.255.255.0 for class C networks
255.255.0.0 for class B networks
255.0.0.0 for class A networks
The leftmost group of digits in your IP address can identify the type of network
you have. The value of this group ranges from 192 through 255 for Class C
networks (e.g., 192.189.207.3), 128 through 191 for Class B networks
(e.g.,128.10.1.30), and 1 through 127 for Class A networks (e.g., 13.27.7.1).
If you have a gateway (router), enter its address with the command SET IP
ROUTER routeraddress, where routeraddress is the desired IP address of the
gateway you wish to assign to the Print / Fax server. For example:
Local> SET IP ROUTER 192.189.207.1
To verify that you have entered the IP information correctly, type SHOW IP.
Type EXIT or CTR-D (i.e., hold down the control key and type "D") to end the
remote console session.
1-9
Page 26

CHAPTER 1 TCP/IP CONFIGURATION
Other Sources of Information
Visit http://solutions.brother.com/ for more information on the TCP/IP protocol.
1-10
Page 27

CHAPTER 2 FRONT PANEL SETUP MENU
CHAPTER TWO
21
Front Panel Setup Menu
2
LAN Main Setup Menu
The LAN menu selections allow you to setup the Brother MFC for your network
and Internet Fax configuration. Press [Menu] then press the appropriate number
for LAN, based on the selections displayed on your machine. After you have
displayed the LAN Main Setup menu, there are five main selections: 1-Setup
TCP/IP, 2-Setup Internet, 3-Setup Mail RX, 4-Setup Mail TX, 5-Setup Relay
and 6-Setup MISC. Proceed to the menu selection you wish to configure.
Please note that once you have specified a valid IP address for the machine, it is
also possible to configure many aspects of the MFC using your favorite web
browser. For added flexibility, the MFC is supplied with the BRAdmin
Professional Windows
aspects of the NC-8100h.
®
software, which also can be used to configure many
1-Setup TCP/IP
This menu has eight sections: 1-Boot Method, 2-IP Address, 3-Subnet Mask, 4Gateway, 5-Host Name, 6-WINS Configuration and 7-WINS Server.
1-BOOT METHOD
1. Press the [Menu] button to display the configuration menu.
2. Select LAN.
3. Press [1] [1].
4. Press ! or " to select AUTO, STATIC, RARP, BOOTP or DHCP.
5. Press [Set] to accept the selection.
6. Press [Stop/Exit] to exit the configuration menu.
7. Now make sure that you power cycle the MFC.
2-1
Page 28

CHAPTER 2 FRONT PANEL SETUP MENU
STATIC mode
In this mode the MFC IP address must be manually assigned. Once entered the IP
address is locked to the assigned address.
AUTO mode
In this mode, the MFC will scan the network for a DHCP server, if it can find
one, and if the DHCP server is configured to allocate an IP address to the MFC,
then the IP address supplied by the DHCP server will used. If no DHCP server is
available, then the MFC will scan for a BOOTP server. If a BOOTP server is
available, and it is configured correctly, the MFC will take its IP address from the
BOOTP server. After it is initially powered ON, it may take a few minutes for
the MFC to scan the network for a server.
If your MFC supports “POWER SAVE mode” and you are using the AUTO
Boot mode, POWER SAVE must be set to OFF.
RARP mode
Brother Print / Fax server IP address can be configured using the Reverse ARP
(rarp) facility on your host computer. This is done by editing the /etc/ethers file
(if this file does not exist, you can create it) with an entry similar to the
following:
00:80:77:31:01:07 BRN_310107
Where the first entry is the Ethernet address of the Print / Fax server and the
second entry is the name of the Print / Fax server (the name must be the same as
the one you put in the /etc/hosts file).
If the rarp daemon is not already running, start it (depending on the system the
command can be rarpd, rarpd -a, in.rarpd -a or something else; type man rarpd or
refer to your system documentation for additional information). To verify that the
rarp daemon is running on a Berkeley UNIX-based system, type the following
command:
ps -ax | grep -v grep | grep rarpd
For AT&T UNIX-based systems, type:
ps -ef | grep -v grep | grep rarpd
The Brother Print / Fax server will get the IP address from the rarp daemon when
it is powered on.
BOOTP mode
BOOTP is an alternative to rarp that has the advantage of allowing configuration
of the subnet mask and gateway. In order to use BOOTP to configure the IP
address make sure that BOOTP is installed and running on your host computer (it
should appear in the /etc/services file on your host as a real service; type man
bootpd or refer to your system documentation for information). BOOTP is
usually started up via the /etc/inetd.conf file, so you may need to enable it by
removing the "#" in front of the bootp entry in that file. For example, a typical
bootp entry in the /etc/inetd.conf file would be:
#bootp dgram udp wait /usr/etc/bootpd bootpd -i
Depending on the system, this entry might be called "bootps" instead of "bootp".
2-2
Page 29

CHAPTER 2 FRONT PANEL SETUP MENU
In order to enable BOOTP, simply use an editor to delete the "#" (if there is no
"#", then BOOTP is already enabled). Then edit the BOOTP configuration file
(usually /etc/bootptab) and enter the name, network type (1 for Ethernet),
Ethernet address and the IP address, subnet mask and gateway of the Print / Fax
server. Unfortunately, the exact format for doing this is not standardized, so you
will need to refer to your system documentation to determine how to enter this
information (many UNIX systems also have template examples in the bootptab
file that you can use for reference). Some examples of typical /etc/bootptab
entries include:
BRN_310107 1 00:80:77:31:01:07 192.189.207.3
and:
BRN_310107:ht=ethernet:ha=008077310107:\
ip=192.189.207.3:
Certain BOOTP host software implementations will not respond to BOOTP
requests if you have not included a download filename in the configuration file;
if this is the case, simply create a null file on the host and specify the name of
this file and its path in the configuration file.
As with rarp, the Print / Fax server will load its IP address from the BOOTP
server when the printer is powered on.
DHCP mode
Dynamic Host Configuration Protocol (DHCP) is one of several automated
mechanisms for IP address allocation. If you have DHCP Server in your network
(typically a Unix, Windows
®
NT®/2000 or Novell Netware network) the Print /
Fax server will automatically obtains its IP address from DHCP server and
register its name with any RFC 1001 and 1002-compliant dynamic name
services.
If you do not want your Print / Fax server configured via DHCP, BOOTP or
RARP, you must set the BOOT METHOD to static, this will prevent the Print /
Fax server from trying to obtain an IP address from any of these systems. To
change the BOOT METHOD, use the print front panel (for those printers that
have a LCD panel, TELNET (using the SET IP METHOD command), Web
browser or by using the BRAdmin application.
2-IP ADDRESS
1. Press the [Menu] button to display the configuration menu.
2. Select LAN.
3. Press [1] [2].
4. Select [1] to change the IP address—OR—[2] to exit.
5. Enter the IP address.
6. Press [Set] to accept the IP address.
7. Press [Stop/Exit] to exit the configuration menu.
2-3
Page 30

CHAPTER 2 FRONT PANEL SETUP MENU
IP ADDRESS
This field displays the current IP address of the MFC. If you have selected a Boot
Method of STATIC, enter the IP address that you wish to assign to the MFC
(check with your network manager for the IP address to use). If you have
selected a method other than STATIC, the MFC will attempt to determine its IP
address using the DHCP or BOOTP protocols. The default IP address of the
Brother network board in your MFC will probably be incompatible with the IP
address numbering scheme of your network. We recommend that you contact
your network manager for an IP address for the network the unit will be
connected on.
When the BOOT METHOD is set to “AUTO”, the MFC cannot receive IP
address from a BOOTP server in Windows
DHCP for Windows
®
2000 server.
®
2000. So please ensure that you use
3-SUBNET MASK
1. Press the [Menu] button to display the configuration menu.
2. Select LAN.
3. Press [1] [3].
4. Select [1] to change the Subnet Mask—OR—[2] to exit.
5. Enter the Subnet Mask address.
6. Press [Set] to accept the IP address.
7. Press [Stop/Exit] to exit the configuration menu.
SUBNET Mask
This field displays the current subnet mask used by the MFC. If you are not using
DHCP or BOOTP to obtain the subnet mask, enter the desired subnet mask.
Check with your network manager for the subnet mask to use.
4-GATEWAY
1. Press the [Menu] button to display the configuration menu.
2. Select LAN.
3. Press [1] [4].
4. Select [1] to change the Gateway—OR—[2] to exit.
5. Enter the Gateway address.
6. Press [Set] to accept the selection.
7. Press [Stop/Exit] to exit the configuration menu.
GATEWAY
This field displays the current gateway or router address used by the MFC. If you
are not using DHCP or BOOTP to obtain the gateway or router address, enter the
address you wish to assign. If you do not have a gateway or router, leave this
field blank. Check with your network manager if you are unsure.
2-4
Page 31

CHAPTER 2 FRONT PANEL SETUP MENU
5-HOST NAME
1. Press the [Menu] button to display the configuration menu.
2. Select LAN.
3. Press [1] [5].
4. Select [1] to change the Host Name—OR—[2] to exit.
5. Enter the Host Name.
6. Press [Set] to accept the selection.
7. Press [Stop/Exit] to exit the configuration menu.
HOST NAME
You can register the machine name on the Network. This name is often referred
to as a NetBIOS name; it will be the name that is registered by the WINS server
on your network. Brother recommends the name BRN-XXXXXX (where
XXXXXX is the last six digits of the Ethernet address) (up to 15 characters).
6-WINS Configuration
1. Press the [Menu] button to display the configuration menu.
2. Select LAN.
3. Press [1] [6].
4. Press ! or " to select AUTO, or STATIC.
5. Press [Set] to accept the selection.
6. Press [Stop/Exit] to exit the configuration menu.
WINS Configuration
This selection controls how the MFC obtains the IP address for the WINS Server.
AUTO
Automatically uses a DHCP request to determine the IP addresses for the primary
and secondary WINS servers. You must set the Boot Method to Auto for this
feature to work.
STATIC
Uses a specified IP address for the primary and secondary WINS servers.
OFF
Disables WINS resolution.
7-WINS SERVER
1. Press the [Menu] button to display the configuration menu.
2. Select LAN.
3. Press [1] [7].
4. Press ! or " to select the Primary or secondary WINS Server.
5. Press [Set] to accept the selection.
6. Select [1] to change the WINS Server address—OR—[2] to exit.
7. Enter the WINS Server address.
8. Press [Set] to accept the selection.
9. Press [Stop/Exit] to exit the configuration menu.
2-5
Page 32

CHAPTER 2 FRONT PANEL SETUP MENU
PRIMARY WINS Server IP Address
This field specifies the IP address of the primary WINS (Windows
Naming Service) server. If set to a non-zero value, the machine will contact this
server to register its name with the Windows
®
Internet Name Service.
®
Internet
SECONDARY WINS Server IP Address
This field specifies the IP address of the secondary WINS server. It is used as a
backup to the Primary WINS server address. If the Primary server is unavailable,
the MFC still can register itself with a secondary server. If set to a non-zero
value, the machine will contact this server to register its name with the Windows
Internet Name Service. If you have a primary WINS server, but no secondary
WINS server, simply leave this field blank.
8-DNS SERVER
1. Press the [Menu] button to display the configuration menu.
2. Select LAN.
3. Press [1] [8].
4. Press ! or " to select the Primary or secondary DNS Server.
5. Press [Set] to accept the selection.
6. Select [1] to change the DNS Server address—OR—[2] to exit.
7. Enter the DNS Server address.
8. Press [Set] to accept the selection.
9. Press [Stop/Exit] to exit the configuration menu.
®
PRIMARY DNS Server IP Address
This field specifies the IP address of the primary DNS (Domain Name Service)
server.
SECONDARY DNS Server IP Address
This field specifies the IP address of the secondary DNS server. It is used as a
backup to the Primary DNS server address. If the Primary server is unavailable,
the MFC will contact the Secondary DNS server.
2-Setup Internet
This menu has five selections: 1- Mail Address, 2-SMTP Server, 3-POP3 Server,
4-Mailbox Name and 5-Mailbox PWD. You may find that it is more convenient
to use your favorite web browser to configure these settings.
1-MAIL ADDRESS
1. Press the [Menu] button to display the configuration menu.
2. Select LAN.
3. Press [2] [1].
2-6
Page 33

CHAPTER 2 FRONT PANEL SETUP MENU
Refer to the following table (only for MFC-9700):
Key
1
2
3
4
5
6
7
8
9
Once
@
A
D
G
J
M
P
T
W
Twice
.
B
E
H
K
N
Q
U
X
Three times
/
C
F
I
L
O
R
V
Y
Four times
1
2
3
4
5
6
S
8
Z
If you want to enter a blank space, press """" twice.
To change the mode between upper case and lower case for entering the e-mail /
I-Fax address press [!Shift] and [3].
Refer to the following table (for other models):
One Touch Dial Key Alphabet Conversion Table
01 - a
17 – q
05 – e
21 – u
09 – i
25 – y
13 – m
29 – space
02 - b
18 – r
06 – f
22 – v
10 – j
26 – z
14 – n
30 – [ special ]
03 - c
19 – s
07 – g
23 – w
11 – k
27 - .
15 – o
31 – [ symbols]
04 - d
20 - t
08 - h
24 - x
12 - l
28 - @
16 – p
32 – a<->A
Making corrections:
If you entered a letter incorrectly and want to change it, press ! to move the
cursor after the last correct letter. Then re-enter the correct text and/or digits. You
can also back up and type over incorrect letters.
Repeating letters:
If you need to enter a character assigned to the same key as the previous
character, press """" to move the cursor to the right.
Special characters and symbols (only for MFC-9700):
Press * for (space) ! “ # $ % & ’ () * + , - . /
Press # for : ; < = > ? @ [ ] ^ _
Press ∅ for • À È Ê Î Ç Ë Ö 0
As you enter the E-mail address, it will appear character by character on
the LCD panel.
If you specify more than 16 characters, the LCD panel will scroll the
name to the left, character by character. You can enter up to 60
characters.
Please note that also you can connect to the MFC using a web browser
and specify the E-mail address information through Web Based
Management.
4. Press [Set] to accept the selection.
5. Press [Stop/Exit] to exit the configuration menu.
2-7
Page 34

CHAPTER 2 FRONT PANEL SETUP MENU
2-SMTP SERVER
1. Press the [Menu] button to display the configuration menu.
2. Select LAN.
3. Press [2] [2].
4. Select [1] to change the SMTP SERVER Address—OR—[2] to exit.
5. Select [1] IP ADDRESS or [2] NAME to select the method of the
entering the SMTP SERVER Address.
6. Enter the SMTP SERVER Address.
7. Press [Set] to accept the selection.
8. Press [Stop/Exit] to exit the configuration menu.
SMTP SERVER Address
This field displays the Host Name or IP address of an SMTP mail server
(outgoing E-mail Server) on your network.
(Ex, mailhost.brothermail.net -or- 192.000.000.001)
3-POP3 SERVER
1. Press the [Menu] button to display the configuration menu.
2. Select LAN.
3. Press [2] [3].
4. Select [1] to change the POP3 Server Address—OR—[2] to exit.
5. Select [1] IP ADDRESS or [2] NAME to select the method of the
entering the POP3 Server Address.
6. Enter the POP3 Server Address.
7. Press [Set] to accept the selection.
8. Press [Stop/Exit] to exit the configuration menu.
POP3 SERVER address
This field displays the Host Name or IP address of the POP3 server ( incoming
E-mail server) used by the Brother MFC. This address is necessary for the
Internet Fax features to function correctly.
(Ex, mailhost.brothermail.net -or- 192.000.000.001)
4-MAILBOX NAME
1. Press the [Menu] button to display the configuration menu.
2. Select LAN.
3. Press [2] [4].
4. Select [1] to change the Mailbox Name—OR—[2] to exit.
5. Enter the user account name assigned to the Brother MFC to login to the
POP3 Server.
6. Press [Set] to accept the selection.
7. Press [Stop/Exit] to exit the configuration menu.
2-8
Page 35

CHAPTER 2 FRONT PANEL SETUP MENU
5-MAILBOX PWD
1. Press the [Menu] button to display the configuration menu.
2. Select LAN.
3. Press [2] [5].
4. Select [1] to change the Mailbox password—OR—[2] to exit.
5. Enter the user password assigned to the MFC to login to the POP3
Server. Please note that this password is case sensitive.
6. Press [Set] to accept the selection.
7. Press [Stop/Exit] to exit the configuration menu.
3-Setup Mail RX
This menu has Five selections 1-Auto Polling, 2-Poll Frequency, 3-Header, 4-Del
Error Mail and 5-Notification.
1-AUTO POLLING
1. Press the [Menu] button to display the configuration menu.
2. Select LAN.
3. Press [3] [1].
4. Press ! or " to select On or OFF.
5. Press [Set] to accept the selection.
6. Press [Stop/Exit] to exit the configuration menu.
AUTO POLLING
When set to ON the MFC automatically will check the POP3 server for new
messages. “NO MAIL” will be displayed if there are no E-mail messages when
the POP3 server is polled.
2-POLL FREQUENCY
1. Press the [Menu] button to display the configuration menu.
2. Select LAN.
3. Press [3] [2].
4. Enter the polling frequency.
5. Press [Set] to accept the selection.
6. Press [Stop/Exit] to exit the configuration menu.
POLLING FREQUENCY
Sets the interval for checking for new messages on the POP3 server (default is
10min).
3-HEADER
1. Press the [Menu] button to display the configuration menu.
2. Select LAN.
3. Press [3] [3].
4. Press ! or " to select SUBJECT+FROM+TO or ALL or NONE.
5. Press [Set] to accept the selection.
6. Press [Stop/Exit] to exit the configuration menu.
2-9
Page 36

CHAPTER 2 FRONT PANEL SETUP MENU
HEADER
This selection allows the contents of the mail header to be printed when the
received message is printed (Subject+From+To or All or NONE).
4-DEL ERROR MAIL
1. Press the [Menu] button to display the configuration menu.
2. Select LAN.
3. Press [3] [4].
4. Press ! or " to select ON or OFF.
5. Press [Set] to accept the selection.
6. Press [Stop/Exit] to exit the configuration menu.
DELETE ERROR MAIL
When set to ON, the MFC automatically deletes error mails that the MFC can not
receive from the POP server.
5-NOTIFICATION
1. Press the [Menu] button to display the configuration menu.
2. Select LAN.
3. Press [3] [5].
4. Press ! or " to select ON or MDN or OFF.
5. Press [Set] to accept the selection.
6. Press [Stop/Exit] to exit the configuration menu.
NOTIFICATION
Notification feature allows a receive notification message to be transmitted to
the sending station to indicate successful reception of the I-Fax.
“ON” send notification mail to all I-Fax machines only sends an e-mail to I-Fax
that supports the “MDN” specification.
4-Setup Mail TX
This menu has three selections 1-Sender Subject, 2-Size Limit and 3Notification.
1-SENDER SUBJECT
1. Press the [Menu] button to display the configuration menu.
2. Select LAN.
3. Press [4] [1].
4. Select [1] to change the Sender Subject—OR—[2] to exit.
5. Enter the subject information.
6. Press [Set] to accept the selection.
7. Press [Stop/Exit] to exit the configuration menu.
SENDER SUBJECT
This field displays the subject that is attached to the Internet Fax data being sent
from the Brother MFC to a PC (default is “Internet FAX Job”).
2-10
Page 37

CHAPTER 2 FRONT PANEL SETUP MENU
2-SIZE LIMIT
1. Press the [Menu] button to display the configuration menu.
2. Select LAN.
3. Press [4] [2].
4. Press ! or " to select ON or OFF.
5. Press [Set] to accept the selection.
6. Press [Stop] to exit the configuration menu.
SIZE LIMIT
Some E-mail servers do not allow you to send large E-mail documents. The MFC
may display “Out of Memory” when trying to send E-mail documents (the
System Administrator will often place a limit on the maximum E-mail size).
With this function enabled, the MFC will display “Out of Memory” when trying
to send E-mail documents over 1Mbyte in size. The document will not be sent
and an error report will be printed. The document you are sending should be
separated into smaller documents that will be accepted by the mail server. (Ex. A
42 page document of the CCITT#1 test chart is approximately 1Mbyte in size).
3-NOTIFICATION
1. Press the [Menu] button to display the configuration menu.
2. Select LAN.
3. Press [4] [3].
4. Press ! or " to select ON or OFF.
5. Press [Set] to accept the selection.
Press [Stop] to exit the configuration menu.
Notification feature when switched to “ON” sends two fields of data in addition
to the image data which requests a notification from the receiving station for
successful reception. The receiving I-Fax station must support the “MDN”
standard in order to be able to understand the request and consequently submit a
notification message confirming successful receipt of the I-Fax.
2-11
Page 38

CHAPTER 2 FRONT PANEL SETUP MENU
5-Setup Relay
This menu has three selections 1-RLY Broadcast, 2-Relay Domain and 3-Relay
Report. For details on Relay Broadcast refer to Chapter3, How to use the WebBased Management Utility or Chapter 4 Internet Fax.
1-RLY BROADCAST
1. Press the [Menu] button to display the configuration menu.
2. Select LAN.
3. Press [5] [1].
4. Press ! or " to select ON or OFF.
5. Press [Set] to accept the selection.
6. Press [Stop/Exit] to exit the configuration menu.
RELAY BROADCAST
This function allows the MFC to receive a document over the Internet, and then
relay it to other fax machines through conventional analog landlines.
2-RELAY DOMAIN
1. Press the [Menu] button to display the configuration menu.
2. Select LAN.
3. Press [5] [2].
4. Press ! or " to select the Relay Domain (01 – 10).
5. Press [Set] to accept the selection.
6. Enter the Relay Domain name for the Domain that is being allowed to
request a Relay Broadcast.
7. Press [Set] to accept the selection.
8. Press [Stop/Exit] to exit the configuration menu.
RELAY DOMAIN
You can register the Domain Names (Max.10) that are allowed to request a Relay
Broadcast.
3-RELAY REPORT
1. Press the [Menu] button to display the configuration menu.
2. Select LAN.
3. Press [5] [3].
4. Press ! or " to select ON or OFF.
5. Press [Set] to accept the selection.
Relay Broadcast Report can be printed at the MFC used as the Relay Station for
all Relay Broadcasts. Also, when the MFC is used with the Brother Network PC
Fax software the MFC is acting as a Relay Station for fax transmissions from the
network so a Relay Report can also be printed for confirmation of sent network
faxes.
Its primary function is to print reports of Relay Broadcasts from external sources
through the MFC. Please note that this is not possible without the consent of the
Relaying Station as permission in the form of Relay Domain has to be given to
external parties.
2-12
Page 39

CHAPTER 2 FRONT PANEL SETUP MENU
6-Setup Misc.
1-NETWARE
You can select to switch the NetWare feature “ON”, this allows you specify the
Frame Type is item 2.
1. Press the [Menu] button to display the configuration menu.
2. Select LAN.
3. Press [6] [1].
4. Press ! or " to select ON or OFF.
5. Press [Set] to accept the selection.
2-NET FRAME
1. Press the [Menu] button to display the configuration menu.
2. Select LAN.
3. Press [6] [2].
4. Press ! or " to select AUTO/802.3/ENET/802.2/SNAP.
5. Press [Set] accept the selection.
AUTO sets the Frame type to automatic, the network card will detect the frame
type being used by the NetWare server (Recommended).
802.3 sets the Frame type to Ethernet 802.3
ENET sets the Frame Type to Ethernet II
802.2 sets the Frame type to Ethernet 802.2
SNAP sets the Frame type to Ethernet SNAP
* NET Frame Setting is available when NetWare is “ON”
3-APPLETALK
1. Press the [Menu] button to display the configuration menu.
2. Select LAN.
3. Press [6] [3].
4. Press ! or " to select ON or OFF.
5. Press [Set] accept the selection.
AppleTalk protocol is used with Macintosh Networks. If you are your MFC on a
Macintosh network please select to ON.
4-DLC/LLC
1. Press the [Menu] button to display the configuration menu.
2. Select LAN.
3. Press [6] [4].
4. Press ! or " to select ON or OFF.
5. Press [Set] accept the selection.
2-13
Page 40

CHAPTER 2 FRONT PANEL SETUP MENU
5-NETBIOS/IP
1. Press the [Menu] button to display the configuration menu.
2. Select LAN.
3. Press [6] [5].
4. Press ! or " to select ON or OFF.
5. Press [Set] accept the selection.
The NC-8100h Print / Fax Server supports SMB (Server Message Block) over the
TCP/IP protocol via the NetBIOS interface. This means that just like regular
Windows
®
PC’s the Brother MFC can appear in your network neighborhood. The
main advantage of NetBIOS printing is that you are able to print from legacy DOS
applications that are running on PC’s that are connected to Microsoft networks.
6-ETHERNET
1. Press the [Menu] button to display the configuration menu.
2. Select LAN.
3. Press [6] [6].
4. Press ! or " to select AUTO/100B-FD/100B-HD/10B-FD/10B-HD.
5. Press [Set] accept the selection.
Ethernet link mode. Auto allows the print server to operate in 100BaseTX full or
half duplex, or in 10BaseT half duplex mode by auto negotiation.
100BaseTX Full Duplex (100B-FD) or Half Duplex (100B-HD) and 10BaseT
Full Duplex (10B-FD) or Half Duplex (10B-HD) fix the print server link mode.
This change is valid after the print server has been reset. NOTE: if you
incorrectly set this value, you may not be able to communicate with your print
server.
7-TIME ZONE
1. Press the [Function/Menu] button to display the configuration menu.
2. Select LAN.
3. Press [6] [7].
4. Press ! or " to set the time.
5. Press [Set] to accept the selection.
6. Press [Stop] to exit the configuration menu.
TIME ZONE
This field displays the time zone you can set for your country. The time is the
difference between your location and Greenwich Mean Time. This time will be
shown on documents received via the Internet. For example the Time Zone for
Eastern Time in the USA and Canada is GMT-05:00. You can determine the
time difference for you location by using the Time Zone setting in Windows
Windows
®
Time Zone Setting:
®
.
1. Click on Start.
2. Select Settings / Control Panel.
3. Double click on Date/Time.
4. Select Time Zone.
Verify your time zone setting from the pull-down menu (this menu displays the
time difference from GMT).
2-14
Page 41

CHAPTER 2 FRONT PANEL SETUP MENU
User Setting List
1. Press the [Reports] button.
2. Select USER SETTINGS/SYSTEM SETUP.
3. Press [Start/Exit] to print the report.
This feature prints a report listing all the current user settings. The NC-8100h
Print / Fax Server Settings will be printed on the second page of the report.
Other Sources of Information
For more information of this chapter please visit http://solutions.brother.com/
2-15
Page 42

CHAPTER 3 WEB BASED MANAGEMENT
CHAPTER THREE
31
Web Based Management
3
How to Use the Web-Based
Management Utility
Overview
The Web Based Management utility provides easy management and status
information for your Brother MFC.
A standard World Wide Web Browser (we recommend Netscape Navigator
version 4.xx /Microsoft Internet Explorer version 4.xx a or later) can be used to
manage your Brother MFC using the HTTP (Hyper-Text Transfer Protocol).
The following are the main features of the Web Based Management utility:
1. Machine status information.
2. Change Fax configuration items, such as Initial Setup, One Touch Dial
settings and Remote Fax.
3. You can also change network settings such as TCP/IP information,
Internet Fax address information, etc.
You must use the TCP/IP protocol on your network and have a valid IP address
programmed into the Brother MFC.
3-1
Page 43

CHAPTER 3 WEB BASED MANAGEMENT
How to Connect Using a Browser
Type the IP address of the Brother MFC into your Web browser ( Ex.
http://192.189.207.3). You can also use the NetBIOS name (Host Name) of the
Brother network board if you are in Microsoft Windows
environment (WINS Config/WINS Server must already be set).
If your MFC supports English, French, German, Dutch, Italian or Spanish, you
must set the same language in your Web Browser. If your MFC does not support
these languages set your Web Browser for English.
®
domain/Workgroup
Password Information
Important Information:
Login names are not
changeable. Login names
and passwords are both
case sensitive.
Web Based Management offers two levels of password access. Users are able to
access to the General Setup, Fax settings, I-Fax Settings and Lists and Reports.
The default user name for Users is user and the default password is access.
Administrators are able to access all settings. The login name for the
Administrator is admin and the default password is access.
Other Sources of Information
The key information relating to Web Based Management differs slightly
depending on the model number of your MFC. For further detailed description of
this chapter please visit http://solutions.brother.com/
Refer to chapter 1 of this user guide to learn how to configure the IP address of
the printer.
3-2
Page 44

CHAPTER 4 INTERNET FAX
CHAPTER FOUR
41
Internet FAX
4
Overview
Internet Faxing (I-FAX) allows you to send and receive FAX documents using
the Internet as the transport mechanism. Documents are transmitted in E-mail
messages as attached TIFF-F files. This means that PC’s are also able to receive
and send documents, providing that the PC has as an application that can
generate and view TIFF-F files, your can use Microsoft
viewer application [Pagis Viewer 2.0] is available as a download from the
Brother Web site (http://www.brother.com). Any documents sent via the MFC
will automatically be converted into a TIFF-F format. If you wish to send and
receive messages to and from your MFC, your mail application on the PC must
be able to support the MIME format.
®
Imaging or A TIFF-F
E-mail
Internet
E-mail
Relay
Fax (G3 TX)
Internet
Fax
Internet
Relay
E-Mail
4-1
Page 45

CHAPTER 4 INTERNET FAX
Getting Connected
Before sending or receiving an Internet Fax you must configure your Brother
MFC to communicate with your network and mail server. You must ensure the
following: a correctly configured IP address for your MFC, an E-mail address for
your MFC, the mail server(s) IP address, mailbox name and password for your
Brother MFC. If you are unsure of any of these items, please contact your
systems administrator. For details of how to configure this information, refer to
the Web Based Management section (Internet Settings) of this User’s Guide.
Front Panel Key Functions
Shift + [1]
Used to change input mode. You can use Dial Pad keys as Standard alphabet
character keys.
Dial Pad
Used to enter Standard Alpha characters (26 letters), as well as @ . space ! “ # %
& ‘ () + / : ; < > = ? [ ] ^ – $ , *, _ and Numbers.
Shift + [3]
To change between upper case and lower case for entering the e-mail / I-Fax
address.
!!!! or """"
Moves the LCD cursor to the left or right.
Set
Used to store multiple numbers.
Fax Start
Begins transmitting the document.
Stop/Exit
Deletes entered data and stops the scanning or transmitting process.
One Touch Dial / Speed Dial / Tel Index / Group Dial
These functions work the same way as with conventional MFC’s.
However, please note that you cannot use chain dialling for E-mail addresses.
Shift + Start
Used to receive E-mail from the POP3 server manually.
4-2
Page 46

CHAPTER 4 INTERNET FAX
Sending an Internet Fax
1. Set the document that you wish to send into the auto feeder of the
Brother MFC.
When using the MFC over a network, documents will be transmitted and printed
in Standard or Fine mode (i.e. 200 × 100 / 200 × 200DPI). Even if you select S.
Fine mode or Photo mode, your document always will be transmitted in Fine
mode.
2. Press the Scan to E-mail button on the control panel of the MFC. The
display with alternate between
1. Connect to PC
2. Connect to LAN
Select the number for your preferred connection and press the “Set” key. A
submenu appears on the LCD so you can select the resolution and the scan to
format. Use the arrows keys to scroll through the options.
1. B/W STD (200×100dpi Black and White)
2. B/W FINE (200×200dpi Black and White)
3. COLOR STD (150×150dpi Color)
4. COLOR FINE (300×300dpi Color)
5. COLOR S.FINE (600×600dpi Color)
* MFC-9660 doesn't include 3-5.
Select the number for your preferred resolution and format and press the “Set”
key.
A method is available for already programmed One Touch or Speed Dial
locations.
If you have already programmed this information into the MFC as a One Touch
or Speed Dial, simply select the appropriate Dial location and press “Fax Start”.
To manually enter the address, continue to the following step.
Entering Text
Press [1], while holding down [!Shift] to change into the "alphabet" dialling
mode.
MFC-9700:
You can now use the Dial Pad to dial the E-mail address. Refer to the following
table: Most number keys have three or four letters printed above them. The keys
for 0, #, * don’t have printed letters because they are used for special characters.
By pressing the appropriate number key the correct number of times, you can
access the character you want.
4-3
Page 47

CHAPTER 4 INTERNET FAX
Key
1
2
3
4
5
6
7
8
9
Once
@
A
D
G
J
M
P
T
W
Twice
.
B
E
H
K
N
Q
U
X
Three times
/
C
F
I
L
O
R
V
Y
Four times
2
3
4
5
6
S
8
Z
Other models:
You can now use the One-Touch Dial keys to dial the E-mail address. Refer to the
following table:
One Touch Dial Key Alphabet Conversion Table
01 - a
17 – q
05 – e
21 – u
09 – i
25 – y
13 – m
29 – space
02 - b
18 – r
06 – f
22 – v
10 – j
26 – z
14 – n
30 – [ special ]
03 - c
19 – s
07 – g
23 – w
11 – k
27 - .
15 – o
31 – [ symbols]
04 - d
20 - t
08 - h
24 - x
12 - l
28 - @
16 – p
32 – a<->A
If you want to enter a blank space, press """" twice.
To change the mode between upper case and lower case for entering the e-mail /
I-Fax address press [!Shift] and [3].
If you specify more than 16 characters, the LCD panel will scroll the name to the
left character by character. You can enter up to 60 characters.
Making corrections:
If you entered a letter incorrectly and want to change it, press ! to move the
cursor after the last correct letter. Then re-enter the correct text and/or digits. You
can also back up and type over incorrect letters.
Repeating letters:
If you need to enter a character assigned to the same key as the previous
character, press """" to move the cursor to the right.
Special characters and symbols (only for MFC-9700):
Press * for (space) ! “ # $ % & ’ () * + , - . /
Press # for : ; < = > ? @ [ ] ^ _
Press ∅ for • À È Ê Î Ç Ë Ö 0
As you enter the Internet Fax address, it will appear character by character on the
LCD panel.
If you specify more than 16 characters, the LCD panel will scroll the name to the
left character by character. You can enter up to 60 characters.
3. Press [Fax Start] to send the document.
4-4
Page 48

CHAPTER 4 INTERNET FAX
After the document is scanned, it is transmitted to the Recipient Internet Fax
Machine automatically via your SMTP server. You can cancel the send operation
by pressing the [Stop] button during scanning. After the transmission is finished,
the machine will return to standby mode.
Some E-mail servers do not allow you to send large E-mail documents (the
System Administrator will often place a limit on the maximum E-mail size). You
can enable the Limit Size of the Sent Mail feature. The machine will display
“Out of Memory” when trying to send E-mail documents over 1Mbyte in size.
The document will not be sent and an error report will be printed. The document
you are sending should be separated into smaller documents that will be accepted
by the mail server. You can turn on this feature through the Web Management
utility or the LAN function mode.
Using Scan to E-mail
Scan to E-mail gives users the capability of scanning documents directly from the
MFC to E-mail accounts anywhere in the world in either black and white (Mono)
or color. The documents arrive in the E-mail inbox as file attachments. They can
be viewed using Microsoft
Systems. Alternatively there is a viewer supplied on the CD-ROM of your MFC.
®
Imaging supplied with the Windows® Operating
Important Information.
When sending multi page
data as a color JPEG the
pages appear as separate
JPEG attachments to the
E-mail.
Before attempting to Scan to E-mail please see Getting Connected on Page 2.
The method of sending documents with Scan to E-mail is the same as sending an
Internet Fax as described above on Page 3.
When using Mono Scan to E-mail, documents will be transmitted in TIFF-F file
format at Standard or Fine mode (i.e. 200 × 100 / 200 × 200DPI). Even if you
select S. Fine mode or Photo mode, your document always will be transmitted in
Fine mode always will be transmitted in Fine mode.
When using Color Scan to E-mail, documents can be transmitted as JPEG images
in different resolutions 150×150dpi (Standard), 300×300dpi (Fine) or 600 ×
600dpi (Super Fine) by the method described above.
Some E-mail servers do not allow you to send large E-mail documents (the
System Administrator will often place a limit on the maximum E-mail size). You
can enable the Limit Size of the Sent Mail feature. The machine will display
“Out of Memory” when trying to send E-mail documents over 1Mbyte in size.
The document will not be sent and an error report will be printed. The document
you are sending should be separated into smaller documents that will be accepted
by the mail server. You can turn on this feature through the Web Management
utility or the LAN function mode.
4-5
Page 49

CHAPTER 4 INTERNET FAX
Receiving E-mail or Internet Fax
There are 2 ways you can receive E-mail messages:
• POP3 receiving at regular intervals
• POP3 receiving (manually initiated)
Using POP3 receiving the MFC machine must poll the E-mail server to receive
the print jobs. This polling can occur at set intervals (for example, you can
configure the MFC to poll the E-mail server at 10 minute intervals) or you can
manually poll the server by pressing the Shift + Start button.
If your MFC starts to receive E-mail print jobs, the LCD panel will reflect this
activity. For example, you will see "RECEIVING" on the LCD panel followed
by "xx MAIL(S)". If you press the Shift + Start buttons to manually poll the Email server for E-mail print jobs and there are no mail documents waiting to be
printed, the MFC will display "NO MAIL" on the LCD panel for two seconds.
If your machine is out of paper when receiving data, the received data will be
held in the MFC’s memory. This data will be printed automatically after paper is
re-inserted into the machine. Memory receive must be switched “ON”.
If the received mail is not in a plain text format or an attached file is not in the
TIFF-F format, the following error message will be printed: “ATTACHED FILE
FORMAT NOT SUPPORTED. FILE NAME:XXXXXX.doc” If the received
mail is too large, the following error message will be printed: “E-MAIL FILE
TOO LARGE.” If “Delete POP Receive Error Mail” is “ON” (default) then error
mail is automatically deleted from the E-mail Server.
4-6
Page 50

CHAPTER 4 INTERNET FAX
Receiving an Internet Fax to a PC
When a PC receives an Internet Fax document, the document is attached to
a mail message that informs the PC that it is receiving a document from an
Internet Fax. This is notified in the Subject field of the received mail
message.
If the PC to which you wish to send a document is not running Windows
98/98SE/Me or Windows
®
NT®4.0/2000 operating system, please inform the PC’s
®
95/
owner that software must be downloaded for documents in the TIFF-F format to
be viewed.
You can download a TIFF-F viewer from the Brother Web site
(http://www.solutions.brother.com). You can also use “ Microsoft
is supplied with Windows
versions of Windows
®
95/98/Me or Windows® NT®4.0/2000 but some older
®
95 do not support viewing TIFF-F documents.
®
Imaging” that
Forwarding Received E-mail and Fax Messages
You can forward received E-mail or standard fax messages to another E-mail
address or fax machine. Received messages can be forwarded via E-mail to a PC
or Internet Fax. They can also be forwarded via standard phone lines to another
MFC.
Please see your MFC User guide to check that this feature is supported. This
function is only for monochrome models.
This can be done using the Web Management Utility or through the front panel.
The steps for configuring Fax Forward can be found in the User Guide supplied
with your MFC.
4-7
Page 51

CHAPTER 4 INTERNET FAX
Relay Broadcasting
This function allows the Brother MFC to receive a document over the Internet,
and then relay it to other fax machines through conventional telephone lines.
If you wish to use your MFC as a relay broadcast device, you must specify the
domain name that you trust at the MFC, in other words, the portion of the domain
after the ‘@’ sign.
A trusted domain refers to the E-mail address. For example, if your address is
bob@brothernjk.com, then we identify the domain as brothernjk.com. If your Email address is jack@brothernjk.com, then we identify the domain as
brothernjk.com.
Use care in selecting a trusted domain since any user on a trusted domain will be
able to send a Relay Broadcast.
Relay Broadcast can support the relay of a document up to a maximum of 48 Fax
machines through conventional telephone lines.
This function is only for monochrome models.
4-8
Page 52

CHAPTER 4 INTERNET FAX
Relay Broadcast from a MFC
FAX@brother.com UKFAX@brother.co.uk
123456789
INTERNET
UKFAX@brother.co.uk(fax#123456789)
Your MFC has an E-mail address of FAX@brother.com, you wish to send a
document from this machine to another MFC in England with an E-mail address
of UKFAX@brother.co.uk, this machine will then forward the document to a
standard FAX machine using a conventional telephone line. If your E-mail
address is FAX@brother.com, you must configure a trusted domain name of
brother.com on the machine in England that will broadcast the document to the
conventional FAX machine. If you do not enter the domain name information,
then the machine in the middle (the machine that will broadcast the document)
will not trust any internet jobs that it receives from the MFC machine in the
@brother.com domain.
After the trusted domain is set you can send the document from your MFC
[I.E. FAX@brother.com] by entering the E-mail address of the MFC
[I.E. UKFAX@brother.co.uk] that will forward the document followed by the
phone number of the fax that will receive the document. The following is an
example of how to enter the E-mail address and phone number.
UKFAX@brother.co.uk(fax#123456789)
E-mail address Fax Phone Number
The word “fax#” must be
included with the phone
number inside the parenthesis.
Sending to multiple phone numbers:
If you want to have the document relayed to more than one standard Fax machine
the address can be entered using the following method:
1. Enter the phone number of the first Fax machine
UKFAX@brother.co.uk(Fax#123).
2. Press the “Set” key.
3. Enter the phone number of the second Fax machine
UKFAX@brother.co.uk(Fax#456).
4. Press the “Start” key.
4-9
Page 53

CHAPTER 4 INTERNET FAX
You can also store the address information in One-Touch Dial. For example:
Store UKFAX@brother.co.uk(Fax#123) in One-Touch Dial key 01 and store
UKFAX@brother.co.uk(Fax#456) in One-Touch Dial key 02. You can then
press the One-Touch Dial Key for each number instead on entering each
individual number.
Relay Broadcast from a PC
Your PC UKFAX@brother.co.uk
123456789
INTERNET
UKFAX@brother.co.uk(fax#123456789)
You can also send E-mail from your PC and have it relayed to a conventional
FAX machine. The method of entering the phone number of the conventional
FAX machine that will receive the relayed E-mail will vary depending on the
mail application you are using. The following are some examples of different
mail applications:
Some E-mail applications do not support sending to multiple phone numbers. If
your E-mail application cannot support multiple phone numbers you will only be
able to relay to one Fax machine at a time.
Outlook 97/98 & 2001 / Outlook Express / Internet Explorer 4 & 5/ Netscape
Communicator 4.5/ Eudora Ver 4.x and Pegasus (for Europe):
Enter the address of the relay MFC and phone number of the FAX in the “TO”
box using the same method used when sending from an MFC.
UKFAX@brother.co.uk(fax#123456789)
4-10
Page 54

CHAPTER 4 INTERNET FAX
TX Verification Mail
Transmission Verification Mail supports two separate functions. Verification
Mail for sending allows you request notification from the receiving station that
the I-Fax or E-mail was received and processed. Verification Mail for receiving
allows you to transmit a default report back to the sending station after
successfully receiving and processing an I-Fax or E-mail.
To use this feature you must set the “Notification” option within the “Setup Mail
RX” and “Setup Mail TX” options.
Setup Mail (TX)
You can set the “Notification” option in the “Setup Mail TX” option to either ON
or OFF. When switched to ON an additional field of information is sent with the
image data. This field is named “MDN”.
MDN
Mail Disposition Notification – This field requests the status of the I-Fax / E-mail
message after delivery through the SMTP (send mail transfer protocol) transport
system. Once the message has arrived at the Receiving station this data is used
when the MFC or user reads or prints the received I-Fax or E-mail. For example,
if the message is opened for reading or is printed the receiving station sends back
a notification to the original sending machine or user.
The receiving station must support the MDN field in order to be able to send a
notification report, otherwise the request will be ignored.
Setup Mail (RX)
There are three possible settings for this option ON/MDN/OFF.
Receive Notification “ON”
When switched to “ON” a fixed message is sent back to the sending station to
indicate successful reception and processing of the message. These fixed
messages depend on the operation requested by the sending station.
Report messages consist of
SUCCESS: ……………………..
or
FAILURE: ………………………
4-11
Page 55

CHAPTER 4 INTERNET FAX
Receive Notification “MDN”
When switched to “MDN” a report as described above is sent back to the sending
station if the originating station sent the “MDN” field to request confirmation.
Receive Notification “OFF”
OFF – Switches all forms of receive notification OFF, no messages are send back
to the sending station regardless of the request.
Error mail
If there is a mail delivery error while sending an Internet Fax, the mail server will
send an error message back to the MFC and the error message will be printed. If
there is an error while receiving mail, an error message will be printed
(Example: “The message being sent to the MFC was not in a TIFF-F format.”).
Important information on Internet Fax
Internet Fax Communication on a LAN system is basically the same as
communication via E-mail; however, it is different from Fax communication
using standard phone lines. The following is important information for using
Internet Fax:
• Factors such as the receiver’s location, structure of the LAN system, and
how busy the circuit (such as the internet) is, may cause the system to take a
long time to send back an error mail. (normally 20 sec to 30 sec).
• In the case of transmission through the Internet, due to its low level of
security, we recommend that you use standard phone lines to send
confidential documents.
• If the receiver’s mail system is not compatible with the MIME format, you
cannot transmit a document to the receiver. Depending on receiver’s server,
there may be some cases in which the error mail will not be sent back.
• If the size of a document’s image data is huge, there is a possibility of
unsuccessful transmission.
• You cannot change font and character size of Internet mail that you received.
Other Sources of Information
Visit http://solutions.brother.com/ for more information on network scanning and
Internet Fax frequently asked questions.
Refer to chapter 1 of this user guide to learn how to configure the IP address of
the printer.
4-12
Page 56

CHAPTER 5 TCP/IP PRINTING
CHAPTER FIVE
51
TCP/IP Printing
51
5
Printing from Windows® NT® or
51
®
Windows
and Warp Server
2000, LAN Server
Overview
Users of Windows® NT® can print directly to a network ready Brother MFC using
the TCP/IP protocol. Microsoft Windows
install Microsoft's "TCP/IP printing" protocol. Windows
send print jobs directly to the printer without installing any additional software.
Quick Tips:
1. The default IP address of Brother Print / Fax servers is 192.0.0.192. To
change it, use the MFC’s front panel, the BRAdmin application, or let
your DHCP server allocate an IP address.
2. Refer to chapter 1 of this user guide to learn how to configure the IP
address on your MFC.
3. The default password for Brother Print / Fax servers is "access".
4. Windows
"Microsoft TCP/IP printing" protocol (available through the control
panel applet).
5. Windows
Network Printing software and IPP protocol software built into any
Windows
6. Windows
a Windows
Services software is installed on the client PC, IIS is installed and
running on the Windows
version 4 or later of Microsoft Internet Explorer.
7. The default name for a Brother Print / Fax server is usually
BRN_xxxxxx (where xxxxxx is the last six digits of the Ethernet address
of the Print / Fax server).
®
NT® 3.51 and Windows® NT® 4.0 users must install the
®
2000 users can print using TCP/IP using the standard
®
2000 installation.
®
95/98/Me users can send print jobs using the IPP protocol via
®
2000 computer providing that the Microsoft Internet Print
®
®
NT® 3.5x and NT® 4.0 users must
2000 computer and that the client PC is using
®
2000 users are able to
5-1
Page 57

CHAPTER 5 TCP/IP PRINTING
Windows® NT® 3.5x/NT® 4.0/2000 (TCP/IP) Configuration
If you have not already done so, install the TCP/IP protocol onto your Windows
NT® system. This is done via the Network icon in the Control Panel window of
the Windows
3.5x systems, or use the Start button on NT® 4.0 to access the Settings/Control
Panel menu). The default configuration of Windows
®
NT® system (the Control Panel is in the Main window on NT
®
2000 automatically installs
®
the TCP/IP protocol. Refer to the appropriate section in this chapter for more
information.
®
5-2
Page 58

CHAPTER 5 TCP/IP PRINTING
Windows® 2000 Printing (Printer Driver not yet installed)
By default, Windows® 2000 systems install with all the necessary software
required for you to be able to print. This chapter describes the two most
commonly used configurations, Standard TCP/IP Port printing and IPP (Internet
Printing Protocol). If you have already installed the printer driver, jump to the
printer driver already installed section.
Standard TCP/IP Port Printing
1. From the Printers Folder select "Add Printer", the "Add Printer Wizard"
will now start. Click on "Next".
2. Now select the Local Printer option and deselect the "Automatically
detect and install my Plug and Play printer" option.
3. Click on "Next".
4. You must now select the correct Network printing port. Select the
"Standard TCP/IP Port" option as the port is installed by default on
Windows
5. When you have done that click "Next".
6. The "Add Standard TCP/IP Port Wizard" will now appear. Click the
"Next" button.
7. Enter the IP address, or name of the printer you wish to configure. The
Wizard will automatically enter the Port name information for you.
8. Click the "Next" button.
9. Windows
did not specify the correct IP address or name then you will receive an
error message.
10. Click the "Finish" button to complete the Wizard.
11. Now that you have configured the port, you must specify which printer
driver you wish to use. Select the appropriate driver from the list of
supported printers. If you are using a driver supplied on the CD-ROM
supplied with your MFC then select the "Have Disk" option to browse to
the CD-ROM disk. You can also click the “Windows
connect directly to Microsoft’s support Web site to download printer
drivers.
12. When the driver is installed, click the Next button.
13. Specify a name and click the “Next” button.
14. Now specify if you wish to share the printer, enter the share name and
click “Next”.
15. Continue through the Wizard clicking the “Finish” button when
complete.
®
2000 systems.
®
2000 will now contact the printer that you specified. If you
®
Update” button to
5-3
Page 59

CHAPTER 5 TCP/IP PRINTING
IPP Printing from Windows® 2000 Clients
If you wish to print using the IPP protocol, follow these steps:
1. From the Printers Folder select "Add Printer", the "Add Printer Wizard"
will now stat. Click on "Next".
2. Select "Network Printer".
3. Click the "Connect to a printer on the Internet or on your intranet"
option.
4. You must now enter a URL name, a typical example of a URL name for
a printer that supports the IPP protocol is: http://ip_address:631/ipp
(where ip_address is the IP address, NetBIOS name or DNS name of the
Print / Fax server).
5. Click the "Next" button.
6. Windows
determine the model number of the printer, if the appropriate driver is
installed on the PC, it will be used, if the appropriate driver is not
available you will be asked to insert the driver diskette that was supplied
with the printer.
7. Follow the Wizard through to the end of the installation.
8. Click the "Finish" button to complete the Wizard.
®
2000 will now connect to the device that you specified and
IPP printing from Windows® 95/98/Me Clients
It is also possible to send a IPP print jobs from a Windows® 95/98/Me client PC
providing the PC has the ability to connect to and access Windows
resources. Visit the Microsoft web site (www.microsoft.com) and download the
Windows® Internet Print Services support software for Windows® systems.
Once installed, this software will allow you to connect to a Windows
system that is also running IIS and send print jobs using the IPP protocol.
By using Microsoft’s IPP software you can also send jobs to other printers that
do not support the IPP protocol.
®
2000
®
2000
Windows® 2000 Printing (Printer Driver already installed)
If you have already installed the printer driver and wish to configure it for
network printing, follow these steps:
1. Select the printer driver you wish to configure.
2. Select File and then chose Properties.
3. Click the Ports tab of the driver and click “Add Port”.
4. Select the port that you wish to use, typically this would be “Standard
TCP/IP Port”, then click the “New Port…” button.
5. The standard TCP/IP Port Wizard will start. Follow steps 6-10 of the
“Standard TCP/IP Port Printing” section.
5-4
Page 60

Windows® NT® 4.0 Printing
CHAPTER 5 TCP/IP PRINTING
If you did not install the TCP/IP protocol or the Microsoft TCP/IP Printing
protocol during the installation of your Windows
®
NT®4.0 system (either
workstation or server) follow these steps. Please note that it is essential that you
install the Microsoft TCP/IP Printing protocol if you wish to print over the
network using the TCP/IP protocol. If you have already installed the TCP/IP
protocol and Printing protocol proceed to step 2.
Step 1: Running the Network applet, click on the Protocols tab.
1. Select Add, and double click on TCP/IP protocol.
2. Insert the requested disk(s), or CD-ROM, to copy the required files.
3. Click on the Services tab, click on Add and double click on Microsoft
TCP/IP Printing.
4. Again insert the requested disk (s) or CD-ROM.
5. Click on the Protocols tab when then copying is finished.
6. Double click on the TCP/IP Protocol option and add the host IP address,
subnet mask, and gateway address. Consult your system manager for
these addresses.
7. Click OK twice to exit (your NT server will need to be re-booted).
5-5
Page 61

CHAPTER 5 TCP/IP PRINTING
Windows® NT® 4.0 Printing (Printer Driver not yet installed)
1. Go to the Start button, choose Settings, and then select Printers. Double
click the Add Printer icon to get the Add Printer Wizard. Select My
Computer (Not Network Printer) and click on Next.
2. Select Add Port, select LPR Port (LPR Port will not be displayed unless
you install the "Microsoft TCP/IP Printing" protocol as described earlier)
from the list of available ports and click on New Port.
3. Type in the IP address that you wish to assign to the Print / Fax server in
the Name or address of server providing lpd: box. If you have edited
your HOSTS file are using Domain Name System, enter the name
associated with the Print / Fax server, instead of an IP address. As the
Print / Fax server supports TCP/IP and NetBIOS names, you can also
enter the NetBIOS name of the Print / Fax server. The NetBIOS name
can be seen in your print configuration sheet. From default the NetBIOS
name will usually appear as "BRN_xxxxxx" where xxxxxx is the last six
digits of the Ethernet address.
4. Type in the Print / Fax server service name in the Name of printer or
print queue on that server: box. If you do not know which service name
to use, enter BINARY_P1 and then click on OK:
Note
Refer to How to configure TCP/IP printing for UNIX system for more
information on Service Names.
5. Click on Close. The new Print / Fax server IP address should be listed
and highlighted as an available port. Click on Next.
6. Select the desired printer model. If the correct model is not displayed,
click on the "Have Disk" option and insert the CD-ROM supplied with
your MFC.
7. If the driver already exists, select Keep Existing Driver (if it does not,
this step will be skipped), and then click on Next.
8. If desired, change the name of the printer then click on Next.
9. If desired, make the printer shared (so other users can access it), and
select the operating system(s) that these other computers will be running.
Click on Next.
10. Select Yes when you are asked "Would you like to print a test page?"
Click on Finish to complete the installation. You may now print to the
printer as if it were a local printer.
5-6
Page 62

CHAPTER 5 TCP/IP PRINTING
Windows® NT®4.0 Printing (Printer Driver already installed)
Follow these steps if the printer driver is already installed.
1. Click on Start then select Settings/Printers to display the currently
installed printer drivers.
2. Double click the printer driver you wish to configure and select Printer
menu and then choose Properties.
3. Select the Ports tab and click on Add Port.
4. Select LPR Port (LPR Port will not be displayed unless you install the
"Microsoft TCP/IP Printing" protocol as described earlier) from the list
of available ports and click on New Port.
5. Type in the IP address that you assigned to the Print / Fax server in the
Name or address of server providing lpd: box. If you have edited your
HOSTS file or are using Domain Name System, you can enter the name
associated with the Print / Fax server, instead of an IP address. As the
Print / Fax server supports TCP/IP and NetBIOS names, you can also
enter the NetBIOS name of the Print / Fax server. The NetBIOS name
can be seen in your print configuration sheet. From default the NetBIOS
name will usually appear as "BRN_xxxxxx" where xxxxxx is the last six
digits of the Ethernet address.
6. Type in the Print / Fax server service name in the Name of printer or
print queue on that server: box. If you do not know which service name
to use, enter BINARY_P1 and then click on OK:
Figure 1 Add LPR compatible printer screen
7. Click on the Close button.
8. You should now see that the printer driver is configured to print to the IP
address (or name) that you specified.
9. If you wish to share the printer, click on the Share tab and share the
driver.
5-7
Page 63

CHAPTER 5 TCP/IP PRINTING
Windows® NT® 3.5x Printing
1. Go into the Control Panel and run the Network applet.
2. Select Add Software and TCP/IP Protocol and related components.
3. Select the TCP/IP Network Printing Support check box. And then click
on the Continue button. (This option will be unavailable if the TCP/IP
Network Printing Support protocol is already installed.
4. Insert the requested disk(s) to copy the required files. Your NT
will need to be re-booted when the files are copied over.
®
server
Windows® NT® 3.5x Printing (Printer Driver not yet installed)
If you have Windows® NT® 3.5 or 3.51, use the following procedure to configure
the Print / Fax server.
1. Go to the Main window and select the Print Manager icon.
2. Select Printer menu.
3. Select Create Printer.
4. Enter any name for the Printer Name.
5. Select Driver. Choose the appropriate driver.
6. Select Description. Enter anything for the description.
7. Select Print to and then select Other.
8. Select LPR Port.
9. Type in the IP address that you assigned to the Print / Fax server in the
Name or address of host server providing lpd: box. If you have edited
your HOSTS file or are using Domain Name System, enter the name
associated with the Print / Fax server, instead of an IP address.
10. Type in the Print / Fax server service name in the Name of printer on
that Machine. If you do not know which service name to use, enter
BINARY_P1 and then click on OK.
Note
Refer to How to configure TCP/IP printing for Unix system for more information
on Service Names.
Share the printer if necessary.
5-8
Page 64

CHAPTER 5 TCP/IP PRINTING
Other Sources of Information
1. Visit http://solutions.brother.com/ for more information on network
printing and for documents on the IPP protocol and how to configure a
Windows
2. Refer to chapter 1 of this user guide to learn how to configure the IP
address of the printer.
®
2000/95/98/Me System.
5-9
Page 65

CHAPTER 6 TCP/IP PEER TO PEER PRINTING
CHAPTER SIX
61
Peer to Peer Printing
61
6
®
How to Print in a Windows
61
95/98/Me Peer to Peer network
Overview
Microsoft's Windows® 95/98/Me operating systems features built-in networking
capabilities. These capabilities allow a Windows
workstation in a file server based network environment.
®
For smaller networks, Windows
peer-to-peer mode. In this mode, the PC can share resources with other PCs on
the network without the need for a central file server.
Quick Tips:
1. The default IP address of Brother Print / Fax servers is 192.0.0.192. To
change it, use the MFC’s front panel, the BRAdmin application, or let
your DHCP server allocate an IP address to the printer.
2. Refer to chapter 1 of this user guide to learn how to configure the IP
address on your MFC.
3. The default password for Brother Print / Fax servers is "access".
4. Windows
a Windows
Services software is installed on the client PC, IIS is installed and
running on the Windows
or later of Microsoft Internet Explorer.
5. Brother printers are also compatible with HP JetDirect software, this
means that you can use HP utilities to manage and to print to your
Brother printer.
®
95/98/Me users can send print jobs using the IPP protocol via
®
2000 computer providing that the Microsoft Internet Print
95/98/Me also allows the PC to operate in a
®
2000 and that the client PC is using version 4
®
PC to be configured as a client
6-1
Page 66

TCP/IP Printing
CHAPTER 6 TCP/IP PEER TO PEER PRINTING
Our Peer to Peer printing software requires the TCP/IP protocol to be installed on
your Windows
the Print / Fax server. Refer to your Windows
information on how to configure the TCP/IP protocol on your Windows
®
peer-to-peer computers and an IP Address has to be defined for
®
documentation for more
®
PC.
If you haven’t already done so, configure the IP address of the MFC, for more
information on IP address configuration, refer to chapter 1 of this user guide.
6-2
Page 67

CHAPTER 6 TCP/IP PEER TO PEER PRINTING
Installing the Brother Peer to Peer Software
1. Start the CD-ROM (supplied with your MFC) installation menu
program according to the Quick Setup Guide and select Install Software.
2. From the Network Applications menu select Install Software.
3. Click “Install” Network Print Software.
4. Push the Next button in response to the Welcome message.
5. Select the Brother Peer to Peer Print (LPR) button.
6. Select the desired directory to install the Brother Network Direct Print
files and push Next. The installation program will create the directory
for you if it does not already exist on your disk.
7. Enter the Port name that you wish to use and click OK. The default port
name is BLP1. Whichever name you choose, it must be unique and it
MUST begin with BLP.
8. You must now enter the actual IP address of the Print / Fax server in the
"Printer name or IP address" field. If you have edited the hosts file on
your computer or are using Domain Name System, you can also enter
the name of the Print / Fax server. As the Print / Fax server supports
TCP/IP and NetBIOS names, you can also enter the NetBIOS name of
the Print / Fax server. The NetBIOS name can be seen in your print
configuration sheet. From default the NetBIOS name will usually appear
as "BRN_xxxxxx" where xxxxxx is the last six digits of the Ethernet
address.
®
Window 95/98/Me store the hosts file in the default Windows
By default, the Windows
®
hosts file is called hosts.sam. If you wish to use the
directory.
hosts file you must rename the file to hosts with no extension, the .sam extension
stands for sample.
9. Click the OK button. When prompted you must re-boot your computer.
6-3
Page 68

CHAPTER 6 TCP/IP PEER TO PEER PRINTING
Associating to the printer
You must now create a printer on your Windows® system using the standard
Windows
®
printer setup procedure.
1. To do this, go the Start button, select Setting and then Printers.
2. Select Add Printer to begin the printer installation.
3. Click Next when you get the add Printer Wizard window.
4. Select Local Printer when you are asked how the printers are connected
to your computer, and then push Next.
5. Select the correct driver. Click Next when you are done.
6. If you have selected a printer driver that is already being used, you have
the option of either keeping the existing driver (recommended) or
replacing it. Select the desired option and press Next.
7. Select the Brother LPR port (port name you assigned in step 4 of the
Installing the Brother Peer to Peer Print (LPR) Software section) and
press Next.
8. Enter any desired name for the Brother printer and press Next. For
example, you could call the printer "Networked Brother Printer".
9. Windows
®
will now ask you if you wish to print out a test page, select
Yes and then select Finish.
You have now finished installing the Brother Network Direct Print software.
Adding a Second Brother LPR Port
You do not re-run the install program to add a new Brother LPR port. Instead,
press the Start button, select Settings, and open the Printers Windows
®
. Click on
the icon of the printer that you wish to configure, select File form the Menu bar,
and then choose Properties. Click on the Details tab and push the Add Port
button. In the Add Port dialog, select the Other radio button and then highlight
"Brother LPR port". Click OK and enter the port name. The default port name is
BLP1. If you have already used this name, you will get an error message if you
try to use it again, in which case use BLP2, etc… Once you have specified the
Port name, click the OK button. You will then see the Port Properties Dialog.
Enter the IP address of the printer that you wish to print to and click OK. You
should now see the port that you have just created in the "Print to the following
port" setting of the printer driver.
6-4
Page 69

CHAPTER 6 TCP/IP PEER TO PEER PRINTING
Other Sources of Information
1. Visit http://solutions.brother.com/ for more information on network
printing.
2. Refer to chapter 1 of this user guide to learn how to configure the IP
address of the MFC.
6-5
Page 70

CHAPTER SEVEN
71
NetBIOS Peer to Peer
Printing
How to Printing using NetBIOS
on Windows
95/98/Me/NT®/2000
Overview
CHAPTER 7 NETBIOS PEER-TO-PEER PRINTING
7
®
Brother's Print / Fax server range supports SMB (Server Message Block) over the
TCP/IP protocol via the NetBIOS interface. This means that just like regular
Windows
main advantage of NetBIOS printing is that you are able to print from legacy
DOS applications that are running on PC’s that are connected to Microsoft
networks.
Quick Tips:
®
PC’s, Brother printers can appear in your network neighborhood. The
1. The default IP address of Brother Print / Fax servers is 192.0.0.192. To
change it, use the MFC’s front panel, the BRAdmin application, or let
your DHCP server allocate an IP address to the printer.
2. Refer to chapter 1 of this user guide to learn how to configure the IP
address on your printer.
3. The default login names are “user” for users and “admin” for
administrators and the default password for Brother Print / Fax servers is
"access".
4. The default domain name of the Print / Fax server is WORKGROUP, to
change it use your web browser or the BRAdmin application.
7-1
Page 71

CHAPTER 7 NETBIOS PEER-TO-PEER PRINTING
Print / Fax Server Configuration
In order for this function to work, you must correctly change the DOMAIN name
or WORKGROUP name to match that of your network. Once this is done, the
Print / Fax server will appear automatically in your network neighborhood and
you will be able to send print documents to it without having to install additional
software. However, in some instances you may find that your Windows
95/98/Me and Windows® NT®4.0/2000 systems may receive "Printer is busy"
error messages when more that one person attempts to access the MFC. In this
instance Brother has provided the "Brother NetBIOS Port Monitor" software
which allows users to continue spooling print jobs while the printer is busy, down
or out of paper. The port monitor will hold the jobs until the printer is again
available.
®
When you install Windows
belong to, the default workgroup name for Windows
"WORKGROUP", however you could change this to anything you want. With
Windows
®
NT®, Microsoft introduced the concept of "Domains". A domain
95/98/Me you are asked which workgroup you
®
95/98/Me is
offers centralized security management where as a workgroup offers distributed
security management. The Print / Fax server does not care if your network
consists of a Workgroup or a Domain, the only thing you must tell it is the name
of the workgroup or domain. The Brother Print / Fax server automatically has a
default workgroup/domain name of "WORKGROUP". If you need to change
name, you can configure the Brother Print / Fax server to recognize this. There
are four ways of doing this (If you are unsure about the name of your workgroup
or domain, look in the identification tab in your network applet).
®
• Use BRAdmin (this utility can use the TCP/IP protocol or Netware IPX
protocol - no file server necessary).
• Use a Web browser, (the Print / Fax server must have a valid IP address and
your computer must also have a valid IP address); you can configure the IP
address by using BRAdmin.
• TELNET, again your computer and printer must have a valid IP address.
• Use BRCONFIG for DOS (this utility requires a Netware file server and the
IPX protocol).
Because of the way that Microsoft networks work, the Print / Fax server may
take several minutes to appear in the network neighborhood. You will also find
that the Print / Fax server may take several minutes to disappear from the
network neighborhood even if the printer is switched off. This is a feature of
Microsoft workgroup and domain based networks.
7-2
Page 72

CHAPTER 7 NETBIOS PEER-TO-PEER PRINTING
Changing the workgroup/domain name using TELNET or BRCONFIG or a web browser
If you are unable to use the BRAdmin application or a web browser, you can use
TELNET or the BRCONFIG Remote console program (BRCONFIG requires the
IPX/SPX protocol to be installed on your PC).
When you are connected to the Print / Fax server, enter the default password
"access" in response to the "#" prompt. Type in anything in response to the
"Enter Username>" prompt, you will then be at the "Local>" prompt.
Now enter the command:
SET NETBIOS DOMAIN domainname
EXIT
Where domainname is the name of the domain or workgroup that you are on. If
you are not sure what your domain name or workgroup name is look in the
Identification tab in your Windows
®
95/98/Me/NT®4.0 network applet.
You can also use a standard WWW browser to change the NetBIOS name, to do
this connect to the Print / Fax server using its IP address and then select the
"Configure NetBIOS" option from the Print / Fax server configuration screen,
enter you workgroup/domain name into the "Domain Name" text box. Make sure
you submit the changes.
7-3
Page 73

CHAPTER 7 NETBIOS PEER-TO-PEER PRINTING
NetBIOS Port Monitor for Windows
®
95/98/Me, NT®4.0/2000
This software requires the TCP/IP transport protocols to be installed on your
Windows
your Windows
If you are using the TCP/IP protocol, the proper IP address should be defined on
both the Brother Print / Fax server and your client PC.
®
95/98/Me, NT®4.0/2000 computer. To install those protocols refer to
®
documentation.
Installing the Brother NetBIOS Port Monitor
1. Start the CD-ROM (supplied with your MFC) installation menu
program according to the Quick Setup guide and select Install Software.
2. From the Network Applications menu select Install Software.
3. Click “Install” Network Print Software.
4. Push the Next button in response to the Welcome message.
5. Select Brother Peer-to-Peer Print (NetBIOS) installation.
6. Select the desired directory to install the Brother Network Direct Print
files and push Next.
7. Enter the Port name that you wish to use. The port name must start with
"BNT". For example BNT1. Whichever name you choose, it must be
unique. Then press "OK". The name must be unique on your PC,
however other computers can use the same port name as the name you
specify on your PC.
8. You must now enter the server name and port name for actual Print / Fax
server. You can use the Browse button for searching the Print / Fax
server, select the domain/workgroup name, and then the server is listed.
If the Print / Fax server does not automatically appear in your browse
list, then you must ensure that the domain name is configured correctly.
Otherwise you must enter the name manually. The name should be
compliant with UNC (Universal Name Convention). For example
"\\NodeName\ServiceName".
Where NodeName is the NetBIOS name of the Brother Print / Fax server
(the default name is usually BRN_xxxxxx, where "xxxxxx" is the last
six digits of the Ethernet address), and ServiceName is the service name
for NetBIOS of the Print / Fax server, by default it is BINARY_P1. For
example:
\\BRN_310107\BINARY_P1
You can find the NetBIOS name and MAC address by printing out the MFC
configuration page. Refer to the User’s Guide for information on how to print the
configuration page on your Print / Fax server.
9. Then press "OK".
10. Click the Finish button. You must now restart your computer before you
can continue.
7-4
Page 74

CHAPTER 7 NETBIOS PEER-TO-PEER PRINTING
Associating the printer
1. You must now create a printer on your Windows® 95/98/Me and
®
4.0/2000 system using the standard Windows® printer setup
NT
procedure. To do this, go the Start button, select Setting and then
Printers.
Windows® 95/98/Me
2. Select Add Printer to begin the printer installation.
3. Click Next when you get the add Printer Wizard window.
4. Select Local Printer when you are asked how the printer is connected to
your computer, and then push Next.
5. Select the correct driver. Click Next when you are done.
6. If you have selected a printer driver that is already being used, you have
the option of either keeping the existing driver (recommended) or
replacing it. Select the desired option and press Next.
7. Select the Brother NetBIOS Port (Port name you assigned in step 7 of
the Installing the Brother Peer-to-Peer Print (NetBIOS) section) and
press Next.
8. Enter any desired name for the Brother MFC and press Next. For
example, you could call the printer "Networked Brother Printer".
9. Windows
Yes and then select Finish.
®
will now ask you if you wish to print out a test page, select
You are now ready to print. If necessary, you can share the printer on your PC so
that all print jobs are routed through your computer.
Windows® NT®4.0/2000
2. Select Add Printer to begin the printer installation.
3. Click Next when you get the add Printer Wizard window.
4. Select My Computer when you are asked how the printer is connected to
your computer, and then push Next.
5. Select the Brother NetBIOS Port (Port name you assigned in step 6 of
the Installing the Brother Peer-to-Peer Print (NetBIOS) section ) and
press Next.
6. Select the correct driver. Click Next when you are done.
7. If you have selected a printer driver that is already used, you have the
option of either keeping the existing driver (recommended) or replacing
it. Select the desired option and press Next.
8. Enter any desired name for the Brother printer and press Next. For
example, you could call the printer "Networked Brother Printer".
9. Select not Shared or Shared and Share Name and press Next.
10. Windows
Yes and then select Finish.
You are now ready to print. If necessary, you can share the printer on your PC so
that all print jobs are routed through your computer.
®
will now ask you if you wish to print out a test page, select
7-5
Page 75

CHAPTER 7 NETBIOS PEER-TO-PEER PRINTING
Adding a Second NetBIOS Print Port
1. You do not need to re-run the installation program to add a new
NetBIOS port. Instead, press the Start button, select Settings, and open
the Printers Windows
configure, select File from the Menu bar, and then choose Properties.
Windows® 95/98/Me
2. Click on the Details tab and push the Add Port button. In the Add Port
dialog, select the Other radio button and then highlight "Brother
NetBIOS port". Click OK and enter the port name. The default port
name is BNT1. If you have already used this name, you will get an error
message if you try to use it again, in which case use BNT2, etc… Once
you have specified the Port name, click the OK button. You will then see
the Port Properties Dialog. Enter the Print / Fax server and port name of
the printer that you wish to print to and click OK. You should now see
the port that you have just created in the "Print to the following port"
setting of the printer driver.
®
. Click on the icon of the printer that you wish to
Windows® NT®4.0/2000
2. Click on the Ports tab and push the Add Port button. In the Add Port
dialog, highlight "Brother NetBIOS port". Click New Port and enter the
port name. The default port name is BNT1. If you have already used this
name, you will get an error message if you try to use it again, in which
case use BNT2, etc… Once you have specified the Port name, click the
OK button. You will then see the Port Properties Dialog. Enter the Print
/ Fax server and port name of the printer that you wish to print to and
click OK. You should now see the port that you have just created in the
"Print to the following port" setting of the printer driver.
7-6
Page 76

CHAPTER 7 NETBIOS PEER-TO-PEER PRINTING
Other Sources of Information
1. Visit http://solutions.brother.com/ for more information on network
printing.
2. Refer chapter 1 of this user guide to learn how to configure the IP
address of the printer.
7-7
Page 77

CHAPTER 8 BIP INTERNET PRINTING INSTALLATION
CHAPTER EIGHT
81
How to Configure
81
Internet Printing for
8
®
Windows
95/98/Me/NT®4.0/2000
Internet Printing Installation
81
Overview
Brother's Brother Internet Print (BIP ) software, for Windows® 95/98/Me/NT®4.0,
allows a PC user at one location, to send a print job to a Brother Printer at a
remote location via the Internet. For example, a user on a PC in New York could
print a document directly from his Microsoft Excel application program to a
printer in Paris.
®
Windows
use the IPP protocol support that is part of the Windows
systems. Skip to the “Windows
2000 users can also use this BIP software, but are recommended to
®
2000 IPP Printing” section of this document.
®
2000 operating
Quick Tips:
1. The default IP address of Brother Print / Fax servers is 192.0.0.192. To
change it, use the MFC’s front panel, the BRAdmin application, or let
your DHCP server allocate an IP address to the printer.
2. Refer to chapter 1 of this user guide to learn how to configure the IP
address on your printer.
3. The default password for Brother Print / Fax servers is "access".
4. Windows
Network Printing software and IPP protocol software built into any
Windows
5. Windows
Windows
Services software is installed on the client PC, IIS is installed and
running on the server and that the client PC is using version 4 or later of
Microsoft Internet Explorer.
®
2000 users can print using TCP/IP using the standard
®
2000 installation.
®
95/98/Me users can send print jobs using the IPP protocol via
®
2000 computer providing that the Microsoft Internet Print
8-1
Page 78

CHAPTER 8 BIP INTERNET PRINTING INSTALLATION
Brother Internet Print General Information
The BIP software is installed using a standard Windows® 95/98/Me/NT®4.0
Installation Wizard. It creates a virtual port on the Windows
PC that operates in a similar way to the standard LPT1 printer port from the
Application program point of view. The user can use the Windows
95/98/Me/NT®4.0 Print Manager to create a printer that uses this port along with
a standard Windows
®
95/98/Me, NT®4.0-compatible printer. Any Windows
®
95/98/Me/NT®4.0
®
®
95/98/Me/NT®4.0 applications program can therefore print to this printer (and
hence to the virtual port) without modification or operational procedure.
When a job is printed to the BIP virtual port, it is actually MIME-encoded
(converted to a standard Internet E-mail message) and sent out to a Brother Print
/ Fax server at the remote location using Winsock This means that BIP is
compatible with most common E-mail software packages. The only requirement
is that the E-mail server be capable of sending E-mail message over the Internet.
In more detail, the procedure works in the following way:
• If you are connected to a Local Area Network, the E-mail message is passed
to the E-mail server, which in turn transmits the message out over the
Internet using the SMTP protocol (Simple Mail Transport Protocol) to the
remote Print / Fax server.
• If you are connecting via a modem directly to an Internet Service Provider
(ISP), the ISP handles the routing of the E-mail to the remote Print / Fax
server.
• At the remote site, an E-mail server receives the E-mail message. The
remote Print / Fax server, which has its own E-mail address, uses the POP3
protocol (Post Office Protocol 3) to download the E-mail message from the
server. It then decodes the attachment and prints it out on the printer.
If an E-mail is received that has not been configured to use the BIP virtual port
driver, the printer will print the e-mail out as a text document.
8-2
Page 79

CHAPTER 8 BIP INTERNET PRINTING INSTALLATION
Brother Internet Print Configuring the Brother Print / Fax server
The Print / Fax server can be configured using BRAdmin, by using a web
browser, or by using the TELNET command.
Print / Fax server Configuration Checklist
Before configuring the Print / Fax server to receive BIP jobs, be sure that the Email server at the remote site (the receiving end) is configured to handle the
TCP/IP POP3, and SMTP protocols (SMTP is only required if the notification
feature is enabled).
1. Configure the POP3 server on the E-mail server at the remote site with a
mail account (Mailbox name) and password for the Brother Print / Fax
server (generally, the mail account name will be the first part of the
Email address; for example, if you assign the Email address
emailprinter@xyz.com, then the mail account name would be
emailprinter).
2. Make sure that the Print / Fax server is installed and running with
TCP/IP enabled and has a valid IP address assigned to it.
Because access to the E-mail server on most networks is usually restricted, you
may need to have your network administrator check the configuration and add
the mail account.
8-3
Page 80

CHAPTER 8 BIP INTERNET PRINTING INSTALLATION
Brother Internet Print Using BRAdmin to Configure the Print / Fax server
Skip this section if you wish to use the Print / Fax server remote console or Web
Browser to configure the Print / Fax server.
Using the BRAdmin application, you can configure the Brother Print / Fax server
using the TCP/IP protocol, or the IPX protocol.
The steps required to configure the Print / Fax server to receive print jobs from a
Windows
You can find the node name and MAC address by printing out the MFC’s
configuration page. Refer to the Quick Network Setup Guide for information on
how to print the configuration page on your Print / Fax server.
®
95/98//Me/NT®4.0. PC running the BIP software is as follows:
1. Start BRAdmin.
2. Select the node name of the desired Brother Print / Fax server from the
list and double clicking on it. (the default node name is usually
BRN_xxxxxx, where "xxxxxx" is the last six digits of the Ethernet
address (MAC address)). You will be prompted for a password, the
default password is "access".
3. Click on the Internet tab.
4. Enter the IP address of the POP3 server (consult your network
administrator if you do not know this address).
5. Enter the mailbox name for the remote Brother Print / Fax server.
Usually this will be the first part of the E-mail address (for example, if
the E-mail address of the Print / Fax server is emailprinter@xyz, then the
mailbox name would be emailprinter).
6. Enter the password for the mailbox, if any.
7. The Print / Fax server is configured by default to poll the POP3 server
every 10 minutes. You may change this value, if desired.
8. If you have enabled notification, enter the IP address of your SMTP
server (consult your network administrator if you do not know this
address).
9. Press the OK button and save the changes. Now exit the BRAdmin
application. You have now configured the Print / Fax server to receive
print jobs.
8-4
Page 81

CHAPTER 8 BIP INTERNET PRINTING INSTALLATION
Brother Internet Print Using a Web Browser to configure the Print / Fax server
1. Connect to the printer server IP address using your web browser.
2. When you reach the network configuration screen, you will be prompted
for a password. The default password is "access".
3. Select the Configure Internet option and enter the information as
described above. Refer to "Using BRAdmin to Configure the Print / Fax
server".
4. You should see a Segmented Message Timeout option. If a print job is
separated into multiple E-mail messages using the Partial E-mail Print
feature of the BIP, this value indicates how long the Print / Fax server
will wait for all of the segments of the message to arrive.
8-5
Page 82

CHAPTER 8 BIP INTERNET PRINTING INSTALLATION
Brother Internet Print Using TELNET to Configure the Print / Fax server
Skip this section if you used BRAdmin or a Web Browser to configure the
remote Print / Fax server.
As an alternative to BRAdmin, you can use the Print / Fax server remote console
to configure the Print / Fax server. The console can be accessed via TELNET.
When you access the Print / Fax server using these utilities, you will be asked for
a password. The default password is "access".
1. When you get the "Local>" prompt after connecting to the console, enter
the command:
SET POP3 ADDRESS ipaddress
where ipaddress is the IP address of your POP3 server (consult with your
network administrator if you do not know this address).
2. Enter the command:
SET POP3 NAME mailboxname
SET POP3 PASSWORD emailpassword
where mailboxname is the name of the remote Print / Fax server mailbox
and emailpassword is the password associated with this mailbox.
Usually the mailbox name is the same as the first part of the E-mail
address that you defined previously (for example, usually if the E-mail
address is emailprinter@xyz.com, then the mailbox name is
emailprinter).
3. The Print / Fax server is set by default to poll the POP3 server every 10
minutes. If you wish to change this value, enter the command:
SET POP3 POLLING rate
where rate is the polling rate in minutes.
Type EXIT to exit the console and save the changes. You have now
completed configuring the Print / Fax server.
8-6
Page 83

CHAPTER 8 BIP INTERNET PRINTING INSTALLATION
Brother Internet Print
Installing the BIP software on Windows
®
95/98/Me/NT®4.0/2000
To install the BIP software on a Windows® 95/98/NT®4.0 PC, execute the
following steps:
• Be sure that the PC is running an E-mail program (for example, Microsoft
Outlook) that is capable of sending E-mail message using Winsock.
• Be sure that your E-mail server is capable of sending messages across the
Internet.
Setup from CD-ROM
1. Start the CD-ROM (supplied with your MFC) installation menu program
according to the Quick Setup guide and select Install Software.
2. From the Network Applications menu select Install Software.
3. Click “Install” Network Print Software.
4. Push the Next button in response to the Welcome message.
5. Select the Brother Internet Print button.
6. Select the desired directory to install the BIP files and then push Next.
The installation program will create the directory for you if it does not
already exist.
7. You will then be asked for a port name. Enter the name of the port. The
port name must begin with the BIP and end with a number, for example,
BIP1.
8. You will then see a message about Partial E-mail Print. Partial E-mail
Print is the ability of the Brother Internet Print software to break down
E-mail Print jobs into smaller sections to prevent a mail file size
limitation problem for mail server.
9. Press OK to continue.
8-7
Page 84

CHAPTER 8 BIP INTERNET PRINTING INSTALLATION
10. You will then be asked to enter the port settings for the remote Print /
Fax server:
Enter any unique legal Internet E-mail address for the remote Print / Fax
server (for example emailprinter@xyz.com). Note that Internet E-mail
addresses cannot have spaces in them.
Enter your E-mail address and the IP address of your SMTP E-mail
server (consult your network administrator if you do not know this
address). Also specify if you are going to use the Partial E-mail Print
option and Notification type.
11. Press OK to continue. You will then be asked to re-start your computer.
12. Once your computer has re-started you must create a printer on your
Windows
®
95/98/Me/NT®4.0 system using the standard Windows
95/98/Me/NT®4.0 printer setup procedure. To do this, go the Start
button, select Settings and then Printers.
13. Select Add Printer to begin the printer installation.
14. Click Next when you get the Add Printer Wizard window.
®
(For Windows
95/98/Me user)
15. Select Local Printer, when you are asked how the printers are connected
to your computer and push Next.
®
®
(For Windows
NT4.0/2000 user)
15. Select Local Printer, and then delete the check mark in Plug and Play
check box.
8-8
Page 85

CHAPTER 8 BIP INTERNET PRINTING INSTALLATION
<For Windows® 95/98/Me users>
15. Select the desired model of the remote printer (for example, Brother HL-
series). If necessary, click Have Disk to load the driver from the
installation CD ROM diskette. Click Next when you are done.
16. If you have selected a printer driver that is already being used, you have
the option of either keeping the existing driver (recommended) or
replacing it. Select the desired option and press Next.
17. Select the Brother Internet port (BIP...) which you select in step 6 and
press Next.
®
<For Windows
NT®4.0/2000 users>
15. Select the Brother Internet port (BIP...) which you select in step 6 and
press Next.
16. Select the desired model of the remote printer (for example, Brother HL-
series). If necessary, click Have Disk to load the driver from the printer's
installation diskette. Click Next when you are done.
17. If you have selected a printer driver that is already being used, you have
the option of either keeping the existing driver (recommended) or
replacing it. Select the desired option and press Next.
18. Enter any desired name for the BIP remote printer and press Next. Note
that this name does not need to match the Port name that you assigned in
step 7, or E-mail address that you assigned in step 10.
19. Select No when asked if you want to print a test page, unless you have
already configured the remote Print / Fax server to receive BIP print
jobs.
You have now finished installing the BIP software. If you need to configure
another remote Print / Fax server, go to next section, Adding a Second Brother
Internet Port.
8-9
Page 86

CHAPTER 8 BIP INTERNET PRINTING INSTALLATION
Adding a Second Brother Internet Port
You should not re-run the install program to add a new Brother Internet Port.
Instead, press the Start button, select Settings, and open the Printers Windows
Click on the icon of a printer that is using BIP, select File from the menu bar, and
then choose Properties. Click on the Details (Ports on Windows
®
NT®) tab and
®
.
push the Add Port button.
®
In the Add Port dialog, select the Other radio button (Windows
and then "Brother Internet Port". Click OK (New Port on Windows
95/98/Me only)
®
NT®) and it
will give you the Port Name. Any unique name can be given here as long as it
starts with "BIP" and another port does not already exist with the same name.
8-10
Page 87

CHAPTER 8 BIP INTERNET PRINTING INSTALLATION
Windows® 2000 IPP Printing
Use the following instructions if you wish to use the IPP printing capabilities of
Windows
®
2000.
1. Run the Add Printer Wizard and click the Next button when you see the
“Welcome to the Add Printer Wizard” screen.
2. You are now able to select “Local Printer” or “Network Printer”. Make
sure that you select “Network Printer”.
3. You will see the “Add Printer Wizard” screen.
4. Select the “Connect to a printer on the Internet or on your intranet” and
then enter the following in the URL: field:
http://printer_ip_address:631/ipp
IP address or DNS name of your printer.)
5. When you click “Next”, Windows
(Where “printer_ip_address” is the
®
2000 will make a connection with
the URL that you specified.
IF THE PRINTER DRIVER HAS ALREADY BEEN INSTALLED
If the appropriate printer driver is already installed on your PC, Windows
®
2000
will automatically use that driver for use. In this case, you will simply be asked if
you wish to make the driver the default driver, after which the Driver installation
Wizard will complete. You are now ready to print.
IF THE PRINTER DRIVER HAS NOT BEEN INSTALLED
One of the benefits of the IPP printing protocol is that it establishes the model
name of the printer when you communicate with it. After successful
communication you will see the model name of the printer automatically, this
means that you do not need to inform Windows
®
2000 the type of printer driver
to be used.
6. Click “OK”, you will then see the following Printer selection screen in
the Add Printer Wizard.
7. If your printer is not in the list of supported printers, click the “Have
Disk” button. You will then be asked to insert the driver disk.
8. Click the “Browse” button and select the CD-ROM or network share
that contains the appropriate Brother printer driver.
9. Now specify the model name of the printer.
10. If the printer driver that you are installing does not have a Digital
Certificate you will see a warning message. Click “Yes” to continue with
the installation. The Add Printer Wizard will then complete.
11. Click the “Finish” button and the printer is now configured and ready to
print. To test the printer connection, print a test page.
8-11
Page 88

CHAPTER 8 BIP INTERNET PRINTING INSTALLATION
Specifying a different URL
Please note that there are several possible entries that you can enter for the URL
field.
http://printer_ip_address:631/ipp
This is the default URL and we recommend that you use this URL. Please note
the “Get More Info” option will not display any printer data.
http://printer_ip_address:631/ipp/port1
This is for HP JetDirect compatibility. Please note the “Get More Info” option
will not display any printer data.
http://printer_ip_address:631/
If you forget the URL details, you can simply enter the above text and the printer
will still receive and process data. Please note the “Get More Info” option will
not display any printer data.
If you are using the built in service names that the Brother NC-8100h series Print
/ Fax server supports, you can also use the following (however, please note the
“Get More Info” option will not display any printer data.
http://printer_ip_address:631/brn_xxxxxx_p1
http://printer_ip_address:631/binary_p1
http://printer_ip_address:631/text_p1
http://printer_ip_address:631/postscript_p1
http://printer_ip_address:631/pcl_p1
http://printer_ip_address:631/brn_xxxxxx_p1
Where printer_ip_address is the IP address of the printer.
Other Sources of Information
1. Visit http://solutions.brother.com/ for more information on network
printing and for documents on the IPP protocol and how to configure a
Windows
2. Visit Microsoft’s web site for the “Microsoft Internet Print Services”
software for Windows
3. Refer to chapter 1 of this user guide to learn how to configure the IP
address of the printer.
®
2000/95/98/Me System.
®
95/98/Me.
8-12
Page 89

CHAPTER 9 NOVELL NETWARE PRINTING
CHAPTER NINE
91
Novell NetWare Printing
91
9
How to configure Novell
91
NetWare Printing
Overview
Brother Print / Fax servers allow NetWare client PCs to print jobs on the same
printer as TCP/IP or other network protocol users. All NetWare jobs are spooled
through the Novell server and delivered to the printer when it is available.
Quick Tips:
1. The default IP address of Brother Print / Fax servers is 192.0.0.192. To
change it, use the print front panel (if applicable), the BRAdmin
application, or let your DHCP server allocate an IP address to the
printer.
2. The default password for Brother Print / Fax servers is "access".
9-1
Page 90

CHAPTER 9 NOVELL NETWARE PRINTING
General Information
In order to use a Brother Print / Fax server on a NetWare network, one or more
file servers must be configured with a print queue that the Print / Fax server can
service. Users send their print requests to the file server's print queue, and the
jobs are then spooled (either directly, or in the case of remote printer mode, via
an intermediate Print / Fax server) to the appropriate Brother Print / Fax server.
The system administrator can create Bindery (NetWare 3), NDS (NetWare 3 and
NetWare 4) based queues in a single environment without having to switch
between applications by using the BRAdmin application.
NetWare 5 users wishing to configure an NDPS printer must use the NWADMIN
application supplied with NetWare 5. Please note that it is possible to create IPX
BINDERY or NDS based queues on a NetWare 5 system using the BRAdmin
application.
You must install the Novell NetWare Client 32 if you wish to create queue
information on your NetWare servers using the BRAdmin application.
If you can't use the BRAdmin application in your environment, you can create
the queue using the traditional NetWare PCONSOLE utility or NWADMIN
utilities, but you will then also need to use the Brother BRCONFIG utility,
TELNET or a WWW browser to configure the Print / Fax server as described
later in this chapter.
Brother Print / Fax servers can service up to 16 file servers and 32 queues.
9-2
Page 91

CHAPTER 9 NOVELL NETWARE PRINTING
Creating a NDPS Printer Using NWADMIN for NetWare5
With NetWare 5, Novell has released a new preferred printing system called
Novell Distributed Print Services (NDPS). Before the Print / Fax server can be
configured, NDPS must be installed on the NetWare 5 server and an NDPS
Manager configured on the server.
For further information regarding NDPS printers and printing please refer to the
“Other Sources of Information” section at the end of this chapter.
NDPS Manager
This creates a NDPS manager that interacts with services running at the server
and manages an unlimited number of printer agents.
You have to create an NDPS manager within an NDS tree before creating serverbased printer agents. If the NDPS manager controls a printer attached directly to
the server, you must load the manager on the server that the printer is attached to.
1. In NetWare administrator, navigate to the area you want the NDPS
manager to reside. Select Object | Create | NDPS Manager and click OK.
2. Enter an NDPS manager name.
3. Browse to a server (which has NDPS installed but no NDPS manager
installed) where you want to install the NDPS manager and then to the
volume you want the NDPS manager database assigned to. Click create.
NDPS Broker
When NDPS is installed, an NDPS broker is loaded onto the network. One of the
Broker services Resource Management Service allows Printer Drivers to be
installed onto the server for use with Printer Agents.
To add a Printer Driver to the Broker:
4. Make sure the Resource Management Service is enabled.
5. Open the Broker Object's main window in NetWare Administrator.
6. Select the Resource Management view.
7. The Resource Management dialog appears. Select the Add Resources
button.
8. When the Manage Resources dialog appears, select the icon for the type
of driver you want to add. This will be a 3.1x, 95/98/Me or NT4.0 driver
for NetWare 5. If you are using NDPS version 1 with NetWare 4.x only
3.1x and 95/98/Me options will be available. NDPS version 2 for
NetWare 4.x will support NT drivers automatic download.
9-3
Page 92

CHAPTER 9 NOVELL NETWARE PRINTING
9. A complete list of currently loaded resources of that type appears in the
Current Resources window. Click the Add button.
10. The Add <resource type> dialog appears. The listed resources that
appear on this screen are currently installed.
11. Press the Browse button to locate the driver you want to add to the list.
The driver list appears possibly showing several printers. This should be
the driver in different languages supported.
Creating a Printer Agent
1. In NetWare Administrator, select object | create | NDPS Printer. Enter
the NDPS printer name.
For further information regarding NDPS printers and printing please refer to the
“Other Sources of Information” section at the end of this chapter.
2. If this is a new printer select create A New Printer Agent.
3. If there is already an NDS printer and you are upgrading it to use the
NDPS scheme, select Existing NDS printer object. You will then have to
select which printer object you wish to upgrade.
4. Enter the name you wish the Printer Agent to be referred to and either
type the name of the NDPS Manager or click the radio button and select
a NDPS Manager. Select the type of Port for the Printer Agent and Click
OK.
5. You must now specify the type of connection that you are going to use.
There are four possible options. Select the LPR over IP option.
6. Enter the relevant details of the printer and Brother recommend typing
Binary_P1 for the printer name. Click finish and wait. Select the printer
drivers for the client operating systems.
You are now ready to print.
9-4
Page 93

CHAPTER 9 NOVELL NETWARE PRINTING
Configuring Netware 3 and NetWare 4 systems
Brother's BRAdmin application provides similar functionality to the NetWare
PCONSOLE utility (or the NWADMIN utility in NetWare 4.1x or later). To use
the BRAdmin application to configure a Brother Print / Fax server under
NetWare, make sure that you are logged in as SUPERVISOR (NetWare 2.xx or
3.xx) or ADMIN (NetWare 4.1x or later) and perform the appropriate steps as
detailed in the following pages.
You must install the Novell NetWare Client 32 if you wish to create queue
information on your NetWare servers by BRAdmin.
9-5
Page 94

CHAPTER 9 NOVELL NETWARE PRINTING
Configuring the Brother Print / Fax server (Queue Server Mode in Bindery emulation mode) using BRAdmin
1. Make sure that you logged in as SUPERVISOR (NetWare 2.xx or 3.xx)
or ADMIN (NetWare 4.xx or later).
2. Start BRAdmin.
3. One or more Print / Fax server will appear in the list (the default node
names are BRN_xxxxxx, where "xxxxxx" is the last six digits of the
Ethernet address (MAC address)).
You can find the node name and MAC address by printing out the MFC’s
configuration page. Refer to the Quick Network Setup Guide for information on
how to print the configuration page on your Print / Fax server.
4. Select the Print / Fax server that you wish to configure and double click
it. You will be asked for a password. The default password is "access".
5. Select the NetWare tab.
If necessary change the "Print / Fax server Name", the default NetWare Print /
Fax server name will usually be BRN_xxxxxx_P1 where xxxxxx is the Ethernet
address of the Print / Fax server. Be careful! Changing the name may impact the
configuration of other protocols because the Print / Fax server service names will
be altered.
a. If it is not already selected, select Queue Server mode.
b. Click the Change Bindery Queues button.
c. Select the NetWare server which you wish to configure.
d. Select the New Queue button and type in the queue name which you
wish to create.
e. Once you have done that highlight the queue name you created and
click on the Add button.
f. Click on Close and then OK.
Now exit the BRAdmin application. You are ready to print.
9-6
Page 95

CHAPTER 9 NOVELL NETWARE PRINTING
Configuring the Brother Print / Fax server (Queue Server Mode in NDS mode) using BRAdmin
1. Make sure that you logged in as ADMIN in NDS mode.
2. Start BRAdmin.
3. One or more Print / Fax server services will appear in the list of printers
(the default node names are BRN_xxxxxx, where "xxxxxx" is the last
six digits of the Ethernet address (MAC address)).
You can find the node name and MAC address by printing out the MFC’s
configuration page. Refer to the Quick Network Setup Guide for information on
how to print the configuration page on your Print / Fax server.
4. Select the printer that you wish to configure and double click it. You will
be asked for a password. The default password is "access".
5. Select the NetWare tab.
a. If it is not already selected, select Queue Server mode.
b. Select the correct NDS tree and NDS context (you can manually
enter this information, or by clicking on the down arrow by the side
of NDS tree and the Change button by the side of NDS Context,
you can let BRAdmin display your choices automatically. Once you
have specified this information, click on the Change NDS queues
button.
c. In the NetWare Print Queues screen select the appropriate TREE
and Context and then Click the New Queue button.
d. Enter the queue name and specify the volume name. If you do not
know the volume name, select the Browse button to browse the
NetWare volumes. When the information is entered correctly, select
the OK button.
e. Your queue name will appear in the TREE and Context that you
specified. Select the queue and click on Add. The queue name will
then be transferred to the Service Print Queues Window. You will
be able to see the TREE and Context information along with the
queue name information in this Window.
f. Click on the Close button. Your Brother Print / Fax server will now
log into the appropriate NetWare server.
Now exit the BRAdmin application. You are ready to print.
9-7
Page 96

CHAPTER 9 NOVELL NETWARE PRINTING
Configuring the Brother Print / Fax server (Queue Server Mode in NDS mode) using Novell NWADMIN and BRAdmin
If you do not wish to use the Brother BRAdmin application solely to configure
your NetWare file server, use the following instructions for configuration using
the NWADMIN application in conjunction with the BRAdmin application.
1. Make sure that you are logged in as ADMIN in NDS mode on the
NetWare 4.1x (or later) file server and start the NWADMIN application.
2. Select desired Context that will contain the Printer and then click on
Object from the menu bar and then Create. When you get the New
Object menu, select Printer and then OK.
3. Enter the name of the printer and select Create.
4. Select the desired Context that will contain the default print queue, and
then click on Object and Create to get New Object menu.
5. Select Print Queue and then OK. Make sure that Directory Service
Queue is selected and then type in a name for the default print queue.
6. Click on the button to select the print queue volume. Change the
directory context if necessary, then select the desired volume (from
Available Objects) and click OK. Click Create to create the print queue.
7. Change context if required and then double click the name of the printer
you created in step 3.
8. Click Assignments and then Add.
9-8
Page 97

CHAPTER 9 NOVELL NETWARE PRINTING
Change the context if necessary and select the print queue you created in step 5.
9. Click Configuration and set the Printer type to Other/Unknown. Click
OK and then OK again.
10. Change the context if required, select Object from the menu bar and then
Create. When you get the New Object menu, select Print / Fax server
and then OK.
11. Enter the name of the Print / Fax server and select Create.
Enter the NetWare Print / Fax server name of the Print / Fax server exactly as it
appeared in the NetWare tab of the BRAdmin application (this will generally be
the BRN_xxxxxx_P1 default service name, unless you changed the name).
You can find the current service name and MAC address by printing out the
MFC’s configuration page. Refer to the Quick Network Setup Guide for
information on how to print the configuration page on your Print / Fax server.
Important:
Do not assign a password to the Print / Fax server or it will not log in.
12. Double click on the name of your Print / Fax server. Click on
Assignments and then Add...
13. If necessary, change the directory context. Select the printer you created
in step 3 and click OK and then OK again.
14. Exit NWADMIN.
15. Start the appropriate BRAdmin application, and select the correct Print /
Fax server from the list (by default, the node name is BRN_xxxxxx,
where "xxxxxx" is the last six digits of the Ethernet address (MAC
address)).
Double click the appropriate Brother Print / Fax server. You will be prompted for
a password, the default password is "access". Now select the NetWare tab.
16. Select Queue Server as the operating mode.
The same service assigned by NetWare server name cannot be used for both
queue server mode and remote printer mode.
If you want to enable queue server capabilities on services other than the default
NetWare services, you must define new services that are enabled for NetWare
and for the desired port. Refer to the Appendix in this manual for information on
how to do this.
17. Enter the NDS tree name (note that a Print / Fax server can service both
NDS and bindery queues).
18. Type in the name of the context where the Print / Fax server resides.
19. Exit the BRAdmin application making sure that you save the changes
that you have made. You are now ready to print.
9-9
Page 98

CHAPTER 9 NOVELL NETWARE PRINTING
Configuring the Brother Print / Fax server (Remote Server Mode in NDS mode) using Novell NWAdmin and BRAdmin
To configure a Brother Print / Fax server for remote printer mode with
NWADMIN (NetWare Administrator utility) and BRAdmin, you will need to
perform the following steps:
1. Make sure that the PSERVER NLM (NetWare Loadable Module) is
loaded on your file server and that you are logged in as ADMIN in NDS
mode on the NetWare 4.1x file server.
2. Start NWADMIN by double clicking on the icon. Select the desired
Context that will contain the new printer.
3. Select Object from the menu bar and then Create. When you get the New
Object menu, select Printer and then OK.
4. Enter the name of the printer and select Create.
5. Double click on the Print / Fax server name of your PSERVER NLM.
Click on Assignments and then Add.
6. If necessary, change the directory context. Select the printer you created
and click OK. Note the number of the printer, as you will use this later,
then click OK.
7. Select the desired Context that will contain the default print queue, and
then click on Object and Create to get New Object menu.
8. Select Print Queue and then OK. Make sure that Directory Service
Queue is selected, and then type in a name for the default print queue.
9-10
Page 99

CHAPTER 9 NOVELL NETWARE PRINTING
9. Click on the button to select the print queue volume. Change the
directory context if necessary, then select the desired volume (Objects)
and click OK. Click Create to create the print queue.
10. Change context if required and then double click the name of the printer
you created previously.
11. Click Assignments and then Add.
12. Change context if necessary and select the print queue you created. Click
OK and then OK again, and then exit NWADMIN.
13. Start the appropriate BRAdmin application, and select the correct Print /
Fax server you wish to configure (by default, the node names will begin
with BRN_xxxxxx_P1 ).
You can find the NetWare server name and MAC address by printing out the
MFC’s configuration page. Refer to the Quick Network Setup Guide for
information on how to print the configuration page on your Print / Fax server.
14. Double click the appropriate Print / Fax server. You will be prompted
for a password, the default password is "access".
15. Now select the NetWare tab.
16. Select Remote Printer as the Operating Mode, select the name of your
PSERVER NLM as the Print / Fax server Name and select the number
of the printer from step 6 as the Printer Number.
The same service assigned by NetWare Print / Fax server cannot be used for both
queue server mode and remote printer mode. If you want to enable remote printer
capabilities on a service other than the default NetWare service, you must define
new services that are enabled for NetWare and for the desired port. Refer to
Appendix B in this manual for information on how to do this.
17. Click OK. And exit BRAdmin.
You must now unload the PSERVER NLM from your NetWare file server
console and then reload it in order for the changes to take effect.
As an alternative to Brother's BRAdmin application or the Novell NWADMIN
application, you can use the standard Novell PCONSOLE utility in conjunction
with Brother's BRCONFIG program to set up your print queues. BRCONFIG
program will be installed at the same time when you install the BRAdmin and
you can find the BRCONFIG in the menu "Start/Program/Brother BRAdmin
utilities". Otherwise you can find it on the CD-ROM supplied with your MFC.
Note that if desired, you may use a WWW browser or TELNET utility - instead
of the BRCONFIG utility).
9-11
Page 100

CHAPTER 9 NOVELL NETWARE PRINTING
Configuring the Brother Print / Fax server (Queue Server Mode in Bindery emulation mode) using PCONSOLE and BRCONFIG
1. Login as Supervisor (NetWare 3.xx) or ADMIN (NetWare 4.1x or later;
be sure to specify the /b option for bindery mode).
2. Execute the BRCONFIG from the Windows
Fax server Configuration Utility diskette in drive A: and type the
following at the DOS prompt:
A:BRCONFIG or A:BRCONFIG PrintServerName
Where PrintServerName is the NetWare print service name of the
Brother Print / Fax server (the default name is BRN_xxxxxx_P1, where
"xxxxxx" is the last six digits of the Ethernet address (MAC address)).
You can find the NetWare print service name and MAC address by printing out
the MFC’s configuration page. Refer to the Quick Network Setup Guide for
information on how to print the configuration page on your Print / Fax server.
®
menu or insert the "Print /
3. If you did not specify the Print / Fax server name in the BRCONFIG
command, select the corresponding server name from the list of Print /
Fax servers.
4. When you get the message that the Print / Fax server is connected, type
the default password "access" in response to the "#" prompt (the
password will not echo), and then press the ENTER key in response to
the Enter Username> prompt.
5. When you get the Local> prompt, type:
6. SET NETWARE SERVER servername ENABLED
7. Where servername is the name of the file server on which the print
queue will reside. If there is more than one file server that you wish to
print from, repeat this command as many times as necessary.
9-12
 Loading...