

Page 1
riotx.bk : riotx-co.fb4 Page 1 Tuesday, December 16, 1997 3:08 PM
HP D5511A
HP VISUALIZE fx4 Texture Module
User’s Guide
Page 2

riotx.bk : riotx-co.fb4 Page 2 Tuesday, December 16, 1997 3:08 PM
Notice
The information contained in this document is subject to change without notice.
Hewlett-Packard makes no warranty of any kind with regard to th is material, including, but not limited to, the implied warranties of
merchantability and fitness for a particular purpose.
Hewlett-Packard shall not be liable for errors contained herein or for incidental or consequential damages in connection with the
furnishing, performance, or use of this material.
Hewlett-Packard assumes no responsibility for the use or reliability of its software on equipment that is not furnished by HewlettPackard.
This document contains proprietary information that is protected by copyright. All rights are reserved. No part of this document
may be photocopied, reproduced, or translated to another l anguage without the prior written consent of Hewlett-Packard Company.
Hinweis
Inhaltliche Änderungen vorbehalten.
Hewlett-Packard übernimmt keine Garantie welcher Art auch immer für diese Ausrüstung, einschließlich der (doch nicht begrenzt
auf die) Qualitätsgarantie und die Garantie bezüglich Eignung für einen bestimmten Zweck.
Hewlett-Packard haftet nicht für in dieser Dokumentation enthaltene Fehler oder für unbeabsichtigte oder indirekte Schäden in
Verbindung mit der Lieferung, der Leistung oder der Benutzung der Ausrüstung.
Hewlett-Packard übernimmt keine Haftung fur den Betrieb oder die Zuverlässigkeit seiner Software, wenn diese auf Hardware
benutzt wird, die nicht von Hewlett-Packard geliefert wurde.
Dieses Dokument enthalt proprietäre Informationen, die durch das Copyright geschützt sind. Alle Rechte vorbehalten. Dieses
Dokument darf ohne vorherige schriftliche Genehmigung der Hewlett-Packard Company weder ganz noch teilweise fotokopiert,
reproduziert oder übersetzt werden.
Avertissement
Les informations contenues dans ce document peuvent être modifiées sans préavis.
Hewlett-Packard ne donne aucune garantie de quelque sorte que ce soit concernant, sans que ce soit limitatif, les garanties
implicites de qualité commerciale de ce matériel, ou la bonne adaptation de celui-ci à un usage particulier.
Hewlett-Packard n’est pas responsable des erreurs pouvant apparaître dans ce manuel et n’est pas non plus responsable des
dommages directs ou indirects résultant de l’équipement, des performances et de l’utilisation de ce matériel.
Hewlett-Packard ne saurait être tenu pour responsable de l’utilisation et de la fiabilité de son logiciel sur des matériels non fournis
par Hewlett-Packard.
Les informations contenues dans ce document sont originales et protégées par copyright. Tous droits réservés. L’acheteur s’interdit
en conséquence de les photocopier, de les reproduire ou de les traduire dans toute autre langue, sauf accord préalable et écrit de
Hewlett-Packard.
Aviso
La información contenida en este documento está sujeta a cambios sin previo aviso.
Hewlett-Packard no ofrece ningún tipo de garantía con respecto a este material, incluyendo, pero sin limitarse a, las garantías
implícitas de comerciabilidad e idoneidad para un fin determinado.
Hewlett-Packard no asume responsabilidad alguna por los posibles errores contenidos o por los daños casuales o emergentes
relacionados con el suministro, funcionamiento o uso de este material.
Hewlett-Packard no asume responsabilidad alguna por el uso o fiabilidad de su software en equipos que no hayan sido fabricados
por Hewlett-Packard.
Este documento contiene información patentada, protegida por las leyes del copyright. Reservados todos los derechos. Ninguna
parte de este documento puede ser fotocopiada, reproducida o traducida a otro idioma sin la autorización previa y por escrito de
Hewlett-Packard Company.
Avviso
Le informazioni contenute in questo documento sono soggette a cambiamento senza preavviso.
Hewlett-Packard non rilascia garanzie di alcun tipo riguardo a questo materiale, comprese le garanzie implicite di commerciabilità
e di idoneità per uno scopo particolare.
Hewlett-Packard non sarà ritenuta responsabile per errori contenuti in questo documento, né per danni accidentali o conseguenti
alla fornitura, alle prestazioni o all’uso di questo materiale.
Hewlett-Packard non si assume alcuna responsabilità riguardo all’uso o all’affidabilità del proprio software su apparecchiature di
altri produttori.
Questo documento contiene informazioni di proprietà protette da copyright. Tutti i diritti sono riservati. Nessuna parte di questo
documento può essere fotocopiata, riprodotta o tradotta in un’altra lingua senza un preced ente consenso scritto di Hewlett-Packard
Company.
Hewlett-Packard France
Performance Desktop Computing Operation
38053 Grenoble Cedex 9
France
© 1997 Hewlett-Packard Company
Francais
Page 3

riotx.bk : riotxtoc.fb4 Page 3 Tuesday, December 16, 1997 3:08 PM
English.................................................... Chapter 1
Deutsch .................................................. Kapitel 2
Français.................................................. Chapitre 3
Español................................................... Capítulo 4
Italiano................................................... Capitolo 5
Page 4

riotx.bk : riotxtoc.fb4 Page 4 Tuesday, December 16, 1997 3:08 PM
Page 5

riotx.bk : riotx-us.toc Page i Tuesday, December 16, 1997 3:08 PM
Contents
1 HP VISUALIZE fx4 Texture Module
User’s Guide
Important Safety Instructions . . . . . . . . . . . . . . . . . . . . . . . . . . . . . . . . 4
Overview. . . . . . . . . . . . . . . . . . . . . . . . . . . . . . . . . . . . . . . . . . . . . . . . . . 5
Installing the Texture Module . . . . . . . . . . . . . . . . . . . . . . . . . . . . . . . . 6
Removing the VISUALIZE fx4 Interface Board . . . . . . . . . . . . . . . . . . . . . 6
Adding the Texture Module to the VISUALIZE fx4 Board . . . . . . . . . . . . 8
Replacing the VISUALIZE fx4 Interface Board . . . . . . . . . . . . . . . . . . . . 10
Checking the Installation . . . . . . . . . . . . . . . . . . . . . . . . . . . . . . . . . . . 12
Updating the Driver. . . . . . . . . . . . . . . . . . . . . . . . . . . . . . . . . . . . . . . . 14
Configuring the Driver . . . . . . . . . . . . . . . . . . . . . . . . . . . . . . . . . . . . . 17
Hardware Warranty . . . . . . . . . . . . . . . . . . . . . . . . . . . . . . . . . . . . . . . . 19
Regulatory Information. . . . . . . . . . . . . . . . . . . . . . . . . . . . . . . . . . . . . 20
English English i
Page 6

riotx.bk : riotx-us.toc Page ii Tuesday, December 16, 1997 3:08 PM
ii English English
Page 7
riotx.bk : riotx-us.fb4 Page 3 Tuesday, December 16, 1997 3:08 PM
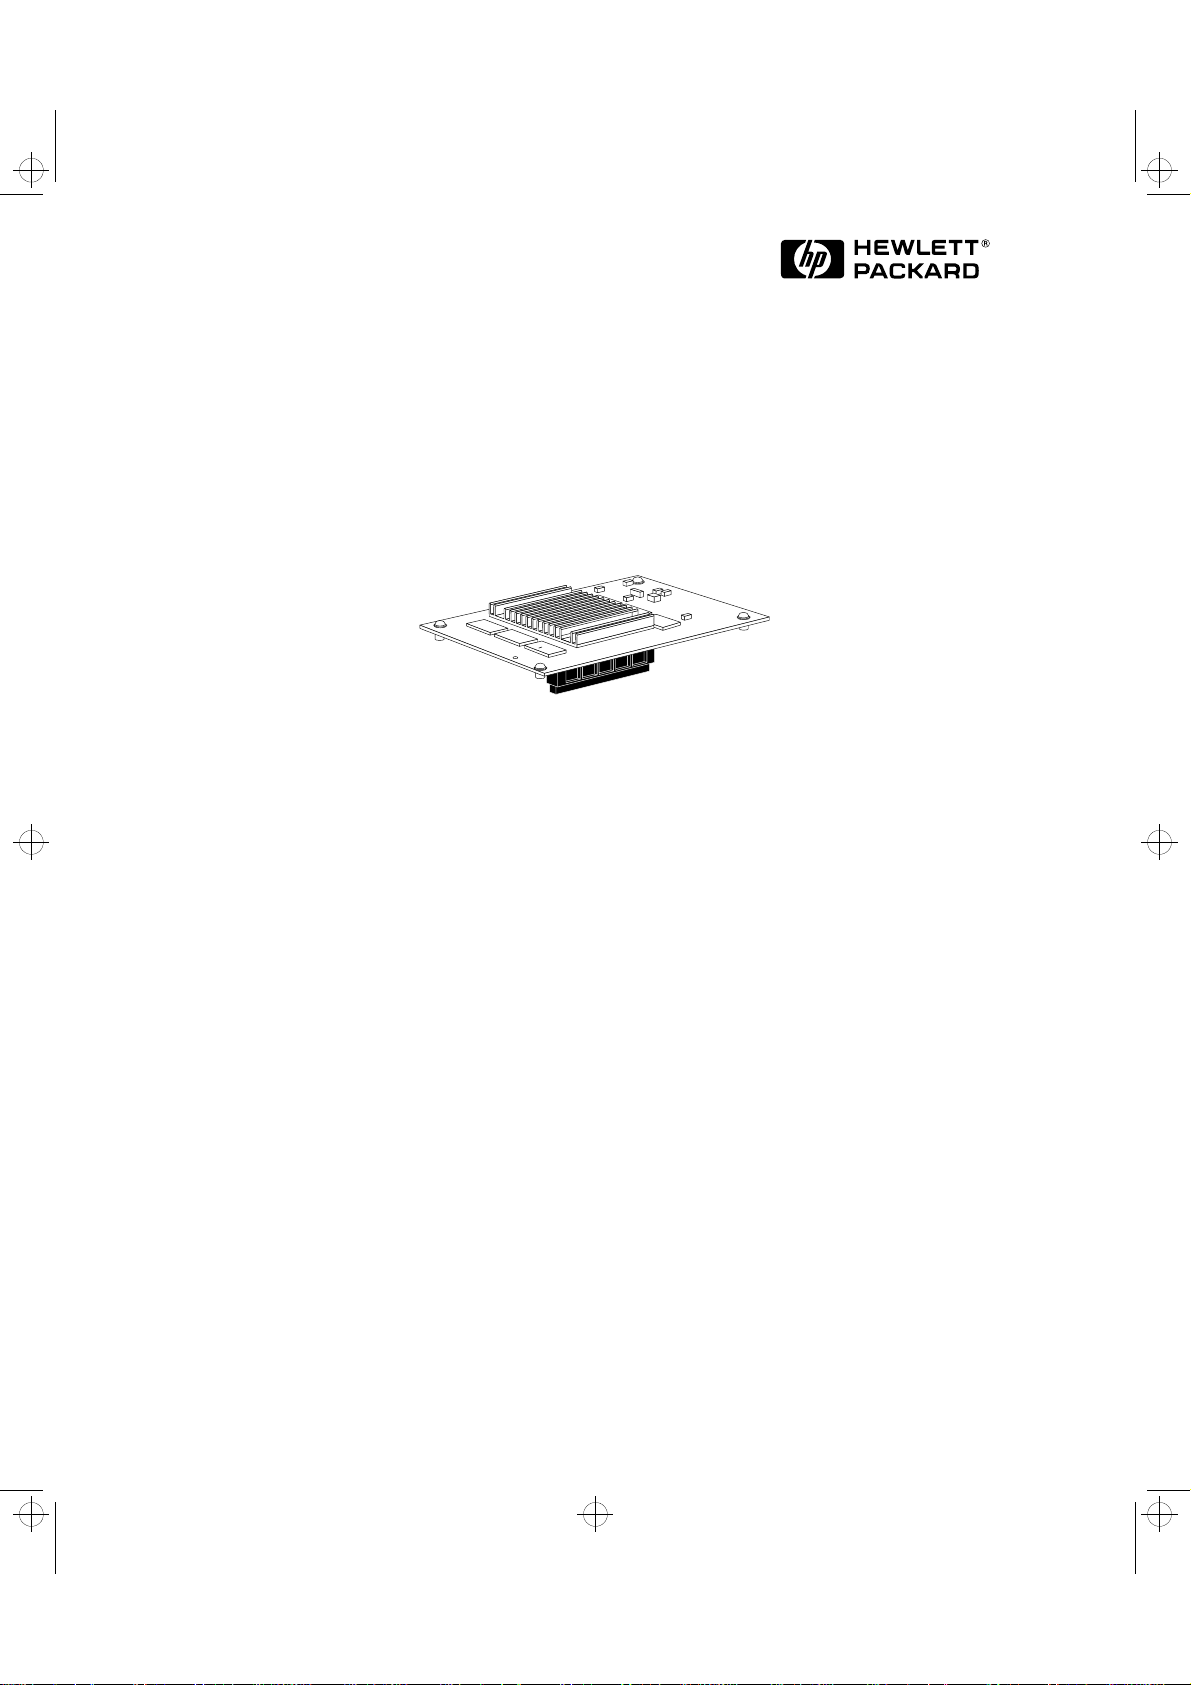
1
Texture Module (HP D5511A)
HP VISUALIZE fx4 OpenGL Interface Board
(without Texture Module installed)
HP VISUALIZE fx4 Texture Module
User’s Guide
Page 8

riotx.bk : riotx-us.fb4 Page 4 Tuesday, December 16, 1997 3:08 PM
1 HP VISUALIZE fx4 Texture Module User’s Guide
Important Safety Instructions
Important Safety Instructions
Please read the following safety information first.
CAUTION Static electricity can damage electronic components.
Use an electrostatic bracelet if you have one.
Turn all equipment OFF. Don’t let your clothes touch the accessory.
To equalize the static electricity, rest the accessory bag on top of the PC
while you are removing the accessory from the bag. Handle the
accessory as little as possible and with care.
WARNING For your safety, never remove the PC’s cover without first removing
the power cord from the power outlet, and any connection to a
telecommunications network. Always replace the cover on the PC
before switching it on again.
Before handling the VISUALIZE fx4 graphics board, first wait until the
board has cooled down completely before touching it. The graphics
board can become very hot during use.
4 English English
Page 9

riotx.bk : riotx-us.fb4 Page 5 Tuesday, December 16, 1997 3:08 PM
1 HP VISUALIZE fx4 Texture Module User’s Guide
Overview
The HP VISUALIZE fx4 Texture Module is an add-on accessory for the
HP VISUALIZE fx4 OpenGL Interface board, found on all HP Kayak XW
Series W2 PC Workstations.
NOTE Some models of HP Kayak XW Series W2 Workstation already have the
texture model installed (such as the Workstation with HP Product
Number D5514N).
The HP VISUALIZE fx4 Texture Module provides:
• Accelerated hardware texture mapping
• 16 MB dedicated SDRAM (Synchronous DRAM) memory for
textures.
Overview
English English 5
Page 10

riotx.bk : riotx-us.fb4 Page 6 Tuesday, December 16, 1997 3:08 PM
1 HP VISUALIZE fx4 Texture Module User’s Guide
Installing the Texture Module
Installing the Texture Module
CAUTION Be very careful when handling the VISUALIZE fx4 board. Bumping,
bending or dropping the board can cause irreparable damage.
To install the texture module, carefully follow the steps described in
the next three sections.
Removing the VISUALIZE fx4 Interface Board
1 Switch off the display and computer, disconnect all power cables and
any telecommunication cables.
2 Remover the computer’s cover (refer to the computer’s User’s
Guide for detailed instructions).
3 Carefully place the computer on its side.
6 English English
Page 11

riotx.bk : riotx-us.fb4 Page 7 Tuesday, December 16, 1997 3:08 PM
1 HP VISUALIZE fx4 Texture Module User’s Guide
WARNING Before handling the VISUALIZE fx4 graphics board, first wait until the
board has cooled down completely before touching it. The graphics
board can become hot during use.
4 Unscrew the innermost screw that holds the board in place and then,
using both hands, carefully slide the board up and out of the
computer.
Installing the Texture Module
TIPS To free the board, hold it at either end and slowly lever each
end up, using a careful seesaw motion to free the board from
the connectors.
When sliding the board up, ensure that the board does not snag
or catch against the chassis by keeping it perfectly straight.
5 Place the board on a clean, dry surface.
English English 7
Page 12

riotx.bk : riotx-us.fb4 Page 8 Tuesday, December 16, 1997 3:08 PM
1 HP VISUALIZE fx4 Texture Module User’s Guide
Installing the Texture Module
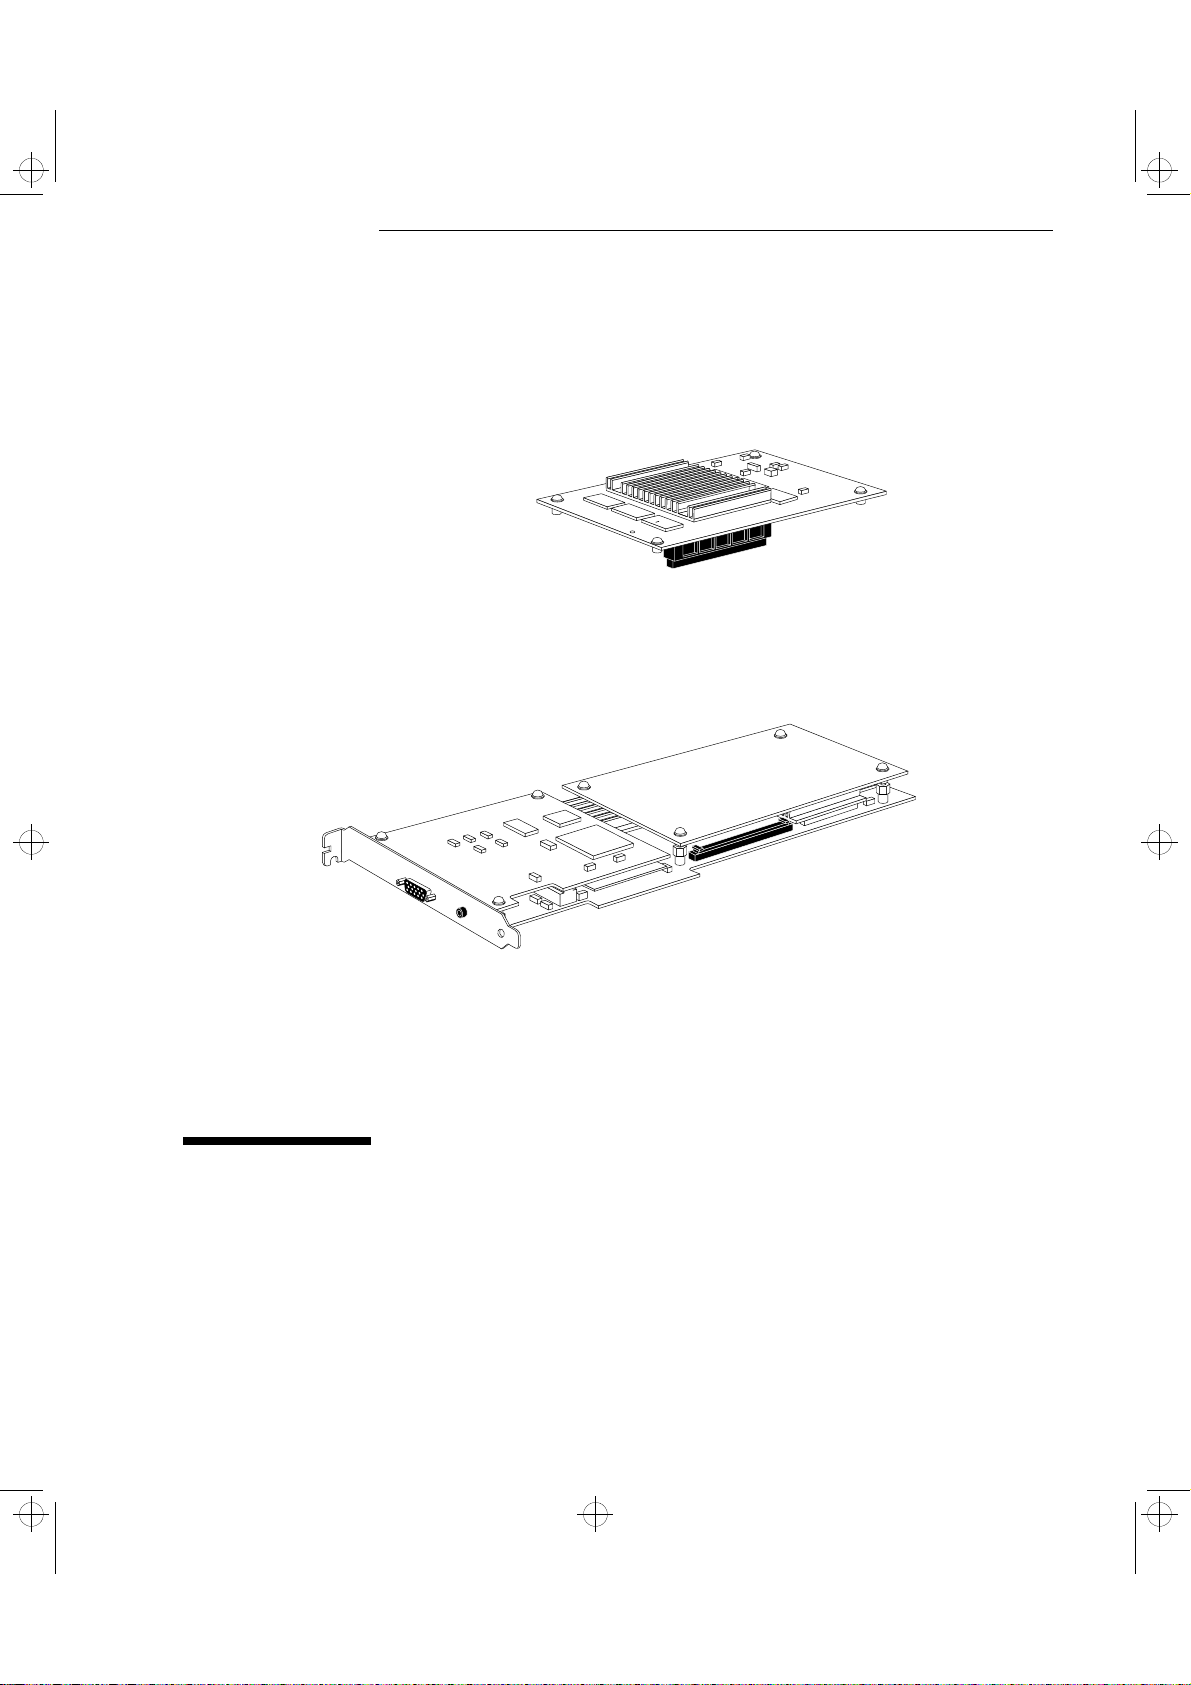
Adding the Texture Module to the VISUALIZE fx4 Board
1 Remove the four screws from the blank stiffener board, then remove
the board. (You can use a Torx
screwdriver of the correct size.) Keep the smallest screw (shown
below) to secure the texture module.
Reuse this small screw when
installing the texture module
Ensure that the stand-off
(where the screw goes in)
remains fixed to the heat sink
TM
screwdriver or a flat-blade
Blank Stiffener Board
Terminator
2 Using both hands, carefully remove the terminator from the
VISUALIZE fx4 board. Store the terminator in a safe place (you may
need it at a later date).
3 Before installing the texture module, ensure that all four screws on
the texture module are fully retracted or removed.
8 English English
Page 13

riotx.bk : riotx-us.fb4 Page 9 Tuesday, December 16, 1997 3:08 PM
1 HP VISUALIZE fx4 Texture Module User’s Guide
4 Carefully line up the connectors on the texture module and the
VISUALIZE fx4 board. Then using both thumbs, apply pressure to
the top of the texture module connector and press the texture board
into place. Ensure that the texture module is all the way in.
Insert the screw taken from
the blank stiffener board here.
(The texture module is
provided with the three other
screws.)
Installing the Texture Module
Texture Module
Texture Module
Connector
VISUALIZE fx4
Connector
5 Secure the texture module in place by replacing the four screws,
using the small screw from the blank stiffener board.
English English 9
Page 14

riotx.bk : riotx-us.fb4 Page 10 Tuesday, December 16, 1997 3:08 PM
1 HP VISUALIZE fx4 Texture Module User’s Guide
Installing the Texture Module
Replacing the VISUALIZE fx4 Interface Board
1 First ensure that the system board data cables are correctly routed
and flat against the system board so that they do not obstruct the
VISUALIZE fx4 interface board.
2 Using both hands, hold the board at a slight angle (as shown below)
and carefully slide it down towards the slots, keeping it at an angle.
TIP When sliding the board down, ensure that the board does not
snag or catch against the chassis.
10 English English
Page 15

riotx.bk : riotx-us.fb4 Page 11 Tuesday, December 16, 1997 3:08 PM
1 HP VISUALIZE fx4 Texture Module User’s Guide
3 When the board touches the slots, line up the board and then push it
into the two slots. Then using both thumbs, press down each panel
of the board to ensure that both connectors are firmly in their slots.
Installing the Texture Module
4 Secure the board by replacing the slot cover screw.
5 Replace the computer’s cover. Reconnect all cables and power cords.
English English 11
Page 16

riotx.bk : riotx-us.fb4 Page 12 Tuesday, December 16, 1997 3:08 PM
1 HP VISUALIZE fx4 Texture Module User’s Guide
Checking the Installation
Checking the Installation
You must check that the texture module is correctly installed and that
you have the correct version of the driver. To do this:
1 Open the
button, selecting Settings ⇒ Control Panel, then double-clicking
Display.
2 Click the
Indicates that the texture
module is correctly installed
Display Properties window by clicking the Start
About tab.
3 If the texture module was correctly installed, the
contain the text:
12 English English
Hardware Texture Mapping: Installed.
About window will
Page 17

riotx.bk : riotx-us.fb4 Page 13 Tuesday, December 16, 1997 3:08 PM
1 HP VISUALIZE fx4 Texture Module User’s Guide
4 Click the Settings tab then click the Advanced button.
Version Number
Checking the Installation
5 The first part of the version number should be later than:
FX.00.00.06
If the version number is
.
FX.00.00.06 or earlier, then you must
update the driver. To learn how to do this, refer to "Updating the
Driver", on page 14.
6 Click
OK to close the Display Properties window.
If the correct driver is installed, go directly to "Configuring the Driver",
on page 17.
English English 13
Page 18

riotx.bk : riotx-us.fb4 Page 14 Tuesday, December 16, 1997 3:08 PM
1 HP VISUALIZE fx4 Texture Module User’s Guide
Updating the Driver
Updating the Driver
This is not always necessary since you may already have the correct
version of the driver. To learn if you have the correct version of the
driver, refer to "Checking the Installation", on page 12.
To update the driver, follow these instructions.
1 Insert the Drivers diskette that came with the texture module kit.
2 Copy the file
C:\TEMP\VISNT\) on the hard disk drive.
3 Run the file
VISNT.EXE to a temporary directory (for example,
VISNT.EXE to decompress the contained files. You can
do this by double-clicking the file.
4 Open the
Display Properties window by clicking the Start
button, selecting Settings ⇒ Control Panel, then double-clicking
Display.
5 Click the
Settings tab.
14 English English
Page 19

riotx.bk : riotx-us.fb4 Page 15 Tuesday, December 16, 1997 3:08 PM
1 HP VISUALIZE fx4 Texture Module User’s Guide
6 Click the Display Type button then the Change button.
Updating the Driver
Click here to
change the
display driver
7 Click the
8 Click the
Have Disk button.
Browse button and select the temporary directory where
you copied the Driver files (for example,
click
OK.
9 Click the
Browse button and select the temporary directory where
you copied the Driver files (for example,
click
OK.
10 Select the display type
from the list, then click
11 Click
Yes in the next popup window with the message about the
Hewlett-Packard VisualizeFX Video
OK.
third party driver.
C:\TEMP\VISNT\), then
C:\TEMP\VISNT\), then
English English 15
Page 20

riotx.bk : riotx-us.fb4 Page 16 Tuesday, December 16, 1997 3:08 PM
1 HP VISUALIZE fx4 Texture Module User’s Guide
Updating the Driver
12 The next window will inform you that the driver was correctly
installed. Click
OK.
13 Close the
14 Click
Display Type and Display Properties windows.
Yes to confirm that you want to restart Windows.
15 You must now re-install the Windows NT 4.0 Service Pack 3 to
update the system. To do this, use the “Windows NT Service Pack 3”
CD-ROM that came with your system.
16 English English
Page 21

riotx.bk : riotx-us.fb4 Page 17 Tuesday, December 16, 1997 3:08 PM
1 HP VISUALIZE fx4 Texture Module User’s Guide
Configuring the Driver
To optimize the driver configuration for your OpenGL application, you
must configure the driver. To do this:
Configuring the Driver
1 Open the
Display Properties window by clicking the Start
button, selecting Settings ⇒ Control Panel, then double-clicking
Display.
2 Click the
Options tab.
English English 17
Page 22

riotx.bk : riotx-us.fb4 Page 18 Tuesday, December 16, 1997 3:08 PM
1 HP VISUALIZE fx4 Texture Module User’s Guide
Configuring the Driver
3 In the Options page you can optimize the VISUALIZE fx4 driver
settings according to your needs.
Select your OpenGL application from those listed or, if your
application does not appear, select
Typical Configuration.
For Help About the
Options
To get help about an option, move the mouse on top of the option
(such as the
4 Click the
Properties
Maximum Performance option), then press .
Apply button then click OK to close the Display
window.
18 English English
Page 23

riotx.bk : riotx-us.fb4 Page 19 Tuesday, December 16, 1997 3:08 PM
1 HP VISUALIZE fx4 Texture Module User’s Guide
Hardware Warranty
This HP accessory is covered by a limited hardware warranty for a
period of one year from the date of purchase by the original end-user.
The type of service provided is return to an HP or repair-authorized
reseller service-center.
A defective accessory will be replaced by a new unit either—at
Hewlett-Packard’s discretion—of the same type or of an equivalent
model.
If this accessory is purchased and used together with an HP Kayak
Workstation PC, it will be covered by the warranty of this computer,
under the same conditions of service and duration.
Hardware Warranty
Please refer to the warranty statement provided with your HP Kayak
Workstation PC for warranty limitations, customer responsibilities, and
other terms and conditions.
English English 19
Page 24

riotx.bk : riotx-us.fb4 Page 20 Tuesday, December 16, 1997 3:08 PM
1 HP VISUALIZE fx4 Texture Module User’s Guide
Regulatory Information
Regulatory Information
Notice for USA: FCC
Federal Communications Commission Radio Frequency Interference Statement Warning:
This equipment has been tested and found to comply with the limits for a Class B digital device, pursuant to Part
15 of the FCC Rules. These limits are designed to provide reasonable protection against harmful interference in
a residential installation. This equipment generates and uses, and can radiate radio frequency energy and, if not
installed and used in accordance with the instructions, may cause harmful interference to radio
communications. However, there is no guarantee that interference will not occur in a particular installation. If
this equipment does cause harmful interference to radio or television reception, which can be determined by
turning the equipment off and on, the user is encouraged to correct the interference by one or more of the
following measures:
• reorient or relocate the receiving antenna
• increase the separation between the equipment and the receiver
• connect the equipment into an outlet on a circuit different from that to which the receiver is connected
• consult the dealer or an experienced radio/TV technician for help.
Hewlett-Packard’s FCC Compliance Tests were conducted with HP-supported peripheral devices and HP
shielded cables, such as those you receive with your system. Changes or modifications not expressly approved
by Hewlett-Packard could void the user’s authority to operate the equipment.
Notice for Canada
This Class B digital apparatus meets all requirements of the Canadian Interference-Causing Equipment
Regulations.
Cet appareil numérique de la Class B respecte toutes les exigences du Règlement sur le matériel brouilleur du
Canada.
Notice for Japan (Class B)
20 English English
Page 25

riotx.bk : riotx-bc.fb4 Page xix Tuesday, December 16, 1997 3:08 PM
Page 26

riotx.bk : riotx-bc.fb4 Page xx Tuesday, December 16, 1997 3:08 PM
Paper not bleached with chlorine
Part Number: D5511-90001
Printed in ? 12/97
 Loading...