

Page 1

iPAQ based Shuttles:
connection and user manual
This guide applies to the iPAQ series H3600, H3900, H2210,HX4700 , RZ1710,RX1950. All these models
are equipped with a serial port, needed to communicate with the MultiDAT.
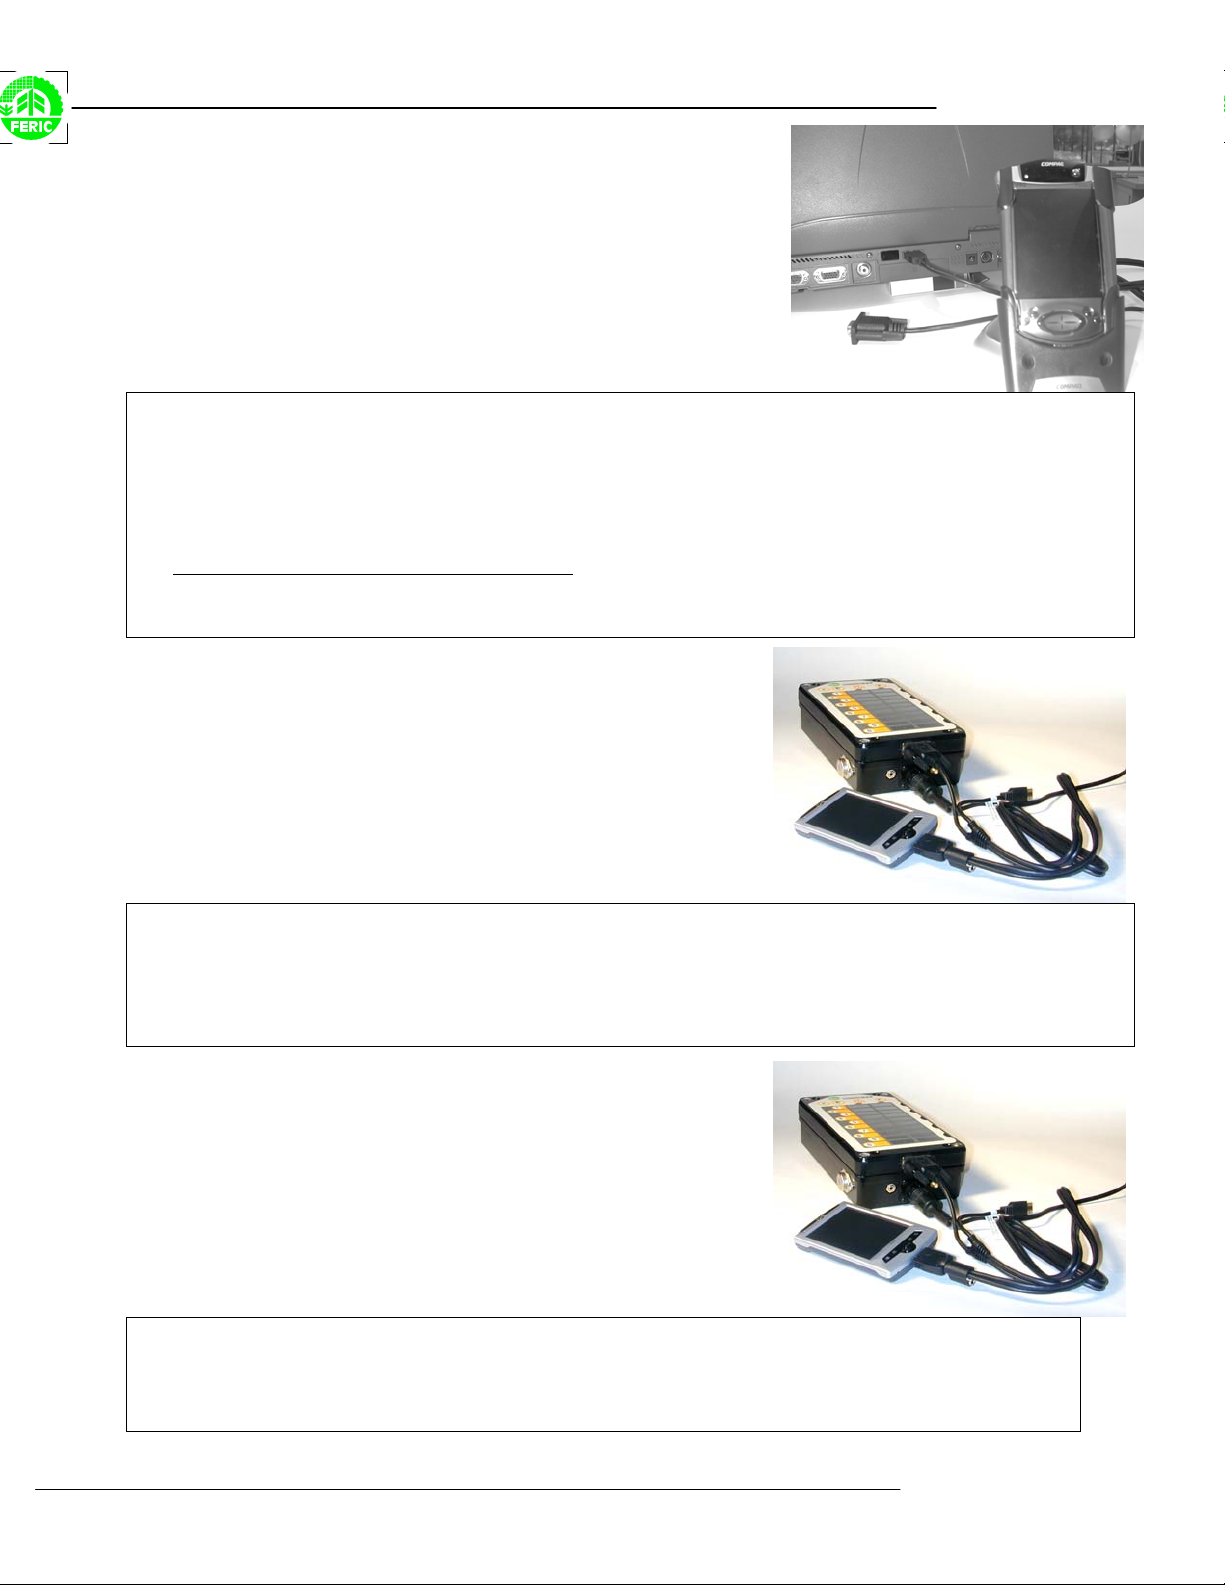
Cables required:
The iPAQ based shuttle uses a serial cable (DB9 connector) to communicate with the MultiDAT and can
use either a serial cable or USB cable to connect to the PC. Many iPAQs are sold with a USB cable only,
so the HP Serial/USB cable must be purchased separately. This cable can be ordered on the HP website
at http://www.hp.ca
Older MultiDAT units do not have a 9 pin connector to connect to the Shuttle. To
use the above cable with these MultiDAT units, you must purchase the DB9-tostereo jack short adapter from the distributor who supplied you with your
MultiDAT unit.
Introduction to the shuttle application (MDAT):
. The part number is FA122A#AC3.
Revision May 2007
When you start the MDAT program, you will notice a Preference button that you can use to set the
language of the interface and the COM port to use. There is also a Files button that will lead you to a list
of configuration files and download files loaded in your shuttle.
Setting the motion sensor using the data shuttle
• Connect the shuttle to the datalogger as shown at left and start MDAT.
• Tap the Motion sensor button with the stylus.
• Idle the machine's engine and observe the range of values under the heading Readout.
• Adjust the threshold by tapping the arrow icons with the stylus until the Readout is under the threshold
value while the machine idles
• Increase this Readout value by 3 to 5 points to ensure that only productive activity (work) will be recorded.
• Operate the machine to confirm that the additional movement is recorded (i.e., that the On timer reading
increases). If not, lower the threshold slightly.
• Tap the Set threshold button with the stylus.
• Close MDAT, then turn off and disconnect the shuttle.
Page 2
MultiDAT iPAQ based shuttles
Transferring the configuration file to the shuttle
• Connect the shuttle to the PC as shown above (using the USB or Serial connection)
• Run MultiDAT, then run MDAT. If ActiveSync is not running, please start it before continuing. (And select
either USB or Serial communication)
• Make sure that the Windows CE choice option is checked under the Tools, Preferences, Shuttle tab.
• In MultiDAT, select the desired machine, open the context menu by right-clicking on it, choose the Shuttle
sub-menu, then Send config file.
• If you are using the application in client mode
• In MultiDAT, click the Send button.
• When the transfer is complete, close MDAT then turn off and disconnect the shuttle.
, select the desired configuration file.
Transferring the configuration file
to the datalogger
• Connect the shuttle to the datalogger as shown above. Run MDAT.
• Tap the MultiDAT button with the stylus.
• Tap the Initialize button with the stylus.
• Select the desired configuration file, then tap the OK button with the stylus.
• When the transfer is complete, close MDAT, then turn off and disconnect the shuttle.
Transferring data files to the shuttle
• Connect the shuttle to the datalogger as shown above. Run MDAT.
• Tap the MultiDAT button with the stylus.
• Tap the Readout button with the stylus.
• When the transfer is complete, close MDAT, then turn off and disconnect the shuttle.
2
Page 3

MultiDAT iPAQ based shuttles
Transferring data files to the PC
• Connect the shuttle to the PC as shown above.
• Run MultiDAT, then run MDAT. If ActiveSync is not running, please start it before continuing.
• In MultiDAT, open the Communications menu and select Shuttle, then select Readout.
• When the transfer is complete, close the software, then turn off and disconnect the shuttle.
Extracting older data files from the MultiDAT
If, for any reason, you lost a MultiDAT data file, you can return to that MultiDAT unit and extract the last
file extracted, if it is not overwritten with newer data. It is not recommended to perform this operation if
you have not lost any data.
To extract a previously read file:
• Connect the shuttle to the datalogger as shown above.
• Run MDAT.
• Tap the MultiDAT button with the stylus.
• Tap the Multiple Read button with the stylus.
• When the transfer is complete, close MDAT, then turn off and disconnect the shuttle.
This operation will transfer up to 3 files to your shuttle. The first one is the data recorded since the last
readout. The other two contain the data transferred in the two previous readout, if they are not
overwritten.
3
Page 4

MultiDAT iPAQ based shuttles
Changing the default communication mode
If, for any reason, you need to communicate with a MultiDAT that has been configured to work in a
different communication mode (ex: wireless radio modem or satellite mode) with the MultiCOM software,
you can do so by following these steps (To switch between NORMAL, MAXSTREAM or SATELLITE
mode):
• Connect the shuttle to the datalogger as shown above.
• Run MDAT.
• Tap the Preferences button with the stylus.
• Tap the Advance settings… button with the stylus.
• Using the Communication mode dropdown list, select one of the new communication modes
• Tap the OK button with the stylus.
This operation will tell the IPAQ that further communications with the MultiDAT should only be done in the
new selected communication mode. In order to come back to the default cabled communication mode,
follow the same procedure and choose the Normal Cabled mode.
PLEASE NOTE: THAT YOU NEED MDAT SOFTWARE 1.2 (BUILD 7) or higher available on the FERIC
website to access this feature.
4
 Loading...