

Page 1
HP Software
®
File Migration Agent (FMA
)
Installation and Administration Guide
Published: July 2009
Page 2

© Copyright 2009 Hewlett-Packard Development Company, L.P.
Legal Notice
Confidential computer software. Valid license from HP required for possession, use or copying. Consistent with FAR 12.211 and 12.212,
Commercial Computer Software, Computer Software Documentation, and Technical Data for Commercial Items are licensed to the U.S.
Government under vendor’s standard commercial license.
The information contained herein is subject to change without notice. The only warranties for HP products and services are set forth in the express
warranty statements accompanying such products and services. Nothing herein should be construed as constituting an additional warranty. HP
shall not be liable for technical or editorial errors or omissions contained herein.
Export of the information contained in this publication may require authorization from the U.S. Department of Commerce.
Microsoft, Windows, Internet Explorer, Notepad, and all Windows-based trademarks are either trademarks or registered trademarks of Microsoft
Corporation.
Mozilla and Firefox are registered trademarks of the Mozilla Corporation.
Java and all Java-based trademarks are trademarks of Sun Microsystems, Inc.
Other product and company names may be the trademarks of their respective owners.
Page 3

Contents
Preface . . . . . . . . . . . . . . . . . . . . . . . . . . . . . . . . . . . . . . . . . . . . . . . . . . . . . . . . . . . . . . . . . . . . . . . . . . . . . . . . . vii
About this guide . . . . . . . . . . . . . . . . . . . . . . . . . . . . . . . . . . . . . . . . . . . . . . . . . . . . . . . . . . . . . . . . . . . . . . vii
Audience . . . . . . . . . . . . . . . . . . . . . . . . . . . . . . . . . . . . . . . . . . . . . . . . . . . . . . . . . . . . . . . . . . . . . . . . . . . . vii
Typographical conventions . . . . . . . . . . . . . . . . . . . . . . . . . . . . . . . . . . . . . . . . . . . . . . . . . . . . . . . . . . . . . viii
Related documentation . . . . . . . . . . . . . . . . . . . . . . . . . . . . . . . . . . . . . . . . . . . . . . . . . . . . . . . . . . . . . . . . viii
Support . . . . . . . . . . . . . . . . . . . . . . . . . . . . . . . . . . . . . . . . . . . . . . . . . . . . . . . . . . . . . . . . . . . . . . . . . . . . viii
Subscription service . . . . . . . . . . . . . . . . . . . . . . . . . . . . . . . . . . . . . . . . . . . . . . . . . . . . . . . . . . . . . . . viii
Support . . . . . . . . . . . . . . . . . . . . . . . . . . . . . . . . . . . . . . . . . . . . . . . . . . . . . . . . . . . . . . . . . . . . . . . . . .ix
1 Overview . . . . . . . . . . . . . . . . . . . . . . . . . . . . . . . . . . . . . . . . . . . . . . . . . . . . . . . . . . . . . . . . . . . . . . . . . . . . . . . . 1
Migration . . . . . . . . . . . . . . . . . . . . . . . . . . . . . . . . . . . . . . . . . . . . . . . . . . . . . . . . . . . . . . . . . . . . . . . . . . . . 2
Release . . . . . . . . . . . . . . . . . . . . . . . . . . . . . . . . . . . . . . . . . . . . . . . . . . . . . . . . . . . . . . . . . . . . . . . . . . . . . . 2
Recall . . . . . . . . . . . . . . . . . . . . . . . . . . . . . . . . . . . . . . . . . . . . . . . . . . . . . . . . . . . . . . . . . . . . . . . . . . . . . . . 2
Cluster operation . . . . . . . . . . . . . . . . . . . . . . . . . . . . . . . . . . . . . . . . . . . . . . . . . . . . . . . . . . . . . . . . . . . . . . . 3
FMA components . . . . . . . . . . . . . . . . . . . . . . . . . . . . . . . . . . . . . . . . . . . . . . . . . . . . . . . . . . . . . . . . . . . . . . 3
2 Installation . . . . . . . . . . . . . . . . . . . . . . . . . . . . . . . . . . . . . . . . . . . . . . . . . . . . . . . . . . . . . . . . . . . . . . . . . . . . . . 5
Creating a technical user account . . . . . . . . . . . . . . . . . . . . . . . . . . . . . . . . . . . . . . . . . . . . . . . . . . . . . . . . . . 5
Configuring backup management applications to work with FMA . . . . . . . . . . . . . . . . . . . . . . . . . . . . . . . . 6
Ensuring interoperability with FMA . . . . . . . . . . . . . . . . . . . . . . . . . . . . . . . . . . . . . . . . . . . . . . . . . . . . 6
Backing up managed volumes . . . . . . . . . . . . . . . . . . . . . . . . . . . . . . . . . . . . . . . . . . . . . . . . . . . . . . . . . 6
Backing up archives . . . . . . . . . . . . . . . . . . . . . . . . . . . . . . . . . . . . . . . . . . . . . . . . . . . . . . . . . . . . . . . . 6
Restoring data . . . . . . . . . . . . . . . . . . . . . . . . . . . . . . . . . . . . . . . . . . . . . . . . . . . . . . . . . . . . . . . . . . . . . 7
Installing FMA on file servers . . . . . . . . . . . . . . . . . . . . . . . . . . . . . . . . . . . . . . . . . . . . . . . . . . . . . . . . . . . . 7
Prerequisites . . . . . . . . . . . . . . . . . . . . . . . . . . . . . . . . . . . . . . . . . . . . . . . . . . . . . . . . . . . . . . . . . . . . . . . . . . 7
Minimum requirements . . . . . . . . . . . . . . . . . . . . . . . . . . . . . . . . . . . . . . . . . . . . . . . . . . . . . . . . . . . . . . 7
Technical user . . . . . . . . . . . . . . . . . . . . . . . . . . . . . . . . . . . . . . . . . . . . . . . . . . . . . . . . . . . . . . . . . . . . . 7
Operating system version . . . . . . . . . . . . . . . . . . . . . . . . . . . . . . . . . . . . . . . . . . . . . . . . . . . . . . . . . . . . 7
Compatibility issues . . . . . . . . . . . . . . . . . . . . . . . . . . . . . . . . . . . . . . . . . . . . . . . . . . . . . . . . . . . . . . . . 8
Restrictions . . . . . . . . . . . . . . . . . . . . . . . . . . . . . . . . . . . . . . . . . . . . . . . . . . . . . . . . . . . . . . . . . . . . . . . 8
First steps . . . . . . . . . . . . . . . . . . . . . . . . . . . . . . . . . . . . . . . . . . . . . . . . . . . . . . . . . . . . . . . . . . . . . . . . . 8
Installing FMA in a cluster configuration . . . . . . . . . . . . . . . . . . . . . . . . . . . . . . . . . . . . . . . . . . . . . . . . . . 14
Evicting a node from a cluster . . . . . . . . . . . . . . . . . . . . . . . . . . . . . . . . . . . . . . . . . . . . . . . . . . . . . . . . 17
Adding a new node to a cluster . . . . . . . . . . . . . . . . . . . . . . . . . . . . . . . . . . . . . . . . . . . . . . . . . . . . . . . 17
Configuring FMA . . . . . . . . . . . . . . . . . . . . . . . . . . . . . . . . . . . . . . . . . . . . . . . . . . . . . . . . . . . . . . . . . . . . . 17
Upgrading FMA . . . . . . . . . . . . . . . . . . . . . . . . . . . . . . . . . . . . . . . . . . . . . . . . . . . . . . . . . . . . . . . . . . . . . . 17
Migrating a Windows 2003 cluster . . . . . . . . . . . . . . . . . . . . . . . . . . . . . . . . . . . . . . . . . . . . . . . . . . . . . . . . 18
Downgrading FMA . . . . . . . . . . . . . . . . . . . . . . . . . . . . . . . . . . . . . . . . . . . . . . . . . . . . . . . . . . . . . . . . . . . . 19
Uninstalling FMA . . . . . . . . . . . . . . . . . . . . . . . . . . . . . . . . . . . . . . . . . . . . . . . . . . . . . . . . . . . . . . . . . . . . . 20
Removing the Explorer plugin . . . . . . . . . . . . . . . . . . . . . . . . . . . . . . . . . . . . . . . . . . . . . . . . . . . . . . . . . . . 20
3 Licensing . . . . . . . . . . . . . . . . . . . . . . . . . . . . . . . . . . . . . . . . . . . . . . . . . . . . . . . . . . . . . . . . . . . . . . . . . . . . . . . 21
Enter FMA license keys . . . . . . . . . . . . . . . . . . . . . . . . . . . . . . . . . . . . . . . . . . . . . . . . . . . . . . . . . . . . . . . . 21
FMA licensing problems . . . . . . . . . . . . . . . . . . . . . . . . . . . . . . . . . . . . . . . . . . . . . . . . . . . . . . . . . . . . . . . 23
Contents | iii
Page 4

4 Archives . . . . . . . . . . . . . . . . . . . . . . . . . . . . . . . . . . . . . . . . . . . . . . . . . . . . . . . . . . . . . . . . . . . . . . . . . . . . . . . 25
Primary and secondary configuration . . . . . . . . . . . . . . . . . . . . . . . . . . . . . . . . . . . . . . . . . . . . . . . . . . . . . . 25
Storage descriptors . . . . . . . . . . . . . . . . . . . . . . . . . . . . . . . . . . . . . . . . . . . . . . . . . . . . . . . . . . . . . . . . . . . . 25
Ignore Security and Data Stream Only . . . . . . . . . . . . . . . . . . . . . . . . . . . . . . . . . . . . . . . . . . . . . . . . . 26
Ignore System Name and Ignore Volume Serial . . . . . . . . . . . . . . . . . . . . . . . . . . . . . . . . . . . . . . . . . . 26
Viewing archives . . . . . . . . . . . . . . . . . . . . . . . . . . . . . . . . . . . . . . . . . . . . . . . . . . . . . . . . . . . . . . . . . . . . . 27
Adding archives to FMA in a cluster environment . . . . . . . . . . . . . . . . . . . . . . . . . . . . . . . . . . . . . . . . . . . 28
Creating CIFS archives . . . . . . . . . . . . . . . . . . . . . . . . . . . . . . . . . . . . . . . . . . . . . . . . . . . . . . . . . . . . . . . . . 28
Preparing CIFS archives for FMA . . . . . . . . . . . . . . . . . . . . . . . . . . . . . . . . . . . . . . . . . . . . . . . . . . . . 28
Configuring CIFS archives . . . . . . . . . . . . . . . . . . . . . . . . . . . . . . . . . . . . . . . . . . . . . . . . . . . . . . . . . . 29
Creating FTP archives . . . . . . . . . . . . . . . . . . . . . . . . . . . . . . . . . . . . . . . . . . . . . . . . . . . . . . . . . . . . . . . . . 31
Preparing FTP archives for FMA . . . . . . . . . . . . . . . . . . . . . . . . . . . . . . . . . . . . . . . . . . . . . . . . . . . . . 31
Configuring FTP archives . . . . . . . . . . . . . . . . . . . . . . . . . . . . . . . . . . . . . . . . . . . . . . . . . . . . . . . . . . . 35
Using FmaFileUtil to work with FTP archives . . . . . . . . . . . . . . . . . . . . . . . . . . . . . . . . . . . . . . . . . . . 37
Creating HP Integrated Archive Platform archives . . . . . . . . . . . . . . . . . . . . . . . . . . . . . . . . . . . . . . . . . . . 39
Preparing IAP archives for FMA . . . . . . . . . . . . . . . . . . . . . . . . . . . . . . . . . . . . . . . . . . . . . . . . . . . . . 40
Configuring IAP archives . . . . . . . . . . . . . . . . . . . . . . . . . . . . . . . . . . . . . . . . . . . . . . . . . . . . . . . . . . . 40
Editing archive properties . . . . . . . . . . . . . . . . . . . . . . . . . . . . . . . . . . . . . . . . . . . . . . . . . . . . . . . . . . . . . . . 43
Deleting archives . . . . . . . . . . . . . . . . . . . . . . . . . . . . . . . . . . . . . . . . . . . . . . . . . . . . . . . . . . . . . . . . . . . . . 44
Removing deleted files from archives . . . . . . . . . . . . . . . . . . . . . . . . . . . . . . . . . . . . . . . . . . . . . . . . . . . . . 44
5 Managed Volumes . . . . . . . . . . . . . . . . . . . . . . . . . . . . . . . . . . . . . . . . . . . . . . . . . . . . . . . . . . . . . . . . . . . . . . . 45
Viewing managed volumes . . . . . . . . . . . . . . . . . . . . . . . . . . . . . . . . . . . . . . . . . . . . . . . . . . . . . . . . . . . . . . 45
Creating managed volumes . . . . . . . . . . . . . . . . . . . . . . . . . . . . . . . . . . . . . . . . . . . . . . . . . . . . . . . . . . . . . . 47
Releasing files using disk space policies . . . . . . . . . . . . . . . . . . . . . . . . . . . . . . . . . . . . . . . . . . . . . . . . . . . 48
Setting disk space watermarks . . . . . . . . . . . . . . . . . . . . . . . . . . . . . . . . . . . . . . . . . . . . . . . . . . . . . . . . 48
Setting retention periods . . . . . . . . . . . . . . . . . . . . . . . . . . . . . . . . . . . . . . . . . . . . . . . . . . . . . . . . . . . . 49
Excluding files from release based on disk space . . . . . . . . . . . . . . . . . . . . . . . . . . . . . . . . . . . . . . . . . 50
Migrating and releasing files using file policies . . . . . . . . . . . . . . . . . . . . . . . . . . . . . . . . . . . . . . . . . . . . . . 51
Creating file policies . . . . . . . . . . . . . . . . . . . . . . . . . . . . . . . . . . . . . . . . . . . . . . . . . . . . . . . . . . . . . . . 51
Scheduling file policies . . . . . . . . . . . . . . . . . . . . . . . . . . . . . . . . . . . . . . . . . . . . . . . . . . . . . . . . . . . . . 54
Editing file policies . . . . . . . . . . . . . . . . . . . . . . . . . . . . . . . . . . . . . . . . . . . . . . . . . . . . . . . . . . . . . . . . 55
Enabling and disabling file policies . . . . . . . . . . . . . . . . . . . . . . . . . . . . . . . . . . . . . . . . . . . . . . . . . . . 55
Deleting file policies . . . . . . . . . . . . . . . . . . . . . . . . . . . . . . . . . . . . . . . . . . . . . . . . . . . . . . . . . . . . . . . 55
Migrating and releasing files with the Explorer plugin . . . . . . . . . . . . . . . . . . . . . . . . . . . . . . . . . . . . . . . . 56
Recalling files . . . . . . . . . . . . . . . . . . . . . . . . . . . . . . . . . . . . . . . . . . . . . . . . . . . . . . . . . . . . . . . . . . . . . . . . 58
Moving files to another managed volume . . . . . . . . . . . . . . . . . . . . . . . . . . . . . . . . . . . . . . . . . . . . . . . . . . 58
Moving a small number of files . . . . . . . . . . . . . . . . . . . . . . . . . . . . . . . . . . . . . . . . . . . . . . . . . . . . . . . 58
Moving a large number of files . . . . . . . . . . . . . . . . . . . . . . . . . . . . . . . . . . . . . . . . . . . . . . . . . . . . . . . 59
Stopping volume management . . . . . . . . . . . . . . . . . . . . . . . . . . . . . . . . . . . . . . . . . . . . . . . . . . . . . . . . . . . 59
Restarting volume management . . . . . . . . . . . . . . . . . . . . . . . . . . . . . . . . . . . . . . . . . . . . . . . . . . . . . . . . . . 60
Removing volume management . . . . . . . . . . . . . . . . . . . . . . . . . . . . . . . . . . . . . . . . . . . . . . . . . . . . . . . . . . 60
iv | Contents
Page 5

6 Best Practices . . . . . . . . . . . . . . . . . . . . . . . . . . . . . . . . . . . . . . . . . . . . . . . . . . . . . . . . . . . . . . . . . . . . . . . . . . . 61
Create a new HP StorageWorks File Migration Agent (FMA) archive . . . . . . . . . . . . . . . . . . . . . . . . . . . . 61
FMA archive configuration for a Windows FTP archive . . . . . . . . . . . . . . . . . . . . . . . . . . . . . . . . . . . 61
FMA archive configuration for an Linux FTP archive . . . . . . . . . . . . . . . . . . . . . . . . . . . . . . . . . . . . . 64
FMA archive configuration for a CIFS-based NAS device . . . . . . . . . . . . . . . . . . . . . . . . . . . . . . . . . 68
FMA archive configuration for IAP . . . . . . . . . . . . . . . . . . . . . . . . . . . . . . . . . . . . . . . . . . . . . . . . . . . 70
Create a new managed volume . . . . . . . . . . . . . . . . . . . . . . . . . . . . . . . . . . . . . . . . . . . . . . . . . . . . . . . . . . . 72
Create file policies . . . . . . . . . . . . . . . . . . . . . . . . . . . . . . . . . . . . . . . . . . . . . . . . . . . . . . . . . . . . . . . . . . . . 72
Create disk usage monitoring . . . . . . . . . . . . . . . . . . . . . . . . . . . . . . . . . . . . . . . . . . . . . . . . . . . . . . . . . . . . 74
Determine FMA software version . . . . . . . . . . . . . . . . . . . . . . . . . . . . . . . . . . . . . . . . . . . . . . . . . . . . . . . . 75
Migrate files . . . . . . . . . . . . . . . . . . . . . . . . . . . . . . . . . . . . . . . . . . . . . . . . . . . . . . . . . . . . . . . . . . . . . . . . . 76
Release files . . . . . . . . . . . . . . . . . . . . . . . . . . . . . . . . . . . . . . . . . . . . . . . . . . . . . . . . . . . . . . . . . . . . . . . . . 76
Recall files . . . . . . . . . . . . . . . . . . . . . . . . . . . . . . . . . . . . . . . . . . . . . . . . . . . . . . . . . . . . . . . . . . . . . . . . . . 77
Set a high-watermark for migration or releases . . . . . . . . . . . . . . . . . . . . . . . . . . . . . . . . . . . . . . . . . . . . . . 77
Verify data files . . . . . . . . . . . . . . . . . . . . . . . . . . . . . . . . . . . . . . . . . . . . . . . . . . . . . . . . . . . . . . . . . . . . . . 77
Schedule FMA commands . . . . . . . . . . . . . . . . . . . . . . . . . . . . . . . . . . . . . . . . . . . . . . . . . . . . . . . . . . . . . . 77
Schedule FMA jobs . . . . . . . . . . . . . . . . . . . . . . . . . . . . . . . . . . . . . . . . . . . . . . . . . . . . . . . . . . . . . . . . . . . 78
Backup/restore concept for FMA managed volumes . . . . . . . . . . . . . . . . . . . . . . . . . . . . . . . . . . . . . . . . . . 78
Relocating data to another FMA managed volume . . . . . . . . . . . . . . . . . . . . . . . . . . . . . . . . . . . . . . . . . . . 79
Relocating data procedure . . . . . . . . . . . . . . . . . . . . . . . . . . . . . . . . . . . . . . . . . . . . . . . . . . . . . . . . . . . . . . 79
Relocating a large number of files . . . . . . . . . . . . . . . . . . . . . . . . . . . . . . . . . . . . . . . . . . . . . . . . . . . . . . . . 80
A Command Line Interface Reference . . . . . . . . . . . . . . . . . . . . . . . . . . . . . . . . . . . . . . . . . . . . . . . . . . . . . . . . 81
FMA commands . . . . . . . . . . . . . . . . . . . . . . . . . . . . . . . . . . . . . . . . . . . . . . . . . . . . . . . . . . . . . . . . . . . . . . 81
activate . . . . . . . . . . . . . . . . . . . . . . . . . . . . . . . . . . . . . . . . . . . . . . . . . . . . . . . . . . . . . . . . . . . . . . . . . . 83
archive . . . . . . . . . . . . . . . . . . . . . . . . . . . . . . . . . . . . . . . . . . . . . . . . . . . . . . . . . . . . . . . . . . . . . . . . . . 86
cleanup . . . . . . . . . . . . . . . . . . . . . . . . . . . . . . . . . . . . . . . . . . . . . . . . . . . . . . . . . . . . . . . . . . . . . . . . . . 88
erase . . . . . . . . . . . . . . . . . . . . . . . . . . . . . . . . . . . . . . . . . . . . . . . . . . . . . . . . . . . . . . . . . . . . . . . . . . . . 89
info . . . . . . . . . . . . . . . . . . . . . . . . . . . . . . . . . . . . . . . . . . . . . . . . . . . . . . . . . . . . . . . . . . . . . . . . . . . . . 92
migrate . . . . . . . . . . . . . . . . . . . . . . . . . . . . . . . . . . . . . . . . . . . . . . . . . . . . . . . . . . . . . . . . . . . . . . . . . . 97
policy . . . . . . . . . . . . . . . . . . . . . . . . . . . . . . . . . . . . . . . . . . . . . . . . . . . . . . . . . . . . . . . . . . . . . . . . . . 101
recall . . . . . . . . . . . . . . . . . . . . . . . . . . . . . . . . . . . . . . . . . . . . . . . . . . . . . . . . . . . . . . . . . . . . . . . . . . 103
release . . . . . . . . . . . . . . . . . . . . . . . . . . . . . . . . . . . . . . . . . . . . . . . . . . . . . . . . . . . . . . . . . . . . . . . . . 106
rsa . . . . . . . . . . . . . . . . . . . . . . . . . . . . . . . . . . . . . . . . . . . . . . . . . . . . . . . . . . . . . . . . . . . . . . . . . . . . 110
system . . . . . . . . . . . . . . . . . . . . . . . . . . . . . . . . . . . . . . . . . . . . . . . . . . . . . . . . . . . . . . . . . . . . . . . . . 112
verify . . . . . . . . . . . . . . . . . . . . . . . . . . . . . . . . . . . . . . . . . . . . . . . . . . . . . . . . . . . . . . . . . . . . . . . . . . 114
version . . . . . . . . . . . . . . . . . . . . . . . . . . . . . . . . . . . . . . . . . . . . . . . . . . . . . . . . . . . . . . . . . . . . . . . . . 117
volume . . . . . . . . . . . . . . . . . . . . . . . . . . . . . . . . . . . . . . . . . . . . . . . . . . . . . . . . . . . . . . . . . . . . . . . . . 119
Result codes . . . . . . . . . . . . . . . . . . . . . . . . . . . . . . . . . . . . . . . . . . . . . . . . . . . . . . . . . . . . . . . . . . . . . . . . 121
B Troubleshooting . . . . . . . . . . . . . . . . . . . . . . . . . . . . . . . . . . . . . . . . . . . . . . . . . . . . . . . . . . . . . . . . . . . . . . . . 123
Accessing FMA log files . . . . . . . . . . . . . . . . . . . . . . . . . . . . . . . . . . . . . . . . . . . . . . . . . . . . . . . . . . . . . . 124
FMA log . . . . . . . . . . . . . . . . . . . . . . . . . . . . . . . . . . . . . . . . . . . . . . . . . . . . . . . . . . . . . . . . . . . . . . . 124
FMACLI log . . . . . . . . . . . . . . . . . . . . . . . . . . . . . . . . . . . . . . . . . . . . . . . . . . . . . . . . . . . . . . . . . . . . 125
Windows event log . . . . . . . . . . . . . . . . . . . . . . . . . . . . . . . . . . . . . . . . . . . . . . . . . . . . . . . . . . . . . . . 126
Troubleshooting installation . . . . . . . . . . . . . . . . . . . . . . . . . . . . . . . . . . . . . . . . . . . . . . . . . . . . . . . . . . . . 126
Troubleshooting configuration issues . . . . . . . . . . . . . . . . . . . . . . . . . . . . . . . . . . . . . . . . . . . . . . . . . . . . . 126
Troubleshooting connectivity . . . . . . . . . . . . . . . . . . . . . . . . . . . . . . . . . . . . . . . . . . . . . . . . . . . . . . . . . . . 127
Troubleshooting common issues . . . . . . . . . . . . . . . . . . . . . . . . . . . . . . . . . . . . . . . . . . . . . . . . . . . . . . . . 129
Troubleshooting third-party application issues . . . . . . . . . . . . . . . . . . . . . . . . . . . . . . . . . . . . . . . . . . . . . 132
Troubleshooting cluster systems . . . . . . . . . . . . . . . . . . . . . . . . . . . . . . . . . . . . . . . . . . . . . . . . . . . . . . . . . 133
Contents | v
Page 6

C Third-party Product Compatibility List . . . . . . . . . . . . . . . . . . . . . . . . . . . . . . . . . . . . . . . . . . . . . . . . . . . . 135
Anti-virus . . . . . . . . . . . . . . . . . . . . . . . . . . . . . . . . . . . . . . . . . . . . . . . . . . . . . . . . . . . . . . . . . . . . . . . . . . 135
Symantec AntiVirus . . . . . . . . . . . . . . . . . . . . . . . . . . . . . . . . . . . . . . . . . . . . . . . . . . . . . . . . . . . . . . 135
McAfee VirusScan . . . . . . . . . . . . . . . . . . . . . . . . . . . . . . . . . . . . . . . . . . . . . . . . . . . . . . . . . . . . . . . 135
Sophos Anti-Virus . . . . . . . . . . . . . . . . . . . . . . . . . . . . . . . . . . . . . . . . . . . . . . . . . . . . . . . . . . . . . . . . 136
ServerProtect . . . . . . . . . . . . . . . . . . . . . . . . . . . . . . . . . . . . . . . . . . . . . . . . . . . . . . . . . . . . . . . . . . . . 136
eTrust AntiVirus . . . . . . . . . . . . . . . . . . . . . . . . . . . . . . . . . . . . . . . . . . . . . . . . . . . . . . . . . . . . . . . . . 136
TrendMicro OfficeScan . . . . . . . . . . . . . . . . . . . . . . . . . . . . . . . . . . . . . . . . . . . . . . . . . . . . . . . . . . . . 137
Backup/restore . . . . . . . . . . . . . . . . . . . . . . . . . . . . . . . . . . . . . . . . . . . . . . . . . . . . . . . . . . . . . . . . . . . . . . 137
BackupExec . . . . . . . . . . . . . . . . . . . . . . . . . . . . . . . . . . . . . . . . . . . . . . . . . . . . . . . . . . . . . . . . . . . . . 137
BrightStor ArcServe . . . . . . . . . . . . . . . . . . . . . . . . . . . . . . . . . . . . . . . . . . . . . . . . . . . . . . . . . . . . . . 137
Data Protector . . . . . . . . . . . . . . . . . . . . . . . . . . . . . . . . . . . . . . . . . . . . . . . . . . . . . . . . . . . . . . . . . . . 138
NetBackup . . . . . . . . . . . . . . . . . . . . . . . . . . . . . . . . . . . . . . . . . . . . . . . . . . . . . . . . . . . . . . . . . . . . . . 138
Networker . . . . . . . . . . . . . . . . . . . . . . . . . . . . . . . . . . . . . . . . . . . . . . . . . . . . . . . . . . . . . . . . . . . . . . 139
NetVault . . . . . . . . . . . . . . . . . . . . . . . . . . . . . . . . . . . . . . . . . . . . . . . . . . . . . . . . . . . . . . . . . . . . . . . 139
MS VSS . . . . . . . . . . . . . . . . . . . . . . . . . . . . . . . . . . . . . . . . . . . . . . . . . . . . . . . . . . . . . . . . . . . . . . . . 139
Tivoli Storage Manager . . . . . . . . . . . . . . . . . . . . . . . . . . . . . . . . . . . . . . . . . . . . . . . . . . . . . . . . . . . . 140
Galaxy Backup & Recovery . . . . . . . . . . . . . . . . . . . . . . . . . . . . . . . . . . . . . . . . . . . . . . . . . . . . . . . . 140
Quota/encryption . . . . . . . . . . . . . . . . . . . . . . . . . . . . . . . . . . . . . . . . . . . . . . . . . . . . . . . . . . . . . . . . . . . . 141
StorageExec . . . . . . . . . . . . . . . . . . . . . . . . . . . . . . . . . . . . . . . . . . . . . . . . . . . . . . . . . . . . . . . . . . . . . 141
Defragmentation . . . . . . . . . . . . . . . . . . . . . . . . . . . . . . . . . . . . . . . . . . . . . . . . . . . . . . . . . . . . . . . . . . . . . 141
O & O Defrag . . . . . . . . . . . . . . . . . . . . . . . . . . . . . . . . . . . . . . . . . . . . . . . . . . . . . . . . . . . . . . . . . . . 141
MS Defragmentation . . . . . . . . . . . . . . . . . . . . . . . . . . . . . . . . . . . . . . . . . . . . . . . . . . . . . . . . . . . . . . 142
IndexServer . . . . . . . . . . . . . . . . . . . . . . . . . . . . . . . . . . . . . . . . . . . . . . . . . . . . . . . . . . . . . . . . . . . . . . . . . 142
MS IndexServer . . . . . . . . . . . . . . . . . . . . . . . . . . . . . . . . . . . . . . . . . . . . . . . . . . . . . . . . . . . . . . . . . . 142
HP Storage Mirroring Interoperability . . . . . . . . . . . . . . . . . . . . . . . . . . . . . . . . . . . . . . . . . . . . . . . . . . . . 143
Mirroring and Replication . . . . . . . . . . . . . . . . . . . . . . . . . . . . . . . . . . . . . . . . . . . . . . . . . . . . . . . . . . 143
Failure monitoring and failover . . . . . . . . . . . . . . . . . . . . . . . . . . . . . . . . . . . . . . . . . . . . . . . . . . . . . . 144
Restoration . . . . . . . . . . . . . . . . . . . . . . . . . . . . . . . . . . . . . . . . . . . . . . . . . . . . . . . . . . . . . . . . . . . . . . 144
Supported Configuration . . . . . . . . . . . . . . . . . . . . . . . . . . . . . . . . . . . . . . . . . . . . . . . . . . . . . . . . . . . 145
Script creation . . . . . . . . . . . . . . . . . . . . . . . . . . . . . . . . . . . . . . . . . . . . . . . . . . . . . . . . . . . . . . . . . . . 147
D Error Codes and Messages . . . . . . . . . . . . . . . . . . . . . . . . . . . . . . . . . . . . . . . . . . . . . . . . . . . . . . . . . . . . . . . 149
Index . . . . . . . . . . . . . . . . . . . . . . . . . . . . . . . . . . . . . . . . . . . . . . . . . . . . . . . . . . . . . . . . . . . . . . . . . . . . . . . . . 175
vi | Contents
Page 7

Preface
Welcome to the File Migration Agent Installation and Administration Guide. This guide provides the
information required to install and work with File Migration Agent (FMA
FMA enables systematic migration of inactive and rarely used data on Windows file servers to Hierarchical
Storage Management (HSM) systems or other Network Attached Storage (NAS) devices. Before migration
is enabled, an FMA user must define the volumes to be managed and the archives where data will be stored.
About this guide
The File Migration Agent Installation and Administration Guide is designed to help you install, configure,
and work with FMA. The chapters are include information about product functionality and use, planning and
performing installation, creating and managing archives, managing volumes and moving files between
managed volumes and archives, using the Command Line Interface (CLI), and troubleshooting.
Audience
This guide is designed for use by anyone deploying FMA. Users should be familiar with the file servers that
will be managed in order to effectively create migration policies. Familiarity with system and network
configuration is highly recommended.
®
).
Preface | vii
Page 8

Typographical conventions
This guide uses the following typographical conventions:
Convention Description
Bold Used for file names, field names, URLs, interface elements that are
Bold Italic Represents variables within file names, command syntax, URLs, or
Italics Used for emphasis, book titles, and variables.
Monospace Used for output text, command names and arguments (syntax), code,
Monospace Italic Represents variables within command syntax, code, or command-
Blue Text Used for cross-references.
Related documentation
In addition to this guide, you can reference the HP File Migration Agent Release Notes. This document
provides information about system requirements, known issues, and other information about the current
release.
clicked/selected, and information that must be used literally.
other literal text.
file content (such as parameters), and command-line text.
line text.
These and other HP documents can be found on the HP documents web site. In the Software section, select
Software and go to the Information Management section to find FMA:
http://www.hp.com/support/.
Support
For service and support assistance, contact your authorized service and support representative directly.
• For technical assistance with an evaluation version of FMA, contact your sales representative.
• For technical assistance with a registered version of FMA, contact HP Support for support of this
product.
• **ADD standard HP support contact**
Subscription service
HP strongly recommends that customers sign up online using the Subscriber's choice web site:
http://www.hp.com/go/e-updates
• Subscribing to this service provides you with e-mail updates on the latest product enhancements, newest
versions of drivers, and firmware documentation updates as well as instant access to numerous other
product resources.
• After signing up, you can quickly locate your products by selecting Business support and then Storage
under Product Category.
viii | Preface
Page 9

Support
You can visit the HP Software Support web site at:
http://www.hp.com/go/hpsoftwaresupport
HP Software Support Online provides an efficient way to access interactive technical support tools. As a
valued support customer, you can benefit by using the support site to:
• Search for knowledge documents of interest
• Submit and track support cases and enhancement requests
• Download software patches
• Manage support contracts
• Look up HP support contacts
• Review information about available services
• Enter into discussions with other software customers
• Research and register for software training
Most of the support areas require that you register as an HP Passport user and sign in. Many also require a
support contract.
To find more information about access levels, go to:
http://h20230.www2.hp.com/new_access_levels.jsp
For more information about HP Passport, go to:
http://h20229.www2.hp.com/passport-registration.html
When calling support:
Collect the following information before calling:
• Technical support registration number (if applicable)
• Product serial numbers
• Product model names and numbers
• Error messages
• Troubleshooting package (If further investigation is needed to resolve an issue. Please provide the
troubleshooting package to support. See
from your system.)
Troubleshooting on page 123 on how to obtain this package
Preface | ix
Page 10

x | Preface
Page 11

Overview
File Migration Agent (FMA) offers a technologically innovative approach to data management by
maintaining active files on high-performance primary storage while archiving inactive files on cost-effective
secondary storage. FMA does not require changes to the current directory structure and integrates
seamlessly into the existing IT infrastructure. FMA only manages files on specified volumes on the file
server defined as managed volumes.
FMA is a Windows-based solution that copies, or migrates, inactive or rarely used data to archive storage
systems such as Content Addressed Storage (CAS) systems, Hierarchical Storage Management (HSM)
systems, or Network Attached Storage (NAS) devices. Migrated files can subsequently be released so that
only a stub file (a data file that stands in for the original file) remains on the file server while the full file
resides on the archive storage system. FMA recalls the file from the archive whenever it is needed on the file
server.
Migration, release, and recall processes are transparent to Windows users and applications, which can
continue to access files as if the files were still on the file server. Migrating and releasing files manages the
growth and complexity of Windows file servers, freeing space for active data.
FMA administrators define the conditions under which files on managed volumes are migrated or released.
The administrator can create policies to migrate and release files based on properties such as the file
extension or timestamp. The administrator can monitor the space on a managed volume and automatically
release migrated files based on a retention time period when a configurable watermark is reached.
1
Page 12

Migration
During the migration process, FMA adds FMA-specific metadata to a managed file on a file server and
copies the managed file to one or more archives. FMA supports the following:
• Common Internet File System (CIFS), for Windows-based archives
• File Transfer Protocol (FTP), for Linux-based archives
• HP Integrated Archive Platform (IAP), for IAP archives
Although files can be migrated manually, FMA administrators typically create policies to define the
conditions under which files are migrated. Policies can migrate files based on file name; file age in relation
to creation, modification, or last access time; or a minimum file size. They can exclude files from migration
based on file name or file attributes, such as hidden files. Policies can be run manually or scheduled to run at
regular intervals.
Administrators can apply any number of policies to each managed volume. Policies set in the root folder
apply to all files in the entire volume. Policies set at the folder level are valid for the files in that folder and
its subfolders.
After migration, FMA verifies that the file size and timestamp of a file on the file server and the file on the
archive are identical.
For information about migrating files, see Managed Volumes on page 45.
Release
Recall
During the release process, FMA replaces a migrated file on a file server with a stub file. FMA marks this
stub file as offline, which designates files that have remote data.
Although files can be released manually, FMA administrators typically set disk space policies, which are
watermark levels that monitor available disk space on managed volumes. When a managed volume reaches
its high watermark, FMA evaluates the retention policies for the volume and begins releasing files that
match the policy criteria. FMA stops releasing files when it reaches its low watermark. If the critical
watermark is reached, files are released independently of the retention policies. Retention policies are
related to elapsed time since last access or modification to a file. For information about these watermarks,
see
Releasing files using disk space policies on page 48.
Before a file can be released, it must be migrated with at least one valid copy in an archive and it must be
larger than 1024 bytes. Because releasing locks files exclusively, files that cannot be opened exclusively
cannot be released and remain on the file server. Files can also be released according to user-set policies
regarding the number of archived copies existing for each file.
For information about releasing files, see Managed Volumes on page 45.
When a user or application accesses a released file to read it or write to it, FMA intercepts the read or write
request and retrieves the file data from the archive. If one archive is not available, FMA attempts to find the
file in other archives where the file was also migrated. If FMA cannot recall a file from any of the archives,
it returns an error.
Files can also be manually recalled explicitly by using the FMA command line interface, or by using the
Window Explorer plug-in.
For information about recalling files, see Managed Volumes on page 45.
2 | Overview
Page 13

Cluster operation
When running on a Microsoft Cluster Server, an instance of FMA is installed and running on each node.
Two of the FMA services are concurrently active on all nodes. The Active File Management (AFMSvc) and
the Volume Manager (HsmSvc) run concurrently on each node to handle file migrations and recalls on any
managed volumes that might be active on those nodes. A third service, the Configuration service
(HsmCfgSvc), runs only on the node currently hosting the cluster group resources. Its activation is tied to
and controlled by the cluster group.
For a given volume, the policy information is stored at the root level of the volume in the “HSM Volume
Information” system directory. Because this information is stored on the volume, policy information for the
volume is available when the volume is moved or fails over to another node in the cluster. When this volume
appears on the new node where FMA is running, a new file system filter instance is attached to the volume
and an instance of the volume manager is started for this volume. The volume manager is then able to read
the policy information and carry on management of the volume on the new node.
Archive configuration is considered a global resource and is controlled by the Configuration service.
Although archive configuration is accessible from all nodes, the policy referencing the archive must be
edited from the node where the volume is currently active. When installing or managing FMA in a Microsoft
Cluster Server, be aware of the cluster-specific instructions in chapters 2-5.
FMA components
The following FMA interfaces and utilities are available:
User interface
Use the FMA user interface to perform most tasks related to managed files or volumes. The user
interface is seamlessly integrated into Microsoft’s Management Console (MMC) and its use is
documented throughout this guide. To access the FMA user interface, select All Programs→HP
StorageWorks File Migration Agent→FMA Configuration from the Windows Start menu.
You can also access the FMA user interface from the Computer Management window or the Server
Management window, depending on the operating system. For the 32-bit version of Server 2003,
the File Migration Agent section is listed in the Storage section of Computer Management. For the
32-bit version of Server 2008, the File Migration Agent section is listed in the Storage section of
Server Manager.
Explorer plugin
Use the Explorer plugin on the file server to manually migrate, release, and recall managed files
from Windows Explorer. To view the FMA properties of a file using the Explorer plugin, rightclick on a file (in a managed volume) in Windows Explorer, select Properties, and then select the
FMA tab. For more information about using the Explorer plugin, see Migrating and releasing files
with the Explorer plugin on page 56.
Command line interface
Use the FMA command line interface (FMACLI) to work with managed files. While most
functions are available from the FMACLI, tasks such as creating managed volumes must be
performed in the user interface.
When running HP FMA on a 64-bit Windows Operating System, the Explorer plug-in is only
available for the 32-bit MS Explorer version. In order to use the FMA plug-in on a 64-bit OS, the
following command must be manually run:
%windir%\syswow64\explorer /separate
For details about the FMACLI, see Command Line Interface Reference on page 81.
Overview | 3
Page 14

FMAFileUtil
Use FMAFileUtil to manually retrieve and store data on FTP-based archives. For details about this
utility, see Using FmaFileUtil to work with FTP archives on page 37.
4 | Overview
Page 15

Installation
This chapter describes the tasks you must perform to install File Migration Agent (FMA). These tasks
include the following:
1. Create the technical user required by the FMA service.
2. Configure backup management applications to ensure that data on file servers continues to be backed up
as expected.
3. Install FMA on each file server with files that you want to manage.
4. If you are installing in a Windows cluster environment, run the FMA cluster configuration wizard.
In addition, this chapter contains information about FMA license keys, upgrading FMA, downgrading FMA,
uninstalling FMA, and removing the Explorer plugin.
Note To install, use the FMA components, or uninstall FMA, the login user account must have
Administrator privileges.
Note
Ensure there is no unsupported third-party applications installed on the file server.
Creating a technical user account
FMA can run processes using a technical user account. Before you begin, create a Windows user account
with Full Control permissions, including permissions to start, stop, and pause services. Specifically, FMA
uses the technical user to migrate data to Common Internet File System (CIFS) archives. To maintain FMA
access to the files it manages, the password for this technical user account should never change or expire. If
a password change is required, the password must be updated on every archive accessed by FMA.
In a cluster environment, a domain user is typically used to run FMA processes.
5
Page 16

Configuring backup management applications to work with FMA
Managed volumes and archives must be backed up regularly. FMA is an archiving solution and does not
replace the current backup solution.
Refer to the File Migration Release Notes for a list of supported backup management applications and their
limitations with FMA.
Ensuring interoperability with FMA
To ensure proper interoperability with FMA, the backup management application must back up and restore
the following file information:
• Unnamed data stream (actual file data)
• Proper sparse-file handling
• Access control list (file security)
• Alternate data streams
• Reparse point information
• NTFS object-id
• File attributes, such as offline and sparse
In addition, keep the following in mind when performing backups:
• The backup management application must open files using the FILE_FLAG_OPEN_NO_RECALLS
and FILE_FLAG_BACKUP_SEMANTICS options.
• The backup management application must use the WIN32 BackupRead and BackupWrite functions.
• The backup management application must not make changes to the last access timestamp of scanned or
backed up files.
• Backing up files on managed volumes using network shares triggers recalls.
Backing up managed volumes
Backup management applications use different criteria when selecting candidates for incremental backup.
Changes to parameters such as file size, modification date, or file attributes can trigger a backup.
Some applications monitor the reparse attribute for a file. If this attribute has changed since the last backup,
the application backs up the file again. These applications should back up files incrementally. Currently,
IBM Tivoli Storage Manager is the only supported backup management application that should use only
incremental backups.
Other applications monitor the modification timestamp and file size. For these applications, FMA operations
are transparent. Configure these backup management applications to run a weekly full backup with daily
incremental backups. As files are released, periodic full backups include stub files rather than full files. This
reduces the size of backups but requires that the archive be backed up reliably.
Backing up archives
Archive files must be backed up as well. Because these are always full files, they do not have the same
restrictions as the managed volume backups. However, for CIFS backups, use the following guidelines:
• Run weekly full and daily incremental backups on the managed volumes and CIFS archives at the same
time.
• For performance reasons, run incremental forever backups on the CIFS archives.
6 | Installation
Page 17

• Do not migrate or release files during the backup window to ensure that the backups of the managed
volumes and CIFS archives are synchronized and consistent.
• As a best practice, create two archive copies when using CIFS archives.
• FMA archive cleanup expiration time must be greater than the backup retention time. For information
about cleanup, see
• Ensure that a replica of a file is backed up before that file is released from the managed volume.
Removing deleted files from archives on page 44.
Restoring data
If you must restore a backup of a file or folder, you should copy and paste the current file or folder to a new
location and then restore the file or folder to the original location. FMA does not support file activation for
files that have been restored to a new location. Restoring files is only supported to their original location.
Installing FMA on file servers
Prerequisites
Minimum requirements
• A server that meets the minimum hardware requirements shown in the HP FMA 2.5 Release Notes
document.
• An additional hard disk drive(s).
Technical user
The FMA service needs to run under a user account (for example, FMAUser) with the following privileges:
• Backup files and directories.
• Restore files and directories.
• Take ownership of files or other objects.
• Network access.
• Other things to consider about technical users:
• Password must not expire.
• Password should not be changeable by the user.
Note The user must have the appropriate access rights (“FULL CONTROL”) on the NAS devices, which
are used as backend data stores. Create the FMA technical user account before starting the
installation procedure. A wizard is launched during the installation for setting up the technical user.
Operating system version
The 32 and 64-bit versions of the following operating systems are supported for file servers and for CIFSbased NAS archives:
• Microsoft Windows Server 2008 Standard, Enterprise, and Datacenter Editions
• Microsoft Windows Server 2003 SP2 Standard and Enterprise Edition
• Microsoft Windows Server 2003 R2 SP2 Standard and Enterprise Edition
• Microsoft Windows Storage Server 2003 Standard and Enterprise Edition
Installation | 7
Page 18

• Microsoft Windows Storage Server 2003 R2 SP2 Standard and Enterprise Edition
• HP Windows Unified Data Storage Server (WUDSS) 2003
• Microsoft Windows Server 2003 R2 NFS server with the following restrictions:
• Windows can only handle paths with a maximum length of 260 characters.
• UNIX and Windows systems use different user and group IDs. Therefore, there needs to be a
corresponding set of user and group IDs on the UNIX system to the Windows system.
• Window components “Services for Unix” and “User mapping” components is required for NFS
sharing of the source volume(s)
• When files with the same name but different capitalization (such as temp1, Temp1, and TEMP1)
are saved in the same directory, the Win32 subsystem recognizes only one of them. FMA and other
Windows applications can only access one of these versions, and it is not possible to determine
which version will be retrieved.
Compatibility issues
Before installation, please review Third-party Product Compatibility List on page 135. Software which is
not on the list is not supported and needs to be removed from the FMA server before installation.
Restrictions
The following features are not part of this FMA version:
• No continuous migration and release.
• No event-driven migration and release.
• No built-in disaster recovery function. Regular backups of the managed file system are required. (See
Third-party Product Compatibility List on page 135.)
• The system volume cannot be managed by FMA.
• No support for multiple generations of files.
• No load balancing for recall between different archives.
• A monitor resolution of at least 1024 x 768 pixels is required.
• FMA can not manage a cluster quorum disks.
• For restrictions on third-party applications see Third-party Product Compatibility List on page 135.
First steps
When using the FMA for the first time, the following procedures must be executed:
1. Install the backend archive (CIFS, IAP, or FTP).
2. Create a technical user for the File Migration Agent service. Collect information about the data storage
3. Install FMA. For further information about the FMA installation, see Installing FMA on file servers on
4. Configure at least one FMA archive using the FMA MMC Snap-In. For further information about the
5. Configure the managed volumes using the FMA MMC Snap-In. For further information about the FMA
8 | Installation
(user ID, IP address, and so on).
page 7, Installing FMA in a cluster configuration on page 14, and Upgrading FMA on page 17.
FMA archive management, see
volume management, see
Archives on page 25.
Managed Volumes on page 45.
Page 19

6. Configure file policies and schedules on the managed volumes using the FMA Policy Manager (see
Migrating and releasing files using file policies on page 51).
7. Configure the watermarks and retention periods for disk space monitoring of the managed volumes
using the FMA Policy Manager (see
Releasing files using disk space policies on page 48).
You must install FMA on each file server to be managed. During this installation process, the following
folders are created the FMA installation folder, which by default is C:\Program Files\Hewlett-Packard\HP
FMA\.
• bin—Program files and binaries
• doc—Documentation
• log—FMA log files
• templates—Policy templates
If you are working in a cluster environment, see Installing FMA in a cluster configuration on page 14.
To install FMA
1. Close all applications running on the file server.
2. Run setup.exe to start the installation wizard. This file is available on the installation CD.
The Welcome dialog box is displayed:
3. On the Welcome dialog box, click Next. The License Agreement dialog box is displayed:
Installation | 9
Page 20

4. On the License Agreement dialog box, read the agreement, select whether to accept it, and click Next.
You cannot continue with installation unless you accept the license agreement.
The Destination Folder dialog box is displayed:
5. On the Destination Folder dialog box, choose the location where to install FMA.
• To install in the default location, click Next. This is recommended.
• To install in a different location, click Change, select a new location in the dialog box, and then
click Next in the wizard.
10 | Installation
The Setup Type dialog box is displayed:
Page 21

6. On the Setup Type dialog box, choose whether to install all features or select features.
• To install all features, which is recommended, click Next.
• To install select features or if you are installing in a Windows cluster environment, select Custom
and then click Next. The Custom Setup dialog box is displayed:
Click the icon on the Custom Setup dialog box next to the files you do not want to install. To install
these files in a location other than the default location, click Change and select a new location in
the dialog box. Then, click Next.
Note
If you are installing in a Windows cluster environment, do not select HSM Explorer
Extension. This feature (the Windows Explorer plugin) can be installed after FMA
configuration is complete.
Installation | 11
Page 22

The wizard installs FMA.
Then, the Technical user dialog box is displayed:
7. On the Technical user dialog box, provide information about the technical user you set up for the FMA
12 | Installation
service. For more information about this account, see
Creating a technical user account on page 5.
If you select LocalSystem account, FMA uses the local ID named system to run processes.
Page 23
To specify a technical user, complete these steps:
a. Select This account and type the name of the account.
b. In the Password and Confirm password fields, type the account password.
c. Click Next.
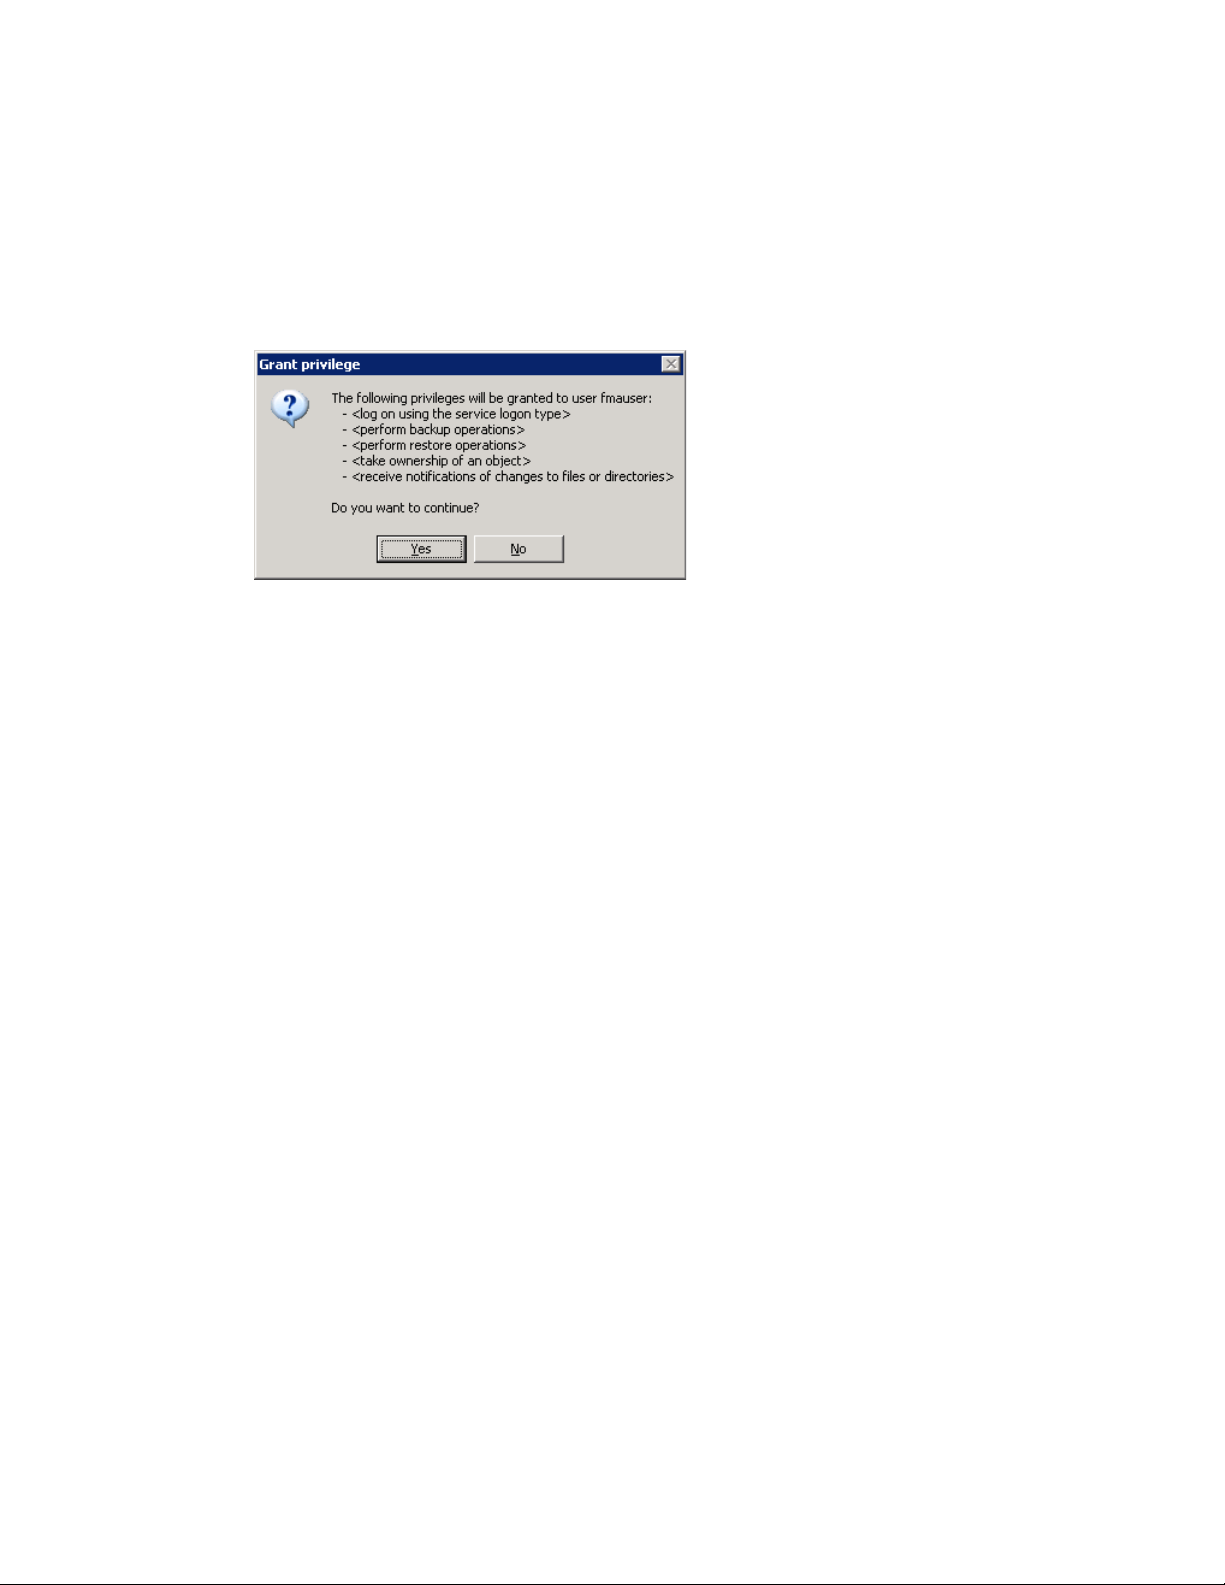
The Grant Permissions dialog box is displayed:
8. Click Ye s to confirm you want to grant permissions to the technical user.
9. Click Next on the Wizard Summary dialog. The completion dialog box is displayed.
10. Click Finish.
Installation | 13
Page 24

Installing FMA in a cluster configuration
If you are installing FMA on a Microsoft cluster system, you must perform additional configuration steps.
FMA supports clusters based on Windows Server 2003 and 2008. Consult Microsoft documentation for help
in determining the best cluster configuration for the application. The following quorum modes are supported
by FMA and the installation instructions are the same for all cases:
• Server 2003
Standard Quorum—All nodes use a common disk to store the cluster information.
Majority Node Set (MNS)—All nodes store a copy of the cluster information and there is no shared disk
quorum resource.
• Server 2008
Node Majority—This is similar to MNS for Server 2003.
Node and Disk Majority—This is used when there are an even number of nodes for a single site cluster
and there is a single shared disk resource.
Node and File Share Majority—This is used when there are an even number of nodes and the shared
disk resource is a file share that enables nodes from remote sites to access the quorum data.
No Majority—This is similar to Standard Quorum for Server 2003.
When you work with a cluster environment, consider the following:
• FMA must be installed on every node.
• All cluster nodes must be running and the cluster system must be fully operational before installing and
configuring FMA. For a Server 2008 cluster, run the Validate a Configuration Wizard before installing
FMA. All issues must be resolved before installation of FMA.
• When deploying FMA on an MNS multi-site cluster, ensure that the replication tool maintains exact
duplicates of production disks at the recovery location.
If you want to migrate a Windows 2003 cluster that includes FMA to a Windows 2008 cluster, see Migrating
a Windows 2003 cluster on page 18.
To configure FMA in a cluster environment
The Active/Active and Active/Passive configuration have different configuration steps in the cluster
environment, refer to
The following steps are for the Active/Passive cluster configuration:
1. Install FMA on each cluster node, following the steps in Installing FMA on file servers on page 7.
Note In cluster environments, the FMA configuration service runs on one node only. This service is
not started until all steps in this procedure are completed. The FMA migrator service should
only run for seven minutes when the configuration service is not running. Therefore, if step 1
takes longer than seven minutes to complete for ALL nodes, HP recommends rebooting all
nodes prior to completing step 2.
2. Launch the FMA cluster wizard on any cluster node to configure the FMA configuration service as a
cluster resource in the default cluster group.
From the Start menu, select All Programs→HP StorageWorks File Migration Agent→FMA Cluster
Setup.
3. On the Cluster Setup dialog box, click Next.
To create an Active/Active Cluster configuration on page 15 for more information.
14 | Installation
Page 25

4. On the Cluster Setup dialog box, select the account to use to run processes and click Next. In a cluster
environment, a domain user is typically used to run the FMA Configuration process. If you do not want
to create a new user for this process, you can select Localsystem account.
5. On the Cluster Setup dialog box, select Cluster Group and click Next.
6. On the next Cluster Setup dialog box, enter a resource name and brief description and click Next.
7. On the Wizard Summary dialog box, click Finish.
8. Use the Windows cluster administration tools to view the status of the cluster group and the FMA
service that was just created. The cluster group should be online and contain the FMA configuration
service that was just created.
9. Move the cluster group to all nodes of the cluster and verify that it comes online in each case. Manually
Start the management of managed volume(s) on each node after verifying the cluster group is online.
Moving the cluster group is different depending on whether the system is based on Server 2003 or 2008.
• Server 2003
In the cluadmin application, right-click the default cluster group and select Move.
• Server 2008
Enter the following command at a command line prompt:
cluster . group "Cluster Group" /move:Node
where Node is the destination for the move.
For information about adding archives in a cluster environment, see Adding archives to FMA in a cluster
environment on page 28. See Creating managed volumes on page 47 for information about adding volumes
in a cluster environment.
To create an Active/Active Cluster configuration
The Active/Active configuration requires a few additional steps to configure compare to the Active/Passive
configuration.
1. Create an Active/Passive configuration using the steps provided in To configure FMA in a cluster
environment on page 14.
2. Open the Cluster Administrator. The Cluster Administrator is a tool to enable creating and controlling
cluster configurations. To open the Cluster Administrator:
• Open a new command window by clicking Start → Run. Enter cluadmin.
or
• Open the control panel by clicking Start → Settings → Control Panel. Open Administrative
Tools and then Cluster Administrator.
Installation | 15
Page 26

3. Create a new Cluster Group for the resources to be allocated to the secondary Active node.
a. Click Add New Resources. Add the new Physical Disk to the new Cluster Group you have created.
b. Move the Cluster Group with all its resources to the appropriate active node by right clicking over
the selected group and selecting Move Group.
Note All drive letters or resource names in the cluster resources must be unique. Drive letters or
resource names cannot be used more than once. If you have identical drive letters or resources,
they will not failover to the another node because it already contains the same drive letter. If
the disk drive does not failover to another node during failure, it will not be managed by FMA.
4. Log on to the secondary active node and verify the resources have come online.
a. Open the control panel by clicking Start → Settings → Control Panel.
b. Open Administrative Tools and then Computer Management.
c. Expand Service and Applications, and select Services.
d. Examine the list for HP StorageWorks File Migration Agent config service. The startup type
should be Manual, and the two other FMA services should already be in Started status.
e. Right click the HP StorageWorks File Migration Agent config service and select Start to make
this an active node.
5. Bring up the FMA configuration, and manage your new volumes as described in Chapter 5, Managed
16 | Installation
Volumes. You can now configure your archives and file policies.
Note During failover, your cluster resources failover to the other active node, or to a passive node
depending on configuration.
Page 27

Evicting a node from a cluster
To uninstall FMA from a node that has been evicted from a cluster, follow these steps:
1. Evict the node using Windows cluster administration tools.
2. Uninstall FMA from the evicted node. Follow the instructions (To uninstall FMA from a single file
server on page 20) for uninstalling FMA from a single server.
3. Return to a node that is still a member of the cluster and run the FMA Cluster Setup wizard. Select Ye s
on the first dialog to allow the wizard to reconfigure the cluster and then click Next for the remainder of
the dialogs.
Adding a new node to a cluster
If you want to add a new node to a cluster that is already running FMA, follow these steps.
1. Ensure the new node has access to all cluster disks.
2. Add the new node using Windows cluster administration tools.
3. Install FMA on the new node. The new node must already be a member of the cluster before installing
FMA so that the installer completes the necessary cluster based configurations.
4. Go back to one of the other nodes in the cluster and run the FMA Cluster Setup wizard (select All
Programs
dialog and then click Next on the remaining dialogs. Verify that the wizard shows all nodes that are
expected to be in the cluster on the final dialog.
→HP StorageWorks File Migration Agent→FMA Cluster Setup). Select Ye s on the first
5. Move the cluster group to the new node and verify that the FMA Configuration service comes online.
Refer to the information (
6. Move all disk resources that are managed by FMA on this cluster to the new node.
7. Open the FMA configuration user interface and add the managed volumes to FMA management on the
new node. Refer to
Configuring FMA
After you install FMA on file servers, you must set up the archives to store data and the managed volumes
that FMA will manage. For information about archives, see
managed volumes, see Managed Volumes on page 45.
To view the user interface for configuring FMA, select All Programs→HP StorageWorks File Migration
Agent
→FMA Configuration from the Windows Start menu. Also, FMA configuration information is
available in the Storage section of Computer Management on Server 2003 (32 bit) and in the Server
Manager section on Server 2008 (32 bit).
Upgrading FMA
The following upgrade paths are supported:
•2.1.x→2.5
To upgrade from 2.1.x, you must upgrade to 2.1.11, then upgrade to 2.2.7, and then upgrade to 2.5.
•2.2.x→2.5
To upgrade from 2.2.x, you must upgrade to 2.2.7 and then upgrade to 2.5.
Evicting a node from a cluster on page 17) on moving cluster groups.
Managed Volumes on page 45 for instructions on adding volumes.
Archives on page 25. For information about
Installation | 17
Page 28

If you want to migrate a Windows 2003 cluster that includes FMA to a Windows 2008 cluster, see Migrating
a Windows 2003 cluster on page 18.
To upgrade FMA on a file server
1. Run setup.exe. This file is available on the installation CD.
2. In the confirmation dialog box, click Ye s .
3. Follow the instructions in the installation wizard.
To update a cluster
WARNING
1. Failover the cluster groups containing the managed volumes and resources of the default cluster group
to another node.
2. Update the nodes in the cluster.
a. Run setup.exe. This file is available on the installation CD.
b. When prompted, confirm to install the new version.
c. After the installation is complete, click Finish.
d. If you are upgrading from FMA 2.1, click Ye s to reboot the server. Wait until the node is active
3. Repeat steps 1 and 2 on each node of the cluster.
Use the Windows cluster administration tools to view the status of the cluster group and the FMA service
that was just updated. The cluster group should be online and it should contain the FMA configuration
service. Viewing the cluster group is different depending on whether the system is based on Server 2003 or
2008:
• Server 2003:
Run the cluadmin application. The default cluster group can be found under the Groups section.
• Server 2008:
Window 2003 clusters cannot be upgraded to Windows 2008 clusters directly with this
method. This is because of the differing requirements of the Windows 2003 server clusters
and Windows 2008 failover clusters. See Migrating a Windows 2003 cluster on page 18 to
prevent data loss.
before continuing with the step
If you are updating from FMA 2.2, a reboot is not required.
3.
Run the cluadmin.msc application. Select the cluster name and then in the center pane expand the
Cluster Core Resources section.
To verify that the File Migration Agent service and File Migration Agent AFM service are running on all
nodes, run services.msc from the Windows Run menu and check the status of both services. The FMA
configuration service only runs on the node that is hosting the Cluster Group.
Migrating a Windows 2003 cluster
This section describes how to migrate a Windows 2003 cluster to a 2008 cluster configuration and FMA is
installed in the cluster.
Before beginning this upgrade process, perform the following:
• Record the drive letter that is listed in FMA volume management.
18 | Installation
Page 29

•Use the fmacli arc command to record the list of archives with their IDs. The IDs are listed in the
first column of the output of the command.
To migrate an FMA cluster to 2008
1. Uninstall FMA 2.2 on each node of the 2003 cluster. Refer to Uninstalling FMA on page 20 for more
information.
2. Migrate the cluster configuration to the Microsoft Server 2008 cluster by following the recommended
Microsoft process,
• The storage must be migrated to the same drive letters
• To prevent recalling all the managed files in the process, the storage must be moved as-is to the new
cluster
3. Install FMA 2.5 on each node of the 2008 cluster and configure it as described in Installing FMA in a
cluster configuration on page 14.
4. Manage the volumes that where moved during the migration process. For more information on adding a
volume to management, see
5. Recreate the archives as follows:
• Create archives in the same order in which they were created on the original cluster, to ensure that
the archive IDs are created properly. Use the list of archives that was generated by the fmacli
arc command before beginning this procedure.
• When complete, run the fmacli arc command again. The output should be identical to the
output of the command for the 2003 cluster.
http://technet.microsoft.com/en-us/library/cc754506.aspx. Note the following:
Creating managed volumes on page 47.
Downgrading FMA
If you must downgrade from version 2.5 and 2.2.7 was previously installed, you must complete the
following steps.
To downgrade from 2.5 to 2.2.7
1. Uninstall 2.5 as described in Uninstalling FMA on page 20.
2. When prompted to save configuration settings, select Ye s.
3. Insert the 2.5 CD.
4. Change directories to the CD drive.
5. Run the following command:
instmod RISS "\SOFTWARE\Hewlett-Packard\HP FMA\Archives"
6. Reinstall 2.2.7 as described in Installing FMA on file servers on page 7. (You can ignore the Autopass
warning about the higher version.) FMA 2.5 provides a new version of Autopass which is backward
compatible with 2.2.
Installation | 19
Page 30

Uninstalling FMA
Use the following steps to uninstall FMA.
To uninstall FMA from a single file server
1. In the Windows Start menu, select HP StorageWorks File Migration Agent→FMA Uninstall.
2. After starting the uninstallation process, you are asked if you want to keep the current FMA
configuration or if you want to completely uninstall the FMA software.
HP recommends selecting Ye s to keep the current FMA configuration. If you select No, ensure that all
migrated data from each managed volume have been successfully recalled. Otherwise, you will not be
able to access released files.
3. If you are uninstalling version 2.1.x or older, you must reboot after uninstalling.
To uninstall FMA from a cluster
1. Stop the File Migration Agent and File Migration Agent AFM services on every cluster node.
2. To remove the FMA configuration server cluster resource from the default cluster group, use the
Windows cluster administration user interface, right-click the FMACFS resource (located in the Cluster
Group by default) and click Delete. Removing this resource prevents the cluster group from failing.
3. Run the FMA uninstallation on all nodes. For more information, see To uninstall FMA from a single file
server on page 20.
4. If you are uninstalling version 2.1.x or older, you must reboot after uninstalling.
Note If you are permanently uninstalling FMA as a single file server or as a cluster, examine the
managed volumes carefully to ensure all metadata is removed. If necessary, run fmacli erase
on the managed volumes to remove any remaining FMA metadata from the files.
Removing the Explorer plugin
The FMA Explorer plugin is automatically registered during the installation process.
To remove the plugin from Windows Explorer
On the command line, enter the following:
regsvr32 /u hsmext.dll
To add the plugin to Windows Explorer
On the command line, enter the following:
regsvr32 hsmext.dll
20 | Installation
Page 31

Licensing
Enter FMA license keys
FMA includes a temporary license that allows use of the product for 60 days. Use this procedure to enter
your permanent license keys.
1. Open a web browser, and enter http://www.webware.hp.com to access the HP Password delivery service
website.
2. Click the Generate password(s) link in the navigation pane.
3. Enter the order number from the Entitlement Certificate that you received with the product, and click
Next.
4. Select the correct license to generate appropriate to your system configuration.
Example #1: For a standalone configuration using HP Hardware, you will select T4275A.
Example #2: For a cluster configuration using HP Hardware, you will select T4276A.
5. Enter the IP address of the FMA server. Ensure that the IP address you use is the primary IP address of
the FMA server. If you have a cluster configuration, using the virtual IP address does work. You must
generate a license for each node in your cluster using the primary IP address of each node. Click Next
when you have entered the correct IP address. You need to repeat this process for each node in your
system.
6. Enter your e-mail address and password, and click Sign-In.
Note If this is the first time you are signing in to this website, you must create a password at this
time.
7. Enter the appropriate contact information, and click Next, and the Password Certificate appears.
8. Scroll down and copy the license key that appears near the bottom of the certificate.
9. Open the C:\Program Files\Common Files\Hewlett-Packard\HPOvLic\data\
directory
10. Open LicFile.txt in a text editing application, for example, Notepad.
11. On a new line, paste the license key that you copied from the Password Certificate.
12. Save and close the LicFile.txt file.
Note It is important that you do not delete the license from LicFile.txt. Make backup of this file
after adding the license information.
13. Restart the File Migration Agent service.
21
Page 32

14. Start FMA by selecting Start → Programs → HP StorageWorks File Migration Agent→ FMA
Configuration.
15. Bring up the HP File Archiving software Configuration Utility, and select License information to verify
that your permanent license was entered successfully.
FMA License Information – Stand-alone Permanent License
If you have a Cluster license or OpenStorage license, you will see Permanent license in the Optional
features box. Otherwise, Not available will be shown in the status.
Here is an example of a success cluster license installed:
Note
22 | Licensing
FMA License Information – Cluster License
There is a defect that currently does not display the values and status of the capacity license(s) in
the License Information screen shown above. If you have a capacity license installed, rest assure
that the capacity is being track by the FMA application.
Page 33

FMA licensing problems
If your permanent license keys are not active, verify that the connection for which you have requested the
License keys is on top of the connections list. The order of the connections can be configured by rightclicking My Network Places and selecting:
Properties → Network Connections →Advanced → Advanced Settings → Adapters and Bindings
Advanced Settings dialog
Use the up and down arrow keys to move the connection of the registered IP address to top of the
connections list.
If you have a Cluster license or OpenStorage license, Permanent license is listed in the Optional
features box. Otherwise, Not available is displayed as the status.
Licensing | 23
Page 34

24 | Licensing
Page 35

Archives
Archives store data that FMA has migrated or released from managed volumes. FMA supports the following
types of archives:
• Common Internet File System (CIFS), for Windows-based archives
• File Transfer Protocol (FTP), for Linux-based archives
• HP Integrated Archive Platform (IAP), for IAP archives
When you create an archive, you configure an FMA remote storage adapter (RSA) so that the archive can
communicate with FMA. You must create the archive in the FMA user interface, but you can perform other
archive operations using the FMA command line interface (FMACLI). For more information about the
FMACLI, see
Primary and secondary configuration
When creating an archive, you are given the option of entering a primary and secondary archive path. The
primary archive path is mandatory, and the secondary archive path is optional. When entering the primary
archive path, you must choose the location of the archive where data is stored. You must choose the
locations of the archives where data is stored. A primary archive is the location where FMA migrates data
and the location from which it recalls data. You can choose to archive information from a managed volume
to one or more primary archives. Using multiple independent archives provides failover security; if FMA
cannot access one archive, it tries to access the other archives. When you use multiple archives, you should
set a performance index for each. Performance index prioritizes the lowest number as the highest priority.
For example, the performance index number 1 has a higher priority than index number 100. FMA attempts
to recall a file from the archive with the smallest index number first.
Command Line Interface Reference on page 81.
An optional secondary archive replicates the primary archive and must be created outside of FMA using a
replication mechanism. If the primary archive location becomes inaccessible, FMA retrieves data from the
secondary archive. FMA does not migrate data to the secondary archive.
Storage descriptors
A storage descriptor defines where a file is stored in the archive. The following is the default structure of the
storage descriptor:
ArchivePath\SystemName\VolumeSerial\LocalPath\FileName.Generation
The following is an example of a storage descriptor:
D:\archives\system03\00471100\dir1\dir2\file1.dat.timestamp
When you create a CIFS or FTP archive, the system name and volume serial number in the storage
descriptor are optional. HP recommends using the default structure unless you can ensure that the storage
descriptor is unique without the system name or volume serial number.
25
Page 36

During the creation of a CIFS or FTP archive, you are given the option to remove some of these descriptors:
• Ignore system Name
• Ignore Volume Serial
• Ignore Security
• Data Stream Only
Ignore Security and Data Stream Only
The process of migration is copying data from the File Migration Agent managed volume onto the selected
archive target. When the Ignore Security and Data Stream Only options are selected, the information of
the file is not stored into the archive. By default, a file contains these elements:
• File Attributes
• File Security
• HSM metadata
• Data
If the Ignore Security option is selected, the security information is removed and stored onto the archive.
Similarly, with Data Stream Only, only the data of the file is stored in the archive.
For example:
Ignore System Name and Ignore Volume Serial
When storing your data onto the archive, the default setting allows the FMA to track the following
information regarding your data:
• <Arc_path> is the archive storage path.
• <Sys_key> is the name of the local system. The default value is the name of the system when the
archive was created. This does not change when System Name changes.
• <Vol_SN> is the volume serial number the file belongs to.
• <Path> is the local path of the file at time of migration.
• <File_Name> is the local file name at time of migration.
• <Gen> the new number incrementally generated each time a file with the same name exists.
26 | Archives
Page 37

The Ignore system name option removes the file server system name when creating the archive storage
path. Similarly, Ignoring volume serial removes the volume serial number of the managed volume on the
serial path.
Viewing archives
You can view a list of archives and information about each archive.
To view the list of archives
1. Launch the FMA user interface by selecting All Programs→HP StorageWorks File Migration
Agent
→FMA Configuration from the Windows Start menu.
2. In the left pane, select Archives.
In the right pane, the following information is displayed about each archive:
• Archive Name—The name of the archive, which identifies this archive for migration and recall
operations.
• Archive ID—The unique, internal reference number for the archive, which is generated automatically
and cannot be modified.
• Archive type—The type of archive:
• RSA-CIFS for Windows-based archives
• RSA-FTP for Linux-based archives
• RSA module—The module required for FMA to communicate with the archive.
• Performance Index—The order in which FMA recalls files from this archive. The range is 0-100, and
the default is 100. If a file is stored on multiple archives, FMA attempts to recall it from the archive with
the smallest index number first.
• Description—A description of the archive.
• Configuration—The primary and secondary hosts
• State—Whether the archive is accessible
Archives | 27
Page 38

Adding archives to FMA in a cluster environment
If FMA is installed in a cluster environment, you must move all cluster resources, including the default
cluster group, to a single node. Then, complete the steps in the following sections to create archives. After
you have created the archives, redistribute the cluster resources.
Creating CIFS archives
On a managed volume, a managed file contains file attributes, security information, Hierarchical Storage
Management (HSM) metadata, and the default data stream. In CIFS archives, an exact copy of the managed
file is archived by default.
Note To have exact copy of the managed file in the archive, the option "Ignore Security" and "Data
Stream Only" options must NOT be selected during archive creation.
Preparing CIFS archives for FMA
Before files can be saved to a CIFS-based Network Attached Storage (NAS) device, the archive folder on
the NAS device needs to be shared on the network. By default, FMA only supports NTFS filesystems on
Windows-based CIFS archives.
After sharing the appropriate folder on the NAS device, the NTFS permissions on the folder must be set to
Full Control for the FMA technical user account. It is recommended that you restrict access to the share and
allow only the FMA technical user and administrators access to the archive.
To configure the NTFS permissions on the archive share
1. Right-click the CIFS share and select Sharing and Security.
2. In the Properties dialog box, click the Sharing tab.
3. Click Share this folder.
4. Click Permissions.
28 | Archives
Page 39

5. Add the technical user account that you established during installation. Give this user Full Control
permissions.
For more information about the technical user account, see Creating a technical user account on page 5.
6. Click the Security tab.
7. Add the same technical user account with Full Control permissions.
8. Click OK.
Configuring CIFS archives
After you set up the archive share, you can configure the archive.
Note You can create an archive even if it is currently unavailable. This enables you to create definitions
for archives that may be offline.
To configure a CIFS archive
1. Launch the FMA user interface by selecting All Programs→HP StorageWorks File Migration
Agent
→FMA Configuration from the Windows Start menu.
2. In the left pane, select Archives.
3. In the right pane, right-click and select New archive from the context menu. The Archive Properties
dialog box is displayed.
4. In the Archive Properties dialog box, enter the following information:
• Archive name—The name of the archive, which identifies this archive for migration and recall
operations and is used to refer to the archive for command line operations. You cannot include a
space or semi-colon character in the name.
• RSA Module—The module required for FMA to communicate with the archive. Select RSA-
CIFS, which is required for CIFS archives.
• Performance Index—The order in which FMA recalls from this archive. The range is 0-100, and
the default is 100. If a file is stored on multiple archives, FMA attempts to recall it from the archive
with the smallest index number first.
• Description—A description of the archive.
In addition, this dialog box displays the Archive ID, which is the unique, internal reference number for
this archive. It is generated automatically and cannot be modified.
Archives | 29
Page 40

5. Click RSA Config. The RSA Configuration dialog box is displayed.
6. In the Archive storage path area, enter the following information:
7. In the Options area, select any of the following options if applicable:
30 | Archives
• Primary Archive—The fully qualified NAS path to the location to which data is migrated and from
which it is recalled. The specified path must exist and be specified using Universal Naming
Convention (UNC) notation. Using a mapped drive is not recommended due to the limited visibility
of the mapped drive for the service.
• Secondary Archive—The fully qualified NAS path to the location from which data is recalled when
the primary archive is not accessible. The specified path must exist and be specified using UNC
notation. Using a mapped drive is not recommended due to the limited visibility of the mapped
drive for the service. FMA does not replicate files to the secondary archive; you must perform this
operation yourself.
• Ignore security on backend archive—Select this option if you have a multi-domain environment in
which security information should not be stored on the archive.
• Store data stream only—Select this option to only store the default data stream on the archive. The
default data stream refers to the file content and does not include any NTFS file metadata. This
option is not recommended for normal Windows NAS devices.
Page 41

• Ignore system name—Select this option if you do not want the storage descriptors for this archive
to include the system name. This option is required for cluster systems. If you use this option, you
must ensure that the storage descriptor is unique without the system name.
• Ignore volume serial—Select this option if you do not want to the storage descriptors for this
archive to include the serial number of the local managed file system. If you use this option, you
must ensure that the storage descriptor is unique without the volume serial number.
8. Click Save.
9. In the Archive Properties dialog box, click OK.
Creating FTP archives
On a managed volume, a managed file contains file attributes, security information, HSM metadata, and the
default data stream. In FTP archives, the managed file is stored in an envelope.
Because of how the managed file is stored, no direct file access is available except through a packing and
unpacking utility. For more information, see
Preparing FTP archives for FMA
FTP archives require additional configuration before they can be used with FMA. The RSA-FTP module
uses FTP commands including the following, which are not supported on all servers:
• STOR (Defined in RFC765)
• RETR (Defined in RFC765)
• MDTM (Extension)
• SIZE (Extension)
Using FmaFileUtil to work with FTP archives on page 37.
The steps to make these commands available and to configure FTP archives to work with FMA vary
depending on the FTP server and operating system, as described in the following sections. You must perform
one of the following procedures.
Archives | 31
Page 42

Configuring VSFTPD on SuSE Linux
Perform the following steps to enable an FMA-compatible FTP configuration with Very Secure FTP
Daemon (VSFTPD) on SuSE Linux.
To set up a new group and user
1. At the system prompt, enter the following to add a new user group with restricted rights to the system:
groupadd fma
2. Enter the following to add a user with minimal rights:
useradd -m -k /bin/false -d PartitionRoot -g fma -s /bin/false fma
where -d PartitionRoot is the root directory of the archive location, -s /bin/false prevents a login using
telnet, and -g fma is the primary group of the FMA user.
3. Enter the following to change the password and activate the account:
passwd fma
4. Enter a new password.
To take ownership of the PartitionRoot
At the system prompt, enter the following:
chown -R fma:fma PartitionRoot
To activate inetd, the UNIX daemon that manages Internet services
1. Enter the following to start the YaST operating system setup and configuration tool with the
corresponding parameter:
yast inetd
2. Enter the following to check whether inetd is already active:
ps ax | fgrep -i inetd
3. If inetd does not appear in the output of grep, enter the following to start inetd:
/etc/init.d/inetd start
To configure VSFTPD
1. Activate the FTP server vsftpd in /etc/inetd.conf file. The entry is commented out by default.
2. Create a file named /etc/vsftpd.userlist.
3. Open the file and add all users that are allowed to access the FTP server.
4. Open the /etc/vsftpd.conf file for the FTP server and modify it to match the following:
/etc/vsftpd.conf
#------ Configuration used for FTPAccess of FMA
anonymous_enable=NO
local_enable=YES
write_enable=YES
dirmessage_enable=YES
xferlog_enable=YES
chroot_local_user=YES
userlist_enable=YES
userlist_deny=NO
userlist_file=/etc/vsftpd.userlist
local_umask=027
32 | Archives
Page 43

5. At the system prompt, enter the following to trigger inetd to reread its configuration file:
killall -HUP inetd
6. Enter the following to convert all files with the dos2unix utility. This prevents problems caused by
transferring these configuration files from a DOS filesystem to a UNIX filesystem.
dos2unix vsftpd.conf
dos2unix vsftpd.userlist
To prevent uncontrolled growth of the vsftpd.log file using LogRotate
1. Create the /etc/cron.daily/logrotate file and use a text editor to add the following lines:
#!/bin/sh
/usr/sbin/logrotate /etc/logrotate.conf
2. Enter the following to make the file executable:
chmod +x /etc/cron.daily/logrotate
3. Create the /etc/cron.daily/logrotate.d/ivd file and use a text editor to add the following lines:
/etc/logrotate.d/ivd
# Configuration for logrotate
/var/log/vsftpd.log
{
compress
size=500M
rotate=5
}
where
• compress ensures that old versions of log files are compressed with gzip by default.
• size=size ensures that log files are rotated as they grow larger than the specified size. This size can
be specified in bytes, kilobytes (k) or megabytes (M).
• rotate=count ensures that log files are rotated the specified number of times before being removed.
If count is 0, old versions are removed rather than rotated.
Configuring VSFTPD on Red Hat
Perform the following steps to enable an FMA-compatible FTP configuration with VSFTPD on Red Hat.
To configure VSFTPD on Red Hat
1. Verify the /user/sbin/vsftpd directory exists. If it does, continue with the step 2. If not, install it with the
following steps:
a. Mount Red Hat Installation CD #1.
b. Change to the RedHat/RPMS directory.
c. Enter the following to add the package vsftpd-1.2.1-3.i386.rpm to the system:
rpm -ivh vsftpd-1.2.1-3.i386.rpm
2. Enter the following to create the fma user group:
groupadd fma
3. Enter the following to create the fma_user FTP user:
useradd -d path -g fma fma_user
Archives | 33
Page 44

where path is the mount point of the archive.
4. Enter the following to change the password and activate the account:
passwd fma_user
5. Enter a new password.
6. Enter the following to change the user and group assignment of the archive:
chown -R fma_user:fma
This enables the fma_user user to write to the archive.
7. Add the fma_user user to the /etc/vsftpd.user_list, which contains all users that are allowed to access the
archive using FTP.
8. In the /etc/vsftpd/vsftpd.conf file, modify or add the following parameters:
anonymous_enable=NO
local_enable=YES
write_enable=YES
dirmessage_enable=YES
xferlog_enable=YES
chroot_local_user=YES
userlist_enable=YES
userlist_deny=NO
userlist_file=/etc/vsftpd.user_list
local_umask=027
9. If parameter xferlog_enable is set to YES, remove the comment from the
xferlog_file=/var/log/vsftpd.log parameter.
10. Enter the following to restart inetd:
/etc/init.d/xinitd restart
11. Enter the following to start vsftpd:
/etc/init.d/vsftpd start
The start/stop script is installed in /etc/init.d/vsftpd. The installation also creates symbolic links into
different directories for different run levels, for example, /etc/rc2.d/K50vsftpd.
Because vsftpd is dependent on module xinetd (K50xinetd), the standard installation runs vsftpd start
before xinitd start at next boot time, which will fail. Therefore, you must delete all symbolic links and
add them properly by creating an appropriate symbolic link in the different run level directories.
For example, you would perform the following steps:
1. Change to the /etc/rc2.d directory.
2. Delete K50vsftpd.
3. Enter the following to create a new link:
ln -s ../init.d/vsftpd S99vsftpd
To prevent uncontrolled growth of the vsftpd.log file using LogRotate
1. Create the /etc/cron.daily/logrotate file and use a text editor to add the following lines:
#!/bin/sh
/usr/sbin/logrotate /etc/logrotate.conf
2. Enter the following to make the file executable:
34 | Archives
Page 45

chmod +x /etc/cron.daily/logrotate
3. Create the /etc/cron.daily/logrotate.d/ivd file and use a text editor to add the following lines:
/etc/logrotate.d/ivd
# Configuration for logrotate
/var/log/vsftpd.log
{
compress
size=500M
rotate=5
}
where
• compress ensures that old versions of log files are compressed with gzip by default.
• size=size ensures that log files are rotated as they grow larger than the specified size. This size can
be specified in bytes, kilobytes (k) or megabytes (M).
• rotate=count ensures that log files are rotated the specified number of times before being removed.
If count is 0, old versions are removed rather than rotated.
Configuring FTP archives
Use the following steps to create an FTP archive using GDSFTPserver for Windows.
Note You can create an archive even if it is currently unavailable. This enables you to create definitions
for archives that may be offline.
To configure an FTP archive
Ensure a GDSFTPserver has been installed and configured on the FTP archive before configuring the FMA
server.
1. Launch the FMA user interface by selecting All Programs→HP StorageWorks File Migration
Agent
→FMA Configuration from the Windows Start menu.
2. In the left pane, select Archives.
3. In the right pane, right-click and select New archive from the context menu. The Archive Properties
dialog box is displayed.
4. In the Archive Properties dialog box, enter the following information:
• Archive name—The name of the archive, which identifies this archive for migration and recall
operations. You cannot include a space or semi-colon character in the name.
Archives | 35
Page 46

• RSA Module—The module required for FMA to communicate with the archive. Select RSA-FTP,
which is required for FTP archives.
• Performance Index—The order in which FMA recalls from this archive. The range is 0-100, and
the default is 100. If a file is stored on multiple archives, FMA attempts to recall it from the archive
with the smallest index number first.
• Description—A description of the archive.
In addition, this dialog box displays the Archive ID, which is the unique, internal reference number for
this archive. It is generated automatically and cannot be modified. If you move a stub file between file
servers, you must ensure that the archive ID remains unique.
5. Click RSA Config. The RSA Configuration dialog box is displayed.
6. In the FTP configuration parameters area, enter the following information:
36 | Archives
• Host/IP—The hostname or IP address of the FTP server to which data is migrated and from which
it is recalled.
• Secondary Host/IP—The hostname or IP address of the FTP server from which data is recalled
when the primary archive is not accessible. FMA does not replicate files to the secondary archive;
you must perform this operation.
Page 47

• Port—The FTP port. The default port is 21.
• User—The FTP user required to access the FTP server.
• Password—The password used to access the FTP server.
• Root path—The root path on the specified FTP server.
• Connection timeout (ms)—The number of milliseconds after which the connection to the FTP
server times out. The default value is 500 ms.
• Data read timeout (ms)—The number of milliseconds after which reads on FTP data times out. The
default value of 0 results in no timeout. Do not modify this setting except at the request of
Technical Support.
7. Enter the following information in the Options area:
• Ignore system name—Select this option if you do not want the storage descriptors for this archive
to include the system name. This option is required for cluster systems. If you use this option, you
must ensure that the storage descriptor is unique without the system name.
• Ignore volume serial—Select this option if you do not want to the storage descriptors for this
archive to include the serial number of the local managed file system. If you use this option, you
must ensure that the storage descriptor is unique without the volume serial number.
8. Click Save.
9. In the Archive Properties dialog box, click OK.
Using FmaFileUtil to work with FTP archives
FMA stores data in the archive in its own internal archive format. This prevents metadata from being lost as
files are transferred from the NTFS-based Windows file server to the Linux archive. FmaFileUtil is a
command line utility used for unpacking the envelope and restoring the local NTFS file.
The syntax for FmaFileUtil commands is as follows:
FmaFileUtil [options] command [command-options] arguments
The following options are available for FmaFileUtil:
Option Description
-v Writes verbose ERROR, WARNING, or INFO messages to stdout.
-L Writes ERROR messages to the log file.
-V Writes verbose ERROR, WARNING, or INFO messages to the log file.
-H Displays usage information for the command.
If none of these options are used, all ERROR messages are written to stdout.
The FmaFileUtil pack and unpack commands are both available.
pack
Creates a packed file based on an NTFS file.
Syntax
FmaFileUtil p[ack]
Archives | 37
Page 48

Description
Creates a packed file based on an NTFS file. Its input is an NTFS file and its output is a file in the FMA
storage format. All NTFS file information is included.
Options
Option Description
-f Filelist Converts all files listed in (Filelist).
-o Overwrites existing destination files. By default, no files are overwritten.
-r Recurses into directories.
-p Preserves timestamps. When unpacking a file, the original creation and
modification timestamp is restored.
If this option is used without the –o option, FmaFileUtil only resets the
timestamps of the destination file (dFile) to the timestamps preserved in the
source file (sFile).
sFile dFile Packs the source file (sFile) to destination file (dFile).
sDir dDir Packs all files in the source directory (sDir) to the destination directory
(dDir). The new files have the same name.
unpack
Creates an NTFS file based on a packed file.
Syntax
FmaFileUtil u[npack]
Creates an NTFS file based on a packed file. Its input is a packed file and its output is an NTFS file. All
NTFS streams saved in the packed file are written into the created NTFS file.
Options
Option Description
-f Filelist Converts all files listed in (Filelist).
-o Overwrites existing destination files. By default, no files are overwritten.
-r Recurses into directories.
-p Preserves timestamps. When unpacking a file, the original creation and
modification timestamp is restored.
If this option is used without the –o option, FmaFileUtil only resets the
timestamps of the destination file (dFile) to the timestamps preserved in the
source file (sFile).
sFile dFile Unpacks the source file (sFile) to destination file (dFile).
sDir dDir Unpacks all files in the source directory (sDir) to the destination directory
(dDir). The new files have the same name.
38 | Archives
Page 49

Examples
FmaFileUtil pack File001.dat File001.dat.p
Packs the File001.dat file into the File001.dat.p file.
FmaFileUtil pack d:\Dir001 d:\tmp\Dir001.p
Packs all files in the d:\Dir001 directory into the d:\tmp\Dir001.p directory.
FmaFileUtil pack –r d:\Dir001 d:\tmp\Dir001.p
Packs all files in the d:\Dir001 directory and its subdirectories into the d:\tmp\Dir001.p directory.
FmaFileUtil unpack –p –oFile001.dat.p File001.dat
Unpacks the File001.dat.p file into the File001.dat file and restores the original timestamps. If the
File001.dat file already exists, the File001.dat file are overwritten.
FmaFileUtil unpack –p File001.dat.p File001.dat
Resets the timestamps of the File001.dat destination file to the timestamps preserved in the
File001.dat.p source file.
FmaFileUtil pack -o d:\Dir001 d:\tmp\Dir001.p
Packs all files in the d:\Dir001 directory into the d:\tmp\Dir001.p directory. If a destination file
exists, it are overwritten.
FmaFileUtil unpack File001.dat.p File001.dat
Unpacks the File001.dat.p file into the File001.dat file.
FmaFileUtil unpack d:\Dir001.p d:\tmp\Dir001
Unpacks all files in the d:\Dir001.p directory into the d:\tmp\Dir001 directory.
FmaFileUtil unpack –r d:\Dir001.p d:\tmp\Dir001
Unpacks all files in the d:\Dir001.p directory and its subdirectories into the d:\tmp\Dir001
directory.
FmaFileUtil unpack -o d:\Dir001.p d:\tmp\Dir001
Unpacks all files in the d:\Dir001.p directory into the d:\tmp\Dir001 directory. If a destination file
exists, it are overwritten.
Creating HP Integrated Archive Platform archives
Any documents with a size of up to 1.47 GB (1,470,581,054 bytes) can be sent from a managed volume to
the Integrated Archive Platform (IAP). On the managed volume, a managed file contains file attributes,
security information, HSM metadata, and the default data stream. In IAP archives, managed file information
is stored as a BLOB in the IAP object store.
Depending on FMA’s RSA-IAP configuration, a specific set of metadata about the document can be attached
to the binary object. FMA attaches the following metadata:
• File modification date
• MIME type of the file
• Full path name in UNC notation
• File security depending on FMA’s recipients options
• Subject (filename without path and file extension)
The following additional metadata is attached for OLE compound documents, such as those generated with
Microsoft Office 97 and later: title, subject, author, company, keywords, comments, last author, revision,
created, last saved, name of application used, type, and extension.
Archives | 39
Page 50

FMA’s recipients options and the Recipients field entries determine which IAP repositories are granted
access to the binary object. The access information is retrieved from the document’s Access Control List
(ACL).
Preparing IAP archives for FMA
FMA uses the ILM Object Storage API interface to access IAP archives. Before you create an IAP archive,
you must configure the IAP system.
Enabling integration
Applications integrating with HP IAP must have TCP/IP access to port 25 and port 80. To store email, the
application requires the virtual IP addresses for each storage domain. To use the ILM Object Storage API,
the application can use any HTTP IP address. These attributes are defined when the IAP device is initially
configured and installed in the environment.
Configuring IAP devices
An application requires an AIP repository and user to view BLOBs through the API. The application might
require additional separate repositories and users if end users are using the IAP web interface to search for
documents stored through the ILM Object Storage API. At a minimum, all BLOBs should be stored in the
repository for the application. Applications can make information available to the individual users who own
files if those users also have accounts automatically populated on IAP from the installation’s user
management LDAP server.
See the HP StorageWorks Reference Information Storage System Administrator Guide for instructions on
adding users, data repositories, and ACLs between users and repositories. The administrator guide is
available on the documentation CD and on the HP Business Support Center.
Configuring computers on which FMA is installed
If data is stored with Windows Security Descriptor information, the computers on which FMA is installed
must be configured with access to the active-directory server on the network.
Enabling secondary sites
If the primary IAP site cannot accept any incoming traffic, FMA does not redirect the data traffic to the
secondary replica site. FMA only supports one replica site, which is built by one-way (Active/Passive) IAP
remote replication services.
Configuring IAP archives
Use the following steps to create an IAP archive.
Note You can create an archive even if it is currently unavailable. This enables you to create definitions
for archives that may be offline.
To configure an IAP archive
1. Launch the FMA user interface by selecting All Programs→HP StorageWorks File Migration
Agent
→FMA Configuration from the Windows Start menu.
2. In the left pane, select Archives.
40 | Archives
Page 51

3. In the right pane, right-click and select New archive from the context menu.
4. In the Archive Properties dialog box, enter the following information:
• Archive name—The name of the archive. You cannot include a space or semi-colon character in the
name. This name identifies this archive for migration and recall operations.
• RSA Module—The module required for FMA to communicate with the archive. Select RSA-IAP,
which is required for IAP archives.
• Performance Index—The priority in which FMA recalls from this archive. The default is 100. If a
file is stored on multiple archives, FMA attempts to recall it from the archive with the smallest
index number first.
• Description—A description of the archive.
In addition, this dialog box displays the Archive ID—the unique, internal reference number for this
archive. It is generated automatically and cannot be modified. If you move a stub file between systems,
you must ensure that the archive ID remains unique.
Archives | 41
Page 52

5. Click RSA Config. The Rsa Configuration dialog is displayed:
6. In the Rsa Configuration dialog box, enter the following in the Parameters area:
42 | Archives
• Primary IAP Host name—The hostname or IP address of the IAP system to which data is migrated
and from which it is recalled
• Secondary IAP Host name—The hostname or IP address of the IAP system from which data is
recalled when the primary archive is not accessible
You must replicate files to the secondary archive outside of FMA.
• Domain—The IAP domain where data is stored
• Default repository—The default repository where data is stored
• Recipients—The default recipients for FMA data
• Recipients options—Select one of the following:
• The addresses of users contained in the access control list (ACL) should not be added to the
recipients list. (Default)
• The addresses of users and groups defined in the top level of the ACL should be added to the
recipients. Groups are not expanded to include their users.
• The addresses of users and groups defined in the ACL, including those contained in any groups
defined, are to be included in the recipients list.
Page 53

7. Click Save.
8. In the Archive Properties dialog box, click OK.
Editing archive properties
You can edit archive properties to change the archive name, performance index, or description. You cannot
change the archive ID or RSA module. While you can change the RSA configuration, you should do so with
caution to ensure continued access to archive.
To edit archive properties
1. Launch the FMA user interface by selecting All Programs→HP StorageWorks File Migration
Agent
→FMA Configuration from the Windows Start menu.
2. In the left pane, select Archives.
3. In the right pane, right-click the archive and select Properties from the context menu.
4. In the Archive Properties dialog box, edit the following as necessary:
• Archive name—The name of the archive, which identifies this archive for migration and recall
operations.
• Performance Index—The order in which FMA recalls from this archive. The default is 100. If a file
is stored on multiple archives, FMA attempts to recall it from the archive with the smallest index
number first.
• Description—A description of the archive.
5. To modify RSA-specific information, click RSA Config and modify the primary and secondary archive
path and the options, as necessary.
Note Editing the RSA configuration is not recommended because it can prevent you from accessing
data saved with the old configuration.
For information about the CIFS configuration, see Configuring CIFS archives on page 29. For
information about the FTP configuration, see Configuring FTP archives on page 35. For information
about the IAP configuration, see Creating HP Integrated Archive Platform archives on page 39.
Then, click Save.
6. In the Archive Properties dialog box, click OK.
7. If you changed the RSA configuration, restart the File Migration Agent service.
Archives | 43
Page 54

Deleting archives
You can delete an archive and remove all of its data.
WARNING Prior to deleting an archive, be sure to recall any released files to prevent loss of access to
data.
To delete an archive
1. Launch the FMA user interface by selecting All Programs→HP StorageWorks File Migration
Agent
→FMA Configuration from the Windows Start menu.
2. In the left pane, select Archives.
3. In the right pane, right-click the archive and select Delete from the context menu.
4. In the confirmation dialog box, click Ye s .
Removing deleted files from archives
If deletion is supported by your archives, routinely run the cleanup command to remove archive entries
that have been deleted from the file server. This command removes expired files and cleans up the archive.
The cleanup command can only be run through the FMA CLI command line. Use the cleanup command
carefully, as any files in the archive that does not have a file or a file stub associated with it will be deleted.
When a managed file is deleted on the file server, FMA moves metadata to the following garbage collection
log: \HSM Volume Information\$HsmGC.log. When you run the cleanup command, you specify an
expiration time for deleted files. FMA only deletes files from the archive if they were deleted prior to that
expiration period. For example, if you run the cleanup command with an expiration time of 15 days, only
files deleted from the file server more than 15 days ago are removed from the archive. The cleanup
command cleans-up the garbage collection associated with multiple copies of a file, for example
file.001 and file.002.
For information about using the cleanup command, see cleanup on page 88.
44 | Archives
Page 55

Managed Volumes
When you designate a volume as managed by FMA, its data can be migrated and released to one or more
archives. You can manage any locally attached NTFS volumes with the exception of network drives, system
volumes, and Microsoft cluster quorum disks.
You must designate managed volumes using the FMA user interface, but you can perform other operations
related to the managed volume using the FMA command line interface (FMACLI). For more information
about the FMACLI, see
When FMA migrates a managed file, it saves a copy to one or more archives associated with the managed
volume. Files can be migrated manually or through the user of policies that define the conditions under
which files are migrated and released.
When FMA releases a file, it replaces the file on the file server with a stub file that points to the copies on
the archives. FMA marks the file as offline using the Windows FILE_ATTRIBUTE_OFFLINE flag, which
designates files with remote data. Windows 2008 Offline files can look different compared to
The Windows FILE_ATTRIBUTE_OFFLINE flag. Offline files typically take up to 4k in file sizes on
the local drive.
Command Line Interface Reference on page 81.
Figure 1:
Figure 1: The Windows FILE_ATTRIBUTE_OFFLINE flag
After files are migrated or released, users can continue to work with them on the file server. FMA
automatically recalls released files when they are accessed.
Viewing managed volumes
This section describes how to view a list of managed volumes and information about each volume using the
FMA user interface. You can also view managed volume information from the FMA command line interface
(FMACLI). FMA can support up to 80 managed volumes and display up to 128 drives on the FMA
Configuration pane. Refer to
To view the list of volumes on the file server
1. Launch the FMA user interface by selecting All Programs→HP StorageWorks File Migration
Agent
→FMA Configuration from the Windows Start menu.
2. In the left pane, select Managed Volumes.
volume on page 119 for more information.
45
Page 56

In the right pane, the following information is displayed for each volume:
• Volume—The name of the volume and an icon that represents its current status
Icon Status Description
Not managed Available but not managed by FMA
Active Managed by FMA
Stopped or
Not Mounted
Managed by FMA but was stopped by a user, or the volume is not
mounted. In a cluster, the volume can be mounted on another node.
Restricted System volume that cannot be managed
Error A problem must be resolved to return the status to Active
Reboot required The file server must be rebooted to return the status to Active
• Status—The current status
• File system—The file system
• Capacity—The amount of disk space in gigabytes
• Free Space—The amount of free disk space in megabytes
• % Free—The percentage of free disk space
• HSM Status—The volume status
• Active—Managed by FMA
• Inactive—Available but not managed by FMA, or management was stopped
• Unknown—Cannot be managed by FMA
• PID—The process ID of the volume manager process
• Migrated bytes—The number of bytes migrated from this volume
To view information about a particular volume
In the right pane, double-click the volume.
The following information is displayed in the Volume Properties area:
• Serial number—The volume serial number
• Mount point—The drive on which this volume is mounted
• Label—The volume label
• HSM status—The volume status
• Active—Managed by FMA
• Inactive—Available but not managed by FMA, or management was stopped
• Unknown—Cannot be managed by FMA
46 | Managed Volumes
Page 57

• HSM process ID—The process ID of the FMA volume manager process
• File system type—The type of file system (FMA only supports NTFS volumes)
• Capacity—The amount of space available on the volume
• Free space—The amount of free space in gigabytes and as a percentage of total space
• Used space—The amount of used space in gigabytes and as a percentage of total space
In addition, you can view the following information for this volume:
• Disk space policies
For information about setting disk space policies, see Releasing files using disk space policies on page
48.
• Scheduling information for policies
For information about scheduling file policies, see Scheduling file policies on page 54.
• Migration policies
For information about creating file policies, see Creating file policies on page 51.
Creating managed volumes
Before you begin, ensure that the volume is a locally attached NTFS volume. FMA does not support
network drives, system volumes, or Microsoft cluster quorum disks.
If FMA is installed in a cluster environment, you must perform additional steps, which are described in To
create a managed volume in a cluster environment on page 47.
To create a managed volume
1. In the left pane of the FMA user interface, select Managed Volumes.
2. In the right pane, right-click the volume you want to manage and select Add to Management from the
context menu. (Note that the status of the volume changed to Active.)
Repeat this step for each volume you want to manage.
To create a managed volume in a cluster environment
1. Move all cluster resources, including the default cluster group, to a single node.
2. Launch the FMA user interface by selecting All Programs→HP StorageWorks File Migration
Agent
→FMA Configuration from the Windows Start menu.
3. In the left pane, select Managed Volumes.
4. In the right pane, right-click the volume you want to manage and select Add to Management from the
context menu. (Note that the status of the volume changed to Active.)
Repeat this step for each volume you want to manage.
5. Move the volume resources to the next node, and then repeat steps 2-4. Because FMA configuration
information is stored on the volume, it is only necessary to add the volume to management. All other
volume-based FMA settings configured in these steps are configured automatically.
Note For both Server 2003 and 2008 clusters, the resources can be moved to other nodes by right-
clicking and selecting the Move operation in the cluster administration tool.
6. Repeat steps 2-5 until all volumes have been added to FMA management on all nodes.
Managed Volumes | 47
Page 58

Releasing files using disk space policies
You can set disk space policies, which are watermarks and retention periods that define when files are
released from a managed volume. You can also set an exclusion list of files that are not released, even if they
meet the criteria in these disk space policies.
FMA monitors the disk space on each managed volume and releases files when the high watermark is
reached. This release process continues until the low watermark is met or until no more files meet the
retention criteria you define for the volume. When disk space reaches the critical watermark, all migrated
files are released, regardless of the retention periods you have set.
Setting disk space watermarks
Use these steps to create watermarks that define the files to be released as disk space fills.
To set watermarks for disk use
1. In the left pane of the FMA user interface, select Managed Volumes.
2. In the right pane, double-click the volume for which you want to set disk space watermarks. FMA
displays information about that volume.
3. In the Disk Space Policy area, set the percentage of disk space that corresponds to the following
watermarks:
• Critical—When disk space reaches this watermark, FMA releases migrated files until the disk
space reaches the low watermark.
• High—When disk space reaches this watermark, FMA releases migrated files that meet the
retention criteria you set. It stops releasing files when disk space reaches the low watermark.
• Low—When disk space reaches this watermark, FMA stops releasing files.
4. From the Monitoring time interval drop-down lists, set the amount of time FMA waits before it checks
disk space use.
48 | Managed Volumes
Page 59

Note The disk space policy interval counter starts running when the server is started. If the server is
rebooted, the counter restarts.
5. Click Save.
Setting retention periods
Use the following steps to establish retention periods during which files are not released based on the high
watermark.
To set retention periods
1. In the left pane of the FMA user interface, select Managed Volumes.
2. In the right pane, double-click the volume on which you want to set retention periods. FMA displays
information about that volume.
3. In the Disk Space Policy area, click the Retention tab.
4. Set the time interval for each of the following retention periods:
• modified—When the high watermark is reached, migrated files that have been modified more than
this number of days ago can be released. You cannot enable accessed if you enable modified.
• accessed—When the high watermark is reached, migrated files that have been accessed more than
this number of days ago can be released. You cannot enable modified if you enable accessed.
• recalled—When the high watermark is reached, released files that were recalled more than this
number of days ago can be released again.
5. Click Save.
Managed Volumes | 49
Page 60

Excluding files from release based on disk space
Use the following steps to specify a list of files that FMA must not release, regardless of whether they meet
the criteria in the disk space policies.
Note Excluded files are also excluded from statistical summaries.
To exclude files from release based on disk space
1. In the left pane of the FMA user interface, select Managed Volumes.
2. In the right pane, double-click the volume on which you want to exclude files from disk space policies.
FMA displays information about that volume.
3. In the Disk Space Policy area, click the Exclusion tab.
By default the Exclusions list contains \HSM Volume Information and \System Volume Information.
4. Click and then enter the absolute path to the folder or file you want to exclude from the release
process. Do not enter the mount point (drive letter, such as “D:”) or the mount path if the volume is
mounted to another volume’s directory (“D:\MountPoint”). The path should begin with “\”.
You can use the asterisk (*) wildcard to specify any number of characters of any value or the question
mark (?) wildcard to specify exactly one character of any value.
Repeat this step for each folder or file you want to exclude.
5. Click Save.
50 | Managed Volumes
Page 61

Migrating and releasing files using file policies
File policies define the conditions under which files are migrated to an archive or set of archives. You can
define a file policy to migrate files in a managed volume based on any combination of file age, size, or
name. Files are migrated to archives according to the order specified in the policy’s archive list.
By default, a file policy applies to all files in the specified folder and its subfolders, but you can include or
exclude specific files. Policies that are defined for a subfolder override the policies set at a higher level. Each
folder can have multiple policies. In the event that two policies conflicts with one another when using
inclusion and exclusions, exclusion always takes precedence over inclusion policies.
Creating file policies
You can create a file policy for a single volume or a folder within a volume.
To create a file policy
1. In the left pane of the FMA user interface, select Managed Volumes.
2. In the right pane, double-click the volume on which you want to create a file policy.
3. In the right pane, right-click in the Migration Policies area and select New.
The New Policy dialog box is displayed.
4. On the Properties tab, enter the policy name and description.
FMA automatically enters managed volume information.
5. To apply this policy to a folder rather than to the entire volume, perform the following steps:
a. Click Browse (...) next to the Path field.
b. In the Browse for Folder dialog box, select a folder and click OK.
6. To activate this policy, select Enabled.
Managed Volumes | 51
Page 62

7. Click the Filtering tab.
8. To migrate based on the age of a file, perform the following steps:
a. Select File Age.
b. Select one of the following from the Timestamp list:
• Access—Files that have been accessed more than this number of days ago are migrated.
• Modification—Files that have been modified more than this number of days ago are migrated.
• Creation—Files that were created more than this number of days ago are migrated.
c. From the Elapsed time drop-down lists, set the number of seconds, minutes, hours, or days that
FMA waits before it migrates files.
9. To migrate based on the size of a file, perform the following steps:
a. Select File Size.
b. From the Min Filesize drop-down lists, set number of kilobytes, megabytes, or gigabytes that the
file must reach before it can be migrated.
10. If you want to release files as soon as they have been successfully migrated to all archives configured
for the policy, select Release immediately.
11. To include specific files in this policy, perform the following steps in the Inclusion area:
a. Click .
b. Type the name of the file. You can use the asterisk (*) wildcard to specify none or any number of
characters of any value or the question mark (?) wildcard to specify exactly one character of any
value.
12. To exclude hidden, archive, or system files, select the corresponding checkbox.
Note If you select the Archive checkbox, files that are ready to be archived (files for which the
archive, or “A”, attribute is set) are excluded.
Also, note that excluded files are excluded from statistical summaries.
To exclude specific files, perform the following steps:
a. Click .
b. Type the name of the file. Do not enter the mount point (drive letter, such as “D:”) or the mount
path if the volume is mounted to another volume's directory (“D:\MountPoint”). The path should
52 | Managed Volumes
Page 63

begin with “\”. You can use the asterisk (*) wildcard to specify none or any number of characters of
any value or the question mark (?) wildcard to specify exactly one character of any value.
Note The exclusion list takes precedence over inclusion list. If multiple criteria are specified, all of
them must be met in order for a file to be excluded.
13. Click the Archives tab.
14. Use the following steps to set up to four archive locations where FMA migrates data. Using the
following steps to setup the archive(s) location to which FMA migrates data. A maximum of four
archive locations are recommended for migration of data.
a. Click .
b. In the Select archive dialog box, select up to four archives where files are migrated and click OK.
c. From the Max copies list, select the number of archives to which this file must be saved before it
can be considered for release.
15. Click OK.
Managed Volumes | 53
Page 64

Scheduling file policies
You can schedule a time when FMA runs all file policies for a specific volume.
Note If the server is offline when a policy is scheduled to start, the policy does not run again until the
next scheduled time after the server is started.
To schedule file policies
1. In the left pane of the FMA user interface, select Managed Volumes.
2. In the right pane, double-click the volume on which you want to schedule file policies.
3. In the Scheduling area, click Change.
4. In the Schedule Options dialog box, change the following information as necessary:
• Start times—The time (in 24-hour notation) when FMA starts migrating files based on policies. If
no start time is set, file policies are not processed for this volume unless they are run manually.
• Day of month—The days of the month when FMA runs policies.
• Months—The months when FMA runs policies.
• Days of week—The days of the week when FMA runs policies.
5. To limit the duration of the policy run, select Max duration (minutes) and set the number of minutes
that FMA spends running policies.
6. Click OK.
To run policies manually
1. In the left pane of the FMA user interface, select Managed Volumes.
2. In the right pane, double-click the volume on which you want to run policies.
3. In the Scheduling area, click Start now.
54 | Managed Volumes
Page 65

Editing file policies
You can modify file policies and define the files that they affect, but you cannot change the volume that they
affect.
To edit a file policy
1. In the left pane of the FMA user interface, select Managed Volumes.
2. In the right pane, double-click the volume that contains the policy.
3. In the right pane, right-click the policy in the Migration Policies area and select Properties.
For information about fields in the Policy dialog box, see Creating file policies on page 51.
Enabling and disabling file policies
After you disable a policy, FMA does not apply it to the managed volume until you enable it again.
To enable a file policy
1. In the left pane of the FMA user interface, select Managed Volumes.
2. In the right pane, double-click the volume that contains the policy.
3. In the right pane, right-click the policy in the Migration Policies area and select Enable.
To disable a file policy
1. In the left pane of the FMA user interface, select Managed Volumes.
2. In the right pane, double-click the volume that contains the policy.
3. In the right pane, right-click the policy in the Migration Policies area and select Disable.
Deleting file policies
To delete a file policy
1. In the left pane of the FMA user interface, select Managed Volumes.
2. In the right pane, double-click the volume that contains the policy.
3. In the right pane, right-click the policy in the Migration Policies area and select Delete.
4. Select Ye s to confirm the deletion.
Managed Volumes | 55
Page 66

Migrating and releasing files with the Explorer plugin
The Explorer plugin enables you to manually migrate, release, or recall files or folders from a managed
volume on the local system. To access these commands in Windows Explorer, right-click a file or folder in a
managed volume.
Note The 64-bit version of Explorer is not supported. You can run the 32-bit version of Windows
Explorer, which is provided with 64-bit Windows, by entering the following from the Command
Prompt window:
%systemroot%\SysWOW64\explorer.exe /separate
The following FMA column properties under Window Explorer have been moved to File Properties under
the FMA tab:
•State
• Copies
• Last recall
• Recalls
56 | Managed Volumes
Page 67

To view FMA file properties
1. In Windows Explorer, select one or more files or a folder
2. Right-click to display the context menu and select Properties.
3. Click the FMA tab.
FMA displays the following information:
• Status—The current status of the file
• OFF(n)—Offline
• MOD(n)—Modified
•SAV(n)—Migrated
• INA(n)—Inactive
• DIS(n)—Disabled
(n) indicates the number of valid copies.
• Generations—The number of versions of this file that are archived
• System file ID—The operating system ID number for the file
• File size—The file size in bytes
• Change time—The date and time when this file was last modified
• State—The current status of the file
• Copies—The number of copies of this file that are archived
• Last recall—The last date and time when this file was recalled
• Recalls—The number of times this file has been recalled
To migrate one or more files or a folder
1. In Windows Explorer, select one or more files or a folder
2. Right-click to display the context menu and select Migrate.
3. Select the archive to which FMA should copy the data. If a command takes more than a few seconds,
the Explorer plugin displays a progress bar.
4. In the Processing results dialog box, select OK.
To release one or more files or a folder
1. In Windows Explorer, select one or more files or a folder.
2. Right-click to display the context menu and select Release.
3. If you are releasing a folder, set the following options in the Release options dialog box, as necessary:
• Min number of archive copies—The minimum number of copies that must be migrated to the
archive before the files can be released.
• Modified retention Time—Files that have been modified more than this number of days ago can be
released.
• Accessed retention time—Files that have been accessed more than this number of days ago can be
released.
4. Click OK.
Managed Volumes | 57
Page 68

Recalling files
When users select a released file on the file server, FMA automatically recalls the file. Specifically, FMA
must recall files when the “system” process reads the file contents. In addition, you can recall the file
manually using the Explorer plugin.
If a file is migrated to multiple archives and FMA releases the file, the file is recalled from the last location
to which it was migrated. The last location contains the most recent version of the file contents.
To recall files or folders using the Explorer plugin
1. In Windows Explorer, select the objects you want to recall and right-click the selection.
2. In the context menu, select Recall.
3. In the Processing results dialog box, click OK.
Moving files to another managed volume
You can move data from one managed volume to another using the robocopy command line tool, which is
available from the Microsoft Resource Kit.
Moving a small number of files
Moving files from one volume to another can be time-consuming. Use this procedure if you are moving a
small number of files or if you have a large production downtime available.
To move files to another managed volume
1. Ensure that the FMA archive configuration is identical on both file servers.
2. Obtain the robocopy.exe utility Version XP010 or higher by installing the Microsoft Resource Kit.
3. Add the NoRecRobocopy process name to the FMA registry key:
HKEY_LOCAL_MACHINE\SOFTWARE\Hewlett-Packard\HP FMA\IgnoreModules
4. Restart the File Migration Agent configuration service and File Migration Agent service.
5. Stop sharing the subfolder you want to move to avoid user access during relocation.
6. Ensure that all data is backed up.
7. Stop the File Migration Agent AFM service. This ensures that no migration jobs are running during the
relocation process. If the target location is another FMA file server, stop the File Migration Agent AFM
service on the other file server as well.
8. Disable the files in the source folder. Here is an example:
FMACLI act -–off -r e:\homedir
To check whether the files are set to DIS (DISABLED), use the following command:
FMACLI info –r e:\homedir
9. Copy the files using the robocopy command. Here is an example:
robocopy e:\homedir f:\homedir /E /SEC /COPYALL /B
10. Ensure that all files have been copied successfully to the target location.
11. Activate the files in the target folder.
58 | Managed Volumes
Page 69

Activating a file means that the FMA metadata is synchronized to the new system file ID. This step
enables the link to the archive copy and is performed from the FMACLI. For more information about
the FMACLI, see
FMACLI act -r f:\homedir
12. Delete the source folder.
13. Restart the File Migration Agent AFM service.
Command Line Interface Reference on page 81.
Moving a large number of files
Use this procedure if you are relocating a large number of files and only a short production downtime is
available. You run the command for disabling the files after the target folder has been enabled for user
access and before the source folder is deleted. This decreases downtime by the processing time of the
command for disabling the files.
This procedure is feasible under the following conditions:
• User and application access to the source folder must be permanently revoked before starting the
relocation procedure.
• Do not allow user and application access to the target folder until all files have been activated using the
FMACLI act command.
• You must ensure that the command for disabling the files in the source folder has been run before
deleting them.
To move a large number of files
1. Revoke access to the filesystems of the source and target folders.
2. Ensure that all data is backed up.
3. Stop the File Migration Agent AFM service. This ensures that no migration jobs are running during the
relocation process. If the target location is on a remote FMA file server, stop the File Migration Agent
AFM service on the remote file server as well.
4. Copy the data from the source folder using the robocopy command and check that all files have been
copied successfully.
Example:
robocopy e:\homedir f:\homedir /E /SEC /COPYALL /B
5. Activate the files in the target location.
FMACLI act -r f:\homedir
6. Grant access to the target location.
7. Deactivate the files in the source location.
FMACLI act --off -r e:\homedir
8. Delete the files in the source location.
9. Restart the File Migration Agent AFM service.
Stopping volume management
When you stop volume management, FMA cannot access the released files stored in the archive until you
restart volume management. Stopping volume management is rarely required unless you want to prevent
Managed Volumes | 59
Page 70

FMA from managing it (remove volume management) or you want to address an issue on the volume, as
directed by Technical Support.
To stop managing a volume
1. In the left pane of the FMA user interface, select Managed Volumes.
2. Right-click on the volume you want to stop managing and select Stop from the context menu. The status
for this volume has changed to Stopped.
Restarting volume management
After you stop volume management, you can restart it to restore access to the files stored on the archive.
To start managing a volume
1. In the left pane of the FMA user interface, select Managed Volumes.
2. Right-click on the volume you want to start managing and select Start from the context menu. The
status for this volume changed to Active.
Removing volume management
WARNING Before you discontinue FMA management of a volume, be sure to recall all migrated files to
ensure against data loss. After you remove volume management, you can no longer access the
files stored on the archive.
To stop FMA management of a volume
1. In the left pane of the FMA user interface, select Managed Volumes.
2. Right-click on the volume you want to stop managing and select Stop from the context menu. The status
for this volume changed to Stopped.
3. Right-click on the volume again and select Remove from Management from the context menu. The
status for this volume changed to Not managed.
60 | Managed Volumes
Page 71

Best Practices
Create a new HP StorageWorks File Migration Agent (FMA) archive
FMA archive configuration for a Windows FTP archive
Prerequisites
For archiving data to a Windows-based HP StorageWorks File System Extender (FSE) Archive, the GDS
FTP-Server needs to be set up on the FSE Archive.
The GDS FTP-Server comes with its own user management facilities. Therefore, the FTP authentication
process is completely controlled by the GDS FTP-Server and no Windows domain user account needs to be
created for the FTP client access.
Because the GDS FTP-Server runs as a Windows service, user access to the FTP server’s home directory
can be restricted to designated administrators of the domain.
The absolute path to the archive directory is composed of the root directory, which is specified in the
configuration file ftp_server.cfg of the GDS FTP-Server, and the root path set up in the FMA’s RSA-FTP
configuration dialog. If a root path is defined on the client side (FMA), the administrator needs to create this
subdirectory during the GDS FTP-Server configuration.
The absolute path to the archive directory in the following example should be:
c:\fsefs1\data1\fma
Example of the GDS FTP-Server configuration file ftp_server.cfg file
[default]
RootDirectory = c:\fsefs1
Port = 21
UserFile = C:\program files\Hewlett-Packard\FTPServer\GDSFtpServerUsers
LogFile = C:\program files\Hewlett-Packard\FTPServer\GDSFtpServer.log
61
Page 72

FMA RSA-FTP Configuration dialog
For archiving data directly to c:\fsefs1, the root path of the FMA RSA-FTP configuration menu needs to be
left blank.
Verification of the GDS FTP-Server configuration can be done with any FTP client software.
After the FTP server side has been tested successfully, the next step is to attach FMA as an FTP client to the
new archive storage location. For this, the following actions are necessary:
1. Start FMA MMC Snap-In from Windows Start menu. (Start → Programs → HP StorageWorks File
Migration Agent
2. Select the Archives item.
3. Start the context menu and select the item New. A new dialog is displayed.
4. Enter the name for the new archive. The archive name must be unique.
5. Select RSA-FTP as RSA module.
6. Enter the performance index. Typically, smaller the index, the higher the priority.
7. Enter an archive description.
8. Click OK. A new dialog is displayed.
9. Enter the following settings corresponding to the requirements:
• Host or IP address (primary and secondary host)
• Port (default: 21)
→ FMA Configuration)
62 | Best Practices
Page 73

•User
• Password
• Root path
•FTP server
• Connection timeout in ms
• Data read timeout in ms
• Select various options
10. Click Save. The new FMA archive is shown in the FMA MMC Snap-In list.
The creation of a new FMA archive is finished.
If the backend archive is replicated outside of FMA via some replication mechanism such as the HP
Continuous Access (HP CA) for the FSE Archive, the host name or IP address of the secondary system
needs to be added to the entry field Secondary Host/IP.
In this case recall requests are switched to the secondary system, when the primary archive is not accessible.
Best Practices | 63
Page 74

Note that the primary and secondary archive configuration (FTP user ID, FTP server configuration and
archive directory structure) must be identical.
Note For further information about managing FMA archives, see Archives on page 25.
FMA archive configuration for an Linux FTP archive
For archiving data to a Linux-based FSE Archive, the VSFTPD needs to be set up on the FSE Archive.
The absolute path to the archive directory is composed of the FTP user’s home directory and the relative
path, which is configured in the FMA RSA-FTP configuration dialog.
The first part of the absolute path to the archive is specified during the creation of the FTP user on the Linux
system. The command
useradd -m -k /bin/false -d /fma/hmsfs1 -g fma -s /bin/false fma
defines the directory /fma/hsmfs1 as the home directory for the FTP user fma. The second part of the
absolute path to the archive directory is set up in the FMA RSA-FTP configuration dialog.
64 | Best Practices
Page 75

In this example, the complete path to the archive directory is /fma/hsmfs1/data1/fma.
After the FTP server side has been tested successfully, the next step is to attach FMA as an FTP client to the
new archive storage location. For this, the following actions are necessary:
1. Start FMA MMC Snap-In from Windows Start menu. (Start → Programs → HP StorageWorks File
Migration Agent
→ FMA Configuration)
2. Select the Archives item.
3. Start the context menu and select the item New. A new dialog is displayed.
4. Enter the name for the new archive. The archive name must be unique.
5. Select RSA-FTP as RSA module.
6. Enter the performance index. Typically, the smaller the index, the higher the priority.
7. Enter an archive description.
8. Click OK. A new dialog is displayed.
9. Enter the following settings corresponding to the requirements:
• Host or IP address (primary and secondary host)
• Port (default: 21)
•User
• Password
• Root path
Best Practices | 65
Page 76

•FTP server
• Connection timeout in ms
• Data read timeout in ms
• Select various options
10. Click Save. The new FMA archive is shown in the FMA MMC Snap-In list.
The creation of a new FMA archive is finished.
If the backend archive is replicated outside of FMA via some replication mechanism such as the HP CA for
the FSE Archive, the host name or IP address of the secondary system needs to be added to the entry field
Secondary Host/IP.
In this case recall requests are switched to the secondary system, when the primary archive is not accessible.
66 | Best Practices
Page 77

Note that the primary and secondary archive configuration (FTP user ID, FTP server configuration and
archive directory structure) must be identical.
Note For further information about managing FMA archives, see Archives on page 25.
Best Practices | 67
Page 78

FMA archive configuration for a CIFS-based NAS device
For archiving data to a CIFS-based NAS device, the archive folder on the NAS device needs to be shared on
the network. FMA only supports NTFS file systems on CIFS archives.
After sharing the appropriate folder on the NAS device, the NTFS permissions on the folder must be set to
FULL Control for the FMA technical user account (see
corresponding group.
The absolute path to the archive location can be configured in FMA’s RSA-CIFS dialog.
Example:
If the share archives has been created on the NAS device NAS_DEVICE, subsequent archives can be set up
through FMA RSA-CIFS configuration:
\\NAS_DEVICE\archives\users
\\NAS_DEVICE\archives\projects
Creating a technical user account on page 5) or the
68 | Best Practices
Page 79

If the backend archive is replicated outside of FMA via some replication mechanism the UNC path of the
target location needs to be added to the entry field Secondary Archive. In this case recall requests are
switched to the secondary archive location, when the primary archive is not accessible.
Best Practices | 69
Page 80

FMA archive configuration for IAP
FMA is using the ILM Object Storage API interface for accessing the HP Integrated Archive Platform (IAP)
as a backend archive.
Any documents with a size of up to 1.58 GB can be sent from an FMA managed volume to the IAP.
Depending on FMA’s RSA-IAP configuration, a specific set of metadata about the document can be attached
to the binary object. The following metadata is attached by FMA:
• File modification date
• MIME type of the file
• Full path name in UNC notation
• File security depending on FMA’s recipients options
• Subject (file name without path and file extension)
FMA’s recipients options and the Recipients field entries determine which IAP repositories are granted
access to the binary object. The access information is retrieved from the document’s Access Control List
(ACL).
Documents are automatically retrieved from the IAP, when a user or application accesses the document on
the FMA managed volume. To search for documents, users can use the IAP Web Interface embedded in a
standard IAP solution.
If a IAP is mirrored on a remote location using the IAP Replication Manager, the host name or IP address of
the replica site needs to be entered to the input field Secondary IAP. In this case FMA retrieves data from the
70 | Best Practices
Page 81

replica site, when the primary IAP is not available. If the primary IAP site can not accept any incoming
traffic, FMA does not redirect the data traffic to the replica site.
FMA only supports one replica site, which is built by one-way (Active/Passive) IAP remote replication
services.
Best Practices | 71
Page 82

Create a new managed volume
To create a new managed volume:
1. Start FMA MMC Snap-In from Windows Start menu. (Start → Programs → HP StorageWorks File
Migration Agent
2. Select the Managed Volumes item. All NTFS volumes are displayed.
3. Right-click the corresponding volume entry to display the context menu.
4. Select the New item in the context menu.
5. Reboot the FMA system now.
6. The creation of a new managed volume is finished.
Note For further information about managing volumes, see Managed Volumes on page 45.
→ FMA Configuration)
Create file policies
To create and schedule migration rules on a managed volume:
1. Start FMA MMC Snap-In from Windows Start menu. (Start → Programs → HP StorageWorks File
Migration Agent
2. Select the Managed Volumes item.
3. Double-click the corresponding volume entry to display the Policy Configuration window.
→ FMA Configuration)
4. Right-click the Policies pane to display the context menu and select New.
5. Enter a policy name and policy description, and select the path, for which the policy should be applied.
6. Set up the migration rules on the Filtering tab.
Example:
• Migrate all files that have not been accessed for 180 days and release the files immediately.
• Files with the extension *.tmp are excluded from migration.
7. Select the archives, where data needs to be stored, and click OK.
8. After all policies are configured for the managed volume, set up the schedule for policy processing by
clicking Change in the Scheduling pane.
72 | Best Practices
Page 83

9. Policy processing can be scheduled to be run hourly, daily, weekly or monthly and at any point in time
to suit your business needs.
Examples:
• Start policies every day at 10:00 p.m.
• Start policies every Saturday at 01:00 a.m.
(Select Every day on Day of month, if policies should run on certain days of week.)
• Start policies on the 1st of every month.
(Select Every week day, if policies should run on certain days of month.)
Best Practices | 73
Page 84

Create disk usage monitoring
To set up the disk space monitor on a managed volume:
1. Start FMA MMC Snap-In from Windows Start menu. (Start → Programs → HP StorageWorks File
Migration Agent
2. Select the Managed Volumes item.
3. Double-click the corresponding volume entry to display the Policy Configuration window.
4. Files are released when the high or critical watermark threshold is reached. The policy ensures that the
monitored managed volume never causes a DISK FULL error. The release operation is based on the
configured retention times and the configuration for excluded files and directories.
Example:
For an optimal usage of the managed volume, the following watermarks are defined:
→ FMA Configuration)
The disk space is monitored every hour and when the disk utilization reaches 85%, files which have not
been accessed for 180 days are not released until the low watermark is reached.
If the critical watermark is hit, the release process is no longer limited by the defined retention criteria
until the high watermark is reached.
If the retention time period is based on the modification timestamp of a file, HP recommends specifying
a retention time for recalled files to avoid unnecessary recalls.
74 | Best Practices
Page 85

In this example recalled files are kept online for a minimum of 7 days, although the files have not been
modified for 60 days.
This configuration guarantees a fast access to files for a certain time period since the files have been
recalled.
Files which should always be online, can be excluded.
Determine FMA software version
To display the current version of FMA software components:
• Enter FMACLI sys in the command line. On top of the output, the current version is displayed:
HP Storage Works File Migration Agent
Version 2.5.1.0
HP File Migration Agent command line interface
Copyright (C) 2007-2009 Crossroads Systems, Inc.
Copyright (C) 2005-2009 Hewlett-Packard Company
Version of HP File Migration Agent kernel 2. 5. 0. 17
System status = 0, installPath=[C:\Program Files\Hewlett-Packard\HP
FMA]
HSM API Version = 2.5.0-0017 ""
License Information:
=====================
+ Serial number S+ Base Product License Evaluation license expiration in 59 days
+ OpenStorage Option Evaluation license, capacity (avail/used) 1000
GB / 0 GB.
+ Cluster Option Evaluation license.
Config:
Loglevel for eventlog: LOG_WARNING
Loglevel for logfile: LOG_INFO
Number of log files: 100
Options:=00000000
• Or view the version information for (almost) each FMA file by looking at the files in the Windows File
Explorer. Right-click the file, click Properties, and click the Version tab.
•Or click About HP FMA in the menu of the FMA MMC Snap-In.
Best Practices | 75
Page 86

• For further information, see the Readme.txt file. To read the Readme.txt file, use the shortcut: Start →
Programs
Migrate files
To migrate files:
• Use the FMACLI command-line utility to migrate files.
FMACLI migrate f:\testdir\test.* -a myArchive
In the following example, the testdir directory is migrated into the myArchive archive:
FMACLI migrate -r f:\testdir -a myArchive
• To migrate a directory to more than one archive (max. 4), apply:
FMACLI migrate -r f:\testdir -a myArchive, myArchive02
• To migrate a directory with immediately release operation after successfully migrating of the directory,
apply:
FMACLI migrate -r f:\testdir -a myArchive -n1 --release
You can also migrate files using the FMA Explorer plug-in.
Release files
• To release files:
→ HP StorageWorks File Migration Agent → FMA Readme.
Use the FMACLI command-line utility to release files.
FMACLI release f:\testdir\test.* -n 1
In the following example, the testdir directory is released:
FMACLI release -r f:\testdir -n 1
You can also migrate files using the FMA Explorer plug-in.
76 | Best Practices
Page 87

Recall files
• To recall files:
Use the FMACLI command-line utility to recall files.
FMACLI recall f:\testdir\test.*
In the following example, the testdir directory is recalled:
FMACLI recall -r f:\testdir
You can also migrate files using the FMA Explorer plug-in.
Set a high-watermark for migration or releases
• To set a high-watermark for migration or release:
Use the FMACLI command-line utility. In the following example, the testdir directory is released when
the fill level of the file system (85 percent) is reached.
FMACLI release -r f:\testdir -u 85
Verify data files
• To verify FMA metadata information:
Use the FMACLI command-line utility to check whether the FMA metadata of a file object is
consistent.
FMACLI verify f:\testdir\test.dat -o local
• To check all files of a directory, apply:
FMACLI verify -r f:\testdir -o local
• To check if the link to the archive copy of a file is valid, apply:
FMACLI verify f:\testdir\test.dat -o remote
Schedule FMA commands
• To schedule an FMA command:
Use the AT command-line utility of Windows. In the following example, the FMA release command
starts at 10 a.m.:
at 10:00 "FMACLI release -r f:\testdir -n 2"
Note For further information about the AT command-line utility, see the documentation for Microsoft
Windows.
You can use the Scheduled Task Wizard in the Windows Control Panel (Start → Control Panel →
Scheduled Tasks) for these tasks also.
Best Practices | 77
Page 88

Schedule FMA jobs
• To schedule FMA jobs, use the Scheduled Task Wizard in the Windows Control Panel (Start →
Control Panel
• Or, you can use the following command-line tools for scheduling an FMA job.
In this example, the FMA job starts every Sunday (Su) at 03:00 a.m.
schtasks /create /ST 03:00 /D Su /TN "C:\Progr..\MyJob.cmd"
Note For further information about the AT or SCHTasks command-line utility, see the documentation for
Microsoft Windows.
→ Planned/Scheduled Tasks) for scheduling the FMA job.
Backup/restore concept for FMA managed volumes
FMA is a hierarchical storage management (HSM) solution and, therefore, not a replacement for data
backup. The major purpose for backup is to ensure recovery of data on the server if a disaster occurs. The
main goal of HSM is to better manage data storage costs.
FMA migrates files to other forms of storage and creates copies of files, but does not back up files on the
server. When FMA releases files, only stubs are left on the managed file system, which point FMA to the
exact location in the backend storage, enabling file retrieval and user access.
To provide data protection, third-party backup applications are absolutely essential for disaster recovery.
The qualified third-party backup applications are HSM-aware, which means that stubfiles are backed up
without causing recalls from backend storage. Because FMA stubfiles are created as Windows sparse files, a
further requirement for backup applications is the appropriate processing of sparse files to avoid heavy
network traffic and to minimize the backup window.
Concepts for organizing the back up of FMA managed volumes:
• Protect all data on the server—To accomplish this, the backup process needs to be set up to the
incremental forever mode and the release of FMA jobs needs to be scheduled after the backup process
to ensure that files are backed up before becoming a stubfile. In this case it is most likely that the
capacity of the saved data exceeds the capacity of the original locations on the managed volumes.
Therefore, release operations trigger during a disaster recovery or massive restore of saved data. HP
recommends adjusting the monitoring time interval (for example, 10 minutes) and watermarks
accordingly.
• Speedy backup/restore processing—In this scenario, data backup needs to be configured to periodically
run full backups with subsequent incremental backups. This approach reduces the backup data volume
and backup/restore time period compared to a non-HSM managed filesystem with the same data
capacity and number of files.
CAUTION: When backing up stubfiles, it is very important that FMA’s cleanup expiration time must be set
equal to the expiration time that is configured for the backed up files. The FMA cleanup function removes
the archive copies of deleted files depending on the specified cleanup expiration time. In this context, the
expiration time, which is specified for the backend storage, also needs to be configured appropriately.
FMA does not support multiple references to one archive file copy. Only one stubfile can be linked to one
archive copy. As a result of this restriction, restore operations of files to an alternate location are not
permitted by FMA. Backed up files from FMA managed volumes can only be restored to their original
location.
78 | Best Practices
Page 89

Relocating data to another FMA managed volume
Copying data to another FMA managed volume needs to be run by the robocopy.exe command-line tool,
which is available from Microsoft’s Resource Kit.
To avoid recall operations during copying of the data, HP recommends creating a duplicate of the robocopy
utility. Name the duplicate NoRecRobocopy.exe. Add the process name NoRecRobocopy to the list of
modules for which FMA enables a physical view to the file system.
Therefore, the following steps are necessary:
1. Install the robocopy.exe utility Version XP010 or higher by installing Microsoft’s Resource Kit.
-------------------------------------------------------------
ROBOCOPY :: Robust File Copy for Windows :: Version XP010
-------------------------------------------------------------
2. Create the NoRecRobocopy command:
copy <InstPath>\robocopy.exe %SYSTEMROOT%\system32\NoRecRobocopy.exe
3. Add the process name NoRecRobocopy to FMA’s registry key.
HKEY_LOCAL_MACHINE\SOFTWARE\Hewlett-Packard\HP FMA\IgnoreModules
4. Restart the FMA services:
• File Migration Agent config service
• File Migration Agent service
Note When moving data to other server systems, ensure that the FMA archive configuration is identical
on all systems.
Relocating data procedure
This section describes the steps that are needed to copy a subdirectory from an FMA managed volume to
another FMA managed volume either local or remote. Assume that you want to relocate a subdirectory
named e:\homedir to f:\homedir.
1. Stop sharing the subdirectory to avoid user access during the relocation process.
2. Ensure that the data has been backed up.
3. Disable the files in the source directory.
Description:
When a disabled file is deleted, no entry is written to the garbage collection container and, therefore,
the corresponding archive copy is not deleted during an FMA cleanup run. Additionally, recall
operations are rejected on disabled files.
FMACLI act --off -r e:\homedir
(Check whether the files are set to DIS (DISABLED), use the command FMACLI info -r e:\homedir.)
4. Use the appropriate NoRecRobocopy command now.
Example:
NoRecRobocopy e:\homedir f:\homedir /E /SEC /COPYALL
Best Practices | 79
Page 90

(Check that all files have been copied successfully to our target location.)
5. Activate the files in the target directory.
Description:
Activating a file means that FMA’s metadata is synchronized to the new system file ID. This step
enables the link to the archive copy.
FMACLI act -r f:\homedir
6. Delete the source directory
Relocating a large number of files
If the relocation process is required for a large number of files and only a short production downtime is
available, the command for disabling the files can also be run after the target directory has been enabled for
user access and before deleting the source directory. In this case, the downtime is decreased by the
processing time of the command for disabling the files.
This procedure is feasible under the following conditions:
• User and/or application access to the source directory must be permanently revoked before starting the
relocation procedure.
• User and/or access to the target directory must be avoided until all files have been activated using the
command fmacli act.
• The administrator must guarantee that the command for disabling the files in the source directory has
been run before deleting them.
Steps for relocating a large number of files:
1. Revoke access to the file systems of the source and target directories.
2. Ensure that the data has been backed up.
3. Copy the data using the NoRecRobocopy command and check that all files have been copied
successfully.
Example:
NoRecRobocopy e:\homedir f:\homedir /E /SEC /COPYALL
4. Activate the files in the target location.
FMACLI act -r f:\homedir
5. Grant access to the target location.
6. Deactivate the files in the source location.
FMACLI act --off -r e:\homedir
7. Delete the files in the source location.
80 | Best Practices
Page 91

Command Line Interface Reference
The FMA command line interface (FMACLI) provides access to most FMA functions and can be used
instead of the user interface to manage data. The FMACLI is implemented in the FMACLI.exe module. It
writes informational output to stdout and errors to stderr. Keep this in mind when redirecting output for
logging purposes.
This section uses the following typographical conventions:
• Bold is used for command names and arguments in text.
• Monospace is used for command names and arguments in syntax and for code.
• Monospace italic is used for variables within command syntax, code, or command-line text.
• Brackets [ ] and braces { } are used for optional information.
FMA commands
The syntax for FMACLI commands is as follows: FMACLI [command] [command-options].
Use FMACLI or FMACLI --help to list the available commands, which include the following:
Command Description
CLI
only
act[ivate] Repairs metadata file IDs after restore X
arc[hive] Displays a list of defined archives
cle[anup] Removes the archived replicas of deleted files and reorganizes
archives
era[se] Deletes FMA metadata X
inf[o] Displays FMA metadata
mig[rate] Migrates files to specified archives
pol[icy] Displays or runs a file policy
rec[all] Recalls data for released file
rel[ease] Releases data for files
rsa Displays a list of storage adapters and their status
sys[tem] Displays FMA-related information and settings
X
81
Page 92

CLI
Command Description
only
ver[ify] Displays the result of the verification process X
vers[ion] Displays FMA version and build information
vol[ume] Displays information about available volumes
Most commands can be shortened on the first three letters (for example, mig instead of migrate). Only the
version command needs four letters (vers) to define the short form. There is no short form for the find
command. In addition, many command parameters have a short form. For example, --help and -h are
interchangeable.
All commands return 0 on successful completion and a non-zero value in failure situations.
82 | Command Line Interface Reference
Page 93

activate
Sets the file ID in the metadata to the current ID of the file.
Syntax
FMACLI act[ivate]
[--help | -h]
[{--logfile | -L} logfile]
[--log-info-messages | -V]]
[--verbose | -v]
[file] | [{--filelist] | -f} filelist]
[{--recursive | -r} path]
[--oem-file-format | --unicode-file-format | --ansi-file-format |
--utf8-file-format]
[{--minimum-file-size | -S} nb|k|m|g]
[{--minimum-access-time | -A} nd|h|m|s]
[{--minimum-write-time | -W} nd|h|m|s]
[--exclude-system]
[--exclude-hidden]
[--exclude-read-only]
[--exclude-archive]
[--exclude-compressed]
[--ignore-files ignorefile]
[--off]
[-F outlist]
Description
The activate command sets the file ID in the metadata to the current ID of the file. Use this function under
the following conditions:
• When the file ID of the file changes.
• After metadata is restored.
• When moving FMA metadata from one computer to another.
• When file has been restored from a backup application. File stubs must be activated after a restore from
backup for it to operate correctly.
Do not try to activate files that have an unknown status.
Files must be active in order to be recalled.
Disabling files ensures that no entry is written to the FMA garbage collection container when files are
deleted. As a result, the corresponding archive copy is not deleted during an FMA cleanup run.
Note Excluded files are excluded from statistical summaries.
Command Line Interface Reference | 83
Page 94

Options
Option Description
--help
-h
--logfile logfile
-L logfile
--log-info-message
-V
--verbose
-v
Displays Online Help for the activate command.
Specifies a log file.
The log file must be specified with a fully qualified
path. Log files are created with the following
(fixed) policies:
• Maximum size is 10MB. If the file grows
larger then 10MB, the file is switched.
• Old log files are named logfile.nnn, where the
lowest number contains the youngest file:
logfile.log
logfile.000
logfile.001
...
Writes informational and debug messages to the
log file (and the console).
This option must be specified in combination with
the --logfile | -L option.
By default, only errors are written to the log.
Display debug information on the console
(std_out).
file Specifies a file name. Wildcards like * or ? can be
used.
--filelist filelist
-f filelist
--recursive path
-r path
--oem-file-format Indicates that the input file list is in OEM format.
--unicode-file-format Indicates that the input file list is in unicode
--ansi-file-format Indicates that the input file list is in ANSI format.
--utf8-file-format Indicates that the input file list is in UTF8 format
--minimum-file-size nb|k|m|g
-S nb|k|m|g
Specifies an input file list (default is stdin). Files in
the file list are separated by CR/LF. File names can
be relative or fully qualified. If you plan to run
scripts use fully qualified names only.
Applies this command to subfolders starting at
path.
format.
(default).
Defines a minimum file size (n) for the specified
operation.
The value can be specified in bytes (b), kilobytes
(k), megabytes (m), or gigabytes (g).
84 | Command Line Interface Reference
Page 95

Option Description
--minimum-access-time nd|h|m|s
-A nd|h|m|s
--minimum-write-time nd|h|m|s
-W nd|h|m|s
--exclude-system Excludes system files.
--exclude-hidden Excludes hidden files.
--exclude-read-only Excludes read-only files.
--exclude-archive Excludes files with an active archive bit.
--exclude-compressed Excludes files with an active compressed bit.
--ignore-files ignorefile Excludes file ignorefile. Wildcards like * or ? can
--off Deactivates files.
Defines the minimum time (n) since file was last
accessed for the specified operation.
The value can be specified in seconds (s), minutes
(m), hours (h), or days (d).
Defines the minimum time (n) since file was last
modified for the specified operation.
The value can be specified in seconds (s), minutes
(m), hours (h), or days (d).
be used.
This is required when files need to be relocated on
FMA managed volumes.
-F outlist Creates a file list (outlist) as output.
To define an operation, specify an explicit file name or a file list that contains file names. If neither is
specified, the FMACLI tries to read the file list from stdin.
Use UNICODE or UTF8 formats whenever possible. The OEM and ANSI formats are for compatibility
reasons only and cannot display all character sets.
Example
FMACLI activate D:\ASC\MyFile.doc
Activates the D:\ASC\MyFile.doc file.
Command Line Interface Reference | 85
Page 96

archive
Lists the status of the FMA archives.
Syntax
FMACLI arc[hive]
[--help | -h]
[{--logfile | -L} logfile]
[--log-info-messages | -V]]
[--verbose | -v]
Description
The archive command displays list of all archives.
Options
Option Description
--help
-h
--logfile logfile
-L logfile
--log-info-message
-V
--verbose
-v
Displays Online Help for the archive command.
Specifies a log file.
The log file must be specified with a fully qualified
path. Log files are created with the following
(fixed) policies:
• Maximum size is 10MB. If the file grows
larger then 10MB, the file is switched.
• Old log files are named logfile.nnn, where the
lowest number contains the youngest file:
logfile.log
logfile.000
logfile.001
...
Writes informational and debug messages to the
log file (and the console).
This option must be specified in combination with
the --logfile | -L option.
By default, only errors are written to the log.
Display debug information on the console
(std_out).
86 | Command Line Interface Reference
Page 97

Example
FMACLI arc
Lists the archives. Output of the archive command is as follows:
Id—The unique, internal reference number for the archive, which is generated automatically and
cannot be modified.
Status—The status of the archive (currently not used).
State—Whether the archive is online or offline.
Archive type—Type of Remote Storage Adapter (RSA-FTP for Linux archives, RSA-CIFS for
Windows archives, RSA_IAP for IAP archives).
pI—The order in which FMA recalls files from this archive. The range is 0-100. and the default is
100. If a file is stored on multiple archives, FMA attempts to recall it from the archive with the
smallest index number first.
Name—The name of the archive, which identifies this archive for migration and recall operations.
Location—Path of primary and secondary archives.
Description—A description of the FMA archive.
Here is an example:
Id Status State Archive type pI Name Location Description
---- ------ ------ ------------ --- ------- ------------------- ------------0001 OK online RSA-IAP 100 IAP-1 P.: 192.168.40.163,
S.: "HP IAP #12"
0002 OK online RSA-FTP 100 FTP-1 P.: 192.168.100.8:21,
S.: :21 "FTP Archive"
0003 OK online RSA-CIFS 100 CIFS-1 P.: \\w2003r2vm-arch1\Arch1-2,
S.: "CIFS
Archive"
Command Line Interface Reference | 87
Page 98

cleanup
Reorganizes FMA archives after files are deleted on the file server.
Synopsis
FMACLI cle[anup]
[--help | -h]
[{--logfile | -L} logfile]
[--log-info-messages | -V]]
[--verbose | -v]
[--expiration nd|h|m|s]
Description
Use the cleanup command after files have been deleted on the file server to remove copies from the archive
and reorganize the archive.
Options
Option Description
--help
-h
--logfile logfile
-L logfile
--log-info-message
-V
--verbose
-v
--expiration nd|h|m|s] Deletes all files in all archives that have been deleted more than an
Displays Online Help for the cleanup command.
Specifies a log file.
The log file must be specified with a fully qualified path. Log files
are created with the following (fixed) policies:
• Maximum size is 10MB. If the file grows larger then 10MB, the
file is switched.
• Old log files are named logfile.nnn, where the lowest number
contains the youngest file:
logfile.log
logfile.000
logfile.001
...
Writes informational and debug messages to the log file (and the
console). This option must be specified in combination with the -logfile | -L option. By default, only errors are written to the log.
Display debug information on the console (std_out).
expiration value (n) ago.
The value (n) can be specified in seconds (s), minutes (m), hours (h),
or days (d).
This option is mandatory if the -h|--help option is not used.
Example
FMACLI cleanup --expiration 30d
Removes archive files that were deleted more than 30 days ago on the file server.
88 | Command Line Interface Reference
Page 99

erase
Deletes FMA metadata from a file.
Syntax
FMACLI era[se]
[--help | -h]
[{--logfile | -L} logfile]
[--log-info-messages | -V]]
[--verbose | -v]
[file] | [{--filelist] | -f} filelist]
[{--recursive | -r} path]
[--oem-file-format | --unicode-file-format |
--ansi-file-format | --utf8-file-format]
[{--minimum-file-size | -S} nb|k|m|g]
[{--minimum-access-time | -A} nd|h|m|s]
[{--minimum-write-time | -W} nd|h|m|s]
[--exclude-system]
[--exclude-hidden]
[--exclude-read-only]
[--exclude-archive]
[--exclude-compressed]
[--ignore-files ignorefile]
[[--primary-metadata | -Mp] |
[--secondary-metadata | -Ma] |
[--all-metadata | -Mb]]
[--force ]
[-F outlist]
Description
The erase command deletes FMA metadata from a file system.
Note erase deletes metadata without confirmation. Before erasing the file metadata, recall the file to
avoid data loss. Metadata from offline files are erased unless the --force option is used.
Excluded files are excluded from statistical summaries.
Command Line Interface Reference | 89
Page 100

Options
Option Description
--help
-h
--logfile logfile
-L logfile
--log-info-message
-V
--verbose
-v
Displays Online Help for the erase command.
Specifies a log file.
The log file must be specified with a fully qualified
path. Log files are created with the following
(fixed) policies:
• Maximum size is 10MB. If the file grows
larger then 10MB, the file is switched.
• Old log files are named logfile.nnn, where the
lowest number contains the youngest file:
logfile.log
logfile.000
logfile.001
...
Writes informational and debug messages to the
log file (and the console).
This option must be specified in combination with
the --logfile | -L option.
By default, only errors are written to the log.
Display debug information on the console
(std_out).
file Specifies a file name. Wildcards like * or ? can be
used.
--filelist filelist
-f filelist
--recursive path
-r path
--oem-file-format Indicates that the input file list is in OEM format.
--unicode-file-format Indicates that the input file list is in unicode
--ansi-file-format Indicates that the input file list is in ANSI format.
--utf8-file-format Indicates that the input file list is in UTF8 format
--minimum-file-size nb|k|m|g
-S nb|k|m|g
Specifies an input file list (default is stdin). Files in
the file list are separated by CR/LF. File names can
be relative or fully qualified. If you plan to run
scripts, use fully qualified names only.
Applies this command to subfolders starting at
path.
format.
(default).
Defines a minimum file size (n) for the specified
operation.
The value can be specified in bytes (b), kilobytes
(k), megabytes (m), or gigabytes (g).
90 | Command Line Interface Reference
 Loading...