

Page 1

HP StorageWorks
Tape Blade
User Guide
Part number: 509508–001
Third edition: October 2008
Page 2

Legal and notice information
© Copyright 2008 Hewlett-Packard Development Company, L.P.
The information contained herein is subject to change without notice. The only warranties for HP products and services are set forth
in the express warranty statements accompanying such products and services. Nothing herein should be construed as constituting
an
additional warranty. HP shall not be liable for technical or editorial errors or omissions contained herein.
Linear Tape-Open, LTO, LTO Logo, Ultrium and Ultrium Logo are trademarks of Certance, HP and IBM in the US, other countries
or both.
Patented under one or more of U.S. Patents Nos. 5,003,307; 5,016,009; 5,463,390; 5 ,506,580; held by Hi/fn, Inc.
Microsoft, Windows, Windows XP, and Windows NT are U.S. registered trademarks of Microsoft Corporation.
UNIX is a registered trademark of The Open Group.
Page 3

Contents
Aboutthisguide .......................... 9
Intendedaudience...................................... 9
Relateddocumentation.................................... 9
Documentconventionsandsymbols .............................. 9
HPtechnicalsupport.................................... 10
Productwarranties..................................... 10
Subscriptionservice .................................... 10
HPwebsites........................................ 10
Documentationfeedback .................................. 11
1Beforeyoustart......................... 13
SupportedTapeBlades................................... 13
Installationguidelines ................................... 13
Partnerserverblade .................................. 14
OnboardAdministrator................................... 14
Power specifications .................................... 14
YourHPStorageWorksTapeBlade.............................. 14
UsingtheHPStorageWorksTapeCD-ROM .......................... 15
2Driversandbackupsoftware ................... 17
Installdrivers ....................................... 17
SAScontrollerdriver.................................. 17
HPUltriumTapedriver ................................. 17
InstallingonWindows ............................... 17
InstallingonUNIX................................. 18
InstallingonIA64 ................................. 18
Upgradebackupsoftware.................................. 18
Enablingencryption .................................. 18
3InstallinganHPStorageWorksTapeBlade ............. 19
Beforeyoustart ...................................... 19
Installationwithahalf-heightpartnerserverblade ....................... 20
Installationwithafull-heightpartnerserverblade........................ 24
Poweringthetapebladeonandoff ............................. 28
Powerup....................................... 28
Powerdown ..................................... 28
4 Verify installation ........................ 29
5 Understanding LEDs ....................... 31
TapeBladeChassisLEDs.................................. 31
TroubleshootingwithTapeBladeLEDs .......................... 31
TapeDriveLEDs...................................... 32
TroubleshootingwithTapeDriveLEDs........................... 32
6 Loading and unloading cartridges and removing tape blade . . . . . . 35
Insertingcartridges .................................... 35
Tape Blade
3
Page 4

Removingcartridges.................................... 35
Removingthetapeblade.................................. 36
7Usethecorrectmedia . ..................... 39
Cartridges ........................................ 39
Datacartridges .................................... 39
Cleaningcartridges .................................. 40
HPUltriumWORMdatacartridges............................ 40
HPStorageWorksSB1760cTapeBladesandencryption................... 40
WhenshouldIuseencryption? ........................... 40
HowdoIenableencryption? ............................ 41
WhenwillIbeaskedtoenterthekey? ........................ 41
WhathappensifIdon’trememberthekey? ...................... 41
Doesencryptionaffecttapedriveperformance? .................... 41
DoesthetapedriveencryptmediainanearlierUltriumformat?.............. 41
WherecanIgetmoreinformation?.......................... 41
Cleaningthetapedrive................................... 42
Writeprotectingcartridges ................................. 42
Handlingcartridges .................................... 43
Operatingandstorageenvironment ............................. 43
8UsingHPOBDR......................... 45
Compatibility....................................... 45
WhatdoesHPOBDRdo? ................................. 45
Remotedisasterrecovery(ProLiantserversonly) ........................ 45
Testingforcompatibility .................................. 46
RunningHPOBDR..................................... 46
9Troubleshooting . . ....................... 49
Whenthetapebladedoesnotpowerup ........................... 49
ManagementandDiagnostictools.............................. 49
OnboardAdministrator................................. 50
HPLibrary&TapeTools ................................ 50
TroubleshootingwithLibrary&TapeTools....................... 50
Optimizingperformance ................................ 50
Problemswithcartridges .................................. 51
Thecartridgeisjammed ................................ 51
Emergencyreset.................................. 52
Thedrivewillnotacceptthecartridge(orejectsitimmediately)................ 52
10Replacingatapebladechassisortapedrive............ 53
Beforeyoureplaceapart.................................. 53
Replacingthetapedrive .................................. 53
Removethetapedrive ................................. 53
Installthenewtapedrive ................................ 55
Replacingthetapebladechassis............................... 57
Removethetapeblade................................. 57
Remove the coupler plate, full-height partner servers in a c7000 enclosure only . . . . . . . . . 58
Removethetapedrive ................................. 59
Installthereplacementchassis.............................. 60
Returningthefaultypart .................................. 63
Index .............................. 65
4
Page 5

Figures
1
2
3
4
5
FrontviewofHPStorageWorksTapeBlade..................... 15
Half-heightdevicebaynumberinginac7000enclosure ............... 20
Half-heightdevicebaynumberinginac3000enclosure ............... 20
Paired locations in a c7000 enclosure with a half-height par tner server blade . . . . . . 21
Paired locations in a c3000 enclosure with a half-height partner server blade . . . . . . 22
6
Removing the
7
Removingtheconnectorcover .......................... 23
8
Installing the tape blade, partnered with a half-height server blade . . . . . . . . . . . 23
9
Paired locations in a c7000 enclosure with a full-height partner server blade . . . . . . 25
10
Paired locations in a c3000 enclosure with a full-height par tner server blade . . . . . . 25
11
Removingtheblank............................... 26
12
Installin
13
Removingtheconnectorcover .......................... 27
14
Installing the tape blade, partnered with a full-height server blade . . . . . . . . . . . 27
15
SystemhealthLED ............................... 28
16
TapeBladechassisLEDs............................. 31
17
TapedriveLEDs ................................ 32
18
Insertingacartridge .............................. 35
19
Ejectingacartridge............................... 36
20
Removingthetapeblade ............................ 37
21
Writeprotectingacartridge ........................... 43
blank............................... 22
gthecouplerplate............................ 26
22
InsertingcartridgeforOBDR........................... 46
23
Keepingejectbuttonpresseddown,poweroninOBDRmode............. 46
24
Releasingthetapedrive............................. 54
25
DisconnectingthepowerandSAScables ..................... 54
26
Removingtheclip-onmountingrailsonafaultytapedrive .............. 55
27
Replacingtheclip-onmountingrailsonanewtapedrive............... 55
28
ReconnectingthepowerandSAScablestothetapedrive .............. 56
29
Installingthetapedrive ............................. 56
30
emovingthetapeblade ............................ 58
R
31
Disconnectingthecouplerplate.......................... 58
32
Releasingthetapedrive............................. 59
33
DisconnectingthepowerandSAScables ..................... 59
Tape Blade
5
Page 6

34
Removingthetapebladecover.......................... 60
35
Removingtheconnectorcover .......................... 60
36
Reconnecting t
37
Installingthetapedrive ............................. 61
38
Cablinginthereplacementchassis ........................ 62
39
Replacingthetapebladecover.......................... 62
40
Installingthecouplerplate............................ 62
41
Installingthereplacementchassis......................... 63
hepowerandSAScablestothetapedrive .............. 61
6
Page 7

Tables
1
2
3
4
5
6
Documentconventions............................... 9
Power specifications............................... 14
TapedriveLEDsequences ............................ 33
Datacartridgecompatibility ........................... 39
Cleaningcartridgecompatibility ......................... 40
Troubleshootingtapebladeoperation ....................... 49
Tape Blade
7
Page 8

8
Page 9
About this guide
This guide provides information about:
• Installing the HP StorageWorks Tape Blade
• Using the HP StorageWorks Tape Blade
• Troubleshooting the HP StorageWorks Tape Blade
Intended audi
This guide is intended for users who install, operate and maintain the HP StorageWorks Tape Blade.
ence
Related documentation
The following documents provide related information:
• ‘Start here’poster foranoverviewofthe installation informationinthisguide (available in
English, French, German and Japanese)
You can find this document from the Manuals page of the HP Business Support Center website:
ttp://www.hp.com/support/manuals
h
In the Storage section, click Tape Storage and M e dia and then select your product.
Document conventions and symbols
Table 1 Document conventions
Convention
Blue text: Table 1
Blue, underlined text: http://www.hp.com website addresses
Bold text
Element
Cross-reference links and e-mail addresses
• Keys that are pressed
Text typed into a GUI element, such as a box
•
GUI elements that are clicked or selected, such as
•
menu
and list items, buttons, tabs, and check boxes
Italic text Text emphasis
Monospace text
Monospace, italic text
Monospace, bold text
CAUTION:
Indicates that failure to follow directions cou ld result in damage to equipment or data.
• File and directory names
System output
•
Code
•
Commands, their arguments, and argument values
•
• Code variables
Command variables
•
Emphasized monospace text
Tape Blade
9
Page 10

IMPORTANT:
Provides clarifying information or specific instructions.
NOTE:
Provides additional information.
HP technical support
For worldwide technical support information, see the HP support website:
ttp://www.hp.com/support
h
Before contacting HP, collect the following information:
• Product model names a nd numbers
• Technical support registration number (if applicable)
• Product serial numbers
• Error messages
• Operating system type and revision level
• Detailed questions
Product warr
For information about HP StorageWorks product warranties, see the warranty information website:
ttp://www.hp.com/go/storagewarranty
h
anties
Subscription service
HP recommends that you register your product at the Subscriber’s Choice for Business website:
ttp://www.hp.com/go/e-updates
h
After registering, you will receive e-mail notification of product enhancements, n ew driver versions,
firmware updates, and other product resources.
After signing up, you can quickly locate your products by selecting Business support and then Storage
under Product Category.
HP websites
information, see the following HP websites:
For additi
• h
• http://www.hp.com/go/bladesystem/documentation
• http://ww
• http://www.hp.com/go/connect/
• http://www.hp.com/service_locator
• http://w
• http://www.hp.com/support/downloads
onal
ttp://www.hp.com
w.hp.com/go/bladesystemupdates/
ww.hp.com/support/manuals
10
About this guide
Page 11

Documentation feedback
HP welcomes your
To make comments and suggestions about product documentation, please send a message to
storagedocs.feedback@hp.com. All submissions become the property of HP.
feedback.
Tape Blade
11
Page 12

12
About this guide
Page 13

1 Before you start
In this chapter:
•
“Supported Tape Blades” on page 1 3
•
“Installation guidelines” on page 1 3
• “Onboard Administrator”onpage14
• “Power specifications” on page 14
• “Your HP StorageWorks Tape Blade” on page 14
• “Using the HP StorageWorks Tape CD-ROM” on page 15
Supported Tape Blades
This guide describes how to install and operate the following Tape Blades:
• the H P Stora
blade
• the HP StorageWo rks SB920c Tape Blade, which is an Ultrium 920 tape drive within a tape blade
assembly.
• the HP StorageWorks Ultrium 448c Tape Blade, which is an Ultrium 448 tape drive within a tape
blade assembly
These tape
be
running the correct firmware for it to support the tape blade. Firmware version 1.3 or later is required
when installing in a c7000 enclosure. In a c3000 enclosure all versions of the firmware support the
HP
StorageWorks Tape Blade. For the best reliability, performance and new features update to the
most recent version of the firmware.
For the most up-to-date information about supported operating systems and configurations, refer to
h
ttp://www.hp.com/go/bladesystem/documentation.
geWorks SB1760c Tape Blade, which is an Ultrium 1760 tape d rive within a tape
assembly
assemblies may only be installed in an HP BladeSystem c-Class enclosure, which must
blade
Before performing any procedures specific to the HP StorageWorks Tape Blade, install and configure an
HP BladeSystem c-Class enclosure. The m ost current d o cumentation for HP BladeSystem components is
ble at the HP BladeSystem website (h
availa
Docume
• Documentation CD that ships with the enclosure
• HP BladeSystem Technical Resources website (h
• HP Business Support Center website (h
• HP Technical Documentation website (h
ntation is also available in the following locations:
entation)
docum
Installation guidelines
Observe the following guidelines when installing the HP StorageWorks Ultrium Tape Blade:
• An HP StorageWorks Tape Blade supports one partner server blade, and a partner server blade
supports one HP StorageWorks Tape Blade.
• The server blade and the HP StorageWorks Tape Blade must be adjacent to each other in the
HP BladeSystem enclosure.
• Install the partner server blade first and ensure that it is powered down before installing the
HP
StorageWorks Tape Blade.
ttp://www.hp.com/go/bladesystem).
ttp://www.hp.com/go/bladesystem/
ttp://www.hp.com/support)
ttp://www.hp.com/support/manuals)
Tape Blade
13
Page 14

Partnerserverb
The partner server b la de may be half-height or full-height. When partnering the tape blade with a
full-height server blade, a n HP PCI Express Mezzanine Pass-Thru Card is required (option kit par t number:
431643-B21). This must be installed prior to operation with the tape blade.
When installin
• the tape blade may be installed in the upper or lower bay adjacent to the server blade. See
“Installation with a half-height par tner server blade”onpage20.
When installing the HP StorageWorks Ultrium Tape Blade with a full-height server blade:
• In a c7000 encl
blade.
• In a c3000 enclosure, the tape blade must be installed immediately above the partner server
blade in devi
to the
HP
• Before insta
require ins
enclosures require installation of a m ini divider (supplied with the enclosure). See
“Installation with a full-height partner ser ver blade ” on page 24.
lade
the HP StorageWorks Tape Blade with a half-height server blade:
g
osure , the tape blade must be installed in the lower bay adjacent to the server
bay 8. A half-height server blade can be installed in the empty bay next
ce
HP StorageWorks Tape Blade, but this server blade cannot be partnered with the
StorageWorks Tape Blade.
lling a
tallation of a coupler plate (supplied with the Tape Blade), and c3000
server blade in the empty bay above the tape blade, c 7000 enclosures
Onboard Administrator
Theblade enclosure must berunning thecorrect firmware for it to support the Tape Blade. Onboard
Administrator is used to power the partner server blade on and off, update firmware for the enclosure
and configure it to function with the Tape Blade. Onboard Administrator version 1.3 or later is
required when installing in a c7000 enclosure. In a c3000 enclosure all OA versions support the HP
StorageWorks Tape Blade. For the best reliability, performance and new features update to the most
recent version of the firmware.
Power specifications
Maximum power consumption for the Tape Blade is approximately 45 Watts.
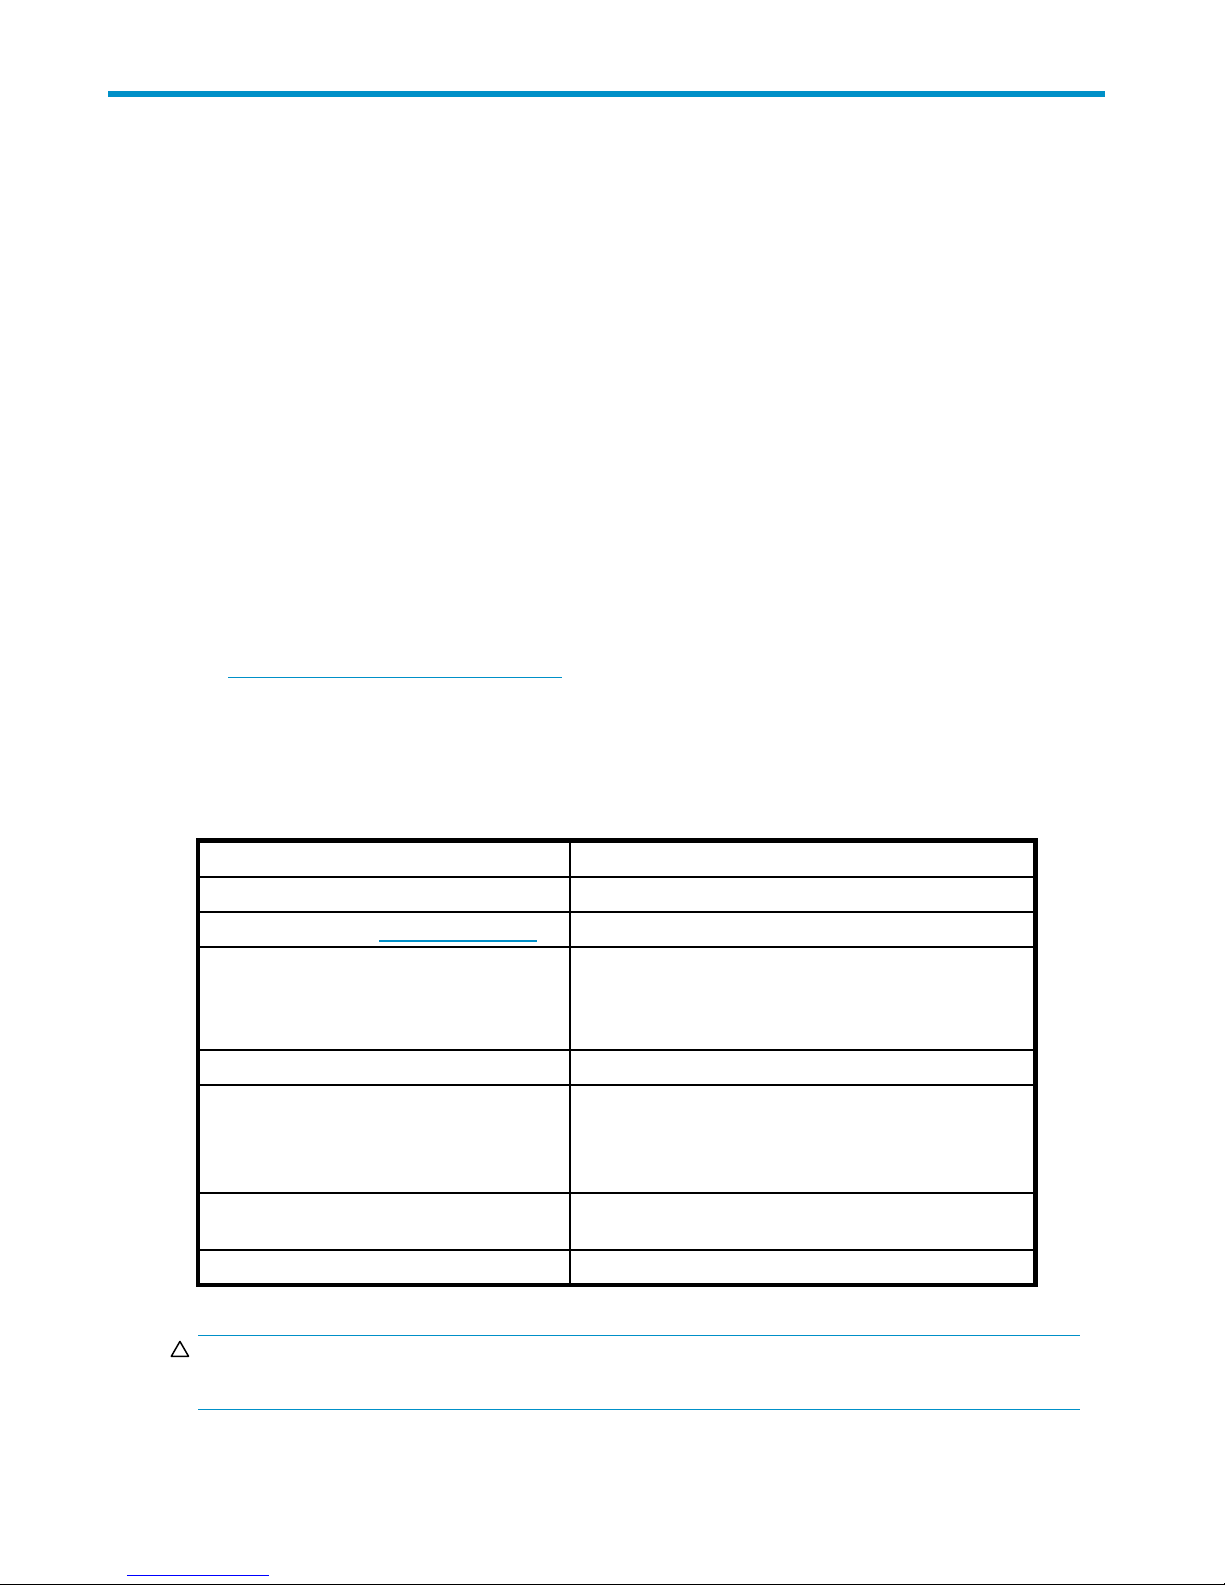
Table 2 Power specifications
Tape Drive SC44Ge
13 Watts idle
Power consumption
Power re quirements
20 Watts typical
33 Watts maximum
+5V @ 2.5A typical
+5V @ 2.5A maximum
+12V @ 0.7A typical
+12V @ 2.1A maximum
6.8 Watts maximum 5.2 Watts maximum
+12V @ 0.56A maximum +12V @ 0.43A maximum
Your HP StorageWorks Tape Blade
For a detailed product specification, please refer to our website (http://www.hp.com/go/bladesystem/
documentation).
Main Logic Board
14
Before you start
Page 15
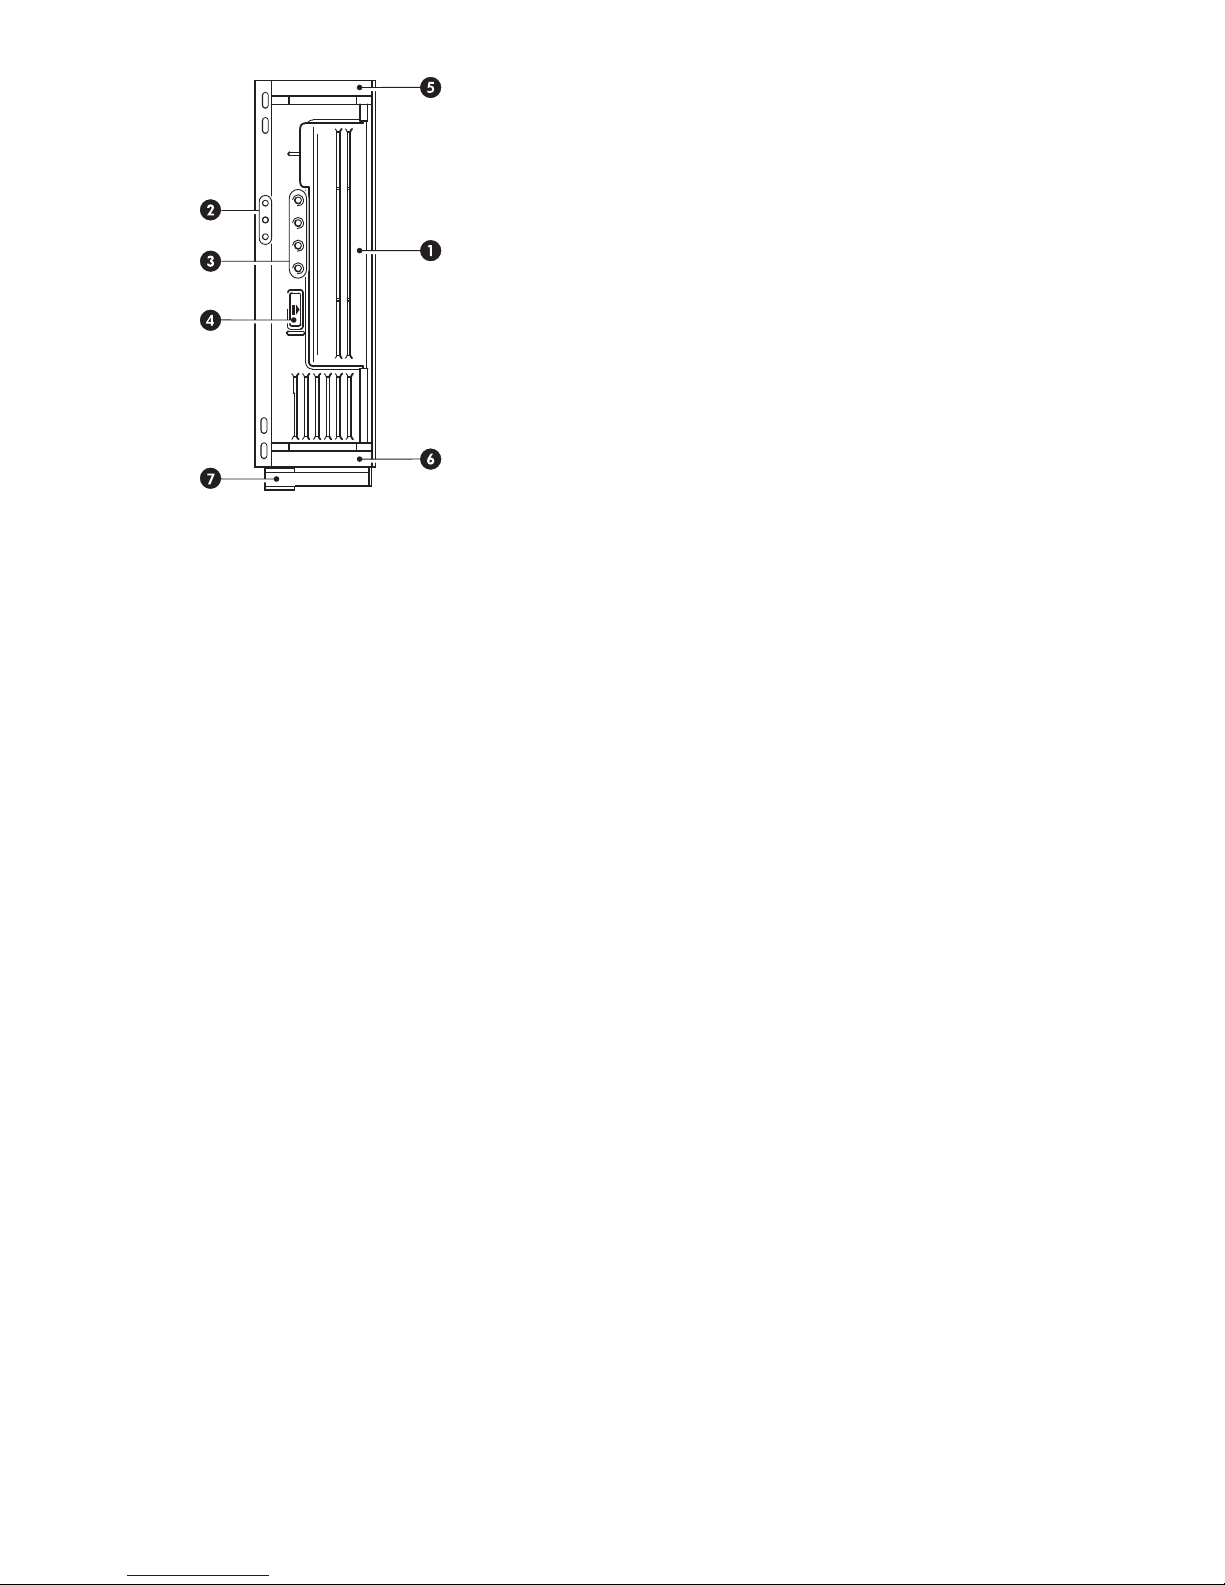
1. Cassette door 4. Cartridge eject button
2. Tape blade LEDs 5 and 6. Mounting rails
3. Tape drive LEDs 7. Release latch
Figure 1 Front view of HP StorageWorks Tape Blade
Using the HP StorageWorks Tape CD-ROM
The HP StorageWorks Tape CD-ROM is a central source of information about your tape blade with utilities
for g etting the best performance from your tape blade.
Use the H P StorageWorks Tape CD-ROM to check installation, as described in this guide, and to verify
and
troubleshoot performance after installation. It helps you to:
• Install your product, which includes access to drivers, and performance information a nd tools
• Learn about your product
• Register your product
• Buy media online
• Troubleshoot with HP Library & Tape Tools.
Tape Blade
15
Page 16

16
Before you start
Page 17

2Drivers andbackupsoftware
In this chapter:
• “Install drivers ” on page 17
•
“Upgrade backup software” on page 18
Install driv
Two drivers are required:
• An SC44Ge SAS controller driver for the tape blade assembly
• An HP Ultrium
IMPORTANT:
The SC44Ge SAS controller driver must be installed first.
Drivers may be downloaded from the web at the following location:
nl
http://h18004.www1.hp.com/products/blades/components/c-class-storageworks.html.
To download drivers:
1. Select Tape Blades and click the product link (for example HP StorageWorks SB920c Tape Blade).
2. Click Support — > Technical Doc uments.
3. Click Download Drivers and Soft ware.
ers
SAS controller driver
The SC44Ge SAS controller driver is only available from the HP website. It can be installed from the link
on the
HP StorageWorks Tape CD-ROM or directly from the HP StorageWorks BladeSystem website,
ttp://h18004.w ww1.hp.com/products/blades/components/c-class-storageworks.html.
h
The SC44Ge SAS controller driver must be installed before the HP Ultrium Tape driver.
Tape driver for the tape drive
HP Ultrium Tape driver
Please refer to http://h18004.www1.hp.com/products/blades/components/c-class-storageworks.html
for the latest information about supported operating systems.
NOTE:
Certain backup applications require you to use their own Tape driver instead of the HP Ultrium Tape
driver.
Installing on Windows
The CD-ROM contains a Tape driver install package for supported Microsoft Windows operating systems.
If you prefer to use Windows Device Manager to install the tape drivers manually, you will find them in
the
drivers directory on the CD-ROM.
Updates to the drivers will be provided on the HP StorageWorks BladeSystem website
(h
ttp://h18004.w ww1.hp.com/products/blades/components/c-class-storageworks.html).
Tape Blade
17
Page 18

Installing on UN
The recommended backup applications use the operating system’s standard, built-in device drivers. To
upgrade drivers we recommend that you patch to the latest version of the operating system.
IX
Installing on IA64
If you are installing on an IA64 system, such as an HP Integrity server, check http://
h18004.www1. hp.com/products/blades/components/c-class-storageworks.html for the latest
information on the availability of backup application upgrades and drivers.
Upgrade back
software
up
to check h
It is importa
c-class-storageworks.html for software compatibility and install any recommended upgrades.
For optimum performance it is important to use a backup application that is appropriate for your
system’s configuration. HP, Symantec, Legato, Yosemite and Computer Associates all provide suitable
products. Further details about these and other products that may be appropriate can be found on
the
HP conne
1. Go to h
and select Tape Blades.
2. Select you
3. Click on the Tape Blade tab and select your combination of operating system and tape drive model
in
Alist ofsu
is
drives and tape blades support HP OBDR. However, you can only use this feature if your system
configuration and backup application also s upport it. See “Compatibility” on page 45.)
4. Make sure
downloa
nt
ctivity website.
ttp://h18004.www1.hp.com/products/blades/components/c-class-storageworks.html
model of tape blade and select Support -> Compatibility & Tools.
r
the table.
pported backup applications is displayed. This will also tell you whether your configuration
compatible with HP One-Button Disaster Recovery, HP OBDR. (All HP StorageWorks tape
you have a backup application that supports HP StorageWorks Ultrium tape drives and
any upgrades or patches, if required.
d
Enabling encryption
Your HP StorageWorks Tape Blade includes hardware capable of performing data encryption while
writing and data decryption while reading, both at full speed. This is only possible with Ultrium 1.6 TB
media. See also “HP StorageWorks SB1760c Tape Blades and encryption” on page 40.
ttp://h18004.w ww1.hp.com/products/blades/components/
If you wish to make use of the encryption capability, you must enable this feature via the backup
software application. Refer to h
c-class-storageworks.html to find out which applications support this advanced data protection capability.
18
Drivers and backup software
ttp://h18004.w ww1.hp.com/products/blades/components/
Page 19

3 Installing an HP StorageWorks
Tape Blade
In this chapter:
•
“Before you start”onpage19
•
“Installation with a half-height par tner server blade” o n page 20
• “Installation with a full-height partner server blade” on page 24
•
“Powering the tape blade on and off”onpage28
Before you s
These installation instructions assume you have already:
1. Installed and configured an HP BladeSystem c-Class enclosure. It must be running the correct
firmware for it to support the tape blade. Firmware version 1.3 or later is required when installing in
a
c7000 enclosure. In a c3000 enclosure all versions of the firmware support the HP StorageWorks
Tape Blade. For the best reliability, performance and new features update to the most recent version
of
the firm
2. Installed the partner ser ver blade. It must be powered off before you install the tape blade. We
recommend that you use the Shutdown command on the partner server blade to do this.
3. Install
enclosure.
NOTE:
The most current documentation for HP BladeSystem components is available at the HP website
/www.hp.com/go/bladesystem/documentation).
ttp:/
(h
You need one half-height device bay in which to install the HP StorageWorks Ultrium Tape Blade. The
tape blade may be used with a half-height or a full-height server blade and must be installed next
to the partner server blade.
tart
ware.
ed any device bay dividers as recommended in the documentation provided with the c-Class
Tape Blade
19
Page 20

Figure 2 H alf-height device bay numbering in a c7000 enc l osure
NOTE:
In c3000enclosuresdevices areseatedhorizontallybut thesameinstallationrules apply. Thetape
in the adjacent device bay below or above the pa rtner server blade. Slot combinations
resi
des
blade
are1&2,3&4,5&6,7&8.
Figure 3 H alf-height device bay numbering in a c3000 en c losure
Installation with a half-height partner server blade
If you are installing with a full-height partner server blade, refer to
“Installation with a full-height partner server blade” on page 24.
NOTE:
The partner server blade and any device bay dividers must be installed and powered down before you
install the tape blade. See the documentation that ships with the server blade.
20
Installing an HP StorageWorks Tape Blade
Page 21

CAUTION:
To prevent improper cooling and thermal damage, do not operate the server blade or the enclosure
unless all device bays are populated with either a component or a blank.
1. Identify the partner server blade to be installed with the HP StorageWorks Tape Blade. The two
blades
always occupy a pair of device bays.
• c7000 enclosures: Slotcombinationsare: 1&2,3&4,5&6,7&8,9&10,11&
12, 13 & 14, 15 & 16.
Partnerserverblade in
bay:
Tape Blade in bay: even-numbered bay to the right
HP
odd-numbered bay even-numbered bay
odd-numbered bay to the left
Figure 4 Paired locations in a c7000 enclosure with a half-heig ht partner server
blade
• c3000 enclosures: Slotcombinationsare: 1&2,3&4,5&6,7&8.
Partnerserverblade in bay:
HP Tape Blade in bay:
1
2
2 3
1
4
4
3 6
5
6
5
7
8
8
7
Tape Blade
21
Page 22

Figure 5 Paired locations in a c3000 enclosure with a half-height partner server
blade
2. Use the Shutdown command on the partner server blade to power down the partner server blade.
3. Remove the bla nk from the device bay. Squeeze in the release tabs (1) and pull the blank away
from the assembly (2), as illustrated in Figure 6.
In the following figure the partner server blade is installed in device bay 2. So, the blank has
been
removed from device bay 1.
e6Removing theblank
Figur
4. Remo
ve the connector cover on the rear of the tape blade assembly. Release the back of the cover
(1) and pull it away from the tape blade (2) , as illustrated in Figure 7.
22
Installing an HP StorageWorks Tape Blade
Page 23

Figure 7 Rem
oving the connector cover
CAUTION:
To prevent d
blade assem
amage to the backplane connector, take special care when handling the tape
bly. If the tape blade is installed with a damaged connector, the enclosure
backplane may also be damaged.
5. Install the tape blade, ensuring that it is in the correct orientation: in a c7000 enclosure the latch is
at the
bottom of the blade assembly, as illustrated; in a horizontal orientation in a c3000 enclosure it
is to the
the
right of the tape blade. Carefully push the tape blade into the device bay (1) and push
latch in (2) to secure the blade in position.
CAUTION:
Take care as you p ush the blade into position. Do not press directly on the cassette door,
because this may damage it.
Figure 8 Installing the tape blade, partnered with a half-height server blade
6.
Now go to “Powering the tape blade on and off” on page 28.
Tape Blade
23
Page 24

Installation wi
If you are insta
“Installation
When partnerin
Card is required (option kit part number: 431643-B21). The Mezzanine Card must be installed in
mezzanine 3 connector in the ser ver blade. The exact location of this connector varies according to the
model of server blade. Please refer to the schematic on the server blade’s panel or the server blade
documentatio
NOTE:
The partner server blade must be installed and powered down b efore you install the tape blade. See the
documentation that ships with the server blade.
CAUTION:
To prevent improper cooling and thermal damage, do not operate the server blade or the enclosure
unless all device bays are populated with either a component or a blank.
1. Identify the partner server blade to be installed with the HP StorageWorks Tape Blade. The two
blades
• c7000 enclosures: The tape blade is always located on the lower row of the enclosure
always occupy a pair of device bays.
(bays 9 to 16).
th a
with a half-height partner server blade” on page 20.
for detailed instructions on installing the Mezzanine Card.
n
full-height partner server blade
with a half-height partner server blade, refer to
lling
the tape blade with a full-height server blade, an HP PCI Express Mezzanine Pass-Thru
g
Partnerserverblade in bays:
HP Tape Blade in bay:
1/9 2/103/114/125/136/147/158/16
10 9 12
11
14
13 16
15
24
Installing an HP StorageWorks Tape Blade
Page 25

Figure 9 Pa
ired locations in a c7000 enclosure with a full-height partner server
blade
• c3000 enclosures:The tape blade is always located in bay 8.
Partnerserverblade in bays: 3and 7
HP Tape Blade in bay:
8
Figure 10 Paired locations in a c3000 enclosure with a full-height partner server
blade
2. Use the Shutdown command on the par tner server blade to power down the partner server blade.
Tape Blade
25
Page 26

If not already installed, install a HP PCI Express Mezzanine Pass-Thru Card in mezzanine 3 connector
in the
server blade. See the documentation that ships with the mezzanine card and the server blade
documentation for more information.
3. Remove the bla nk from the device bay. Squeeze in the release tabs (1) and pull the blank away
from the assembly (2).
Figure 11 Removing the blank
4. c7000 enclosures only: lnstall the supplied coupler plate. (This allows you to install a separate
upper bay above the tape blade, if required.) Align the slots, as illustrated, and slide
device in t
forward to
he
lock into place.
Figure 12 Installing t he coupler plate
NOTE:
If you need to return the tape blade for service, you must first remove the coupler plate. See
“Remove the coupler plate”onpage58for furtherdetails.
NOTE:
c3000 enclosures require a mini divider. This is supplied with the enclosure. Refer to the
documentation provided with the enclosure for installation instructions.
26
Installing an HP StorageWorks Tape Blade
Page 27

5. Remove the connector cover on the rear of the tape blade assembly. Release the back of the cover
(1) and pull the cover away from the tape blade (2).
Figure 13 Removing the connector cover
CAUTION:
To prevent damage to the backplane connector, take special care when handling the tape
blade assembly. If the tape blade is installed with a damaged connector, the enclosure
backplane may also be damaged.
6. Install the tape blade, ensuring that it is in the correct orientation: in a c7000
enclosure the latch is at the bottom of the blade assembly, as illustrated; in a
horizontal orientation in a c3000 enclosure it is to the right of the tape blade. In
“Installing the tape blade, partnered with a full-height server blade” on page 27 the partner server
blade is installed in device bay 9. So, the tape blade must be installed in device bay 10. Carefully
push the tape blade into the device bay (1) and push the latch in to secure the blade in position (2).
Figure 14 Installing the ta pe blade, partnered with a full-height server bla de
7.
Now go to “Powering the tape blade on and off” on page 28.
When installing the HP StorageWorks Tape Blade with a full-height server blade, a half-height server
blade can
be installed in the empty bay next to the tape blade. (In a c7000 enclosure this is the
bay above the tape blade. In a c3000 enclosure this will be bay 4.) This server blade cannot be
partnered with the HP StorageWorks Tape B lade.
If the bay is left empt y, a b lank must be fitted to maintain proper airflow for cooling.
Tape Blade
27
Page 28

P owering the tap
Power up
1. Install the tape blad e, as described in the previous sections. The system health LED (item 1 in
Figure 15 on page 28) flashes red while the connection is established. (If it continues to flash red
for more than 2 minutes, there is a fault. M ake sure that the partner server blade is powered off
and
re-install the tape blade.)
2.
When the tape blade is recognized, the system health LED (item 1 in Figure 15 on page 28)
illuminates solid green.
3. Power up the partner server blade. See the server blade documentation for more information. This
powers up the tape blade and the tape drive performs its hardware self-test.
blade on and off
e
Power d
Figure 15 System health LED
own
Use the On board Administrator or the Shutdown command on the partner server blade to power down
the
partner server blade and tape blade. See the server blade and onboard administrator documentation
information.
for mor
e
28
Installing an HP StorageWorks Tape Blade
Page 29

4 Verify installation
Once you have installed the tape blade assembly, check that drivers have been installed correctly and
you have the correct version of backup software, and verify that the tape blade is functioning properly
before you store your valuable data.
NOTE:
Check h
latest information on the availability of backup application upgrades and drivers.
1. Use the Onboard Administrator to power up the partner server blade, see
2. The system health LED flashes red while the connection is established. When the tape blade is
3. The tape drive will run its hardware self-test, which takes about 5 seconds. If self-test p asses, the
4. Make sure that the drivers are installed; two are required.
ttp://h18004.www1.hp.com/products/blades/components/c-class-storageworks.html for the
“Powering the tape blade on and off”onpage28. This also powers on thetapeblade.
recognized, the system health LED (1) illu minates solid green.
NOTE:
If the System Health LED continues to flash red for more than 2 minutes, there is a fault. Make sure that
thepartner server bladeispowered offand re-install thetapeblade.
green Ready LED flashes and then shows steady green. If the test fails, the Drive Error and Tape
Error LEDs flash, while the Ready and Clean L EDs are off. This continues until the drive is reset. See
LEDs” on page 32 for more information about front panel lights.
“Tape Dri
• SC44Ge SAS co n troller driver
• HP Ultr
ve
SAS controller driver must be installed first. It is only available
The SC44G
from the HP web site. It can be installed from the link on the HP StorageWorks
Tape CD-ROM or directly from the HP BladeSystem Technical Resources website,
ttp://h18004.w ww1.hp.com/products/blades/components/c-class-storageworks.html.
h
The CD-ROM contains a Tape driver install package for Microsoft Windows operating
systems. If you prefer to use Windows Device Manager to install the tape drivers manually,
you will find them in the drivers directory on the CD-ROM or on the HP BladeSystem
Technical Resources website, h
ss-storageworks.html.
c-cla
For other operating systems, the recommended backup applications use the operating
system’s standard, built-in device drivers. To upgrade drivers we recommend that you patch
to the latest version of the operating system.
e
Tape driver
ium
ttp://h18004.www1.hp.com/products/blades/components/
NOTE:
Certain backup applications require you to use their own Tape driver instead of the HP Ultrium
river.
Tape d
Tape Blade
29
Page 30

5. Verify that the tape drive installation was successful.
HP StorageWorks Library & Tape Tools (L&TT) is the recommended diagnostic and support tool for
your HP tape drive. Useittoverifyinstallation andconfirm that your tape drive is functioning
correctly before you use it for backup. It is available free at h
ttp://www.hp.com/support/tapetools.
NOTE:
L&TT tests tape drive operation only; use the Onboard Administrator to diagnose the
tape blade.
6. For all operating systems ensure that you have downloaded any upgrades necessary for your backup
application. Check for software compatibility and install any recommended upgrades.
7. Perform a backup and restore test to check that the drive can write data to tape. Use a blank
cartridge.
Windows Backup or Unix native backup applications can be used to check basic tape drive
operation, but they will not support all the advanced features of your tape drive. We recommend
that
you upgrade your software application before running this test.
30
Verify installation
Page 31

5 Understanding LEDs
There are t wo sets of LEDs; one for the tape blade chassis and one for the Ultrium tape d rive.
In this
chapter:
•
“Tape Blade Chassis LEDs”onpage31
•
“Tape Drive LEDs” on page 32
Tape Blade Chassis LEDs
Figure 16 Tape Blad e chassis LEDs
1 UID LED
2
3
System health LED
Reserved Not used
Blue = Identified
Off = Not identified
Green = Normal operation
Flashing amber = Degraded condition
Flashing red = Critical condition
Troubleshooting with Tape Blade LEDs
The UID LED helps you identify the location of a specific tape blade, if several are installed in an
enclosure. It can be toggled on and off.
The system health LED flashes red whenever the tape blade connection is established with the enclosure;
either immediately after installation or when the tape b lade is removed and reinserted. If it continues to
flash for more than 2 minutes, there is a fault. Make sure that the partner server was powered down
before the tape blade was installed.
If the fault condition persists, other causes are:
Tape Blade
31
Page 32

• c7000 enclosures only: The enclosure firmware is earlier than version 1.30. (In a c3000 enclosure
all versions of the firmware support the HP StorageWorks Tape Blade.) For the best reliability,
performance and new features update to the most recent version of the firmware.
• The adjacent blade is not a server blade
• The tape blade is adjacent to a full-height partner server blade but a mezzanine card has not been
installed, see “Installation with a full-height partner server blade”onpage24.
See the HP BladeSystem Technical Resources website h
components/c-class-storageworks.html for more comprehensive troubleshooting information.
Tape Drive LEDs
ttp://h18004.w ww1.hp.com/products/blades/
Figure 1
1
2
3
4
7Tapedrive LEDs
Clean LED
Tape LED
Drive LED
Ready LED
Off: the drive does not require cleaning
Amber: cleaning cartridge in use
Flashing: the drive needs cleaning
Off: no f
Flashin
or
unsup
Off: no fault has been detected
Flashing amber: the drive mechanism has detected a hardware error
Green: the drive is ready for use
Off: the drive power is off or there was a failure during self-test
Flashing: the drive is busy
Troubleshooting with Tape Drive LEDs
The meaning of different patterns of tape drive LEDs is as follows. See the HP BladeSystem
Technical Resources website h
c-class-storageworks.html for more comprehensive troubleshooting information.
ttp://h18004.www1.hp.com/products/blades/components/
ault has
g
amber: the cartridge currently in the drive is faulty (damaged
ported). Discard the cartridge.
been detected
32
Understanding LEDs
Page 33

Table 3 Tape drive LED sequences
LED Sequence Cause
Drive may not have power,
All LEDs OFF.
Ready and Clean OFF. Drive
and
Tape FLASH.
Ready is ON.
Ready FLASHES.
Ready sequence FLASHESON- FLASHES.
Ready FLASHES fast.
Ready isOFF,othersare ON.
maybefaultyormay have
been power cycled or reset
during a firmware upgrade.
The drive has failed to execute
power-on self test (POST).
The drive is ready for
operation.
The drive is carrying out a
normal activity (read, write).
The drive is in OBDR mode.
The drive is downloading
firmware.
Firmware is being
reprogrammed.
Action required
Check that the t
correctly.
Check the Syst
Use the Onboar
the
status of t
If thetapedri
service.
Power the server blade off and on again.
If the
error condition reappears, call for
service.
None. This is normal.
None.
drive is upgrading firmware, do not
If the
reset or power cycle it.
See “Running HP OBDR”onpage46for
further details.
None.
Do not reset or power cycle the drive.
None.
rese
Do not
ape blade is installed
em
Health LED is green.
d
Administrator to check
he
tape blade.
ve LEDs are still off, call for
torpower cyclethe drive.
Clean FLASHES. The drive requires cleaning.
Ready FLASHES and Clean is
ON.
Tape FL ASHES.
The tape is ejected immediately
and
Tape FLASHES, or Drive
FLASHES on unloading tape.
Cleaning is in progress.
Thedrive believes thecurrent
tape or the tape just ejected
is
faulty.
The tape cartridge memory
(CM) may be faulty.
Load the Ultrium cleaning cartridge. See
“Cleaning the tape drive” on page 42
for supported cartridges and instructions.
If the
Clean LED is still flashing when
you load a new or known good data
cartridge after cleaning, call for service.
None. The cleaning cartridge will eject
on
completion.
The cleaning cycle can take up to 5
minutes to complete.
the
Unload
that you are using the correct format
cartridge; an Ultrium data cartridge or
Ultrium universal cleaning cartridge. (See
“Use the correct media”onpage39.)
Reloa
flashes or starts flashing during the
still
next backup, load a new or known good
cartridge.
he
If
t
spect’ tape cartridge. If it is still on,
’su
call for service.
Write-protect the car tridge by sliding the
switch on the tape cartridge, see “Write
protecting cartridges” on page 42. The
tape can be loaded and the data read.
Once the
must be discarded.
tape cartridge. Make sure
dthe cartridge. If theTapeLED
Tape LED is now off, discard the
data is recovered, the cartridge
Tape Blade
33
Page 34

LED Sequence Cause
Action required
Drive FLASHES.
Drive, Tape and Ready FLASH.
Drive and Ready ON with Tape
and Clean OFF. Alternates
repeatedly.
The drive mechanism has
detected an error.
There is a firmware download
problem.
The drive has a firmware
error.
Loadanew cartri
persists, powe
Drive LED
If the
dge. If the error
rcycle or resetthe drive.
remains on, call for
service.
Insert a cartridge to clear the LED
sequence. If the condition persists, call
for service.
Power cycle or reset the drive.
Upgrade the firmware. If the condition
persists, call for service.
34
Understanding LEDs
Page 35

6 Loading and unloading cartri dges
and removing tape bla de
In this chapter:
•
“Inserting cartridges”onpage35
•
“Removing cartridges” on page 35
•
“Removing the tape blade” on page 36
Inserting ca
1. Arrow indicates leading direction 3. Label area
2. Cartridge door
Figure 1
1. Lift th
facing
2. Apply gentle pressure until the drive takes the cartridge and loads it.
rtridges
Inserting a cartridge
8
cartridge door and inser t the cartridge into the slot with the white arrow uppermost and
e
cartridge door.
the
3. The Ready light flashes green while the drive performs its load sequence. When the cartridge is
loaded, the Ready light shows steady green.
Removing cartridges
CAUTION:
Never try to remove a cartridge before it is fully ejected.
Tape Blade
35
Page 36

1. Press the Eject button on the front panel.
1. Eject button
Figure 19 Ej
2. The drive will complete its current task, rewind the tape to the beginning, and eject the car tridge.
Therewindprocess maytakeupto10 minutes. The Readylight will flash to indicate that the
unload is
ecting a car trid ge
still in p rogress.
Removing the tape blade
The tape blade is powered down from the partner server blade, see
“Powering the tape blade on and off” on page 28. To ensure reliable operation, do not power
down the partner server blade and remove power from the drive during read, write, fast-search,
load and
Before removing the tape blade:
•
• Make sure the partner server blade is powered down. This powers down the tape blade. (The
To remove the tape blade from the enclosure:
1. Grasp the metal latch, located at the bottom of the tape blade in a c7000 enclosure and to the
2. Carefully slide the tape blade assembly out from the enclosure.
unload activities.
Unload the cartridge as described in “Removing cartridges” on page 35.
tape blade is not a hot-plug device and should always be powered down before removal.)
right of the tape blade in a c3000 enclosure, and pull the latch forward as far as it will go to
release the locking m echanism.
36
Loading and unloading cartridges and removing tape blade
Page 37

Figure 20 Removing the tape blade
CAUTION:
Do not pull on the tape drive bezel when removing the tape blade.
Tape Blade
37
Page 38

38
Loading and unloading cartridges and removing tape blade
Page 39

7Use thecorrect media
For best per formance we recommend HP branded media. Order online at: http://www.hp.com/
go/storagemedia.
In this chapter:
•
“Cartridges” on page 39
• “Cleaning the tape drive” on page 42
• “Write protecting cartridges” on page 42
•
“Handling cartridges”onpage43
•
“Operating and storage environment” on page 43
Cartridges
Data cartridges
HP StorageWorks Tape Blades use Ultrium tape cartridges. These are single-reel cartridges that match
your drive’s format and are optimized for high capacity, throughput and reliability. Compatible media can
be
recognized by the U ltrium logo, which is the same as the logo on the front of your drive. Do not use
other
format cartridges in your tape drive and do not use Ultrium cartridges in other format tape drives.
For optimum performance always use a cartridge that matches the specification of your tape drive, see
Table 4 on page 39. A lower specification will have a lower transfer rate and may not s uppor t write
activities; a higher specification will not support read or write activities. Use:
• Ultrium 1.6 TB
• Ultrium 800 GB
• Ultrium 400 G B
1
1,
RW and Ultrium 1.6 TB1 WORM cartridges with Ultrium SB1760c Tape Blades
1,
RW and Ultrium 800 GB1 WORM car tridges with Ultrium SB920c Tape Blades
1
cartridges with Ultrium 448c Tape Blades
Table 4 Data cartridge compatibility
Ultrium 200 GB
nl nl nl nl
data
cartridge
SB1760c Tape
Blade
SB920c Tape
Blade
448c Tape Blade
1
Capacity assumes 2:1 compression.
not supported read only
read only
read/write
Ultrium 400 G B
data cartridge
read/write
read/write
(C7972A)
nl
recom
mended
Ultrium 800 GB
data
cartridge
Ultrium 1.6 TB
data
cartridge
read/write
read/write
nl
write once/read
many
(C7974A)
nl
write once/read
many (C7974W)
nl
recommended
read/write
(C7973A)
nl
write once/read
many (C7973W)
nl
not supported
recommended
not supported not supported
Tape Blade
39
Page 40

Cleaning cartri
You must use Ultrium cleaning cartridges with HP StorageWorks Tape Blades, as other cleaning cartridges
will not load and run. HP recommends the HP Ultrium universal cleaning car tridge (see Table 5). Unlike
some earlier Ul
designed to work with any Ultrium drive.
Table 5 Cleaning cartridge compatibility
dges
trium cleaning cartridges, the orange-colored HP Ultrium universal cleaning cartridge is
Type of car trid
Cleaning
ge
Recommended cartridge Other options
HP Ultrium universal cleaning
cartridge C7978A (Orange)
HP Ultrium WORM data cartridges
The HP StorageWorks SB1760c and SB920c Tape Blade include support for both re-writable and
Write-Once, Read-Many, WORM, data ca r tridges. WORM cartridges provide for an enhanced level
of
data security against accidental or m a licious alteration of data on the tape cartridge. The WORM
data cartridge can be appended to maximize the full capacity of the tape cartridge, but the user will
be unable to erase or overwrite data on the cartridge. Any attempt to modify a WORM cartridge to
enable
should still be readable in a WORM drive, depending upon the severity of the tampering, but no further
appended
WORM da ta cartridges are clearly identified by their distinctive, two-tone cartridge color. They do not
have a write-protect slider and can only be used with Ultrium tape drives that support the WORM feature.
To check whether your backup or archive software application supports WORM cartridges,
refer to the following web site: h
c-class-storageworks.html.
writing over existing data will result in the media bec om ing permanently write protected. It
backups will be possible.
ttp://h18004.www1.hp.com/products/blades/components/
HP Ultrium cleaning cartridge
C7979A (Blue) . Do not use
early, non-universal Ultrium
cleaning cartridges from other
manufacturers.
HP Stor
ageWorks SB1760c Tape Blades and encryption
The HP S
full s
Encry
prote
stro
To ma
• A b ackup application that supports hardware encryption
• Ultrium 1.6 TB media (C7974A or C7974W); no encryption will be performed when writing earlier
torageWorks SB1760c Tape Blade includes hardware capable of performing data encryption at
peed while writing data, and decrypting when reading.
ption is the process of changing data into a form that cannot be read until it is deciphered,
cting the data from unauthorized access and use. HP StorageWorks SB1760c Tape Blades use the
ngest version of the industry-standard AES encrypting algorithm to protect your data.
ke use of this feature you need:
generations of tape
When should I use encryption?
Your company policy will determine when you need to use encryption. For example, it may be mandatory
for company confidential and financial data, but not for personal data. Company policy will a lso define
how encryption keys should be generated and m anaged. Backup applications that support encryption
will generate a key for you or a llow you to enter a key manually.
40
Use the correct media
Page 41

NOTE:
Encryption with keys that are generated directly from passwords or passphrases may be less secure than
encryption using truly random keys. Your application should explain the options and methods that are
available. Please refer to your application’s user documentation for more information.
How do I enable encryption?
Hardware encryption is turned off by default and is switched on by settings in your backup application,
where you also generate and supply the encryption key. Your backup application must support hardware
encryption for this feature to work. The software supplied with the tape drive provides this support.
See
ttp://h18004.w ww1.hp.com/products/blades/components/c-class-storageworks.html for an
h
up-to-date list of other suitable backup software.
When will I be asked to enter the key?
Encryption is primarily designed to protect the m edia once it is offline and to prevent it being accessed
from another machine. You will be able to read and append the encrypted media without being
prompted for a key as long as it is being accessed by the machine and application that first encrypted it.
There are two main instances when you will need to know the key:
• If you try to import the media to another ma chine or another instance of the backup application
• If you are recovering your system after a disaster
What happens if I don’t remember the key?
CAUTION:
You should keep a record or backup of your encryption keys and store them in a secure place separate
from the computer running the backup software. If you are unable to supply the key when requested to
do
so, neither you nor HP Support will be able to access the encrypted data.
This guarantees the security of your data, but also means that you must be careful in the management
of the encryption key used to generate the tape.
Does enc
ryption affect tape drive performance?
Hardware encryption can be used with o r without compression and without spee d or capacity penalties.
Does the tape drive encrypt media in an earlier Ultrium format?
No. Encryption is supported only on Ultrium 1.6 TB media (C7974A or C7974W ).
Ultrium 1.6 TB tapes encrypted on an HP StorageWorks SB1760c Tape Blade can be read on any
compatible HP StorageWorks SB1760c Tape B lade (or Ultrium 1760 or Ultrium 1840 tape drive) that
supports hardware encryption.
HP StorageWorks SB1760c Tape Blades can read Ultrium 800 GB and Ultrium 400 GB media and write
Ultrium 800 GB media, but hardware encryption is not supported on these formats.
Where can I get more information?
For more information about AES encryption, encryption keys, and using hardware encryption with your
HPStorageWorks SB1760c Tape Blade, see h
lto4Encryp/index.html or refer to the White Papers on http://h18006.www1.hp.com/storage/
hitepapers.html.
tapew
ttp://h18006.www1.hp.com/products/storageworks/
Tape Blade
41
Page 42

For detailed instructions about enabling encryption please refer to the documentation supplied with
your backup application. This will also highlight any default states, for example when copying tapes,
that may need changing if using encrypted tapes.
Cleaning the t
HP StorageWorks Tape Blade tape drives do not require regular cleaning. An Ultrium universal cleaning
cartridge should only be used when the orange Clean LED is flashing.
1. Insert the Ultrium universal cleaning cartridge.
2. The drive wil
to 5 minutes). During the cleaning cycle the orange Clean LED will be on solidly and the green
Ready LED will flash.
Each HP Ultrium universal cleaning cartridge (C7978A) can be used up to 50 times with Ultrium tape
drives. (Th
tape drive.
ape
e
)
drive
carry out its cleaning cycle and eject the cartridge on completion (which can take up
l
blue HP Ultrium cleaning cartridges, C7979A, can only be used up to 15 times with any
If the cleaning cartridge is ejected immediately with the Tape LED on, it has expired.
Write protecting cartridges
If you want to protect the data on a car tridge from being altered or overwritten, you can write protect the
cartridge.
IMPORTANT:
Always remove thecartridge from thetapedrive before youchangethe write protection.
• To write protect a ca rtridge, push the switch to the right to prevent any data recording on the
cartridge. Note the padlock on the tab that indicates that the cartridge is protected.
• To write enable a cartridge, push the switch to the left to allow data recording on the cartridge.
Figure 21 illustrates the location of the write-protect tab.
NOTE:
Write-protection will not protect your cartridges against magnets. Write-protection will not prevent a
cartridge being erased by bulk-erasure or degaussing. Do not bulk erase Ultrium format cartridges. This
will destroy pre-recorded servo information and make the cartridge unusable.
42
Use the correct media
Page 43

1. Write-protect tab
Figure 21 Write protecting a cartridge
Handling cartridges
• Do not touch the tape media.
• Do not attempt to clean the tape path or tape guides inside the cartridge.
• Do not leave cartridges in the d rive. The tape loses tension in the p ower-off state, which can lead
to problems, par ticularly if the drive has been moved.
• Store cartridges in a vertical orientation.
• Do not leave cartridges in excessively dry or humid conditions.
• Do not leave cartridges in direct sunlight or in places where magnetic fields a re present (for
example, under telephones, next to monitors or near transformers).
• Do not drop cartridges or handle them roughly.
• Attach labels to the label area only.
• Do not bulk erase (or degauss) Ultrium format cartridges because this will render them unusable.
Operating and storage environment
To prevent condensation and for long life, the cartridge sho uld only be operated o r stored as follows:
• Operation: 10°Cto 45°C(50° Fto113°F)
• Day-
• Non-condensing relative humidity: 10% to 80% (operating), 20% to 60% (non-operating)
• Wet bulb temperature should not exceed 26° C (79° F)
• Sto
to-day storage (in plastic container): 16° C to 32º C (60° F to 90° F)
re cartridges in a vertical orientation
es intended for long-term storage should be stored in the plastic containers, at temperatures between
Tap
5° C
and 23° C (41° F and 73° F) and 20% to 60% relative humidity.
Tape Blade
43
Page 44

44
the correct media
Use
Page 45

8Using HP OBDR
In this chapter:
•
“Compatibility” on page 45
•
“What does HP OBDR do?” on page 45
•
“Remote disaster recovery (ProLiant servers only)” on page 45
•
“Testing for compatibility” on page 46
•
“Running HP OBDR”onpage46
Compatibi
HP One-But
Blades. H
HP
To check whether your system (server blade, operating system and backup software) is OBDR-compatible,
please refer to our World Wide Web site h
For more specific information concerning the benefits of OBDR and the latest new features please refer to
our
If your system does not support HP One-Button Disaster Recovery, you can still use your tape blade
normally to back up and restore data. H owever, you must remember to create a separate set of
emergen
lity
ton Disaster Recovery, HP O B DR, is a standard feature on all H P StorageWorks Ultrium Tape
owever, it can only be used with specificconfigurations. To use HP OBDR with the
StorageWorks Ultrium Tape Blade, it must be partnered with a ProLiant server blade.
World Wide Web site h
cy recovery disks for your op erating system whenever you change your system configuration.
ttp://www.hp.com/go/obdr.
What does HP OBDR do?
Using just the tape blade and the most recent backup car tridge HP OBDR allows you to recover from
the
following types of system disasters:
• Hardware failures where the server blade is replaced by an identical component
• File corruption because of an operating system error
• File corruption because of an application software error
• Viruses that prevent you from booting your system correctly
• User errors that stop you from booting your system correctly
When you run HP One-Button Disaster Recovery, your tape blade goes through the following sequence:
ttp://www.hp.com/go/connect.
1. It goes into a special disaster recovery mode that enables it to restore your operating system and
reboot. It acts like a bootable CD-ROM. (Your system’s ability to boot from CD-ROM is normally
enabled by default. If you have changed this set ting, you will need to enable it again. Refer to
your system BIOS manual for further details.)
2. It returns to normal tape blade mo d e and restores the data.
Remote disaster recovery (ProLiant servers only)
HP Remote Insight Lights-Out Edition (RILOE) on ProLiant servers gives the IT Administrator the abilit y
The
completely recover a failed server at a remote location without physically traveling to where the
to
server resides. The on-site non-technical person need only insert the bootable cartridge into the tape
drive when asked to do so by the administrator.
fer to the HP OBDR web site at h
Re
is feature and comp atibility.
th
ttp://www.hp.com/go/obdr for more information about using
Tape Blade
45
Page 46

Testing for compatibility
We recommend that you perform a full backup and test disaster recovery as soon as possible after
possible, onto a blank hard disk. If you do not have a blank hard disk and do not want
installation—
to
overwrite your system, you can safely cancel the disaster recovery process at step 3 in the “Running
HP OBDR” procedure. Refer to our connectivity web site (h
information about suitable backup applications.
if
Running HP OBDR
HP OBDR can only be used with backup applications that support one-button disaster recovery and
methods
Web site (http://www.hp.com/go/ obdr) for the latest information about software compatibility, firmware
upgrades and troubleshooting before you use HP OBDR.
1. Insert the latest bootable cartridge in the tape drive. Every full backup with overwrite creates a
of o perating OBDR will vary between different software companies. Check our World Wide
bootable tape.
ttp://www.hp.com/go/connect) for more
Figure 22 Inserting cartridge for OBDR
2. Power on the blade server for approximately 3 seconds then power off. This will reset the tape blade.
Immediately hold down the eject button on the tape drive to invoke OBDR. Release the button as
soon as the Ready LED on the front panel flashes in the OBDR sequence. This is a repeated flashing
pattern. Once the tape blade is in OBDR mode, power on the blade server again.
Figure 23 Keeping eject button pressed down, power on in OBD R mode
Keyboard shortcut for HP ProLiant servers
There is no need to press the Eject button. Just power on your server and press the [F8] function key
during the Power On Self Test (POST). This invokes OBDR to restore your system. For more information
and
specific instructions please refer to our World Wide Web site at h
NOTE:
The firmware for the embedded SC44Ge HBA may need to be upgraded to the latest version in order to
take advantage of this feature.
ttp://www.hp.com/go/obdr.
Using
46
HP OBDR
Page 47

3. Follow the on-screen instructions to restore your system. Once the operating system has been restored
and
rebooted, you may remove the backup cartridge.
Tape Blade
47
Page 48

Using HP OBDR
48
Page 49

9 Troub l eshooting
Read this chapter for information about:
•
When the tape blade does not power up ,page49
•
Management and Diagnostic tools ,page49
• Problems with cartridges, page 51
NOTE:
For information about troubleshooting using tape blade and tape drive LEDs, see
“Understanding LEDs”onpage31.
When the tape blade does not power up
If the tape blade does not start, use the following table to help resolve the problem:
Table 6 Troubleshooting tape blade operation
Possible reasons Possible solutions
• The tape bla de is not installed in the
correct location for the partner server
blade.
• The partner server blade was not
restarted after the tape blade was
installed.
Verify that the tape blade is installed adjacent to the partner
server blade. See “Installing an HP StorageWorks Tape
Blade”on page 19.
Restart the server blade and verify that the tape blade front panel
system health LED changes from flashing red to solid green.
1. Power down the partner server b lade.
Reseat thetapeblade in the devicebay.
• The tape blade is not properly seated
in thedevicebay.
• No mezzanine pass-thru card
installed
• The c-Class enclosure firmware is at
the
• There is insufficient power or cooling
with a full-height server
wrong version
2.
Restart the server blade and verify that the tape blade front
3.
panel
system health LED changes from flashing red to solid
green.
Purchase and install the required card, option kit part number:
431643-B21.
Firmware version 1.3 or later is required when installing in
a
c7000 enclosure. In a c3000 enclosure all versions of the
firmware support the HP StorageWorks Tape Blade. For the best
reliability, performance and new features update to the most
recent version of the firmware .
Use the Onboard Administrator to verify that sufficient power
and
cooling are available.
Management and Diagnostic tools
HP BladeSystem Onboard Administrator is the management and diagnostic tool for the tape blade
assembly. HP Library & Tapetools provides diagnostic and troubleshooting tools for the tape drive.
Tape Blade
49
Page 50

Onboard Adminis
HP BladeSystem Onboard Administrator is the enclosure managem ent processor, subsystem, and
firmware base used to support the HP BladeSystem c–Class enclosure and all the managed devices
contained within the enclosure.
Onboard Admini
blades, tape blades or switches within the enclosure. Utilizing this hardwired knowledge, Onboard
Administrator performs initial configuration steps for the enclosure, allows for run-time management and
configuration of the enclosure components, and informs you of problems within the enclosure through
email, SNMP, or the Insight Display.
Please read the HP BladeSystem Onboard Administrator User Guide for more information.
trator
strator provides a single point from which to perform basic management tasks on server
HP Library & Tape Tools
HP StorageWorks Library & Tape Tools is the recommended diagnostic and s upport tool for your HP tape
drive product. It is available from a link on the CD shippe d with your product or as a free download from
the
HP web site. It is supported on nearly all major operating systems.
HP recommends installation of Library & Tape Tools, so that it can be quickly accessed at any time. HP
Support will also request that you use Library & Tape Tools should you need to contact them in the
future, so it is a good idea to have it installed.
ttp://www.hp.com/support/tapetools for compatibility information, updates and the latest version
See h
of the tool.
Troublesh
ooting with Library & Tape Tools
1. When Library & Tape Tools is first run, it will scan for HP tape drives a n d libraries on your system
and
ask you to select the one to work with. At this time you can see the HBA configuration of your
how your devices are connected.
server an
2. Once you have selected your device you have a number of choices for troubleshooting.
•Device identification: shows part number, serial number and information about any cartridge
• Firmware upgrade: allows you to locate and upgrade to the latest firmware. To check for
•Run tes
• G enerate a support ticket: this is a full dump of the drive logs along with interpretation and
•Run t
d
loaded.
anddownloadthe latest firmware from the HP web site, the server on which Library and
Tape Tools is running must have an internet connection.
ts: allows you to run proactive tests on your drive, such as the drive assessment test,
which will verify the functionality of your drive in around 20 minutes. HP recommends
running this test before ca lling HP Support. You will need to provide a ‘trusted’ cartridge that
can
is used by HP Support to learn about the condition of your drive. Most useful is the device
analysis section which is the output from approximately 20 rules forming a comprehensive
analysis of thehealthofyourdrive. Theserules maygiveadvicesuchascleaning the head
or
for further analysis.
drive and the data generation rates of your disk subsystem are also integrated into Library &
Tape Tools. Use these tests to find the per formance bottleneck in your system.
ritten to during this test.
be w
trying a different tape if issues are found. The suppor t ticket can be sent to HP Support
performance tests: the tests to measure the write/read performance of your tape
he
Optimizing performance
• The HP StorageWorks SB1760c Tape Blade can write uncompressed data at up to 80 MB/s (288
GB/hour).
• The HP StorageWorks SB920c Tape Blade can write uncompressed data at up to 60 MB/s (216
GB/hour).
50
Troubleshooting
Page 51

• The HP StorageWorks Ultrium 448c Tape Blade c an write uncompressed data at up to 24 MB/s
(86 GB/hour).
If your tape blade is not performing as well as expected—for example, if backup windows are longer
than
expected—please try the tools and consider the following points b efore c ontacting HP Support at
ttp://www.hp.com/support.
h
Typical areas where bottlenecks can occur are:
• Disk subsystem
A
single spindle disk will not be able to deliver good data throughput at poor compression
ratios. Bestpracticeto ensuregood throughputistoutilize multiple disk spindles in a RAID
configuration or use multiple data sources.
• System architecture
Be
aware of the architecture of your data protection environment.
The aggregation of multiple client sources over a network provides a good way of delivering
good performance, but anything less than Gigabit Ethernet will limit performance.
Some enterprise class backup applications ca n be made to interleave data from multiple sources,
such as clients or disks, to keep the tape drive working at optimum performance. The drawback
of interleaving is that it will increase the time needed to restore data.
• Tape me dia type
The data cartridge should match the specification of the tape drive. A lower specification will
have a lower transfer speed (see “Data cartridges” on page 39). Use
• Ultrium 1.6 TB cartridges with the HP StorageWorks SB1760c Tape Blade
• Ultrium 800 GB cartridges with the HP StorageWorks SB920c Tape Blade
• Ultrium 400 GB cartridges with the HP StorageWorks Ultrium 448c Tape Blade.
• Data and file types
The type of data being backed up or restored can affect performance. Typically, small files incur
greater overhead in processing and access than large files. Equally, data that is not compressible
will always limit the speed at which the drive can write/read data. You will achieve no more
than
native rates with unc ompressible data.
Examples of files that compress well are plain text files, spreadsheets; those that compress poorly
are those that are either compressed as part of their format (such as, JPEG photographic files) or
stored as compressed (such as, .ZIP files or .gz/.Z files on Unix platforms).
Problems with cartridges
If you experience any problems using HP branded cartridges, check:
• You are using an Ultrium cartridge. Compatible media can be recognized by the Ultrium logo,
which is the same as the logo on the front of your drive.
• You are
use with HP StorageWorks SB1760c Tape Blades; Ultrium 800 GB* tape cartridges (C7973A or
C7973W) for use with HP StorageWorks SB920c Tape Blades; Ultrium 400 GB* tape cartridges
(C7972A) for use with HP StorageWorks Ultrium 4 48c Tape Blades.
• If you are using C7974W or C7973W tape cartridges with the HP StorageWorks SB1760c or
SB920
• The cartridge case is intact and that it contains no splits, cracks or damage.
• The cartridge has been stored at the correct temperature and humidity. This p revents
condensation. See the insert included with the tape cartridge for storage conditions.
• The
• The World Wide Web site for more detailed troubleshooting i nformation:
h
ttp://h18004.w ww1.hp.com/products/blades/components/c-class-storageworks.html.
The cartridge is jammed
If the cartridge is jammed or the backup application is unable to eject it, you can force eject the
cartridge. Once the cartridge is successfully ejected, it is good practice to run Library & Tape Tools to
using the correct media type: Ultrium 1.6 TB* tape cartridges (C7974A or C7974W) for
Tape Blade respectively, remember that you can only write to these cartridges once.
c
write-protect switch is fully operational. It should move from side to side with a positive click.
Tape Blade
51
Page 52

diagnose the problem and to upgrade the firmware. If the failure occurs regularly, contact customer
service at h
1. Pressand hold theEject button on thefront of the tape drivefor at least10 seconds.
2. Wait forthe cartridgeto beejected. Thisprocess maytakeupto10minutes (the maximum rewind
time). It is important that you allow sufficient time for the drive to complete this process. If you
interrupt it, you may damage the media or the tape drive. The drive is then reset as though you
had
You m ay lose data if you force eject a cartridge. The tape may also become unreadable because an
EOD (End of Data) mark may not be properly written.
3. If the cartridge is still jammed, the tape drive has failed. Contact customer ser vice at
h
ttp://www.hp.com/support.
Emergency reset
As a l ast resort, if the drive has disappeared from the system and app ears to have failed, it can be reset
by holding the eject button d own for 20 seconds. This will allow the drive to reset its internal hardware
and potent
The reset process may take up to 10 minutes (the maximum rewind time) to complete.
NOTE:
This form of reset will clear the internal buffers and, therefore, lose any data in them. If the drive was
writing at
subseque
ttp://www.hp.com/support.
turned the power off and then on a gain.
ially m ake it visible to a host again.
the time, data may be lost a nd the cartridge will not have an EOD, which means that
nt restores are likely to fail. Discard the cartridge.
The drive will not accept the cartridge (or ejects it immediately)
The cartridge may have been damaged, for example dropped, or the drive may have a fault. If it is a
cleaning cartridge, it has probably expired and should be discarded immediately. For data cartridges:
1. Check that the drive has power (the power cable is properly connected and the Ready L ED is on).
2. Checkthatyou are using thecorrect media. Only useUltrium media, (see
“Data cartridges”onpage39).
3. Make sure that you have loaded the cartridge with the correct orientation (see
“Inserting cartridges” on page 35).
4. The tape cartridge memory (CM) may be faulty. Write-protect the cartridge by sliding the switch
on thetapecartridge,see “Write protecting cartridges” on page 42. If the tape can be loaded
and the data read, recover the data. Discard the faulty cartridge and save the recovered data to a
new cartridge.
5. Check for damage to your media and discard it if it is damaged.
6. Use a new or known, g ood piece of media and see if it loads during a backup. If it does, the
original cartridge is faulty and should be discarded.
7. Check if another Ultrium drive of the same model will accept the c artridge. If i t does, the original
drivemay be faulty. Beforecalling customer service, please check thatthe tape driveis responding.
See “Troubleshooting with Library & Tape Tools” on page 50.
52
Troubleshooting
Page 53

10 Replacing a tape blade chassis
or
tape drive
In this chapter:
•
Before you replace a part, page 53
•
Replacing the tape drive, page 53
• Replacing the tape blade chassis, page 57
•
Returning the faulty part,page63
Before you r
1. Unpack your replacement part and retain the packaging.
2. Remove the data cartridge from the tape drive.
There are t
•
Thetapedrive,see “Replacing the tape drive” on page 53.
The replac
• The tape blade chassis that encloses the tape drive, see
“Replacing the tape blade chassis” on page 57.
The partner server blade must be powered down before you replace a tape blade chassis or
a
tape dri
apart from the tape drive and its mounting rails and the coupler plate.
eplace a
wo customer replaceable parts:
ement tapedrivedoesnot includecablesormountingrails.
ve. The replacement chassis is supplied with cables and all tape blade components,
part
Replacing the tape drive
There are four stages to this process:
• Power down the tape blade
• Remove the faulty tape drive from the tape blade chassis and remove its mounting rails
• Attach the mounting rails to the replacement tape drive and install it in the tape blade
• Power up the tape blade.
Remove
the tape drive
1. Power down the partner server blade. This powers down the tape blade, see
“Powering the tape blade on and off” on page 28.
NOTE:
Do not power down the partner server blade and remove power from the drive during
read, write, fast-search, load and unload activities.
2. Press the mounting rails in towards the tape drive and slowly pull the tape drive away from the
chassis until the power and data cables become accessible. If you pull too hard on the tape drive,
you may disturb the cable routing and will not be able to install the replacement drive without
removing the chassis cover, as described in “Replacing the tape blade chassis” on page 57.
Tape Blade
53
Page 54

Figure 24 Releasing the tape drive
3. Disconnect the power and SAS cable at the rear of the tape drive.
Figure 25 Disconnecting the power and SAS cables
4. Remove the tape drive and then remove the clip-on mounting rails, one from each side of the faulty
tape drive, and retain the rails for use with the replacement tape drive.
54
Replacing a tape blade chassis or tape drive
Page 55

Figure 26 Removing the clip-on mounting rails on a faulty tape drive
5. Put the faulty tape drive into the packaging that contained the replacement item.
Install the new tape drive
1. Attach the clip-on mounting rails to the new tape drive. They are marked right a nd left. (It is easier to
clip in the rear end of the rails first.)
27 Replacing the clip-on mounting rails on a new tape drive
e
Figur
the power and SAS cable to the rear of the tape drive.
2. Attac
h
Tape Blade
55
Page 56

Figure 28 Reconnecting thepower and SAS cables to thetapedrive
3. Slide the tape drive into the tape blade chassis and push on the mounting rail handles until the tape
drive is fully inserted into the chassis, taking care not to catch any of the cables at the rear of
the tape drive.
Figure 29 Installing the tape drive
4. Power on the partner server blade. The tape drive will run its hardware self-test, which takes about 5
seconds. If self-test passes, the green Ready LED on the tape drive flashes and then shows steady
green.
Follow normal operating procedures to work with the tape blade. Follow the step-by-step instructions
in this
User Guide.
56
Replacing a tape blade chassis or tape drive
Page 57

Replacing the tape blade chassis
There are five stages to this process:
• Power down the tape blade and remove it from the blade enclosure
• Full-height pa
• Remove the good tape drive from the faulty tape blade chassis
• Insert the tape d rive into the replacement chassis
• Install the re
Remove the tape blade
1. Power down the partner server blade. This powers down the tape blade, see
“Powering the tape blade on and off” on page 28.
NOTE:
Do not power down the partner server blade and remove power from the drive during
read, write, fast-search, load and unload activities.
NOTE:
If thereisahalf-heightserverblade in the devicebay directly abovethe tape blade,
please remove it before you remove the tape blade. See the server blade documentation
for more details.
rtner server blades only: Remove the coupler plate from the faulty tape blade chassis
placement
tape blade and power it up
2. Grasp the metal release latch, at the bottom of the tape blade in c7000 enclosures and to the right
of the tape blade in c3000 enclosures, and pull forward until the locking mechanism disengages.
3. Carefully pull the tape blade out from the enclosure.
CAUTION:
Do not pull on the tape drive bezel when removing the tape blade.
Tape Blade
57
Page 58

Figure 30 Removing thetapeblade
1. Pull latch forward
2. Pull tape blade away from the enclosure
NOTE:
If you are not replacing the tape blade immediately, you should insert a half-height blank
into the empty device bay.
Remove the coupler plate, full-height partner servers in a c7000 enclosure only
If you are using the tape blade with a full-height partner server, you must retain the c oupler plate for use
with your replacement tape blade. (No coupler plate is shipped with the replacement product.)
1. Press a small pin into the last flat hole of the coupler plate.
2. Gently start to slide the coupler plate in the opposite direction to installation
Figure 31 Disconnecting the coupler plate
1. Location to insert release pin
3. Retain thecoupler platefor usewiththe replac
58
Replacing a tape blade chassis or tape drive
2. Slide back and lift coupler plate
ement chassis.
Page 59

Remove the tape drive
1. Press the mounting rails in towards the tape drive and slowly pull the tape drive away from the
chassis until t
Figure 32 Releasing the tape drive
2. Disconnect the power and SAS cable at the rear of the tape drive.
he
power and data cable become accessible.
R
Figure 33 Disconnecting the power a nd SAS cables
3. Remove the tape drive completely and retain it for use with the replacement chassis.
4. Put the faulty tape blade chassis into the packaging that contained the replacement item.
Tape Blade
59
Page 60

Install the repl
1. Unscrew the sin
Figure 34 Removing the tape blade cover
2. Remove the connector cover on the rear of the replacement chassis.
acement chassis
screw and remove the cover from the replacement tape blade chassis.
gle
Figure 35 Removing the connector cover
1. Release side clips 2. Pull cover away
tape drive that you removed earlier into the tape blade assembly and attach the power
3. Slide t
60
he
and
SAS cable to the rear of the tape drive.
Replacing a tape blade chassis or tape drive
Page 61

Figure 36 Reconnecting the power and SAS cables to the tape drive
CAUTION:
Take care when routing the cables. If routed incorrectly, they may jam the tape drive
or
damage components.
4. Push o n the mou nting rails until the tape drive is fully inserted into the chassis, taking care not to
catch any of the cables at the rear of the tape drive.
R
Figure 37 Installing thetapedrive
Tape Blade
61
Page 62

Figure 38 Cabling in the replacement chassis
5. Replace the cover on the tape blade chassis and tighten the screw.
Figure 39 Replacing the tape blade cover
6. Full-height partner servers in a c7000 enc losu re only: Attach the coupler plate that you removed
from the faulty chassis to the replacement unit.
Figure 40 Installing the coupler plate
7. Push the tape blad e chassis back into the device bay until it is fully inserted and the enclosure
connectors are fully engaged. The System Health LED will briefly flash red, indicating that the
system is connected.
62
Replacing a tape blade chassis or tape drive
Page 63

Figure 41 Installing the replacement chassis
1. Push tape blade into the bay 2. Push latch in to secure the tape blade
8. Power on the partner server blade. Follow normal operating procedures to work with the tape blade.
Follow the step-by-step instructions in this User Guide.
Returning the faulty part
1. Put the faulty tape drive or tape blade chassis into the packaging that contained the replacement part.
2. Return the faulty part to your local HP Service Center. Instructions on where to return faulty parts
will be shipped with the replacement part. You must ship the defective part back to H P within a
definedperiodof time, normally five (5) business days. The defective part must be returned with
the
associated documentation in the provided shipping material. Failure to return the defective par t
may result in HP billing you for the replacement. HP will pay all shipping and part return costs
and
determine the courier/carrier to be used.
See complete hp lim ited warranty statement at: h
warranty.html
ttp://h18006.www1.hp.com/products/storageworks/
Tape Blade
63
Page 64

64
Replacing a tape blade chassis or tape drive
Page 65

Index
A
audience, 9
B
backup software,18
encryption,18
buttons
Unload,36
C
cabling
tape blade chassis,61
cartridges
cleaning,40, 42
compatibility,
drive won’t accept,52
encryption,40
environment,43
handling,43
inserting,
jammed,51
recommended,39
removing,36
troubleshooting,51
WORM,40
write protecting,42
chassis
cabling,61
installing,60
Clean LED,32
cleaning cartridges,40
cleaning the tape drive,42
conventions
document, 9
coupler plate,26
removing,58
drive
operating,35
Drive LED,32
drivers,17
SAS controller,17
Tape driver,17
E
ejecting cartridge,36, 36
emergency reset,52
encryption,40
backup software,18
environment
cartridges,43
F
faulty parts
returning,63
firmware
on
tape enclosure,13
onboard a dministrator,14
firmware, upgrading
drives,
front view,14
full-height par tner server
installing in,24
H
half-height partner server
installing in,20
handling cartridges,43
help
obtaining,10
HP
technical support,10
HP StorageWorks Tape CD-ROM,15
D
device bay numbering,19
device bays
paired locations, 21, 24
diagnostic questions,49
disaster recovery
See OBDR
document
conventions, 9
related documentation, 9
documentation
HP
website, 9
providing feedback,11
I
inserting cartridges,
installation
before you start,19
coupler plate,26
drivers,17
full-height partner server,24
guidelines,13
half-height p artner server,20
partnerserverblade,14
verify,29
installing tape blade chassis,60
Tape Blade
65
Page 66

installing tape drive,55
J
jammed cartridge,51
L
L&TT,50
LEDs
Clean,32
Drive,32
Ready,32
system health,31
Tape,32
tape blade chassis,31
tape drive,32
UID,31
loading cartridges,
M
media
See
cartridges
mezzanine card,24
N
numbering
device bays,19
O
OBDR
compatibility,45
remote recovery,45
running,46
testing for compatibility,46
what it does,45
onboard administrator,50
firmware required,14
operation
drives,35
P
partnerserverblade,14
performance,50
power off,28
power on,28
power specifications,14
R
Ready LED,32
recommended media,39
related documentation, 9
remote disaster recovery,45
removing coupler plate,58
removing tape blade,36, 57
removing tape drive,53, 59
replacing parts,53
returning
faulty parts,63
S
SAS controller driver,17
Subscriber’s Choice, H P,10
supported tape blades,13
system health LED,28, 31
T
tape blade
front view,14
optimizing perfromance,50
power off,28
power on,28
power specification,14
removing,36, 57
supported models,13
tape blade doesn’t power up,49
tape blade LEDs,31
troubleshooting,31
tape blade operation
troubleshooting,49
tape drive
installing,55
removing,53, 59
tape drive LEDs,32
troubleshooting with,32
Tape driver,17
tape enclosure
firmware required,13
Tape LED,32
technical support
HP,10
service locator website,10
tools
L&TT,50
onboard administrator,50
troubleshooting
cartridges,51
drive ejects cartridge,52
L&TT,50
tape blade doesn’t power up,49
tape drive LEDs,31, 32
tools,49
U
UID LED,31
Unload button,36
upgrading firmware
drives,
V
verify installation,29
66
Page 67

W
websites
HP ,10
HP Subscriber’s Choice for Business,10
product manuals, 9
WORM cartridges,40
write protecting cartridges,42
Tape Blade
67
 Loading...