

Page 1

HP Cloud OS for Moonshot
Version 1.0
Administration Dashboard Help
Page 2

HP Cloud OS for Moonshot Administration Dashboard Help Version 1.0
Contents
Overview ........................................................................................................................................................ 6
Purpose of this document ............................................................................................................................. 6
Target Audience ........................................................................................................................................... 6
Document Conventions .................................................................................................................................... 6
The Administration Dashboard ......................................................................................................................... 7
Cloud Tab .................................................................................................................................................... 8
Region Tab .................................................................................................................................................. 9
Project Tab .................................................................................................................................................. 9
Settings Link .............................................................................................................................................. 10
User Roles and Their Tasks ............................................................................................................................. 11
Admin User Tasks ....................................................................................................................................... 11
Cloud Administrator Tasks .......................................................................................................................... 12
Cloud Architect Tasks ................................................................................................................................. 12
Project Administrator Tasks ........................................................................................................................ 12
Project User Tasks ...................................................................................................................................... 13
Working with Cloud Tab ................................................................................................................................. 14
View Cloud Services ................................................................................................................................... 14
View Domain Details .................................................................................................................................. 15
Manage Projects ........................................................................................................................................ 15
Create a Cloud Project ............................................................................................................................ 16
Modify a Cloud Project ............................................................................................................................ 18
View Cloud Project Usage Summary ......................................................................................................... 19
Modify Compute Limits ........................................................................................................................... 19
Add or Remove a Project User ................................................................................................................. 20
Delete a Cloud Project ............................................................................................................................ 21
Restore a Cloud Project ........................................................................................................................... 21
Manage Users ............................................................................................................................................ 21
Create a Cloud User ................................................................................................................................ 22
Edit a Cloud User .................................................................................................................................... 23
Disable a Cloud User ............................................................................................................................... 24
Enable a Cloud User ................................................................................................................................ 24
Delete a Cloud User ................................................................................................................................ 24
Restore a Cloud User .............................................................................................................................. 25
Manage Roles ............................................................................................................................................ 25
Page | 2
© Copyright 2014 Hewlett-Packard Development Company
Page 3

HP Cloud OS for Moonshot Administration Dashboard Help Version 1.0
Create a Cloud Role ................................................................................................................................ 26
Edit a Cloud Role .................................................................................................................................... 26
Delete a Cloud Role ................................................................................................................................ 27
Manage Images .......................................................................................................................................... 27
Create a Cloud Image .............................................................................................................................. 27
Edit a Cloud Image .................................................................................................................................. 31
Delete a Cloud Image .............................................................................................................................. 31
Launch a Cloud Image ............................................................................................................................. 32
Manage Moonshot Chassis ......................................................................................................................... 33
Datacenter View ..................................................................................................................................... 34
Single Chassis View ................................................................................................................................. 38
Changing the Power Status of a Cartridge/Node ....................................................................................... 40
Changing the Maintenance mode of a Cartridge or a Chassis ..................................................................... 41
Search a Cartridge .................................................................................................................................. 41
Search a Node ........................................................................................................................................ 41
View Events Log ..................................................................................................................................... 42
Working with Region Tab ............................................................................................................................... 43
Region Overview ........................................................................................................................................ 43
Region Info ................................................................................................................................................ 43
Manage Region Instances ........................................................................................................................... 44
Edit a Region Instance ............................................................................................................................. 45
Soft Reboot an Instance .......................................................................................................................... 45
Terminate Region Instance(s) .................................................................................................................. 46
Force Delete an Instance ......................................................................................................................... 46
View Console ......................................................................................................................................... 46
Manage Images .......................................................................................................................................... 46
Create a Region Image ............................................................................................................................ 47
Edit a Region Image ................................................................................................................................ 50
Delete a Region Image ............................................................................................................................ 50
Launch a Region Image ........................................................................................................................... 51
Manage Networks ...................................................................................................................................... 52
Edit a Network ....................................................................................................................................... 52
Manage Flavors .......................................................................................................................................... 53
Create a Flavor ....................................................................................................................................... 53
Edit a Region Flavor ................................................................................................................................ 55
Page | 3
© Copyright 2014 Hewlett-Packard Development Company
Page 4

HP Cloud OS for Moonshot Administration Dashboard Help Version 1.0
Delete a Region Flavor ............................................................................................................................ 55
View a Region Flavor Extra Specifications ................................................................................................. 56
Create a Region Flavor Extra Specifications ............................................................................................... 57
Edit a Region Flavor Extra Specifications ................................................................................................... 57
Delete a Region Flavor Extra Specifications ............................................................................................... 57
Working with Project Tab ............................................................................................................................... 58
Project Overview ........................................................................................................................................ 58
Manage Provisioning .................................................................................................................................. 59
Workloads ............................................................................................................................................. 59
Manage Running Topologies ................................................................................................................... 81
Manage Deployment Profiles .................................................................................................................. 84
Manage Topology Designs ....................................................................................................................... 85
Manage Resource Pool ......................................................................................................................... 101
Manage Infrastructure .............................................................................................................................. 105
Manage Project Instances ..................................................................................................................... 105
Manage Project Images ......................................................................................................................... 108
Manage Networks ................................................................................................................................ 114
Manage Access and Security ..................................................................................................................... 115
View Keypair List .................................................................................................................................. 115
Create Keypairs .................................................................................................................................... 116
Delete Keypairs .................................................................................................................................... 116
Import Keypairs .................................................................................................................................... 117
Delete Multiple Keypairs ....................................................................................................................... 117
Download API Access ............................................................................................................................ 118
Access Authentication Token ................................................................................................................. 118
Manage Updates and Extensions ............................................................................................................... 119
Configure Credentials ........................................................................................................................... 119
View the Updates List ........................................................................................................................... 120
Import an Update ................................................................................................................................. 121
Download Updates or Extensions .......................................................................................................... 122
Publish an Update or Extension ............................................................................................................. 122
Settings Tab ................................................................................................................................................ 123
Customize Site Settings ............................................................................................................................. 123
To Change the Log Level ........................................................................................................................ 124
Enable Extra Logging ............................................................................................................................. 124
Page | 4
© Copyright 2014 Hewlett-Packard Development Company
Page 5

HP Cloud OS for Moonshot Administration Dashboard Help Version 1.0
Change Proxy Settings........................................................................................................................... 124
Customize User Settings ........................................................................................................................... 124
Change Password ..................................................................................................................................... 125
About HP Cloud OS for Moonshot Administration Dashboard ...................................................................... 125
Help ........................................................................................................................................................ 125
Page | 5
© Copyright 2014 Hewlett-Packard Development Company
Page 6
HP Cloud OS for Moonshot Administration Dashboard Help Version 1.0
Convention
Description
Text in Bold
Tab names, Field names, Section names.
Text in Blue and Italics
Field values that are to be entered.
Checkbox
Note
Information to remember
URL
URLs of webpages
Important
Very important information
Overview
HP Moonshot Servers are designed and tailored for specific workloads to deliver optimum performance.
These support a wide range of complex IT demands right from cloud based applications to Social Media,
Big Data and Mobility. HP Moonshot is the world’s first software defined web server that will accelerate
innovation while delivering breakthrough efficiency and scale.
HP Cloud OS for Moonshot is an enterprise ready product used to manage Moonshot Chassis, discover
Moonshot Servers from the managed Moonshot Chassis, provision the given workload based on
Moonshot Server capabilities such as Static Web, HDI, Online Gaming, etc. It also enables the Cloud
Administrator to setup multiple project sharing across the discovered Moonshot Servers.
The IT Administrators need to plan, prepare and follow a defined process to successfully setup, configure
and install the HP Cloud OS for Moonshot.
Purpose of this document
The document provides comprehensive instructions on the post installation step up, process and details
that are required to be followed after installing HP Cloud OS for Moonshot. The document is designed to
help different users to navigate through the Administration Dashboard which is visible once the Cloud
environment is setup. It provides detailed instructions on the different options that are available in the
dashboard for the user to customize the environment.
Target Audience
This document is primarily designed for the users of the Administration Dashboard.
Document Conventions
© Copyright 2014 Hewlett-Packard Development Company
Page | 6
Page 7

HP Cloud OS for Moonshot Administration Dashboard Help Version 1.0
The Administration Dashboard
The HP Cloud OS for Moonshot Administration Dashboard is the interface you’ll use to manage your
cloud after the cloud environment is created in the Operational Dashboard.
You can access the Administration Dashboard via different user roles to perform the tasks assigned to
each role. Apart from the basic functions, such as creating projects, users, roles, resource pools, and
topology templates, HP Cloud OS for Moonshot provides two major features to enhance your cloud
experience:
Moonshot Management
Workload Service
Moonshot Management
Managing the IT resources in a scalable, dynamic cloud is challenging. To have a simplified and
enhanced cloud management experience, HP Cloud OS for Moonshot provides a Single Pane of Glass
(SPOG) view with the Chassis Manager.
The Chassis Manager caters to three important requirements of a Cloud Administrator.
1. Display an overall perspective of the datacenter, hosted servers and health of chassis in the
Datacenter View
2. Provide detailed information of individual chassis host and its health status in the Single Chassis
View
3. Server management with the Power On/Off actions and Maintenance action
Datacenter View
It provides an overview of the hosted chassis in a datacenter. In this view, Cloud Administrator is able to
add/delete chassis, which then goes on to discover all cartridges and nodes of a chassis. At a glance, the
user is able to comprehend the datacenter health and view critical events that need immediate attention.
Single Chassis View
It provides in-depth information of a selected chassis. In this view, the user is able to grasp the overall
structure and health of the contained cartridges and nodes.
A drill-down to individual cartridges or nodes provides detailed information in terms of configuration,
power status, health status, workload information etc.
Event information at individual chassis level helps to monitor chassis events.
The user is also able to perform power Off/On operations on individual cartridges and nodes.
For more details on working with Moonshot Chassis, refer to the Moonshot Management section.
Workload Service
In Cloud Enterprise IT, a typical goal is to deploy a composite service, which is comprised of different
application components that cater to different aspects of a service. Each application will have its own
computing pattern defining its specific workload and hence needs specialized deployment of
infrastructure elements. Namely: Compute, Storage and Network. The Workload service aims to facilitate
the end user in deployment of a composite service in user-friendly manner. For details on creating and
provisioning a workload, refer to the Workloads section.
Page | 7
© Copyright 2014 Hewlett-Packard Development Company
Page 8
HP Cloud OS for Moonshot Administration Dashboard Help Version 1.0
Panel Option
Description
Services
Allows you to view information related to cloud services.
Domains
Allows you to view domain information.
Projects
Allows you to manage projects, add users and add roles using this option.
Users
Allows you to create new users and modify and delete existing users.
Roles
Allows you to create a new role and displays a list of existing cloud roles. You can
also delete an existing role.
How to access the Administration Dashboard
Before you access the Administration Dashboard, ensure that the Cloud Environment is up and running.
You can access the HP Cloud OS for Moonshot Administration Dashboard in either of the following ways:
In your browser window, type the public IP address of your Cloud Controller Node in the following
format https://<Public IP Address>
OR
From the Operational Dashboard, click Manage Clouds->More->Launch Dashboard
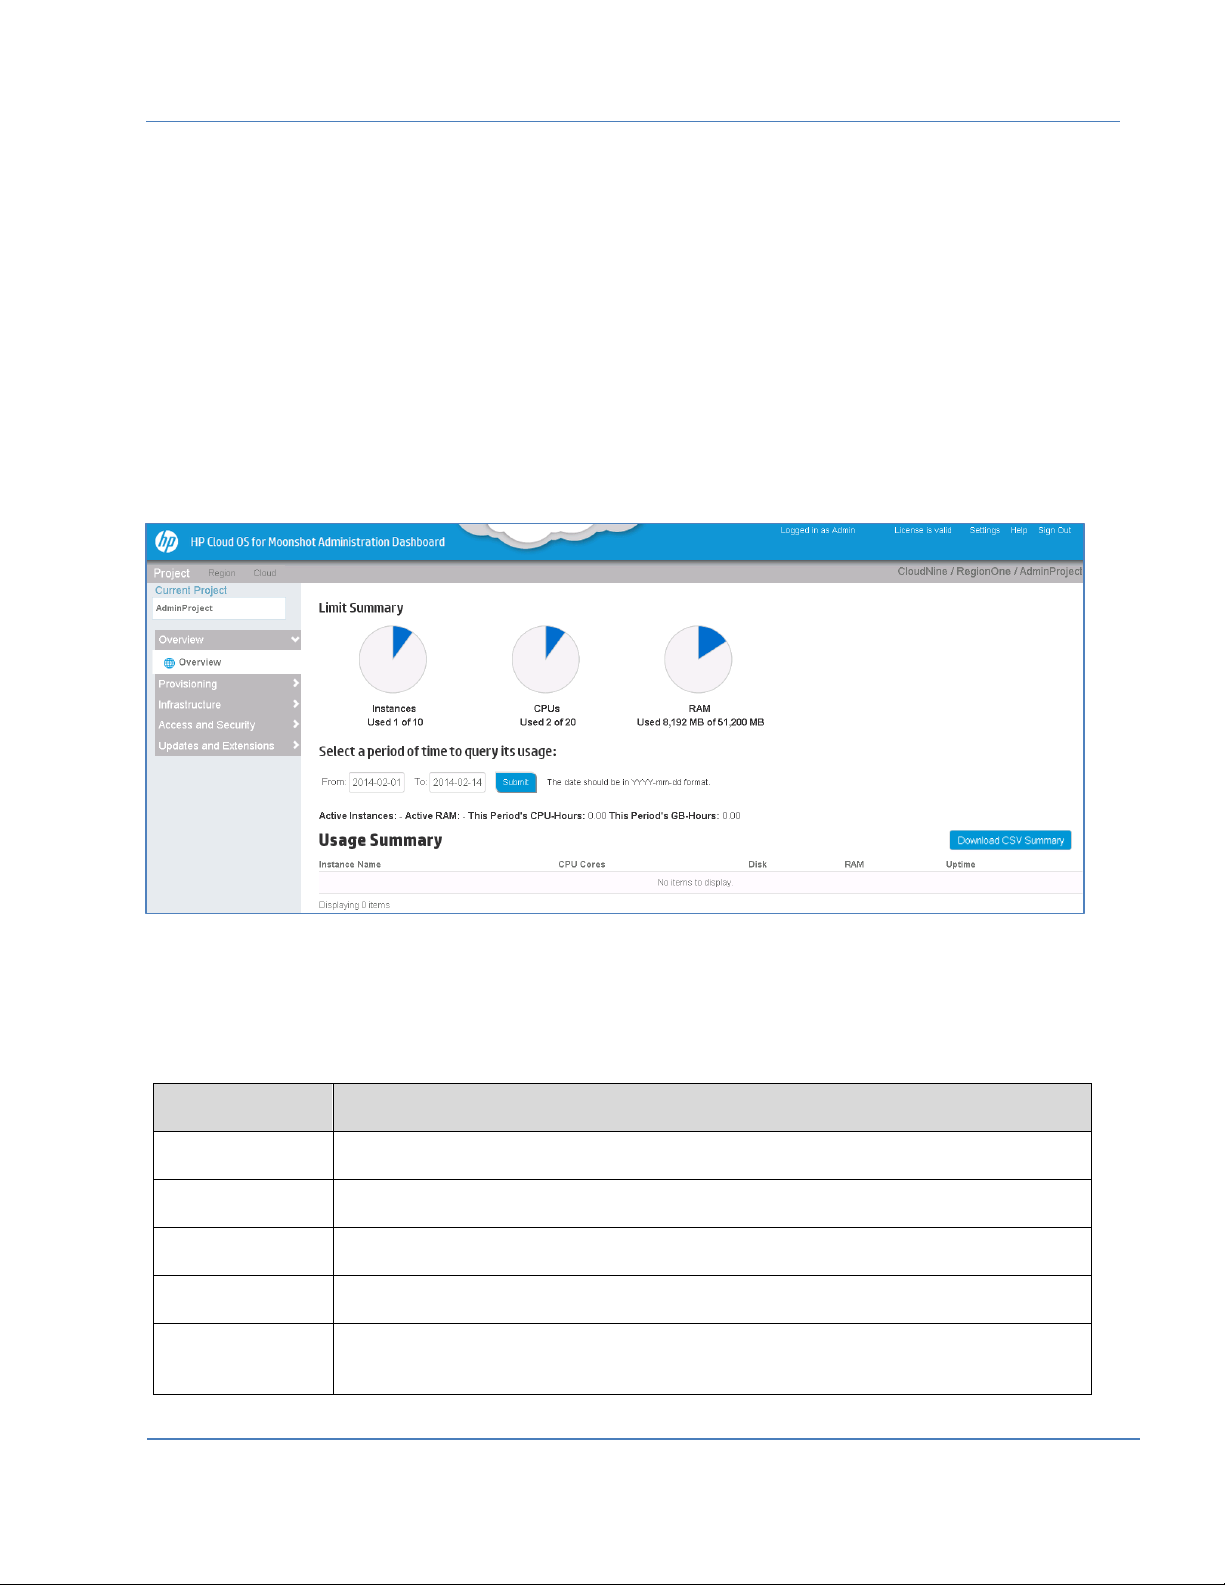
The Administration Dashboard menu bar displays three different tabs: Cloud, Region and Project. Each
active tab displays options in the left panel. You can view tabs and options only if you have the required
privileges. The dashboard also displays the currently logged in user, License Validity, Settings link, Help
link and the Sign Out option on the top right corner of the screen.
Figure 1: HP Cloud OS for Moonshot Administration Dashboard
Cloud Tab
The tab displays different options in the left panel. The following table describes each option.
Page | 8
© Copyright 2014 Hewlett-Packard Development Company
Page 9
HP Cloud OS for Moonshot Administration Dashboard Help Version 1.0
Images
Allows you to create, view, modify, launch and delete all from which instances can
be launched.
Moonshot
Management
Allows you to manage Moonshot Chassis and Moonshot servers. It also enables
you to discover and allocate Moonshot Servers for provisioning.
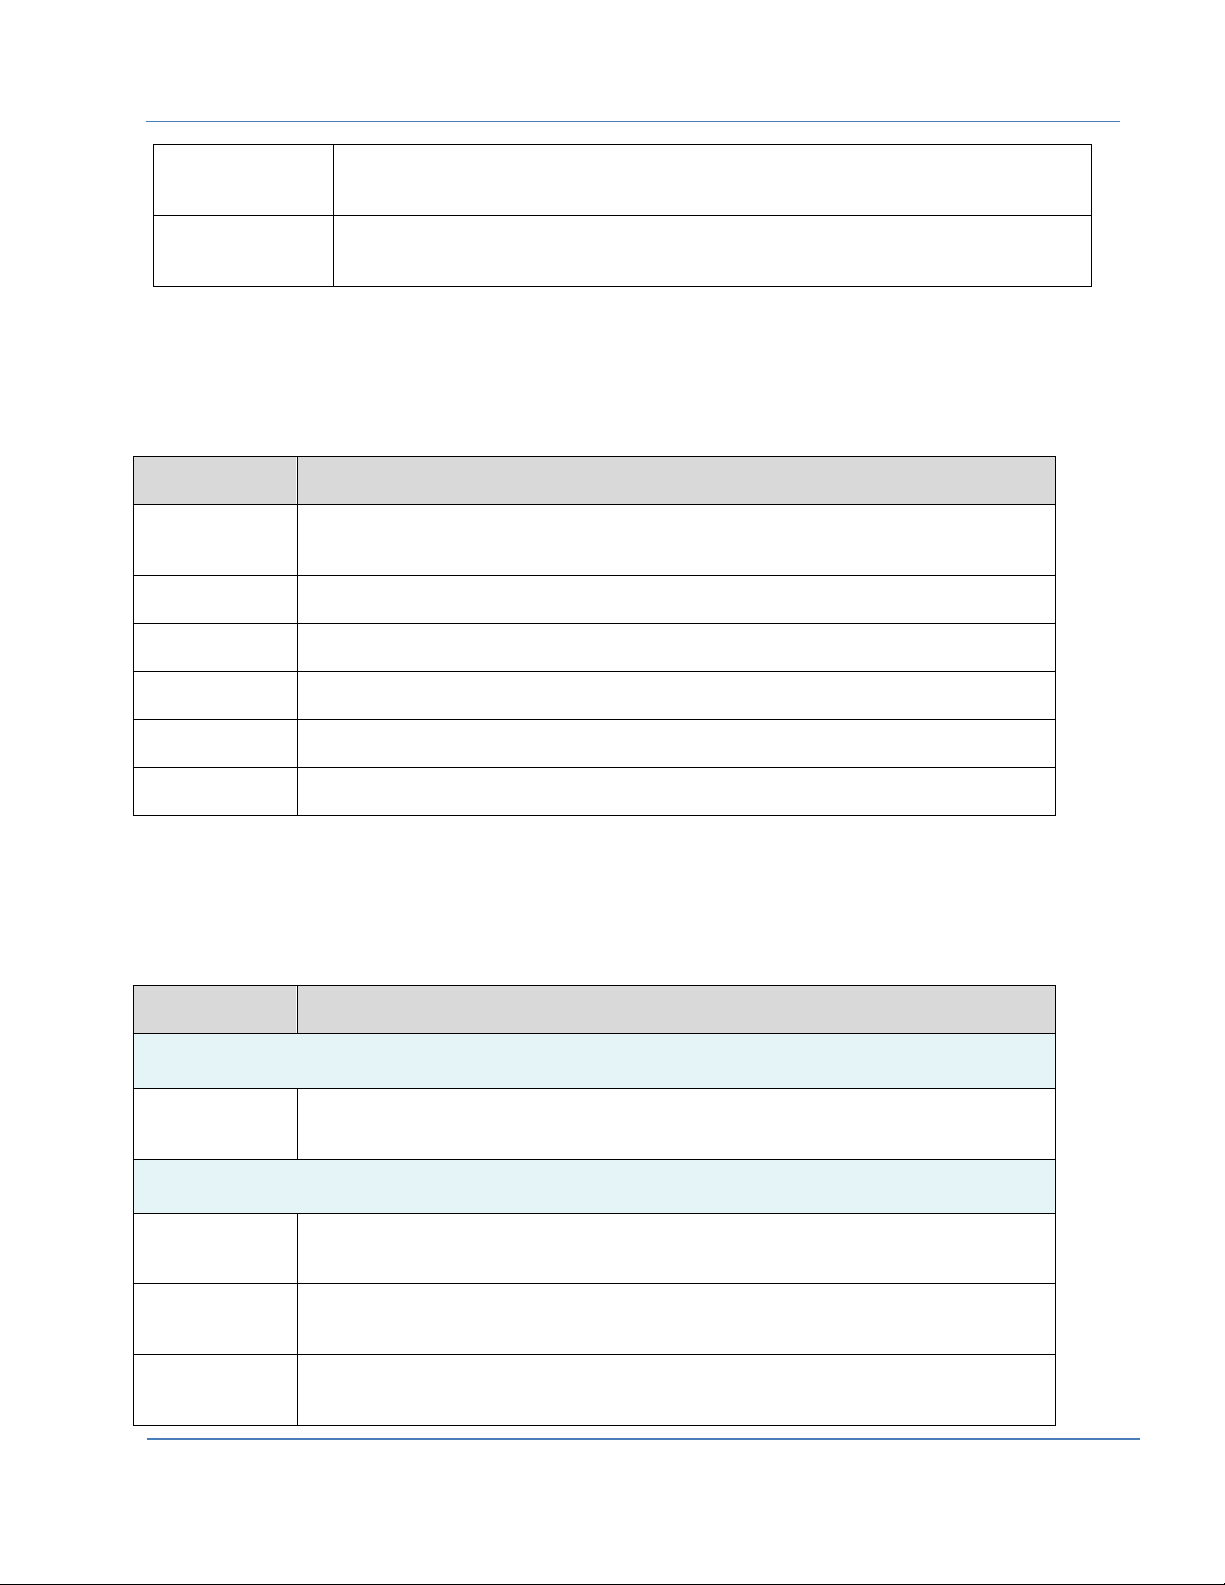
Panel Option
Description
Overview
Allows you to view the detailed usage summary of a region. By default, it is
displayed for the current month.
Info
Displays the details of the Compute Services and Default Quotas.
Instances
Displays the list of instances.
Images
This option allows you to create, view, modify, launch and delete images.
Networks
This tab provides a way to view networks details
Flavors
Displays the list of flavors in the region. You can create, modify, delete flavors and
also view extra specifications of the selected flavor.
Panel Option
Description
Overview
Overview
Allows you to view the detailed usage summary of a project. By default, it is
displayed for the current month.
Provisioning
Workloads
Displays Workload services. These services aim to facilitate you in deployment of a
composite service comprising of different applications and hence different
workloads.
Running
Topologies
Displays a list of topologies that have been provisioned from deployment profiles.
Deployment
Profiles
Displays a list of published topology designs. These profiles can be provisioned.
Region Tab
The Region tab displays the following option to work with in the compute region.
Project Tab
This tab allows you to use the following options.
© Copyright 2014 Hewlett-Packard Development Company
Page | 9
Page 10
HP Cloud OS for Moonshot Administration Dashboard Help Version 1.0
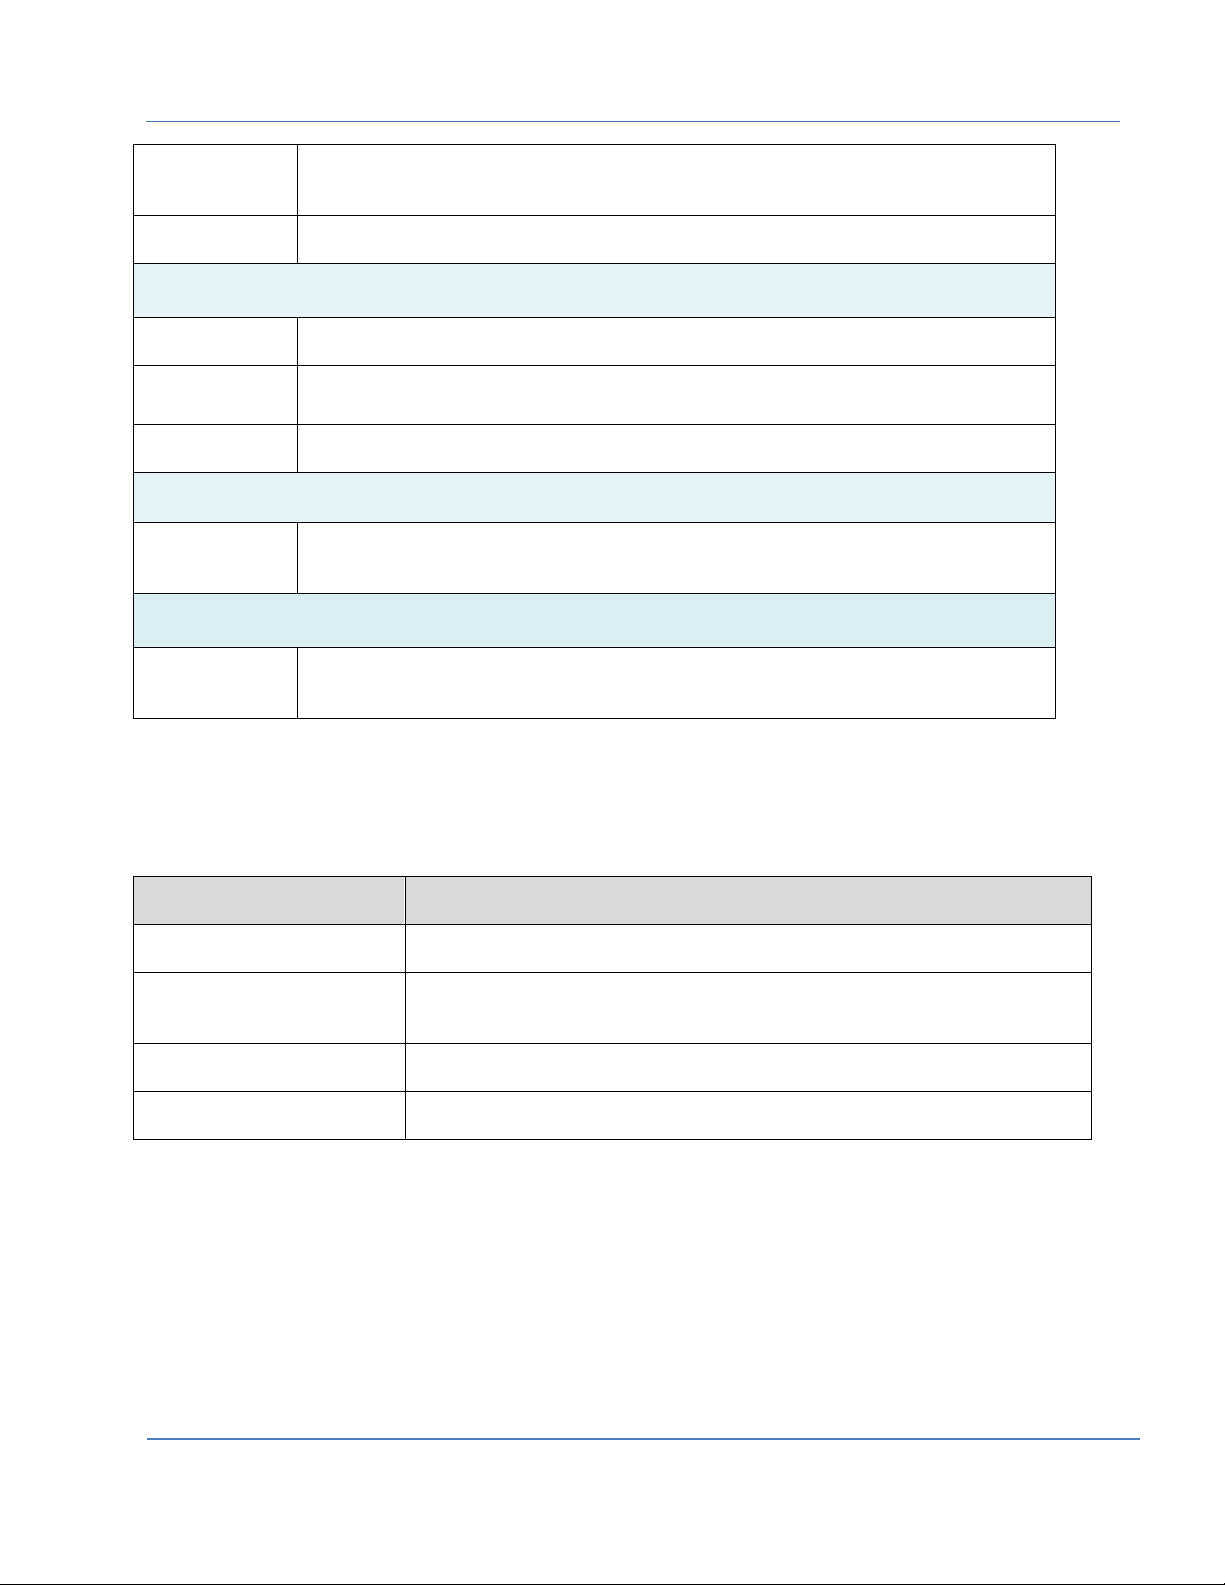
Topology
Designs
Displays a list of topology designs. A topology design is used for straightforward
IaaS deployments, and allows you to design in a free-form layout where connection
relationships implicitly define the service fulfillment lifecycle.
Resource Pools
Records that define the access to a specific cloud provider, resources that are
made available by the provider and services associated with the resources.
Infrastructure
Instances
Displays the list of running instances.
Images
Displays all the images (QCOW2 format) that can be launched to create new
instances.
Networks
You can view the network details using this option.
Access and Security
Access &
Security
This option allows you create and manage Keypairs, view API Endpoints and view
Authentication Token.
Updates and Extensions
Updates and
Extensions
This option allows you to download content files from HP Cloud OS Delivery
Network (CODN) and use it in your cloud environment.
Panel
Description
Site
Allows you to change the site settings as per your requirements.
User
Allows you to select various user settings such as language, time zone and
items per page
Password
Allows you to change your password.
About
Allows you to view version and copyright information.
Settings Link
The Settings link is visible with all its options to the Admin User and Cloud Administrator. The Site option
is not visible to other users. It displays the following options:
© Copyright 2014 Hewlett-Packard Development Company
Page | 10
Page 11

HP Cloud OS for Moonshot Administration Dashboard Help Version 1.0
S.No
Role
Working Tab
Privileges
1.
Cloud Administrator or
Cloud Admin
All Tabs (Cloud, Region,
Project)
Cloud Administrator has all the privileges associated with
the cloud and HP Cloud OS for Moonshot services
including the assigning projects and resources to the
users. Cloud Administrators have global permissions
across cloud including all regions and projects. Cloud
Administrators are members of every project by design.
2.
Administrator or Admin
User
All Tabs (Cloud, Region,
Project)
Admin role is best suited to create projects, and create
users and assign the users to project. The Admin role can
view domains and services, and delete protected images.
3.
Cloud Architect
Project Tab
Cloud Architect creates topology designs and
deployment profiles for the assigned projects.
4.
Project Administrator or
Project Admin
Project Tab
Project Administrator has the privileges to modify and
delete project resources and content. Multiple users can
be assigned the role of Project Administrator. A Project
Administrator is explicitly added as a member of a
project or multiple projects.
5.
Project User
Project Tab
Owns only the content and resources they create. Project
users can modify or delete the content and resources
they own. They can also use resources that are shared
with their project or cloud.
User Roles and Their Tasks
The HP Cloud OS for Moonshot Administration Dashboard can be accessed by different users. Each user
role is customized and has different privileges attached to it. The Administration Dashboard displays
differently for each user role. Different user roles and their privileges are defined in the table below:
The following section describes the Administration Dashboard tasks for each of the user roles. Generally,
the privilege hierarchy gives each role all the rights of the roles beneath it. For example, a Project
Administrator can perform all the tasks of a Project user, plus some additional tasks.
Admin User Tasks
The Admin user has the privileges to create projects and users for the projects. Admin user can view
domains and services, and delete protected images. Generally, the Admin user works on the
AdminProject and performs the below mentioned tasks:
Change Settings
Create Projects
Create Users
View Domains
View Services
© Copyright 2014 Hewlett-Packard Development Company
Page | 11
Page 12

HP Cloud OS for Moonshot Administration Dashboard Help Version 1.0
Cloud Administrator Tasks
After the cloud is created, the Cloud Administrators can focus on day-to-day cloud administration tasks.
Although Cloud administrators can access all the tabs in the Administration Dashboard, they primarily
concentrate on the following tasks.
Cloud Tab Tasks
Region Tab Tasks
Manage Updates and Extensions
Manage Workloads
Manage Resource Pools
Working with Access and Security
Administration Dashboard Settings
Cloud Architect Tasks
The role of the Cloud Architect involves working with creating topology designs and deployment profiles.
Once the cloud and projects are created by the Cloud Administrator, Cloud Architects can focus on dayto-day cloud architect tasks. Cloud architects are mostly concerned with creating topology designs and
deployment profiles. They have the privileges to perform the following tasks:
Working with Topology Designer
Project Overview
Manage Running Topologies
Manage Deployment Profiles
Manage Resource Pools
Manage Instances
Manage Images
Manage Updates and Extensions
Using Deployed Workloads
Project Administrator Tasks
The Project Administrators focus on their day-to-day tasks of monitoring and maintaining project
resources and content. Project administrators have all the rights of project users, as well the rights to
modify or delete project resources and content. Project Administrators can work on all the projects of
which they are the members and perform all project related tasks.
Project Administrators maintain projects and performs the following tasks:
Working with Topology Designer
Project Overview
Page | 12
© Copyright 2014 Hewlett-Packard Development Company
Page 13

HP Cloud OS for Moonshot Administration Dashboard Help Version 1.0
Manage Running Topologies
Manage Deployment Profiles
Manage Resource Pools
Manage Instances
Manage Images
Manage Networks
Working with Access and Security
Using Deployed Workloads
Administration Dashboard Settings
Project User Tasks
The Project Users work on the project tasks. They create topology designs and deployment profiles, and
work with the different Project tab options.
Project Users perform the following tasks:
Working with Topology Designer
Viewing Project Overview
Manage Running Topologies
Manage Deployment Profiles
Manage Resource Pools
Working with Project Instances
View Project Images
Manage Networks
Using Deployed Workloads
Working with Access and Security
Administration Dashboard Settings
Page | 13
© Copyright 2014 Hewlett-Packard Development Company
Page 14
HP Cloud OS for Moonshot Administration Dashboard Help Version 1.0
Working with Cloud Tab
Only the Cloud Administrator can view the Cloud Tab. To work with the Cloud Tab, do the following.
Login to the HP Cloud OS for Moonshot Administration Dashboard with the Cloud Administrator
credentials.
The Administration Dashboard is displayed with a menu bar at the top displaying three tabs:
Project, Region and Cloud.
Click Cloud Tab to activate it.
The screen displays the current cloud name and the options in the left panel.
Figure 2: Cloud Tab
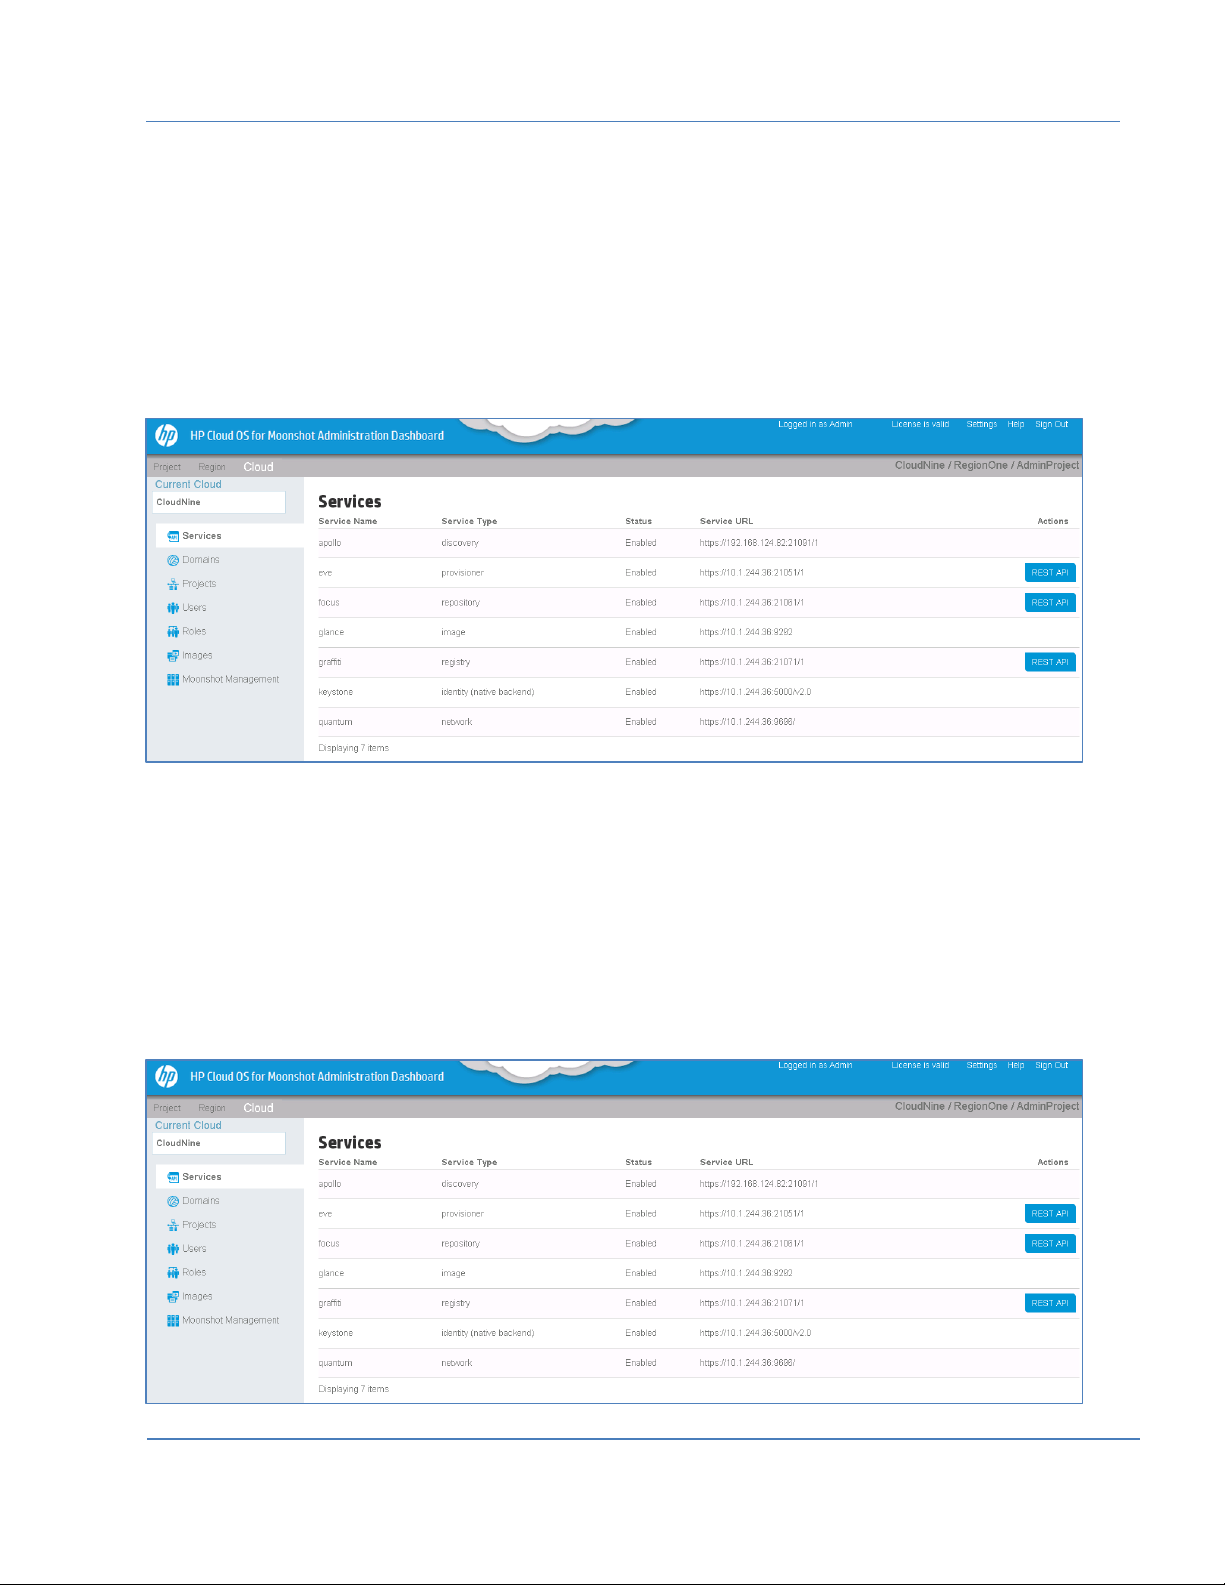
View Cloud Services
The Services option in the left panel displays the list of cloud services that are enabled for your cloud
environment. By default, Services is the active option.
To view the cloud services, do the following:
1. Click Cloud Tab to select it.
2. From the options in the left panel, select Services to display the Services page.
Figure 3: Services Option in Cloud Tab
Page | 14
© Copyright 2014 Hewlett-Packard Development Company
Page 15
HP Cloud OS for Moonshot Administration Dashboard Help Version 1.0
The page displays the following details for each of the services:
Service Name: Displays the name of the service.
Service Type: Displays the type of service.
Service URL: This column shows the IP address where the service is running.
Status: Whether enabled.
Actions: If a service supports Rest APIs, option to open Rest API displays under the Actions
column.
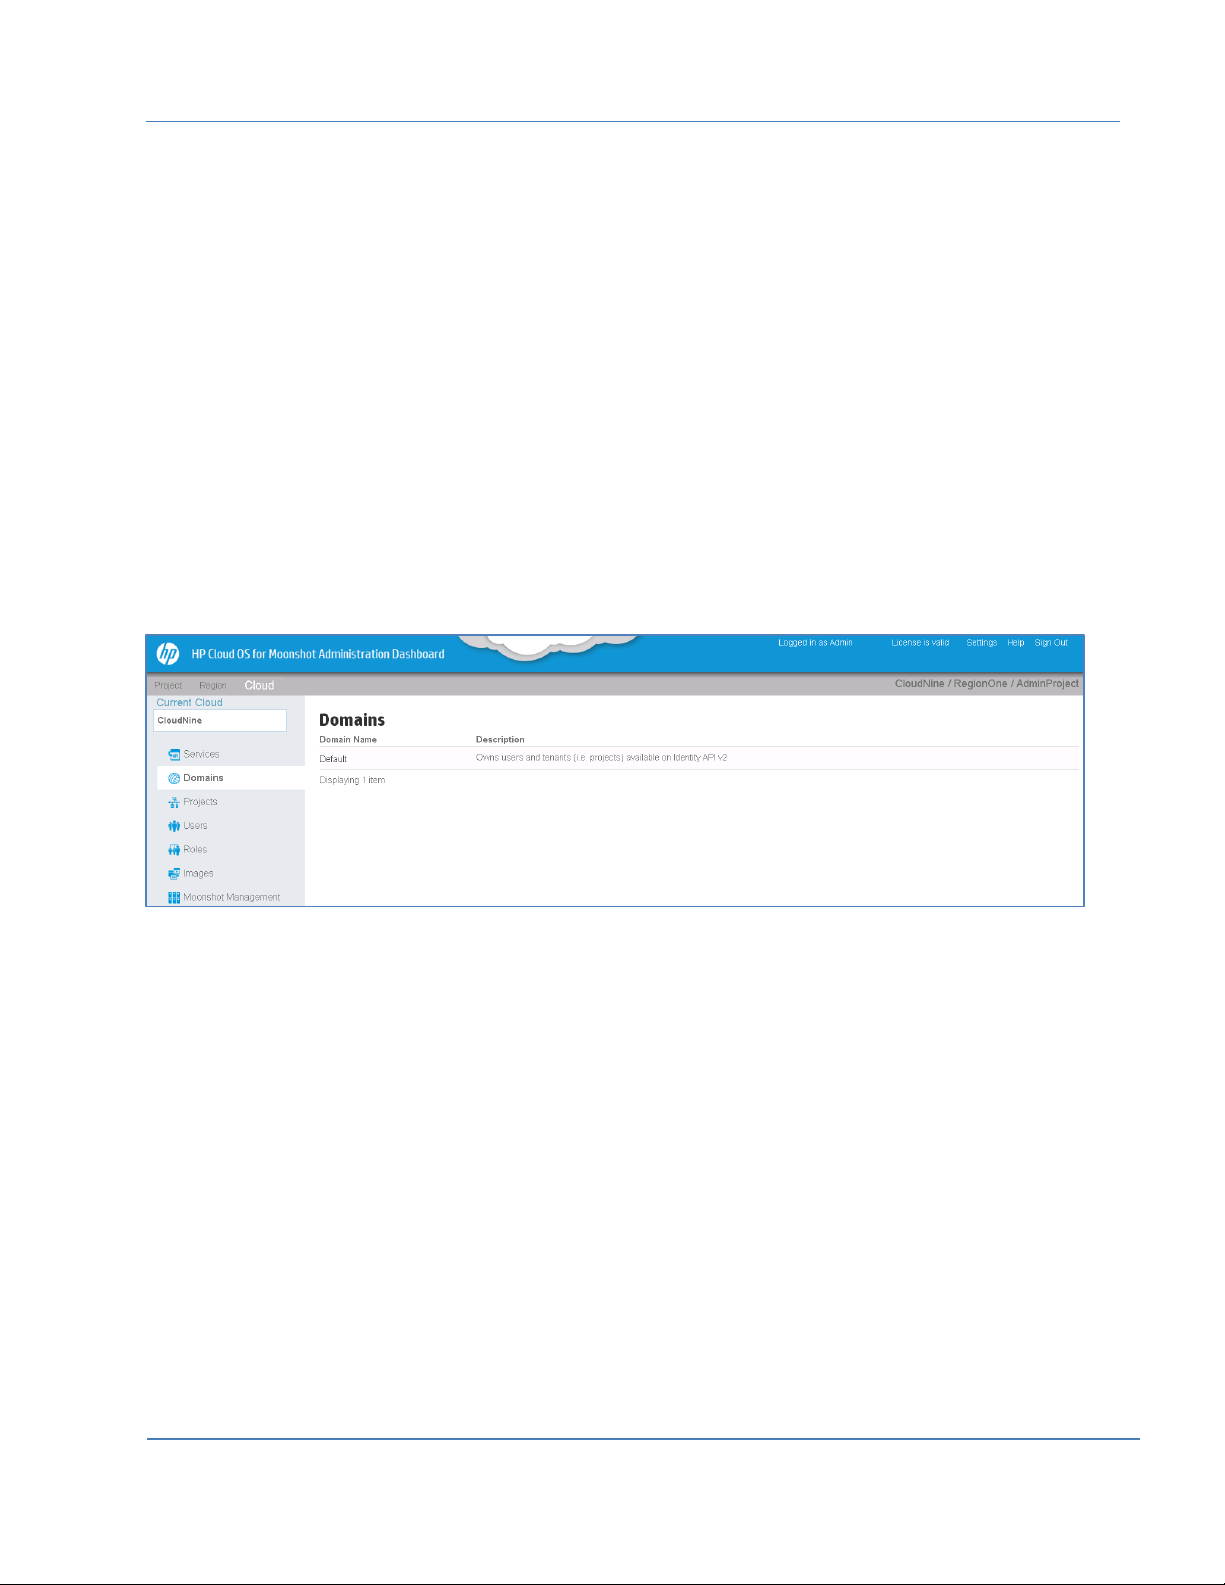
View Domain Details
The Domain option displays all the domain related details. Currently, only one domain is visible because
we are supporting a single domain. To view all the domain related details, do the following:
1. Click Cloud Tab to select it
2. From the options in the left panel, select Domains.
The domain is displayed in a table in the right pane.
3. Click Default to display a screen with the details of the Default domain.
Figure 4: Domains Page
Manage Projects
Project is a grouping that allows users within each group to view and use the same set of resources.
Projects protect topology templates, resources and infrastructure design from being visible to all users.
Only the Cloud Administrator can create projects. Using the Projects option the Cloud Administrator can
create new projects, assign users to the projects and define the compute limits for each project.
To view the list of projects, do the following:
1. Click the Cloud Tab to select it.
2. From the options in the left panel, select Projects.
The list of projects is displayed in a table in the right pane.
Page | 15
© Copyright 2014 Hewlett-Packard Development Company
Page 16
HP Cloud OS for Moonshot Administration Dashboard Help Version 1.0
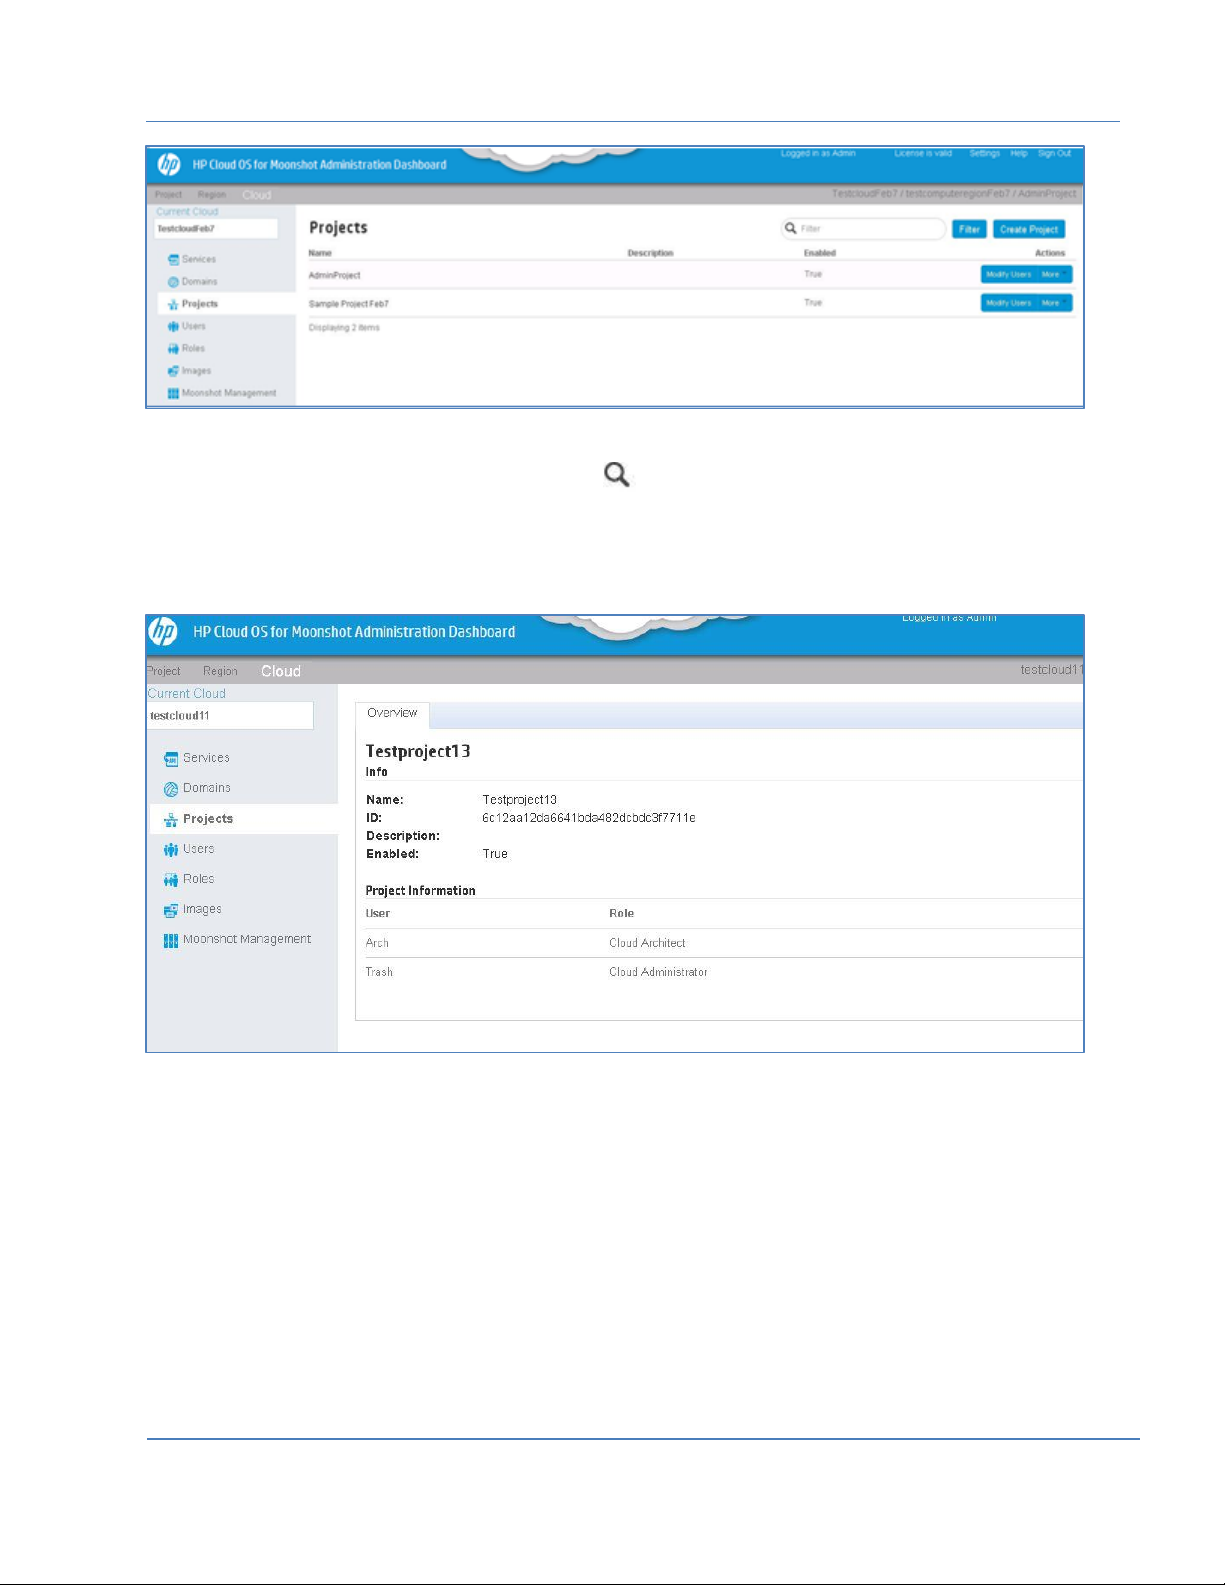
Figure 5: Cloud Projects Page
3. To view the details of a particular project, in the Filter box, enter few characters of the project
name.
The project details are displayed in the Projects page.
4. Click the Project Name to display an Overview screen with detailed project information. It displays the
information related to project name, ID, default users and their roles etc.
Figure 6: Project Overview Page
Create a Cloud Project
Use this option to create a new project, associate users to it, integrate applications and tools to it and
define limits for it.
To create a project, do the following:
1. Click the Cloud Tab to select it.
2. From the options in the left panel, select Projects to display the Projects page.
3. Click Create Project displayed on the top right in the right pane.
Create Project dialog box is displayed with four different tabs: Project Info, Project Members,
Integrations and Compute Limits. By default, Project Info is the active tab.
Page | 16
© Copyright 2014 Hewlett-Packard Development Company
Page 17

HP Cloud OS for Moonshot Administration Dashboard Help Version 1.0
Figure 7: Create a Project Dialog Box
4. In the Project Info Tab, do the following:
In the Name box, enter the name of the project.
In the Description box, enter the description for the project.
By default Enabled is selected.
This means that the project content is available to all the users assigned to it.
5. Click to activate the Project Members Tab.
It displays two columns Available Users and Project Members.
Do the following:
From Available Users column, select a user.
Click against a user to add the user to the Project Members column.
This adds the user to the project.
To add a role to the user, in the Project Members column, click to display the role list.
Select the role.
The user is assigned to the selected role in the project.
(Optional) Click against the project member to remove from the project.
Note: This is an optional step at the initial stage of project creation as no users are displayed, once you
create the users, they will be visible in the list of Available Users.
6. (Optional) In the Integrations Tab, do the following:
(Optional) Click to select it, if no default Resource Pool exists and you want to create one.
The Resource Pool is created as part of the project creation. A default resource pool is created
for each region in the domain.
Page | 17
© Copyright 2014 Hewlett-Packard Development Company
Page 18

HP Cloud OS for Moonshot Administration Dashboard Help Version 1.0
7. In the Compute Limits Tab, you can set the default limits for the compute resources in the project for
example: total CPUS’s, total instances that can be created, Keypairs etc. Do the following:
From the Region drop-down list, select the region.
By default, the current region is displayed.
In the RAM (MB), Keypairs, CPU Cores, Instances, Metadata Items boxes, default values are
displayed. You can make the changes as required.
8. Click Create Project.
A message is displayed on successful project creation. The project is displayed with a system
generated project ID.
Modify a Cloud Project
Use this option to make the changes to the project details.
To modify project details, do the following:
1. Click the Cloud Tab to select it.
2. From the options in the left panel, select Projects to display the Projects page with a list of projects.
3. Click More drop-down list against the project that you want to edit.
4. Select Edit Project.
The Edit Project dialog box is displayed with three tabs: Project Info, Project Members and
Compute Limits. By default, Project Info is the active tab.
Figure 8: Edit Project Dialog Box
5. Select each tab and make the required changes.
6. Click Save to save the changes.
Page | 18
© Copyright 2014 Hewlett-Packard Development Company
Page 19
HP Cloud OS for Moonshot Administration Dashboard Help Version 1.0
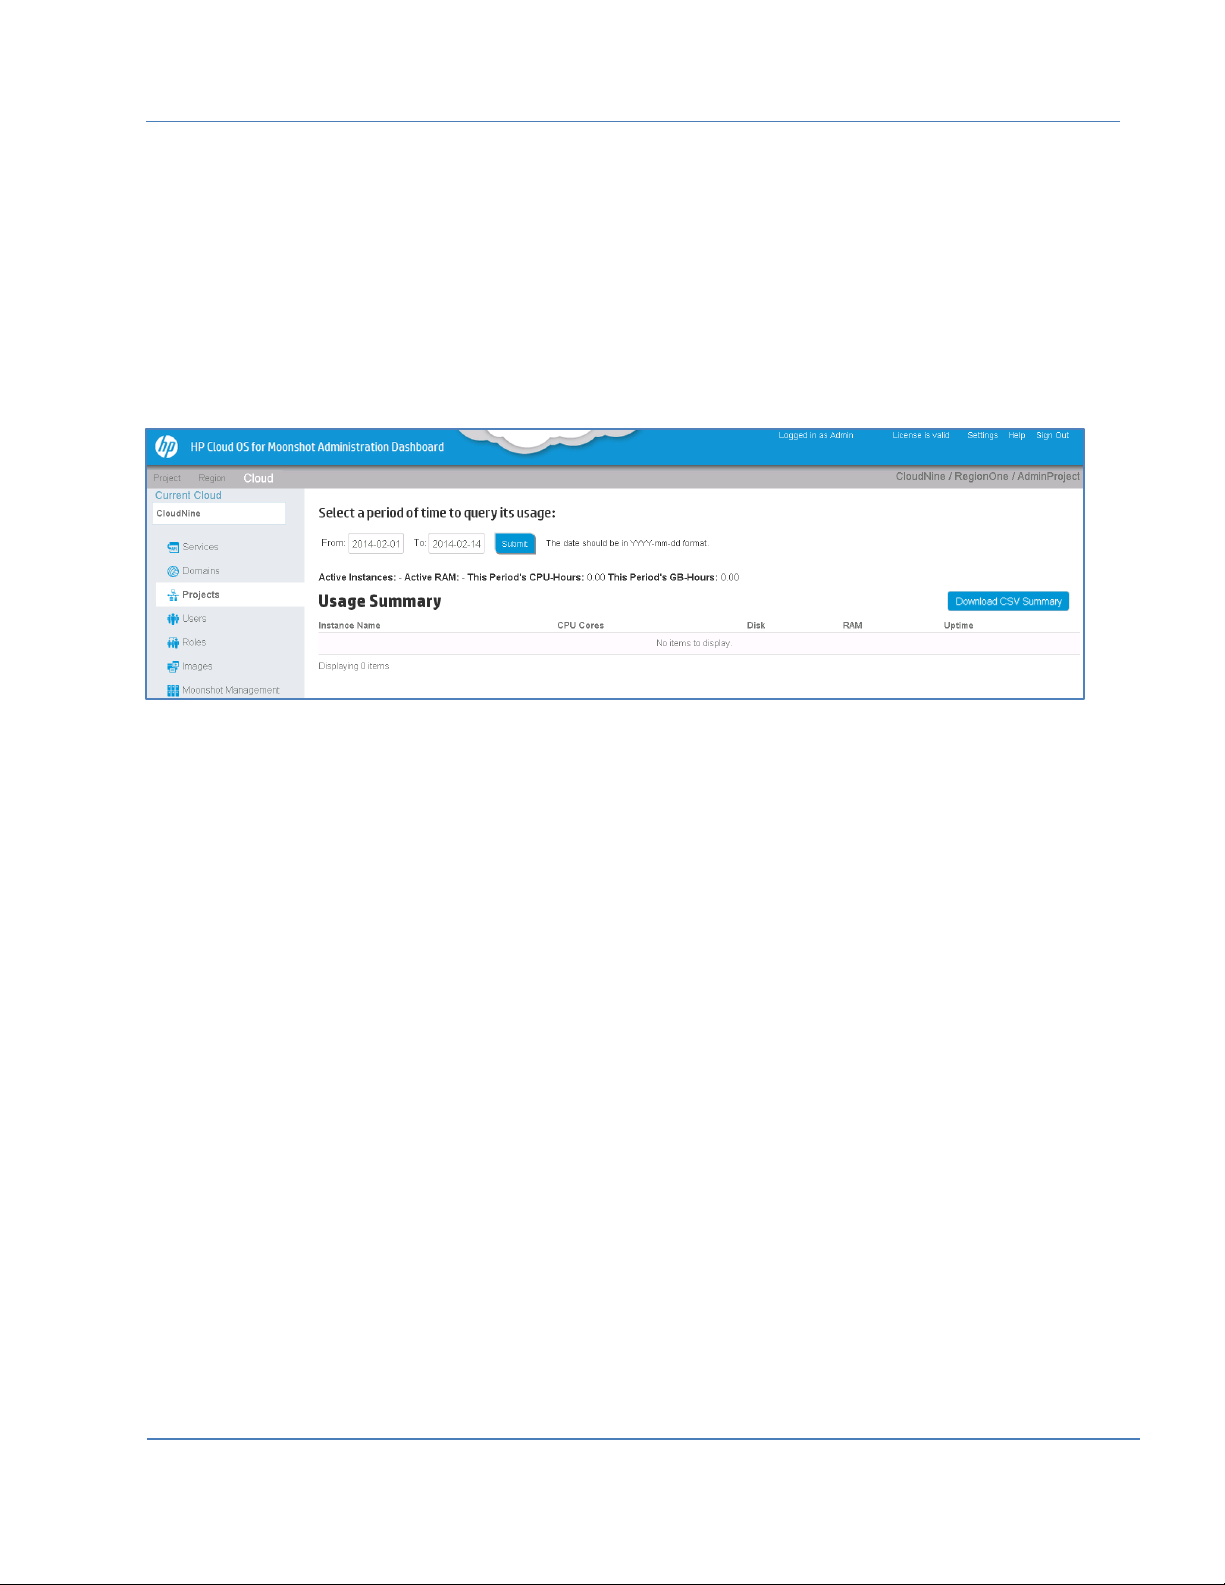
View Cloud Project Usage Summary
Use this option to view the usage summary in a project. The usage summary gives the details of the
resources being used in a particular project.
1. Click the Cloud Tab to select it.
2. From the options in the left panel, select Projects to display the Projects page with a list of projects.
3. Click More drop-down list against the project for which you want to view usage summary.
4. Select View Usage.
Project Usage Summary page is displayed with the details of the current month.
Figure 9: Project Usage Summary
5. To view the details of a different month, click From and To boxes to display a calendar.
6. Select dates and click Submit.
The details for the selected month are displayed.
7. Click Download CSV Summary to view a text file in Microsoft Excel with the details of the usage
summary.
Modify Compute Limits
This option allows you to edit the compute limits that are defined in your project. To modify limits, do the
following:
1. Click the Cloud Tab to select it.
2. From the options in the left panel, select Projects to display the Projects page with a list of projects.
3. Click More drop-down list against the project for which you want to edit the limits.
4. Select Modify Compute Limits to display the Edit Project dialog box.
By default, Compute Limits is the active tab.
Page | 19
© Copyright 2014 Hewlett-Packard Development Company
Page 20

HP Cloud OS for Moonshot Administration Dashboard Help Version 1.0
Figure 10: Modify Compute Limits Dialog Box
5. Make the required changes.
6. Click Save to apply the changes.
Add or Remove a Project User
You can add a new user to the project or remove an existing user from the project.
To add or remove a project user, do the following:
1. Click the Cloud Tab to select it.
2. From the options in the left panel, select Projects to display the Projects page with a list of projects.
3. Click Modify Users against the project for which you want to make changes.
The Edit Project dialog box is displayed with three tabs:- Project Info, Project Members and
Compute Limits. By default, Project Members is the active tab and displays two columns: Available
Users and Project Members.
Page | 20
© Copyright 2014 Hewlett-Packard Development Company
Page 21
HP Cloud OS for Moonshot Administration Dashboard Help Version 1.0
4. To add a user to the project from the Available Users column, click to add the user to the
Project Members column.
5. To remove the user, click against the user in the Project Members column to remove the user.
6. Click Save to save the details.
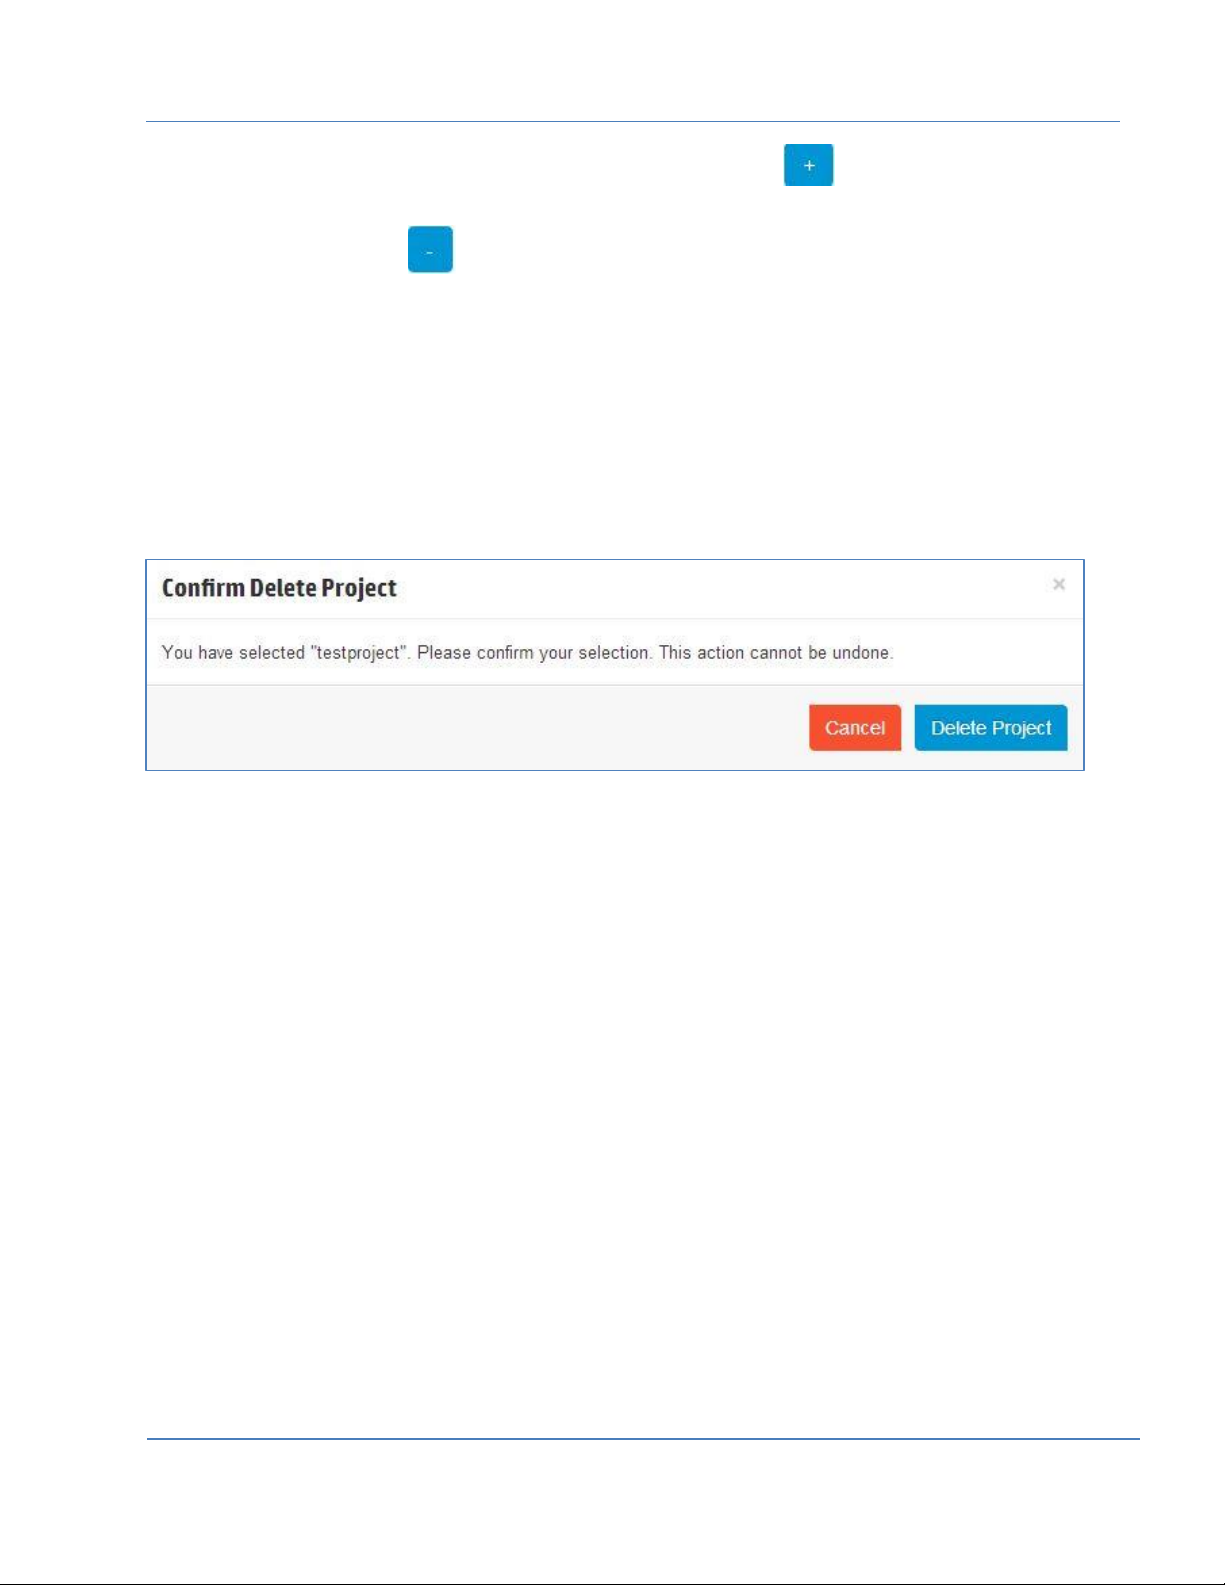
Delete a Cloud Project
To delete a project, do the following:
1. Click the Cloud Tab to select it.
2. From the options in the left panel, select Projects to display the Projects page with a list of projects.
3. Click More drop-down list against the project which you want to delete.
A confirmation dialog box is displayed.
Figure 11: Delete Project
4. Select Delete Project.
5. Click Delete Project to delete the project.
The project is marked for deletion and (~) is displayed against the project name.
Restore a Cloud Project
To restore a deleted project, do the following:
1. Click the Cloud Tab to select it.
2. From the options in the left panel, select Projects to display the Projects page with a list of projects.
3. Click Restore displayed against the project to restore.
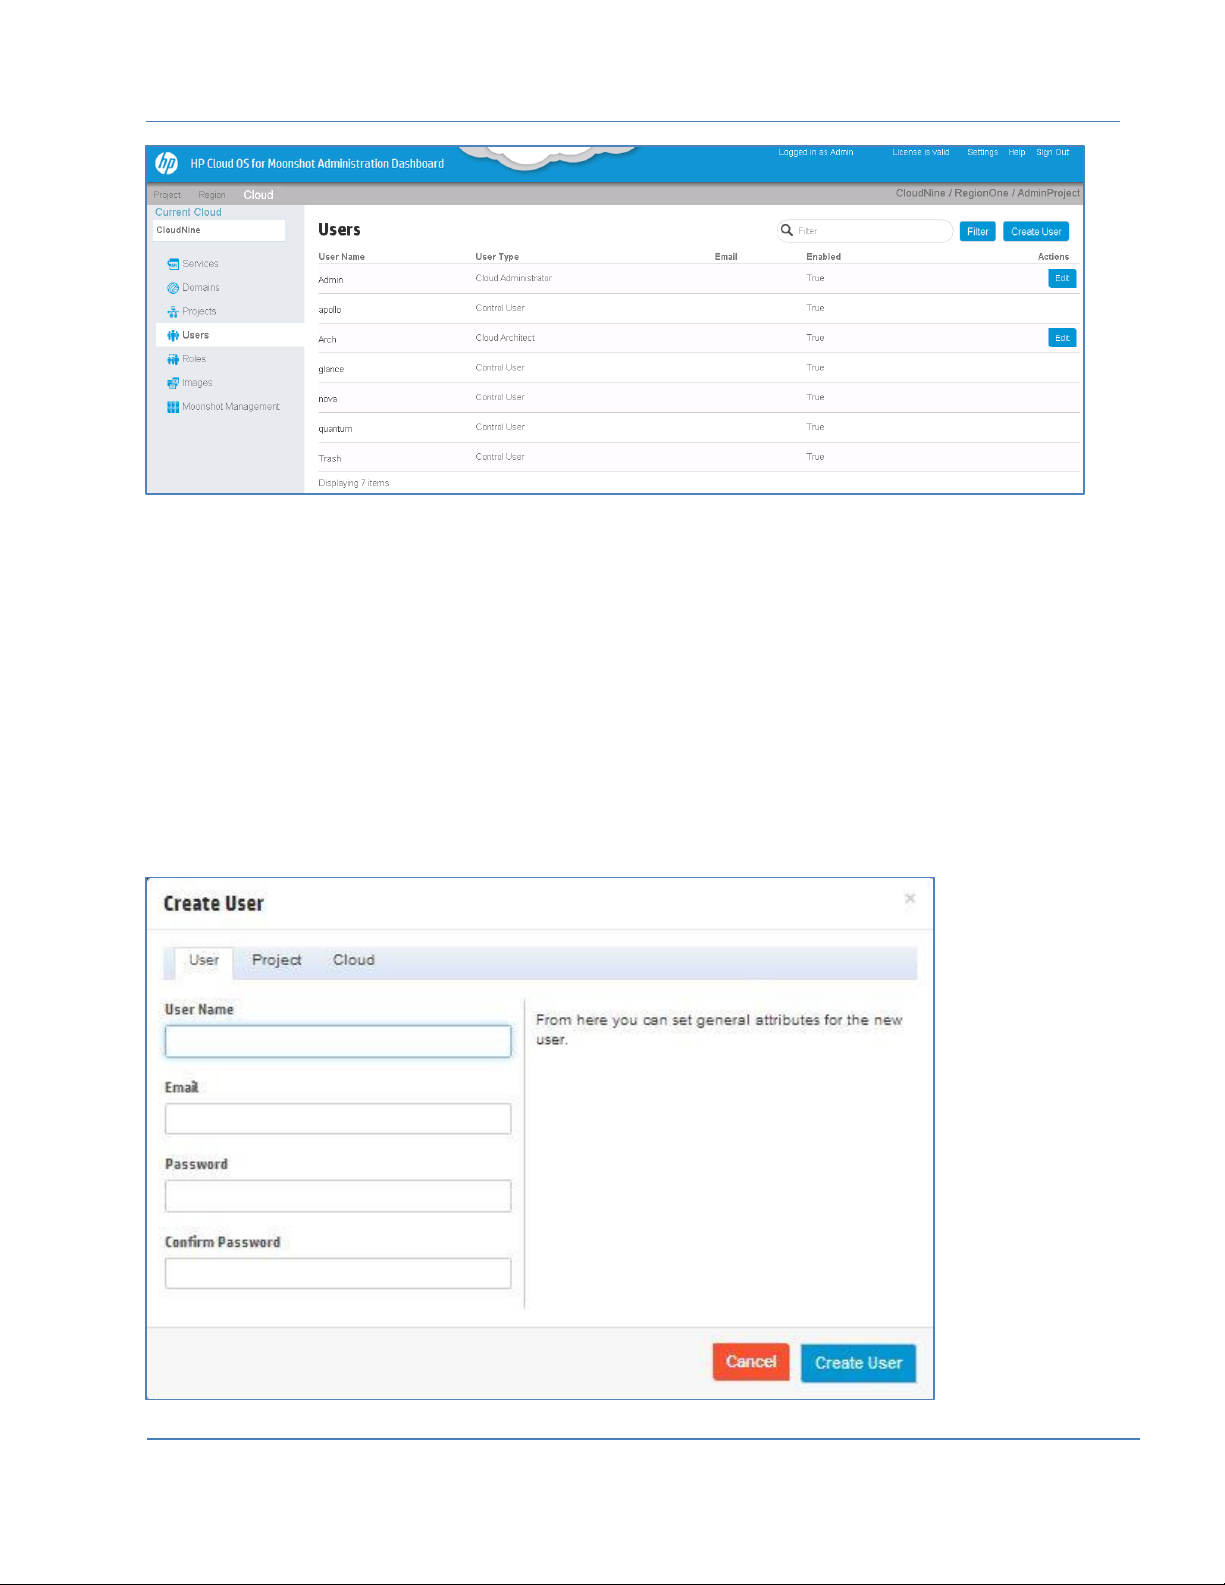
Manage Users
You can create different users and assign different roles and projects to them. To view the list of different
cloud users, do the following:
1. Click the Cloud Tab to select it.
2. From the options in the left panel, select Users to display the Users page with a list of users.
Page | 21
© Copyright 2014 Hewlett-Packard Development Company
Page 22
HP Cloud OS for Moonshot Administration Dashboard Help Version 1.0
Figure 12: Cloud Users Page
3. Click User Name to view the user details.
Create a Cloud User
Use this option to create a cloud user and set general attributes for the user. You can also assign a
project specific and cloud specific role to the user through this option.
To create a cloud user, do the following:
1. Click the Cloud Tab to select it.
2. From the options in the left panel, select Users to display the Users page.
3. Click Create User displayed on the top right corner in the right pane. Create User dialog box is
displayed with three different tabs: User, Project and Cloud. By default, User is the active tab.
Figure 13: Create User Dialog Box
Page | 22
© Copyright 2014 Hewlett-Packard Development Company
Page 23

HP Cloud OS for Moonshot Administration Dashboard Help Version 1.0
4. In the User Tab, do the following:
In the User Name box, enter the name of the user.
(Optional) In the Email box, enter the email-ID for the user.
In the Password box, enter the password.
In the Confirm Password box, re-enter the password to verify it.
5. In the Project Tab, do the following:
From Primary Project drop-down list, select the project to which you want to add the user.
From Project Role drop-down list, select the role to that you want to assign to the user.
Note: The role defined in the Project Tab is specific to the selected project.
6. (Optional) In the Cloud Tab, do the following:
From the Cloud Role drop-down list, select the cloud role for the user.
7. Click Create User to create the user.
A message is displayed on successful creation.
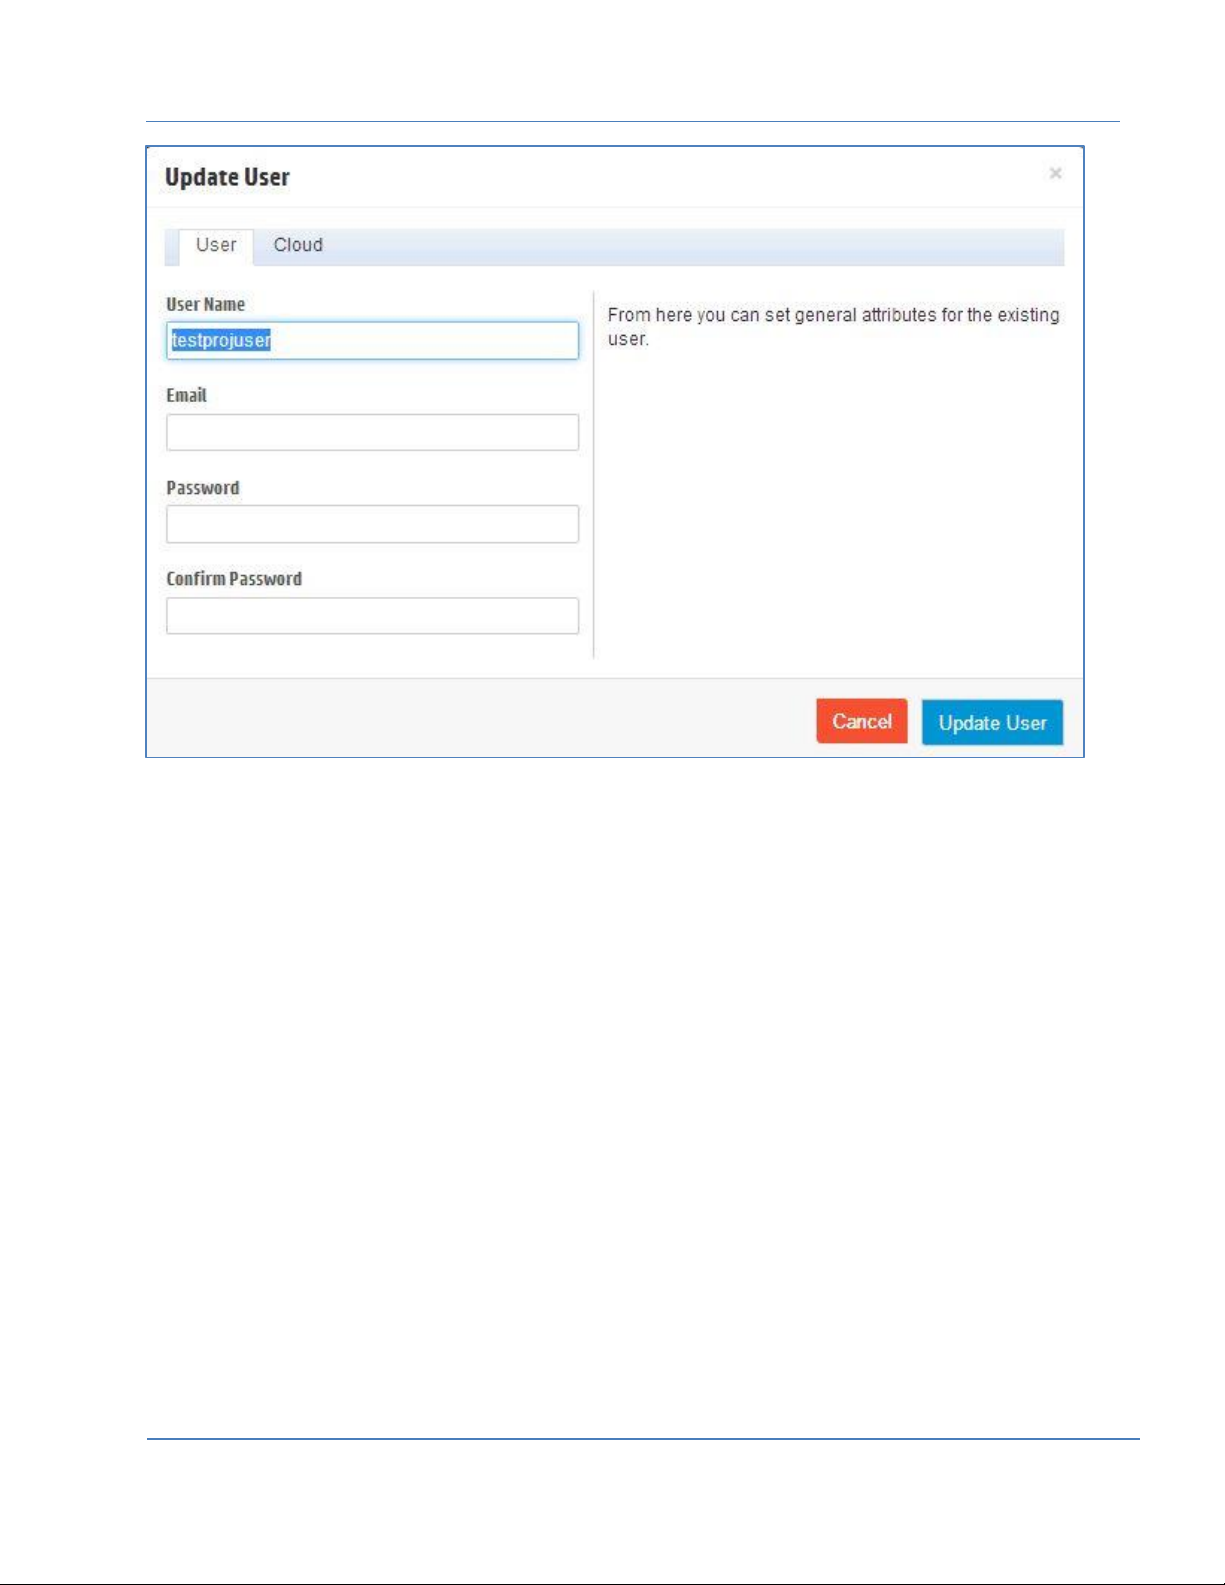
Edit a Cloud User
Use this option to edit the attributes of a cloud user. You can modify the User and Cloud related
information here and for modifying the project related attributes refer to Modify Users section. To modify
the user details, do the following:
1. Click the Cloud Tab to select it.
2. From the options in the left panel, select Users to display the Users page.
3. Click Edit against the user whom you want to edit.
Update User dialog box is displayed with only two tabs: User and Cloud.
Page | 23
© Copyright 2014 Hewlett-Packard Development Company
Page 24
HP Cloud OS for Moonshot Administration Dashboard Help Version 1.0
Figure 14: Edit User Dialog Box
4. Make the required changes.
5. Click Update User to save the details.
Disable a Cloud User
To disable the cloud user from logging in, do the following:
1. Click Cloud Tab to select it.
2. From the options in the left panel, select Users to display the Users page.
3. Click More drop-down list against the user whom you want to disable and select Disable User from
the drop-down list.
The user is disabled and the Enabled field status changes to False.
Enable a Cloud User
To enable the user again, select Enable User from the More drop-down list against the user.
The Enabled field status changes to True.
Delete a Cloud User
The delete option marks the user for deletion.
Do the following:
Page | 24
© Copyright 2014 Hewlett-Packard Development Company
Page 25
HP Cloud OS for Moonshot Administration Dashboard Help Version 1.0
1. Click the Cloud Tab to select it.
2. From the options in the left panel, select Users to display the Users page.
3. Click More drop-down list against the user whom you want to delete.
4. Select Delete User from the drop-down list.
A confirmation box is displayed.
5. Click Delete User. The user is marked for deletion by adding a tilde mark (~) against it.
Restore a Cloud User
To restore a deleted user, do the following:
1. Click the Cloud Tab to select it.
2. From the options in the left panel, select Users to display the Users page.
3. Click Restore User against the user whom you want to restore.
A confirmation box is displayed.
4. Click Restore. A message is displayed on successful restoration.
Once the user is restored, you need to manually assign the user to the previously assigned project.
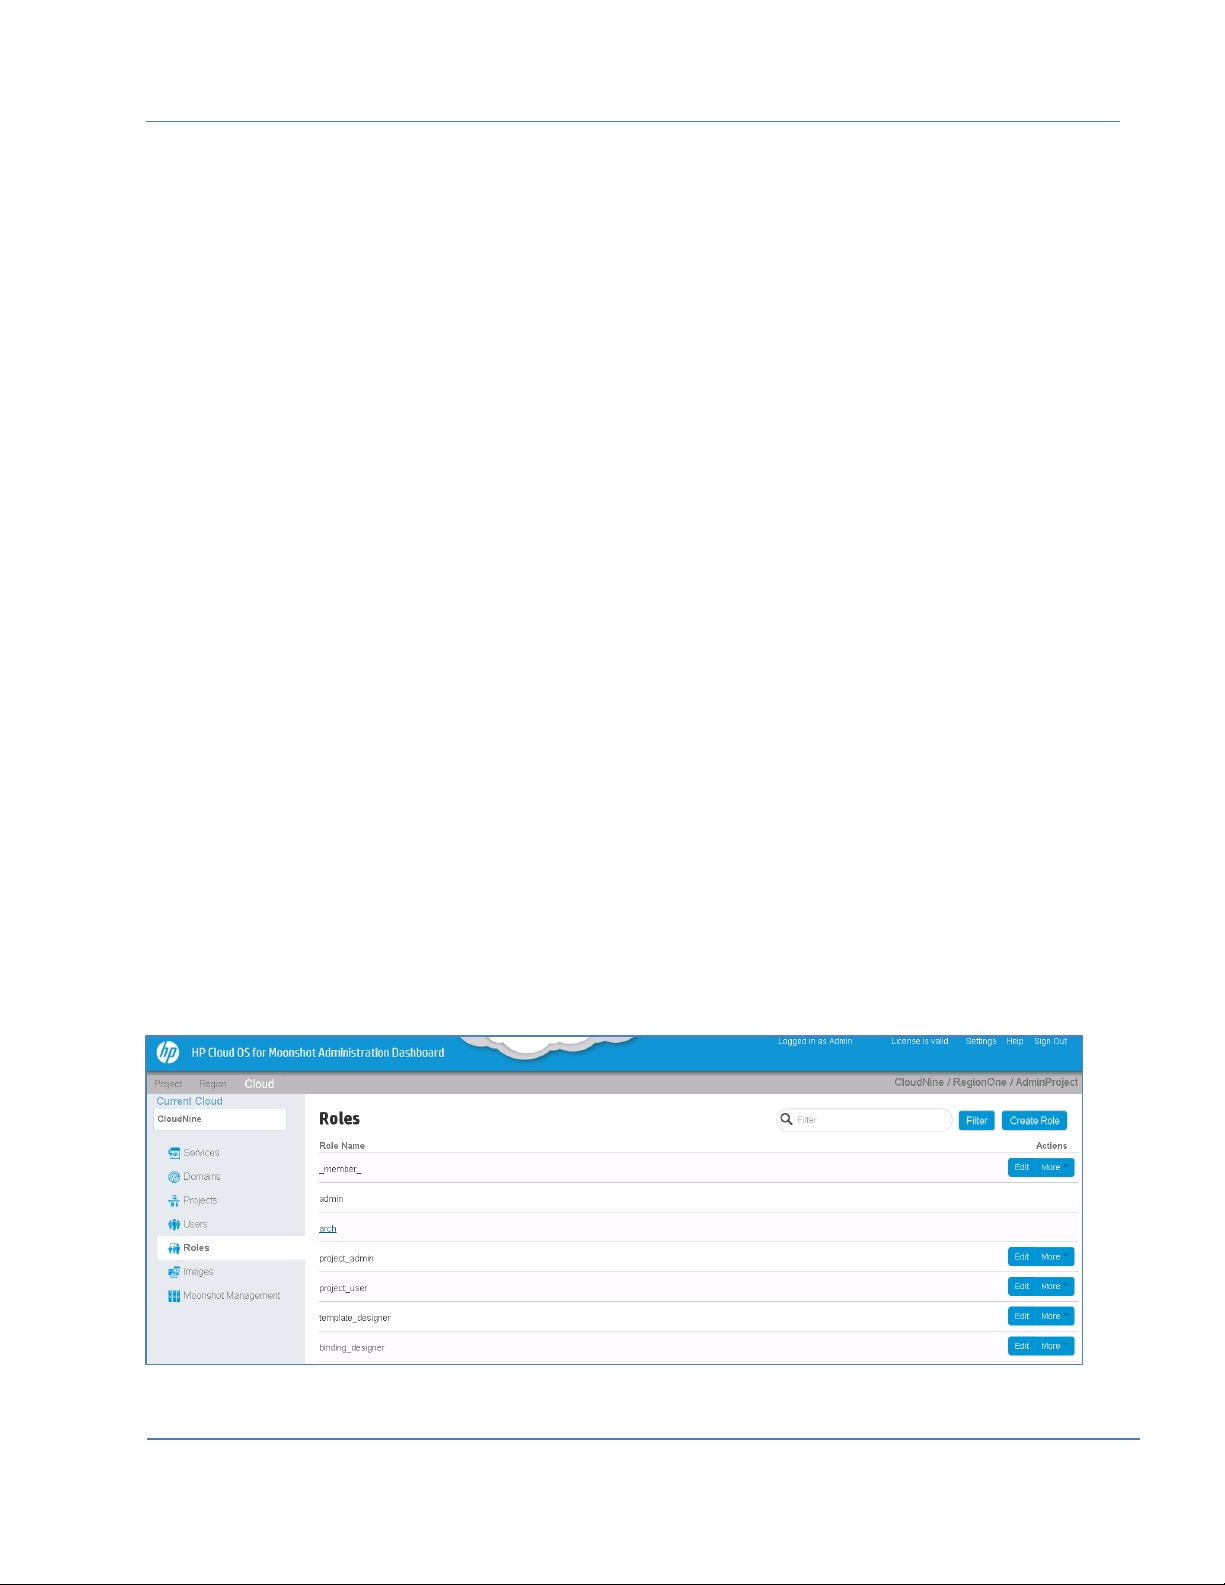
Manage Roles
Each role has different privileges assigned to it. Based on the privileges, the users can access the project
resources.
HP Cloud OS for Moonshot has defined several roles/personas that represent users with different
responsibilities within the cloud. These roles manage resources within the cloud within their respective
realms.
Use this option to assign privileges to different users.
To view the list of roles, do the following:
1. Click the Cloud Tab to select it.
2. From the options in the left panel, select Roles to display the Roles page with a list of roles.
Figure 15: Cloud Roles Option
Page | 25
© Copyright 2014 Hewlett-Packard Development Company
Page 26
HP Cloud OS for Moonshot Administration Dashboard Help Version 1.0
3. Click Role Name to view all the related details of the selected role.
Create a Cloud Role
To create a cloud role, do the following:
1. Click the Cloud Tab to select it.
2. From the options in the left panel, select Roles to display the Roles page.
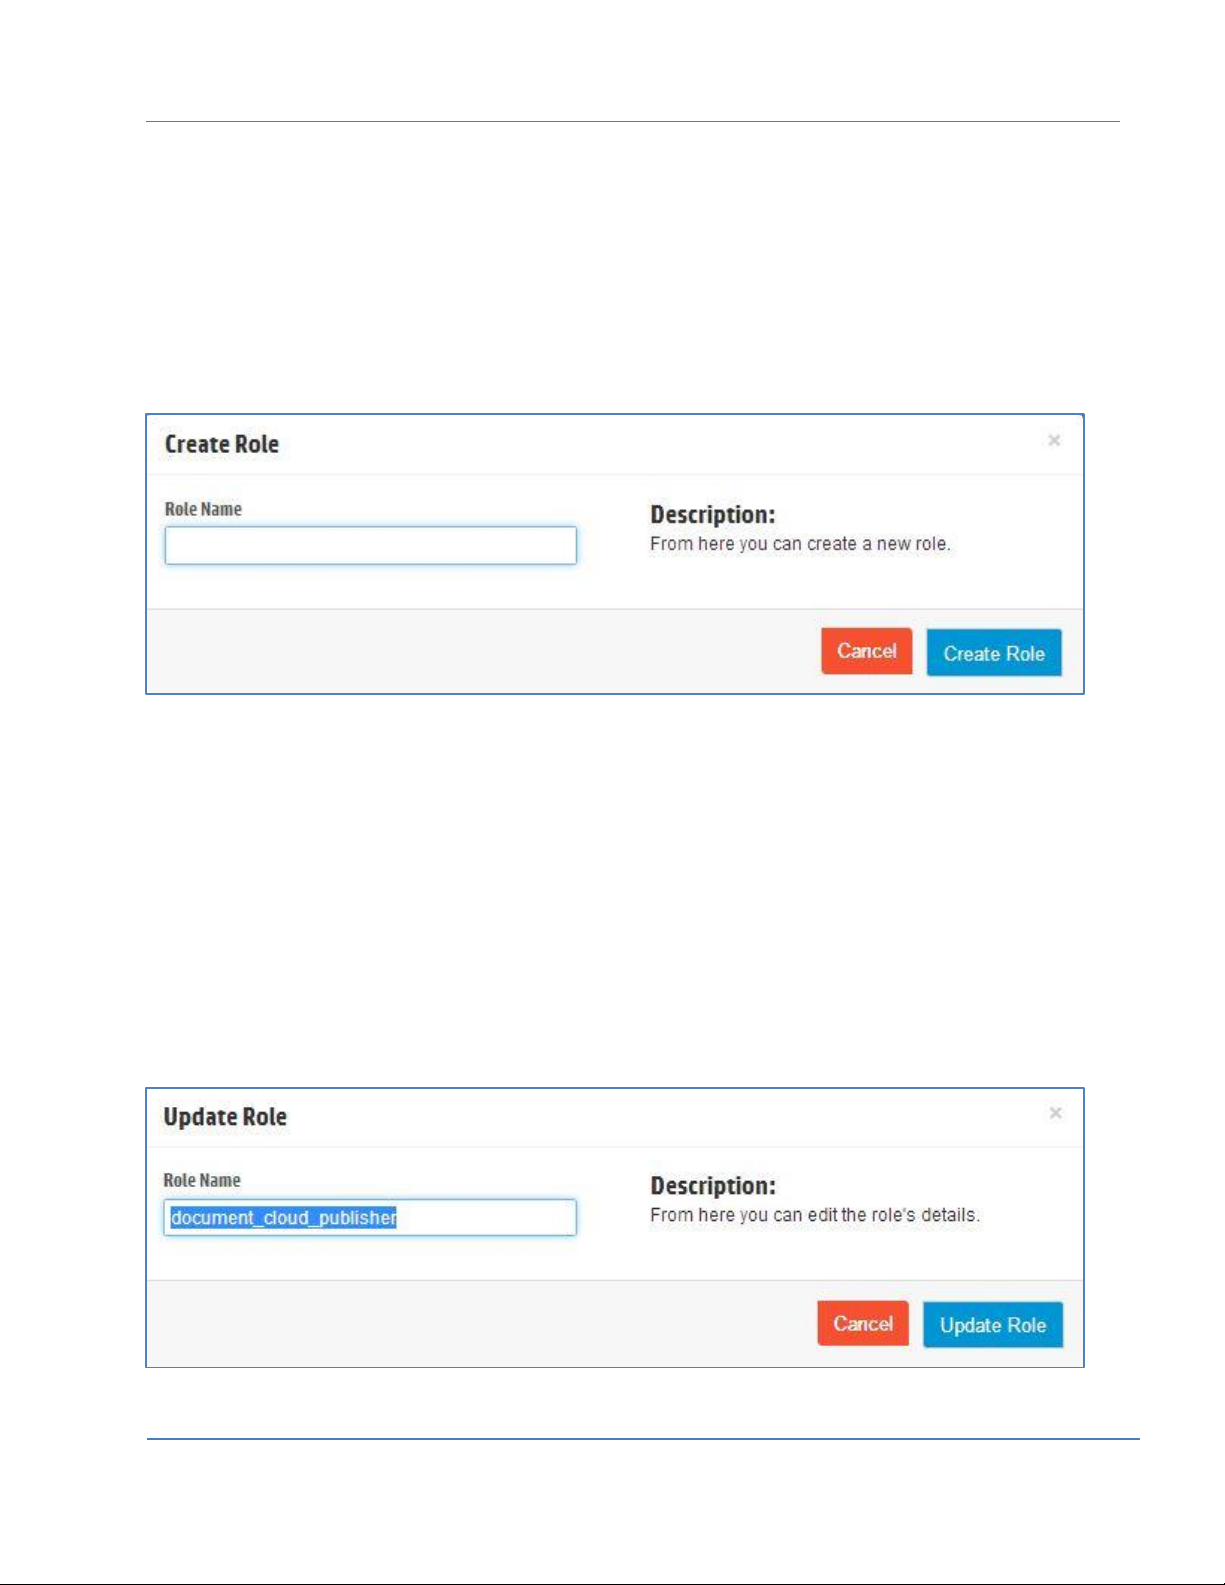
3. Click Create Role displayed on the top right corner in the right pane.
Create Role dialog box is displayed.
Figure 16: Create Role Dialog Box
4. In the Role Name box, enter the name of the role.
5. Click Create Role to create a new role.
The role is added to the role list and is displayed in the alphabetical order.
Edit a Cloud Role
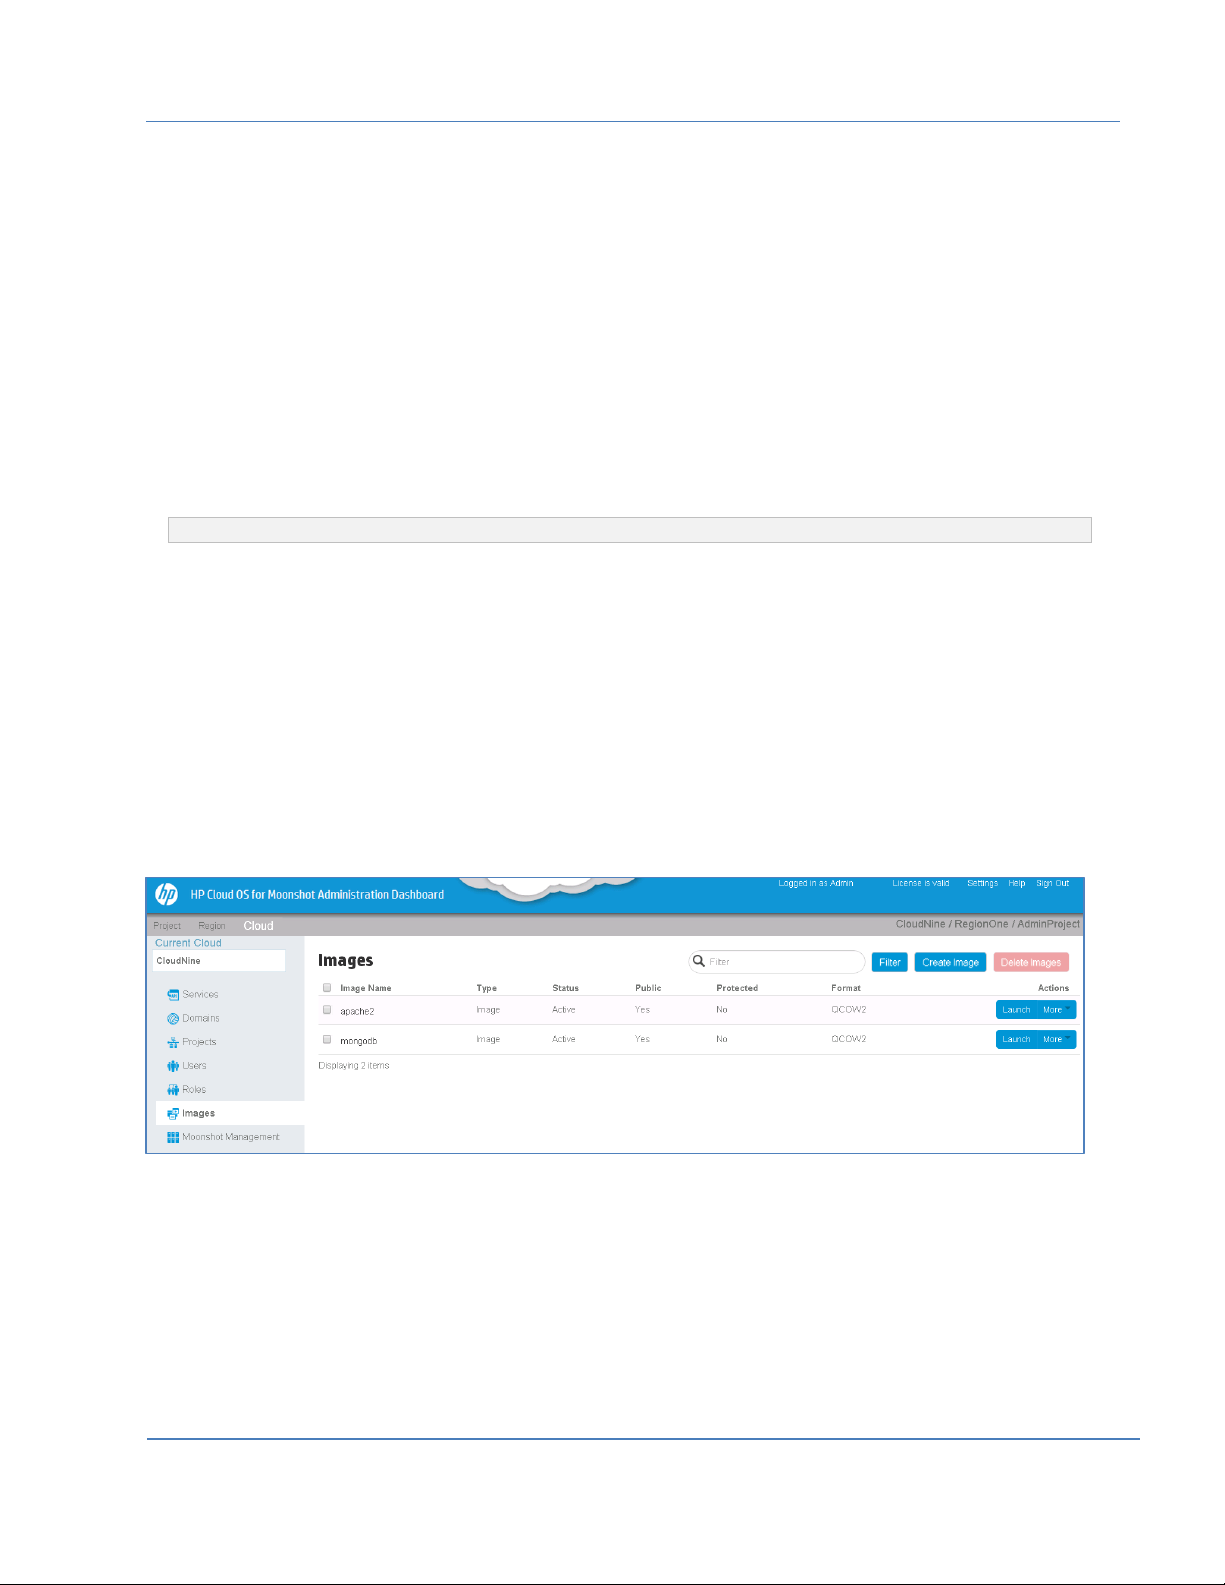
Use this option to modify the role. You can only edit the role name.
To edit a cloud role, do the following:
1. Click the Cloud Tab to select it.
2. From the options in the left panel, select Roles to display the Roles page.
3. Click Edit against the role that you want to modify to display Update Role dialog box.
Figure 17: Edit Role Dialog Box
Page | 26
© Copyright 2014 Hewlett-Packard Development Company
Page 27
HP Cloud OS for Moonshot Administration Dashboard Help Version 1.0
4. Make the required changes.
5. Click Update Role to update the changes.
Delete a Cloud Role
To delete a cloud role, do the following:
1. Click the Cloud Tab to select it.
2. From the options in the left panel, select Roles to display the Roles page.
3. Click More drop-down list against the role that you want to delete.
4. Select Delete Role to display a confirmation box.
5. Click Delete Role to delete the role.
The role is deleted from the role list.
Note: You cannot delete the Admin and Arch roles.
Manage Images
Cloud Administrator can create, modify and publish cloud images. The scope of an image can be set
within a cloud or within a region. The image is required for installing an Operating System in an instance.
To create images, refer to the Cloud Image Builder document for more details.
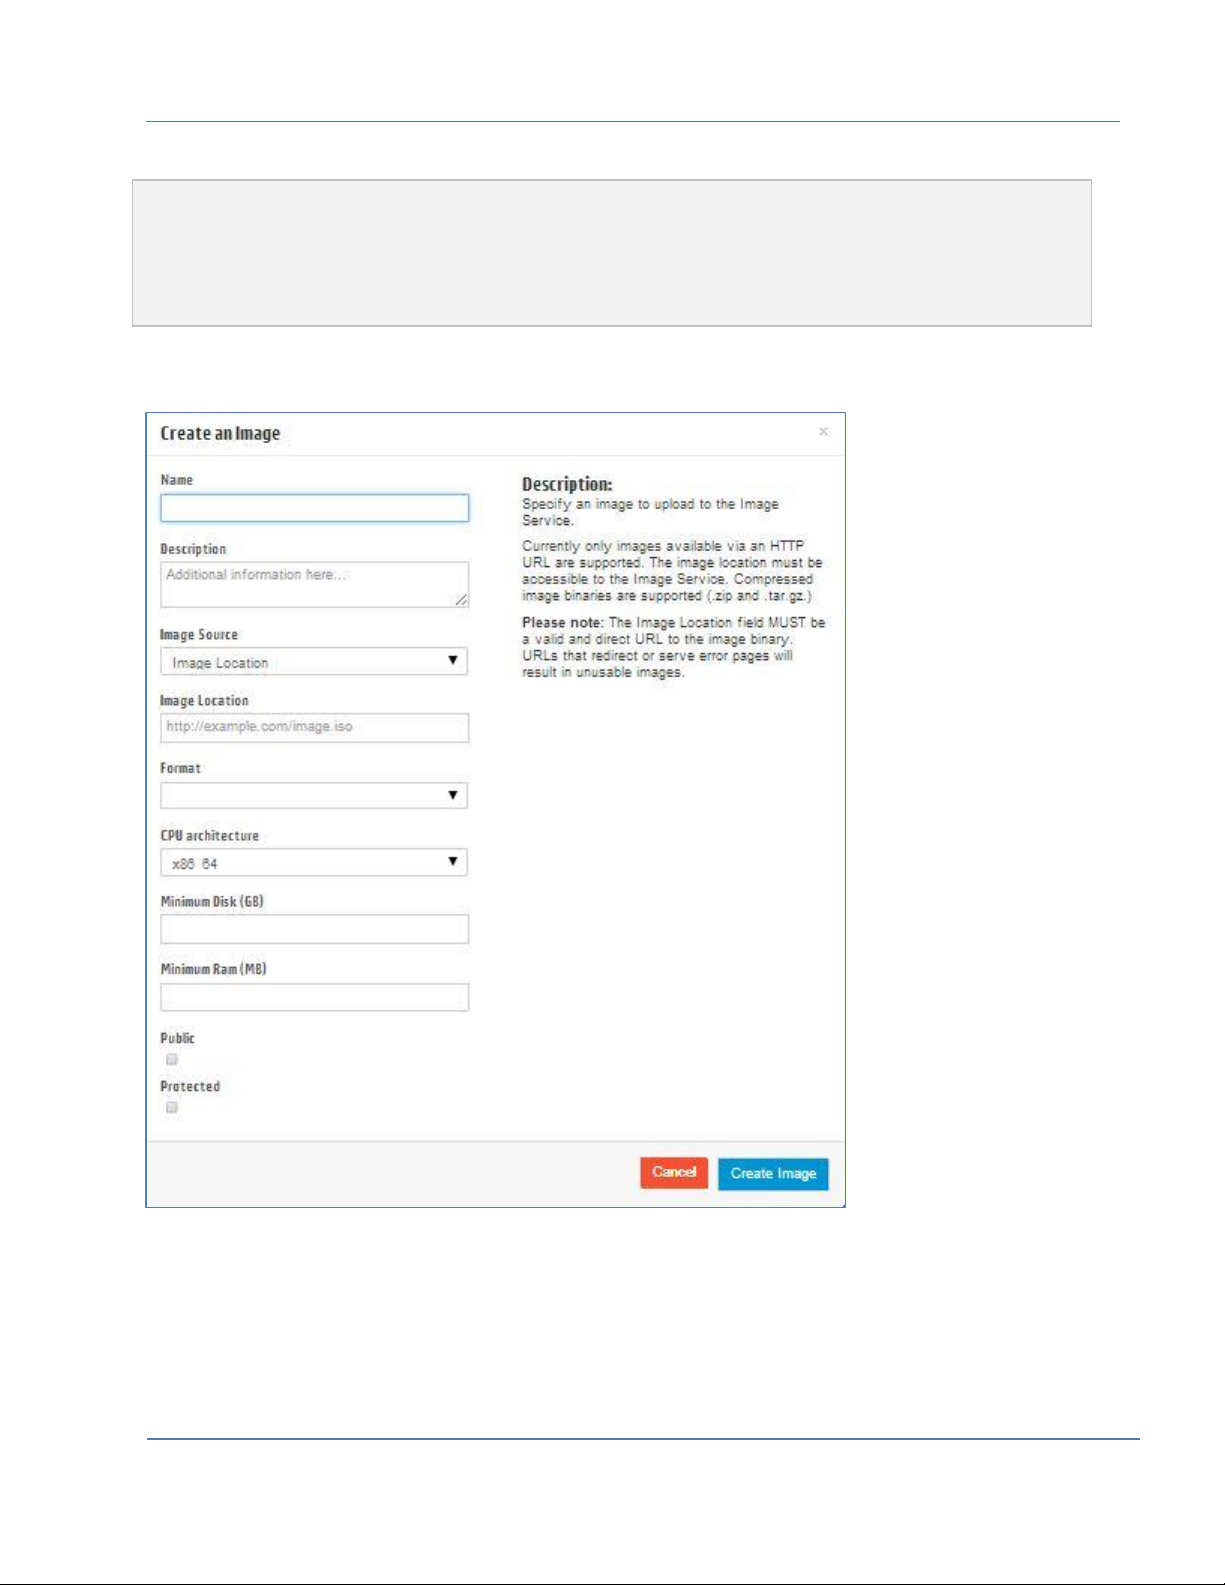
To view the list of cloud images, do the following:
1. Click the Cloud Tab to select it.
2. From the options in the left panel, select Images to display the Images page with a list of images.
Figure 18: Cloud Images Option
3. Click Image Name to view the image details and specifications.
Create a Cloud Image
To create cloud images, do the following:
1. Click the Cloud Tab to select it.
2. From the options in the left panel, select Images to open the Images page.
Page | 27
© Copyright 2014 Hewlett-Packard Development Company
Page 28
HP Cloud OS for Moonshot Administration Dashboard Help Version 1.0
Note:
It is mandatory to create image types such as QCOW2 and AMI with associated Amazon Kernel Image (AKI) and
Amazon RAMdisk Image (ARI). It is suggested to create the images in the following sequence: Amazon Kernel
Image (AKI), Amazon RAMdisk Image (ARI) and QCOW2.
The Kernel Image drop-down list and RAM Disk Image drop-down list is displayed when the selected format is
QCOW2 or AMI.
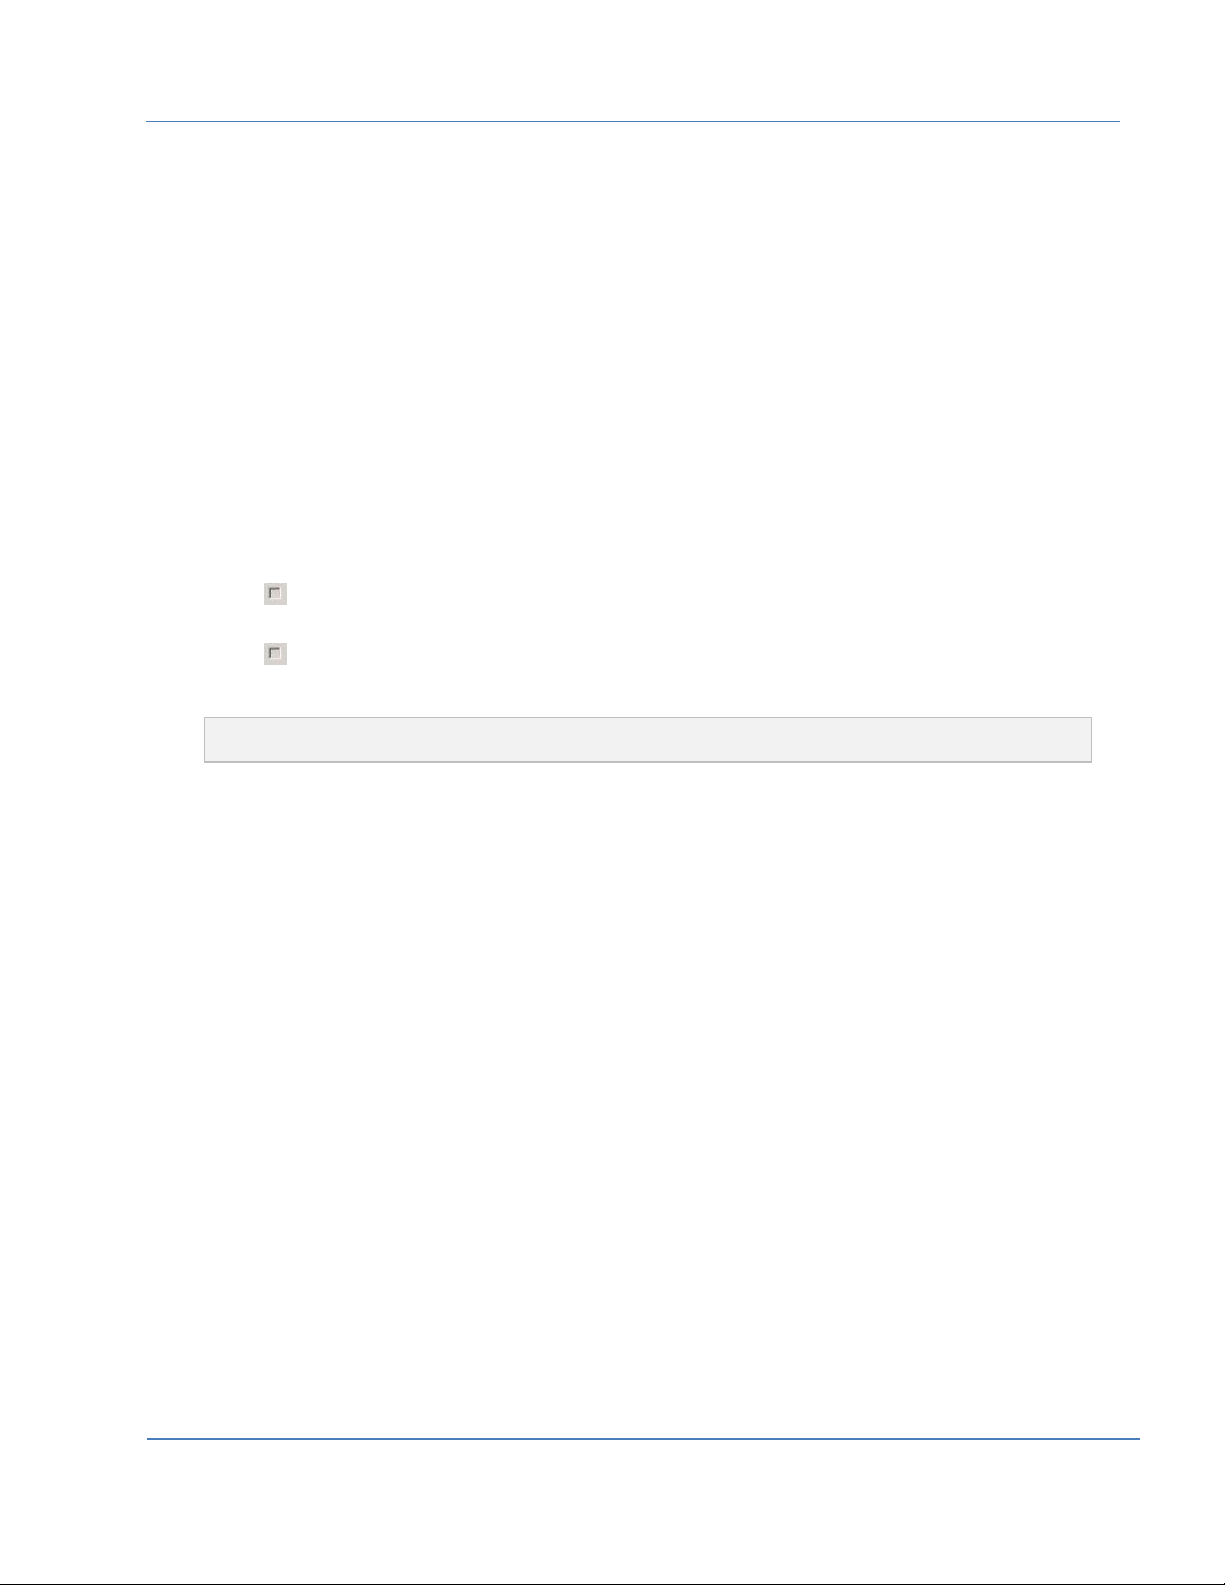
To create AKI images, do the following:
Click Create Image to open a Create an Image dialog box.
Figure 19: Create Image Dialog Box
In the Name box, enter a name for the image.
(Optional) In the Description box, enter description for the image.
From the Format drop-down list, select the format as AKI.
From the Image Source drop-down list, do either of the following:
Page | 28
© Copyright 2014 Hewlett-Packard Development Company
Page 29
HP Cloud OS for Moonshot Administration Dashboard Help Version 1.0
Select Image location from the drop-down list.
The Image Location box is displayed.
In the Image Location box, enter the HTTP URL to load the AKI image from.
OR
Select Image File from the drop-down-list.
The Choose File option is displayed.
Click Choose File to browse the AKI image.
Select the AKI Image to upload.
The CPU Architecture drop-down list displays x86_64 by default.
The moonshot hardware supports the above specification.
In the Minimum Disk box, specify a minimum size required to boot image.
If no input is entered, the minimum value defaults to 0.
In the Minimum Ram box, specify a minimum size required to boot image.
If no input is entered, the minimum value defaults to 0.
Click against Public to select it.
This will make the image visible to all users.
Click against Protected to select it.This makes the image as editable but cannot be deleted.
Click Create Image. A message is displayed on successful creation.
Note: ARI and AKI images are only listed in the Region Tab. Cloud and Project Tabs display images from
which an instance can be launched such as QCOW2, AMI etc.
To create the ARI image, do the following:
Click Create Image to open a Create an Image dialog box.
In the Name box, enter a name for the image.
From the Format drop-down list, select the format as ARI.
From the Image Source drop-down list, do either of the following:
Select Image location from the drop-down list.
The Image Location box is displayed.
In the Image Location box, enter the HTTP URL to load the ARI image from.
OR
Select Image File from the drop-down-list.
The Choose File option is displayed.
Click Choose File to browse the ARI image.
Select the ARI Image to upload.
The CPU Architecture drop-down list displays x86_64 by default.
The moonshot hardware supports the above specification.
In the Minimum Disk box, specify a minimum size required to boot image.
If no input is entered, the minimum value defaults to 0.
In the Minimum Ram box, specify a minimum size required to boot image.
If no input is entered, the minimum value defaults to 0.
Page | 29
© Copyright 2014 Hewlett-Packard Development Company
Page 30
HP Cloud OS for Moonshot Administration Dashboard Help Version 1.0
Click against Public to select it.
This will make the image visible to all users.
Click against Protected to select it.
This makes the image as editable but cannot be deleted.
Click Create Image.
A message is displayed on successful creation.
Note: ARI and AKI images are only listed in the Region Tab. Cloud and Project Tabs display images from
which an instance can be launched such as QCOW2, AMI etc.
To create QCOW2, do the following:
Click Create Image to open a Create an Image dialog box.
In the Name box, enter a name for the image.
From the Format drop-down list, select the format as QCOW2-QEMU Emulator.
From the Image Source drop-down list, do either of the following:
Select Image location from the drop-down list.
The Image Location box is displayed.
In the Image Location box, enter the HTTP URL to load the QCOW2 image from.
OR
Select Image File from the drop-down-list.
The Choose File option is displayed.
Click Choose File to browse the QCOW2 image.
Select the QCOW2 Image to upload.
The CPU Architecture drop-down list displays x86_64 by default.
The moonshot hardware supports the above specification.
In the Minimum Disk box, specify a minimum size required to boot image.
If no input is entered, the minimum value defaults to 0.
In the Minimum Ram box, specify a minimum size required to boot image.
If no input is entered, the minimum value defaults to 0.
Click against Public to select it.
This will make the image visible to all users.
Click against Protected to select it.
This makes the image as editable but cannot be deleted.
From the Kernel Image drop-down list, select the corresponding kernel image.
From the RAM Disk Image drop-down list, select the corresponding RAM disk image.
Click Create Image. A message is displayed on successful creation. The image displays in the
table in the Images page.
Note:
* Do not navigate from the page while the image is being created.
* Use different names while creating images.
Page | 30
© Copyright 2014 Hewlett-Packard Development Company
Page 31

HP Cloud OS for Moonshot Administration Dashboard Help Version 1.0
Edit a Cloud Image
To edit an image, do the following:
1. Click the Cloud Tab to select it.
2. From the options in the left panel, select Images to open the Images page.
3. Click More drop-down list displayed against the image that you wish to edit and select Edit Image.
The Edit Image dialog box is displayed.
Figure 20: Edit Image Dialog Box
4. Make the required changes.
5. Click Update Image to update the changes.
Delete a Cloud Image
1. Click the Cloud Tab to activate it.
The tab displays options in the left panel.
2. From the left panel, select Images to display the Images page.
3. Click More drop-down list displayed against the image that you wish to delete and select Delete
Image.
A message is displayed to ask your confirmation. The image is deleted once your confirmation is
received.
Page | 31
© Copyright 2014 Hewlett-Packard Development Company
Page 32

HP Cloud OS for Moonshot Administration Dashboard Help Version 1.0
To delete a group of images, click to select the image/images that you want to delete and
click Delete Images.
The images are deleted and removed from the image list.
Launch a Cloud Image
To launch an image in the Administration Dashboard, do the following:
1. Click the Cloud Tab to select it.
2. From the options in the left panel, select Images to display the Images page.
3. Select Launch against the image listed in the table.
A Launch Instance dialog box displays with four tabs: Details Tab, Access & Security Tab,
Networking Tab and Post-Creation Tab. By default, Details is the active tab.
Figure 21: Launch Image Dialog Box
4. On the Details Tab, do the following:
From the Instance Source drop-down list, select the image.
From the Image drop-down list, select the value.
In the Instance Name box, enter a name for the instance.
Page | 32
© Copyright 2014 Hewlett-Packard Development Company
Page 33

HP Cloud OS for Moonshot Administration Dashboard Help Version 1.0
From the Flavor drop-down list, select the Baremetal flavor.
This is default flavor that is created.
In the Instance Count box, enter 1 or more than 1.
The flavor details are displayed on the right side of the dialog box.
5. On the Access and Security Tab, do the following:
From the Keypair drop-down list, select value from the list.
6. On the Networking Tab, no networks are listed in the Selected Networks section.
Select the network from the Available networks section.
7. Click Launch.
You are taken to the Instances page with the progress bar displaying the completion progress.
Manage Moonshot Chassis
This section helps you to add HP Moonshot servers to the Cloud. It allows you to manage Moonshot
Chassis by using add, edit and delete options. You can view the details and overall health status of the
chassis using Datacenter View or Single Chassis View. Events panel provides the information about
chassis related events.
Note: This function can be performed by the Cloud Administrator or any member who is part of the Cloud
Administrator group.
To access Moonshot Management option, do the following:
1. Select the Cloud Tab to select it.
2. From the options in the left panel, select Moonshot Management to display the Datacenter View
page.
This option enables two views- Datacenter View and Single Chassis View.
Page | 33
© Copyright 2014 Hewlett-Packard Development Company
Page 34

HP Cloud OS for Moonshot Administration Dashboard Help Version 1.0
Datacenter View
This view provides an overview of the chassis that are managed in a Datacenter. It displays Add, Edit
and Delete options at the top and Events Log panel on the right. The Datacenter View has two
representations – Grid View and Table View which can be accessed using and icons.
Figure 22: Datacenter –Grid View
Click or to toggle between the Grid and Table Views.
By default, the chassis information is displayed in the Grid view of the Datacenter view.
Double-click the Chassis to go to the Single Chassis View.
Table View
The Table View displays the chassis details in a tabular format.
Click displayed at the top right corner of the Datacenter View.
The following chassis details are displayed in the table.
Display Name
Chassis Name
Chassis ID
Product ID
MAC Address
IP Address
Refresh Status
Status
Page | 34
© Copyright 2014 Hewlett-Packard Development Company
Page 35

HP Cloud OS for Moonshot Administration Dashboard Help Version 1.0
Figure 23: Table View
Add a Chassis
1. Click to display the Enter Chassis Details dialog box.
Figure 24: Add Chassis
Page | 35
© Copyright 2014 Hewlett-Packard Development Company
Page 36

HP Cloud OS for Moonshot Administration Dashboard Help Version 1.0
2. In the Display Name box, enter the display name of the chassis.
The name should have a minimum of 4 characters. The name should start with an alphabet and may
be followed by numbers or an underscore (_).
Note: Special characters and spaces are not allowed.
3. In the Chassis Manager IP Address box, enter the IP address of the Moonshot Chassis.
4. In the Chassis Manager User Name box, enter the user name.
5. In the Chassis Manager Password box, enter the password.
6. In the Managing Hostname box, enter the FQDN of the Baremetal host that will manage the chassis.
For example: hostname.cloudos.local
7. Click Add to add the Moonshot Chassis to the Cloud.
The chassis can be in any of the following states:
Discovering – When the chassis is being discovered
Warning - When a few of the cartridges are not in good condition
Failed – When the discovery process fails
Optimal- When the chassis is discovered and is in good state
Once the operation is successful, the Moonshot Chassis is graphically represented on the screen.
Edit Chassis
You can only edit the password of the chassis.
1. In the Datacenter View, select the chassis to edit.
The Edit option does not get activated until you select the chassis in the Grid or Table view.
2. Click to display the Edit Chassis Details dialog box.
Page | 36
© Copyright 2014 Hewlett-Packard Development Company
Page 37

HP Cloud OS for Moonshot Administration Dashboard Help Version 1.0
Figure 25: Edit Chassis Dialog Box
3. Enter the new password.
4. Click Save to save the password details.
Delete Chassis
You can delete a chassis if it is in maintenance mode and no active instances are running on it. A chassis
can also be deleted if the discovery fails when the chassis is being added for the first time.
1. In the Datacenter View, select the chassis to delete.
The Delete option does not get activated until you select the chassis in the Grid or Table view.
2. Click to display a confirmation box.
Figure 26: Delete Chassis Confirmation Box
Page | 37
© Copyright 2014 Hewlett-Packard Development Company
Page 38

HP Cloud OS for Moonshot Administration Dashboard Help Version 1.0
Icon
Description
Displays the chassis UUID
Displays the chassis name
Displays the Chassis Manager IP address
Displays the Firmware Version
Displays the number of cartridges discovered.
Displays the number of available nodes for provisioning.
3. Click Confirm to delete the chassis.
The chassis is deleted after getting a confirmation.
Single Chassis View
The Single Chassis View displays the detailed information about the selected Chassis in two sectionsChassis Snapshot and Table section. It also displays the Events log panel on the right.
Figure 27: Single Chassis View
The Chassis Snapshot visually represents the chassis with all the cartridges along with power states of
the cartridges.
The following table displays a list of icons and their description. These icons are displayed next to the
Chassis Snapshot on the right. It also displays the complete state of the chassis in terms of the following:
© Copyright 2014 Hewlett-Packard Development Company
Page | 38
Page 39

HP Cloud OS for Moonshot Administration Dashboard Help Version 1.0
Displays the overall health of the chassis
Displays the Last Sync-Up Time
Displays the Maintenance Mode status.
Displays the fan status
Displays the power supply status
Displays the temperature status.
Click to view the refreshed Chassis data.
The Force Refresh option takes a minute to complete. During this time you will be unable to perform
any action on the cartridge or the nodes.
Note: By default, the chassis data gets refreshed every 30 minutes.
Table View
The Table view section displays two tabs- Cartridges and Nodes. Cartridges Tab provides the Cartridge
View and the Nodes Tab provides the Nodes View. By default, the Cartridges View is the active view.
Cartridges View
Click Cartridges Tab displayed below the Chassis Snapshot to view the following details about the
cartridges:
Cartridge Name
ID
Serial #
Nodes
Product ID
Type
System ROM Version
Health
Maintenance Mode
Nodes View
Click Nodes Tab displayed below the Chassis Snapshot to view the following details about the nodes:
Node ID
© Copyright 2014 Hewlett-Packard Development Company
Page | 39
Page 40

HP Cloud OS for Moonshot Administration Dashboard Help Version 1.0
CPU Cores
Memory(in MB)
Min Disk (in MB)
MAC List
Power Status
Instance UUID
The Nodes View also displays two tabs on the right- Workload and Configuration.
To view the workload and configuration details of a particular node, do the following:
Select a node from the table for which you want to view the workload or configuration details.
Click the Workload Tab to view the workload details of the selected node.
Click the Configuration Tab to view the configuration details of selected node.
Note:
1. Selecting / de-selecting a cartridge or a node in the Cartridges or Nodes table is a toggle function.
2. You can select multiple cartridges or nodes by selecting the particular rows one-by-one, in the Cartridges or
Nodes table – as the case may be.
3. Selecting a cartridge in the Cartridges table also selects that cartridge on the Chassis Snapshot and vice versa.
4. Selecting the cartridge also selects all its nodes in the Nodes table.
5. Selecting all the Nodes of a cartridge in the Nodes table selects the parent cartridge also.
6. Selects all the cartridge/nodes in the table as well as in the Chassis Snapshot section.
7. De-selects all the cartridges/nodes in the table as well as Chassis Snapshot section.
Changing the Power Status of a Cartridge/Node
Note:
* You cannot change the power status of a provisioned cartridge.
* Changing the Power status of a cartridge also changes the power status of all related nodes.
To power On/Off nodes of a cartridge, click the cartridge or node in the table or click the cartridge on
the chassis image in the Chassis Snapshot section to select it.
Select a cartridge from the table and click or button to power On/Off respectively.
OR
From the right-click menu of the cartridge, select Power On or Off to change the power status.
A Confirmation dialog box “Node Power On/Off” is displayed.
Click Confirm to power On/Off the cartridge/node.
The cartridge/node is powered off or on.
Page | 40
© Copyright 2014 Hewlett-Packard Development Company
Page 41

HP Cloud OS for Moonshot Administration Dashboard Help Version 1.0
Changing the Maintenance mode of a Cartridge or a Chassis
You can place a cartridge or a chassis in maintenance On or Off mode. This is a scheduled activity that
may be done periodically.
Note:
* If a cartridge is in maintenance mode, then the nodes of the cartridge cannot be used for provisioning.
* If a chassis is in maintenance mode, then the cartridges and the nodes within the chassis cannot be used for
provisioning.
To change the maintenance mode of a chassis, do the following:
In the Single Chassis view, select or displayed at the top right corner to set Maintenance
Mode to On or Off.
A Maintenance Mode On/Off dialog box is displayed.
Click Confirm to set the Maintenance Mode for the chassis.
To change the maintenance mode of a cartridge, do the following:
In the Single Chassis view, select the cartridge from the table and click or to set
maintenance mode to on or off.
OR
In the Chassis Snapshot, right-click on the cartridge to select Maintenance Mode On or
Maintenance Mode Off. A Maintenance Mode On/Off dialog box is displayed.
Click Confirm to set the Maintenance Mode for the cartridge.
Search a Cartridge
This option allows you to search particular cartridges based on the search criteria defined.
1. In the Single Chassis view, click the Cartridge Tab to select it.
2. Click drop-down displayed at the top right corner of the table and select the column name.
3. In the Filter box, enter the search criteria.
4. Click .
The search results are displayed based on the search criterion in the table below.
Search a Node
This option allows you to search particular nodes based on the search criteria defined.
1. In the Single Chassis view, click the Node Tab to select it.
Page | 41
© Copyright 2014 Hewlett-Packard Development Company
Page 42

HP Cloud OS for Moonshot Administration Dashboard Help Version 1.0
2. Click drop-down displayed at the top right corner of the table and select the column name.
3. In the Filter box, enter the search criteria.
4. Click .
The search results are displayed based on the search criterion in the table below.
View Events Log
Events log displays of the sequence of events in the selected view. You can search for a particular event
by defining search criteria.
View Event Log in Datacenter View
Events log is displayed on the right panel of Datacenter View page. The Panel displays two tabs – High +
Warning and Informational. By default High + Warning is the active tab and displays the high severity
events and warnings. The Informational Tab displays the informational details of general events. You
can search for particular events by defining the search criteria.
1. In the Events Panel, in the From box, click to select the start date for searching the events.
2. In the To box, click to select the end date for searching the events.
3. Click .
The search results are displayed in the table below.
OR
In the Filter box, enter the text to base your search on.
Click .
The search results are displayed in the table below.
4. (Optional) Click to clear the search criteria.
Note: * You can also perform search based on both the date and text criteria.
* The Events log refreshes every 10 minutes by default.
View Events Log in Single Chassis View
Events log is displayed in the right panel of Single Chassis View page. It displays the sequence of events
related to the particular chassis.
1. In the Events Panel of the Single Chassis View, in the From box, click to select the start date for
searching the events.
2. In the To box, click to select the end date for searching the events.
3. Click .
The search results are displayed in the Events panel.
4. (Optional) Click All to display all the events.
Note: The Events log refreshes itself every 10 minutes by default.
Page | 42
© Copyright 2014 Hewlett-Packard Development Company
Page 43

HP Cloud OS for Moonshot Administration Dashboard Help Version 1.0
Working with Region Tab
The Region Tab displays all the options in the left panel for the Cloud Administrators.
Login to the HP Cloud OS for Moonshot Administration Dashboard with the Cloud Administrator
credentials.
The Administration Dashboard is displayed with a menu bar at the top displaying three tabs:
Project, Region and Cloud.
Click Region Tab to select it.
The screen is displayed with the region details and the options in the left panel.
Figure 28: Region Tab
Region Overview
To view the details of the region, do the following:
1. Click the Region Tab to select it.
By default, Overview is the active tab and displays the region details and region usage summary of
the current month.
2. To view the details of a different month, in the Select a period of time to query its usage section,
do the following:
In the From box, click to select the start date.
In the To box, click to select the end date.
Click Submit.
The usage summary of the selected period is displayed.
3. Click Download CSV Summary to view a text file in Microsoft Excel with the details of the region
usage summary.
Region Info
The Info option allows user to view the list of services, compute services and default quotas.
To view the info details of the region, do the following:
1. Click the Region Tab to select it.
Page | 43
© Copyright 2014 Hewlett-Packard Development Company
Page 44

HP Cloud OS for Moonshot Administration Dashboard Help Version 1.0
2. From the options in the left panel, select Info to display a page with three tabs- Services, Compute
Services, Default Quotas.
By default, Services is the active tab and displays all the services being used in the region.
Services can be run on the same node as the compute region controller or they can be run on a
different server.
Figure 29: Region Info Page
3. To view the compute service details, click the Compute Services Tab to activate it.
A list of compute services is displayed for the region.
4. To view the default quotas, click the Default Quotas Tab to activate it.
A list of default quotas is displayed.
Manage Region Instances
Use this option to view the list of instances in a region.
1. Click the Region Tab to select it.
2. From the options in the left panel, select Instances to display a page with the list of instances.
3. Click Name to display a page with two tabs- Overview and Console.
By default, Overview is the active tab and displays the specifications, IP addresses and metadata of
the selected instance.
Figure 30: Region Instances Page
Page | 44
© Copyright 2014 Hewlett-Packard Development Company
Page 45

HP Cloud OS for Moonshot Administration Dashboard Help Version 1.0
4. Click the Console Tab to activate it.
A page is displayed to enter a password. Enter the Chassis Manager password for the instance.
Once the password is accepted, the boot process of the instance is displayed.
Note: You cannot login to the instance with this console; it only displays the boot process of the instance. To login,
you need to open a separate SSH session using the IP assigned to the instance.
Edit a Region Instance
Once a region instance is created, you can only edit the name of the instance.
Use this option to edit the instance.
1. Click the Region Tab to select it.
2. From the options in the left panel, select Instances to display a page with the list of instances.
3. Click Edit Instance.
An Edit Instance dialog box is displayed. You can only edit the name of the instance.
Figure 31: Edit Region Instance Dialog Box
4. Make the required changes.
5. Click Save to save the details.
Soft Reboot an Instance
Soft reboot can be used to stop the instance and reboot it. This function is similar to the Restart option in
Microsoft Windows.
To reboot the instance, do the following.
1. Click the Region Tab to select it.
2. From the options in the left panel, select Instances to display an Instances page.
3. Click More against the instance to display the drop-down list.
4. Select Soft Reboot an Instance.
A confirm Soft Reboot dialog box is displayed.
5. Click Soft Reboot Instance to reboot the instance.
Page | 45
© Copyright 2014 Hewlett-Packard Development Company
Page 46

HP Cloud OS for Moonshot Administration Dashboard Help Version 1.0
Terminate Region Instance(s)
1. Click the Region Tab to select it.
2. From the options in the left panel, select Instances to display an Instances page.
The page displays a list of instances.
3. Click to select the instances to delete.
4. Click Terminate Instances.
The instances are deleted after getting a confirmation from you.
OR
To terminate a single instance, click More against the instance to display a drop-down list.
Select Terminate Instance to terminate it.
Force Delete an Instance
Use this option to delete an instance which is in an unresponsive state.
1. Click the Region Tab to select it.
2. From the options in the left panel, select Instances to display an Instances page.
The page displays a list of instances Click More against the instance to display the drop-down list.
3. Click Force Delete Instance.
The selected instance is deleted after getting a confirmation from you.
View Console
To view the console details, do the following:
1. Click the Region Tab to select it.
2. From the options in the left panel, select Instances to display the Instances page.
The page displays a list of instances.
3. Click More against the instance to display the drop-down list.
4. Click the Console Tab to activate it.
A page is displayed to enter a password. Enter the Chassis Manager password for the instance.
Once the password is accepted, the boot process of the instance is displayed.
Note: You cannot login to the instance using this console; it only displays the boot process of the instance. To
login, you need to open a separate SSH session using the IP assigned to the instance.
Manage Images
Images are stored at the Domain level with a single Glance service and are unaffected by region
selection. Only Public images are visible to all users. To create images, refer to the Cloud Image Builder
document for more details.
To view the list of available images, do the following:
1. Click the Region Tab to select it.
2. From the options in the left panel, select Images to display the Images page with a list of images.
Page | 46
© Copyright 2014 Hewlett-Packard Development Company
Page 47

HP Cloud OS for Moonshot Administration Dashboard Help Version 1.0
Figure 32: Region Images Page
3. Click Image Name to view the image details and specifications
Create a Region Image
To create a region image, do the following:
1. Click the Region Tab to activate it.
The tab displays options in the left panel.
2. Select Images from the left panel to open the Images page.
Note:
It is mandatory to create image types such as QCOW2 and AMI with associated Amazon Kernel Image (AKI) and
Amazon RAMdisk Image (ARI). It is suggested to create the images in the following sequence: Amazon Kernel
Image (AKI), Amazon RAMdisk Image (ARI) and QCOW2.
The Kernel Image drop-down list and RAM Disk Image drop-down list is displayed when the selected format is
QCOW2 or AMI.
To create AKI images, do the following:
Click Create Image to open a Create an Image dialog box.
Page | 47
© Copyright 2014 Hewlett-Packard Development Company
Page 48

HP Cloud OS for Moonshot Administration Dashboard Help Version 1.0
Figure 33: Create Image Dialog Box
In the Name box, enter a name for the image.
(Optional) In the Description box, enter description for the image.
From the Format drop-down list, select the format as AKI.
From the Image Source drop-down list, do either of the following:
Select Image location from the drop-down list.
The Image Location box is displayed.
In the Image Location box, enter the HTTP URL to load the AKI image from.
OR
Select Image File from the drop-down-list.
The Choose File option is displayed.
Click Choose File to browse the AKI image.
Select the AKI Image to upload.
The CPU Architecture drop-down list displays x86_64 by default.
The moonshot hardware supports the above specification.
In the Minimum Disk box, specify a minimum size required to boot image.
If no input is entered, the minimum value defaults to 0.
Page | 48
© Copyright 2014 Hewlett-Packard Development Company
Page 49

HP Cloud OS for Moonshot Administration Dashboard Help Version 1.0
In the Minimum Ram box, specify a minimum size required to boot image.
If no input is entered, the minimum value defaults to 0.
Click against Public to select it.
This will make the image visible to all users.
Click against Protected to select it.
This makes the image as read-only.
Click Create Image. A message is displayed on successful creation. The image displays in the
table in the Images page.
To create the ARI image, do the following:
Click Create Image to open a Create an Image dialog box.
In the Name box, enter a name for the image.
From the Format drop-down list, select the format as ARI.
From the Image Source drop-down list, do either of the following:
Select Image location from the drop-down list.
The Image Location box is displayed.
In the Image Location box, enter the HTTP URL to load the ARI image from.
OR
Select Image File from the drop-down-list.
The Choose File option is displayed.
Click Choose File to browse the ARI image.
Select the ARI Image to upload.
The CPU Architecture drop-down list displays x86_64 by default.
The moonshot hardware supports the above specification.
In the Minimum Disk box, specify a minimum size required to boot image.
If no input is provided, minimum is not considered and it defaults to 0.
In the Minimum Ram box, specify a minimum size required to boot image.
If no input is provided, minimum is not considered and it defaults to 0.
Click against Public to select it.
This will make the image visible to all users.
Click against Protected to select it.
This makes the image as read-only.
Click Create Image.
A message is displayed on successful creation. The image displays in the table in the Images
page.
To create QCOW2, do the following:
Click Create Image to open a Create an Image dialog box.
In the Name box, enter a name for the image.
From the Format drop-down list, select the format as QCOW2-QEMU Emulator.
Page | 49
© Copyright 2014 Hewlett-Packard Development Company
Page 50

HP Cloud OS for Moonshot Administration Dashboard Help Version 1.0
From the Image Source drop-down list, do either of the following:
Select Image location from the drop-down list.
The Image Location box is displayed.
In the Image Location box, enter the HTTP URL to load the QCOW2 image from.
OR
Select Image File from the drop-down-list.
The Choose File option is displayed.
Click Choose File to browse the QCOW2 image.
Select the QCOW2-QEMU Image to upload.
The CPU Architecture drop-down list displays x86_64 by default.
The moonshot hardware supports the above specification.
In the Minimum Disk box, specify a minimum size required to boot image.
If no input is provided, minimum is not considered and it defaults to 0.
In the Minimum Ram box, specify a minimum size required to boot image.
If no input is provided, minimum is not considered and it defaults to 0.
Click against Public to select it.
This will make the image visible to all users.
Click against Protected to select it.
This makes the image as read-only.
From the Kernel Image drop-down list, select the corresponding kernel image.
From the RAM Disk Image drop-down list, select the corresponding RAM disk image.
Click Create Image.
A message is displayed on successful creation. The image displays in the table in the Images
page.
Note: Do not navigate from the page while the image is being created.
Edit a Region Image
To edit an image, do the following:
1. Click More drop-down list displayed against the image that you wish to edit and select Edit Image.
The Edit Image dialog box is displayed.
2. Make the required changes.
3. Click Update Image to update the changes.
Delete a Region Image
Click More drop-down list displayed against the image that you wish to delete and select Delete
Image.
A message is displayed to ask your confirmation. The image is deleted once your confirmation is
received.
Page | 50
© Copyright 2014 Hewlett-Packard Development Company
Page 51

HP Cloud OS for Moonshot Administration Dashboard Help Version 1.0
To delete a group of images, click to select the image/images that you want to delete and click
Delete Images.
The images are deleted and removed from the image list.
Launch a Region Image
To launch an image in the Administration Dashboard, do the following:
1. Click the Region Tab to select it.
2. From the options in the left panel, select Images to display the Images page.
3. Select Launch against the image listed in the table.
A Launch Instance dialog box displays with four tabs: Details Tab, Access & Security Tab,
Networking Tab and Post-Creation Tab. By default, Details is the active tab.
Figure 34: Launch Instance in Region Tab
4. On the Details Tab, do the following:
From the Instance Source drop-down list, select the image.
From the Image drop-down list, select the value.
In the Instance Name box, enter a name for the instance.
Page | 51
© Copyright 2014 Hewlett-Packard Development Company
Page 52

HP Cloud OS for Moonshot Administration Dashboard Help Version 1.0
From the Flavor drop-down list, select the Baremetal flavor.
This is default flavor that is created.
In the Instance Count box, enter 1 or more than 1.
The flavor details are displayed on the right side of the dialog box.
5. On the Access & Security Tab, do the following:
From the Keypair drop-down list, select value from the list.
6. On the Networking Tab, no networks are listed in the Selected Networks section.
Select the private network from the Available networks section.
7. Click Launch.
The image is displayed in the table on the Image page with Active status.
Manage Networks
Networks option displays the networks available in the region. You can view and edit networks.
To view the list of available networks, do the following:
1. Click the Region Tab to select it.
2. From the options in the left panel, select Networks to display a page with the list of networks.
Figure 35: Region Networks Page
3. Click the network name to display the specifications and properties of the network.
4. (Optional) In the network details page, click the subnet name to view the complete subnet details.
5. (Optional) In the network details page, click the port name to view the complete port details.
To edit the port details, click Edit Port against the port name to display the Edit Port dialog box.
Make the required changes.
Click Save Changes to save the changes.
Edit a Network
Use this option to edit the name of your network.
To edit a network, do the following:
1. Click the Region Tab to select it.
2. From the options in the left panel, select Networks to display Networks page with a list of networks.
Page | 52
© Copyright 2014 Hewlett-Packard Development Company
Page 53

HP Cloud OS for Moonshot Administration Dashboard Help Version 1.0
3. Click Edit Network against the network that you want to edit.
Edit Network dialog box is displayed.
4. Make the required changes.
5. Click Save Changes to save the changes.
Note: You must be logged in as a Cloud Administrator to edit the network. Although the other options are editable,
modifying any properties except the name of the network is not recommended.
Manage Flavors
A flavor describes the amount of memory, number of CPUs, and storage capacity of Baremetal instances.
Only a Cloud Administrator can create and delete flavors.
To view the list of available flavors, do the following:
1. Click the Region Tab to select it.
2. From the options in the left panel, select Flavors to display a page with the list of flavors.
Figure 36: Region Flavors Page
Create a Flavor
Flavors are machine configurations that describe the amount of memory, number of CPUs, and storage
capacity of Baremetal instances. The moment you register a chassis, a flavor is created by default. You
can use the default flavor or create a flavor of your choice.
To create a flavor, do the following:
1. Click the Region Tab to select it.
2. From the options in the left panel, select Flavors to display the Flavors page.
3. Click Create Flavor to open a Create Flavor dialog box.
Page | 53
© Copyright 2014 Hewlett-Packard Development Company
Page 54

HP Cloud OS for Moonshot Administration Dashboard Help Version 1.0
Figure 37: Create Flavor Dialog Box
4. In the Name box, enter the name that you want to assign to the Baremetal flavor.
5. In the CPUs box, enter the required number.
6. In the RAM MB box, specify the RAM corresponding to the cartridge.
7. In the Root Disk GB box, enter the required space.
8. From the CPU Architecture drop-down list, select the architecture.
9. From the Kernel Image drop-down list, select the PXE Kernel image.
10. From the RAM Disk Image drop-down list, select the PXE RAMdisk image.
11. Click Create Flavor to create a new the flavor.
A message is displayed on successful creation.
Note: A Baremetal flavor must have the following extra specifications to provision instance successfully.
* CPU Architecture
* Deploy Kernel Image
* Deploy RAMDisk Image
Page | 54
© Copyright 2014 Hewlett-Packard Development Company
Page 55

HP Cloud OS for Moonshot Administration Dashboard Help Version 1.0
Edit a Region Flavor
You cannot edit a system generated flavor. To edit a user created flavor, do the following:
1. Click the Region Tab to select it.
2. From the options in the left panel, select Flavors to display the Flavors page.
The Flavors page displays with a list of flavors.
3. Click Edit Flavor against the flavor that you want to edit.
The Edit Flavor dialog box is displayed.
Figure 38: Edit Flavor Dialog Box
4. Make the required changes.
5. Click Save to save the details.
Delete a Region Flavor
Use this option to delete a region flavor. You cannot delete a system generated flavor. A flavor cannot be
deleted if it is in use.
To delete a flavor, do the following:
1. Click Region Tab to select it.
Page | 55
© Copyright 2014 Hewlett-Packard Development Company
Page 56

HP Cloud OS for Moonshot Administration Dashboard Help Version 1.0
2. From the options in the left panel, select Flavors to display the Flavors page.
The Flavors page displays with a list of flavors.
3. Click More drop-down list against the flavor that you want to delete.
4. Select Delete.
A confirmation box is displayed. The flavor is deleted after getting a confirmation from you.
Figure 39: Delete Flavor Confirmation Box
View a Region Flavor Extra Specifications
This option allows you to view the extra specifications key-value pair for the selected flavor.
1. Click Region Tab to select it.
2. From the options in the left panel, select Flavors to display the Flavors page.
The Flavors page displays with a list of flavors.
3. Click More drop-down list against the flavor for which you want to view the Extra Specifications and
click View Extra Specs. The Extra Specs page is displayed with the details of the extra
specifications.
Figure 40: View Extra Specs Dialog Box
4. Click Close to cancel the dialog box.
Page | 56
© Copyright 2014 Hewlett-Packard Development Company
Page 57

HP Cloud OS for Moonshot Administration Dashboard Help Version 1.0
Create a Region Flavor Extra Specifications
This option allows you to create an extra specifications key-value pair for the custom flavor. You cannot
create extra specifications for default flavor.
1. In the Administration Dashboard, select the Region Tab. The tab displays with options in the left
panel.
2. Select Flavors to display the Flavors window. The Flavors window displays with a list of flavors.
3. Click More drop-down list against the flavor for which you want to create that you want to edit and
click View Extra Specs. The Extra Specs window is displayed with the different items.
4. Click Create to display Create Flavor Extra Spec dialog box.
5. In the Key box, enter the key, for example baremetal:deploy_kernel_id.
6. In the Value box, enter the value, for example,c209db5f-2ee9-479d-ac2a-a9753725e555.
7. Click Create to create the extra specifications.
Edit a Region Flavor Extra Specifications
Important: Ensure that the following extra specifications for Baremetal are not deleted or wrongly edited:
* CPU Architecture
* Deploy Kernel Image
* Deploy RAMDisk Image
This option allows you to edit extra specifications for the selected custom flavor. You cannot create extra
specifications for default flavor.
1. In the Administration Dashboard, select the Region Tab.
The tab displays with options in the left panel.
2. Select Flavors to display the Flavors page.
The Flavors page displays with a table of flavors.
3. Click More drop-down list against the flavor that you want to edit and click View Extra Specs.
The Extra Specs page is displayed with the different items.
4. Click against the item which you want to edit.
5. Click Edit to display the Edit Flavor Extra Spec dialog box.
6. Make the required changes in the Key or the value.
7. (Optional) Click Cancel to cancel the process and return to the View Extra Specs window.
8. Click Save to save the details.
9. Click Close to close the window.
Delete a Region Flavor Extra Specifications
Important: Ensure that the following extra specifications for Baremetal are not deleted or wrongly edited:
* CPU Architecture
* Deploy Kernel Image
* Deploy RAMDisk Image
Page | 57
© Copyright 2014 Hewlett-Packard Development Company
Page 58

HP Cloud OS for Moonshot Administration Dashboard Help Version 1.0
This option allows you to delete extra specifications for the selected custom flavor. You cannot create
extra specifications for default flavor.
1. In the Administration Dashboard, select the Region Tab.
The tab displays with options in the left panel.
2. Select Flavors to display the Flavors page.
The Flavors window displays with a table of flavors.
3. Click More drop-down list against the flavor that you want to edit and click View Extra Specs.
The Extra Specs window is displayed with the different items.
Click More drop-down list against the flavor for which you want to delete extra specifications and click
View Extra Specs. The extra specification is deleted after receiving a confirmation from you.
Working with Project Tab
The Project Tab displays all the options in the left panel for the all users. The users can perform project
specific tasks related to the selected project.
Login to the HP Cloud OS for Moonshot Administration Dashboard with your credentials.
The Administration Dashboard is displayed with a menu bar at the top displaying three tabs:
Project, Region and Cloud.
Click Project Tab to activate it.
The screen is displayed with the options in the left panel.
Figure 41: Project Tab
Project Overview
To view the details of a project, do the following:
1. Click the Project Tab to select it.
2. From the options in the left panel, select Overview to display a page with project details.
By default, Project Usage Summary for the current month is displayed.
Page | 58
© Copyright 2014 Hewlett-Packard Development Company
Page 59

HP Cloud OS for Moonshot Administration Dashboard Help Version 1.0
Figure 42: Overview Page
3. To view the details of a different month, in the Select a period of time to query its usage section,
do the following:
In the From box, click to select the start date.
In the To box, click to select the end date.
Click Submit.
The usage summary of the selected period is displayed.
4. Click Download CSV Summary to view a text file in Microsoft Excel with the details of the usage
summary.
Manage Provisioning
The Provisioning option in the left panel of the Project Tab helps you to perform the following tasks:
Manage Workloads
Manage Running Topologies
Manage Deployment Profiles
Manage Topology Design
Manage Resource Pools
Workloads
Workloads functionality in HP Cloud OS for Moonshot aims to facilitate the end user in deployment of a
composite service comprising of different applications and hence different workloads in an easy to use
manner.
The end user can browse through HP’s catalog listing of pre-tested and pre-crafted workloads, download
and publish them to the cloud and launch them to get a running application infrastructure without worrying
about the intricate and in-depth understanding of technical details like topology, OpenStack nova flavor,
Moonshot Cartridge specification etc. The end user can also define personalized workloads by following a
simplified folder structure and can import the same to the cloud.
Page | 59
© Copyright 2014 Hewlett-Packard Development Company
Page 60

HP Cloud OS for Moonshot Administration Dashboard Help Version 1.0
Workloads Service
Facilitates automated deployment of a workload based service realization.
Workload
A composite entity comprising Application Image, Infrastructure Design, Infrastructure hints for
specific resource requirement.
Workload Topology
An infrastructure blueprint defining infrastructure topology.
Deployment Profile
A cloud specific workload binding document which references cloud resources and can be
provisioned (or deployed) as is to create a deployed workload. It references specific cloud
resources.
Deployed Workload
A realized service after the deployment profile has been successfully launched by the end user
Understanding Workload Entities
Some of the important entities that help to make up Workloads based provisioning are:
Relationship between Workload Entities
A workload entity is an abstract representation of a service which maps to a given infrastructure blue-print
(technically termed as topology). The same workload can be realized by different cloud resources present
in the system which can be uniquely represented as deployment profiles.
For Example: Let us assume that a single server group based workload requirement is, to serve static
web hosting. As we know that both Scott_1 and Borman can serve static web hosting, it is thus possible
to have two different deployment profiles; where one maps to nova flavor compute resource of Borman
while the other maps to Scott_1. Also, a given deployment profile can be launched multiple times for
same or different user. Considering this, there is an inherent relationship amongst workloads, topology,
deployment profiles and deployed workloads which has been illustrated below:
Figure 43: Relationship between Workload Entities
© Copyright 2014 Hewlett-Packard Development Company
Page | 60
Page 61

HP Cloud OS for Moonshot Administration Dashboard Help Version 1.0
Content Creator
Responsibility: to create pre-tested workload
Content Publisher
Responsibility: Publishes content on a centralized shared portal maintained by HP
Cloud Administrator
Responsibility: Imports content from different sources using CODN. Currently, CODN allows
importing of workload content from local folder (like Glance allows importing images) as well as
from remote portal maintained by HP. Cloud Administrator also creates deployment profile(s)
(more than one in most of cases) as per resources available in the cloud
Cloud User
Responsibility: Provisions a deployable profile. Cloud User can also create a deployment profile
Cloud Personalities
Lifecycle of a Workload is a multi-phase activity and needs different actors to collaborate together to
make a simplified realization of a given application infrastructure by the end user. The list below
elaborates on the actors along with their roles and responsibilities in entire workload lifecycle.
All the above players contribute towards realizing the lifecycle of a Workload and play relevant role in
each stage of its workflow.
Understanding Workload Content
Each workload is represented as a CSU file, which is inherently a data container to store various
elements of workload (like images, topology design etc.) in compressed format as shown in the diagram
below:
Figure 44: Workload Content
© Copyright 2014 Hewlett-Packard Development Company
Page | 61
Page 62

HP Cloud OS for Moonshot Administration Dashboard Help Version 1.0
Category
Type
Description
Infrastructure
Documents
Topology
Defines the blue print of the infrastructure. Every workload
has one topology document.
UI Binding
Contains graphical aspect of infrastructure design and is
needed by CCUE designer to open the topology in
Administrator Dashboard. Every workload must have UI
binding document corresponding to the topology document.
Default profile
Defines the structure of deployment profiles for a given
topology document. Every workload must have a default
profile corresponding to topology document.
Application Software
specification
Deployment Profile
Guide
Defines the software aspect of the workload. It primarily
contains infrastructure hints in cloud agnostic format so that
appropriate cloud resources can be discovered and can be
referred in deployment profiles, which are used to deploy
(often termed as launch) a given workload.
Images
OS image
Specifies OS image used in server provisioning. A workload can
have number of OS images depending upon the server design
mentioned in the topology.
Kernel image
Every Baremetal OS image is associated with a kernel image
which is used during PXE boot process.
RAM disk image
Every Baremetal OS image is associated with a RAMdisk image
which is used during PXE boot process.
CSU specification
Manifest
Specifies layout of workload and its components and their
dependencies. It is used by CODN to import a given workload
during the import process of the workload.
Help
Readme
Contains description of a workload.
HP Cloud OS for Moonshot provides the functionality to import the CSU file and create a workload (a
cloud entity) which can be managed by the Administration Dashboard. This section explains in detail the
following:
1. Elements of a Workload
2. Content Structure of CSU File
3. Manifest file
Entire section illustrates the content using a sample Apache workload which allows you to deploy single
Apache server on a Moonshot cartridge.
Elements of Workload
A workload typically comprises of images, topology, manifest file etc. Every workload must have the
following set of components as described in the table below:
© Copyright 2014 Hewlett-Packard Development Company
Page | 62
Page 63

HP Cloud OS for Moonshot Administration Dashboard Help Version 1.0
Content Structure of a CSU File
As mentioned above, a workload CSU file is an archived version of different content types in a
compressed format. The entire content is organized in a folder structure. The below figure explains the
layout of Apache workload:
Figure 45: File Structure of Apache Workload
Understanding the Manifest File
A manifest file is a JSON file which contains specification of elements of a workload. The below picture
explains the layout of Manifest file Apache workload:
Page | 63
© Copyright 2014 Hewlett-Packard Development Company
Page 64

HP Cloud OS for Moonshot Administration Dashboard Help Version 1.0
Figure 46: Manifest File Image- Part 1
Page | 64
© Copyright 2014 Hewlett-Packard Development Company
Page 65

HP Cloud OS for Moonshot Administration Dashboard Help Version 1.0
Figure 47: Manifest File Image- Part2
Page | 65
© Copyright 2014 Hewlett-Packard Development Company
Page 66

HP Cloud OS for Moonshot Administration Dashboard Help Version 1.0
Understanding Workload Lifecycle
The following figure illustrates the lifecycle of workload entities and the workflow required when the
content is being imported from remote folder using CODN:
Figure 48: Workload Lifecycle
Each lifecycle phase depicted above, and the various tasks that its respective owner / cloud personality
plays, is briefly explained in the following sections.
Note: The next section “Managing Workload Lifecycle using Administrator Dashboard” illustrates Workload workflow
in detail.
Phase 1: Create Content
Content Creator is responsible for creating the deployable content that is uploaded to a shared portal.
Content creation involves:
1. Workload Creation - packaging different aspects of a workload (as topology, images,
infrastructure hints etc.)
2. Modifying the Manifest file
Phase 2: Upload Content
Content Publisher bundles the workload files as a .csu file and uploads it on a centralized portal. It is later
published to HP Cloud’s Public catalog after necessary approvals. It is then available for importing into
the cloud environment using HP Cloud OS for Moonshot Administration Dashboard. Access to the catalog
is based on username and password credentials.
Phase 3: Download / Import to Cloud
Workload Management is primarily the task of Cloud Administrator. While the Cloud Administrator
downloads the workload content and publishes it for user consumption, he also creates / edits and
launches deployment profiles. Other roles can only manipulate the workload content that has been
downloaded as per the project requirements.
Page | 66
© Copyright 2014 Hewlett-Packard Development Company
Page 67

HP Cloud OS for Moonshot Administration Dashboard Help Version 1.0
Phase 4: Publish to Cloud
Once the content is downloaded / imported, the Cloud Administrator publishes it to the Cloud thus
enabling the Workloads to be used in different projects depending on the scope defined while publishing
the content.
Phase 5: Create Profile
A workload can have multiple deployment profiles. When a workload is downloaded from CODN or is
imported from local system, a deployment guide that is part of the setup is also downloaded to your cloud
environment. This deployment guide helps in the creation of a deployment profile. Once the deployment
profile is created, you can provision the workload.
Phase 6: Provision
Once the Workloads are deployed, Project Administrators / Users can use the workload content to create
/ edit deployment profile and launch profile as per project requirements.
Managing Workload Lifecycle using Administration Dashboard
Workload workflow using Administration Dashboard can be depicted in the following sequence of steps:
Figure 49: Workload Lifecycle using Administration Dashboard
Each step is explained in detail in the following sections.
Create Workload
Creation of workload is a manual process. This necessitates the need of assembling the following
elements as per the folder structure explained in the Understanding the Workload section and creating an
archive file with a .csu extension:
1. Infrastructures documents
a. Topology
b. UI binding document
c. Default profile
2. Deployment Profile Guide
3. Images
4. CSU file
Page | 67
© Copyright 2014 Hewlett-Packard Development Company
Page 68

HP Cloud OS for Moonshot Administration Dashboard Help Version 1.0
Currently, you can use CCUE designer to generate infrastructure documents and export its content as an
XML file. CSU and Deployment Profile Guide can be generated using normal text editor. Content of the
deployment profile needs to be customized as per desired topology.
Figure 50: Deployment Profile Guide
Publish Workload to HP Cloud OS Enterprise Portal
This process involves uploading content to HP Cloud OS Enterprise portal and initialization of the HP
content approval process. Once content is approved by the appropriate authorities, it is published to HP
Cloud Public catalog. The Cloud Administrator can now import, download and publish the workload in the
Cloud environment using the Administration Dashboard. Refer to Updates and Extensions section for
details.
Page | 68
© Copyright 2014 Hewlett-Packard Development Company
Page 69

HP Cloud OS for Moonshot Administration Dashboard Help Version 1.0
Perform Cloud Prerequisites
Cloud Administrator has to ensure the following prerequisites before provisioning any workload.
1. Publish Graffiti factory data
2. Automated creation of nova flavors
Graffiti Factory Data
Cloud Administrator must publish graffiti factory data before importing any workload in the Cloud. This
can be done either by using CODN to import graffiti content from local folder or HP CloudOS Enterprise
portal. Refer to the section on Importing Workload to initialize your cloud with the graffiti factory data.
One can validate if the content from CODN portal or local import is being downloaded or not. To validate
the content download, do the following:
1. On the Administration Dashboard, click Cloud Tab to select it.
The Cloud tab is activated and the options are displayed in the left panel. By default, all the
services are displayed in the right pane.
2. Click Rest API displayed against Graffiti to display a Graffiti Service Details page.
Figure 51: Graffiti Services Screen
3. Go to namespace section and click /1/namespace/list to expand it.
4. Search for the URN:X-HP:2014-1:CLOUDOS:TYPES:CAPABILITIES:MOONSHOT in the list of
Moonshot namespace.
OR
Go to Reference UI and replace the token value with the Authentication token.
You can access your Authentication Token from Project->Access and Security->Authentication
Token
Automated Creation of Nova Flavors
Cloud discovers the cartridges and creates flavors automatically. There is a polling cycle of five minutes
to check for new registered cartridges for flavor creation .To validate that the flavor associated to content
has been automatically created, do the following:
1. On the Administration Dashboard, click Region Tab to select it.
The Region tab is activated and the options are displayed in the left panel.
Page | 69
© Copyright 2014 Hewlett-Packard Development Company
Page 70

HP Cloud OS for Moonshot Administration Dashboard Help Version 1.0
2. Select Flavors to display the Flavors page.
The page displays with the list of flavors.
3. Click More against the flavor for which you want to view Extra Specs.
4. Click View Extra Specs to view the extra specifications of the flavor.
Populating Cloud with Workload
Cloud Administrator can populate the Cloud with workload by either importing it using local folder (if the
.csu file corresponding to workload is available) or by using the remote HP Cloud OS Enterprise portal.
Note: Cloud Administrator should have the necessary permissions to access the HP Cloud OS Enterprise portal.
Populating cloud with workload involves following phases:
1. Import using local folder
and/or
2. Login to CODN remote portal
3. Download
4. Publish
Once you have imported the workload or you have logged in to the remote folder, content is available for
you to publish it to your local cloud.
Import Using Local Folder
You can import a workload from your local folder. Once the import process is successful, the document
displays in the Updates and Extensions page. To import an update that is stored on your local system,
do the following:
1. On the Administration Dashboard, click Project Tab to select it.
The Project tab is activated and the options are displayed in the left panel.
2. From the options in the left panel, click Updates and Extensions and then select Updates and
Extensions to display the Updates and Extensions page with the list of updates.
3. Click Import displayed on the top right corner of the page.
An Import dialog box is displayed.
Figure 52: Import Dialog Box
4. Click Choose File to display a dialog box to browse and select the file. The file displays in the
Import dialog box.
Page | 70
© Copyright 2014 Hewlett-Packard Development Company
Page 71

HP Cloud OS for Moonshot Administration Dashboard Help Version 1.0
5. Click Import. The file is imported to your local cloud and displayed in the Updates and Extensions
page.
Login to CODN Remote Portal
To import an update from CODN remote portal, do the following:
1. On the Administration Dashboard, click Project Tab to select it.
2. The Project Tab is activated and the options are displayed in the left panel.
3. From the options in the left panel, click Updates and Extensions and then select Updates and
Extensions to display the Updates and Extensions page with the list of updates.
4. Click Configure displayed at the top right corner of the page to display the Configure dialog box.
5. Enter your credentials.
6. Click OK to save the details. The updates are displayed in the Updates and Extensions page.
Download
To download the Workload content that has been imported, do the following:
1. On the Administration Dashboard, click Project Tab to select it.
The Project tab is activated and the options are displayed in the left panel.
2. From the options in the left panel, click Updates and Extensions and then select Updates and
Extensions to display the Updates and Extensions page with the list of updates.
3. Click Download against the workload that you want to download.
4. The workload is downloaded to your local system in the form of a .csu file which is a zip file and
the Publish option is displayed.
Page | 71
© Copyright 2014 Hewlett-Packard Development Company
Page 72

HP Cloud OS for Moonshot Administration Dashboard Help Version 1.0
Figure 53: Updates and Extensions Panel with four Workloads
The Updates and Extensions panel in the above screenshot displays four workloads. In the
screenshot, the graffiti_moonshot_data_2014_01_30.csu content contains factory meta-data that
needs to be published before registration of any chassis.
Publish
Once the content is downloaded, you can publish it using the Publish option. The Publish option unzips
the .csu file and stores it in the relevant repositories. This enables the Workloads to be used in different
projects depending on the scope defined while publishing the content.
Do the following:
1. In the Updates and Extensions page, click Publish against the document to publish.
Publish dialog box is displayed. The Update Name and Update Version are prepopulated.
Figure 54: Publish Dialog Box
Page | 72
© Copyright 2014 Hewlett-Packard Development Company
Page 73

HP Cloud OS for Moonshot Administration Dashboard Help Version 1.0
Scope
Description
Private, Project
Allows you access while working in this project.
Private, Cloud
Allows you access while working in any project.
Public, Project
Allows access to you and other project members.
Public, Cloud
This document can be viewed by anyone in the cloud in any
project.
2. From the Openstack Scope drop-down list, select the Public.
It displays the following options:
Private: This means that the update is private to this project.
Public: This means that the update is available to others outside the project.
3. From the Cloud OS Scope drop-down list, select Public, Cloud.
It displays the following four options:
4. Click Publish to start the installation process.
A success message is displayed. Once the installation completes, the workload will display in the
Workloads page.
5. (Optional) Click View Progress to view the installation progress.
Managing Workload
Once the Workload content is downloaded, it is displayed in the Workloads page. The Workloads page
displays the Workload Dashboard with the details of the Workload content. The Cloud Administrator and
Project Administrator can use the Workloads Page to view the workloads and create deployment profiles.
To view the Workload Dashboard, do the following:
1. On the Administration Dashboard, click Project Tab to select it. The Project tab is activated and the
options are displayed in the left panel.
2. From the Current Project drop-down list in the left panel, select the project.
3. From the left panel, click Provisioning and then select Workloads. The Workloads page is
displayed.
© Copyright 2014 Hewlett-Packard Development Company
Page | 73
Page 74

HP Cloud OS for Moonshot Administration Dashboard Help Version 1.0
Figure 55: Workloads Dashboard
The Workloads Dashboard displays the details of the total workload topologies, the corresponding
deployment profiles and the deployed workloads. The total workloads are the workloads that are
downloaded using the Updates and Extensions option or are present on your local system.
The Dashboard page is divided into two views: Tree View in the left and Details View in the right.
Tree View displays all the workloads in the system. It also represents the relationship between
existing workloads, deployment profiles and deployed workloads.
Details View is further divided into three sections:
The top section displays the total number of Workload Topologies, Deployment Profiles, and
Deployed Workloads. It also displays the progress in terms of running and not running Workload
Topologies, Deployed Profiles and Workloads.
The above information is also represented in a tabular view in the bottom section of the panel.
The table also displays the source of the workload. Currently, supported sources are-
CODN-Local- If the content is being published using local import folder
CODN-Remote- If the content is being published using remote HP Cloud OS Portal.
The middle section of the right panel displays a graphical representation of the top ten workload
topologies based on the highest number of successfully deployed workloads.
Click the Workload in the left panel or click Name displayed in the right panel table.
The details of the workload are displayed.
Note: This is an optional step at the initial stage as no data is displayed, once you create the profiles, they will
be visible in the list.
Search a workload
Page | 74
© Copyright 2014 Hewlett-Packard Development Company
Page 75

HP Cloud OS for Moonshot Administration Dashboard Help Version 1.0
To search for a particular workload, in the left panel, do the following:
In the Search box, enter the first few characters of the workload name and click .
The workloads matching the search criteria are displayed.
To search for details of a particular workload, do the following:
In the right panel, above the table in the search box, enter the first few characters of the workload
name. The search results are displayed.
Managing Deployment Profiles
A workload can have multiple deployment profiles. The deployment profile can be created by Cloud
Administrator as well as Project Administrator.
Once the deployment profile is created, you can provision the workload. To create a deployment profile
from an existing workload, do the following:
1. In the Administration Dashboard, select the Project Tab. The tab displays with options in the left
panel.
2. From the Current Project drop-down list in the left panel, select the project.
3. From the left panel, click Provisioning and then select Workloads. The Workloads page is
displayed.
4. Click the Workload in the Tree View or click Name displayed in the right panel table.
5. The Deployment Profile Details page of the selected workload is displayed. It has two tabs-Overview
and Topology. By default, Overview is the active tab and displays the profile details of the selected
workload. Topology Tab gives a graphical representation of the workload topology.
Figure 56: Deployment Profile Details Page
Page | 75
© Copyright 2014 Hewlett-Packard Development Company
Page 76

HP Cloud OS for Moonshot Administration Dashboard Help Version 1.0
6. Click Create Profile displayed at the top right corner of the right panel.
A dialog box is displayed.
Figure 57: Create Profile Dialog Box
7. In the Profile Name box, enter the profile name.
8. From the Resource Pool drop-down list, select the resource pool to associate with the profile.
9. Click Create to create the profile.
The profile is created and is displayed in the Editor Tab of Topology Designer.
Figure 58: Profile Displayed in Topology Designer
10. Click the icon displayed in the canvas to select it. The details are displayed in the right panel.
Page | 76
© Copyright 2014 Hewlett-Packard Development Company
Page 77

HP Cloud OS for Moonshot Administration Dashboard Help Version 1.0
11. From the Key Name drop-down list, select the Keypair. The keypair value has to be injected at the
time of profile creation. All other values are pre-populated.
12. Click Save to save the profile.
13. Click to close the Topology Designer page. The deployment profile is displayed in the Workloads
page.
14. Click Workloads option again to view the Dashboard and the click the Workload for which you
created the deployment profile.
15. The profile that you created displays in the table in Deployment Profile Details page of the selected
Workload.
.
Figure 59: New Deployment Profile
Provisioning Workload
Once the Deployment Profile is created, it results in provisioning of physical infrastructure and creation of
a deployed workload. Once the Workloads are deployed, Project Administrators and Project users can
use the workload content to Launch Profile and Edit Profile as per project requirements. Provisioning a
Workload involves the following tasks:
Launch a Profile
To launch the profile, do the following:
1. In the Administration Dashboard, select the Project Tab.
The tab displays with options in the left panel.
2. From the Current Project drop-down list in the left panel, select the project.
3. From the left panel, click Provisioning and then select Workloads.
The Workloads page is displayed.
4. Click Workload in the left panel and then click the arrow displayed against the workload to expand
the list.
5. Click the Deployment Profile to display the Deployment Profile Details page of the selected
profile.
Page | 77
© Copyright 2014 Hewlett-Packard Development Company
Page 78

HP Cloud OS for Moonshot Administration Dashboard Help Version 1.0
Figure 60: Deployment Profile Page with the Selected Profile
6. Click Launch displayed at the top right corner of the page.
A Launch Profile dialog box is displayed.
Figure 61: Launch Profile Dialog Box
Page | 78
© Copyright 2014 Hewlett-Packard Development Company
Page 79

HP Cloud OS for Moonshot Administration Dashboard Help Version 1.0
Note: You can also click displayed in the table against the profile in the Workload Profile Details page to launch
the profile.
7. In the Workload Name box, enter the name for the workload.
8. Click Launch to launch the profile.
A success message is displayed.
Figure 62: Success Message
Once the launch is successful, the profile is visible in the Deployed Workload.
Figure 63: Dashboard after the Profile is launched
Page | 79
© Copyright 2014 Hewlett-Packard Development Company
Page 80

HP Cloud OS for Moonshot Administration Dashboard Help Version 1.0
View Running Topologies
To view the progress of the launch of deployment profiles, do the following:
1. In the Administration Dashboard, select the Project Tab.
The tab displays with options in the left panel.
2. From the Current Project drop-down list in the left panel, select the project.
3. From the left panel, click Provisioning and then select Running Topologies to display the
Running Topologies page with a list of topologies in the provisioning state. Once it is successfully
provisioned and instances associated with it are running, the deployed workload status is counted
as successful.
Figure 64: Running Topologies Page
Edit a Profile
To edit a deployment profile, do the following:
1. In the Administration Dashboard, select the Project Tab.
The tab displays with options in the left panel.
2. From the Current Project drop-down list in the left panel, select the project.
3. From the left panel, click Provisioning and then select Workloads.
The Workloads page is displayed.
4. Click Workload in the left panel to display the Workloads Details page.
5. Click displayed in the table against the profile that you want to edit.
The profile displays in the Profile Tab of the Workload Topology Designer.
Page | 80
© Copyright 2014 Hewlett-Packard Development Company
Page 81

HP Cloud OS for Moonshot Administration Dashboard Help Version 1.0
Figure 65: Edit Profile Screen
6. Make the required changes.
7. Click Save to save the details.
Manage Running Topologies
Topology is the visual representation of networking resources. Once the Infrastructure Topology and
Infrastructure Design are created, the topology is ready to be launched.
The following tasks can be performed using Running Topologies option in the left panel:
View Topology List
Launch Topology
Terminate Topology
Delete Topology
View Topology List
To view the existing topologies, do the following:
1. Click the Project Tab to select it.
The tab displays with options in the left panel.
2. From the Current Project drop-down list in the left panel, select the project.
3. From the left panel, click Provisioning and then select Running Topologies to display the Running
Topologies page with a list of existing topologies.
The page displays the topology name, state and time stamp.
Page | 81
© Copyright 2014 Hewlett-Packard Development Company
Page 82

HP Cloud OS for Moonshot Administration Dashboard Help Version 1.0
Figure 66: Running Topologies Page
4. (Optional) Click Topology Name to open the topology details page.
The details page opens with three tabs: Overview, Job, and Content. By default, Overview is the
active tab and displays the details of the topology.
5. (Optional) Click Job Tab to activate it.
The details of all the jobs that were performed are displayed.
6. (Optional) Click Content Tab to activate it.
The XML version of the document is displayed.
(Optional) Click Export to download the design document to your local system.
Launch Topology
Use this option to launch the latest version of the topology document.
Do the following:
1. Click the Project Tab to select it.
The tab displays with options in the left panel.
2. From the Current Project drop-down list in the left panel, select the project.
3. From the left panel, click Provisioning and then select Running Topologies to display the Running
Topologies page with a list of existing topologies.
The page displays the topology name, state and time stamp.
4. Click Launch Topology to display a launch dialog box.
Page | 82
© Copyright 2014 Hewlett-Packard Development Company
Page 83

HP Cloud OS for Moonshot Administration Dashboard Help Version 1.0
Figure 67: Launch Topology Dialog Box
5. From the Deployment Profile drop-down list, select the deployment profile.
6. In the Topology Name box, enter the name.
7. Click Launch.
Terminate Topology
When the topology is terminated, the Administration Dashboard stops the instance.
Note: Even if the terminated topologies are not running, they are still displayed in the list of topologies.
To terminate the topology, do the following:
1. Click the Project Tab to select it.
The tab displays with options in the left panel.
2. From the Current Project drop-down list in the left panel, select the project.
3. From the left panel, click Provisioning and then select Running Topologies to display the Running
Topologies page with a list of existing topologies.
The page displays the topology name, state and time stamp.
4. Click Terminate Topology.
The topology state changes to inactive.
Delete Topology
When a topology is deleted, the Administration Dashboard stops the instance and permanently removes
it. This action cannot be undone.
To delete a running topology, do the following:
1. Click the Project Tab to select it.
The tab displays with options in the left panel.
2. From the Current Project drop-down list in the left panel, select the project.
3. From the left panel, click Provisioning and then select Running Topologies to display the Running
Topologies page with a list of existing topologies.
Page | 83
© Copyright 2014 Hewlett-Packard Development Company
Page 84

HP Cloud OS for Moonshot Administration Dashboard Help Version 1.0
4. Select the topology you want to delete and then click Delete Topology.
A confirmation box is displayed. The topology is deleted after getting a confirmation from you.
Manage Deployment Profiles
This option allows you to work with the Deployment Profiles. You can perform the following tasks:
View Deployment Profile List
To view the list of deployment profiles, do the following:
1. Click the Project Tab to select it.
The tab displays with options in the left panel.
2. From the Current Project drop-down list in the left panel, select the project.
3. From the options in the left panel, click Provisioning and then select Deployment Profiles to open
the Deployment Profiles page.
It displays deployment name, version, based on, scope, and associated project.
Figure 68: Deployment Profile Page
4. (Optional) To view the details of a deployment profile, click the Deployment Name to open a window
that offers the following tabs:
Overview: - displays where you see detailed deployment profile information, including versions.
Contents: - displays the deployment profile content.
Launch Deployment Profile
To launch a deployment profile, do the following:
1. Click the Project Tab to select it.
The tab displays with options in the left panel.
2. From the Current Project drop-down list in the left panel, select the project.
3. From the options in the left panel, click Provisioning and then select Deployment Profiles to open
the Deployment Profiles page.
It displays deployment name, version, based on, scope, and associated project.
4. Select the deployment that you want to launch and click Launch to open the Launch dialog box.
Page | 84
© Copyright 2014 Hewlett-Packard Development Company
Page 85

HP Cloud OS for Moonshot Administration Dashboard Help Version 1.0
Do the following:
Accept or modify the Infrastructure Name.
Click Launch.
If the launch is successful, you create running topology.
Note: A deployment profile can be launched multiple times to create multiple running topologies.
Manage Topology Designs
Use the Topology Designs area of the HP Cloud OS for Moonshot Administration Dashboard to manage
service designs, which are the recipes for automating the cloud. A topology design is used for
straightforward IaaS deployments, and allows you to design in a free-form layout where connection
relationships implicitly define the service fulfillment lifecycle. The provider for Topology Designs is HP
Cloud OS for Moonshot. Available components are determined by the version of OpenStack you select
within HP Cloud OS for Moonshot, e.g., Diablo, Grizzly.
As part of creating a design, you add nodes and set properties in the Editor Tab. Use the Validation Tab
at any time to view details about design errors. After creating the design, you can optionally create one or
more Profiles based on the design which allows you to override some of the original configuration
properties. Profiles create an association to a design document and allow you to set different values such
as flavors, machine images and keypairs.
Note: Topology Designs can be created by all users but should ideally be created by a Cloud Architect.
* If the topology design is created by a Project Admin or a Project User, it is suggested that the scope should not
be selected as Public, Cloud as the user will be unable save and publish the design.
* Project User cannot edit any topology created by Cloud Architect.
* Project Administrator can edit topology designs with Project scope only, such as: Public, Project; Private, Project.
The Topology Designer allows you to perform different tasks using the following:
Browse Designs Page
Overview Tab
Editor Tab
Profiles Tab
Revisions Tab
Validations Tab
Browse Designs
The Browse Designs page displays the list of existing topology designs and their status. You can perform
the following tasks in the Browse Designs page:
View Topology Designs
View Design Details
Create Topology Design
Import Topology Design
Page | 85
© Copyright 2014 Hewlett-Packard Development Company
Page 86

HP Cloud OS for Moonshot Administration Dashboard Help Version 1.0
View Topology Designs
To view the list of topology designs, do the following:
1. Click the Project Tab to select it.
The tab displays with options in the left panel.
2. From the Current Project drop-down list in the left panel, select the project.
3. From the options in the left panel, click Provisioning and then select Topology Designs to display
list of existing designs and their status in the Browse Designs page.
Figure 69: Browse Designs
You can also search for a particular design using the search options. By default, the designs are
displayed in alphabetical order. To search for a particular design use any of the following options:
Click in the By Name box to display the options.
Selecting the required option displays all the designs that meet the criteria
In the Search field, enter first few characters of the name and click .
The search result is displayed.
View Design Details
To view the design details, do the following:
1. Click the Project Tab to select it.
The tab displays with options in the left panel.
2. From the Current Project drop-down list in the left panel, select the project.
3. From the options in the left panel, click Provisioning and then select Topology Designs to display
list of existing designs and their status in the Browse Designs page.
Page | 86
© Copyright 2014 Hewlett-Packard Development Company
Page 87

HP Cloud OS for Moonshot Administration Dashboard Help Version 1.0
4. Select a design from the list of Deployment Templates.
The design details are displayed in the right panel of the Overview Tab along with the graphical
representation of the design.
Figure 70: Design Details
The design is displayed in View only mode and displays the following details.
Name - The name of the design.
Last Modified - Date, time, and user who last modified the design.
Cloud Profile - Represents the supported OpenStack version and capabilities of the cloud to
which you are deploying.
Resource Pool - Indicates the name of the Resource Pool associated with the design
Validation Status -Indicates the validation status of the Document, Nodes, Relations, and
Profiles.
Structure Overview - Shows the number of nodes and connections.
Create Topology Design
1. Click the Project Tab to select it.
The tab displays with options in the left panel.
2. From the Current Project drop-down list in the left panel, select the project.
3. From the options in the left panel, click Provisioning and then select Topology Designs to display a
list of existing designs and their status in the Browse Designs page.
4. Click Create to open the Create New Design dialog box.
Page | 87
© Copyright 2014 Hewlett-Packard Development Company
Page 88

HP Cloud OS for Moonshot Administration Dashboard Help Version 1.0
Figure 71: Create Topology Design
5. In the Name box, enter a unique descriptive name for the design with or without spaces.
6. In the Description box, enter the details about the design for example-size, operating system etc.
7. Click Next.
The General appears selected and the Resource Pool & Scope option gets highlighted.
Figure 72: Create Topology Design 2
8. From the Cloud Profile drop-down list, select HP Cloud OS Grizzly Baremetal.
It represents the supported OpenStack version and capabilities of the cloud to which you are
Page | 88
© Copyright 2014 Hewlett-Packard Development Company
Page 89

HP Cloud OS for Moonshot Administration Dashboard Help Version 1.0
Scope
Description
Private, Project
Allows you access while working in this project. This document can only
be viewed by the user who created it in the project in which it was
created and some admin users
Private, Cloud
Allows you access while working in any project. this document can only
be viewed by the user who created it from any project of which the user
is a member and by some admin users
Public, Project
Allows access to you and other project members. This document can
be viewed by members of the project in which it was created and by
some admin users
Public, Cloud
Only Cloud Users have the necessary privileges to create documents
that are scoped as Public cloud. Allows access for all users. This
document can be viewed by anyone in the cloud in any project.
deploying. Your selection here determines which node types are available during design layout in the
Editor and which Resource Pools are available for selection.
9. (Optional) Select a Resource Pool, which is a pool of resources associated with the selected Cloud
Profile.
10. Select the required Scope from any one of the options defined below:
11. Click Finish.
12. Click Save to save the details.
Import a Design
1. Click the Project Tab to select it.
The tab displays with options in the left panel.
2. From the Current Project drop-down list in the left panel, select the project.
3. From the options in the left panel, click Provisioning and then select Topology Designs to display a
list of existing designs and their status in the Browse Designs page
4. Click Import.
Import dialog box is displayed.
5. In the Archive box, enter or click (.. ) to specify the Archive File (.zip file) that contains the service
design you want to import.
Archive filenames for service designs begin with SERVICE_DESIGN_.
6. Click OK to import the design.
Overview Tab in Topology Designer
The Overview Tab opens with the selected design details at the top and a graphical representation of the
topology design at the bottom of the page.
You can perform the following tasks in the Overview Tab
View Design Details
Edit a Topology Design
Copy a Topology Design
Publish/Unpublish a Topology Design
© Copyright 2014 Hewlett-Packard Development Company
Page | 89
Page 90

HP Cloud OS for Moonshot Administration Dashboard Help Version 1.0
Export a Design
Delete a Topology Design
View Design Details
1. Click the Project Tab to select it.
The tab displays with options in the left panel.
2. From the Current Project drop-down list in the left panel, select the project.
3. From the options in the left panel, click Provisioning and then select Topology Designs to display
Browse Designs page.
The design opens in the Overview Tab with the following details:
Name - Name of the design.
Last Modified - Date, time, and user who last modified the design.
Cloud Profile - Represents the supported OpenStack version and capabilities of the cloud to
which you are deploying.
Resource Pool - Indicates the name of the Resource Pool if one was associated to the design.
Validation Status - Indicates the status of the four validation categories (Document, Nodes,
Relations, and Profiles).
Structure Overview - Displays nodes in the topology design.
Topology diagram - A graphical view of the nodes and connectors representing the design.
Edit a Topology Design
All design properties except the Cloud Profile can be edited in both the Overview and Editor Tabs.
1. Click the Project Tab to select it
The tab displays with options in the left panel.
2. From the Current Project drop-down list in the left panel, select the project.
3. From the options in the left panel, click Provisioning and then select Topology Designs to display
the list of existing topology designs in the Browse Designs page.
4. Select the design to edit.
The design displays in the Overview Tab of the Design Details page.
5. Click Edit to open the Edit Properties dialog box.
6. Make the required changes.
7. Click Finish to return to the Overview Tab.
8. Click Save to save the changes.
Page | 90
© Copyright 2014 Hewlett-Packard Development Company
Page 91

HP Cloud OS for Moonshot Administration Dashboard Help Version 1.0
Copy a Design
To make a copy of an already existing design and all its components, do the following:
1. Click the Project Tab to select it.
The tab displays with options in the left panel.
2. From the Current Project drop-down list in the left panel, select the project.
3. From the options in the left panel, click Provisioning and then select Topology Designs to display
the list of existing topology designs.
4. Select the design to copy.
The design opens in the Overview Tab of the Browse Designs page.
5. Click Save as.
A Save As dialog box is displayed.
6. In the Name box, enter a new name or keep the default which appends "copy of" to the original
design name.
7. In the Description box, enter the description as needed.
8. Click Save to save the details.
Publish/Unpublish a Design
The status of a saved topology design displays as Published or Unpublished. Published status
indicates the design is fully bound (has a Resource Pool defined), has no validation errors, and can be
used to provision. Published designs and their associated profiles can be viewed and launched by
selecting Deployment Profiles option under the Provisioning option in the Project Tab:
Project > Provisioning > Deployment Profiles.
Rules regarding saving, validation, and publishing:
You can create and save a design with validation errors.
You can create and save a profile with errors.
You cannot save a profile that has errors if the underlying design is published.
Publishing status can be viewed in Browse Designs and can be changed in the Overview or the Editor
Tabs.
To publish a design:
1. Click the Project Tab to select it
The tab displays with options in the left panel.
2. From the Current Project drop-down list in the left panel, select the project.
3. From the options in the left panel, click Provisioning and then select Topology Designs to display
Browse Designs page.
4. Select the design to publish.
The design is displayed in the Overview Tab in the Design Details page.
5. From the Overview Tab, click Publish.
If the design has no validation errors and publish is successful, the Publish button in the page
changes to Unpublish.
Page | 91
© Copyright 2014 Hewlett-Packard Development Company
Page 92

HP Cloud OS for Moonshot Administration Dashboard Help Version 1.0
To unpublish a design:
1. Follow steps 1-4 defined in the Publish a Design section to unpublish a design.
2. From the Overview Tab, click Unpublish.
The Publish button becomes available and within Browse Designs the status displays as blank.
Delete a Topology Design
1. Click the Project Tab to select it.
The tab displays with options in the left panel.
2. From the Current Project drop-down list in the left panel, select the project.
3. From the options in the left panel, click Provisioning and then select Topology Designs to display
Browse Designs page.
4. Select the design to delete.
The design displays in the Overview Tab of the Design Details page.
5. Click Delete.
A confirmation box is displayed.
6. Click Yes.
The design is deleted and the Browse Designs page is displayed. The design does not display in the
list of designs.
Export a Design
The export process takes all the topology files, including the design in XML format, and creates a content
archive (.zip) file. Exporting is used for data backup within the same HP Cloud OS instance.
The design must be valid and you must specify a Resource Pool before exporting.
1. Click the Project Tab to select it.
The tab displays with options in the left panel.
2. From the Current Project drop-down list in the left panel, select the project.
3. From the options in the left panel, click Provisioning and then select Topology Designs to display
Browse Designs page.
4. Select the design to export.
5. From the Overview Tab, click Export.
A dialog box opens prompting you to save the archive (.zip) file.
6. Click Save to save the design.
Editor
The Editor Tab within Topology Designs helps you to create and edit a design in a free-form component
layout.
You can perform the following tasks in the Editor Tab.
Create a new design
Use Editor Controls
Design Topology Layouts
Page | 92
© Copyright 2014 Hewlett-Packard Development Company
Page 93

HP Cloud OS for Moonshot Administration Dashboard Help Version 1.0
Icon
Description
Delete selected item.
Zoom in.
NOTE: You can also use the wheel on your mouse to zoom in and out within the Editor.
Zoom out.
Zoom the design to fit the window.
Toggle between show or hide a navigator.
Edit a Topology Design
Create a new design
From Browse Designs, click Create.
A blank canvas displays in the Editor tab. For more information, refer to Create Topology Design.
Figure 73: Editor Tab in Topology Designer
Use Editor Controls
When you open the editor, the following controls are available in the left toolbar:
Design Topology Layouts
You can design the free-form component layout of nodes and their connections in the Editor Tab once
the design is created.
As you move your cursor around the canvas in the Editor, gray tiles are displayed. Once you click a tile, a
list of available node types determined by the Cloud Profile is displayed. A new blank design displays at
© Copyright 2014 Hewlett-Packard Development Company
Page | 93
Page 94

HP Cloud OS for Moonshot Administration Dashboard Help Version 1.0
Node Name
Node Properties
Description
Server Group
Name*
By default, the system proposes a name with a sequential
number for each server group added to the design, e.g.,
Server Group 1, Server Group 2. Replace this name, if
required.
Instance Name
Prefix*
A prefix to the name of the host you are creating.
Number of Instances
Controls the minimum and maximum number of servers
that can be used in the server group. To create a single
server Server Group, specify 1 for both values. For a
Server Group where the maximum number of servers is
greater than the minimum, the user is allowed to add
additional servers in the future up to the maximum.
Image
Image is only available if a Resource Pool was selected
during design creation. To add a resource Pool to the
design, click the Edit Design Properties button.
Machine
Flavor*
A flavor describes the machine configuration size (amount
of memory, number of CPUs, and storage capacity of
Baremetal instances.
Machine Flavor is only available if a Resource Pool was
selected during design creation. To add a Resource Pool
to the design, click Edit.
least one validation error indicating the design layout is unsaved. As you add nodes, more validation
issues will display until you set required properties for the nodes and save the template. By default, the
system proposes a Name for the node consisting of the node type and a sequential number, e.g.,
Network Segment 1. This name can be changed by editing the node properties.
To create a design layout, do the following:
1. After you create a new design, the Editor opens with a blank canvas.
You can define the design layout in the canvas.
2. Left-click a tile to display a list.
3. Select the node type as Server Group.
The icon displays in the canvas and the properties are displayed in the right panel.
Note: Currently HP Cloud OS for Moonshot supports only server groups.
To set the properties for the Node (Server Group)
Note: The term Node is used here for Server Group as currently we are supporting only Server Group.
Do the following:
Click to select the node in the canvas.
The properties panel displays on the right side of the page. The properties that you set in the panel
become the default configuration of the design. The following table defines the node properties.
© Copyright 2014 Hewlett-Packard Development Company
Page | 94
Page 95

HP Cloud OS for Moonshot Administration Dashboard Help Version 1.0
Key Name
Select the keypair to be used for this instance. Keypairs
are the SSH credentials required for accessing an
instance. Key Name is only available if a Resource Pool
was selected during design creation.
Click Save to save the details.
Edit a Topology Design
Once the design is created and saved, you can modify the properties of the components and change the
layout of the nodes and connectors within the Editor tab. A selected component is indicated with blue
highlighting and associated properties open in the right panel for editing. For more information on creating
a design and specific properties, refer to Design Topology Layout section.
1. Click the Project Tab to select it.
The tab displays with options in the left panel.
2. From the Current Project drop-down list in the left panel, select the project.
3. From the options in the left panel, click Provisioning and then select Topology Designs to display
Browse Designs page.
4. Select the design to edit.
5. Click the Editor tab.
The design displays on the canvas.
Figure 74: Edit Design
6. Make the required changes.
7. Click Save to save the details.
To edit node properties
1. In the Editor Tab, click the node to edit.
The properties display in the right panel.
© Copyright 2014 Hewlett-Packard Development Company
Page | 95
Page 96

HP Cloud OS for Moonshot Administration Dashboard Help Version 1.0
2. Edit the fields as required.
3. Click Save.
To delete node/nodes
1. Select the item on the canvas to be deleted.
2. Right-click and select Delete Item.
The system prompts you to confirm the deletion.
3. Click Yes to confirm.
The item is removed from the layout.
Profiles
When a topology design is created, the properties set for the nodes become the default configuration for
the design. This configuration displays as the Default Profile in the Provisioning > Deployment Profiles
option. Profiles provide a way to override the default configuration by allowing you to set different values
for node properties such as flavors, machine images, or keypairs. They create an association to a binding
document. Profiles are optional and are not required in order to publish a design.
Profiles are validated by the topology designer and tracked in the Validation Tab. The validation process
checks that a profile contains valid values for the configuration properties that are being overwritten.
You can create as many profiles as required. You can also create a new profile based on an existing
profile with similar configuration to save time and duplication of effort.
View Profiles List
1. Click the Project Tab to select it. The tab displays with options in the left panel.
2. From the Current Project drop-down list in the left panel, select the project.
3. From the options in the left panel, click Provisioning and then select Topology Designs to display
Browse Designs page with a list of existing designs.
4. Select the design for which you want to view profiles.
5. Click the Profiles tab. A list of existing profiles is displayed.
Page | 96
© Copyright 2014 Hewlett-Packard Development Company
Page 97

HP Cloud OS for Moonshot Administration Dashboard Help Version 1.0
Figure 75: Profiles Page
6. Select a profile.
7. The profile opens in the Overview Tab, showing the Name, Description, Changed properties and a
visual representation of the topology design.
Create a Profile
1. Click the Project Tab to select it. The tab displays with options in the left panel.
2. From the Current Project drop-down list in the left panel, select the project.
3. From the options in the left panel, click Provisioning and then select Topology Designs to display
Browse Designs page with a list of existing designs.
4. Select the design for which you want to create a profile.
5. Click the Profiles tab.
6. Click Create.
Page | 97
© Copyright 2014 Hewlett-Packard Development Company
Page 98

HP Cloud OS for Moonshot Administration Dashboard Help Version 1.0
Figure 76: Create a Profile Page
7. From the Based on drop-down list, select an existing profile on which you want to base the new
profile. If you select an existing profile, you save configuration time and effort as properties for the
existing profile are populated in the new profile.
8. In the Name box, enter the name for the new profile.
9. In the Description box, enter the description for the profile.
10. From the Resource Pool drop-down list, select the resource pool.
11. From the Scope drop-down list, select the scope.
12. Click OK.
13. The profile opens in the Editor Tab, with the title bar at the top of the window displaying the path to
the Profile Detail of the current design.
Page | 98
© Copyright 2014 Hewlett-Packard Development Company
Page 99

HP Cloud OS for Moonshot Administration Dashboard Help Version 1.0
Figure 77: New Profile displays in Editor Tab
14. In the Editor Tab, update fields as required for the new configuration profile.
15. Click Save.
16. Click the design name in the title bar path to return to the Profiles tab,
Edit a Profile
1. Click the Project Tab to select it. The tab displays with options in the left panel.
2. From the Current Project drop-down list in the left panel, select the project.
3. From the options in the left panel, click Provisioning and then select Topology Designs to display
Browse Designs page with a list of existing designs.
4. Select the design for which you want to view profiles.
5. The design displays in the Overview Tab.
6. Click the Profiles Tab.
7. Click the profile to edit.
The profile opens in the Overview Tab, showing the topology design diagram on the right and details
in the left panel.
8. Click Edit to make the required changes.
9. Click OK. The Overview Tab is displayed
10. Click Save to save the details.
Page | 99
© Copyright 2014 Hewlett-Packard Development Company
Page 100

HP Cloud OS for Moonshot Administration Dashboard Help Version 1.0
Delete a Profile
The ability to delete a profile is determined by your Scope. For example, only a Cloud Administrator can
create, edit, or delete profiles that are scoped Public, Cloud.
1. Click the Project Tab to select it. The tab displays with options in the left panel.
2. From the Current Project drop-down list in the left panel, select the project.
3. From the options in the left panel, click Provisioning and then select Topology Designs to display
Browse Designs page with a list of existing designs.
4. Select the design with the profile to delete.
5. From the Overview tab, click the Profiles tab.
6. Click on the profile you want to delete.
The profile opens in the Overview tab, showing the topology design diagram on the right and details
in the left panel.
7. Click Delete. A confirmation dialog box displays.
8. Click Yes. The profile is deleted.
Revisions
The system tracks design revisions sequentially in the Revisions tab. Every time a design is edited and
saved, the revisions list is updated. You can revert to an earlier version of the design, if required.
To revert to a previous design version, do the following:
1. Click the Project Tab to select it. The tab displays with options in the left panel.
2. From the Current Project drop-down list in the left panel, select the project.
3. From the options in the left panel, click Provisioning and then select Topology Designs to display
Browse Designs page with a list of existing designs.
4. Select the design for which you want to view profiles.
5. Select the design you want to revert.
6. From the Overview Tab, click the Revisions Tab. A list of design revisions are displayed with the
Revision number and Date & Time.
7. Select a revision from the list.
8. Click Revert to Selected.
9. Click Yes to confirm. A new version is created (a copy of the selected version) with updated details.
Validation
Validation is a continuing process during design creation, configuration and editing. Topology Designs
provide a validation log to view all design detail issues in one place. While creating design in Editor Tab
and Profiles in Profiles Tab, an error count is displayed in case of errors. The validation process checks
that a Profile contains all the required configuration properties, for example the image is selected etc.
Within the Editor, the following artifacts are validated:
Document properties
Node properties
Page | 100
© Copyright 2014 Hewlett-Packard Development Company
 Loading...