

Page 1
User's Guide
NeroVision Express 2
Bringing the world of video closer to home - Creating
your very own DVD, VCD, SVCD and miniDVD
Ahead Software AG
Page 2

Copyright and Trademark Information
The NeroVision Express 2 Quick Start Guide and the NeroVision Express 2
Software are copyrighted and the property of Ahead Software AG, Im
Stoeckmaedle 18, 76307 Karlsbad, Germany. All rights are reserved.
This Quick Start Guide contains materials protected under International Copyright
Laws.
It is expressly forbidden to copy, reproduce, duplicate or transmit all or any part of
the Guide or the software without the prior written consent of Ahead Software AG.
All brand names and trademarks are properties of their respective owners.
THIS MANUAL IS PROVIDED 'AS IS,' AND AHEAD SOFTWARE AG MAKES NO
REPRESENTATIONS OR WARRANTIES, EXPRESS OR IMPLIED, INCLUDING,
BUT NOT LIMITED TO, WARRANTIES OF MERCHANTABILITY, FITNESS FOR
A PARTICULAR PURPOSE, NON-INFRINGEMENT, OR TITLE; THAT THE
CONTENTS OF THE MANUAL ARE SUITABLE FOR ANY PURPOSE; NOR
THAT THE IMPLEMENTATION OF SUCH CONTENTS WILL NOT INFRINGE
ANY THIRD PARTY PATENTS, COPYRIGHTS, TRADEMARKS OR OTHER
RIGHTS.
AHEAD SOFTWARE AG WILL NOT BE LIABLE FOR ANY DIRECT, INDIRECT,
SPECIAL OR CONSEQUENTIAL DAMAGES ARISING OUT OF ANY USE OF
THE MANUAL OR THE PERFORMANCE OR IMPLEMENTATION OF THE
CONTENTS THEREOF.
The name and trademarks of Ahead Software AG may NOT be used in advertising
or publicity pertaining to this manual or its contents without specific written prior
permission. Title to copyright in this manual will at all times remain with Ahead
Software AG.
Ahead Software AG accepts no claims for the correctness of the contents of the
manual. The contents of the enclosed software and the manual are subject to
change.
If you are neither in possession of the copyright nor have authorization from
the owner of the copyright, unauthorized copying of CDs violates national
and international legislation and can result in severe penalties.
Copyright © 1995-2003 by Ahead Software AG
REV. 1.1
Page 3

Contents
1 Introduction.......................................................................................... 5
1.1 Welcome to NeroVision Express 2 ..................................................5
2 Installing NeroVision Express 2 ......................................................... 6
2.1 System Requirements.......................................................................6
2.2 Installing from CD .............................................................................7
2.3 Uninstalling NeroVision Express 2.................................................. 7
3 Getting Started..................................................................................... 8
3.1 Opening NeroVision Express 2 for the first time............................8
3.2 Getting to know the user interface ..................................................9
3.2.1 Save Button.......................................................................................12
3.3 Nero Cover Designer....................................................................... 13
4 Capturing Video from DV cameras and other external video
devices ............................................................................................... 14
4.1 Capturing .........................................................................................14
4.2 Digital video vs. Analog video .......................................................14
4.3 Setting up your hardware ...............................................................15
4.3.1 Digital Video ......................................................................................15
4.3.2 Analog Video .....................................................................................15
4.4 Capturing your first video ..............................................................16
5 Making your first DVD-Video, VCD, SVCD or miniDVD .................. 20
5.1 Choosing the right format ..............................................................20
5.2 Information regarding the DVD Plug-in ......................................... 21
5.3 Starting a video project ..................................................................22
6 Open Existing Project ....................................................................... 32
6.1 Open Existing Project .....................................................................32
NeroVision Express 2 Contents • 3
Page 4

7 Editing Your Video............................................................................. 34
7.1 Editing Your Video ..........................................................................34
7.2 Trimming video titles ......................................................................36
7.3 Adding Chapter Marks ....................................................................38
7.3.1 Creating chapter marks manually......................................................38
7.3.2 Adding chapter marks automatically .................................................40
7.3.3 Working with chapters .......................................................................40
8 Create your first slide show.............................................................. 42
8.1 Create your first slide show ...........................................................42
9 Create your first movie...................................................................... 51
9.1 Create your first movie ...................................................................51
9.2 Exporting the movie........................................................................62
10 DVD+VRs ............................................................................................ 66
10.1 DVD+VRs..........................................................................................66
10.2 Making DVD+VRs from videos stored on the hard drive.............66
10.3 Adding videos stored on the hard drive to a DVD+VR disk ........68
10.4 Making a DVD+VR disk directly from a capture source...............70
11 Menu Layout ...................................................................................... 73
11.1 Menu Layout ....................................................................................73
12 Preview Settings................................................................................ 80
12.1 Preview Settings.............................................................................. 80
13 Technical Support ............................................................................. 82
13.1 F.A.Q.’s.............................................................................................82
13.2 Contact Information ........................................................................84
14 Glossary ............................................................................................. 85
15 Index ................................................................................................... 89
NeroVision Express 2 Contents • 4
Page 5

1 Introduction
1.1 Welcome to NeroVision Express 2
NeroVision Express 2 is the new video capturing, authoring and burning software
with an incredibly user-friendly interface that allows you to 'capture' your videos
from DV cameras and other external video devices, and record them to DVDVideo, Video CD (VCD), Super Video CD (SVCD) and miniDVD. With the many
features offered in this powerful multimedia software, you will have numerous
options for creating and collecting your memories. Even for those who are new to
the world of video will find that NeroVision Express 2 is fun and easy with no
worries!
With NeroVision Express 2 you can …
Trim your videos in a fast and flexible way
Create chapters using automatic scene detection and/or set chapter marks
manually
Create video discs with your own and customize menus using pre-defined
layout templates and button frames
Add your own background pictures and text design
Use the preview mode and the handy remote control to view your video project
… and much much more!
Once you have your DV camcorder, 1394 Firewire card, and appropriate hardware,
you are on your way to creating your own movies. If you have a DirectShowcompatible Video Card, you can use NeroVision Express 2 to capture video from
the Video Capture card directly. If you don´t have any video hardware at all, you
will still be able to work with video files that are on your system or that you
downloaded from the internet.
Sit back, relax, and enjoy the easy-to-use features of NeroVision Express 2!
NeroVision Express 2 Introduction • 5
Page 6

2 Installing NeroVision Express 2
2.1 System Requirements
Supported Operating Systems
With your system should come a pre-installed operating system. Below you will find
a list that NeroVision Express 2 supports. Please check to make sure that you
have one of the following operating systems:
Windows 98/SE
Windows ME
Windows 2000
Windows XP
In addition, DirectX 9.0a should be installed. To download the latest version of
DirectX please visit www.microsoft.com/directx/default.asp
Minimum Hardware Requirements
Your PC must have a 500 MHz processor or higher. 800 MHz (for capturing to
hard disk), 1.6 GHz (for capturing to DVD). A faster processor is recommended
for best performance.
You must have at least 128
Hard disk space: 100 MB for the standard installation and up to 4.7 GB (for DVD
projects, VCD/SVCD projects require up to 800MB) of HD space for temporary
files.
To burn a DVD-Video disc, you need to have a supported DVD recordable drive
connected to your system. To burn VCD/SVCD/miniDVD discs, you need to
have a supported CD and/or DVD recordable drive connected to your system.
(Please visit www.nero.com
do not have a recorder capable of burning DVD and/or VCD/SVCD/miniDVD
discs, you can still burn a disc image on your hard drive and save it for future
use. Once you have the appropriate recordable drive connected to your system,
you can open disc images using Nero and/or Nero Express at any time, and
burn real video discs.
Graphics card (800x600 display, 16-bit color) with 8 MB or higher
MB RAM memory. Generally, more would be better.
or the list of currently supported drives). Even if you
.
Sound card
Firewire (IEEE 1394) and/or USB port (optional)
DirectShow compatible video capture card (optional)
NeroVision Express 2 Installing NeroVision Express 2 • 6
Page 7

2.2 Installing from CD
Step 1: Insert the NeroVision Express 2 CD-ROM into your CD/DVD drive on
your PC.
If you have a feature called 'Autorun' activated, this will start your installation
process automatically.
If you do not have 'Autorun' activated, you can go to My Computer > Click on
the drive letter of the CD/DVD drive > click setup.exe
Step 2: Follow prompts until you are finished installing the software.
NOTE: NeroVision Express 2 works with the same serial number as Nero
Burning ROM and/or Nero Express. If Nero Burning ROM and/or Nero Express
are already installed on your system, you do NOT need to enter a NeroVision
Express 2 serial number. If you have no serial number, you can get one at
www.nero.com
Some versions of NeroVision Express 2 that are delivered together with the
hardware (OEM versions) may have an integrated serial number, in which case
you will also not be requested to enter a serial number. Simply enter your name
and company to personalize your software. Then click OK.
Step 3: Restart your PC.
2.3 Uninstalling NeroVision Express 2
Step 1: Go to Start > Control Panel > Add or Remove Programs.
In some operating systems, you will find - Start > Settings > Control Panel.
Step 2: Select NeroVision Express 2 in the Add or Remove Programs window
and click 'Remove'.
Step 3: In some cases, you will find that when removing software, there will be one
or two files that the operating system will ask if you want them removed since they
may be shared by other programs. If you are unsure, always opt to keep these
files.
NeroVision Express 2 Installing NeroVision Express 2 • 7
Page 8
3 Getting Started
With the many features offered in this powerful multimedia software, you will have
numerous options for creating and collecting your memories.
3.1 Opening NeroVision Express 2 for the first time
Now that we are ready to start recording your first disc, let us begin by opening the
program NeroVision Express 2.
There are two ways to start the software program:
(1) Go to the Start > All Programs > Nero > NeroVision Express 2 then >
NeroVision Express. For some operating systems, you will find - Start >
Programs > Nero > NeroVision Express 2 > NeroVision Express.
(2) You can also create a shortcut for NeroVision Express 2 on your desktop by
simply going to My Computer > Local Disk (C) > Program Files > Ahead >
NeroVision Express 2 > NeroVision.exe.
F.Y.I.! The path how to open NeroVision Express 2 described above can
differ in some versions.
Click the right mouse button on this file and select Send To > Select Desktop
(create shortcut). An icon for NeroVision Express 2 will now be placed on your
desktop!
To start NeroVision Express 2, go to your desktop and click on the newly created
icon:
NOTE: If you have a demo version, please click the 'Demo' button for your trial
period. Please visit www.nero.com
are able to register your software copy after the trial period is over.
NeroVision Express 2 Getting Started • 8
to purchase a serial number online so that you
Page 9
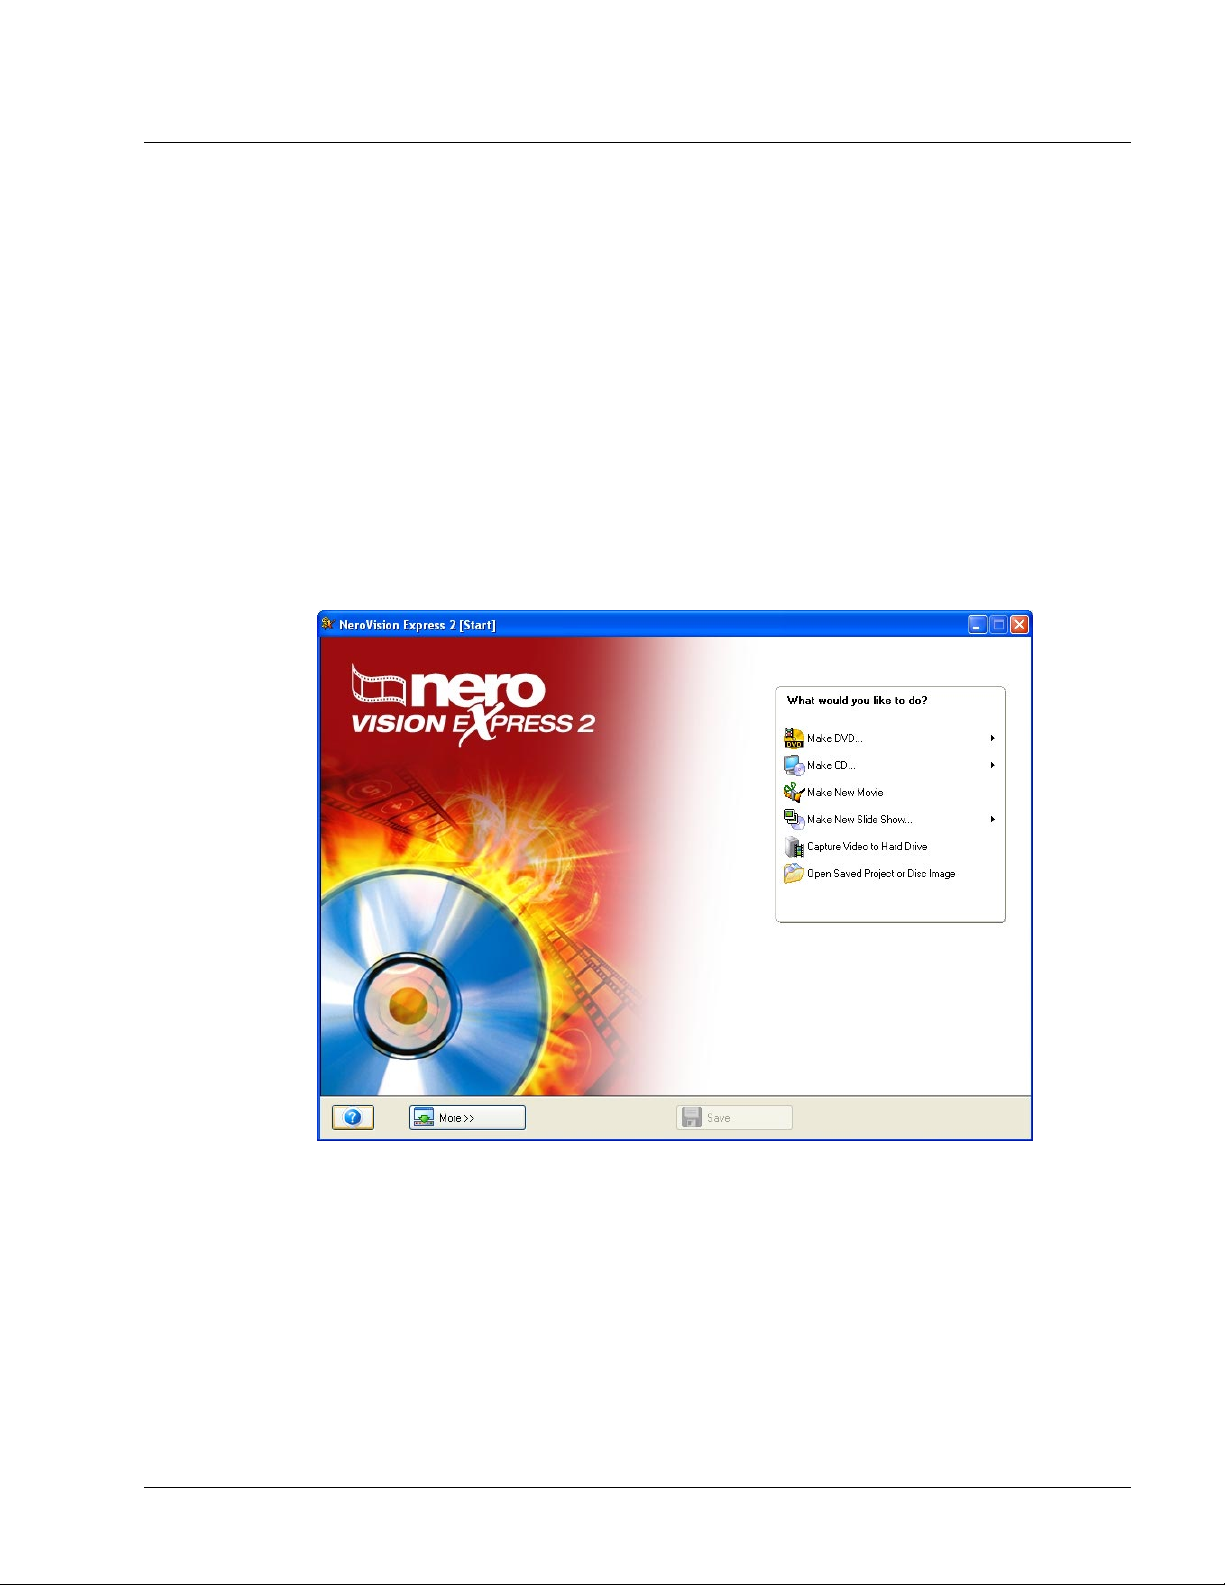
3.2 Getting to know the user interface
NeroVision Express 2 uses a user interface style that you will find very familiar
and easy to use. It basically consists of choosing a task from the START screen,
and then completing the task by navigating through various steps (each step
consisting of a new screen) using the 'Next' button on the navigation bar. You can
move back and forth throughout the various steps of the task by clicking on the
'Back' and 'Next' buttons in the navigation bar. After you have finished a task, you
are taken to the FINISH screen, where you are again given a set of tasks to choose
from.
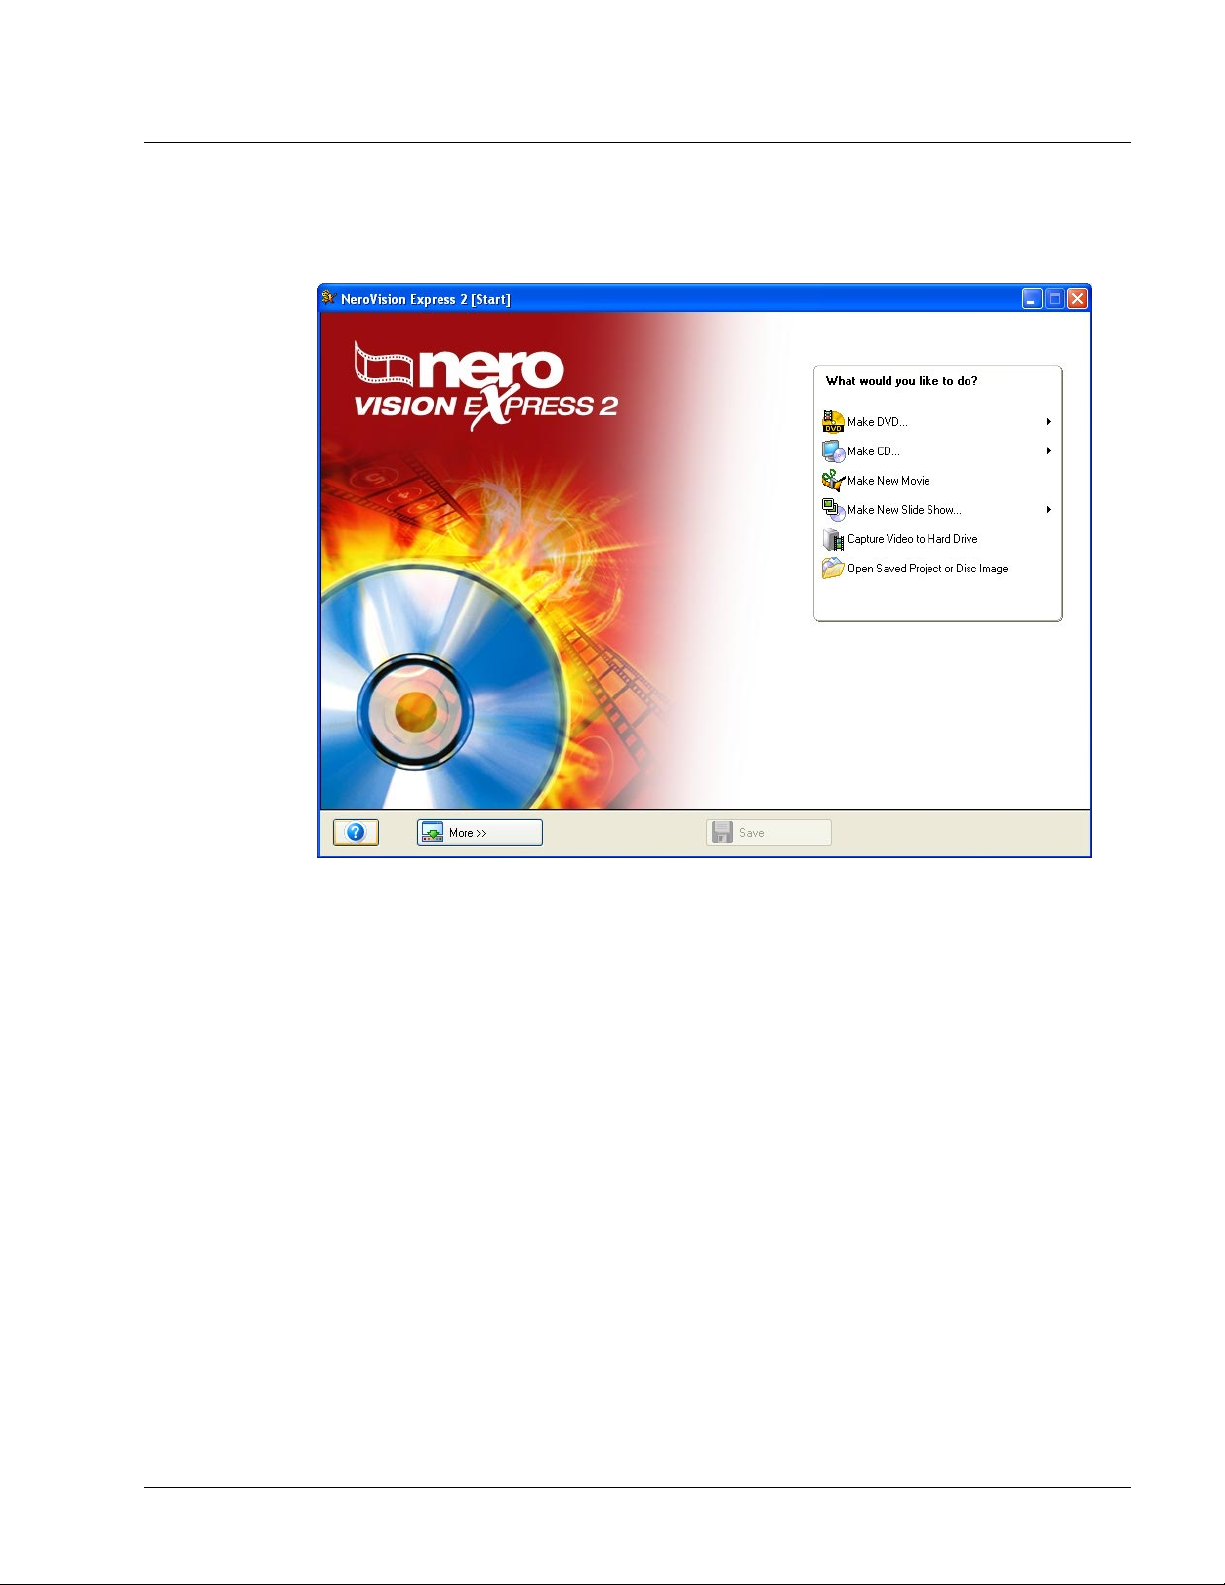
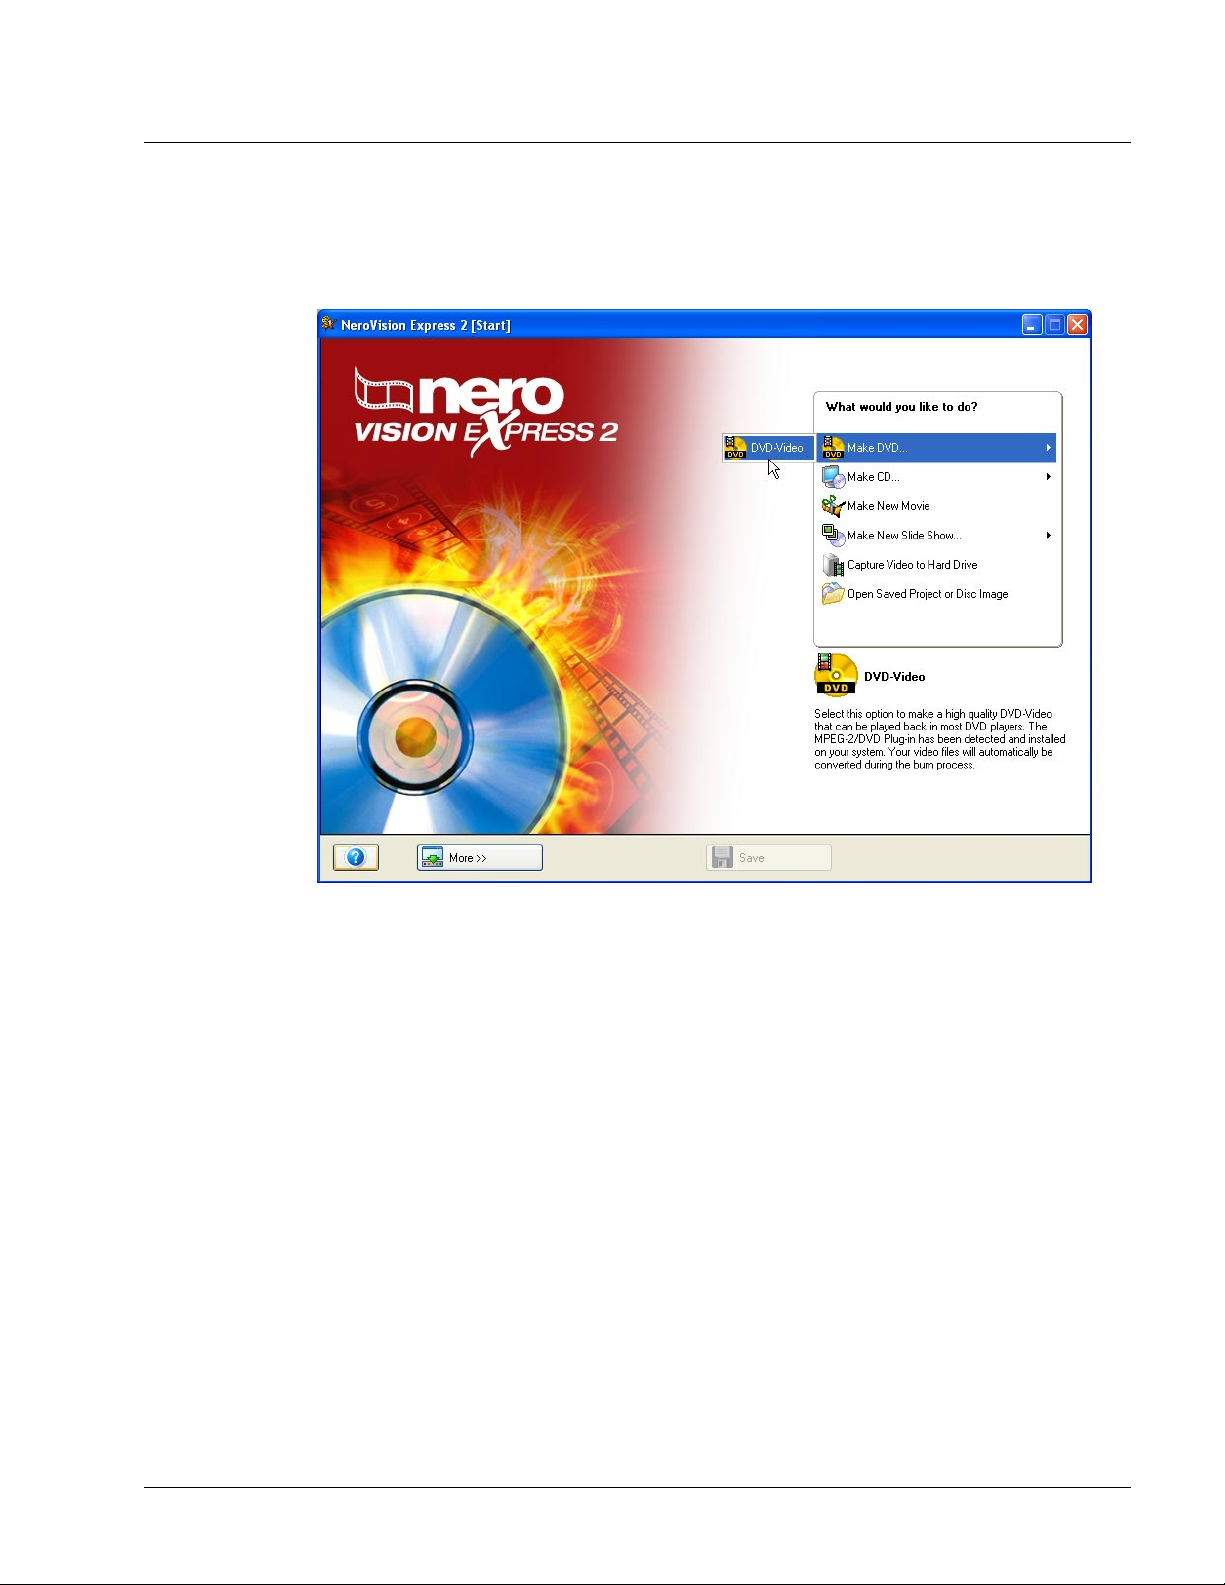
Step 1: Choose a task: Choose what you would like to do by moving your mouse
over the items in the task selection menu. As you move your mouse pointer over a
project entry, an explanatory text will pop up underneath. Once you have made
your choice, simply click your left mouse button to start the task.
For each task, you will find a chapter in this manual that explains all the steps
involved to complete it.
NeroVision Express 2 Getting Started • 9
Page 10
Step 2: Complete a task: depending on the task, you will have to go through
various steps until you reach the end. Each step consists of a new screen. To
move to the next screen or to go back to the previous screen, simply use the 'Next'
and 'Back' buttons on the navigation bar.
To help you know where you are and what you need to do, each screen comes
with a name and a brief description.
NeroVision Express 2 Getting Started • 10
Page 11
Some screens include a menu. As you move over each entry, an explanatory text
will pop up underneath.
This is the navigation bar that lets you move through the various steps of a project.
NOTE: Each screen contains tooltips, detailed information regarding the buttons,
icons or menus and what they are for. Simply hold your mouse pointer for a few
seconds over such item, to learn more about them.
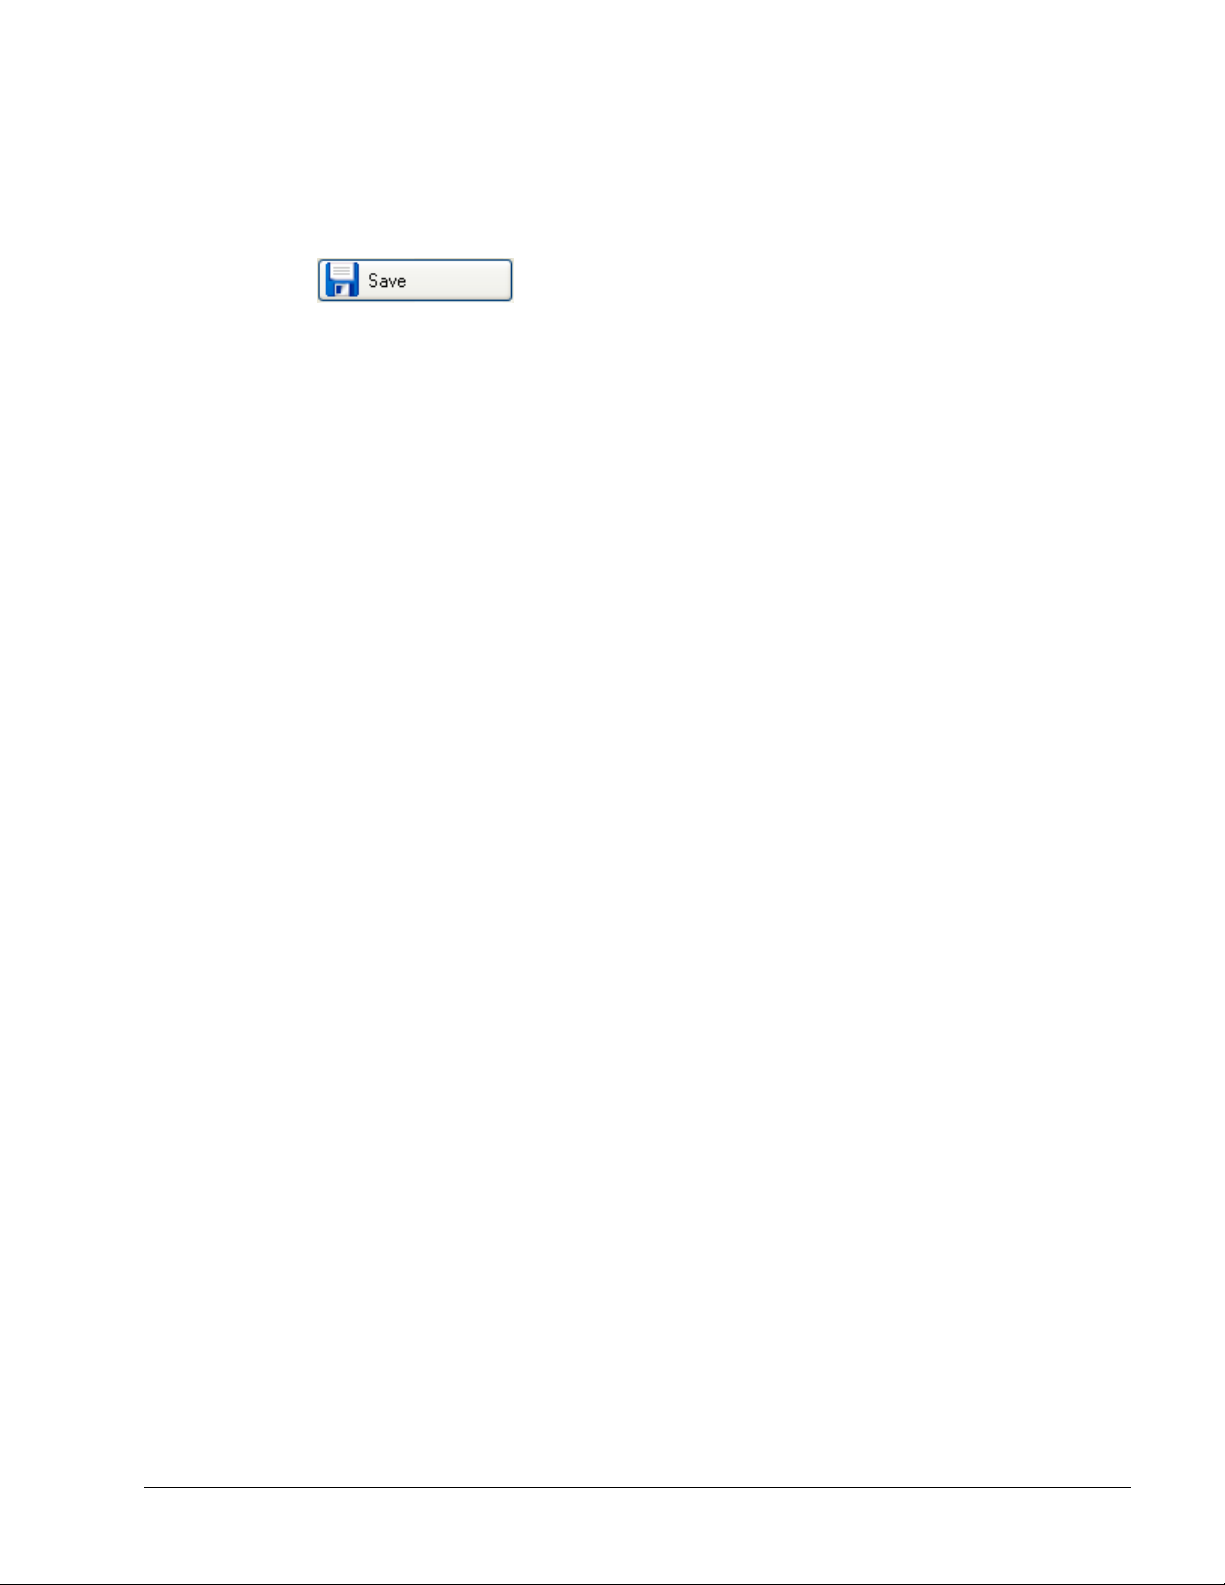
Step 3: Finish: Once a task has been completed, you will end up at the FINISH
screen where you can once more choose what you would like to do next. When the
mouse pointer is over an entry, an explanatory text will pop up underneath. Once
you have made your choice, simply click your mouse button to start the task.
NeroVision Express 2 Getting Started • 11
Page 12
3.2.1 Save Button
If you would like to save your DVD-Video, VCD or SVCD project with all the
changes and modifications that were made, click the 'Save' button and your project
will be saved to a file with the extension of .NVC, which is the acronym for
NeroVision Express 2 Compilation. This option is also great for times in which you
are not able to finish your layout and would like to continue at a later time.
NeroVision Express 2 Getting Started • 12
Page 13
3.3 Nero Cover Designer
Included with your version of NeroVision Express 2 is Nero Cover Designer.
With Nero Cover Designer, you can create professional-looking labels and covers
for your CD/DVD discs with the pre-designed templates or create your very own
designs. Please see the dedicated Nero Cover Designer manual (included on
your NeroVision Express 2 CD-ROM) for more details.
There are two ways to start the software program:
(1) As a stand-alone application: Go to the Start > All Programs
NeroVision Express 2> then > Nero Cover Designer. For some operating
systems, you will find - Start > Programs > Nero > NeroVision Express 2 > Nero
Cover Designer.
F.Y.I.! The path how to open Nero Cover Designer described above can
differ in some versions.
(2) From NeroVision Express 2: When you have completed a task and are on the
FINISH screen, just select 'Make Covers and Labels' from the menu and click your
left mouse button.
> Nero >
NeroVision Express 2 Getting Started • 13
Page 14

4 Capturing Video from DV cameras and
other external video devices
4.1 Capturing
Capturing is a way of taking the video from your DV camera (or from external video
sources connected to your video capture card) and bringing it to your computer.
This chapter will assist you with your first video capture.
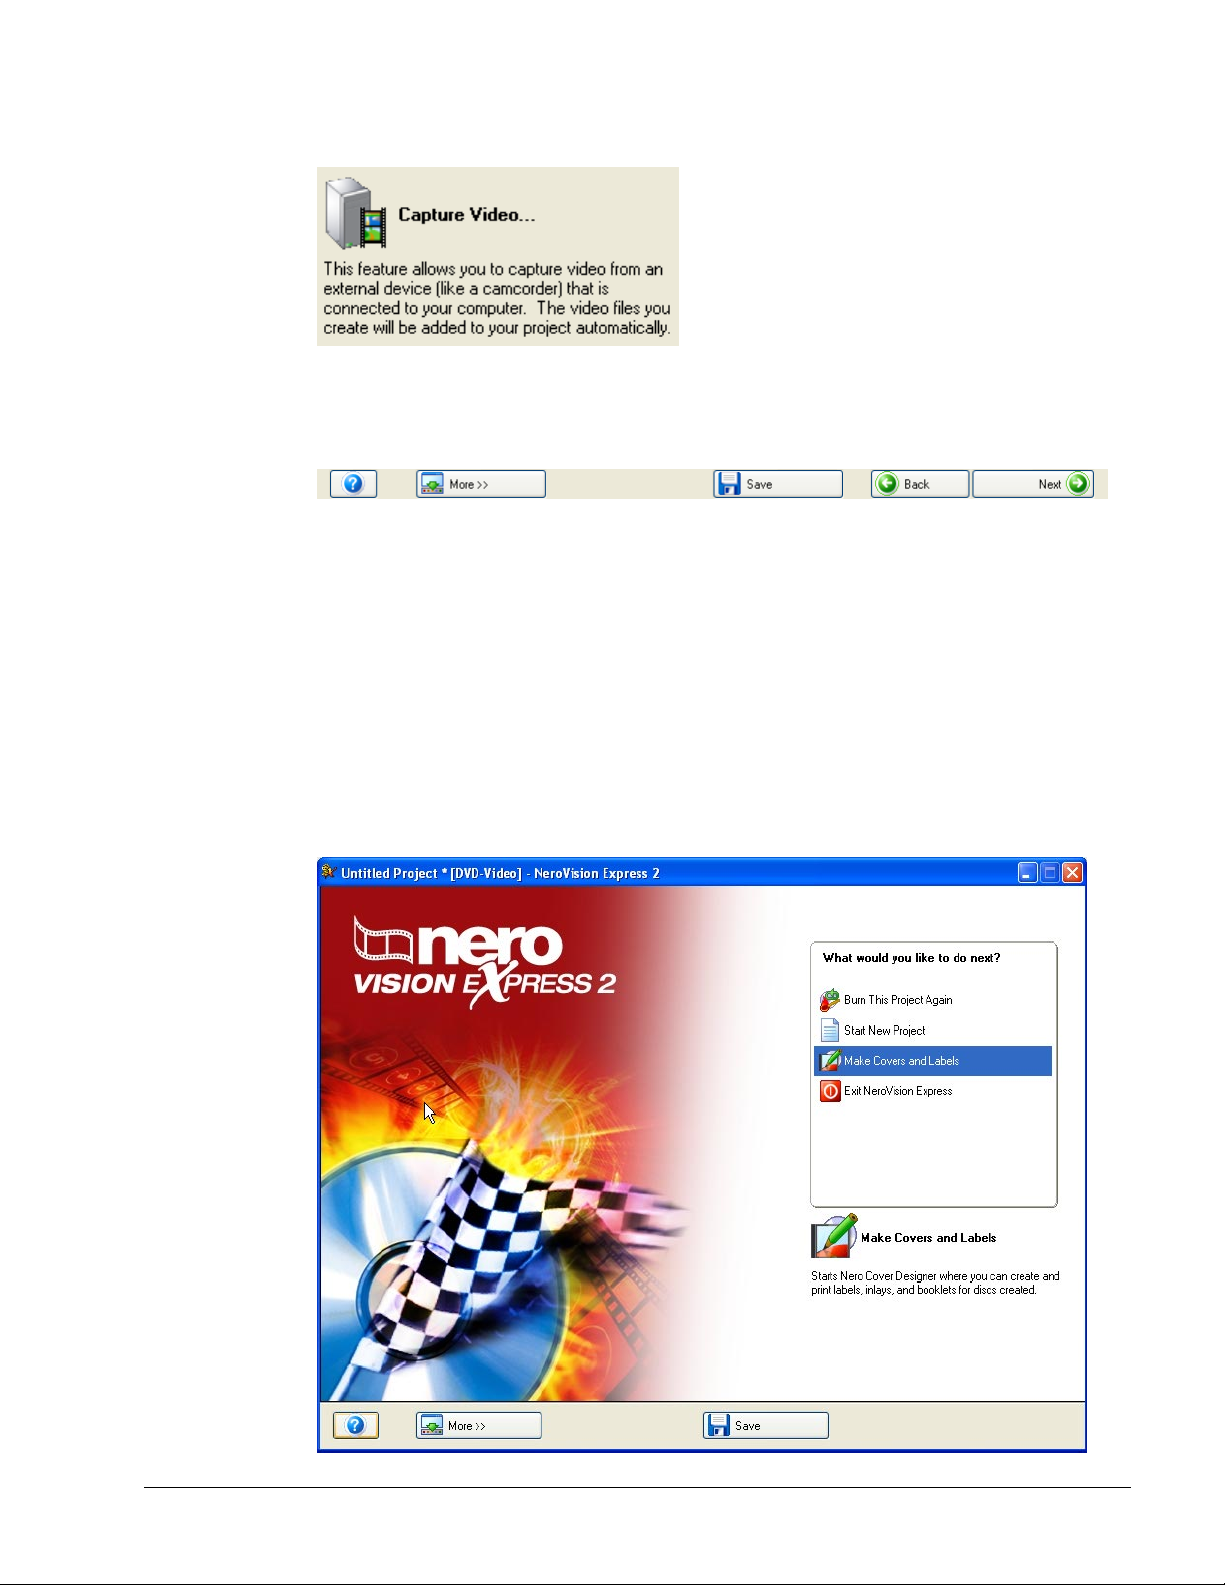
NOTE: You should select the 'Capture Video' task from the START screen if you
want to simply transfer video from external sources to your PC and use the
captured video in a future project. If you want to make a DVD-Video, VCD, SVCD
or miniDVD and need to capture video for that specific project, you should select
the respective 'Make DVD (or CD, SVCD, miniDVD)' task from the START screen
and select 'Capture Video' on the CONTENT page. That way you can capture
video and work on your project simultaneously.
4.2 Digital video vs. Analog video
There are two types of video sources – analog video and digital video (DV) which
have different hardware requirements.
Digital Video (DV): a DV source means that the video signal is delivered by the
device to your computer in a digital format. Such devices would typically be DV
Camcorders. All you need to transfer video to your PC is a connecting cable and
respective sockets on your PC.
Analog Video: video signals from an analog source need to be converted to a
digital format for your computer to be able to work with them. Examples of analog
video sources include VHS video recorders, TV, VHS-C, 8mm and Hi-8
Camcorders. Unlike DV sources where the device itself delivers digital video
signals to your PC, you need to have a video capture card installed in case of
analog video signals. The capture card then converts the analog video signals into
digital signals.
NeroVision Express 2 Capturing Video from DV cameras and other external video devices • 14
Page 15

4.3 Setting up your hardware
4.3.1 Digital Video
Step 1: Please make sure that you have followed the manufacturer’s instructions
on installing your Firewire (IEEE 1394) card or USB card unless it is built-in to your
computer or laptop.
Step 2: Attach your DV device to the Firewire (IEEE 1394) cable (or USB cable)
then connect it to the corresponding socket on your PC. If your camera is not
turned on, please do so now.
4.3.2 Analog Video
Step 1: Please make sure that you have followed the manufacturer’s instructions
on installing your video capture card unless it is built-in to your computer or laptop.
Step 2: Connect your analog video device to the video input socket of your capture
card using the necessary cables (please check manufacturer´s instructions
regarding which cable is required).
Step 3: Turn on your analog video device.
NeroVision Express 2 Capturing Video from DV cameras and other external video devices • 15
Page 16
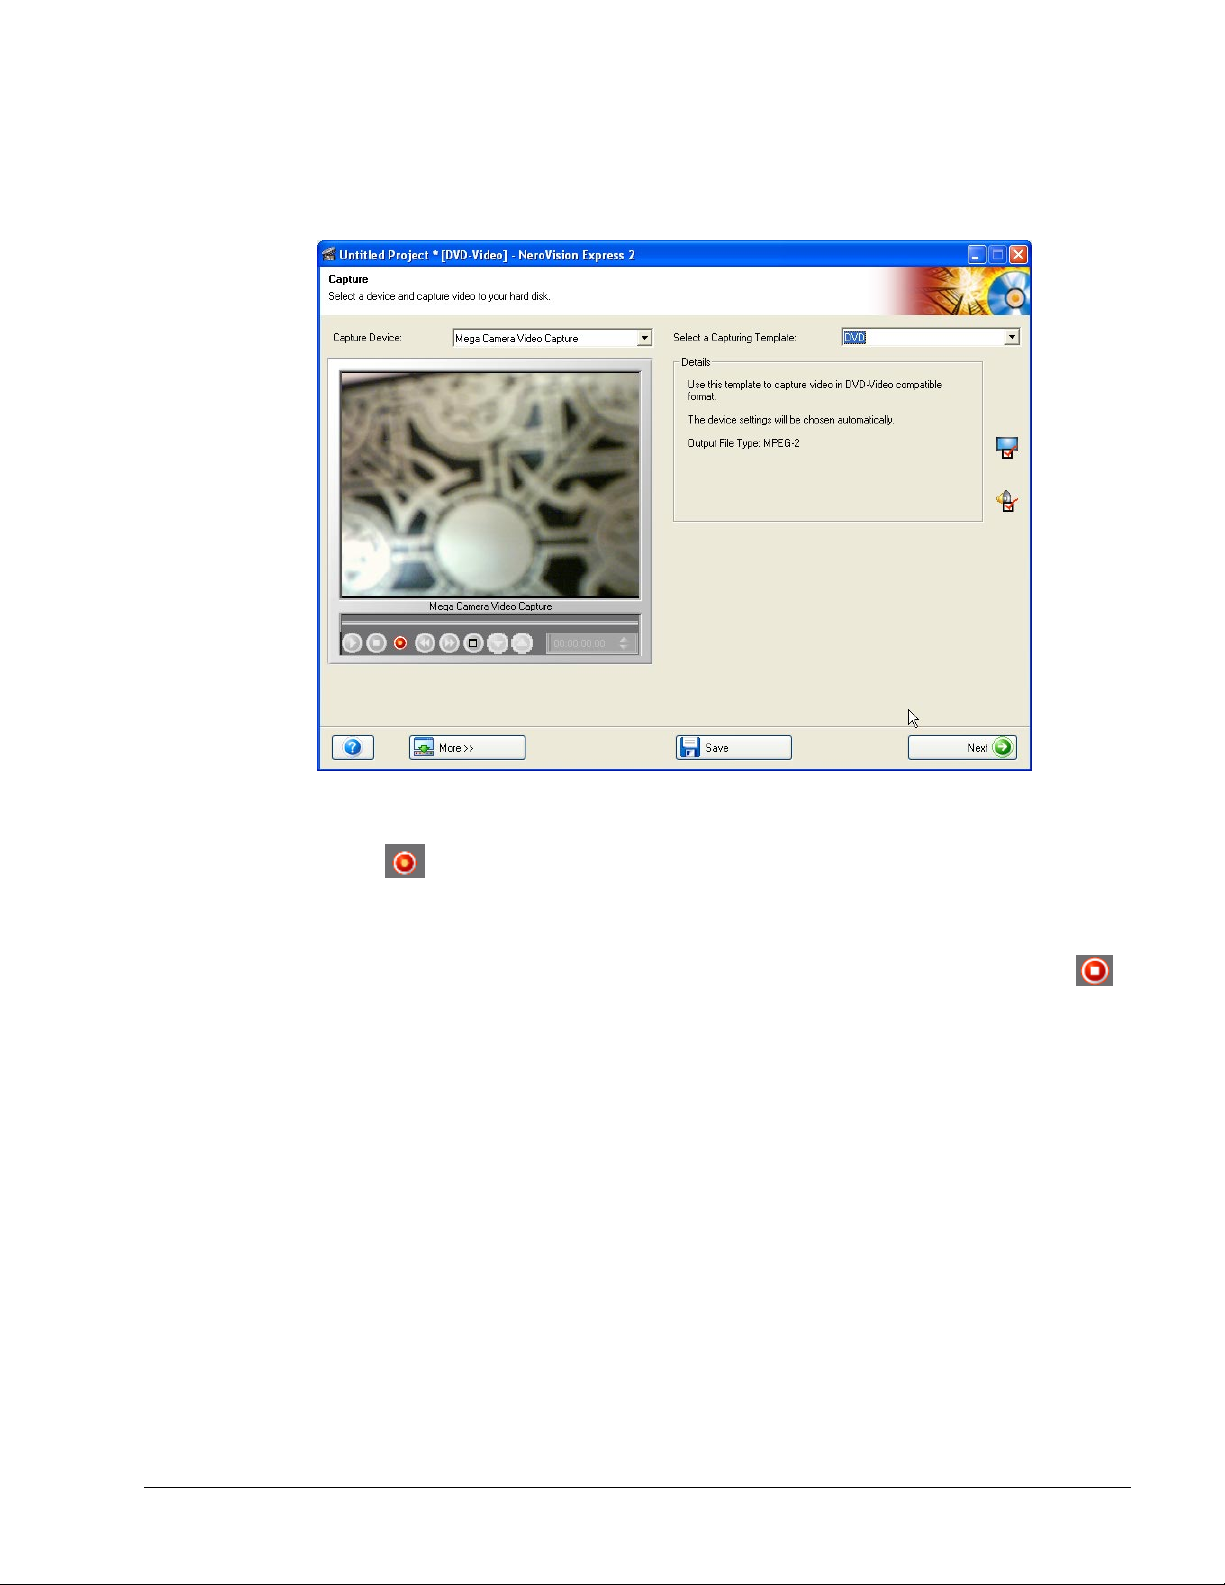
4.4 Capturing your first video
Step 1: Start NeroVision Express 2 and select Capture Video to Hard Drive
NOTE: Capturing video by selecting 'Capture Video' from the CONTENT screen of
a DVD, VCD, SVCD or miniDVD project works exactly the same way, the only
difference being that your captured video is automatically added as a video title in
that particular project.
Step 2: Please select your capture device (i.e. the device that delivers the video
signals you want to capture such as your DV Camcorder or video capture card)
from the menu.
Depending on your capture device, it will either be in 'camera' mode, or in 'VCR'
mode.
NOTE: Camcorders can be set to either 'camera' mode or 'VCR' mode. Please
check the manufacturer’s instructions on how to do this.
'Camera' Mode
In 'camera' mode, video signals are constantly being sent by the device to your PC
and you can preview the current video signal in the preview window. In case of a
DV camera, whatever you are pointing at would be displayed in the preview
NeroVision Express 2 Capturing Video from DV cameras and other external video devices • 16
Page 17
screen. A TV card would similarly be in camera mode as there is a constant video
signal coming in and there is no way of pausing, rewinding/fast forwarding or restarting the video signal.
'VCR' Mode
In 'VCR' mode, the video already exists on tape (or another medium). To capture
that video you need to insert the tape into your video device and play it back. You
can also rewind/fast forward through the whole tape to play back specific video
scenes.
Step 3: After the device has been selected, please decide which hard drive and
folder where you would like to save your video capture to, and enter a suitable
name. If you are happy with the default settings for name and location, you can just
leave the entry as it is.
NOTE: Capturing video requires a lot of drive space. Please make sure that you
have enough drive space to capture all your video. Capturing video from a capture
card requires about 3-30MB of hard disk space per second depending on the
resolution and the data format of your video. DV capturing via a Firewire card
(IEEE 1394) requires about 3.6 MB of hard disk space per second.
Depending on whether your selected device is in Camera or VCR mode, certain
control buttons will be available and others will not.
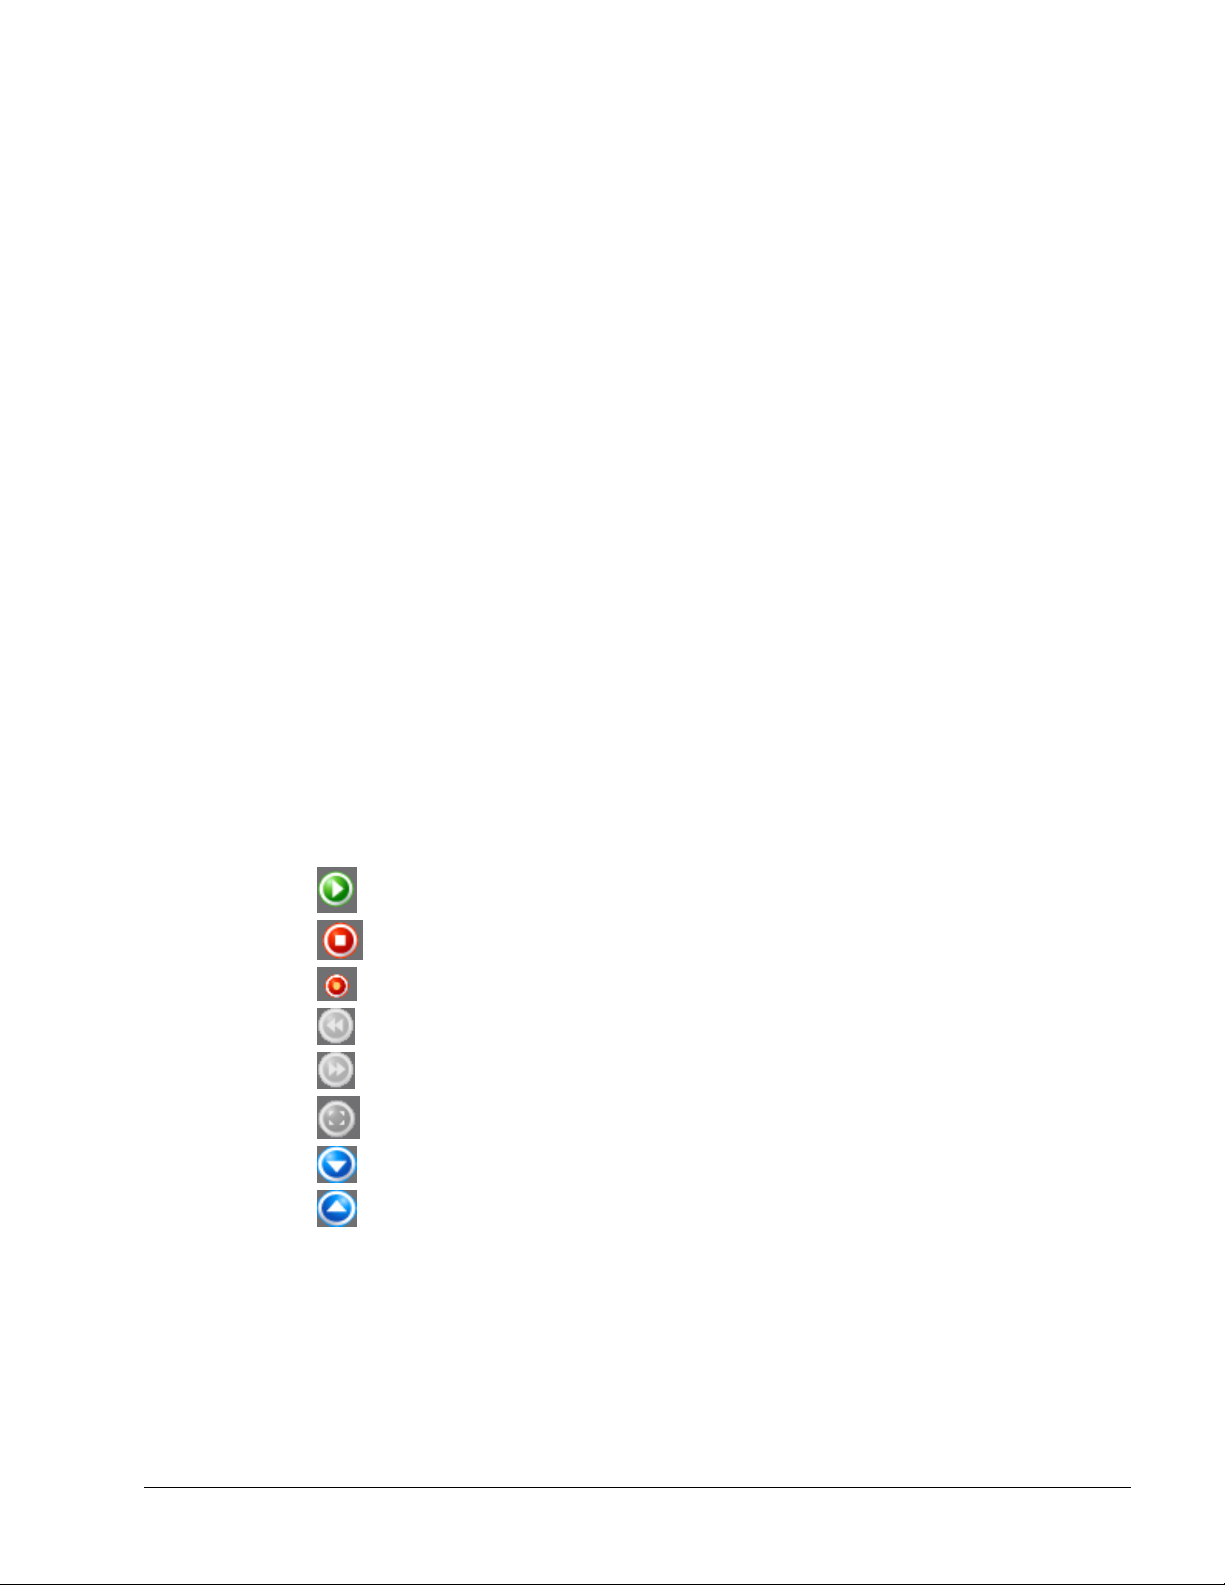
Play
Stop
Record
Rewind
Fast forward
Full picture
Next channel
Previus channel
If your device is in 'Camera' mode, you can preview the current video in the
preview monitor.
If your DV device is in 'VCR' mode, you can use the buttons to control the tape. In
addition, by selecting these buttons, you can move the video to where you would
like to start capturing.
NeroVision Express 2 Capturing Video from DV cameras and other external video devices • 17
Page 18
To start captures from an analog device, you must start the play back from the
video source. You will see the current scene in the preview monitor.
Step 4: When you are ready to capture your video, please click on the 'Record'
button
and you will see the picture you are recording displayed in NeroVision
Express 2.
Step 5: You can finish capturing video at any time by clicking the 'stop' button
.
Step 6: To capture more video files from the same source, simply click the 'Record'
button again when you are ready.
NOTE: You are not able to preview your captured videos until you have added
them to a DVD, VCD,SVCD or miniDVD project. When you are working on a
project, you are able to preview and edit the captured video.
NeroVision Express 2 Capturing Video from DV cameras and other external video devices • 18
Page 19
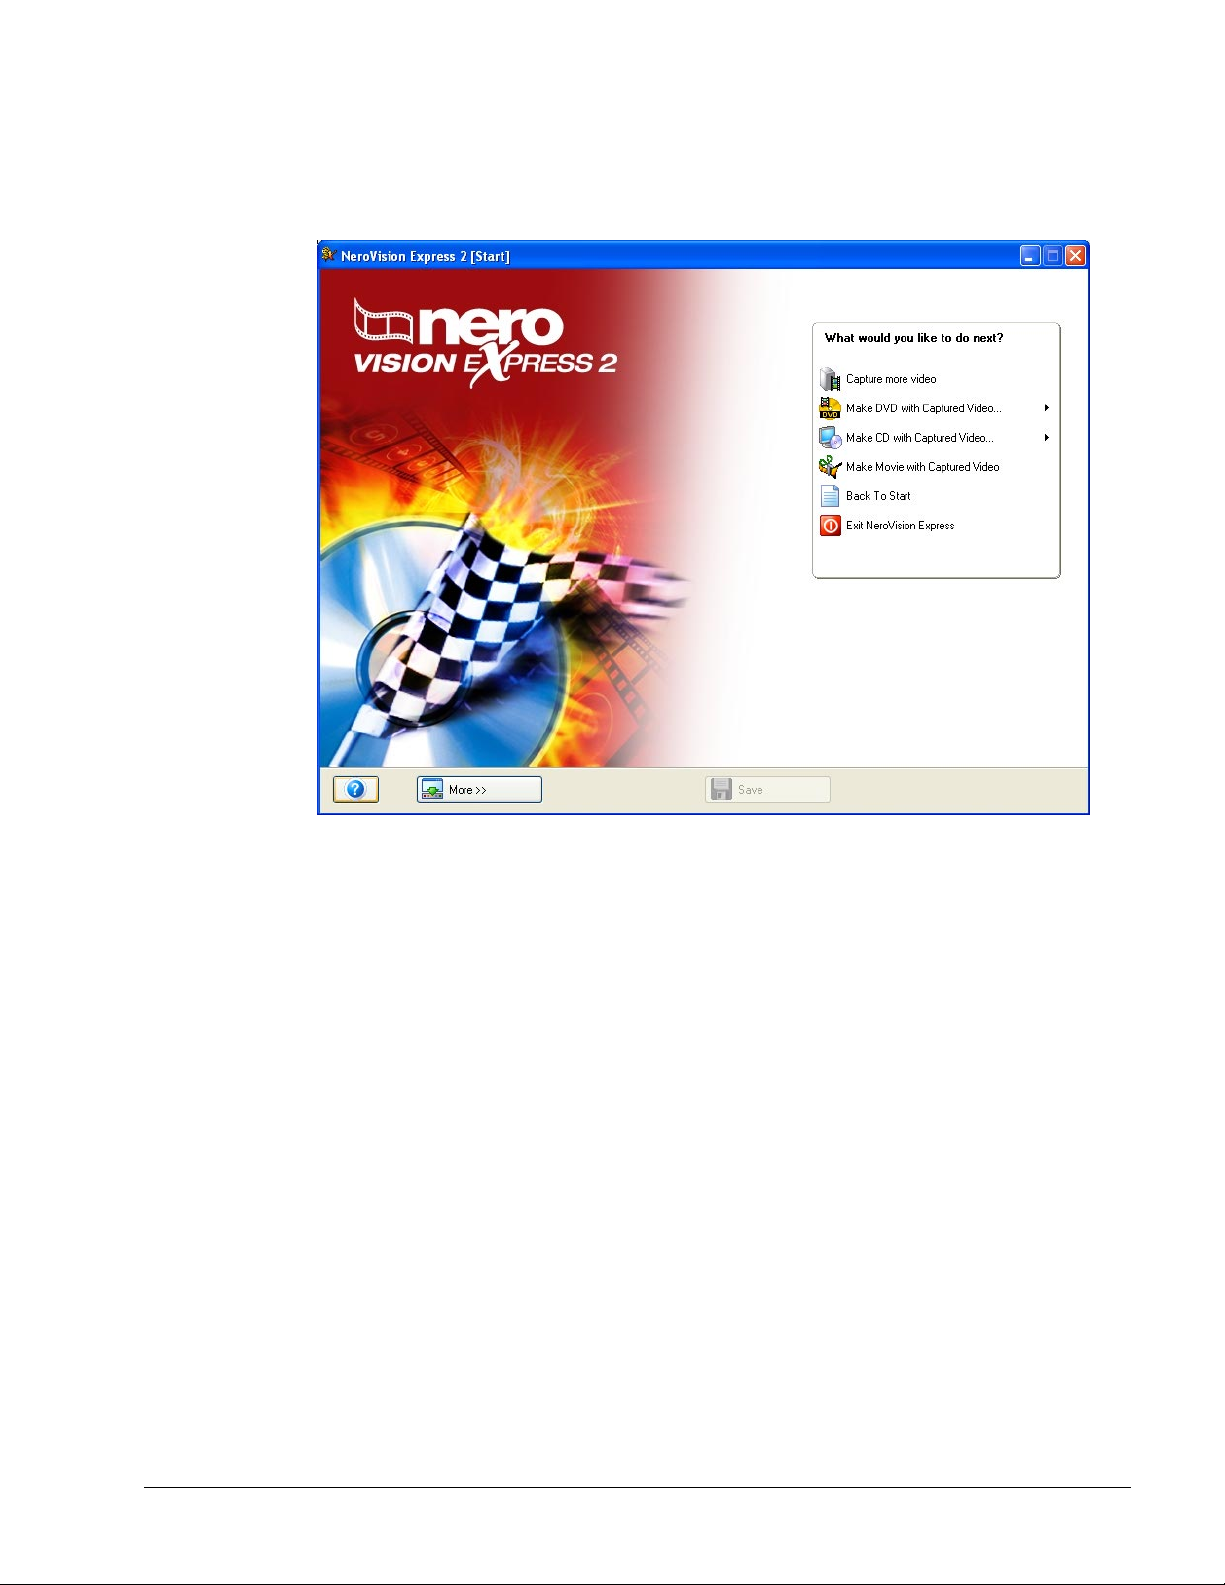
Step 7: To exit the 'Capture Video' task, click the 'Next' button on the navigation
bar. You will be taken to the START screen where you can decide what to do next.
NeroVision Express 2 Capturing Video from DV cameras and other external video devices • 19
Page 20

5 Making your first DVD-Video, VCD, SVCD
or miniDVD
This chapter will help assist you in creating your first DVD disc and/or image. The
easy-to-follow steps will show you just how easy the procedure is!
5.1 Choosing the right format
NeroVision Express 2 supports four different video formats:
DVD-Video
Using MPEG-2 technology to compress video files, a DVD-Video can hold up to
135 minutes of video on a 4.7GB DVD-R/-RW/+R/+RW in a quality far superior to
VHS video or VCD (see below). You are able to view your disc on most DVD
players which makes it wonderful for storing all your home videos in the highest
possible quality! You can also play DVD’s on your PC if you have the appropriate
software and DVD-ROM drive.
miniDVD
In principal a miniDVD is the same as a CD-R or CD-RW written in UDF format
with a DVD structure. It offers the same technical options and qualities as a DVD,
can create chapters or animated menus and support subtitles and multiple audio
tracks (including real digital multichannel sound). While compatibility with all DVD
players is not guaranteed, miniDVDs can be played by computers without any
problem.
Video CD (VCD)
Using MPEG-1 technology to compress video files, a VCD generates a quality
roughly similar to VHS video and can hold up to 74/80 minutes on 650MB/700MB
CDs respectively of full-motion video along with stereo sound. VCD’s can be
played on most DVD players and on your PC if you have the appropriate software
and a drive that can read CD-R/CD-RW discs.
NeroVision Express 2 Making your first DVD-Video, VCD, SVCD or miniDVD • 20
Page 21

Super Video CD (SVCD)
Very similar to a VCD, this format uses MPEG-2 technology to store video files in a
quality roughly similar to S-VHS and can hold around 35/40 minutes on
650MB/700MB CDs respectively of higher quality full-motion video along with
stereo sound. SVCD’s can be played on a growing number of DVD players and on
your PC if you have the appropriate software and a drive that can read CD-R/CDRW discs.
NOTE: To burn a DVD-Video disc, you need to have a supported DVD recordable
drive connected to your system. To burn VCD/SVCD/miniDVD discs, you need to
have a supported CD and/or DVD recordable drive connected to your system.
(Please visit www.nero.com
do not have a recorder capable of burning DVD and/or VCD/SVCD/miniDVD discs,
you can still burn a disc image on your hard drive and save it for future use. Once
you have the appropriate recordable drive connected to your system, you can open
disc images using Nero and/or Nero Express at any time, and burn real video
discs.
for the list of currently supported drives). Even if you
5.2 Information regarding the DVD Plug-in
In order to create and encode video to DVD-Video and/or Super Video CD (SVCD)
and/or miniDVD standard, the source video files need to be encoded into the
appropriate MPEG-2 format. SVCD's, miniDVD and DVD-Video discs can then be
created on the appropriate hardware for playback on compatible DVD players.
NeroVision Express 2 Making your first DVD-Video, VCD, SVCD or miniDVD • 21
Page 22
5.3 Starting a video project
Step 1: Select Burn Video to > DVD (or VCD, SVCD, miniDVD) from the main
'Start' screen and click your left mouse button to start a new project.
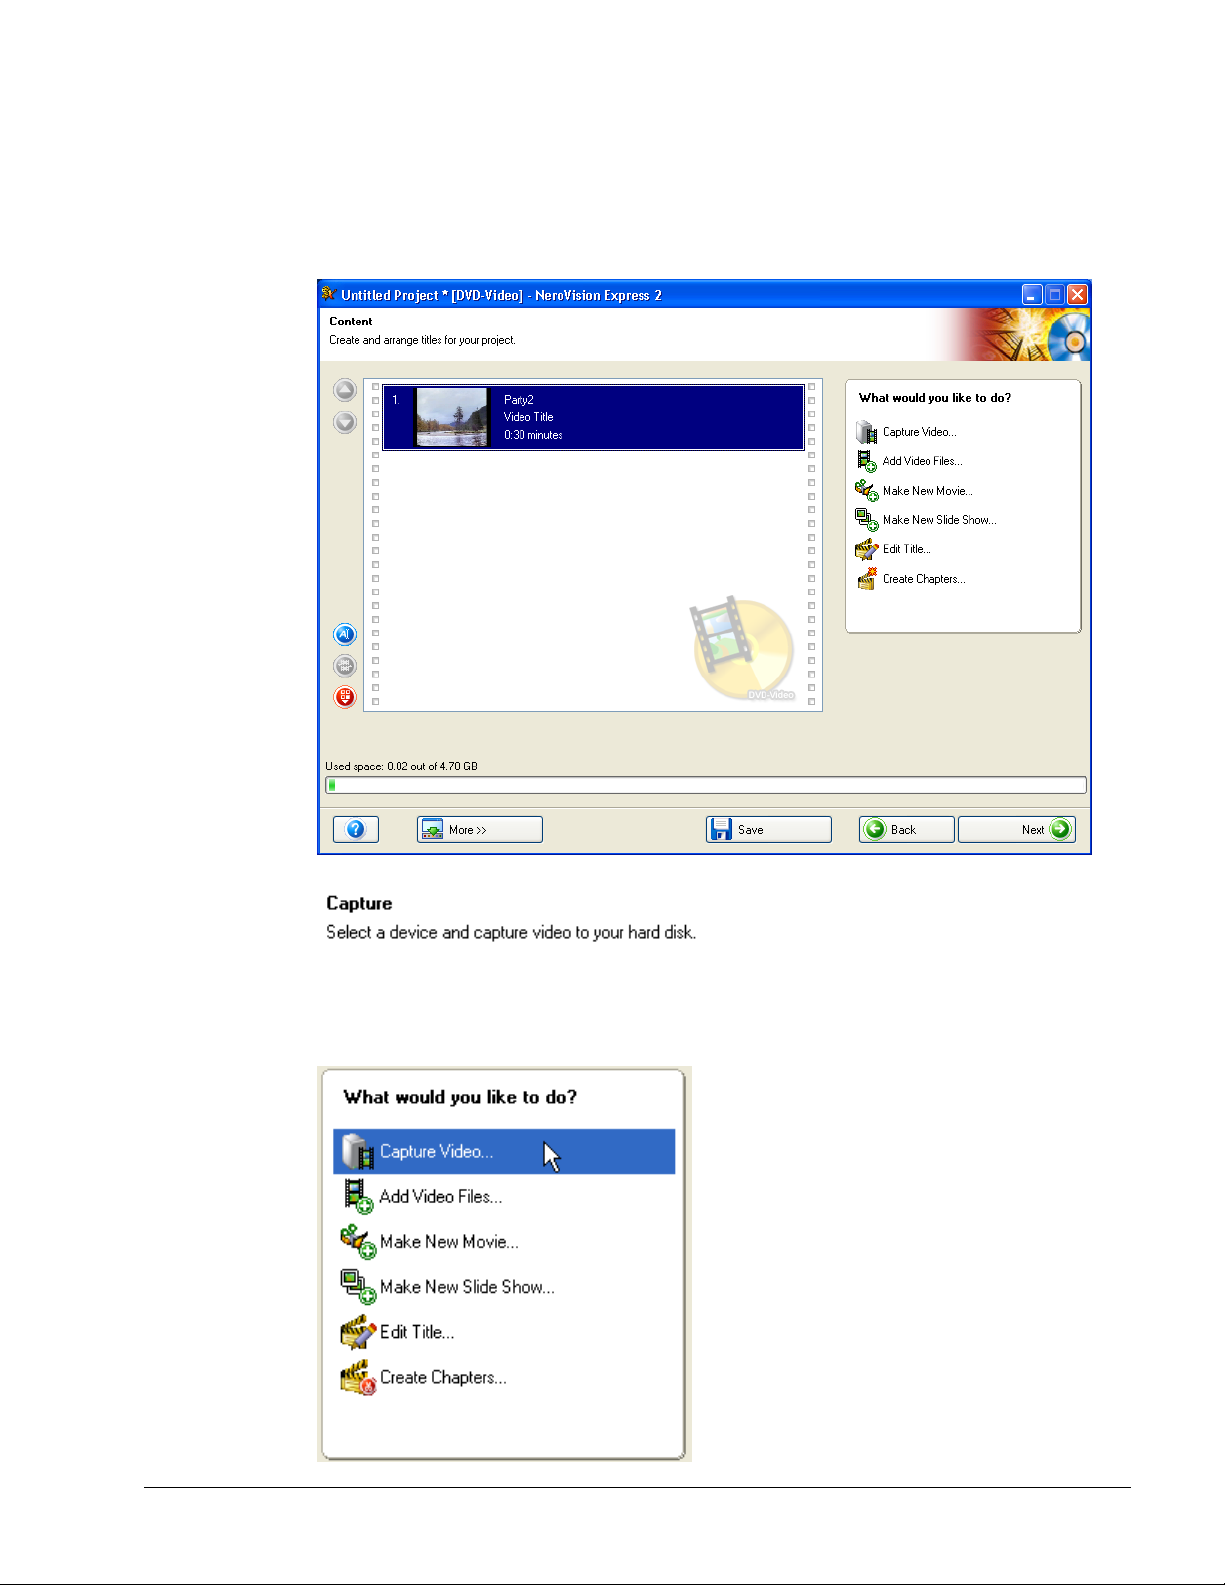
Step 2: Starting the project takes you to the CONTENT screen. This is the place
you add video-titles to your project. You can think of a video title as one video file
or one movie.
If you need to capture video for your project, please refer to the chapter 'Capturing
Video from DV cameras and other external video devices' of this manual.
NeroVision Express 2 Making your first DVD-Video, VCD, SVCD or miniDVD • 22
Page 23
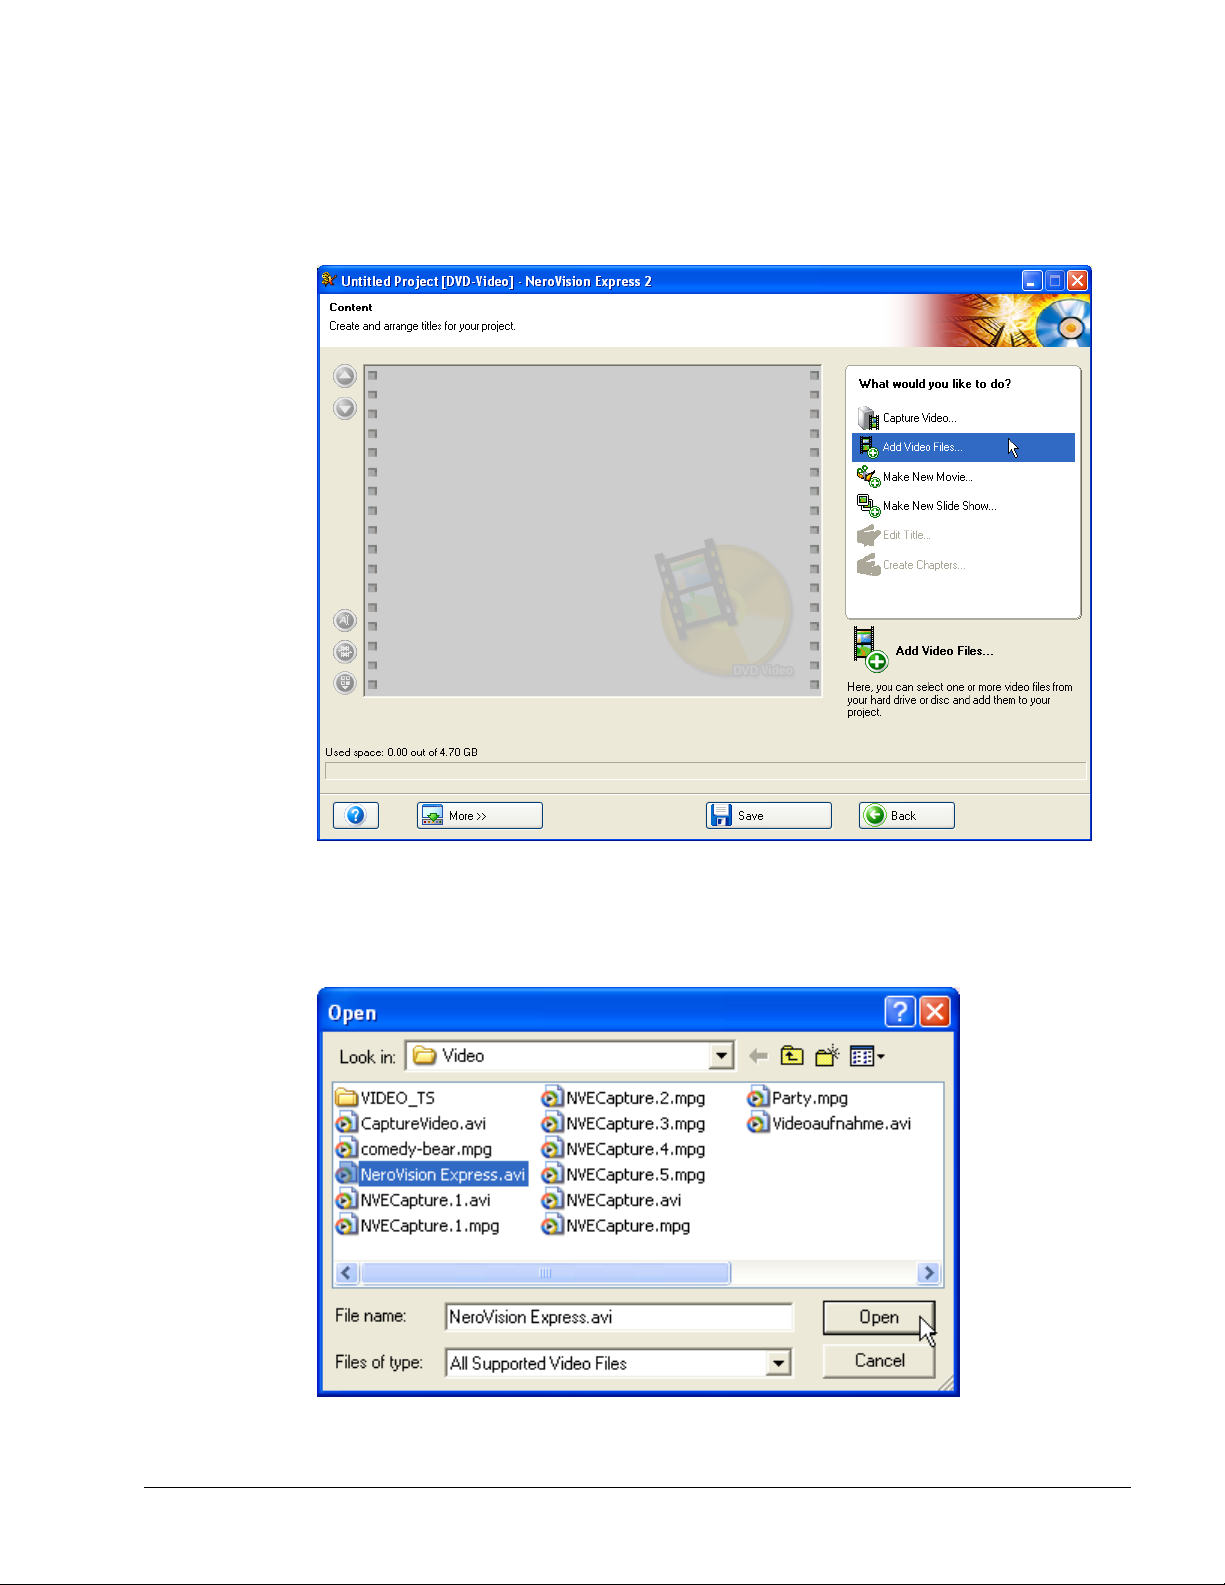
If you have already captured your video or have video previously saved on your
hard disk and would like to start creating your layout, click Add Video Files in the
CONTENT window.
Please select the file(s) you would like to add to the project from your hard disk,
external drive or CD/DVD drive and click 'Open'.
NeroVision Express 2 Making your first DVD-Video, VCD, SVCD or miniDVD • 23
Page 24
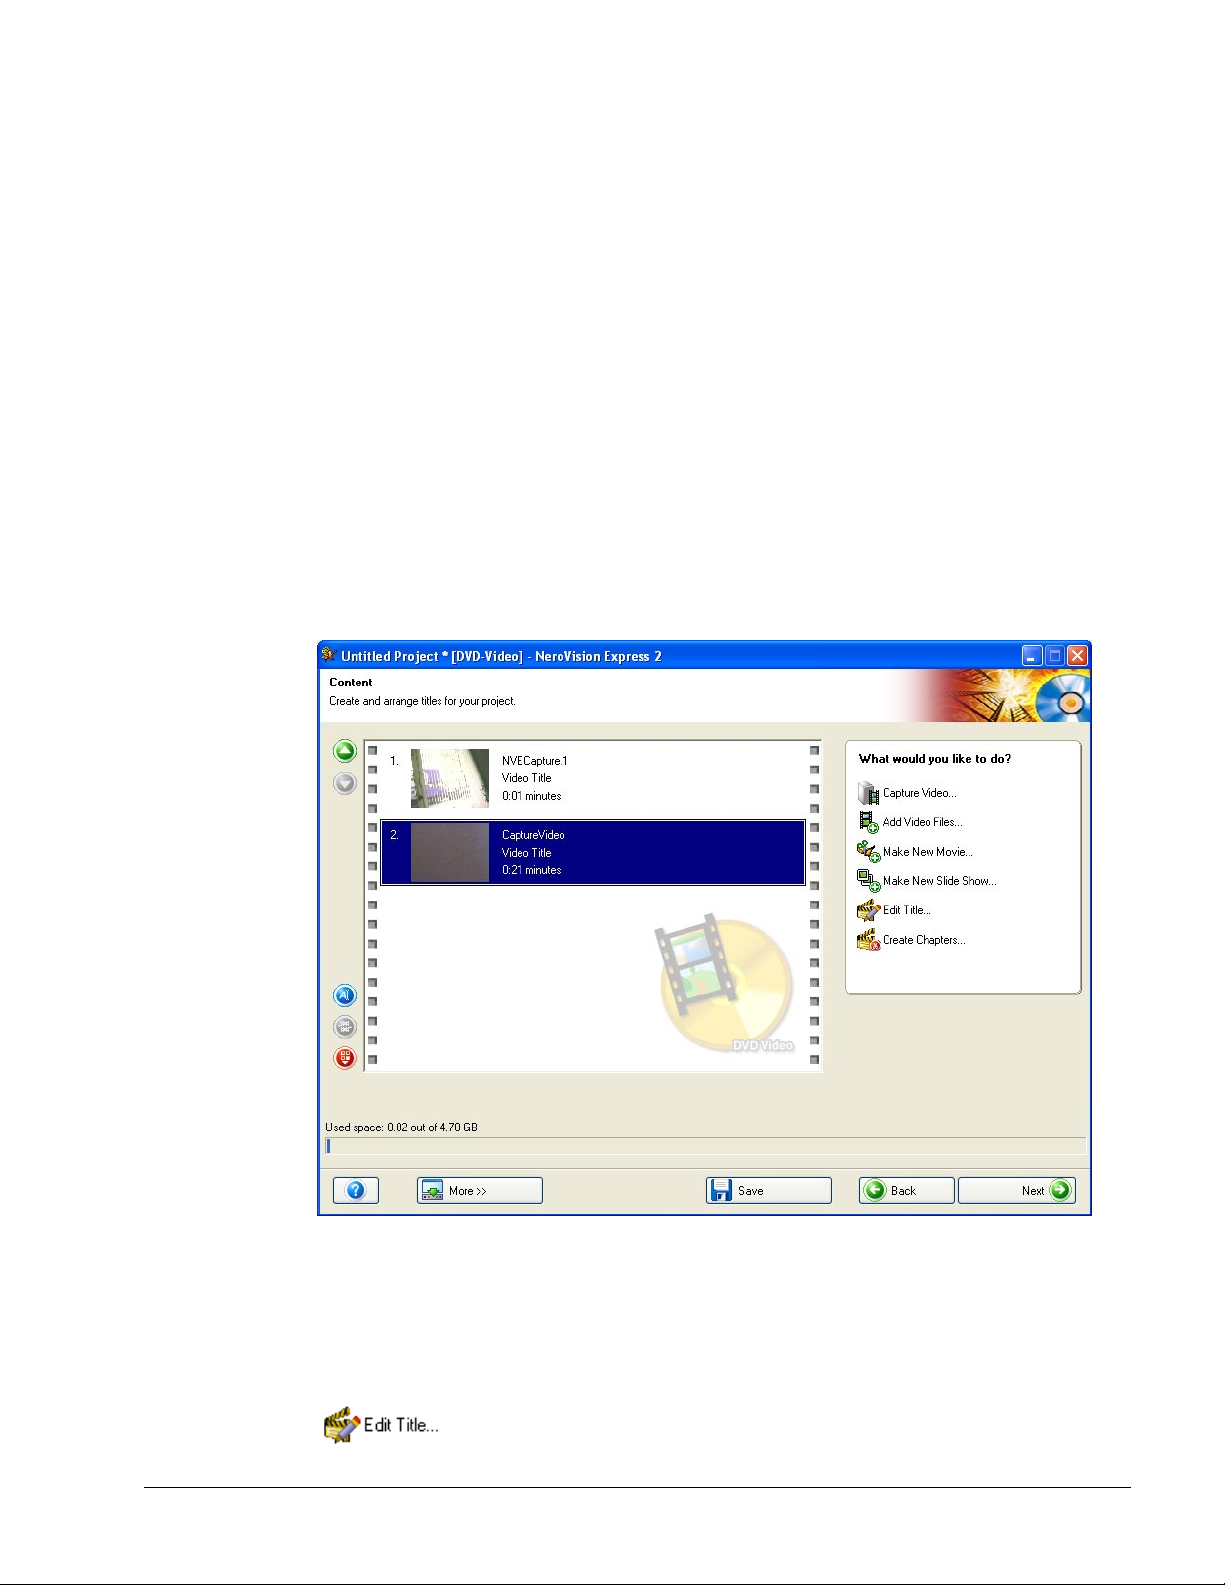
Step 3: As you add each video file, a small screen shot of the first frame of the
video title will be shown. By selecting a video title in the menu, you can use the
arrow keys on the top right to move it more to the beginning or end of the project.
You can also rename the video title, or remove the video title from the project.
Next to the 'thumbnail' of the first frame, you will also see the length of the video
and the number of chapters displayed. Each video title consists of at least one
'chapter'. A chapter is a certain point in the video title where there is a mark or
reference point to it. The more reference points you make in the video, the more
chapters you have. The advantage of having a video title with several chapters is
that you can access each chapter directly during playback without having to fast
forward or rewind through the title.
NOTE: The indicator meter at the bottom will show and measure how much space
you have left for your project. The total space available depends on whether you
are working on a DVD, VCD, SVCD or miniDVD project.
Step 4: (optional): You can select each title individually and edit the video file by
clicking on the Edit Title icon. On the edit screen you can trim video titles (cut out
unwanted video segments at the beginning and/or end of the title). To find out
more about how to edit video titles, please refer to Chapter 7.1 'Editing Your Video'
in this manual.
NeroVision Express 2 Making your first DVD-Video, VCD, SVCD or miniDVD • 24
Page 25
Step 5: (optional): You can select each title and add chapter marks to the video.
Chapter marks are positions within a video title that you can access directly without
having to fast forward or rewind through the whole video. To find out more about
how to edit video titles, please refer to Chapter 7.3.1 'Creating chapter marks
manually' in this manual.
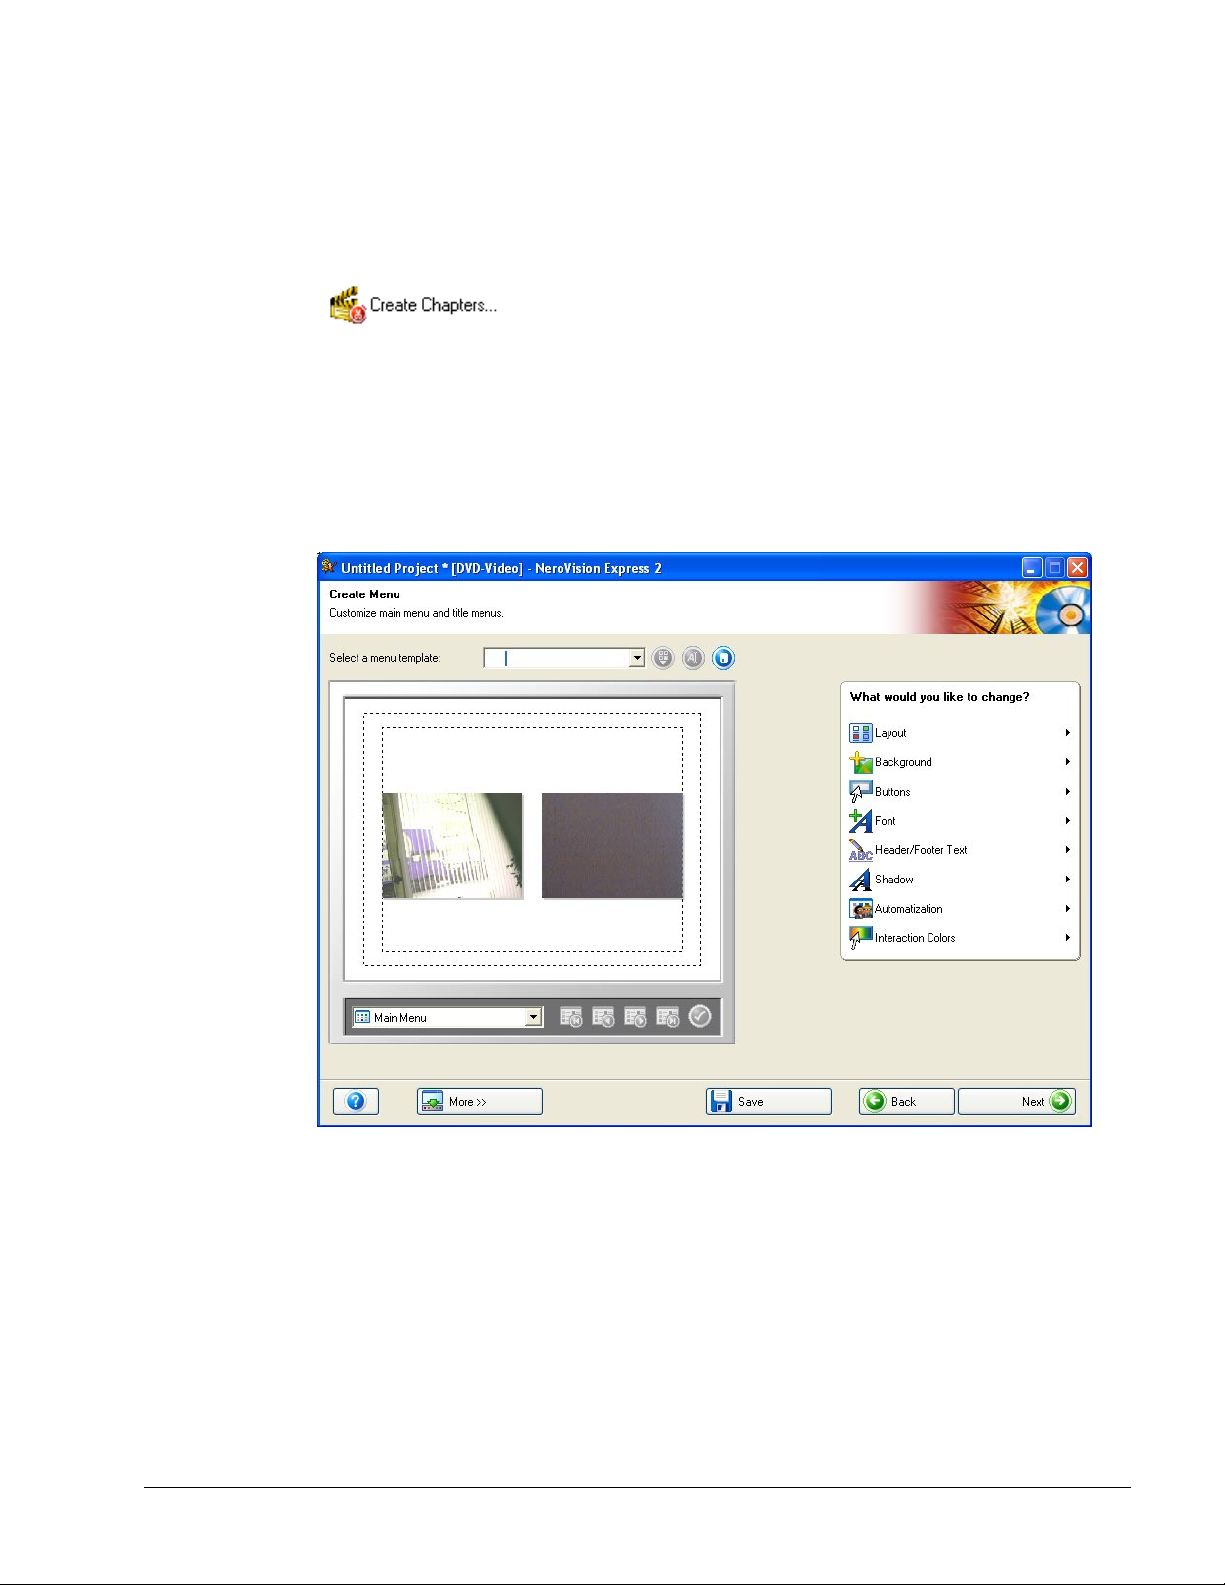
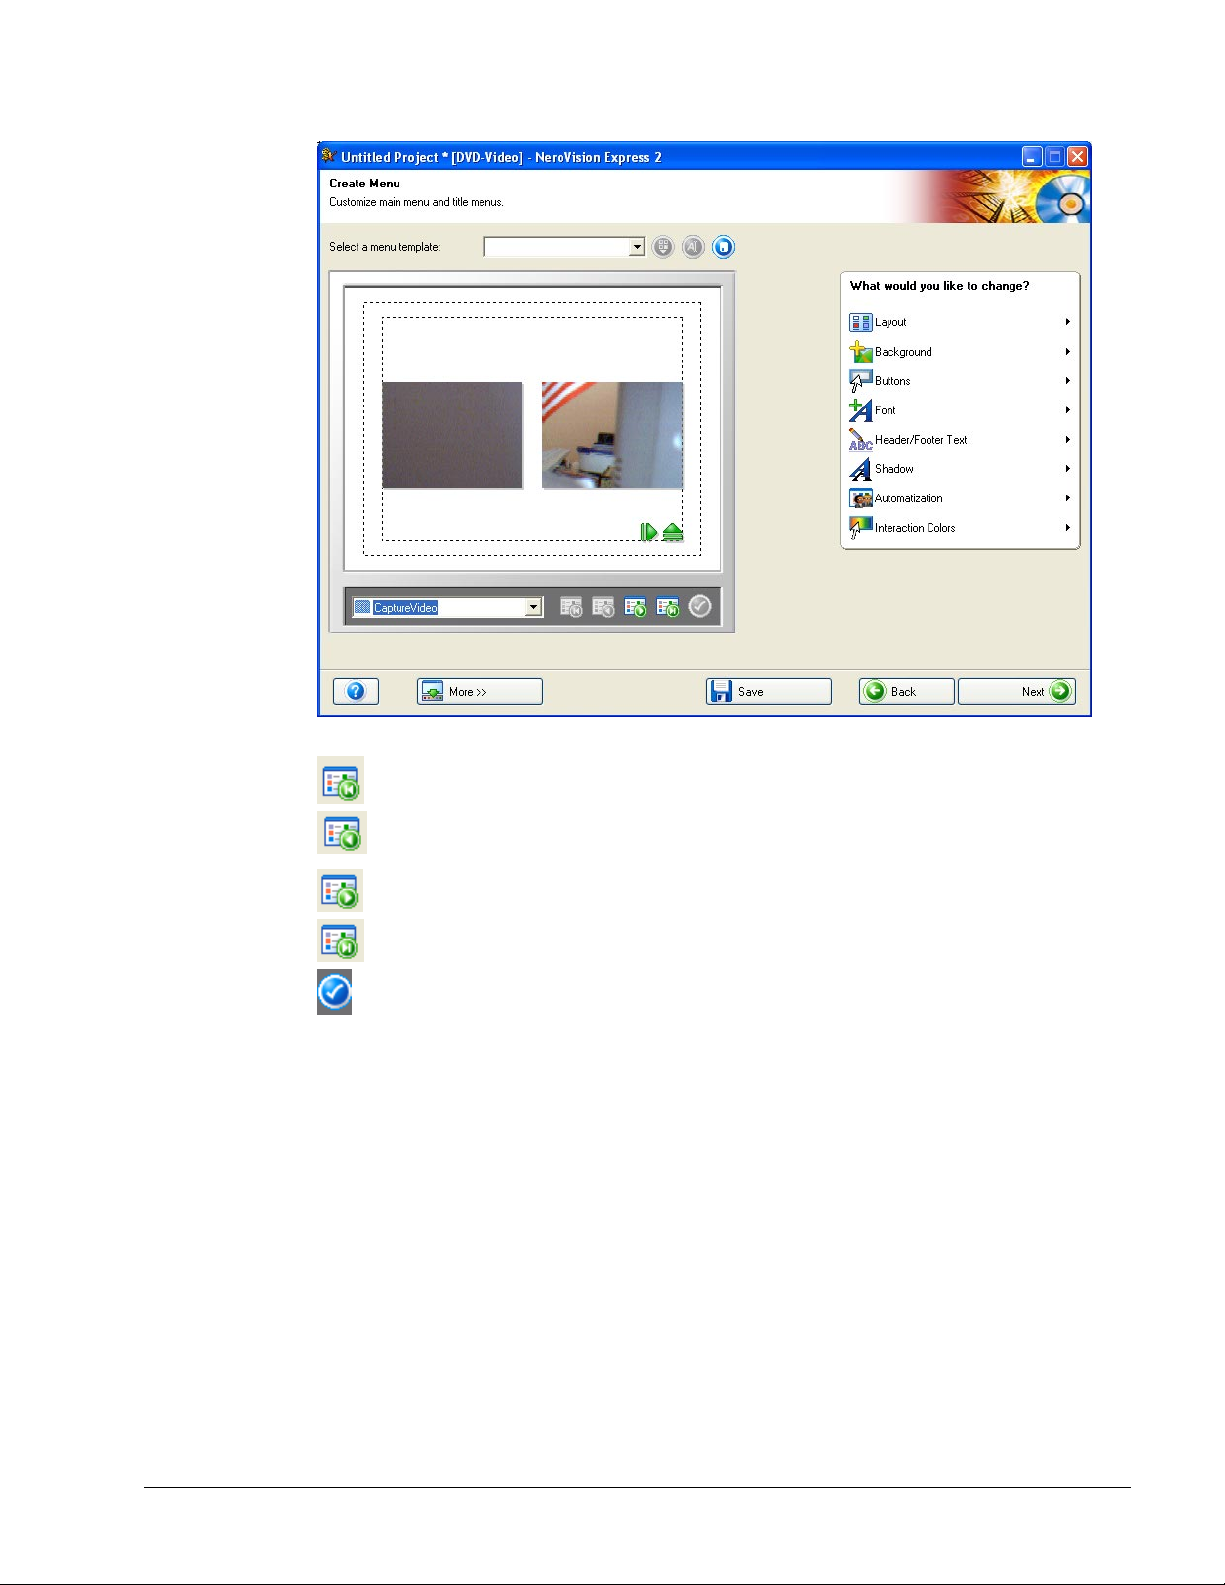
Step 6: Clicking 'Next' in the CONTENT screen takes you to CREATE MENU. In
the 'Create Menu' window, you will be able to design the layout of your video such
as the color of the background, font, text size, etc by moving your mouse over the
respective entry and making your selection. Every video file and chapter will have a
button associated with it.
NeroVision Express 2 Making your first DVD-Video, VCD, SVCD or miniDVD • 25
Page 26
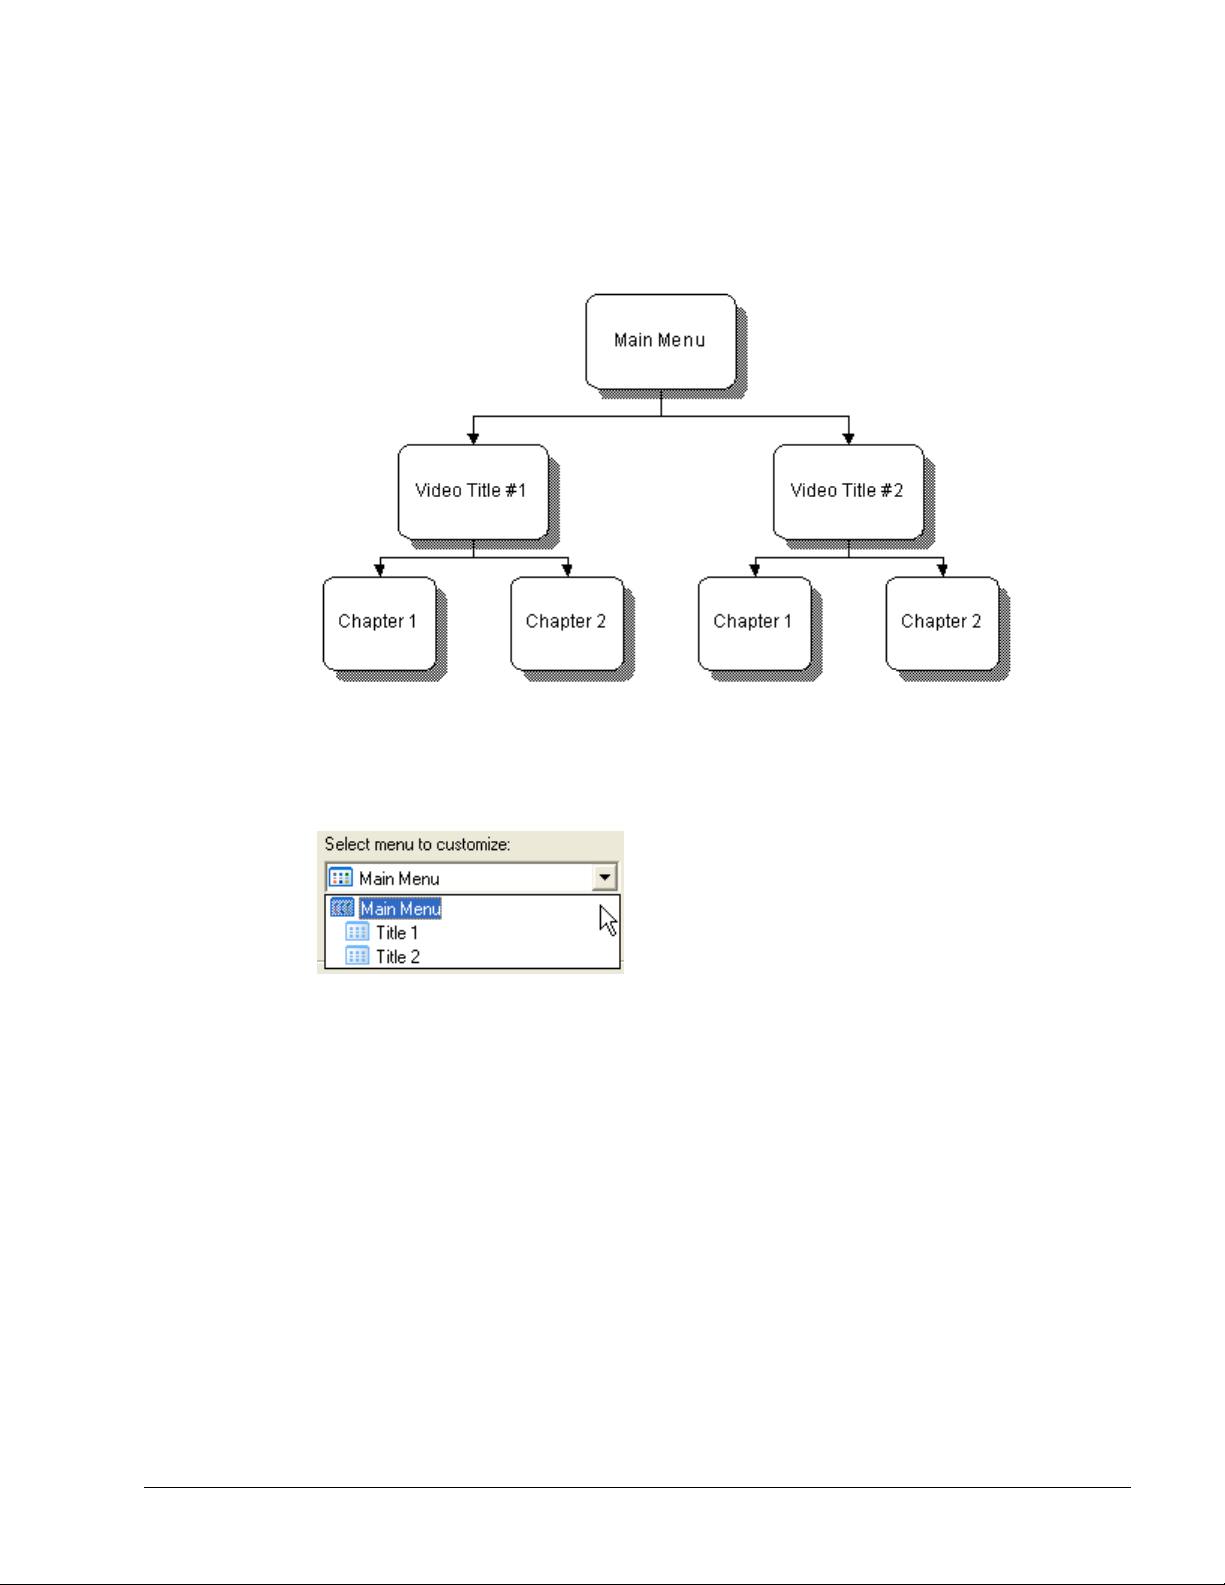
You are able to have up to two hierarchies within your layout. The main menu
consists of all the video titles in the project. If a video title consists of more than one
chapter, a video title sub-menu is generated. When you make changes, all menu
hierarchies can be customized independently of each other.
You can select the menu you would like to customize by selecting from the drop
down box in the bottom left corner and clicking on the appropriate entry.
Note: Should the buttons not all fit on one menu screen, you can use the menu
navigation buttons to move from screen to screen.
NeroVision Express 2 Making your first DVD-Video, VCD, SVCD or miniDVD • 26
Page 27
Switches to the first page of the selected menu in the previous window
Switches to the previous page of the selected menu in the previous
window
Switches to the next page of the selected menu in the previous window
Switches to the last page of the selected menu in the previous window
Opens a window in which the selected chapter can be renamed and
the displayed image modified.
For additional information on the individual menu layout settings, please refer to
chapter 'Menu Layout'.
NeroVision Express 2 Making your first DVD-Video, VCD, SVCD or miniDVD • 27
Page 28

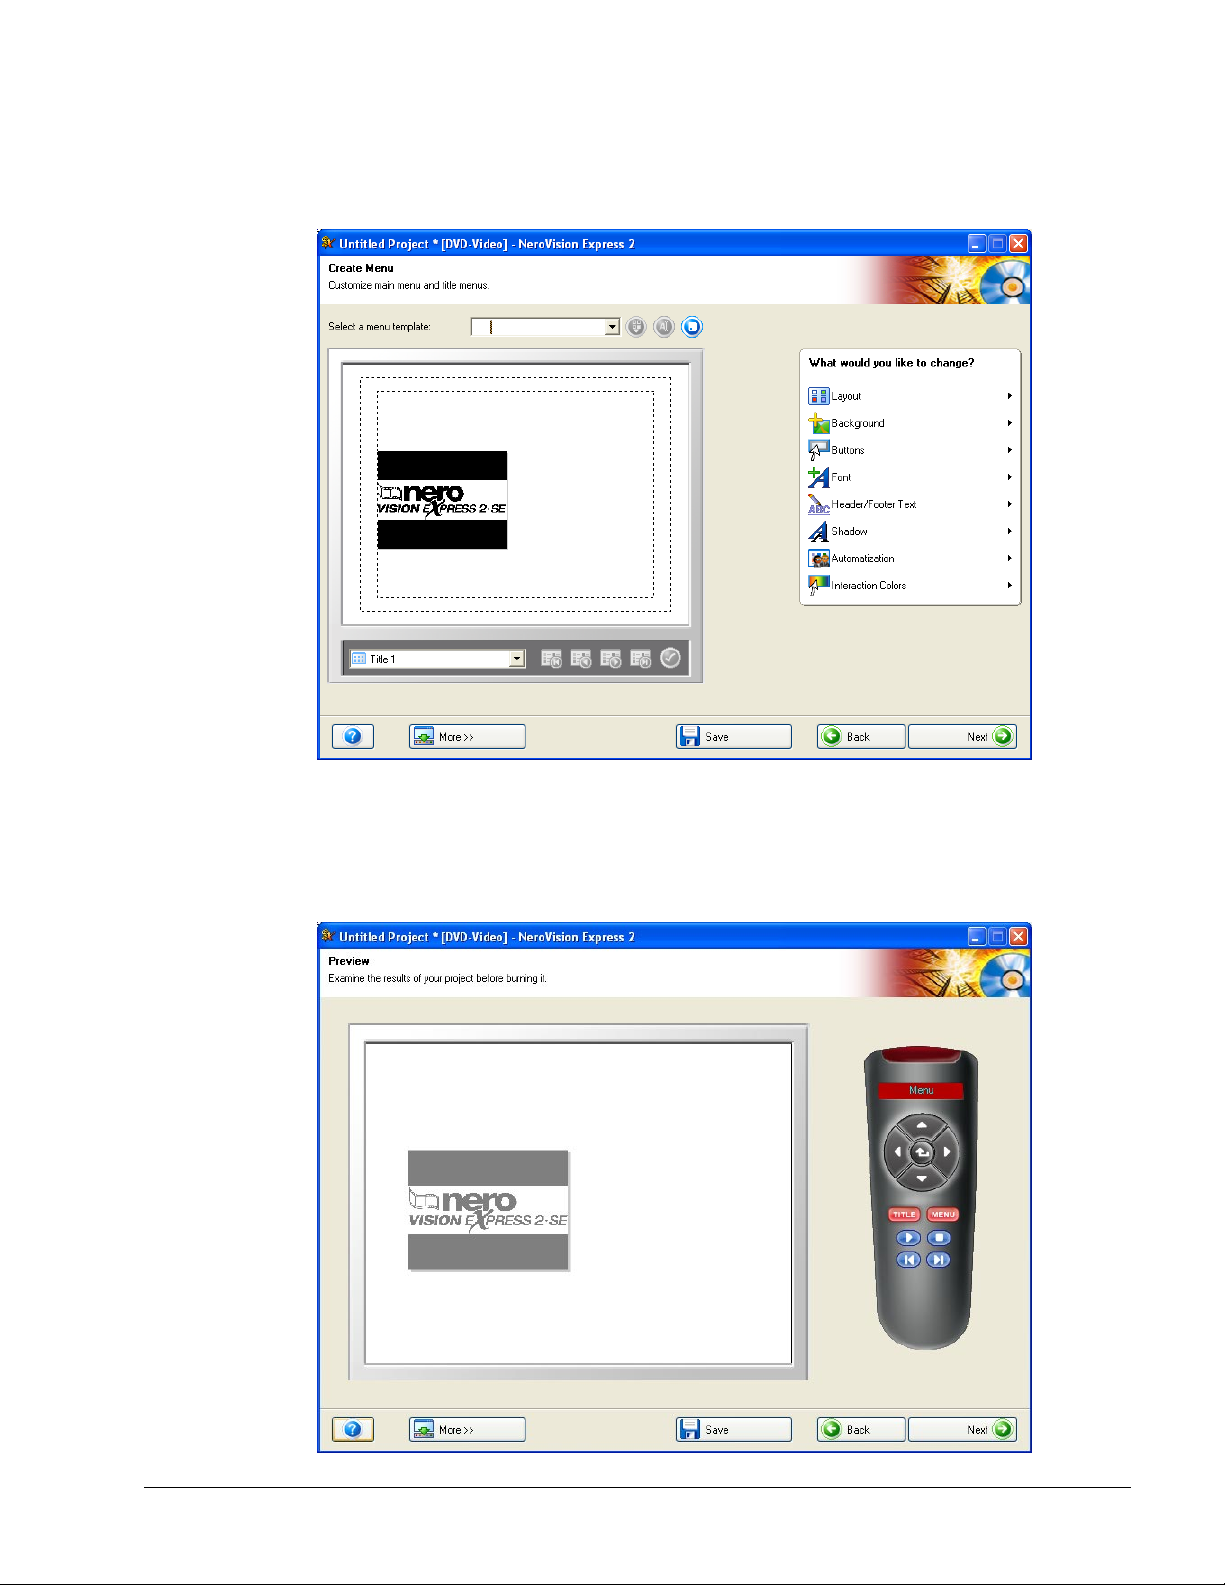
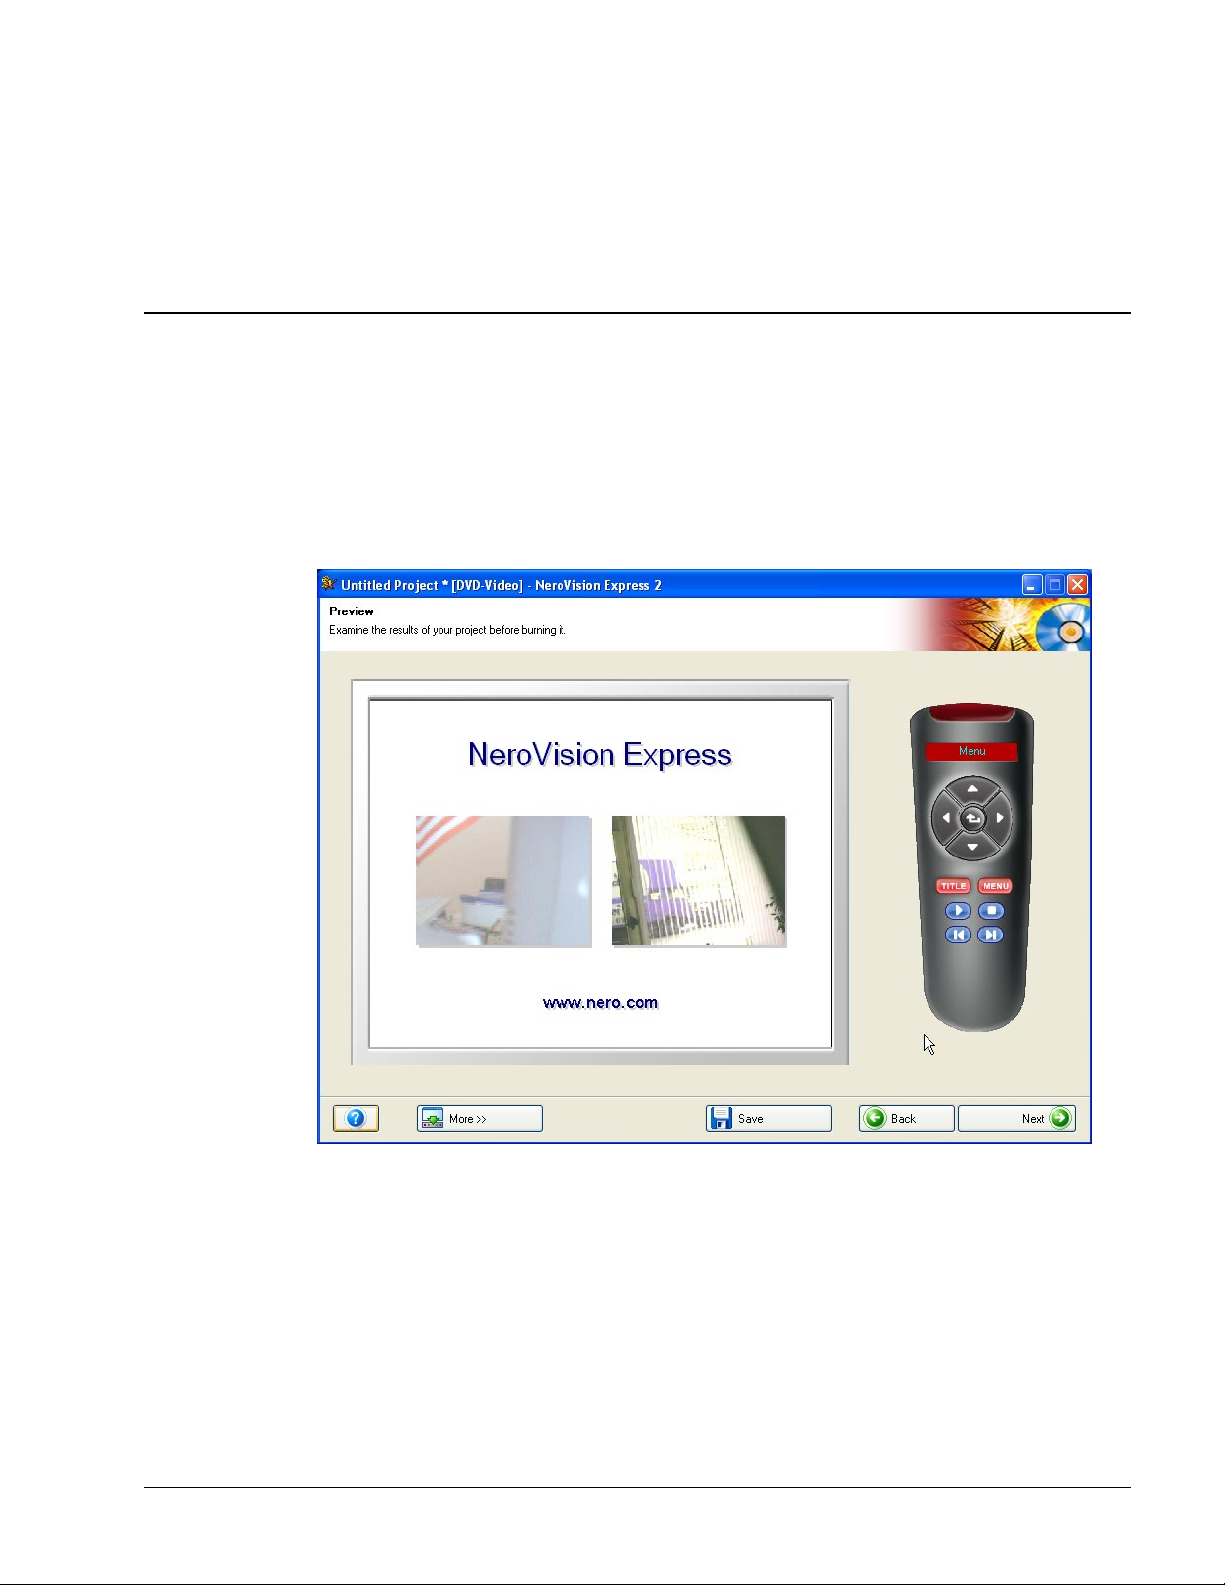
Step 7: If you are happy with the current design, click 'Next' to enter the PREVIEW
page. Using your mouse pointer or the remote control, you can test what your
DVD, VCD or SVCD disc would behave like if played back on a compatible player.
For additional information on how to use the remote control, please refer to chapter
'Preview Settings'.
NeroVision Express 2 Making your first DVD-Video, VCD, SVCD or miniDVD • 28
Page 29

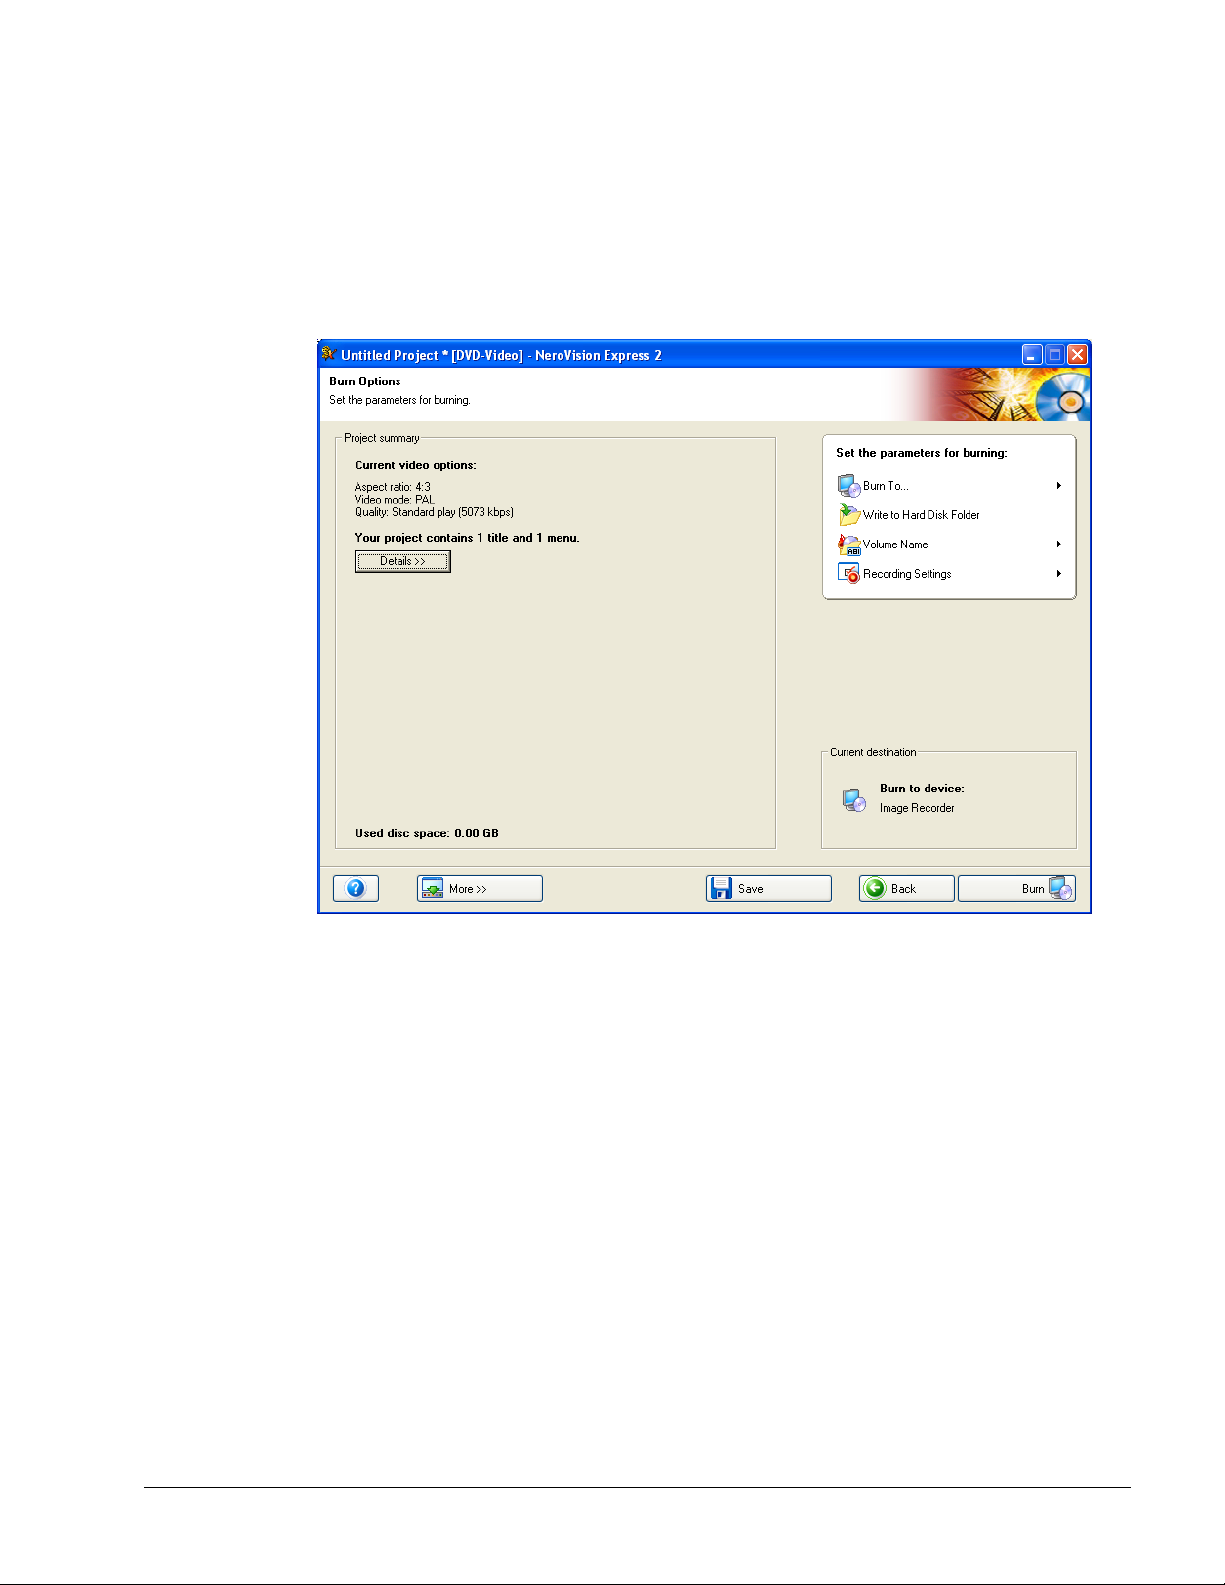
Step 8: Once you are satisfied with your project, you can now proceed to the
BURN OPTIONS page and burn your DVD, VCD, SVCD or miniDVD by clicking
'Next'. You may now make your final settings before burning.
NOTE: If you need to make any additional changes to your project (e.g. change the
menu, edit video titles, add/remove video titles) you can click the 'Back' button to
go to the previous pages.
You can change the following settings by moving your mouse pointer to the
relevant entry in the project settings menu:
Volume Name – Enter a name for the disc you are about to burn.
NeroVision Express 2 Making your first DVD-Video, VCD, SVCD or miniDVD • 29
Page 30

Burn to – You can either select to burn to the following devices, depending on the
type of project you are working on and which recorders are connected to your
system:
CD-R/RW drive
DVD-R/-RW or DVD+R/+RW drive
Image Recorder
Write to Hard Disk Folder
Selecting a drive will burn an actual disc. When you select 'Image Recorder', you
will burn an image to your hard disk in which you can open and burn later with
Nero and/or Nero Express.
NOTE: When you are making a DVD project, you can also write the actual DVD
files to your hard drive. Using DVD playback software, you can then open these
files and view them as if you were viewing a real DVD-video. Not all DVD software
players support this feature so please check the software´s specifications.
Recording Settings – This is active once you have selected an actual CD or DVD
recordable drive. You can select the burn settings for your recorder:
NeroVision Express 2 Making your first DVD-Video, VCD, SVCD or miniDVD • 30
Page 31

Use buffer underrun protection: When checked, buffer underrun protection is
enabled for this recording session to increase chances of a successful burn.
Please check this option if available.
Determine maximum speed: When checked, a speed test is performed before
recording to check if the recorder is able to write the session using the current
speed settings. In addition, it will also verify if all files selected for burning are
actually available.
Simulation: When checked, a simulation burn will be performed to check if the
disc is ready to be recorded. All actions of the burn process are performed, with
the exception that actually no data is written to the disc.
Write: When checked, the data is actually written to the disc after all tests have
passed successfully.
Step 9: When you are ready, click the 'Burn' button and begin to start the recording
process. Your project files will be converted to the appropriate format and then
burned to disc, burned as an image, or written to the hard disk, depending on what
you chose.
Step 10: When the burn process has finished click on 'Next' to enter the FINISH
page. There you have the option to burn your project again, start a new project,
make covers and labels, or exit the program.
NeroVision Express 2 Making your first DVD-Video, VCD, SVCD or miniDVD • 31
Page 32

6 Open Existing Project
6.1 Open Existing Project
Once you have started working with your projects and made your layout,
occasionally, you may want to burn it at a later date. As you exit NeroVision
Express 2 or change projects, you will have the option to save your project. On the
START page you then have the option to re-open an existing project.
Step 1: Select Open Saved Projekt or Disc Image from the main screen and click
the left mouse button.
NeroVision Express 2 Open Existing Project • 32
Page 33

Step 2: Select the project that you have saved from the menu and click the 'Open'
button.
Step 3: You will be taken to the CONTENT page and can continue from there as
described in Chapter Five 'Making your first DVD-Video, VCD, SVCD or miniDVD'.
NeroVision Express 2 Open Existing Project • 33
Page 34

7 Editing Your Video
7.1 Editing Your Video
You cannot edit videos or create your own movies with NeroVision Express
2 SE.
In NeroVision Express 2 you can perform two types of video editing. You can trim
video titles, which involves cutting out unwanted video footage at the beginning
and/or end of the video title, and you can add chapter marks. Chapter marks are
positions within a video title that you can access directly using the previous/next
buttons on your DVD/(S)VCD player without having to fast forward or rewind
through the whole video title.
On the CHAPTERS screen, the slider bar below the preview monitor represents
the video title from start to end. The thumb or slider button
a certain position within the video title. The video image that exists at that position
will be shown on the preview monitor.
NeroVision Express 2 Editing Your Video • 34
allows you to move to
Page 35

The control buttons allow you to play and stop the video, create and delete chapter
marks and change the name.
Play selected video
Stop selected video
Rename chapter
Delete selected chapter mark
Delete all chapter marks
Start automatic scene cut detection
Create chapter mark manually
Click on the time run button (hours, minutes, seconds) and
use the ‘forward’ and ‘back’ buttons to jump to a particular
place in the selected video.
NeroVision Express 2 Editing Your Video • 35
Page 36

7.2 Trimming video titles
The editing (cutting) of videos is a non-linear process, i.e. the original file is not
modified during this process.
Step 1: To open the edit window, select a video file and click on the icon
NeroVision Express 2 Editing Your Video • 36
Page 37

Step 2: When you select the timeline screen, the cut button is immediately
enabled.
Step 3: Click the
button to start the cut mode. Start and end marks appear in
the corresponding preview window.
Step 4: Move the left start mark to select the beginning of the segment you want to
cut or remove. You can check the exact position of the clip in the preview window.
Step 5: Move the right end mark to select the end of the segment you want to cut
or remove. You can check the exact position of the clip in the preview window.
Step 6: Click the
button to cut the selected segment. A dialog box appears and
asks if you want to carry out this action. The video is then split into two clips. The
first clip contains the pre-edited segment, the second clip the edited segment.
NeroVision Express 2 Editing Your Video • 37
Page 38

7.3 Adding Chapter Marks
Initially each video title contains only one chapter. You can manually or
automatically add more chapters, rename chapters or delete unwanted chapters.
7.3.1 Creating chapter marks manually
Step 1: use the slider button to mark 'where' in the video you would like to place
the chapter marks.
Step 2: when you are satisfied with the placement of where you would like the
marker placed, click the 'Create new chapter mark' button
NeroVision Express 2 Editing Your Video • 38
to place the marker.
Page 39

Step 3: after you have placed the marker, your new chapter will be displayed in the
window to the right and a marker
mark(s) have been placed.
on the slider bar will show where the chapter
Step 4: if you would like to be more precise as to which frame you would like to
place your chapter marks, you can then use the 'Next Frame' or 'Previous Frame'
buttons to search frame-by-frame for the appropriate place.
NeroVision Express 2 Editing Your Video • 39
Page 40

7.3.2 Adding chapter marks automatically
Step 1: click on to start the Automatic Scene Cut Detection. Scene changes in
the video are automatically detected and the appropriate chapter marks will be
inserted. Once you click the icon, the detection process starts and afterward, it will
show you how many chapters were found and created.
You can then use the sliders to increase or decrease that number. When the
checkbox is checked, all chapter marks created
previously and within your edit window will be saved. When unchecked, all
previously created chapter marks may be deleted when you press 'Generate'.
Step 2: click on 'Generate' and the chapters will be added. Your new chapter(s) will
be displayed in the window to the right and a marker
where the chapter mark(s) have been placed.
7.3.3 Working with chapters
Each chapter (except the first chapter which is the start of the video title) is
represented by a marker
When you select a chapter, the first video frame of the chapter will be displayed in
the preview monitor.
on the slider bar under the preview monitor.
on the slider bar will show
Using the slider button
and end positions of the video title (within the brackets on the slider bar) as far as
the next chapter mark (if there are more than 2 chapter marks on the slider bar).
If you would like to be more precise as to which frame you would like to place your
chapter marks, you can then use the 'Next Frame' or 'Previous Frame' buttons to
move the chapter mark one frame at a time.
NeroVision Express 2 Editing Your Video • 40
you can move the position of each chapter within the start
Page 41

Rename chapter.
If you would like to rename the chapter video file, click on the rename chapter icon
and enter the new filename.
You can also right click on the mouse and select the appropriate command from
the pop-up menu.
Delete chapter
Select the chapters that you no longer want and then click the 'Delete Selected
Chapter Marks' button.
You can also right click on the mouse and select the appropriate command from
the pop-up menu.
Deletes all chapters.
Click this icon to delete all chapter marks that you have made.
NeroVision Express 2 Editing Your Video • 41
Page 42

8 Create your first slide show
8.1 Create your first slide show
Step 1: Start NeroVision Express 2, select Make New Slide Show and highlight
the required disc type.
NeroVision Express 2 Create your first slide show • 42
Page 43

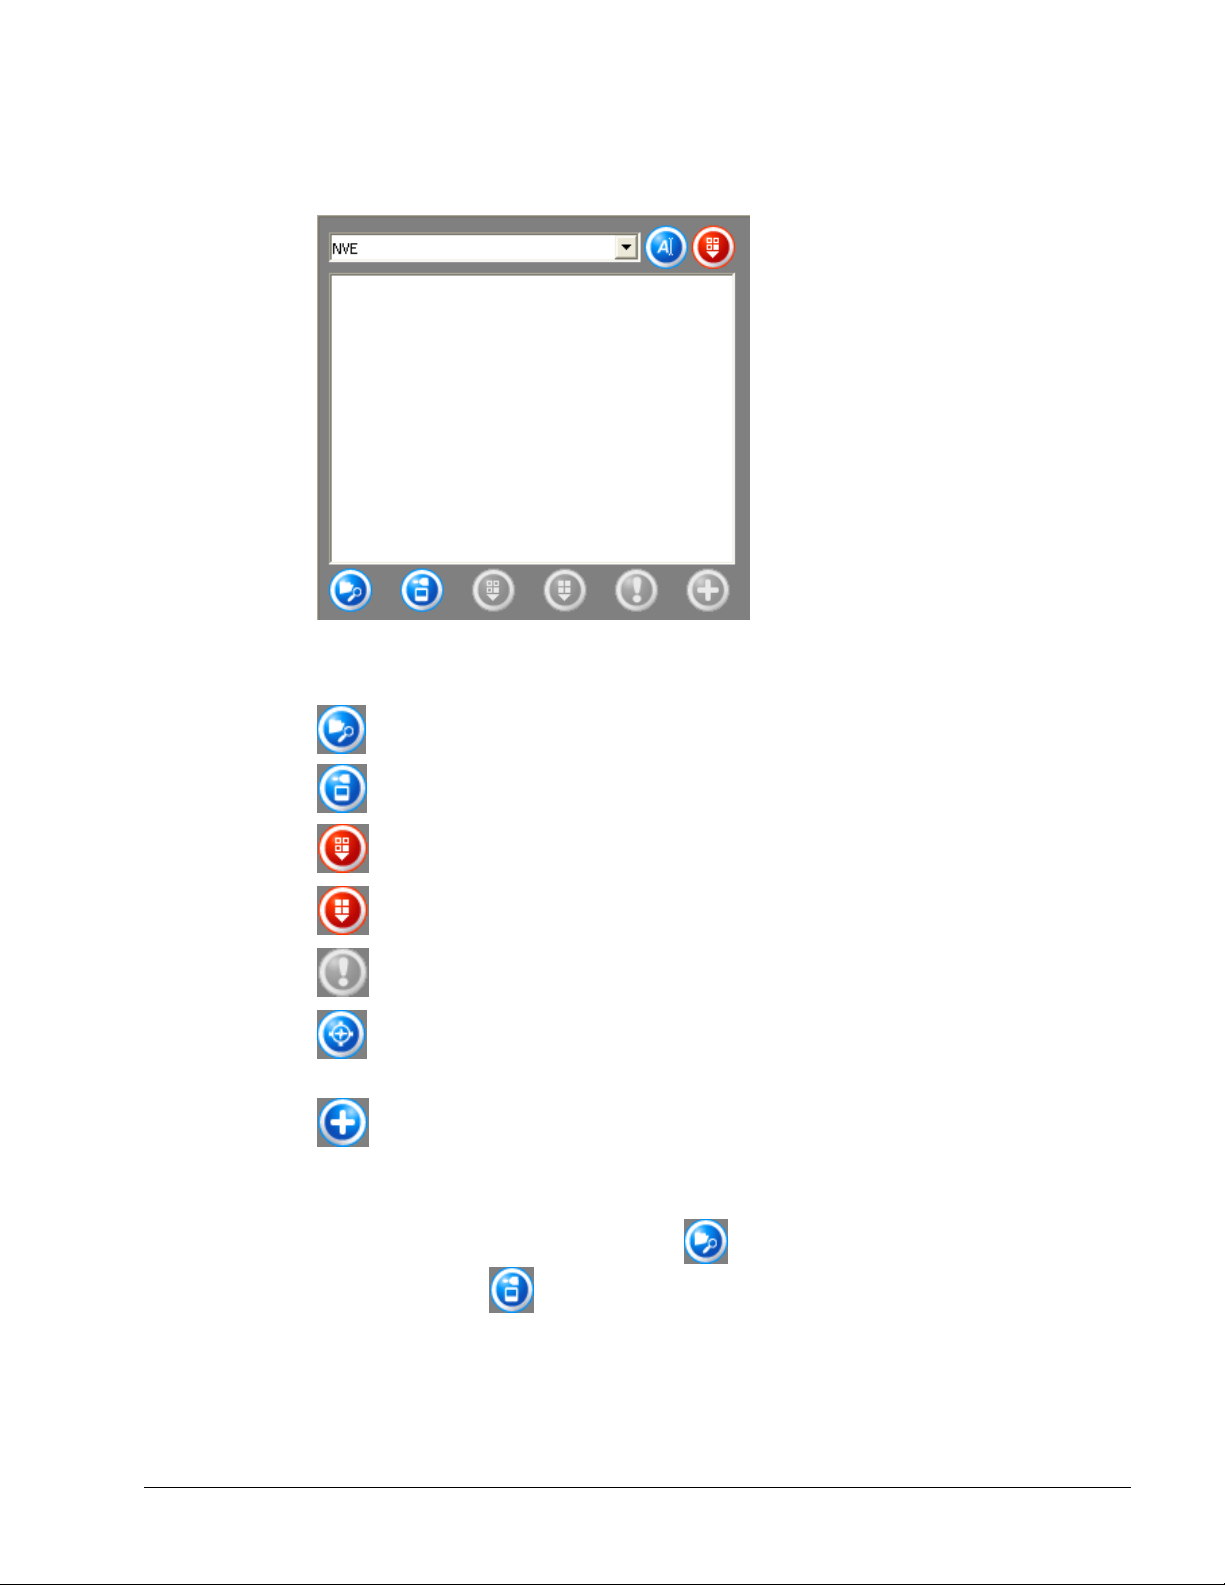
Step 2: If media files are already available, they will be displayed in the upper right
window. If not, you can add files to the selected group (My Media Files), select
another group or create a new group.
Select a new group by clicking on the drop down button in the upper right corner of
the window and highlighting the required group.
Create a new group by clicking on the drop down button in the upper right corner of
the window and selecting ‘Create New Group’.
NeroVision Express 2 Create your first slide show • 43
Page 44
Create a name for the group and click ‘OK’ The new group is now available.
Item Function
Opens a window and enables you to search for the required files.
Activates the scanner and enables you to import graphic files.
Removes the selected item from the group. The item is not
however deleted.
Removes all items contained in the group. The items are not
however deleted.
If NO item is selected and assigned an executable action, the item
is greyed out.
If an item is selected and assigned an executable action, the icon
of the relevant program is displayed. Click on the icon to start the
program.
Adds the selected item(s) to the project.
Add new media to the displayed group either by searching the hard disk or
importing a scanned image. Click the button if you want to add a file from your
computer or click
NeroVision Express 2 Create your first slide show • 44
to import a scanned image.
Page 45

Step 3: You can now add the files available in the group to your slide show. Select
the required files and click on the button.
The image files are added to the image screen of NeroVision Express 2. You can
specify how long the images should be displayed by entering the desired value.
Button Function
Opens a window and enables you to crop part of the graphic.
Opens a pop-up menu displaying different options for modifying the
graphic. This allows you, for example, to alter the brightness or use
different filters.
Rotates the graphic 90 degrees to the left.
Rotates the graphic 90 degrees to the right.
NeroVision Express 2 Create your first slide show • 45
Page 46

If you have added audio files, these will be displayed on the audio screen and your
slide show will be accompanied by the music you have chosen.
Opens a window which enables you to add a header or footer bar to
the graphic. Multiple text appearance options are available.
Step 4: The slide show can be viewed in the preview window accompanied by your
chosen background music, so you can decide if you are happy with the result.
When you are happy with your slide show click on the ‘Next’ button.
NeroVision Express 2 Create your first slide show • 46
Page 47

Buttons Function
Starts the slide show.
Pauses a slide show so it can subsequently be resumed from the
same position.
Ends a slide show.
Removes the displayed item from the slide show.
Removes all items from the slide show.
Step 5: Decide if you wish to added further files from the disc, select the required
option and carry out the appropriate steps. (These are not set out here. Please
refer to the relevant chapter). Click on the 'Next' button to proceed to the next
window.
Step 6: Customize the menu as required and click on the ‘Next’ button when you
are happy with the result.
NeroVision Express 2 Create your first slide show • 47
Page 48
Note: You will find full details about customizing the menu in the chapter 'Starting a
video project’.
Step 7: You can us the mouse pointer or the remote control to test how the disk
behaves when played back on a compatible player. You will find further details
about the remote control and how it is used in the chapter ‘Preview Settings’ Click
on the 'Next' button to proceed to the next window.
NeroVision Express 2 Create your first slide show • 48
Page 49
Step 8: Specify the final settings before burning. Click the ‘Write’ button to start the
burning process.
Note: You will find full details about the burning settings in the chapter 'Starting a
video project'.
Step 9: The project files are converted into the relevant format and then written to
disk, burned as an image or written to the hard disk as required.
NeroVision Express 2 Create your first slide show • 49
Page 50

Step 10: When the burning process has finished, click on ‘Next’ to proceed to the
END page. The options on this page enable you to re-burn a project, begin a new
project, create a cover or label, or end the program.
NeroVision Express 2 Create your first slide show • 50
Page 51

9 Create your first movie
9.1 Create your first movie
You cannot edit videos or create your own movies with NeroVision Express
2 SE.
NeroVision Express 2 differentiates between videos and movies. A video is a file
recorded on the hard disk. It therefore makes no difference if you have created the
video yourself or imported it. A movie however, is a compilation of one or multiple
video files edited on a disk before burning. Editing can include crossfading, cutting,
creating tracks etc.
Step 1: Start NeroVision Express 2, select Make New Movie.
NeroVision Express 2 Create your first movie • 51
Page 52

Step 2: If media files are already available, they will be displayed in the upper right
window. If not, you can add files to the selected group (My Media Files), select
another group or create a new group.
Select a new group by clicking on the drop down button in the upper right part of
the window and highlighting the required group.
Create a new group by clicking on the drop down button in the upper right part of
the window and selecting ‘Create New Group’.
NeroVision Express 2 Create your first movie • 52
Page 53

Create a name for the group and click ‘OK’ The new group is now available.
Item Function
Opens the screen containing the media files.
Opens the screen with the filter effects.
Opens the screen with the text effects.
Opens the screen with the crossfades.
Name of the displayed sub-groups. Clicking on the drop
down button displays the other groups and allows you to
select them.
Opens the screen with the text effects.
Deletes the selected sub-group.
Opens a window and enables you to search for the required file.
Opens the capture screen of NeroVision Express 2.
Removes the selected item from the group. The item is not however
deleted.
Removes all items contained in the group. The items are not
NeroVision Express 2 Create your first movie • 53
however deleted.
Page 54

If NO item is selected and assigned an executable action, the item is
greyed out.
If an item is selected and assigned an executable action, the icon of
the relevant program is displayed Clicking on the first icon starts, for
example, Nero Media Player and clicking on the second icon starts
automatic scene detection in NeroVision Express 2.
Adds the selected item(s) to the project.
Add new media to the displayed group either by searching the hard disk or
importing a scanned image. Click the button if you want to add a file from your
computer or
Step 3: You can now add the files available in the group to your movie. Select the
required files and click on the
click to import a scanned image.
button.
The video files are added in the CONTENT screen of NeroVision Express 2.
NeroVision Express 2 Create your first movie • 54
Page 55

The following actions can be executed with the added videos.
Item Function
Plays selected video.
Stops video.
Creates a screen shot and stores it on the hard disk.
Starts audio file capture (in accordance with audio source selection
and compression format).
Splits video or audio file. Both files exist independently of each other
after splitting and can be added separately. The original file is not
however modified.
Opens the cutting screen in which unwanted passages in video and
audio files can be removed. The original file is not however
modified.
Removes the selected item from the group. The item is not however
deleted.
Opens a section in which the properties of selected items can be
modified, including the color saturation of audio files or the volume
of audio files.
NeroVision Express 2 Create your first movie • 55
Page 56

Crossfades
The symbol
appears between two video files indicates that no crossfade effect has been
selected. Adding a crossfade effect is very easy.
Click on the
relevant section.
on the NeroVision Express 2 storyboard screen which
icon and the available crossfade effects appear in the
Click on the drop down button and select the required crossfade type.
Select the required effect, keep the mouse button pressed, drag the effect to the
crossfade symbol and let go. The effect symbol will be displayed between the
video files. Click on the button to display the effect.
In this way all crossfades can be assigned the required effects.
NeroVision Express 2 Create your first movie • 56
Page 57

Timeline screen
In addition to the storyboard screen, a timeline screen is also provided for videos.
The timeline screen opens automatically when you add a video or text effect or
click on the relevant tab.
The videos contained in the movie are shown in the middle of the timeline screen,
the lower section shows how long the individual videos are and how long the movie
is.
The timeline screen consists of the following items.
Zooms in to the timeline screen to display the whole movie.
Zooms in to the timeline screen.
Zooms out of the timeline screen.
Contains the text effects.
Contains the video effects.
Contains the video clips.
Contains the audio files on the first track.
Contains the audio files on the second track.
NeroVision Express 2 Create your first movie • 57
Page 58

Adding video effects
Click on the
crossfade effects appear in the relevant section.
icon. This opens the timeline screen and the available
Select the required effect, keep the mouse key pressed and drag the effect to the
required position in the movie.
Repeat the process until the required effects are available at all positions.
NeroVision Express 2 Create your first movie • 58
Page 59

Adding text effects
Click on the icon. This opens the timeline screen and the available
crossfade effects appear in the relevant section.
Select the required effect, keep the mouse key pressed and drag the effect to the
required position in the movie. This opens a window displaying the text effect
properties and allows you to enter text and specify other properties.
NeroVision Express 2 Create your first movie • 59
Page 60

Repeat the process until the required effects are available at all positions.
Adding audio effects
Click on the
selected files and click on the timeline screen.
icon to display media files. Open the group containing the
Select the required audio file, keep the mouse key pressed and drag it in the audio
track to the required position in the movie.
NeroVision Express 2 Create your first movie • 60
Page 61

Repeat the process until the audio files have been placed at the required positions
throughout the whole movie.
Note: When two tracks are present you can also overlay multiple audio tracks. For
example, a commentary can be provided on track 2 whilst music plays
simultaneously on track 1.
Step 4: When all steps have been executed, click on the ‘Next’ button. The
selected movie can now be exported, burnt to disk or edited further. Select the
required option.
If you wish to burn the movie to disk, follow the process as described in chapter
'Starting a video project', point 3 onwards.
To export the movie, please refer to the chapter ‘Exporting the movie’
NeroVision Express 2 Create your first movie • 61
Page 62

9.2 Exporting the movie
When the movie has been created, it can be exported as well as burnt to disk.
Step 1: Start NeroVision Express 2, create a movie and select Export Movie.
NeroVision Express 2 Create your first movie • 62
Page 63

Step 2: Select the required export template by clicking on the drop down button
and highlighting the required template. This template can also be further
customized by clicking on the ‘Configure’ button.
Selecting the template
The following change according to the template selected:
Output format (MPEG-1 /MPEG-2/ AVI)
Video (PAL / NTSC)
Aspect ratio (4 : 3 / user defined)
Frame size (720 x 567 pixels / 480 x 567 pixels / 120 x 90 pixels / user defined)
Choosing the ‘Custom’ template gives you the most customization options. This
allows you to select the video and audio compressor in addition to the
aforementioned options. The ‘Configure’ button is however not available in this
case.
NeroVision Express 2 Create your first movie • 63
Page 64
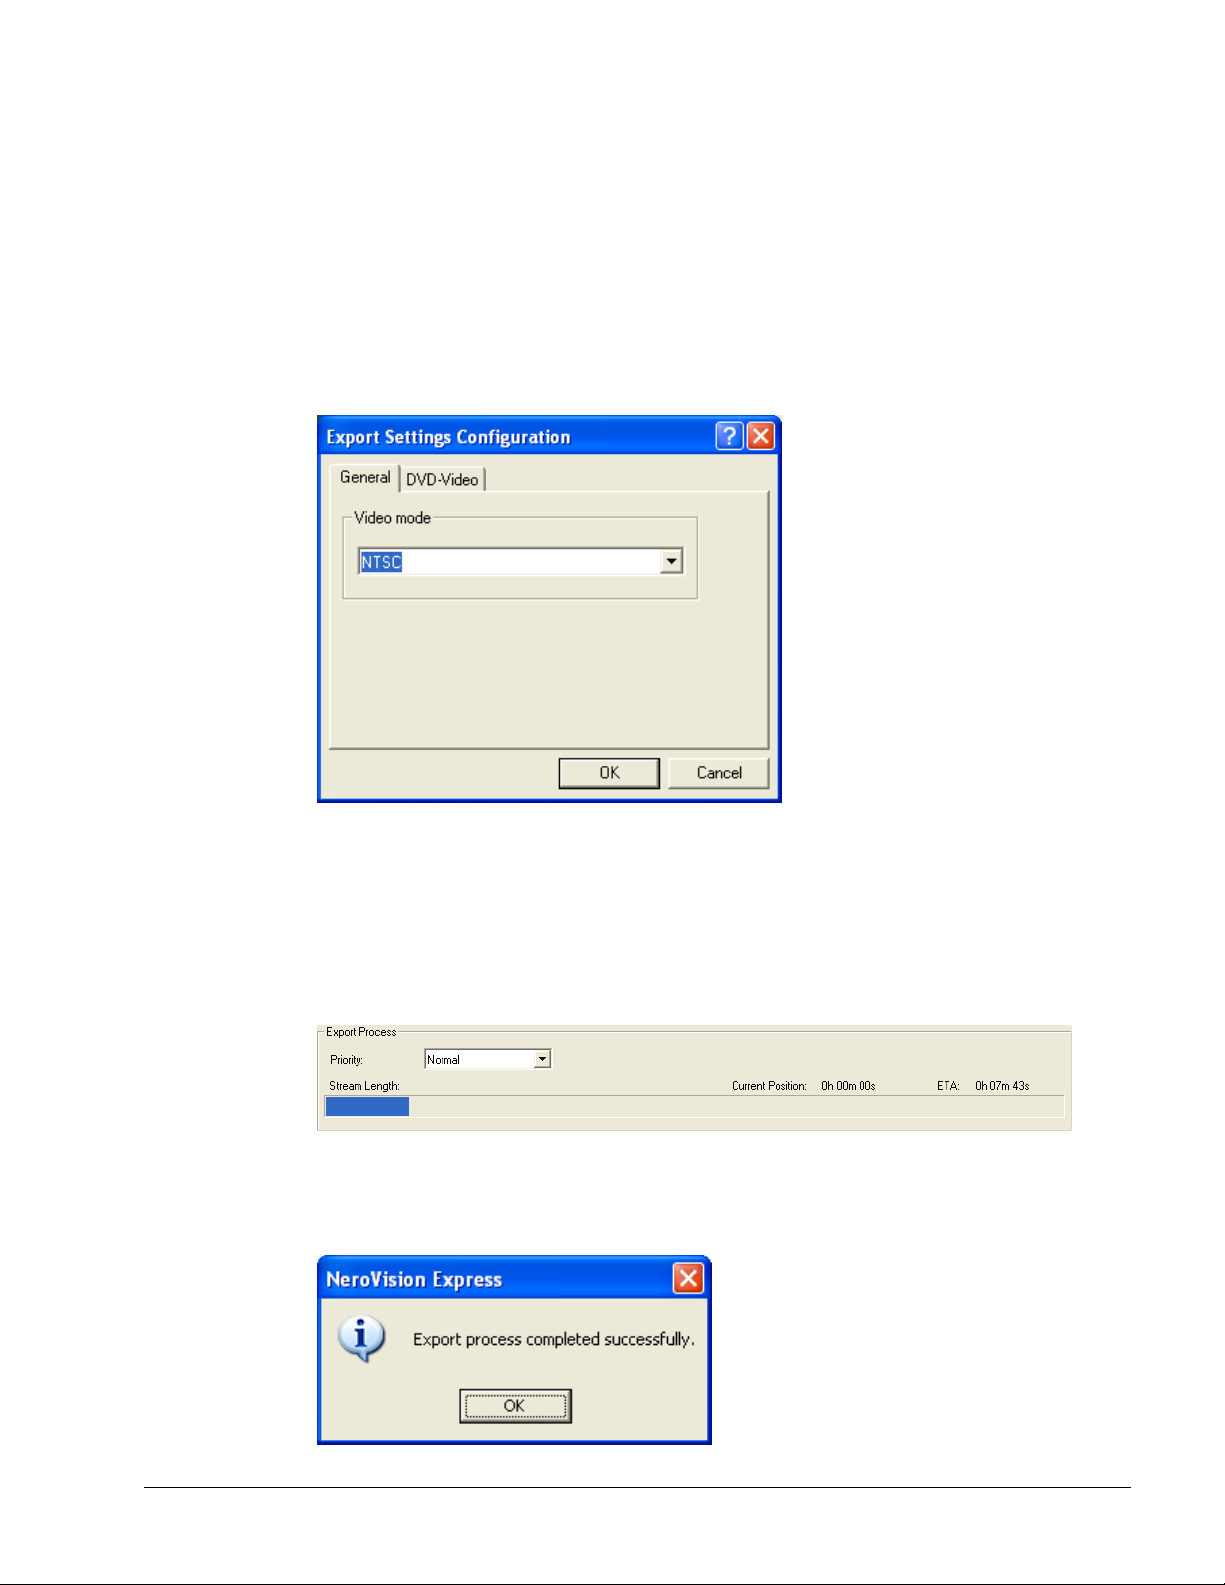
Configuring export settings
The export settings can be modified still further by selecting the DVD, SVCD, VCD
and E-Mail templates.
Click the ‘Configure’ button to modify the export settings. One or two tabs are
available, depending on the template selected.
The ‘General’ tab is available for all templates and allows you to change the video
mode (PAL / NTSC). The second tab is dependant on the template selected and
allows you, amongst other things, to modify the transcoder quality.
Specifying the target directory
Clicking on the ‘…’ button allows you to enter a name and target directory for the
exported movie file.
Step 4: Click the ‘Export’ button to start the export. The export progress is
displayed in the same window.
A message appears once the export is complete. Click on the ‘OK’ button to end
the export.
NeroVision Express 2 Create your first movie • 64
Page 65

Step 5: The exported movie can now be burnt to disk or edited further. Select the
desired option.
If you wish to burn the movie to disk, follow the process as described in chapter
'Starting a video project', point 3 onwards.
NeroVision Express 2 Create your first movie • 65
Page 66

10 DVD+VRs
10.1 DVD+VRs
NeroVision Express 2 SE does not support the DVD+VR format.
If you have a DVD+RW recorder installed and have inserted a DVD+RW disk, then
you will also be able to create a DVD-Video disk
NeroVision Express 2.
The advantage that DVD+VR has over other DVD-Video formats is that you can
always alter the contents at a later stage. This means that you can edit the films,
insert new passages, delete scenes that you do not want to see, or overwrite the
disk. And you can do all this while conforming fully to the DVD standard - so that
you can play these DVDs on normal DVD players.
DVD+VRs can also be made from videos that have already been stored on the
hard drive, or directly via a capture device.
in the DVD+VR format with
10.2 Making DVD+VRs from videos stored on the hard
drive
Step 1: Select Make DVD > DVD-Video (VR) from the main 'Start' screen and click
your left mouse button to start a new project.
NeroVision Express 2 DVD+VRs • 66
Page 67

Step 2: Once you start the project you will be taken to the CONTENT screen.
If you have to record a video for your project, please read the section on
'Recording videos with DV cameras and other external video devices' in this
handbook.
If you have already recorded the video or already have a video stored on your hard
drive and would like to begin creating the layout, click on Add Video Files in the
CONTENT window. If you would like to add the content of a DVD in the DVD-Video
(VR) format, click on Import DVD-Video (VR).
What you do next is identical to the procedure described in Section 5 'Making your
first DVD-Video, VCD, SVCD or miniDVD'. Please read the appropriate
paragraphs.
NeroVision Express 2 DVD+VRs • 67
Page 68

10.3 Adding videos stored on the hard drive to a
DVD+VR disk
Step 1: Insert a DVD+VR disk that you have already recorded on into the
DVD+RW recorder.
Step 2: In the main START screen, select the Make DVD > DVD-Video (VR)
option and click the left-hand mouse button to start a new project.
NeroVision Express 2 DVD+VRs • 68
Page 69

Step 3: Once you have started the project, the CONTENT screen will be shown
with details of the videos and films on the disk.
Now you can add new videos, create new films or process the existing contents.
Adding videos
Click on Add Video Files. What you do next is identical to the procedure described
in Section 5 'Creating the first DVD-Video disk, VCD or SVCD'. Please read the
appropriate paragraphs.
Making films
Click on Make New Movie. Now follow the same procedure as described in
Section 9 'Making your first film'. Please read the appropriate paragraphs.
Editing existing videos and films
You can edit existing videos and films in a number of different ways. Highlight the
current video and then carry out the action you want.
Creating chapters: Click on the
icon, to open the window for
editing titles.
Changing the order: Click on the
upwards or
NeroVision Express 2 DVD+VRs • 69
downwards.
icon, to shift the video one position
Page 70

Change title: Click on , to open a window that lets you change the title.
Delete a video: Click on
, to erase a particular video.
10.4 Making a DVD+VR disk directly from a capture
source
Please note that DVD+VR recording is only possible using an installed capture
source like a video camera when it is connected to the computer. DVD+VR capture
and recording is in real time.
Step 1: Insert a DVD+RW Disk in the DVD+RW recorder.
Step 2: Connect the capture source to the computer from which you would like to
capture a film.
Step 3: Start NeroVision Express 2, then select Record Directly to DVD+VR.
NeroVision Express 2 DVD+VRs • 70
Page 71

Step 4: Choose the capture source by clicking on the dropdown button and
highlighting the device you want (if more than one is connected) and check the
picture settings in the preview monitor.
You can make changes to the video settings by clicking on the
icon. A
window will now open that allows you to alter the brightness, contrast, definition,
and so on.
If you have installed a TV (or video) card, you will be able to select the capture
source (e.g. a tuner or S-video); to do this, click on the
to change the format of the capture source of the output stream, click on
icon. If you would like
. In
the window that now opens you can define the frame rate, color compression
process and the output format in which the video is to be recorded on the DVD.
NeroVision Express 2 DVD+VRs • 71
Page 72

If the sound is also to come from an external source, then click on
. First
choose the audio device by clicking on the dropdown button and highlighting the
device you want (if more than one is connected) and then select the audio input.
Click on the icon with the mouse button and select the audio input you would
like (e.g. a CD player, or the line in or microphone, etc.)
Step 5:
Click on the button located below the preview window, which starts the
simultaneous capturing and recording processes.
NeroVision Express 2 DVD+VRs • 72
Page 73

11 Menu Layout
11.1 Menu Layout
In the 'Create Menu' window, you will be able to design a menu for your video
project with the simple drop down boxes. You are able to change the background
color, change font styles and size, select the type of buttons you would like to use,
add a background picture, and select your header and footer comments.
You are able to have up to two hierarchies within your layout. Each video title is
represented by a button on the main menu. If you have more than one title, a title
submenu will be generated for each title that has more than one chapter. When
you make changes, all menu hierarchies can be customized independently of each
other. Please see the diagram below:
NeroVision Express 2 Menu Layout • 73
Page 74

Step 1 – Layout: Select the layout of your pictures and buttons by choosing one of
the pre-set layouts. Each setting represents a miniature layout on how the buttons
will be placed. Select one that you would like for your layout.
NeroVision Express 2 Menu Layout • 74
Page 75

Step 2 - Background picture and color:
Background picture: Select an image for the background such as BMP’s, JPG’s
and other supported picture formats. If you prefer to not have a picture, you can
select 'Use No Image'.
F.Y.I!
If you have selected a background picture, the background color option will
not be available and will be grayed out.
If you would like to add a picture,
click 'Browse'. Select the supported image file you would like to from the location
on your hard disk or external device and click 'Open'.
NeroVision Express 2 Menu Layout • 75
Page 76

The picture you have selected will be displayed as the background picture for your
layout menu. Each picture that you add will be part of the drop down box selection.
Background Color: If you don't want to use a background picture, you can select
a background color by pointing to a color on the color wheel. In addition, you can
change the hue with the slider to the right. If you have selected a 'Background
Picture', this option will be grayed out and not available.
NeroVision Express 2 Menu Layout • 76
Page 77

Step 3 - Buttons: Select the button style you prefer to activate your menus. If you
prefer to have no frame around your buttons, please select 'Use No Frame'.
Step 4 – Font: Specify the font, font attributes, and the color to use for text in your
menu. The hue of the chosen color can also be altered by using the slider to the
right of the color wheel.
NeroVision Express 2 Menu Layout • 77
Page 78

Step 5 - Header and Footer Text: Enter the text that will be displayed in the
header and footer line on the main page of your layout.
Step 6 – Shadow: Use a shadow to display objects in the menu.
NeroVision Express 2 Menu Layout • 78
Page 79

Step 7 – Automatization: Select the length of menu animation and define which
menu should be played automatically.
Step 8 – Interaction Colors: Customize the highlight and activation colors for
menu buttons.
NeroVision Express 2 Menu Layout • 79
Page 80
12 Preview Settings
12.1 Preview Settings
With the 'Preview' window, you are able to play your Video/SVCD/DVD before you
burn to disc. All the menu buttons and even the remote control work just like the
real thing so that you can see the work and layout that you have made.
Each video clip that you have captured or added from your hard drive or external
source will be displayed.
Within each video clip, all the chapter marks that were made within will be
displayed when you click the button of each video on the first 'Preview' page as
shown above.
You can either click on the buttons themselves or use the remote control to the
right to control the play, stop, fast-forward, rewind, etc…
NeroVision Express 2 Preview Settings • 80
Page 81

This remote control will allow you to find your way between your video layout,
menus, and chapter marks in any order you prefer.
Up Move up on the main menu
Right Move right on the main menu
Down Move down on the main menu
Left Move left on the main menu
Enter Return to main menu
Jumps to the main/title menu
While playing a video clip, selecting 'Menu' will
return you to the last menu or sub-menu used.
Play Play your current title
Stop Stop your current title
Previous View your previous scene
Next Go to next chapter mark
NeroVision Express 2 Preview Settings • 81
Page 82

13 Technical Support
13.1 F.A.Q.’s
Q: When I burn a disc, I get buffer underruns every time.
A: There could be for several reasons for this.
Please try the following:
1. Try reducing the burn speed of the recorder.
2. Try different media brands. The one that you are using may not be compatible
with your recorder.
3. Update the firmware version on your recorder. Firmware is a chip inside your
recorder, which acts as the brain of the device. Please check the manufacturer’s
website for the latest version.
4. Recorder or cable that is attached to it is defective.
5. Try using a different source to see if it is corrupted or too slow as a source.
6. Defrag your hard disk from time to time.
7. During burning no other tasks should be performed by the computer.
8. Before burning, you should always run the speed test and the simulation
in order to get the optimal speed. If not, the maximum possible write speed of
the recorder is kept as default.
9. Proceed to the Nero homepage to check for software updates at
www.nero.com
Q: I have installed NeroVision Express 2 correctly but it still will not see my
recorder?
A: There are a number of possible causes:
The recorder is either too old and support for this drive has been discontinued
The recorder is very new to the market and support has not yet been implemented
or is the process.
Please check to make sure that your PC recognized the recorder and that it has
been installed properly. You can go to Start > Control Panel then the appropriate
menu to see if your hardware was installed correctly or not.
.
Please check the Nero website at www.nero.com
and a list of supported recorders.
NeroVision Express 2 Technical Support • 82
for the latest drivers, updates
Page 83

Q: How can I save in other formats besides AVI when I capture video with
NeroVision Express 2?
A: At this time, NeroVision Express 2 only supports saving captured files in AVI
format. In the future, we will be exploring other video formats.
Q: Why am I not able to see my DV camera under the 'Select A Capture
Device' option in the capture window?
A: There are a number of possible causes:
1. The capture card you are using is not recognized by your PC.
2. Please re-check the setup of your DV device.
3. Please re-check your hardware to make sure it was setup properly.
4. Try another firewire cable.
Q: I recorded my first DVD/VCD/SVCD but my DVD player does not recognize
the disc?
A: It is possible that your DVD player does not support the media that you are
using or the type of disc that you burned. Please check the manufacturer’s
specifications as to what the player supports.
NeroVision Express 2 Technical Support • 83
Page 84

13.2 Contact Information
NeroVision Express 2 is a product from Ahead software.
Ahead Software AG
Im Stoeckmaedle 18
76307 Karlsbad
Germany
Web: www.nero.com
Help: http://englishsupport.nero.com
Mail: techsupport@nero.com
Fax: +49 7248 911 888
Copyright © 2001 - 2003 Ahead Software. All rights reserved.
NeroVision Express 2 Technical Support • 84
Page 85

14 Glossary
AVI File
An acronym for Audio Video Interleave. This is a Microsoft format standard for
video and digital audio.
AVI File Type 1
This is the basic version of the AVI file. The Type 1 AVI files adds an AVI header to
the data stream and then places the DV data stream into the AVI file without
changing anything.
AVI File Type 2
The Type 2 AVI file adds an AVI header to the data stream. It removes the audio
from the DV stream and includes this as an additional AVI format stream to the AVI
file.
Bitrate
The amount of data or video that is calculated in bits over time.
Buffer Underrun
Buffer underruns are caused when there is an interruption to the flow of data to the
internal buffer of the recorder. This can be the fault of the software or the hardware
itself. When recording, data is fed continuously to the recorder’s buffer in order to
keep a steady flow of data which is required when recording. When something
interrupts that steady flow, it can cause a buffer underrun and your disc is no
longer useable.
Capture
This is the method of transporting the video from your DV camera or DV/Analog
device to your computer.
Capture Card
This is a card that fits inside your computer that will connect with a cable to your
DV/Analog device. It will 'capture' video from your device, through the card, and
onto your hard disk.
CD-R
Compact Disc - Recordable. A technology for CD-R (recordable) media.
Chapter Marks
These are marks set in the video which identify a scene change or place. A chapter
in a video is a segment divider. Chapters are sub-positions of the video.
NeroVision Express 2 Glossary • 85
Page 86

CODEC (EnCOder/DECoder)
A method in which a video is encoded for recording or saving to disk then decoded
for playback.
Disc-At-Once
Method in which the laser in your recorder burns straight through in one session
without turning off and on between each track. This method is best when recording
audio CD’s you would like to play in your home or car stereo.
Disc Image
This process can be used when having system performance problems or when you
do not have a burner available. When choosing the disc image option, it takes the
file you want to copy and places it temporarily on your hard disk. From that image it
builds the file. When creating a disc image, you will need a certain amount of drive
space to perform this function.
DV
DVD
DVD-R
DVD+RW
DVD-RW
An acronym for Digital Video, it is the format for storing and saving video and audio
intended for DV products such as cameras and video cameras.
An acronym for Digital Versatile or Video Disc.
DVD was originally only known for being specific to the movie and gaming market,
you can now burn data and your own home videos to a DVD disc that can be
played by all DVD-ROMs. You have the advantage of storing much more data on
this disc than that of a regular CD-R/RW. The DVD-R is a non rewritable format
that is compatible with most DVD-ROM drives and DVD players.
A rewritable format developed in cooperation by Hewlett-Packard, Mitsubishi
Chemical, Philips, Ricoh, Sony and Yamaha. It is a rewritable format that provides
full, non-cartridge, compatibility with existing DVD-Video players and DVD-ROM
drives for both real-time video recording and random data recording for many PC
and entertainment software applications.
An acronym for DVD ReWriteable. The DVD-RW disc is rewritable and performs
the same function as that of a DVD-R. However, the compatibility with various
DVD-ROMs and DVD players is less. Please check with the manufacturer for
compatibility issues.
Frame
A sector is made up of 98 frames. A frame contains 24 data bytes and 9 control
bytes. With an Audio-CD, 75 sectors provide one second of played music.
NeroVision Express 2 Glossary • 86
Page 87

Frames Per Second
The rate for the number of images per second in the video.
Interlaced Video
This format as displays video in two parts: Each part displays and contains a line in
every other row and the second part fills in the alternating rows until the screen is
complete. This method is faster than the Progressive Scan in which all rows are
displayed one at a time until the screen is complete.
JPEG
An acronym for Joint Photographic Experts Group. This is an international group
which created a standard for the compression of pictures.
Lead-In Area
The initial area of every session is known as the Lead-In Area at the beginning of
the disc. This is where the 'table of contents' for your disc and additional
information concerning the CD is stored.
Lead-Out Area
This defines the closing stages of a session and is located at the end of the disc. If
the CD has not yet been finalized, the reference to the next session is stored here.
MiniDV
This is a type of cassette that your DV camcorder uses. It is known to have finer
quality.
MOV File
This is a QuickTime movie format for video.
MPEG
An Acronym for Motion Picture Experts Group, it is a standard that was created for
highly compressed video such as SVCD and Video CD.
MPEG-1
Which is a part of the MPEG compression family has the highest compression rate.
MPEG-2
These is very little difference between MPEG-1 and MPEG-2, with the exception
that MPEG-2 works better with televisions that are interlaced and is the broadcast
standard.
NTSC
NTSC is the standard for video and television in the United States and Japan.
Other parts of the world have another standard. NTSC has more frames per
second than PAL. However, NTSC has less horizontal lines than PAL.
NeroVision Express 2 Glossary • 87
Page 88

PAL
PAL is the standard video and television in many parts of Europe. PAL has more
horizontal lines than NTSC. However, PAL has less frames per second than NTSC.
QuickTime
This is Apple’s format for video and audio for the Macintosh computers. A version
for the PC has also been released.
Simulated Recording
Simulation of the burn process in order to test whether there is a constant writing
flow. The procedure is the same as the writing of the disc, with the only difference
being that the laser writer is switched off.
Super Video CD (SVCD)
Super Video CD or (SVCD) is very similar to a video CD however this format uses
a compression standard called MPEG to store the audio and data. SVCD discs can
be played on DVD players, PC’s with DVD-ROM’s or a CD-ROM drive with
software which allows this type of video format to be seen.
Table of Contents
This designates the contents of every session and is stored in the Lead-In.
Track-At-Once
Method in which the laser in your recorder turns off and on between each track.
VHS
The old cassette/tape format in which everyone used to watch video.
Video CD
An acronym for 'Video Compact Disc', it holds movies and audio/video in stereo
with a compression standard called MPEG. A video disc can be played on most
CD-ROM’s, DVD players, and DVD-ROM drives with the help of software.
White Book
The official papers from Sony, Philips, and JVC in 1993 that extended the Red
Book audio standard to include digital video in MPEG-1 format which is known as
Video CD.
Yellow Book
The official papers by Sony and Philips in 1985 that extended the Red Book audio
format to include digital data for use by a computer which is known as CD-ROM.
NeroVision Express 2 Glossary • 88
Page 89

15 Index
M
Making your first DVD-Video, VCD, SVCD or
miniDVD 20
miniDVD 20
Minimum Hardware Requirements 6
A
Analog Video 14
B
Background Color 77
Background picture 75
Buffer underrun protection 31
C
Camera mode 16
Capturing 14
Contact 86
D
Determine maximum speed 31
Digital Video 14
Digital video vs. Analog video 14
DVD Plug-in 21
DVD+VR 67
DVD-Video 20
F
Font 79
Footer text 79
N
Nero Cover Designer 13
O
Opening NeroVision Express for the first time
8
Operating Systems 6
R
Recording Settings 30
S
Save Button 12
Setting up your hardware 15
Simulation 31
Super Video CD 21
SVCD 21
SVCD Plug-in 21
System Requirements 6
U
Uninstalling NeroVision Express 7
V
G
Getting Started 8
Getting to know the user interface 9
H
Header text 79
I
Installing from CD 7
L
Layout 75
NeroVision Express 2 Index • 89
VCD 20
VCR mode 17
Video CD 20
Volume Name 29
W
Write 31
 Loading...