

Page 1
Setting Up Your AutoloaderNavigating the Front PanelOperating the Autoloader
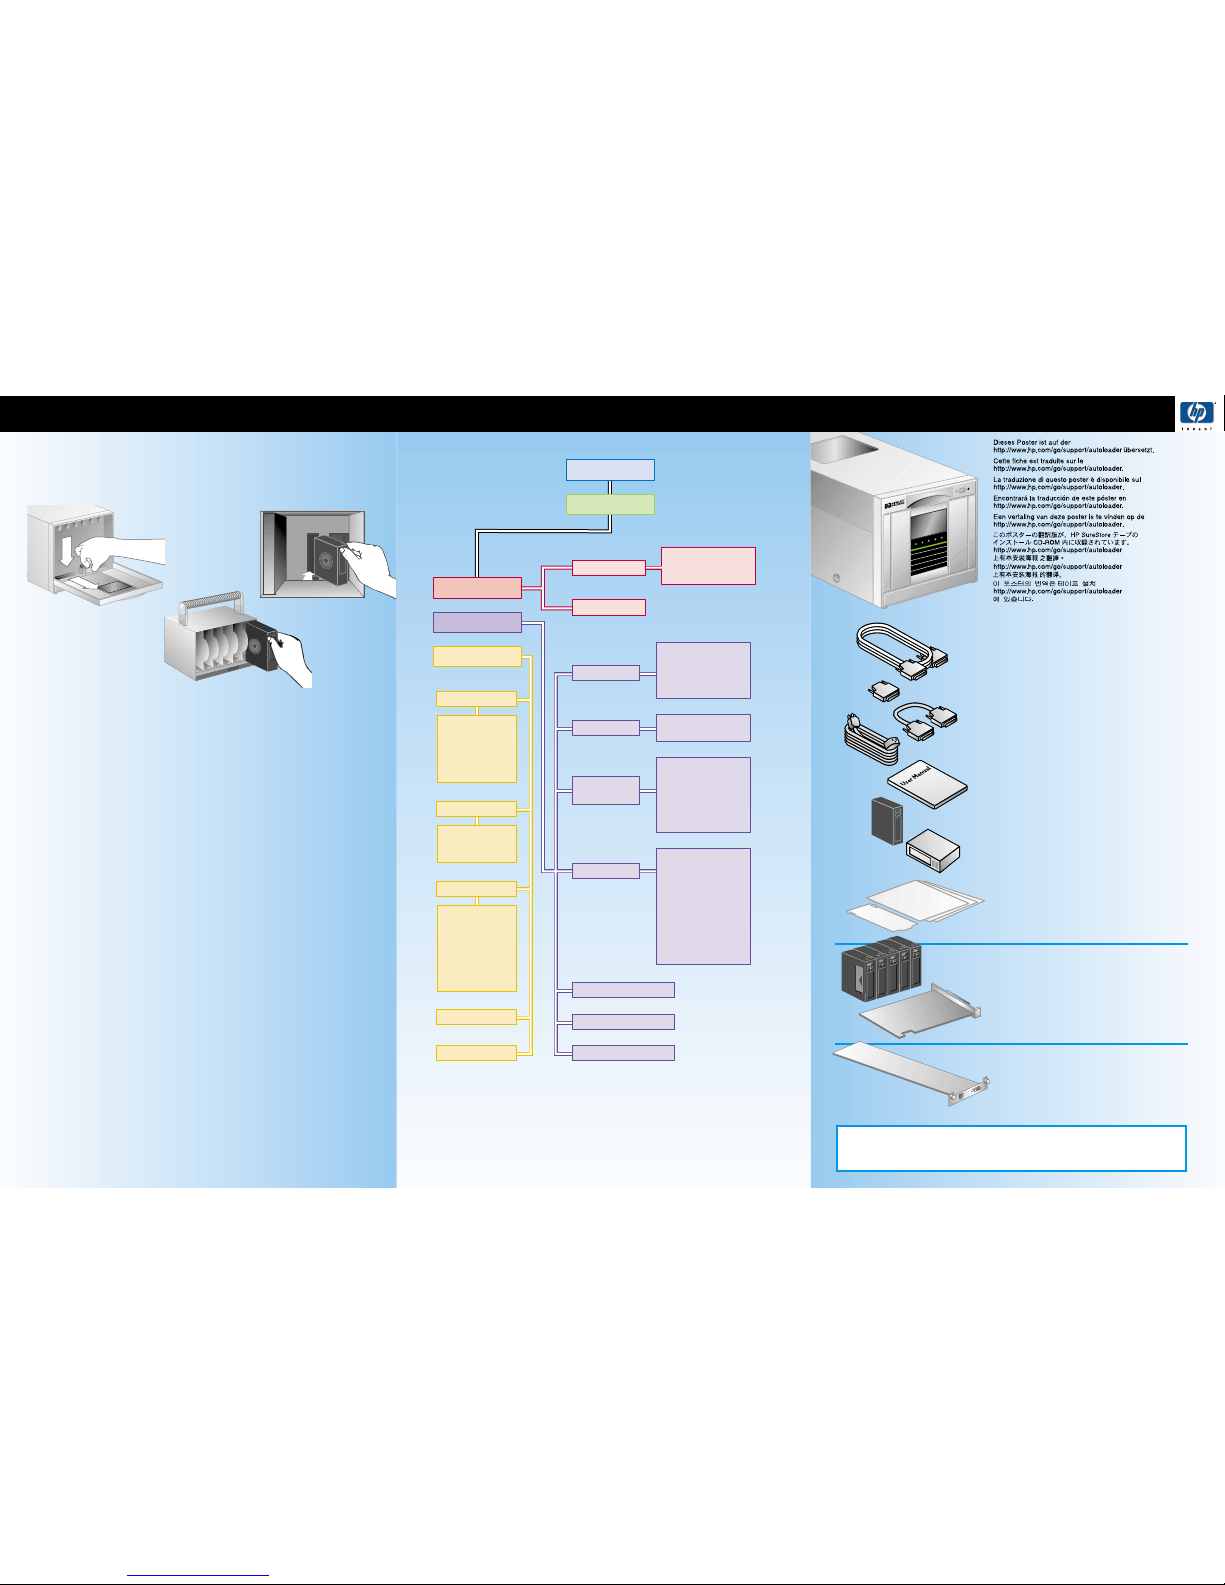
Opening the Door
From the Home screen, select Door. Pull the handle down to open the door.
Loading Tapes into the Magazine
Remove the magazine
by pressing the release button
while pulling the magazine out.
Insert tapes into the magazine,
ensuring the write-protect switch
faces out of the magazine and
the tapes click into place.
Loading Tapes into the Internal Slots
If you are using the autoloader for the first time, power cycle it to move the transport
before loading tapes. With the write-protect switch facing out of the slot, load the
internal slots by pushing the tape in until it clicks into place.
Unloading Tapes from the Internal Slots
Unload tapes from the internal slots by pressing the tape in until it clicks and releases.
Remove the tape after it partially ejects.
Loading Tapes into the Drive
From the Drive Operations menu, select Load Tape to Drive. Select the slot that
contains the tape you want to load, and press OK.
Enabling and Changing a Password
From the Change Configuration menu, select Password.
• If the password is turned off, select Set New Password to enable the password.
• If the password is turned on, select Change Password to enter the new password.
It must be exactly 8 digits long.
• If the password is turned on, select Turn Password Off to clear the password.
Press OK to exit.
Using the Remote Management Card (Optional)
The remote management card allows web management and monitoring of your
autoloader through a network connection. Note: Some remote operations require
the autoloader administration password.
Configure the autoloader for remote access by going to the Change Configuration
menu and selecting Network Access.
Selecting the Operating Mode
From the Change Configuration menu, select Operating Mode.
Select one of the following:
• Stacker: With this mode, you will also need to select Circular Mode On/Off and
Autoload On/Off
• Random
• Autodetect: With this mode, you must also select Circular Mode On/Off
Moving Tapes Between Slots
To move a tape from one slot to another, go to Drive and Tape Operations, and select
Move Tape Slot-to-Slot.
Load Tape to Drive
Unload Tape from Drive
Clean Drive
Drive Operations
Open Door
HOME SCREEN
MAIN MENU
ADMINISTRATION
Loader Status
Hard Error Log
Recovered (soft)
Error Log
Odometer
Identity
OPERATIONS
Loader Information
Event Log
Odometer
Identity
Drive Information
Password
Network Access
Operating Mode
SCSI IDs
Save Element Reserve
After Power Cycle
Other Configuration
Options
View Configuration
Date and Time
Firmware Revisions
INFORMATION
Information
Loader Information
Drive Information
View Configuation
Date and Time
Firmware Revisions
Operations
Tape and Drive Operations
Open Door
Run Test
Check Inventory
Recalibrate Loader
Test Lateral Motion
Test Magazine Moves
Wellness Test
Rewind Media
Lock Transport
Unlock Transport
Test Transport Comm
Show All Sensors
Demonstration
Online Drive Repair
Set Date and Time
Upgrade Drive Firmware
Change
Configuration
Password
Network Access
Operating Mode
SCSI IDs
Save Element Reserve
After Power Cycle
Other Config. Options
Data subject to change
©2000 Hewlett-Packard Company
Printed in USA 11/2000
Part Number C7145-90016
*C7145-90016*
Check Your Accessory Kit
Contents
SCSI Interface Cable: Connects the
autoloader to the host.
SCSI Terminator: Terminates the SCSI chain.
SCSI Jumper Cable: 68-pin cable that
connects the drive to the autoloader controller.
Power Cord: Localized power cord included
with the autoloader.
User Manual: Describes installation, operation,
configuration, and troubleshooting information.
Localized versions of the manual are available at
http://www.hp.com/support/autoloader.
Tape Cartridge: One cartridge for data
backup.
Cleaning Tape: One cleaning tape to clean a
drive.
Label Kits: Includes pull-out information tabs
and barcode labels.
Enhanced Accessory Kit
(Optional)
Includes five data tape cartridges, one cleaning
tape, one label kit, and one host bus adapter card.
Remote Management Card Kit
(Optional)
You can purchase this component (if it is not
already included) to manage and monitor your
autoloader over the web.
Visit http://www.hp.com/support/autoloader to view localized versions of the user
manual and this poster, access the HP Library & Tape Tools support diagnostic utility,
and obtain backup software for the autoloader.
Page 2
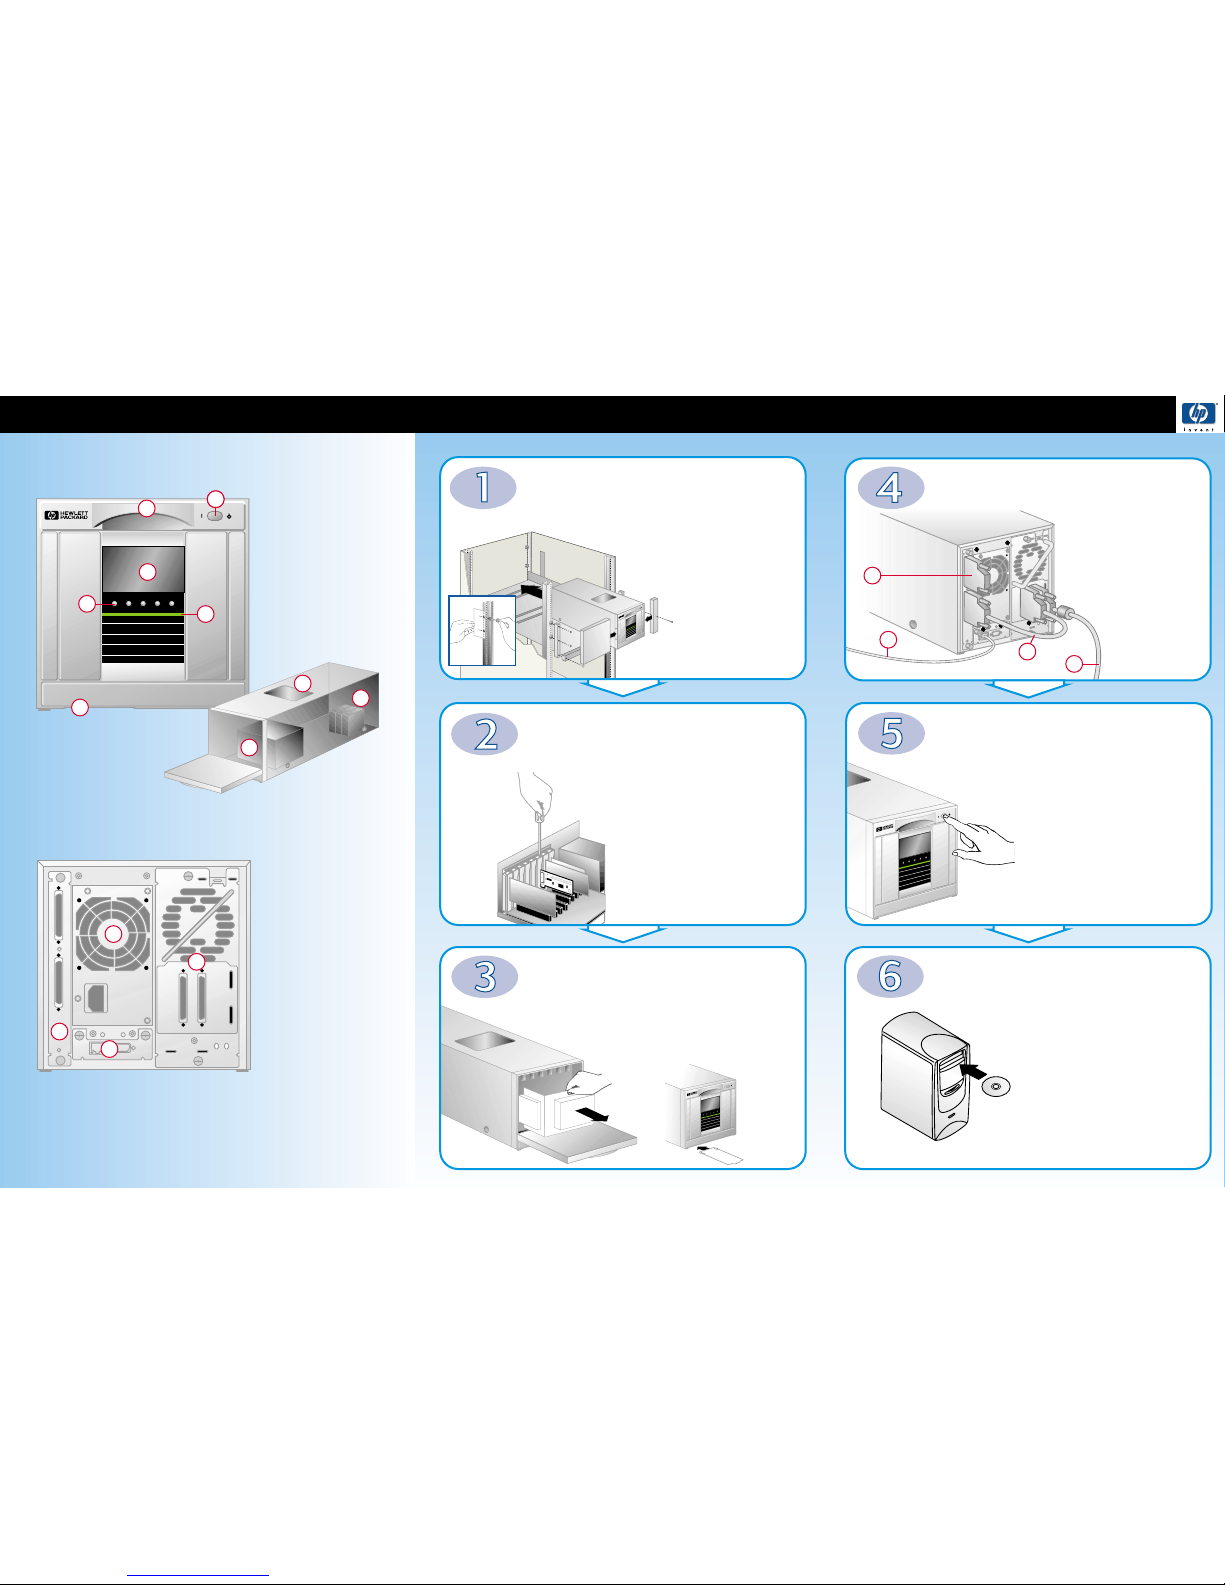
Using the Autoloader Setting Up the Autoloader
2
1 Door Handle
2 Recessed Power (Standby)
Switch
3 Display
4 Soft Keys
5 LED Bar
6 Pull-out Information Tab
7 Removable Magazine
8 Viewing Window
9 Internal Slots
Support and Product Information
http://www.hp.com/go/automated
You can access information on products, accessories, support, and backup
software for your autoloader.
Choosing a Location
and Rackmounting
Preparing the Autoloader
for Installation
Powering On the
Autoloader and Host
Connecting the Autoloader
Verifying the Connection
Front Panel Overview
The autoloader contains six slots in a removable magazine and three internal
slots. The front panel is the control device for the autoloader.
Back Panel Overview
This illustration shows the autoloader with the remote management card.
Choose a location that has adequate
clearance around the door and rear
cables. When installing autoloaders into a
rack without threaded screw holes, use
the clip nut template to install clip
nuts for the mounting rails
and spacer brackets. Install
the mounting rails, brackets,
tray, and autoloader. Refer to
the autoloader user manual
for additional rackmounting
instructions.
Remove the internal packaging by opening
the door.
Install the pull-out information tab into the
slot on the front of the autoloader.
Install a SCSI host bus adapter card and driver
compatible with the autoloader.
While the host computer system is powered
up, install the driver. After installing the
driver, power off the host system and install
the SCSI host bus adapter card. Refer to
documentation included with the SCSI bus
adapter card for more information on
installation.
1 Terminator
2 Category 5 ethernet cable
(optional for RMC only)
3 SCSI jumper cable
4 SCSI interface cable to host
Connect the power cord from the back of the
autoloader into a grounded outlet. Press the
standby switch on the front of the autoloader
to power it on. After the power-up test
completes (approximately 1 minute), you will
see the default Home screen on the front
panel display. Power on the host and
additional peripherals.
Verify that your backup software package
is compatible with your autoloader and
that it is properly installed. Most backup
software packages require an additional
module to communicate with the
autoloader robotics. Install the HP Library &
Tape Tools diagnostic utility available at
http://www.hp.com/support/autoloader to
ensure the host computer is connected to the
autoloader, as well as to diagnose problems.
1 Controller Card
2 Power Supply
3 Remote Management
Card (optional)
4 Drive Module
5
3
1
4
6
7
8
9
1
2
3
4
Preparing the Host
for Installation
2
1
4
3
 Loading...