

Page 1
User's GuideUser's Guide
HP C6463AHP C6463A
Two-Sided Printing ModuleTwo-Sided Printing Module
for use with thefor use with the
HP PhotoSmart P1000/P1100 Color InkJet PrinterHP PhotoSmart P1000/P1100 Color InkJet Printer
Page 2

HP C6463A Two-Sided Printing Module User’s Guide i
Table of ContentsTable of Contents
Overview. . . . . . . . . . . . . . . . . . . . . . . . . . . . . . . . . . . . . . . . . . . . . . . . . . . . . . . . . . . . . . . . . . . . . . . . . . . . . . . . . . . . . . . . . . . . 1
Installing the Two-Sided Printing Module . . . . . . . . . . . . . . . . . . . . . . . . . . . . . . . . . . . . . . . . . . . . . . . . . . . . . . . . . . . . . 1
Setting up the HP PhotoSmart P1100 Printer software for two-sided printing . . . . . . . . . . . . . . . . . . . . . . . . . . . . 2
Automatic two-sided printing. . . . . . . . . . . . . . . . . . . . . . . . . . . . . . . . . . . . . . . . . . . . . . . . . . . . . . . . . . . . . . . . . . . . . . . . 3
Troubleshooting . . . . . . . . . . . . . . . . . . . . . . . . . . . . . . . . . . . . . . . . . . . . . . . . . . . . . . . . . . . . . . . . . . . . . . . . . . . . . . . . . . . 8
Page 3
HP C6463A Two-Sided Printing Module User’s Guide 1
OverviewOverview
The HP PhotoSmart P1100 Color InkJet Printer Two-Sided Printing Module enables the
printer to automatically print on the second side of a piece of plain paper. Automatic
two-sided printing requires three steps. These steps are explained in detail throughout
this guide.
To automatically print two-sided documents:To automatically print two-sided documents:
11 Intall the Two-Sided Printing Module.
22 Set up the HP PhotoSmart Printing software.
33 When you print, select Automatic Two-Sided PrintingAutomatic Two-Sided Printing in the printer Properties.
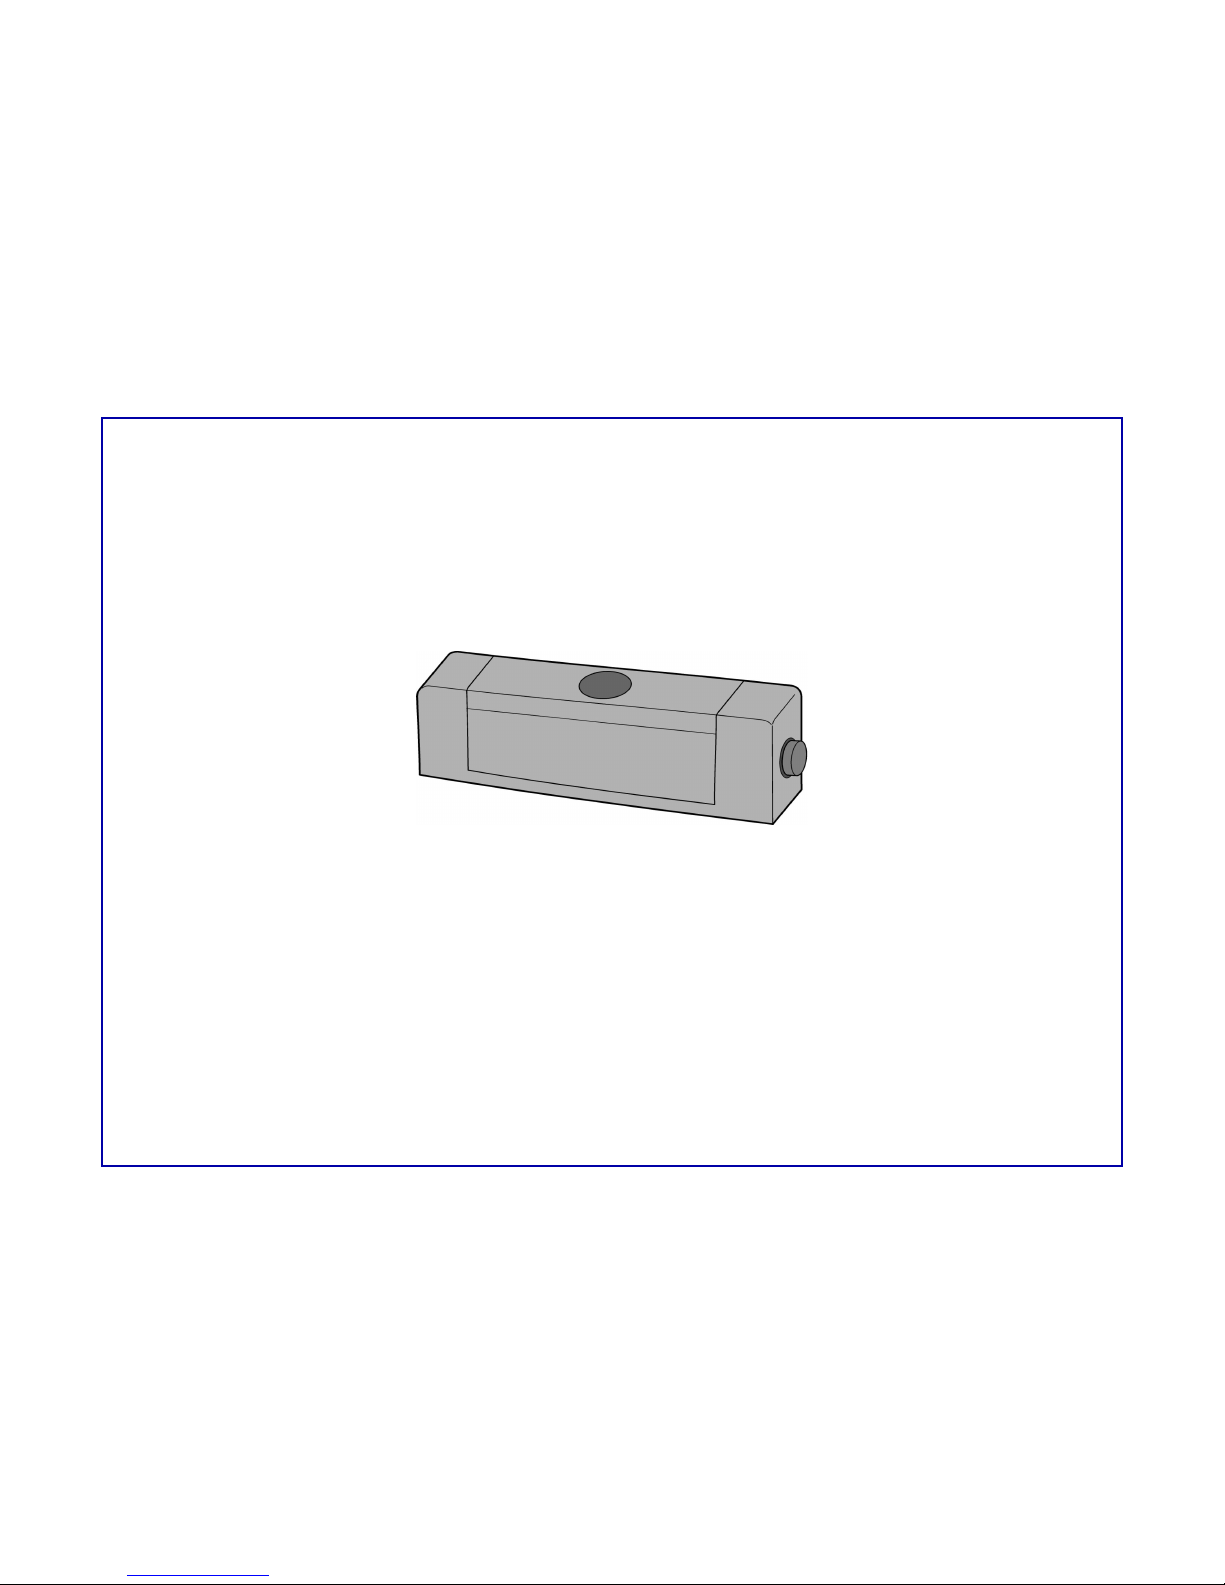
Installing the Two-Sided Printing ModuleInstalling the Two-Sided Printing Module
11 Remove the HP PhotoSmart P1100 Printer rear
access door: turn the knob on the door
counter-clockwise 1/4 turn to the unlock
position, then remove the door.
Page 4
HP C6463A Two-Sided Printing Module User’s Guide 2
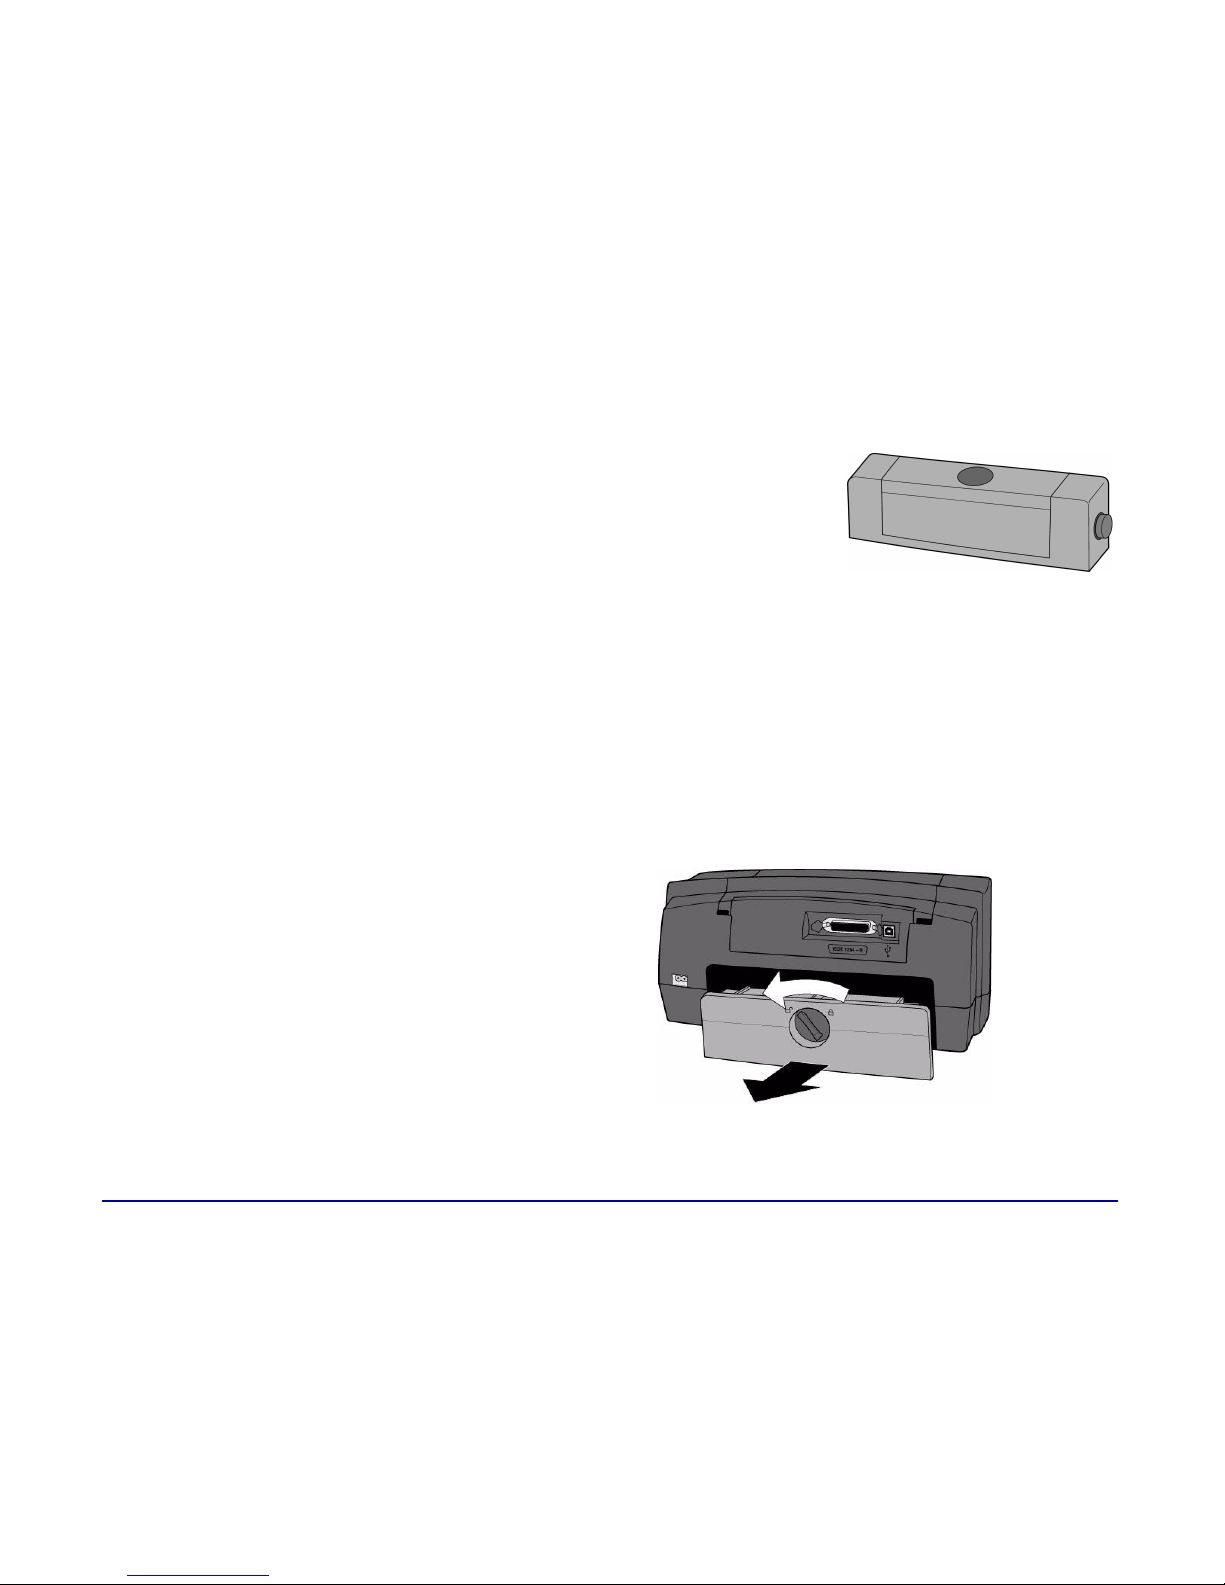
22 Insert the Two-Sided Printing Module (with the
top button facing up) into the back of the
printer—it “snaps” into place.
Setting up the HP PhotoSmart P1100 Printer software for two-sided printingSetting up the HP PhotoSmart P1100 Printer software for two-sided printing
Before you use the Two-Sided Printing Module for the first time, you need to set up the printer software for automatic twosided printing.
Note:Note: You only need to set up the printer software once.
11 Open the HP PhotoSmart printer Toolbox: from the Windows StartStart menu, choose ProgramsPrograms, HPHP PhotoSmartPhotoSmart, P1100P1100,
HP PhotoSmart P1100 Series ToolboxHP PhotoSmart P1100 Series Toolbox.
22 Select the ConfigurationConfiguration tab.
Note:Note: Store the HP PhotoSmart P1100 Printer
rear access door to avoid damage while it
is not in use.
top button
Page 5

HP C6463A Two-Sided Printing Module User’s Guide 3
33 Make sure Automatic Two-Sided Printing ModuleAutomatic Two-Sided Printing Module is selected, then
click ApplyApply.
44 Close the Toolbox window: click the XX in the upper right corner of
the window.
Automatic two-sided printingAutomatic two-sided printing
Step 1: Load plain paper in the paper trayStep 1: Load plain paper in the paper tray
11 Pull out the front paper guide on the paper tray.
22 Place a stack of plain paper in the paper tray.
•• Load the plain paper with the side you want to print first facing downfacing down.
•• Always load paper in the portrait direction, with the long edge of the paper against the long edge of the paper tray.
•• Be careful not to load too much paper. The stack should be below the front paper guide.
Note:Note: Be sure to only use plain paper. You can use letter size (8.5 in. x
11 in.) or A4 size (210 mm. x 297 mm.) Not all paper types or sizes
work with the Two-Sided Printing Module. Using other types of
paper may cause damage to the printer.
Page 6

HP C6463A Two-Sided Printing Module User’s Guide 4
33 Adjust the side and front paper guides to fit close to the edges of the paper, without bending the paper. This helps the
paper feed into the printer straight.
44 Make sure the photo tray is disengaged.
•• On the output tray, move the slider (visible through
the output tray) toward you (away from the inside of
the printer) until it stops.
side
paper
guide
front
paper
guide
slider
Page 7

HP C6463A Two-Sided Printing Module User’s Guide 5
Step 2: Print your projectStep 2: Print your project
11 From your software application’s FileFile menu, choose
PrintPrint.
Your software application’s Print dialog box displays.
22 Select the print settings:
•• Make sure the HP PhotoSmart P1100 Series is the
selected printer.
•• Select the pages you want to print.
•• Select the number of copies you want to print.
Note:Note: Where you find these settings depends on the software application you are using. You may need to click a
SetupSetup button.
33 Click the PropertiesProperties button.
The printer Properties dialog box displays.
44 Select the SetupSetup tab and select the print quality and paper size.
Note:Note: The Print dialog box is different for each
software application.
Page 8

HP C6463A Two-Sided Printing Module User’s Guide 6
55 Select the FeaturesFeatures tab, choose the paper orientation (Portrait or Landscape), then choose Two-Sided Printing Two-Sided Printing.
The HP PhotoSmart P1100 Printer software may have to increase the
margin at the top of the page when automatically printing on both
sides of a sheet of paper. This results in adding more pages to your
document or reducing the size of content to fit in your document. When
the printer software asks you how to set the margins for the paper,
select one of the following:
•• Do not reduce content sizeDo not reduce content size if you do not mind additional pages
added to your document, then click OKOK.
OR
•• Reduce content size to fit smaller areaReduce content size to fit smaller area if do not want additional
pages added to your document, then click OKOK.
Page 9

HP C6463A Two-Sided Printing Module User’s Guide 7
66 Select a binding option:
•• BookBook - if you want to bind your document on the left (like a book).
OR
•• TabletTablet - if you want to bind your document along the top (like a calendar) .
77 Select AutomaticAutomatic to turn on automatic two-sided printing.
88 If your document contains a lot of color, you may want to increase the dry time
for the first side of the page.
•• Select the AdvancedAdvanced tab.
•• In the Extra Dry Time Extra Dry Time area, click and drag the slider to the right to increase the dry time. Click and drag the slider to
the left to decrease the dry time.
99 Click OKOK to close the Properties dialog box.
1010 Click OKOK to begin printing your document.
After printing the first side of the page, the printer holds the paper in
the output tray while the ink dries. When the ink is dry, the Two-Sided
Printing Module pulls the paper back into the printer, and begins
printing the second side of the page. When the printer finishes
printing both sides of the page, it releases the page in the output tray.
Note:Note: You can click OKOK to close the Dry Time Pause dialog box or it will automatically close for you.
Book binding
Tablet binding
Page 10

HP C6463A Two-Sided Printing Module User’s Guide 8
TroubleshootingTroubleshooting
The HP PhotoSmart P1100 Printer will not printThe HP PhotoSmart P1100 Printer will not print
The printer will print only if the Two-Sided Printing Module or the rear access door is properly attached to the printer. Check
to make sure the Two-Sided Printing Module or the rear access door are properly attached to the printer, then try turning the
printer off and shutting down the computer. Restart the computer and the printer, then reprint your document.
The paper is jammedThe paper is jammed
A paper jam may occur in the Two-Sided Printing Module or in the back of the HP PhotoSmart P1100 Printer.
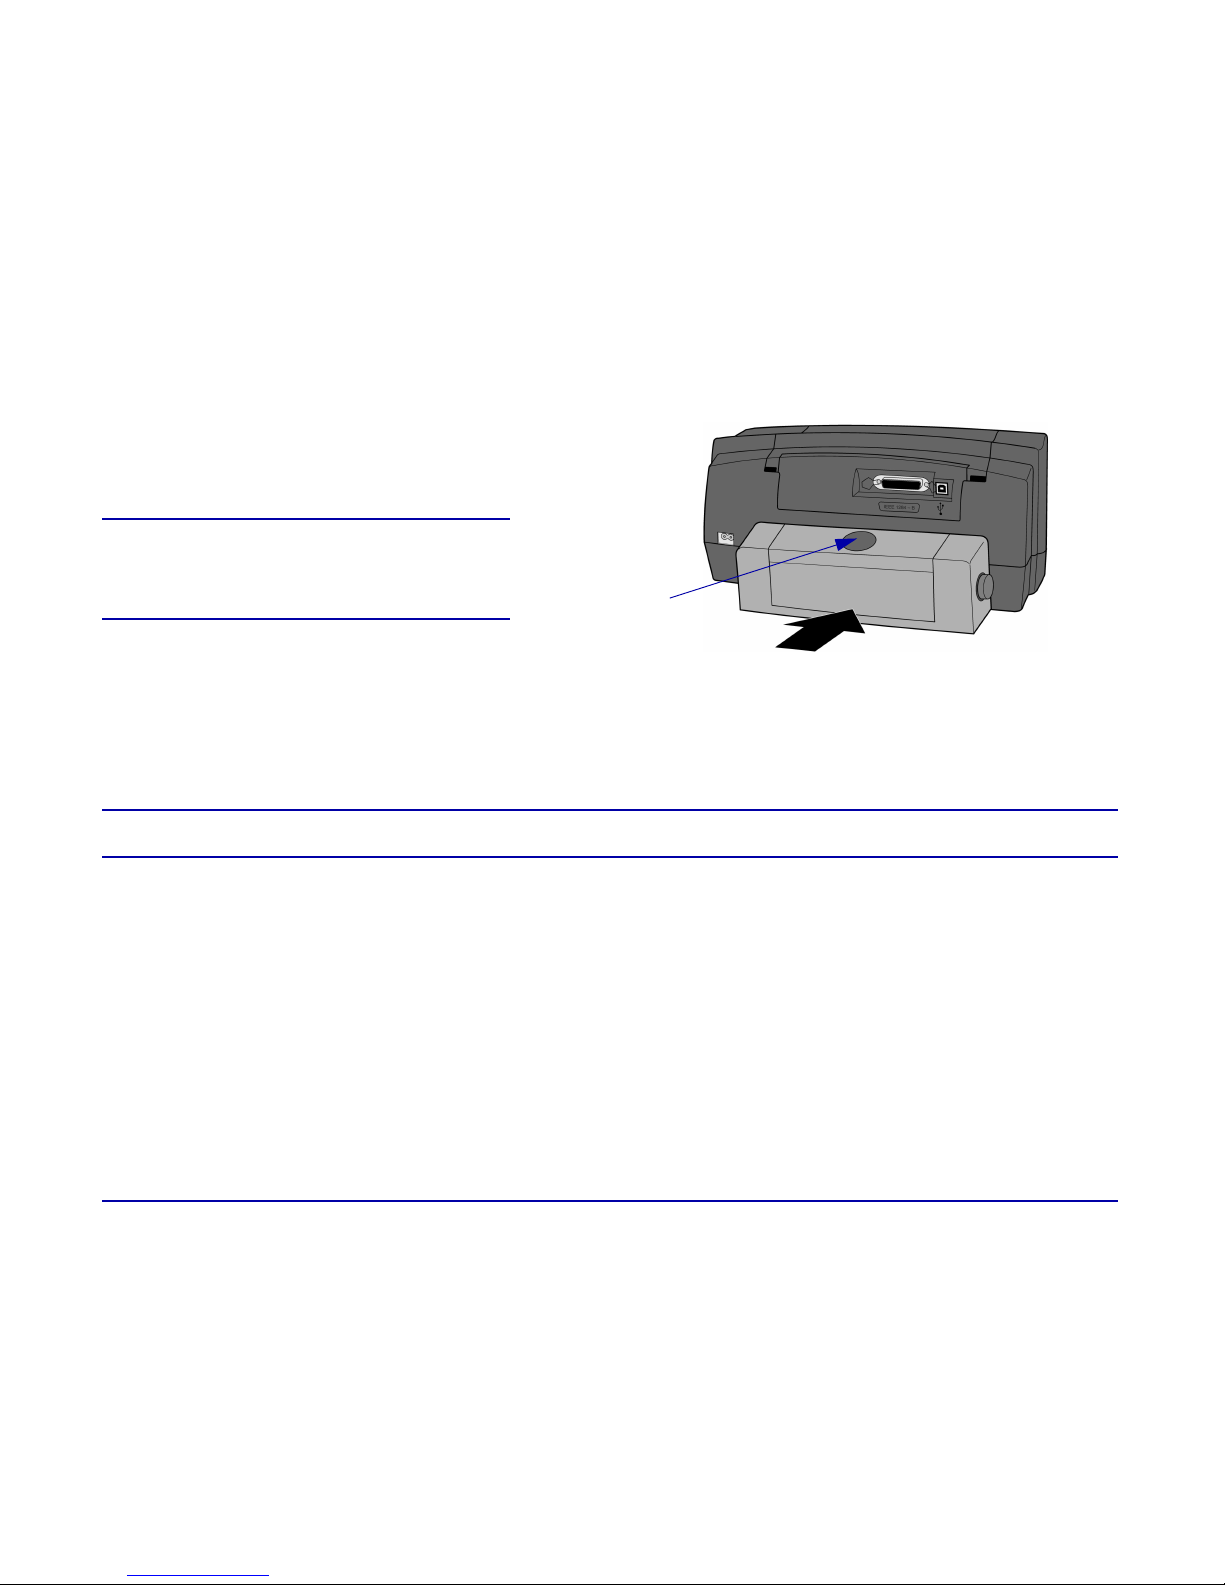
To clear a paper jam in the Two-Sided Printing Module:To clear a paper jam in the Two-Sided Printing Module:
11 Press the release button on top of the Two-Sided Printing Module to
open the access door.
22 Carefully remove the jammed paper out of the Two-Sided Printing
Module.
33 Close the access door.
44 Reprint your document.
top release button
Page 11

HP C6463A Two-Sided Printing Module User’s Guide 9
To clear a paper jam in the back of the printer:To clear a paper jam in the back of the printer:
11 Press the release buttons on both sides of the Two-Sided Printing Module
to detach and remove it from the printer.
22 Carefully remove the jammed paper from the back of the printer.
33 Re-attach the Two-Sided Printing Module. See “Installing the Two-Sided
Printing Module” on page1 for more information.
44 Reprint your document.
I am not able to select Automatic on the Features tab of theI am not able to select Automatic on the Features tab of the
printer Propertiesprinter Properties
11 In the printer PropertiesProperties, on the FeaturesFeatures tab, deselect Two-Sided PrintingTwo-Sided Printing.
22 Print one page.
33 In the printer PropertiesProperties, on the FeaturesFeatures tab, select Two-Sided PrintingTwo-Sided Printing, then select AutomaticAutomatic.
Note:Note: See “Step 2: Print your project” on page5 for more information on using the printer Properties.
side release button
side release button
Page 12

HP C6463A Two-Sided Printing Module User’s Guide 10
Two-Sided Printing is selected, but the HP PhotoSmart P1100 Printer is only printing on one side of the Two-Sided Printing is selected, but the HP PhotoSmart P1100 Printer is only printing on one side of the
paperpaper
11 Re-attach the Two-Sided Printing Module. See “Installing the Two-Sided Printing Module” on page1 for more
information.
22 Open the HP PhotoSmart P1100 Printer ToolboxToolbox and make sure Automatic Two-Sided Printing ModuleAutomatic Two-Sided Printing Module is selected on the
ConfigurationConfiguration tab. See “Setting up the HP PhotoSmart P1100 Printer software for two-sided printing” on page2 for more
information.
33 Check the FeaturesFeatures tab of the printer Properties and make sure you selected Two-Sided PrintingTwo-Sided Printing. See “Step 5” on page6
for more information on using printer Properties.
The binding margins are in the wrong placeThe binding margins are in the wrong place
•• Check the FeaturesFeatures tab in the printer PropertiesProperties and make sure you selected the correct binding option (Book or Tablet)
for your project. See page7 for more information on using printer Properties.
I get an error message when I use the HP PhotoSmart P1100 Printer with the rear access door attachedI get an error message when I use the HP PhotoSmart P1100 Printer with the rear access door attached
•• Open the HP PhotoSmart P1100 printer ToolboxToolbox and deselect AutomaticAutomatic Two-Sided Printing ModuleTwo-Sided Printing Module on the
ConfigurationConfiguration tab. See “Setting up the HP PhotoSmart P1100 Printer software for two-sided printing” on page2 for more
information on using the printer Properties.
 Loading...