

Page 1

Getting Started
HP PC
http://www.hp.com/go/brio
Page 2
Choosing a Comfortable Work Space
Choose a work space for your computer near a grounded electrical wall outlet.
SAFETY WARNINGS:
If you are in any doubt about whether you can lift the equipment safely, do not try to move it without help.
Please read carefully the relevant sections in your HP Brio PC’s documentation for safety instructions relating to:
● unpacking and setting up your display
● electrical connections
● telephone connections
REGULATORY, WARRANTY AND SOFTWARE LICENSE INFORMATION
Please read carefully the relevant sections in your HP Brio PC’s documentation.
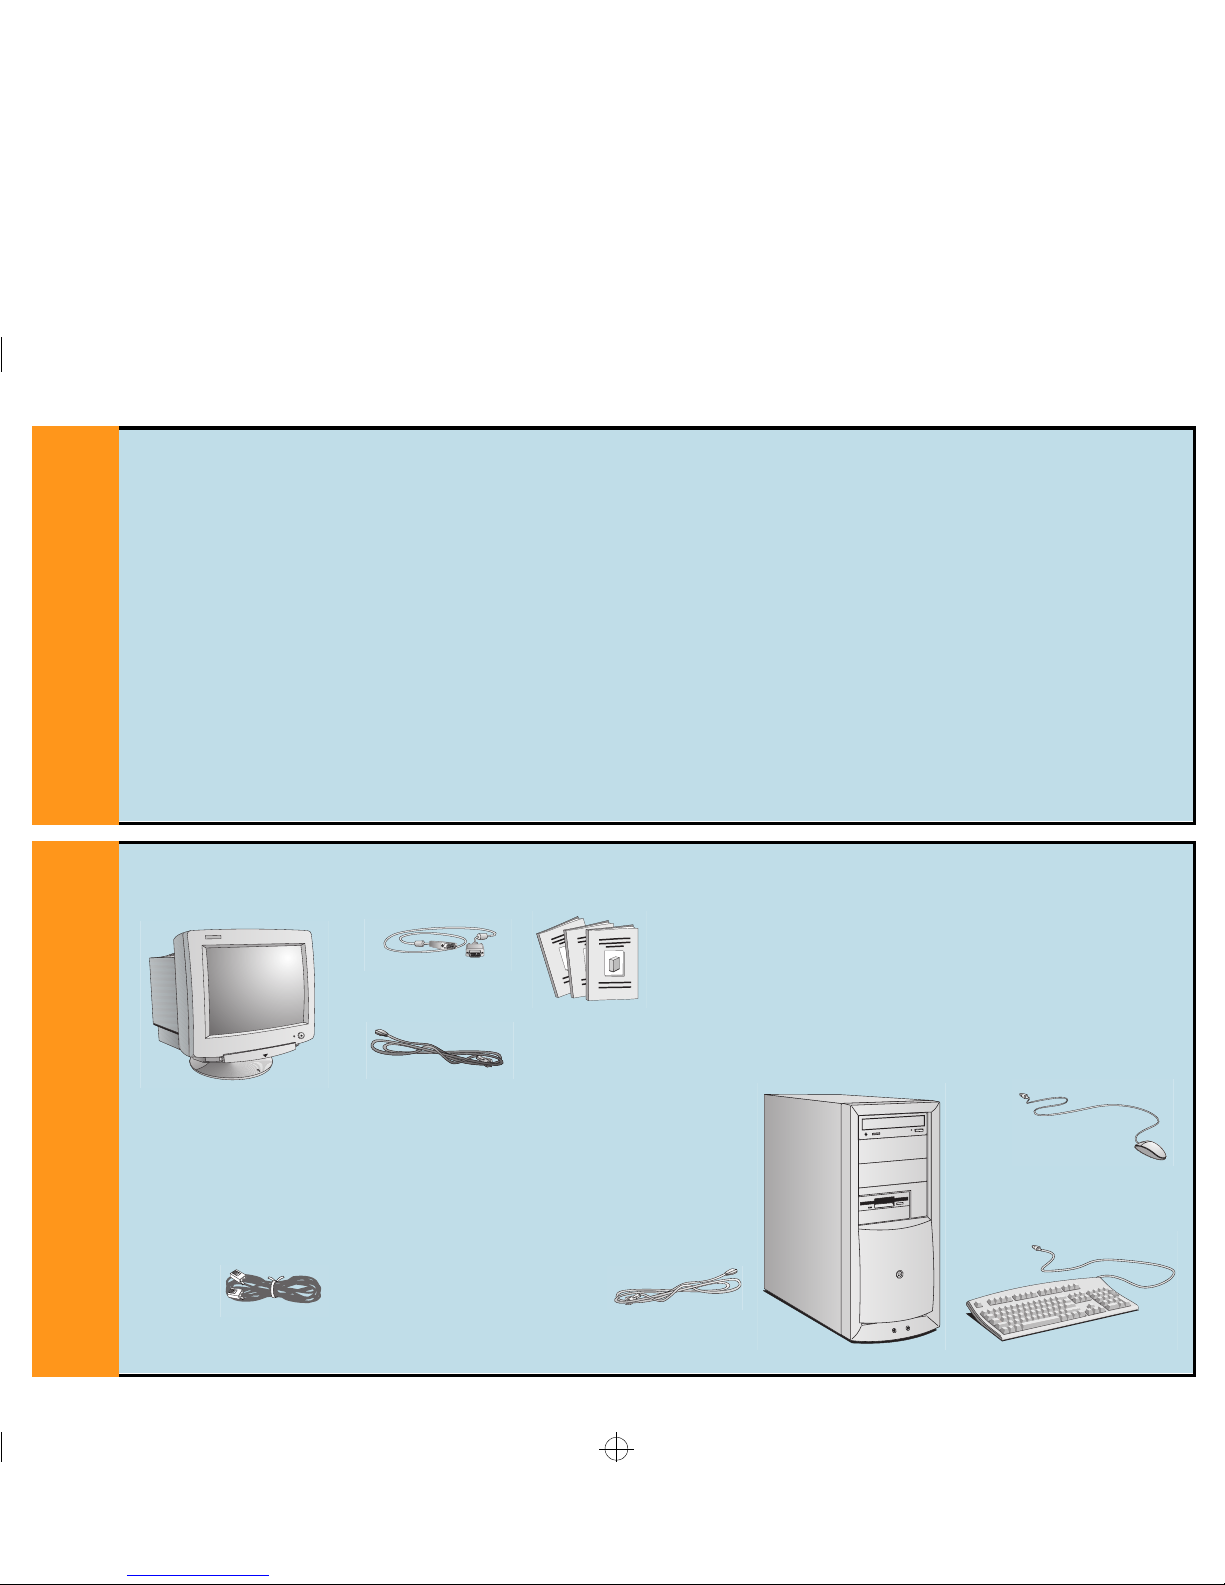
Unpacking the Computer and the Display
COMMUNICATIONS OPTION ONLY
DISPLAY CABLE
TELEPHONE CABLE
COMPUTER
MOUSE
POWER CORD
POWER CORD
DOCUMENTATION
DISPLAY
Remove the computer and the display from their shipping boxes. When you have completely unpacked the
boxes, you will find the items shown here.
KEYBOARD
1
1
2
2
Tarako.fm5 Page 2 Tuesday, December 2, 1997 9:00 PM
Page 3

Insert the display connector into the back of the
computer, as shown. If your HP Brio PC does not
have the enhanced video display option, connect
the display as shown in the alternate display
position.
Please note that all connectors are shaped to go
in one way only.
Insert the mouse and keyboard connectors into
the back of the computer, as shown in the illustration.
KEYBOARD
MOUSE
DISPLAY
DISPLAY
(enhanced video option)
(alternate display position)
Positioning the Computer and the Display
If you have a tilt-swivel, attach it to the display as described in the display manual. Refer to your display documentation to
make sure it is firmly attached.
Position the display on your desk.
Place the computer under your desk. Position the computer to allow proper ventilation and access to the cables.
Connecting the Mouse, Display, and Keyboard to the Computer
4
4
3
3
Tarako.fm5 Page 3 Tuesday, December 2, 1997 9:00 PM
Page 4

Connecting Your Printer to the Computer
(optional)
Connecting your Sound Card
(if applicable)
PARALLEL
SERIAL
LINE IN (BLUE)
MIC (RED)
SPEAKER (GREEN)
MIDI/GAME PORT
LINE OUT (BLACK)
Insert the printer connector into the back of the
computer, as shown in the illustration.
If you have a serial printer, connect it to the socket
labeled SERIAL.
If you have a parallel printer, connect it to the
socket labeled PARALLEL.
If you have amplified computer speakers, plug
one end of the cable into the LINE OUT socket of
your sound card, and the other end into the
Input socket of your speakers.
If your speakers are not amplified or if you
want to use a headset, use the SPEAKER socket
of your sound card.
6
6
5
5
Tarako.fm5 Page 4 Tuesday, December 2, 1997 9:00 PM
Page 5

Connecting the Telephone Cable
(if applicable)
Connecting the Computer and Display Power Cords
VOLTAGE SWITCH
Check that the voltage of your computer
is set to the correct value for the country that you are in.
The voltage is displayed on the back of the
computer, above the computer power
socket.
Connect the power cords to the computer
and display as shown in the illustration.
Plug both cords into grounded electrical outlets.
Connect the telephone cable to the modem on the back of your computer, using the most appropriate configuration.
8
8
7
7
Tarako.fm5 Page 5 Tuesday, December 2, 1997 9:00 PM
Page 6

Starting Up Your Computer for the First Time
Welcome to Your Computer
(only models pre-installed with HP Brio Center)
Turn on the display first, and then
the computer. This is to ensure that
the computer can detect the display
and adjust itself to the best settings.
Manual Part Number 5966-8292-EN
1997 Hewlett-Packard Company
2. TURN ON
THE COMPUTER
1. TURN ON
THE DISPLAY
Once you have started up your computer, double-click on the shortcut on the
desktop to launch the HP Brio Center.
The HP Brio Center lets you get the most out of your PC, quickly and efficiently, while
at the same time being your first point of reference to all questions or problems you
might encounter. Here’s just some of the possibilities with the HP Brio Center:
● register your HP Brio PC
● take a guided tour of your HP Brio PC
● view on-line help
● perform tasks with help
● communicate & share resources
● back-up data
● perform troubleshooting
1
1
0
0
9
9
Tarako.fm5 Page 6 Tuesday, December 2, 1997 9:00 PM
 Loading...