

Page 1

Getting Started
Page 2
1
1
2
2
Choosing a Comfortable Work Space
Choose a work space for your computer near a grounded
electrical wall outlet.
SAFETY WARNINGS:
If you are in any doubt about whether you can lift the equipment
safely, do not try to move it without help.
Refer to the Important Safety Information section in Getting
Support for safety instructions relating to:
● unpacking and setting up your display
● electrical connections
● telephone connections
● use of the combination headset
REGULATORY, WARRANTY AND SOFTWARE LICENSE
INFORMATION
Please refer to the relevant sections in Getting Support.
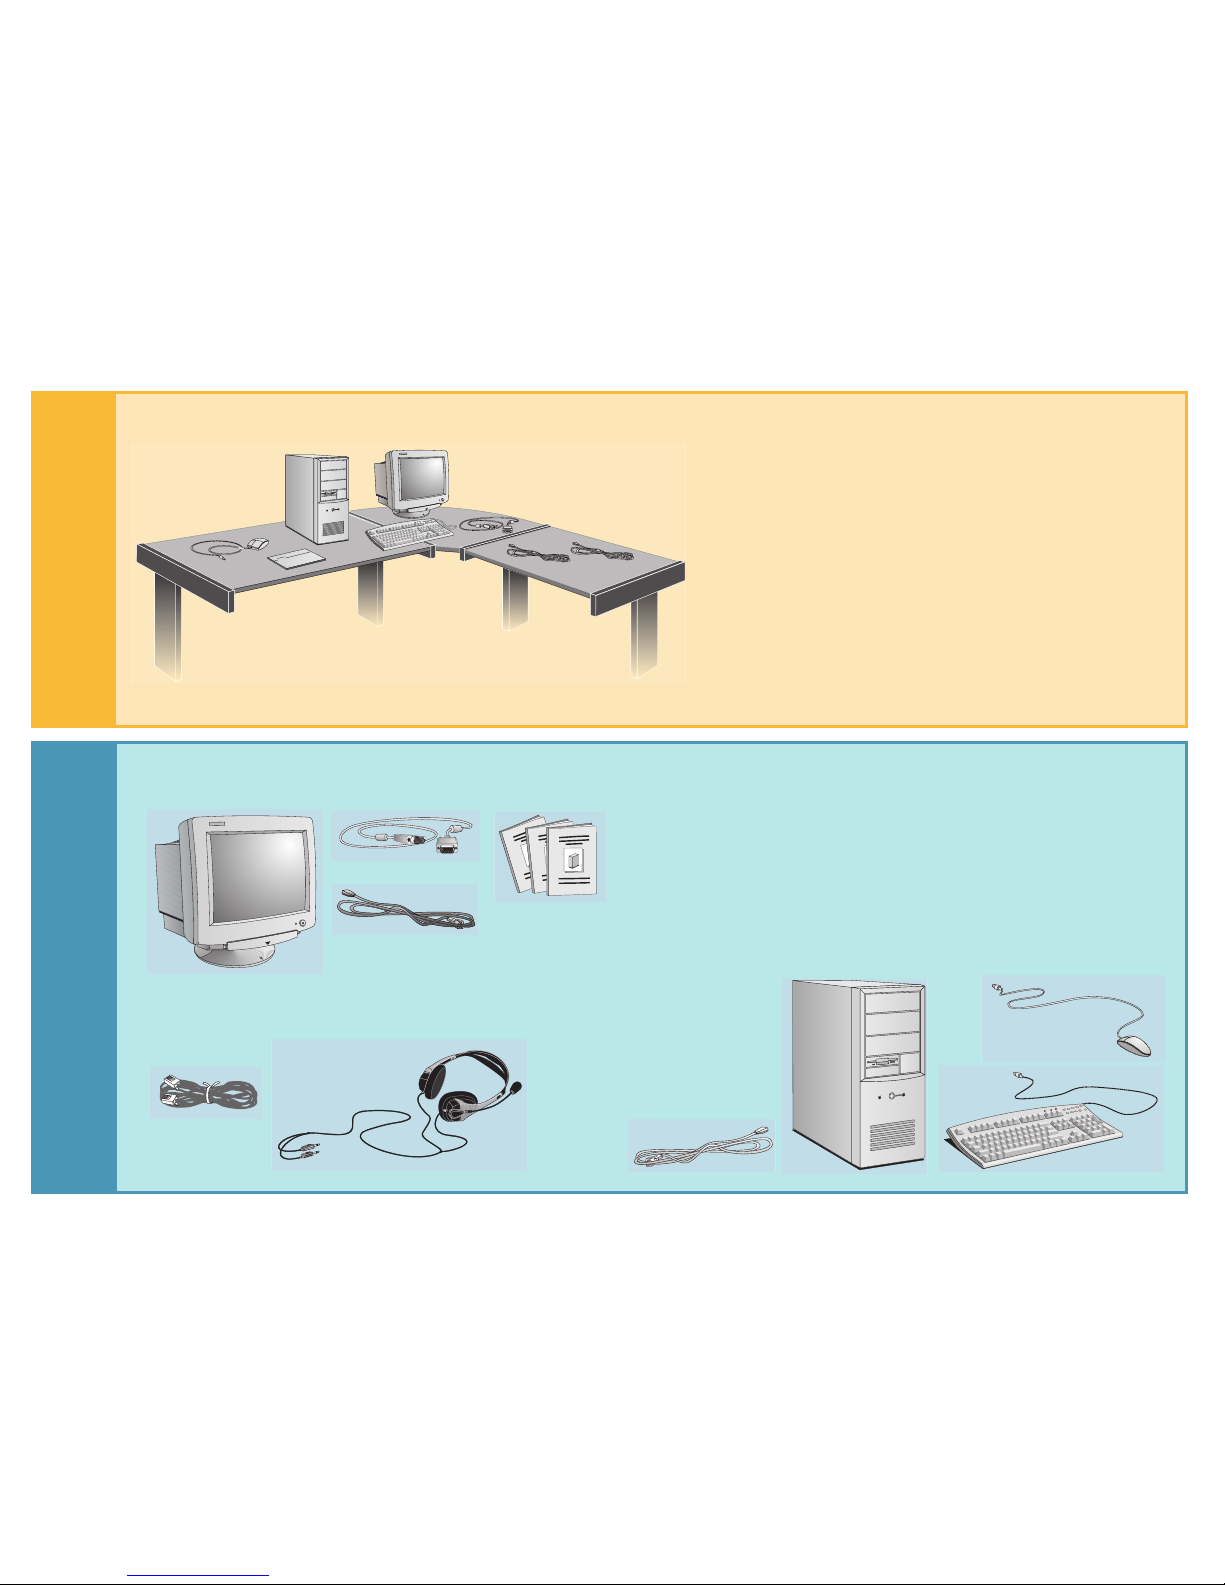
Unpacking the Computer and the Display
Remove the computer and the display from their shipping boxes. When
you have completely unpacked the boxes, you will find the items shown
here.
COMMUNICATIONS OPTION ONLY
DISPLAY CABLE
TELEPHONE CABLE
COMPUTER
DISPLAY
COMBINATION
HEADSET
MOUSE
KEYBOARD
POWER CORD
POWER CORD
DOCUMENTATION
Page 3

3
3
4
4
Connecting the Mouse, Display, and Keyboard to the Computer
Insert the display connector into the back of the computer, as shown in
the illustration.
Please note that all connectors are shaped to go in one way only.
Insert the mouse and keyboard connectors into the back of the computer,
as shown in the illustration.
Positioning the Computer and the Display
If you have a tilt-swivel, attach it to the display as described in the display
manual. Refer to your display documentation to make sure it is firmly
attached.
Position the display on your desk.
Place the computer on or under your desk. Position the computer to allow
proper ventilation and access to cables.
Page 4

5
5
6
6
Connecting Your Printer to the Computer (optional)
Insert the printer connector into the back of the computer, as shown in
the illustration.
If you have a serial printer, connect it to the socket labeled serial.
If you have a parallel printer, connect it to the socket labeled parallel.
Setting Up your Combination Headset (if you have the communications option)
Insert the red connector with the microphone icon into
the socket marked MIC.
Insert the black connector into the line out socket
marked LINE OUT
SERIAL
PARALLEL
Page 5

7
7
8
8
Connecting the Telephone Cable (if you have the communications option)
Connect the telephone cable to the modem on the back of your computer
as shown in the illustration.
Connecting the Computer and Display Power Cords
Check that the voltage of your computer is set to the
correct value for the country that you are in.
The voltage is displayed on the back of the computer, above
the computer power socket.
Connect the power cords to the computer and display as
shown in the illustration.
Plug both cords into grounded electrical outlets.
OTHER
COUNTRIES
U.S. AND
CANADA
VOLTAGE SWITCH
Page 6

9
9
Welcome to Your Computer (models preinstalled with Windows 95 only)
To get started using your computer, press one of the keys shown below on your keyboard.
Starting Up Your Computer for the First Time
Turn on the display first, and then the computer. This is to ensure that the
computer can detect the display and adjust itself to the best settings.
Manual Part Number 5966-8262-EN
Printed in
1997 Hewlett-Packard Company
THE COMPUTER
2. TURN ON
1. TURN ON
THE DISPLAY
1
1
0
0
Press here for a description of your keyboard function buttons.
Press here to find out about the documentation provided with your computer.
Press here to launch the
HP centers. See below
for a description of the
HP centers.
From HP centers you can access the following online centers:
Welcome center - discover what you can do with your computer and how to
personalize it.
Communications center - set up your communications software.
Data protection center - protect your system data.
Network center - share and access shared resources.
Support center - solve any problems with the support tools and services
provided by HP.
 Loading...