

Page 1

HP
PCI-X 2.0 single-port and dual-port 4Gb FC
adapters for Itanium Linu x and Windows
installation guide
Par t num ber: AA –RW 87B–T E
irst edition: June 2006
F
Page 2

Legal and notice information
© Copyrig ht 2006 Hewlett-Packard Development Company, L.P.
©
Copyright 2 006 QLogic Corp.
Confidential computer software. Valid license from HP required for possession, use or copying. Consistent with FAR 12.211 and
12.212, Commercial Computer Software, Computer Software Documentation, and Technical Data for Commercial Items are
licensed to the U.S. Government under vendor’s standard commercial license.
The information contained herein is subject to change without notice. The only warranties for HP products and services are set forth
express warranty statements accompanying such products and services. Nothing herein should be construed as constituting
in the
an
additional warranty. HP shall not be liable for technical or editorial errors or omissions contained herein.
Intel and Itanium are trademarks or registered trademarks of Intel Corporation or its subsidiaries in the United States and other
countries.
Linux is a U.S. registered trademark of Linus Torvalds.
Microsoft and Windows are U.S. registered trademarks of Microsoft Corporation.
RED HAT is a trademark of Red H at, Inc.
SUSE is a registered trademarks of Novell, Inc.
Page 3

Contents
Aboutthisguide .......................... 7
Intendedaudience...................................... 7
Relateddocumentation.................................... 7
Documentconventionsandsymbols .............................. 7
HPtechnicalsupport..................................... 8
Helpfulwebsites .................................... 8
Subscriptionservice ................................... 8
1HBAfeatures........................... 9
Performance specifications .................................. 9
Environmental specifications................................. 10
Physic al specifications ................................... 10
2 Installing the HBAs ....................... 11
Installationprerequisites .................................. 11
Installationprocedure ................................... 12
LEDindicators....................................... 13
3 Installing and configuringtheLinuxdriver.............. 15
Prerequisites ....................................... 15
Installingthedriverkit ................................... 15
UsingtheRPM ...................................... 15
Installing the fibreutilsRPM ................................. 16
Changingdriverparameters............................... 16
Proc filesystemsupport................................... 16
ConfiguringtheHBAs ................................... 16
Starting the Configurationprotocol.............................. 17
Using the Driver Configurationmenu ............................. 18
TroubleshootingLinux.................................... 19
4InstallingtheWindowsdrivers................... 21
Prerequisites ....................................... 21
InstallingdriversusingtheSmartComponent.......................... 21
TroubleshootingWindows.................................. 22
UsingtheEventViewer................................. 22
ARegulatorycomplianceandsafety................. 23
DeclarationofconformityforproductsmarkedwiththeFCClogo,UnitedStatesonly......... 23
Laserdevice ....................................... 23
Lasersafetywarning.................................... 23
Certification and classificationinformation........................... 23
Laserproductlabel..................................... 24
Internationalnoticesandstatements ............................. 24
Canadiannotice(avisCanadien) ............................ 24
EuropeanUnionnotice................................. 24
BSMI(Taiwan)..................................... 25
Japanesenotice.................................... 25
Koreannotice..................................... 25
PCI-X 2.0 single-port and dual-port 4Gb FC adapters for Itanium Linux and Windows
3
Page 4

Electrostaticdischarge ................................... 26
Groundingmethods .................................... 26
Index .............................. 27
4
Page 5

Figures
1
64-bitPCI-X2.0connector.............................. 12
2
Class1laserproductlabel.............................. 24
3
BSMI(Taiwan)notice ................................ 25
4
Japanesenotice .................................. 25
5
Koreannotice ................................... 25
PCI-X 2.0 single-port and dual-port 4Gb FC adapters for Itanium Linux and Windows
5
Page 6

Tables
1Documentconventions................................. 7
2 HBA environmental specifications ........................... 10
3 HBA specifications ................................. 10
4LEDindicatorsactivity................................ 13
5DriverConfigurationmenucomponents......................... 19
6
Page 7

About this guide
This guide provides information about:
• Installing and configuring the HP PCI-X 2.0 dual-port 4Gb FC adapter (PCI-X 2.0 dual-port host
bus adapter), product number AB639A, for Itanium
• Contacting technical support for additional assistance
Intended audience
This guide is i
• Linux operating systems
• Windows operating systems
• Host bus adap
Related documentation
In addition to this guide, see the HP StorageWorks QLogic host bus adapters for Itanium Linux and
Windows release notes.
Other HP documents are available on the HP web site: h
ntended for system administrators who are familiar with:
(HBAs)
ter
®
Linux® and Microsoft® Windows® systems.
ttp://www.docs.hp.com.
Document conventions and symbols
Table 1 Doc
Convention
Medium blue text: Related documentation
Medium blue, underlined text
ttp://www.hp.com)
(h
Bold font
Italic font
Monospace font
Monospace, italic font
ument conventions
Element
Cross-reference links and e-mail addresses
Web site addresses
• Key names
Text typed into a GUI element, such as into a box
•
• GUI
Text emphasis
• File and directory names
•
•
•
•
• Code variables
•
elements that are clicked or selected,
such as menu and list items,buttons,and check
boxes
System output
User input
Code
Text typed at the command line
Command-line variables
WARNING!
Indicates that failure to follow directions could result in bodily harm or death.
PCI-X 2.0 single-port and dual-port 4Gb FC adapters for Itanium Linux and Windows
7
Page 8

CAUTION:
Indicates that failure to follow directions could result in damage to equipment or data.
IMPORTANT:
Provides clarifying information or specific instructions.
NOTE:
Provides additi
TIP:
Provides helpful hints and shortcuts.
onal information.
HP technical support
Telephone numbers for worldwide technical support are listed on the HP support web site:
h
ttp://www.hp
Collect the following information before calling:
• Technical support registration number (if applicable)
• Product seria
• Product model names and numbers
• Applicable error messages
• Operating sys
• Detailed, specificquestions
.com/support/.
lnumbers
tem type and revision level
Helpful web sites
For other product information, see the following HP web sites:
ttp://www.hp.com
• h
• http://www.hp.com/go/storage
• http://www.hp.com/support/
• http://www.docs.hp.com
Subscription service
HP strongly recommends that customers register online using the Subscriber’s choice web site:
http://www.hp.com/go/e-updates.
Subscribing to this service provides you with e-mail updates on the latest product enhancements, newest
driver versions, and firmware documentation updates, as well as instant access to numerous other product
resource
After subscribing, locate your products by selecting Business Support Center and then Storage under
Product Category.
s.
8
About this guide
Page 9

1HBAfeatures
This chapter describes the features of the PCI-X 2.0 single-port HBA (product number AB479A) and the
PCI-X 2.0 dual-port HBA (product number AB379A).
•
Performance specifications, page 9
•
Environmental specifications,page10
•
Physical specifications, page 10
Performance specifications
The PCI-X 2.0 4Gb FC adapters are 4-Gb, high-performance direct memory access (DMA) bus master
HBAs designed for high-end systems.
These HBAs have the following features:
• Combine a po
manager
(PCI) or peripheral component interconnect-extended (PCI-X) local bus interface in a single-chip
solution
• Support Fa
• Support bus master DMA
• Supports SCSI-3 Fibre Channel Protocol (SCSI-FCP), and Fibre Channel-Virtual Interface (FC-VI)
protocol
• Support point-to-point fabric connection (F-PORT FABRIC LOGIN)
• Comply with:
•PCI Loca
• PCI-X Protocol Addendum to the PCI Local Bus Specification, revision 2.0a
• PCI-X Electrical and Mechanical Addendum (revision 2.0a) to the PCI Local Bus Specification
•PCI Bus P
•PCI Hot Plug Specification, revision 1.0PCI-X Addendum (revision 1.0) to the PCI Local Bus
Specification
• Third-generation Fibre Channel–Physical and Signaling Interface (FC-PH) standard
•Fibre C
• Fibre Channel Framing and Signaling (FC-FS)
• U.S. and international safety and emissions standards
werful reduced instruction set computing (RISC) processor, a Fibre Channel protocol
(FPM) with 4Gb Fibre Channel transceivers, and a peripheral c omponent interconnect
bric Loop Attach (FLA) connections
s
lBus Specification revision 2.3
ower Management Interface Specification revision 1.1
hannel-Arbitrated Loop (FC-AL-2) standard
PCI-X 2.0 single-port and dual-port 4Gb FC adapters for Itanium Linux and Windows
9
Page 10

Environmental specifications
Table 2 lists the HBA environmental specifications.
Table 2 HBA environmental specifications
Environment Minimum Maximum
Operating temperature
Storage temperature
Relative humidity (noncondensing)
Storage hum
idity (noncondensing)
0 °C/32 °F 55 °C/131 °F
-20 °C/-4 °F 70 °C/158 °F
10% 90%
5%
Physical specifications
Table 3 lists the HBA specifications.
Table 3 HBA specifica tions
95%
Type
Bus interface 64-bit, PCI-X 2.0 266-MHz DDR, compatible with 66/33-MHz PCI
nnel
Fibre Cha
Central processing unit (CPU) Single-chip design that includes a RISC processor, Fibre
Memory
Signal
Data rate
Onboard DM A Five-channel DMA controller: two data and one command, one
Frame B
Por ts
Connectors
specifications
voltage
uffers
Specification
and 133/100/66-MHz PCI-X
Conforms to PCI Local Bus Specification, revision 2.3, PCI Bus
Power Management Interface Specification, revision 1.1, PCI Hot
Plug Specification, revision 1.0
Bus type:
Bus trans
to
Channel protocol manager, PCI-XDMA controller, integrated
serializer/deserializer (SEREDES), and electrical transceivers that
canautonegotiate adatarateof4 Gb/s
1-MB SR AM, 1-MB flash (SPI), and 2-KB NVRAM (SPI)
3.3 V (mode 1), 3.3 V/1.5 V (mode 2)
4, 2, 1 Gb/s auto-negotiation (4.2480/2.1240/1.0625 G b/s)
auto-DMA request, and one auto-DMA response.
Integr
4-KB transmit) for each data channel.
Single or dual 4 Gb/s
Small-form-factor fixed (SFF) multimode optic with LC connector
fiber optic media
fer rate: 4Gb/s FC increases aggregate throughput rate
800 MB/s in full-duplex mode
ated 10-KB frame buffer FIFOs (6-KB receive and
Form factor Low-profile MD2: 16.93 cm × 5.15 cm (6.7 in. × 2.5 in.)
Bracket size Standard: 1.84 cm × 12.08 cm (0.73 in. × 4.76 in.)
Power consumption
10
HBA features
Low-profile: 1.84 cm × 8.01 cm (0 .73 in. × 3.15 in.)
~11.0 Watts
Page 11

2 Installing the HBAs
This chapter describes the procedure for installing the HP PCI-X 2.0 single-port and dual-port HBAs,
including:
• Installation prerequisites,page11
• Installation procedure, page 12
Refer to your host d ocumentation for installing the HBA.
WARNING!
Disconnect thehost from the powersourcebeforeinstalling theHBA.Toreducethe risk of personal injury
from hot surfaces, allow the internal server or workstation components to cool before touching.
CAUTION:
Electrostatic d ischarge (ESD) c an damage electronic components. Be sure you are properly grounded
before beginning this procedure as described in "Regulatory compliance and safety" on page 23.
Installation prerequisites
Before you begin, ensure that you have:
• An optical multimode cable with an LC-style duplex connector
• An empty 64-bit PCI-X slot
• The following u nique information that is located on the bottom of the HBA:
•Serial number
• WorldWide Port Name (WWPN) and Node Name (NN), each of which is derived from the
HBA’s I EEE address. Combined, the WWPN and NN create the WorldWide Name (WWN)
that
uniquely identifies an HBA in the Fibre Channel environment.
PCI-X 2.0 single-port and dual-port 4Gb FC adapters for Itanium Linux and Windows
11
Page 12
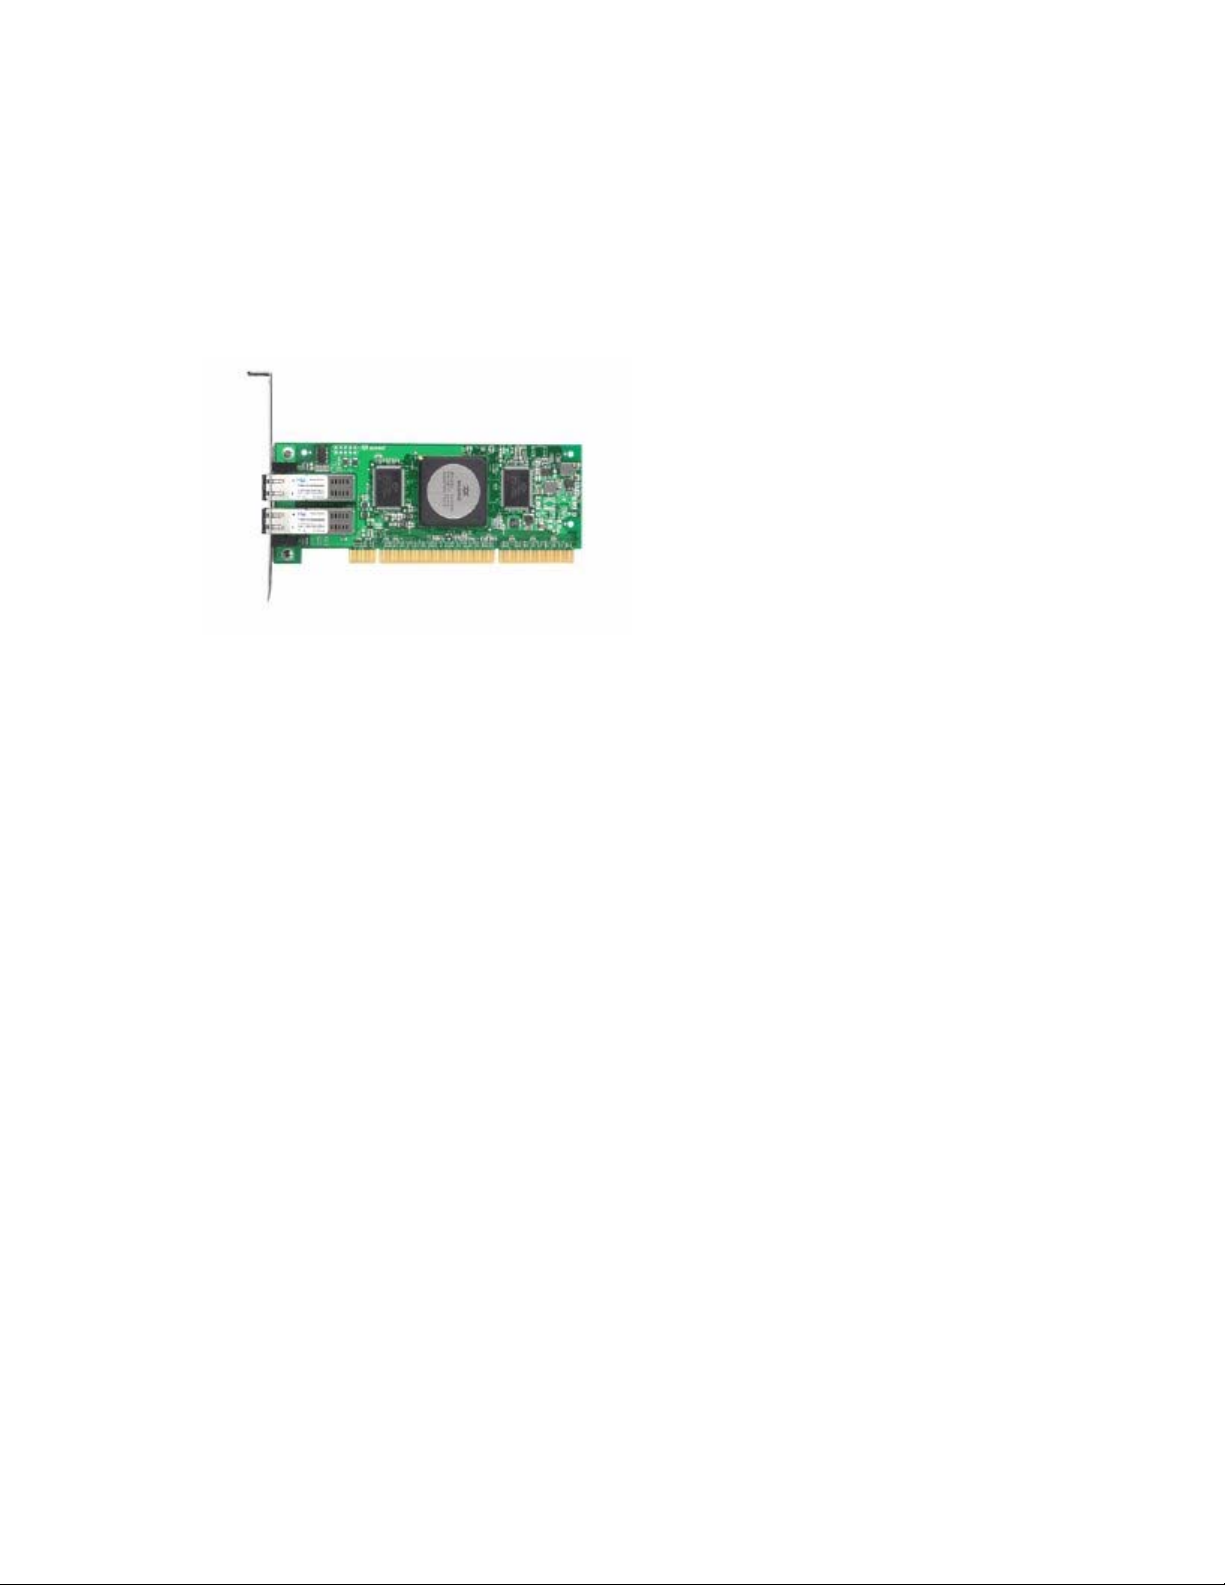
Installation procedure
To install the HBA:
1. Check the mo
2. Power down t
3. Disconnect the power cable.
4. Remove the computer cover and save the screws.
5. Locate the
Figure 1 64-b it PCI-X 2.0 connector
therboard and make any necessary configuration changes to accommodate the HBA.
peripherals, and then turn off the computer.
he
appropriate bus slot. The connector for the slot looks like the connector in Figure 1.
6. Remove theslotcover forthe slot in whichyou will installthe HBA.
7. Place the HBA in the slot and carefully press the board into the slot until it seats firmly.
8. Secure the HBA to the chassis following the server manufacturer’s instructions.
9. Connect the appropriate cable from the devices to the corresponding LC-connector.
10. Close and tighten the computer cover.
11. Plug in the power cable.
12. Power up all external Fibre Channel d evices, then power up the server and observe the monitor and
the
LED indicators described in "LED indicators " on page 13 to ensure proper operation.
12
Installing the HBAs
Page 13

LED indicators
Table 4 identifies and describes the activity of the LED indicators.
Table 4 LED in
dicators activity
Yellow LED
Off Off Off Power off
On On On
Flashing Flashing Flashing
Alternately flashing Alternately flashing Alternately flashing Firmware fault
Off Off
Off
Flashing
Flashing
Green LED
Flashing
Off Off
Off
Amber LED
Flashing Activity at 1Gb
Off
Flashing
Activity
Power on befo
firmware ini
Power on after firmware
initialization
Activity at 2Gb
Activity at 4Gb
Beacon
tialization
re or after
PCI-X 2.0 single-port and dual-port 4Gb FC adapters for Itanium Linux and Windows
13
Page 14

14
Installing the HBAs
Page 15

3 Installing and configuring the
Linux driver
This chapter provides instructions for installing the Linux qla2xxx driver (xxx is the kit date string) for the
PCI-X 2.0 single-port and dual-port HBAs on an already installed Red Hat™ Enterprise Linux (Red Hat EL)
or
SUSE™Linux Enterprise Server (SUSE SLES) system.
You can obtain the software kit for the driver from the following HP web site:
h
ttp://h18006.www1.hp.com/storage/saninfrastructure.html.
To install the driver, you must be familiar with the operating system under which the HBA is to operate,
and
have access to standard system documentation.
To install the driver, use the procedures and information in the following sections:
• Prerequisites, page 15
• Installing the driver kit, page 15
•Using the RPM, page 15
•
Configuring the HBAs, page 16
Prerequisites
Perform the following tasks before you install the drivers:
• Obtain the HP StorageWorks QLogic host bus adapters for x86 and x64 Linux
and
Window
ttp://h18006.www1.hp.com/storage/saninfrastructure.html.
h
• Be familiar with the o perating system under which the HBA is to operate, and have access
to standa
s, and x86 N etWare release notes, available on the HP web site
rd system documentation.
Installing the driver kit
HP recommends that you install the complete driver kit for these HBAs. The kit contains the driver and
utilities you need to deploy these HBAs on Linux.
NOTE:
You must install the gcc compiler and the kernel sources or kernel development packages on your
system before installing the driver kit.
To install the complete HP driver kit, copy the .gz file to your system and enter the following commands:
# tar -zxvf
#
cd hp_qla2 xxx
# ./INSTALL
The xxx is the kit date string.
hp_qla2x00-xxx.tar.gz
Using the RPM
PCI-X 2.0 single-port and dual-port 4Gb FC adapters for Itanium Linux and Windows
15
Page 16

The RPM Package Manager (RPM) is a package m anagement system that lets you easily install Linux
software. Using RPM, you can install software in prebuilt bundles called RPM packages.
This section is included for reference only. See this section for future separate RPM installations you
may need.
For example:
• To install the RPM, copy the RPM package file to your system and enter the following command:
# rpm -ivh package_name.rpm
• To manually install the Linux HBA driver RPM, enter the following command:
# rpm -ivh hp_qla2xxx.rpm
• To upgrade the RPM, copy the RPM package file to your system and enter the following command:
•For Red Hat EL, enter:
# rpm -Uvh --nopostun --nopreun package_name.rpm
• For SUSE SLES:
# rpm -Uvh package_name.rpm
• To uninstall the RPM package, enter the following command:
# rpm -e
package_name.rpm
Installing the fibreutils RPM
HP recommends installing the fibreutils RPM found in the driver kit. It contains useful utilities for managing
Fibre-at tached storage. To manually install this R PM, enter the following command:
# rpm -ivh fibreutils-version.rpm
Changing driver parameters
To change driver parameters:
1. Run the set_parm script located in the /opt/hp/src… directory.
2. Reboot the server.
NOTE:
You must reboot. Other wise, the qla2
system using a device that is attached to the HBA.
Proc file system support
The /proc file system for the qla2xxx driver can be found in the /proc/scsi/qla2xxx/ directory.
This directory contains entries for each SCSI HBA channel in the system. Each entry presents information
about the
adapter and transfer statistics for each discovered LUN.
Configuring the HBAs
This section describes how to configure the HBAs on Linux systems using the Configuration protocol
Driver Configuration menu.
NOTE:
This processisfor advanced userswho want to customizethe configuration of the HBAs and the
connected devices.
xxx
driver may not unload if there is a process or file
16
Installing and configuring the Linux driver
Page 17

This section includes:
•Starting the Configuration protocol,page17
•
Using the Driver Configuration menu, page 18
Starting the C
To configure th
1. Use the fibreut
described in
2. Power on the server to the EFI shell.
3. Start efiutil as follows (the auxiliary driver is automatically loaded if it is needed):
a. Set t he driv
b. Change to the directory containing efiutil. For example, enter:
cd
c. Run efiutil:
efiutil.efi
Enter Help at any time for information about commands.
d. Select the
e. Select configure.
4. Configure the HBA’s NVRAM by selecting the menu items for the parameters to be changed, as
described in "Using the Driver Configuration menu"onpage18.
5. Write the new configuration to N VRAM.
6. Exit the utility (select quit).
7. Reboot t
onfiguration protocol
eHBA on Linux, access theConfiguration protocol as follows:
ils RPM package to o btain efiutil (efiutil.efi) and the auxiliary driver, as
"Installing the fibreutils RPM" on page 16.
to the boot device (for example, fs1:).
e
efi\qla2xxx
HBA channel that you want to configure by selecting adapter.
system.
he
PCI-X 2.0 single-port and dual-port 4Gb FC adapters for Itanium Linux and Windows
17
Page 18

Using the Driver Configuration menu
This section d escribes the Configuration protocol’s Driver Configuration menu. The menu contains the
following sections and functions:
• NVRAM—Modify settings that are stored in the HBA’s NVRAM.
• Informatio
• Operation—Write or discard NVR AM data and exit the Configuration protocol.
The following example shows the Driver Configuration menu.
Main Menu
NVRAM
1. Edit Adapter Settings
2. Edit Advanced Settings
3. Edit Data
4. Edit Boot Settings
Information
5. Show Data
6. Show Translation
7. Show NVRAM Buffer
8. Info
9. Help
Operation
n—View device, HBA, and Help information.
Param
eters
base
base
10. Abandon
11. Write
12. Quit
18
Installing and configuring the Linux driver
Page 19

Table 5 describes the Driver Configuration components.
Table 5 Driver Configuration menu components
Menu Option Description
NVRAM Paramete
1. Edit Adapter Settings Displays the Edit Adapter Settings menu.
2. Edit Advanced Settings Displays the Edit Advanced Settings menu.
3. Edit Database Displays the Edit Database screen.
4. Edit Boot Settings Displays the Edit Boot Set tings menu.
Information
rs
5. Show Database
6. Show Translation
7. Show NVRAM Buffer Displays the contents of the lo cal NVRAM buffer in hexadecimal. This
8. Info Display
Displays the c
form.
Displays the SCSI target ID translation table. This table is a list of SCSI
TID and Fibre Channel loop id mapping pairs. Each entry in the table
consists of
SCSI id (TID)
•
Fibre channel loop id (LID)
•
World wide port name (WWPN)
•
Worldwidenodename(WWNN)
•
All numbers are in hexadecimal.
Tid values from 0x00 to 0x0A are persistent, and TID values greater
than 0x0A are assigned sequentially as devices are discovered. Tid
values greater than 0x80 are fabric-attached while those b elow 0x7F
are arbitrated-loop-attached.
is the
selection to commit them to the HBA’s NVRAM.
• EFI
Por t WWP
•
•
Serial
SSVID a
•
the
Use
ontents of the world wide name (WWN) database in table
the following information about each device:
local buffer containing changes made prior to using the Write
s
the following HBA information:
ce
path
devi
N
number
nd
SSDID from NVRAM
device path to determine which HBA configuration is displayed.
9. H el p
Operation
10. Aba
11. Write
12. Quit
ndon
Troubleshooting Linux
For troubleshooting Linux driver-related information, check the var/log/messages file. If the qla2 xxx
driver detects any fabric or driver events, the information about these events reside in this file.
PCI-X 2.0 single-port and dual-port 4Gb FC adapters for Itanium Linux and Windows
Displays a brief description of the menu selections.
Abandons the changes in the current Configuration protocol local buffer
oads its contentsfromthe HBA’s NVRAM.
rel
and
Writes the current Configuration protocol local b uffer to the HBA’s
NVRAM. Use this function any time you use a menu selection to modify
configuration data. When the NVRAM has been successfully written, the
Configuration protocol local buffer is reloaded from the HBA’s NVRAM.
Quits the Configuration protocol and returns to the EFI shell. You must use
the
Write selection to write any changes to the HBA’s NVRAM before
quitting.
19
Page 20

20
Installing and configuring the Linux driver
Page 21

4 Installing the Windows drivers
This chapter describes how to install the Windows Storport m inipo rt driver, including the following topics:
• Prerequisites, page 21
• Installing drivers using the S mart Component,page21
• Troubleshooting Windows, page 22
Prerequisite
Perform the f
• Obtain the HP StorageWorks QLogic host bus adapters for x86 and x64 Linux and Windows,
• Obtain the H
• Be familiar with the o perating system under which the HBA is to operate, and have access
• Review any restrictions or mandatory hot fixes that apply to your configuration and operating
s
ollowing tasks before you install the drivers:
and
x86 NetWare release notes, which are available from the HP web site:
h
ttp://h18006.www1.hp.com/storage/saninfrastructure.html.
Smart Component kit with the latest drivers from the HP web site:
P
ttp://h18006.www1.hp.com/storage/saninfrastructure.html.
h
system documentation.
to standar
system.
d
Installing drivers using the Smart Component
To install HBA Windows drivers, obtain the latest Smart Component for your configuration and copy it to
your Windows desktop. Double-click the S m art Component executable to begin the installation, and then
click Install. The installation completes automatically.
NOTE:
If you are performing a driver upgrade, HP recommends that, prior to launching the installation, you
verify that the current driver parameter values match those in described in the
host bus adapters for x86 and x64 Linux and Windows, and x86 NetWare release n otes
any discrepancies, launch the Smart Component using the command prompt window.
HP StorageWorks QLogic
.If there are
To launch the Smart Component in the command prompt window:
1. Open a command prompt window. Enter Start > Run > cmd.
2. Use the cd command to set the current directory to the folder containing the Smart Component bug
fixes for the Storport miniport driver.
3. Enter the following comma nd :
cp00xxxx.exe /X
The xxxx is the Sm art Component version number. This command installs the new driver and ensures
that
all registry parameters associated with the driver are using QLogic defaults or HP-supported
values.
For more information about Smart Component installation options, see the QLS***Readme.txt
file. To obtain a copy of this document, double-click the Smart Component executable, then click
Extract to place a copy of all Smart Component files in the folder you select.
PCI-X 2.0 single-port and dual-port 4Gb FC adapters for Itanium Linux and Windows
21
Page 22

Troubleshooting Windows
This section de
scribes how to use the Windows Event Viewer to troubleshoot Windows drivers.
Using the Event Viewer
The miniport drivers verify the condition of the HBA’s POST LED states. If there is a failure or a suspected
failure, an error log entry appears in the Windows Event Log. Use the Event viewer to access the Event log
To o p en the Event Viewer:
1. Click Start > Programs > Administrative Tools >Event Viewer,or right-click My Computer and
select Manage.
2. Click Event Viewer in Computer Management.
The Event Viewer window appears.
3. See the following web site for inform ation about interpreting the event codes:
ttp://www.qlogic.com/support/logs/evlogV9xxx_error. asp.
h
22
Installing the Windows drivers
Page 23

A Regulatory compli ance and
safety
Declaration of conformity for products marked with the FCC logo, United States only
This device complies with Part 15 of the FCC Rules. Operation is subject to the following two conditions:
(1) this device may not cause harmful interference, and (2) this device must accep t any interference
received, including interference that may cause undesired operation. For questions regarding your
product, visit h
telephone:
• Hewlett-Packard Company, P.O. Box 692000, Mailstop 510101 Houston, TX 77269–2000
• 1–281–514–3333
To identify this product, refer to the par t, Regulatory Model Number, or product number found on the
product.
Laser device
All HP syst
Electrote
laser pro
does
not emit hazardous light.
ttp://www.hp.com. For questions regarding this FCC declaration, contact us by mail or
ems equipped with a laser device comply with safety standards, including International
chnical Commission (IEC) 825. With specific regard to the laser, the equipment complies with
duct performance standards set by government agencies as a Class1 laser product. The product
Laser safety warning
WARNING!
To reduce the risk of exposure to hazardous radiation:
• Do not try to open the laser device enclosure. There are no user-serviceable components inside.
• Do not operate controls, make adjustments, or perform procedures to the laser device other than
those
specified herein.
• Allow only HP-authorized service technicians to repair the laser device.
Certification and classification information
This product contains a laser internal to the fiber optic (FO) transceiver for connection to the Fibre
Channel communications port.
In the USA, the FO transceiver is certified as a Class 1 laser product conforming to the requirements
contained
label
Outside the USA, the FO transceiver is certifie d as a Class 1 laser product conforming to the requirements
contained in IEC 825-1:1993 and EN 60825-1:1994, including Amendment 11:1996 and Amendment
2:2001.
in the Department of Health and Human Services (DHHS) regulation 21 CFR, Subchapter J. A
on the plastic FO transceiver housing indicates the certification.
PCI-X 2.0 single-port and dual-port 4Gb FC adapters for Itanium Linux and Windows
23
Page 24
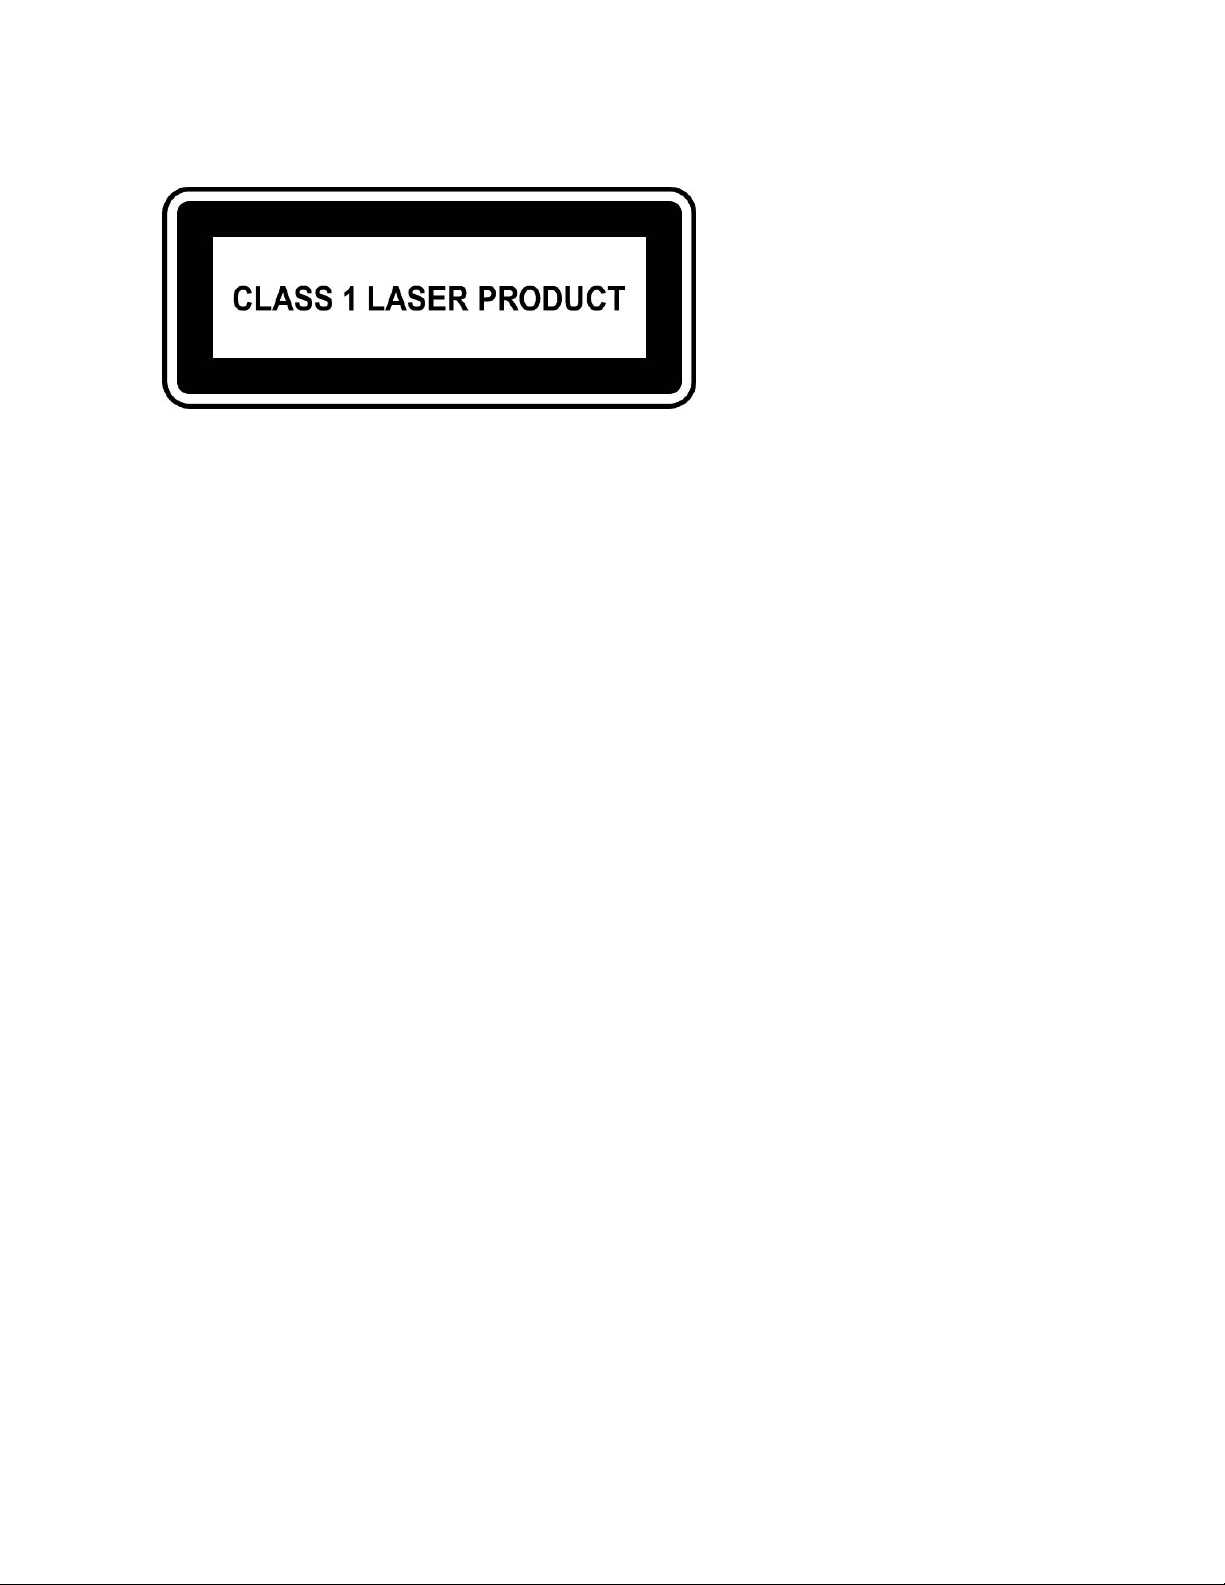
Laser product label
The optional label in Figure 2 or equivalent may be located on the s urface of the HP-supplied laser device.
Figure 2 Class 1 laser product label
International notices and statements
Canadian
notice (avis Canadien)
This Class A digital apparatus meets all requirements of the Canadian Interference-Causing Equipment
Regulations.
Cet appar
brouilleur du Canada.
eil numérique de la classe A respecte toutes les exigences du Règlement sur le matériel
European Union notice
Products bearing the CE marking comply with the EMC Directive (89/336/EEC) and the Low Voltage
Directive (73/23/EEC) issued by the Commission of the European Community, and if this product has
telecommunication functionality, the R&TTE Directive (1999/5/EC).
Compliance with these directives implies conformity to the following European Norms (in parentheses are
the
equivalent international standards and regulations):
• EN55022 (CISPR 22)—Electromagnetic Interference
• EN55024 (IEC61000-4-2, IEC61000-4-3, IEC61000-4-4, IEC61000-4-5, IEC61000-4-6,
IEC61000-4-8, IEC61000-4-11)—Electromagnetic Immunity
• Power Qualit y:
• EN61000-3-2 (IEC61000-3-2)—Power Line Harmonics
• EN61000-3-3 (IEC61000-3-3)—Power Line Flicker
• EN60950 (IEC60950)—Product Safety
• Also approved under UL 60950/CSA C22.2 No. 60950-00, Safety of Information Technology
Equipment
24
Regulatory compliance and safety
Page 25
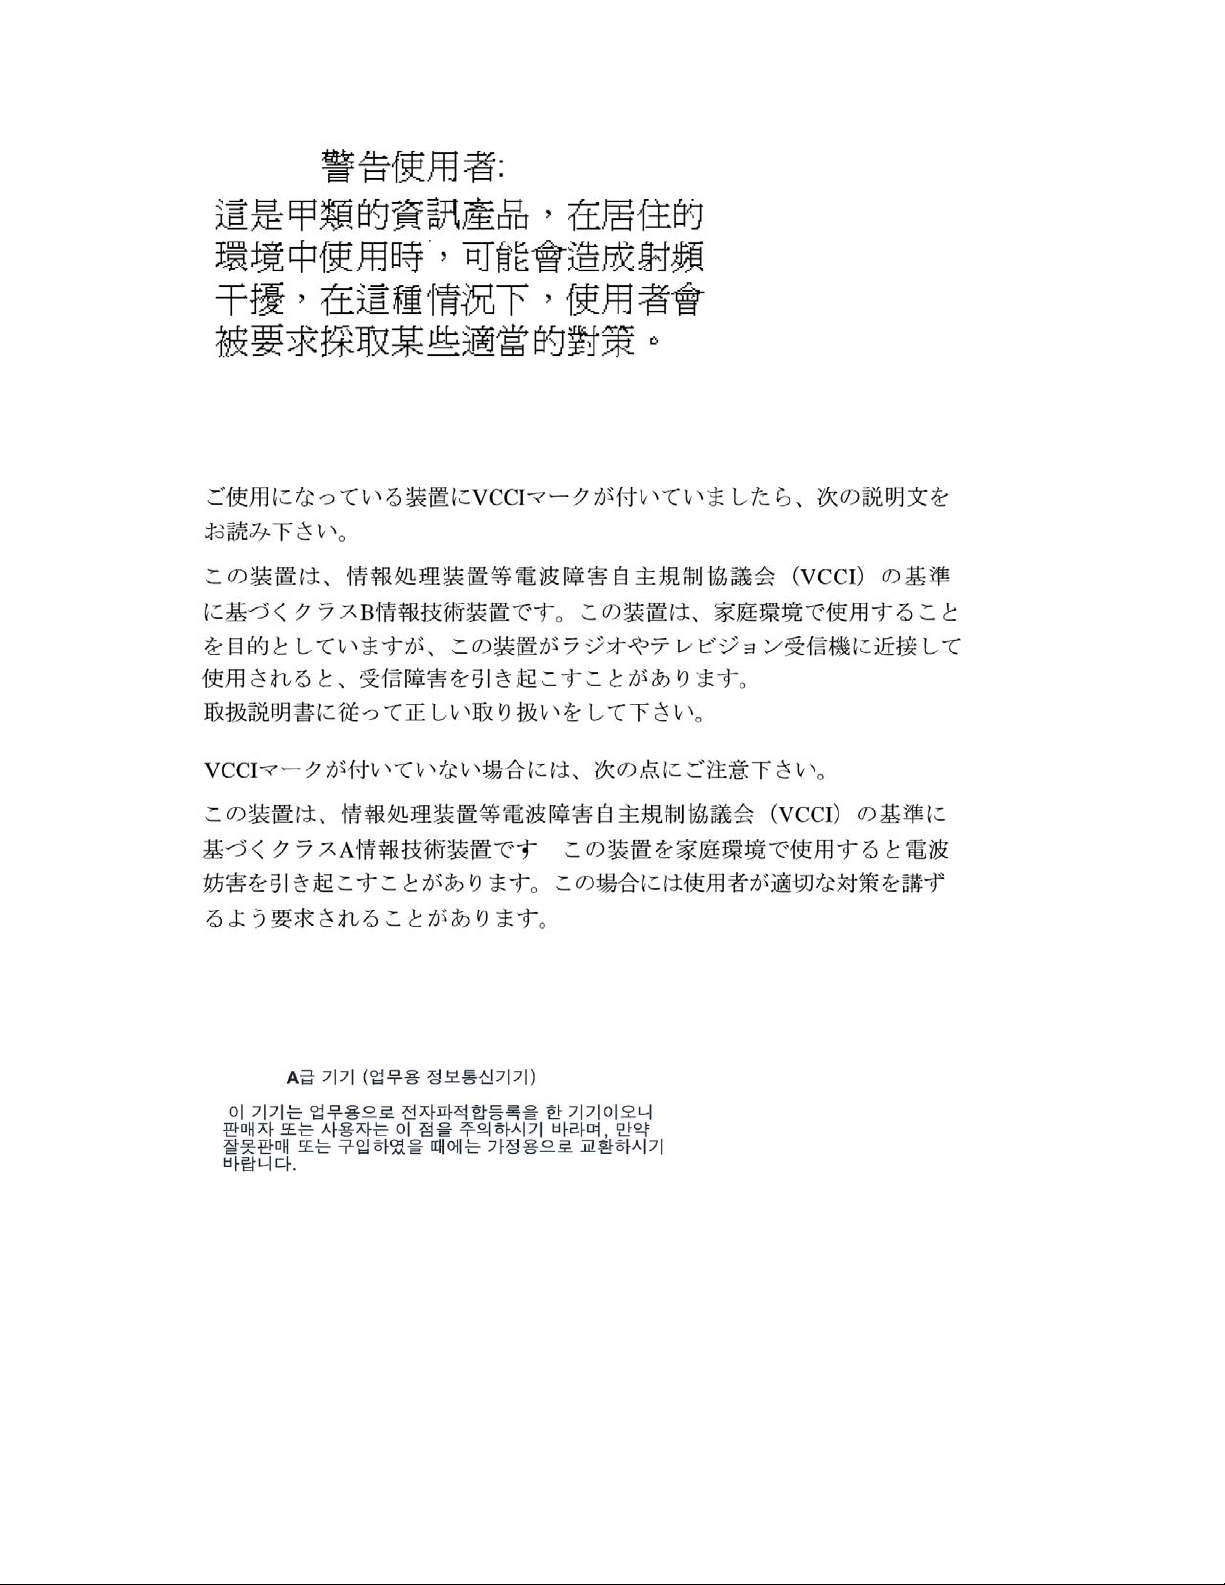
BSMI (Taiwan)
Figure 3 BSMI (Taiwan) notice
Japanese notice
Figure 4 Japanese notice
Korean notice
Figure 5 Korean notice
PCI-X 2.0 single-port and dual-port 4Gb FC adapters for Itanium Linux and Windows
25
Page 26

Electrostatic discharge
To prevent damage to the system, be aware of the precautions you need to follow when setting up the
system or handling parts. A discharge of static electricity from a finger or other conductor may damage
system boards or other static-sensitive devices. This t ype of damage may reduce the life expectancy of
the
device.
To prevent e
• To avoid hand contact, transport and store products in static-safe containers.
• Keep static-sensitive parts in their containers until they arrive at static-free workstations.
• Place part
• Avoid touching pins, leads, or circuitry.
• Always be properly grounded when touching a static-sensitive component or assembly (see
"Groundi
lectrostatic damage, observe the following precautions:
on a grounded surface before removing them from their containers.
s
methods" on page 26).
ng
Grounding methods
There are several methods for grounding. Use one or more of the following methods when handling or
installing static-sensitive p a rts:
• Use a wrist strap connected by a ground cord to a grounded workstation or computer chassis.
Wrist straps are flexible straps with a minimum of 1 megohm (±10 percent) resistance in the
ground cords. To provide proper ground, wear the strap snug against the skin.
• Use heel straps, toe straps, or boot straps at standing workstations. Wear the straps on both feet
when standing on conductive floors or dissipating floor mats.
• Use conductive field service tools.
• Use a portable field service kit with a folding static-dissipating work mat.
If you do not have any of the recommended equipment for proper grounding, have an HP-authorized
reseller install the part.
NOTE:
For more information on static electricity, or assistance with product installation, contact your
HP-authorized reseller.
26
Regulatory compliance and safety
Page 27

Index
A
audience, 7
auxiliary driver,17
B
BSMI (Taiwan) regulatory compliance notice,
25
C
certification and classification information,
laser,23
Class A equipment, Canadian compliance
statement,24
Configuration protocol,17
configuring HBAs,16
conventions
document, 7
text symbols, 7
D
Declaration of conformity,23
document
conventions, 7
related documentation, 7
documentation, HP web site, 7
drivers
auxiliary,17
changing pa rameters on Linux,16
installing from RPM,16
installing with Smar t Component,21
qla2xxx,15
Storport miniport,21
troubleshooting Linux,19
troubleshooting Windows,22
features, 9
fibreutils RPM, 16, 17
G
gcc compiler,15
grounding methods,26
H
HBAs
configuring on Linux,16
environm ental specifications,10
installation prerequisites,11
installing,12
LED indicators,13
Linux Configuration protocol,16
performance specifications, 9
physical specifications,10
HP
Subscriber’s choice web site, 8
subscription service, 8
I
IEC EMC worldwide regulatory compliance
notice,24
installing
HBA,12
Linux driver kit,15
prerequisites,11
RPM,16
Windows drivers,21
J
Japanese regulatory compliance notice,25
E
efiutil.efi,17
electrostatic discharge (ESD),11, 26
environmental specifications,10
European Union regulatory compliance notice,
24
Event Viewer
using,22
F
FCC logo,23
PCI-X 2.0 single-port and dual-port 4Gb FC adapters for Itanium Linux and Windows
K
Korean regulatory compliance notice,25
L
laser
international certification and classification
information,23
product label,24
radiation warning,23
LED indicators,13
27
Page 28

Linux
.gz file,15
auxiliary driver,17
changing driver parameters,16
configuring HBAs,16
driver installation,15
driver installation prerequisites,15
fibreutils RPM,16
gcc compiler,15
RPM,16
set_parm script,16
starting the Configuration protocol,17
troubleshooting,19
P
parameters, Linux drivers,16
prerequisites
HBA i nstallation,11
Linux driver installation,15
Windows driver installation,21
preventing electrostatic discharge (ESD),26
Q
qla2xxx
installing,15
parameter changes,16
troubleshooting,19
R
regulatory compliance notices
BSMI (Taiwan),25
Canadian,24
European Union,24
Japanese,25
Korean,25
related documentation, 7
RPM,16
fibreutils, 16, 17
uninstalling,16
upgrading,16
S
set_parm script,16
Smart Component,21
specifications
environmental,10
performance, 9
physical,10
Storport miniport driver,21
Subscriber’s choice, H P , 8
subscription service, HP, 8
symbols in text, 7
T
text symbols, 7
troubleshooting
Linux drivers,19
Windows drivers,22
Windows Event Viewer,22
U
uninstalling the RPM,16
upgrading RPM,16
W
warnings, lasers radiation,23
web sites
HP
documentation, 7
HP Subscriber’s choice, 8
Windows
driver installation,21
driver installation prerequisites,21
Event Viewer,22
troubleshooting d rivers,22
28
 Loading...