

Page 1

Models 745i/50, 745i/100, 747i/50, and 747i/100
Owner's Guide
for HP-UX Users
HP 9000 Series 700i Industrial Workstations
ABCDE
HP Part No. A2628-90014
Printed in USA August 1993
Edition 1
E0893
DRAFT 2/5/97 11:31
FINAL TRIM SIZE : 7.0 in x 8.5 in
Page 2

Legal Notices
The information contained in this do cumen
t is sub ject to c
hange without
notice.
Hewlett-Packard makes no warranty of any kind with r
egard to this manual,
including, but not limited to, the implied warranties of merchantability and
tness for a particular purpose.
contained herein or direct, indirect, sp ecial, inciden
Hewlett-Packard shall not be liable for errors
tal or consequential damages
in connection with the furnishing, performance, or use of this material.
Warranty.
Agreement and Limited Warranty
Please read the enclosed
Hewlett-Packard SoftwareProduct License
before operating this product. Rights in the
software are oered only on the condition that the customer accepts all terms
and conditions of the License Agreement.
Operating the product indicates your acceptance of these terms and conditions.
If you do not agree to the License Agreemen
t, you may return the unused
product for a full refund.
A copy of the specic warranty terms applicable to your Hewlett-Packard
product and replacement parts can be obtained from your local Sales and
Service Oce.
Copyrightc
1993 Hewlett-Packard Company
This document contains information which is protected by copyright. All rights
are reserved. Reproduction, adaptation, or translation without prior written
permission is prohibited, except as allowed under the copyrightlaws.
c
Copyrightc
1986, 1987, 1988 Sun Microsystems, Inc. Copyright
1984, 1986 UNIX System Laboratories, Inc. Copyright
c
Massachusetts Institute of Technology. Copyright
Corp. Copyrightc
The Regents of the University of California 1979, 1980,
c
1985-1986, 1988
1986 Digital Equipment
1980,
1983, 1985.
FINAL TRIM SIZE : 7.0 in x 8.5 in
Page 3

This software and documentation is based in part on the F
Software Distribution under license from the Regen
ts of the University of
California.
ourth Berkeley
Restricted Rights Legend.
Use, duplication or disclosure by the U.S.
Government Department of Defense is subject to restrictions as set forth in
paragraph (b)(3)(ii) of the Righ
ts in Technical Data and Software clause in
FAR 52.227-7013.
FINAL TRIM SIZE : 7.0 in x 8.5 in
Page 4
Printing History
This manual's printing date and part n
printing date will change when a new edition is prin
made at reprint without changing the printing date. The man
will change when extensivechanges occur.
Manual updates ma
product changes. To ensure that you receive these updates or new editions,
you should subscribe to the appropriate pro duct support service. See y
Hewlett-Packard Sales Representative for details.
August, 1993 Edition 1
Hewlett-Packard Company
OSSD Learning Products
3404 East Harmony Road
Fort Collins, Colorado 80525
y be issued bet
umber show its current edition. The
ted. Minor changes maybe
ual part number
ween editions to correct errors or documen
our
t
iv DRAFT
2/5/97 11:31
FINAL TRIM SIZE : 7.0 in x 8.5 in
Page 5
Safety Symbols and Conventions
The following conventions are used throughout this man
Note
Caution
Notes contain important information set o from the text.
Caution messages indicate procedures whic
could result in loss of data or damage to equipmen
ual:
h, if not observed,
t. Do not
proceed b eyond a CAUTION sign until the indicated conditions
are fully understood and met.
Warning
Warning messages indicate procedures or practices which, if
not observed, could result in personal injury. Do not proceed
beyondaWARNING sign until the indicated conditions are fully
understood and met.
FCC Statement (For U.S.A. Only)
The Federal Communications Commission (in Subpart J of Part 15, Do cket
20780) has sp ecied that the following notice be brough
t to the attention of the
users of this product.
Warning.
This equipment generates, uses, and can radiate radio frequency
energy and if not installed and used in accordance with the instructions
manual, may cause interference to radio communications. It has been
tested and found to comply with the limits for a Class A computing device
pursuant to Subpart J of Part 15 of FCC rules, which are designed to provide
reasonable protection against suchinterference when operated in a commercial
environment. Operation of this equipment in a residential area is likely to
cause interference in which case the user at his own expense will be required to
take whatever measures may be required to correct the interference.
DRAFT
2/5/97 11:31
FINAL TRIM SIZE : 7.0 in x 8.5 in
v
Page 6
Regulatory Information
FCC Statement(For U.S.A. Only)
The Federal Communications Commission (in Subpart J of P
20780) has sp ecied that the following notice be brough
art 15, Docket
t to the attention of
the users of this pro duct:
This equipment generates, uses, and can radiate radio frequency energy
and if not installed and used in accordance with the instructions man
ual,
may cause interference to radio communications. It has b een tested and
found to comply with the limits for a Class A computing device pursuan
tto
Subpart J of Part 15 of FCC rules, which are designed to provide reasonable
protection against suchinterference when operated in a commercial
environment. Op eration of this equipment in a residential area is likely to
cause interference in which case the user at his own expense will be required
to take whatever measures may be required to correct the in
terference.
Turvallisuusyhteenveto (Finland Only)
Laserturvallisuus
Luokan 1 Laserlaite
Klass 1 Laser Apparat
HP 9000 Mo del 745i/747i tietokoneeseen v
oidaan asentaa muistilaitteeksi
laitteensisainen CD-ROM-levyasema, joka on laserlaite. Talloin myos
paalaitteena toimiva tietokone katsotaan laserlaitteeksi.
Kyseinen CD-ROM-livyasema on kayttajan kannalta turvallinen luokan 1
laserlaite. Normaalissa kaytossa levyaseman suo jakotelo estaa lasersateen
paasyn laitteen ulkopuolelle.
HP 9000 Mo del 745i/747i tietokoneen on t
yyppihyvaksynyt Suomessa
laserturvallisuuden osalta Tyosuojeluhallitus, Tyosuojeluhallituksen
hyvaksyntanumero TSH 222/6019/90. Laitteiden turvallisuusluokkaon
maaritettyvaltioneuvoston paatoksen No: 472/1985 ja standardin SFS-IEC
825 mukaisesti. Tiedot CD-ROM-levyasemassa kaytettavan laserdio din
sateilyominaisuuksista:
Aallonpituus 780 nm
Teho 0,4 mW
Luokan 1 laser
vi DRAFT
2/5/97 11:31
FINAL TRIM SIZE : 7.0 in x 8.5 in
Page 7
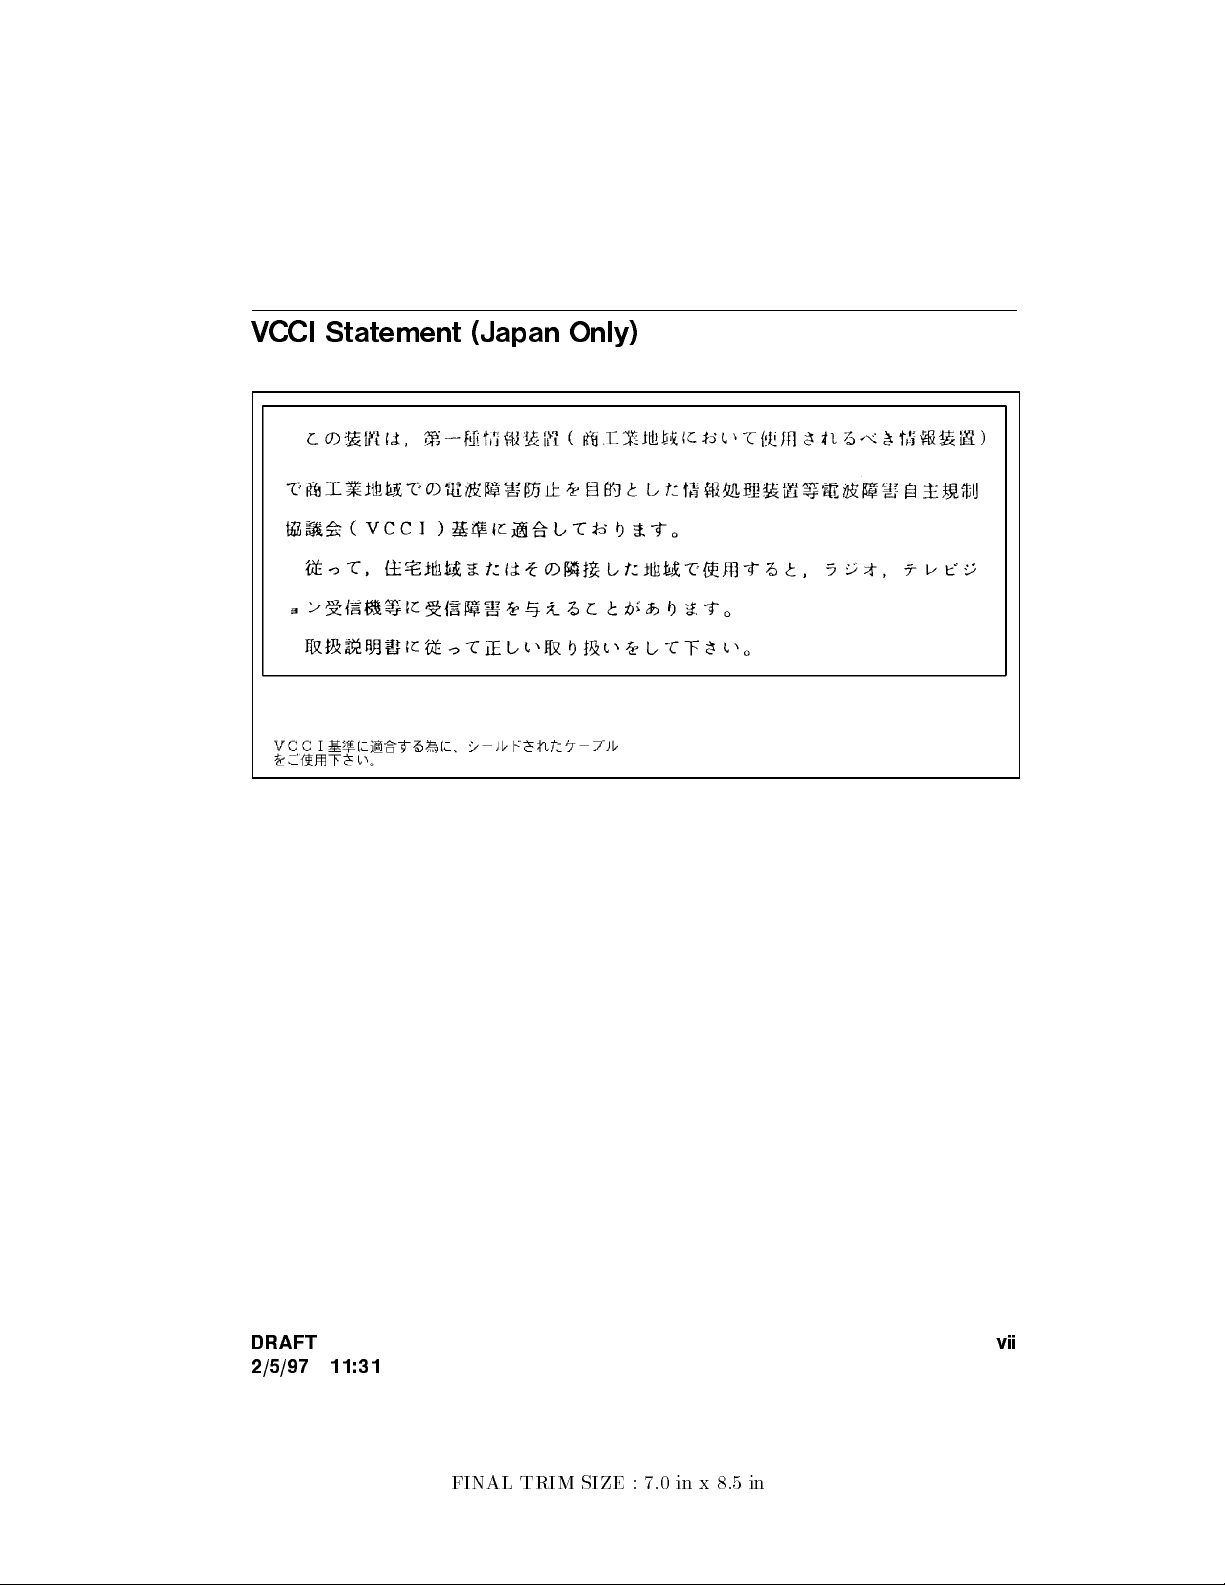
VCCI Statement (Japan Only)
DRAFT
2/5/97 11:31
vii
FINAL TRIM SIZE : 7.0 in x 8.5 in
Page 8
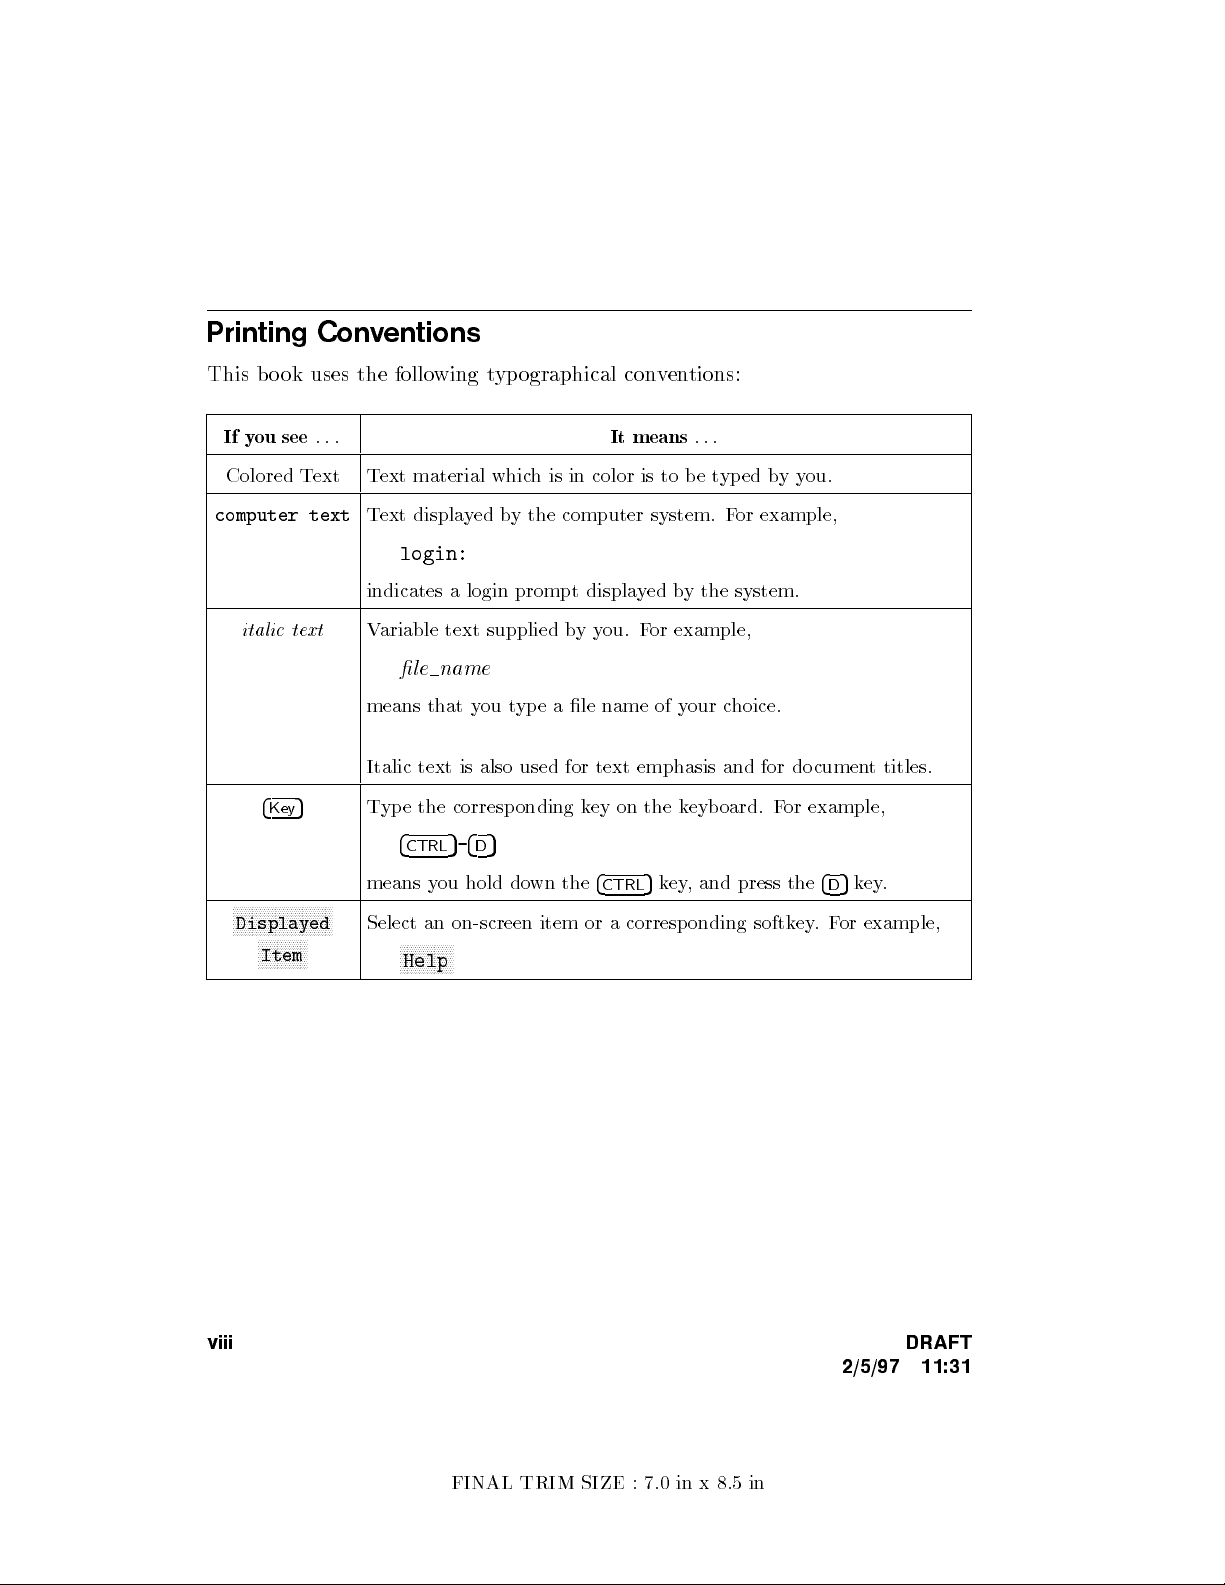
Printing Conventions
This bo ok uses the follo
If you see
...
wing typographical conventions:
It means
Colored Text Text material which is in color is to be t
computer text
Text displayed by the computer system. F
login:
italic text
indicates a login prompt displa
Variable text supplied byyou. For example,
yed by the system.
le name
means that you type a le name of your choice.
Italic text is also used for text emphasis and for documen
4
Key
5
Type the corresponding key on the keyboard. For example,
4
5-4D5
CTRL
5
means you hold down the
4
key, and press the
CTRL
NNNNNNNNNNNNNNNNNNNNNNNNNN
Displayed
NNNNNNNNNNNNN
Item
Select an on-screen item or a corresponding softkey.For example,
NNNNNNNNNNNNNN
Help
...
yped byyou.
or example,
t titles.
5
key.
4
D
viii DRAFT
2/5/97 11:31
FINAL TRIM SIZE : 7.0 in x 8.5 in
Page 9
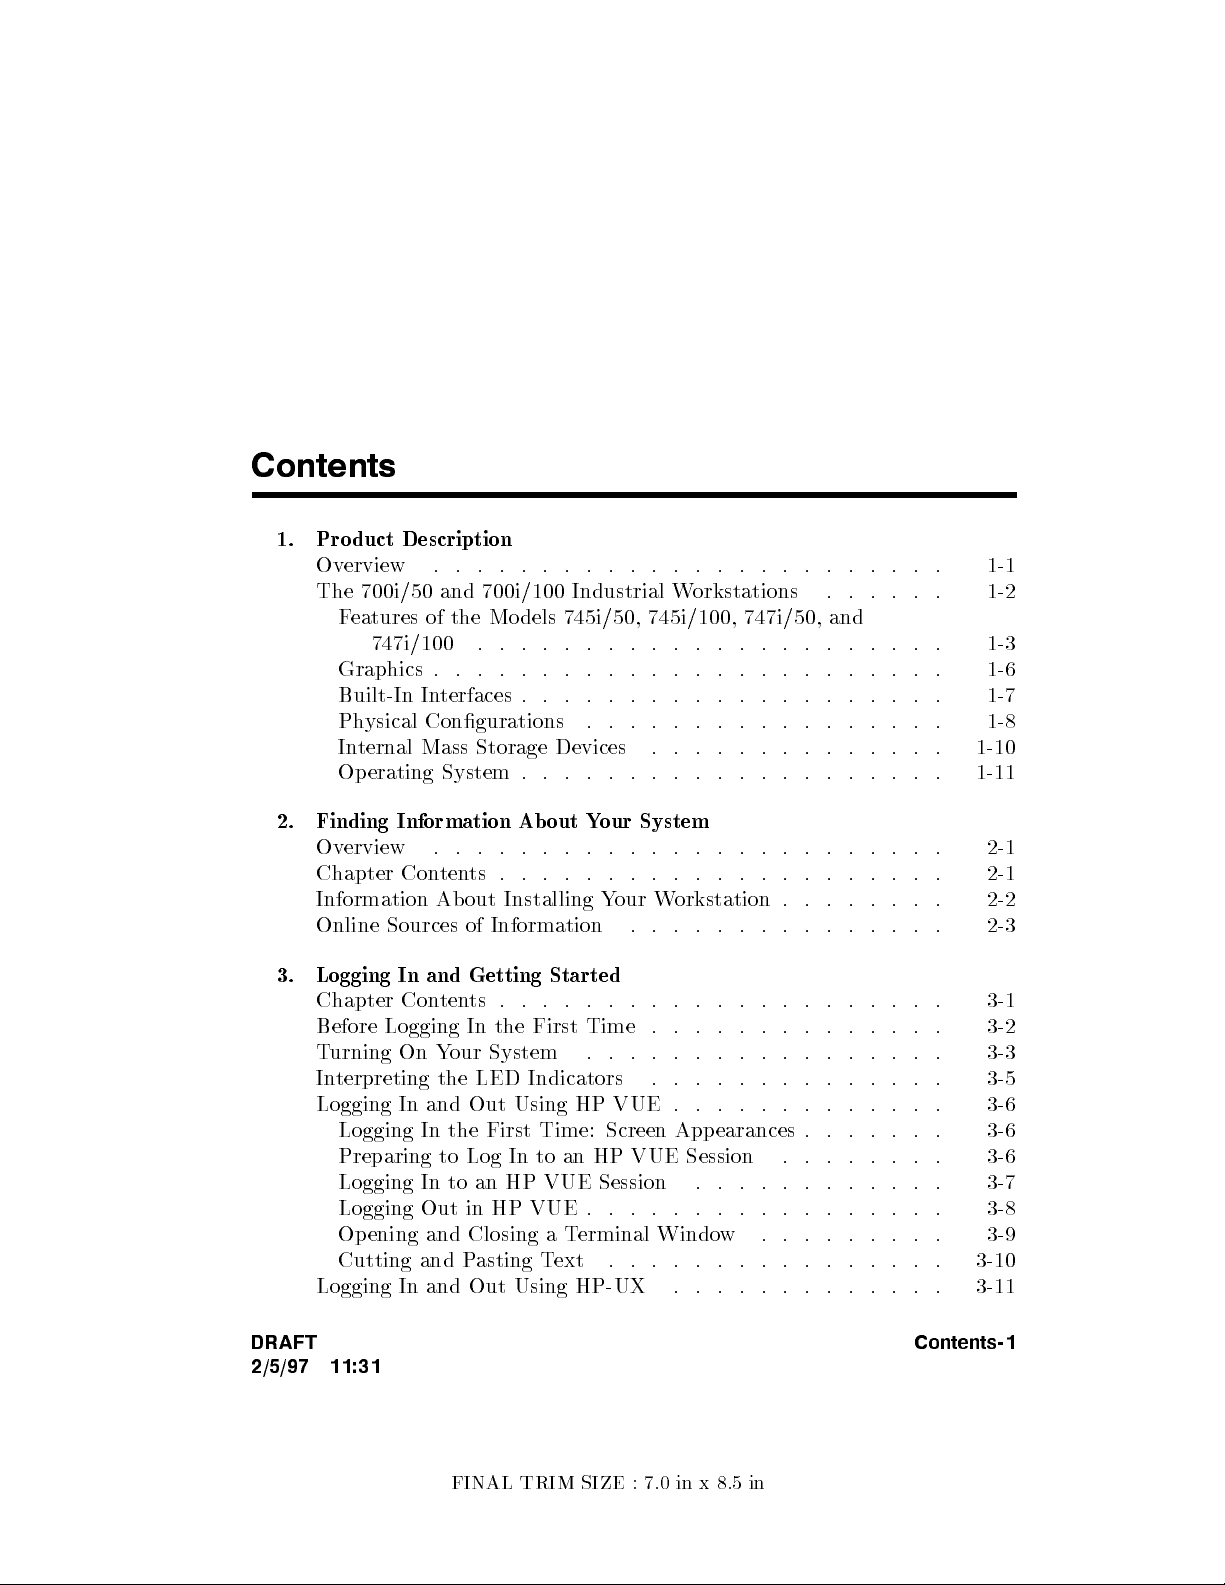
Contents
1. Product Description
Overview . . . . . . . . . . . . . . . . . . . . . . . . 1-1
The 700i/50 and 700i/100 Industrial W
Features of the Mo dels 745i/50, 745i/100, 747i/50, and
747i/100 . . . . . . . . . . . . . . . . . . . . . . 1-3
Graphics . . . . . . . . . . . . . . . . . . . . . . . . 1-6
Built-In Interfaces . . . . . . . . . . . . . . . . . . . . 1-7
Physical Congurations . . . . . . . . . . . . . . . . . 1-8
Internal Mass Storage Devices . . . . . . . . . . . . . . 1-10
Operating System . . . . . . . . . . . . . . . . . . . . 1-11
2. Finding Information About Your System
Overview . . . . . . . . . . . . . . . . . . . . . . . . 2-1
Chapter Contents . . . . . . . . . . . . . . . . . . . . . 2-1
Information About Installing Your Workstation . . . . . . . . 2-2
Online Sources of Information . . . . . . . . . . . . . . . 2-3
3. Logging In and Getting Started
Chapter Contents . . . . . . . . . . . . . . . . . . . . . 3-1
Before Logging In the First Time . . . . . . . . . . . . . . 3-2
Turning On Your System . . . . . . . . . . . . . . . . . 3-3
Interpreting the LED Indicators . . . . . . . . . . . . . . 3-5
Logging In and Out Using HP VUE . . . . . . . . . . . . . 3-6
Logging In the First Time: Screen Appearances . . . . . . . 3-6
Preparing to Log In to an HP VUE Session . . . . . . . . 3-6
Logging In to an HP VUE Session . . . . . . . . . . . . 3-7
Logging Out in HP VUE . . . . . . . . . . . . . . . . . 3-8
Opening and Closing a Terminal Window . . . . . . . . . 3-9
Cutting and Pasting Text . . . . . . . . . . . . . . . . 3-10
Logging In and Out Using HP-UX . . . . . . . . . . . . . 3-11
orkstations . . . . . . 1-2
DRAFT
2/5/97 11:31
Contents-1
FINAL TRIM SIZE : 7.0 in x 8.5 in
Page 10
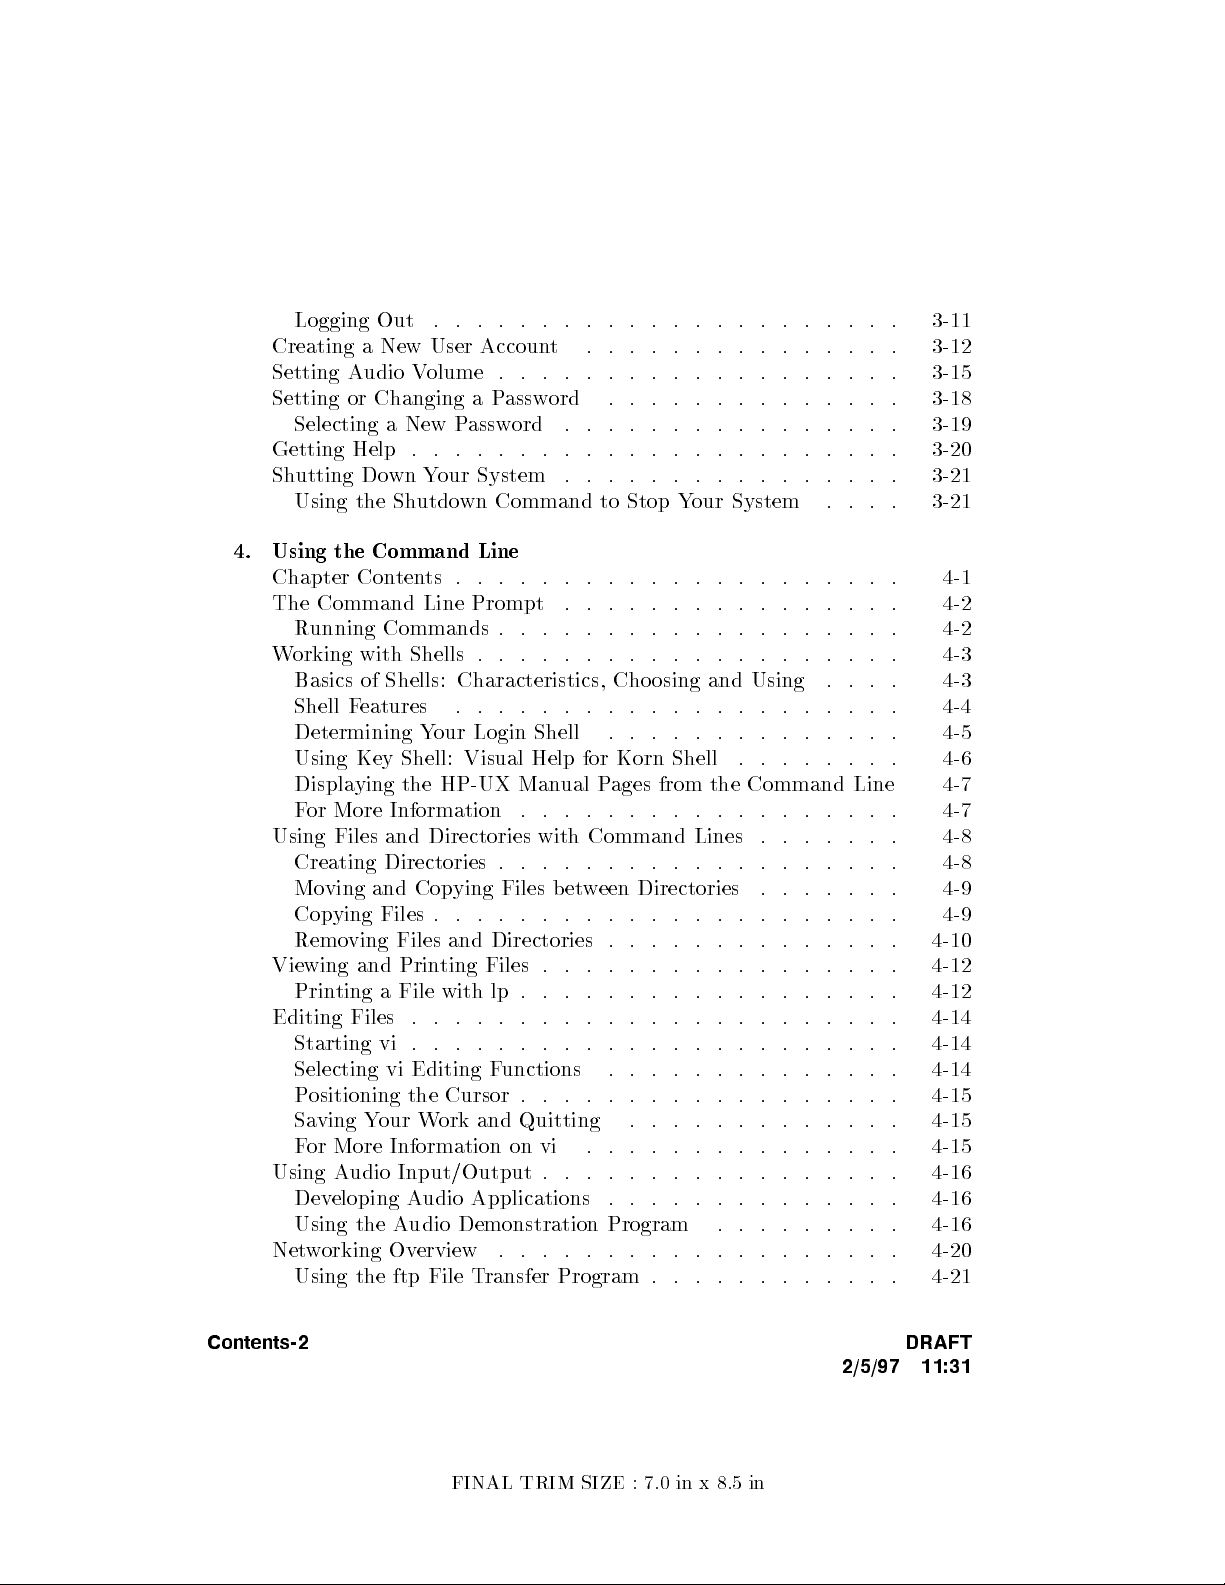
Logging Out . . . . . . . . . . . . . . . . . . . . . . 3-11
Creating a New User Accoun
t . . . . . . . . . . . . . . . 3-12
Setting Audio Volume . . . . . . . . . . . . . . . . . . . 3-15
Setting or Changing a P
assword . . . . . . . . . . . . . . 3-18
Selecting a New Password . . . . . . . . . . . . . . . . 3-19
Getting Help . . . . . . . . . . . . . . . . . . . . . . . 3-20
Shutting Down Your System . . . . . . . . . . . . . . . . 3-21
Using the Shutdown Command to Stop Y
our System . . . . 3-21
4. Using the Command Line
Chapter Contents . . . . . . . . . . . . . . . . . . . . . 4-1
The Command Line Prompt . . . . . . . . . . . . . . . . 4-2
Running Commands . . . . . . . . . . . . . . . . . . . 4-2
Working with Shells . . . . . . . . . . . . . . . . . . . . 4-3
Basics of Shells: Characteristics, Choosing and Using . . . . 4-3
Shell Features . . . . . . . . . . . . . . . . . . . . . 4-4
Determining Your Login Shell . . . . . . . . . . . . . . 4-5
Using Key Shell: Visual Help for Korn Shell . . . . . . . . 4-6
Displaying the HP-UX Manual Pages from the Command Line 4-7
For More Information . . . . . . . . . . . . . . . . . . 4-7
Using Files and Directories with Command Lines . . . . . . . 4-8
Creating Directories . . . . . . . . . . . . . . . . . . . 4-8
Moving and Copying Files between Directories . . . . . . . 4-9
Copying Files . . . . . . . . . . . . . . . . . . . . . . 4-9
Removing Files and Directories . . . . . . . . . . . . . . 4-10
Viewing and Printing Files . . . . . . . . . . . . . . . . . 4-12
Printing a File with lp . . . . . . . . . . . . . . . . . . 4-12
Editing Files . . . . . . . . . . . . . . . . . . . . . . . 4-14
Starting vi . . . . . . . . . . . . . . . . . . . . . . . 4-14
Selecting vi Editing Functions . . . . . . . . . . . . . . 4-14
Positioning the Cursor . . . . . . . . . . . . . . . . . . 4-15
Saving Your Work and Quitting . . . . . . . . . . . . . 4-15
For More Information on vi . . . . . . . . . . . . . . . 4-15
Using Audio Input/Output . . . . . . . . . . . . . . . . . 4-16
Developing Audio Applications . . . . . . . . . . . . . . 4-16
Using the Audio Demonstration Program . . . . . . . . . 4-16
Networking Overview . . . . . . . . . . . . . . . . . . . 4-20
Using the ftp File Transfer Program . . . . . . . . . . . . 4-21
Contents-2 DRAFT
2/5/97 11:31
FINAL TRIM SIZE : 7.0 in x 8.5 in
Page 11
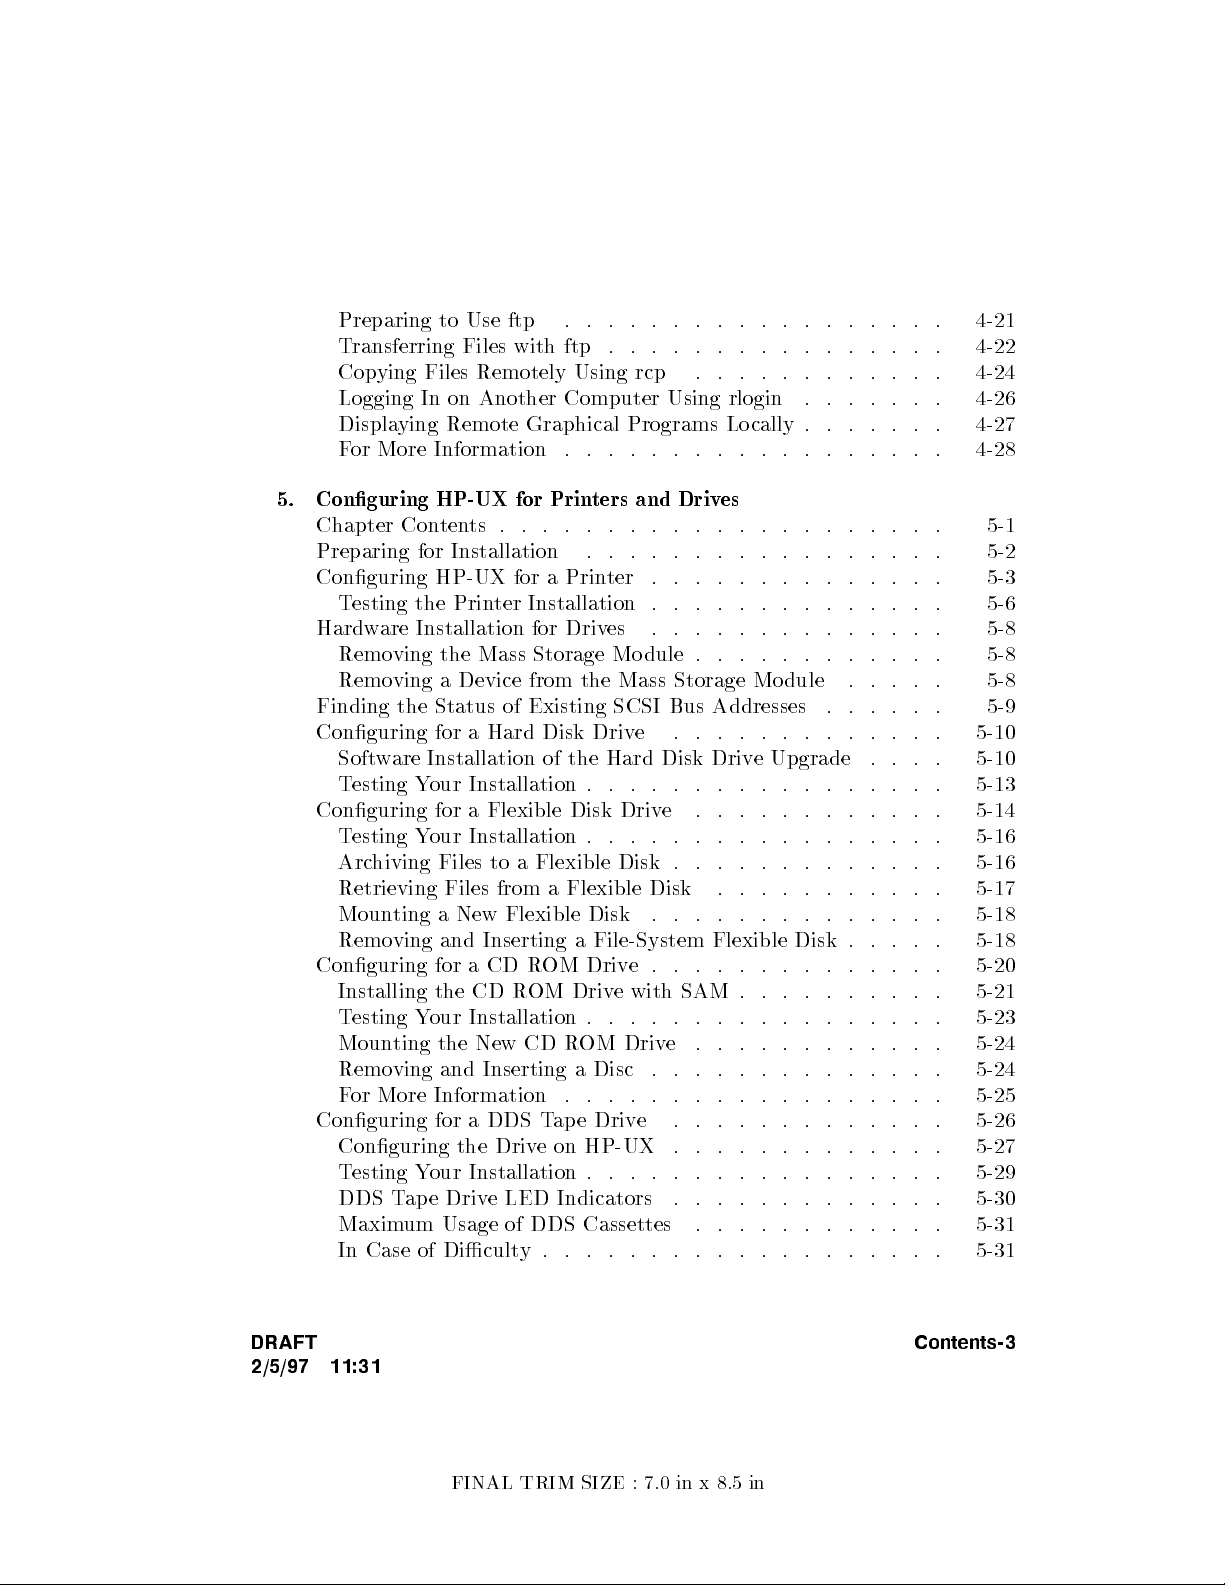
Preparing to Use ftp . . . . . . . . . . . . . . . . . . 4-21
Transferring Files with ftp . . . . . . . . . . . . . . . . 4-22
Copying Files Remotely Using rcp
Logging In on Another Computer Using rlogin
Displaying Remote Graphical Programs Locally .
. . . . . . . . . . . . 4-24
. . . . . . . 4-26
. . . . . . 4-27
For More Information . . . . . . . . . . . . . . . . . . 4-28
5. Conguring HP-UX for Printers and Drives
Chapter Contents . . . . . . . . . . . . . . . . . . . . . 5-1
Preparing for Installation . . . . . . . . . . . . . . . . . 5-2
Conguring HP-UX for a Prin
ter . . . . . . . . . . . . . . 5-3
Testing the Printer Installation . . . . . . . . . . . . . . 5-6
Hardware Installation for Drives . . . . . . . . . . . . . . 5-8
Removing the Mass Storage Module . . . . . . . . . . . . 5-8
Removing a Device from the Mass Storage Mo dule . . . . . 5-8
Finding the Status of Existing SCSI Bus Addresses . . . . . . 5-9
Conguring for a Hard Disk Drive . . . . . . . . . . . . . 5-10
Software Installation of the Hard Disk Drive Upgrade
. . . . 5-10
Testing Your Installation . . . . . . . . . . . . . . . . . 5-13
Conguring for a Flexible Disk Drive . . . . . . . . . . . . 5-14
Testing Your Installation . . . . . . . . . . . . . . . . . 5-16
Archiving Files to a Flexible Disk . . . . . . . . . . . . . 5-16
Retrieving Files from a Flexible Disk . . . . . . . . . . . 5-17
Mounting a New Flexible Disk . . . . . . . . . . . . . . 5-18
Removing and Inserting a File-System Flexible Disk . . . . . 5-18
Conguring for a CD ROM Drive . . . . . . . . . . . . . . 5-20
Installing the CD ROM Drive with SAM . . . . . . . . . . 5-21
Testing Your Installation . . . . . . . . . . . . . . . . . 5-23
Mounting the New CD ROM Drive . . . . . . . . . . . . 5-24
Removing and Inserting a Disc . . . . . . . . . . . . . . 5-24
For More Information . . . . . . . . . . . . . . . . . . 5-25
Conguring for a DDS Tape Drive . . . . . . . . . . . . . 5-26
Conguring the Drive on HP-UX . . . . . . . . . . . . . 5-27
Testing Your Installation . . . . . . . . . . . . . . . . . 5-29
DDS Tape Drive LED Indicators . . . . . . . . . . . . . 5-30
Maximum Usage of DDS Cassettes . . . . . . . . . . . . 5-31
In Case of Diculty . . . . . . . . . . . . . . . . . . . 5-31
DRAFT
2/5/97 11:31
Contents-3
FINAL TRIM SIZE : 7.0 in x 8.5 in
Page 12

6. Backing Up, Restoring, and Updating Soft
ware
Chapter Contents . . . . . . . . . . . . . . . . . . . . . 6-1
Backing Up Your System and Software . . . . . . . . . . . 6-2
Creating a Recovery System . . . . . . . . . . . . . . . 6-2
Backing Up Your File Systems . . . . . . . . . . . . . . 6-5
Restoring Individual Files . . . . . . . . . . . . . . . . . 6-8
Restoring Your Operating System Using the Reco
very Tape . . 6-10
For More Information . . . . . . . . . . . . . . . . . . 6-12
7. Dealing With Problems
Chapter Contents . . . . . . . . . . . . . . . . . . . . . 7-1
Interpreting the LED Indicators . . . . . . . . . . . . . . 7-2
Managing a Boot Failure . . . . . . . . . . . . . . . . . . 7-8
\Missing Driver" Message During Boot . . . . . . . . . . 7-8
Initializing the System Hardware . . . . . . . . . . . . . 7-8
Selecting an Alternate Operating System . . . . . . . . . . 7-9
Dealing with HP VUE Problems . . . . . . . . . . . . . . 7-12
Logging In With HP VUE When All Else F
ails . . . . . . . 7-13
Recovering from a System Panic . . . . . . . . . . . . . . 7-14
Procedures for Recovering from a System Panic . . . . . . . 7-16
Dealing with Network Failures . . . . . . . . . . . . . . . 7-20
A. Installing Additional Memory
Appendix Contents . . . . . . . . . . . . . . . . . . . . A-1
RAM Upgrade Contents . . . . . . . . . . . . . . . . . . A-2
Tools Required . . . . . . . . . . . . . . . . . . . . . . A-2
Planning for Installation of the RAM Upgrade . . . . . . . . A-3
Determining Existing Memory . . . . . . . . . . . . . . A-3
RAM Board Installation Requirements . . . . . . . . . . A-3
Installing the RAM Upgrade . . . . . . . . . . . . . . . . A-4
Verifying the Upgrade . . . . . . . . . . . . . . . . . . . A-10
Contents-4 DRAFT
2/5/97 11:31
FINAL TRIM SIZE : 7.0 in x 8.5 in
Page 13
B. VME and EISA Accessory Cards
Appendix Contents . . . . . . . . . . . . . . . . . . . . B-1
VME Overview (Mo dels 747i/50 and 747i/100) .
. . . . . . . B-2
VME Performance . . . . . . . . . . . . . . . . . . . B-3
Overview of Installing VME Cards
. . . . . . . . . . . . B-4
Installing VME Accessory Cards . . . . . . . . . . . . . . B-6
Installation Procedures . . . . . . . . . . . . . . . . . B-6
For More Information . . . . . . . . . . . . . . . . . . B-12
Installing EISA Accessory Cards . . . . . . . . . . . . . . B-13
EISA Performance . . . . . . . . . . . . . . . . . . . B-13
Procedure . . . . . . . . . . . . . . . . . . . . . . . B-14
For More Information . . . . . . . . . . . . . . . . . . B-19
C. Using the Boot ROM
Appendix Contents . . . . . . . . . . . . . . . . . . . . C-1
Boot Console User Interface . . . . . . . . . . . . . . . . C-2
Introduction . . . . . . . . . . . . . . . . . . . . . . C-2
Using the Boot Console User Interface . . . . . . . . . . . C-3
Entering the Boot Administration Mo de . . . . . . . . . . C-4
Exiting the Bo ot Administration Mode . . . . . . . . . . C-4
Getting Help for the Bo ot Console User In
terface Commands . C-5
Booting the Workstation . . . . . . . . . . . . . . . . . C-5
Searching for Bootable Media . . . . . . . . . . . . . . . C-7
Redisplaying the Results of a Search. . . . . . . . . . . . C-8
Displaying and Setting Paths . . . . . . . . . . . . . . . C-9
Resetting the Workstation . . . . . . . . . . . . . . . . C-11
Displaying and Setting the Real-Time Clo ck . . . . . . . . C-11
Displaying and Setting the Autoselect Flag . . . . . . . . . C-12
Displaying and Setting the Secure Bo ot Mo de . . . . . . . C-13
Displaying and Setting the Fastbo ot Mo de . . . . . . . . . C-14
Displaying the LAN Station Address . . . . . . . . . . . C-14
Setting the VME Backplane Networking Parameters . . . . . C-15
DRAFT
2/5/97 11:31
Contents-5
FINAL TRIM SIZE : 7.0 in x 8.5 in
Page 14
D. Keyb oard Comparisons
Appendix Contents . . . . . . . . . . . . . . . . . . . . D-1
Introduction . . . . . . . . . . . . . . . . . . . . . . . D-2
Keyboard Dierences . . . . . . . . . . . . . . . . . . . D-3
For More Information . . . . . . . . . . . . . . . . . . D-6
Glossary
Index
Contents-6 DRAFT
2/5/97 11:31
FINAL TRIM SIZE : 7.0 in x 8.5 in
Page 15
Product Description
Overview
1
1
The HP 9000 Series 700i/50 and Series 700i/100 w
exible, high-performance Precision Architecture systems based on the
Hewlett-Packard PA RISC 7100 technology.
This manual covers the Mo dels 745i/50, 747i/50, and their higher-speed
counterparts, the Mo dels 745i/100 and 747i/100. The features and options of
these systems are outlined in this chapter.
orkstations are exceptionally
DRAFT
2/5/97 11:31
Product Description 1-1
FINAL TRIM SIZE : 7.0 in x 8.5 in
Page 16
1
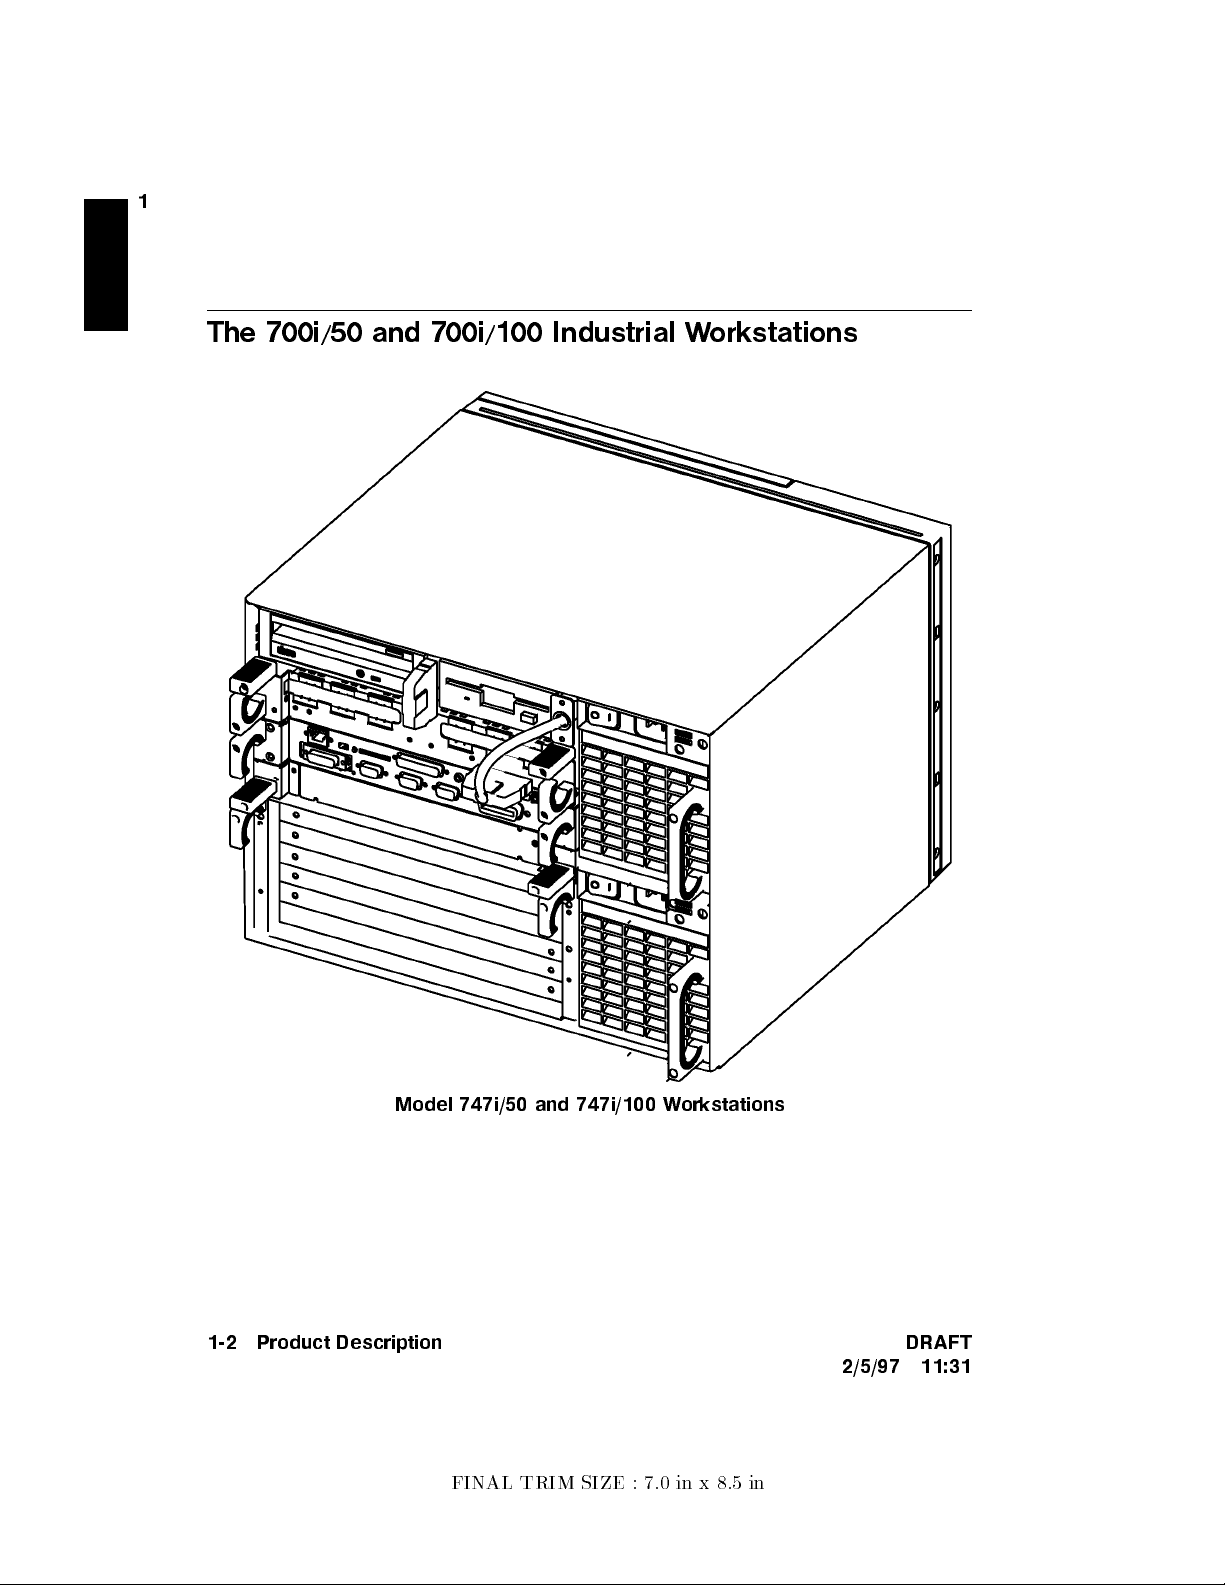
The 700i/50 and 700i/100 Industrial W
orkstations
Model 747i/50 and 747i/100 Workstations
1-2 Product Description DRAFT
2/5/97 11:31
FINAL TRIM SIZE : 7.0 in x 8.5 in
Page 17
1
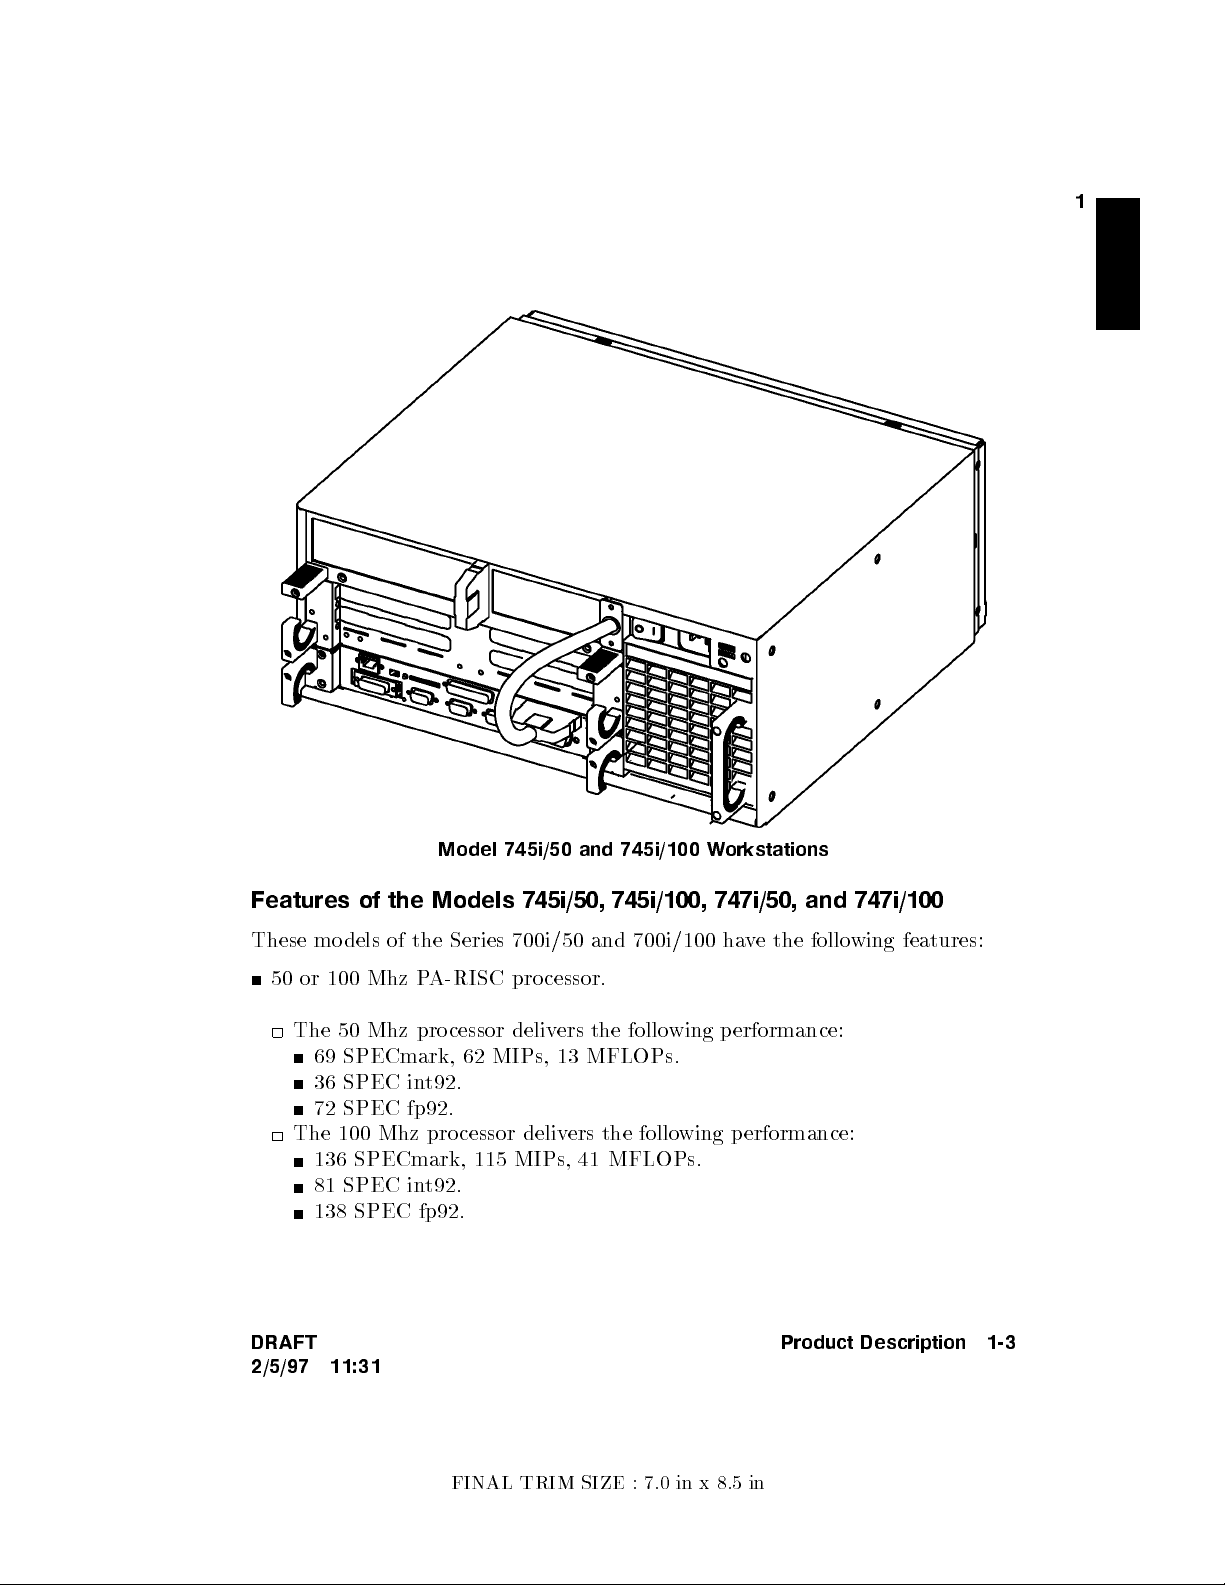
Model 745i/50 and 745i/100 Workstations
Features of the Models 745i/50, 745i/100, 747i/50, and 747i/100
These models of the Series 700i/50 and 700i/100 ha
50 or 100 Mhz PA-RISC processor.
The 50 Mhz pro cessor delivers the following p erformance:
69 SPECmark, 62 MIPs, 13 MFLOPs.
36 SPEC int92.
72 SPEC fp92.
The 100 Mhz processor delivers the following p erformance:
136 SPECmark, 115 MIPs, 41 MFLOPs.
81 SPEC int92.
138 SPEC fp92.
DRAFT
2/5/97 11:31
ve the following features:
Product Description 1-3
FINAL TRIM SIZE : 7.0 in x 8.5 in
Page 18
1
Error-Checking and Correcting (ECC) RAM memory is congurable as
follows:
Series 700i/50: 16 to 128 MB main memory:
installable as pairs consisting of 8, 16, or 32 MB RAM b oards.
Series 700i/100: 16 to 256 MB main memory:
installable as pairs consisting of 8, 16, 32, or 64 MB RAM boards.
(See \Memory Upgrades" belo
w, for details).
External Caching:
Series 700i/50: 64 Kbyte instruction cache and 64 Kbyte data cache.
Series 700i/100: 256 Kbyte instruction cache and 256 Kbyte data cache.
Three mass storage bays for hard disk, 3.5-in. exible disk, CD R
OM, and
DDS (\DAT") drives. Variable congurations, include the following:
One 3.5-in. xed disk and the following alternativ
es:
Two additional 3.5-in. xed or removable devices or
One 3.5-in. and one 5.25-in (CD ROM) device.
Front or rear access to removable media can be changed optionally.
Front access is the default for the 745i/50 or 745i/100
Rear access is the default for the 747i/50 or 747i/100.
Input/Output:
RS-232-C (2).
LAN
AUI
SCSI-II SE
HP Parallel.
HP-IB (instrument only).
Voice quality audio I/O.
Standard interfaces.
Rack-mount packages.
Internal speaker on board.
1-4 Product Description DRAFT
2/5/97 11:31
FINAL TRIM SIZE : 7.0 in x 8.5 in
Page 19
Memory Upgrades
Factory-integrated RAM provides 16 MB, 32 MB, 64 MB, and 128 MB upgrade
increments. See Appendix A for installation details.
Keyboards
1
The HP-HIL connector on the rear panel accepts a v
devices, including the following k
under the following product numbers:
A1099C HP 46021A/B Integrated Terminal Format (ITF) Keyboard.
A2205B C1429A/B Personal Computer (PC101) Keyboard.
Other HP-HIL devices may also be connected to the keyboard or HP-HIL
connector. See Appendix D for a functional comparison of the t
Displays
Available monitors are the following:
HP D1196A 15-in.,(70 Hz.), 1024x768, color.
HP A2287A 17-in., (75 Hz.), 1024x768, color.
HP A1097A/B 19-in., (72 Hz.), 1280x1024, color.
HP A2094A 19-in., (72 Hz.), 1280x1024, color.
Note that, with Series 700i products, the A2094A monitor is available only by
separate purchase.
eyboards available in the Localization Kits
ariety of HP-HIL input
wokeyb oards.
DRAFT
2/5/97 11:31
Product Description 1-5
FINAL TRIM SIZE : 7.0 in x 8.5 in
Page 20
1
Graphics
Supported graphics upgrades for the Mo dels 747i/50 and 747i/100 are as
follows:
HP A2269A: Adds dual CRX-accelerated color graphic board, including
SGC CRX card, and two 19-in. 1280 X 1024 color monitors.
HP 98768A: CRX-accelerated color graphics and a 19-in. 1280 X 1024 color
monitor.
HP A2262A: Adds dual CRX-accelerated color graphic board, with no
monitor.
HP A2270A: CRX-24 color graphics and a 19-in. 1280 X 1024 color monitor.
HP A1439A: CRX-24 color graphics, with no monitor.
SGC graphics option operate concurrently with on-board graphics. The
Models 747i/50 and 747i/100 function as single workstations, accepting user
input from single keyboards, but delivering graphics output to as manyas
three monitors.
The Models 747i/50 and 747i/100 have only one SGC interface. Upgrade
products may not be used concurrently.
The 745i/100 or 747i/100 systems and upgrades are congured for a 70
Hz refresh rate monitor. The so cket-installed 75.0000 Mhz crystal for
the fast refresh rate display is identied as Part Number 18130940. The
corresponding STI ROM is identied as Part Number 18185347.
Switches for Changing Graphics Formats
Note that b oth on-b oard graphics and CRX upgrades ma
y be used
concurrently in the Models 747i/50 and 747i/99. On the system board, four
switches near the edge are used to congure the graphics circuit for dierent
situations.
from the factory.
These switches are appropriately set for your monitor as shipped
However, if you should choose to upgrade your system with
a dierent HP monitor, the follo wing information will help in conguring the
system to communicate appropriate resolution and scan-rate.
1-6 Product Description DRAFT
2/5/97 11:31
FINAL TRIM SIZE : 7.0 in x 8.5 in
Page 21
1
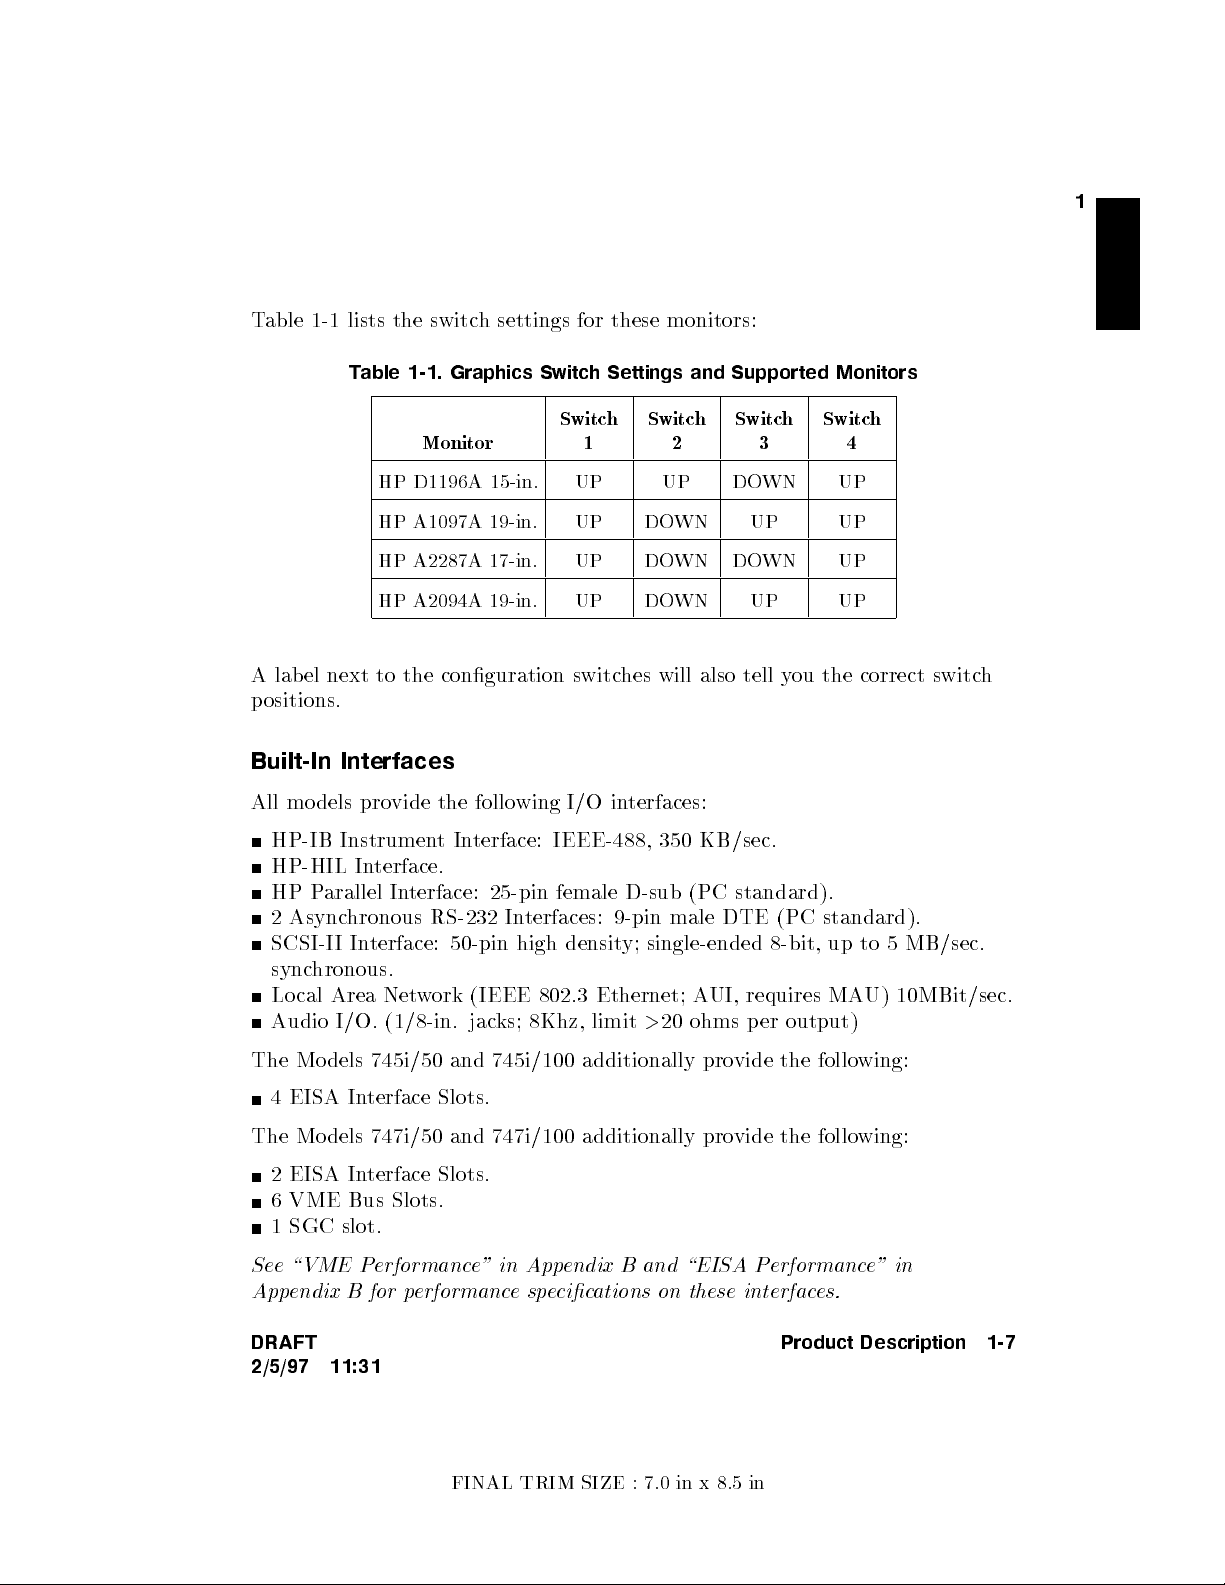
Table 1-1 lists the switc
h settings for these monitors:
Table 1-1. Graphics Switch Settings and Supported Monitors
Switch1Switch2Switch3Switch
Monitor
4
HP D1196A 15-in. UP UP DOWN UP
HP A1097A 19-in. UP DOWN UP UP
HP A2287A 17-in. UP DOWN DOWN UP
HP A2094A 19-in. UP DOWN UP UP
A label next to the conguration switches will also tell you the correct switch
positions.
Built-In Interfaces
All models provide the following I/O interfaces:
HP-IB InstrumentInterface: IEEE-488, 350 KB/sec.
HP-HIL Interface.
HP Parallel Interface: 25-pin female D-sub (PC standard).
2 Asynchronous RS-232 Interfaces: 9-pin male DTE (PC standard).
SCSI-II Interface: 50-pin high density; single-ended 8-bit, up to 5 MB/sec.
synchronous.
Local Area Network (IEEE 802.3 Ethernet; AUI, requires MAU) 10MBit/sec.
Audio I/O. (1/8-in. jacks; 8Khz, limit>20 ohms per output)
The Models 745i/50 and 745i/100 additionally provide the following:
4 EISA Interface Slots.
The Models 747i/50 and 747i/100 additionally provide the following:
2 EISA Interface Slots.
6 VME Bus Slots.
1 SGC slot.
See \VME Performance" in Appendix B and \EISA Performance" in
Appendix B for performancespecications on these interfaces.
DRAFT
Product Description 1-7
2/5/97 11:31
FINAL TRIM SIZE : 7.0 in x 8.5 in
Page 22
1
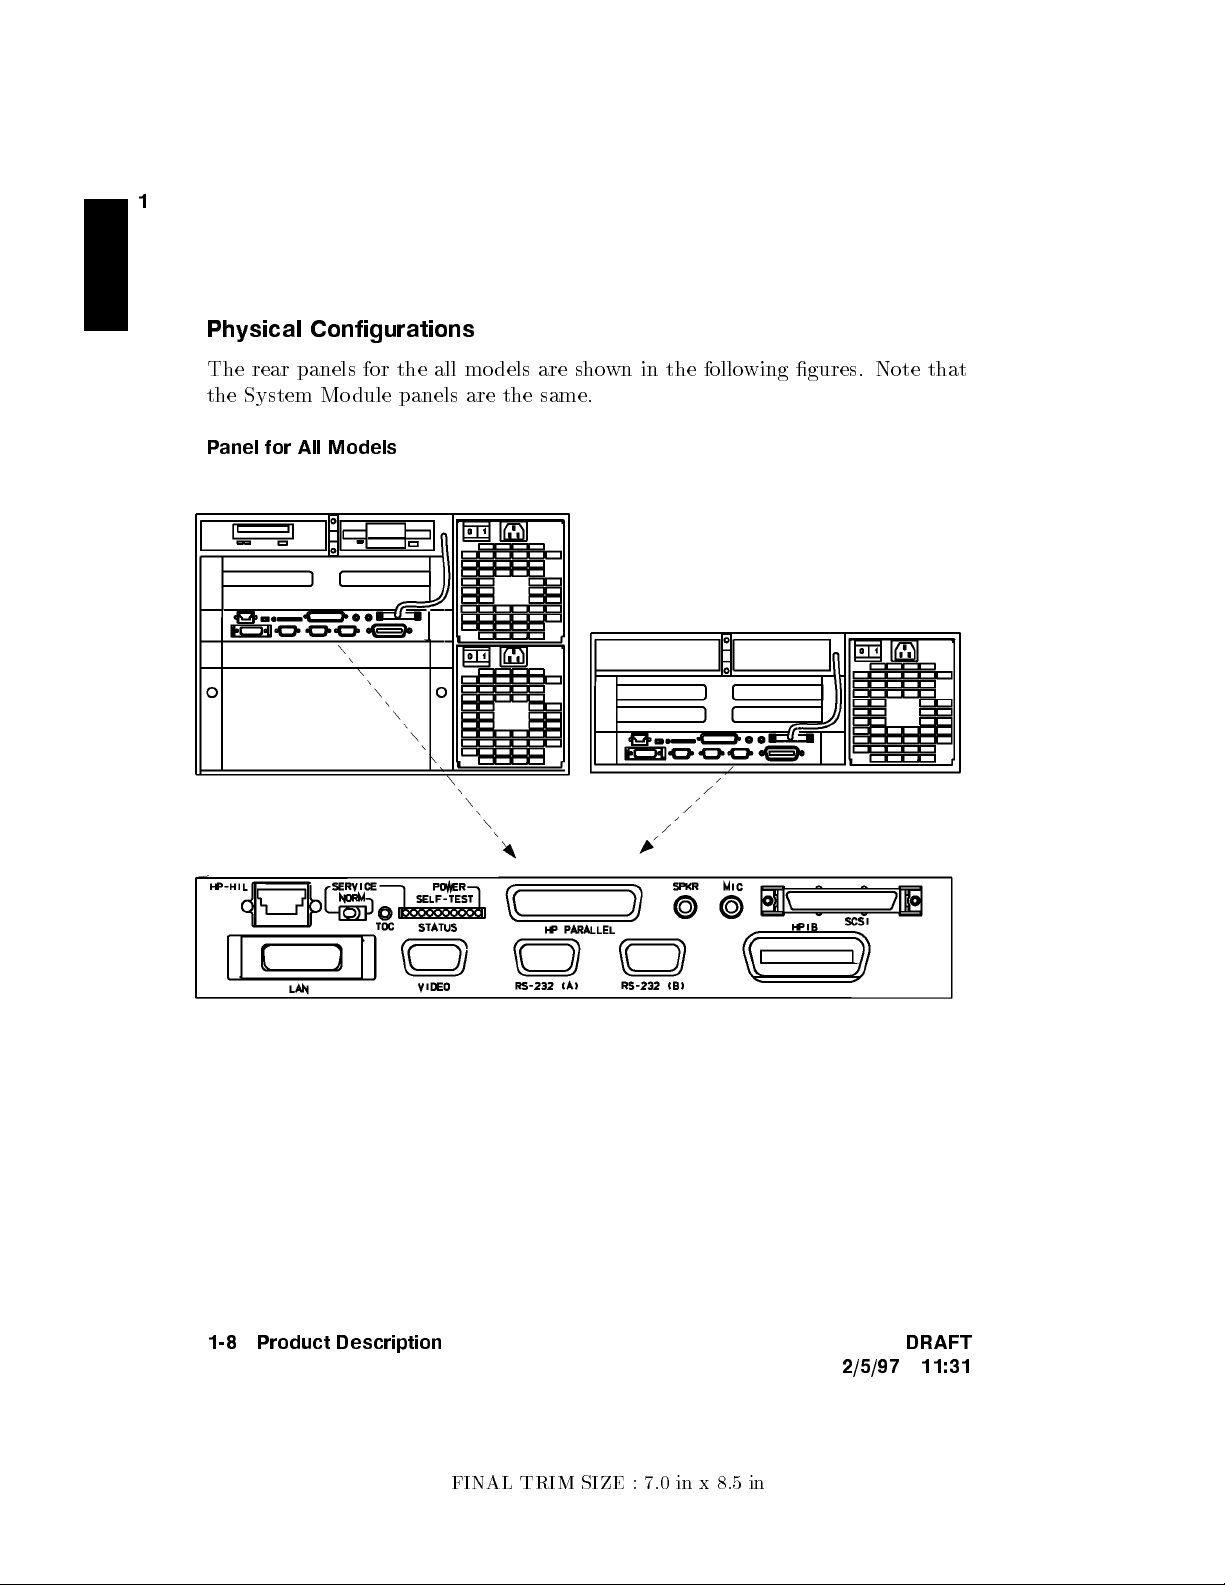
Physical Configurations
The rear panels for the all mo dels are sho
the System Mo dule panels are the same.
Panel for All Models
wn in the following gures. Note that
1-8 Product Description DRAFT
2/5/97 11:31
FINAL TRIM SIZE : 7.0 in x 8.5 in
Page 23
Physical Dimensions and Power Requirements
Height: 176.75 mm. (6.97 in.) (Mo del 745i/50 and 745i/100); 310.15 mm.
(12.2 in.) (Mo del 747i/50 and 747i/100).
Width: 425.45 mm. (16.75 in.) (all models).
Depth: 412.6 mm. (16.2 in.) (all models).
Weight: 18.6 Kg. (4l lb.) (Mo del 745i/50 and 745i/100); 29 Kg. (64.1 lb.)
(Model 747i/50 and 747i/100).
Power
Model 745i/50 or 745i/100: 350 w
Model 747i/50 or 747i/100: 700 w
atts maximum.
atts maximum.
Line select: 90-130 volts or 180-250 volts, auto ranging.
Audio I/O
All models feature 8 Khz voice quality audio with 128 Byte I/O channel
buering. The audio I/O is as follows:
1
Output connector (1/8 in.) for external speak
er or headphones.
Input connector (1/8 in.) for microphone or other audio source.
These interfaces allowyou to use a microphone to digitize speec
h-quality,
provide single-channel audio for voice annotation, and use applications
for voice-mail and voice recognition. HP-UX provides software control
for recording audio les on hard disk driv
ROMs cannot output directly to the audio-out connector.
es.
Note however that audio CD
See \Using Audio
Input/Output" in Chapter 4 for an overview of audio access with these
workstations.
DRAFT
2/5/97 11:31
Product Description 1-9
FINAL TRIM SIZE : 7.0 in x 8.5 in
Page 24
1
Internal Mass Storage Devices
The Series 700i industrial workstations may use up to three in
storage devices connected to the in
also available in diskless as w
mass-storage bays (one 3.5-in. and one 5.25-in.) can be tted with a
combination of a CD R
One xed-media mass storage ba
disk drives installed.
Factory-installed and customer-installable mass storage devices include the
following. The HP upgrade pro duct n
HP A2640A: 525 MB hard disk drive.
HP A2641A: 1.05 GB hard disk drive.
HP A2645A: 3.5-in. exible disk drive.
HP A2644A: 600 MB CD ROM Disk Drive.
HP A2642A: 2GB DDS Tape Drive
HP A2643A: 4 - 8 GB DDS (Data Compression) T
OM, DDS tape driv
ternal SCSI interface. Eachworkstation is
ell as disked congurations. Two removable-media
e, hard disk, or exible disk driv
y can have one of two optional pre-formatted
umbers are given at the left:
ape Drive
ternal mass
e.
1-10 Product Description DRAFT
2/5/97 11:31
FINAL TRIM SIZE : 7.0 in x 8.5 in
Page 25
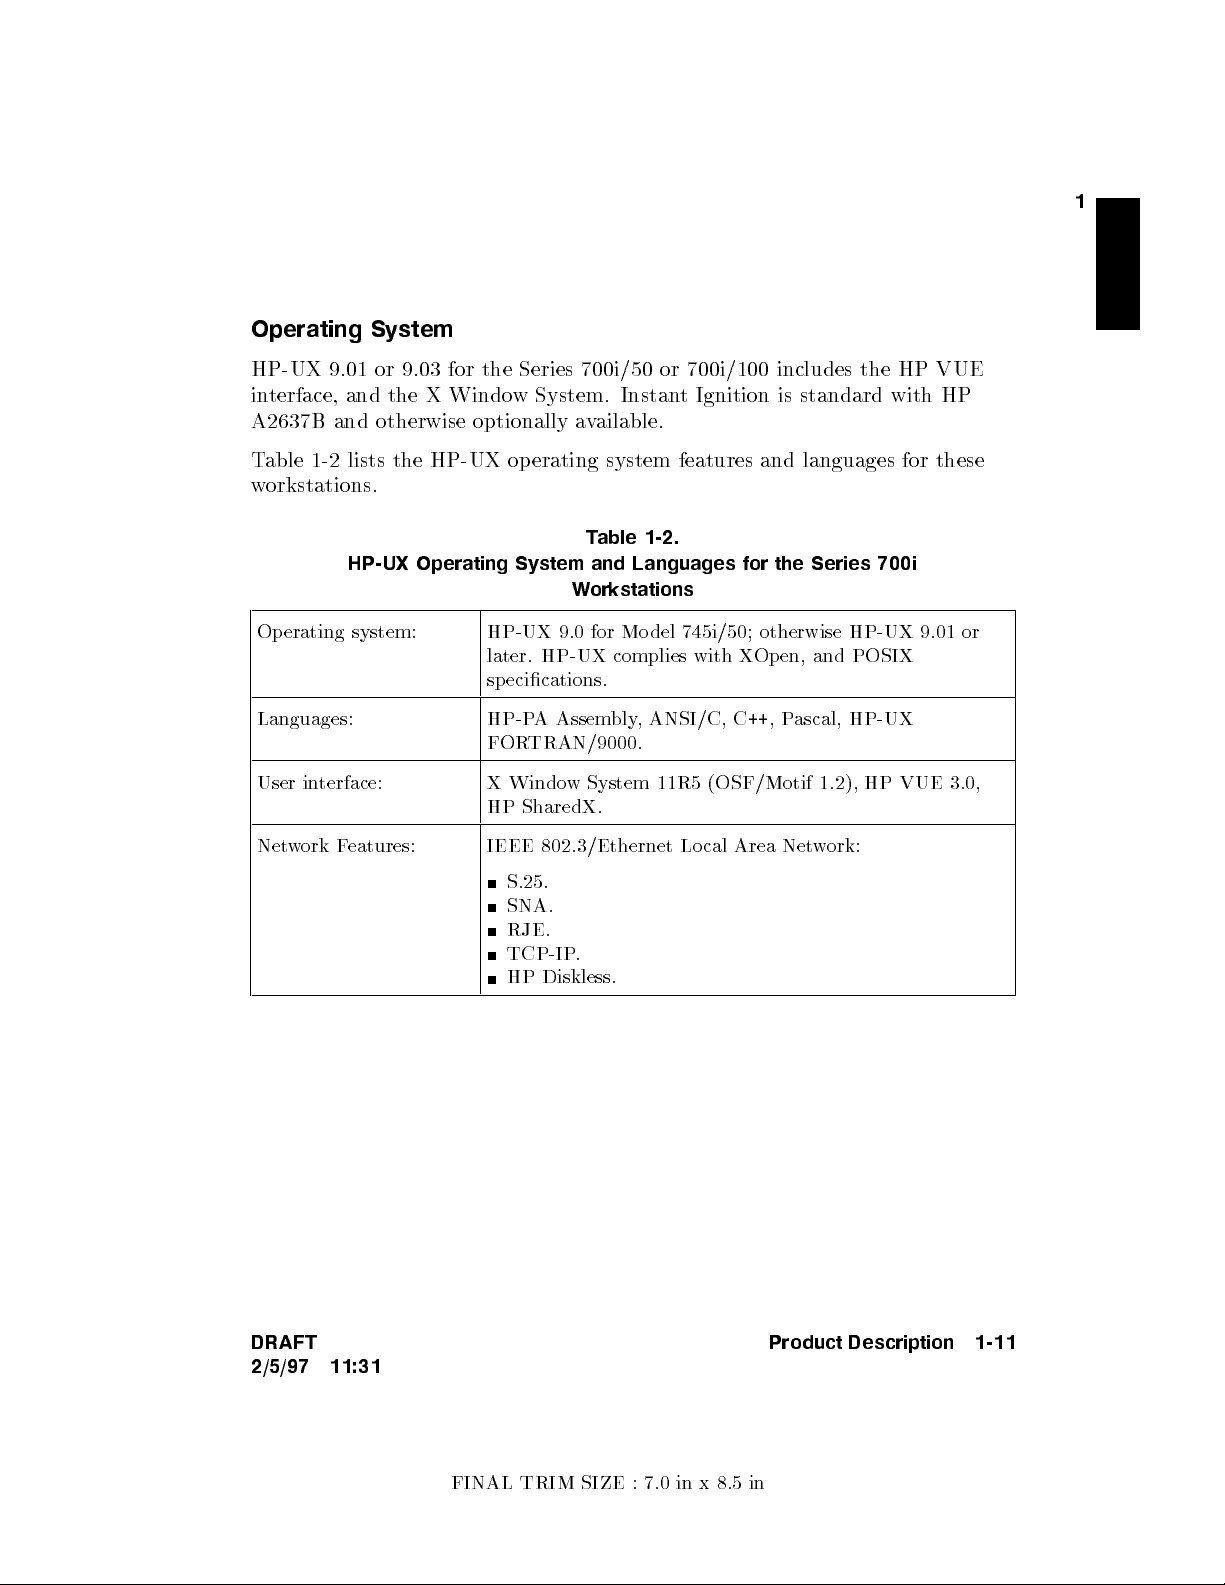
Operating System
HP-UX 9.01 or 9.03 for the Series 700i/50 or 700i/100 includes the HP VUE
interface, and the X Windo
A2637B and otherwise optionally a
Table 1-2 lists the HP-UX operating system features and languages for these
workstations.
HP-UX Operating System and Languages for the Series 700i
Operating system: HP-UX 9.0 for Model 745i/50; otherwise HP-UX 9.01 or
Languages: HP-PA Assembly, ANSI/C, C++,Pascal, HP-UX
w System. Instant Ignition is standard with HP
vailable.
Table 1-2.
Workstations
later. HP-UX complies with XOpen, and POSIX
specications.
FORTRAN/9000.
1
User interface: X Window System 11R5 (OSF/Motif 1.2), HP VUE 3.0,
HP SharedX.
Network Features: IEEE 802.3/Ethernet Local Area Network:
S.25.
SNA.
RJE.
TCP-IP.
HP Diskless.
DRAFT
2/5/97 11:31
Product Description 1-11
FINAL TRIM SIZE : 7.0 in x 8.5 in
Page 26

FINAL TRIM SIZE : 7.0 in x 8.5 in
Page 27
Finding Information About Your System
Overview
Your new HP workstation uses the HP-UX op erating system and the HP
Visual User Environment (HP VUE). HP-UX is a versatile op erating system
that you can use to run application programs and perform a v
HP VUE is a graphical interface to HP-UX that can simplify manyofyour
daily tasks.
Chapter Contents
Information Ab out Installing Your Workstation.
Online Sources of Information.
ariety of tasks.
2
2
DRAFT
2/5/97 11:31
Finding Information About Your System 2-1
FINAL TRIM SIZE : 7.0 in x 8.5 in
Page 28
2
Information About Installing Your Workstation
If you have not installed your hardware or started your workstation, refer to
the
Instal lation Guide
for your workstation before going further.
Finding Out About Y
After you have read the
our Workstation
Instal lation Guide
for your system, you maywantto
see the following sources for further information:
For a quick reference to commonly-used HP-UX commands, see the
Appendix in
Using HP-UX
.
HP VUE is the default interface for HP-UX. If you are planning to use the X
Window System, see
For information on HP VUE, see the
Using the X Window SystemorUsing HP-UX
HP VUE User's Guide
.
.
The following manuals will also be useful:
If you have not yet installed your HP-UX system, see
Updating HP-UX 9.0
For administration information, see
For troublesho oting HP-UX, see
.
System Administration Tasks
Solving HP-UX Problems
Instal ling and
.
, and Chapter 7
in this manual.
For VME conguration information, see the
VME Conguration Guide for
HP-UX
2-2 Finding Information About Your System DRAFT
2/5/97 11:31
FINAL TRIM SIZE : 7.0 in x 8.5 in
Page 29
Online Sources of Information
2
HP-UX is designed so that y
leaving your workstation. Some of these information sources are a
ou can access many sources of information without
vailable in
the HP VUE interface; others can be accessed through a shell command line.
You will nd information on help in
manuals can be accessed and searc
Using HP-UX
. All the current HP-UX
hed online if you purchase the LaserRom
optional pro duct.
NNNNN
?
Online HP VUE Help: If y
ou are using HP VUE, clic
(with the picture of books behind it), on the VUE fron
k on the
t panel, will get you
button
help on using HP-UX and HP VUE.
NNNNN
?
If you click on the up-arrowabove the
you will get a slide-up sub panel
with help subcategories, including HP VUE Help and HP-UX help on specic
tasks.
Man Pages: The information on HP-UX which is found in
HP-UX Reference
is also on line and accessible by clicking on the Toolbox button at the right
of your FrontPanel, or byentering the following at a shell prompt:
man
command
In place of
command
,enter the name of the HP-UX command y
ou wantto
get information on. If you're not sure of the command name you can enter
man -k
keyword
, where
keyword
is a likely topic word to search on. This will
result in a display of commands having that keyword in their description.
Optional LaserROM: If you have a CD ROM drive attached to your system,
you can access and print out all the HP-UX manuals, as well as obtain
other current information, using LaserRom. Your Hewlett-Packard sales
representative can help you with information on obtaining and using online
manuals with LaserROM.
DRAFT
Finding Information About Your System 2-3
2/5/97 11:31
FINAL TRIM SIZE : 7.0 in x 8.5 in
Page 30
2
There are many les on your system which contain information which will be
useful in administering and conguring cards and devices for y
HP-UX. Among these are the follo
wing:
our version of
Release Notes: This is the online v
with your system. It contains all the late information, undocumen
changes and bug xes for y
the
/etc/newconfig
e.g.,
90RelNotes
, for HP-UX 9.0.
Terminfo: The directory
our release of HP-UX. Release Notes is found in
directory, and may be named b
/usr/lib/terminfo
containing information about terminal congurations, indexed b
ersion of the Release Notes whic
y its release number,
contains subdirectories
y the
h came
ted
rst character of the terminal name. For example, to nd conguration
information about the hp98546, you can lo ok in
/usr/lib/terminfo/h
for a
listing of information les for all the terminal names beginning with \h".
These lenames also constitute all the acceptable arguments for setting the
TERM variable, in case you are using a non-default terminal conguration.
Newcong: The directory
versions of HP-UX pro duct conguration les, as w
/etc/newconfig
contains information and new
ell as shell scripts which
mayhave been customized (localized) on your system. The contents of this
directory will vary depending on which products you have loaded on your
system. In most cases, old versions of these les, in their regular lo cations in
the le system, are not overwritten by the update process. See the README
le in
/etc/newconfig
for information on the contents of this directory.
2-4 Finding Information About Your System DRAFT
2/5/97 11:31
FINAL TRIM SIZE : 7.0 in x 8.5 in
Page 31
3
Logging In and Getting Started
Chapter Contents
Before Logging In the First Time.
Turning On Your System.
Interpreting the LED Indicators.
Logging In and Out Using HP VUE.
Logging In and Out Using HP-UX.
Creating a New User Account.
Setting Audio Volume.
Setting or Changing a Password.
Getting Help.
Shutting Down Your System.
3
DRAFT
2/5/97 11:31
Logging In and Getting Started 3-1
FINAL TRIM SIZE : 7.0 in x 8.5 in
Page 32

Before Logging In the First Time
If your system has HP-UX preloaded on its disk (this is indicated b
over the power switch), HP-UX will automatically load itself when y
y a label
ou rst
turn the power on.
3
If your system does not ha
ve a hard disk installed, or if it has a le system
disk, and you wantyour workstation to be a cluster clien
to the manual
Managing Clusters of HP-UX Computers
t node (cnode), refer
for instructions on
setting up clusters and cno des.
This chapter reviews some initial procedures and pro
both HP VUE sessions and HP-UX. F
HP VUE after login, see the
HP VUE User's Guide
or more detailed information ab out using
When you turn on your workstation to complete the installation process, y
vides information on using
.
ou
will be asked for the following information. If you do not have this information
5
readily available, simply press
4
Return
after the questions, and you can supply
this information later:
The time zone where your workstation is located.
The host name for your workstation; any alphanumeric, single-word name
with eight or fewer characters.
The network address number, also called an IP number, for your workstation.
This consists of four address elds separated by periods: for example,
255.32.3.10
.You may need to consult with your system administrator for
this information. Or, if your host name and IP number have already been
assigned, you can nd out the host name, after bo ot, b
yentering
uname -a
.
If you knowyour host name, you can nd out your IP number byentering
nslookup
host name
, at the system prompt.
If you can't supply this information at b oot time, y
system later, after logging in, byentering the command
ou can congure it into the
set_parms
,as
root
.
You can then enter the information at the prompts.
3-2 Logging In and Getting Started DRAFT
2/5/97 11:31
FINAL TRIM SIZE : 7.0 in x 8.5 in
Page 33

Turning On Your System
With all p eripheral devices turned
1. Turnonthe power to your monitor. The po
that it is turned on, ev
en though the screen remains dark during initial
o
, do the following:
wer indicator LED will sho
self-testing.
2. Turn on the po
wer to any other external devices.
3. Turn your system on. The LEDs will light, sho
Note
These mo dels of the Series 700i ha
the front and rear of the system unit. There are sev
switch the power on or o.
In al l cases, if one power switch is
OFF, power for the entire unit wil l be turned OFF.
To activate power for the system:
If your unit is rack-mounted and placed with the
unit facing out:
a. Turn the rear power switch(es)on. (These are the rocker
switches.)
b. Then use the front (push button) power switch to toggle
poweronoro. The rightmost green LED (labeled \P")
on the front of the system module will conrm po
as will the corresponding LED on the rear of the unit.
w
wing that the po
wer is on.
vepower switches on both
eral ways to
front
of the
weron,
3
DRAFT
2/5/97 11:31
If your unit is rack-mounted and is placed with the
rear
of
the unit facing out:
a. Make sure that the push-button power switch on the front
is pushedon.
b. Turn
on
the power switch(es) to activate the system. The
rear LEDs will conrm p ower on.
c. Turn rear power switch(es)
o
to turn o the system.
Logging In and Getting Started 3-3
FINAL TRIM SIZE : 7.0 in x 8.5 in
Page 34

4. For ab out 20 seconds the system performs k
eyboard and other testing
routines with a black screen. Then you will see a color test of the displa
followed by a sequence of boot messages. Allow the b oot to con
tinue.
y,
5. You will be prompted for the host name, IP n
have this information, enter it as requested. Otherwise, press
3
can also enter this information after login b
umber, and time zone. If y
4
Return
ytyping
set_parms
4
Return
5
.You
5
ou
at a
shell prompt.
6. You will be ask
choose to do this, see \Selecting a New P
ed if you want to set a ro ot passw
assword", in this chapter, for
ord at this time. If y
ou
password requirements.
The system will nish the bo ot sequence, and y
window. If you don't have HP VUE, and you see the \
ou will see the HP VUE Login
Console login:
"
prompt, go to the section \Logging In and Out Using HP VUE".
Caution
If your system has its own disk and you are running a local
operating system, do not turn o po
wer to your system without
rst shutting down the operating system software according to
the procedure in this chapter, \Shutting Down Your System".
Turning o the power for your stand-alone system without rst
doing the shutdown procedure may result in damage to data on
your disk. Always execute the shut-down process to completion
rst.
If you are running your system as a no de in a cluster (without
a le system disk) you can, in any case, shut down your system
by turning o the power after you have properly closed les
and terminated pro cesses. If you have a mounted le system
disk, you must become
root
and p erform the pro cedure
in \Shutting Down Your System", or haveyour system
administrator do so. You can run
by being listed in the le
Administration Tasks
/etc/shutdown.allow
for details.
shutdown
without
. See
being
System
root
3-4 Logging In and Getting Started DRAFT
2/5/97 11:31
FINAL TRIM SIZE : 7.0 in x 8.5 in
Page 35

Interpreting the LED Indicators
There are nine LEDs (\Ligh
t Emitting Dio des"), whic
hyou can view on the
front or rear panel. Eight of these are diagnostic, or indicate the normal
activityofyour system. The one on the far righ
The normal running indications for HP-UX are sho
four of the eight diagnostic LEDs will alwa
during normal op eration. F
or LED indications of error conditions during boot,
t indicates p ower \on".
wn in Table 3-1. The right
ys be blinking to reect activit
see Table 7-1.
The green power-indicator LED is omittedfrom the table below.
Table 3-1. Normal LED Display During HP-UX Operation
LED Display Meaning
Operating system running
Disk access in progress
Network receive in progress
Network transmit in progress
3
y
DRAFT
2/5/97 11:31
Logging In and Getting Started 3-5
FINAL TRIM SIZE : 7.0 in x 8.5 in
Page 36

Logging In and Out Using HP VUE
Once HP-UX is running on y
logging in is one of the w
using your system. This is especially important if y
3
network.
our system, you must log in. The pro cess of
ays that HP-UX prevents unauthorized p ersons from
our system is attached to a
Logging In the First Time: Screen Appearances
Your screen after login will ha
you log in from the w
If you have a pre-loaded operating system, the rst time y
NNNNNNNNNNNNNNNNNNNNNNN
see a
Welcome
ay it will lo ok subsequen
window displayed along with the HP VUE FrontPanel, the
rst time you log in. The information in this screen will help y
ve a slightly dieren
tly:
t appearance the rst time
ou log in, you will
ou explore the
capabilities of your system and p erform some basic tasks.
If you are only updating your HP-UX system to the currentversion and you
have installed HP VUE, then you will see the
NNNNNNNNNNNNNNNNNNNNNNN
Welcome
window and the HP
VUE FrontPanel.
When you log in to HP VUE for subsequent sessions, you will see the Front
Panel and the File Manager for your home directory.
When you log in using \
login:
" (or \No Windows") for subsequent sessions,
you will see the shell prompt (\$").
Preparing to Log In to an HP VUE Session
The HP VUE login screen provides a place for you to type your login name and
password.
NNNNNNNNNNNNNNNNNNNNNNN
The
Options
menu on the login screen allows you to select several alternative
types of sessions, such as HP VUE Lite, or a failsafe session. You can also
select the language for your session. See
HP VUE User's Guide
for the details
of these HP VUE congurations.
3-6 Logging In and Getting Started DRAFT
2/5/97 11:31
FINAL TRIM SIZE : 7.0 in x 8.5 in
Page 37

Login Options Menu
During the login process, if you need help logging in, click the login screen
NNNNNNNNNNNNNN
Help
button.
3
If you choose
NNNNNNNNNNNNNNNNNNNNNNN
Options
not
to use HP VUE for the current session only,you can select
from the login window menu and
NNNNNNNNNNNNNNNNNNNNNNNNNNNNNNNN
No Windows
from the VUE login
screen. Then, enter your login name and password after the appropriate
prompts. You will see the shell command line prompt.
If you are
not
running HP VUE at b oot, y
ou will log in using \
login:
".
Logging In to an HP VUE Session
1.
Select the
NNNNNNNN
OK
.
2.
Type your password. Press
If the Login Manager do es not recognize your name or password, you will see
an error message. If this happens, choose
DRAFT
NNNNNNNNNNNNNNNNN
Login
box and type your login name. Press
NNNNNNNN
4
5
Return
or choose
OK
.
NNNNNNNNNNNNNNNNN
Clear
and start over.
Logging In and Getting Started 3-7
4
Return
5
or choose
2/5/97 11:31
FINAL TRIM SIZE : 7.0 in x 8.5 in
Page 38

Logging Out in HP VUE
You can secure your workstation temp orarily and lea
clicking on the \loc
password to unlo ck the screen.
3
If you are going to log out of the session, close y
following:
Choose the logout con
k" control icon on the F
trol on the FrontPanel.
The Logout Control1
rontPanel. You will type your
ve processes running b
our current les and do the
y
3-8 Logging In and Getting Started DRAFT
2/5/97 11:31
FINAL TRIM SIZE : 7.0 in x 8.5 in
Page 39

Opening and Closing a T
erminal Window
For using a shell prompt to en
VUE, you will generally be using a terminal windo
of terminal windows, HP Term and X Term. Each has slightly dieren
ter HP-UX commands while you are in HP
w. There are twotypes
t
behavior. For example, HP Term windows (Term0 compatible) can utilize
softkey representations, whereas X T
terminal. For more information, see the
entries
To op en a terminal windo
hpterm
(1) and
xterm
(1).
w from a shell prompt, t
erm emulates a VT102 (ANSI complian
HP-UX Reference
ype
or online man page
hpterm
.
t)
To op en a terminal window in HP VUE, click on the FrontPanel button that
resembles a keyboard and screen. For a regular HP VUE session the button is
found in the following lo cation:
3
DRAFT
2/5/97 11:31
The HP VUE Terminal Button Location
Logging In and Getting Started 3-9
FINAL TRIM SIZE : 7.0 in x 8.5 in
Page 40

Cutting and Pasting Text
Cutting and pasting is a w
text. You can cut from, and paste in
Text elds.
3
Terminal windows.
Editor windows.
Cutting Text
1. Move the pointer to the start of the text bloc
2. Hold down mouse button 1 and drag the pointer to the end of the text
block. This will highlight the text that you are going to \paste" (copy).
Pasting Text
1. Put the text insertion cursor at the target lo cation.
2. Click mouse button 2 to paste the text in
To unselect text, click mouse button 1 in an empty area of the window that has
the text selected, or press
ay of copying which eliminates the need to ret
to, the following:
k.
to the eld.
4
5
.
ESC
ype
3-10 Logging In and Getting Started DRAFT
2/5/97 11:31
FINAL TRIM SIZE : 7.0 in x 8.5 in
Page 41

Logging In and Out Using HP-UX
If you are not using HP VUE, then a command-line login prompt app ears after
boot:
login:
1. Type your login name (or
root
).
3
2. Press
If you
4
Return
haven't
5
.
yet set a password, you will get a a system prompt (
#
for
root, or$for user), and you can begin using the system.
3. Otherwise, type your password when the system gives the following prompt:
Password:
4.
Press
4
5
. The system prompt (#or$) appears and you can use the
Return
system.
Logging Out
If you are not using HP VUE, you can use the
lock
command to temporarily
leaveyour workstation (while leaving pro cesses running). If you want to log
out of your currentwork session entirely, use the following command:
exit
DRAFT
2/5/97 11:31
Logging In and Getting Started 3-11
FINAL TRIM SIZE : 7.0 in x 8.5 in
Page 42

Creating a New User Account
Using HP VUE
If you have access to a system administrator, that person ma
3
up a user accoun
you will need to do the follo
The home directory or \accoun
every new session and where most of y
of this directory and its subdirectory
t for you. If you are doing your own system administration,
wing to set up a user accoun
t" in whichyou work is where you log in at
our default les are found. As \o
,you also have control over who can access
yhave already set
t.
wner"
any of its les.
If you have not already created a user account, do the following steps to create
one:
1. Log into HP VUE as
2. Click on the up arrow (the small triangle) o
root
.(You will need the
root
password).
ver the Toolbox control icon at
the right side of the FrontPanel. A slide-up menu (\subpanel") appears.
3.
Choose the
which lists applications in the General Toolbox. Select the
NNNNNNNNNNNNNNNNNNNNNNN
General
icon on the Tools subpanel. You will see a window
NNNNNNNNNNNNNNNNNNNNNNNNNNNNNNNNNNNNNN
System_Admin
folder.
NNNNNNNNNNN
Sam
4. The System Administration window appears. Cho ose
Caution
In order to use SAM, you must be logged in as
root
account is a separate login account providing unlimited
.
root
. The
permissions on your system. This means that you need to
take actions more carefully when you are
root
. The
root
account is only used to do system administration tasks, and, for
security reasons, it should use a password which is dierent
from your everyday user password.
Administration Tasks
giveyou more details on using SAM.
Using HP-UX
and
System
5. At the opening menu, choose
then clicking on
NNNNNNNNNNNNNN
Open
(or just double-click on the item).
Users and Groups->
by clicking on it and
3-12 Logging In and Getting Started DRAFT
2/5/97 11:31
FINAL TRIM SIZE : 7.0 in x 8.5 in
NNNNNNNNNNNNNNNNNNNNNNNNNNNNNNNNNNNNNNNNNNNNNNNNNNNNNNNN
Page 43

6.
At the next screen, c
hoose
NNNNNNNNNNNNNNNNN
Users
displaying a list of logins and real names.
7.
Select
NNNNNNNNNNNNNNNNNNNNNNNNNNNNNNNNNNNNNNNNNNNNNNNNNNNNNNNN
NNNNNNNNNNN
Add
from the
Add a User Account
NNNNNNNNNNNNNNNNNNNNNNN
Actions
.
pull-down menu. You will see a form
. After a pause, y
ou will see a screen
8. Fill in your login name, choice of start-up program and en
dierent from the defaults giv
Note
At this p oin
en), and the optional information.
tyou can select X Windo
ws as your login default
vironment (if
environment, if you so desire.
NNNNNNNN
9. Choose
OK
when you are nished.
10. You will be asked to select a password. (See \Selecting a New Password"
for password requirements. If you wish, you can select a temporary
password and reset it later). Type the password and clickon
NNNNNNNN
OK
. Re-enter
the password, as requested. The re-entered password must match the rst.
11.
Choose
12.
When the \Task Completed" message appears, choose
13.
In the Users window, select
the
14.
Choose the
NNNNNNNN
OK
NNNNN
-
in the upp er-left corner).
NNNNNNNNNNNNNNNNNNNNNNNNNN
Exit SAM
button.
NNNNNNNNNNNNNN
Exit
from the
NNNNNNNNNNNNNN
List
NNNNNNNN
OK
.
menu (or double-clickon
3
DRAFT
2/5/97 11:31
Logging In and Getting Started 3-13
FINAL TRIM SIZE : 7.0 in x 8.5 in
Page 44
Using SAM
If you are not running HP VUE, y
ou can set up a user accoun
tby accessing
SAM directly.You can then use SAM with or without a mouse. Note that, if
you are not already logged in as
root
you will be ask
ed for your ro ot password
in order to begin using SAM.
3
1. Type
2.
3.
usr/bin/sam
At the opening menu, choose
clicking on
NNNNNNNNNNNNNN
Open
,as
(or press
At the next screen, choose
root
, followed by
4
Return
NNNNNNNNNNNNNNNNN
Users
NNNNNNNNNNNNNNNNNNNNNNNNNNNNNNNNNNNNNNNNNNNNNNNNNNNNNNNN
Users and Groups->
5
,ifyou are using a keyboard).
.You will see a screen displaying a list of
4
Return
5
.
by clicking on it and
logins and real names.
4.
Select
NNNNNNNNNNNNNNNNNNNNNNNNNNNNNNNNNNNNNNNNNNNNNNNNNNNNNNNN
NNNNNNNNNNN
Add
from the
Add a User Account
NNNNNNNNNNNNNNNNNNNNNNN
Actions
.
pull-down menu. You will see a form
5. Fill in your login name, choice of start-up program and environment (if
dierent from the defaults given), and the optional information.
Note
At this pointyou can select X Windows as your login default
environment, if you so desire.
NNNNNNNN
6. Choose
OK
when you are nished.
7. You will be asked to select a password. (See \Selecting a New Password"
for password requirements. If you wish, you can select a temporary
password and reset it later). Type the password and choose
press
4
5
). Re-enter the password, as requested, and choose
Return
NNNNNNNN
OK
(or
NNNNNNNN
OK
. The
re-entered password must match the rst.
8.
Choose
9.
When the \Task Completed" message appears, choose
10.
In the Users window, select
NNNNN
-
11.
Choose the
NNNNNNNN
OK
.
NNNNNNNN
OK
.
NNNNNNNNNNNNNN
Exit
from the
NNNNNNNNNNNNNN
List
menu (or double-clickon
).
NNNNNNNNNNNNNNNNNNNNNNNNNN
Exit SAM
button.
3-14 Logging In and Getting Started DRAFT
2/5/97 11:31
FINAL TRIM SIZE : 7.0 in x 8.5 in
Page 45
Setting Audio Volume
Your system is equipped with sev
the output of audio b eeps from v
reproduction of speec
h-quality digital audio. For more details on digital audio,
see \Using Audio Input/Output" in Chapter 4. The v
for other audio is con
Your system has an in
trolled in separate ways.
ternal audio sp eaker. The beeper output, as w
audio, is also routed to the output jac
be used for either headphones or external speak
eral audio systems which be used either for
arious applications or for the recording and
olume for the beep and
ell as other
k on the system panel. This output can
ers. So you have three possible
modes of hearing audio:
Internal speaker.
External headphones.
External sp eaker(s).
For high-quality audio, headphones or external speakers are recommended.
In HP VUE, the b eeper audio v
olume, by default, is set to a level of 50%. If
you are using your system with the internal speaker only, the audio volume
from the internal speaker maybetoolow to be audible in some surroundings
and you mayhave trouble hearing the b eeper.
On the other hand, if you are using your system with headphones plugged into
the Audio Out jack, and you are running HP VUE, the 50% audio v
olume level
is more appropriate and you may nd the 100% level to b e uncomfortably loud.
3
In case you need to adjust the audio volume, do the following while you are
running HP VUE:
1. Click on the Style Manager icon at the left side of the HP VUE F
ront
Panel. An elongated window showing various HP VUE conguration options
appears.
2. Click on the Audio icon. An audio conguration window app ears.
DRAFT
Logging In and Getting Started 3-15
2/5/97 11:31
FINAL TRIM SIZE : 7.0 in x 8.5 in
Page 46
d a
3
c b
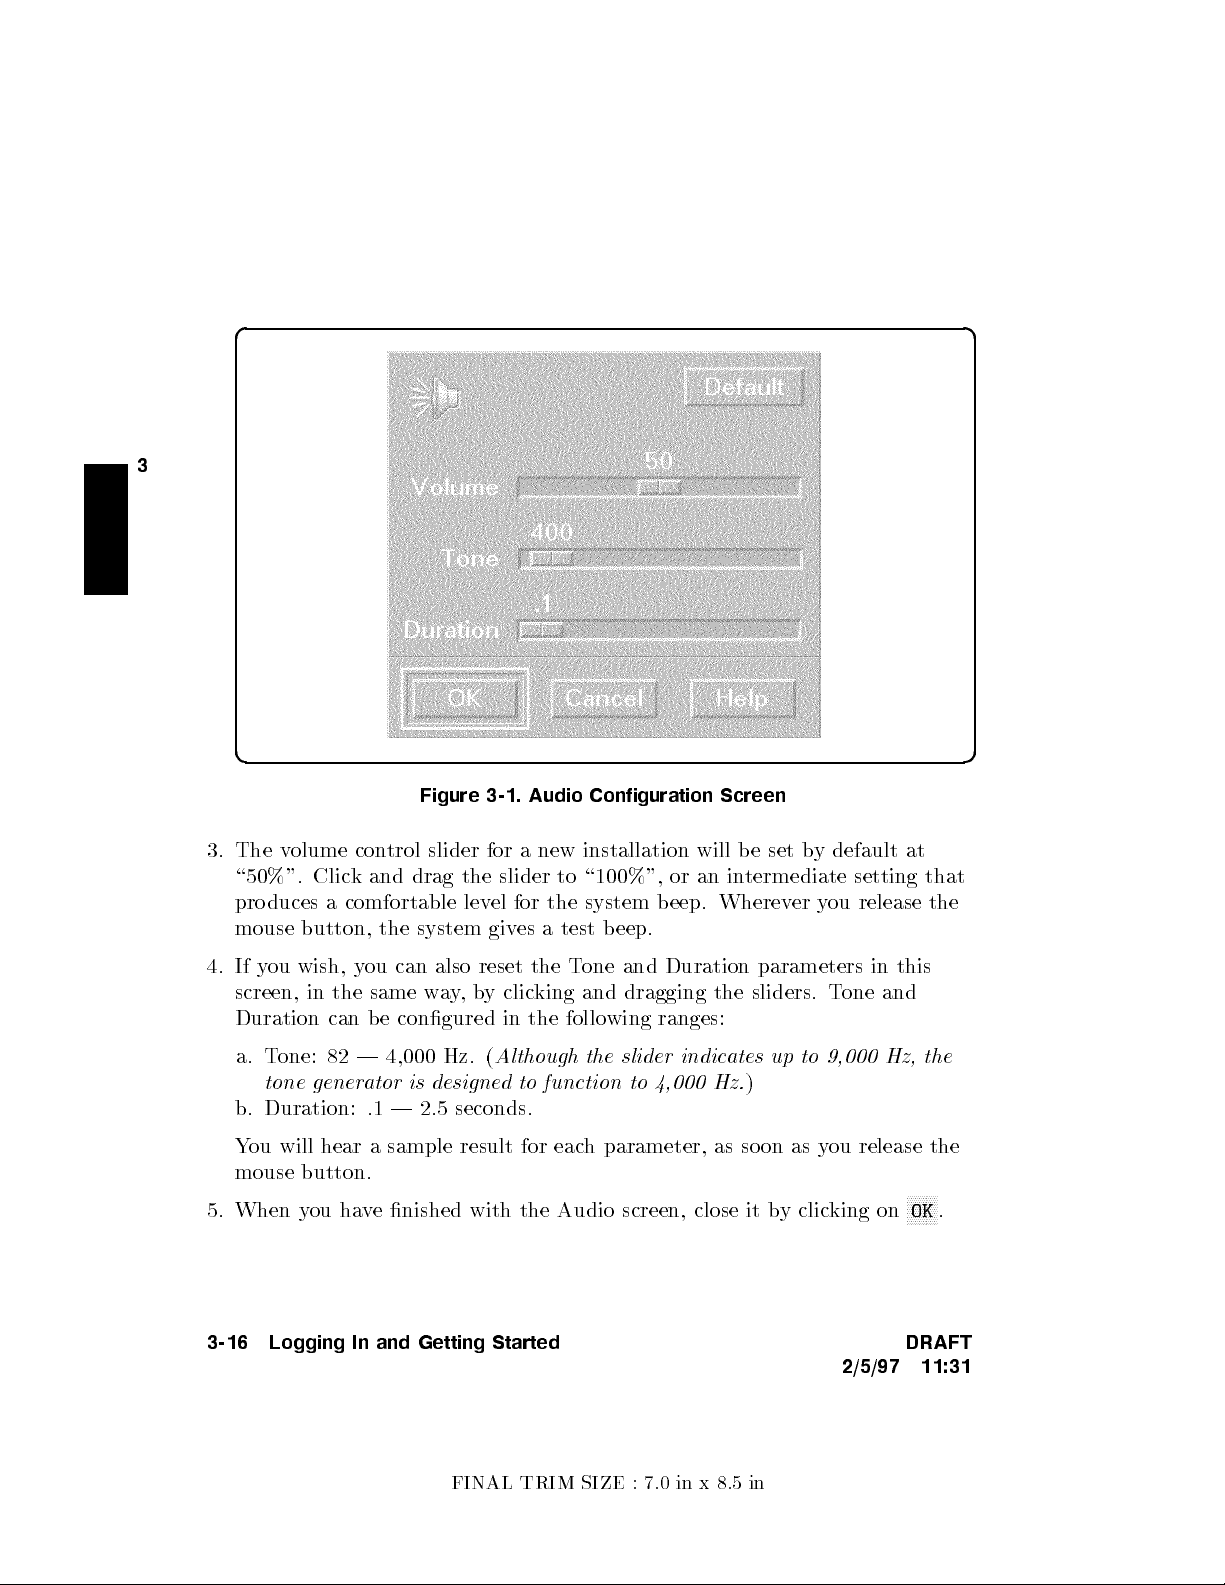
Figure 3-1. Audio Configuration Screen
3. The volume control slider for a new installation will be set b
\50%". Click and drag the slider to \100%", or an in
produces a comfortable level for the system beep. Wherever you release the
mouse button, the system gives a test b eep.
4. If you wish, you can also reset the Tone and Duration parameters in this
screen, in the same way,by clicking and dragging the sliders. Tone and
Duration can b e congured in the following ranges:
a. Tone: 82 | 4,000 Hz. (
tone generator is designed to function to 4,000 Hz.
b. Duration: .1 | 2.5 seconds.
You will hear a sample result for each parameter, as soon as you release the
mouse button.
5. When you have nished with the Audio screen, close it by clicking on
3-16 Logging In and Getting Started DRAFT
Although the slider indicates up to 9,000 Hz, the
termediate setting that
)
y default at
NNNNNNNN
2/5/97 11:31
OK
.
FINAL TRIM SIZE : 7.0 in x 8.5 in
Page 47

6. To ensure that the new setting(s) become a part of y
our next HP VUE
login session (i.e., that the congurations will remain in eect after y
out and log back in), click on the Startup icon, (also on the St
window).
7.
In the Startup window, clickon
NNNNNNNNNNNNNNNNNNNNNNNNNNNNNNNNNNNNNNNNNNNNNNNNNNNNNNNNNNNNNNNNNNNN
Resume current session
if it isn't
already \pushed" or illuminated.
8.
When you are ready, logout in the customary w
button at the far righ
back later, you can do either of the follo
tofyour HP VUE FrontPanel. If you wanttochange
wing:
ayby clicking on the
ou log
yle Manager
3
NNNNNNNNNNNNNN
EXIT
a. Recongure the Audio and log out with the curren
t session congurations
specied as your login session. Or:
b. Congure the Startup screen to cause your interface to return to the
\Home Session" when you next log in.
In case you need to adjust the audio volume additionally for the
audio_editor
, do the following while you are running the
audio_editor
widget. (See \Using Audio Input/Output" in Chapter 4 for instructions for
using the
For these models of the Series 700i, the output default for the
is the internal speaker. Using the
NNNNNNNNNNNNNNNNNNNNNNNNNN
External
audio_editor
).
NNNNNNNNNNNNNNNNNNNNNNN
Options
menu, change the output to
audio_editor
,even if you are using the internal speaker. All audio output goes
to an \external" channel regardless whether you have an external speaker
plugged in or not.
Drag the
audio_editor
audio-level adjustment slider to another point on the
scale.
In the Files menu, click on \Load" and select an audio sample le. Clic
kon
\Play" to check the sound level, using your headphones, external speaker, or
the internal sp eaker.
DRAFT
2/5/97 11:31
Logging In and Getting Started 3-17
FINAL TRIM SIZE : 7.0 in x 8.5 in
Page 48

Setting or Changing a P
Using HP VUE
assword
Tochange or create a new passw
3
can also use the HP VUE T
Choose the Toolb ox control icon at the righ
will see the Personal Toolb ox. (The
either here or in the General T
ord for your new user account or for
oolbox:
NNNNNNNNNNNNNNNNNNNNNNNNNNNNNNNNNNNNNNNNNNNN
ChangePassword
t side of the F
action can be accessed
oolbox, which app ears on the T
root
rontPanel. You
oolbox
,you
subpanel).
Choose
NNNNNNNNNNNNNNNNNNNNNNNNNNNNNNNNNNNNNNNNNNNN
ChangePassword
.You will see a
NNNNNNNNNNNNNNNNNNNNNNNNNNNNNNNNNNNNNNNNNNNNNNNNNNNNN
Changing password
screen.
Enter your old password, at the prompt.
Enter the new password. (See \Selecting a New Password", if necessary).
Re-enter the new password, as requested.
Using HP-UX
From a command line shell prompt, you can use the
passwd
command directly
to set or change a password. Enter the following:
passwd
You will be prompted for your old password. Then you will be prompted to
enter and re-enter your new password. The re-entered password must match
the rst entry.
See the later section in this chapter, \Selecting a New Password", if you
need help with selecting passwords. Use the same pro cedure to change an
old password as to add a new password. If you already have one, you will be
prompted appropriately for the old password.
3-18 Logging In and Getting Started DRAFT
2/5/97 11:31
FINAL TRIM SIZE : 7.0 in x 8.5 in
Page 49

Selecting a New Password
If you have already bo oted and used y
dierent passwords for your user account and for
our system, you should already have set
root
.
However, you will also wanttochange your password from time to time as a
matter of good securit
y practice. The following gives the general requirements
of setting passwords.
A password must meet four criteria to be v
Contains at least six c
haracters.
alid:
At least twocharacters must be alphabetic.
At least one character must be a number (0-9) or a special character (/, ?, !,
or other punctuation mark).
Dier from your previous password by at least three characters.
Your password is case-sensitive, so the password
password
?secret
.Your password can also be as long as you want, but only
?Secret
is dierent from the
the rst eightcharacters are checked.
If you are adding many users to your system, see
System Administration Tasks
for the details of controlling access to your system.
If you have not yet set your password, you can do so using SAM or a shell
command line.
3
DRAFT
2/5/97 11:31
Logging In and Getting Started 3-19
FINAL TRIM SIZE : 7.0 in x 8.5 in
Page 50

Getting Help
NNNNN
HP VUE help is accessed b
FrontPanel. You can also get a help sub-panel b
above the
3
If you have HP VUE and need to learn more about using it, see
NNNNN
?
.
HP-UXorHP VUE User's Guide
y clicking on the
.
?
icon (with books) on the VUE
y clicking on the up arrow
Using
If you do not have HP VUE or ha
the command line,
Using HP-UX
HP-UX.
For advanced information, refer to
Reference,User's Guides
to the vi and ex Text Editors
, or to the online \Man Pages". The
has advanced information on using text editing
tools.
ve decided to remove it and w
ork with
will help you with all the basic asp ects of
System Administration Tasks,HP-UX
Ultimate Guide
3-20 Logging In and Getting Started DRAFT
2/5/97 11:31
FINAL TRIM SIZE : 7.0 in x 8.5 in
Page 51

Shutting Down Your System
If you need to cycle p o
to execute the
shutdown
command line, with SAM or b
Using the Shutdown Command to Stop Y
Caution
Do not turn o p o
down the op erating system softw
wer on a system using a local disk, y
ou will have
command rst. You can do this either from the
y using the HP VUE T
oolbox.
our System
wer to your system without rst sh
are according to the follo
utting
procedure. Turning o the power for your system without rst
doing the shutdown procedure may result in damage to data on
your disk. Always execute the shut-down process to completion
rst.
1. As
root
,enter the following command:
shutdown -h
This will giveyou and any other users on your system a one-minute \grace
period" to save les and terminate pro cesses before the system goes do
the halted state.
2. You will see a message:
Waiting a grace period of 60 seconds for users to logout.
Do not turn
off the power or press reset during this time.
3
wing
wn to
(You can specify this message and you can determine the \grace period"
that
shutdown
allows. See
shutdown
(1M) and
System Administration Tasks
for instructions on using various options.)
3. At the end of the p eriod, y
ou will see another warning and the following
request for conrmation:
Do you want to continue? ...
4. Respond withy.You will see another message conrming shutdown.
Finally,you will see the following message:
Halted, you may now cycle power.
DRAFT
Logging In and Getting Started 3-21
2/5/97 11:31
FINAL TRIM SIZE : 7.0 in x 8.5 in
Page 52

5. At this time the system no longer resp onds to k
turn o the po
process.
wer. Turning the system back on again will initiate the boot
eyboard input and y
ou may
If you wanttoshutdown and reboot automatically en
3
shutdown -r.
ter the following:
3-22 Logging In and Getting Started DRAFT
2/5/97 11:31
FINAL TRIM SIZE : 7.0 in x 8.5 in
Page 53

Using the Command Line
Chapter Contents
4
The Command Line Prompt.
Working with Shells.
Using Files and Directories with Command Lines.
Viewing and Printing Files.
Editing Files.
Using Audio Input/Output.
Networking Overview.
4
DRAFT
2/5/97 11:31
Using the Command Line 4-1
FINAL TRIM SIZE : 7.0 in x 8.5 in
Page 54

The Command Line Prompt
Whenever you see the command line prompt, y
If you are logged in as
user
, the command line prompt is either
depending on your shell. HP-UX displays the prompt ev
4
5
.
Return
ou can b egin t
ery time you press
yping commands.
$or%
,
Running Commands
To run a command, t
4
5
. The command then will begin running. When the command nishes,
4
Return
the prompt reappears. For example, run the following
$ whoami
4
Return
leslie
$
If you make a mistake when typing a command, use the
ype the command's name after the prompt and press
whoami
command now:
5
Your user name appears here.
Then the command line prompt reappears.
5
4
Back space
key to back
up and correct it.
5
Note
Commands are generally followed by
command. From this point on, the
4
Return
4
Return
to enter the
5
at the ends of
commands will b e assumed.
4-2 Using the Command Line DRAFT
2/5/97 11:31
FINAL TRIM SIZE : 7.0 in x 8.5 in
Page 55

Working with Shells
Whenever you enter a command you are making use of a command in
whichinterprets that command for HP-UX. The command in
a
shell
.
When you log in, you are said to b e \in" a
dierent shells which behave in slightly dieren
shell
. HP-UX supports sev
tways and giveyou varying
terpreter is called
terpreter
eral
amounts of interactive support at your display. These are called the Bourne,
Korn, Posix, Key, and C Shells. Y
shell you get when you rst log in, and y
our system administrator determines whic
ou have the option of c
hanging shells
h
later.
Basics of Shells: Characteristics, Choosing and Using
HP-UX gives you your choice of several dierent shell-types whichyou can run:
the Bourne, Korn, Posix, Key, and C Shells. Each of these shells has dierent
characteristics, and you can increase the speed and eciency with whic
hyou
interact with HP-UX inside windows if you learn to use some of the built-in
features of the shell of your choice.
For details on shell features and b eha
Shells: User's Guide
.
vior, please see the
Using HP-UX
and the
4
DRAFT
2/5/97 11:31
Using the Command Line 4-3
FINAL TRIM SIZE : 7.0 in x 8.5 in
Page 56

Shell Features
Below are listed some of the features whic
which shell would b e best for the kind of w
hmay help you make a decision on
ork you are doing:
Table 4-1. Comparison of Shell Features
Features Description Bourne Posix,
C
Korn,
Key
4
history
Command
A feature allowing commands
to be stored in a buer, then
No Yes Yes
modied and reused.
Line
editing
The ability to modify the
current or previous command
No Yes No
lines with a text editor.
File name
completion
The ability to automatically
nish typing le names in
No Yes Yes
command lines.
alias
command
A feature allowing users to
rename commands,
No Yes Yes
automatically include
command options, or
abbreviate long command
lines.
Restricted
shells
A security feature providing a
controlled environment with
limited capabilities.
Yes Yes
(Not
Posix
No
Shell)
Job
control
Tools for tracking and
accessing processes that run in
the background.
See Shel ls:
No Yes Yes
User's Guide
4-4 Using the Command Line DRAFT
2/5/97 11:31
FINAL TRIM SIZE : 7.0 in x 8.5 in
Page 57

Determining Your Login Shell
The command
echo $SHELL
displays the le name of the shell y
ou entered
when you logged in.
$ echo $SHELL
/bin/sh
$
Temporarily Changing Your Shell
Unless you are in a restricted shell, y
ou can temp orarily c
hange your shell by
using this command:
shell name
where
shell name
is the name of the shell (for example,
sh,ksh
,or
keysh
).
Temporarily changing your shell lets you experiment in other shells. By typing
the name of the shell you want to run, you
invoke
(enter) that shell, and the
correct prompt is displayed. After experimenting in the new shell, return to
5-4D5
your original shell bytyping either
exitor4
CTRL
.
Permanently Changing Your Shell
To permanently change your
in), use the
chsh(ch
angeshell) command:
login shell
(the default shell you get when you log
4
chsh
username shel l path name
where
(e.g.,
username
/bin/ksh
is your user name and
shell path name
) of the shell you wantasyour default. After you use the
command, you must log out and log in again for the c
For example, if
terry
changes the default login shell to the Korn Shell, the
command reads:
$ chsh terry /bin/ksh
$
DRAFT
Using the Command Line 4-5
2/5/97 11:31
FINAL TRIM SIZE : 7.0 in x 8.5 in
is the full path name
chsh
hange to take eect.
Page 58
Using Key Shell: Visual Help for Korn Shell
Key Shell gives you help on most HP-UX commands in Korn Shell b
displaying softkey command-names and options in sequence. Y
from these and let Key Shell build y
have mastered the commands and command syn
Key Shell gives you softkey displays at the bottom of y
our command lines \in English" before y
tax of HP-UX.
our screen which provide
y
ou can select
ou
a \menu" of basic Korn Shell commands, along with their options in sequence.
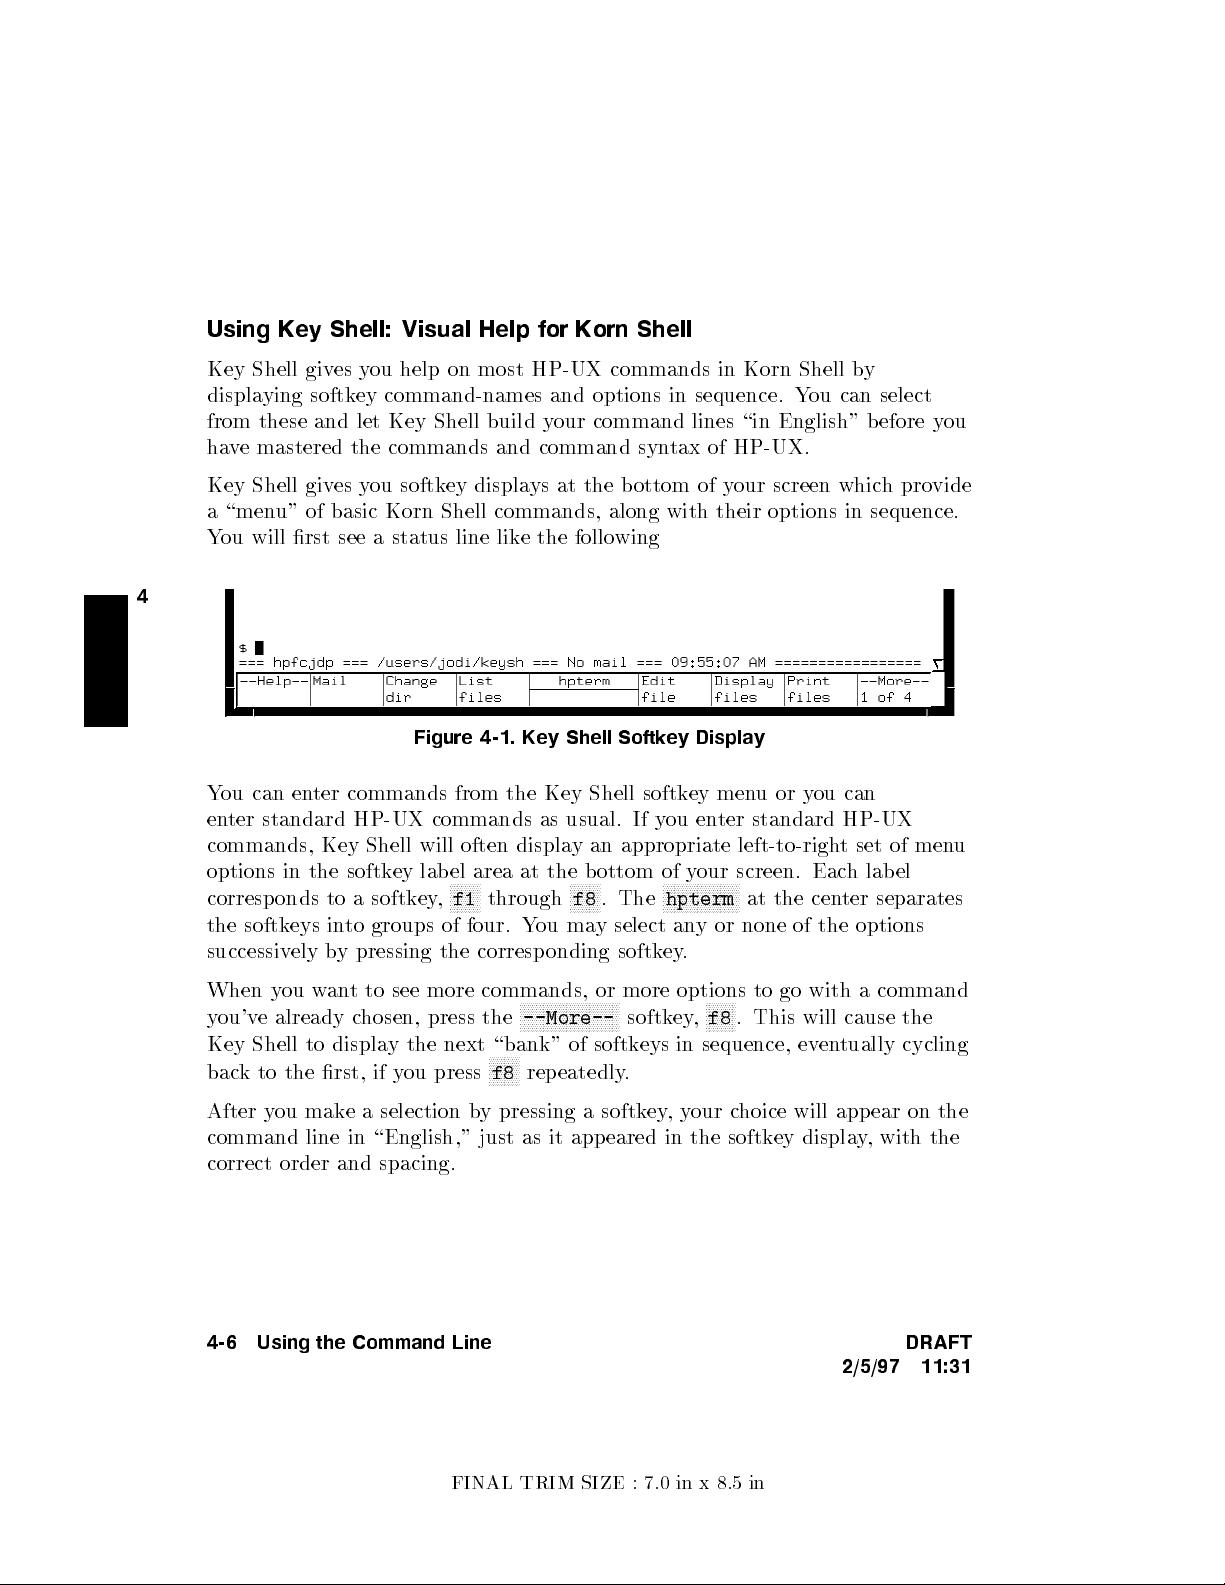
You will rst see a status line like the following
4
Figure 4-1. Key Shell Softkey Display
You can enter commands from the Key Shell softkey menuoryou can
enter standard HP-UX commands as usual. If y
ou enter standard HP-UX
commands, Key Shell will often display an appropriate left-to-right set of menu
options in the softkey label area at the bottom of y
corresponds to a softkey,
NNNNNNNN
f1
through
NNNNNNNN
f8
. The
our screen. Each lab el
NNNNNNNNNNNNNNNNNNNN
hpterm
at the center separates
the softkeys into groups of four. You may select any or none of the options
successively by pressing the corresponding softkey.
When you want to see more commands, or more options to go with a command
you've already chosen, press the
Key Shell to display the next \bank" of softkeys in sequence, ev
back to the rst, if you press
NNNNNNNNNNNNNNNNNNNNNNNNNN
--More--
NNNNNNNN
f8
repeatedly.
softkey,
NNNNNNNN
f8
. This will cause the
entually cycling
After you make a selection by pressing a softkey,your choice will appear on the
command line in \English," just as it appeared in the softkey display, with the
correct order and spacing.
4-6 Using the Command Line DRAFT
2/5/97 11:31
FINAL TRIM SIZE : 7.0 in x 8.5 in
Page 59

Displaying the HP-UX Manual P
Type
man
command name
at the command prompt. F
more about thecpcommand type:
$ man cp
ages from the Command Line
or example, to learn
After a few seconds, an information displa
The message
- More -(11%)
means you've viewed 11% of the le, and 89%
remains. (Some systems will just displa
y appears.
y
- More -
). At this point, you can do
any of the following:
Step through the le a page at a time b
Scroll through the le a line at a time b
Quit viewing the reference page by pressing
To printa
man
You can use the
man
page for a command named
command
| col -b | lp
man
command to get a complete listing of HP-UX manuals by
y pressing the space bar.
5
y pressing
5
.
4
q
command
4
.
Return
,enter the following:
entering:
man manuals
For More Information
Your shell has many pro ductivity-enhancing capabilities you may nd useful.
To learn about shells in detail, also refer to
User's Guide
.
Using HP-UX
and to
Shells:
4
DRAFT
2/5/97 11:31
Using the Command Line 4-7
FINAL TRIM SIZE : 7.0 in x 8.5 in
Page 60
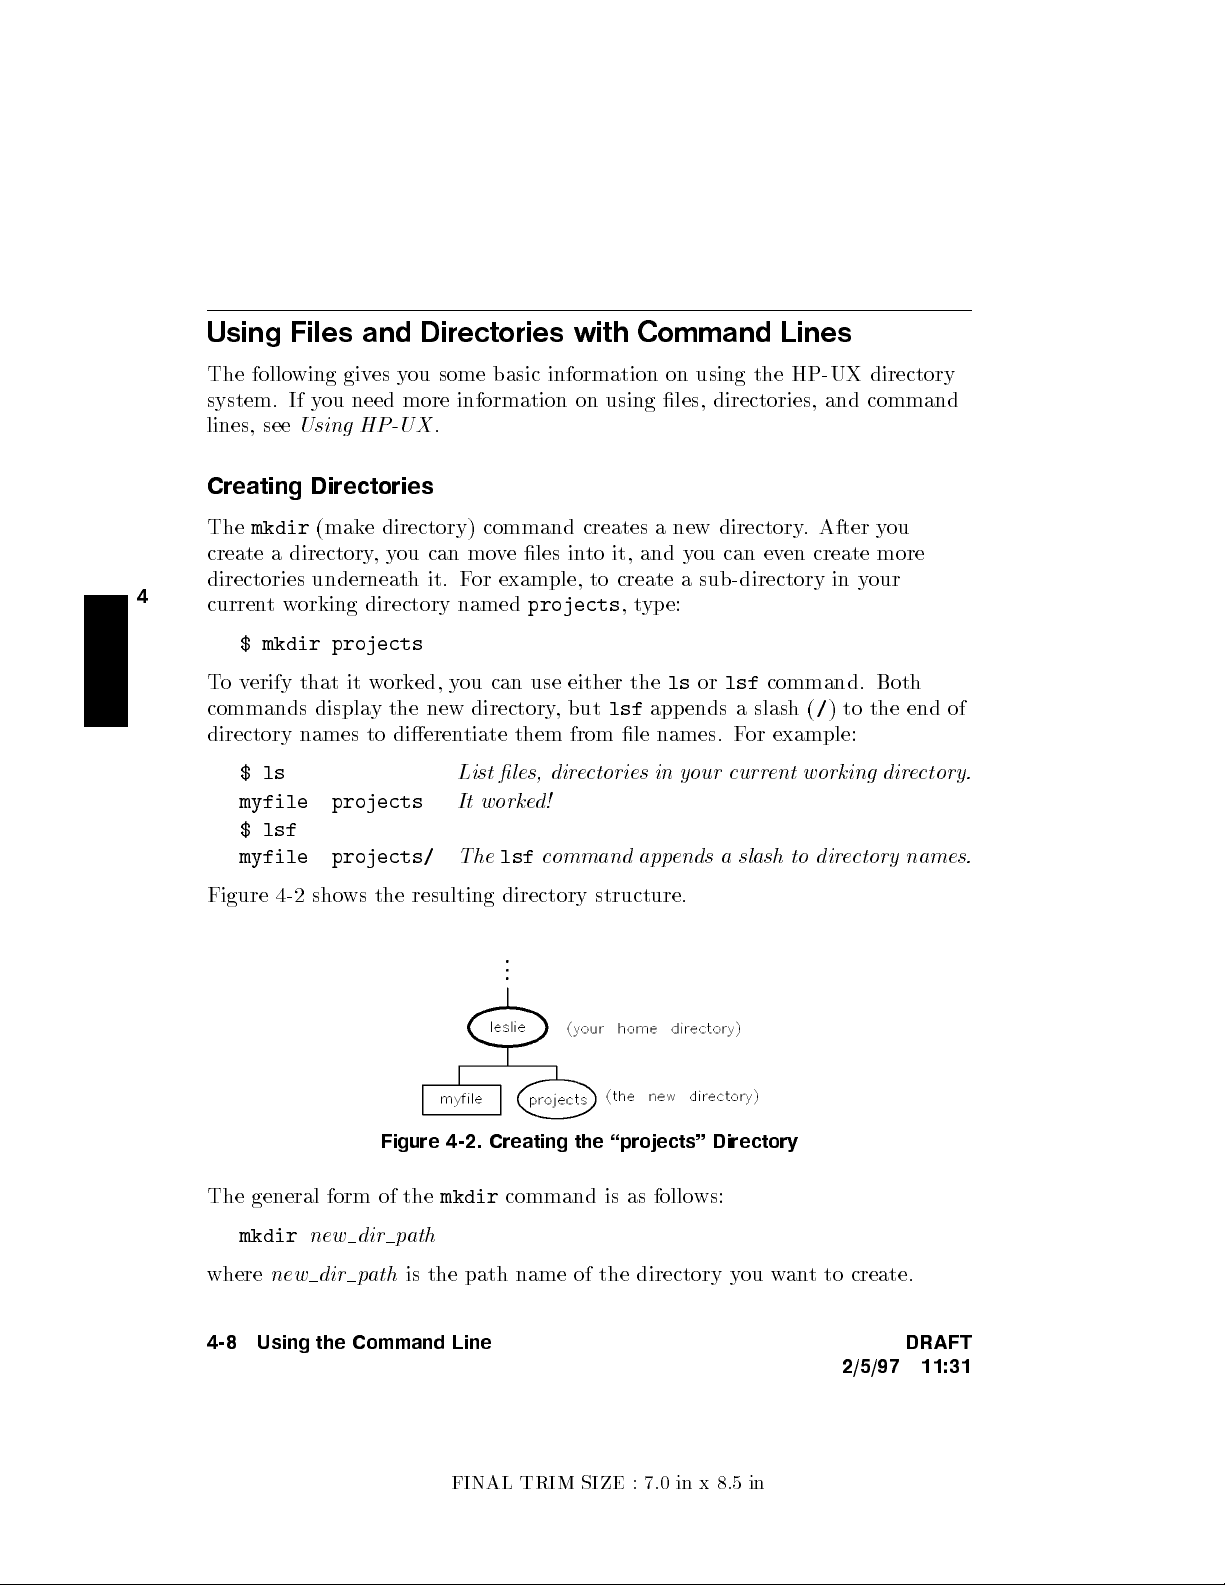
Using Files and Directories with Command Lines
The following gives you some basic information on using the HP-UX directory
system. If you need more information on using les, directories, and command
lines, see
Using HP-UX
.
Creating Directories
The
mkdir
(make directory) command creates a new directory
. After you
create a directory,you can move les into it, and you can even create more
4
currentworking directory named
projects
,type:
directories underneath it. For example, to create a sub-directory in y
our
$ mkdir projects
Toverify that it worked, you can use either thelsor
commands display the new directory, but
lsf
appends a slash (/) to the end of
lsf
command. Both
directory names to dierentiate them from le names. For example:
$ls
myfile projects
List les, directories in your current working directory.
It worked!
$ lsf
myfile projects/
The
lsf
command appends a slash to directory names.
Figure 4-2 shows the resulting directory structure.
Figure 4-2. Creating the \projects" Directory
The general form of the
mkdir
new dir path
mkdir
command is as follows:
where
new dir path
is the path name of the directory you want to create.
4-8 Using the Command Line DRAFT
2/5/97 11:31
FINAL TRIM SIZE : 7.0 in x 8.5 in
Page 61

Moving and Copying Files between Directories
Themvcommand can be used to mo
from one directory to another. F
ve les from one lename to another or
or example, to move
myfile
into the
projects
directory,type:
$cd
Move to your home dir
ectory rst.
$ mv myfile projects
The general form of the
mv
from path to path
where
and
from path
to path
is the le name or path name of the le y
is the name of the path where you are moving the le.
mv
command is as follows:
ou wanttomove,
Copying Files
To copy a le into a dierent directory, use thecpcommand. For example, to
make a copyof
myfile
named
myfile2
in the
projects
directory,type:
$ cp myfile projects/myfile2
To make a new version of
myfile2
named
myfile3
in your current directory,
type:
$ cp projects/myfile2 myfile3
The general form of thecpcommand is as follows:
4
cp
from path to path
where
to path
from path
is the path name of the directory or le to whic
Caution
DRAFT
2/5/97 11:31
is the le name or path name of the le y
ou want to copy, and
hyou are copying.
If you copy a le to a directory,even if the directory has the
same name as the le, the directory will not be destroyed. But
a le of the same nameinthat directory would be.
As a general rule, before usingmvorcp, uselsor
lsf
to
ensure that the target le name to whichyou wanttomoveor
copy doesn't already exist.
Using the Command Line 4-9
FINAL TRIM SIZE : 7.0 in x 8.5 in
Page 62

Removing Files and Directories
If you have les that are no longer needed, y
Deleting unnecessary les leaves more room on y
suppose you've nished using
myfile2
,type:
myfile2
ou should remove (delete) them.
our system. For example,
, and it is no longer needed. T
o remove
$ rm myfile2
To removean
rmdir
4
If there are any visible or invisible (\dot") les still in the directory, this
empty
dirname
directory,type the follo
wing:
command will not be executed, and you will get a message that the directory is
not empty. Also, if there are any subdirectories in the directory,you will get a
message. In either case you can do the following:
cd
dirname
Any invisible \dot" lenames remaining will be displayed.
rm *
ll -a
rm
.lenames You may have to repeat this command for al l dot les.
rmdir *
cd ..
This removes any empty subdirectories.
To get to the parent directory again.
rm
dirname
4-10 Using the Command Line DRAFT
2/5/97 11:31
FINAL TRIM SIZE : 7.0 in x 8.5 in
Page 63

Toavoid this process and remo
one action, type the following:
ve a directory
and al l its les and dir
ectories
in
rm -rf
Caution
dirname
Use
rm -rf
and all its contents, irretrievably, in one action.
with great caution, since it does remo
ve a directory
4
DRAFT
2/5/97 11:31
Using the Command Line 4-11
FINAL TRIM SIZE : 7.0 in x 8.5 in
Page 64

Viewing and Printing Files
The
more
command displays a text le's con
the following line displa
ys the contents of
tents on the screen. F
myfile
:
$ more myfile
This is the text of "myfile", which I had previously
entered.
$
or example,
If the le contains more lines than are on y
4
screen is full. With a longer le, y
additional screens, and press
ou can press
4Q5
when you are nished. Then
our screen,
5
4
space
more
pauses when the
to continue looking at
more
returns you
to the system prompt.
For using thevitext editor, see \Editing Files", in this chapter.
Printing a File with lp
If your system is appropriately congured, you can print a text le using the
lp(l
ineprinter) command. Before using thelpcommand you may need to
nd out whether your system is set up so that you can use thelpcommand.
If it is not, basic installation information is in Chapter 5, in this man
can nd detailed information on installing and conguring prin
Administration Tasks
.
ters in
ual. You
System
Iflpdoes work on your system, you may also need to nd out the lo cation of
the printer, on an extensive system. When you have this information, print
myfile
by running thelpcommand:
$ lp myfile
If thelpcommand is working prop erly, it should display a message indicating
that it sentyour le to the printer. For example:
request id is lp-
The
number
is an i.d. number assigned to the print job by thelpcommand. If
number
(1 file)
you don't see this message, or if you get an error message, consult your system
administrator. Iflpworks successfully,you should get a printout with your
username displayed on the rst page. The time required for a printout depends
on the number of tasks b eing run by the system and the speed of the printer.
4-12 Using the Command Line DRAFT
2/5/97 11:31
FINAL TRIM SIZE : 7.0 in x 8.5 in
Page 65

To display a report on the prin
in the printer queue, type:
$ lpstat -t
ter status, including the order of y
our print job
To cancel a print job, enter the
your job:
$ cancel
request id
cancel
command, with the i.d. n
umber for
4
DRAFT
2/5/97 11:31
Using the Command Line 4-13
FINAL TRIM SIZE : 7.0 in x 8.5 in
Page 66

Editing Files
You can use the HP VUE T
HP-UX interactive text editorvito view and edit text les, as w
ext Editor (see
HP VUE User's Guide
) or the
ell as to
create new ones. Thevieditor is the default for the Elm mailer, command line
editing, and for some HP VUE functions. This section in
usingvi.For detailed information, see
Text Editors
.
The Ultimate Guide to the vi and ex
troduces the basics of
Starting vi
4
Startvibyentering the commandvilename
lename
exists, you will see the rst screen of that le. If the le do es not
at the prompt. If a le called
exist, it is created, and you will see a blank screen.
Selecting vi Editing Functions
Thevieditor has several functional mo des. When you enterviyou are in
command mo de
and it is in this mode that you select all editing functions.
Your selection determines what you can do to the text.
Press
4
5
to ensure thatviis in command mode. Then you can execute any
ESC
of the following commands (among others):
i
(the insert
command)
Places your le in text mo de and enters whatever you type
preceding the cursor. Everything after the cursor will b e
moved to the right.
a
(the append
command)
Places your le in text mo de and en
ters whatever you type
after the cursor. The cursor moves to the right, and then text
is inserted as withi.
x
(the delete
command)
Deletes the character that is highlighted by the cursor. This
command does not put your document in text mo de.
Each command in command mode allows you to perform only that function.
For example, if you place your le in text mo de bytypingr(\replace a single
character" command), then you may only replace one character. You are then
placed in command mo de, and you can return to text mo de bytypingior
a
before inserting text.
4-14 Using the Command Line DRAFT
2/5/97 11:31
FINAL TRIM SIZE : 7.0 in x 8.5 in
Page 67

Positioning the Cursor
The most commonly-used method to mo
l
keys. You can also use the arrow k
(press
4
5
rst for command mode):
ESC
ve the cursor is to use the
h,j,k
, and
eys. These keys move the cursor as follows
Table 4-2.
To Do This: Type This Command:
Move the cursor right.
Move the cursor left.
Move the cursor up.
Move the cursor down.
lor475
hor465
kor485
jor495
Saving Your Work and Quitting
You can saveyour work with or without quittingvi.Your documentmust be
in command mode for you to be able to use the follo
5
your work. Press
to ensure that your document is in command mode:
4
ESC
wing commands to save
Table 4-3.
To Do This
...
Type This Command
...
4
Save without quitting
Save and quit
vi :wq
vi :w
Quitviwithout saving changes
Save under another le name
Save in an existing le and overwrite that le
For More Information on vi
Refer to
Using HP-UXorThe Ultimate Guide to the vi and ex Text Editors
more complete information aboutvi.
DRAFT
2/5/97 11:31
FINAL TRIM SIZE : 7.0 in x 8.5 in
:q!
:w
lename
:w!
lename
for
Using the Command Line 4-15
Page 68

Using Audio Input/Output
HP-UX includes audio softw
are comprising an audio editor, Audio Application
Program Interface (AAPI), and some sample programs. Audio output is
available either through an in
SPU mo dule, or via an audio output jac
highest quality audio, an external headphone set or speak
(See \Setting Audio Volume" in Chapter 3 for setting v
ternal speaker in your Series 700i/50 or 700i/100
k on the SPU mo dule panel. F
or
er is recommended.
olume for specic
output requirements).
4
Developing Audio Applications
The HP-UX audio software package contains client and server components,
which can run on separate systems. Audio data ma
y reside on still a third
system.
The Audio Applications Programming Interface (AAPI) includes a library of
functions that can be called by an application program written in C language.
The functions interact with the audio server, enabling the application to record
and play audio data les and also convert audio data les from one format to
another.
The AAPI also includes audio widgets for pla
y and record, and a to olkit of
functions that initialize, register, and unregister these widgets. The to olkit and
widgets enable application programs based on Motif or similar graphical user
interface toolkits to integrate audio capabilities.
Using the Audio Demonstration Program
The audio demonstration program is designed to demonstrate man
y of the
capabilities of the AAPI. It provides a Motif-like interface to play, record, and
edit functionality.Awaveform is displayed to facilitate editing and traversal of
the audio selection.
4-16 Using the Command Line DRAFT
2/5/97 11:31
FINAL TRIM SIZE : 7.0 in x 8.5 in
Page 69

d a
c b
Figure 4-3.
After connecting a microphone to the input jackonyour system, you can use
the demonstration program to create and record an audio le. T
o ensure user
privacy, be sure to turn o the microphone when it is not in use.
To use the play features of the demonstration program, one or more audio data
les must be present. These can b e created by using the program's record
feature, or you can run the demonstration audio in
If you wish to run the demonstration audio, it ma
directory before you run
You can open an audio le, pla
audio_editor
.
y it, lo ok at its waveform, and use the waveform
/usr/audio/examples
y be easiest tocdto that
.
to edit the le. To send output to a speaker or headphone connected to the
output jackonyour system, direct the play output to the external device.
To run the demonstration program, follow these steps:
1. Start the NCS Local Location Broker Daemon.
2. Log in as
root
,ifyou have not already done so.
3. Enter the following command line:
/usr/etc/ncs/llbd
4
4. Set the
client should lo ok for the audio server. If
AUDIO
environmentvariable to specify the node where the audio
AUDIO
the client connects with a server on the same node.
DRAFT
2/5/97 11:31
FINAL TRIM SIZE : 7.0 in x 8.5 in
is not set or if it is set to :0,
Using the Command Line 4-17
Page 70

5. Normally, the audio server starts whenever the system is bo oted. Chec
the existence of the Aserv
ps -e | grep Aserver
er processes bytyping
k for
You should see two Aserver processes. If the serv
audio server by hand bytyping the following:
/usr/audio/bin/Aserver
Then type the following:
ps -e | grep Aserver
4
Check that there are two active server processes.
6. Start the demonstration program bytyping the following:
/usr/audio/bin/audio_demo
There is also online help for the demonstration program.
To use the Audio Editor for playback, recording and editing, type the
following:
/usr/audio/bin/audio_editor
er is not running, start the
4-18 Using the Command Line DRAFT
2/5/97 11:31
FINAL TRIM SIZE : 7.0 in x 8.5 in
Page 71

For More Information
For information on programming for audio, see
Program Interface
For the procedures for using audio annotation with HP VUE, see the
User's Guide
and the man page
.
audio
Using the Audio Application
(1).
HP VUE
4
DRAFT
2/5/97 11:31
Using the Command Line 4-19
FINAL TRIM SIZE : 7.0 in x 8.5 in
Page 72

Networking Overview
Your HP-UX system can use a v
ariety of networking services to enable y
ou to
transfer copies of les to or from other computer systems. These services can
also enable you to log onto remote machines on the net
and processes remotely
.
This section gives you basic pro cedures for using the follo
work and run commands
wing networking
functions:
Copying les to and from a remote computer:
4
Copying les remotely:
rcp
.
Logging onto another computer on the network:
ftp
rlogin
.
.
Displaying remote graphics programs locally.
For information on using HP-VUE on remote systems, NFS-mounting remote
le systems, and exporting le systems to remote systems, see
HP VUE User's Guide
,or
Using Network Services
.
Using HP-UX
,
4-20 Using the Command Line DRAFT
2/5/97 11:31
FINAL TRIM SIZE : 7.0 in x 8.5 in
Page 73

Using the ftp File Transfer Program
The
ftp
le transfer program allows you to copy les bet
ween your local
system and remote systems and among remote HP-UX, UNIX, and non-UNIX
network hosts that support ARP
you to perform remote le cop
A services. The
ftp
program not only allows
ying , but also facilitates le managemen
t
operations suchaschanging, listing, creating, and deleting directories on a
remote system for whichyou haveavalid login or account.
Using
also append a lo cal le to the end of a remote le. The le to whic
copying can have either the same or a dieren
ftp
you can copy a local le to a remote le or vice v
t directory path and/or name as
ersa. You can
hyou are
the one on the originating system.
Preparing to Use ftp
If the host system you wish to use is congured for anonymous ftp, you will
not need an account to use ftp in public directories. Anon
require entries in your
/etc/hosts
le.
ymous ftp does not
If you wish to have more general access to the host system, do the follo wing:
Make sure that your
/etc/hosts
le contains entries for the remote hosts
with whichyou will communicate.
Ask the system administrator for each remote host to giveyou an account
and a password, so that you can ftp in and access more general directories.
The following pro cedures will assume that you have such an account.
4
DRAFT
2/5/97 11:31
Using the Command Line 4-21
FINAL TRIM SIZE : 7.0 in x 8.5 in
Page 74

Transferring Files with ftp
1. Toinvoke
ftp
This connects you to the remote host.
ftp
and connect to a remote host in one step, t
remote hostname
ype the following:
ftp
then conrms the connection and
prompts you for a remote login name:
Name (
If you intend to log in with the same remote login name as y
name, just press
remote hostname
5
Return
.
4
):
our lo cal login
4
2. Enter the password asso ciated with your remote login name and
conrm this action with a message and a conrmation that y
ftp
will
ou are logged
in. (If you are using anonymous ftp, you can enter \anonymous" as the
login name, and your login name as the password.)
Password (
Password required for
User
3. If you are going to transfer binary les (as opposed to \readable" text), t
bin
at the prompt, before proceeding.
Use
get
to transfer les from a
remote hostname
remote login name
):
remote login name
logged in.
remote host
to your
local directory
ype
.
At the
The
In that case,
the same le name as the
on the remote host,
that le. The
path on your local system. (For example,
If there is no matching path,
or directory
ftp>
prompt, type:
get
remote lename
remote lename
ftp
ftp
". If the destination le already exists,
is the name of a le in the remote w
orking directory.
copies the le to the lo cal working directory and gives it
remote name
remote lename
. If the le is in another directory
is the absolute or relative path for
program copies the le to a le name with the same
get /user/doc/
ftp
gives you a message, \
lename
No such file
ftp
overwrites its
).
contents with the contents of the remote le.
4-22 Using the Command Line DRAFT
2/5/97 11:31
FINAL TRIM SIZE : 7.0 in x 8.5 in
Page 75
When copying successfully,
ftp
and the length of time it required.
Use
put
to transfer les from y
gives you messages conrming the cop
our
local directory
to a
remote host
y
.
At the
ftp>
prompt, type:
put
local lename remote lename
In this case,
local lename
is copied to the remote le name in the
specied remote directory.
local lename
working directory.
in
remote le
remote lename
can b e the name of the local le in y
ftp
will copy the le into a le of the same name
.
can b e an absolute or relative path to a le name on
the remote host. If not sp ecied otherwise, it will be in the curren
working directory on the remote host.
General File-Manipulation Commands for ftp:
See
Using HP-UX
commands, suchas
for information on how to use
cd, mkdir, pwd
, and
rmdir
, many of which function in the
same way as the corresponding HP-UX commands.
If you need information on any of the
the
ftp
prompt.
ftp
commands, just type
Exiting ftp
our current local
ftp
le-manipulation
help
4
t
(or?)at
To close the connection with the remote host and exit
bye
DRAFT
Using the Command Line 4-23
2/5/97 11:31
FINAL TRIM SIZE : 7.0 in x 8.5 in
ftp
,enter the following:
Page 76
Copying Files Remotely Using rcp
You can copy les between HP-UX or other UNIX hosts on the net
rcp
. Also, using appropriate options, y
using
rcp
, if the conguration les that the service uses are set up properly
ou can copy directories between systems
work using
.
Preparing to Use rcp
To use
rcp
,you'll need the following prerequisites:
An account (login) on the remote host.
A
4
.rhosts
le in the remote host home directory con
taining the names of
your local host system and your local login name.
A
.rhosts
le on your local system, as well. This contains the names of all
the systems you will copy from. It will ensure that you will be able to use
rcp
when you use
Note
rlogin
A
$HOME/.rhosts
on the remote system.
le creates a signicant security risk. To
prevent unauthorized users form gaining
remote account and host,
and write to a
.rhosts
only you
should be able to create
le in your remote home directory.
remsh
access to your
Permissions need to b e set accordingly.
A
/etc/host
le on your local system which lists hosts with whichyou can
communicate using ARPA/Berkeley Services. For each host, the le has a
line containing information about the remote host in the follo
wing form:
internet address ocial name alias
You will nd that the
addresses on the network. To facilitate such a lo okup, use the
described in
grep
/etc/hosts
(1) and in
le is useful for lo oking up names and
Using HP-UX
grep
tool
.
Copying a Local File to a Remote Host
To copy from your system to a remote system, use the following syntax:
rcp
local lename remote hostname:remote lename
4-24 Using the Command Line DRAFT
2/5/97 11:31
FINAL TRIM SIZE : 7.0 in x 8.5 in
Page 77

Note that, if
the relative path (to get from y
local le
is not in your current directory,you will need to supply
our current directory) or the absolute path
(from/), in addition to the local le name. Y
complete (absolute) path for the
you wantittogoin
to a directory other than the remote home directory
remote
lenameonremote hostname
ou will need to specify the
only if
.
For example, to copy
called
xyz
:
myfile
from your current directory to a remote system
rcp myfile xyz:/users/leslie/otherdir
In this case,
otherdir
copied
You can also include a lename in the destination. F
system named
myfile
will be copied as
myfile
into the remote subdirectory
.Ifyou had only supplied the remote host name,
myfile
into the remote home directory, also as
xyz
:
rcp
myfile
or example, to copytoa
rcp myfile xyz:/users/leslie/otherfile
In this case, you have copied
leslie
.
Copying a File on a Remote Host to Y
myfileasotherfile
our Local Directory
, in the remote directory
Now, to reverse the process, here is howyou would copy a le
host into your lo cal directory. Use the follo wing syntax:
rcp
remote hostname:remote lename local lename
For example, to copy
myfile
from your account in a remote system
your current directory:
would have
.
from
a remote
xyz
,
4
into
rcp xyz:/users/leslie/myfile .
The dot (.) is shorthand for \current directory". In this case,
copied as
myfile
from the remote directory into your current directory.You
myfile
will be
do not have to supply the destination lename if you don't want to copyittoa
new name.
If you want to copy
myfile
into another directory in your home system, use a
path name, absolute or relative, as shown:
rcp xyz:/users/leslie/myfile otherdir/
DRAFT
Using the Command Line 4-25
2/5/97 11:31
FINAL TRIM SIZE : 7.0 in x 8.5 in
Page 78
Or, if you want to copy the le to another le name in another directory:
rcp xyz:/users/leslie/myfile otherdir/otherfile
Run thelscommand to conrm what y
ou have done.
Logging In on Another Computer Using rlogin
If you have an accountona
a remote host by supplying your remote login name and passw
then work on that system just as y
4
If the remote host is congured to allow it, y
remote host
ou would on your home system.
, then you can use
rlogin
to log in on
ord. You can
ou can also log in on a remote host
automatically, without having to supply your login name and password.
Logging In on a Remote Host
At the shell prompt, use the form:
rlogin
The
remote hostname
system. As before, this system is named in y
.rhosts
remote hostname
is the name of an appropriately congured remote
our
/etc/hosts
le and in your
le. The remote host prompts you for your remote password.
Enter your remote password. The remote host logs you in with the login
message and the remote host prompt.
If for some reason you should make an error in entering your password, the
remote host will giveyou the error message,
Login incorrect
, and will prompt
you for your login, and your password:
Login incorrect
login:
Getting the Same Working Environment on the Remote Host
To get the remote host environment to behave in the same wayas your home
environment, you can set the
copying your local
.profileor.login
remote system. As with your home system, the values in your
or
.login
will take precedence over the values in the remote system's
/etc/profileor/etc/csh.login
.profileor.login
les to your home directory on the
le.
values to be the same by
.profile
4-26 Using the Command Line DRAFT
2/5/97 11:31
FINAL TRIM SIZE : 7.0 in x 8.5 in
Page 79

Logging Out and Exiting the Remote Host
You can log out of the remote host just as y
ou would from your home system,
bytyping:
exit
Typing
At this poin
to HP-UX on your lo cal system, whic
4
5-4D5
CTRL
also logs you out on most system.
tyou are logged out of the remote host, disconnected, and returned
h displays a message and your local
prompt:
Connection closed.
$
Displaying Remote Graphical Programs Locally
If you are running HP VUE or the X Windo
w System, you can run a program
using windows on a remote machine and display the results locally. This is
done by setting the
DISPLAY
sets the host, displaynumber, and screen number to which a system
DISPLAY
environmentvariable on the remote system.
sends bitmapp ed output for clients.
For example, if the remote machine is called
and the remote program is called
xhost +
rlogin
remote This enables your system to recognize the remote host.
remote Loginonaremote machine on which you have an
xwijit
remote
,your lo cal system is
,enter the following on your system:
account.
DISPLAY=
local
:0.0
On the remote machine, set the DISPLAY variable to
display on your local system.
export DISPLAY
xwijit
Export the variable
Run the program
local
4
,
DRAFT
2/5/97 11:31
Using the Command Line 4-27
FINAL TRIM SIZE : 7.0 in x 8.5 in
Page 80

For More Information
For detailed information on running HP VUE in a net
the
HP VUE User's Guide
.
worked environment, see
4
4-28 Using the Command Line DRAFT
2/5/97 11:31
FINAL TRIM SIZE : 7.0 in x 8.5 in
Page 81

5
Configuring HP-UX for Printers and Driv
Chapter Contents
Preparing for Installation.
Conguring HP-UX for a Printer.
Hardware Installation for Drives
Finding the Status of Existing SCSI Bus Addresses.
Conguring for a Hard Disk Drive.
Conguring for a Flexible Disk Drive.
Conguring for a CD ROM Drive.
Conguring for a DDS Tape Drive.
es
5
DRAFT
2/5/97 11:31
Configuring HP-UX for Printers and Drives 5-1
FINAL TRIM SIZE : 7.0 in x 8.5 in
Page 82

Preparing for Installation
If your system was shipped with its in
ternal mass storage devices
factory-installed, you will not need to do further installation to enable the
device to communicate with HP-UX. If you have purchased a new (upgrade)
device, you will have to install it on HP-UX. Y
conguration for appropriate data in
terchange with a new printer. This chapter
ou may also have to do some
gives you general guidance for these tasks.
For p eripherals devices in general:
For a list of device upgrades whic
h are supp orted b
y the Models 745i/50 or
745i/100 and 747i/50 or 747i/100, see Chapter 1.
See the
Installation Guide
for the device you are installing for information
on hardware installation. You can also get installation information from
Installing Peripherals
5
Ensure that each new device you install which communicates through the
SCSI proto col has a
.
unique bus address
.You can use
/etc/ioscan
(see
\Finding the Status of Existing SCSI Bus Addresses") to determine this, or
you can use SAM (System Administration Manager). The factory-set SCSI
addresses for the upgrade devices in this chapter are as follows:
Hard Disk Drive:
Flexible Disk Drive:
CD ROM Drive:
6
0
2
DDS Drive:
3
This chapter shows you how to use basic SAM (System Administration
Manager) procedures. SAM will determine the status of an
yofyour
connected devices and will p erform many installation tasks for you.
If you don't want to use SAM, or it is not on your system, you can also
HP-UX commands directly to accomplish the same tasks. For information on
using manual system administration procedures, see
Tasks
.
System Administration
5-2 Configuring HP-UX for Printers and Drives DRAFT
2/5/97 11:31
FINAL TRIM SIZE : 7.0 in x 8.5 in
Page 83

Configuring HP-UX for a Printer
You will need to supply certain items of information needed to iden
printer you are installing. It will help to ha
to during the softw
are installation process:
ve this information available to refer
tify the
Printer Interface:
Parallel:
Serial (RS232) Port 1:
Serial (RS232) Port 2:
Printer Name (a name the system uses to identify the printer. It can be any
name.):
Printer Model Number (see lab el on the back of the printer):
Procedure:
To install your printer:
1. Log in as
root
.
2. Run SAM bytyping:
5
/usr/bin/sam
5
To get help in SAM, pressing the
key gives you context-sensitive
4
f1
information for the ob ject at the location of the cursor.
In case you are not using a mouse, arrow keys and
for moving the highlighted areas around the screen. Pressing
equivalent to clicking the mouse on
NNNNNNNN
OK
. See
4
Tab
Using HP-UX
of keyboard equivalents.
3. At the SAM opening screen, choose (highlight and open)
NNNNNNNNNNNNNNNNNNNNNNNNNNNNNNNNNNNNNNNNNNNNNNNNNNNNNNNNNNNNNNNNN
Printers and Plotters
4.
Choose
NNNNNNNNNNNNNNNNNNNNNNNNNNNNNNNNNNNNNNNNNNNNNNNNNNNNN
Printers/Plotters
DRAFT
.
from the next screen.
Configuring HP-UX for Printers and Drives 5-3
2/5/97 11:31
FINAL TRIM SIZE : 7.0 in x 8.5 in
5
also are used
4
Return
for the details
5
is
Page 84

If your workstation do esn't haveany printers connected, you will see a
message. Make sure you have a printer connected. Clickon
4
5
.
Return
5.
From the
NNNNNNNNNNNNNNNNNNNNNNNNNNNNNNNNNNNNNNNNNNNNNNNNNNNNNNNNNNNNNNNNNNNNNNNNNNNNN
on
Add Local Printer/Plotter
NNNNNNNNNNNNNNNNNNNNNNN
Actions
menu (on the menu bar at the top of the windo
NNNNNNNN
OK
or press
w), click
6. Click on an appropriate selection on the sub-men
u giving options for
Parallel, Serial, HP-IB, etc.
7. A window will giveyou information on a
8.
If you chose
NNNNNNNNNNNNNNNNNNNNNNNNNNNNNNNNNNNNNNNNNNNNNNNNNNNNNNNNNNNNNNNNNNNNNNNNNNNNNNNNNNNNNNNNNNNNNNNNNNNNNNNNNN
Add Serial (RS-232) Printer/Plotter
one serial interface could be listed. The serial in
vailable parallel or serial in
, more than
terfaces are listed in
terfaces.
ascending order. The lowest-numbered serial interface corresponds to the
lowest-numbered serial connector on your system. Choose the one to which
you have connected your printer.
5
9.
Clickon
NNNNNNNN
OK
NNNNNNNNNNNNNNNNNNNNNNNNNNNNNNNNNNNNNNNNNNNNNNNNNNNNNNNNNNNNNNNNNNNNNNNNNNNNN
The window op ens for
10.
Click on the b ox labeled
Add Local Printer/Plotter
NNNNNNNNNNNNNNNNNNNNNNNNNNNNNNNNNNNNNN
Printer Name
and enter your
.
printername
for
the new printer (entered in the blank earlier).
11.
Clickon
12. Scroll down the next screen to nd the Model Name of y
NNNNNNNNNNNNNNNNNNNNNNNNNNNNNNNNNNNNNNNNNNNNNNNNNNNNNNNNNNNNNNNNNNNNNNN
Printer/Model Interface
our printer.
13. Click on the Mo del Name.
NNNNNNNN
14. Clickon
OK
.
5-4 Configuring HP-UX for Printers and Drives DRAFT
2/5/97 11:31
FINAL TRIM SIZE : 7.0 in x 8.5 in
Page 85

15.
In the
click on the bo
16.
Clickon
NNNNNNNNNNNNNNNNNNNNNNNNNNNNNNNNNNNNNNNNNNNNNNNNNNNNNNNNNNNNNNNNNNNNNNNNNNNNN
Add Local Printer/Plotter
x labeled
NNNNNNNNNNNNNNNNNNNNNNNNNNNNNNNNNNNNNNNNNNNNNNNNNNNNNNNNNNNNNNNNNNNNNNNNNNNNNNNNNNNNNNNNNNNNNNNNNNNNNNNNNNNNN
Make this the system default printer
NNNNNNNN
OK
.
window which reappears, select and
.
17. If you are running HP VUE, y
printer name to the VUE
18. If the print spooler was not previously running, a windo
the question:
NNNNNNNNNNN
on
Yes
NNNNNNNNNNNNNNNNNNNNNNNNNNNNNNNNNNNNNNNNNNNNNNNNNNNNNNNNNNNNNNNNNNNNNNNNNNNNNNNNNNNNNNNNNNNNNNNNNNNNNNNNNNNNNNNNNNNNNNNNNNNNNNN
Do you want to start the print spooler now?
5
or press
4
Return
.
19. You will see a conrmation screen asking if y
ou will asked a question about adding the
NNNNNNNNNNNNNNNNNNNNNNNNNN
Printers
subpanel.
w will appear with
our printer is turned on,
NNN
connected to your system, and online. Checkyour printer to ensure that it
5
is ready, and press
20.
You will see the message
21.
Exit the task and choose
22. Type
Refer to
exit
to leave
System Administration Tasks
4
.
Return
NNNNNNNNNNNNNNNNNNNNNNNNNNNNNNNNNNNNNNNNNNNN
Task completed
NNNNNNNNNNNNNNNNNNNNNNNNNN
Exit SAM
root
and return to
. Press
4
Return
5
.
.
user
status.
, for additional SAM information.
. Click
5
DRAFT
2/5/97 11:31
Configuring HP-UX for Printers and Drives 5-5
FINAL TRIM SIZE : 7.0 in x 8.5 in
Page 86

Testing the Printer Installation
If you made your printer the default system prin
commands to test it:
cd
lp .profile
(If your printer (called
following command to test it:)
lp -d
printername
The contents of the le named
5
4
Return
5
printername
.profile
.profile
) isn't the default system prin
should print out on your new printer.
ter, enter the following
ter, enter the
5-6 Configuring HP-UX for Printers and Drives DRAFT
2/5/97 11:31
FINAL TRIM SIZE : 7.0 in x 8.5 in
Page 87

Dealing With Printer Problems
If you experience problems in prin
installed:
The power cord for the printer is plugged in.
The printer is turned on.
The printer selection switches are set for online.
Paper is loaded in
The correct interface has been set up.
The printer cable is connected to the correct interface port on your printer.
The cable is connected to the correct port on y
to the printer (and it isn't jammed).
ting, ensure that the follo
our system.
wing are correctly
5
DRAFT
2/5/97 11:31
Configuring HP-UX for Printers and Drives 5-7
FINAL TRIM SIZE : 7.0 in x 8.5 in
Page 88

Hardware Installation for Drives
Tools Required
You'll need these to ols to access the mass storage devices:
Medium at-tipp ed screwdriv
er.
No. 1 Phillips screwdriver.
Static-free work area.
Removing the Mass Storage Module
1. Modules can only be removed from the back.
If your system is rack-mounted front side out, and there is not enough room
to remove a mo dule from the back, remove the system from the rack.
5
2. Unplug the SCSI cables attached to the system module's SCSI connector
and the mass storage mo dule's SCSI connector.
3. Inside the handle for each module is a slotted screw. Unscrew the screw
about 7 turns (until it pops out), then pull out the mass storage module.
Removing a Device from the Mass Storage Module
Before you can change the conguration for a device, you will need to remove
the drive from the mass storage tray.Follow these steps to remove the drive.
Caution
Hard disk drives are vulnerable to physical shock.
hard disk drive from even a smal l height will damage its he
Dropping a
ads
and platters.
Always handle hard disk drives with extreme caution.
Do not place a hard disk drive upside down on any surface.
1. Remove the screw at the rear of the mounting bracket for the drive.
2. Slide the bracket back ab out 12mm (0.5-in.) to unlock the bracket tabs,
then lift the bracket with attached drive up and out of the tray.
5-8 Configuring HP-UX for Printers and Drives DRAFT
2/5/97 11:31
FINAL TRIM SIZE : 7.0 in x 8.5 in
Page 89

Finding the Status of Existing SCSI Bus Addresses
Before you install a new SCSI driv
your device is currently unused, you can use SAM, or y
tool to help determine whic
h devices are currently connected. To determine the
currently connected SCSI bus IDs, en
e, to ensure that the SCSI bus address of
ou can use the
ioscan
ter the following command line:
/etc/ioscan -fb
The result will be a displa
y of information, such as the follo wing:
Class H/W Path Driver H/W Status S/W Status Description
=========================================================================
...
disk 2.0.1.2.0 scsi ok(0x5800101) ok TOSHIBA CD-ROM
tape_drive 2.0.1.3.0 scsitape ok(0x1800202) ok HP HP35450A
disk 2.0.1.6.0 scsi ok(0x101) ok MICROP 1528
...
For example, the SCSI bus address for the \MICR
fourth column of its hardware address as \6"(
OP" disk device is in the
2.0.1.6.0
). If you were
installing another disk, for le system use, it would best be accessed at the
adjacent SCSI bus address in the \scanning" order, \
5
". SAM would help you
determine where to put it when you did the installation.
5
DRAFT
2/5/97 11:31
Configuring HP-UX for Printers and Drives 5-9
FINAL TRIM SIZE : 7.0 in x 8.5 in
Page 90

Configuring for a Hard Disk Driv
e
Hard disk drive upgrades can b e installed to accommo date lo cal le systems
and swap space on your workstation.
Software Installation of the Hard Disk Driv
After hardware installation has been completed (see the
this device), you'll need to ensure that y
our operating system is prepared to
exchange data with the device. This section pro
conguring HP-UX to communicate with hard disk driv
e Upgrade
Instal lation Guide
for
vides instructions for manually
e upgrades, in order to
use the disks for mass storage and/or swap space. Note that your HP disk is
pre-formatted.
Caution
Although the device is well-protected from physical shock when
installed in the workstation, it is very easily damaged when
5
The factory-set SCSI bus address for the disk driv
For an upgrade disk drive: SCSI bus address:
This SCSI address assumes usage of the disk as
separate. Avoid dropping or striking a device.
e:
6
root
. Although the
conguration jumpers in the back of the drive are factory-installed and should
not require reconguring, it is possible that the SCSI bus address jumpers for
an upgrade may be shipp ed with dierent settings. Therefore, please see the
Instal lation Guide
for the drive for the procedure for resetting jumpers, should
it be necessary.
The following list outlines the software pro cedures you'll nd in this section for
installing the hard disk drive as a le system disk:
Verify that you haveanunused device le with the correct select co de and
bus address for your device. (Use SAM or the script in \Finding the Status
of Existing SCSI Bus Addresses").
Use SAM to:
Install a disk on HP-UX.
Build a le system on the disk (done automatically by SAM).
Mount the disk so that you can access it as a le system.
5-10 Configuring HP-UX for Printers and Drives DRAFT
2/5/97 11:31
FINAL TRIM SIZE : 7.0 in x 8.5 in
Page 91

Note
SAM does not support the follo
wing:
Changing the hardware address of a disk driv
e containing
the root le system.
Changing the hardware address of a disk array
.
Changing the hardware address of a disk that is part of
software disk striping.
After hardware installation has been completed (see the
Installation Guide
for
this device), you'll need to ensure that your op erating system is prepared to
exchange data with the device. This section pro
vides instructions for doing
this.
1. Run SAM bytyping:
/usr/bin/sam
Pressing the
4f15
key gives you context-sensitive information for the ob ject
at the location of the cursor.
NNNNNNNNNNNNNNNNNNNNNNNNNNNNNNNNNNNNNNNNNNNNNNNNNNNNNNNNNNNNNNNNNNNN
5
2. Choose
4
Return
3.
Choose
Disks and File Systems
5
).
(highlight and clickon
NNNNNNNNNNNNNNNNNNNNNNNNNNNNNNNNNNNNNNNNNNNNNNNNNNNNNNNNNNNNNNNNNNNNNNNNNNNNNNNNNNNNNNNNNNNN
CD-ROM, Floppy, and Hard Disks
.
4
OK
or press
4. Choose the line identifying the type of new disk you have connected. In the
\Use" column, it will b e designated as \unused".
5
DRAFT
2/5/97 11:31
Configuring HP-UX for Printers and Drives 5-11
FINAL TRIM SIZE : 7.0 in x 8.5 in
Page 92

5. In the next screen, c
hoose the line iden
tifying the mo del of the new disk.
If the device you have connected does not appear on the list:
a. Checkyour hardware connections, and make sure that the device is
turnedon.
NNNNNNNNNNNNNNNNNNNNNNNNNNNNNNNNNNNNNNNNNNNN
b. Click on the button
Device Missing
, and you will be giv
en the
following options:
i. Have SAM rescan the system for the device. If y
the device
clickon
NNNNNNNN
No
after
starting SAM, you should clickon
.
ou have connected
NNNNNNNNNNN
Yes
. Otherwise,
ii. Respond to the conrmation screen regarding whether the device is
connected and p owered up.
iii. Resp ond to the conrmation screen regarding whether additional
5
device drivers are needed. (Unless the kernel has, for some reason,
had drivers removed, the drivers needed for a hard disk should
currently be in the kernel.)
iv. You will be given an information screen suggesting things to try if
the device still cannot be found. If this is the case, y
consult
Installing Peripherals
.
ou will need to
6. After you choose the device, you will see a form giving three tasks:
NNNNNNNNNNNNNNNNNNNNNNNNNNNNNNNNNNNNNNNNNNNNNNNNNNNNNNNNNNNNNN
a.
Select a Disk to Add
NNNNNNNNNNNNNNNNNNNNNNNNNNNNNNNNNNNNNNNNNNNNNNNNNNNNNNNNNNNNNNNNNNNNNNNNNNNNNNNN
b.
Set Disk Usage and Options
NNNNNNNNNNNNNNNNNNNNNNNNNNNNNNNNNNNNNNNNNNNNNNNNNNNNNNNN
c.
Modify Defaults...
.(You have already done this).
.
. (This task is optional).
NNNNNNNNNNNNNNNNNNNNNNNNNNNNNNNNNNNNNNNNNNNNNNNNNNNNNNNNNNNNNNNNNNNNNNNNNNNNNNNN
Choose
Set Disk Usage and Options
.
7. On the form which appears, select howyou want to use the disk (\File
System", or other usage).
8.
Clickon
NNNNNNNN
OK
when you have nished with this form.
9. A \Messages" Box appears, rep orting the progress of the task. When the
task is nished, clickon
4OK5
.
5-12 Configuring HP-UX for Printers and Drives DRAFT
2/5/97 11:31
FINAL TRIM SIZE : 7.0 in x 8.5 in
Page 93

10. Exit SAM. (SAM copies y
/etc/checklist.old
).
Testing Your Installation
our original
/etc/checklist
to
A simple test to mak
(whether it is moun
appropriate character device le name as the argumen
e certain that the drive has been installed correctly
ted or not) is to execute the command
diskinfo
t). For example:
(using the
diskinfo /dev/rdsk/c201d5s0
If the disk is installed correctly
,
diskinfo
will display a listing of information
about it, such as the following:
SCSI describe of /dev/rdsk/c201d5s0
vendor: Quantum
product id: XXXXXXX
type: direct access
size: 200000 Kbytes
bytes per sector: 512
After mounting a new disk on a directory,anlllisting of the directory should
giveyou at least one le or directory entry.For example:
total 1024
drwxr-xr-x 2 root root 8192 Aug 31 15:24 lost+found
5
DRAFT
2/5/97 11:31
Configuring HP-UX for Printers and Drives 5-13
FINAL TRIM SIZE : 7.0 in x 8.5 in
Page 94

Configuring for a Flexible Disk Driv
e
Caution
Although the device is w
installed in the w
orkstation, it is very easily damaged when
ell-protected from physical sho ck when
separate. Avoid dropping or striking a device.
Note the exible disk driv
It should not be necessary to c
The factory-set SCSI bus address for the driv
SCSI bus address:
As it is possible that the SCSI bus setting for an upgrade ma
dierently, please check the setting before installation. See the
5
necessary.
Guide
for the device for the procedure for resetting the device, should it b e
e jumpers are pre-congured correctly at the factory
hange jumper settings.
e:
0
y be shipped
Instal lation
.
After hardware installation has been completed, you'll need to ensure that your
operating system is prepared to exchange data with the device. This section
provides instructions for doing this.
1. If you wish to initialize a new disk, make sure you have the disk loaded in
the drive.
2. Run SAM bytyping:
/usr/bin/sam
5
To get help in SAM, pressing the
key gives you context-sensitive
4
f1
information for the ob ject at the lo cation of the cursor.
3.
Choose
4
Return
4.
Choose
5.
From the
NNNNNNNNNNNNNNNNNNNNNNNNNNNNNNNNNNNNNNNNNNNNNNNNNNNNNNNNNNNNNNNNNNNN
Disks and File Systems
5
).
(highlight and clickon
NNNNNNNNNNNNNNNNNNNNNNNNNNNNNNNNNNNNNNNNNNNNNNNNNNNNNNNNNNNNNNNNNNNNNNNNNNNNNNNNNNNNNNNNNNNN
CD-ROM, Floppy, and Hard Disks
NNNNNNNNNNNNNNNNNNNNNNN
Actions
menu, select
NNNNNNNNNNNNNNNNNNNNNNNNNNNNNNNNNNNNNNNNNNNNNNNNNNNNNNNNNNNNNNNNNNNNNNNNNNNNNNNN
Add a Floppy Disk Drive...
5
or press
4
OK
.
.You will
see a list of unused disks, including the new one you have connected.
5-14 Configuring HP-UX for Printers and Drives DRAFT
2/5/97 11:31
FINAL TRIM SIZE : 7.0 in x 8.5 in
Page 95

6. Choose the line iden
tifying the mo del of the new disk.
If the device you have connected does not appear on the list:
a. Checkyour hardware connections, and make sure that the device is
turnedon.
NNNNNNNNNNNNNNNNNNNNNNNNNNNNNNNNNNNNNNNNNNNN
b. Click on the button
Device Missing
, and you will be giv
en the
following options:
i. Have SAM rescan the system for the device. If y
the device
clickon
NNNNNNNN
No
after
starting SAM, you should clickon
.
ou have connected
NNNNNNNNNNN
Yes
. Otherwise,
ii. Respond to the conrmation screen regarding whether the device is
connected and p owered up.
iii. Respond to the conrmation screen regarding whether additional
device drivers are needed.
iv. You will be given an information screen suggesting things to try if
the device still cannot be found.
NNNNNNNNNNNNNNNNNNNNNNNNNNNNNNNNNNNNNNNNNNNNNNN
7. After you highlight the device, note that the
toggledon(the default). Click on this button to turn it
Initialize disk
o
if you do not
button is
wish to initialize a disk (or if the disk is preformatted).
8.
Clickon
NNNNNNNN
OK
when you have nished with this form.
9. A \Messages" Box appears, rep orting the progress of the task. When the
5
task is nished, clickon
10. Exit SAM. (SAM copies your original
/etc/checklist.old
).
4
OK
.
/etc/checklist
to
5
DRAFT
2/5/97 11:31
Configuring HP-UX for Printers and Drives 5-15
FINAL TRIM SIZE : 7.0 in x 8.5 in
Page 96

Testing Your Installation
A simple test to make certain that everything has been installed correctly is to
execute the command
diskinfo
.
1. Make sure a exible disk is inserted in the driv
e (otherwise, a core dump
may result).
2. Type the follo
wing, using the appropriate device le name as the argumen
t.
For example:
diskinfo /dev/rfloppy/c201d0s0
If the disk is installed correctly,
diskinfo
will display a listing of
information ab out it, such as the following:
/dev/rfloppy/c201d0s0
SCSI describe of 0.rdsk:
5
vendor: TEAC
product id: XXXXXXX
type: direct access
size: 1400000 bytes
bytes per sector: NNN
If you wish to test the installation of your exible disk drive
installed, use the
ioscan
command.
without
a disk
Archiving Files to a Flexible Disk
Data can b e stored on exible disk media in a v
ariety of formats. The capacity
of these devices is generally too small to hold useful HP-UX le systems.
Instead, DOS or LIF le systems are commonly used. Data can also be stored
in an archive-utility format. For example,
tar
and
cpio
are commonly used to
share data with other HP-UX systems.
See the man pages or
detailed descriptions of the le systems. For information on
tar
(1) and
cpio
.
Tosave les archivally to a exible disk using
enter the following command line, where
tar -cvf /dev/rfloppy/c201d0s0
HP-UX Reference
references
tar
pathname
pathname
dosif
(4) and
tar
lif
and
(4) for
cpio
, see
, use a formatted disk and
is the le directory.
5-16 Configuring HP-UX for Printers and Drives DRAFT
2/5/97 11:31
FINAL TRIM SIZE : 7.0 in x 8.5 in
Page 97

Retrieving Files from a Flexible Disk
To list les stored in a
to your hard disk, use the follo
tar -tvf /dev/rfloppy/c201d0s0
This lists all the les on the exible disk.
To transfer or restore les from a exible disk to y
following:
1. Load the source disk in
2. Usingcd, make sure you are in in directory you want the les to reside in.
3. Enter the following command line to restore
current directory:
tar -xvf /dev/rfloppy/c201d0s0
tar
archive on a exible disk, without transferring them
wing command line:
our hard disk drive, do the
to the exible disk driv
e.
pathname
pathname
on the disk to your
5
DRAFT
2/5/97 11:31
Configuring HP-UX for Printers and Drives 5-17
FINAL TRIM SIZE : 7.0 in x 8.5 in
Page 98

Mounting a New Flexible Disk
If you want HP-UX to be able to address a newly-inserted exible disk as a
small le system, you will need to moun
the new disk. For example, using \
mount /dev/floppy/c201d0s0 /flex
t it. Execute the following to moun
/flex
" as the mount directory:
t
See the next section for information on moun
as a le system.
Removing and Inserting a File-System Flexible Disk
Caution
5
You will need to do the following:
Before you remove a disk:
1. Temporarily unmount the le system for the disk by executing the
following. For example, if the disk is designated b
/dev/floppy/c201d0s0
umount /dev/floppy/c201d0s0
2. Remove the disk.
If you wish to use the disk as a mounted le system, you must
mountitevery time you insert it into the drive, and you must
unmount the disk b efore you eject it from the drive.
:
ting and unmounting a disk used
y the blo ck device le
5-18 Configuring HP-UX for Printers and Drives DRAFT
2/5/97 11:31
FINAL TRIM SIZE : 7.0 in x 8.5 in
Page 99

After you insert a disk:
1. Mount the disk le system so that HP-UX will recognize it. If, for
example, you are mounting the disk in a driv
le
/dev/floppy/c201d0s0
the following:
mount /dev/floppy/c201d0s0 /flex
under a pre-existing directory
e designated by the device
/flex
, execute
(Note that the directory
path name).
In this example, the
removable le system is to be attached at the directory
2. Nowyou can access the exible disk as y
/flex
mount
, in the example, must b e giv
command announces to the system that a
ou would any other disk.
en an absolute
/flex
.
5
DRAFT
2/5/97 11:31
Configuring HP-UX for Printers and Drives 5-19
FINAL TRIM SIZE : 7.0 in x 8.5 in
Page 100

Configuring for a CD ROM Driv
e
You can use a CD R
accommodate read-only use of a wide v
OM (\Compact Disc Read-Only Memory") driv
ariety of softw
are, including HP-UX
eto
system updates.
After hardware installation for a driv
Installation for Drives" and the
need to ensure that y
the device. This section pro
communicate with the CD R
Note
our operating system is prepared to exc
vides instructions for conguring HP-UX to
OM drive.
The use of audio-mo de for a CD R
e has b een completed (see \Hardw
Installation Guide
for this device), y
OM is not supported.
are
ou'll
hange data with
The CD ROM drive cannot be locally-mounted on a diskless
node, although its driver must be congured into each cluster
node's kernel.
5
This section deals with the following topics:
Installing the CD ROM with SAM.
Testing the installation.
Mounting the new CD ROM.
Removing and inserting a disc.
The factory-set SCSI address for this device:
SCSI bus address:
As it is possible that the CD R
bus setting, please see the
2
OM drivemay be shipped with a dierent SCSI
Instal lation Guide
for the device for guidance on
resetting it, if necessary.
Inserting the disc in your CD ROM drive.
Note that a rigid plastic caddy holds and protects the disc. Before inserting
the disc, make sure you have the disc installed in the appropriate disc caddy.
When inserted into the disc p ort, data is read from the disc through a shutter
in the caddy. When you eject the caddy, the shutter closes to protect the disc's
data surface.
5-20 Configuring HP-UX for Printers and Drives DRAFT
2/5/97 11:31
FINAL TRIM SIZE : 7.0 in x 8.5 in
 Loading...