

Page 1
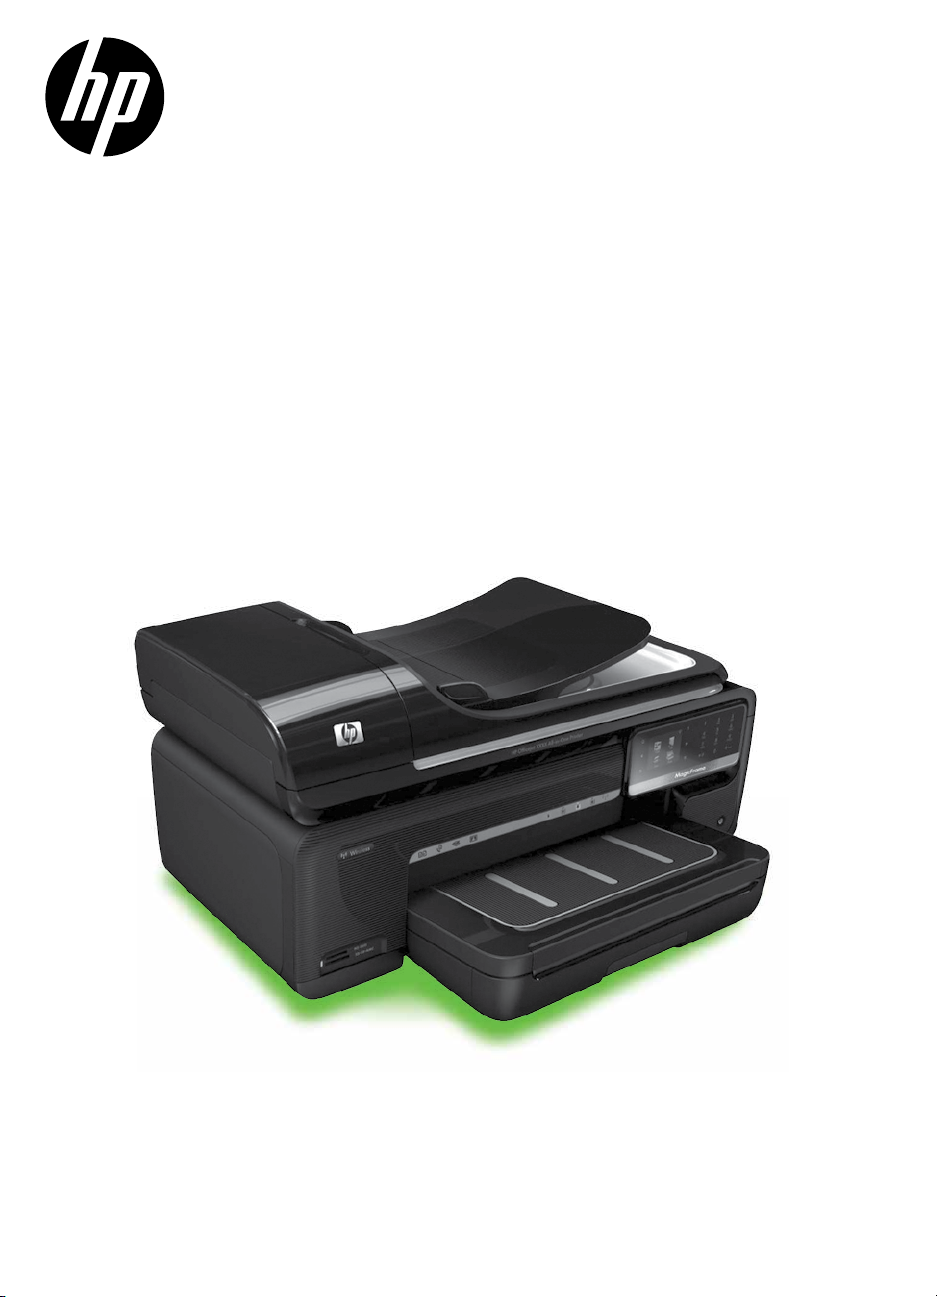
OFFICEJET 7500A
Getting Started Guide
Guía de instalación inicial
E910
Page 2

Copyright Information
© 2010 Copyright Hewlett-Packard Development
Company, L.P.
Edition 1, 3/2010
Reproduction, adaptation or translation without
prior written permission is prohibited, except as
allowed under the copyright laws.
The information contained herein is subject to
change without notice.
The only warranties for HP products and services
are set forth in the express warranty statements
accompanying such products and services.
Nothing herein should be construed as
constituting an additional warranty. HP shall not
be liable for technical or editorial errors or
omissions contained herein.
Trademark credits
Microsoft
®
and Windows® are U.S. registered
trademarks of Microsoft Corporation.
2
Page 3

Contents
Use the printer ........................................................................................................ 2
HP Digital Solutions ............................................................................................ 3
Internet features ................................................................................................. 4
Set up and use fax .................................................................................................. 6
Set up fax ......................................................................................................... 6
Use fax ............................................................................................................12
Fax and digital phone services ...........................................................................17
Set up wireless (802.11) communication (some models only) .........................................18
Solve setup problems ..............................................................................................22
Problems setting up the printer ............................................................................22
Problems installing the software ..........................................................................22
Problems setting up fax ......................................................................................23
Wireless (802.11) setup problems ........................................................................26
Use the Embedded Web server (EWS) ......................................................................28
Hewlett-Packard limited warranty statement ................................................................29
English
Safety Information
Always follow basic safety precautions when
using this printer to reduce risk of injury from re
or electric shock.
1. Read and understand all instructions in the
documentation that comes with the printer.
2. Observe all warnings and instructions
marked on the printer.
3. Unplug this printer from wall outlets before
cleaning.
4. Do not install or use this printer near water,
or when you are wet.
5. Install the printer securely on a stable
surface.
6. Install the printer in a protected location
where no one can step on or trip over the
line cord, and the line cord cannot be
damaged.
7. If the printer does not operate normally, see
the user guide (which is available on your
computer after you install the software).
8. There are no user-serviceable parts inside.
Refer servicing to qualied service
personnel.
9. Use only the external power adapter
provided with the printer.
Note: Ink from the cartridges is used in the
printing process in a number of different
ways, including in the initialization process,
which prepares the printer and cartridges
for printing, and in printhead servicing,
which keeps print nozzles clear and ink
owing smoothly. In addition, some residual
ink is left in the cartridge after it is used. For
more information see www.hp.com/go/
inkusage.
Contents 1
Page 4
1. Use the printer
Thank you for purchasing this printer. With
this printer, you can print documents and
photos, scan documents to a connected
computer, make copies, and send and
receive faxes.
To scan, copy, and send faxes, you can use
the printer’s control panel. You can also use
the control panel to change settings, print
reports, or get help for the printer.
Tip: If the printer is connected to a
computer, you can also change the
printer settings using software tools
available on your computer, such as the
printer software or the embedded Web
server (EWS). For more information
about these tools, see the user guide
(which is available on your computer
after you install the software).
Where’s the user guide?
The user guide for this printer (also called “Help”) is not provided in printed format.
Instead, it is placed on your computer while the installation program is installing the
HP software.
This guide provides information on the following topics:
Troubleshooting information
•
Important safety notices and regulatory information
•
Information about supported printing supplies
•
Detailed user instructions
•
You can open this guide either from the HP print software (Windows) or from the Help
menu (Mac OS X):
Windows: Click Start, select Programs or All Programs, select HP, select the folder
•
for your HP printer, and then select Help.
Mac OS X: From the Finder, click Help > Mac Help. In the Help Viewer window,
•
choose your printer from the Mac Help pop-up menu.
Also, an Adobe Acrobat version of this guide is available on HP’s support Web site
(www.hp.com/support).
Use the printer2
Page 5
HP Digital Solutions
The printer includes a collection of digital
solutions that can help you simplify and
streamline your work.
Scan to Computer
Learn more!
For more information about setting
up and using these digital solutions,
see the user guide. (The user guide is
available on your computer after you
install the software.)
EnglishEnglish
Using the printer, you can simply walk up
to the printer, touch a button on the printer’s
control panel, and either scan documents
directly to a computer or quickly share
them with business partners as e-mail
attachments.
Note: If you are using a computer
running Microsoft® Windows® and
if your computer does not appear in
the list of destinations on the printer’s
control-panel display, you will need
HP Digital Fax (Fax to PC and Fax to Mac)
Never lose important faxes misplaced within
a stack of paper pages again!
Use Fax to PC and Fax to Mac to
automatically receive faxes and save faxes
directly to your computer. With Fax to PC
and Fax to Mac, you can store digital
copies of your faxes easily and also
eliminate the hassle of dealing with bulky
paper les.
In addition, you can turn off fax printing
altogether — saving money on paper
and ink, as well as helping reduce paper
consumption and waste.
to restart your HP software’s scan
function on the destination computer.
To restart the scan function, click the
Start on your computer desktop, select
Programs or All Programs, select HP,
select the folder for your HP printer,
and then select your HP printer. In the
window that appears, click the Activate
Scan to Computer option.
Use the printer 3
Page 6

Internet features
The printer offers innovative, Web-enabled
solutions that can help you quickly access
the Internet, obtain documents, and print
them faster and with less hassle—and all
without using a computer. In addition, you
can use a Web service (Marketsplash by
HP) to create and print professional-quality
marketing materials.
Note: To use these Web features,
the printer must be connected to the
Internet (either using an Ethernet cable
or wireless connection). You cannot
use these Web features if the printer is
connected using a USB cable.
HP Apps
HP Apps provide a quick and easy way to
access, store, and print business information
without a computer. Using HP Apps, you
can gain access to content stored on
the Web, such as business forms, news,
archiving, and more—right from the printer’s
control-panel display.
To use HP Apps, the printer needs to be
connected to the Internet (either using an
Ethernet cable or wireless connection).
Follow the instructions on the printer’s control
panel to enable and set up this service.
Note: In addition to these solutions,
you can send print jobs to the printer
remotely from mobile devices. With this
service, called HP ePrint, you can print
from e-mail connected mobile phones,
netbooks, or other mobile devices—
anywhere, anytime.
New Apps are periodically added and you
can select and download to the printer’s
control panel for use. For more information,
visit www.hp.com/go/ePrintCenter.
Note: For a list of system requirements
for this Web site, see the user guide
(which is available on your computer
after you install the software).
Use the printer4
Page 7

Marketsplash by HP
Grow your business using online HP tools
and services to create and print professional
marketing materials. With Marketsplash, you
can do the following:
• Quickly and easily create amazing,
professional-quality brochures, yers,
business cards, and more. Choose
from thousands of customizable
templates created by award-winning
business graphic designers.
• A variety of print options allow you to
get exactly what you need, when you
need it. For immediate, high-quality
results, print on your printer. Other
options are available online from HP
and our partners. Achieve the
professional quality you expect, while
minimizing printing costs.
• Keep all of your marketing materials
organized and readily accessible in
your Marketsplash account, available
from any computer and directly from
the printer’s control-panel display (on
select models only).
To get started, select Marketsplash by HP
in the HP printer software that came with
your printer. Or for more information, visit
marketsplash.com.
Note: For a list of system requirements
for this Web site, see HP Web site
specications, in the user guide (which
is available on your computer after you
install the software).
Note: Not all Marketsplash tools
and services are available in all
countries, regions and languages. Visit
marketsplash.com for the most current
information.
English
HP ePrint
With HP ePrint, you can print from e-mail
connected mobile phones, netbooks, or
other mobile devices—anywhere, anytime.
Using your mobile device service and
the printer’s Web Services, you can print
documents to a printer that could be sitting
next to you or sitting thousands of miles
away.
To use the HP ePrint service, you need to
have the following components:
• An HP ePrint-enabled printer that is
connected to the Internet (either using
an Ethernet cable or wireless
connection)
• A device that has a functioning e-mail
capability
Follow the instructions on the printer’s control
panel to enable and set up the printer’s
Web Services. For more information, see
www.hp.com/go/ePrintCenter
Use the printer 5
Page 8
2. Set up and use fax
This printer allows you to
send and receive black-andwhite and color faxes.
Set up fax
Before using the fax feature, follow these
steps to connect your printer successfully.
Tip: You can use the Fax Setup Wizard
(Windows) or HP Utility (Mac OS X) to
set up the fax.
For more information about fax features
available with the printer, see the user guide
(which is available on your computer after
you install the software).
Finding fax setup
information
If you are in one of the following countries/regions, visit
the appropriate Web site for information about setting
up fax.
Austria
Belgium
Dutch
French
Denmark
Finland
France
Germany
Ireland
Italy
Norway
Netherlands
Portugal
Spain
Sweden
Switzerland
French
German
United Kingdom
IMPORTANT: Check the “Finding
fax setup information” box for your
country/region. If your country/
region is included in the list, visit the
Web site for setup information. If your
country/region is not listed, follow the
instructions provided in this guide.
www.hp.com/at/faxcong
www.hp.be/nl/faxcong
www.hp.be/fr/faxcong
www.hp.dk/faxcong
www.hp./faxcong
www.hp.com/fr/faxcong
www.hp.com/de/faxcong
www.hp.com/ie/faxcong
www.hp.com/it/faxcong
www.hp.no/faxcong
www.hp.nl/faxcong
www.hp.pt/faxcong
www.hp.es/faxcong
www.hp.se/faxcong
www.hp.com/ch/fr/faxcong
www.hp.com/ch/de/faxcong
www.hp.com/uk/faxcong
Set up and use fax6
Page 9
Step 1: Connect the printer to the phone line
Before you begin…
Before beginning, be sure you have
done the following:
Installed ink cartridges
•
Loaded A4- or Letter-size paper in
•
the tray
Have the telephone cord and
•
adapter (if provided with the printer)
ready.
Note: If the phone cord that came
with the printer is not long enough,
you can use a coupler to extend the
length. You can purchase a coupler at
an electronics store that carries phone
accessories. You also need another
phone cord, which can be a standard
phone cord that you might already
have in your home or ofce. For more
information, see the user guide (which
is available on your computer after you
install the software).
English
For more information, see the setup
poster included in the box with the
printer.
To connect the printer and any other
telephone equipment or devices, complete
the following steps:
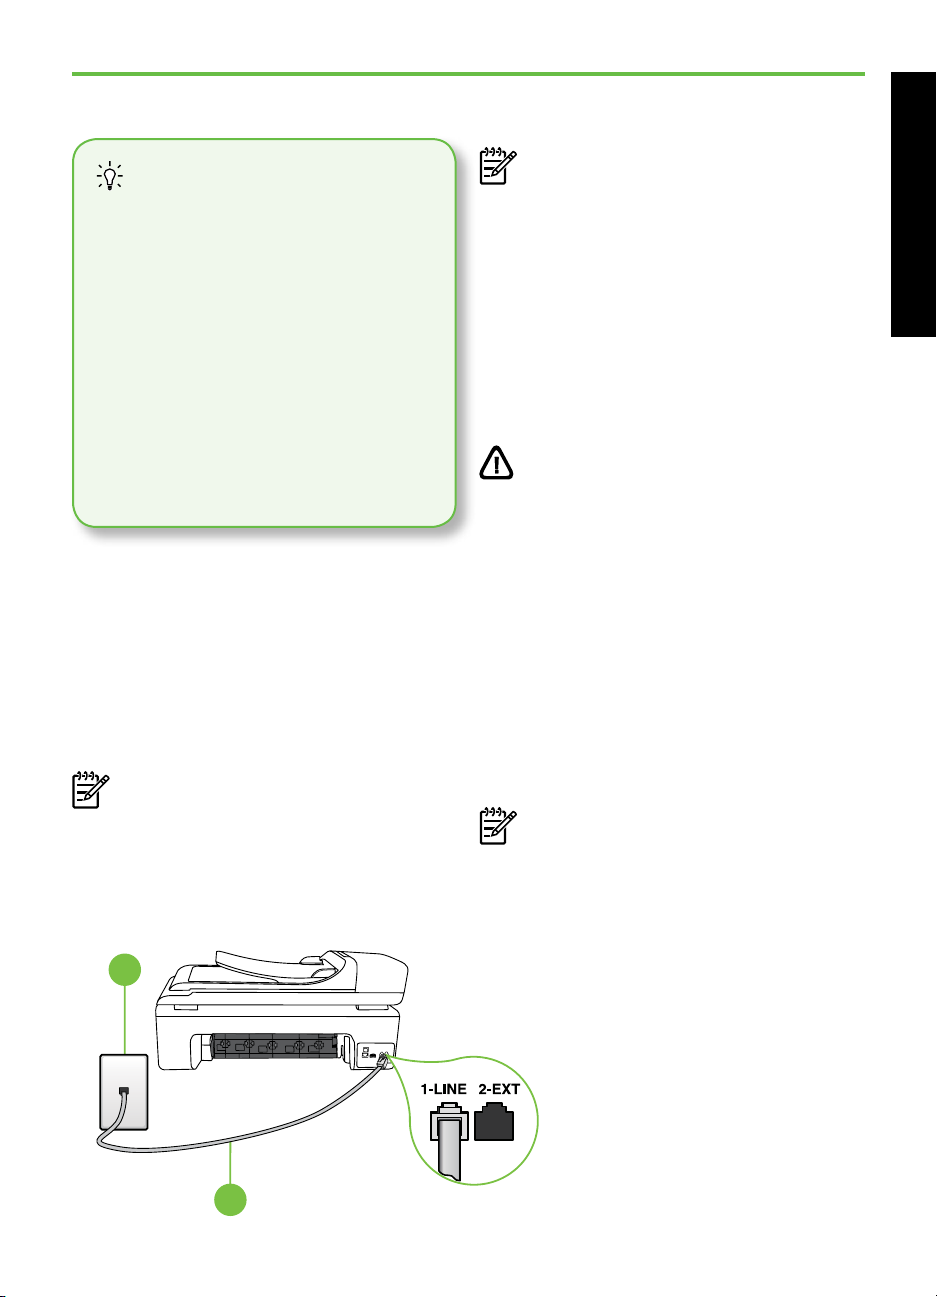
1. Using the phone cord provided in the
box with the printer, connect one end to
your telephone wall jack, then connect
the other end to the port labeled 1-LINE
on the back of the printer.
Note: You might need to connect the
provided phone cord to the adapter
provided for your country/region.
1
CAUTION: If you use a phone cord
other than the one provided with the
printer, you might not be able to fax
successfully. Because phone cords
that you might be using in your home
or ofce can be different from the
one provided with the printer, HP
recommends that you use the phone
cord that is provided with the printer.
2. Connect any other telephone equipment.
For more information about connecting
and setting up additional devices or
services with the printer, see the boxes in
this section or see the user guide.
Note: If you encounter problems setting
up the printer with other equipment
or services, contact the company that
provided the equipment or service.
1 Telephone wall jack
2 1-LINE port on printer
2
Set up and use fax 7
Page 10
What is a distinctive ring service?
Many phone companies offer a distinctive ring feature that allows you to have several
phone numbers on one phone line. When you subscribe to this service, each number
is assigned a different ring pattern. You can set up the printer to answer incoming
calls that have a specic ring pattern.
If you connect the printer to a line with distinctive ring, have your telephone company
assign one ring pattern to voice calls and another ring pattern to fax calls. HP
recommends that you request double or triple rings for a fax number. When the
printer detects the specied ring pattern, it answers the call and receives the fax.
For information about setting up distinctive ring, see ”Step 3: Congure fax settings”
on page 10.
Tip: If you subscribe to a voicemail
service on the same phone line that
you will use for faxing, you cannot
receive faxes automatically. Because
you must be available to respond in
person to incoming fax calls, be sure
to turn off the Auto Answer feature.
If you want to receive faxes automatically
instead, contact your telephone company to
subscribe to a distinctive ring service or to
obtain a separate telephone line for faxing.
3. After you have connected the printer
and any other telephone equipment, go
to ”Step 2: Test fax setup” on page 9.
Connecting to a DSL/ADSL line
If you subscribe to a DSL/ADSL service, follow these steps to connect the fax.
1
32
1. Connect the DSL/ADSL lter and
telephone cord provided by your DSL/
ADSL service provider between the
telephone wall jack and the DSL/
ADSL lter.
2. Connect the telephone cord provided
with the printer between the DSL/
ADSL lter and the 1-Line port on the
printer.
1 Telephone wall jack
2 DSL/ADSL lter and telephone cord (provided by your DSL/ADSL service provider)
3 Telephone cord provided in the box with the printer, connected to the 1-LINE port on the printer
Set up and use fax8
Page 11
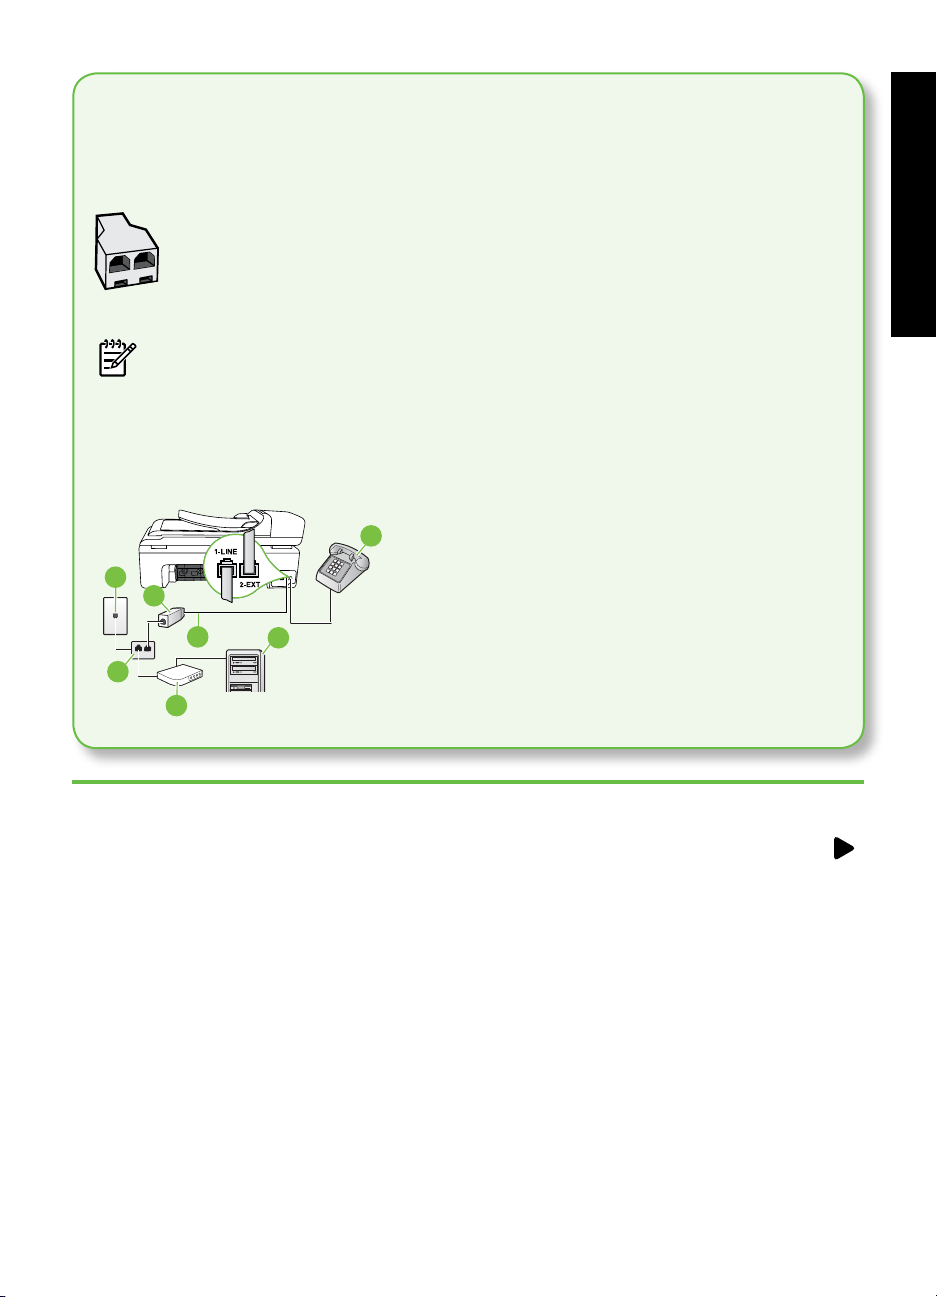
Connecting additional equipment
Remove the white plug from the port labeled 2-EXT on the back of the printer, and
then connect a phone to this port.
If you are connecting additional equipment, such as a dial-up computer
modem or a telephone, you will need to purchase a parallel splitter. A
parallel splitter has one RJ-11 port on the front and two RJ-11 ports on the
back. Do not use a 2–line phone splitter, a serial splitter, or a parallel
splitter which has two RJ-11 ports on the front and a plug on the back.
Note: If you subscribe to a DSL/ADSL service, connect to the DSL/ADSL lter to the
parallel splitter, and then use the HP-provided telephone cord to connect the other
end of the lter to the 1-Line port on the printer. Remove the white plug from the port
labeled 2-EXT on the back of the printer, and then connect a telephone set or telephone
answering machine to the 2-EXT port. Next, connect the second port of the parallel
splitter to the DSL/ADSL modem which is connecting to the computer.
1 Telephone wall jack
7
2 Parallel Splitter
1
3
4
2
5
6
3 DSL/ADSL lter (available from your DSL/ADSL service
provider)
4 Phone cord provided with printer
5 DSL/ADSL Modem
6 Computer
7 Telephone
English
Step 2: Test fax setup
Test your fax setup to check the status of the
printer and make sure it is set up properly
for faxing.
The fax test does the following:
• Tests the fax hardware
• Veries the correct type of phone cord is
connected to the printer
• Checks that the phone cord is plugged
into the correct port
• Checks for a dial tone
• Checks for an active phone line
• Tests the status of your phone line
connection
1. From the printer control panel, touch
and then touch Setup.
2. Touch Tools, and then touch Run Fax
Test. The printer displays the status of the
test on the display and prints a report.
After the test is nished, the printer prints a
report with the results of the test. If the test
fails, review the report for information on
how to x the problem and rerun the test.
For additional troubleshooting
information, see ”Problems setting up the
printer” on page 22.
3. Once the fax test has run successfully,
go to ”Step 3: Congure fax settings”
on page 10.
Set up and use fax 9
Page 12
Step 3: Congure fax settings
Change the printer’s fax settings to meet
your needs after you have connected the
printer to a phone line.
Note: To use the same fax resolution
and lighter/darker settings for all faxes
sent from the printer, congure the
settings as you wish, and then touch
Set as New Defaults.
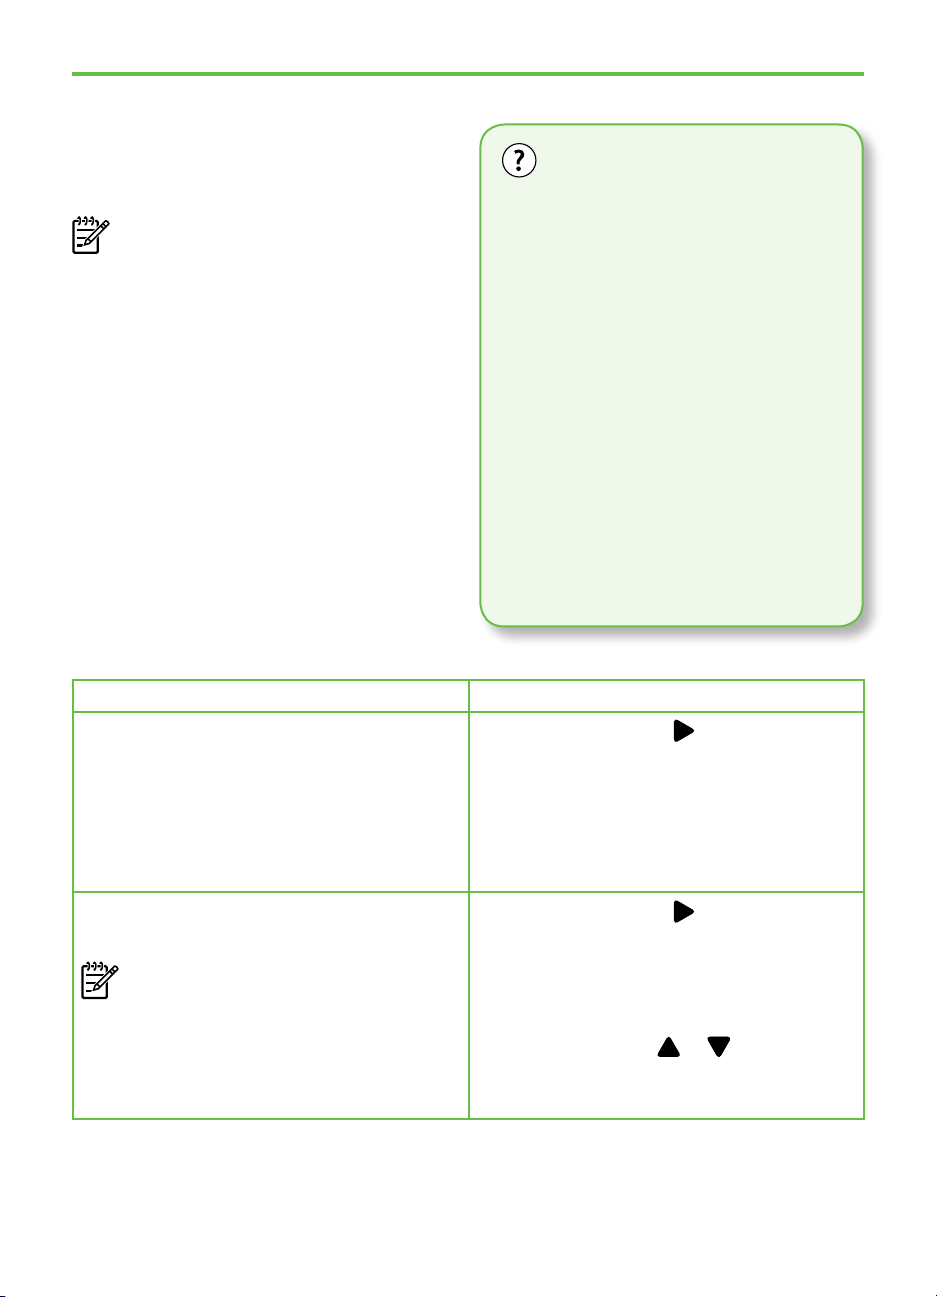
If you want to congure this setting… …do this:
Auto Answer
Set the answer mode to On if you want the
printer to automatically answer incoming
calls and receive faxes. The printer will
answer these incoming calls after the
number of rings that has been specied in
the Rings to Answer setting.
Rings to Answer (Optional)
Set the number of rings to answer
Note: The number of rings to answer
for the printer should be greater than
the number of rings to answer for the
answering machine.
You can congure fax settings using
the following tools:
Printer’s control panel
Touch the Setup button on the printer’s
control panel, touch Fax Settings, and
then touch the setting you want to
congure.
HP software
If you have installed the HP software
on your computer, you can congure
fax settings using the software that was
installed on your computer.
For more information about using these
tools or settings, see the user guide.
1. Touch right arrow
Setup.
2. Touch Fax Setup, and then touch Basic
Fax Setup.
3. Touch Auto Answer, and then touch
ON.
1. Touch right arrow
Setup.
2. Touch Fax Setup, and then touch Basic
Fax Setup.
3. Touch Rings to Answer.
4. Touch up arrow
number of rings.
5. Touch Done, to accept the setting.
Where can I change fax
settings?
and then touch
and then touch
or to change the
Set up and use fax10
Page 13
If you want to congure this setting… …do this:
Distinctive Ring
Change the answer ring pattern for
distinctive ring
Note: If you are using a distinctive
ring service, you can use more than
one telephone number on the same
telephone line. You can change
this setting to enable the printer to
determine automatically which ring
pattern it should use for fax calls only.
Tip: You can also use the Ring Pattern
Detection feature in the printer’s
control panel to set distinctive
ring. With this feature, the printer
recognizes and records the ring
pattern of an incoming call and,
based on this call, automatically
determines the distinctive ring pattern
assigned by your telephone company
to fax calls.
Fax Speed
Set the fax speed used to communicate
between the printer and other fax machines
when sending and receiving faxes.
Note: If you experience problems
sending and receiving faxes, try using
a lower fax speed.
Fax Error Correction Mode
If the printer detects an error signal during
the transmission and the error-correction
setting is turned on, the printer can request
that a portion of the fax be resent.
Note: If you have problems sending
and receiving faxes, turn off error
correction. Also, turning off this setting
might be useful when you are trying to
send a fax to another country/region
or receive a fax from another country/
region or if you are using a satellite
phone connection.
1. Touch right arrow
Setup.
2. Touch Fax Setup, and then touch
Advanced Fax Setup.
3. Touch Distinctive Ring.
4. A message appears stating that this
setting should not be changed unless
you have multiple phone numbers on
the same telephone line. Touch Yes to
continue.
5. Do one of the following:
• Touch the ring pattern assigned by
your telephone company to fax calls.
Or
• Touch Ring Pattern Detection, and
then follow the instructions on the
printer’s control panel.
Note: If you are using either a PBX
phone system that has different ring
patterns for internal and external calls,
you must call the fax number from an
external number.
1. Touch right arrow
Setup.
2. Touch Fax Setup, and then touch
Advanced Fax Setup.
3. Touch down arrow
Fax Speed.
4. Touch to touch Fast, Medium, or Slow.
1. Touch right arrow
Setup.
2. Touch Fax Setup, and then touch
Advanced Fax Setup.
3. Touch down arrow
Error Correction Mode.
4. Select On or Off.
and then touch
English
and then touch
, and then touch
and then touch
, and then touch
Set up and use fax 11
Page 14
If you want to congure this setting… …do this:
Volume
Change the volume of the printer sounds,
including the fax tones.
1. Touch right arrow
Setup.
2. Touch Fax Setup, and then touch Basic
Fax Setup.
3. Touch down arrow
Fax Sound Volume.
4. Touch to touch Soft, Loud, or Off.
Use fax
and then touch
, and then touch
In this section, you will learn how to send
and receive faxes.
Send a fax
You can send faxes in a variety of ways.
Using the printer’s control panel, you can
send black-and-white or color faxes. You can
also send faxes manually from an attached
phone, which allows you to speak with the
recipient before sending the fax.
Learn more!
See the user guide for more
information about the following topics:
Send a fax using monitor dialing
•
Send a fax from a computer
•
Send a fax from memory
•
Schedule a fax to send later
•
Send a fax to multiple recipients
•
Send a fax in Error Correction
•
Mode
The user guide is available on your
computer after you install the software.
You can also send documents on your
computer as faxes, without printing them
rst.
Set up and use fax12
Page 15
Send a standard fax
1. Load the document you want to fax in
the printer.
You can fax either from the automatic
document feeder (ADF) or from the scanner
glass.
2. Touch Fax.
Send a fax from an extension phone
1. Load the document you want to fax in
the printer.
You can fax either from the automatic
document feeder (ADF) or from the scanner
glass.
3. Enter the fax number by using the
keypad.
Tip: To add a pause in the fax
number you are entering, touch
*@ repeatedly, until a dash (-)
appears on the display.
4. Touch Start Black or Start Color.
Tip: If the recipient reports issues
with the quality of the fax you sent,
you can try changing the
resolution or contrast or your fax.
4. If the recipient answers the telephone,
you can engage in a conversation
before sending the fax. When you’re
ready to send the fax.
Note: If a fax machine answers the
call, you will hear fax tones from the
receiving fax machine. Proceed to the
next step to transmit the fax
English
2. Touch Fax.
3. Dial the number by using the keypad on
the phone that is connected to the
printer.
Note: Do not use the keypad on the
control panel of the printer when
manually sending a fax. You must use
the keypad on your phone to dial the
recipient’s number.
5. When you are ready to send the fax,
touch Start Black or Start Color.
Note: If prompted, select Send Fax.
If you were speaking with the recipient
before sending the fax, inform the recipient
that they should press Start on their fax
machine after they hear fax tones. The
telephone line is silent while the fax is
transmitting. At this point, you can hang
up the telephone. If you want to continue
speaking with the recipient, remain on the
line until the fax transmission is complete.
Set up and use fax 13
Page 16
Receive faxes
You can receive faxes automatically or
manually.
Note: If you receive a legal-size
or larger fax and the printer is not
currently set to use legal-size paper,
the printer reduces the fax so that it
ts on the paper that is loaded. If you
have disabled the Automatic Reduction
feature, the printer prints the fax on two
pages.
If you are copying a document when a
fax arrives, the fax is stored in the printer’s
memory until the copying nishes. As a
result, the number of fax pages that can be
stored in memory might be reduced.
Receive a fax automatically
Learn more!
See the user guide for more
information about the following topics:
Reprint received faxes from
•
memory
Poll to receive a fax
•
Forward faxes to another number
•
Set the paper size for received
•
faxes
Set automatic reduction for
•
incoming faxes
Block junk fax numbers
•
The user guide is available on
your computer after you install the
software.
If you turn on the Auto Answer option (the
default setting) from the printer’s control
panel, the printer automatically answers
incoming calls and receives faxes after
the number of rings specied by the Rings
to Answer setting. For information about
conguring this setting, see ”Step 3:
Congure fax settings” on page 10.
Set up and use fax14
Faxes and your voice mail
service
If you subscribe to a voicemail service
on the same phone line that you will
use for faxing, you cannot receive faxes
automatically. Instead, you must receive
make sure the Auto Answer setting
is turned off so that you can receive
faxes manually. Be sure you initiate the
manual fax before the voicemail picks
up the line.
If you want to receive faxes
automatically instead, contact your
telephone company to subscribe to a
distinctive ring service or to obtain a
separate phone line for faxing.
Page 17

Receive a fax manually
When you are on the phone, the person you
are speaking with can send you a fax while
you are still connected (called “manual
faxing”).
You can receive faxes manually from a
phone that is connected to the printer
(through the 2-EXT port) or a phone that
is on the same phone line (but not directly
connected to the printer).
1. Make sure the printer is turned on and
you have paper loaded in the main tray.
2. Remove any originals from the
document feeder tray.
3. Set the Rings to Answer setting to a high
number to allow you to answer the
incoming call before the printer
answers. Or turn off the Auto Answer
setting so that the printer does not
automatically answer incoming calls.
4. If you are currently on the phone with
the sender, instruct the sender to press
Start on their fax machine.
5. When you hear fax tones from a
sending fax machine, do the following:
a. Touch Fax, and then select Start
Black or Start Color.
b. After the printer begins to receive
the fax, you can hang up the
phone or remain on the line. The
phone line is silent during fax
transmission.
English
Reprint received faxes from memory
If you turn on the Backup fax Reception,
received faxes are stored in memory,
whether the printer has an error condition
or not.
Note: All faxes stored in memory are
deleted from memory when you turn off
the power. For more information about
using this feature, see the user guide
(which is available on your computer
after you install the software).
1. Make sure you have paper loaded in
the main tray.
2. Touch right arrow and then touch
Setup.
3. Touch Tools, and then touch Reprint
Faxes in Memory. The faxes are printed
in the reverse order from which they
were received with the most recently
received fax printed rst, and so on.
4. If you want to stop reprinting the faxes
in memory, touch (Cancel).
Set up and use fax 15
Page 18
Working with reports and logs
You can print sevral different types of fax
reports:
Fax Conrmation page
•
Fax Log
•
Image on Fax Send Report
•
Other reports
•
To print a report
1. Touch right arrow , and then touch
Setup.
2. Touch Fax Setup, touch down arrow ,
and then touch Fax Reports.
To clear the fax log
Note: Clearing the fax log also deletes
all faxes stored in memory.
1. Touch right arrow , and then touch
Setup.
These reports provide useful system
information about the printer.
Note: You can also view the call history
on the printer’s control panel display.
To view the call history, touch Fax, and
then touch (Call History). However,
this list cannot be printed.
3. Select the fax report you want to print,
and then touch OK.
2. Touch Tools.
3. Touch down arrow , and then touch
Clear Fax Log.
Set up and use fax16
Page 19

Fax and digital phone services
Many telephone companies provide their
customers with digital phone services, such
as the following:
• DSL: A Digital subscriber line (DSL)
service through your telephone
company. (DSL might be called ADSL
in your country/region.)
• PBX: A private branch exchange (PBX)
phone system
• ISDN: An integrated services digital
network (ISDN) system.
• FoIP: A low-cost phone service that
allows you to send and receive faxes
with your printer by using the Internet.
This method is called Fax over Internet
Protocol (FoIP). For more information,
see the user guide.
HP printers are designed specically for
use with traditional analog phone services.
If you are in a digital phone environment
(such as DSL/ADSL, PBX, or ISDN), you
might need to use digital-to-analog lters or
converters when setting up the printer for
faxing.
Note: HP does not guarantee that
the printer will be compatible with
all digital service lines or providers,
in all digital environments, or with all
digital-to-analog converters. It is always
recommended that you discuss with
the telephone company directly for the
correct setup options based on their
line services provided.
English
Set up and use fax 17
Page 20
3. Set up wireless (802.11)
communication (some models
only)
If the printer supports wireless
(802.11) communication, you
can connect it wireless to an
existing wireless network.
To connect the printer, complete the
following steps in the order listed.
What is my network name and passkey?
While you are installing the software,
you will be prompted to enter the network
name (also called an “SSID”) and a
security passkey:
The network name is the name of your
•
wireless network.
The security passkey prevents other
•
people from connecting to your
wireless network without your
permission. Depending on the level of
security required, your wireless
network might use either a WPA key or
WEP passphrase.
If you have not changed the network
name or the security passkey since
setting up your wireless network, you can
sometimes nd them on the back or side
of the wireless router.
Note: Before you set up wireless
communication, make sure the
printer hardware is set up. For more
information, see the setup poster that
came with the printer.
In addition, if you are using a computer
running Windows, HP provides a
web-based tool called the Wireless
Network Assistant that can help retrieve
this information for some systems. To
use this tool, go to www.hp.com/go/
networksetup. (This tool is currently
available in English only.)
If you cannot nd the network name or
the security passkey or cannot remember
this information, see the documentation
available with your computer or with the
wireless router. If you still cannot nd
this information, contact your network
administrator or the person who set up
the wireless network.
For more information about the network
connections types, the network name, and
the WEP key/WPA Passphrase, see the
user guide.
Set up wireless (802.11) communication (some models only)18
Page 21

Connecting without a wireless router
If you do not have a wireless router (such as a Linksys wireless router or Apple AirPort
Base Station), you can still connect the printer to your computer using a wireless
connection (known as a “computer-to-computer” or an “ad hoc“ wireless connection).
For more information, see the user guide.
Step 1: Connect the printer to your wireless network
English
1. On the printer control panel, touch the
right arrow, and then select Network.
2. Touch Wireless, touch Wireless Setup
Wizard, and then touch OK.
Step 2: Install software for your printer
Follow the instructions for your operating
system.
Windows
1. Save any open documents. Close any
applications that are running on your
computer.
2. Place the HP software CD into the
computer.
3. Follow the display instructions to
complete the setup.
Note: If you encounter problems while
running the Wireless Setup Wizard,
see ”Wireless (802.11) setup problems”
on page 26.
3. On the CD menu, click Install Network/
Wireless Device and then follow the
onscreen instructions.
Note: If the rewall software on your
computer displays any messages
during the installation, select the
“always permit/allow” option in the
messages. Selecting this option allows
the software to install successfully on
your computer.
Set up wireless (802.11) communication (some models only) 19
Page 22

Mac OS
1. Place the HP software CD into the
computer.
Step 3: Test the wireless connection
Print the wireless test page for information
about the printer’s wireless connection.
The wireless test page provides information
about the printer’s status, MAC address, and
IP address. If the printer is connected to a
network, the test page displays details about
the network settings.
2. Double-click the HP Installer icon on the
software CD, and then follow the
onscreen instructions.
1. Touch right arrow , and then touch
Network.
2. Touch Wireless, and then touch
Wireless Network Test.
Set up wireless (802.11) communication (some models only)20
Page 23

Change the connection method
If you have installed the HP software
and connected your printer using a USB,
Ethernet, or wireless connection, you can
change to a different connection any time
you want.
Note: If you are changing to a wireless
connection, make sure that an Ethernet
cable has not been connected to
the printer. Connecting an Ethernet
cable turns off the printer’s wireless
capabilities.
Follow the instructions for your operating
system.
Windows
1. On the computer desktop, click Start,
select Programs or All Programs, click
HP, select your printer name, and then
click Connect a New Printer.
2. Follow the onscreen instructions.
Mac OS X
1. Click the HP Utility icon in the Dock.
Note: If the icon does not appear in
the Dock, click the Spotlight icon on
the right side of the menu bar, type
HPUtility in the box, and then click
the HP Utility entry.
2. Click the Application icon on the
toolbar.
3. Double-click HP Setup Assistant, and
then follow the onscreen instructions.
English
Set up wireless (802.11) communication (some models only) 21
Page 24

4. Solve setup problems
The following sections
provide help with
problems you might have
while setting up the
printer.
Problems setting up the printer
Make sure that all packing tape and
•
material have been removed from
outside and inside the printer.
Make sure that the printer is loaded with
•
plain, white, unused A4- or Letter-size
(8.5x11 inch) paper.
Make sure that any cords and cables
•
that you are using (such as a USB cable
or Ethernet cable) are in good working
order.
Make sure the (Power) light is on and
•
not blinking. When the printer is rst
turned on, it takes approximately 45
seconds to warm up.
If you need more help, see the user guide
(which is available on your computer after
you install the software).
Make sure the printer is displaying the
•
home screen and that no other lights on
the printer’s control panel are lit or
blinking.
Make sure that the power cord and
•
power adapter are securely connected
and that the power source is working
properly.
Make sure paper is loaded correctly in
•
the tray and is not jammed in the
printer.
Make sure that all latches and covers
•
are closed properly.
Problems installing the software
Before installing software, make sure
•
that all other programs are closed.
If the computer does not recognize the
•
path to the CD drive that you type, make
sure that you are specifying the correct
drive letter.
If the computer cannot recognize the HP
•
software CD in the CD drive, inspect the
HP software CD for damage. You can
Solve setup problems22
•
also download the HP software from the
HP Web site (www.hp.com/support).
If you are using a computer running
Windows and are connecting using a
USB cable, make sure that the USB
drivers have not been disabled in the
Windows Device Manager.
Page 25

Problems setting up fax
This section contains information about
solving problems you might have when
setting up fax for the printer.
Note: If the printer is not set up
properly for faxing, you might
experience problems when sending
faxes, receiving faxes, or both.
If you are having faxing problems, you can
print a fax test report to check the status of
the printer. The test will fail if the printer is
not set up properly for faxing. Perform this
test after you have completed setting up the
printer for faxing. For more information, see
“Step 2: Test fax setup” on page 9.
Step 1: Run the fax test
Test your fax setup to check the status of the
printer and to make sure it is set up properly
for faxing. For more information, see ”Set up
and use fax” on page 6.
Tip: If you receive a fax communication
error that includes an error code, you
can nd an explanation of the error
If you are unable to solve the problems using
the suggestions provided in the fax test, go
to Step 2.
Step 2: Check the list of possible problems
If you have run the fax text but are still
having problems setting up fax, check the
following list of possible problems and
solutions:
English
code at HP’s support Web site (www.
hp.com/support). If prompted, choose
your country/region, and then type
“fax error codes” in the Search box.
The printer is having problems sending and receiving faxes
• Make sure you use the phone cord or
adapter that came with the printer. (If
you do not use this phone cord or
adapter, the display might always
show Phone Off Hook.)
• Other equipment that uses the same
phone line as the printer might be in
use. Make sure extension phones
(phones on the same phone line, but
not connected to the printer) or other
equipment is not in use or off the
hook. For example, you cannot use
the printer for faxing if an extension
phone is off the hook or if you are
using a computer dial-up modem to
send e-mail or access the Internet.
• If you are using a phone splitter, the
splitter could cause faxing problems.
Solve setup problems 23
Page 26

Try connecting the printer directly to
the telephone wall jack.
• Make sure that one end of the phone
cord is connected to the telephone
wall jack, while the other end to port
labeled “1-LINE” on the back of the
printer.
• Try connecting a working phone
directly to the telephone wall jack and
check for a dial tone. If you do not
hear a dial tone, contact your
telephone company to check the line.
• Make sure you connect the printer to
an analog phone line, or you cannot
send or receive faxes. To check if your
phone line is digital, connect a
regular analog phone to the line and
listen for a dial tone. If you do not
hear a normal-sounding dial tone, it
might be a phone line set up for
digital phones. Connect the printer to
an analog phone line and try sending
or receiving a fax.
• The phone line connection might be
noisy. Phone lines with poor sound
quality (noise) can cause faxing
problems. Check the sound quality of
the phone line by plugging a phone
into the telephone wall jack and
listening for static or other noise. If you
hear noise, turn Error Correction
Mode (ECM) off and try faxing again.
• If you are using a DSL/ADSL service,
make sure that you have a DSL/ADSL
lter connected. Without the lter, you
cannot fax successfully.
• If you are using either a private
branch exchange (PBX) or an
integrated services digital network
(ISDN) converter/terminal adapter,
make sure the printer is connected to
the correct port and the terminal
adapter is set to the correct switch
type for your country/region.
• You are using a Fax over IP service.
Try to use a slower connection speed.
If this does not work, contact your Fax
over IP service’s support department.
The printer can send faxes but cannot receive faxes
• If you are not using a distinctive ring
service, check to make sure that the
Distinctive Ring feature on the printer
is set to All Rings.
• If Auto Answer is set to Off, or if you
subscribe to a voicemail service on the
same phone line that you will use for
faxing, you can only receive faxes
manually.
• If you have a computer dial-up modem
on the same phone line with the
printer, check to make sure that the
software that came with your modem
is not set to receive faxes
automatically.
Solve setup problems24
• If you have an answering machine on
the same phone line with the printer:
- Check that the answering machine is
working properly.
- Make sure the printer is set to receive
faxes automatically.
- Make sure the Rings to Answer setting
is set to a greater number of rings than
the answering machine.
- Disconnect the answering machine
and then try receiving a fax.
- Record a message that is
approximately 10 seconds in duration.
Page 27

Speak slowly and at a low volume
when recording your message. Leave
at least 5 seconds of silence at the
end of the voice message.
• Other equipment that uses the same
phone line might be causing the fax
test to fail. You can disconnect all the
other devices and run the test again. If
the Dial Tone Detection Test passes,
then one or more of the other
equipment is causing problems. Try
adding them back one at a time and
rerunning the test each time until you
identify which piece of equipment is
causing the problem.
The printer cannot send faxes but can receive faxes
English
• The printer might be dialing too fast or
too soon. For example, if you need to
access an outside line by dialing “9,”
try inserting pauses as follows:
9-XXX-XXXX (where XXX-XXXX is the
fax number you are sending to). To
enter a pause, touch *@ and select a
dash (-).If you are having problems
sending a fax manually from a phone
that is connected directly to the printer
the printer—and if you are in the
following countries/regions—you
must use the keypad on the telephone
to send the fax:
Argentina Australia
Brazil Canada
Chile China
Colombia Greece
India Indonesia
Ireland Japan
Korea Latin America
Malaysia Mexico
Philippines Poland
Portugal Russia
Saudi Arabia Singapore
Spain Taiwan
Thailand USA
Venezuela Vietnam
Solve setup problems 25
Page 28

Wireless (802.11) setup problems
This section provides information about
solving problems you might encounter when
connecting the printer to your wireless
network.
Follow these suggestions in the order listed.
Note: If you are still encountering
problems, see the problem-solving
information in the user guide (which is
available on your computer after you
install the software).
After you resolve any problems
and have connected the printer to
your wireless network, complete the
following steps for your operating
system:
Windows
Place the HP software CD into the
computer and run the software
installation program again. Select
either Install Network/Wireless Device
or Add a Device when prompted.
Mac OS
Open the HP Utility, located in the
Dock. (HP Utility is also located
in the Hewlett-Packard folder in
the Applications folder on your
computer.) Click the Application
icon on the toolbar, double-click HP
Setup Assistant, and then follow the
onscreen instructions.
After resolving the problems…
Step 1: Make sure the wireless (802.11) light is turned on
If the blue light near the printer’s control
panel is not lit, wireless capabilities might
not have been turned on.
To turn on wireless, press the (Wireless)
button once to turn on wireless capabilities.
Solve setup problems26
Or touch Setup on the printer’s control
panel, touch Wireless Menu, touch Wireless
ON/OFF, and then touch On.
Page 29

Step 2. Check the wireless signal strength
If the strength of the signal for your wireless
network or computer is weak or if there
is interference on the wireless network,
the printer might not be able to detect the
signal.
To determine the strength of the wireless
signal, run the Wireless Network Test
from the printer’s control panel. (For more
information, see “Step 4. Run the Wireless
Network Test” on page 27).
If the Wireless Network Test indicates the
signal is weak, try moving the printer closer
to the wireless router.
Reducing interference
The following tips might help reduce
the chances for interference in a
wireless network:
Keep the wireless devices away
•
from large metal objects, such as
ling cabinets, and other
electromagnetic devices, such as
microwaves and cordless
telephones, as these objects can
disrupt radio signals.
Keep the wireless devices away
•
from large masonry structures and
other building structures as these
objects can absorb radio waves
and lower signal strength.
Step 3. Restart components of the wireless network
English
Turn off the router and the printer, and then
turn them back on in this order: router rst,
and then the printer.
If you still are unable to connect, turn off the
router, printer, and your computer, and then
Step 4. Run the Wireless Network Test
For wireless networking issues, run the
Wireless Test from the printer’s control
panel:
1. Touch right arrow , and then touch
Network.
2. Touch Wireless, and then touch
Wireless Network Test.
turn them back on in this order: router rst,
then the printer, and nally the computer.
Sometimes, turning off the power and then
turning it back on will recover a network
communication issue.
If a problem is detected, the printed test
report will include recommendations that
might help solve the problem.
Solve setup problems 27
Page 30

5. Use the Embedded Web server
(EWS)
When the printer is connected to a network,
you can use the “embedded Web server”
(“EWS”) to view status information and
congure network settings from your
computer web browser. No special software
needs to be installed or congured on your
computer.
To open the EWS
1. Obtain the IP address for the printer.
The IP address is shown on the Network
Conguration Page.
a. Load paper in the tray.
b. Touch the right arrow , touch
Setup, touch Network, and then
touch Print Network Settings.
Note: You can open and use the EWS
without being connected to the Internet,
though some features will not be
available.
For more information about the EWS, see
the user guide (which is available on your
computer after you install the software).
2. In a supported Web browser on your
computer, type the IP address or
hostname that has been assigned to the
device.
For example, if the IP address is
123.123.123.123, type the following address
into the Web browser:
http://123.123.123.123
Tip: After opening the EWS, you can
bookmark it so that you can return to it
quickly.
Use the Embedded Web server (EWS)28
Page 31

Hewlett-Packard limited warranty statement
HP product Duration of limited warranty
Software Media 90 days
Printer 1 year
Print or Ink cartridges Until the HP ink is depleted or the “end of warranty” date printed
Printheads (only applies to products with customer 1 year
replaceable printheads)
Accessories 1 year unless otherwise stated
A. Extent of limited warranty
1. Hewlett-Packard (HP) warrants to the end-user customer that the HP products specified above will be free from defects
in materials and workmanship for the duration specified above, which duration begins on the date of purchase by the
customer.
2. For software products, HP’s limited warranty applies only to a failure to execute programming instructions. HP does not
warrant that the operation of any product will be interrupted or error free.
3. HP's limited warranty covers only those defects that arise as a result of normal use of the product, and does not cover
any other problems, including those that arise as a result of:
a. Improper maintenance or modification;
b. Software, media, parts, or supplies not provided or supported by HP;
c. Operation outside the product's specifications;
d. Unauthorized modification or misuse.
4. For HP printer products, the use of a non-HP cartridge or a refilled cartridge does not affect either the warranty to the
customer or any HP support contract with the customer. However, if printer failure or damage is attributable to the use of
a non-HP or refilled cartridge or an expired ink cartridge, HP will charge its standard time and materials charges to
service the printer for the particular failure or damage.
5. If HP receives, during the applicable warranty period, notice of a defect in any product which is covered by HP's
warranty, HP shall either repair or replace the product, at HP's option.
6. If HP is unable to repair or replace, as applicable, a defective product which is covered by HP's warranty, HP shall,
within a reasonable time after being notified of the defect, refund the purchase price for the product.
7. HP shall have no obligation to repair, replace, or refund until the customer returns the defective product to HP.
8. Any replacement product may be either new or like-new, provided that it has functionality at least equal to that of the
product being replaced.
9. HP products may contain remanufactured parts, components, or materials equivalent to new in performance.
10. HP's Limited Warranty Statement is valid in any country where the covered HP product is distributed by HP. Contracts
for additional warranty services, such as on-site service, may be available from any authorized HP service facility in
countries where the product is distributed by HP or by an authorized importer.
B. Limitations of warranty
TO THE EXTENT ALLOWED BY LOCAL LAW, NEITHER HP NOR ITS THIRD PARTY SUPPLIERS MAKES ANY
OTHER WARRANTY OR CONDITION OF ANY KIND, WHETHER EXPRESS OR IMPLIED WARRANTIES OR
CONDITIONS OF MERCHANTABILITY, SATISFACTORY QUALITY, AND FITNESS FOR A PARTICULAR PURPOSE.
C. Limitations of liability
1. To the extent allowed by local law, the remedies provided in this Warranty Statement are the customer's sole and
exclusive remedies.
2. TO THE EXTENT ALLOWED BY LOCAL LAW, EXCEPT FOR THE OBLIGATIONS SPECIFICALLY SET FORTH IN
THIS WARRANTY STATEMENT, IN NO EVENT SHALL HP OR ITS THIRD PARTY SUPPLIERS BE LIABLE FOR
DIRECT, INDIRECT, SPECIAL, INCIDENTAL, OR CONSEQUENTIAL DAMAGES, WHETHER BASED ON
CONTRACT, TORT, OR ANY OTHER LEGAL THEORY AND WHETHER ADVISED OF THE POSSIBILITY OF
SUCH DAMAGES.
D. Local law
1. This Warranty Statement gives the customer specific legal rights. The customer may also have other rights which vary
from state to state in the United States, from province to province in Canada, and from country to country elsewhere in
the world.
2. To the extent that this Warranty Statement is inconsistent with local law, this Warranty Statement shall be deemed
modified to be consistent with such local law. Under such local law, certain disclaimers and limitations of this Warranty
Statement may not apply to the customer. For example, some states in the United States, as well as some governments
outside the United States (including provinces in Canada), may:
a. Preclude the disclaimers and limitations in this Warranty Statement from limiting the statutory rights of a consumer
(e.g., the United Kingdom);
b. Otherwise restrict the ability of a manufacturer to enforce such disclaimers or limitations; or
c. Grant the customer additional warranty rights, specify the duration of implied warranties which the manufacturer
cannot disclaim, or allow limitations on the duration of implied warranties.
3. THE TERMS IN THIS WARRANTY STATEMENT, EXCEPT TO THE EXTENT LAWFULLY PERMITTED, DO NOT
EXCLUDE, RESTRICT, OR MODIFY, AND ARE IN ADDITION TO, THE MANDATORY STATUTORY RIGHTS
APPLICABLE TO THE SALE OF THE HP PRODUCTS TO SUCH CUSTOMERS.
Dear Customer,
You will find below the name and address of the HP entity responsible for the performance of the HP Limited Warranty in your
country.
You may have additional statutory rights against the seller based on your purchase agreement. Those rights are not
in any way affected by this HP Limited Warranty.
Ireland: Hewlett-Packard Ireland Limited, 63-74 Sir John Rogerson's Quay, Dublin 2
United Kingdom: Hewlett-Packard Ltd, Cain Road, Bracknell, GB-Berks RG12 1HN
Malta: Hewlett Packard International Trade BV, Branch 48, Sqaq Nru 2, Triq ix-Xatt, Pieta MSD08, Malta
South Africa: Hewlett-Packard South Africa Ltd, 12 Autumn Street, Rivonia, Sandton, 2128, Republic of South Africa
on the cartridge has been reached, whichever occurs first. This
warranty does not cover HP ink products that have been refilled,
remanufactured, refurbished, misused, or tampered with.
HP Limited Warranty
English
Hewlett-Packard limited warranty statement 29
Page 32

Page 33

Contenido
Uso de la impresora ...............................................................................................32
HP Digital Solutions ...........................................................................................33
Funciones de Internet ........................................................................................ 34
Congurar y usar el fax ..........................................................................................36
Congurar para fax ..........................................................................................36
Usar el fax .......................................................................................................43
Fax y servicios telefónicos digitales .................................................................... 48
Congure la comunicación inalámbrica (802.11) (sólo en algunos modelos) ...................49
Resolver problemas de conguración ........................................................................53
Problemas para congurar la impresora ..............................................................53
Problemas durante la instalación del software ...................................................... 54
Problemas para congurar el fax ....................................................................... 54
Problemas de conguración inalámbrica (802.11) ..................................................58
Uso del servidor Web incorporado (EWS) ................................................................ 60
Declaración de garantía limitada de Hewlett-Packard ..................................................61
Español
Información de seguridad
Tome las precauciones básicas de seguridad
siempre que vaya a usar esta impresora para
reducir el riesgo de daños por fuego o descarga
eléctrica.
1. Lea y comprenda todas las instrucciones de
la documentación que viene con la
impresora.
2. Tenga presente todos los avisos y las
instrucciones indicadas en la impresora.
3. Antes de limpiarla, desenchufe la impresora
de la toma de corriente de pared.
4. No instale ni utilice esta impresora si está
cerca de agua o mojado.
5. Instale la impresora de manera segura
sobre una supercie estable.
6. Instale la impresora en un lugar protegido
donde nadie pueda pisar el cable de
alimentación eléctrica ni tropezar con él, y
donde dicho cable no sufra daños.
7. En caso de que la impresora no funcione
con normalidad, consulte la Guía del
usuario (disponible en su equipo después
de instalar el software).
8. No hay piezas que el usuario pueda
reparar dentro de la impresora. Confíe las
tareas de servicio a personal de servicio
calicado.
9. Use sólo el adaptador externo
proporcionado junto con la impresora.
Nota: La tinta de los cartuchos se utiliza en
el proceso de impresión de varias maneras,
entre ellas el proceso de inicio, que prepara
la impresora y los cartuchos para la
impresión, y el mantenimiento de cabezales
para mantener los inyectores de tinta
limpios y el ujo de tinta correcto. Además,
queda siempre tinta residual en el cartucho
tras su utilización. Para obtener más
información, consulte www.hp.com/go/
inkusage.
Contenido 31
Page 34

1. Uso de la impresora
Gracias por adquirir esta impresora. Con
esta impresora, puede imprimir documentos
y fotos, escanear documentos para un
equipo conectado, hacer copias, y enviar y
recibir faxes.
Para escanear, copiar y enviar faxes, puede
usar el panel de control de la impresora.
También puede usar el panel de control
para cambiar conguraciones, imprimir
informes u obtener ayuda de la impresora.
Consejo: Si la impresora se encuentra
conectada a un equipo, también
puede cambiar su conguración
con las herramientas del software
disponibles en su equipo, tales como
el software de la impresora o el
servidor web integrado (EWS). Para
obtener más información acerca de
estas herramientas, consulte la Guía
del usuario (que está disponible en su
equipo después de instalar el software).
¿Dónde se encuentra la guía del usuario?
La Guía del usuario de esta impresora (también llamada “Ayuda”) no se proporciona
en formato impreso. En su lugar, se ubica en su equipo mientras el programa de
instalación instala el software HP.
Esta guía proporciona información sobre los temas siguientes:
Información sobre solución de problemas
•
Avisos de seguridad importantes e información regulatoria
•
Información acerca de los suministros de impresión admitidos
•
Instrucciones detalladas para el usuario
•
También puede abrir esta guía desde el software de impresión HP (Windows) o desde
el menú Ayuda (Mac OS X):
Windows: Haga clic en Inicio, seleccione Programas o Todos los programas,
•
seleccione HP, luego la carpeta de la impresora HP y luego Ayuda.
Mac OS X: En Finder, haga clic en Ayuda > Ayuda de Mac. En la ventana Visor de
•
ayuda, elija la impresora en el menú emergente Ayuda de Mac.
También hay disponible una versión en Adobe Acrobat de esta guía en el sitio Web
de asistencia de HP (www.hp.com/support).
Uso de la impresora32
Page 35

HP Digital Solutions
La impresora incluye un conjunto de
soluciones digitales que pueden ayudarle a
simplicar y optimizar su trabajo.
Escanear para equipo
¡Sepa más!
Para obtener más información acerca
de la conguración y el uso de estas
soluciones digitales, consulte la Guía
del usuario. (La Guía del usuario está
disponible en su equipo después de
que instala el software.)
Con la impresora, puede simplemente
caminar hasta la impresora, tocar un
botón en el panel de control de la misma
y escanear documentos en forma directa a
un equipo o compartirlos rápidamente con
socios comerciales como archivos adjuntos
de correo electrónico.
Nota: Si está usando un equipo con
Microsoft® Windows® y este equipo
no aparece en la lista de destinos de
la pantalla del panel de control de la
Fax digital HP (Fax a PC y Fax a Mac)
Nunca vuelva a perder faxes importantes
traspapelados en una pila de papel.
Use Fax a PC y Fax a Mac para recibir
faxes automáticamente y guardarlos de
forma directa en su equipo. Con Fax a PC
y Fax a Mac, puede almacenar copias
digitales de su faxes fácilmente, además
de eliminar las complicaciones de manejar
grandes archivos de papeles.
impresora, deberá reiniciar la función
de escaneo del software de HP en
el equipo de destino. Para reiniciar
la función de escaneo, haga clic
en Inicio en el escritorio del equipo,
seleccione Programas o Todos los
programas, luego HP y luego la
carpeta correspondiente a la impresora
HP; luego, seleccione la impresora HP.
En la ventana que aparece, haga clic
en la opción Activar escanear para
equipo.
Además, puede desactivar por completo la
impresión de faxes, lo que ahorra dinero en
papel y tinta, y ayuda a reducir el consumo
y el desperdicio de papel.
Español
Uso de la impresora 33
Page 36

Funciones de Internet
La impresora ofrece soluciones innovadoras,
activadas para Web que pueden ayudarle
rápidamente a acceder a Internet, obtener
documentos e imprimirlos más rápido
y con menos problemas... y sin usar un
equipo. Además, puede usar un servicio
Web (Marketsplash por HP) para crear e
imprimir materiales de marketing de calidad
profesional.
Nota: Para usar estas funciones
Web, la impresora debe conectarse
a Internet (ya sea mediante un cable
Ethernet o una conexión inalámbrica).
No podrá usar estas funciones Web si
la impresora se encuentra conectada
mediante un cable USB.
HP Apps
HP Apps brinda una manera rápida y
fácil de acceder, almacenar e imprimir
información comercial sin un equipo. Al
usar HP Apps, puede obtener acceso a
contenido almacenado en la Web, como
formularios comerciales, noticias, archivos
y más; directamente desde la pantalla del
panel de control de la impresora.
Para usar HP Apps, la impresora debe
conectarse a Internet (ya sea mediante un
cable Ethernet o una conexión inalámbrica).
Siga las instrucciones en el panel de control
de la impresora para activar y congurar
este servicio.
Nota: Además de estas soluciones,
puede enviar trabajos de impresión a
la impresora de manera remota desde
dispositivos móviles. Con este servicio,
llamado HP ePrint, puede imprimir
desde teléfonos móviles conectados a
correo electrónico, netbooks u otros
dispositivos móviles, en cualquier lugar
y en cualquier momento.
Periódicamente se agregan nuevas
aplicaciones que usted pueda seleccionar
y descargar al panel de control de la
impresora para su uso. Para obtener más
información, visite www.hp.com/go/
ePrintCenter.
Nota: Para obtener una lista de los
requisitos del sistema para este sitio
Web, consulte la Guía del usuario
(disponible en su equipo después de
instalar el software).
Uso de la impresora34
Page 37

Marketsplash por HP
Haga crecer su negocio con las
herramientas y los servicios HP en línea
para crear e imprimir materiales de
marketing profesional. Con Marketsplash,
puede hacer lo siguiente:
• Cree rápida y fácilmente increíbles
folletos de calidad profesional,
volantes, tarjetas de negocios y más.
Elija de entre miles de plantillas
personalizables creadas por
galardonados diseñadores grácos
comerciales.
• Diversas opciones de impresión le
permiten obtener exactamente lo que
necesita, cuando lo necesita. Para
resultados inmediatos de alta calidad,
imprima en la impresora. También
existen otras opciones disponibles en
línea desde HP y nuestros socios.
Obtenga la calidad profesional que
espera a la vez que minimiza los
costos de impresión.
• Mantenga todos sus materiales de
marketing organizados y fácilmente
accesibles en su cuenta de
Marketsplash, disponibles desde
cualquier equipo y directamente
desde la pantalla del panel de control
de la impresora (sólo en modelos de
selección).
Para comenzar, seleccione Marketsplash
por HP en el software HP que venía
con la impresora. O para obtener más
información, visite marketsplash.com.
Nota: Para obtener una lista de los
requisitos del sistema para este sitio
Web, consulte las Especicaciones
del sitio Web de HP en la Guía del
usuario (disponible en su equipo
después de instalar el software).
Nota: No todas las herramientas
y los servicios de Marketsplash
están disponibles en todos los
países, regiones e idiomas. Visite
marketsplash.com para obtener la
información más actual.
Español
HP ePrint
Con HP ePrint, puede imprimir desde
teléfonos móviles conectados a correo
electrónico, netbooks u otros dispositivos
móviles, en cualquier lugar y en cualquier
momento. Al usar el servicio del dispositivo
móvil y Web Services de la impresora,
puede imprimir documentos en una
impresora que está al lado suyo o a miles
de kilómetros de distancia.
Para utilizar el servicio HP ePrint, debe
contar con los siguientes componentes:
• Una impresora activada para HP
ePrint que esté conectada a Internet
(ya sea mediante un cable Ethernet o
una conexión inalámbrica)
• Un dispositivo con capacidad
operativa para correo electrónico
Siga las instrucciones en el panel de control
de la impresora para activar y congurar
Web Services de la impresora. Para obtener
más información, consulte www.hp.com/
go/ePrintCenter
Uso de la impresora 35
Page 38

2. Congurar y usar el fax
Esta impresora permite
enviar y recibir faxes en
blanco y negro y en color.
Congurar para fax
Antes de usar la función de fax, siga
estos pasos para conectar su impresora
correctamente.
Consejo: puede usar el Asistente de
conguración del fax (Windows) o la
HP Utility (Mac OS X) para congurar
el fax.
Para obtener más información acerca de
las funciones del fax disponibles en la
impresora, consulte la Guía del usuario (que
Búsqueda de
información de
conguración
de fax
Si se encuentra en alguno de los siguientes países
o regiones, visite el sitio Web correspondiente para
obtener información acerca de la conguración de fax.
Austria
Bélgica
Holandés
Francés
Dinamarca
Finlandia
Francia
Alemania
Irlanda
Italia
Noruega
Holanda
Portugal
España
Suecia
Suiza
Francés
Alemán
United Kingdom
está disponible en su equipo después de
instalar el software).
IMPORTANTE: Seleccione la
casilla “Buscando información de
conguración de fax” para su país o
región. Si su país o región está incluido
en la lista, visite el sitio Web para
obtener información de conguración.
Si su país o región no está incluido
en la lista, siga las instrucciones
proporcionadas en esta guía.
www.hp.com/at/faxcong
www.hp.be/nl/faxcong
www.hp.be/fr/faxcong
www.hp.dk/faxcong
www.hp./faxcong
www.hp.com/fr/faxcong
www.hp.com/de/faxcong
www.hp.com/ie/faxcong
www.hp.com/it/faxcong
www.hp.no/faxcong
www.hp.nl/faxcong
www.hp.pt/faxcong
www.hp.es/faxcong
www.hp.se/faxcong
www.hp.com/ch/fr/faxcong
www.hp.com/ch/de/faxcong
www.hp.com/uk/faxcong
Congurar y usar el fax36
Page 39

Paso 1: Conecte la impresora a la línea telefónica
Nota: Si el cable telefónico que viene
Antes de comenzar…
Antes de comenzar, asegúrese de
haber hecho lo siguiente:
Cartuchos de tinta instalados
•
Papel tamaño A4 o Carta cargado
•
en la bandeja
Tener listos el cable telefónico y el
•
adaptador (si se incluían con la
impresora).
con la impresora no es lo sucientemente
largo, puede utilizar un acoplador para
ampliar la longitud. Puede comprar el
acoplador en una tienda de electrónica
que venda accesorios telefónicos.
También necesitará otro cable telefónico,
que puede ser uno estándar que ya
tenga en su casa u ocina. Para obtener
información, consulte la Guía del usuario
(que se encuentra disponible en su
equipo después de instalar el software).
Para obtener más información, consulte
el póster de conguración que viene
en la caja con la impresora.
Para conectar la impresora y cualquier otro
equipo o dispositivo telefónico, realice los
siguientes pasos:
1. Conecte un extremo del cable telefónico
suministrado con la impresora al
conector telefónico de la pared y el otro
extremo al puerto con el nombre 1-LINE
que se encuentra en la parte posterior
de la impresora.
Nota: Puede ser necesario conectar
el cable telefónico suministrado al
adaptador proporcionado para su
país/región.
1
PRECAUCIÓN: Si no utiliza un cable
telefónico que no sea el que incluye la
impresora, tal vez no pueda enviar o
recibir faxes correctamente. Debido a
que los cables telefónicos que pueda
usar en su casa u ocina pueden
diferir del que incluye la impresora, HP
recomienda que utilice el cable que
incluye la impresora.
2. Conecte cualquier otro equipo telefónico.
Para obtener información acerca de la
conexión y conguración de dispositivos
o servicios adicionales con la impresora,
consulte los cuadros de esta sección o
consulte la Guía del usuario.
Nota: Si tiene problemas al congurar
la impresora con otros equipos o
servicios, póngase en contacto con la
empresa que proporcionó el equipo o
servicio.
Español
1 Conector telefónico de pared
2 Puerto 1-LINE de la impresora
2
Congurar y usar el fax 37
Page 40

¿Que es un servicio de timbre especial?
Muchas compañías telefónicas ofrecen una función de timbre especial que permite
disponer de varios números de teléfono en la misma línea. Al contratar este servicio,
cada número tendrá un patrón de timbre de llamada distinto. Puede congurar la
impresora para que responda las llamadas entrantes que tengan un patrón de timbre
especíco.
Si conecta la impresora a una línea con timbre especial, solicite a la compañía
telefónica que asigne un patrón de timbre a las llamadas de voz y otro a las de fax.
HP recomienda solicitar que los números de fax tengan dos o tres timbres. Cuando la
impresora detecta el patrón de timbre especíco, responde a la llamada y recibe el fax.
Para obtener información acerca de la conguración de un timbre especial, consulte
“Paso 3: Congure los ajustes de fax” en la página 40.
Consejo: si se suscribe al servicio de
correo de voz en la misma línea que
usará para fax, no podrá recibir faxes
automáticamente. Dado que debe
responder en persona a llamadas de
fax entrantes, asegúrese de desactivar
la función Respuesta automática.
Si en lugar de ello preere recibir los faxes
en forma automática, comuníquese con su
compañía telefónica para suscribirse a un
servicio de timbre especial o para solicitar
una línea telefónica separada para enviar y
recibir fax.
3. Después de haber conectado la
impresora y cualquier otro equipo
telefónico, vaya al “Paso 2: Prueba de
la conguración de fax” en la página 39.
Conexión a línea DSL/ADSL
Si se suscribe al servicio DSL/ADSL, siga los siguientes pasos para conectar el fax.
1
32
1. Conecte el ltro DSL/ADSL y el cable
telefónico proporcionado por su
proveedor de servicios DSL/ADSL
entre el conector telefónico de pared
y el ltro DSL/ADSL.
2. Conecte el cable telefónico
proporcionado con la impresora entre
el ltro DSL/ADSL y el puerto 1-Line
de la impresora.
1 Conector telefónico de pared
2 Filtro DSL/ADSL y cable telefónico (proporcionado por su proveedor de servicios DSL/ADSL)
3 Cable telefónico que se incluye en la caja de la impresora, conectado al puerto “1-LINE” de
la impresora
Congurar y usar el fax38
Page 41

Conexión de equipo adicional
Retire el enchufe blanco del puerto etiquetado 2-EXT en la parte posterior de la
impresora y luego conecte un teléfono a este puerto.
Si va a conectar equipo adicional, como un módem de marcación
de equipo o un teléfono, deberá comprar un bifurcador paralelo. Un
bifurcador paralelo tiene un puerto RJ-11 en la parte delantera y dos
puertos RJ-11 en la parte posterior. No utilice un bifurcador telefónico de
2 líneas, un bifurcador en serie ni un bifurcador paralelo con dos puertos
RJ-11 en la parte delantera y un conector en la parte posterior.
Nota: Si se suscribe a un servicio DSL/ADSL, conecte el ltro DSL/ADSL al bifurcador
paralelo, y use el cable telefónico proporcionado por HP para conectar el otro extremo
del ltro al puerto 1-Line de la impresora. Retire el enchufe blanco del puerto etiquetado
2-EXT en la parte posterior de la impresora y luego conecte un teléfono o un contestador
automático al puerto 2-EXT. A continuación, conecte el segundo puerto del bifurcador
paralelo al módem DSL/ADSL que se conecta con el equipo
1 Conector telefónico de pared
7
2 Bifurcador paralelo
1
3
4
2
5
6
3 Filtro DSL/ADSL (disponible con su proveedor de
servicio DSL/ADSL)
4 Cable telefónico proporcionado con la impresora
5 Módem DSL/ADSL
6 Equipo
7 Teléfono
Español
Paso 2: Prueba de la conguración de fax
Pruebe la conguración de fax para
vericar el estado de la impresora y
asegúrese de que esté congurado
correctamente para el envío y recepción de
fax.
La prueba de fax hace lo siguiente:
• Prueba de la máquina de fax
• Comprueba que el tipo de cable
telefónico correcto está conectado a la
impresora
• Revisa que el cable telefónico esté
conectado en el puerto correcto
• Revisa si hay tono de marcación
• Revisa si hay una línea de teléfono activa
• Prueba el estado de la conexión de la
1. En el panel de control de la impresora,
2. Toque Herramientas y luego Ejecutar
línea telefónica
toque y luego Conguración.
prueba de fax. La impresora muestra el
estado de la prueba en la pantalla e
imprime un informe. Después de
terminada la prueba, la impresora
imprime un informe con el resultado de la
prueba. Si se produce algún fallo en la
Congurar y usar el fax 39
Page 42

prueba, compruebe el informe para
saber cómo corregir el problema y volver
a ejecutar la prueba. Para obtener
información adicional sobre la solución de
problemas, consulte “Problemas para
congurar la impresora” en la página 53.
Paso 3: Congure los ajustes de fax
3. Una vez que la prueba de fax se ha
ejecutado correctamente, vaya al “Paso
3: Congure los ajustes de fax” en la
página 40.
Cambie la conguración del fax de
la impresora para que se ajuste a sus
necesidades una vez que haya conectado
la impresora a la línea telefónica.
Nota: Para usar la misma resolución de
fax y ajustes más claros/más oscuros
para todos los faxes enviados desde
la impresora, congure los ajustes
según sus preferencias y luego toque
Congurar como valores nuevos
predeterminados.
Si desea congurar este ajuste... ...haga esto...
Respuesta automática
Establezca el modo de respuesta en
Activado si desea que la impresora
responda a las llamadas entrantes y reciba
faxes automáticamente. La impresora
responderá a estas llamadas entrantes
después del número de timbres que se ha
especicado en el ajuste Timbres antes de
responder.
¿Dónde puedo cambiar los
ajustes de fax?
Puede congurar los ajustes de fax
mediante las siguientes herramientas:
Panel de control de la impresora
Toque el botón Conguración en el
panel de control de la impresora,
toque Ajustes de fax y seleccione el
ajuste que desea congurar.
Software de HP
Si tiene instalado el software HP en el
equipo, puede congurar los ajustes
de fax mediante el software instalado
en el equipo.
Para obtener más información acerca
del uso de estas herramientas o
ajustes, consulte la Guía del usuario.
1. Toque la echa a la derecha
Conguración.
2. Toque Conguración de fax y luego
Conf. básica del fax.
3. Toque Respuesta automática y luego
ACTIVADO.
y luego
Congurar y usar el fax40
Page 43

Si desea congurar este ajuste... ...haga esto...
Timbres antes de responder (opcional)
Establecer el número de timbres antes de
responder
Nota: El número de timbres que deben
sonar antes de que la impresora
responda debe ser mayor que el
establecido para el contestador
automático.
Timbre especial
Cambiar el patrón del timbre de respuesta
por un timbre especial
Nota: Si usa un servicio de timbre
especial, puede usar más de un
número telefónico en la misma línea
de teléfono. Puede cambiar este
ajuste para permitir que la impresora
determine automáticamente el patrón
de timbre que debe usar sólo para
demandas de fax.
Consejo: También puede usar la
función Detección de patrón de
timbre en el panel de control de
la impresora para congurar un
timbre distintivo. Con esta función, la
impresora reconoce y graba el patrón
de timbre de una llamada entrante y,
basada en esta llamada, determina
automáticamente el patrón de timbre
distintivo asignado por la compañía
de teléfonos a las llamadas de fax.
Velocidad de fax
Establecer la velocidad que emplea el fax
para comunicarse entre la impresora y otros
aparatos de fax al enviar y recibir faxes.
Nota: Si experimenta problemas al
enviar y recibir faxes, intente utilizar
una velocidad de fax más baja.
1. Toque la echa a la derecha
Conguración.
2. Toque Conguración de fax y luego
Conf. básica del fax.
3. Toque Timbres antes de responder.
4. Toque la echa hacia arriba
para cambiar el número de timbres.
5. Toque Listo para aceptar el ajuste.
1. Toque la echa a la derecha
Conguración.
2. Toque Conguración de fax y luego
Conguración avanzada de fax.
3. Toque Timbre especial.
4. Aparecerá un mensaje informando de
que este ajuste no se debe cambiar a
menos que tenga varios números de
teléfono en la misma línea telefónica.
Toque Sí para continuar.
5. Realice una de las siguientes acciones:
• Toque el patrón de timbre asignado
por su compañía de teléfonos a las
llamadas de fax.
O
• Toque Detección de patrón de timbre
y siga las instrucciones en el panel de
control de la impresora.
Nota: Si va a usar un sistema
telefónico PBX que tiene otros patrones
de timbre para llamadas internas y
externas, debe llamar al número de
faz desde un número externo.
1. Toque la echa a la derecha
Conguración.
2. Toque Conguración de fax y luego
Conguración avanzada de fax.
3. Toque la echa hacia abajo
Velocidad de fax.
4. Toque para seleccionar Rápida, Media
o Lenta.
y luego
o
y luego
Español
y luego
y luego
Congurar y usar el fax 41
Page 44

Si desea congurar este ajuste... ...haga esto...
Modo corrección de errores de fax
Si la impresora detecta una señal de
error durante la transmisión y el ajuste de
corrección de errores está activado, la
impresora puede solicitar que una parte del
fax se vuelva a enviar.
Nota: Si tiene problemas para enviar
y recibir faxes, apague la corrección
de errores. Desactivar este ajuste
también puede ser útil cuando intenta
enviar o recibir un fax desde o hacia
otro país/región, o si está utilizando
una conexión telefónica por satélite.
Volumen
Cambiar el volumen del sonido de la
impresora, incluidos los tonos de fax.
1. Toque la echa a la derecha
Conguración.
2. Toque Conguración de fax y luego
Conguración avanzada de fax.
3. Toque la echa hacia abajo
Modo de corrección de errores.
4. Seleccione Encender o Apagar.
1. Toque la echa a la derecha
Conguración.
2. Toque Conguración de fax y luego
Conf. básica del fax.
3. Toque la echa hacia abajo
Volumen de sonido del fax.
4. Toque para seleccionar Bajo, Alto o
Desactivado.
y luego
y luego
y luego
y luego
Congurar y usar el fax42
Page 45

Usar el fax
En esta sección, aprenderá a enviar y
recibir faxes.
¡Sepa más!
Para obtener más información acerca
de las siguientes temas, consulte la
Guía del usuario.
Envío de un fax mediante el control
•
de llamadas
Envío de un fax desde un equipo
•
Envío de un fax desde la memoria
•
Programación de un fax para
•
enviarlo más tarde
Envío de un fax a varios
•
destinatarios
Envío de un fax en modo de
•
corrección de errores
La Guía del usuario está disponible en
su equipo después de que instala el
software.
Español
Enviar un fax
Puede enviar faxes de diversas formas. El
panel de control de la impresora le permite
enviar un fax en blanco y negro o en color.
También puede enviar faxes en forma
manual desde un teléfono conectado, lo que
le permite hablar con el destinatario antes
de enviar el fax.
También puede enviar documentos en su
equipo como faxes, sin imprimirlos antes.
Congurar y usar el fax 43
Page 46

Enviar un fax estándar
1. Cargue el documento que desee enviar
por fax en la impresora.
Puede enviar faxes desde el alimentador
automático de documentos (ADF) o desde el
cristal del escáner.
2. Toque Fax.
Enviar un fax desde una extensión
1. Cargue el documento que desee enviar
por fax en la impresora.
Puede enviar faxes desde el alimentador
automático de documentos (ADF) o desde el
cristal del escáner.
3. Introduzca el número de fax mediante
el teclado numérico.
Consejo: Para agregar una pausa
en el número de fax que desea
introducir, toque *@ varias veces
hasta que aparezca un guión (-)
en la pantalla.
4. Toque Iniciar negro o Iniciar color.
Consejo: Si el destinatario tiene
problemas con la calidad del fax
enviado, puede intentar cambiar
la resolución o el contraste del fax.
4. Si el destinatario responde al teléfono,
puede entablar una conversación antes
de enviar el fax. Cuando esté
preparado para enviar el fax, pulse
Iniciar.
Nota: Si una máquina de fax responde
a la llamada, oirá los tonos del fax.
Continúe con el paso siguiente para
transmitir el fax.
2. Toque Fax.
3. Marque el número utilizando el teclado
del teléfono que esté conectado a la
impresora.
Nota: No utilice el teclado del panel
de control de la impresora para enviar
faxes de forma manual. Debe utilizar
el teclado numérico del teléfono para
marcar el número del destinatario.
Congurar y usar el fax44
5. Cuando todo esté listo para enviar el
fax, toque Iniciar negro o Iniciar color.
Nota: Si el sistema se lo pide,
seleccione Enviar fax.
Si habla con el destinatario antes de enviar
el fax, infórmele que debe pulsar Inicio en
su equipo de fax tras oír los tonos de fax.
La línea de teléfono quedará en silencio
mientras el fax esté transmitiendo. En
este momento, puede colgar el teléfono.
Si desea continuar hablando con el
destinatario, permanezca en la línea hasta
que se complete la transmisión del fax.
Page 47

Recibir faxes
Puede recibir faxes de forma automática o
manual.
Nota: Si recibe un fax de tamaño
legal o mayor, y la impresora no está
congurada para utilizar papel de
dicho tamaño, ésta reducirá el fax
para ajustarlo al papel cargado. Si
ha desactivado la función Reducción
automática, la impresora imprimirá el
fax en dos páginas.
Si copia un documento al llegar un fax, éste
se guarda en la memoria de la impresora
hasta que naliza la copia. Como resultado,
el número de páginas del fax que se
pueden almacenar en la memoria puede
disminuir.
¡Sepa más!
Para obtener más información acerca
de las siguientes temas, consulte la
Guía del usuario.
Reimpresión de faxes recibidos
•
desde la memoria
Sondeo para recibir un fax
•
Reenvío de faxes a otro número
•
Selección del tamaño del papel de
•
los faxes que reciba
Establecimiento de reducción
•
automática para faxes entrantes
Bloqueo de números de fax no
•
deseados
La Guía del usuario está disponible
en su equipo después de que instala
el software.
Español
Recibir un fax automáticamente
Si se activa la opción Respuesta automática
(el ajuste predeterminado) en el panel de
control de impresora, la impresora responde
automáticamente a llamadas y recibir faxes
después del número de timbres especicado
en el ajuste Timbres antes de responder.
Para obtener información sobre este ajuste,
consulte “Paso 3: Congure los ajustes de
fax” en la página 40.
Faxes y servicio de correo de
voz
Si se suscribe al servicio de correo
de voz en la misma línea que usará
para fax, no podrá recibir faxes
automáticamente. En su lugar, debe
asegurarse de que el ajuste Respuesta
automática esté apagado para que
pueda recibir faxes manualmente.
Asegúrese de iniciar el fax manual antes
de que el correo de voz tome la línea.
Si en lugar de ello preere recibir los
faxes en forma automática, comuníquese
con su compañía telefónica para
suscribirse a un servicio de timbre distintivo
o para solicitar una línea telefónica
separada para enviar y recibir fax.
Congurar y usar el fax 45
Page 48

Recepción manual de un fax
Cuando habla por teléfono, la persona
con quien lo hace puede enviarle un fax
mientras está conectado (lo que se conoce
como recepción de un fax de forma
manual).
Puede recibir faxes manualmente desde un
teléfono conectado a la impresora (a través
del puerto 2-EXT) o de un teléfono que se
encuentre en la misma línea telefónica (pero
no conectado directamente a la impresora).
1. Asegúrese de que la impresora esté
encendida y que cargó papel en la
bandeja principal.
2. Retire los originales de la bandeja del
alimentador de documentos.
3. Establezca el ajuste Timbres antes de
responder en un número alto para
poder responder a la llamada entrante
antes de que lo haga la impresora.
También puede desactivar el ajuste
Respuesta automática para que la
impresora no responda
automáticamente a las llamadas
entrantes.
4. Si está hablando por teléfono con el
remitente, indíquele que pulse Inicio en
su equipo de fax.
5. Al oír los tonos de fax del equipo que lo
envía, siga estos pasos:
a. Toque Fax y, a continuación,
seleccione Iniciar negro o Iniciar
color.
b. Cuando la impresora haya
comenzado a recibir el fax, puede
colgar el teléfono o no hacerlo. La
línea telefónica está en silencio
durante la transmisión del fax.
Reimpresión de faxes recibidos desde la memoria
Si activa la opción Recepción fax seguridad,
los faxes recibidos se almacenan en la
memoria, independientemente de si se ha
producido un error.
Nota: Todos los faxes almacenados
en la memoria se eliminan cuando
desconecta la alimentación. Para
obtener más información acerca del
uso de esta función, consulte la Guía
del usuario (disponible en su equipo
después de instalar el software).
Congurar y usar el fax46
1. Asegúrese de que hay papel cargado
2. Toque la echa a la derecha y luego
3. Toque Herramientas y luego Reimpr.
4. Si desea detener la reimpresión de los
en la bandeja principal.
Conguración.
faxes en memoria. Los faxes se
imprimen en orden inverso al que se
recibieron comenzando por la
impresión del fax recibido más
recientemente, y así sucesivamente.
faxes de la memoria, toque
(Cancelar).
Page 49

Trabajo con informes y registros
Puede imprimir varios tipos diferentes de
informes de fax:
Página de conrmación de fax
•
Registro de fax
•
Imagen de informe de envío de faxes
•
Otros informes
•
Para imprimir un informe
1. Toque la echa a la derecha y luego
Conguración.
2. Toque Conguración de fax, luego la
echa hacia abajo y luego Informes
de fax.
Para borrar el registro de fax
Nota: Borrar el registro de fax también
elimina todos los faxes almacenados
en la memoria.
1. Toque la echa a la derecha y luego
Conguración.
Estos informes incluyen información útil
acerca de la impresora.
Nota: También puede ver el historial
de llamadas en la pantalla del panel
de control de la impresora. Para ver
el historial de llamadas, toque Fax
y luego (Historial de llamadas).
Sin embargo, esta lista no se puede
imprimir.
3. Seleccione el informe de fax que desee
imprimir y luego toque OK.
Español
2. Toque Herramientas.
3. Toque la echa hacia abajo y luego
Borrar registro de faxes.
Congurar y usar el fax 47
Page 50

Fax y servicios telefónicos digitales
Muchas compañías telefónicas proporcionan
a sus clientes servicios telefónicos digitales,
como el siguiente:
• DSL: un servicio de línea de
suscriptores digitales (DSL) a través de
la compañía telefónica. (Es posible
que DSL se denomine ADSL en su país
o región.)
• PBX: sistema telefónico de
intercambio privado de sucursales
(PBX)
• ISDN: sistema de servicio de red
digital de servicios integrados (RDSI)
• FoIP: servicio telefónico de bajo coste
que permite enviar y recibir faxes con
la impresora a través de Internet. A
este método se le conoce como fax
sobre protocolo de Internet (FoIP)
Consulte la Guía del usuario para
obtener más información.
Las impresoras HP están diseñadas
especícamente para usarse con servicios
telefónicos análogos tradicionales. Si se
encuentra en un entorno telefónico digital
(como DSL/ADSL, PBX, or ISDN), es posible
que deba usar ltros o convertidores de
digital a análogo al congurar la impresora
para el envío de faxes.
Nota: HP no garantiza que la
impresora sea compatible con todas
las líneas o proveedores de servicios
digitales, en todos los entornos
digitales, o con todos los convertidores
de digital a análogo. Siempre se
recomienda que converse directamente
con la compañía telefónica respecto
de las opciones correctas de
conguración según sus servicios de
línea proporcionados.
Congurar y usar el fax48
Page 51

3. Congure la comunicación
inalámbrica (802.11) (sólo en
algunos modelos)
Si la impresora admite
comunicación inalámbrica
(802.11), puede conectarla en
forma inalámbrica o una red
inalámbrica.
Para conectar la impresora, realice los
siguientes pasos en el orden indicado.
¿Cuál es mi nombre de red y clave de acceso?
Mientras instala el software, se le puede
pedir que ingrese el nombre de red
(también llamado “SSID”) y una clave de
acceso de seguridad:
El nombre de red es el nombre de su
•
red inalámbrica.
La clave de acceso de seguridad
•
impide que otras personas se conecten
a su red inalámbrica sin su permiso.
Según el nivel de seguridad requerido,
su red inalámbrica puede usar una
clave WPA o una contraseña WEP.
Si no ha cambiado el nombre de red o la
clave de acceso de seguridad desde que
instaló su red inalámbrica, en algunos
casos puede encontrarlos en la parte
posterior del direccionador inalámbrico.
Además, si usa un equipo que ejecute
Windows, HP ofrece una herramienta
basada en la Web llamada Wireless
Nota: Antes de congurar la
comunicación inalámbrica, compruebe
que el hardware de la impresora
esté congurado. Para obtener más
información, consulte el póster de
conguración que viene con la
impresora.
Español
Network Assistant (Asistente de red
inalámbrica), que puede ayudar a
recuperar esta información en algunos
sistemas. Para usar esta herramienta,
vaya a www.hp.com/go/networksetup.
(Esta herramienta se encuentra disponible
actualmente sólo en inglés.)
Si no puede encontrar el nombre de la
red o la clave de acceso de seguridad
o no recuerda esta información, consulte
la documentación disponible con el
equipo o el direccionador inalámbrico.
Si sigue sin poder encontrar esta
información, póngase en contacto con el
administrador de red o con la persona
que conguró la red inalámbrica.
Para obtener más información acerca de
los tipos de conexiones de red, el nombre
de la red, la clave WEP o la contraseña
WPA, consulte la Guía del usuario.
Congure la comunicación inalámbrica (802.11) (sólo en algunos modelos) 49
Page 52

Conexión sin direccionador inalámbrico
Si no tiene un direccionador inalámbrico (como un direccionador inalámbrico Linksys
o Apple AirPort Base Station), de todas formas puede conectar la impresora al
equipo mediante conexión inalámbrica (lo que se conoce como “equipo a equipo” o
conexión inalámbrica “ad hoc”).
Consulte la Guía del usuario para obtener más información.
Paso 1: Conecte la impresora a la red inalámbrica
1. En el panel de control de la impresora,
toque la tecla de echa a la derecha y
luego seleccione Red.
2. Toque Inalámbrico, luego Asistente de
instalación inalámbrica y luego OK.
3. Siga las instrucciones que aparecen en
Paso 2: Instale el software de la impresora
Siga las instrucciones para su sistema
operativo.
Windows
1. Guarde todos los documentos abiertos.
Cierre cualquier aplicación que esté en
ejecución en el equipo.
2. Inserte el CD del software HP en el
equipo.
3. En el menú CD, haga clic en Instalar
pantalla para completar la
conguración.
Nota: Si detecta problemas mientras
ejecuta el Asistente de instalación
inalámbrica, consulte”Problemas de
conguración inalámbrica (802.11)” en
la página 58.
dispositivo Red/Inalámbrico y siga las
instrucciones de la pantalla.
Nota: Si el software rewall del equipo
muestra algún mensaje durante la
instalación, seleccione la opción “siempre
permitir/autorizar” de los mensajes.
Si selecciona esta opción, software se
instala correctamente en el equipo.
Congure la comunicación inalámbrica (802.11) (sólo en algunos modelos)50
Page 53

Mac OS
1. Inserte el CD del software HP en el
equipo.
2. Haga doble clic en el icono del
Paso 3: Compruebe la conexión inalámbrica
Imprima la página de prueba inalámbrica
para obtener información sobre la conexión
inalámbrica de la impresora. La página
de prueba inalámbrica ofrece información
sobre el estado de la impresora, la
dirección MAC y la dirección IP. Si la
impresora se encuentra conectada a una
red, la página de prueba mostrará detalles
sobre los ajustes de la red.
1. Toque la echa a la derecha y luego
2. Toque Inalámbrico y luego Prueba de
Instalador HP del CD de software y siga
las instrucciones que aparecen en
pantalla.
Español
Red.
red inalámbrica.
Congure la comunicación inalámbrica (802.11) (sólo en algunos modelos) 51
Page 54

Cambiar el método de conexión
Si ya instaló el software HP y conectó la
impresora mediante un cable USB, Ethernet
o una conexión inalámbrica, puede cambiar
a una conexión diferente en cualquier
momento que desee.
Nota: Si va a cambiar a una conexión
inalámbrica, asegúrese de que no
haya un cable Ethernet conectado
a la impresora. Si conecta un cable
Ethernet, se desactivan las funciones
inalámbricas de la impresora.
Siga las instrucciones para su sistema
operativo.
Windows
1. En el escritorio del equipo, haga clic en
Inicio, seleccione Programas o Todos
los programas, haga clic en HP,
seleccione el nombre de la impresora y
luego haga clic en Conectar una nueva
impresora.
2. Siga las instrucciones que aparecen en
la pantalla.
Mac OS X
1. Haga clic en el icono Utilidad de HP en
el dock.
Nota: Si no aparece el icono en el
Dock, haga clic en el icono Spotlight
que se encuentra a la derecha de la
barra de menús, escriba Utilidadde
HP en el recuadro y, a continuación,
haga clic en la entrada Utilidad de HP.
2. Haga clic en el icono de la aplicación
en la barra de herramientas.
3. Haga doble clic en Asistente de
conguración de HP y siga las
instrucciones que aparecen en pantalla.
Congure la comunicación inalámbrica (802.11) (sólo en algunos modelos)52
Page 55

4. Resolver problemas de
conguración
Las siguientes secciones
proporcionan ayuda para
problemas que puede
tener mientras congura
la impresora.
Si necesita más ayuda, consulte la Guía del
usuario (que se encuentra disponible en su
equipo después de instalar el software).
Problemas para congurar la impresora
Asegúrese de que se haya retirado toda
•
la cinta y materiales de embalaje del
interior y exterior de la impresora.
Asegúrese de que la impresora tenga
•
papel blanco, normal y sin utilizar,
tamaño A4 o Carta (8,5 x 11 pulgadas).
Asegúrese de que todos los cables en
•
uso (como un cable USB o Ethernet)
estén en el orden correcto y funcionen
bien.
Compruebe que la luz (de
•
alimentación) esté encendida y sin
pestañear. La primera vez que se
enciende la impresora, demora
aproximadamente 45 segundos en
calentarse.
Asegúrese de que la impresora muestre
•
la pantalla de inicio y de que no haya
otras luces encendidas ni parpadeando
en el panel de control de la impresora.
Asegúrese de que el cable de
•
alimentación y el adaptador de
alimentación estén conectados en
forma segura, y de que la fuente de
alimentación funcione correctamente.
Asegúrese de que el papel esté
•
correctamente cargado en la bandeja y
que no esté atascado en la impresora.
Revise que todos los seguros y las
•
cubiertas estén correctamente cerrados.
Español
Resolver problemas de conguración 53
Page 56

Problemas durante la instalación del software
Antes de instalar el software, asegúrese
•
de que el resto de los programas está
cerrado.
Si el equipo no reconoce la ruta hacia
•
la unidad de CD que ha introducido,
asegúrese de que está especicando la
letra de unidad correcta.
Si el equipo no puede reconocer el CD
•
de software HP en la unidad de CD,
•
Problemas para congurar el fax
Esta sección contiene información acerca de
la solución de problemas que puede tener
cuando congura el fax de la impresora.
Nota: Si la impresora no está
congurada correctamente para el
envío y recepción de faxes, es posible
que tenga problemas para enviar
faxes, recibir faxes o ambos.
Si tiene problemas relacionados con el fax,
puede imprimir un informe de prueba de fax
para comprobar el estado de la impresora.
Esta prueba fallará si la impresora no está
congurada correctamente para el envío y
recepción de faxes. Realice esta prueba tras
haber congurado el fax de la impresora.
Para obtener más información, consulte el
“Paso 2: Prueba de la conguración de fax”
en la página 39.
compruebe que el CD no esté dañado.
Puede descargar el controlador del
dispositivo en el sitio Web de HP (www.
hp.com/support).
Si usa un equipo que ejecuta Windows
y está conectado con un cable USB,
asegúrese de que las unidades USB no
se hayan desactivado en el
Administrador de dispositivos de
Windows.
Paso 1: Ejecute la prueba del fax
Pruebe la conguración de fax para
vericar el estado de la impresora y
asegúrese de que esté congurado
correctamente para el envío y recepción de
fax. Para obtener más información, consulte
“Congurar y usar el fax” en la página 36.
Resolver problemas de conguración54
Consejo: Si recibe un error de
comunicación de fax que incluye un
código de error, puede buscar la
explicación del código de error en el
sitio Web de asistencia de HP (www.
hp.com/support). si se le solicita, elija
a su país o región y escriba “códigos
de error de fax” en el cuadro Buscar.
Si no puede resolver los problemas
mediante las sugerencias proporcionadas en
la prueba de fax, vaya al paso 2.
Page 57

Paso 2: Revise la lista de posibles problemas
Si ha ejecutado la prueba de fax, pero
sigue teniendo problemas para congurarlo,
revise la siguiente lista de posibles
problemas y soluciones:
La impresora está experimentando problemas al enviar y recibir faxes
• Compruebe que está utilizando el
cable telefónico o adaptador
suministrado con la impresora. (Si no
usa este cable telefónico o adaptador,
la pantalla puede mostrar siempre
Teléfono descolgado.)
• Es posible que se esté utilizando otro
equipo conectado a la misma línea
de teléfono que la impresora.
Asegúrese de que ningún teléfono de
extensión (teléfono conectado a la
misma línea pero no a la impresora)
ni otros equipos se están utilizando ni
estén descolgados. Por ejemplo, no se
puede utilizar la impresora para
enviar faxes si un teléfono de
extensión está descolgado o si se está
usando el módem del equipo para
enviar mensajes de correo electrónico
o acceder a Internet.
• Si utiliza un bifurcador telefónico, éste
podría ser la causa de los problemas
en el envío y la recepción de faxes.
Intente conectar la impresora
directamente al conector telefónico de
pared.
• Asegúrese de que un extremo del
cable telefónico esté conectado al
conector telefónico de pared y que el
otro esté conectado al puerto “1-LINE”
en la parte posterior de la impresora.
• Pruebe a conectar un teléfono
directamente al conector telefónico de
pared y compruebe si hay tono de
llamada. Si no oye el tono, póngase
en contacto con la compañía
telefónica para comprobar la línea.
• Asegúrese de conectar la impresora a
una línea telefónica analógica o no
podrá enviar ni recibir faxes. Para
comprobar si su línea telefónica es
digital, conecte un teléfono analógico
corriente a la línea y escuche el tono
de llamada. Si no se oye un tono de
llamada normal, es posible que sea
una línea telefónica congurada para
teléfonos digitales. Conecte la
impresora a una línea de teléfono
analógica y envíe o reciba un fax.
• La conexión de la línea telefónica
puede tener ruido. Las líneas
telefónicas con una calidad de sonido
deciente (ruido) pueden causar
problemas con el fax. Verique la
calidad de sonido de la línea
telefónica conectando un teléfono a la
toma telefónica de pared y
comprobando si hay ruido estático o
de otro tipo. Si oye ruido, desactive
Modo de corrección de errores (ECM)
e intente enviar o recibir faxes de
nuevo.
• Si utiliza un servicio DSL/ADSL,
asegúrese de que cuenta con un ltro
DSL/ADSL conectado. Sin este ltro,
no podrá enviar ni recibir faxes
correctamente.
Español
Resolver problemas de conguración 55
Page 58

• Si utiliza un sistema telefónico de
intercambio privado de sucursales
(PBX) o un adaptador de red digital
de servicios integrados (RDSI) de
conversor/terminal, asegúrese de que
la impresora esté conectada al puerto
correcto y que el adaptador de
terminal esté congurado en el tipo
de conmutación correspondiente al
país/región.
• Está utilizando el servicio de fax sobre
IP. Intente utilizar una conexión de
menor velocidad. Si esto no funciona,
comuníquese con el departamento de
atención al cliente o de servicio
técnico de fax sobre IP.
La impresora puede enviar faxes pero no recibirlos
• Si no utiliza un servicio de timbre
especial, asegúrese de que la función
Timbre especial de la impresora esté
establecida en Todos los timbres.
• Si Respuesta automática está
desactivada, o si se suscribe al
servicio de correo de voz en la misma
línea que usará para fax, sólo podrá
recibir faxes manualmente.
• Si cuenta con un equipo con módem
de marcación en la misma línea
telefónica que la impresora,
compruebe que el software del
módem no esté congurado para
recibir faxes de forma automática.
• Si tiene un contestador automático en
la misma línea telefónica que la
impresora:
- Verique que el contestador
automático funcione correctamente.
- Compruebe que la impresora está
congurada para que reciba faxes
automáticamente.
- Compruebe que la conguración de
Rings to Answer (Timbres antes de
responder) tenga un número mayor de
timbres que el contestador
automático.
- Desconecte el contestador automático
e intente recibir un fax.
- El mensaje debe durar unos 10
segundos. Hable lento y bajo cuando
grabe el mensaje. Cuando termine el
mensaje, deje pasar 5 segundos
antes de detener la grabación.
• Es posible que otro equipo que utiliza
la misma línea telefónica esté
provocando el error de la prueba de
fax. Puede desconectar los otros
dispositivos y volver a realizar la
prueba. Si se supera la prueba de
detección de tono de llamada, algún
otro equipo está causando los
problemas. Intente conectar de nuevo
una a una las piezas y vuelva a
realizar la prueba en cada ocasión
hasta que identique la pieza del
equipo que causa el problema.
Resolver problemas de conguración56
Page 59

La impresora no puede enviar faxes pero sí recibirlos
• Es posible que la impresora marque
demasiado deprisa o demasiado
pronto. Por ejemplo, si necesita
acceder a una línea externa con el
“9”, intente introducir pausas de la
siguiente forma: 9-XXX-XXXX (donde
XXX-XXXX es el número de fax
receptor). Para introducir una pausa,
toque *@ y seleccione un guión (-). Si
tiene problemas para enviar
manualmente un fax desde un
teléfono conectado directamente de
impresora a impresora, y se encuentra
en los siguientes países o regiones,
debe usar el teclado numérico del
teléfono para enviar el fax:
Argentina Australia
Brasil Canadá
Chile China
Colombia Grecia
India Indonesia
Irlanda Japón
Corea América Latina
Malasia México
Filipinas Polonia
Portugal Rusia
Arabia Saudita Singapur
España Taiwán
Tailandia EE.UU.
Venezuela Vietnam
Español
Resolver problemas de conguración 57
Page 60

Problemas de conguración inalámbrica (802.11)
Esta sección entrega información acerca
de la solución de problemas que puede
encontrar al conectar la impresora a la red
inalámbrica.
Siga las siguientes sugerencias en el orden
indicado:
Nota: Si sigue teniendo problemas,
consulte la información de solución
de problemas en la Guía del usuario
(disponible en su equipo después de
instalar el software).
Después de resolver los
problemas...
Después de resolver todos los
problemas y de conectar la impresora
a la red inalámbrica, siga estos pasos
para su sistema operativo:
Windows
Coloque el CD del software HP en
el equipo y vuelva a ejecutar el
programa de instalación del software.
Seleccione Instalar dispositivo de red/
inalámbrico o Agregar un dispositivo
cuando se le solicite.
Mac OS
Abra HP Utility, ubicada en el dock.
(HP Utility también se ubica en la
carpeta Hewlett-Packard dentro de
la carpeta Aplicaciones del equipo.)
Haga clic en el icono Aplicación en
la barra de herramientas, haga doble
clic en Asistente de conguración de
HP y luego siga las instrucciones en
pantalla.
Paso 1: Compruebe que la luz inalámbrica (802.11) esté encendida
Si la luz azul del panel de control de
la impresora no se enciende, no se han
activado las capacidades inalámbricas.
Para activar las capacidades inalámbricas,
pulse el botón (Inalámbrico) una vez.
Resolver problemas de conguración58
O toque Conguración en el panel de
control de la impresora, toque Menú
inalámbrico, luego Inalámb act/des y luego
Activado.
Page 61

Paso 2. Compruebe la intensidad de la señal inalámbrica
Si la intensidad de la señal de la red
inalámbrica o de la computadora es débil
o si hay interferencia en la red inalámbrica,
puede que la impresora no sea capaz de
detectar la señal.
Para determinar la intensidad de señal
inalámbrica, ejecute la prueba de red
inalámbrica en el panel de control de la
impresora. (Para obtener más información,
consulte “Paso 4: Ejecute la prueba de red
inalámbrica” en la página 59).
Si la prueba de red inalámbrica indica
que la señal es débil, intente acercar la
impresora al direccionador inalámbrico.
Reducción de la interferencia
Los siguientes consejos podrían
ayudarle a reducir la interferencia en
una red inalámbrica:
Mantenga los dispositivos
•
inalámbricos alejados de objetos
metálicos grandes, como
gabinetes de archivadores y otros
dispositivos electromagnéticos,
como microondas y teléfonos
inalámbricos, ya que estos objetos
pueden interrumpir las señales de
radio.
Mantenga los dispositivos
•
inalámbricos alejados de grandes
estructuras de concreto y otras
edicaciones, ya que estos objetos
absorben las ondas de radio y
disminuyen la intensidad de la señal.
Español
Paso 3: Reinicie los componentes de la red inalámbrica
Apague el router y la impresora y, a
continuación, vuelva a encenderlos en el
siguiente orden: primero el direccionador y
luego la impresora.
Si aún no puede conectarse, apague el
direccionador, la impresora y el equipo, y
vuelva a encenderlos en este orden: primero
el direccionador, luego la impresora y,
nalmente, el equipo.
Algunas veces, si desconecta la
alimentación y la vuelve a activar, el
problema de comunicación de red se
resuelve.
Paso 4: Ejecute la prueba de red inalámbrica
Para solucionar problemas de conexión en
red inalámbrica, ejecute la prueba de red
inalámbrica en el panel de control de la
impresora:
1. Toque la echa a la derecha y luego
Red.
2. Toque Inalámbrico y luego Prueba de
red inalámbrica.
Si se detecta un problema, el informe
de la comprobación impreso incluirá
recomendaciones que podrían ayudar a
resolver el problema.
Resolver problemas de conguración 59
Page 62

5. Uso del servidor Web incorporado
(EWS)
Cuando la impresora está conectada
a una red, puede utilizar el servidor
Web incorporado (“EWS”) para ver la
información de estado y congurar los
ajustes de red desde el explorador Web
del equipo. No es necesario instalar ni
congurar ningún software especial en el
equipo.
Para abrir el EWS
1. Obtener la dirección IP de la impresora.
La dirección IP aparece en la página de
conguración de la red.
a. Cargue papel en la bandeja.
b. Toque la echa a la derecha ,
luego Conguración, luego Red y
luego Imprimir ajustes de red.
Nota: Puede abrir y usar el EWS
sin estar conectado a Internet; sin
embargo, algunas funciones no
estarán disponibles.
Para obtener más información acerca del
EWS, consulte la Guía del usuario (que está
disponible en su equipo después de instalar
el software).
2. En un navegador web compatible con
su equipo, escriba la dirección IP o el
nombre de host que se ha asignado al
dispositivo.
Por ejemplo, si la dirección IP es
123.123.123.123, escriba la siguiente
dirección en el explorador Web:
http://123.123.123.123
Consejo: Después de abrir el EWS,
puede agregarlo a los favoritos para
poder regresar a él rápidamente.
Uso del servidor Web incorporado (EWS)60
Page 63

Declaración de garantía limitada de Hewlett-Packard
Producto HP Duración de la garantía limitada
Medio de almacenamiento del software 90 días
Impresora 1 año
Cartuchos de tinta o impresión La garantía es válida hasta que se agote la tinta HP o hasta que
Cabezales de impresión (sólo se aplica a productos con 1 año
cabezales de impresión que el cliente puede sustituir)
Accesorios 1 año, a no ser que se especifique otro dato
A. Alcance de la garantía limitada
1. Hewlett-Packard (HP) garantiza al usuario final que el producto de HP especificado no tendrá defectos de materiales ni mano de obra por
el periodo anteriormente indicado, cuya duración empieza el día de la compra por parte del cliente.
2. Para los productos de software, la garantía limitada de HP se aplica únicamente a la incapacidad del programa para ejecutar las
instrucciones. HP no garantiza que el funcionamiento de los productos se interrumpa o no contenga errores.
3. La garantía limitada de HP abarca sólo los defectos que se originen como consecuencia del uso normal del producto, y no cubre otros
problemas, incluyendo los originados como consecuencia de:
a. Mantenimiento o modificación indebidos;
b. Software, soportes de impresión, piezas o consumibles que HP no proporcione o no admita;
c. Uso que no se ajuste a las especificaciones del producto;
d. Modificación o uso incorrecto no autorizados.
4. Para los productos de impresoras de HP, el uso de un cartucho que no sea de HP o de un cartucho recargado no afecta ni a la garantía
del cliente ni a cualquier otro contrato de asistencia de HP con el cliente. No obstante, si el error o el desperfecto en la impresora se
atribuye al uso de un cartucho que no sea de HP, un cartucho recargado o un cartucho de tinta caducado, HP cobrará aparte el tiempo y
los materiales de servicio para dicho error o desperfecto.
5. Si durante la vigencia de la garantía aplicable, HP recibe un aviso de que cualquier producto presenta un defecto cubierto por la garantía,
HP reparará o sustituirá el producto defectuoso como considere conveniente.
6. Si HP no logra reparar o sustituir, según corresponda, un producto defectuoso que esté cubierto por la garantía, HP reembolsará al cliente
el precio de compra del producto, dentro de un plazo razonable tras recibir la notificación del defecto.
7. HP no tendrá obligación alguna de reparar, sustituir o reembolsar el precio del producto defectuoso hasta que el cliente lo haya devuelto a HP.
8. Los productos de sustitución pueden ser nuevos o seminuevos, siempre que sus prestaciones sean iguales o mayores que las del
producto sustituido.
9. Los productos HP podrían incluir piezas, componentes o materiales refabricados equivalentes a los nuevos en cuanto al rendimiento.
10. La Declaración de garantía limitada de HP es válida en cualquier país en que los productos HP cubiertos sean distribuidos por HP. Es
posible que existan contratos disponibles para servicios de garantía adicionales, como el servicio in situ, en cualquier suministrador de
servicios autorizado por HP, en aquellos países donde HP o un importador autorizado distribuyan el producto.
B. Limitaciones de la garantía
HASTA DONDE LO PERMITAN LAS LEYES LOCALES, NI HP NI SUS TERCEROS PROVEEDORES OTORGAN NINGUNA OTRA
GARANTÍA O CONDICIÓN DE NINGÚN TIPO, YA SEAN GARANTÍAS O CONDICIONES DE COMERCIABILIDAD EXPRESAS O
IMPLÍCITAS, CALIDAD SATISFACTORIA E IDONEIDAD PARA UN FIN DETERMINADO.
C. Limitaciones de responsabilidad
1. Hasta donde lo permitan las leyes locales, los recursos indicados en esta Declaración de garantía son los únicos y exclusivos recursos de
los que dispone el cliente.
2. HASTA EL PUNTO PERMITIDO POR LA LEY LOCAL, EXCEPTO PARA LAS OBLIGACIONES EXPUESTAS ESPECÍFICAMENTE EN
ESTA DECLARACIÓN DE GARANTÍA, EN NINGÚN CASO HP O SUS PROVEEDORES SERÁN RESPONSABLES DE LOS DAÑOS
DIRECTOS, INDIRECTOS, ESPECIALES, INCIDENTALES O CONSECUENCIALES, YA ESTÉ BASADO EN CONTRATO,
RESPONSABILIDAD EXTRACONTRACTUAL O CUALQUIER OTRA TEORÍA LEGAL, Y AUNQUE SE HAYA AVISADO DE LA
POSIBILIDAD DE TALES DAÑOS.
D. Legislación local
1. Esta Declaración de garantía confiere derechos legales específicos al cliente. El cliente podría también gozar de otros derechos que
varían según el estado (en Estados Unidos), la provincia (en Canadá), o la entidad gubernamental en cualquier otro país del mundo.
2. Hasta donde se establezca que esta Declaración de garantía contraviene las leyes locales, dicha Declaración de garantía se considerará
modificada para acatar tales leyes locales. Bajo dichas leyes locales, puede que algunas de las declinaciones de responsabilidad y
limitaciones estipuladas en esta Declaración de garantía no se apliquen al cliente. Por ejemplo, algunos estados en Estados Unidos, así
como ciertas entidades gubernamentales en el exterior de Estados Unidos (incluidas las provincias de Canadá) pueden:
a. Evitar que las renuncias y limitaciones de esta Declaración de garantía limiten los derechos estatutarios del cliente (por ejemplo, en el
Reino Unido);
b. Restringir de otro modo la capacidad de un fabricante de aumentar dichas renuncias o limitaciones; u
c. Ofrecer al usuario derechos adicionales de garantía, especificar la duración de las garantías implícitas a las que no puede renunciar el
fabricante o permitir limitaciones en la duración de las garantías implícitas.
3. LOS TÉRMINOS ENUNCIADOS EN ESTA DECLARACIÓN DE GARANTÍA, SALVO HASTA DONDE LO PERMITA
LA LEY, NO EXCLUYEN, RESTRINGEN NI MODIFICAN LOS DERECHOS ESTATUTARIOS OBLIGATORIOS PERTINENTES A LA
VENTA DE PRODUCTOS HP A DICHOS CLIENTES, SINO QUE SON ADICIONALES A LOS MISMOS.
Para clientes en México aplican las siguientes cláusulas:
1) La sección 4 de la garantía de producto queda reemplazada por la siguiente:
La garantía limitada de HP cubrirá sólo los defectos que surjan debido a un uso normal del producto y no cubrirá ningún otro problema,
incluidos los derivados de los casos siguientes:
- Cuando el producto se hubiese utilizado en condiciones distintas a las normales
- Cuando el producto no hubiese sido operado de acuerdo con el instructivo de uso que se le acompaña
- Cuando el producto hubiese sido alterado o reparado por personas no autorizadas por el fabricante nacional, importador o comercializador
responsable respectivo.
2) Para mayor información comunicarse a:
Hewlett-Packard México, S. de R.L. de C.V.
Prolongación Reforma No. 700, Col. Lomas de Sta. Fé
Delegación Alvaro Obregón CP 91210 México, D.F.
Consulte nuestra página Web: www.hp.com/support
Centro de Asistencia Telefónica de HP:
Ciudad de México: (55) 5258 9922 Para el resto del país: 01 800-474-68368
Para hacer válida su garantía, solo se deberá comunicar al Centro de Asistencia Telefónica de HP y seguir las instrucciones de un
representante, quien le indicará el procedimiento a seguir.
3) Los gastos de transportación generados en lugares dentro de la red de servicios de HP en la República Mexicana, para dar cumplimiento a
esta garantía, serán cubiertos por Hewlett-Packard.
Estimado Cliente:
Adjunto puede encontrar el nombre y dirección de las entidades HP que proporcionan la Garantía Limitada de HP (garantía comercial adicional del fabricante) en su país.
Usted también tiene los derechos que la normativa vigente le concede al consumidor frente al vendedor en caso de falta de conformidad de los productos con el contrato de
compraventa, que son independientes y compatibles con la garantía comercial adicional del fabricante y no quedan afectados por ésta. Dichos derechos son los de reparación y/o
sustitución, rebaja en el precio y/o resolución, que se aplicarán según lo establecido en el Título V del Real Decreto Legislativo 1/2007.
España: Hewlett-Packard Española S.L., C/ Vicente Aleixandre 1, Parque Empresarial Madrid - Las Rozas, 28230 Las Rozas, Madrid
Información sobre la Garantía Limitada del Fabricante HP
se alcance la fecha de “fin de garantía” indicada en el cartucho,
cualquiera de los hechos que se produzca en primer lugar. Esta
garantía no cubrirá los productos de tinta HP que se hayan
rellenado o manipulado, se hayan vuelto a limpiar, se hayan
utilizado incorrectamente o se haya alterado su composición.
Español
Declaración de garantía limitada de Hewlett-Packard 61
Page 64

© 2010 Hewlett-Packard Development Company, L.P.
www.hp.com
EN ES
*C9309-90012*
*C9309-90012*
C9309-90012
 Loading...