

Page 1
HP
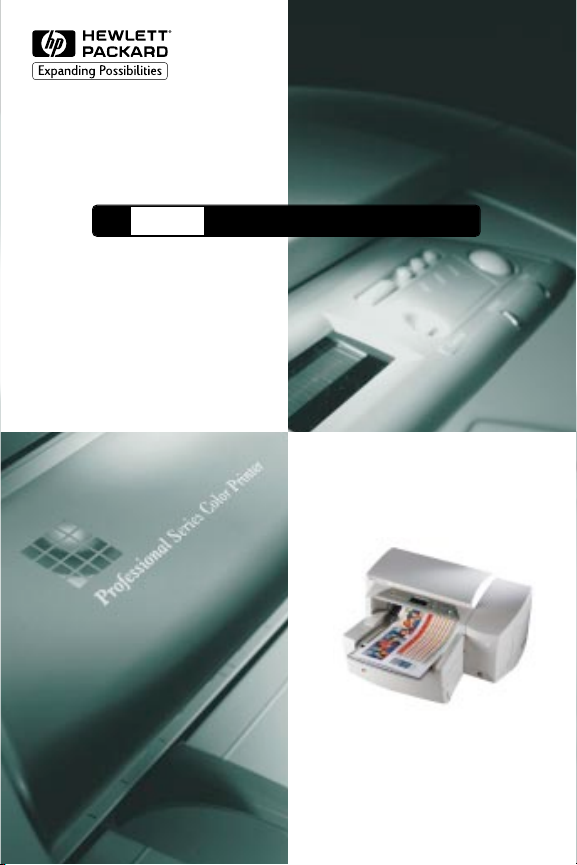
2500C
Professional Series Color Printer
QUICK REFERENCE GUIDE
Page 2

Acknowledgments
HP ColorSmart II, HP PhotoREt II and HP Zoom Smart
Scaling Technology are trademarks of Hewlett-Packard
Company.
Microsoft is a U.S. registered trademark of Microsoft
Corporation.
Windows is a trademark of Microsoft Corporation.
Adobe is a U.S. registered trademark of Adobe Systems
Incorporated.
PostScript is a trademark of Adobe Systems Incorporated.
Notice
The information contained in this document is subject to
change without notice.
Hewlett-Packard makes no warranty of any kind with
regard to this material, including, but not limited to, the
implied warranties of merchantability and fitness for a
particular purpose.
Hewlett-Packard shall not be liable for errors contained
herein or for incidental or consequential damages in
connection with the furnishing, performance, or use of
this material.
No part of this document may be photocopied,
reproduced, or translated to another language without
the prior written consent of Hewlett-Packard Company.
Page 3

2500C
HP
Identifying Printer Parts 1
Control Panel 1
Navigating the Menu System 1
To Check the Printer's Configuration 1
To Print a Menu Map 2
To Print a Diagnostic Page 2
Common Printer Messages 2
Loading Paper 5
Loading Commonly-Used Media in Tray 2 6
Loading Commonly-Used Media in Tray 3 8
Loading Paper in Tray 1 9
Loading Paper in the Rear Manual Feed 10
Maintaining the Printer 11
CONTENTS
Clean Printheads 11
Align Printheads 11
Removing Paper Jams 12
Resetting the Printer 14
Supported Paper Sizes 14
For More Information 15
Contents
Page 4

1
HP
2500C
Identifying Printer Parts
Paper
Knob
Tray 1/
Output Tray
Tray 2
LCD Panel
Cancel Job
Top Co ve r
Tray 3
Button
Attention (Red)
Menu Button
Item Button
Value Button
Select Button
Ready (Green)
(Go)
Printhead Latch
HP
Power
Button
2500C
Extended
Tray Cover
Printhead
Access Cover
Ink Cartridge
Door
Control Panel
Navigating the Menu System
1. Press [Menu] until the desired menu appears.
2. Press [Item] until the desired item appears.
3. Press [Value] to enter the desired values.
To scroll through the values, you may press
and hold the [Value] key.
4. Press [Select] to save or activate your
selection.
5. Press to exit the menu without changing
the settings or to get the printer online.
To Check the Printer's Configuration
From the printer, you can print the following
information:
• Menu Map - The Menu Map gives an
overview of the different settings that can be
configured as well as diagnostics that can
be performed through the key panel.
• Diagnostic Page - The Diagnostic Page
shows general printer information and
current network parameters.
Back Panel
Rear Access
Door
Page 5
To Print a Menu Map
2
1. Press [Menu] until SELF TEST MENU appears.
2. Press [Item] until PRINT MENU MAP appears.
3. Press [Select] to print the menu map.
For more information on the Menu Map items, please refer
to the User's Guide.
To Print a Diagnostic Page
1. Press [Menu] until SELF TEST MENU appears.
2. Press [Item] until PRINT DIAGNOSTIC
PAGE appears.
3. Press [Select] to print the diagnostic page.
For more information on the Diagnostic Page, please
refer to the User's Guide.
Common Printer Messages
Note: Brackets [ ] in the Message column indicate variables
MESSAGE EXPLANATION SOLUTION
OFFLINE The printer is offline. Press to set the printer online.
CANCELING JOB The printer is canceling
current print job.
[COLOR] INK OUT, One of the ink cartridges Replace the appropriate
REPLACE CART (black, cyan, magenta cartridge.
or yellow) is out of ink.
[COLOR] CART One of the ink cartridges Replace the appropriate
FAULTY, REPLACE (black, cyan, magenta cartridge.
or yellow) is faulty.
[COLOR] CART One of the ink cartridges Insert the appropriate
MISSING, INSERT (black, cyan, magenta or cartridge.
yellow) is missing.
[COLOR] PRNT-HD One of the printheads Replace the appropriate
FAULTY, REPLACE (black, cyan, magenta printhead.
or yellow) is faulty.
Page 6
[COLOR] PRNT-HD One of the printheads Insert the appropriate
3
MISSING, INSERT (black, cyan, magenta printhead.
or yellow) is missing.
PRNT-HD ACCESS The Printhead Access Close the cover to resume
COVER OPEN Cover is open. printing.
TOP COVER OPEN The Top Cover is open. Close the cover and press
PAPER JAM, OPEN There is paper jammed Open the Top Cover to
TOP COVER in the printer. remove paper. When
CARRIAGE JAM, The Carriage is jammed. Open the Top Cover to
OPEN TOP COVER clear obstruction. When
CARRIAGE JAM, The Carriage is jammed. Open the Printhead Access
OPEN ACC COVER Cover to remove obstruction.
LEFT BACK PANEL The left side of the Back Open the Rear Access
OUT Panel has not been Cover and ensure that
inserted properly. the left side of the panel
RIGHT BACK The right side of the Open the Rear Access
PANEL OUT Back Panel has not Cover and ensure that
been inserted properly. the right side of the
TRAY 2 PAPER One of the Paper Insert the Paper Guide
GUIDE REMOVED Guides in Tray 2 has back into Tray 2.
been removed.
TRAY 3 OPEN OR Tray 3 is either open or Ensure that both the Paper
GUIDE REMOVED one of its Paper Guides Guides are properly
has been removed. installed and that Tray 3
to resume printing.
finished, close the Top
Cover and press to
resume printing.
finished, close the Top
Cover and press to
resume printing.
When finished, close the
Printhead Access Cover
and align printheads.
is properly installed.
panel is properly installed.
is inserted into the printer.
Page 7

MNL FEED LOAD You have chosen to print Load the paper type and
4
[TYPE] [SIZE] through the Rear Manual size as specified in the LCD
Feed. panel and press to
continue printing.
TRAY [NUMBER] The specified tray is empty. Load the paper size and
EMPTY, LOAD & Load the paper size and type type which this tray
PRESS which this tray has been set has been set up for.
up for. If you wish to change the
paper size setting of this
tray, please refer to
section on Loading Paper.
PRESS TO To continue your present
CONTINUE task, press the button.
MEDIA IN TRAY 1, There is media in Tray 1 which Remove the media in Tray 1
REMOVE may not be the type or size and press the button
that is specified in your to resume printing.
current print job. If you wish to print
through Tray 1, set your
driver to pick from Tray 1
and send the print job
before putting media in
Tray 1.
WRONG MEDIA The media type which the You may wish to either
TYPE, [ACTION] printer has detected is not load in the right media, or
the type specified in your choose to print on existing
print settings. media. You may also cancel
the current print job by
pressing the [Cancel Print]
button.
UNEXPECTED The specified paper size Reload the correct media
PAPER SIZE is different from the into the tray and print again.
paper size in the selected
input tray. The output was
truncated to fit the paper
in the printer. Some output
may have been lost.
PRINT-HDS NOT The printheads have not Align the printheads.
ALIGNED been aligned. For best See below for instructions
print quality, align the on how to align printheads.
printheads before the
next print job.
Page 8

NON HP [COLOR] A non-HP color cartridge has Use original HP ink
5
CART been detected. HP does not cartridges instead.
[COLOR] CART One of the ink cartridges (black, Be prepared to replace
NEAR EXPIRY cyan, magenta or yellow) is near the mentioned color
[COLOR] INK LOW One of the ink cartridges (black, Be prepared to replace
guarantee non-HP cartridges.
The use of incompatible
cartridges may disrupt the
intricate printing system,
potentially resulting in
reduced print quality and
even printer damage.
expiry. To obtain optimum cartridge.
print quality, it is recommended
that you do not use expired
ink cartridges.
cyan, magenta or yellow) is low the mentioned color
on ink. You may still continue cartridge.
to print with this cartridge until
the ink has totally run out.
HP
2500C
Loading Paper
The HP 2500C Series printer has 3 paper
trays and 1 rear feed for superior paper
handling capabilities.
Tray 1 - This tray acts as a by-pass tray. It
holds up to 10 sheets of paper. This tray
should be used for media types and sizes
that are seldom used.
Tray 2 - This tray holds up to 150 sheets of
paper. It is recommended that you use this
tray to hold paper that is commonly used.
Tray 3 - This tray holds up to 250 sheets of
paper. It is recommended that you use this
tray to hold paper that is commonly used.
Page 9

2
6
Rear Manual Feed - The Rear Manual Feed is
1
3
2
2
3
designed to provide a straight paper path for
printing on thicker media (up to 0.3mm) such as
cardstock or labels without bending. This paper
path allows you to print only 1 sheet at a time.
Loading Commonly-Used Media in Tray 2
Note:
• Tray 2 is a fixed tray. Tray 1 has to be removed
before Tray 2 can be accessed.
• Tray 2 is designed to hold up to 150 sheets of paper
and can accommodate paper sizes such as Letter,
A4, Legal, B4, A3, 11"x17", 13"x19" and 330x483mm.
1. Remove Tray 1 and set it aside.
2. If you wish to change the paper size setting
that has been set in the tray, go to step 3. If
you wish to load paper using the existing
tray setting, go to step 5.
3. Snap the Paper Length and Width Guides
into the slots. Paper size markings are
indicated beside their respective slots.
Page 10
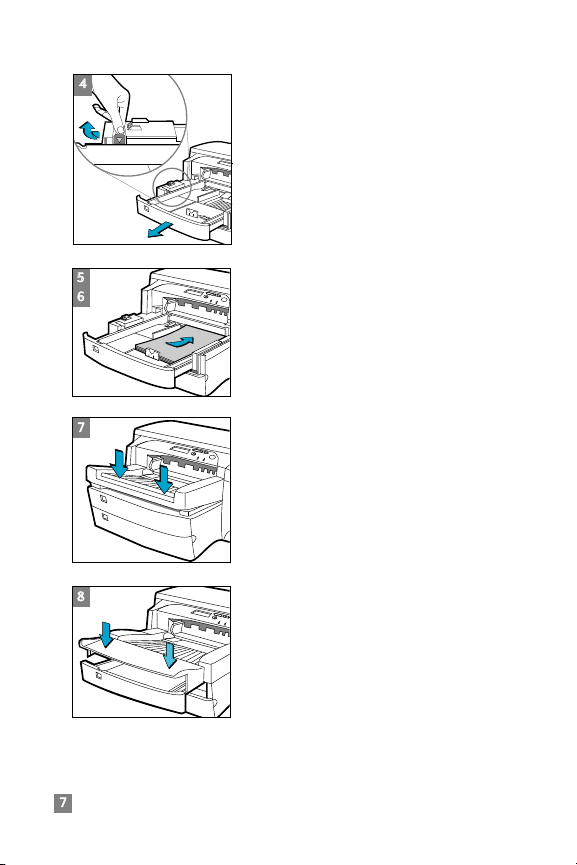
7
5
7
8
6
4
4. If you are loading paper sizes such as B4,
A3, 11"x17", 13"x19" and 330x483mm, unlock
the tray lock, extend the tray and re-lock the
tray lock.
If you are loading paper sizes such as Letter,
A4 and Legal, check that the tray is not
extended. If it is, unlock the tray lock, push
in the tray and re-lock the tray lock.
5. Insert paper, print side down into the printer.
6. Tap the left side of the stack of paper to
ensure that it is flushed to the right side of
the tray.
7. Replace Tray 1.
8. If Tray 2 is extended, place the Extended
Tray Cover over the tray.
9. On the control panel, press [Menu]
until PAPER HANDLING MENU appears.
10.Press [Item] to select TRAY 2 TYPE=
11. Press [Value] to select the media type you
have loaded into the tray and press [Select].
For more information, please refer to the User's Guide.
Page 11

LLooaaddiinngg CCoommmmoonnllyy--UUsseedd MMeeddiiaa iinn TTrraayy 33
1. Grasp the sides of Tray 3 and pull it
out of the printer.
2. If you wish to change the paper size that has
been set in the tray, go to step
3. If you wish to load paper into tray using
the existing setting, go to step 5.
3. Snap the Paper Length and Width Guides
into the slots. Paper size markings are
indicated beside their respective slots.
4. If you are loading paper sizes such as B4,
A3, 11"x17", 13"x19" and 330x483mm, unlock
the tray lock, extend the tray and re-lock the
tray lock.
If you are loading paper sizes such as Letter,
A4 and Legal, check that the tray is not
extended. If it is, unlock the tray lock, push
in the tray and re-lock the tray lock.
5. Load paper by aligning the paper edge to
the Paper Length guide first.
6. Tap the left side of the stack of paper to
ensure that it is flushed to the right side of
the tray.
3
A3
3
3
88
44
33
55
66
11
22
A3
3
Page 12

7
8
1
9
7. Re-insert Tray 3 into the printer.
8. If Tray 3 is extended, place the Extended
Tray Cover over the tray.
9. On the control panel, press [Menu]
until PAPER HANDLING MENU appears.
10.Press [Item] to select TRAY 3 TYPE=
11. Press [Value] to select the media type you
have loaded into the tray and press [Select].
For more information, please refer to the User's Guide.
Loading Paper in Tray 1
1. Set your driver to pick paper from Tray 1
and print your document. For more
information on how to set your print
settings, please refer to the Toolbox in
your computer.
2. After sending your print job to the printer,
the LCD panel will display the message
"TRAY 1 LOAD [TYPE] [SIZE]" where [TYPE]
and [SIZE] is the media type and size as
specified in your printer driver respectively.
3. Slide the paper width guide to its outermost
position.
4. Insert up to 10 sheets of paper along the
right side of Tray 1, print side down, until it
stops.
5. Slide the paper width guide in until it stops
at the edge of the paper.
6. Press the button to print.
Page 13

10
1
Loading Paper in the Rear Manual Feed
1. Set your driver to pick from the Rear
Manual Feed and print your document. For
more information on how to set your print
settings, please refer to the Toolbox in
your computer.
2. After sending your print job to the printer,
the LCD panel will display the message
"MNL FEED LOAD [TYPE] [SIZE]" where
[TYPE] and [SIZE] is the media type and
size as specified in your printer driver
respectively.
3. Insert the media into the Rear Manual Feed
at the back of the printer, making sure that
the edge of the sheet is aligned with the
alignment mark on the left side of the slot.
Wait for the printer to grip the media
before releasing it.
Page 14

11
2500C
HP
Clean Printheads
Whenever print quality noticeably decreases
it is a good idea to perform the cleaning
procedure. You may “Clean Printhead” utility
either through the Toolbox in your computer
or from the Control Panel. Click on the
Maintenance Tab of the Toolbox if you wish
to clean the printheads from the Toolbox.
The “Clean Printhead” utility consists of 3
levels of cleaning. Each level of cleaning uses
some ink to clear the printheads. It is
recommended that you start with Level 1 before
proceeding to subsequent levels.
Note that Level 3 takes the longest and uses
the most ink.
To run the “Clean Printhead” utility through
the Control Panel:
1. Press [Menu] until DIAGNOSTICS MENU
2. Press [Item] to either CLEAN PRNT-HDS
3. Press [Select] to clean printheads.
Align Printheads
Although you may not notice misalignment,
it is recommended that you run the “Align
Printheads” utility whenever the LCD displays
the message "PRNT-HDS NOT ALIGNED".
This ensures that you have the best possible
print quality.
Maintaining The Printer
appears.
LEVEL 1, 2 or 3.
You may align the printheads either through
the Toolbox or from the Control Panel. Please
refer to the Maintenance Tab of the Toolbox if
you wish to align the printheads from the
Toolbox.
Page 15

To run the “Align Printheads” utility through
12
1
the Control Panel:
1. Press [Menu] until DIAGNOSTICS MENU
appears.
2. Press [Item] until ALIGN PRNT-HDS
appears.
3. Press [Select].
4. The printer will print a page with 5 sets of
alignment patterns.
5. In each set (A, B, C, D or E) select the most
aligned (straightest) pair of lines (1, 2, 3, 4 or 5).
6. Enter the corresponding numbers in the
Control Panel by pressing [Value].
7. When you have entered a value for a set,
press [Item] to move to the next.
8. When you have finished entering the
values press [Select].
9. The printer will print a confirmation page
consisting of 2 squares and a cross.
10.Check the confirmation page to see if the
lines on the squares and the cross are
aligned.
11. Re-align the printheads if the confirmation
page is not satisfactory.
2500C
HP
If paper is jammed in the printer, follow these
instructions to clear the jam:
1. Remove all media from trays 1, 2 and 3.
Pull out any paper that is visibly stuck.
Removing Paper Jams
Page 16

13
2
3
3
4
5
6
7
8
2. Lift the Top Cover and pull out any paper
that may be stuck.
3. If you are unable to free the jammed paper,
pull out the handle of the Paper Knob,
pull the knob away from the printer and
rotate to remove the paper.
4. If the LCD still reports a paper jam, go to
the back of the printer and lower the Rear
Access Door by lifting the two rear door
latches.
5. Remove the Back Panel by pressing the
two catches inwards.
6. Pull out any paper that may be stuck inside.
7. Replace the Back Panel and make sure it
fits securely.
8. Close the Rear Access Door and turn on
the printer.
Page 17

14
2500C
HP
You can reset the printer by selecting the
reset items in the Resets Menu.
Use this menu with caution. You can lose
buffered page data or printer configuration
settings when you select these items. Only
reset the printer under the following
circumstances:
• You want to restore the printer's default settings;
• Communication between the printer and
computer has been interrupted.
Resetting The Printer
2500C
HP
The HP 2500C Professional Series Color
Printer is able to print on the following
paper sizes:
Tray 1 and Rear Media Feed:
All media sizes from 4” x 6” to 13” x 19” or
10.2cm x 15.3cm to 33cm x 48.3 cm
Tray 2 and Tray 3:
Letter (8.5” x 11”)
Legal (8.5” x 14”)
Tabloid (11” x 17”)
Super B (13” x 19”)
A4 (210mm x 297mm)
A3 (297mm x 420mm)
330mm x 483mm
Supported Paper Sizes
Page 18

15
2500C
HP
Please check on the following documentation
for more information:
Getting Started Guide – Information on how
to set up the printer.
User’s Guide - For printer specifications and
troubleshooting information.
Network Guide - For instructions on how to
share the printer over a network.
Toolbox - Provides “how-to” information and
troubleshooting instructions as well as access
to printer maintenance functions and HP
information.
Web Site - http://www.hp.com/go/hp2500
or http://www.hp.com provides a link to the
HP Web site for the latest printer software,
product and support information.
For More Information
Page 19

©Copyright 1998
Hewlett-Packard Company
450 Alexandra Road
Singapore 119960
Singapore.
http://www.hp.com/go/hp2500
 Loading...